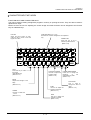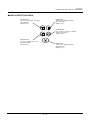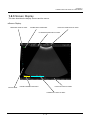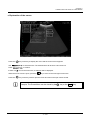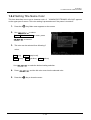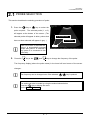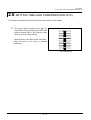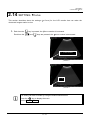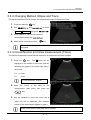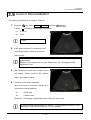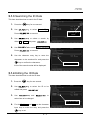
1
Please read this Manual carefully before you operate this ultrasonic scanner for safe and proper operation. Do not operate using other method than those specified in this manual. Keep Manual in a place you can access easily when operating this instrument. In case of the loss of this manual, contact your local distributor. ABOUT THE SYSTEM The HS-2100V system is a general-purpose ultrasound diagnostic system used for internal medicine, obstetrics, gynecology, pediatrics and so on. It is used to acquire and display gray scale B mode image and M mode image. ABOUT THIS MANUAL Thank you very much for purchasing our medical ultrasound diagnostic equipment, HS-2100V. HS-2100V is the ultrasound diagnostic equipment with high performance functions and compact size that provides the following features. ◆ Wide selection of probes (including high-sensitivity Convex and Linear) enabling diagnosis in various fields. ◆ Compact size with foldable keyboard ◆ Portable and space saving ◆ Multiple image control functions enable to obtain high quality image. ◆ The 10.4 inch color LCD monitor provides clear images. ◆ Trackball and easy-operating key layout enabling efficient diagnosis and measurement. ◆ Enriched diagnostic programs ◆ Extensive measuring functions that can be used in a wide range of applications, such as abdominal and obstetrical examinations. NOTE ・For the safety of patients and users and the full use of HS-2100V, read this manual thoroughly before starting the examination. ・The use of the software is restricted to the examination and diagnosis with HS-2100V. It may be copied only in accordance with the terms of agreement. ・No part of this manual may be reproduced in any form without the express permission of the copyright owner. ・The contents of this manual are subject to change without notice. Safety Classifications The HS-2100V has the following safety classifications. ・Impact protection classification based on model type. Class I ・Impact protection classification based on level of protection. BF type installed part ・Precautions for ingress of liquids The enclosure for this equipment offers no protection against the ingress of liquids. ・Precautions about use in combustible environments This equipment is not suitable for use in environments where air and combustible anesthetic gases or oxygen/ nitrous oxide and combustible anesthetic gases are used I IMPORTANT PRECAUTIONS FOR SAFETY This instruction manual adopts the following symbols and words. These symbols and words are intended to operate HS-2100V safely and to prevent risks and damages to property from occurring. Understand the meanings of these symbols and words thoroughly before reading this instruction manual. DANGER If HS-2100V is handled improperly without following DANGER mark, the possibility to cause death or serious injury of patient and user might increase. If HS-2100V is handled improperly without following WARNING mark, it could cause serious injury or death of patient and user. WARNING If HS-2100V is handled improperly without following CAUTION mark, it could cause personal injury or property damage. CAUTION This mark indicates supplemental descriptions and hints for using HS-2100V. II CONTENTS CHAPTER 1 GENERAL DESCRIPTIONS 1.1 PRECAUTIONS ·················································································································1 - 1 1.2 NAMES AND FUNCTIONS OF COMPONENTS ·······························································1 - 4 1.2.1 External Views ············································································································1 - 4 1.2.2 Keyboard ····················································································································1 - 5 1.2.3 Screen Display ···········································································································1 - 9 1.3 ACCESSORIES CONNECTIONS ···················································································· 1 - 11 1.4 INSTALLING THE EQUIPMENT AND MAKING CONNECTIONS ···································1 - 13 1.4.1 Installation Conditions ······························································································1 - 13 1.4.2 Power Connections ··································································································1 - 14 1.4.3 Interface Connection ································································································1 - 15 1.4.4 Probe Connection ·····································································································1 - 16 1.5 GENERAL OPERATING STEPS ·····················································································1 - 17 1.6 TIME/HOSPITAL NAME SETTINGS ················································································1 - 20 1.6.1 Setting Date and Time ······························································································1 - 20 1.6.2 Setting Title Name Color ····························································································1 - 21 1.6.3 Registering Hospital Name ·······················································································1 - 22 1.6.4 Setting Hospital Name Color ······················································································1 - 23 1.6.5 Setting the Buzzer Sound ··························································································1 - 24 1.6.6 Setting the Save Destination ······················································································1 - 25 CHAPTER 2 KEY OPERATION AND DISPLAY FUNCTION 2.1 PROBE SELECTION ········································································································ 2 – 1 2.2 PRESET ···························································································································· 2 – 2 2.2.1 Saving a Preset············································································································2 - 2 2.2.2 Selecting a Preset ········································································································2 - 3 2.2.3 Initializing a Preset ·······································································································2 - 3 2.3 IMAGE DISPLAY MODE SELECT ·····················································································2 - 4 2.3.1 B Mode ·······················································································································2 - 4 2.3.2 B/B Mode ····················································································································2 - 4 2.3.3 B/M Mode ···················································································································2 - 5 2.3.4 B/Z Mode ····················································································································2 - 5 2.3.5 M Mode ······················································································································2 - 6 2.4 FREEZING IMAGE and CINE MEMORY ···········································································2 - 7 2.4.1 Freezing Image ··········································································································2 - 7 2.4.2 Cine memory and Cine loop ·······················································································2 - 7 2.5 SETTING GAIN ··················································································································2 - 8 III 2.6 SETTING TIME GAIN COMPENSATION (STC) ·······························································2 - 9 2.7 SETTING RANGE ············································································································2 - 10 2.8 LEFT/RIGHT INVERSION ································································································ 2 - 11 2.9 UP/DOWN INVERSION ·····································································································2 - 12 2.10 POSTIVE/NEGATIVE INVERSION··················································································2 - 13 2.11 FOCUS SETTING ··········································································································2 - 14 2.12 IMAGE SOFT ADJUSTMENT AND EDGE ENHANCEMENT ········································2 - 15 2.13 SETTING DYNAMIC RANGE ························································································2 - 16 2.14 SETTING γ Curve···········································································································2 - 17 2.15 SETTING ACOUSTIC POWER ······················································································2 - 18 2.16 BODY MARK SETTINGS ·······························································································2 - 19 2.17 ENTERING COMMENTS ·······························································································2 - 20 2.18 PRINTING OUT IMAGE ·································································································2 - 23 2.19 SETTING M-SPEED ······································································································2 - 24 2.20 DISPLAYING THE M-SCALE···························································································2 - 25 2.21 DISPLAYING A MODE ·····································································································2 - 26 2.22 DISPLAYING BIOPSY GUIDE LINE ················································································2 - 27 2.23 ENHANCEMENT FUNCTION SELECTION ···································································2 - 28 2.24 SCREEN BRIGHTNESS ADJUSTMENT ·······································································2 - 29 2.25 CHANGING VIEW ANGLE / VIEW WIDTH ····································································2 - 30 CHAPPTER 3 MEASURING FUNCTIONS 3.1 DISTANCE MEASUREMENT ····························································································3 - 1 3.2 VELOCITY MEASUREMENT ·····························································································3 - 3 3.3 CIRCUMFERENCE AND AREA MEASUREMENT ····························································3 - 5 3.3.1 Circumference and Area measurement (Ellipse) ························································3 - 5 3.3.2 Changing Method, Ellipse and Trace ·········································································3 - 7 3.3.3 Circumference and Area measurement (Trace) ·························································3 - 7 3.4 ESTIMATING VOLUME ·····································································································3 - 9 3.5 HISTOGRAM MEASUREMENT ······················································································· 3 - 11 3.6 HEART RATE MEASUREMENT························································································3 - 13 3.7 LVET MEASUREMENT ·····································································································3 - 15 3.8 LV MEASUREMENT ··········································································································3 - 17 3.9 Tendon% MEASUREMENT ·······························································································3 - 20 3.10 CURSOR FINE ADJUSTMENT FUNCTION····································································3 - 22 3.11 DISPLAYS RELATING TO MEASUREMENT AND OTHER SETTINGS··························3 - 23 CHAPTER 4 FETAL AGE DIAGNOSIS PROGRAMS IV 4.1 FETAL AGE TABLE ············································································································4 - 1 4.2 ASSIGNMENT OF FETAL AGE TABLE ···············································································4 - 9 4.3 ESTIMATING GESTATIONAL AGE ···················································································4 - 10 4.4 DISPLAYING/HIDING FETAL AGE CURVE ······································································ 4 - 11 4.5 DISPLAYING/HIDING THE MEASUREMENT HISTORY ··················································4 - 12 4.6 DISPLAYING/HIDING THE NAMES OF ANIMALS····························································4 - 13 4.7 USER TABLE ···················································································································4 - 14 4.7.1 Create a Table Template ···························································································4 - 14 4.7.2 Preparation before Edit Table ···················································································4 - 15 4.7.3 Edit User Table ·········································································································4 - 16 4.7.4 Upload User Table ····································································································4 - 18 4.7.5 Download User Table ·······························································································4 - 19 CHAPTER 5 DATA MANAGEMENT 5.1 ID DATA ······························································································································5 - 1 5.1.1 Saving the ID Data ·······································································································5 - 1 5.1.2 Selecting the ID Data ···································································································5 - 2 5.1.3 Searching the ID Data··································································································5 - 3 5.1.4 Editing the ID Data ·······································································································5 - 3 5.1.5 Transferring the ID Data·······························································································5 - 4 5.1.6 Deleting the ID Data·····································································································5 - 5 5.2 IMAGE DATA ······················································································································5 - 6 5.2.1 Saving Image Data·······································································································5 - 6 5.2.2 Saving Moving Image Data ··························································································5 - 6 5.2.3 Searching for Image Data ····························································································5 - 7 5.2.4 Editing Image Data·······································································································5 - 8 5.2.5 Moving Image Data ······································································································5 - 9 5.2.6 Transferring Image Data ······························································································5 - 9 5.2.7 Deleting Image Data ··································································································5 - 10 5.2.8 Viewing Image Data ··································································································· 5 - 11 CHAPTER 6 APPENDIX 6.1 TROUBLESHOOTING ·······································································································6 - 1 6.2 CLEANING ·························································································································6 - 2 6.3 IMPORTANT INFORMATION FOR USE AND MANAGEMENT ········································6 - 3 6.4 LABELING SYMBOLS ·········································································································6 - 5 6.5 PROTECTIVE INSPECTIONS·····························································································6 - 6 6.6 SPECIFICATIONS ·············································································································6 - 7 V VI CHAPTER 1 GENERAL DESCRIPTIONS This chapter describes the safety precautions, outlines of the system, and basic operating method for HS-2100V. Be sure to read this chapter thoroughly before using HS-2100V. CHAPTER 1 1.1 PRECAUTIONS 1.1 PRECAUTIONS ●The power cable should be connected to the ground without fail when operating this equipment. Failure to do so could cause electrical shocks. DANGER ●This equipment should not be disassembled excepted by authorized persons since this equipment includes high voltage. Failure to do so could cause electrical shocks. DANGER ●The power cable should be connected to specified power outlets properly. Failure to do so could cause heating or smoking. WARNING ●The grip mounted at the top of this equipment should be held after closing the front panel and holding the probe in the probe holder when carrying. CAUTION 1-1 CHAPTER 1 1.1 PRECAUTIONS ●This equipment should not be used under moist atmospheres and places that could get the water splash such as under transfusion stands, etc. If not handled properly, it will cause failure of this equipment. CAUTION ●The abnormality and damage in the main body and accessories used in this equipment should be inspected before each use. Extra special care must be taken on the attaching parts of the probes and power cables. If damage is detected, stop operating immediately, and replace the damaged part with new parts. CAUTION ●Before starting examination, the ultrasound transmission gel should be evenly applied to the probe or the portion to be examined. Only use the ultrasonic gel designated by Honda Electronics. The use of other undesignated ultrasonic gels could cause deterioration of the probe. CAUTION ●This equipment should not be used near the device (medical telemeter, cordless telephone, etc.) that generates the electromagnetic noise and radio-frequency. CAUTION 1-2 CHAPTER 1 1.1 PRECAUTIONS ●The probes should be handled with special care. (The function will work improperly if the probes are fallen and applied impact.) In addition, never pull on the probe cable. CAUTION ●The mechanism used to hold the keyboard in the closed position has magnets. Do not place IC cards, magnetic cards or other such objects near these magnets. This could result in damage to these objects, CAUTION ●Only attach/remove the probes when the power is off. If the probe is attached/ removed with the power on, it will not be properly recognized by the unit. In addition, it could also result in damage to the probe. CAUTION [Other Precautions] ●This equipment is only for medical use. Never use for any other purpose. The equipment should not be used by non-qualified person. ●In order to avoid unnecessary exposure to ultrasound output, keep the time used for making diagnosis to an absolute minimum. Keep the time used for acquiring data for examination to an absolute minimum. ●Never use this device for diagnosis during surgery. ●Never allow this unit to come in contact with anything other than human skin. Never use on the eyes or other such areas as it can damage the surface and inner parts of the eyes. ●Never touch this device or its peripheral components with wet hands. ●This equipment should not be used in the place that could cause explosion and around combustible material. ●Never use this unit in areas where there are volatile solvents. ●Never use a probe other than the one provided with this unit. ●Always use the designated devices when connecting this unit to peripheral equipment. Failure to use the designated devices is dangerous as the safety of this unit as a medical device cannot be ensured. ●Always use the power supply cord provided. Never use a cord other than the designated cord as this is dangerous and could cause an accident. ●Always check that the unit is functioning properly and that the patient feels no abnormalities. If an abnormality is detected, take the necessary procedures such as immediately stopping the unit and giving assistance to the patient. ●If failure occurs, attach the indication to alert caution properly. Do not touch this equipment. Contact your dealer for inspection and repair. ●Never attempt to modify the main unit or the probe. ●The safety precautions described in this manual and the instruction manual attached to this equipment should be completely followed. 1-3 CHAPTER 1 1.2 NAMES AND FUNCTIONS OF COMPONENTS 1.2 NAMES AND FUNCTIONS OF COMPONENTS ●MONITOR (This is used to display echo images, echo information, diagnosis data, etc.) Brightness adjustment can be performed. (Refer to 2.24) 1.2.1 External Views ●GEL HOLDER ●CABLE HANGER ●USB PORT This port is only for USB memory devices. Do not use it for connecting other USB devices. Remove the USB memory device when it is not in use. (It could be damaged if left in place during transport.) ●PROBE HOLDER (Provides a place for the probe when it is not in use or when transporting the unit.) ●KEYBOARD (This is used to control ultrasound images and input data.) ●POWER SWITCH (This is used to turn the power ON or OFF.) ●PROBE SOCKET (These two connectors are provided for different probes in PROBE SOCKET.) ●POWER CONNECTOR PANEL (This consists of power socket, fuse holders, and grounding terminal.) ●INTERFACE CONNECTOR PANEL (Various external devices can be connected to these connectors.) 1-4 CHAPTER 1 1.2 NAMES AND FUNCTIONS OF COMPONENTS 1.2.2 Keyboard This item describes the name and function of each feature on the keyboard. GENERAL VIEWS INPUT KEY AREA These are used for inputting character data, etc. In addition, menus such as the one for adjusting the screen image and other functions can be assigned to the function keys or individual keys. ID INFORMATION AREA Use this to enter the patient’s ID other information.. (Refer to 5.1) STC SLIDE CONTROL These are used to RANGE ADJUSTMENT KNOB adjust the gain each Use this knob to adjust the depth. Refer to 2.6) image range. (Refer to 2.7) MENU KEY Shows the main menu. PRINT KEY The contents displayed in the screen are output from video printer. (Refer to 2.18) IMAGE STORE KEY Saves the image displayed on the screen. (Refer to 5.2) Sp1, Sp2 keys Executes the function assigned to the respective key. SELECT KEY Use this key to select each menu item and set it. PROBE SELECTION These are used to switch either probe of two probes that are currently connected. (Refer to 2.1) DISPLAY SELECTION AREA These are used to select the display mode of the image. (Refer to 2.3) TRACKBALL OPERATION AREA These are used to perform each measurement and to move the cursor, etc. 1-5 FREEZE KEY This is used to freeze the image. (Refer to 2.4) OVERALL GAIN CONTROL KNOB This is used to adjust the overall gain. (Refer to 2.5) CHAPTER 1 1.2 NAMES AND FUNCTIONS OF COMPONENTS CHARACTER INPUT KEY AREA FUNCTION KEYS AND CHARACTER KEYS This can be used for starting a diagnostic program in memory or opening the menu. They can also be used for alphanumeric input. Menus such as the one for adjusting the screen image and other functions can be assigned to the function keys or individual keys. ESC KEY When the menu screen is open, press this key to move to the next higher menu item. FUNCTION KEYS (F1 – F10) Executes the function assigned to the respective key. PRESET KEY Press this key to set or execute a preset function. (Refer to 2.2) SOFT Press this key to soften the image. (Soft adjustment) (Refer to 2.12) ACOUSTIC POWER Use this to adjust the acoustic power. (Refer to 2.15) PROBE FREQUENCIES Press this to change the frequency of the multi-frequency probe. (Refer to 2.1) EDGE Adjusts the strength of the edge. (Refer to 2.12) M-DR Use this to adjust the contrast in M-mode. (Refer to 2.13) GAMMA Use this to select the γcurve (Refer to 2.14) B-DR Use this to adjust the contrast in B-mode. (Refer to 2.13) 1-6 FOCUS KEY This is used to change the level of focus. (Refer to 2.11) CHAPTER 1 1.2 NAMES AND FUNCTIONS OF COMPONENTS TRACKBALL OPERATION AREA CALIPER KEY This is used at measurement of distance. (Refer to 3.1.) CIRCUMFERENCE/AREA MEAS. KEY This is used at measurements of the circumference and area. (Refer to 3.3.) MEASUREMENT MENU KEY Press this and the measurement menu will appear. (Refer to Chapters 3 and 4) Continue to hold the key down and the setting menu will open. ) BODYMARK KEY Press this key to when selecting a body mark. (Refer to 2.16) CLEAR KEY This is used to reset the display of the caliper cursor and stop measurement. COMMENT KEY Comments can be entered. (Refer to 2.17) FIX KEY Use this key to set data while inputting measurements or characters. TRACKBALL The functions of TRACKBALL change according to the mode and the operation. This allows scrolling the screen, moving the focus scale or M line, and positioning the cursor for caliper and data entry. SET KEY This is used to determine and execute the contents at setting. ID INFORMATION AREA ID KEY Use this to enter the patient’s ID other information. This is used after each change of the patient. (Refer to 5.1) IMAGE UTILITY KEY Use this key to operate the image data. (Refer to 5.2) 1-7 CHAPTER 1 1.2 NAMES AND FUNCTIONS OF COMPONENTS DISPLAY SELECTION AREA M MODE KEY This is used to display the image with the M mode. (Refer to 2.3.5.) B/M MODE KEY This is used to display the image with B/M mode. (Refer to 2.3.3.) B/B MODE KEY This is used to display the B-mode image on two screens. (Refer to 2.3.2) B/Z MODE KEY Use this to enlarge one part of the B-mode display. (Refer to 2.3.4) B MODE KEY This is used to display the image with the B mode. (Refer to 2.3.1.) 1-8 CHAPTER 1 1.2 NAMES AND FUNCTIONS OF COMPONENTS 1.2.3 Screen Display This item describes the display screens and the menus. Screen Display TIME/DATE DISPLAY AREA PROBE DIRECTION MARK HOSPITAL NAME DISPLAY AREA ID INFORMATION DISPLAY AREA FUNCTION DISPLAY AREA PROBE INFORMATION AREA FOCUS MARK GAIN/RANGE DISPLAY AREA 1-9 CHAPTER 1 1.2 NAMES AND FUNCTIONS OF COMPONENTS Explanation of the menus Press the Use Press If there is a key or the key to display the menu and the menu screen appears. to select the item. The selected item will be have a box around it. to confirm. next to the menu item, a submenu will be displayed. When the menu screen is open, press the Press the key to move to the next higher menu item. key or the key used to open the menu and menu now open will be closed. Example: The Preset Menu can be closed by the 1 - 10 key or the key. CHAPTER 1 1.3 ACCESSORIES CONNECTIONS 1.3 ACCESSORIES CONNECTIONS Check that the following accessories are composed with the main device before unpacking. 1. Accessories O Probe (2. Select from among the optional probes.) O Power Cable O Ultrasound gel 1 - 11 CHAPTER 1 1.3 ACCESSORIES CONNECTIONS 2. Option O Printer (UP-897MD or P93) O Probe Type of Probe ·Convex ·Convex ·Convex ·Convex ·Convex ·Convex ·Linear ·Linear ·Linear ·Linear ·Linear ·Linear ·Linear ·Linear ·Linear 60R 60R 20R 12R 10R 10R 80mm 50mm 50mm 40mm 30mm 30mm 50mm 50mm 120mm 2.8MHz,3.5MHz,5.0MHz 2.8MHz,3.5MHz,5.0MHz 3.5MHz,5.0MHz,7.0MHz 5.0MHz,7.5MHz,9.0MHz 5.0MHz,7.5MHz,9.0MHz 5.0MHz,7.5MHz,9.0MHz 2.8MHz,3.5MHz, 5.0MHz 5.0MHz,7.5MHz,10.0MHz 5.0MHz,7.5MHz,10.0MHz 6.0MHz,8.5MHz,11.0MHz 7.5MHz,10.0MHz,12.5MHz 7.5MHz,10.0MHz,12.5MHz 5.0MHz,7.5MHz,10.0MHz 5.0MHz,7.5MHz,10.0MHz 1.5MHz,2.0MHz,3.0MHz All of the probes shown above are multifrequency probes. * Special order O Cassette (HWA-03, HWA-05) O Water bag (HWB-02) O Foot Switch (SFUS-1GR Cable length 2.5m) 1 - 12 OPU Rectal Rectal (HCS-536M) (HCS-436M) (HCS-452M) (HCS-5712M) (HCS-4710M) (HCV-4710MV)* (HLS-438) (HLS-575M) (HLS-475M) (HLS-584M) (HLS-513M) (HLS-413) (HLV-575M) (HLV-475M) (HLV-4212M)* CHAPTER 1 1.4 INSTALLING THE EQUIPMENT AND MAKING CONNECTIONS 1.4 INSTALLING THE EQUIPMENT AND MAKING CONNECTIONS This section describes how to set up the equipment and make connections. 1.4.1 Installation Conditions This item describes the installation of HS-2100V. DANGER Set the keyboard onto the table without fail. Dropping the main body can cause injury or damage. 1 - 13 CHAPTER 1 1.4 INSTALLING THE EQUIPMENT AND MAKING CONNECTIONS 1.4.2 Power Connections This item describes the connection method of the power cable. DANGER Operate this equipment with its ground terminal connected without fail. Failure to do so could cause electrical shock. Always use the power supply cord provided. Never use a cord other than the designated cord as this is dangerous and could cause an accident. 1 - 14 CHAPTER 1 1.4 INSTALLING THE EQUIPMENT AND MAKING CONNECTIONS 1.4.3 Interface Connection This item describes the interface connection of the video printer and external monitor. Foot Switch To external monitor. (Analog RGB) Connect the monitor in accordance with IEC60601-1. Video Printer Video Cable Video Printer Connection Connect the printer in accordance with IEC60601-1. 1 - 15 CHAPTER 1 1.4 INSTALLING THE EQUIPMENT AND MAKING CONNECTIONS 1.4.4 Probe Connection This item describes the probe connection. 1. Connect the probe to the connecting socket in the rear panel of the main body. Before connecting the probe, check that the locking lever is in CAUTION the “OPEN” position. Failure to do so could damage the connecting pin. 2. Turn the lock lever 90° in clockwise to lock Lock lever <Lock lever "Open"> the probe connector in place. Cable Only attach/remove the probes when the power is off. If the CAUTION probe is attached/ removed with the power on, it will not be properly recognized by the unit. In addition, it could also result in damage to the probe. 1 - 16 Turn clockwise 90° Cable <Lock lever "Locked"> CHAPTER 1 1.5 GENERAL OPERATING STEPS 1.5 GENERAL OPERATING STEPS This section describes the basic operating steps. 1. Turn ON (“I” side) the power switch at the right surface of HS-2100V. The lamp color of the selected probe key will change to blue and the screen will appear. 2. If the screen is difficult to see, press the key and use Monitor-Brightness to adjust the brightness of the screen. Refer to 1.2.3 for more information about the operation of menu items. Refer to “2.24 SCREEN BRIGHTNESS ADJUSTMENT”. 3. Enter the ID data. Refer to “5.1.1 Saving the ID Data”. 1 - 17 CHAPTER 1 1.5 GENERAL OPERATING STEPS 4. If two probes are connected, press either from key to select the probe. When only one probe is connected, it will automatically be selected and the lamp color of the key for that probe will change to blue. Refer to “2.1 PROBE SELECTION”. 5. Spread the ultrasound transmission gel on the examination surface of the probe or the portion of the body to be examined. Then put the probe on the portion to be examined. 6. Set the gain, focus, range and other areas. Refer to Chapter 2 for each setting. 7. Press the key to freeze the image. 1 - 18 CHAPTER 1 1.5 GENERAL OPERATING STEPS 8. Perform measurements using the trackball, caliper keys, and other function keys as required. Refer to Chapter 3 and 4 for details about each type of measurement. 9. Press the key to display the bodymark, and set the position of probe with the aid of trackball. Refer to “2.16 SETTINGS”. 10. BODYMARK Once all the necessary items have been displayed on the screen, press the key to save the screen. Refer to “2.18 PRINTING OUT IMAGE” if you would like a print out of the screen. 1 - 19 CHAPTER 1 1.6 TIME/HOSPITAL NAME SETTINGS 1.6 TIME/HOSPITAL NAME SETTINGS If this is the first time to use the HS-2100V since purchasing it, please make the following settings and save them. 1.6.1 Setting Date and Time Although a calendar and clock is set on installation previously, it is possible for the user to reset the date/time if necessary. To reset the date/time, take the following steps. 1. Press the key. The main menu appears on the screen. 2. to Use System-Date menu. execute. select the to Press The setting menu will appear. 3. to select the appropriate Use year, month and day. Press to set. 4. Use to select the System- Time Set menu. Press execute. 5. The setting menu will appear. to select the appropriate Use hour, to minute and second. Press to set. 6. Press the Press the Press key to close the menu. key. Use to execute. to select the System-Date Format menu. The setting menu will appear. display can be selected. YYYY/MM/DD : YEAR, MONTH, and DATE DISPLAY DD-MM-YYYY : DATE, MONTH, and YEAR DISPLAY MM.DD.YYYY : MONTH, DATE, and YEAR DISPLAY 1 - 20 The type of date CHAPTER 1 1.6 TIME/HOSPITAL NAME SETTINGS 1.6.2 Setting Title Name Color This item describes how to set a character color of “HONDA ELECTRONICS HS-2100” appears on the upper part of screen. Title color setting is protected even if the power is turned off. 1. Press the 2. Use key. Main menu appears on the screen. to select System-Title Name Color on menu, press to execute. 3. Title color can be selected from following 5 colors. Gray(gray)、Magenta(purple-red)、 Green(green)、Cyan(light blue)、Yellow(yellow) Use 4. Press 5. Press the to make the desired setting selection. and the title color turns into the selected color. key to close the menu. 1 - 21 CHAPTER 1 1.6 TIME/HOSPITAL NAME SETTINGS 1.6.3 Registering Hospital Name This item describes how to register the hospital name and display it in the space in the upper right side of the screen. Once the hospital name registered, it will be saved even if the power is turned off. 1. Press the 2. Use key. The main menu appears on the screen. to select the System-Hospital Name menu. to execute. Press The input menu will appear. 3. Enter the hospital name with the alphanumeric key. The maximum number of characters is 40. 4. Press the key to set the hospital name. 5. Press the key to close the menu. The registration operation is now complete. 1 - 22 CHAPTER 1 1.6 TIME/HOSPITAL NAME SETTINGS 1.6.4 Setting Hospital Name Color This item describes how to set a character color of hospital name that appears on the upper part of screen. The color setting of hospital name is protected even if the power is turned off. 1. Press the 2. Use key. Main menu appears on the screen. to select System-Hospital Name Color on menu, press 3. to execute. Hospital name color can be selected from following 5 colors Gray(gray)、Magenta(purple-red)、 Green(green)、Cyan(light blue)、Yellow(yellow) Use 4. Press 5. Press the to make the desired setting selection. and the hospital name color turns into the selected color. key to close the menu. 1 - 23 CHAPTER 1 1.6 TIME/HOSPITAL NAME SETTINGS 1.6.5 Setting the Buzzer Sound This item describes how to set the sound that will be heard each time a button is pressed. Once this sound has been set, it will be saved even if the power is turned off. 1. Press the 2. Use key. The main menu appears on the screen. to select the System-Buzzer menu. Press to execute. 3. Set the buzzer to ON or OFF. Select either On or Off. to make the desired Use setting selection. 4. Press 5. Press the and the selection is set. key to close the menu. This sound is set to Off in the initial settings. 1 - 24 CHAPTER 1 1.6 TIME/HOSPITAL NAME SETTINGS 1.6.6 Setting the Save Destination This item explains the save destinations for the data. There are two save destinations: internal memory and external USB memory device. 1. Press the 2. Use key. The main menu appears on the screen. to select the USB-Priority of Current Memory menu. Press 3. to execute. This sets the save destination. Select either External USB (USB memory Select save destination device) or Internal Memory. to set the desired Use destination. 4. Press 5. Press the and the selected save destination is set. key to close the menu. If External USB is set but there is no external USB device connected, the save destination will become the Internal Memory. After pressing the key to disconnect the USB memory, select . After the “Memory is removed. Menu USB-Disconnect and press will close” window appears, press and remove the USB memory. 1 - 25 CHAPTER 2 KEY OPERATION AND DISPLAY FUNCTION This chapter describes the keys and key operations related to the system setting and image display. If the operation of the function key is valid, a single “beep” will be sounded. If the operation is invalid, multiple “beeps” will be sounded. CHAPTER 2 2.1 PROBE SELECTION 2.1 PROBE SELECTION This section describes the selecting procedure of probe. 1. Press the probe required. key or key to select the The selected probe (1, or 2) will appear at the bottom of the screen. (The selected probe will appear in white; probes that P: Selected Probe have not been selected will appear in grey. ) F: Frequency When HS-2100V is switched ON, probe 1 is automatically selected except that probe 2 is selected if only probe 2 is connected to the main body. 2. Press the key or the and keys to change the frequency of the probe. The frequency display (above the probe name) in the lower left hand corner of the screen changes. . The frequency can be changed even if the selected / key is pushed. The setting can also be made by using the method shown below. key to display the menu. Press the Set the Manual-Frequency . 2-1 CHAPTER 2 2.2 PRESET 2.2 PRESET On this model, it possible to save the current conditions (the settings of the probe now being used) as preset condition for the probe that has been selected. (Up to 10 settings per probe can be saved.) In addition, this function can be used to change the settings when the unit is started as well. 2.2.1 Saving a Preset This item describes how to save the settings of the currently selected probe as a preset. 1. Press the 2. Use key for one second. to select Current Setting-Store. Press to execute. 3. Use to select the save Select the Save Destination destination. (Preset 1 to 10.) 4. Press and the current settings are saved in the selected preset. If you wish to change the name of the preset, press the key for one second, select the Preset that you wish to change and change with Preset Name. If you wish to copy one preset to another, press the key for one second, designate the source to be copied, select Store and then select the copy destination. The contents saved in a preset can be confirmed when the copy source of the preset is designated. (The parameters will appear. ) The Preset 10 setting will be used when the unit is started and when the probe is changed. 2-2 CHAPTER 2 2.2 PRESET 2.2.2 Selecting a Preset This item explains selecting a preset. 1. Press the key. Preset 1 to Preset 10 will be displayed. 2. Use to select the desired Preset. It is also possible to directly call up Preset 1 through Preset 10 by using the Select the desired preset corresponding F1 through F10 keys. 3. Press and the selected Preset is set. If the selection is made during Freeze mode, a “UnFreeze is OK?” prompt will appear. If you want to unfreeze and set as a Preset, select Yes. If you select No, the freeze mode will be maintained, but the Preset will not be set. 2.2.3 Initializing a Preset This item explains initializing a preset. (The following operation initializes the unit to the factory settings.) 1. 2. Press the Use key for one second. to select the Preset to be initialized and then press 3. Use . Select initialize. to select Call Factory Default. Select the Preset to be initialized. to Press execute. To initialize all Preset, press the Factory Default All. key for one second and select The initialization of the Preset will only be performed for the currently selected probe. 2-3 CHAPTER 2 2.3 IMAGE DISPLAY MODE SELECT 2.3 IMAGE DISPLAY MODE SELECT This section describes selecting method of the display type and the operation mode. 2.3.1 B Mode 1. Press the key. The B mode image with 1 screen appears on the monitor. 2.3.2 B/B Mode In the B/B mode, two screens can be used to compare B-mode images. 1. Press the key and the B-mode image will appear on the left side. 2. Press the key once again and a B-mode image will appear on the right side. 3. Once the two screens are displayed, pressing the once again enables switching of the active side. If the key is pressed in the scan mode, the probe settings, etc. will be transferred and the active side will be switched. (In this case, the side that is active will be in the scan mode.) If the key is pressed in the freeze mode, the probe settings, etc. for each will be maintained and the active side will be switched. (In this case, both screens will remain in the freeze mode. ) 2-4 CHAPTER 2 2.3 IMAGE DISPLAY MODE SELECT 2.3.3 B/M Mode 1. key. Press the The B mode image appears on the left side, and the M mode image appears on the right side of the screen. The M mode measurement line will be Measurement Scroll speed display displayed as the dotted line in the B mode to image on the left side. Use move this measurement line. Use the menu to set the scroll speed in M-mode. Refer to “2.19 SETTING M-SPEED”. The M-mode measurement line can only be moved in the scan mode. The position of the M-mode measuring line for M-mode will be in the same position as the M-mode measuring line in the BM-mode. 2.3.4 B/Z Mode Enlargement frame 1. Press the key and part of the B-mode image will be enlarged on the right side of the screen. The enlargement frame shows the area that is being enlarged. Use the trackball to determine the area to be enlarged. (The enlargement frame moves.) to Use change the enlargement ratio (×2 to ×4). (The size of the enlargement box will change and the enlargement ratio will be displayed on the screen.) 2-5 Enlargement Ratio CHAPTER 2 2.3 IMAGE DISPLAY MODE SELECT 2.3.5 M Mode 1. Press the key. The M mode image appears on the screen. Scroll speed display Use the menu to set the scroll speed in M-mode. Refer to “2.19 SETTING M-SPEED”. The position of the M-mode measuring line for M-mode will be in the same position as the M-mode measuring line in the BM-mode. 2-6 CHAPTER 2 2.4 FREEZING IMAGE and CINE MEMORY 2.4 FREEZING IMAGE and CINE MEMORY This section describes freezing the image (creating a still image). 2.4.1 Freezing Image For measurements and calculation, the echo image should be frozen beforehand. HS-2100V offers following way to freeze the image. ● button on the key board. Press To unfreeze the image, perform the same operation again. Some of the parameter settings and key operations are invalid when the image is frozen. The measurement data will be erased when freeze is cancelled. (Except obstetrical measurements. ) 2.4.2 Cine memory and Cine loop 1. Once the image is in freeze mode, the image prior to freeze mode knob can be used to display the using frame-by-frame advance. 2. Once the image is in freeze mode, pressing will start the cine-loop display and the image prior to freeze mode will be Cine loop display played in a repeating loop. Turn the knob to the left to play the image in slow motion (1/1 1/4 1/16). Turning the knob in the opposite direction (right) will restore play speed (1/16 1/4 1/1). Press once again during play mode will freeze the playback image. 2-7 CHAPTER 2 2.5 SETTING GAIN 2.5 SETTING GAIN This section describes adjusting the overall gain (sensitivity) for the reflecting echo level. 1. Use the total gain adjustment knob to adjust the sensitivity of the overall reflection echo level. The gain that has been set will be displayed. (G:36 to 100) Overall Gain Control Knob G: Gain Value Only the gain of M mode image can be adjusted in the B/M mode. The B-mode gain will remain at the value it was prior to switching to B/M-mode. 2-8 CHAPTER 2 2.6 SETTING TIME GAIN COMPENSATION (STC) 2.6 SETTING TIME GAIN COMPENSATION (STC) This section describes the reflected echo level adjustment for each depth. 1. The system adjusts optimum echo gain for each depth range by sliding the 8 STC slide controls toward right or left. Adjust so that there is an even image overall. Slide the lever to the left to lower sensitivity. Slide the lever to the right to increase sensitivity. STC Slide Control 2-9 CHAPTER 2 2.7 SETTING RANGE 2.7 SETTING RANGE This section describes the range settings. 1. Use the range adjustment knob to adjust the range for observing. Turn the knob to the left to make the observation depth deeper. Turn the knob to the right to make the observation depth shallower. Range Adjustment Knob R: Range Value 2 - 10 CHAPTER 2 2.8 LEFT/RIGHT INVERSION 2.8 LEFT/RIGHT INVERSION This section describes the left/right inversion of the image. This function is already assigned to keys 1. and Press the left/right inversion key( . (During Scan) or key). Each time the key is pressed, the image will invert in the lateral direction and the probe direction mark on the screen ( / Probe Direction Mark ) will change. This mark corresponds to the protrusion of the probe. Align the probe direction mark and the protrusion of the probe at the examination Normal Image area. Probe Direction Mark Protrusion of Probe Left/Right Inversion Image Use the following procedure to operate by using the menu. 1. Press the 2. Use key. The main menu appears on the screen. to select the Manual-Left/Right menu. Press Press the to execute. key to close the menu. When the image is in the freeze mode, lateral inversion will not be performed even if the buttons are pushed. However, it can be performed by using the menu. 2 - 11 CHAPTER 2 2.9 UP/DOWN INVERSION 2.9 UP/DOWN INVERSION This section describes the up/down inversion of the image. This function is already assigned to key 1. Press the key. . (During Scan) Each time this button is pushed, the display will toggle between the normal and vertical inversion screen. Use the following procedure to operate by using the Normal Image menu. 1. Press the key. The main menu appears on the screen. 2. Use to select the Manual-Up/Down menu. Press to execute. 3. Set the up/down inversion. Select Up (normal setting) or Down (inverted). 4. Use to make the desired setting selection. Press and the selection is set. Press the Up/Down Inversion Image key to close the menu. When the image is in the freeze-mode, Up/Down inversion will not be performed. 2 - 12 CHAPTER 2 2.10 POSTIVE/NEGATIVE INVERSION 2.10 POSTIVE/NEGATIVE INVERSION This section explains the positive/negative inversion of the image. Once the positive/negative setting has been set, it will be saved even if the power is turned off. 1. Press the key. The main menu appears on the screen. 2. Use to select the System-Posi/Nega menu. Press to execute. 3. Set the positive/negative (Posi/Nega) inversion. Select Posi (normal setting) or Nega (inverted). Use to make the desired setting selection. Posi/Nega inverted image 4. Press Press the and the selection is set. key to close the menu. 2 - 13 CHAPTER 2 2.11 FOCUS SETTING 2.11 FOCUS SETTING This section describes the focus setting procedure. 1. Use the track ball to move the focus mark and Focus mark set the focus position. Focus Number 1 2. Set the stage number of the focus by pressing the key (1 to 4 stages). The frame rate Focus marks increase will slow down as the stage number of the focus increases. (Refreshing of the screen will be delayed.) 3. Set the gap of the focus by pressing the key. Focus Number 3 Each time the key is pressed, the focus stage setting moves from 1→2→3→4→1→2... +Each time the and keys are pressed, the focus stage setting moves from 4 → 3 → 2 → 1 → 4 → 3. . . Each time the key is pressed, the focus gap setting moves from 0 → 1 → 2 → 0 → 1 → 2 . (Widens) +Each time the and keys are pressed, the focus gap setting moves from 2 → 1 → 0 → 2 → 1→ 0 .(Narrows) The setting can also be made by using the method shown below. Press the key to display the menu. Set the Manual-Focus Number, Manual-Focus Steps. 2 - 14 CHAPTER 2 2.12 IMAGE SOFT ADJUSTMENT AND EDGE ENHANCEMENT 2.12 IMAGE SOFT ADJUSTMENT AND EDGE ENHANCEMENT This section describes the settings for the soft adjustment and edge enhancement that can make the ultrasound image easier to see. Soft adjustment 1. Press the key. This makes the image softer and reduces noise. S: Soft value E: Edge value Edge enhancement 1. Press the key. The edge of the image is enhanced. Each time the k e y i s p r e s s e d , t h e s o f t s e t t i n g m o v e s f r om 1→2→3→4→0→1... Each time the k e y i s p r e s s e d , t h e ed g e s e t t i n g m o ve s f r om 0 → 1 → 2 → 3 → 0 →1. . . The setting can also be made by using the method shown below. Press the key to display the menu. Set the Manual-Edge、Manual-Soft . 2 - 15 CHAPTER 2 2.13 SETTING DYNAMIC RANGE 2.13 SETTING DYNAMIC RANGE This section describes adjusting the contrast of the image in the B- and M-modes. As the dynamic range value is increased, it is possible to display from a strong echo to a weak echo. For B-mode 1. Each time the key is pressed, the dynamic range value increases. +Each time the and keys are pressed, the dynamic range value decreases. D: Dynamic Range Value The value will change in increments of 10 dB, from 35 dB to 95 dB. For M-mode 1. Each time the +Each time the key is pressed, the dynamic range value increases. and keys are pressed, the dynamic range value decreases. The value will change in increments of 10 dB, from 35 dB to 95 dB. The setting can also be made by using the method shown below. Settings can be changed in 1 dB increments if the setting is done from the menu. Press the key to display the menu. In B-mode, set Manual-B-D/R . In M-mode set Manual-M-D/R . 2 - 16 CHAPTER 2 2.14 SETTING Curve 2.14 SETTING Curve This section describes about the settings ( ultrasound images easier to view. 1. Each time the Each time the key is pressed, the and Curve) for the LCD monitor that can make the curve number is increased. keys are pressed, the curve number is decreased. γ: γcurve number γ curve: 1 γ curve: 4 γ: 4 The setting can also be made by using the method shown below. Press the key to display the menu. Set the Monitor-Gamma . 2 - 17 CHAPTER 2 2.15 SETTING ACOUSTIC POWER 2.15 SETTING ACOUSTIC POWER This section describes how to adjust the acoustic power. 1. Each time the key is pressed, the acoustic power value is increased. Each time the key is pressed, the acoustic power value is decreased. The value changes in 10% increments, from 20% to 100%. A: Acoustic power value The setting can also be made by using the method shown below. key to display the menu. Press the Set the Manual-A-Power . 2 - 18 CHAPTER 2 2.16 BODY MARK SETTINGS 2.16 BODY MARK SETTINGS This section describes how to set the body marks. Body mark settings 1. Press the key and the body mark menu Select body mark will appear. 2. and Use to select the body mark that is appropriate for the area being examined. The body mark is shown on the screen. 3. Use the trackball to determine the position of to set the probe mark and use the angle of the probe mark. 4. Press the key. The position of the Probe mark probe mark and its angle have now been set. Deleting a body mark 1. Press the key and the body mark menu will appear. 2. Use 3. The body mark deletion confirmation screen will appear. NO :The body mark is not deleted and the normal screen display is restored. YES: The body mark is deleted. to select Clear. to execute. Press The body mark cannot be deleted using the Deletion confirmation screen or Probe Mark can be relocated after fixing it. Press and hold 2 - 19 keys. key to do so. CHAPTER 2 2.17 ENTERING COMMENTS 2.17 ENTERING COMMENTS This section describes how to enter annotations onto the ultrasound image. Note that with the initial settings, the annotations are removed when freeze mode is cancelled. Press the key for one second. Select Clear all annotations after unfreezing-off and the annotations will not be removed when freeze mode is cancelled. Entering Annotations 1. Press the key and the annotation menu will appear. 2. Use to select Word. Press Annotation input area to execute. Above process can be altered by pressing key once again. 3. Use the character input keys to enter a comment. 4. Press the key and entered annotation will appear on the screen. 5. Use the trackball to position the annotation and press then press the key. Saving Annotations 1. Press the 2. Use key for one second and the annotation save menu will appear. to select the location to save the annotation. (User Anno. 1 to User Anno. 10) and press the 3. key. After entering the annotation with the character keys, press the key to confirm. Entering the annotation 4. Press the key to close the menu. 2 - 20 CHAPTER 2 2.17 ENTERING COMMENTS Selecting an Annotation 1. Press the key and the annotation menu will appear. 2. to select the desired item Use (other than Word). Press to execute. 3. Use to select the annotation to be used. Press and the selected annotation will appear on the screen. 4. Select annotation key. Use the trackball to position the annotation and press then press the It is also possible to select an annotation that has already been saved. Press the key and select User Preset. The annotations saved as User Anno. 1 to User Anno. 10 will be displayed. Select the annotation to be used. Correcting an Annotation 1. Press the key and the annotation menu Character entry box 2. will appear. Use to select Edit. to execute. Above process can pressing E key. 3. The be Press altered by cursor will be displayed on the screen. Use the trackball to move the cursor to the annotation to be corrected. (The color of annotation will change from yellow to green.) Press the 4. Press the key. key and the character entry box will appear. The annotation to be corrected will appear inside the box. 5. When the annotation has been corrected, press the key. The corrected annotation will appear on the screen. 2 - 21 CHAPTER 2 2.17 ENTERING COMMENTS 6. Use the trackball to position the annotation and press then press the key. Moving an Annotation 1. Press the 2. Use 3. The cursor will be displayed on the screen. Use the trackball to move the cursor annotation to be moved. (The color of annotation will change from yellow to green.) key and the annotation menu will appear. to select Edit. the to execute. to the Press key. Use the trackball to move both the cursor 4. Press and comment. When the annotation has been moved to the desired location, press the Cursor key once again. Deleting Annotations 1. Press the 2. Use key and the annotation menu will appear. to select Edit. Press to execute. 3. Use the trackball to move the cursor to the annotation to be deleted. (The color of annotation will change from yellow to green.) Press the 4. Press the Cursor key. key and the annotation that has turned green will be deleted. To delete all annotations, press the 2 - 22 key and select All Delete. CHAPTER 2 2.18 PRINTING OUT IMAGE 2.18 PRINTING OUT IMAGE This section describes the printing out of the image. Before printing, freeze the examination screen and confirm that the proper image has been acquired. 1. Press the key. The ultrasound image data displayed on the screen is immediately transmitted to the video printer before printout. Therefore, the examination may be continued without any interval. Make sure to connect the remote cable to print using the Pressing key. key and SHIFT key together while the USB memory in the port can save a screen image in the root folder of the USB memory. 2 - 23 CHAPTER 2 2.19 SETTING M-SPEED 2.19 SETTING M-SPEED This section describes the settings for the M-mode scroll speed. 1. Press the 2. Use key. The main menu appears on the screen. to select the Manual-M-Speed menu. Press to execute. 3. Set the M- speed. The speed can be selected from among five levels: 1/1, 1/2, 1/4, 1/8 and 1/16. M-Speed: 1/8 to make the desired Use setting selection. 4. Press to set the speed. Press the key to close the menu. Either the B/M-mode and M-mode can be set in the same manner. M-Speed: 1/1 M speed can be changed one by one as follows, 1/1, 1/2, 1/4, 1/8, and 1/16, by pressing the S key. 2 - 24 CHAPTER 2 2.20 DISPLAYING THE M-SCALE 2.20 DISPLAYING THE M-SCALE This section describes the settings for displaying the scale on M-mode and Mode of the B/M mode screen. Once the M-scale setting has been set, it will be saved even if the power is turned off. 1. Press the key. The main menu appears on the screen. 2. Use to select the System- M Scale Display menu. Press to execute. 3. Set on/off for the display of the M-scale. Select either On (Display) or Off (No Display). Use 4. Press Press the to make the desired setting selection. and the selection is set. key to close the menu. M-Scale Display When M-Scale is On When the M-Scale is set to On, the scale (1 sec. / div.) will be displayed on the M-mode screen . 2 - 25 CHAPTER 2 2.21 DISPLAYING A MODE 2.21 DISPLAYING A MODE This item describes how to display A mode pattern on the B screen. A mode setting is protected even if the power is turned off. 1. Press the key. Main menu appears on the screen. 2. Use to select System- A Mode Display on menu, press to execute. 3. Set on/off for the A mode display. Select either On (Display) or Off (No Display). Use to make the desired setting selection. 4. Press Press the and the selection is set. A mode display key to close the menu. When A mode display is On 5. When A mode is ON, a signal level (an echo level) on the dotted line of the B mode screen is to change dotted line position. displayed as A mode graph. Use A mode can be displayed only when the image is in the freeze mode. The display disappears once when the freeze mode is released, and it appears again when it freezes again. A mode wave display can be changed by pressing CTRL and A keys at a same time instead of above operation. 2 - 26 CHAPTER 2 2.22 DISPLAYING BIOPSY GUIDE LINE 2.22 DISPLAYING BIOPSY GUIDE LINE This item describes how to display biopsy guide line on the B mode screen. Display setting is protected even if the power is turned off. 1. Press the key. Main menu appears on the screen. 2. Use to select System- Biopsy Guide Line Display on menu, press 3. to execute. Set biopsy guide line display. Select one among followings, Off (non display)・ 1Line・3Line. Use to make the desired setting selection. 4. Press Press the Biopsy guidelines and the selection is set. key to close the menu. Biopsy guide lines on 3Line setting This function is effective only in a probe which option is set. Biopsy guide line is displayed at the corresponding place on the B mode screen when biopsy guideline is set on 1Line or 3Line. Display - Off (non display), 1Line , 3Line - can be changed by pressing CTRL and G keys at a same time instead of above operation. 2 - 27 CHAPTER 2 2.23 ENHANCEMENT FUNCTION SELECTION 2.23 ENHANCEMENT FUNCTION SELECTION This section describes the selection of the enhancement function (image processing). Use the following procedure to select the best image processing for the examination. This function is already assigned to key 1. Press the key. (During Scan). Each time the key is pressed, the image processing function will change. The currently selected condition will appear on the screen. Use the following procedure to operate by using the menu. 1. Press the 2. Use key. The main menu appears on the screen. to select the Manual-Enhancement menu. Press execute. 3. Select the enhancement function. Use Press the to select and press . key to close the menu. Enhancement Function Setting Display 2 - 28 to CHAPTER 2 2.24 SCREEN BRIGHTNESS ADJUSTMENT 2.24 SCREEN BRIGHTNESS ADJUSTMENT This section describes setting the brightness of the screen. Once the brightness setting has been set, it will be saved even if the power is turned off. 1. Press the 2. Use key. The main menu appears on the screen. to select the Monitor-Brightness menu. Press to execute. 3. Use and press Press the to change the brightness of the screen. Select the desired brightness . key to close the menu. Select brightness 2 - 29 CHAPTER 2 2.25 CHAGING VIEW ANGLE / VIEW WIDTH 2.25 CHANGING VIEW ANGLE / VIEW WIDTH This section describes how to change view angle or view width. 1. Press a left/right inversion key (Either the key). The view angle (convex scope) or or view width (linear scope) of the ultrasound image being displayed on the current screen will change in the following sequence: 1/1→3/4→1/2→1/1. Use the following procedure to operate by using the menu. 1. Press the key. The main menu appears on the screen. 2. Use to select the Manual-View Width menu. Press Press the key to close the menu. to execute. When the image is in the freeze mode, switching between view angle and view width will not be performed even if the button is pushed. 2 - 30 CHAPTER 2 2.25 CHAGING VIEW ANGLE / VIEW WIDTH 2 - 31 CHAPTER 3 MEASURING FUNCTIONS This chapter describes how to make various measurements, such as distance and peripheral length. There is a need to freeze the image before taking these measurements. (Measurements cannot be taken during scanning.) CHAPTER 3 3.1 DISTANCE MEASUREMENT 3.1 DISTANCE MEASUREMENT This section describes the distance measurement method. 1. Press the key. The cursor will be displayed in the middle of the screen and D1:0.0 mm will appear in upper right corner of the screen. The measurement scale of B/B mode is taken from the side where the cursor locates. 2. Use the track ball to move the cursor to the start of the measurement (start point) and press key. the 3. Use the trackball to move the cursor from the start point and a green line will appear. (The tentative results of the measurement appear in green.) 4. Use the track ball to move the cursor to the end of the measurement (end point) and press key. the 5. The line will change to yellow and the results of the measurement will be Ending Point of Measurement displayed in yellow. It is possible to make Starting Point of Measurement distance measurements to eight locations continuously. The cursor will flash as the measurements are continued. Use the key to set the same type of measurement one step at a time. When the maximum number of locations has been measured (for example, eight lines) the original caliper is restored and can be reset. Fine adjustment of the cursor position in the up/down and right/left directions can be performed in one dot increments by pressing the arrow key. Refer to “3.10 CURSOR FINE ADJUSTMENT FUNCTION”. 3-1 CHAPTER 3 3.1 DISTANCE MEASUREMENT When the measurement has been confirmed, press the key. key The measurement contents will be deleted in the following order when the key is pressed when in the measurement mode. If a measurement has been taken during the measurement operation, only that measurement will be deleted. . If no measurement has been taken during the measurement operation and there are two or more types of measurements (such as distance measurement and area/circumference, that last measured system is deleted. (For example, if the sequence of measurement was distance and then area/circumference, all area/circumference measurements will be deleted.) If the key is pressed after and remaining measurements will be deleted. above have been executed, all When the Average of Distance Display is on, all enabled distances shown on the screen will be average values. (AV: mm) It is possible to change the line being displayed at the time of measurement (the spacing of the dots in the line) and whether or not the average value is displayed. Refer to “3.11 DISPLAYS RELATING TO MEASUREMENT AND OTHER SETTINGS”. Correcting measurements It is possible to correct a measurement that has been set. 1. Hover the cursor on the fixed measurement line or numeric result. The line and the cursor measurement result change its color from key to select yellow to green. Press the measurement. 2. Fixed measurement now can be corrected by trackball. Start and End point can be swapped key. by 3. Press the key to complete the measurement. Start point moves 3-2 CHAPTER 3 3.2 VELOCITY MEASUREMENT 3.2 VELOCITY MEASUREMENT This section describes the settings for displaying the velocity measurement on M-mode and M-mode of the B/M mode screen. By operating the measurement cursor in the M-mode and M-mode of the B/M mode screen, measurement of the mitral valve and other items is preformed and the following information can be obtained. (1) Distance between the measuring cursors (Vertical direction): D (Movement distance of valve, etc.) (2) Time between the measuring cursor (Vertical direction): T (Time required for the mitral valve to open and close, etc.) (3) The velocity calculated from (1) and (2): V 1. Press the appear. key and the cursor will The following will be displayed in the upper right side of the screen. D 1 : 0 . 0 0 mm T1 : 0 ms V1 : 0 mm/s 2. Move the cursor to the start of the measurement (start point) and press the key. 3. Starting Point of Measurement Use the trackball to move the cursor and a green line will be displayed. (The tentative results of the measurement appear in green.) 4. Move the cursor to the end of the measurement (end point) and press the key. The line and results of the measurement will be displayed in yellow. 3-3 Ending Point of Measurement CHAPTER 3 3.2 VELOCITY MEASUREMENT To end the current measurement, press the key. key The measurement contents will be deleted in the following order when the key is pressed when in the measurement mode. If a measurement has been taken during the measurement operation, only that measurement will be deleted. . If no measurement has been taken during the measurement operation and there are two or more types of measurements (such as distance measurement and area/circumference, that last measured system is deleted. (For example, if the sequence of measurement was distance and then area/circumference, all area/circumference measurements will be deleted.) If the key is pressed after and remaining measurements will be deleted. above have been executed, all It is possible to change the line being displayed at the time of measurement (the spacing of the dots in the line) and whether or not the average value is displayed. Refer to “3.11 DISPLAYS RELATING TO MEASUREMENT AND OTHER SETTINGS”. 3-4 CHAPTER 3 3.3 CIRCUMFERENCE AND AREA MEASUREMENT 3.3 CIRCUMFERENCE AND AREA MEASUREMENT This measurement cannot be performed in M mode screen (include B/M mode). 3.3.1 Circumference and Area measurement (Ellipse) This section describes the measurement method of circumference and area in ellipse. 1. Press the key. The cursor will be displayed in the middle of the screen and the following will appear in the lower right side of the screen. C 1 : 0 . 0 mm A1 : 0 cm2 C= Circumference, A=Area 2. Move the cursor to the start of the measurement (start point) and press the key. 3. Use the trackball to move the cursor and a green line will be displayed. (The tentative results of the measurement appear in green.) 4. Move the measurement cursor (end to the point) end and of turn the Starting Point of Measurement the Minor axis key to change the minor axis of the ellipse. Ending Point of Major Axis 3-5 CHAPTER 3 3.3 CIRCUMFERENCE AND AREA MEASUREMENT 5. Press the key to complete the measurement. The ellipse and the results of the key instead of the measurement will change to yellow. By pressing the key, you can continue to make another set of circumferential measurements. key The measurement contents will be deleted in the following order when the key is pressed when in the measurement mode. If a measurement has been taken during the measurement operation, only that measurement will be deleted. . If no measurement has been taken during the measurement operation and there are two or more types of measurements (such as distance measurement and area/circumference, that last measured system is deleted. (For example, if the sequence of measurement was distance and then area/circumference, all area/circumference measurements will be deleted.) key is pressed after and If the remaining measurements will be deleted. above have been executed, all It is possible to change the line being displayed at the time of measurement (the spacing of the dots in the line) and whether or not the average value is displayed. Refer to “3.11 DISPLAYS RELATING TO MEASUREMENT AND OTHER SETTINGS”. Initially, the measurement mode is in “Ellipse”. Please change the mode to Trace following the instruction described in 3.3.2. Correcting measurements It is possible to correct a measurement that has been set. 1. Hover the cursor on the fixed measurement line or numeric result. The line and the measurement result change its color from yellow to green. Press key to select the measurement. 2. Fixed measurement now can be corrected by trackball and point can be swapped by 3. Press the key. key to complete the measurement. 3-6 . Start and End CHAPTER 3 3.3 CIRCUMFERENCE AND AREA MEASUREMENT 3.3.2 Changing Method, Ellipse and Trace This section describes how to change the measurement method, Ellipse and Trace. 1. Press and hold the 2. Use key. and to select . General –CA method and press 3. Select Ellipse or Trace for the needs of measurement and press 4. key. Menu will be closed by pressing This setting is used for other C/A measurement, such as Fetal Age Diagnosis Programs. 3.3.3 Circumference and Area measurement (Trace) This section describes the measurement method of circumference and area in ellipse. 1. Press the key. The cursor will be displayed in the middle of the screen and the following will appear in the lower right side of the screen. C 1 : 0 . 0 mm A1 : 0 cm2 C= Circumference, A=Area 2. Move the cursor to the start of the measurement (start point) and press the key. 3. Use the trackball to move the cursor and a green line will be displayed. (The tentative results of the measurement appear in green.) As the cursor moves, trace point will be created. 3–7 CHAPTER 3 3.3 CIRCUMFERENCE AND AREA MEASUREMENT Each trace point is not set until the cursor moves several pixels (shown in green key. next to the cursor). In order to set trace point immediately, press You can trace back the points by rotating 4. Measurement will be completed by pressing . key. The trace line will be closed and the color of the measurement changes from green to yellow. If you press activated. instead of key, another trace measurement will be Initially, the measurement mode is in “Ellipse”. Please change the mode to Trace following the instruction described in 3.3.2. key The measurement contents will be deleted in the following order when the key is pressed when in the measurement mode. If a measurement has been taken during the measurement operation, only that measurement will be deleted. . If no measurement has been taken during the measurement operation and there are two or more types of measurements (such as distance measurement and area/circumference, that last measured system is deleted. (For example, if the sequence of measurement was distance and then area/circumference, all area/circumference measurements will be deleted.) If the key is pressed after and remaining measurements will be deleted. above have been executed, all It is possible to change the line being displayed at the time of measurement (the spacing of the dots in the line) and whether or not the average value is displayed. Refer to “3.11 DISPLAYS RELATING TO MEASUREMENT AND OTHER SETTINGS”. Correcting measurements It is possible to correct a measurement that has been set. 1. Hover the cursor on the fixed measurement line or numeric result. The line and the measurement result change its color from yellow to green. Press key to select the measurement. 2. Use 3. Press the to determine the point to change and retrace by trackball. key to complete the measurement. 3-8 CHAPTER 3 3.4 ESTIMATING VOLUME 3.4 ESTIMATING VOLUME This devices is equipped with a function that can be used to easily calculate the volume from the length, width and depth in order to find the volume of tissue or organs. (Calculation is based on length x width x depth x factor.) There is a need to measure to bisecting cross sections of the tissue or organ using the B/B mode in order to obtain an accurate measurement of the length, width and depth. 1. Press the key and the measurement menu screen will appear. 2. and Use to select General-Volume. Press to execute. (Press the key to move to the next higher menu item.) 3. The cursor will be appear and the following will appear on the right side of the screen. DX1= 0.0mm 4. Move the cursor to the start of the measurement (start point) and press the 5. Use the track ball to measure the length and press the key. The key. cursor will appear. 6. Measure the width and depth in the same way. Press the key and the results of the measurement will appear on the right side of the screen. DX1= 1 0 . 0 mm DY1= 1 0 . 0 mm DZ1= 1 0 . 0 mm Fac. = 0.5236 Vol1 = 0 . 5 cm3 It is possible to change the Fac value. Refer to “3.11 DISPLAYS RELATING TO MEASUREMENT AND OTHER SETTINGS”. By pressing the key instead of the of volume measurements. 3-9 key, you can start another set CHAPTER 3 3.4 ESTIMATING VOLUME key The measurement contents will be deleted in the following order when the key is pressed when in the measurement mode. If a measurement has been taken during the measurement operation, only that measurement will be deleted. . If no measurement has been taken during the measurement operation and there are two or more types of measurements (such as distance measurement and area/circumference, that last measured system is deleted. (For example, if the sequence of measurement was distance and then area/circumference, all area/circumference measurements will be deleted.) If the key is pressed after and remaining measurements will be deleted. above have been executed, all It is possible to change the line being displayed at the time of measurement (the spacing of the dots in the line) and whether or not the average value is displayed. Refer to “3.11 DISPLAYS RELATING TO MEASUREMENT AND OTHER SETTINGS”. 3 - 10 CHAPTER 3 3.5 HISTOGRAM MEASUREMENT 3.5 HISTOGRAM MEASUREMENT This section describes how to measure the histogram. 1. Press the 2. Use key and measurement menu appears. and to select General –Histogram and press . A cursor and a box shape with below indication appears on the screen. C 1 : * * . * mm A1 : * mm2 3. Move the cursor to the center point of the to adjust interested area. Use the size of the box. 4. Press key measurement. One to complete more the histogram measurement can be done continuously by pressing C1 : A1 : Nall : Nmost : Nm/Na : Lmean : SD: key. Circumference of the box Area of the box To t a l p i x e l n u m b e r i n t h e b o x Most appearing pixel number Nmost / Nall Mean Level Sta n d a r d D e v i a t i o n Pressing for starting the second measurement, makes the box size equal to the first measurement. Actual box size may be different when the range setting is different. 3 - 11 CHAPTER 3 3.5 HISTOGRAM MEASUREMENT key The measurement contents will be deleted in the following order when the key is pressed when in the measurement mode. If a measurement has been taken during the measurement operation, only that measurement will be deleted. . If no measurement has been taken during the measurement operation and there are two or more types of measurements (such as distance measurement and area/circumference, that last measured system is deleted. (For example, if the sequence of measurement was distance and then area/circumference, all area/circumference measurements will be deleted.) key is pressed after and If the remaining measurements will be deleted. above have been executed, all It is possible to change the line being displayed at the time of measurement (the spacing of the dots in the line) and whether or not the average value is displayed. Refer to “3.11 DISPLAYS RELATING TO MEASUREMENT AND OTHER SETTINGS”. Correcting measurements It is possible to correct a measurement that has been set. 1. Hover the cursor on the fixed measurement line or numeric result. The line and the measurement result change its color from yellow to green. Press key to select the measurement. 2. Fixed measurement now can be corrected by trackball. Start and End point can be swapped by 3. Press the key. key to finish the measurement. 3 - 12 CHAPTER 3 3.6 HEART RATE MEASUREMENT 3.6 HEART RATE MEASUREMENT This section describes how to measure the heart rate. Use Freeze when taking the heart rate measurement. 1. Press the key, select Cardiac-HR and press . D 1 : 0 . 0 0 mm T1 : 0 ms V1 : 0 mm/s HR1 ( N = ) : ? ? ? bpm is displayed. Above process can be altered by pressing H key. N is the number of heart beats used when calculating the heart rate. It is possible to change the N setting. Refer to “3.11 DISPLAYS RELATING TO MEASUREMENT AND OTHER SETTINGS”. 2. Move the cursor to the start of the measurement (start point) and press the Starting Point of Measurement Ending Point of Measurement key. 3. Use the trackball to move the cursor and a green line will be displayed. (The tentative results of the measurement appear in green.) 4. Move the cursor to the end of the measurement (end point) and press the key or key. The line will change to yellow and the results of the measurement will be displayed in yellow. 3 - 13 Result of Measurement (Displayed in Yellow) CHAPTER 3 3.6 HEART RATE MEASUREMENT key The measurement contents will be deleted in the following order when the key is pressed when in the measurement mode. If a measurement has been taken during the measurement operation, only that measurement will be deleted. . If no measurement has been taken during the measurement operation and there are two or more types of measurements (such as distance measurement and area/circumference, that last measured system is deleted. (For example, if the sequence of measurement was distance and then area/circumference, all area/circumference measurements will be deleted.) key is pressed after and If the remaining measurements will be deleted. above have been executed, all It is possible to change the line being displayed at the time of measurement (the spacing of the dots in the line) and whether or not the average value is displayed. Refer to “3.11 DISPLAYS RELATING TO MEASUREMENT AND OTHER SETTINGS”. Correcting measurements It is possible to correct a measurement that has been set. 1. Hover the cursor on the fixed measurement line or numeric result. The line and the measurement result change its color from yellow to green. Press key to select the measurement. 2. Fixed measurement now can be corrected by trackball. Start and End point can be swapped by 3. Press the key. key to finish the measurement. 3 - 14 CHAPTER 3 3.7 LVET MEASUREMENT 3.7 LVET MEASUREMENT This section describes how to measure LVET (left ventricular ejection time). This measurement can only be done on M mode screen including B/M mode. 1. Press the key, select Crdiac-LVET and press . D 1 : 0 . 0 0 mm T1 : 0 ms V1 : 0 mm/s LVET: 0ms is displayed. 2. Move the cursor to the start of the measurement (start point) and press the 3. Use the trackball to move the cursor and a green line will be displayed. (The tentative key. results of the measurement appear in green.) 4. Move the cursor to the end of the measurement (end point) and press key. The line and the results of the measurement Result of Measurement (Displayed in Yellow) will change to yellow. Pressing key will activate another LVET measurement. It is possible to change the line being displayed at the time of measurement (the spacing of the dots in the line) and whether or not the average value is displayed. Refer to “3.11 DISPLAYS RELATING TO MEASUREMENT AND OTHER SETTINGS”. 3 - 15 CHAPTER 3 3.7 LVET MEASUREMENT key The measurement contents will be deleted in the following order when the key is pressed when in the measurement mode. If a measurement has been taken during the measurement operation, only that measurement will be deleted. . If no measurement has been taken during the measurement operation and there are two or more types of measurements (such as distance measurement and area/circumference, that last measured system is deleted. (For example, if the sequence of measurement was distance and then area/circumference, all area/circumference measurements will be deleted.) key is pressed after and If the remaining measurements will be deleted. above have been executed, all Correcting measurements It is possible to correct a measurement that has been set. 1. Hover the cursor on the fixed measurement line or numeric result. The line and the measurement result change its color from yellow to green. Press key to select the measurement. 2. Fixed measurement now can be corrected by trackball. Start and End point can be swapped by 3. Press the key. key to finish the measurement. 3 - 16 CHAPTER 3 3.8 LV MEASUREMENT 3.8 LV MEASUREMENT This section describes how to measure LV (left ventricular). This measurement can only be done on M mode screen including B/M mode. 1. Press the A cursor, 2. key, select Cardiac-LV and press . will appear at the center of the M mode screen. Move the cursor to the start point of the LVIDd measurement (left ventricular internal dimension diastolic) and press the key. 3. Move the cursor on the fixed vertical line to measure the internal diameter. 4. Another cursor will appear on the screen. Measure LVIDs measurement (left ventricular internal dimension systolic) in a same manner as above. 5. Another cursor will appear to measure LVET (left ventricular ejection time). Measure the time using track ball and key to complete. If LVET measurement (3.7 LVET MEASUREMENT) has been performed beforehand, the result will be shown. You can use this result by pressing key. If you press 6. key, you may enter numeric value directly by keyboard. Another cursor will appear for Heart rate measurement. 3 - 17 CHAPTER 3 3.8 LV MEASUREMENT If Heart rate measurement (3.6 HEART RATE MEASUREMENT) has been performed beforehand, the result will be shown. You can use this result by key. pressing key, you may enter numeric value directly by keyboard. If you press 7. When all measurement completed following result will be shown. Display LVIDd LVIDs LVET HR N EDV ESV SV CO EF FS MSER MVCF Description left ventricular internal diameter diastole left ventricular internal diameter systole left ventricular ejection time heart rate number of heart beat end diastolic volume end systolic volume stroke volume cardiac output ejection fraction fractional shortening mean systolic ejection rate mean velocity of circumferential fiber shortening Measurement method can be changed. Press and hold key and select the method from Cardiac –LV Method. It is possible to change the line being displayed at the time of measurement (the spacing of the dots in the line) and whether or not the average value is displayed. Refer to “3.11 DISPLAYS RELATING TO MEASUREMENT AND OTHER SETTINGS”. 3 - 18 CHAPTER 3 3.8 LV MEASUREMENT Correcting measurements It is possible to correct a measurement that has been set. 1. Hover the cursor on the fixed measurement line or numeric result. The line and the measurement result change its color from yellow to green. Press key to select the measurement. 2. Fixed measurement now can be corrected by trackball. Start and End point can be swapped by 3. Press the key. key to finish the measurement. 3 - 19 CHAPTER 3 3.9 Tendon% MEASUREMENT 3.9 Tendon% MEASUREMENT This section describes how to measure Tendon%. 1. Press the key, select General-Tendon% and press A cursor, . will appear at the center of the screen. C1: 0.0mm A 1 : 0 cm2 A=Area 2. In the same manner as Circumference and Area Measurement, measure the area of entire tendon. Please refer “3.3 Circumference and Area Measurement” how to perform the measurement. Ellipse or Trace method can be used. Please refer “3.3.2 Changing method, Ellipse and Trace”. 3. After finishing the entire area, another cursor will appear. Please measure the problem region in the same manner. 4. Following result will be displayed. Move the cursor on the fixed vertical line to measure the internal diameter. A1: Entire area A2: Problem area Tendon%1: Percentage of the problem area among the entire area Initially, the measurement mode is in “Ellipse”. Please change the mode to Trace following the instruction described in 3.3.2, if necessary. 3 - 20 CHAPTER 3 3.9 Tendon% MEASUREMENT key The measurement contents will be deleted in the following order when the key is pressed when in the measurement mode. If a measurement has been taken during the measurement operation, only that measurement will be deleted. . If no measurement has been taken during the measurement operation and there are two or more types of measurements (such as distance measurement and area/circumference, that last measured system is deleted. (For example, if the sequence of measurement was distance and then area/circumference, all area/circumference measurements will be deleted.) key is pressed after and If the remaining measurements will be deleted. above have been executed, all Correcting measurements The resulted measurement can be corrected. The procedure differs by the method (Elliplse or Trace) you choose. Please refer 3.3 Circumference and Area Measurement for the detail. 3 - 21 CHAPTER 3 3.10 CURSOR FINE ADJUSTMENT FUNCTION 3.10 CURSOR FINE ADJUSTMENT FUNCTION This section describes how to make fine adjustments of the measurement cursor. 1. It is possible to make fine adjustments to the cursor position with the arrow keys ( , , , , , , ) before setting the position of the measuring cursor. This function can only be used during measurement. Cursor Fine Adjustment Keys 3 - 22 , CHAPTER 3 3.11 DISPLAYS RELATING TO MEASUREMENT AND OTHER SETTINGS 3.11 DISPLAYS RELATING TO MEASUREMENT AND OTHER SETTINGS This section describes displays relating to measurement and other settings. Display of Average Value 1. Press the 2. Use key for one second and the measurement setting menu will appear. and to select General-Average of Distance Display . Press 3. to execute. to select On to display the Use average value or Off to not display it and then . press 4. Average Value Display Setting Press the key to close the menu. Space of Dots 1. Press the 2. Use key for one second and the measurement setting menu will appear. and to select General-Space of Dots . Press 3. to execute. to select the desired gap Use . between dots and then press 4. Press the Setting of Space of Dots key to close the menu. Selection can be made between two dot spacings: 5 mm and 10 mm. 3 - 23 CHAPTER 3 3.11 DISPLAYS RELATING TO MEASUREMENT AND OTHER SETTINGS Setting the Factor Used in Calculating Volume 1. Press the key for one second and the measurement setting menu will appear. 2. and Use to select General-Volume Factor . Press 3. To use to execute. the fixed vale Factor Setting (0.5236), use to select Fix and press 4. . and To set the factor, use . After selecting Free, use the number key to enter the four digits after the decimal point and press 5. Press the . key to close the menu. Setting the Heart Beat Number Used in the Heart Rate Calculation 1. Press the 2. Use key for one second and the measurement setting menu will appear. and to select General- Measured Heartbeat . 3. Press to execute. Use to select the number of heart beats to be used in the heart rate calculation and press 4. Press the . key to close the menu. 3 - 24 Number of Heart Beats Setting CHAPTER 3 3.11 DISPLAYS RELATING TO MEASUREMENT AND OTHER SETTINGS 3 - 25 CHAPTER 4 FETAL AGE DIAGNOSIS PROGRAMS This chapter describes how to use the fetal age diagnosis programs for animals that are incorporated into this device. If fetal diagnosis (measurement) is going to be performed, the image must first be in freeze mode. (Fetal diagnosis cannot be performed during scanning.) CHAPTER 4 4.1 FETAL AGE TABLE 4.1 FETAL AGE TABLE The fetal diagnosis program includes the weeks since conception table (fetal age table). Table Name HORSE CATTLE SHEEP DOG CAT Name Cal. Method Available Measurement Range ESD Equine Sac Diameter 6mm ECD Equine Conceptus Diameter 14mm to 75mm CTD Cattle Trunk Diameter 15mm to 122mm CHL Cattle Head Length 22mm to 145mm CHD Cattle Head Diameter 15mm to 85mm CCRL Cattle Crown Rump Length 15mm to 180mm STD Sheep Trunk Diameter 15mm to 100mm SHD Sheep Head Diameter 20mm to 65mm DGSD Dog Gestation Sac Diameter 1.0mm to 33.0mm DCRL Dog Crown Rump Length 1.0mm to 43.0mm DHD Dog Head Diameter 14.0mm to 30.0mm DBD Dog Body Diameter 16.0mm to 51.4mm cHD Cat Head Diameter 15.0mm to 23.0mm cBD Cat Body Diameter 17.0mm to 36.0mm to 60mm If the measured value is outside of the measurement range, ??? will be displayed for estimated fetal age (GA) and the predicted delivery date as determined by the measurement (ED). 4-1 CHAPTER 4 4.1 FETAL AGE TABLE Equine Gestational Age Table ESD ECD (Equine Sac Diameter) mm days 6 7 7.3 8 8.8 9 11.3 10 12.5 11 13.7 12 14.9 13 16.5 14 17.7 15 19.5 16 20.7 17 22.5 18 23.7 19 25.3 20 27.1 21 28.4 22 30.2 23 32 24 33.8 25 36.2 26 37.4 27 39 28 40.3 29 42.3 30 43.6 31 45 32 47 33 47.7 34 49.3 35 51.1 36 52.8 37 54.6 38 56.2 39 57 40 58.4 41 59.8 42 60 42 (Equine Conceptus Diameter) mm days mm 14 14 56 15 14 57 16 14 58 17 15 59 18 15 60 19 15 61 20 16 62 21 16 63 22 17 64 23 17 65 24 18 66 25 18 67 26 19 68 27 20 69 28 21 70 29 22 71 30 23 72 31 24 73 32 25 74 33 26 75 34 27 35 28 36 29 37 30 38 31 39 32 40 32 41 33 42 33 43 34 44 34 45 35 46 35 47 36 48 36 49 36 50 37 51 37 52 37 53 38 54 38 55 38 4-2 days 39 39 39 40 40 40 41 41 41 42 42 42 43 43 43 44 44 44 45 45 CHAPTER 4 4.1 FETAL AGE TABLE S Cattle Gestational Age Table CTD (Cattle Trunk Diameter) mm days 15 54 16 57 17 59 18 61 19 63 20 65 21 67 22 69 23 70 24 72 25 73 26 75 27 76 28 78 29 79 30 80 31 81 32 82 33 84 34 85 35 86 36 87 37 88 38 89 39 90 40 91 41 92 42 93 43 93 44 94 45 95 46 96 47 97 48 98 49 98 50 99 51 100 52 101 53 101 54 102 55 103 mm 56 57 58 59 60 61 62 63 64 65 66 67 68 69 70 71 72 73 74 75 76 77 78 79 80 81 82 83 84 85 86 87 88 89 90 91 92 93 94 95 96 days 103 104 105 105 106 106 107 108 108 109 109 110 111 111 112 112 113 113 114 114 115 115 116 116 117 117 117 118 118 119 119 120 120 121 121 121 122 122 123 123 123 mm 97 98 99 100 101 102 103 104 105 106 107 108 109 110 111 112 113 114 115 116 117 118 119 120 121 122 4-3 days 124 124 125 125 125 126 126 126 127 127 127 128 128 128 129 129 129 130 130 130 131 131 131 132 132 132 CHAPTER 4 4.1 FETAL AGE TABLE Cattle Gestational Age Table CHL (Cattle Head Length) mm days 22 57 23 59 24 61 25 62 26 64 27 65 28 67 29 68 30 70 31 71 32 72 33 73 34 75 35 76 36 77 37 78 38 79 39 80 40 81 41 82 42 83 43 84 44 85 45 86 46 87 47 88 48 89 49 89 50 90 51 91 52 92 53 93 54 93 55 94 56 95 57 95 58 96 59 97 60 98 61 98 62 99 63 100 mm 64 65 66 67 68 69 70 71 72 73 74 75 76 77 78 79 80 81 82 83 84 85 86 87 88 89 90 91 92 93 94 95 96 97 98 99 100 101 102 103 104 105 days 100 101 101 102 103 103 104 104 105 105 106 107 107 108 108 109 109 110 110 111 111 112 112 113 113 113 114 114 115 115 116 116 117 117 117 118 118 119 119 119 120 120 mm 106 107 108 109 110 111 112 113 114 115 116 117 118 119 120 121 122 123 124 125 126 127 128 129 130 131 132 133 134 135 136 137 138 139 140 141 142 143 144 145 4-4 days 121 121 121 122 122 122 123 123 123 124 124 125 125 125 126 126 126 127 127 127 128 128 128 128 129 129 129 130 130 130 131 131 131 131 132 132 132 133 133 133 CHAPTER 4 4.1 FETAL AGE TABLE S Cattle Gestational Age Table CHD (Cattle Head Diameter) mm days 15 56 16 58 17 61 18 64 19 66 20 69 21 71 22 73 23 75 24 77 25 79 26 80 27 82 28 84 29 85 30 87 31 88 32 90 33 91 34 93 35 94 36 95 37 96 38 98 39 99 40 100 41 101 42 102 43 103 44 104 45 105 46 106 47 107 48 108 49 109 50 110 51 111 52 112 53 113 54 113 55 114 56 115 mm 57 58 59 60 61 62 63 64 65 66 67 68 69 70 71 72 73 74 75 76 77 78 79 80 81 82 83 84 85 days 116 117 117 118 119 120 120 121 122 123 123 124 125 125 126 126 127 128 128 129 130 130 131 131 132 132 133 133 134 4-5 CHAPTER 4 4.1 FETAL AGE TABLE Cattle Gestational Age Table CCRL (Cattle Crown Rump Length) mm 15 16 17 18 19 20 21 22 23 24 25 26 27 28 29 30 31 32 33 34 35 36 37 38 39 40 41 42 43 44 45 46 47 48 49 50 51 52 53 54 55 56 days 34 35 36 37 38 39 39 40 41 42 42 43 44 44 45 45 46 46 47 47 48 48 49 49 50 50 51 51 51 52 52 53 53 53 54 54 54 55 55 55 56 56 mm 57 58 59 60 61 62 63 64 65 66 67 68 69 70 71 72 73 74 75 76 77 78 79 80 81 82 83 84 85 86 87 88 89 90 91 92 93 94 95 96 97 98 days 56 56 57 57 57 58 58 58 58 59 59 59 59 60 60 60 60 60 61 61 61 61 62 62 62 62 62 63 63 63 63 63 64 64 64 64 64 64 65 65 65 65 mm 99 100 101 102 103 104 105 106 107 108 109 110 111 112 113 114 115 116 117 118 119 120 121 122 123 124 125 126 127 128 129 130 131 132 133 134 135 136 137 138 139 140 4-6 days 65 66 66 66 66 66 66 66 67 67 67 67 67 67 68 68 68 68 68 68 68 69 69 69 69 69 69 69 70 70 70 70 70 70 70 70 71 71 71 71 71 71 mm 141 142 143 144 145 146 147 148 149 150 151 152 153 154 155 156 157 158 159 160 161 162 163 164 165 166 167 168 169 170 171 172 173 174 175 176 177 178 179 180 days 71 71 72 72 72 72 72 72 72 72 72 73 73 73 73 73 73 73 73 73 73 74 74 74 74 74 74 74 74 74 74 75 75 75 75 75 75 75 75 75 CHAPTER 4 4.1 FETAL AGE TABLE S Sheep Gestational Age Table STD (Sheep Trunk Diameter) mm days 15 50 16 51 17 52 18 52 19 53 20 54 21 55 22 56 23 57 24 58 25 59 26 59 27 60 28 61 29 62 30 63 31 64 32 65 33 66 34 67 35 67 36 68 37 69 38 70 39 71 40 72 41 73 42 74 43 74 44 75 45 76 46 77 47 78 48 79 49 80 50 81 51 81 52 82 53 83 54 84 55 85 56 86 57 87 SHD mm 58 59 60 61 62 63 64 65 66 67 68 69 70 71 72 73 74 75 76 77 78 79 80 81 82 83 84 85 86 87 88 89 90 91 92 93 94 95 96 97 98 99 100 days 88 89 89 90 91 92 93 94 95 96 96 97 98 99 100 101 102 103 103 104 105 106 107 108 109 110 111 111 112 113 114 115 116 117 118 118 119 120 121 122 123 124 125 (Sheep Head Diameter) mm days 20 49 21 50 22 52 23 54 24 55 25 57 26 58 27 60 28 62 29 63 30 65 31 66 32 68 33 69 34 71 35 73 36 74 37 76 38 77 39 79 40 81 41 82 42 84 43 85 44 87 45 88 46 90 47 92 48 93 49 95 50 96 51 98 52 99 53 101 54 103 55 104 56 106 57 107 58 109 59 111 60 112 61 114 62 115 4-7 mm 63 64 65 days 117 118 120 CHAPTER 4 4.1 FETAL AGE TABLE Gestational Age of Dogs: 3 days GA: Gestational Age (the case under the 40 days) GA(days)=(6 DGSD(cm))+20 (DGSD measuring limit: 0.1 to 3.3 cm) GA(days)=(3 DCRL(cm))+27 (DCRL measuring limit: 0.1 to 4.3 cm) GA : Gestational Age(the case over the 40 days) GA (days)=(15 DHD(cm))+20 (DHD measuring limit: 1.4 to 3.0 cm) GA (days) =( 7 DBD(cm))+29 (DBD measuring limit: 1.6 to 5.14 cm) DBP (days)=65 - GA(days) (DBP: Days Before Parturition in the Dog) A.Gestational Age of Cats: 2 days GA : Gestational Age (the case over the 40 days) GA(days)=(25×cHD(cm))+3 (cHD measuring limit: 1.5 to 2.3 cm) GA(days)=(11×cBD(cm))+21 (cBD measuring limit: 1.7 to 3.6 cm) DBP(days)=61 - GA(days) (DBP:Days Before Parturition in the Cat) The initial settings for the function keys have estimated fetal age measurements assigned to them. These will appear at the bottom of the regular screen. Key Screen Display Function F1 F2 F3 F4 F5 F6 F7 F8 F9 DBD cBD DHD cHD CHD CHL CTD DGSD ECD Dog Body Diameter Cat Body Diameter Dog Head Diameter Cat Head Diameter Cattle Head Diameter Cattle Head Length Cattle Trunk Diameter Dog Gestation Sac Diameter Equine Conceptus Diameter 4-8 Estimated fetal age measurement Estimated fetal age measurement Estimated fetal age measurement Estimated fetal age measurement Estimated fetal age measurement Estimated fetal age measurement Estimated fetal age measurement Estimated fetal age measurement Estimated fetal age measurement CHAPTER 4 4.2 ASSIGNMENT OF FETAL AGE TABLE 4.2 ASSIGNMENT OF FETAL AGE TABLE This item describes how to assign the fetal age table. 1. Press the 2. Use key for one second and the measurement setting menu will appear. to select Vet. Press to execute. (Press the key to move to the next higher menu item.) 3. to select the item to be Use changed (GA1 Method to GA9 Method) and press 4. Select the Item . Use to select the estimation method and press . The fetal age table will be changed. 5. Press the key to close the menu. Select the estimation method If an assignment to a key is not necessary, please select “None.” 4-9 CHAPTER 4 4.3 ESTIMATING GESTATIONAL AGE 4.3 ESTIMATING GESTATIONAL AGE This item describes how to make gestational age measurements following the example for the cattle head length (CHL) program in the fetal age diagnosis program. The fetal age tables in GA1 through GA9 that were saved in 4.2 can be called up directly by using the F1 through F9 keys. 1. After freezing the image, press the F6 key as the Cattle Head Length (CHL) has been saved in the initial settings for F6. 2. Use the track ball to move the cursor to the start of the measurement and press the key. The measurement start position has been selected. 3. Use the track ball to move the cursor to the end of the measurement and press the key. The fetal age table graph will be displayed in the middle of the screen. The measured values, estimated fetal age and predicted date of birth are shown. HL CATTLE D1:85.3mm GA :16W+0D EDs:2009/08/03 ←Title ←Measured value ←Estimated age of fetus ←Predicted date of birth based on measured values. It is also possible to call this up directly from the measurement menu. 1. Press the key and the measurement menu screen will appear. 2. Use and to select Vet–GA6 Method (HL CATTLE). Press to execute. (Press the key to move to the next higher menu item.) Fetal Measurement Selection The measurement of Cattle Head Length (CHL) will start. Use the above as a reference when making other fetal age measurements. 4 - 10 CHAPTER 4 4.4 DISPLAYING/HIDING FETAL AGE CURVE 4.4 DISPLAYING/HIDING FETAL AGE CURVE This section describes displaying/hiding the curve for the fetal age table. 1. Press the 2. Use execute. 3. key for one second and the measurement setting menu will appear. and (Press the to select Vet-Curve Display. Press key to move to the next higher menu item.) To display the fetal age curve, select On. To hide the curve, select Off. Then press . 4 - 11 to CHAPTER 4 4.5 DISPLAYING/HIDING THE MEASUREMENT HISTORY 4.5 DISPLAYING/HIDING THE MEASUREMENT HISTORY This section describes the method for displaying/hiding of the measurement history. 1. Press the 2. Use key for one second and the measurement setting menu will appear. and to execute. (Press the 3. to Vet-Fetal Data Display. key to move to the next higher menu item.) To display the measurement history, select On. To hide the measurement history, select Off. Then press select . 4 - 12 Press CHAPTER 4 4.6 DISPLAYING/HIDING THE NAMES OF ANIMALS 4.6 DISPLAYING/HIDING THE NAMES OF ANIMALS This section describes the method for displaying/hiding of the names of the animals displayed in the measurement history. 1. Press the 2. Use key for one second and the measurement setting menu will appear. and to execute. (Press the 3. to select Vet-Animal Name Display. Press key to move to the next higher menu item.) To display the animal names, select On. To hide the animal names, select Off. press Then . If Off is selected for hiding/displaying the measurement history, the animal names will not be displayed regardless of the animal name display/hide setting. 4 - 13 CHAPTER 4 4.7 USER TABLE 4.7 USER TABLE User can define own table as “User Table” for the special need for obstetric diagnose. The basic procedure to define user table is, 1) Create a table template・・・・・ Downloading default template to USB memory. 2) Preparation before edit table・・ Necessary note before editing the default table 3) Edit user table・・・・・・・・・ Actual editing of the table 4) Upload user table・・・・・・・・ Upload own table data to HS-2100V 5) Download user table・・・・・・・ Download the uploaded table data from HS-2100V* * 5) Download user table is used to back up the table data or correction. 4.7.1 Create a Table Template 1. Insert USB memory to the USB memory port and press and hold the key. Measurement Setting menu screen will appear. 2. 3. and Use to select Obstetric-Free Table-Default Table Export. Press to execute. Use to select Distance or Circumference, then press (Press the key to return the higher menu item.) to execute. 4. Template file (CSV format) is created in the USB memory. “Completed” message will be shown when it is done. It is not possible to create a template file without USB memory inserted to HS-2100V. 4 - 14 CHAPTER 4 4.7 USER TABLE Template file will be created in folders (comma and semicolon) in USB memory like below freetable┳import ┗export┳comma(“,”as a separator) ┗semicolon(“;” as a separator) Template for distance will be created as “freetable_distance.csv” and for circumeference as “freetable_circumference.csv”. 4.7.2 Preparation before Edit Table Please use spread sheet program such as EXCEL installed computer. The edit work will be done on such computer. (Editing table function is not included in HS-2100V) 1. Open the template file created in USB memory*. *Please try any file from comma or semicolon folder at this time. 2. If you see the sheet like below, the format is correctly recognized by the software. Refer to “4.7.3 Edit User Table”. 4 - 15 CHAPTER 4 4.7 USER TABLE If you see the table like below, please reopen the file from semicolon folder. If you see the table like below, please reopen the file from comma folder. Separator for CSV file depends on the setting of “Regional and Language Options” in the “Control Panel” of Windows. 4.7.3 Edit User Table This section describes how to edit the user table. 1. Open a table file (if it is the first time, open a template file. Refer to 4.7.1 and 4.7.2). 2. Please input necessary data like following. 4 - 16 CHAPTER 4 4.7 USER TABLE Name of the table (“Free Table Name” as default) Pregnancy period (days) (500 Maximum. Normally 270 days for human) Input Length(mm), weeks and days W(weeks): Week value (center value) for selected Length(mm) ((Period/7)-1 is the max) D(days): Day value (center value) for selected Length(mm) (0~6) +/-(days): Deviation value (days) to the center value(99 is the max. choose 0, if unnecessary ) ex.) For 30mm as 100 days ±3 days, (100days → 14weeks+2days) All input must be alphanumeric letters Numeric values must be positive value. 3. Please save file with the name following below rule. ex.) template : freetable_distance.csv actual : freetable1distance.csv *Choose 1, 2 or 3 for distance and 4, 5 or 6 for circumference measurement. Folder location freetable┳import (save edited file here for upload) ┗export 4 - 17 CHAPTER 4 4.7 USER TABLE 4.7.4 Upload User Table This describes how to upload the user table to HS-2100V from USB memory. 1. Insert USB memory to the USB memory port and press and hold the key. Measurement Setting menu screen will appear. 2. Use and to select Obstetric-Free Table- import. to execute. Press (Press the key to return the higher menu item.) 3. Use 4. The selected file in the USB memory will be uploaded to HS-2100V. “Completed” message will be shown when it is done. to select the table to upload, and then press to execute. In the case of upload process failed, “Import Error” message will be shown on the screen. The log file will be created to the same folder as uploading file. Please read the log file and correct the error of the table and try upload again. After user table upload is completed, it can be assigned to function keys. Please refer to 4.1.1 Assignment of Fetal Age Tables. Assignment of User table is necessary to use User table estimation. *The maximum number of Fetal Age Calculation (4.2) is 9. Please assign the necessary User table in one of GA1 to GA9. When the User table is modified, the store data with the original User table measurement will be erased. Please measure it again, if necessary. 4 – 18 CHAPTER 4 4.7 USER TABLE 4.7.5 Download User Table This describes how to download the user table from HS-2100V to USB memory. 1. Insert USB memory to the USB memory port and press and hold the key. Measurement Setting menu screen will appear. 2. and Use to select Obstetric-Free Table- export. to execute. Press (Press the key to return the higher menu item.) 3. to select the table to download, and then press Use to execute. 4. The selected file in the USB memory will be downloaded from HS-2100V. “Completed” message will be shown when it is done. It is not possible to download a user table file without USB memory inserted to HS-2100. Folder location freetable┳import ┗export (downloaded file is saved in this folder) 4 - 19 CHAPTER 5 DATA MANAGEMENT This chapter describes the various ways to arrange the data such as entering ID data or saving image data. CHAPTER 5 5.1 ID DATA 5.1 ID DATA This chapter describes the various ways to arrange ID data. 5.1.1 Saving the ID Data This item describes how to save the ID data. 1. Press the 2. Press key for one second. at Add Patient and the ID data entry screen will be displayed. 3. Select the Add Patient and Use to select the necessary item. 4. For the ID, Name and Note use the character input keys to make the entry and press the key to set. 5. If selecting Gender, use and to make the setting. Available settings are Male, Female and None (no designation). 6. To enter the date of birth (DOB), use and to select the ID Data Entry Screen numbers in the sequence of year, month day. 7. After entering the necessary item, select Select this Patient and press . The saved ID is selected and the display returns to the normal screen. Press the key for one second to cancel Freeze and the measured data and annotations will be deleted. If necessary, save the data before pressing the key. An ID must be entered when saving an ID 5-1 CHAPTER 5 5.1 ID DATA Press without pressing Select this Patient and only the ID will be saved. Press without pressing Select this Patient, a default ID will be selected after the ID has been saved and the display will return to the normal screen. The ID data that has been saved in the destination that has been saved. (Refer to “1.6.6 Setting the Save Destination”.) 5.1.2 Selecting the ID Data This item describes how to select the ID data. 1. Press the 2. Use key for one second. to select the ID and press . 3. Press Select Desired ID for Select this Patient and the ID will be selected. If an ID is not selected, the default ID of 0000000000 will be used. Activating Patient Menu by pressing the Select this patient key for one second, it will Unfreeze the image and the measured data and annotations will be deleted. If necessary, save the data before pressing the key. If the menu closed by , or key without selecting the ID, the default ID will be selected. Turn off the power and the default ID will be restored. 5-2 Display of Selected Data CHAPTER 5 5.1 ID DATA 5.1.3 Searching the ID Data This item describes how to search the ID data. 1. Press the 2. Use to select Search Type. Press to execute. Use to select a search by 3. key for one second. Select the type of search . either ID or Name and press 4. to select Search Keyword. Use Press 5. to execute. Use the character entry key to enter the characters to be searched for and press the key to confirm the characters. List of Search Results A list of the search results will be displayed. 5.1.4 Editing the ID Data This item describes how to edit the ID data. 1. Press the 2. Use key for one second. to select the ID to be . edited and press 3. Use and to select item to be changed. Select ID to be Edited 4. For the ID, Name and Note use the character input keys to make the entry and press the key to set. 5-3 CHAPTER 5 5.1 ID DATA 5. If selecting Gender, use and to make the setting. Available settings are Male, Female and None (no designation). 6. To enter the date of birth (DOB), use and Edits the Item to Be Changed to select the numbers in the sequence of year, month day. 7. After changing the necessary item, select Select this Patient and press The edited ID is selected and the display returns to the normal screen. Press saved. . without pressing Select this Patient and only the editing of the ID will be Press without pressing Select this Patient, a default ID will be selected after the ID has been edited and the display will return to the normal screen. 5.1.5 Transferring the ID Data This item describes how to transfer (copy) the ID data. 1. Press the 2. Use key for one second. to select Operation(Copy/Delete). Press to execute. 3. Use to make one of the Selectes the Transfer Destination following selections: Copy(Internal Memory -> USB Memory) or Copy(USB Memory -> Internal Memory) and press . 5-4 Operation(Copy/Delete) CHAPTER 5 5.1 ID DATA 4. Make one of the following selections: to transfer all ID entries, select All Patient Images; to transfer the results of a search, press Searched Patient Images; to transfer the entries for individual ID. an individual ID, select the Selects the ID to Be Transferred After making the selection, . press No transfer will be made if there is no USB memory device connected. Never remove the USB memory device during transfer. 5.1.6 Deleting the ID Data This item describes how to delete the ID data. 1. Press the 2. Use key for one second. to select the ID to be . deleted and press 3. Use press to select Delete and . The “Delete this Delete Patient?” confirmation prompt screen will appear. Erase Confirmation Window Select YES. To delete all ID entries or all the results of a search, press the key for one second and conduct a search, etc. (Refer to “5.1.3 Searching the ID Data”.) Select Operation(Copy/Delete)-Delete to delete all. 5-5 CHAPTER 5 5.2 IMAGE DATA 5.2 IMAGE DATA This section describes the various ways to arrange image data. Remove the USB memory device when it is not in use. 5.2.1 Saving Image Data This item describes how to save image data. Freeze mark 1. Press the 2. Press the key to freeze the image. key. The image will be saved. If the save destination is a USB memory device, ID folders are created inside the patient folder in the USB memory device. The image data is saved in the selected ID folder. If there save destination is the internal memory, the data cannot be saved if there is insufficient space. When resaving an image, the images in the internal memory must be deleted. If there is insufficient space, transfer any needed images to a USB memory device and delete the images in the internal memory to create more available space. 5.2.2 Saving Moving Image Data This item describes how to save moving image (AVI) data. 1. Set the destination to External USB and connect an external USB memory device. (Refer to “1.6.6 Setting Save Destination”.) 2. Press the 3. Turn key. to move to the start position of the moving image to be saved. 4. Press the 5. The selection menu for the save frame number key for one second. 5-6 Selection menu of save frame number CHAPTER 5 5.2 IMAGE DATA will be displayed. Turn the necessary number to select and then press . 6. The “Make AVI File?” confirmation window will be displayed. At this time the frames of the moving image to be saved will appear in the green box. Moving Image Save Confirmation Window Green Box If necessary, turn to select the images. If you wish to change the start position of the data to be saved, press the and then set the start position once again. 7. key and the saving of the Press moving images will begin. 8. Once the saving has been completed, the green box will disappear and a "AVI file is completed” confirmation window will be displayed. “AVI file is completed” confirmation window Never remove the USB memory device while the data is being saved (when the green box is displayed). The moving images will be saved in AVI format. Saved moving images cannot be replayed on this device. 5.2.3 Searching for Image Data This item describes how to search the image data. 1. Press the 2. Use to select Search Type. Press to execute. Select the type of search key. 5-7 CHAPTER 5 5.2 IMAGE DATA 3. and select from among the following: File Name 、 File Type 、 Use Date(Freeze)、Date(Store). Press . 4. Use 5. If the search is by File Name, enter the characters. If the search is by File Type, select to select Search Keyword. Press to execute. either JPG or AVI. If the search is for Date (Freeze) or Date (Store), select the desired day and time. Execute the search. A list of the search results will be displayed. Searching will only be done for the ID that is selected. If Date (Freeze/Store) was selected in Search Type, select only the necessary section and leave the other areas as ??. (Example: [2009/??/?? ??:??:??]) 5.2.4 Editing Image Data This item describes how to edit the image data. 1. Press the 2. Use key. to select the image to be edited and press 3. Use . to select File Name or Note and press . Edit the Characters 4. Edit the characters and then press the key to set. This will only be for the ID that is selected. 5-8 CHAPTER 5 5.2 IMAGE DATA 5.2.5 Moving Image Data This item describes how to move the image data. 1. Press the 2. Use key. to select the image to be moved and press 3. . Use to select Move. Press Select the Destination ID to execute. 4. Use to select the ID to be moved and press . Moving will only be done for the ID of the image that is selected. To move all the images, press the key, and select Operation(Move/Copy/Delete)-Move All to move the images. Moving image data can only be done within the memory that has been designated as the save destination. (Moving between IDs.) 5.2.6 Transferring Image Data This item describes how to transfer (copy) the image data. 1. Press the 2. Use key. to Operation(Move/Copy/Delete). select Press Selectes the Transfer Destination to execute. 3. Use to make one of the following selections: Copy(Internal Memory -> USB Memory) or Copy(USB Memory -> Internal Memory) and press . 5-9 CHAPTER 5 5.2 IMAGE DATA 4. Use make the following selection: to transfer all images, select All Still Images: to transfer images that are the result of a search, select Search Still Images; to transfer an individual image, select the file name. Press Select the Image Data to Be Transferred to execute. Transfer will only be done for the ID of the image that is selected. No transfer will be made if there is no USB memory device connected. The transfer (copy) of image data can only be performed between the internal memory and the USB memory device. (Copy between memory devices.) Never remove the USB memory device during transfer. 5.2.7 Deleting Image Data This item describes how to delete the image data. 1. Press the 2. Use key. to select the image to be deleted and press 3. Use . to select Delete and press Delete . It is not possible to delete an image other than the ID selected. 5 - 10 CHAPTER 5 5.2 IMAGE DATA To delete all images or those from the result of a search, press the key, perform the search (Refer to “5.2.3. Searching Image Data”) and select Operation(Move/Copy/Delete)-Delete to delete the images. 5.2.8 Viewing Image Data This item describes how to view the image data. 1. Press the 2. Use key. to select the image to be viewed and press 3. Press . View selected image for View selected image and the selected image will be displayed. 4. Press the key after the viewing has been completed to return to the menu screen. Press the key once again to close the menu. Mark Indicated Image is Being Viewed It is possible to select from the IDs of the images that are selected. A light blue color frame on the Freeze mark indicates that the image is being viewed. It is possible to perform measurements on images being viewed. Press the key during viewing and the image can also be saved (re-saved). (If the image is re-saved, the Freeze mark will change from light blue to blue.) 5 - 11 CHAPTER 6 APPENDIX This chapter describes the troubleshooting for when HS-2100V does not work properly, cleaning methods for main body, probe, and specifications of HS-2100V. CHAPTER 6 6.1 TROUBLESHOOTING 6.1 TROUBLESHOOTING This section describes the troubleshooting when HS-2100V does not work properly. Inspect HS-2100V according to the following “Condition” and “Countermeasure”. If the same trouble occurs repeatedly or the trouble not described below occurs, immediately contact our service section or distributor. Condition Screen does not display anything even if power switch is turned ON. The screen is displayed, but it is too dark. Check Point Check that power cable is connected properly. Countermeasure Connect power cable properly. Select Menu Monitor and check the brightness level setting. The day and time appear on Check that probe cable is the screen, but the ultrasound connected properly. image does not appear. Also, check that lock lever of probe is positioned at “LOCK”. Select Menu Monitor and set the brightness level. Video printer do not output ultrasound images. If video and video printer are connected improperly, connect video and video printer properly. If power switches of video printer are not turned, turn ON. If probe is connected improperly, connect probe properly. If lock lever is positioned at “OPEN”, turn lock lever to “LOCK” position securely. Even though the probe cable Check if the STC volume is Set the STC volume to the is properly attached and the properly set. proper level. Also, set the gain day and time appear on the Check if the gain is properly to the proper level. screen but no ultrasound set. image appears. DANGER Check that video cable and remote cable are connected properly. Also, check that power switches of video printer are turned ON. Do not remove the cover of HS-2100V or perform the operation not described above. Failure to do so could cause electrical shock due to high pressure or personal injury. 6-1 CHAPTER 6 6.2 CLEANING 6.2 CLEANING DANGER 1. Be sure to turn OFF the power switch. shock. Failure to do so could cause electrical Cleaning the Main Body Remove dust inside outer main body with dry cloth. diluted neutral detergent. Clean using the cloth dampened with Be careful not to dampen any liquid inside this equipment. CAUTION dampened inside this equipment, it could cause failure. 2. If any liquid is Cleaning of Probe After examination, clean the probe using soft damp cloth. Also, clean the contact surface of the probe using rubbing alcohol. Do not use except rubbing alcohol. Handle the probe with sufficient care since the fragile ceramic crystal is adopted for the probe. Failure to do so could cause damage of the probe. CAUTION Do not sterilize in autoclave. Failure to do so could cause damage of the probe Never soak the overall probe in solution. 6-2 CHAPTER 6 6.3 IMPORTANT INFORMATION FOR USE AND MANAGEMENT 6.3 IMPORTANT INFORMATION FOR USE AND MANAGEMENT This section describes the specifications, conditions of use, etc. of HS-2100V. 1. Operation/Storage Conditions 1) Operating Conditions Temperature 10°C to 40°C Humidity 35% to 75%RH Pressure 700hPa to 1060hPa Power 100 to 240V 50/60Hz Protective Earth The protective earth in the power cable is grounded by inserting the three-core cable plug of HS-2100V into the medical-purpose three-core receptacle. 1) Shipping / Storage Conditions – 10°C to 60°C Temperature Humidity 30% to 95%RH Pressure 700hPa to 1060hPa 2) Precautions for Storage This equipment should be stored in a place that is not exposed to water or medicine. This equipment should be stored in a place that does not adversely affect the equipment such as exposure to the direct sunlight, high temperature, high humidity, and atmosphere including dust, salinity, sulphur, etc. It is important to be aware of inclination, vibration, or shock (including during transportation), etc. and make sure this equipment is stable. The equipment should not be stored in a place that chemicals are stored, or that exposed to the gas. When using this equipment again after long period, make sure to confirm that the equipment operates properly. 2. Precautions for Scrapping Packing Material The packing material and cushioning should not be wasted but should be stored, because they are necessary when moving or transporting this equipment. The cushioning, etc. should be stored together when storing the packing material If the packing and impact-reducing materials or the product itself and any of its accessories are to be disposed of, give environmental protection a high priority, separate the materials and dispose of in careful observation of national or regional laws and conditions. Please contact you sales representative if you have any questions. 6-3 CHAPTER 6 6.3 IMPORTANT INFORMATION FOR USE AND MANAGEMENT 3. Information Regarding Electro-magnetic Interference This equipment should not be used in the strong electrical field, or the strong magnetic field (around the transformer) to avoid adversely affecting the equipment. This equipment should not be used around the device generating high frequency (medical telemeter, cordless telephone, etc.) Failure to do so could cause the malfunction of this equipment, or cause other device to fail. 4. Escape Clause Perform diagnosis under the responsibility of the doctor. We, HONDA ELECTRONICS CO., LTD. assume no responsibility for diagnostic condition and diagnostic result. We assume no responsibility for the secondary damage such as wrong diagnosis caused by the formula of measuring equipment entered by the user. We assume no responsibility for quality or any loss relating to the product caused by the relocation, modification, inspection and repair performed by someone other than our service engineer or the specified service engineer. We assume no responsibility for any damage caused by ignoring the precautions and operation procedure specified in this manual. We do not guarantee the remaining data of this equipment when it is returned for repair, etc. It is recommended to take backups as much as possible. 5. Retention Period of Repair Part It is the policy of this company to retain repair parts for a model for seven (7) years after it has stopped being produced. 6-4 CHAPTER 6 6.4 LABELING SYMBOLS 6.4 LABELING SYMBOLS The following symbols are used on the product. symbol definition description “ON”(power) When it pressed, power turns ON. “OFF”(power) When it pressed, power turns OFF. Remote control It indicates connector for the remote cable of the printer. Output It indicates connector for the video printer. Television monitor It indicates connector for the cable for the monitor of an external connection. Foot switch It indicates connector for the foot switch. USB It indicates connector for USB memory devices. Alternating current It indicates connector for the power cable. Frame or chassis It indicates grounding for the frame or the chassis. 6-5 CHAPTER 6 6.5 PROTECTIVE INSPECTIONS 6.5 PROTECTIVE INSPECTIONS Protective inspections are required to maintain the performance and safe operation of the unit. The customer must responsibly perform protective inspections. There are both daily inspections and periodic inspections. Some of the periodic inspections require special tools and should only be performed by specially trained personnel. (For a fee, our company will perform those protective inspections requiring by specially trained personnel. We recommend that periodic protective inspections be performed annually to maintain the performance and safe operation of the unit. Please consult your sales representative for details. ●If the inspection should result in the abnormal operation of the unit, stop its use immediately and contact your sales representative. ●Always use extreme caution if you are going to perform the protective inspections yourself. ●We will not be responsible in any way for damage caused by service engineers not authorized by us. 1. Daily inspections You are responsible for performing the daily inspections. Always perform these daily inspections before turning on the power. Inspect the cables and probes for abnormalities. Make sure the cables and probes are properly connected to the main unit. ● Always unplug the power supply before inspecting. This will prevent electrical shock in the rare event the unit is malfunctioning. ●If the probe is used with cracks, peeling or other such insulation abnormalities, the patient may experience electrical shock or other serious injury. ● If the inspection should result in the abnormal operation of the unit, stop its use immediately and contact your sales representative. ●The probe is a precision instrument. Always use caution when handling it. If the probe is dropped and this causes damage to the surface that comes in contact with the body, stop using it immediately and contact your sales representative. The use of a damaged probe could result in electrical shock. If the probe is used with cracks, peeling or other such abnormalities, the patient may experience electrical shock or other serious injury. 2. Protective inspections The following inspections are required to maintain the performance and safe operation of the unit. Some of the inspections must be performed by specially trained personnel. Contact your sales representative for details. Description of Inspection Items Inspected Cleaning Inside the unit. Covers and panels. Monitor. Probes and probe holder. All parts on the main unit. Console. Resistance of protective systems. Ground leakage current Leaking current from outside of unit. Leaking current to patient I. Leaking current to patient III. Fan Operating panel (touch panel). Design of peripheral equipment (connectors). Other components. Check the exterior of probes. Record wave pattern data from standard probe. Wash & Disinfect Check electrical safety Check mechanical safety Record measurement results 6-6 Inspection Frequency Annually Annually Annually Annually Annually CHAPTER 6 6.6 SPECIFICATIONS 6.6 SPECIFICATIONS [Specifications of HS-2100V] Scanning Method Number of Probe Channel Number of Simultaneous Drive Operating Mode Range 3.5MHz 5MHz or more Focusing Method Rated Ultrasound Frequency Display Monitor Acoustic Power Adjustment Gray Scale Image Display Image Adjustment Sweep Speed in M Mode Cine Memory Measuring Function Fetal Age Table/ Graph Display Data Storage Character Display Video Signal External I/O Power Source Dimension (Width×Depth×Height) Weight Linear/Convex Type Electronic Scanning 96 Channels, 128 Channels Transmitter : 64 Channels (Max) Receiver : 32 Channels (Max) B Mode, B/B Mode, B/M Mode, B/Z Mode, M Mode 0~2-24cm (1cm Step : Adjustable) 0~2-16cm (1cm Step : Adjustable) Transmitter : 4-Level Focus Receiver : Continuous Dynamic Focus 1.5, 2.0, 2.8, 3.0, 3.5, 5.0, 6.0, 7.0, 7.5, 8.5, 9.0, 10.0, 11.0, 12.5MHz 10.4 inch SVGA Color LCD Monitor 20-100% (10% Step : Adjustable) 256 Levels Up/Down, Left/Right, Positive/Negative B-Gain : 36~100dB (1dB Step : Adjustable) M-Gain : 36~100dB (1dB Step : Adjustable) B-Dynamic Range : 35~ 95dB (1dB Step : Adjustable) M-Dynamic Range : 35~ 95dB (1dB Step : Adjustable) STC : 8-Level Slide Control curve Enhancement Function Soft : Off, Level 1 to 4 (Image Processing) Edge : Off, Level 1 to 3 1/1, 1/2, 1/4, 1/8, 1/16( ) B/M-Mode : (1/1) is 1 second per frame. M-Mode : (1/1) is 2 seconds per frame. 255 frames Distance : 8 Measurements Velocity : 4 Measurements Area/Circumference : 4 Measurements (Type: Trace/Ellipse) Volume : 2 Measurements Histogram, HR, LV, Tendon%, Fetal Age ESD, ECD, CTD, CHL, CHD, CCRL, STD, SHD, DGSD, DCRL, DHD, DBD, cHD, cBD User table Still Image (JPEG) : Internal (100 Images max.) / External USB memory Moving Image (AVI) : External USB memory Hospital Name (up to 40 Characters), ID Information(ID: 10 Characters, Name: 30 Characters, Age), Date, Time, Probe Type, Current Setting Information Standard Video Signal (PAL or NTSC) USB Memory Port : 1 Channel Video Output : 2 Channels (composite video) External monitor Output : 1 Channel (Analog RGB) Foot Switch Input, Printer Remote Control Output 100~ 240V AC ± 10%, 50/60Hz, 150VA Approx.335 ×200 ×380 (mm) (Keyboard is closed) Approx.335 ×500 ×380 (mm) (Keyboard is opened) Approx.11kg 6-7 2010-05