1
12
4.2 IMPLEMENTATION
This chapter describes about the implementation of this web content management
system. The thesis aims to meet the following requirements and the implementation of these
is discussed in this chapter:
1. Allow faculty members to create their accounts with the system and use this account
to access and update their information whenever they want.
2. Support for faculty to maintain their personal information on their respective home
pages.
3. Support for faculty to add classes to the website and manage related information.
4. Faculty should be able to upload images for each class.
5. Allow students to register for desired classes to receive emails from the respective
faculty. Faculty should be able to send emails to registered students per class using
the website interface.
6. Have a discussion board for each class. Both faculty and students should be able to
access and update the contents of this section. Also, the concerned faculty should be
notified via email when the content gets updated.
7. The website should be fully web accessibility compliant.
8. Implementation of these requirements is explained next.
4.2.1 Create Account
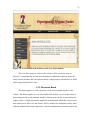
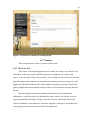
The first step in using this website to manage information is to create an account. This
feature is password protected, as only the faculty members should be allowed to create an
account and not any students or visitors. On the log in page, there is a link as “New User”
using which an account can be created, after proper authentication. To create an account, the
user needs to enter a valid email address, name and password. The email address and
password will be required for subsequent log in. In case the user forgets his password, there
is an option “Forgot Password” on the log-in page; using which he can have the password
emailed to him at this email address. The user can delete his account when no longer needed;
it will permanently delete all information associated with it.
4.2.2 Personal Page
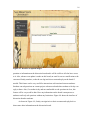
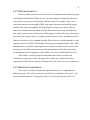
After successful account creation or log in, the next web page (shown in Figure 4.2)
allows the user to manage his personal information on this website. Here he can enter his