1
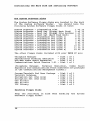
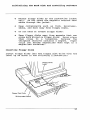
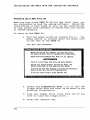
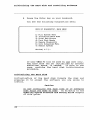
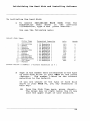
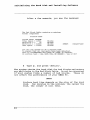
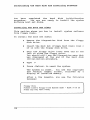
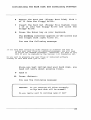
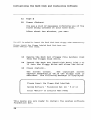
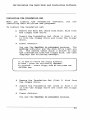
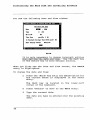
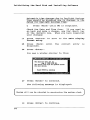
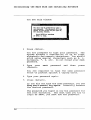
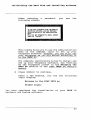
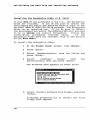
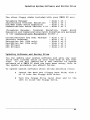
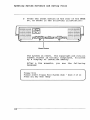
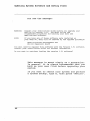
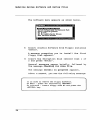
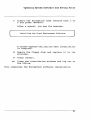
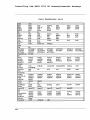
©
1985, 1986, 1987 AT&T
All Rights Reserved
Printed in USA
NOTICE
The information in this document is subject to change
without notice. AT&T assumes no responsibility for any
errors that may appear in this document.
IMPORTANT!
READ BEFORE YOU INSTALL VERSION 3.51 OF
THE SYSTEM SOFTWARE!
If you plan to load Version 3.51 of the system Software
on your UNIX® PC without preserving any existing files,
you can proceed directly to the AT&T UNIX PC Software
Installation Guide and begin installing the software.
If you wish to preserve existing user files and installed
applications, you MUST follow the instructions below
BEFORE you upgrade to Version 3.51.
1
Login as install.
2
Select IAdministration I and press <Enter>.
3
Select ISoftware Setup I and press <Enter>.
4
Select IRemove Installed Software I and press
I Enter I .
Compare
If any
remove
Version
the installed software with the following list.
of the following items appear on your screen,
then now, . BEFORE you upgrade your UNIX PC to
3.51.
IPC Fix
custom Kernel
DOS-73~M. SYSTEM VER. 1.0
IRMA T.M. 3278 - Ver. 1.0 August 5, 1986
STARLAN NETWORK PROGRAM - Version 1.0
STARLAN NETWORK PROGRAM - Version 1.1
TAPE BACKUP 1.0
VOICE POWER: System Software REL 1.0
WIN T .M . /3B-LAN interface Version 1.0
WIN T.M. /3B-LAN interface Version 1.1
3270 Emulator + Version 1.0
All languages (upgrades from Version 2.0 and
3.0 only). You do not need to remove languages
when upgrading from Version 3.5 .
To remove a package:
5
Select the package in the Remove Installed
Software window and press <Enter>. Do this for
each package you need to remove.
Note
The following items are removed automatically when your
system is upgraded to Version 3.51:
DEVELOPMENT SET
RS-232 EXPANSION
Telephone Manager
ATE
Encryption
You may now proceed with the upgrade to Version 3.51.
Please see the AT&T UNIX PC Software Installation Guide
for instructions.
You may reinstall the
completed the upgrade:
following
items
once you have
DOS-73 SYSTEM VER. 1.0
IRMA 3278 - VER. 1.0 August 5, 1986
STARLAN NETWORK PROGRAM - Version 1.1
TAPE BACKUP 1.0
VOICE POWER: System Software REL 1.0
WIN/3B-LAN interface Version 1.1
You should NOT reinstall the following items; contact
your AT&T Sales Representative for instructions on how
to receive free replacements for:
WIN/3B-LAN interface Version 1.0
STARLAN NETWORK PROGRAM - Version 1.0
3270 Emulator + Version 1.0
In addition, you should not reinstall the following
items; they are no longer necessary in Version 3.51:
IPC Fix
custom Kernel
Also, you cannot use previous versions (2.0, 3.0 or 3.5)
of DEVELOPMENT SET or RS-232 EXPANSION. Software for RS232 EXPANSION is included in the Version 3.51 system
software. Please call your AT&T Sales Representative for
information on upgrading to DEVELOPMENT SET 3.51 of the
AT&T UNIX PC utilities.
DOS-73 is a trademark of ALLOY COMPUTER PRODUCTS,
INC.
IRMA is a trademark of Digital Communications Associates,
Inc.
WIN is a trademark of the Wollongong Group, Inc.
Important Information for Users of
The AT&T UNIX PC System Software Installation Guide
This section contains important information for the
installation of Version 3.51 software.
Please review
this information before installing this version, and keep
it with your AT&T UNIX
PC System Software Installation
Guide.
1
Version 1.0 of STARLAN Network cannot be used
with Version 3.51 of the System Software.
2
If you have 3270+ Version 1.0 installed on your
UNIX PC, contact your authorized AT&T Service
Representative BEFORE you upgrade to Version
3.51 for a free copy of 3270+ Version 1.16.
You need this new version with Version 3.51.
Once you have received the free upgrade,
upgrade your UNIX PC to Version 3.51 and then
install 3270+ Version 1.16.
3
If your system has 2.0 or 3.0 UNIX utilities
and any languages installed and you are not
installing the Version 3.51 UNIX utilities,
remove the languag~s before upgrading to
Version 3.51 System Software and then reinstall
them.
4
After you have installed the UNIX PC Foundation
Set, install Tape Backup software if you have
it.
It is particularly important for you to
install Tape Backup software BEFORE you install
any other software which has a loadable device
driver, such as the Combo Board set, STARLAN,
etc.
5
After installing the Version 3.51 Foundation
Set, install the following software from floppy
disk:
communications Patch (Version 3.51)
This is found in the Communications Management
binder.
1
Preface
This AT&T UNIX® PC System Software Installation Guide
shows'you how to install your UNIX PC System Software.
This guide is divided into the following chapters:
o
Single User' to Multiuser Conversion shows you
how to convert a UNIX PC configured for a single
user to a multiuser system.
o
Initializing the Hard Disk and Installing
Software shows you how to prepare the UNIX PC
and install system software.
o
Updating system Software and Saving Files shows
you how to update system software and save the
user files on a UNIX PC that contains an earlier
version of system software.
o
Installing the AT&T UNIX PC Curses/Terminfo
End User Package shows you how to install this
package for enhanced terminal support.
You
only need to install Curses/Terminfo if you are
running a software application that requires
it.
i
ii
contents
1
Introduction
2
Single User to Multiuser Conversion 3
Before You Begin
3
Backing Up the system Files
4
Initializing the Hard Disk
for a Multiuser System
5
Reinstalling 2.0, 3.0 or 3.5
System Software and Applications 12
Restoring Files from Backup
13
3
Initializing the Hard Disk
and Installing Software
Before You Begin
The System Software Disks
Starting Up a New UNIX PC
Initializing the Hard Disk
Installing the Boot Set Disks
Installing the Foundation Set
Setting the Date and Time
Entering a Root Password
Installing the Encryption
Disks (U.S. Only)
What Next?
4
5
Updating system Software
and saving Files
Before You Begin
The System Software Disks
Updating Software and saving Files
Installing the Foundation Set
Installing the Encryption
Disks (U.S. Only)
Installing the AT&T UNIX PC
curses/Terminfo Package
Installing Curses/Terminfo
Core Terminals List
1
15
15
16
18
20
26
29
31
35
38
39
41
41
42
43
50
55
59
59
62
iii
iv
Introduction
This AT&T UNIX® PC System Software Installation Guide
shows you how to install your UNIX PC system Software.
You do not need any tools or special computer experience
to follow the instructions. You will be shown everything
you need to know.
Keep this guide after you finish installing the system
software. It will be useful if you decide to update your
system software at a later date.
You can use this guide for three different purposes:
o
To convert a single user system to a multiuser
system.
o
To install system software on a new UNIX PC.
o
To update system software and save the user
files on a UNIX PC that contains an earlier
version of system software.
If you already have a UNIX PC that is set up for a single
user and you want to convert it to a multiuser system,
use this guide to follow these steps:
1
Back up an existing 2.0, 3.0 or 3.5 system
2
Reinitialize your hard disk for a multiuser
system.
3
Reinstall your 2.0, 3.0 or 3.5 system Software.
4
Restore your user files from the backup.
5
Upgrade your system from 2. 0, 3. 0 or 3. 5 to the
new 3.51 System Software.
1
Introduction
If you have a brand new UNIX PC, use this guide to follow
these steps:
1
Initialize the hard disk and install the system
software.
2
Complete the system software installation by
setting the correct date and time and entering
a system password.
If you have a UNIX PC that already contains user files
and application software, use this guide to follow these
steps:
1
Update your system software and save your user
files and application software.
2
Go directly to the Updating system Software and
Saving Files section of this guide.
DO NOT
INITIALIZE THE HARD DISK.
Each chapter of this guide is set up to lead you through
a particular procedure.
When you're ready, go to the
chapter that best suits your needs.
Note
Version 2.0, 3.0 or 3.5 Full System Backups CANNOT be
restored on a 3.51 system.
2
Single User to Multiuser Conversion
This chapter shows you how to change your UNIX PC from a
single user system to a multiuser system.
Use this
chapter only if you want to implement this conversion on
a system that is presently set up as a single user system.
All standard Version 2. systems are configured as single
user.
°
If you are installing system software on a new machine,
do not use this chapter. Go to the next chapter, titled
Initializing the Hard Disk and Installing Software, for
installation procedures.
If you want to save files that already exist on your hard
disk and update your system software from 2.0, 3.0 or
3.5 to 3.51, and if you do not want to convert your system
from single to multiuser, do not use this chapter. Go
to the chapter titled Updating system Software and saving
Files for updating procedures.
Before You Begin
To convert your system from single user to multiuser, you
will need to reinitialize your hard disk.
Since this
operation destroys all of the files currently on your
hard disk, procedures for backing up your files must be
followed very carefully.
Here is a brief outline of the procedures you will be
following:
1
Perform a complete system backup and verify the
readability of the backups.
2
Reinitialize the hard disk for multiuser.
3
Reinstall your 2. 0, 3.
4
Restore your files from the backup.
5
Upgrade your system from 2.0,
3.51.
° or 3.5
system software.
3.0 or 3.5 to
3
single User to Multiuser Conversion
This procedure takes anywhere from one to two hours to
complete.
DO NOT START THIS PROCEDURE UNLESS YOU HAVE
THE TIME TO FINISH IT IN ONE SESSION.
Do not turn off
the power and try to start where you left off. If you
make a mistake during steps 1 - 4, you must start that
step over from the beginning. If you make a mistake on
step 5, repeat steps 3 - 5.
Backing Up the System Files
Before you perform a system backup, remove any of the
following application software that is installed on your
system.
Version 2.0, 3.0 or 3.5 Development Set
EIA/RAM Combo Board software
IPC Fix
Custom Kernel
DOS-73
SYSTEM VER. 1.0
IRMA
3278 - Ver. 1.0 August 5, 1986
STARLAN NETWORK PROGRAM - Version 1.0
STARLAN NETWORK PROGRAM - Version 1.1
TAPE BACKUP 1.0
VOICE POWER: System Software REL 1.0
WIN
/3B-LAN interface Version 1.0
WIN
/3B-LAN interface Version 1.1
3270 Emulator + Version 1.0
All languages (upgrades from Version 2.0 and
3.0 only). You do not have to remove languages
when upgrading from Version 3.5.
Removal of these packages will substantially decrease the
number of floppy disks or tape cartridges you will need
for your system backup. Additionally, all applications
that have a loadable device driver should also be removed
and reinstalled after the upgrade to version 3.51. This
is relevant only under Version 3.0 or 3.5 (not 2.0).
These packages can be identified by logging in as install,
selecting IAdministration I , selecting ISoftware Setup I
and then selecting either I Configure Loadable Device
Drivers I or Isetup Loadable Device Drivers I , depending
on your system software version.
4
Single User to Multiuser conversion
Note
The EIA/RAM Combo Board software is displayed
in the Loadable Device Driver, Software and
System Information windows as RS232 Expansion.
Backup Procedures
After removing the software listed above, do a complete
system backup.
Since reinitializing the hard disk
destroys all existing files, it is essential that your
system is properly backed up and that the entire backup
set is readable. You can verify that the backup set is
readable by doing a Restore by filename.
For an extra
margin of safety, you can back up the files .of each
individual by selecting the Backup One User option. For
backup procedures, see the Managing the UNIX pc section
of the AT&T UNIX
PC Owner's Manual or the Tape Backup
User's Guide.
Initializing the Hard Disk for a Multiuser System
To initialize the hard disk for a multiuser system:
1
Insert the Diagnostics Disk 1 of 12 into the
floppy drive with the label up.
Note
If you are unfamiliar with handling or
inserting floppy disks,
please refer to
"Handling Floppy Disks" and "Inserting Floppy
Disks" in the Initializing the Hard Disk and
Installing Software chapter of this guide.
2
Turn the floppy drive lever down and to the
left to close the floppy drive.
3
Turn the power switch ON (toward the I).
5
single User to Multiuser Conversion
The power switch is located above the power
cord on the rear of the UNIX PC.
If the power is already on, press the Reset
button located on the rear of the UNIX PC, as
shown in the following illustration:
~-~
~-~
~-~~-~
.----==---.
~--,~-~
~--,~---.
~-~~-~
~--,~---.
~---.,.~~.....-~
..----,.--,
~~-,~--.-~
~-r--'
~~~~~~
~~~~-~
~-~
.-----.---.
==-==:::.J
Reset Button
The copyright and version number screen is
displayed briefly.
Following the copyright
screen, the total amount of memory is displayed
(this varies depending upon your system
configuration):
SYSTEM CONFIGURATION
524287 bytes On-board memory.
524287 bytes Expansion memory.
Type any key to continue.
4
6
Press the space bar on your keyboard.
single User to Multiuser Conversion
You see the following Diagnostics menu:
UNIX PC DIAGNOSTIC, MAIN MENU
1)
2)
3)
4)
5)
6)
7)
Full System Test
Initialize Hard Disk
Enter Bad Blocks
Park Disk Heads
Remote Diagnostic
Goto Subsystem Menu
Reboot System
Choice( 1-7 ):
5
To select Initialize Hard Disk,
press the <Return> key.
type 2 and
The Return key is located to the right of the
alphabetic keys as shown in the following
illustration:
CI••'
',lnr
IfI,s"
P,••
,
-
At'
R~'
.
~.g ..
N ....
,
...,
7
single User to Multiuser Conversion
You see the following screen:
Select disk type:
Drive Type
0
1
2
3
4
5
6
7
8
9
10
11
12
-
-
----------
Miniscribe
Atasi
Maxtor
seagate
Miniscribe
Rodime
Atasi
Hitachi
Miniscribe
Miniscribe
MicroSci1050
CDC Wren
Others
Please select a number:
6
Formatted Capacity
Cyls
Heads
Megabyte
Megabyte
Megabyte
Megabyte
Megabyte
Megabyte
Megabyte
Megabyte
Megabyte
Megabyte
Megabyte
Megabyte
612
645
903
306
612
640
704
714
1024
1024
1024
989
2
7
5
4
4
8
7
7
5
8
5
5
-----------------10
36
36
10
20
40
40
40
40
64
40
40
Current selection is 4
)
Type in the number that corresponds to the type
of hard disk drive in your UNIX PC and press
<Return>.
The number listed as the current
selection is the default.
If you are unsure of the type of hard disk
drive in your UNIX PC, you may determine it
this way:
(1)
From the Disk Type menu, press <Break>.
The Break key is right below the F8 key
near the upper right of your keyboard.
The system responds Do you want to abort
testing( Yes or No ) ?
(2)
Type Y and press <Return>.
The Diagnostic menu reappears.
8
single User to Multiuser Conversion
(3)
Type s4test and press <Return>
You see the prompt expert> on the screen.
(4)
Type 6,12 and press <Return>.
You will see detailed information about
your hard disk drive on the screen, such
as number of cylinders, number of heads
per cylinder, bad blocks, and so forth.
(5)
To determine the type of hard disk you
have, look at the first 5 lines displayed:
WINCHESTER DISK TEST
Volume Name: WINCHE
Winchester Disk
Volume Name: WINCHE
ccc Cylinders. H Heads per Cylinder.
Note the number of cylinders, CCC, and the
number of heads per cylinder, H. You will
use these numbers to identify your hard
disk drive.
(6)
You see the message Type any key to
continue.
Press the space bar.
The
expert> prompt appears.
(7)
Type an uppercase U and press <Return>.
The Diagnostic menu appears.
(8)
Type 2 and press <Return>. When the Disk
Type menu appears, match the number of
cylinders, CCC, and the number of heads
per cyl inder , H, to the corresponding
numbers at the right of the screen.
Select
your
drive type"
enter the
selection number and press <Return>.
9
single User to Multiuser Conversion
You see the following message:
Will this system be used by more than one user ( Yes or No )?
7
Type y and press <Return> to initialize the
disk for multiuser.
You see the message:
Initialize the WINCHESTER disk?
( ALL DATA WILL BE ERASED I ) YIN
Initialization of the hard disk formats it and
prepares it to accept the software you are
going to install.
8
Type y and press <Return>.
Note
Once you press <Return>, all information on the
disk is erased.
You see the following message:
J
-----
(
10
Formatting cylinder nnn
single User to Multiuser Conversion
After a few moments, you see the message:
You can now choose to do a surface test
to ensure that all bad spots have been detected.
This is recommended and takes at least 10 minutes.
Do surface test( ALL DATA WILL BE ERASED) Yes or No?
9
Type y, and press <Return>.
The system checks the hard disk for bad blocks
and enters any bad blocks in the Bad Block
Table.
Do not be concerned if your system
finds a number of bad blocks.
These do not
affect the performance of your UNIX PC.
Note
Surface test time depends on the size of the
hard disk.
Ten minutes is the minimum; the
larger the disk, the longer it will take.
After the system performs the surface check
passes, you see the following Diagnostics menu:
UNIX PC DIAGNOSTIC, MAIN MENU
1)
2)
3)
4)
5)
6)
7)
Full System Test
Initialize Hard Disk
Enter Bad Blocks
Park Disk Heads
Remote Diagnostic
Goto Subsystem Menu
Reboot System
Choice( 1-7 ):
11
single User to Multiuser Conversion
You have completed the procedure for initializing the
hard disk for a multiuser system. You are now ready to
reinstall your 2.0, 3.0 or 3.5 system software. DO NOT
install 3.51 system software at this time. You cannot
restore your 2.0, 3.0 or 3.5 full system backup onto a
system that has had 3.51 system software installed.
Reinstalling
Applications
2.0,
3.0
or
3.5
System
Software
and
The next step in the single user to multiuser conversion
is the reinstallation of your 2.0, 3.0 or 3.5 system
software and applications. You must reinstall the system
software on which your backup files were created in order
to restore them from your backup set. You cannot restore
files created on a 2.0, 3.0 or a 3.5 system onto a system
installed with 3.51 system software.
To begin installing 2.0, 3.0 or 3.5 system software:
1
Remove the Diagnostics Disk from the floppy
disk drive.
2
Insert the 2.0, 3.0 or 3.5 Floppy Boot Disk
into the floppy disk drive.
3
Turn the floppy drive lever down and to the
left to close the floppy drive.
You should still see the Diagnostic menu that
was displayed at the end of the hard disk
initialization procedure.
12
4
Type 7
5
Press <Return> to reset the system.
6
Follow the steps in your 2.0, 3.0 or 3.5 System
Software Installation Guide to install the Boot
Set Disks and the Foundation Set.
single User to Multiuser Conversion
7
Reinstall all software applications that you
removed before doing your backup (Development
Set, EIA/RAM Combo Board software, STARLAN,
Voice Power, and so on). If you are upgrading
your system to Version 3.51, this step must be
postponed until after the upgrade procedure is
completed.
Restoring Files from Backup
Once you have reinstalled your original system software
and applications, you are ready to use your system backup
set to restore your files.
To restore files from backup, refer to the Managing the
UNIX PC section of the AT&T UNIX PC Owner's Manual or the
Tape Backup User's Guide.
When you have finished restoring the backed-up files, the
conversion from a single user to a multiuser system is
complete.
If you plan to update your system to 3.51
System Software, refer to the Updating system Software
and saving Files chapter in this guide for procedures.
13
14
Initializing the Hard Disk and Installing Software
This chapter shows you how to initialize the hard disk
and install system software. Use this chapter if you are
installing software for the first time on a new UNIX PC.
If you want to update a system that is currently running
2.0, 3.0 or 3.5 system software, go to the Updating system
Software and Saving Files chapter of this guide.
Before You Begin
You will be initializing the hard disk, which destroys
all existing files on the hard disk, and then installing
system software from floppy disks.
If your system is brand new, and you are installing the
system software for the first time, you do not need to
worry about destroying existing files.
caution
If you want to update system software and save
files that already exist on the hard disk (on a
single-user system), DO NOT INITIALIZE THE HARD
DISK. Go directly to the Updating system Software
and saving Files chapter of this guide.
Initializing the hard disk and installing system software
takes approximately one hour to complete.
DO NOT START THIS PROCEDURE UNLESS YOU HAVE THE TIME TO
FINISH IT IN ONE SESSION.
Do not turn off the power and
try to start where you left off.
Please follow the steps very carefully to ensure a proper
installation.
15
Initializing the Hard Disk and Installing Software
The System Software Disks
The System Software floppy disks are located in the back
of the System Software binder.
You should have the
following system Software floppy disks on hand:
System
system
System
System
system
System
system
System
System
System
System
System
Software
Software
Software
Software
Software
Software
Software
Software
Software
Software
Software
Software
-
Diagnostics Disk
Boot Set (Floppy Boot Disk)
Boot Set (Floppy File System)
Boot Set (Hard Disk Boot)
Foundation Set (Disk 1)
Foundation Set (Disk 2)
Foundation Set (Disk 3)
Foundation Set (Disk 4)
Foundation Set (Disk 5)
Foundation Set (Disk 6)
Foundation Set (Disk 7)
Foundation Set (Disk 8)
1
2
3
4
5
6
7
8
9
10
11
12
of
of
of
of
of
of
of
of
of
of
of
of
12
12
12
12
13
12
12
12
12
12
12
12
The other floppy disks included with your UNIX PC are:
Telephone Manager
Asynchronous Terminal Emulation
ElA/RAM Combo Board Expansion
Communications Patch Version 3.51
-
Disk
Disk
Disk
Disk
1
1
1
1
of
of
of
of
1
1
1
1
(Telephone Manager, Terminal Emulation, Combo .Board
Expansion and communications Patch diskettes are packaged
in the Communications Management binder.)
Curses/Terminfo End User Package
Terminfo Database
Encryption Set (USA only)
Encryption Set (USA only)
GSS Drivers
GSS Drivers
VOl Library
-
Disk
Disk
Disk
Disk
Disk
Disk
Disk
1
1
1
2
1
2
1
of
of
of
of
of
of
of
1
.1
2
2
2
2
1
Handling Floppy Disks
Keep the following in mind when handling the System
Software floppy disks:
16
Initializing the Hard Disk and Installing Software
o
Handle floppy disks by the protective jacket
only. Do not touch the magnetic surface that
shows through the jacket.
o
Keep contaminants such as food, beverages,
smoke, and dust away from floppy disks.
o
Do not bend or crease floppy disks.
o
Keep floppy disks away from magnets that can
erase data stored on floppy disks. Never place
them close to a telephone,
because the
telephone receiver contains a magnet.
Paper
clips can become magnetized when kept in a
magnetized container.
Inserting Floppy Disks
Insert floppy disks into the floppy disk drive with the
label up as shown in the following illustration:
Write-protect Notch
17
Initializing the Hard Disk and Installing software
starting Up a New UNIX PC
When you turn a new UNIX PC ON for the first time, you
are instructed to load the system software. Follow the
instructions in this guide as well as the instructions
on your screen very carefully to ensure that your system
is loaded properly.
To start up the UNIX PC:
1
Turn the power switch ON (toward the I). The
power switch is located above the power cord
on the rear of the UNIX PC.
You see the message:
Before you can use your computer, you .ust first load
the Syste. Software froa the Foundation Set floppy disks.
Please take the Foundation Set, Disk 1 of 12, labeled:
Place it in the floppy disk drive and press <Return>.
Consult your System Software Installation Guide, and
follow instructions as they appear on your screen.
If you do not have this software or you have any questions,
please contact your local AT&T Rep,resentative.
If you are ready to begin, press <Return> now.
18
2
Insert the Diagnostics Disk 1 of 12 into the
floppy drive with the label up as shown in the
previous illustration.
3
Turn the floppy drive lever down and to the
left to close the floppy drive.
4
Press the <Return> key.
Initializing the Hard Disk and Installing Software
The Return key is located to the right of the
alphabetic keys, as shown in the following
illustration:
~r"""'H'"
<"","
.'.-
,..,
hI
HoIrt.
fd
Pr..
,"i' ,.."
r
ToO =] I 0 II w JI E JI R JI rJ Y J U Jl' J! 0 J!
II [ 111 ] I[( I f:: ~lfA 11[5 lifo ,W ·I[G IIH IfJ irK W IE If: IllR.,- 1 En,.,
~
The copyright and version number screen is
displayed briefly. Then, the total amount of
memory is displayed. This varies depending on
your system configuration:
SYSTEM CONFIGURATION
524287 bytes On-board memory.
524287 bytes Expansion memory.
Type any key to continue.
19
Initializing the Hard Disk and Installing Software
5
Press the Enter key on your keyboard.
You see the following Diagnostics menu:
UNIX PC DIAGNOSTIC, MAIN MENU
1)
2)
3)
4)
Full System Test
Initialize Hard Disk
Enter Bad Blocks
Park Disk Heads
S) Remote Diagnostic
6) Goto Subsystem Menu
7) Reboot System
Choice( 1-7 ):
If your UNIX PC will be used by one user only,
the hard disk can be initialized to recover
additional space, if needed.
If this is the
case, continue the hard disk initialization
procedure.
Initializinq the Hard Disk
Initialization of the hard disk formats the disk and
prepares it to accept the software you are going to
install.
caution
DO NOT INITIALIZE THE HARD DISK IF IT CONTAINS
USER FILES YOU WANT TO KEEP. Go directly to the
Updatinq System Software and Savinq Files chapter
of this guide.
20
Initializinq the Hard Disk and Installinq Software
To initialize the hard disk:
1
To select Initialize Hard Disk from the
Diagnostics menu shown in
the
previous
illustration, type 2 and press <Return>.
You see the following menu:
Select disk type:
Drive Type
0
1
2
3
4
5
6
7
8
9
10
----------
- Miniscribe
- Atasi
- Maxtor
- Seagate
- Miniscribe
- Rodime
- Atasi
- Hitachi
- Miniscribe
- Miniscribe
- MicroSci1050
11 - CDC Wren
12 - Others
Please select a number:
2
Formatted capacity
-----------------10
36
36
10
20
40
40
40
40
64
40
40
Megabyte
Megabyte
Megabyte
Megabyte
Megabyte
Megabyte
Megabyte
Megabyte
Megabyte
Megabyte
Megabyte
Megabyte
Cyls
612
645
903
306
612
640
704
714
1024
1024
1024
989
Heads
2
7
5
4
4
8
7
7
5
8
5
5
( Current selection is 4 )
Type in the number that corresponds to the type
of hard disk drive in your UNIX PC and press
<Return>.
The number listed as the current
selection is the default.
If you are unsure of the type of hard disk
drive in your UNIX PC, you may determine it
this way:
(1)
From the Disk Type menu, press <Break>.
The Break key is right below the F8 key
near the upper right of your keyboard.
21
Initializing the Hard Disk and Installing Software
The system responds Do you want to abort
testing ( Yes or No ) ?
(2)
Type y and press <Return>.
The Diagnostic menu reappears.
(3)
Type s4test and press <Return>
You see the prompt expert> on the screen.
(4)
Type 6,12 and press <Return>.
You will see detailed information about
your hard disk drive on the screen, such
as number of cylinders, number of heads
per cylinder, bad blocks, and so forth.
(5)
To determine the type of hard disk you
have, look at the first 5 lines displayed:
WINCHESTER DISK TEST
Volume Name: WINCHE
Winchester Disk
Volume Name: WINCHE
CCC Cylinders. H Heads per Cyl inder.
Note the number of cylinders, CCC, and the
number of heads per cylinder, H. You will
use these numbers to identify your hard
disk drive.
22
(6)
You see the message Type any key to
continue.
Press the space bar.
The
expert> prompt appears.
(7)
Type an uppercase U and press <Return>.
The Diagnostic menu appears.
(8)
Type 2 and press <Return>. When the Disk
Type menu appears, match the number of
cylinders, CCC, and the number of heads
per cylinder, H, to the corresponding
numbers, at the right of the screen.
Select
your
drive type,
enter the
selection number and press <Return>.
Initializing the Hard Disk and Installing Software
You see the following message:
Will this system be used by more than one user ( Yes or No )?
3
Type n and press <Return> to initialize the
disk for a single user.
You see the message:
Initialize the WINCHESTER disk ?
( ALL DATA WILL BE ERASED I ) YIN
4
Type y and press <Return>.
You see the following message:
(
Formatting cylinder nnn
)
---~---
23
Initializing the Hard Disk and Installing Software
After a few moments, you see the message:
The Bad Block Table contains n entries.
Format completed.
Surface Test
Volume Name: WINCHE
Total Space
19584
Partition 0
32
Partition 1
40000
User space
15552
Blocks
Blocks
Blocks
Blocks
(SWAP)
Single-user
You can now choose to do a surface test
to ensure that all bad spots have been detected.
This is recommended and takes at least 10 minutes.
Do surface test ( ALL DATA WILL BE ERASED ) Yes or No?
5
Type y, and press <Return>.
The system checks the hard disk for bad blocks and enters
any bad blocks in the Bad Block Table. Do not be concerned
if your system finds a number of bad blocks.
These do
not affect the performance of your UNIX PC.
Note
Surface test time depends on the size of the hard
disk.
Ten minutes is the minimum; the larger the
disk, the longer it will take.
24
Initializing the Hard Disk and Installing Software
After the system performs the surface check passes, you
see the following message:
The Bad Block Table contains n entries.
Press RETURN to continue:
6
Press <Return>.
You see the message:
Park Disk Heads
Hard Disk parking done!
The following diagnostics menu appears:
UNIX PC DIAGNOSTIC, MAIN MENU
1)
2)
3)
4)
5)
6)
7)
Full System Test
Initialize Hard Disk
Enter Bad Blocks
Park Disk Heads
Remote Diagnostic
Goto Subsystem Menu
Reboot System
Choice( 1-7 ):
25
Initializing the Hard Disk and Installing software
You have completed the hard disk initialization
procedure.
You are now ready to install the system
software boot set disks.
Installing the Boot set Disks
This section shows you how to install system software
from floppy disks.
To install the boot set disks:
1
Remove the Diagnostics Disk from the floppy
disk drive.
2
Insert the Boot set (Floppy Boot Disk) Disk 2
of 12 into the floppy disk drive.
3
Turn the floppy drive lever down and to the
left to close the floppy drive.
You should still see the Diagnostics menu that
was displayed at the end of the hard disk
initialization procedure.
4
Type
5
Press <Return> to reset the system.
7
The system is reset.
You see the copyright
and version number screen, followed by a
display of installed memory.
After a few moments,
message:
you see the following
Floppy Unix
Please insert Floppy File System disk - disk 3 of 12
Press any key when ready
26
Initializing the Hard Disk and Installing Software
6
Remove the Boot set (Floppy Boot Disk) Disk 2
of 12 from the floppy drive.
7
Insert the Boot set (Floppy File System) Disk
3 of 12 into the floppy drive and close the
floppy drive.
8
Press the Enter key on your keyboard.
The working indicator appears on the screen and
the floppy disk light turns on.
You see the following message:
If you have been running an older version of software and want to
retain your user files an installed programs, you will need
to follow the UPGRADE procedure. Otherwise, all data on your
UNIX PC will be replaced by the Version 3.51 Foundation Set.
Do you want to preserve any user files or installed software
already on this hard disk (yes or no)?
since you just initialized your hard disk, you
need not worry about erasing files.
9
10
Type n
Press <Return>.
You see the following message:
WARNING:
If you continue all files currently
on the hard disk will be erasedll
Do you really want to continue (yes or no)?
27
Initializing the Hard Disk and Installing Software
11
Type y
12
Press <Return>
You see a list of messages informing you of the
files being created on your hard disk.
After about two minutes, you see:
You will be asked to insert the Hard Disk Boot floppy disk momentarily.
Please insert the floppy labeled Hard Disk Boot now.
Press <Return> when ready.
13
Remove the Boot Set (Floppy File System) disk
from the floppy disk drive.
14
Insert the Boot Set (Hard Disk Boot) Disk 4 of
12 into the floppy drive and close the drive.
15
Press <Return>.
The screen clears.
The copyright screen
appears momentarily while the floppy disk is
searched. The following message is displayed:
Please insert the floppy disk labelled:
System Software - Foundation Set (1) - 5 of 12
Touch <Return> to continue when ready
This means you are ready to install the system software
Foundation Set.
28
Initializing the Hard Disk and Installing Software
Installing the Foundation set
When you install the Foundation software,
installing UNIX utilities and programs.
you
are
To install the Foundation set:
1
Remove the Boot set (Hard Disk Boot) disk from
the floppy disk drive.
2
Insert the Foundation set (Disk 1) Disk 5 of
12 into the floppy drive and close the floppy
drive.
3
Press <Return>.
You see the Reading in progress message. The
working indicator and the disk drive light are
on.
The system takes about a minute to copy
the information from the floppy disk, and then
displays the following message:
It is safe to remove the floppy diskette.
To EXIT - press <E> followed by <RETURN>.
To continue - insert floppy disk #2 and press the
<RETURN> key.
4
S
Remove the Foundation Set (Disk 1) disk from
the floppy drive.
Insert the Foundation Set (Disk 2)
Disk 6 of
12 into the floppy drive and close the floppy
drive.
6
Press <Return>.
You see the Reading in progress message.
29
Initializing the Hard Disk and Installing Software
After the system is finished with Foundation
Set (Disk 2), you see the message:
It is safe to remove the floppy diskette.
To EXIT - press <E> followed by <RETURN>.
To continue - insert floppy disk #3 and press the
<RETURN> key.
7
Remove the disk and insert the next disk of the
Foundation Set.
Follow this procedure for the remainder of the
floppy disks in the Foundation Set. Make sure
you insert the disks in the proper numerical
order. If you make a mistake, you will be given
an opportunity to insert the proper floppy
disk.
If you make an unrecoverable mistake,
start over at the beginning of "Installing the
Boot Set Disks" in this chapter.
When the system is done loading the Foundation
Set, it displays the copyright screen again and
follows that with a search of the hard disk.
Upon completion, the total memory is displayed
briefly, followed by four messages:
Nelco.e to the AUT UNIX pc
Stored files are being checked.
Please stand bV •••
30
Initializing the Hard Disk and Installing Software
Loading driveriS
Please stand by
The B,creen Mill nOM be set up.
Please stand by •••
When you start the urW( pc for the first
time, you .ust set the date and tiae.
Please press Enter, and the syste. Mill
prompt you for this infonation.
Press Enter to continue.
8
Remove the last Foundation Set disk, then press
<Enter>.
Setting the Date and Time
To complete the system software installation, you must
set the date and time, and then enter a password for the
system's root directory.
31
Initializing the Hard Disk and Installing software
You see the following Date and Time window:
51 Enter changes
tn s~stell date and time '," (1J
Set Data IDd lila
Il!ImI2
Date
Ti.e
AM
0 ..
J
1986
4 : 81
PM
n.e Zone
PM
pacific (
8)
.. Davlight Savings n.e EVER used? "0
Date display Eo...at
A.e..ieen
OJ
Note
It is only necessary to change incorrect entries
when setting the date and time. Use the Next key
or the Return key to move between entries.
When you first see the Date and Time screen, the month
entry is highlighted.
To change the date and time:
1
Press the <Mark> key until the abbreviation for
the correct month is displayed in the month
entry.
The Mark key is located
corner of the keyboard.
in the
lower-left
2
Press <Return> to move to the date entry.
3
Type the current date.
The date you type is entered over the existing
date.
32
Initializing the Hard Disk and Installing Software
If you make a mistake when typing the date, use
the Back Space key to correct it.
The Back
Space key is located immediately below the F7
key.
4
Press <Return> to move to the year entry.
5
Type the two numbers for the current year (84
for 1984, 85 for 1985, and so on) .
The numbers you type are entered over the
existing numbers.
6
Press <Return> to move to the hour entry.
7
Type the current hour of the day (1 for both
1 a.m. and 1 p.m., and so on).
It is a good idea to set the minute entry a
couple of minutes ahead of the current time,
so the time is correct when you've completed
your changes.
8
Press <Return> to move to the minutes entry.
9
Type the current minutes past the hour.
10
Press <Return> to move to the AM or
~M
11
Press <Mark>
displayed.
entry
12
Press <Return> to move to the Time Zone entry.
until
the
correct
entry.
is
If the time zone displayed is not correct,
press <Mark> until the correct time zone is
displayed.
If you are unsure of the correct time zone for
your area, see your AT&T UNIX PC Owner's Manual
for complete time zone information.
13
Press <Return> to move to the Daylight savings
entry.
33
Initializing the Hard Disk and Installing Software
Automatic time changes due to Daylight savings
Time should be disabled due to changes in the
dates for Daylight Savings Time.
o
Press <Mark> until NO is displayed.
Check the Date and Time form.
If you need to
go back and make a change, use the <Next> key
or the <Return> key. When you have completed
your changes:
14
Press <Return> to move to the Date Display
Format entry.
15
Press <Mark>
displayed.
16
Press <Enter>.
until
the
correct
entry
You see a window similar to this:
The date has been set to:
Aug 6. 1986 9:52 Ali.
The status line will be updated within
the next .inute.
Touch EHTER to continue
17
Press <Enter> to continue.
The following message is displayed:
System will now be rebooted to synchronize the system clock.
18
34
Press <Enter> to continue.
is
Initializing the Hard Disk and Installing Software
After a
window:
few moments,
you
see
the
following
UN IX provides for a non-office login
called -root-. Vou should provide a
password for this login in order to
prevent unauthorized access via the
phone lines. Touc" Enter to provide a
root password now, 01' Cancel to skip.
01'
Touch ENTER to continue
CANCL to stop.
This window informs you that you should provide a password
to protect the root login.
Entering a Root Password
Although you are requested to enter a root password during
the system software installation, you can always change
it later by using the Administration menu of the install
login.
For this reason, and if you are not too familiar
with passwords, make the root password easy to remember.
If you decide you do not want to enter a password at this
time, press the <Cancl> key located near the upper-right
corner of your keyboard.
To enter a root password:
1
Press <Enter>.
35
Initializing the Hard Disk and Installing Software
You see this window:
You Mill nOM be pro.pted to type a
new password. The password will not
appear on the screen as you type it,
for security reasons.
Touch EHTER to continue
or CANCL to stop.
2
Press <Enter>.
You are prompted to type your password. The
system accepts a combination of up to eight
alphabetic and numeric characters. You should
avoid using special characters such as @, *,
backspace, ", #, etc. Do not forget your root
password.
3
Type your
<Return>.
root
password
and
then
press
You are required to type the same password
twice to protect against a typing error.
4
Type your password again.
5
Press <Return>.
If you did not type the same password, you see
They don't match; try again. Carefully reenter
the desired password.
The password you typed is now the password for
the root directory. T~e next time you try to
login as root, you must use the password.
36
Initializing the Hard Disk and Installing software
After entering a
following window:
password,
you
see
the
To use your telephone with the unIx pc
Telephone software, use the Hardware
Setup selection of the Addnistration
.enu.
When you are prolpted to login, please
login as -install-.
This window tells you to use the Administration
menu of the install login to set up your
telephone software. However, you can still use
your telephone as you did before attaching it
to the UNIX PC.
For complete instructions on how to install and
set up your Telephone software, see "Setting
Up the Telephone Lines" in the Managing the
UNIX PC section of the AT&T UNIX PC Owner's
Manual.
6
Press <Enter> to continue.
After a few moments,
login display:
you see the
following
Welcome to the AT&T UNIX pc
Please login:
You have completed the installation of your UNIX
hardware and system software.
PC
37
Initializing the Hard Disk and Installing Software
Installing the Encryption Disks (U.S. Only)
If your UNIX PC was purchased in the U. S., the Encryption
disks are included.
If you do not plan to install the
Development set and/or the Enhanced Editors (part of the
optional UNIX PC UNIX utilities package), the Encryption
disks can be installed now.
If you do plan to install
the Development set and/or the Enhanced Editors, you need
to do so BEFORE you install Encryption.
Follow the
installation procedures
outlined below.
If
the
Encryption disks were not included, skip to the section
titled What Next?
To install the Encryption disks:
1
At the Please login: prompt, type install.
2
Press <Enter>.
3
Select I Administration I
press <Enter>.
4
Select
I Software
Setup I
from
Administration menu and press <Enter>.
from the Office and
the
The Software menu appears as shown below.
a'*.-4¥
Ofitl;m,W:mjMi4jiiHiJrmnIll
Install Software sent by Electronic Hail
Remoye Installed Software
Set Up Font
Set Up loadable Deyice DriYers
Show Installed Software
. -
5
~
Select I Install Software from Floppy I and press
<Enter>.
A message prompting you to install the first
floppy disk appears.
38
Initializing the Hard Disk and Installing Software
6
Insert the Encryption set disk labeled Disk 1
of 2 and press <Enter>.
Several messages appear briefly, followed by
the message Checking for Size file.
The message Install in progress appears.
After a moment, you see the following message:
It is safe to remove the floppy diskette.
To Exit - press <E> followed by <Return>.
To continue - insert floppy disk #2 and
press the <Return> key.
7
Insert the Encryption set disk labeled Disk 2
of 2 and press <Return>.
After a moment, you see the message: Installing
the Crypt Replacement Software.
A window
appears
telling you the installation is
complete.
8
Remove the floppy disk and replace it in its
envelope.
9
Press <Enter>.
10
Close the installation windows and log out of
the Office.
This completes the Encryption Set software installation.
What Next?
If you plan to use the Telephone Manager or the
Asynchronous Terminal Emulator (ATE), you should install
them now. See your AT&T UNIX PC Telephone Manager User's
Guide and your AT&T UNIX PC Terminal Emulation User's
Guide in the Communications Management binder for
installation and setup instructions.
39
Initializing the Hard Disk and Installing Software
If you are unsure about the Telephone Manager or ATE,
refer to the respective manuals for introductions and
functional descriptions.
To get acquainted with the UNIX PC, you should read the
AT&T UNIX PC Getting started Guide and follow the
examples. You'll find the UNIX PC makes it easy to use
a computer.
If you are an experienced computer user, you'll want to
read the AT&T UNIX PC Owner's Manual and learn how to use
the install login and the Administration menu to' set up
your communications ports and printers. This information
is found under "Setting Up the UNIX PC" in the Managing
the UNIX PC section of the Owner's Manual.
The Owner's Manual also contains information on how to
install application software. This information is found
under "Updating the UNIX PC" in the Managing the UNIX PC
section of the Owner's Manual.
If you are looking for information on using your
application software, see the application guides that
come with each software package.
40
updating system Software and Saving Files
This chapter shows you how to install a new version of
system software and save the user files you have created.
When you update your UNIX PC to Version 3.51, you must
also update your Telephone Manager and your Asynchronous
Terminal Emulator (ATE). See the AT&T UNIX PC Telephone
Manager User's Guide and the AT&T UNIX PC Terminal
Emulation User's Guide for installation procedures.
Please follow the steps very carefully to ensure a proper
installation.
Before You Begin
Although you can save existing user files when installing
a new version of system software, it is recommended that
you do the following before updating your system
software:
1
Save your telephone directories by using the
Save Directory command in the Call Screen
Telephone Commands menu.
2
Remove any of the following software that you
currently have installed:
Version 2.0, 3.0 or 3.5 Development set
EIA/RAM Combo board software
IPC Fix
Custom Kernel
DOS-73 SYSTEM VER. 1.0
IRMA
3278 - Ver. 1.0 August 5, 1986
STARLAN NETWORK PROGRAM - Version 1.0
STARLAN NETWORK PROGRAM - Version 1.1
TAPE BACKUP 1.0
VOICE POWER: System Software REL 1.0
WIN
/3B-LAN interface Version 1.0
WIN
/3B-LAN interface Version 1.1
3270 Emulator + Version 1.0
All languages (upgrades from Version 2.0 and
3.0 only) You do not need to remove languages
when upgrading from Version 3.5.
41
Updatinq system Software and savinq Files
Removal
of
these
packages
substantially
decreases the number of floppy disks or tape
cartridges you will need to back up the system.
In addition, all 3.0 and 3.5 applications with
loadable device drivers should also be removed
and reinstalled after the upgrade to 3.51.
These packages can be identified by logging in
as
install,
selecting
IAdministration I ,
selecting ISoftware Setup I and then selecting
either IConfigure Loadable Device Drivers I or
ISet Up Loadable Device Drivers I , depending on
your system software version.
3
After removing the software listed above, do a
complete backup.
For an extra margin of
safety, back up each user using the Backup One
User option.
Refer to the Manaqinq the UNIX
PC section of the AT&T UNIX PC Owner's Manual
or the Tape Backup User's Guide for backup
procedures.
The system Software Disks
The System Software floppy disks are located in the back
of the System Software binder.
You should have the
following System Software floppy disks on hand:
System
System
System
System
System
System
System
System
System
System
System
System
42
Software
Software
Software
Software
Software
Software
Software
Software
Software
Software
Software
Software
-
Diagnostics Disk
Boot Set (Floppy Boot Disk)
Boot Set (Floppy File System)
Boot Set (Hard Disk Boot)
Foundation Set (Disk 1)
Foundation Set (Disk 2)
Foundation Set (Disk 3)
Foundation Set (Disk 4)
Foundation Set (Disk 5)
Foundation Set (Disk 6)
Foundation Set (Disk 7)
Foundation Set (Disk 8)
1
2
3
4
5
6
7
8
9
10
11
12
of
of
of
of
of
of
of
of
of
of
of
of
12
12
12
12
12
12
12
12
12
12
12
12
Updating system Software and saving Files
The other floppy disks included with your UNIX PC are:
Telephone Manager
Asynchronous Terminal Emulation
EIA/RAM Combo Board Expansion
Communications Patch Version 3.51
-
Disk
Disk
Disk
Disk
1
1
1
1
of
of
of
of
1
1
1
1
(Telephone Manager, Terminal Emulation, Combo Board
Expansion and Communications Patch diskettes are packaged
in the Communications Management binder.)
Curses/Terminfo End User Package
Terminfo Database
Encryption Set (USA only)
Encryption Set (USA only)
GSS Drivers
GSS Drivers
-
Disk
Disk
Disk
Disk
Disk
Disk
1 of 1
1 of 1
1 of 2
2 of 2
1 of 2
2 of 2
Updating Software and Saving Files
You can update your system software and save any user
files that already exist on your hard disk at the same
time.
If you are installing a new version of system
software on a UNIX PC that you have been using, this is
the update procedure you should follow.
To update system software while saving existing files:
1
Insert the Boot Set (Floppy Boot Disk) Disk 2
of 12 into the floppy disk drive.
2
Turn the floppy drive lever down and to the
left to close the floppy drive.
43
Updating system Software and saving Files
3
:::===:::::
Press the reset button on the rear of the UNIX
PC, as shown in the following illustration:
~....-------,-~
.....
.....
..... ...--.---,
r====>
~-~~-~
.....
.....
~-
...--~
~-
...--~
.-------.
.....
.-----..---.
.....
.....
~-
~----,.
...-...--~
~~
~~~
~~
~
~~~~~~
~~
~
~..-
~
~=-==:.J
Reset Button
The system is reset. The copyright and version
number screen is briefly displayed, followed
by a display of installed memory.
After a few moments,
message:
you see the
following
Floppy Unix
Please insert Floppy File System disk - disk 3 of 12
Press any key when ready
44
Updating system Software and Saving Files
4
Remove the Boot Set (Floppy Boot Disk) Disk 2
of 12 from the floppy drive.
S
Insert the Boot Set (Floppy File System) Disk
3 of 12 into the floppy drive and close the
floppy drive.
6
Press the <Return> key on your keyboard.
The working indicator appears on the screen and
the floppy disk light turns on.
You see the message:
If you have been running an older version of software and want to
retain your user files an installed programs, you will need
to follow the UPGRADE procedure. otherwise, all data on your
UNIX PC will be replaced by the Version 3.51 Foundation Set.
Do you want to preserve any user files or installed software
already on this hard disk (yes or no)?
7
Type y and press <Return>.
45
Updating system Software and Saving Files
You see the message:
WARNING:
Consult your Installation Guide before you upgrade your
UNIX PC to Version 3.51. You MUST follow the
recommended procedures for backing your data and
applications software.
NOTE:
If you have any of these software sets installed on
your UNIX PC, they will be removed by the upgrade procedure:
UNIX utilities Development Set
RS-232 Expansion Board
You will need to replace this software with the Version 3.51 software.
Consult your Installation Guide for further information.
Do you want to continue loading the version 3.51 software?
This message is meant simply as a precaution.
In general, it is always recommended that you
back up your user files before upgrading your
system.
If you want to reboot your system and perform
a system backup, type n, then press <Return>.
46
updating system Software and Saving Files
If you want to continue with the upgrade:
8
Type y and press <Return>.
The system checks to be sure there is
sufficient space on the hard disk.
Then you
see the message:
There is sUfficient space on the system to install 3.51
.... installation will proceed.
If you do not have enough space on the hard disk, you
see the following message:
Unfortunately there is insufficient space on your system
to perform the upgrade to version 3.51 while saving user
files.
2000 free blocks are required for this conversion.
The state of the system remains unchanged and will be
rebooted now. When the system comes up, please remove
some files and try again.
Please wait ........ .
No changes are made to your existing files, and the update
procedure is canceled.
47
Updating system Software and Saving Files
If you see this message , wait until the system has
rebooted automatically, then remove some files from the
hard disk before updating.
After removing some files,
restart the procedure from the beginning of this chapter
at step 1. If you have the 2.0, 3.0 or 3.5 Development
Set or EIA/RAM Combo Board software installed, you can
remove them to secure additional disk space.
If you do have sufficient space:
You see the following message:
The installation procedure will now save special system files
which may require modification as a result of the upgrade to
Version 3.51 ... please wait
You see a list of messages informing you of the
files being saved on your hard disk.
After
about two minutes (depending upon the number
of files that are saved), you see the following
message:
You will be asked to insert the Hard Disk Boot floppy disk momentarily.
Please insert the floppy labeled Hard Disk Boot now.
Press <Return> when ready.
48
Updating system Software and saving Files
9
Remove the Boot Set (Floppy File System) disk
from the floppy disk drive.
10
Insert the Boot Set (Hard Disk Boot) Disk 4 of
12 into the floppy drive and close the drive.
11
Press <Return>.
The screen clears.
The Copyright screen
appears momentarily while the floppy disk is
searched.
You see the following message:
The telephone manager, terminal emulator, development set, and
encryption software are now separately installable. The old versions
of the above software will now be removed.
If you use any of the
above software, you will need to install it after you have completed
installing this foundation set.
This message simply informs you that some of
the software that used to be part of the
Foundation
Set
must
now
be
installed
separately.
49
Updating system, S,oftware and saving Files
After a few moments, you see the message:
Please insert the floppy disk labelled:
System Software - Foundation Set (1) - 5 of 12
Touch <Return> to continue when ready
This message informs you to begin installing
the Foundation Set software. Go on to the next
section, Installing the Foundation Set.
Installing the Foundation Set
To install the Foundation Set:
50
1
Remove the Boot Set (Hard Disk Boot) Disk 4 of
12 from the floppy disk drive.
2
Insert the Foundation Set (Disk 1) Disk 5 of
12 into the floppy drive and close the floppy
drive.
3
Press <Return>.
Updating system Software and Saving Files
You see the Reading in progress message. The
working indicator and the disk drive light are
on. The system takes about one minute to copy
the information from the floppy disk, and then
displays the message:
It is safe to remove the floppy diskette.
To EXIT - press <E> followed by <RETURN>.
To continue - insert floppy disk #2 and press the
<RETURN> key.
4
Remove the Foundation set (Disk 1) Disk 5 of
12 from the floppy drive.
5
Insert the Foundation set (Disk 2) Disk 6 of
12 into the floppy drive and close the floppy
drive.
6
Press <Return>.
You see the Reading in progress message.
After the system is finished with Foundation
Set (Disk 2), you see the fOllowing"message:
It is safe to remove the floppy diskette.
To EXIT - press <E> followed by <RETURN>.
To cofitinue - insert floppy disk #3 and press the
<RETURN> key.
51
Updating System Software and saving Files
7
Remove the disk and insert the next disk of the
Foundation Set.
Follow this procedure for the remainder of the
disks in the Foundation Set.
Make sure you
insert the disks in the proper numerical order.
If you make a mistake, you will be given an
opportunity to insert the proper floppy disk.
If you make an unrecoverable mistake, you must
recreate
your
original
environment
(by
reinstalling 2.0, 3.0 or 3.5) and start over
at the beginning of "Updating Software and
saving Files" in this section.
After the Foundation Set is installed, the system
converts a variety of existing files, and displays
messages similar to the following:
System files will be converted - please wait •••
If there are any system files that were unexpectedlY
modified, they are stored in the directory /U/SAVE. If
you are not familiar with UNIX commands, you do not need
to be concerned with these files.
52
Updating system Software and saving Files
When the system is done with the conversion, it displays
the copyright screen again and follows that with a search
of the hard disk. Upon completion, the total memory is
displayed briefly, followed by three messages:
E!l . '
. ' . ~- . '.' - ... .,..
Meleo.e to the AliT unIX pe
Stored files are being checked.
Please stand bv •••
Loading drivers
Please stand bv •••
The screen Mill nON be set up.
Please stand bv •••
53
Updating System software and saving Files
Note
After you see the copyright screen, you may
see a system panic message followed by a prompt
to press the reset button. This may be due to
failure to remove all applications that have
loadable device drivers, and should not cause
alarm. No damage has occurred.
If you see this message, press the reset button
and continue with the instructions.
Several
resets may be necessary to clear the problem.
After a few moments, you see the following login display:
Welcome to the AT&T UNIX pc
Please login:
The system software update procedure is complete. Remove
the last Foundation Set disk, and log in to the system
with your user login ide
For a complete update to 3.51, you must also update your
Telephone
Manager
and your Asynchronous Terminal
Emulator.
For installation procedures, refer to your
Telephone Manager User's Guide and your Terminal
Emulation User's Guide.
54
Updating system Software and saving Files
You must also replace any software that was removed for
the upgrade procedure.
This includes Development Set,
EIA/RAM Combo board software, STARLAN Network software,
Voice Power software, and so on.
Versions compatible
with 3.51 are required for the Development Set, STARLAN
Network, EIA/RAM Combo Board, and Voice Power software.
The DOS-73 system should be reloaded. For installation
instructions, refer to the corresponding user's manual
for each package or see the Updating the UNIX PC section
in your AT&T UNIX PC Owner's Manual.
Installing the Enoryption Disks (U.S. Only)
If your UNIX PC was purchased in the U. S., the Encryption
disks are included. If you do not plan to install the
Development Set and/or the Enhanced Editors (part of the
optional UNIX PC UNIX utilities package), the Encryption
disks can be installed now.
If you do plan to install
the Development Set and/or the Enhanced Editors, you need
to do so before you install Encryption.
Follow the
installation procedures outlined below.
If the
Encryption disks were not included, disregard this
section.
To install the Encryption disks:
1
At the Please login: prompt, type install.
2
Press <Enter>.
3
Select IAdministration I
press <Enter>.
4
Select ISoftware Setup I and press <Enter>.
from the Office and
55
Updating system software and saving Files
The Software menu appears as shown below.
0t;t1nlW\t1i4f6i4f1i4.' lltifttM
r
Install Software sent by Electronic Hail
Remove Installed Software
Set Up Font
Set Up Loadable Device Drivers
Show Installed Software
S
Select I Install Software from Floppy I and press
<Enter>.
A message prompting you to install the first
floppy disk appears.
6
Insert the Encryption disk labeled Disk 1 of
2 and press <Enter>.
Several messages appear briefly, followed by
the message Cheoking for size file.
The message Install in progress appears.
After a moment, you see the following message:
It is safe to remove the floppy diskette~
To EXIT - press <E> followed by <RETURN>.
To continue - insert floppy disk #2 and press the
<RETURN> key.
S6
Updating system Software and Saving Files
7
Insert the Encryption disk labeled Disk 2 of
2 and press <Return>.
After a moment, you see the message:
Installing the Crypt Replacement Software.
A window appears telling you that installation
is complete.
8
Eemove the floppy disk and replace it in its
envelope.
9
Press <Enter>.
10
Close the installation windows and log out of
the Office.
This completes the Encryption software installation.
57
58
Installing the AT&T UNIX PC curses/Terminfo Package
version 3.51 of the System Software for the UNIX PC
provides enhanced terminal support using the AT&T UNIX
PC Curses/Terminfo End User package. This package allows
you to run application programs that are compiled with a
version of curses that uses the terminfo database. You
need to install this package only if you run an
application that requires it.
Your application will
inform you if terminfo is required.
Installing Curses/Terminfo
This package consists of one installable disk containing
a core set of terminals and one noninstallable mountable
disk containing a database of 1,260 terminals.
If your terminal appears on the list of terminals in the
Core Terminals List at the end of these procedures, you
need to install only the disk labeled curses/Terminfo
End User Package. If your terminal is not on the list,
you still need to install the curses/Terminfo End User
disk, and you will need to use the disk labeled Terminfo
Database.
Installing the curses/Terminfo End User Disk
The cursesjTerminfo End User disk is installed using the
standard Software Setup entry from the Administration
menu.
To install the disk:
1
From
the
Office
of
install,
IAdministration I and press <Enter>.
select
You see the Administration menu.
2
Select ISoftware Setup I and press <Enter>.
You see the Software Setup menu.
59
Installing the AT&T UNIX PC Curses/Terminfo Package
3
Select I Install Software from Floppy I and press
<Enter>.
You see a window asking you to insert the floppy
disk.
4
Insert the disk and press <Enter>.
You see the Checking for Size file message,
then the message Install in progress.
5
You are notified when to remove the floppy disk
and when the installation is complete ..
6
When the installation is complete, close the
Software windows.
Using the Terminfo Database Disk
If your terminal is not part of the core set on the
Curses/Terminfo End User disk, you need to use the
Terminfo Database disk to select a terminal (s). You must
first install the Curses/Terminfo End User disk before
you can use this disk.
To select terminal(s) from the Terminfo Database disk:
1
Open I Administration I •
You see the Administration menu.
2
Select I Update Terminfo Database I
<Enter>.
and press
You see a Confirm message asking you to insert
the Terminfo Database disk.
3
Insert the disk and press <Enter>.
You see the Add Terminals to Terminfo Database
window
containing
a
list
of
terminal
manufacturers.
60
Installing the AT&T UNIX PC curses/Terminfo Package
4
Select the
<Enter>.
desired
manufacturer
and
press
You see the message Entries being gathered from
diskette
After a minute or so, you see a list of the
terminals
supported
by
the
selected
manufacturer.
5
Select the desired terminal and press <Enter>.
Note
Use the <Slect/Mark> key to select more than
one terminal.
You see a message that the entries are being installed.
Once the entries have been installed, you are returned
to the Administration menu. Remove the floppy disk and
return it to its sleeve for safekeeping.
You can use
this disk to install more terminals at a later time, if
needed.
This completes the instructions for installing the AT&T
UNIX PC Curses/Terminfo End User package.
61
Installing the AT&T UNIX PC curses/Terminfo Paokage
Core Terminals List
1620
2621
2645
2626p
2626P
31
4012
4424-2
4410
4112-nd
1640
2621a
2648a
2640b
2640
36
4015
4426
4424
4115
510
54202
510a
5425
610
7300
610bct
925
ATT441 0
ATTS418
ATT4424
PC6300PLU5
54
adm3
att4426
attp1505
att4424-2
950
ATT4424-2
ATT5620
ATT513
PC7300
ATT541 0
ATTPT510A
ATT54202
aU44lO
aUS418
adm3a
aUSl3
clOO
concept
decwriter
dwl
[viewpoint
hp2621
hp2624b-4p
hp45
hp2626p
intext
2624-4p
2622
2621A
2648A
2626
2623a
2622a
2626a
2624a
2624
26403
2626A
2624b
4027cu
4023
450
4424-1
513bct
4113
4025cu
4014
4425
5410
42
4112
4024
4418
4114
4027
5418
5420
ATTS425
ATT4418
ATTPT505
ATTPT510
ATT4426
ATT4415
ATT5420
ATT4425
ATT610BCT
au4425
att610bct
att4424
aUS425
at15410
adm36
aUSlOa
attptSl0a
aUS620
att4418
aUS420_2
adm31
at1510
attptSlO
att4415
at15420
adm42
cl04
conceptlO8
dmd
dw3
c108-8p
conceptlOO
concepti 08-8p
clOO-4p
clO8
dw
dw2
dw4
diablo
dumb
hp2622a
hp2640a
hp2621a
hp2645
bp2624b
bp2648a
hp2624
hp262x
bp2621A
hp2626a
bp2648
hp2623a
hp2644a
bp2621-wl
hp2626
hp2622
hp2623
hp2640b
hp2624a
intext2
Ip
intextii
Ipr
pe550
p1505
regent200
print
p15IOa
regent40
printing
p1510
pc7300
pe6100
regent20
regent25
regent60
tek4023
ttyS410
tek4014
tty5620
unixpc
vt100
teletec
tvi925
tek4m7
tty4426
tek4013
tty4424
ttydmd
tek4025
tty5425
tek4012
tex
tek4015
vt100-am
vt52
2623
2621-wl
2648
2644a
3a
4025
4013
4424-3
4415
513
5620
6300PLU5
6300plus
bantam
lal20
pc6300plus
printer
regentiOO
84
tek
televide0950
tvi950
tty4424-2
unix pc
viewpoint
62
tek4024
tty5420
tek4112