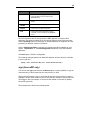
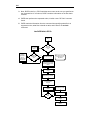
1
Command Line Users Manual PKZIP® Command Line SecureZIP® Command Line Copyright © 1997-2010 PKWARE, Inc. All Rights Reserved. No part of this publication may be reproduced, transmitted, transcribed, stored in a retrieval system, or translated into any other language in whole or in part, in any form or by any means, whether it be electronic, mechanical, magnetic, optical, manual or otherwise, without prior written consent of PKWARE, Inc. PKWARE, INC., DISCLAIMS ALL WARRANTIES AS TO THIS SOFTWARE, WHETHER EXPRESS OR IMPLIED, INCLUDING WITHOUT LIMITATION ANY IMPLIED WARRANTIES OF MERCHANTABILITY, FITNESS FOR A PARTICULAR PURPOSE, FUNCTIONALITY, DATA INTEGRITY, OR PROTECTION. PKWARE IS NOT LIABLE FOR INCIDENTAL OR CONSEQUENTIAL DAMAGES. PKWARE, the PKWARE logo, the zipper logo, PKZIP, PKUNZIP, PKSFX, and SecureZIP are registered trademarks of PKWARE, Inc. Trademarks of other companies mentioned in this documentation appear for identification purposes only and are the property of their respective companies. 2010-04-28 iii Table of Contents 1 WELCOME .................................................................................................... 1 Introduction ................................................................................................................. 1 About This Manual ..................................................................................................... 1 Your Work Environment: The Command Line......................................................... 2 Entering Commands .................................................................................................. 2 Setting PKZIP in the Path .......................................................................................... 3 Strong Encryption ...................................................................................................... 4 Digital Signatures ....................................................................................................... 4 Special Compatibility Options (Win32) .................................................................... 5 Using Help ................................................................................................................... 6 Getting License Information ...................................................................................... 6 Getting Version Information ...................................................................................... 7 Technical Support ...................................................................................................... 8 2 THE BASICS ................................................................................................. 9 An Overview of What PKZIP Does ............................................................................ 9 Supported Archive Types ........................................................................................ 10 Entering Commands: Syntax .................................................................................. 11 Adding Files to an Archive ...................................................................................... 12 Archive File Naming Conventions ........................................................................... 13 Adding a Single File ................................................................................................ 14 Adding Multiple Files ............................................................................................... 14 Moving Files into an Archive ................................................................................... 16 Viewing Files in an Archive ..................................................................................... 16 Extracting Files from an Archive ............................................................................ 17 Extracting All Files .................................................................................................. 17 Extracting Some Files ............................................................................................. 17 Extracting Files to a Different Directory .................................................................. 17 Extracting New and Newer Files ............................................................................. 18 Using Filters When Selecting Files ......................................................................... 18 iv Selecting Files by Date ........................................................................................... 18 Selecting Files by Age ............................................................................................ 19 Selecting Files by Size ............................................................................................ 19 Selecting Files to Include or Exclude ...................................................................... 20 Understanding Commands and Options ............................................................... 21 Difference between a Command and Option.......................................................... 21 Including an Option in Your Command Line ........................................................... 22 Abbreviating Commands and Options .................................................................... 22 Using Multiple Options ............................................................................................ 22 Commands and Options That Have Values ........................................................... 23 Conventions in This Guide ...................................................................................... 23 3 ADDING FILES TO AN ARCHIVE .............................................................. 25 Default Values for Commands and Options .......................................................... 25 Creating and Updating Archives ............................................................................. 25 Adding All Files in a Directory ................................................................................. 25 Adding New and Modified Files .............................................................................. 26 Adding Only Files That Have Changed .................................................................. 26 Clearing Archive Attributes ..................................................................................... 27 Incremental Archiving ............................................................................................. 27 Writing an Archive to STDOUT and Special Files ................................................. 28 Writing an Archive to STDOUT ............................................................................... 28 Writing an Archive to a Named Pipe ....................................................................... 29 Encrypting Files That You Add to an Archive ....................................................... 30 Encrypting Files with a Passphrase ........................................................................ 31 Encrypting Files with a Recipient List (SecureZIP only) ......................................... 33 Encrypting File Names ............................................................................................ 35 Encrypting Using Only FIPS-Approved Algorithms ................................................ 37 Accessing Recipients in an LDAP Directory ........................................................... 39 Contingency Keys ................................................................................................... 41 Working with Digital Signatures (SecureZIP only) ................................................ 42 Compressing Files in Subdirectories ..................................................................... 47 Compressing Open Files ......................................................................................... 47 Storing Directory Path Information ........................................................................ 48 Additional Methods for Storing Directory Path Information ..................................... 48 Storing and Recreating Directory Path Information ................................................ 49 Setting the Compression Level ............................................................................... 51 Specifying a Compression Level from 0-9 .............................................................. 51 Specifying a Compression Level by Name ............................................................. 52 Compressing Files with a List File ......................................................................... 53 Getting a List of Files from Standard Input ............................................................. 54 Compressing Files with the Deflate64 Method ...................................................... 54 v Compressing Files with the BZIP2 Method............................................................ 55 Compressing Files with the LZMA Method ............................................................ 55 Compressing Files Compatible with the Data Compression Library .................. 56 Compressing Files with the PPMd Method ............................................................ 56 Compressing Files to a Specified Type of Archive ............................................... 56 Compressing Files to Diskette ................................................................................ 57 Creating a Spanned Archive ................................................................................... 57 Creating a Split Archive .......................................................................................... 58 Preserving International Characters in File Names .............................................. 59 Creating Multiple, Respective Archives ................................................................. 59 Storing File Information ........................................................................................... 60 Compressing Files with Specified Attributes........................................................... 60 Extended Attribute Storage ..................................................................................... 62 Including Additional Information in a ZIP File ....................................................... 63 Including a Text Comment ...................................................................................... 63 Including a Header Comment ................................................................................. 64 Specifying the Date of a .ZIP File ........................................................................... 64 Removing File Attributes ......................................................................................... 65 Sorting Files Within a .ZIP File ................................................................................ 66 Moving Files to a .ZIP File........................................................................................ 67 Shredding Deleted Files ........................................................................................... 68 Working with Self-Extracting (PKSFX) Archives ................................................... 69 Converting a Standard Archive to a Self-Extractor ................................................. 70 Converting to a Self-Extractor with a Different Name ............................................. 70 Options for Creating Self-Extractors ....................................................................... 70 Run Programs with the Self-Extractor .................................................................... 72 Extraction Options for the Native Self-Extractor ..................................................... 73 4 EXTRACTING FILES .................................................................................. 74 Default Values for Commands and Options .......................................................... 74 Extracting New and Existing Files .......................................................................... 74 Extracting All Files from an Archive ........................................................................ 75 Extracting Newer Versions of Existing Files and New Files ................................... 75 Extracting Only Newer Versions of Files ................................................................ 75 Extracting from an Archive Embedded in An Archive .......................................... 76 Extracting an Archive on STDIN or a Special File ................................................. 76 vi Extracting from an Archive on STDIN ..................................................................... 77 Extracting an Archive from a Named Pipe .............................................................. 77 Extracting to Dynamically Named Folders ............................................................ 78 Checking for Viruses when Extracting ................................................................... 80 Extracting Files in Lower Case ............................................................................... 81 Preserving File Times .............................................................................................. 82 Retaining Directory Structure while Extracting..................................................... 82 Sorting Files in the Extract Directory ..................................................................... 82 Extracting Files Only for Display ............................................................................ 83 Extracting Files with a List File ............................................................................... 83 Authenticating Digital Signatures ........................................................................... 83 Extracting Only Trusted Archives .......................................................................... 85 Specifying Trusted Signers ..................................................................................... 85 5 MISCELLANEOUS OPERATIONS ............................................................. 88 Overwriting Files ...................................................................................................... 88 Viewing the Contents of a .ZIP File ......................................................................... 89 Displaying a Brief View of a .ZIP File ...................................................................... 89 Displaying a Detailed View of the .ZIP File ............................................................. 89 Translating End-of-Line Sequence ......................................................................... 90 Converting File Names to a Short Format ............................................................. 91 Inserting a Timestamp in the Archive File Name .................................................. 91 Printing the Contents of a .ZIP File ......................................................................... 93 Testing the Integrity of an Archive ......................................................................... 93 Apply Strict Checking to Certificates ..................................................................... 94 Checking for Revoked Certificates ......................................................................... 94 Obtaining a CRL ..................................................................................................... 95 Pausing on Warnings ............................................................................................... 96 Treating Warnings as Errors ................................................................................... 97 Previewing Command and Option Operations ...................................................... 97 Fixing a Corrupt .ZIP File ......................................................................................... 98 vii Use an Alternate Drive for PKZIP Temporary Files ............................................... 99 Suppressing Screen Output .................................................................................... 99 Setting Internal Attributes ..................................................................................... 100 Encoding an Archive to Another Type ................................................................. 100 Removing an Intermediate Archive ...................................................................... 101 Generate a List File ................................................................................................ 101 6 CHANGING DEFAULTS FOR COMMANDS AND OPTIONS ................... 103 Viewing Configuration Settings ............................................................................ 103 How Default Settings Work.................................................................................... 104 Filter Options .......................................................................................................... 105 Changing a Default Value ...................................................................................... 106 Changing Defaults for Filter Options ..................................................................... 106 Changing Defaults for Compression Method ........................................................ 107 Using the Options Dialog to Change Defaults ...................................................... 108 Resetting to Original Defaults ............................................................................... 108 Resetting Individual Defaults ................................................................................ 109 Resetting All Defaults ............................................................................................ 109 Using an Alternate Configuration File .................................................................. 109 Creating an Alternate Configuration File............................................................... 109 Using an Alternate Configuration File ................................................................... 110 7 COMMAND CHARACTERISTICS ............................................................. 111 Changing Date and Time Environment Variables ............................................... 111 Changing the List Character for List Files ........................................................... 112 Changing the Command/Option Character ......................................................... 112 A REFERENCE TO COMMANDS AND OPTIONS ....................................... 114 B ERROR AND WARNING MESSAGES ...................................................... 163 Error Messages ....................................................................................................... 163 Warning Messages ................................................................................................. 169 C FREQUENTLY ASKED QUESTIONS ....................................................... 175 viii D HOW PKZIP WORKS................................................................................ 179 Two Processes ....................................................................................................... 179 Compression ........................................................................................................... 179 Information Content .............................................................................................. 179 Binary Data Representation .................................................................................. 180 Speed vs. Size ...................................................................................................... 183 Archiving ................................................................................................................. 183 How PKZIP builds a .ZIP File ................................................................................. 183 CRC ...................................................................................................................... 185 Deleting Files from a .ZIP File ............................................................................... 186 Adding to an Existing .ZIP File .............................................................................. 186 INDEX ............................................................................................................. 187 1 1 Welcome Introduction Welcome to PKZIP Command Line and SecureZIP for Windows Command Line. PKZIP Command Line and SecureZIP for Windows Command Line provide a command-line interface to PKZIP/SecureZIP for use in creating scripts and batch files. With Command Line, you execute PKZIP/SecureZIP commands and options by entering them at a character-based command prompt and running the resulting command line. Command Line supports the full range of compression and archiving features of the graphical PKZIP for Windows Desktop and SecureZIP for Windows Desktop. SecureZIP Command Line also supports both traditional ZIP encryption and strong encryption using digital certificates. Both PKZIP and SecureZIP Command Line decrypt files encrypted with any other version of SecureZIP or PKZIP and authenticates digital signatures attached to archives and archived files. About This Manual This manual describes how to use both PKZIP and SecureZIP Command Line. SecureZIP Command Line contains a superset of the commands and options of PKZIP Command Line. In general, references to PKZIP in the text should be taken to apply equally to SecureZIP. If a feature has special requirements or comes only with special licensing, this is noted in the text. The chapters group related commands and options and describe how to use them. Chapter 2 provides an overview of program features and includes brief tutorials. See in particular the section “Understanding Commands and Options” for an explanation of how commands and options work. You can customize the default behavior of most commands and options. Chapter 6 describes how. Appendix A contains a complete reference to the commands and options of the program. Experienced users may find much of the information they need in this appendix. 2 Your Work Environment: The Command Line In Command Line, your work area is a character-based command line. You enter a command by typing the command on the command line; to execute the command, you press Enter. To display a command line prompt in Windows, do one of the following: • Choose Command Prompt from the list of programs in the Start menu • Choose Run… from the Start menu, enter cmd in the field, and choose OK. Entering Commands The syntax for commands entered on the command line is shown below. Brackets set off elements that are optional (Do not type the brackets.). Note that both PKZIP and SecureZIP Command Line use the same program name, pkzipc, as shown below. pkzipc [command] [options] zipfile [@list] [files...] Examples: To do this Command line Add specified files to an archive pkzipc –add zipfile.zip addfile.txt addfile2.doc Add to an archive all files in current directory pkzipc –add zipfile.zip or: pkzipc –add zipfile.zip * Add to an archive all files in a specified directory pkzipc –add zipfile.zip subdir\* Add files with the fast compression option pkzipc –add –fast zipfile.zip View list of files in archive pkzipc zipfile.zip View list of files whose names begin with "f" in archive pkzipc zipfile.zip f* Extract all files from an archive pkzipc –extract zipfile.zip Extract specified files from an archive pkzipc –extract zipfile.zip readme.txt mystuff.doc 3 Setting PKZIP in the Path The installation puts PKZIP on your system's search path so that you can access the program from any directory without specifying a path. However, if for any reason you need to specify the path yourself, you can. To add the PKZIP installation directory to your search path in Windows 2000 or Windows XP, follow the steps below. 1. Close any open Command Prompt windows. 2. Go to “My Computer” on your desktop and right-click the My Computer icon. Select Properties OR Select Settings | Control Panel from the Start Menu. In the Control Panel, double click the System icon. The System (Properties) dialog appears. 3. Click the Advanced tab and then click the Environmental Variables button. 4. Select the PATH variable in the System (Environment) Variables or User (Environment) Variables boxes. If you are unable to locate the PATH variable, enter the following in the Variable box: path 5. In the Value box, enter (in quotes) the path to the folder where SecureZIP Command Line is installed. (The quotes are necessary because the path contains a space.) For example, assuming that SecureZIP Command Line (pkzipc.exe) is installed in the default location, enter: "c:\program files\PKWARE\pkzipc" If necessary to separate the path from another path designation, precede your path with a semicolon. 6. Click the OK button to return to the Environment Variables screen. 7. Click the OK button. You may now access SecureZIP Command Line from any directory without specifying a path. This change will take effect the next time you open a Command Prompt Window to run SecureZIP Command Line. If necessary, consult your systems administrator for further information on setting the path environment variable. 4 Strong Encryption PKZIP enables you to use either of two kinds of encryption to encrypt files: the older, traditional PKZIP encryption, or strong encryption. Strong encryption is much more secure than traditional PKZIP encryption. Traditional PKZIP encryption is password-based and uses the password option. Strong encryption can use either a passphrase or a certificate-based list of recipients. To do passphrase-based strong encryption, you use the passphrase and cryptalgorithm options. To do certificate-based strong encryption, you use the recipient option. You must also have a digital certificate to use certificate-based strong encryption. Note: Only SecureZIP supports digital certificates, and certificate-based recipient lists. You can still use passphrase-based strong encryption with PKZIP. People who receive archives strongly encrypted using PKZIP Command Line can decrypt them using PKZIP for any platform (version 6 or later) or a copy of the free ZIP Reader by PKWARE. Digital Signatures With SecureZIP, you can attach a digital signature to files in an archive, or to an archive itself. A digital signature assures people who receive the signed file that it is really from the person who signed it and has not been changed. SecureZIP allows you to digitally sign either individual files in an archive or the central directory of the archive, or both. The central directory contains a list of files in the archive. Signing the central directory enables a recipient to confirm that the archive as a whole has not changed. SecureZIP authenticates any digital signatures on extraction. SecureZIP signing functionality is based on the X.509 certificate standard and is compatible with standard authenticity functionality in other applications such as Microsoft Internet Explorer. SecureZIP currently supports Level (or Class) One certificates (otherwise known as “email” or “personal” certificates). These certificates must be in 1024-bit (minimum) RSA format and must contain a private key. To use SecureZIP to sign files, you must have a digital certificate. Digital certificates are available from a variety of certificate authorities. Visit the PKWARE Web site for information on obtaining a certificate: http://www.pkware.com 5 Special Compatibility Options (Win32) cryptoptions The default settings of the two sub-options of cryptoptions enable PKZIP to support certificate-based encryption compatible with most smart cards. On Windows, PKZIP can access certificates stored on smart cards to decrypt strongly encrypted files if the smart cards work with Windows’ facilities for managing digital certificates. Support for using smart card and token certificates is available only on Windows, not on Unix or Linux. The two cryptoptions sub-options are both on by default. They can be turned off to provide compatible certificate-based encryption for two special cases: • smartcard sub-option: Turn off to support certificate-based encryption for recipients using versions of PKZIP prior to 6.1 • win2000 sub-option: Turn off to provide pure Advanced Encryption Standard (AES) certificate-based encryption The smartcard sub-option enables smart cards to decrypt files encrypted for a recipient list. However, if the smartcard sub-option is set, versions of PKZIP prior to 6.1 cannot decrypt files encrypted for a recipient list. To enable users of these earlier versions of PKZIP to decrypt such files, turn off the smartcard sub-option. Note, though, that files encrypted with this sub-option off cannot be decrypted by smart cards. The sub-option affects only recipient-list encryption (that is, encryption using the recipient option). All versions of PKZIP can decrypt passphrase-encrypted files regardless of how the smartcard sub-option is set. The win2000 sub-option enables recipients using smart cards or running on Windows NT or Windows 2000 to extract files encrypted with AES for a recipient list. By default when using a certificate to encrypt data with AES, PKZIP uses the 3DES encryption algorithm to protect the key. This is necessary to enable recipients using smart cards or running on Windows NT or Windows 2000 to decrypt the files. Turn off the win2000 sub-option if you want to avoid any use of the 3DES encryption algorithm when doing AES encryption. Turning off the option causes PKZIP to use only AES, but recipients using smart cards or running on Windows NT or Windows 2000 will likely be unable to extract files encrypted for a recipient list with AES. Like the smartcard sub-option, the win2000 sub-option affects only recipient-list encryption (that is, encryption using the recipient option). Users of Windows NT or Windows 2000 can decrypt files encrypted using AES with a passphrase even with the sub-option off. (Smart cards do not support passphrase-based encryption.) The two sub-options are set independently of one another. You can turn one off and leave the other on. 6 For example, the configuration display of initial defaults shows both sub-options turned on (see “Viewing Configuration Settings” in Chapter 6): CryptOptions = Smartcard, Win2000 To configure one of the sub-options off, prefix it with a hyphen: pkzipc - config - cryptoptions= - smartcard or, to configure both off: pkzipc - config - cryptoptions= - smartcard,- win2000 Either option can also be turned off just for the current command line, to override a configured default setting: pkzipc - add - cryptoptions= - smartcard - recipient= "John Q. Public" test.zip To turn one of the sub-options on, omit the hyphen prefix. For example, the following command line configures both sub-options on: pkzipc - config - cryptoptions= smartcard,win2000 Using Help Besides the manual you are now reading, PKZIP provides a help system for the PKZIP commands and options. The help system describes syntax and shows sample command lines. Access the help system directly from the command line: • At the command prompt, type the following and press ENTER: pkzipc - help A screen with PKZIP version and usage information appears. You can get help for any PKZIP command or option from here. • To bypass the command/option menu and go directly to a help file for a particular command or option, type the help command followed by an equal sign (=) and the command or option for which you want information. For example, to access online help for the add command, type the following at the command prompt and press ENTER: pkzipc - help= add The help information for the add command appears. Getting License Information To display the PKZIP license information on your screen, do the following: 7 At the command prompt, type the following and press ENTER: pkzipc - license If you have the registered version of PKZIP, the screen displays licensing information. Ordinarily, you enter license keys during installation. If you need to enter a license key after installation—for an add-on module, for example—use the enterlicensekey command. To enter a license key: 1. At the command prompt, type the following and press ENTER: pkzipc - enterlicensekey PKZIP prompts you for a product license key. 2. Enter a product license key and press ENTER. Repeat these steps for each license key. Getting Version Information version To list the version of PKZIP that you are using, use the version command: pkzipc - version This command outputs two lines like the following after the usual header information: Program File Version (pkzipc): 12.50.1087 Product Version: 12.50.0005 The first line lists major, minor, and step version numbers of the program: Program File Version (pkzipc): <major>.<minor>.<step> The second line lists the major and minor version numbers and the build number of the product. Product Version: <major>.<minor>.<build> Major and minor version numbers of the program are always the same as those for the product. In addition to producing this display output, the version command returns a version number as a value to the shell. The version number returns as a positive integer value less than 256. This value is only returned to the shell and is not displayed in normal output. It can be used to verify PKZIP version numbers in a .BAT file or shell script. 8 Sub-options of the version command (described in the following table) determine which version number is returned. The major version number is returned by default. Sub-Option PKZIP Returns For example major The major release number. For example, if the version number is 12.50.1087, the value returned is 12. This is the default return. pkzipc –version pkzipc –version=major minor The minor number of the release. For example, if the version number is 12.50.1087, the value returned is 10. pkzipc –version=minor step The step or patch value (minus 1000 if ≥ 1000). For example, if the program version is 12.50.1087, the value returned is 87. pkzipc –version=step product The build number of the product. For example, if the product version is 12.50.0005, the value returned is 5. pkzipc –version=product Technical Support For support, visit our Web site at: www.pkware.com/support 9 2 The Basics This chapter gives an overview of PKZIP and explains basic PKZIP concepts. It shows how to add files to archives and how to extract files that are in archives. It also explains the difference between commands and options and describes command-line syntax. An Overview of What PKZIP Does PKZIP does two main sorts of things: It adds files to archives, and it extracts files from archives to restore them to their original state. The PKZIP add command is used to add files, and the extract command extracts them. These are the two most important PKZIP commands. When PKZIP adds files to a specified archive, it creates the archive if it does not already exist. Generally, PKZIP compresses the added files so that they take less space, and it can also encrypt them so that they cannot be read by anyone who lacks the means to decrypt them. As the creator of an archive, you control how its files are to be decrypted and by whom. You can encrypt files using a passphrase, such that the passphrase is required to decrypt them. Compression and encryption are done when you add files. When you extract files, PKZIP decrypts the files, decompresses them, and validates any digital signatures they contain. Most PKZIP options relate to the two main operations of adding and extracting files and are for optional use when you do one of those things. For example, besides the options to encrypt files, there are options for picking the files that you want to compress or encrypt and options for how you want to compress or encrypt them. Commands are also available for managing archives—for example, for testing their integrity and viewing their contents. 10 Supported Archive Types An archive is a kind of file that can contain other files. Several types of archive files exist. Some can contain only one file, some can contain multiple files, and there can be other differences as well. A ZIP archive can contain multiple compressed files. This is the kind of archive that PKZIP creates by default and is the kind that you will probably use most often. Encryption is supported only for ZIP archives. PKZIP enables you to create and extract from many other archive types besides ZIP. You do not need to do anything special to use PKZIP with one of these other archive types. PKZIP can tell what type an archive is and will just go ahead and extract its files. If you want to create a new, non-ZIP archive, there are two ways to tell PKZIP what type of archive to create: • Specify a name for the archive file that uses the file name extension commonly associated with that archive type • Use the archivetype option to specify the type of archive that you want The following table lists the types of archives that PKZIP can create or extract from and the file name extensions customarily associated with these types. For some archive types, PKZIP can do extractions but cannot create new archives of that type. Archive type PKZIP can create/extract Usual file name extensions ARJ Extract only .arj BinHex Extract only .hqx BZIP2 Create and extract .bz2 CAB Extract only .cab (Not supported on UNIX) compress (UNIX, LZW) Extract only .Z GZIP Create and extract .gz JAR Create and extract .jar LZH Extract only .lzh RAR Extract only .rar (Not supported on UNIX) TAR Create and extract .tar UUEncoded Create and extract .uue XXEncoded Create and extract .xxe ZIP Create and extract .zip, .zipx, .jar 11 Entering Commands: Syntax A PKZIP command line has these main elements: • The name of the program executable—pkzipc. This command runs PKZIP and must appear first. • A PKZIP command for the main task you want PKZIP to do—for example, add files to an archive. Precede the command with a hyphen: -add • Any PKZIP options that you want to use. For example, when adding files to an archive, you can use the maximum option to have PKZIP take a little extra time to compress them as much as possible. You can include zero or more options. Precede each with a hyphen: -maximum • The name of an archive file, such as a ZIP file, to create or operate on. • The names of files to operate on—for example, to add to an archive, to act on in an archive (for example, to delete), or to extract from an archive. Alternatively, you can give a file name pattern such as *.doc to specify these files, or the name of a file that contains a list of such files. The name of the archive file must precede any other file names or file name patterns. To reference multiple file names and/or patterns to operate on, separate the names with spaces. Note: When identifying a pathname that includes a space, always put the pathname in quotation marks. For example, if you are archiving all the files in the Important Documents folder in Windows, type the following: pkzipc -add zipfile.zip “Important Documents\*” The only elements that are required in any command line are the name of the executable pkzipc and a PKZIP command. Other elements may be required depending on the particular commands or options used. The order of appearance of the elements is not important except that: • pkzipc must appear at the beginning of the command line • The name of an archive file, if given, must appear before the name of any other file 12 Examples: To do this Command line Add specified files to an archive pkzipc –add zipfile.zip addfile.txt addfile2.doc Add to an archive all files in current directory pkzipc –add zipfile.zip or: pkzipc –add zipfile.zip * Add to an archive all files in a specified directory pkzipc –add zipfile.zip subdir\* Add files with the fast compression option pkzipc –add –fast zipfile.zip pkzipc –fast –add zipfile.zip pkzipc –add zipfile.zip –fast View list of files in archive pkzipc zipfile.zip View list of files whose names begin with "f" in archive pkzipc zipfile.zip f* Extract all files from an archive pkzipc –extract zipfile.zip Extract specified files from an archive pkzipc –extract zipfile.zip readme.txt mystuff.doc Adding Files to an Archive Use the add command to add files to a new or existing archive. For example, to add a file called test.txt to an archive file called temp.zip, use a command line like the following: pkzipc - add temp.zip test.txt If the archive does not already exist, PKZIP creates it. You can optionally encrypt files when you add them. See “Encrypting Files That You Add to an Archive” in Chapter 3. The following sections describe several ways to add files and how to display a listing of the files an archive contains. 13 Archive File Naming Conventions Conventionally, archive files are named with a file name extension (the last part of the name, after the dot) that indicates the kind of archive. Thus a .ZIP archive generally has a name of the form myarchive.zip, where the file name extension is .zip. A BZIP2 archive generally has a file name extension of .bz2. PKZIP can both create and extract from a variety of archive types—including BZIP2. Because the file name extension is generally a good guide to the type of archive, PKZIP can use this information to determine what sort of archive you want to create. Here are the rules PKZIP uses to determine the type of archive to create: • If you specify an archive name with an extension—for example, myarchive.zip or myarchive.bz2, or myarchive.exe, PKZIP creates an archive of that name. Also, by default, PKZIP uses the file extension to select the type of compression to use. For example, pkzipc - add myarchive.zip results in a ZIP-format archive containing files compressed using standard ZIP-style compression (that is, using the Deflate compression algorithm). Alternatively, the following command line creates a BZIP2 archive. A BZIP2 archive is created using the BZIP2 compression algorithm and can contain only a single file. pkzipc - add myarchive.bz2 myfile.doc • If you specify an archive name with no file extension, by default PKZIP creates a ZIP archive and adds a .zip extension to its name. For example: pkzipc - add myarchive produces a ZIP archive called myarchive.zip. Note: The archivetype option lets you explicitly tell PKZIP the type of archive you want to create. See “Compressing Files to a Specified Type of Archive” in Chapter 3. • If you specify an archive name that has no file extension but does have a trailing dot—that is, a dot as the last character in the file name: for example, “filename.”—PKZIP does not append an extension to the file name. For example: pkzipc - add myarchive. produces (by default) a ZIP archive called myarchive without an extension. On UNIX systems, using a trailing dot suppresses the .zip extension, but the dot remains a part of the file name. For example, specifying myarchive. as the archive name results in a file called myarchive.. Note: Systems that do not support more than one “dot” in a file name suppress the extension if any dot is present in the file name, even if it is not a trailing dot. 14 Note: The noarchiveextension option suppresses automatic adding of a file name extension on all systems. Adding a Single File To add a single file to an archive, use the add command and list on the command line the name of the archive and the name of the file to add. For example: pkzipc - add test.zip red.txt The command line adds file red.txt, in the current directory, to archive test.zip. Archive test.zip is created (in the current directory) if it does not already exist, or it is updated if it does exist. The original of the added file red.txt still remains in the current directory. Adding a file to an archive only compresses and adds a copy (unless you use the move option to delete the original). Adding Multiple Files You can specify multiple files to add either by explicitly naming the files or by using wildcard characters in a file name pattern. Specifying Multiple Files by Name To specify multiple files by name, list them on the command line, separated by spaces, after the name of the archive: pkzipc - add test.zip green.doc blue.fil purple.txt Specifying File Names that Match a Pattern You can use file name patterns to specify, for example, all files whose names begin with p, or all .txt files. A file name pattern picks out all files whose names match the pattern. You can use these wildcard characters in file name patterns: Wildcard character Matches Asterisk (*) Zero or more characters Question mark (?) Zero or one single character For example, the following command line adds all files that have a particular file name extension (such as .txt): pkzipc - add test.zip *.txt *.doc The pattern *.htm? in the command line below matches all files that end in .htm or .html: pkzipc - add test.zip *.htm? 15 Consult the documentation for your operating system to learn more about using wildcards. Adding All Files in the Current Directory If you want to add all files in the current directory, you do not need to specify any files to add. Just use the add command with the name of the target archive: pkzipc - add test.zip This shorthand works only for adding all files in the current directory. To add all files in some other directory, you must use wildcards (or specify the files). For example, both of the following command lines do the same thing: they add all files in the samples directory: pkzipc - add test.zip samples\* pkzipc - add test.zip samples\*.* Adding All Files in a Different Directory To add files in a directory other than the current directory, specify the path to the files. You can use either an absolute path or a path relative to the current directory. For example, these command lines use an absolute path to specify files to add: pkzipc - add test.zip F:\sales_reports\*.xls pkzipc - add test.zip "\Documents and Settings\john_d\My Documents\samples\*.txt" Enclose the path in quotes, as shown above, if it contains spaces. These command lines use a relative path to specify files to add: pkzipc - add test.zip samples\sales_reports\*.xls pkzipc - add test.zip ..\records\jobs\*.doc Working with an Archive in a Different Directory If the target archive is not in the current directory, specify its location in the same way that you specify the location of files to add: include the path in the command line. You can use either an absolute or relative path. pkzipc - add F:\sales_reports\test.zip *.xls pkzipc - add samples\test.zip sales_reports\*.xls PKZIP still assumes that a relative path to files to add starts from the current directory even if the target archive is somewhere else. How you specify the location of the files is not affected by the location of the archive. If a path contains spaces, enclose it in quotes. 16 Moving Files into an Archive Normally, after you add files to an archive, PKZIP leaves the original files on your hard drive. If you would like PKZIP to delete the original files after adding copies to an archive, you can include the move option in the command line when you add the files. pkzipc - add - move confidential.zip sales*.xls The move option is useful if you want to remove files that you no longer expect to use or if you do not want to leave behind unencrypted copies of files that you have placed in an encrypted archive. CAUTION: Be sure to keep backups of your important files. If you move your only copy of a file into an archive, and the archive becomes lost or damaged, you may be unable to recover your file. For information on working with PKZIP options, see the section “Understanding Commands and Options” later in this chapter. Viewing Files in an Archive The view command produces a list of the files in an archive and various information about the files. You can use the command to verify that files were added as expected or simply to find out what files an archive contains. It is also useful to see what path information is saved with a file. Path information is saved as part of the file name and so must be taken into account in order when you reference the file to extract it. pkzipc - view myfiles.zip The display generated by the view command looks like this: Length Method ------ -----0B Stored les/ 3557B DeflatN les/bw_logo.gif 1653B DeflatN 71B DeflatN 420B 420B 420B 420B 308B 24B 7915B 1463B 878B -----17KB DeflatN DeflatN DeflatN DeflatN DeflatN DeflatN DeflatN DeflatN DeflatN Size Ratio ---- ----0B 0.0% Date ---4/4/2006 Time CRC-32 Attr --------- ---7:25p 00000000 ---wD Name ---orderStatus_fi 3496B 4/4/2006 7:24p 23ce6c93 -a-w- orderStatus_fi 2/9/2006 11:06a 891d9c90 -a-w1/27/2006 11:41a fa66929c -a-w- caroline.txt dummy_list.txt 1.8% 847B 48.8% 66B 7.1% 128B 128B 128B 128B 122B 16B 1701B 816B 432B 69.6% 3/10/2006 6:23p 69.6% 3/10/2006 6:23p 69.6% 3/10/2006 6:23p 69.6% 3/10/2006 6:23p 60.4% 5/10/2005 3:14p 33.4% 1/24/2006 2:27p 78.6% 10/27/2005 12:08p 44.3% 1/9/2006 6:54p 50.8% 8/26/2005 10:40a ---- ----8008B 54.4% 4b63fc2a 4b63fc2a 4b63fc2a 4b63fc2a 5f177b65 f22154bb 7b38176a 2ef75758 d1c700e7 -a-w-a-w-a-w-a-w-a-w-a-w-a-w-a-w-a-w- filelist.txt filelist2.txt filelist3.txt filelist4.txt files.txt mylist.txt shared.txt verisign.txt What's New.txt ---13 The listing above was generated from a Windows command line. On UNIX, the Attr column is replaced by a Mode column with permission numbers for each file. For more information on the view command, see “Viewing the Contents of a .ZIP File” in Chapter 5. See Chapter 3 for information on other options you can use when adding files, including options to set the level of compression, add encryption, and so on. 17 Extracting Files from an Archive To get a copy of a file out of an archive in its original form so that you can use it again, use the extract command. Extracting decrypts the file if it was encrypted, decompresses it, and validates any digital signature attached when the file was added. You can extract all the files in an archive, or just selected files. As with adding files, PKZIP gives you numerous options for picking files and for choosing how to extract them. See Chapter 4. Extracting All Files To extract all files in an archive, include in the command line just the extract command and the name of the archive. pkzipc - extract temp.zip The files are extracted to the current directory. Extracting Some Files To extract only a selection of files, additionally specify the files to extract. For example, the following command line extracts all .txt files in the archive into the current directory. pkzipc - extract temp.zip *.txt You can also extract multiple files by explicitly listing their pathnames, separated by a space: pkzipc - extract temp.zip green.doc blue.fil purple.txt How you identify files in an archive depends on the path information that was archived with them. In an archive, path information is treated as part of a file name for purposes of identification. (Use the view command to see any path information saved with files.) For example, if you want to extract file august.xls, and the pathname of the file in the archive is records\august.xls, either of the following command lines will extract the file. The command line that contains the * wildcard character also extracts all other .xls files whose pathnames start with r. pkzipc - extract temp.zip records\august.xls pkzipc - extract temp.zip r*.xls Extracting Files to a Different Directory By default, files are extracted to the current directory. To extract files to a different location, specify a path. For example, the following command line uses the two-dots (..) notation to specify a path to the parent of the current directory, one level up. pkzipc - extract temp.zip *.txt .. 18 Extracting New and Newer Files By default, the extract command extracts all files if you do not specify particular files. You can also configure the extract command to extract only files that are newer versions of files already in the target directory, or only files that are newer versions or do not already exist in the directory. For example, the following command line uses the update sub-option of the extract command to tell PKZIP to extract only files that are newer versions or do not already exist in the directory: pkzipc - extract= update temp.zip Sub-options are explained in the section “Commands and Options That Have Values,” later in this chapter. Using Filters When Selecting Files You can use various criteria to filter a specified set of files to add or extract so that only the subset of files that meets the filter criterion is actually selected. For example, the command line below specifies all text files to add but uses the filter option after to add a constraint, namely, that a file must also have been modified after the specified date (mmddyyyy). As a result, only those text files that meet the additional requirement imposed by the after option are added. pkzipc - add - after= 03152006 myfiles.zip *.txt All the filter options described in this section work with both the add and extract commands. Selecting Files by Date before, after The before option selects files that were modified before a specified date. The after option selects files that were modified on or after a specified date. In the United States, enter dates in one of the following formats: • mmddyy • mmddyyyy The order in which you enter the month, date, and year depends on your locale setting. For more information on the locale setting, see Chapter 7. The following sample command line adds files dated before February 24, 2006: pkzipc - add - before= 02242006 test.zip The command line below adds files dated February 24, 2006, or later: 19 pkzipc - add - after= 02242006 test.zip Selecting Files by Age older, newer The older and newer options select files that are older or newer than a specified age. You can list the age in days (the default), hours, minutes, or seconds using the abbreviations shown in the following table. Time unit Abbreviation Days (default) d (or nothing) Hours h Minutes m Seconds s For example, the following command lines each add files that are no more than five days old: pkzipc - add - newer= 5 test.zip * pkzipc - add - newer= 5d test.zip * The command lines below add files that are older than five days: pkzipc - add - older= 5 test.zip * pkzipc - add - older= 5d test.zip * The following command line uses both options to select files to extract: pkzipc - extract - newer= 10 - older= 5 test.zip * With a time unit of days, the interval (for example, five days) is measured from the beginning of the current day. So, for example, if it is currently 3:34 p.m. on June 15, setting newer or older to 5 sets the cutoff to 12:00 a.m. June 10. The older option gets files dated earlier than this; the newer option gets files dated on or after this. With time units of hours, minutes, or seconds, the interval is measured from the current system time. So, for example, the following command line selects files modified within the last 48 hours: pkzipc - add - newer= 48h test.zip * Selecting Files by Size larger, smaller The larger and smaller options select files that are larger than or equal to, or smaller than or equal to, a size specified in bytes. 20 The following command line adds files whose size is in the range 5000-7000 bytes, inclusive: pkzipc - add - larger= 5000 - smaller= 7000 test.zip Selecting Files to Include or Exclude include The include option has two uses: • To specify a file name pattern to use by default when selecting files to add or extract • To override, in the current command line, a configured default setting that excludes files from being selected Ordinarily, to select files whose names match a pattern (for example, *.doc), simply specify the pattern on the command line: pkzipc - add test.zip *.doc pkzipc - extract test.zip *.doc To include one or more file patterns automatically when selecting files, you can configure a default value for include. For example, if you want to automatically include all files with the extension of .doc when adding files, enter the following: pkzipc - config - add - include= "*.doc" This configured default causes a command line like the following to zip all .doc files in addition to the *.txt files explicitly specified. pkzipc - add test.zip *.txt You can also use include to override a default setting of the exclude option. For example, if you have configured PKZIP to exclude *.txt files by default when adding, you can include such files in a particular case with the command line below: pkzipc - add - include= "*.txt" test.zip If you do not need to override a default configuration setting, you do not need to specify the include option in your command: the file pattern by itself is enough. For more information on modifying default configuration values, see Chapter 6. exclude The exclude option has two uses: • To specify a filename pattern or list file to use to exclude files by default when selecting files to add or extract 21 • To override, in the current command line, a configured default setting that includes files To exclude one or more file patterns automatically when selecting files, you can configure a default value for exclude. For example, if you want to automatically exclude all files with the extension of .doc when adding files, enter the following: pkzipc - configuration - add - exclude= "*.doc" The command line below has the same effect but abbreviates the configuration option: pkzipc - config - add - exclude= "*.doc" The configured default value for exclude causes a command line like the following to zip all files except .doc files. pkzipc - add test.zip *.* To exclude a list of files, specify the list file as the value of the exclude option: pkzipc - add - exclude= @lst.txt test.zip You can also use exclude to override a default setting of the include option. For example, if you have configured PKZIP to include *.txt files by default, you can exclude them in a particular case with the command line below: pkzipc - add - exclude= "*.txt" test.zip For more information on modifying default configuration values, see Chapter 6. Understanding Commands and Options A PKZIP command line includes a command and can also include options that affect how the command is done or specify things to be done in conjunction with it. Many commands and options also have sub-options that determine how the command or option behaves. Difference between a Command and Option A command tells PKZIP what to do; an option tells PKZIP to do the main task in a particular way or to do some additional task in the course of doing the main task. For example, the add command tells PKZIP to add files to an archive. You can use the maximum option with the add command to tell PKZIP to use maximum compression when adding the files. If you want to delete the original files after they are added, you can include the move option too: pkzipc - add - maximum - move myarchive.zip *.doc A command line must always contain a command; it can contain any number of options. A command stands alone in a command line, without requiring (or permitting) any other command. For this reason, it is sometimes referred to as a standalone to indicate that it is not an option. An option can be used only with a command. 22 A few options bend the rules in that they can be used either as options or as commands. These include comment, header, sfx, and some of the mail… options. For example, comment prompts you for a comment to attach to an archive. This option can be used with the add command to attach a comment to a new archive, or it can be used by itself to attach a comment to an archive that already exists. Including an Option in Your Command Line To use an option, prefix it with a hyphen and insert it in the PKZIP command line after the main command. For example, the following command line uses the maximum option with the add command. This option tells PKZIP to use maximum compression: pkzipc - add - maximum test.zip white.doc The following example uses the overwrite option to turn off the usual prompting whether to overwrite files with the same names as files to be extracted. The command line directs that extracted files simply overwrite any files that have the same names, without prompting: pkzipc - extract - overwrite test.zip Abbreviating Commands and Options In a command line, you can abbreviate commands and options by leaving off letters at the end as long as you give enough of the name for PKZIP to know what command or option you mean. For example, you can abbreviate the name of the maximum option to max, as in the command line below, because no other option name starts with those letters. pkzipc - add - max test.zip white.doc The command line below abbreviates the name of the extract command to ext: pkzipc - ext test.zip Using Multiple Options To use multiple options in the same command line, separate them by spaces. For example, the following command line includes both the maximum and comment options. These tell PKZIP to use maximum compression and to prompt you for a comment for each newly added file: pkzipc - add - maximum - comment test.zip *.doc The order in which options appear is not important. Not all options can be used with all commands. For example, you cannot use maximum with the extract command. Appendix A lists the commands with which each option can be used. 23 Commands and Options That Have Values Some commands and options have different possible values, called sub-options, that let you customize how the command or option behaves. For example, the level option enables you to specify how much compression you want to use (more compression takes longer). When you use level, you specify a value for a particular level of compression. For example: pkzipc - add - level= 9 myarchive.zip To specify a sub-option or value with a command or option, attach it to the command/option with an equal sign, as in the last example. Commands as well as options can have sub-options. For example, you can use the add command to add all selected files to an archive, or to add only files that are newer versions of files that the archive already contains. You indicate how you want add to work by specifying a sub-option. To have the command add only newer versions of files that the archive already contains, use the command with the freshen sub-option: pkzipc - add= freshen myarchive.zip *.* Most commands and options that have multiple possible predefined values or suboptions use one of the values as a default. Some options are disabled by default, but if an option has a default value, that value is implicitly used in any command line that does not explicitly list the option. For example, the level option has a default value of 5 (normal compression). The following command line does not explicitly include the level option, but because the option is not disabled and has a default value, the command line applies the option at its default value and uses normal compression: pkzipc - add myarchive.zip *.* PKZIP uses the default value for a command (as opposed to an option) whenever the command is used with no sub-option specified. In the preceding example, PKZIP uses the default value for add. You can replace original default settings with your own by using the configuration command. See Chapter 6. For a list of all commands and options together with their sub-options, see Appendix A. Conventions in This Guide Most commands and options discussed in the following chapters work on all platforms that PKZIP supports. The cases are noted where a command or option is specific to a platform or operating system. The name of a command or option appears by itself in bold italic font immediately under the main heading of the section where the command or option is discussed. In sections devoted to a particular sub-option, or value, of a command or option, the 24 command or option is followed by an equals sign (=) and the name of the suboption—for example, extract=all. 25 3 Adding Files to an Archive This chapter contains detailed information on the features and options available when you add files to an archive. Default Values for Commands and Options For each operation in this chapter, the command or option that represents that operation has a default value. The default value determines the way that the command or option is done when the command or option is used on the command line by itself, with no sub-option explicitly specified. For example, the initial default value for the add command is all, which causes the command to add all files. See Chapter 6 for information on how to change default settings. Creating and Updating Archives add The add command adds files to an archive. You can add files to either a new or existing archive. You specify the name of the archive on the command line, before any list of files to add. If the archive does not already exist, PKZIP creates it. The command line below adds all .txt files in the current directory to myarchive.zip. pkzipc - add myarchive.zip *.txt Adding All Files in a Directory You have the option of compressing all files in a particular directory with a single command. To do this, you do not have to specify each file. Simply type pkzipc –add, and the name of your ZIP file, as shown below: 26 pkzipc - add test.zip In the example above, all files in the current directory are compressed into the test.zip file. (To learn how to compress files that appear in subdirectories, see “Compressing Files in Subdirectories,” later in this chapter.) You can also specify files from a different directory if you wish. For example, if you were in a parent directory to a directory called temp and you wanted to compress all the files in the temp directory, you could type the following: pkzipc - add test.zip temp/* The resulting test.zip file is stored in the current directory (the parent directory to the temp directory in our example). Note: The add command adds all files in a specified directory to your archive file by default. You do not need to specify the all sub-option with the add command to compress all files unless you have used the configuration command to modify the default setting for add. For information on how to modify default values for commands and options, see Chapter 6. Adding New and Modified Files add=update PKZIP allows you to specify that only new or modified files are added to an archive. When the update sub-option is used, dates on the files specified for archiving are compared against dates of files having the same name already present in the archive. A file is added only if no file with the same name is already in the archive or if the file to be added is newer. The update sub-option can save time when you repeatedly archive the same files. The sub-option differs from the freshen sub-option in that it adds files which are not in the archive already. To compress only updated files or files not already archived in a specific .ZIP file, use the update sub-option with the add option, as shown below: pkzipc - add= update test.zip *.doc In this example, a .ZIP file called test.zip is created in the current directory. All files in the current directory matching the file specification (*.doc) will be added or updated into the test.zip archive. Adding Only Files That Have Changed add=freshen The freshen value allows you to selectively update files archived in a .ZIP file. PKZIP will compress only files that exist in the .ZIP file and that have changed. To update files that have changed, use the freshen value with the add option, as shown below: 27 pkzipc - add= freshen test.zip You can also abbreviate the value, so you could type the following instead: pkzipc - add= fre test.zip When you use freshen with add, only files that already exist in the .ZIP file "and" that have also changed will be compressed. No new files will be added to the .ZIP file. If you only want to re-compress specific files, simply include those files in your command. For example, if you wanted to re-compress a file called resume.doc, you would type something like this: pkzipc - add= freshen test.zip resume.doc In the above example, only resume.doc will be re-compressed into the test.zip file. This assumes that the version of resume.doc being added is newer than the version of resume.doc that already exists in the .ZIP file. Clearing Archive Attributes add=incremental If you wish to add files to a .ZIP file that have the archive attribute set and subsequently clear the archive attribute on those files, use the add command with the incremental sub-option. If you wish to add files to a .ZIP file that have the archive attribute set and not clear the archive attribute on those files, use the add command with the -incremental sub-option. The incremental and -incremental sub-options can be very useful when backing up files. If, for example, the incremental sub-option is specified, only files with the archive attribute will be compressed, and the archive attribute will be set to OFF when the ZIP operation is complete for these files. In the following command line example, PKZIP will add only those files to test.zip with the archive attribute set. Additionally PKZIP will clear the archive attribute on any of the source files that have been added to test.zip. pkzipc - add= incremental test.zip The next time you run this command, only those files that have the archive attribute set (new or updated files) will be added to the test.zip file. Incremental Archiving add=archive By using this option, you can create a complete backup of your disk, while clearing the archive attributes to make the way for incremental archiving. Incremental archiving makes use of the archive attribute to take only the files which have been modified since the last backup. For this process to work smoothly, you must first have a complete backup and a clearing of the archive attribute for all files. 28 pkzipc - add= archive - directories f:backup.zip This prepares the files set for future incremental. For future incremental backups, use pkzipc - add= incremental test.zip The archive option should only be used if you are preparing your disk for incremental backup (by doing a full backup) or if you are doing a full backup of your disk. Archive Attribute Explained A file has various attributes, or items of information about it, such as its date. One such attribute is called the archive attribute. This attribute is set ON when a file is created or altered. A backup program that uses this attribute switches the attribute off when the file is backed up. By using the archive attribute to select files, you can get all (and only) files that are new or changed since the last backup. A backup that uses the attribute in this way is called an incremental backup. Writing an Archive to STDOUT and Special Files Ordinarily, when you use the add command to archive files, you write the resulting archive to a physical file that you specify in the command line. For example, the following command line archives text files to the archive myfiles.zip: pkzipc - add myfiles.zip *.txt An archive can also be written, as a data stream, to some other destinations besides a physical file, notably, to STDOUT or a named pipe. Note: When PKZIP compresses and encrypts data to write an archive to a data stream, the data goes to the stream without ever appearing on disk in unencrypted form. PKZIP does create a temporary file to get the size of the data to put in local headers, which must be written before file data. But the data is already compressed and encrypted when it’s placed in the temporary file. No security vulnerability is created. Writing an Archive to STDOUT You can write an archive to standard output, or STDOUT, instead of to a physical file. Data written to STDOUT appears on your computer screen but is not saved to disk (unless you do something extra to save it). It can also be piped to another program or be redirected to (for instance) a file. To have PKZIP write the output of the add command to STDOUT, use a hyphen “–” in place of the name of an archive file. You must also use the noarchiveextension option to prevent PKZIP from outputting to a file named -.zip instead of to STDOUT. And finally, you should include the silent option to suppress the informational messages that PKZIP normally outputs so that these are not inserted in the archive data stream. For example: pkzipc - add - noarchiveextension - silent= normal - *.txt PKZIP creates ZIP-format archives by default. To write a different type of archive to STDOUT, use the archivetype option to specify the type. For example, the following command line tells PKZIP to write a TAR-format archive to STDOUT: 29 pkzipc - add - archivetype= tar - noarchiveextension - silent= normal - *.txt The command line below sends output to STDOUT and then redirects that output to archive myfile.zip. pkzipc - add - noarchiveextension - silent= normal - *.txt > myfile.zip When redirecting STDOUT to a file, you can use the exclude option to make sure that PKZIP does not include the file to receive the output in the set of files to be zipped. Unlike when writing directly to a specified archive file, PKZIP cannot infer from the command line that it should skip a file to which you redirect output. The exclude option explicitly tells PKZIP to skip specified files. For example, the following command line archives all files in a directory and redirects output to a file in the same directory. The exclude option tells PKZIP not to add that file. pkzipc - add - noarchiveextension - silent= normal - exclude= myfile.zip - *.* > myfile.zip You can use a hyphen “–” in place of the name of an archive file when you extract, as well. Used in a command line with the extract command, the hyphen tells PKZIP to extract files from STDIN (standard input). For example, the following command line extracts files from STDIN instead of from a named archive. pkzipc - extract - noarchiveextension - silent= input - When extracting from STDIN, set silent to the input sub-option, as in the command line above, to suppress any PKZIP requests for input (a passphrase, for example). If input is needed, the extraction fails with an error. The noarchiveextension option is needed so that PKZIP does not try to extract from a file named -.zip. If the archive is not a ZIP archive, use the archivetype option to specify its type. For example, the following command line tells PKZIP that the file is a BZIP2 archive: pkzipc - extract - archivetype= bzip2 - noarchiveextension - silent= input - You can combine writing to STDOUT and extracting from STDIN to securely transfer files between two systems. For example, the following (UNIX) command line compresses and encrypts the files to be transferred and adds them to a ZIP archive. The archive is written to STDOUT instead of to a file. The command line pipes the output to the rsh (remote shell) system command, which runs PKZIP on the remote system to extract the files from STDIN. pkzipc - add - noarchiveextension - cryptalgorithm= aes,256 - recipient= Jon silent - | (rsh user@remote_system pkzipc - extract - noarchiveextension silent= input - ) Writing an Archive to a Named Pipe An archive can be written to a named pipe instead of to a physical file. 30 The named pipe must already exist. You can then write an archive to it with a command line like the following. Use the name of the pipe in the command line in place of the name of an archive file. pkzipc - add - noarchivextension < name of pipe> < files to zip> As when writing to STDOUT, you must use the noarchiveextension option to prevent PKZIP from outputting to a .zip file—in this case, one named for the pipe. PKZIP creates ZIP-format archives by default. To write a different type of archive, use the archivetype option to specify the type. For example, the following command line tells PKZIP to write a BZIP2-format archive: pkzipc - add - archivetype= bzip2 - noarchiveextension < name of pipe or socket> < files to zip> You must use the full UNC path when referring to a named pipe on Windows. For example: pkzipc - add - noarchiveextension \\.\pipe\mypipe *.doc In the preceding example, the dot in the path \\.\pipe\mypipe references the current machine. To reference a pipe on a different machine—named boulder—specify the machine. \\boulder\pipe\mypipe You can use either a name or an IP address to specify a machine. Encrypting Files That You Add to an Archive You can encrypt files when you add them to an archive. When you encrypt files, only people that you designate or who know a passphrase that you assign can decrypt and extract the files. You can encrypt using either traditional ZIP encryption or strong encryption. Strong encryption is far more secure than the older, traditional ZIP encryption, but people who want to decrypt your files may need PKZIP to decrypt them. Other ZIP utilities often cannot decrypt strongly encrypted files. Note: Only SecureZIP supports digital certificates, and certificate-based recipient lists. You can still use passphrase-based strong encryption with PKZIP. The passphrase and recipient options control encryption when you add files to an archive. • With the passphrase option, you specify a passphrase to use to decrypt the files. The passphrase option is used to do both strong and traditional ZIP password-based encryption. • With the recipient option, you specify a recipient list. A recipient list is a list of digital certificates that belong to people whom you want to allow to 31 decrypt. PKZIP automatically decrypts the files for the owners of the certificates when the owners extract the files. When you use strong encryption, you also have the option to encrypt not only the contents but the names of files and folders that you add to an archive. When you encrypt file names, you essentially encrypt the archive itself: the archive cannot even be opened except by someone who can decrypt its contents. Encrypting Files with a Passphrase passphrase Use the passphrase option (with the add command) to encrypt files so that users can use a passphrase to decrypt them. You can do either strong or traditional ZIP encryption with the passphrase option. To include a passphrase on the command line, use the passphrase option and enter a passphrase of at least eight characters (preceded by an equal sign). For example (where the passphrase is mypassphrase): pkzipc - add - passphrase= mypassphrase test.zip For more security, you can enter your passphrase separately from the command line, at a prompt. This method prevents other users who can see the command line from learning your passphrase. To have PKZIP prompt for a passphrase, include the passphrase option in the command line but do not specify a passphrase. For example: pkzipc - add - passphrase test.zip When you press ENTER, a prompt like the following appears: Passphrase? Type your passphrase. The characters appear on your screen as asterisks. Press ENTER. PKZIP asks you to confirm the passphrase: Re-enter passphrase for verification. Passphrase? Re-enter the passphrase and press ENTER. If your entry matches the original one, PKZIP proceeds and compresses the files. If the passphrases do not match, PKZIP prompts you again: Passphrases don’t match! Passphrase? Please try again. Another way to enter a passphrase is to point PKZIP to a text file that contains one. For example: pkzipc - add - passphrase= @secret.txt test.zip The file (secret.txt in the example) should contain just the passphrase, on a line by itself. 32 For best security, choose a passphrase that is not easy for someone to guess. Ideally, a passphrase should be at least eight characters long, should contain a mix of numbers and upper and lower case letters, and should not be a word in the dictionary. Note: Use a passphrase of no more than 250 characters for files to be decrypted using PKZIP or SecureZIP for z/OS on a mainframe. Passphrases may have a maximum of 260 characters for files to be decrypted using PKZIP or SecureZIP for i5/OS on the AS/400, iSeries, or i5. Specify an Encryption Method listcryptalgorithms, cryptalgorithm When you use strong encryption, PKZIP gives you a choice of encryption algorithms to use. To list the available algorithms, use the listcryptalgorithms command. pkzipc - listcryptalgorithms The following output from listcryptalgorithms lists all supported algorithms: AES,256 AES,192 AES,128 3DES,168 AES (256-bit) AES (192-bit) AES (128-bit) 3DES (168-bit) Use the cryptalgorithm option to specify a particular algorithm to use. pkzipc - add - passphrase - cryptalgorithm= aes,128 test.zip If you do not use the cryptalgorithm option, PKZIP applies traditional PKWARE encryption. Note: Many other ZIP utilities can decrypt archives encrypted with traditional ZIP encryption, but most cannot decrypt strongly encrypted archives. To decrypt strongly encrypted archives requires PKZIP version 6.0 or later or a copy of PKZIP Reader. Extracting Passphrase-Protected Files To extract files from a passphrase-protected archive, use the extract command with the passphrase option. • Type the passphrase (preceded by an equal sign) as part of your command. For example: pkzipc - extract - passphrase= mysecret test.zip If the correct passphrase, the files are extracted (to the current directory, by default). If the passphrase is incorrect, PKZIP displays a warning message: PKZIP: (W20) Warning! Incorrect passphrase for file: filename.ext Re-type your command line with the correct passphrase. • If you specify the passphrase option without a passphrase, PKZIP prompts for a passphrase. For example: pkzipc - extract - passphrase test.zip 33 When you press ENTER, a prompt appears: Passphrase? Type the passphrase. The characters appear on the screen as asterisks, for security. Press ENTER. If you specified the correct passphrase, the files will be extracted to the current directory. If the passphrase you entered is incorrect, a warning message displays: PKZIP: (W20) Warning! Incorrect passphrase for file: filename.ext Retype your command line and when prompted enter the correct passphrase. • If you do not specify the passphrase option when extracting an archive that contains passphrase-protected files, PKZIP warns that the encrypted files are being skipped, and the files are not extracted. Note: Passphrases are case sensitive. Note: For greater security, enter passphrases at the prompt so that asterisks hide the characters you are entering. Encrypting Files with a Recipient List (SecureZIP only) recipient Use the recipient option (with the add command) to strongly encrypt files and specify a recipient list. A recipient list is a list of digital certificates that belong to the people whom you want to allow to decrypt. To encrypt using a recipient list, you must have a digital certificate, containing a public key, for each intended recipient. Any recipient on the list—that is, any person whose system has access to the private key for that certificate—can decrypt and extract the files simply by using the extract command. No one else can decrypt (unless a passphrase was also specified). If you use the recipient option together with the passphrase option, PKZIP decrypts automatically for listed recipients when they extract the files, and other people can decrypt if, and only if, they have the passphrase. Note: Ordinarily, PKZIP decrypts automatically for anyone on a recipient list. However, if necessary, a recipient can tell PKZIP where to find a private key that is not in one of the usual places. See the keyfile and keypassphrase options. Specifying Recipients You can specify a list of recipients either by specifying each recipient individually on the command line, or by specifying a file that contains a recipient list. Be sure to specify yourself as a recipient if you want to be able to use your own certificate to decrypt. 34 By default, SecureZIP searches for certificates for listed recipients only in the system’s local certificate stores. Use the ldap option (see page 39) to cause SecureZIP to search a specified LDAP directory. Use any of the following criteria to specify recipients: Criterion To use For example Common name Specify, in quotes, the common name of the subject of the certificate (that is, the cn field in a string representation of a certificate); optionally, precede with: -recipient=cn=”John Public” -recipient=”John Public” cn= By default, SecureZIP searches for recipients by common name unless another sub-option is used or the value appears to be an email address. Email address Specify the email address of the certificate (that is, the e field in a string representation of a certificate); optionally, precede with: [email protected] [email protected] e= LDAP filter Specify the LDAP filter that you want to use to filter a search for certificates on an LDAP server that you are accessing with the ldap option; precede with: -recipient=f=(&(userCertificate=*) (ou=Sales)) -recipient=”f=(&(userCertificate=*) (ou=Regional Sales))” f= Use quotes if the filter string contains a space. Place the quotes around the entire filter string, including “f=”. Include the following LDAP presence filter, as shown in the examples at right, to limit the search to LDAP entries that are certificates: (&(userCertificate=*)(…)) Use standard LDAP filter syntax after the “f=” prefix. This sub-option is for use only when the ldap option is used. For example, if the common name of the subject is John Q. Public, you can specify that certificate as a recipient as follows: pkzipc - add - recipient= "John Q. Public" test.zip You can specify multiple recipients by using the recipient option multiple times: 35 pkzipc - add - recipient= "John Q. Public" - recipient= "Mary Samplename" test.zip You can also reference a recipient by email address: pkzipc - add - recipient= [email protected] test.zip pkzipc - add - recipient= e= [email protected] test.zip The prefix e= when using an email address is optional. SecureZIP automatically looks for an email address if the string contains an @ and a dot and looks like an email address. Note that a certificate must contain an email address in order to be found by this method. Not all certificates embed an email address. Specifying a File That Contains a Recipient List PKZIP can extract a recipient list from these kinds of files: • An ordinary text file that lists the common name of each recipient’s certificate on a line by itself To use the recipient option to specify an ordinary text file list of recipients as a sub-option, prefix the file name with the listfile character (@, by default): pkzipc - add - recipient= @recipient_list_file.txt test.zip • A PKCS#7 or PKCS#12 file: These kinds of files can contain one or more actual certificates. PKCS#7 files have the file name extensions .p7b and .p7c and do not contain private keys, only public ones. PKCS#12 files have the file name extensions .pfx and .p12 and may contain private keys as well as public keys. To use the recipient option to specify one of these types of file to define a recipient list comprising the owners of the certificates in the file, prefix the file name with a hash (#) character: pkzipc - add - recipient= #recipient_list_file.p7b test.zip Specifying an Encryption Method with a Recipient List With the passphrase option, you can select either strong encryption or weaker, traditional ZIP encryption. The recipient option, however, always causes SecureZIP to use strong encryption. If you do not use the cryptalgorithm option to explicitly specify a strong encryption method with a recipient list, and no encryption method is configured for use by default, SecureZIP uses the first method listed in the output from the listcryptalgorithm command. Encrypting File Names cd Someone who cannot decrypt the contents of an archive may still be able to infer sensitive information just from the unencrypted names of files and folders. To prevent 36 this, you can encrypt the names of files (and folders) in addition to their contents. Encrypted file names can be viewed in the clear—that is, unencrypted—only when the archive is opened by an intended recipient or by someone who has the passphrase. Use the cd option (stands for “archive central directory”) with the add command to encrypt file names. The cd option encrypts an archive’s central directory, where file names and virtually all other metadata about the archive is stored. An archive that contains encrypted file names requires PKZIP version 8.0 or later to open it. The cd option has two sub-options: Sub-Option: Effect: For example: encrypt Encrypts file names and the archive’s central directory. –cd=encrypt This is the default sub-option, used if you enter –cd and do not explicitly specify a sub-option. normal Does not encrypt file names; produces a normal ZIP file. –cd=normal Use to override a configured default setting that would otherwise encrypt file names. You must use strong encryption when you use the cd option. You can use either strong passphrase encryption or a recipient list (or both), but you must use one of the strong encryption methods. You cannot encrypt file names using traditional, password encryption. The following sample command line encrypts file names using a recipient list: pkzipc - add - recipient= "John Q. Public" - cd test.zip The sample command line below encrypts file names using a passphrase. When you use the cd option with a password, SecureZIP uses the default strong encryption algorithm (ordinarily AES 256) if you do not explicitly specify an algorithm. pkzipc - add - passphrase= mysecret - cryptalgorithm= aes,256 - cd test.zip Encrypting File Names in an Existing Archive You can encrypt file names in either a new or an existing archive. • If you add files to an archive that already contains files with unencrypted file names and specify cd to encrypt file names, SecureZIP encrypts the names of all files in the archive, not just names of newly added files. If the archive contains files whose contents are already encrypted, SecureZIP decrypts these files and then re-encrypts them, and their names, using the currently specified encryption method (passphrase/recipient list) and algorithm. 37 If SecureZIP cannot decrypt the files, SecureZIP does not update the archive: no files are added, and file names are not encrypted. • If you update an archive in which file names are encrypted, SecureZIP encrypts the newly added files and their names using the same passphrase or recipient list originally used to encrypt file names in the archive. Encrypting Using Only FIPS-Approved Algorithms fipsmode “FIPS” is an abbreviation for “Federal Information Processing Standards,” a set of standards for information processing in federal agencies. The standards are published by NIST (National Institute of Standards and Technology), a branch of the US government. The FIPS 140-2 standard defines security requirements for cryptographic modules and specifies the algorithms that federal agencies may use for cryptographic operations—encrypting, decrypting, signing, and authenticating digital signatures. The fipsmode option restricts SecureZIP to using only algorithms that comply with the FIPS 140 standard to perform cryptographic operations. With fipsmode on, SecureZIP exclusively uses FIPS-validated algorithms not only to encrypt but also to decrypt. If you try to decrypt a file that is encrypted using an algorithm that is not FIPS-validated, SecureZIP responds with an error or warning and does not decrypt it. When applying or authenticating signatures, SecureZIP again uses only FIPSvalidated hashing algorithms when the fipsmode option is on. If a signature was created using a hashing algorithm that is not FIPS-validated, SecureZIP shows a warning even if the signature is otherwise valid. The fipsmode option is not compatible with the 204 option (which cannot create archives with strong encryption). For the fipsmode option to work—that is, to actually result in FIPS-mode processing—a FIPS-validated cryptographic module must be installed on your system. On UNIX, SecureZIP supplies such a module itself. On Windows, however, it is the system administrator’s responsibility to ensure that a version of the Microsoft CryptoAPI cryptographic module appropriate to the operating system is installed and that no non-FIPS-validated cryptographic providers (for example, a non-FIPSvalidated smart card) are used. For reference, see the list of FIPS-validated cryptographic modules grouped by vender at the following NIST Web site: http://csrc.nist.gov/cryptval/140-1/1401vend.htm The following table lists FIPS-validated encryption and hashing algorithms that can be set for various Windows operating systems. 38 Windows FIPS-validated encryption algorithms 2000 3DES-168 XP 3DES-168, AES-128, AES-192, AES-256 2003 Server 3DES-168, AES-128, AES-192, AES-256 Vista 3DES-168, AES-128, AES-192, AES-256 FIPS-validated hashing algorithms 2000 SHA-1 XP SHA-1 XP SP3 SHA-1, SHA-256, SHA-384, SHA-512 2003 Server SHA-1, SHA-256, SHA-384, SHA-512 Vista SHA-1, SHA-256, SHA-384, SHA-512 Note: SHA-1 is scheduled to be deprecated by NIST as FIPS-compatible after 2010. SecureZIP in FIPS mode will not sign files or central directories using the SHA-1 hashing algorithm. Be aware that there are no FIPS-compatible hashing algorithms for Windows operating systems older than Windows XP with Service Pack 3. SecureZIP in FIPS mode will not sign any files or central directories on Windows 2000 or early versions of Windows XP. NIST is also scheduled to deprecate 3DES-112 (also known as “two key” 3DES) after 2010. SecureZIP with fipsmode turned on will not extract files encrypted with this algorithm. When used with the fipsmode option, the commands listcryptalgorithms and listhashalgorithms list only available FIPS-validated algorithms. For example: pkzipc - fipsmode - listcryptalgorithms pkzipc - fipsmode - listhashalgorithms The fipsmode option has two sub-options, Enabled and Disabled, used to configure the default state of the option or, on the command line, to override the configured default. On Windows XP and later, SecureZIP sets the default state of the fipsmode option according to the Windows FIPS policy setting System cryptography: Use FIPS compliant algorithms for encryption, hashing, and signing. This setting is set by an administrator in the Local Security Policy or as part of Group Policy. It affects the behavior of Microsoft Internet Explorer and various areas of the operating system, depending on the version of Windows. If the setting is enabled, the default value of fipsmode is Enabled. The following example turns on fipsmode for the current command line: pkzipc - add - recipient= "John Public" - fipsmode save.zip *.doc 39 The next example turns on fipsmode and uses the sfx option to create a graphical Windows self-extracting archive mysfx.exe. A self-extracting (SFX) archive created with fipsmode on extracts in FIPS mode, by default, too. pkzipc - add - recipient= "John Public" - fipsmode - sfx= win32_x86_g610 mysfx *.doc For more information on self-extracting archives, see “Working with Self-Extracting (PKSFX) Archives” later in this chapter. The example below overrides a configured default setting of fipsmode=enabled to turn off fipsmode for the current command line: pkzipc - extract - fipsmode= disabled wedding_plans.zip *.* The following command line prefixes the fipsmode option with two hyphens (--) to turn off FIPS mode when extracting an SFX archive that was created with the fipsmode option on. Ordinarily, an SFX archive that was created with the fipsmode option on extracts in FIPS mode too. This example shows how to override the FIPS flag set internally in the SFX archive to allows files in the archive to be decrypted and authenticated without using only FIPS-validated algorithms: mysfx.exe --fipsmode Conversely, the fipsmode option can also be used with a single hyphen to apply FIPS-mode constraints on extraction to an SFX archive that was not created with the fipsmode option on. mysfx.exe - fipsmode Accessing Recipients in an LDAP Directory ldap The ldap option enables you to access digital certificates in an LDAP directory. Note: To access certificate stores in directories requires SecureZIP Enterprise. SecureZIP accesses certificates in directory stores by making Lightweight Directory Access Protocol (LDAP)-based queries to the target directories. Ordinarily, when you use the recipient option to do certificate-based encryption, SecureZIP looks for certificates only in your system’s local certificate stores. The ldap option enables you to point SecureZIP to an LDAP directory instead. With the ldap option, SecureZIP searches the specified LDAP directory first and only looks in local stores if it does not find the certificate it is seeking on an LDAP server. You can use the ldap option multiple times to specify multiple LDAP directories to search. Directories are searched in the order listed. If SecureZIP is unable to connect to a directory, SecureZIP issues a warning and tries the next directory. Here is what SecureZIP does if multiple certificates are found that match a recipient: • If multiple matching certificates are found in the same LDAP entry, SecureZIP picks the (valid) certificate whose expiration date is farthest in the future. No warning is generated. 40 • If multiple LDAP entries are found, each containing a matching certificate, SecureZIP uses a certificate from each entry to encrypt the archive and issues warning 59 (Multiple certificates found). The certificates may belong to different people, in which case the owner of any of them can decrypt. The ldap option has several components, or fields. Only the last one, ldap_base, is always required. The other fields are required only if needed to access a particular LDAP server. The ldap option has the following syntax (optional fields are bracketed): -ldap=[[userid:password@]server[:port]]/ldap_base where: • userid (optional) is the user account with which to log in if the LDAP server requires a login • password (optional) is the password associated with the user account • server (optional) is the LDAP server name or TCP/IP address • port (optional) is the TCP/IP port to use. The default is 389 if no port is specified. • ldap_base (required) is the name of the entry that SecureZIP should use as the base or root of the LDAP search for certificates, analogous to a root folder or directory in a file system The query string format for ldap_base can vary between LDAP implementations. For example, a server may expect query strings in the Internet domain-style format used by default by Microsoft Active Directory (for example, cn=users,dc=xyz,dc=com), or it may expect them in X.500 naming format (for example, o=xyz,c=US). Check with your LDAP or network administrator for the format to use. Examples: pkzipc - add ldap= john_p:[email protected]:389/cn= users,dc= xyz,dc= com - recipient= ”Mary Samplename” save.zip *.doc pkzipc - add - ldap= jon_p:[email protected]/cn= users,dc= xyz,dc= com - recipient= ”Mary Samplename” save.zip *.doc pkzipc - add - ldap= 192.172.0.1/cn= users,dc= xyz,dc= com - recipient= e= [email protected] save.zip *.doc pkzipc - add - ldap= /cn= users,dc= xyz,dc= com - recipient= e= [email protected] save.zip *.doc 41 The ldap option must appear before the recipient option, as shown in the examples above, when the two options are used together in a command line. To avoid having to type a frequently used ldap option setting, use the configure command to enable the option setting by default. For example: pkzipc - config - ldap= 192.172.0.1/cn= users,dc= xyz,dc= com SecureZIP tests an LDAP connection immediately when you configure it. If the connection is bad, SecureZIP returns a warning to inform you of the problem before you try to use the connection to do encryption. If you configure a default ldap option setting, it is applied implicitly whenever you use the recipient option to encrypt. To remove configured settings for LDAP servers, use the --ldap option (two hyphens): • Use the --ldap option with the add command (and the recipient option) to ignore configured ldap settings just in the current command. • Use the --ldap option with the configuration command to remove any configured default ldap settings. The default command, which globally restores initial defaults, also removes configured ldap settings. Note: The ldap option can only be used to point SecureZIP to an LDAP server to search for certificates to use for encryption, not for digitally signing files. Certificatebased encryption uses public keys; attaching a digital signature requires access to a private key. SecureZIP can only access public keys in certificates in an LDAP directory. Contingency Keys Note: To configure contingency keys, you must have SecureZIP Enterprise. The separate PKWARE Policy Manager MMC (Microsoft Management Console) snap-in application is used to configure contingency keys. Contingency keys, if configured, are used whenever either SecureZIP or PKZIP users encrypt. Contingency keys are digital certificate-based keys that an administrator can have automatically included in the recipient list whenever PKZIP does strong encryption. Contingency keys enable an organization to decrypt files encrypted by anyone in the organization, whether the files are passphrase encrypted or encrypted for specific recipients. Contingency keys are a safeguard to be sure that important information belonging to the organization does not become inaccessible because no one in the organization can decrypt it. A contingency key is an ordinary cryptographic key from a digital certificate. The special thing about it is that, once the key is designated as a contingency key, it is automatically included as a recipient whenever PKZIP encrypts files. This enables the owner of the key to decrypt the files. 42 If defined, contingency keys are used whenever PKZIP or SecureZIP encrypts. They are used even when the user chooses (strong) passphrase-based encryption and does not pick any recipients. The administrator can set the config command to display or suppress a list of contingency keys in use. The administrator can also optionally cause PKZIP to display a line that states the number of contingency keys in use when encrypting. For example: Using 2 contingency keys Working with Digital Signatures (SecureZIP only) With SecureZIP, you can attach a digital signature to files in an archive, or to an archive itself. A digital signature assures people who receive the signed file that it is really from the person who signed it and has not been changed. SecureZIP allows you to digitally sign either individual files in an archive or the central directory of the archive, or both. The central directory contains a list of files in the archive. Signing the central directory enables a recipient to confirm that the archive as a whole has not changed. Note: SecureZIP does not work directly with Netscape certificate stores. For SecureZIP to access a certificate that you used Netscape to install, you must export the certificate from Netscape and then install it in the Windows certificate stores (usually by double-clicking on the certificate file in Windows Explorer). certificate Use the certificate option to specify a certificate to use to sign files. To specify a certificate, use one of the sub-options described in the following table. 43 Sub-Option To use For example <Common name> Specify, in quotes, the common name of the subject of the certificate (that is, the cn field in a string representation of a certificate); optionally, precede with: -certificate=cn=”John Public” -certificate=”John Public” cn= SecureZIP searches for certificates by common name by default. <Email address> Specify the email address of the certificate (that is, the e field in a string representation of a certificate); optionally, precede with: [email protected] [email protected] e= #<filename> Specify the name and location of a file containing the certificate to use. If the certificate’s private key is not in the file with the certificate, use the keyfile option to point to the separate file that contains the private key. If necessary, use the keypassphrase option to specify a passphrase to read the private key. pkzipc –add –certificate=#mycert.pem –keyfile=mykey.key save.zip *.doc pkzipc –add –certificate=#mycert.p12 –keypassphrase="my password" save.zip *.doc For example, if the common name of the subject is John Q. Public, you can specify that certificate as follows: pkzipc - add - certificate= "John Q. Public" test.zip The command uses the John Q. Public certificate to sign files. By default, both the files in the archive and the archive itself are signed. Use the sign option to change what is signed. Use the hash option to change the hash method used for signing. The following examples reference a certificate by email address: pkzipc - add - certificate= [email protected] test.zip pkzipc - add - certificate= e= [email protected] test.zip The prefix “e=” when using an email address is optional. SecureZIP automatically looks for an email address if the string contains an “@” and a dot and looks like an email address. Note that a certificate must contain an email address in order to be found by this method. Not all certificates embed an email address. Note: When you install a certificate on your system, the level of security you configure— low, medium, or high—affects the notifications you receive when an application accesses your private key. SecureZIP uses your private key to attach a 44 digital signature, so your security setting may cause you to receive additional prompts or dialogs when you sign files. With low security, SecureZIP is allowed to access your private key as needed with no additional prompts or dialogs. With medium security, you receive an additional notification dialog each time you access the private key. With high security, you are prompted to enter a passphrase (the one specified when the certificate was installed on your computer) before the certificate can be used. keyfile One way to specify a certificate to use for signing is to reference the file that contains it (see the #<filename> sub-option of certificate). If the private key is not included in the file with the certificate, use the keyfile option to specify the file that contains the private key. For example: pkzipc - add - certificate= #mycert.pem - keyfile= mykey.key save.zip *.doc The keyfile option specifies a file containing the private key for the certificate specified by the certificate option. The option is most useful with SSL server certificates, which often have the private key and certificate in separate files. keypassphrase A private key in a file by itself or in a file that contains a certificate may be encrypted and require a passphrase for PKZIP to decrypt it to use. Use the keypassphrase option to supply the passphrase. For example: pkzipc - add - certificate= #mycert.p12 - keypassphrase= "my password" save.zip *.doc pkzipc - add - certificate= #mycert.pem - keyfile= mykey.key keypassphrase= "my password" save.zip *.doc The keypassphrase option specifies the passphrase used to decrypt private key information. This can be the passphrase used for your certificate store (UNIX only), for a PKCS#12 file (specified with the certificate option), or a key file specified with the keyfile option. hash You can use the hash option with the certificate option to specify the hash method/algorithm to use for signing. The option has the sub-options shown in the following table. 45 Sub-option Description sha1 Uses the SHA-1 hashing algorithm (default) (not FIPS-compatible; cannot be used with the fipsmode option) sha256 Uses the SHA-256 hashing algorithm (fipsmode default) sha384 Uses the SHA-384 hashing algorithm sha512 Uses the SHA-512 hashing algorithm md5 Uses the MD5 hashing algorithm (not FIPScompatible; cannot be used with the fipsmode option) The SHA algorithms are all stronger than the MD5 algorithm. Among the SHA algorithms, the higher-numbered ones are stronger than the lower-numbered ones. See the fipsmode option for information on which algorithms are supported for FIPS processing on different versions of Windows. Use the listhashalgorithms command to list hashing algorithms available on your system. If fipsmode is on, the listhashalgorithms list shows only FIPS-validated algorithms. The hash option’s default is configurable. The following example specifies the SHA-256 algorithm and the “My Cert” certificate to use to sign files: pkzipc - add - certificate= "My Cert" - hash= sha256 test.zip *.* sign (SecureZIP only) You can use the sign option with the certificate option to specify whether to sign the central directory of the archive itself, the archived files, or both. Signing the files enables a user to verify that the files are the same files you signed; signing the archive itself enables a user to verify that the contents of the archive have not changed—that, for example, no files have been added or removed. By default, SecureZIP signs both. The sub-options are listed in the following table. 46 Sub-option Description Example cd Sign only the central directory of the archive, not the files in the archive -sign=cd files Sign only the files in the archive, not the archive itself -sign=files all Sign both the archived files and the archive itself -sign=all Do not sign files. This sub-option is used to turn signing off if it has been configured. -sign=none (Default) none For example: pkzipc - add - certificate= "My Cert" - sign= cd test.zip *.* listcertificates (SecureZIP only) Use the listcertificates command to list the certificates that are in a specified store on your system. Information for each certificate tells whether the certificate is Valid, Expired, Not Trusted, or Revoked (if known). Specify the store using one of the sub-options in the following table. Personal certificates in the MY store are listed by default if no sub-option is used. Sub-option Description Example my Lists certificates in the MY store. This store contains your personal certificates with private keys. pkzipc –listcertificates or pkzipc –listcert=my addressbook Lists certificates in the AddressBook store. This store contains public certificates and public keys belonging to other people. pkzipc –listcert=addressbook ca Lists certificates in the CA store. These are intermediate certificates in a trust chain, created by a certificate authority to validate other certificates. pkzipc –listcert=ca root Lists certificates in the Root store. These are certificates at the beginning of a trust chain, which are trusted by the system. pkzipc –listcert=root For example, the following command line lists certificates in the MY store: pkzipc - listcertificates 47 The command line produces output like the following. In this case, the MY store contains four certificates, three of which have the same name, John Doe. John Doe: Valid John Doe: Expired John Doe: Expired users,John Doe: Valid Compressing Files in Subdirectories recurse PKZIP does not automatically compress files that appear in subdirectories, unless you specify those directories, or use the recurse option with the add command. With the recurse option, all specified files in a directory structure, including files located in subdirectories will be compressed. If you have a directory called tut with a nested subdirectory called test, to compress all of the files in the tut directory and all files in the tut/test directory, you would type the following in the tut directory: pkzipc - add - recurse test.zip * All files in the tut directory as well as those files in subdirectories of the tut directory are compressed. However, directory path information is not stored within the .ZIP file. If you want to store directory information within your .ZIP file (in addition to compressing all the files in those directories), use the path option with the recurse option or simply use the directories option. Compressing Open Files OpenFile In Windows, PKZIP does not automatically include files that are open in other applications in archives, as there is a small chance there could be differences between the file on screen (or in memory) and the file saved to disk. Use the OpenFile option to include open files in your archive. The OpenFile option has sub-options that allow you to set notification and inclusion for open files that match the pattern you want to archive. These sub-options are listed in the table below. By default, using the OpenFile option without a sub-option includes all matching open files in your archive. 48 Sub-Option Description For example never (Default) PKZIP does not include any open files. A warning will appear if a matching file is open. pkzipc –add –OpenFile=never test.zip *.bmp all PKZIP includes all matching open files without prompting first. A message noting each open file is included in the standard output. pkzipc –add –OpenFile test.zip *.bmp prompt PKZIP notifies you when a matching file is open, and asks whether to add the open file or skip it. pkzipc –add –OpenFile=prompt test.zip *.bmp Storing Directory Path Information path Normally, when PKZIP compresses files, only the files are stored within the .ZIP file, not the paths of those files. However, you can instruct PKZIP to store the directory path information of a file within the .ZIP file. This enables you to restore the directory structure of the files when you extract them. For example, if a file you are compressing appears in the doc/temp directory, you can store the file within the .ZIP file as: doc/temp/< filename> To do this, use the path option with the add command. For example, the following command line adds all .TXT files in the specified directories and saves the specified path information: pkzipc - add - path test.zip doc/temp/*.txt If path information is saved, you can use the directories option with the extract command to extract files to the saved paths. PKZIP creates the directories on the saved path if they do not already exist. Note that the path option gets files only from the specified directory. To get files in subdirectories of that directory as well, use the directories option instead of the path option with the add command. Or use the path option together with the recurse option with the add command. Additional Methods for Storing Directory Path Information The path option has sub-options that enable you to specify the path information stored. These sub-options are listed in the table below. By default, using the path option without a sub-option stores relative path information for all files added. 49 Sub-option To For example current Store the directory path relative to the current location. pkzipc -add -path=current docs.zip docs/* root, full specify relative none Store the full path, starting from the root directory down. Stores path information for subdirectories under the specified directories In this example, only directory information under the docs directory will be stored. Parent directory information will not be stored. pkzipc -add -path=root docs.zip docs/* In this example, the entire directory path, starting from "root" directory will be stored. pkzipc -add -path=specify docs.zip temp/docs/* Stores path information for subdirectories under temp\docs. Store the directory path relative to the current working directory of the drive specified. pkzipc -add -directories=relative docs.zip c:*.doc z:*.doc Turn off the path option. (Used to override configuration file). pkzipc -add -path=none docs.zip /temp/docs/* In this example the path information for those directories recursed under the current working directory (for both the C: and Z: drives) will be stored. In this example, only the file names are stored. Storing and Recreating Directory Path Information directories The directories option works with both the add and extract commands. • With the add command, the directories option is equivalent to using the recurse and path options together. It instructs PKZIP to search subdirectories for files and to save the files and their directory path information in the .ZIP file. • With the extract command, the directories option extracts any directory tree structure saved with files. The following example uses the directories option with the add command to add any files called whatsnew.htm in the current directory or in any subdirectory of the current directory: pkzipc - add - directories testdir.zip whatsnew.htm Or abbreviated: pkzipc - add - dir testdir.zip whatsnew.htm Screen output lists any matching files found in subdirectories: Creating .ZIP: testdir.zip Adding File: Win/PK/Whatsnew.htm Deflating Adding File: Win/SZ/Whatsnew.htm Deflating (67.0%), done. (66.7%), done. 50 The following example gets all .htm files in the current directory or its subdirectories: pkzipc - add - dir testdir.zip *.htm To tell PKZIP to start looking for matches from a subdirectory of the current directory, specify the path to the subdirectory. The following example gets all whatsnew.htm files in mysub\ or any of its subdirectories: pkzipc - add - directories testdir.zip mysub\whatsnew.htm The example below gets all .htm files in mysub\ or any of its subdirectories: pkzipc - add - directories testdir.zip mysub\*.htm If you have multiple mysub\ subdirectories under the current directory, you can get files from just those subdirectories by using a wildcard for the subdirectory from which to start the search: pkzipc - add - directories testdir.zip *\mysub\whatsnew.htm The command line below is similar, but it limits the search for mysub\ subdirectories to just those under the nextsub\ subdirectory: pkzipc - add - directories testdir.zip nextsub\*\mysub\whatsnew.htm Even if the command line includes the directories option, you can turn off the searching of subdirectories for matching files by specifying a full path beginning with a backslash (for the root directory) or (on Windows) a drive letter (for example, C:) in the pattern. The pattern must also not include any wildcard characters (* or ?). For example, the following command line adds only the specified file; it does not add matching files from subdirectories of MyFiles: pkzipc - add - directories testdir.zip C:\MyFiles\whatsnew.htm For information on extracting files saved with directory information, see the section “Retaining Directory Structure while Extracting” in Chapter 4. As with the path option, PKZIP provides several choices for saving directory path information. The following table lists the sub-options you can use with directories option: Sub-option To For example current Store the directory path relative to the current location. pkzipc -add -directories=current docs.zip docs/* root or full specify Store the full path, starting from the root directory down. Store path information for subdirectories under the specified directories In this example, only directory information under the docs directory will be stored. Parent directory information will not be stored. pkzipc -add -directories=root docs.zip docs/* In this example, the entire directory path, starting from "root" directory will be stored. pkzipc -add -directories=specify docs.zip temp/docs/* Stores path information for subdirectories under temp\docs. 51 Sub-option To For example relative Store the directory path relative to the current working directory of the drive specified. pkzipc -add -directories=relative docs.zip c:*.doc z:*.doc Turn off the path option. (Used to override configuration file). pkzipc -add -directories=none docs.zip /temp/docs/* none In this example, the path information for those directories recursed under the current working directory (for both the C: and Z: drives) will be stored. In this example, only the file names are stored. See also the preceding section, “Additional Methods for Storing Directory Path Information.” Setting the Compression Level Native ZIP compression (which uses the Deflate compression algorithm) and the bzip2 and deflate64 compression options each support a range of compression levels from 0 (no compression) to 9 (maximum). By default, each of these options uses level 5, or normal, compression. Normal compression strikes a middle balance between compression and performance. In general, greater compression takes more time. You can use the level option to specify a compression level from 0 to 9 when you create or update a ZIP file using one of the compression methods named above. Alternatively, you can use the options normal, store, speed, fast, and maximum to specify a desired balance between speed and degree of compression. See “Specifying a Compression Level by Name,” later in this chapter. With the dclimplode option, you set the compression level in a different way, namely, by specifying the dictionary type and size as sub-options. Specifying a Compression Level from 0-9 level The level option enables you to specify a level or degree of compression to use when creating or updating a ZIP archive with the Deflate64, BZIP2, or default Deflate compression methods. (See the deflate64 and bzip2 options to learn about using these compression methods.) To set a compression level with the level option, specify a numeric value for the option from 0 to 9. A value of 0 specifies zero compression. The following command line specifies a compression level of 2 and uses the native Deflate compression method: pkzipc - add - level= 2 test.zip *.doc 52 The following command line specifies level 2 compression and the BZIP2 compression method to create or update a ZIP archive: pkzipc - add - bzip2 - level= 2 test.zip *.doc Level 5 is the default compression level for level. You can use the configuration command to set a different default. For example, the following command line sets the default value for level to 9: pkzipc - config - level= 9 For information on changing default settings, see Chapter 6. Specifying a Compression Level by Name store, speed, fast, normal, maximum As an alternative to setting numeric compression levels with level, you can use the options normal, store, speed, fast, and maximum. These options enable you to use non-numeric names to specify a desired balance between speed and degree of compression. For example, the following command line specifies the fast compression option: pkzipc - add - fast test.zip *.doc 53 The non-numeric compression level options are described in the following table: Option Description Example speed Provides the fastest performance and the least compression: some files are compressed with the Deflate method, using level 1 compression; others* are stored (level 0) uncompressed. pkzipc -add -speed test.zip *.doc pkzipc -add -bzip2 -speed test.zip *.doc fast Provides the second fastest compression: some files are compressed with the Deflate method, using level 2 compression; others* are stored (level 0) uncompressed pkzipc -add -fast test.zip *.doc maximum Provides the highest level of compression (level 9) pkzipc -add -max test.zip *.doc store Provides zero compression: just stores files inside the archive (level 0) pkzipc -add -store test.zip *.doc normal Provides a middle balance of compression and speed (level 5) pkzipc -add -norm test.zip *.doc (Default) You would only need to use this option if you changed the default compression level. See Chapter 6 for information on setting defaults. * Types of files that the speed and fast options store uncompressed are listed below. The other named options (except store) compress files of these types. You can also use the level option to compress files of these types. *.bz2 *.jpeg *.bzip2 *.jpg *.cab *.mp3 *.gz *.mpeg *.gzip *.mpg *.rar *.sxw *.gif Compressing Files with a List File Instead of specifying a specific file or file pattern in your command line, you can point PKZIP to a list file that lists all the files or file patterns that you want to operate on. A list file is an ASCII text file that contains file names or file patterns and path information. A list file can be an ideal solution for users who archive specific file sets 54 on a regular basis. Using a list file saves time in that you do not need to type file names and paths each time you wish to compress these files with PKZIP. A list file may contain wildcard specifications (*,?) as well as exact file names and paths. A list file in a DOS based environment might look similar to the following: *.exe *.doc \tut\*.doc \tut\?????.* pkzip.html You reference a list file in the command line by prefixing its name with the list character—“@” by default. See the listchar option if you want to use a different character. The following example adds the files listed in list file lst.txt to the archive test.zip: pkzipc - add test.zip @lst.txt You can also use a list file to specify files to exclude from an archive, based on some criteria, using the exclude option. See “Selecting Files to Include or Exclude” in Chapter 2. For more information on the listchar option, see “Changing the List Character for List Files” in Chapter 7. Note: The way you list files to extract is slightly different from the way you list files to add to an archive. See “Extracting Files with a List File” in Chapter 4 for more information. Getting a List of Files from Standard Input You can tell PKZIP to treat as a list a set of files output by another program. PKZIP can then compress the files in the dynamically constructed list. Use a hyphen (-) prefixed with the list character (“@” by default) to identify a set of files in standard input as a list. For example, in the following command line, PKZIP treats a list of files output from some program as a list file and compresses the files into test.zip: < some program> | pkzipc - add test.zip @- The special, dynamically constructed list can also be used with the include and exclude options. For example: < some program> | pkzipc - add test.zip - include= @< some program> | pkzipc - add test.zip - exclude= @- *.doc Compressing Files with the Deflate64 Method deflate64 The deflate64 option enables you to use the Deflate64 compression method to compress files and create ZIP archives. The Deflate64 method can produce greater 55 compression than the Deflate method that PKZIP uses by default because Deflate64 uses a larger dictionary window (64K compared to 32K). Not all ZIP-compatible programs from other vendors can extract files compressed with the Deflate64 method. You can use the level option with deflate64 to specify a level of compression from 0 to 9 (0 is zero compression). The following command line uses the Deflate64 method with the level option set for maximum compression: pkzipc - add - deflate64 - level= 9 mydocs.zip *.doc Compressing Files with the BZIP2 Method bzip2 BZIP2 is an open-source compression algorithm that requires more memory and processing power than standard ZIP compression but provides greater compression. PKZIP can use BZIP2 compression to create either ZIP or BZIP2-format archives (.bz2 files). A BZIP2 archive, unlike a ZIP archive, can contain only a single file. Files compressed with the BZIP2 method can be extracted with most versions of PKZIP, 4.6 and later, but other ZIP-compatible programs may not be able to extract files compressed with BZIP2. You can use the level option with bzip2 to specify a level of compression from 0 to 9 (0 is zero compression). The following command line uses the BZIP2 method with the level option set for maximum compression: pkzipc - add - bzip2 - level= 9 mydocs.zip *.doc Compressing Files with the LZMA Method lzma The LZMA compression algorithm often produces a higher compression ratio than Bzip2 but uses a lot of memory—as much as 16 MB—and takes more time than Deflate. Files compressed with the LZMA method can be extracted with PKZIP versions 12.3 and later, but other ZIP-compatible programs may not be able to extract such files. 56 Compressing Files Compatible with the Data Compression Library dclimplode The dclimplode option enables you to create use the same compression algorithms used by the PKWARE Data Compression Library. Files compressed with this method can be extracted by most versions of PKZIP 2.5x and later, though not by other .ZIPcompatible programs. When using the Implode compression method, you must specify dictionary type (ASCII or BINARY) and dictionary size (1024, 2048, or 4096). In general, the larger the dictionary, the greater the compression. Use the BINARY dictionary when compressing binary files (for example, executable programs) or when the type of the file is unknown. Use the ASCII dictionary with ASCII (text) files. For example, to use the DCL Implode method to compress all text files in a directory, type the following: pkzipc - add - dclimplode= ascii,4096 text.zip *.txt Compressing Files with the PPMd Method ppmd The ppmd option achieves especially good compression for natural language text but can use a lot of memory (~16 MB) and takes more time than Deflate. Files compressed with the PPMd method can be extracted with PKZIP versions 12.3 and later, but other ZIP-compatible programs may not be able to extract such files. Compressing Files to a Specified Type of Archive archivetype The archivetype option explicitly tells PKZIP the type of archive to create or extract. Use the option when PKZIP cannot figure out the correct archive type from the archive’s file name. For some examples, see “Writing an Archive to STDOUT.” PKZIP creates ZIP archives by default: When you use the add command to create a new archive, PKZIP creates a ZIP archive if you do not specify a file name extension that PKZIP recognizes as associated with a particular archive type. For example, the following command creates a ZIP archive called myfile.foo.zip: pkzipc - add myfile.foo 57 Similarly, if the command line does not tell PKZIP the type of archive to extract from, PKZIP tries to extract files from a ZIP-format file. With the archivetype option, you can explicitly tell PKZIP the type of archive to work with. For example, the following command line creates an archive myfile.foo.bz2 of the BZIP2 archive type. The file name extension bz2 associated with the BZIP2 archive type is added to the file name: pkzipc - add - archivetype= bzip2 myfile.foo A simpler way to create a BZIP2 archive called myfile.foo.bz2 is to specify the file name extension as part of the file name In this case, you do not need the archivetype option: pkzipc - add myfile.foo.bz2 When you specify the archive type with archivetype, you can include the noarchiveextension option to tell PKZIP not to add an extension to the file name. For example, the following command suppresses the bz2 extension that would normally be appended and creates a BZIP2 archive named myfile.foo: pkzipc - add - archivetype= bzip2 - noarchiveextension myfile.foo Compressing Files to Diskette span With PKZIP, you can save your .ZIP file or self-extracting file to one or more diskettes when you create it (instead of saving it on your hard disk drive). You can also create a split archive that is saved as multiple files on your hard disk. You can also have PKZIP format or wipe your removable media before writing to it. Creating a Spanned Archive You can save a ZIP file to multiple diskettes if it is too large to fit on a single one. This is called disk spanning. PKZIP prompts you to insert diskettes (or other media) as they are needed. Depending on the size of the ZIP file, it may be necessary for PKZIP to save the file on multiple diskettes. This process is called "spanning". To create a spanned archive: 1. Insert a diskette (or other appropriate medium) into its drive. 2. Type your PKZIP command, and press ENTER. Make sure to specify the drive letter or path that corresponds to your destination drive. A sample command line appears below: pkzipc - add - span a:\test.zip *.doc 58 Note: Ordinarily, PKZIP recognizes removable media as such and spans them as necessary automatically, even if you do not specify the span option. However, if PKZIP is unable to detect that you are creating your ZIP file on removable media, use the span option to tell PKZIP to span. Creating a Split Archive The span option is also used to create a split archive. A split archive is an archive created in segments, all of which are written to your hard disk as separate files. To create a split archive on your computer disk, specify a size in bytes, or use a predefined size from the following table: Predefined size Comment 360 360KB floppy disk (362496 bytes) 720 720KB floppy disk (730112 bytes) 1.2 1.2MB floppy disk (1213952 bytes) 1.44 1.44MB floppy disk (1457664 bytes) 2.88 2.88MB floppy disk (2915328 bytes) 95.7 100MB ZIP disk (100431872 bytes) 650 650MB CD-ROM (681574400 bytes) 700 700MB CD-ROM (734003200 bytes) For example, to create a split archive of size 1.44 Mb to your local system, type the following command: pkzipc - add - span= 1.44 c:\test.zip *.doc To have PKZIP format or wipe removable media before writing to it, use the span command with format or wipe. For example, the following command line formats the media prior to creating a ZIP archive: pkzipc - add - span= format a:\test.zip *.doc 59 Preserving International Characters in File Names utf8 The utf8 option enables UTF-8 characters in file names and file comments to be correctly displayed when an archive’s contents are viewed or extracted in compatible non-UTF-8 locales. For example, with the utf8 option, you can archive files in a Japanese locale using the EUC character set (and the utf8 option) and then correctly view or extract the files in a Japanese locale using the Shift-JIS character set. The option can be used with these commands/options (comment can be either a command or an option): • Add • Comment If a command line containing the utf8 option modifies an archive in any way, UTF-8 characters are used in the names of all files in the archive. In general, use the utf8 option when you add to an archive files that contain international (that is, non-English) characters in file names and file comments. For example: pkzipc - add test.zip - utf8 *.* PKZIP displays the following message to highlight that the option is used: Using UTF-8 file names and comments PKZIP uses the utf8 option automatically when run on UNIX in a UTF-8 locale (such as ja_JP.UTF-8); you do not need to use it explicitly. The utf8 option is incompatible with the 204 option: an error results if the two options are used together. (PKZIP does not turn on the utf8 option automatically on UNIX if the 204 option is used.) PKZIP/SecureZIP Server version 8.6 or SecureZIP for Windows version 11 is required to extract files added with the utf8 option, so use the option only with archives that you expect to be extracted with these (or later) versions of these programs. Creating Multiple, Respective Archives archiveeach With the archiveeach option, you can create a separate archive for each of multiple files specified in a single command line. 60 pkzipc - add - archiveeach *.* With archiveeach, you do not specify names for new archives. PKZIP names each new archive after the file it contains, with an archive-type file name extension (ZIP by default) appended to the end. For example, a ZIP archive created for file mydata.xls is named mydata.xls.zip. An archive created for file mydata.zip is named mydata.zip.zip. If an archive with the same name already exists in the target location, PKZIP appends a number to the archived file name before appending the .zip (or other file name extension). For example: mydata.xls2.zip. To specify a particular archive type, use the archivetype option with the archiveeach option. The archiveeach option can also be used with the encode option, to convert the archive initially created to a different type. By using archivetype and encode together with archiveeach, you can, for example, create multiple .tar.gz files: pkzipc - add - archiveeach - archivetype= tar - encode= gz C:\data\*.* You can specify a destination for the new archives in a sub-option to archiveeach: pkzipc - add - archiveeach= C:\newzips C:\myfiles\*.* You can use the substitution option to have PKZIP add a timestamp to the name of a new destination directory created for the archives. See “Inserting a Timestamp in the Archive File Name” in Chapter 5. Storing File Information PKZIP allows you to store specific file attribute/information within your .ZIP file. You can: • Store file attributes, including hidden, system, archive, and read-only. • Store extended file attribute information. • Remove (mask) file attributes. Refer to the sections that follow for more information. Compressing Files with Specified Attributes attributes PKZIP allows you to compress files based on the attributes that they possess. These attributes are usually assigned either by the creator of a file, a system administrator, or by the operating system. The following are attributes you can store: 61 • Hidden • System • Read-only • Archive The attributes set by default for compression are archive and read-only. With this setting, if you do not use the attributes option on your command line, PKZIP compresses all files except any having the attributes hidden or system. To specify a file attribute, you must include it with the attributes option in your command line. Each attribute is a value for the attributes option. You can: • Specify which file attributes to compress • Override configured default values • Turn off the attributes option The table below lists all of the available sub-options for storing file attribute information: Sub-Option: To: For example: hidden Compress files including those that contain the "hidden" file attribute. pkzipc -add -attributes=hid test.zip system Compress files including those that contain the "system" file attribute. pkzipc -add -attributes=sys test.zip readonly Compress files including those that contain the "read-only" file attribute. pkzipc -add -attributes=read test.zip archive Compress files including those that contain the "archive" file attribute. pkzipc -add -attribute=archive test.zip all Compress files including those that contain the hidden, system, or readonly file attribute. pkzipc -add -attributes=all test.zip none Turn off the attributes option in the Configuration file or compress files that do not have any attributes set. pkzipc -config -attributes=none You may use a dash (-) before an attributes sub-option on your command line to exclude files with a specific attribute from being added regardless of the default attributes configuration setting. If, for example, the default attributes configuration setting was set to "all", you could enter the following command line to exclude hidden files from being added to the test.zip file. pkzipc - add - attributes= - hidden test.zip 62 Extended Attribute Storage noextended When PKZIP adds files to an archive, PKZIP stores the standard FAT file system attributes (Read-Only, Archive, System, Hidden, Directory). By default, various extended attributes are stored as well. These include NTFS times on Windows. The extended attribute timestamps are more accurate than the DOS modification time, but you can slightly reduce the size of an archive by omitting this extended attribute information. To exclude extended attribute information, use the noextended option, as in the following example: pkzipc - add - noextended test.zip readme.doc Note: The noextended option does not affect storage of the offline, temporary, and system attributes. Extended Attributes and the OS Extended attributes are automatically added to .ZIP archives when they are created. PKZIP does not display a message indicating that it is saving extended attributes. PKZIP stores the following extended attributes: • Create time • Last modification time • Last access time Note: Typically, PKZIP automatically extracts extended attributes with archived files and/or directories and thus overwrites existing files, directories and extended attributes with the ones stored in the .ZIP file. Extended Attributes and 204g Compatibility 204 By default, PKZIP does not enable PKZIP for DOS 2.04g compatibility. When 204g compatibility is enabled, extended attribute data is stored in both the Local header and Central header records. This will result in a slightly larger .ZIP file size, but improves the chance that extended attribute information can be recovered if the .ZIP file should become damaged. It also ensures the extended attribute information is always retained if the file is generated with a version of PKZIP other than 2.04g. This option is ignored when extracting. The 204 option also limits the number of files that can be added to a .ZIP archive to 16,383. To enable 204g compatibility, use the 204 option as in the following example: pkzipc - add - 204 test.zip * 63 Including Additional Information in a ZIP File With PKZIP, you can include additional information in your .ZIP file, such as a comment to identify that .ZIP file. You can include a: • Text comment. • Passphrase to protect your .ZIP file. • Header comment. • Date for the .ZIP file (other than the creation date). Refer to the sections that follow for more information. Including a Text Comment comment With PKZIP, you can include a comment for the individual files within a .ZIP file. There are several options for adding comments to your .ZIP files. To include a comment, use the comment option alone or with the add command. When you run the command, PKZIP prompts you to enter the comment. The table below lists the available sub-options for adding comments to your .ZIP archives: Sub-Option: To: For example: all Comment all of the files and any new files added. pkzipc -add -comment=all test.zip * unchanged Comment only files existing in the ZIP file that are not either updated or being added. pkzipc -add -comment=unchanged test.zip * add Comment only the new files added. pkzipc -add -comment=add test.zip * none Disable the comment option. pkzipc -add -comment=none test.zip * freshen Comment all of the files updated in the ZIP file. pkzipc -add -comment=freshen test.zip * update Comment all files added and updated in the zip file. pkzipc -add -comment=update test.zip * Note: Comment length is limited to 59 characters. 64 Including a Header Comment header With PKZIP, you can include a general comment for a .ZIP file. This is called a "header" comment because it appears in the header portion of a .ZIP file. This differs from the comment option in that the "header" comment applies to the entire .ZIP file, not to individual files within the .ZIP file. Note: Headers for .ZIP files are limited to 16K in size. PKZIP will automatically truncate headers larger than 16K. To include a header comment, use the header option and the comment or comment file with the add command. PKZIP provides several methods to include the comment. You can: Include an existing file as the header. With this method, you type the [email protected] option. If there are no spaces in the file name, it is not necessary to use quotation marks. For example: pkzipc - add - header= @header.txt test.zip * Type the actual comment as part of the command. With this method, you include an equal sign, followed by the comment. If there are no spaces in your comment, it is not necessary to use quotation marks. Our example comment does include spaces so therefore our command line would look like the following: pkzipc - add - header= "This is the comment" test.zip * • If you include the header option only, PKZIP will prompt you for text you wish to be the header: pkzipc - add - header test.zip * • When you press enter, the following prompt appears: Zip Header ? Type your header comment and press ENTER. Specifying the Date of a .ZIP File archivedate When you create an archive file, PKZIP gives it the current date by default. You can specify a different date for the file by using the archivedate option with the add command. Note: The archivedate option is the same as the older zipdate option, which is now deprecated. PKZIP provides several methods for applying a date to an archive file. The table below lists the available sub-options for applying date information to your archives: 65 Sub-Option: To use: For example: retain The date that the file was created. pkzipc -add -archivedate=retain test.zip * none The current date. pkzipc -add -archivedate=none test.zip * oldest The date of the oldest file within the archive file. pkzipc -add -archivedate=oldest test.zip * newest The date of the newest file within the archive file. pkzipc -add -archivedate=newest test.zip * (Default) Removing File Attributes mask If you use the attributes option to have PKZIP process files that have attributes, such as hidden or system, specified with the attributes option, you can use the mask option to strip those attributes from the files when they are archived or extracted. You can only use the mask option with attributes specified with the attributes option. Attributes can be specified with this option either on the command line or as configured defaults, The table below lists all of the available sub-options for masking file attribute information: Sub-Option: To: For example: hidden Remove the hidden file attribute from files. pkzipc -add -mask=hidden test.zip * system Remove the system file attribute from files. pkzipc -add -mask=system test.zip * readonly Remove the read-only file attribute from files. pkzipc -add -mask=readonly test.zip * archive Remove the archive attribute from the file. pkzipc -add -mask=archive test.zip * none Turn off file masking. pkzipc -add -mask=none test.zip * all Remove all attributes from files. pkzipc -add -mask=all test.zip * The mask sub-options can be used on the command line either individually or in a comma-separated list. You may use a dash (-) before a mask sub-option on your command line to preserve a file attribute being added or extracted with a file, regardless of the default mask configuration setting. For example, if the default mask configuration is set to all, you 66 can enter the following command line to preserve the hidden attribute associated with any of the files to be added: pkzipc - add - mask= - hidden test.zip Sorting Files Within a .ZIP File sort With PKZIP, you can sort the files in an archive in several ways. If you do not change the sort order, the files are automatically sorted in the order in which they were compressed into the archive. This is called the "natural" order. The sort option works with the add, extract, test, and view commands. The value you include with sort depends on the command you select. Sub-Option To sort by For example date File date. pkzipc -add -sort=date temp.zip size Original uncompressed size of the file ("length" in display). pkzipc -add -sort=size temp.zip extension File extension. pkzipc -add -sort=ext temp.zip name Sorts files and folders by name in a single series. (Contrast with sort=none.) pkzipc -add -sort=name temp.zip none Groups folders first, sorted by name, and then groups files, sorted by name. (The default.) pkzipc -view -sort=none temp.zip natural Preserves the order in which files were added to an archive. pkzipc -view -sort=natural temp.zip ratio Ratio of uncompressed size to compressed size. pkzipc -view -sort=ratio temp.zip crc comment CRC (Cyclic Redundancy Check) number. File comment. Note: The ratio sub-option will not work with the add command. pkzipc -view -sort=crc temp.zip Note: The crc sub-option will not work with the add command. pkzipc -view -sort=comment temp.zip Note: The comment sub-option will not work with the add command. The name sub-option sorts entire path names; it does not sort file names directly if folder information is present. 67 For example, the name sub-option sorts the two files abacus.txt and zebra.txt as follows if they are added to an archive without including any path or folder information: abacus.txt zebra.txt However, if the files are added with folder information, the name of the outermost folder in the path determines their order of appearance. This is because name sorts the entire path name whether or not it includes folder names. For example: all\junk\zebra.txt everything\important\abacus.txt By contrast, the none sub-option groups path names that contain folder names and sorts this group in a separate series from file names that do not include folder information. The names below are sorted by none: all\junk\zebra.txt everything\important\abacus.txt anotherfile.txt lonefile.doc somepix.gif If no sort option is specified, files are sorted as if sort=none was specified (unless you have changed configuration defaults). If you specify the sort option on your command line but do not specify a sub-option value, the name sub-option is applied. Note: Using the sort option with the add command only works on new archive files. It does not work with an archive that is being updated. Moving Files to a .ZIP File move Normally, when you compress files, you end up with two copies of each file: the original file and the compressed file. With PKZIP, you can choose to remove the original file "after" you compress it into the .ZIP file. If you want to move only specific files, you must compress them separately since you can only move all or none of the files that you are compressing. To move files, use the move option with the add command, as shown below: pkzipc - add - move test.zip *.doc This sample command line tells PKZIP to compress and add to archive test.zip all files that end in .doc and then to delete the original files. CAUTION: Like any operation that deletes files, the move option should be used with care. 68 Shredding Deleted Files shred A deleted file still remains on your disk and can often be fully or partly recovered. So can the temporary files that PKZIP creates when updating an archive. To erase these files to prevent information from being retrieved from them, use the shred option with the add command. Shredding a file overwrites the file’s data so that it cannot be read. Shredding overwrites these files: • Deleted originals that have been moved into an archive with the move option • Temporary files that contain the previous version of an archive that has just been updated Note that overwriting files with the shred option takes some additional time. Shredding can overwrite files only if the file system applies the overwriting to the same physical disk sectors that the file to be overwritten used. Most UNIX and Linux file systems do not do this. For this reason, shredding works most reliably on Windows. Shredding has a couple of other constraints: • Files on the Windows NTFS file system that have been encrypted or compressed by NTFS itself have a special NTFS attribute. PKZIP cannot shred these files. • The system temporary folder must be local; it cannot be on a removable or network drive for shredding to work. PKZIP can delete files that are on a removable or network drive but cannot shred them. The shred option has these sub-options: Sub-Option Description None Turns shredding off if it is configured on Random Overwrites files once with random data (the default) Dod5220 Overwrites files three times, to the DOD 5220.22-M specification NSA Overwrites files seven times, to the NSA standard. (Takes much longer.) For example: pkzipc - add - move - cryptalgorithm - passphrase - shred= NSA secret.zip *.* 69 Working with Self-Extracting (PKSFX) Archives sfx With the PKZIP Self-Extractor, you can use PKZIP to create PKSFX archives. A PKSFX archive is self-extracting: it has an .exe file name extension (instead of .zip, for instance), and it can be extracted just by executing it, even by someone who does not have PKZIP or another ZIP utility. (PKSFX archives are also called SFX files and self-extractors.) Note: The PKZIP Self-Extractor is separately licensed and is not included with all PKZIP packages. Contact PKWARE if you want to create self-extracting archives but your current license does not enable you to use the related commands and options. You can create self-extractors of two general types: • A native command line self-extractor for use in the command line environment of the operating system on which PKZIP is running. The native command line self-extractor extracts without using any graphical userinterface features such as dialog boxes. • A graphical 32-bit Windows self-extractor for use in the graphical Windows environment (Windows versions 9x, NT [Intel], XP, and Vista). When run, a graphical Windows self-extractor opens a dialog that contains controls to view progress or set options for extracting files. To create a self-extracting archive, use the sfx option with the add command. For example, the following line creates a native command line self-extractor mysfx.exe: pkzipc - add - sfx mysfx *.doc When used without a sub-option, the sfx option creates a native command line selfextractor by default. Use the listsfxtypes command to list sfx sub-options for the types of self-extractors available to you. The exact types vary with your system and license. For example, the following command pkzipc - listsfxtypes produces a display like this: The SFX sub-option choices are: WIN32_X86_C1230 - V12.30 Command Line SFX for Windows on X86 WIN32_X86_G1230 - V12.30 Windows SFX for Windows on X86 In the list above, win32_x86_c… designates the native Windows command line selfextractor, and win32_x86_g… designates the graphical Windows self-extractor. The digits at the end give the version number. To create a graphical Windows self-extractor, use the sfx option with the win32_x86_g1230 sub-option. For example: pkzipc - add - sfx= win32_x86_g1230 mysfx *.doc 70 You only need to enter enough of the name of an SFX type to uniquely identify it; you can leave off the version number at the end: pkzipc - add - sfx= win32_x86_g mysfx *.doc You can also use sfx as a command to convert an existing, ordinary ZIP file to a selfextractor. To do so, use the sfx command by itself on the command line, without the add command, and specify the ZIP file to convert. For example: pkzipc - sfx= win32_x86_g1230 myfiles.zip Notes: • You cannot use the sfx option with the cd option to create or convert an archive with encrypted file names • The sfx command can only convert ZIP archives that are physical files. It cannot convert ZIP archives that are special files (named pipes, sockets) or are presented from STDIN. Converting a Standard Archive to a Self-Extractor To convert a standard ZIP file to a self-extracting archive, use the sfx command, by itself, without the add command. For example, the following command line converts standard archive test.zip to self-extractor test.exe. PKZIP replaces zip in the file name with exe. pkzipc - sfx test.zip Converting to a Self-Extractor with a Different Name Ordinarily, when you use the sfx command to convert a standard archive to a selfextracting archive, the archive keeps its original name except for the extension, which PKZIP changes from zip to exe. To give an archive a different name, use the namesfx option to specify a new name when you convert the archive: pkzipc - sfx - namesfx= test123.exe test.zip If you omit the .exe in the new name, PKZIP supplies it. Note: You cannot use the sfx option with the cd option to create or convert an archive with encrypted file names. Options for Creating Self-Extractors You can use the following options together with the sfx command/option to customize a self-extractor in various ways when you create it. The options are described in the following sections. Default values for all the options can be configured with the configuration command. As indicated in the table below, some of the options require a GUI (that is, a graphical) self-extractor and do not work with command line self-extractors. 71 Option Works only with GUI Self-Extractors SFXDestination X SFXDirectories X SFXLogfile SFXOverwrite X SFXUIType X RunAfter SFXDestination The SFXDestination option specifies a default target folder for extracted files. For example: pkzipc - add - sfx= win32_x86_g - sfxdestination= ”My Documents\newstuff” mysfx *.doc If no drive letter is listed in the path, the self-extractor chooses the drive that contains the temporary folder and appends the path to the temporary folder. If the specified destination folder or path does not exist, the self-extractor prompts the user whether to create it. The SFXDestination option works only with a GUI self-extractor. SFXDirectories The SFXDirectories option causes the self-extractor to restore saved directory paths on extraction. To recurse subdirectories and save path information (relative to the current directory) when you add files to a self-extractor, use the directories option. For example, the following command line archives the docs folder and all its files and subfolders. The docs folder and the saved subfolders are restored on extraction. pkzipc - add - sfx= win32_x86_g - sfxdirectories - directories mysfx "docs\*.*" The SFXDirectories option works only with a GUI self-extractor. SFXLogfile The SFXLogfile option creates an ASCII text SFX error log named pkerrlog.txt in the destination directory on extraction. pkzipc - add - sfx - sfxlogfile test.exe *.doc 72 SFXOverwrite The SFXOverwrite option specifies when the self-extractor overwrites files that have the same name as a file being extracted. The option has the sub-options listed in the table below. Sub-option Description prompt (Default) The user is asked whether to overwrite files always Files that have the same name in the destination folders are overwritten without prompting update Only files that do not already exist or are newer than same-named files freshen Only newer versions of files that already exist in the destination folders are extracted; the older files are overwritten without prompting never Files are never overwritten For example: pkzipc - add - sfx= win32_x86_g - sfxoverwrite= freshen mysfx *.doc The SFXOverwrite option works only with a GUI self-extractor. SFXUIType The SFXUIType option specifies the type of graphical interface that the self-extractor presents to the user. This option only affects GUI self-extractors. (Command line selfextractors do not present a GUI.) The option has the sub-options listed in the table below. Sub-option Description AutoSFX Presents a dialog that displays a bar to show progress extracting, and a Cancel button EasySFX (Default) Presents a dialog that enables the user to select a destination folder and to turn off any runafter option set. (See “Run Programs with the Self-Extractor,” below.) RegularSFX Presents a dialog that enables the user to change the destination folder and other options before the archive is extracted For example: pkzipc - add - sfx= win32_x86_g - sfxuitype= regularsfx mysfx *.doc Run Programs with the Self-Extractor Use the runafter option with the sfx option to create a self-extracting archive that runs a program after the self-extractor is run. This option enables you to create a selfextractor that runs a script or opens a file after the contents of the self-extractor are extracted. 73 The runafter option does not work with the following types of self-extractors: • DOSJR_X86_C250 - 2.04g compatible SFX Junior for DOS • DOS_X86_C250 - 2.04g compatible SFX for DOS Use the listsfxtypes command to list the types of self-extractors available to you: pkzipc - listsfxtypes Here are examples showing uses of the runafter option. Create a self-extractor to open a readme.txt file after extraction: pkzipc - add - sfx - runafter= "notepad.exe readme.txt" test.exe * Create a self-extractor to open a file by means of its associated application: pkzipc - add - sfx - runafter = "${}readme.txt" test.exe * Create a self-extractor to run an install script: pkzipc - add - sfx - runafter = "${install}install.inf" test.exe * Create a self-extractor to run an install script, with the full path prepended (%0): pkzipc - add - sfx - runafter = "${install}%0install.inf" test.exe * Extraction Options for the Native Self-Extractor To extract files from a self-extracting archive, you run the archive. For example, to extract files from self-extractor test.exe, use the following command line: test.exe When you run a native command line self-extractor, you can use the command line options listed below. The options can be used only with a native self-extractor; they cannot be used with a Windows graphical self-extractor: after locale silent before lowercase smaller console mask sort directories more test exclude newer times extract noextended translate help older version include overwrite warning larger passphrase license print For example, the following command line excludes all text (.txt) files from the set of files to be extracted: test.exe - exclude= "*.txt" 74 4 Extracting Files This chapter describes the options PKZIP offers for extracting files from archives. These options give you various ways to choose what files to extract and where to extract them to and help you manage every aspect of extracting files. Default Values for Commands and Options Commands and options that have sub-options generally have a default value. This is the sub-option value that is used if none is explicitly specified on the command line. For example, the default behavior for the extract command is to unzip or uncompress all files in an archive. This behavior is set with the all sub-option of the extract command. See Chapter 6 for information on configuring default values for commands and options. Extracting New and Existing Files When you extract files from a .ZIP file, you can select those files you wish to extract and those you do not. If the directory into which you extract the files contains files that have the same name as those being extracted, you have to decide if you want to overwrite those files. PKZIP provides several ways to choose which files to extract. You can extract: 75 • All files in an archive (the all sub-option) • Files that are not in the target extract directory plus files that are more recent versions of files that are in the extract directory (the update sub-option) • Only files that are more recent versions of—that is, have the same names as—files that are already in the extract directory (the freshen sub-option) Extracting All Files from an Archive extract=all To extract all files from an archive file, type pkzipc -extract and the name of your archive file, as shown below: pkzipc - extract test.zip In this example, all files in the archive are extracted into the current directory. The all sub-option is the original default for the extract command. You do not need to specify this sub-option unless you have changed the default for extract to some other sub-option. The following example explicitly specifies the sub-option. This command does the same thing as the first example but also overrides any changed default setting. The override applies just to this instance of the command; it does not reset the default you have defined. pkzipc - extract= all test.zip Extracting Newer Versions of Existing Files and New Files extract=update The update sub-option extracts to the target, extract directory only files that are not already in the directory or are newer versions of files that are already there. Archive files that are older versions of files already in the directory are not extracted. pkzipc - extract= update test.zip Extracting Only Newer Versions of Files extract=freshen The freshen sub-option extracts only files that are newer versions of files that already exist in the target, extract directory. It does not add any files to the directory that are not already there in an earlier version. pkzipc - extract= freshen test.zip 76 Extracting from an Archive Embedded in An Archive embedded An archive can contain other archive files. For example, a ZIP file can contain other ZIP archives, or a GZIP archive might contain a TAR archive. Such contained archives are said to be embedded in the archive that contains them. If PKZIP encounters a lone embedded archive file in another archive whose contents PKZIP is extracting, PKZIP prompts you whether you would like to extract the contents of the embedded archive or just the archive itself. For example, if PKZIP is extracting the contents of outerarchive.zip, and outerarchive.zip contains innerarchive.zip, PKZIP asks you whether you want to extract the files in innerarchive.zip or just innerarchive.zip itself. The embedded option can be used with extract to tell PKZIP to omit the prompt and just go ahead and extract the files contained in any lone archive file embedded in an archive of the specified type. You must specify the type of the outer, container archive for which you want to extract files from embedded archives. For example: pkzipc - extract - embedded= zip outerarchive.zip In the example, if outerarchive.zip contains a single embedded archive (it may also contain non-archive files), PKZIP extracts the files from the embedded archive instead of extracting the embedded archive itself, and does not prompt. The embedded option can be configured to operate by default. For example, the following command line configures embedded so that files are routinely extracted from single archives (such as .tar archives) embedded in .gz files: pkzipc - config - embedded= gz Put a hyphen in front of the embedded sub-option to tell PKZIP not to prompt or extract the contents of an embedded archive in an archive of a specified type. A command line containing a hyphenated sub-option overrides a configured setting. For example, the following command line extracts only an embedded archive, not its files: pkzipc - extract - embedded= - gz outerarchive.gz Note that PKZIP extracts the contents of an embedded archive, with or without prompting, only if that archive is the only embedded archive in the outer archive file. If the outer archive file contains multiple embedded archives, the embedded archive files themselves are extracted. Extracting an Archive on STDIN or a Special File Ordinarily, when you use the extract command to extract files from an archive, you extract the files from a physical archive file. For example, the following command line extracts all .txt files from the archive myfiles.zip: 77 pkzipc - extract myfiles.zip *.txt PKZIP can also extract files from an archive that is not a physical file but is presented from an input source such as STDIN or a named pipe. Note: Some options are not supported when extracting from an archive that is not a physical file. In particular: • Signatures (added with the sign option) on either files or the archive central directory are not processed • Because signatures are not processed, the verifysigner extraction option always fails. (This option requires verification that an archive was signed using a specified certificate.) • File name encryption (cd option) is not supported Extracting from an Archive on STDIN You can specify STDIN (standard input) instead of a physical file as the location or source of an archive from which to extract files. To do so, use a hyphen “–” in place of the name of an archive file. In a command line with the extract command (or the test or view command), the hyphen tells PKZIP to read the archive from STDIN. For example: pkzipc - extract - noarchiveextension - silent= input - or (UNIX): cat file.zip | pkzipc - view - noarchiveextension - silent= input - The noarchiveextension option is needed so that PKZIP does not take the hyphen as a file name and try to extract from a file named -.zip. If the archive is not a ZIP archive, use the archivetype option to specify its type. For example, the following command line tells PKZIP that the file is a BZIP2 archive: pkzipc - extract - archivetype= bzip2 - noarchiveextension - silent= input - The option silent is set to the input sub-option to suppress any PKZIP requests for input (a passphrase, for example). If input is needed, the extraction fails with an error. See “Writing an Archive to STDOUT” in Chapter 3 for a way to create an archive that is presented through STDIN. Extracting an Archive from a Named Pipe You can specify a named pipe instead of a physical file as the location of an archive from which to extract files. The pipe or socket must first be created, perhaps by another program, and an archive must be written to it. To extract, use the name of the pipe in the command line in place of the name of an archive file. For example: pkzipc - extract - noarchiveextension < name of pipe> 78 As when extracting from STDIN, you must use the noarchiveextension option to prevent PKZIP from trying to extract from a .zip file—in this case, one named for the pipe or socket. PKZIP tries to extract from ZIP-format archives by default. To extract from a different type of archive, use the archivetype option to specify the type. For example, the following command line tells PKZIP that the archive is a BZIP2-format file: pkzipc - extract - archivetype= bzip2 - noarchiveextension < name of pipe or socket> You must use the full UNC path when referring to a named pipe on Windows. For example: pkzipc - extract - noarchiveextension \\.\pipe\mypipe *.doc In the preceding example, the dot in the path \\.\pipe\mypipe references the current machine. To reference a pipe on a different machine—named boulder—specify the machine. \\boulder\pipe\mypipe You can use either a name or an IP address to specify a machine. You must use the noarchiveextension option to prevent PKZIP from trying to extract from an archive file named .zip. Extracting to Dynamically Named Folders substitution With the substitution option, you can extract the contents of an archive to a folder whose name and path are constructed on the fly from tokens embedded in the specification for the destination folder on the command line. PKZIP creates the actual name of the folder by substituting values for the tokens when the archive is extracted. Tokens are supplied that enable you to name the folder after the archive to be extracted to it, replicate the path to the archive, and embed timestamp elements. With this option, you can use a single command line to extract multiple archives each to its own custom-named folder. The table below lists the tokens for use with the substitution option when extracting. 79 Token Replaced by {archivename} Base name of archive, without the extension {archiveext} The file name extension of the archive (without a leading dot) {archivepath} The path of the archive, without the file name, preceded by a slash or backslash and excluding the drive letter or share path if the name is a UNC name {id} A job ID specified separately with the jobid option. For example, if run in 2006: pkzipc –add –jobid=myJob –substitution {id}{yyyy}.zip *.doc produces a ZIP file named: myJob2006.zip {mm} Month, 2-digit {m} Month, 1-digit (if possible); no leading 0 {dd} Day, 2-digit {d} Day, 1-digit (if possible); no leading 0 {yyyy} Year, 4-digit {yy} Year, 2-digit {HH} Hour, 2-digit, 24-hour format {H} Hour, 1-digit (if possible), 24-hour format {hh} Hour, 2-digit, 12-hour format {h} Hour, 1-digit (if possible), 12-hour format {MM} Minute, 2-digit {M} Minute, 1-digit (if possible); no leading 0 {SS} Second, 2-digit {S} Second, 1-digit (if possible); no leading 0 {ampm} a.m. or p.m. indicator to identify current 12-hour segment of the day The following command line shows a straightforward example of the substitution option. The command line extracts all ZIP files in the current directory, each to a subdirectory named after the ZIP archive extracted there. If two ZIP files, myfiles.zip and myfiles2.zip, are in the current directory, the command line extracts them to subfolders named myfiles and myfiles2, respectively. pkzipc - extract - substitution *.zip {archivename}\ The example below uses the {archivepath} token to specify the archive path for the destination folder. The {archivepath} token includes a leading backslash (or slash). The command line extracts all ZIP files in folder \home\thomas\ each to its own subfolder in other\location\home\thomas\. For example, it extracts 80 myfiles.zip in folder \home\thomas\ to subfolder other\location\home\thomas\myfiles. pkzipc - extract - substitution \home\thomas\*.zip \other\location{archivepath}\{archivename}\ If run from C:\myproject, the command line below extracts all ZIP files to C:\myproject\test. The dot in the specification for the target folder locates the start of the extraction path in the current folder. The drive letter is stripped. pkzipc - extract - substitution D:\test\*.zip .{archivepath}\ If the date is July 31, 2008, and the directory C:\app1\ contains myfiles.zip and test2.zip, the command line below extracts test1.zip to folder test107312008 and test2.zip to folder test2-07312008: pkzipc - extract - substitution C:\app1\*.zip {archivename}- {mm}{dd}{yyyy}\ The following example shows how {archivepath} strips out a share path. If \\server\share\path\to\zips contains test1.zip and test2.zip, and the current directory is d:\testme, the command line extracts test1.zip to d:\path\to\zips\test1 and extracts test2.zip to d:\path\to\zips\test2: pkzipc - extract - substitution \\server\share\path\to\zips\*.zip {archivepath}\{archivename}\ The example below uses the substitution option when extracting an archive from STDIN, represented by a hyphen (–) in the command line (see “Extracting an Archive on STDIN or a Special File”). If the date is July 31, 2008, an archive provided on STDIN is extracted to directory \-07312008. In this case, {archivepath} and {archiveext} are replaced with nothing, and {archivename} is replaced with a hyphen. pkzipc - extract - substitution - noarchiveextension {archivepath}\{archivename}{archiveext}{mm}{dd}{yyyy} The substitution option can also be used with the add command and a slightly different set of tokens to insert a timestamp in the name of a newly created or updated archive. See “Inserting a Timestamp in the Archive File Name” in Chapter 5. Checking for Viruses when Extracting avscan, avargs PKZIP can use your anti-virus program to scan for viruses when you extract files. The avscan option controls whether extracted files are scanned for viruses and specifies the anti-virus program to run to do scans. When you extract with the avscan virus scanning option turned on, PKZIP first extracts the specified files and then runs the anti-virus program to recursively scan all files in the specified destination directory and its subdirectories. PKZIP relays to you any messages returned by the virus scanning program. 81 If your virus scanner is set up to scan files dynamically as they are read or written, you do not need launch a virus scan from PKZIP. Your virus scanner will automatically scan the files as they are extracted. How your anti-virus program deals with files infected by a virus is determined by the way the program is configured and by the arguments, if any, included in the PKZIP command line used to run the scanner. The contents of the command line used to run the scanner and the arguments that may be available for it depend on your antivirus program. Use the PKZIP avargs option to specify any anti-virus command line arguments. To tell the anti-virus program what directory to scan, include the variable %e. PKZIP replaces this variable with the full path to the extraction directory before passing the command line to the anti-virus program. The following example shows avscan used to run a virus-scanning program. The variable %e and arguments for the virus-scanning program’s command line are given in the avargs option. pkzipc - extract - avscan= f- prot.exe - avargs= "%e /silent /nomem /noboot" myfiles.zip In avscan, specify the full path to the anti-virus program if the executable is not on the search path. PKZIP assumes that the anti-virus program will not launch any graphical interfaces that require user interaction and that the program will automatically clean up any viruses that it finds. Most virus scanning programs return a value of 0 when a scan completes successfully and finds no viruses. If a program returns any other value as the result of a scan, PKZIP issues a warning that some of the extracted files may not have passed the scan. Both avscan and avargs can be configured for use by default. Configuring avscan causes PKZIP to do virus scans by default whenever files are extracted, using the specified anti-virus program executable and whatever anti-virus command line arguments, if any, are given in avargs. Extracting Files in Lower Case lowercase The lowercase option allows you to extract files in lower case regardless of how the file name was originally archived. To force the file names to be extracted in lowercase, use the following example: pkzipc - extract - lowercase test.zip 82 Preserving File Times times The times option allows you to preserve the access, creation and modification times of the extracted files. Specify the sub option all to preserve all times, use access to preserve the access times only, use modify to restore the time of last modification times or create to restore the creation times. To preserve all the file times, use the following example: pkzipc - extract - times= all test.zip Retaining Directory Structure while Extracting directories If you stored directory path information within a .ZIP file, you can re-create those directory paths when you extract the files. For example, if you compressed a file called apples.doc in the temp/fruit directory, and you stored temp/fruit you can recreate temp/fruit in the location in which you extract the files. To re-create directories, use the directories option with the extract command, as in the following example: pkzipc - extract - directories test.zip When you use this command, all directories that were stored in the .ZIP file will be retained during extraction. The directory path stored is appended to the directory in which you extract the files. For example, if your extract directory is /doc, and a directory path stored with the files is temp/fruit, the files would now be extracted to /doc/temp/fruit. Sorting Files in the Extract Directory sort PKZIP allows you to specify the sort order of files that are compressed in a .ZIP file or extracted into a destination directory. For example, if you wish to extract files in a specified sort order (by date), you would type the following and press ENTER: pkzipc - extract - sort= date test.zip In this example, all files that exist in the test.zip file are extracted into the current directory sorted in ascending order by date. For more information on sort options, see Appendix A. 83 Extracting Files Only for Display console PKZIP gives you the option of displaying specific files contained in a .ZIP file to your computer monitor. For example, if you wish to view the contents of all of the .txt files contained in a .ZIP file, type the following and press ENTER: pkzipc - console test.zip *.txt In this example, all files with a .txt extension that exist in test.zip are displayed on the monitor. Extracting Files with a List File You can use a list file to specify files to extract from an archive. In the list file, specify file and path name information to identify the target files. You can explicitly list individual files to extract, or you can use wild card characters (*, ?) to specify multiple files in a single entry. For example, entries like the four below are permitted: Fred\My Documents\tmp\yparent\ychild\ychild1.txt Documents and Settings\Fred\My Documents\tmp\yparent\*.txt dparent?.txt *.xls How you identify files in an archive depends on the path information that was archived with them. In an archive, path information is treated as part of a file name for purposes of identification. So d*.txt does not just get all .txt files whose names start with d in the root folder of an archive; it gets all .txt files whose pathname starts with d. For example, it would get these files: Documents and Settings\Fred\My Documents\tmp\yparent\*.txt dparent?.txt Do not use drive letters in a list file used to extract. Drive letters are not saved with other path information in an archive and are not allowed in extraction list file entries. To specify a list file to use to extract, prefix the pathname of the list file with the @ character on the command line after the name of the archive. For example, the following line extracts using list file mylist.txt: pkzipc - extract test.zip @tmp\mylist.txt See the listfile option for information on using this option to create a list file. See the view option for information on viewing path information saved in an archive. Authenticating Digital Signatures When you extract files from an archive or test an archive with the test command, PKZIP authenticates any digital signatures attached to the files or the archive. A 84 digital signature, like a pen-and-ink signature, warrants that the signed item really comes from the signer and has not been changed. You can use the test command on an archive to check for a signature before extracting files. Testing tells you whether files are signed, authenticates any signatures, and gives you information about certificates used to sign files. PKZIP authenticates signatures automatically when extracting. Use the crl option to have PKZIP check an accessible certificate revocation list (CRL) to see if a certificate used for signing has been revoked. (See “Checking for Revoked Certificates” in Chapter 5.) Signatures can be applied to particular files and/or to the central directory of an archive (that is, to the archive itself). The following table lists warning messages that can be displayed when you test or extract signed files, and thus cause PKZIP to authenticate signatures. Message Explanation What to do? Signature is invalid The file or archive has changed since it was signed. You may want to try to obtain the file again (for example, download the file again from the Web site). The archive may be corrupt. Contact the archive creator as the file/archive has been compromised. If the file was downloaded from a Web site, you may want to contact a person at that company about the file. If a file has an invalid signature, then the file may have been modified. If the central directory has an invalid signature, then file(s) have been modified, added or deleted from the archive since the archive was signed. Certificate is not trusted The certificate used to sign is currently not to be trusted. This message indicates that the certificate is not to be trusted, but there may be no problem with the archive. Contact the issuer of the certificate to validate the certificate/signature. Certificate is expired Certificate is revoked The certificate has expired (perhaps because the archive was signed a long time ago). Contact the owner of the certificate. Indicates the issuer has revoked the certificate. Contact the issuer or owner of the certificate. This message indicates that the certificate is not to be trusted, but there may be no problem with the file or archive. This message indicates that the certificate is not to be trusted, but there may be no problem with the file or archive. Certificate not found: XXX The certificate for the signature could not be found on your system. Check to see if the certificate name was misspelled. Confirm that the certificate is on the system. 85 Extracting Only Trusted Archives verifysigner With the verifysigner option, you can set PKZIP to extract an archive only if the archive is signed using one of a specified set of certificates. If the verifysigner option is used, PKZIP will extract an archive only if these two conditions are met: • The archive central directory is signed using a certificate specified with the option • PKZIP can find a copy of each certificate specified with the option, containing the public key, in the local store For example, the following command line extracts only if the archive is signed by John Smith, and PKZIP can find the certificate used to sign: pkzipc - extract - verifysigner= "John Smith" important.zip You can use the option multiple times in the same command line to specify more than one acceptable, trusted signer: pkzipc - extract - verifysigner= "John Smith" - verifysigner= "Jane Doe" important.zip The command line above extracts if the archive is signed by either John Smith or Jane Doe, but certificates for both John Smith and Jane Doe must be found. The requirement that PKZIP be able to find a copy of a signer’s certificate locally ensures that the signer is the person you think he is. If PKZIP only authenticated the signature without also checking its certificate, you would know that an archive really was signed by someone named John Smith, but you would not know if this John Smith is the same John Smith whose certificate you have. Specifying Trusted Signers You can specify a list of trusted certificates/signers either by specifying each certificate individually on the command line or by specifying a file that contains a list. 86 Specifying Trusted Signers Individually You can specify a trusted signer using either of the following criteria: Criterion To use For example Common name Specify, in quotes, the common name of the subject of the certificate (that is, the cn field in a string representation of a certificate); optionally, precede with: –verifysigner=cn=”John Public” –verifysigner=”John Public” cn= By default, SecureZIP searches for certificates by common name unless another sub-option is used or the value appears to be an email address. Email address Specify the email address of the certificate (that is, the e field in a string representation of a certificate); optionally, precede with: –[email protected] –[email protected] e= SecureZIP automatically looks for an email address if the string contains an @ and a dot and looks like an email address. Note that a certificate must contain an email address in order to be found by this method. Not all certificates embed an email address. Specifying a File That Lists Trusted Signers PKZIP can extract a list of certificates from these kinds of files: • An ordinary text file that lists the common name of each certificate on a line by itself To use the verifysigner option to specify an ordinary text file list as a suboption, prefix the file name with the listfile character (@, by default): pkzipc - extract - verifysigner= @my_list_file.txt test.zip • A PKCS#7 or PKCS#12 file: These kinds of files can contain one or more actual certificates. PKCS#7 files have the file name extensions .p7b and .p7c and do not contain private keys, only public ones. PKCS#12 files have the file name extensions .pfx and .p12 and may contain private keys as well as public keys. 87 To use the verifysigner option to specify one of these types of file to define a list comprising the owners of the certificates in the file, prefix the file name with a hash (#) character: pkzipc - extract - verifysigner= #my_cert_file.p7b test.zip The verifysigner option can be configured for use by default. 88 5 Miscellaneous Operations This chapter describes commands and options that are not tied specifically to compressing or extracting or can be done with both of these operations. Overwriting Files overwrite When you add or extract files, the target archive or directory may already contain files that have the same names as the files you are adding or extracting. Use the overwrite option to tell PKZIP how to proceed. Available choices are represented by the sub-options described in the following table. Sub-Option Description For example all (Default) PKZIP overwrites all same-named files without prompting first pkzipc –extract –overwrite=all test.zip *.bmp prompt never pkzipc –add –overwrite test.zip *.bmp PKZIP prompts you whether to overwrite a same-named file before proceeding pkzipc –extract –overwrite=prompt test.zip *.bmp PKZIP does not overwrite any same-named files pkzipc –extract –overwrite=never test.zip *.bmp pkzipc –add –overwrite=prompt test.zip *.bmp If you use the add or extract command alone, without the overwrite option, you are prompted to overwrite same-named files. If you use the overwrite option but do not specify a sub-option, PKZIP overwrites all files without prompting you. 89 Viewing the Contents of a .ZIP File view PKZIP allows you to view the contents of a .ZIP file, without performing any action on that .ZIP file (for example, compress or extract). To view a .ZIP file, use the view option with PKZIP, as in the following example: pkzipc - view test.zip When you type this command, information similar to the following appears: Viewing .ZIP: test.zip Length -----8369B 8369B -----16KB Method -----DeflatN DeflatN Size ---3084B 3084B -----6168B Ratio Date -------63.2% 06/01/2001 63.2% 06/01/2001 ----63.2% Time CRC-32 Attr --------- ---4:50a 87b3c388 -a-w4:50a 87b3c388 -a-w- Name ---red.txt tan.txt ---2 PKZIP also provides two additional methods for displaying information from a .ZIP file. Specify the desired method as a value in addition to the view option. These methods include: • brief - a compact, less informative view of the .ZIP file. • detail - more information than the default view. Displaying a Brief View of a .ZIP File To display a more compact (brief) view of a .ZIP file, use the brief value with the view option, as in the following example: pkzipc - view= brief test.zip When you press ENTER, information similar to the following appears: Viewing .ZIP: test.zip Length -----8369B 8369B -----16KB Method -----DeflatN DeflatN Size ---3084B 3084B -----6168B Ratio Date -------63.2% 06/01/2001 63.2% 06/01/2001 ----63.2% Time ---4:50a 4:50a Name ---red.txt tan.txt ---2 Displaying a Detailed View of the .ZIP File To display a more detailed view of a .ZIP file, use the details value with the view option, as in the following example: pkzipc - view= details test.zip 90 When you press ENTER, information similar to the following appears: Viewing .ZIP: test.zip FileName: FileType: Attributes: Date and Time: Compression Method: Compressed Size: Uncompressed Size: Compression: 32 bit CRC value: Version created by: Needed to extract: red.txt text -a-w-------Jun 01,2001 4:50:00a DeflatN 3084 8369 63.2% - 2.948 bits/byte 87b3c388 PKZIP: 4.5 PKZIP: 2.0 or later FileName: FileType: Attributes: Date and Time: Compression Method: Compressed Size: Uncompressed Size: Compression: 32 bit CRC value: Version created by: Needed to extract: tan.txt text -a-w-------Jun 01,2001 4:50:00a DeflatN 3084 8369 63.2% - 2.948 bits/byte 87b3c388 PKZIP: 4.5 PKZIP: 2.0 or later ------------------Total Files: 2 Compressed Size: 6168 Uncompressed Size: 16738 Compression: 63.2% - 2.948 bits/byte Translating End-of-Line Sequence translate The translate option translates text end-of-line characters to the character sequence used by a different platform. The option can be used with add or extract. Specify a sub-option from the following table to translate line endings to the sequence used by the desired platform. The ebcdic sub-options are for use with data compressed using SecureZIP for z/OS with the Zip Descriptor Word (ZDW) option to preserve variable length records. If a file is not in ZDW format, these sub-options cause no change to line endings. 91 Sub-Option Description none Does not change line endings dos DOS/Windows (carriage return/newline) mac MacOS (carriage return) unix UNIX (newline) ebcdic,nl With ZDW files, substitute EBCDIC newline (0x15) ebcdic,lf With ZDW files, substitute EBCDIC linefeed (0x25) ebcdic,crlf With ZDW files, substitute EBCDIC carriage return/linefeed (0x0D25) ebcdic,lfcr With ZDW files, substitute EBCDIC linefeed/carriage return (0x250D) ebcdic,crnl With ZDW files, substitute EBCDIC carriage return/newline (0x0D15) The following command line translates text line endings to UNIX on extraction: pkzipc - extract - translate= UNIX test.zip Converting File Names to a Short Format shortname The shortname option enables you to convert file names in long file name format to DOS-format short (8+3) file names on the copies of the files added to an archive. Use shortname with the dos sub-option, or no sub-option at all, to specify DOS format: pkzipc - add - shortname= dos save.zip pkzipc - add - shortname save.zip Or, abbreviated: pkzipc - add - short save.zip The option can be configured to be on by default. Use shortname with the none sub-option to turn short name formatting off if it’s configured on. Inserting a Timestamp in the Archive File Name substitution The substitution option causes PKZIP to insert a timestamp in the name of an archive created or updated (or refreshed) by the add command. You specify the elements of the timestamp and its placement in the archive name. 92 The substitution option can also insert a timestamp in the same way in the name of a destination directory specified as a sub-option of the archiveeach option. Construct the timestamp using tokens (replaceable elements) from the table below. When embedded in an archive file name, the tokens serve as named parameters. The substitution option causes PKZIP to replace the tokens with the corresponding values listed in the table. (If the substitution option does not appear in the command line, the tokens become literal parts of the file name.) Token Replaced by {mm} Month, 2-digit {m} Month, 1-digit (if possible) {dd} Day, 2-digit {d} Day, 1-digit (if possible) {yyyy} Year, 4-digit {yy} Year, 2-digit {HH} Hour, 2-digit, 24-hour format {H} Hour, 1-digit (if possible), 24-hour format {hh} Hour, 2-digit, 12-hour format {h} Hour, 1-digit (if possible), 12-hour format {MM} Minute, 2-digit {M} Minute, 1-digit (if possible) {SS} Second, 2-digit {S} Second, 1-digit (if possible) {ampm} a.m. or p.m. indicator to identify current 12-hour segment of the day For example, the following archive name contains several tokens. The name is enclosed in quotes to group the elements, including the intervening spaces: "Design Spec {yyyy}- {mm}- {dd}- {h}- {MM}- {SS}{ampm}.zip" The following command line adds files to an archive having this name and includes the substitution option to tell PKZIP to replace the tokens with their system values: pkzipc - add - substitution "Design Spec {yyyy}- {mm}- {dd}- {h}- {MM}{SS}{ampm}.zip" plan.doc If the current date and time are August 09, 2009 12:06:29 a.m., the resulting archive will be named Design Spec 2009-08-09-12-06-29am.zip. The substitution option can also be used to embed a timestamp in the name of a destination directory specified with the archiveeach option. For example: 93 pkzipc - add - substitution - archiveeach= "C:\newzips {yyyy}- {mm}- {dd}- {h}{MM}- {SS}{ampm}" C:\myfiles\*.* The preceding command line causes each file zipped from the myfiles directory to be added to its own archive in a directory named newzips 2009-08-09-12-0629am.zip if the date and time are August 09, 2009 12:06:29 a.m. The substitution option can be configured to be used by default. Printing the Contents of a .ZIP File print PKZIP gives you the option of printing files contained in a .ZIP file to a selected printer. For example, if you wish to print all of the .txt files contained in a .ZIP file, type the following: pkzipc - print= lpt1 test.zip *.txt When you press ENTER, information similar to the following will appear: Extracting files from .ZIP: test.zip Inflating: readme.txt <to LPT1> Inflating: whatsnew.txt <to LPT1> In this example, all files with a .txt extension that exist in the test.zip are printed to the LPT1 printer. If you do not specify a print device, the 'default' printer is used. Since many .ZIP files contain an information document (e.g., readme.txt), the print option is a good way to determine the contents of a .ZIP file without requiring you to extract a file or file(s) to your hard drive. Testing the Integrity of an Archive test You can test an archive to confirm that it is not damaged and that its files can be extracted. Testing also authenticates any digital signatures attached. Testing extracts the contents of an archive but discards the output instead of saving it to disk. It's a good idea to test an archive before you delete your only copy of an important file you placed in the archive. The following sample command line tests test.zip: pkzipc - test test.zip When you press ENTER, information similar to the following will appear: Testing files from .ZIP: test.zip 94 Testing: readme.txt Testing: whatsnew.txt OK OK As each file is tested, an OK is displayed next to the name. If, for some reason, the archive has been damaged, use the fix command to try to repair it. Apply Strict Checking to Certificates strict The strict option is for use when doing certificate-based encryption or attaching digital signatures. The option turns on strict checking: in other words, it checks to be sure that certificates are • Valid • Designated (on the certificate) to be used for the purpose for which they are about to be used in the current command line, namely, encryption or signing A field on the certificate shows whether the certificate is designated for use only for a specified purpose. Strict checking excludes certificates that are either not designated for any purpose or are designated for the wrong one. For example, strict checking excludes a certificate from being used for encryption if it is designated for signing. The following command line applies strict checking to the certificate to be used to encrypt for a recipient: pkzipc - add - cryptalgorithm - recipient= "John Q. Public" - strict test.zip *.doc If a certificate does not pass strict checking, it is not used, and PKZIP displays a warning like the following: (W76) Warning! John Q. Public does not pass the strict certificate checks, and will not be used. When a certificate fails strict checking and is not used, other warnings may display as well. For example, if the certificate in the sample command line above fails strict checking, PKZIP also displays the following two warnings because a strong encryption method was specified (cryptalgorithm) but no certificate survived strict checking: (W47) Warning! No recipients specified (W63) Warning! You must specify -passphrase or -recipient to encrypt files! Checking for Revoked Certificates crl Digital certificates used to apply signatures and to do recipient-based encryption are issued by a certificate authority (CA). 95 Periodically, CAs publish lists of certificates that have been revoked for one reason or another. For example, an employer might request revocation of a certificate that belongs to an employee who has left the company. Or revocation might be requested for a certificate that has been lost or stolen with its private key. A CA’s list of revoked certificates is called a certificate revocation list (CRL). It consists of a file that contains serial numbers of certificates that have been revoked and the dates. The CRL is signed by the issuing CA. The crl option tells PKZIP to check to see if any certificate to be accessed by the current command line (for signing or encryption, for example) appears in a CRL accessible to PKZIP. If it does, PKZIP displays a warning, (W42) Certificate was revoked. Note: CAs periodically update CRLs. The fact that you can use the crl option and not receive a warning only guarantees that the certificate you accessed is not on a CRL that PKZIP checked. The certificate could still have been revoked subsequent to publication of your list. The following sample command line checks any certificates used for signatures in an archive to be extracted: pkzipc - extract - crl test.zip You can configure the crl option so that it is used by default. The following command line checks the certificate used to encrypt for a recipient: pkzipc - add - recipient= "John Q. Public" - crl test.zip *.doc The command line below checks the certificate used to apply John Adams’ signature to an archive: pkzipc - add - certificate= "John Adams" - crl test.zip To have PKZIP refuse to use a revoked certificate for signing or encrypting, use the strict option. Unless you include the strict option, PKZIP merely warns if a certificate is revoked and uses it anyway for signing or encrypting. The following sample command line checks the certificate used to encrypt for a recipient and uses the strict option to ensure that the certificate is used only if it is not known to be revoked: pkzipc - add - recipient= "John Q. Public" - crl - strict test.zip *.doc Obtaining a CRL Certificate authorities commonly make CRLs available for downloading on their Web sites. A CA is apt to provide different CRLs for different series or types of certificates. You must find the CRL for the type of certificate that you want to use it for. For PKZIP to access a CRL, the CRL must be downloaded and imported into a certificate store that PKZIP checks for certificates. Such a downloaded and imported CRL is called a static CRL to distinguish it from a dynamic CRL that may be published on the Web. PKZIP does not access CRLs published on the Web. 96 In Windows, you can import a CRL by double-clicking the downloaded file. Pausing on Warnings warning PKZIP issues an error or a warning when it encounters a problem or unexpected condition. In general, PKZIP issues a warning when the condition does not prevent PKZIP from completing its operation, and an error when it does. For example, PKZIP issues a warning if a digitally signed file in an archive cannot be authenticated; this condition does not prevent PKZIP from extracting the file. PKZIP issues an error if it cannot find a specified archive or is unable to open it. The warning option causes PKZIP to pause after issuing a warning and to prompt you whether to proceed. The option can be set for specified warning conditions. If used without any specified values, the warning option causes PKZIP to pause on every warning. For example: pkzipc - extract - warning save.zip * To have PKZIP pause and prompt on particular warnings, list the warning numbers with the option. For example, the following command line directs PKZIP to pause on warning 41 (Certificate expired): pkzipc - test - warning= 41 save.zip To specify multiple warning conditions, separate the warning numbers with commas. For example, the following command line tells PKZIP to pause and prompt on either warning condition 40 (Certificate not trusted) or 41: pkzipc - test - warning= 40,41 save.zip You can use the configuration command to specify warning numbers as default values for the warning option. If default warning values are specified, you do not need to explicitly include the warning option in a command line to pause on those warnings. To override a particular configured default warning setting for the warning option in the current command line, precede the warning number with a hyphen. For example, the following setting (in a command line) overrides a configured value of warning 43. The example causes PKZIP not to pause on warning 43. - warning= 42,- 43 The warning option can be used with the add, extract, test, and view commands. See Appendix B for a list of error and warning conditions. 97 Treating Warnings as Errors error The error option enables you to designate warnings, by number, to treat as errors such that PKZIP halts processing if a specified warning condition is encountered. A designated warning is treated as error number 73, Warning configured as an error. Multiple warning numbers can be specified, separated by commas: - error= 40,41 For example, the following command line tells PKZIP to treat the conditions that produce warnings 40 (Certificate not trusted) and 41 (Certificate expired) as error conditions: pkzipc - extract - error= 40,41 save.zip If a specified warning is generated, PKZIP halts processing. Both the triggered warning and an error 73 are issued. For example, if warning 40 is generated, the display looks like this: PKZIP: (W43) Warning! Certificate not trusted PKZIP: (E73) Warning configured as an error You can use the configuration command to specify warning numbers as default values for the error option. If default warning values are specified for the error option, you do not need to explicitly include the error option in a command line to treat those warnings as errors. You can override a particular configured default warning setting for the error option in the current command line. To override a warning setting, precede the warning number with a hyphen. The following example (in a command line) overrides a configured value of warning 43. The example causes warning 43 not to be treated as an error. - error= 42,- 43 The error option can be used with the add, extract, test, and view commands. See Appendix B for a list of error and warning conditions. Previewing Command and Option Operations preview PKZIP allows you to preview the results of a set of commands and options. The commands and options specified will be completed and the resulting output will display, but no changes will be made that result in creating a new .ZIP file or in modifying an existing .ZIP file. For example, if you wish to preview an add operation without actually creating or modifying any files, enter the following: 98 pkzipc - add - preview test.zip *.txt When you press ENTER, information similar to the following appears on your console: Using Preview Option Creating .ZIP: test.zip Adding File: readme.txt Deflating Adding File: whatsnew.txt Deflating (62.0%), done. (59.2%), done. The compressed .ZIP file size would be: 2237 bytes The information, including the size of the resulting .ZIP file, is displayed. However, PKZIP has not actually modified any of your files. The preview option will work with the add, delete, header, sfx, and comment commands. Fixing a Corrupt .ZIP File fix The fix command attempts to repair a damaged ZIP archive so that its files can be extracted. For example, if you have determined that test.zip is damaged, type the following to attempt to fix it: pkzipc - fix test.zip When you press ENTER, information similar to the following appears on your console: Enter a new .ZIP file name (pkfixed): test1.zip Running PKZipFix utility. Scanning .ZIP file: Building new directory. Writing new .ZIP file: test.zip test1.zip Recovered 2 files. When you enter the fix command, PKZIP prompts you to enter a new ZIP file name. The example above used test1ZIP. If you do not enter a file name, the name pkfixed.ZIP is used. PKZIP scans the original file, attempts to repair the archive, and saves the updated file with the new name. The original, damaged file is not updated. Note: The fix command can only fix ZIP archives that are physical files. It cannot fix ZIP archives read from STDIN or special files (named pipes, sockets). Nor can it output fixed archives to such targets. 99 Use an Alternate Drive for PKZIP Temporary Files temp The temp option enables you to specify an alternate location for the temporary file that PKZIP needs to create to update an existing ZIP file or create a spanned archive. PKZIP also creates a temporary file when writing an archive to a data stream (see “Writing an Archive to STDOUT and Special Files”). When you, for example, update a ZIP file, PKZIP first creates and updates a temporary copy of the file. When the update is completed, PKZIP replaces the original archive with the updated copy. In the case of an archive written to a data stream, PKZIP compresses and encrypts the data (if encryption is specified) before writing it to the temporary file, so no security vulnerability is created. The temporary file is needed to get size information for local headers, which are written out before file data. The amount of disk space PKZIP needs for the temporary file is equal to the size of the original ZIP file plus the compressed size of any files to be added. So, for example, if you have an existing ZIP file of 500K, and you are updating it with another file that is 10K compressed, you need a work space of at least 510K for PKZIP to do the update. Ordinarily, the temporary file is created in the system’s default temporary folder. With the temp option, you can span, update, or stream ZIP files that are larger than the space available to create a temporary file in the default location. Specify the drive and/or path for the temporary file as a sub-option of temp. For example, the following command lines specify a custom temporary file location to update big_file.zip. pkzipc - add - temp= z:/public big_file.zip myfile.doc Notes: • You need to provide a path in addition to the drive letter only if you have a particular reason to specify a subdirectory—for example, space or access constraints on a local area network. • The shred option cannot erase temporary files created using the temp option to specify a location on a removable or network drive. Suppressing Screen Output silent The silent option suppresses screen output when compressing or extracting. This option is useful when compressing or extracting files as part of .BAT, .CMD, or shell script operations. Messages that normally appear when compressing or extracting 100 are not displayed. Sub-options provide control over whether to display error messages, warning messages, requests for input, and so on. pkzipc - add - silent test.zip *.doc To suppress confirmation messages printed by the configuration command, use the configuration command with its own silent sub-option. Setting Internal Attributes ASCII/BINARY The ASCII and BINARY option is used to override the data type of a file. Normally, PKZIP will determine whether the data of a file is ASCII or Binary. If this option is used with no sub option, each file that is added, you will be prompted for the file to be set to ASCII, BINARY or if you want PKZIP to determine the best type. The following examples show the different uses for this option. To set all the internal attributes to ASCII for each file added: pkzipc - add - ascii= "*" test.zip To set all the internal attributes for the file test.txt to BINARY and auto detects the other files: pkzipc - add - binary= test.txt test.zip * To prompt the type for each file: pkzipc - add - ascii test.zip * Encoding an Archive to Another Type encode With the encode option, you can convert an archive from one type to another. The encode option is useful to encode a binary archive type to a text format such as UUEncode or XXEncode. It can also be used to convert a non-compressed archive to a compressed archive type. For example, a TAR archive can contain multiple files but does not compress them, and a GZIP archive compresses but can contain only one file. You can use encode with add to create (or update) a TAR archive and encode it to GZIP format: pkzipc - add - encode= gzip myfiles.tar The example creates two archives: a TAR file and a GZIP file myfiles.tar.gz. 101 If you want only the archive created by encode (the GZIP archive in the example), you can include the movearchive option to delete the intermediate (TAR) archive: pkzipc - add - encode= gzip - movearchive myfiles.tar You can also use encode as a command to convert an existing archive. To do so, use the encode command by itself on the command line, without the add command, and specify the archive to convert. For example, the following command line creates an archive save.tar.gz: pkzipc - encode= gz save.tar Note: The encode command/option can only convert physical archive files. It cannot read an archive to be converted from STDIN or a special file (named pipe, socket). Nor can it write an encoded archive to STDOUT or a special file. Removing an Intermediate Archive movearchive The movearchive option deletes an archive that is created only as an intermediate archive—for example, to be converted by the encode option to an archive of a different type. When you add files with the encode option, PKZIP creates two archives: an intermediate archive created by the add command, and an archive of the type specified with the encode option. The encoded archive is created from the intermediate archive. If you do not want to keep the intermediate archive, you can include the movearchive option to delete it. For example: pkzipc - add - encode= gzip - movearchive myfiles.tar The command line above creates a TAR archive, encodes a copy of this archive as a GZIP archive, and then deletes the intermediate TAR archive. Generate a List File listfile The listfile option is used with add and extract to create a list of the files that would be added or extracted if the command line were run without the listfile option. A command line that contains the listfile option just creates a list file; it does not add or extract any files. For example, the following command line creates a file mylist.txt with the names of all the files that would be added to, or updated in, myarchive.zip if the listfile option were omitted from the command line: pkzipc - add= update - listfile= mylist.txt myarchive.zip *.* 102 When listfile is used with add, you can omit the archive name unless you want to reference a particular archive. For example, the following command line creates a list of the files that the command line would add to any new archive: pkzipc - add - listfile= mylist.txt *.* On the other hand, if you want to see what files would be updated in some particular archive, as in the following command line, you must name the archive: pkzipc - add= freshen - listfile= mylist.txt myarchive.zip *.txt When used with add (though not with extract), the listfile option takes account of other options—for example, the options path, recurse, and directories that specify path information to save with the added files. For example, the path option in the following command line causes full path names to be saved with added files, so this information is saved in the list file as well: pkzipc - add - path= full - listfile= mylist.txt myarchive.zip *.* When used with extract, the listfile option lists files with any path information saved for them in the archive even if current option settings would otherwise extract the files without using saved path information. For example, the following command line creates a list file that includes any path information in the archive even though the path option directs that files be extracted without using saved path information: pkzipc - extract - path= none - listfile= mylist.txt myarchive.zip 103 6 Changing Defaults for Commands and Options You can use the configuration command to view current default settings for commands and options. You also use this command to change default values. Another command—default—restores default settings for all commands and options to their original values. With the altconfig option, you can create and apply alternate configuration profiles for special purposes. Viewing Configuration Settings To use the configuration command to view current default values for all commands and options, enter the command by itself on the command line: pkzipc - configuration A list of current default settings displays: 204 = Disabled Add = Add All Files ArchiveDate = None CD = Normal Comment = None Comp Method = Deflate CRL = Disabled Encode = Disabled, UUE Extract = Extract All Files FIPSMode = Disabled Hash = SHA-1 Level = Normal ListChar = @ Locale = Enabled Lowercase = Disabled More = Disabled ASCII = Disabled AVArgs = Disabled AVScan = Disabled Binary = Disabled Certificate = John Public MoveArchive = Disabled NoArchiveExtension = Disabled NoExtended = Disabled NoFix = Disabled NoSmartCard = Disabled OptionChar = Passphrase = Disabled Recurse = Disabled Shortname = None Shred = None Sort = None Span = None, Auto-Detect Test = All Files Times = All UTF8 = Disabled View = Normal 104 CryptAlgorithm = Traditional Embedded = Disabled Error = None Header = Disabled LDAP = Disabled Recipient = Disabled Sign = Disabled, None Silent = None Temp = Disabled Warning = None Compression Options After = Disabled Attributes = Read-Only, Archive Before = Disabled Exclude = Disabled Include = Disabled Larger = Disabled, 0 Mask = None Newer = Disabled Older = Disabled Overwrite = Always Overwrite Path = No Path Information Smaller = Disabled, 18,446,744,073,709,551,615 Translate = None - No Conversion Extraction Options After = Disabled Attributes = Read-Only, Hidden, System, Archive Before = Disabled Exclude = Disabled Include = Disabled Larger = Disabled, 0 Mask = None Newer = Disabled Older = Disabled Overwrite = Prompt Path = Full Path Smaller = Disabled, 18,446,744,073,709,551,615 Translate = None - No Conversion In the display, the command/option is to the left of the equal sign, and the default setting is to the right. An option listed as Disabled is disabled by default. An option listed as None has a None sub-option that is its default value. A command or option that has any other value has that value as its default. In most of these cases, the value is a predefined sub-option. How Default Settings Work Configurable options that have a default value are applied, with their default value, even when they are not explicitly entered on the command line. This includes options that have a default value of None: these options are applied with the value of their None sub-option. Disabled options are not applied. For example, Comment = None indicates that, by default, PKZIP does not prompt for comments to attach to files in an archive. If you want PKZIP to always prompt for comments on files, you can configure the default to a different value—for example, Comment = All. All is another sub-option of comment. With this default, PKZIP will routinely prompt even when the comment option is not used in the command line. 105 For a command, the default setting determines what the command does when the command is listed on the command line without an explicit sub-option. A command must explicitly appear in the command line to be used. This is a difference between commands and options. A default value for a command determines what the command does when it is used by itself, without any specified sub-option. For example, the add command can add all specified files to an archive (the all suboption), or it can just add ones that are not in the archive already or are newer versions of files that are (the update sub-option). Initially, add has the default value of all, so a command line like the following adds all specified files indiscriminately: pkzipc - add myfiles.zip *.* To have this same command line add only new and newer files instead, you can use the configuration command to change the default behavior of add from all to update (see the section “Changing a Default Value,” below): pkzipc - configuration - add= update Some options also have a value—distinct from any configurable default value—that is used automatically if the option is used on the command line without an explicit suboption. This value overrides any configured default value. For example, the initial configurable default for the compression filter path option, which saves or restores path information, is None. The option has several other suboptions that can be set as the default value instead, but no matter which sub-option is the default, path has the value of current (one of the sub-options) when used without a sub-option, as in this command line: pkzipc - add - path myarchive.zip *.txt *.doc Appendix A lists the defaults and override values for all commands and options. Filter Options With options that take sub-options, the default setting is generally a sub-option. For example, the overwrite option shows a default of prompt, which is one of its possible sub-options. Some other options are set to none. An option that does not have a none sub-option shows as Disabled when it is not configured. For example, After shows a date if the option is configured and Disabled if it is not. At the bottom of the listing of defaults are two sets of filter options, one for compression and one for extraction. These are called filter options because they filter out files that do not meet their criteria. Only files that are not filtered out are selected. For example, the after option filters out all files whose date falls before the date specified with the option. Each of the filter options takes a different default value for compression and for extraction. 106 Changing a Default Value To change a default setting in the configuration file, use the configuration command. You can abbreviate this command to: config. To specify a value (sub-option) to use as the default value for a command/option: Type pkzipc –config and the name of the command/option followed by an equal sign and the sub-option value you want to set as the default. For example, to change the default for the add command to update (instead of the original default, all), type the following: pkzipc - config - add= update To turn on and use by default an option that has either no sub-options or a suboption that is used by default: Type pkzipc –config and the name of the option. For example, to do virus scanning by default when extracting files, set the avscan option on by default: pkzipc - config - avscan To turn on the silent option and use its default sub-option: pkzipc - config - silent After you use the configuration command to change a default setting, an updated list of settings displays. You can suppress this list so that it is not displayed. To do so, use the configuration command with its silent sub-option. For example, the following command line sets a default value for the overwrite option and suppresses display of the updated list of settings that the configuration command ordinarily prints to the screen: pkzipc - config= silent - overwrite= never Note that the silent sub-option of the configuration command is different from the silent option proper, which suppresses messages when adding or extracting. See Appendix A for a list of PKZIP commands, options and sub-options, and information about which commands and options have configurable defaults. Changing Defaults for Filter Options Options listed as filter options in the display of default settings take separate defaults for compression and extraction. To specify a default for a filter option for one of these operations, include the related command (add or extract) on the command line. For example: pkzipc - config - add - newer= 1d 107 If you specify a default for a filter option without including the related command, as in the following example, PKZIP asks whether you want to specify the default for compression, extraction, or both: pkzipc - config - newer= 1d Changing Defaults for Compression Method The Comp Method item in the screen of configuration settings shows the current default setting for compression method. To set a default compression method, specify the compression method that you want to make the default. For example, the following command makes BZIP2 the default compression method: pkzipc - config - bzip2 The options in the table below set compression method: Compression Method Options Description deflate64 Sets the compression method to Deflate64 bzip2 Sets the compression method to BZIP2 dclimplode Sets the compression method to DCL Implode lzma Sets the compression method to LZMA ppmd Sets the compression method to PPMd store Sets the compression method to Store (that is, no compression) The options in the next table set both compression method and level: Option Description speed Sets the compression method to Deflate—the initial PKZIP default method—and the level of compression to 1 (the lowest) fast Sets the compression method to Deflate and the level of compression to 2 normal Sets the compression method to Deflate and the level of compression to 5. Normal is the initial default setting for compression method and level for PKZIP. maximum Sets the compression method to Deflate and the level of compression to 9 level=0 When set to 0, the level option sets the compression method to Store (no compression) For example, the following command sets the default compression method to Deflate and the default compression level to 9: pkzipc - config - maximum 108 Using the Options Dialog to Change Defaults As an alternative to using the command line to change defaults, you can use the graphical Options dialogs if you have PKZIP or SecureZIP for Windows Desktop installed: To display the graphical Options dialog: Use the configuration command with the gui sub-option: pkzipc - config= gui In the dialog, the Help button opens the online help for the Windows version of PKZIP or SecureZIP. There you can read how to set options in the dialog. Note that, when you use the gui sub-option to open the Options dialog from the command line, settings that you make in the dialog apply only to the command line version of the product, not to the Windows version. Similarly, if you open the Options dialog from the Windows version, options that you set in the dialog apply only to the Windows version. If you use the gui sub-option without having PKZIP for Windows installed, the suboption is ignored, and the command works as if you had entered it with no suboption. Resetting to Original Defaults Command or option default values that you have changed can be reset back to their original values. You can reset changed defaults either for individual commands and options that you specify, or wholesale, for all. 109 Resetting Individual Defaults To reset an individual command or option to its original default value in the configuration file, use the config command and put two hyphens in front of the command or option that you want to reset. For example, to reset the add value back to its original default without resetting any other default values that you may have modified, type the following and press ENTER: pkzipc - config --add Notice that there are two hyphens in front of the add command. The command changes the update value we set in a previous example back to all. You can also use two hyphens without the config command to reset, or turn off, a configured default for an option just for the current command line. The example below turns off a configured default value (for instance, AES,256) for the cryptalgorithm option to do traditional encryption instead just for the current command line: pkzipc - add --cryptalgorithm - passphrase wedding_plans.zip *.txt Resetting All Defaults To reset default values for all commands and options, use the default command. Type the following and press ENTER: pkzipc - default Using an Alternate Configuration File altconfig You can create alternate configuration profiles to use for special purposes. The altconfig option creates and loads alternate configuration profiles. With an alternate configuration profile, you can temporarily change multiple default command or option settings in a single pass just by loading the configuration profile that defines them. Creating an Alternate Configuration File To create an alternate configuration profile, use the altconfig option with the configuration command. This creates a copy of the current main configuration file with the file name and at the location specified by the altconfig option and updates default settings in the copy with any new settings specified in the command line. If an alternate configuration file of that name already exists at the specified location, the file is updated with the new default settings from the command line. Other settings in the file are left unchanged. 110 For example, the command line below creates or updates an alternate configuration file secure.xml in the root directory of drive C and specifies default values for the cryptalgorithm, and directories options: pkzipc - config - altconfig= c:\secure.xml - cryptalg= aes,256 - dir= current If you have the graphical SecureZIP for Windows Desktop installed, you can use config=gui to configure defaults in the graphical Options dialogs. For example, the following command line opens the Options dialogs: pkzipc - config= gui - altconfig= c:\secure.xml If secure.xml exists, PKZIP displays its settings in the graphical Options dialogs. If the file does not already exist, PKZIP displays the settings of your main configuration file. In either case, saving settings from the Options dialog saves to secure.xml. Using an Alternate Configuration File To use the settings in an alternate configuration file, use the altconfig option to specify the file in a command line with which you want to use the alternate settings. You can use the altconfig option with any command. For example, the following command line loads the alternate configuration file secure.xml to use its settings with the add command. The settings cause PKZIP to use the strong encryption algorithm AES 256 when encrypting and to save path information relative to the current directory. pkzipc - add - altconfig= c:\secure.xml - pass foo.zip *.doc Loading the settings from the alternate configuration file saves the trouble of specifying them all on the command line and does not require changing the main configuration file. To view settings in an alternate configuration file, use the configuration command and specify the file with altconfig: pkzipc - config - altconfig= c:\secure.xml An alternate configuration file must already exist for you to use it in a command line with the add command or any other command besides configuration. The only time you can use the altconfig option to specify an alternate configuration file that does not already exist is when you use the option with the configuration command to create an alternate configuration file. 111 7 Command Characteristics This chapter describes changes you can make to the PKZIP infrastructure. For example, you can specify different characters to use for the list character and the option character, and you can cause PKZIP to display dates and times using a different format from the one used by default on your system. Ordinarily, the original values for the settings described in this chapter should be satisfactory. You should not change them without a good reason. Changing Date and Time Environment Variables locale The locale option causes PKZIP to use your system’s format for displaying dates and times. This option is set on by default. Formerly PKZIP used a date format of MMDDYY and a 12-hour time format of HH:MM. If you prefer PKZIP to use this format, you can revert to it by turning the locale option off. To disable the option in the Configuration file to turn it off by default, use the configuration command and specify the locale option prefixed with two hyphens: pkzipc - config - - locale If you have turned off the locale option in the Configuration file, you can turn it on again for a given command by specifying the option in the command line. For example: pkzipc - add - locale test.zip *.doc This command causes PKZIP to use the system-defined settings regardless of the default settings in the Configuration file. 112 Changing the List Character for List Files listchar PKZIP allows you to specify an ASCII file as a source list of the files to be archived. By default, you specify this ASCII file by pointing to it with the "@" character in your command line. However, if you have files that begin with an "@", you may experience problems when trying to add these files to a .ZIP archive. Fortunately, PKZIP allows you to change the default list character to avoid such problems. This is accomplished using the listchar option. For example, if you wish to define the "+" character in place of the "@" as your default list character, type the following and press ENTER: pkzipc - config - listchar= + If you wish to specify an alternate list character on the command line itself, could type a command line similar to the following and press ENTER: pkzipc - add - listchar= + test.zip + file1.txt When used as a command line option, the listchar option only applies to the options that follow it on that particular command line. In our example the listchar option allows you to add files that begin with an "+" character (e.g., +file1.txt). For more information on using list files with PKZIP see the section on page 53 and the “Extracting Files with a List File” section on page 83. Note: Avoid using metacharacters as list characters. Metacharacters have a special significance to the shell and as such their usage may cause unpredictable results. This would include the following characters: ; , & ( ) | < > # NEWLINE SPACE TAB Changing the Command/Option Character optionchar The optionchar option specifies the character to use to identify commands and options as such in command lines. By default, PKZIP uses the hyphen “-” to flag commands and options in a command line. You can use optionchar to change this option character to a different character instead. For example, to make it easier to zip files whose names begin with a “-”, you might change the option character to a “+”. You can change the option character either just for a single command line or indefinitely, to define a new default character. The following command changes the option character just for the immediate command: pkzipc - opt= + + add save.zip *.doc In a Windows command line, you can also always use the “/” character to indicate a command or option in a particular command line. pkzipc /add save.zip *.doc 113 You can also use optionchar with the configuration command to define a different option character to use by default. For example: pkzipc + config - optionchar= + Note that the newly defined option character is used immediately, in the same command line in which it is defined, by every command or option other than optionchar itself. Note: Avoid using metacharacters as option characters. Metacharacters have a special significance to the shell and as such their usage may cause unpredictable results. This would include the following characters: ; , & ( ) | < > # NEWLINE SPACE TAB 114 A Reference to Commands and Options This appendix contains reference information on every PKZIP command and option. For each command/option, the following information is provided: Category: Represents: Name/Description Gives the name of the command/option and a brief description of what it does. If a default value can be configured for the command/option, the word "Configurable" appears. Value(s) Lists any sub-options or values associated with the command/option and specifies any initial default values Example usage Shows examples of the command/option used in a PKZIP command line Used with Identifies the item as a command or an option: a listing of standalone in this column means that the item is a command. For options, the column lists commands that the option can be used with. If standalone is included with a list of commands, the item can be used as an option with any of the listed commands or can be used by itself as a command. Information on each command/option follows: Name/Description: Value(s): Example usage: Used with: 204 No sub-options. pkzipc –add –204 save.zip * add Turns on PKZIP for DOS 204g compatibility --------------------- Configurable No default value. 115 Name/Description: Value(s): Example usage: Used with: add all – Compress and add files that are new to the archive as well as files that the archive already contains a (maybe newer) copy of pkzipc –add save.zip *.doc standalone Add files to an archive Configurable archive – Turn off archive attribute of all added files (prepares backup file set for incremental archiving). freshen – Add only files that the archive already contains an older copy of update – Freshen files that are in the archive already and add any new ones incremental – Add only files that have the archive attribute on, and then turn off the archive attribute –incremental – Add only files that have the archive attribute on, and do not turn off the archive attribute afterward --------------------Default = all pkzipc –add=freshen save.zip *.doc pkzipc –add=incremental save.zip *.doc pkzipc –add=–incremental save.zip *.doc Outputs the archive to STDOUT instead of to a file: pkzipc –add –noarchiveextension –silent=normal – *.txt 116 Name/Description: Value(s): Example usage: Used with: after Any date in format specified in Country–Settings or the locale option. For compression: add, extract, delete, test, view, delete, console Process files that have the specified date or a later one pkzipc –add –after=09152003 save.zip *.doc For extraction: Configurable separately for add and extract operations. For example, the US date format is: pkzipc –ext –after=09152003 save.zip *.doc mmddyy or mmddyyyy --------------------No default value. altconfig Creates or updates an alternate configuration file containing alternate, specified defaults when used with the configuration command; loads the specified alternate configuration file when used in a command line with any command other than configuration. Path and name of alternate configuration file to create, update, or load Create or update an alternate configuration file secure.xml with specified defaults. File is created if it does not exist already, or is updated if it does: pkzipc –config –altconfig=c:\secure.xml –cryptalgorithm=aes,256 –sign=all –certificate="John Public" Use the default settings specified in alternate configuration file secure.xml when adding files to archive foo.zip: pkzipc -add –altconfig=c:\secure.xml –passphrase foo.zip *.doc All commands except listcertificates, listcryptalgorithms, listsfxtypes, license, and version 117 Name/Description: Value(s): Example usage: Used with: archivedate newest – Sets date of the archive to the date of the newest file in the archive pkzipc –add=update –archivedate=retain save.zip *.txt add, delete, fix, header, comment, sfx Creates a separate ZIP archive for each file in the current directory: add Sets the modification date of the archive file. Configurable Note: The archivedate option is the same as the older zipdate option, which is now deprecated. oldest – Sets date of the archive to the date of the oldest file in the archive retain – When updating, keeps the date the archive had before it was updated. When creating a new archive, behaves the same as none none – Sets the date of the archive to the date of its latest modification --------------------Default = none archiveeach Creates a separate archive for each of multiple files specified in a single command line. Can be used with archivetype and encode to create .tar.gz archives. <destination> – Directory in which to create the archives pkzipc –add –archiveeach *.* By default, archives are created in the current directory. Creates the archives in a specified destination: pkzipc –add –archiveeach=C:\newzips *.* Creates .tar.gz archives: pkzipc –add –archiveeach –archivetype=tar –encode=gz C:\data\*.* 118 Name/Description: Value(s): Example usage: Used with: archivetype bzip2 – Specifies the Bzip2 archive type.* pkzipc –add –archivetype=tar myfile.foo add, extract, test, view Explicitly specifies the type of archive to be acted on by the command. PKZIP works with ZIP archives by default or infers the archive type from the archive name. Use the archivetype option if PKZIP would assume or infer the wrong type. zip – Specifies the .ZIP archive type. (default) gzip – Specifies the GZIP archive type.* tar – Specifies the TAR archive type. Creates a TAR archive named myfile.foo.tar pkzipc –extract –archivetype=bzip2 –noarchiveextension –silent=input – Extracts from a BZIP2 archive on STDIN uue – Specifies the UUENCODED archive type.* xxe – Specifies an XXENCODED archive type.* * These archive types can contain only one file. To use with multiple files, create an archive of one of the other archive types and use the encode option to encode this archive as the single-file archive type that you want. ascii Set the internal attribute bit (ASCII/Binary) to ASCII. Configurable The file(s) or file pattern whose internal attribute bit you wish to set to ASCII; if no files are specified, PKZIP prompts for each file. --------------------No default value. pkzipc –add –ascii=”*.txt” save.zip * pkzipc –add –ascii save.zip * add 119 Name/Description: Value(s): Example usage: Used with: attributes hidden – select hidden files. add, extract Stores files with the specified file attribute information in the archive file. pkzipc –add –attr=system,hidden save.zip * system – select system files. <command line> – A command line that runs an antivirus program pkzipc –extract –avscan= f-prot.exe –avargs="%e /silent /nomem /noboot" myfiles.zip extract <executable> – The name of the anti-virus program executable—with path, if necessary pkzipc –extract –avscan= f-prot.exe –avargs="%e /silent /nomem /noboot" myfiles.zip extract Configurable separately for add and extract operations. readonly – select read–only files. archive – select files with the archive bit set. all – select all types of files. none – do not select files that have hidden, system, or read– only attributes; overrides the default attributes setting in configuration file. <hex value> –The hex value of an attribute to be selected, or the logical OR of multiple hex values --------------------Default = readonly, archive avargs Specifies any command line arguments to use when running the antivirus program given in avscan Configurable avscan Turns on virus scanning: runs the specified anti-virus program using the anti-virus command line arguments in avargs Configurable 120 Name/Description: Value(s): Example usage: Used with: before For compression: Process files that are older than a specified date. Any date in format specified in Country–Settings or the locale option. add, extract, delete, test, view, print, console Configurable separately for add and extract operations. For example, the US date format is one of the following: pkzipc –add –before=09152003 save.zip *.doc For extraction: pkzipc –extract –bef=09152003 save.zip *.doc mmddyy mmddyyyy --------------------No default value The file(s) or file pattern whose internal attribute bit you wish to set to binary; if no files are specified, PKZIP will prompt for each file. pkzipc –add –binary=”*.exe” save.zip * bzip2 No sub-options Compress files using the BZIP2 method. Default compression level: 5 To compress files using the bzip2 algorithm and level 9 compression: binary Treats the files to be added as binary files: sets the internal ASCII/Binary attribute bit of the files to binary. add pkzipc –add –binary save.zip Configurable Note: Files compressed with this method can be extracted with most varieties of PKZIP version 4.6 and later. Other .ZIP programs may not be able to extract files compressed with BZIP2. pkzipc –add –bzip2 –level=9 save.zip doc1.txt To compress files using the default compression level (level 5): pkzipc –add –bzip2 save.zip *.doc add 121 Name/Description: Value(s): Example usage: Used with: cd encrypt – Encrypt file names and the archive’s central directory pkzipc –add –passphrase=mysecret –cryptalgorithm=aes,256 –cd test.zip add normal – Do not encrypt file names; produces a normal ZIP file. Use to override a configured default setting that would otherwise encrypt file names. pkzipc –add –passphrase=mysecret –cryptalgorithm=aes,256 –cd=normal test.zip Encrypt file names and other metadata in a ZIP archive’s central directory. Requires the passphrase also to be used. Uses strong encryption; does not work with traditional ZIP encryption. Encrypting file names produces an archive that requires PKZIP or SecureZIP version 8.0 or later to open it. Configurable --------------------Default = encrypt 122 Name/Description: Value(s): Example usage: Used with: comment all – All files already in the archive and all files added to or updated in the archive are commented pkzipc –add –comment=all save.zip *.doc add, standalone Include a text comment for files within an archive file. When you run the command, PKZIP prompts you to enter the comment. Configurable unchanged – Only files that are not changed in the archive are commented add – Only newly added files and versions of files are commented freshen – Only newly added versions of files already in the archive are commented update – Only newly added files and versions of files already in the archive are commented (the opposite of unchanged) none – No comments added --------------------Default = none Value if used on command line without a suboption = add 123 Name/Description: Value(s): Example usage: Used with: configuration <command or option> – Any configurable command or option pkzipc –config –extract=freshen standalone Defines default values for PKZIP commands and options GUI – Invokes the configuration dialogs from the graphical PKZIP product. If specified, no other command line arguments are processed for configuration except more and silent, which can be set to govern the screen display of configuration settings. silent – Suppresses list of configured settings that is ordinarily displayed after a command or option is configured. To see the current configuration values, type: pkzipc –config To open the Configuration dialogs of the GUI product for use in setting configuration defaults: pkzipc –config=gui Configures overwrite option and suppresses display of settings afterward: pkzipc –config=silent –overwrite=never Configures silent option and suppresses display of settings afterward: pkzipc –config=silent –silent --------------------No default value. console No sub-options. Extracts files to the screen (standard output) instead of to disk --------------------- crl No sub-options. Warns if a certificate to be used for digital signing, encryption, or authentication is listed as revoked in an accessible CRL (certificate revocation list). --------------------- Use with strict option to prevent the certificate from being used. Configurable pkzipc –console save.zip *.txt standalone pkzipc –add –certificate="John Adams" –crl test.zip add, comment, delete, extract, header, listfile, print, test, view No default value. No default value. pkzipc –add –recipient="John Q. Public" –crl –strict test.zip *.doc pkzipc –extract –crl test.zip 124 Name/Description: Value(s): Example usage: Used with: cryptalgorithm The encryption algorithm to use. The listcryptalgorithm s command lists the strong encryption algorithms available to you. Specify a strong encryption algorithm as it is listed in the output from the listcryptalgorithm s command. Encrypt all files added with 128–bit AES using the specified passphrase: add pkzipc –add – cryptalgorithm=3DES,168 –recipient="My friend" save.zip *.doc Default = Traditional PKWARE encryption Override a configured strong encryption setting to use traditional encryption just for the current command line: Value if used on command line without a suboption = The strongest algorithm available on the system pkzipc –add --cryptalgorithm –passphrase save.zip *.doc Encrypts files using the specified encryption algorithm. Configurable pkzipc –add –cryptalgorithm=aes,128 –passphrase save.zip *.doc Encrypt all files added with 3DES using the certificate named "My friend": 125 Name/Description: Value(s): Example usage: Used with: cryptoptions smartcard – Supports certificate-based encryption for recipients using smart cards, but produces encrypted files that cannot be decrypted by older versions of PKZIP. Turn off to support certificate-based encryption for recipients using versions of PKZIP prior to 6.1 at cost of support for smart cards. To turn off smartcard in a command line: add Makes possible a choice of support for smart cards or for certain other target scenarios when doing certificate-based encryption. Only affects encryption done using the recipient option. Configurable (WIN32) win2000 – Supports certificate-based encryption for recipients using smart cards or running on Windows NT or Windows 2000, but uses 3DES encryption to protect access to the key when encrypting with AES. Turn off to use no 3DES when encrypting with AES at cost of support for smart cards and recipients running Windows NT or Windows 2000. --------------------Both sub-options are on by default pkzipc –add –cryptoptions=–smartcard –recipient="John Q. Public" test.zip To configure both sub-options off: pkzipc –config –cryptoptions= –smartcard,–win2000 To configure both sub-options on: pkzipc –config –cryptoptions= smartcard,win2000 126 Name/Description: Value(s): Example usage: Used with: dclimplode ascii – use with ASCII files. add Instructs PKZIP to use the data compression library compression scheme. pkzipc –add –dclimplode=ascii,4096 text.zip *.txt binary – use with BINARY or unknown data files. standalone Configurable You need to also specify the size of the dictionary (1024, 2048, or 4096) by using a comma after the type of dictionary to use (ascii or binary). --------------------No default value default No sub-options To reset all defaults: Reset the original defaults in the configuration file for all commands and options No default value. pkzipc –default deflate64 No sub-options. Compress files using the Deflate64 method. No default value. To compress files using Deflate64 algorithm and level 9 compression: pkzipc –add –deflate64 –level=9 save.zip doc1.txt Configurable To compress files using the normal, default compression level (level 5): Note: Files compressed with this method can be extracted by most versions 2.5x and later of PKZIP, but not all ZIP programs from other vendors can extract such files. delete Remove (delete) files from an archive add pkzipc –add –deflate64 save.zip *.doc <files> –Names or file name pattern of files to delete For individual files: pkzipc –delete save.zip doc1.txt No default value. For a specific file pattern: pkzipc –delete save.zip *.doc standalone 127 Name/Description: Value(s): Example usage: Used with: directories current – Store the path from the current directory. Compression example (assumes you are in /wp): add, extract When adding, includes matching files in subdirectories and stores directory path names; when extracting, recreates saved directory paths. root or full – Store the entire path beginning at the root of the drive; also referred to as "full" path. Configurable Note: Using this command is the same as combining the path and recurse commands. specify or relative – Store path information relative to the specified directories, for their subdirectories none – No path information stored --------------------Default = none when used with add; full when used with extract Value if used on command line without a suboption = current pkzipc –add –directories=root save.zip docs/* The path stored is wp/docs/. pkzipc –add –directories=current save.zip docs/* The path stored is: “docs/”. Extraction: pkzipc –extract –directories save.zip /* 128 Name/Description: Value(s): Example usage: Used with: embedded arj – Extract the contents of lone archives embedded in ARJ archives, without prompting To extract an embedded archive from a ZIP file without prompting: extract, console, print Suppresses prompt and, depending on the sub-option, extracts or does not extract the contents of a lone archive file embedded in another archive file of the type specified in the suboption. Configurable –arj – Do not extract the contents of lone archives embedded in ARJ archives, and do not prompt BinHex – Extract the contents of lone archives embedded in BinHex archives, without prompting –BinHex – Do not extract the contents of lone archives embedded in BinHex archives, and do not prompt bzip2 – Extract the contents of lone archives embedded in BZIP2 archives, without prompting –bzip2 – Do not extract the contents of lone archives embedded in BZIP2 archives, and do not prompt cab – Extract the contents of lone archives embedded in CAB archives, without prompting –cab – Do not extract the contents of lone archives embedded in CAB archives, and do not prompt gzip – Extract the contents of lone archives embedded in GZIP archives, without prompting –gzip – Do not extract the contents of lone archives embedded in GZIP archives, and do not prompt pkzipc –extract –embedded=zip outerarchive.zip To suppress the prompt and not extract archives embedded in ZIP files: pkzipc –extract –embedded=–zip outerarchive.zip 129 Name/Description: Value(s): lzh – Extract the contents of lone archives embedded in LZH archives, without prompting –lzh – Do not extract the contents of lone archives embedded in LZH archives, and do not prompt rar – Extract the contents of lone archives embedded in RAR archives, without prompting –rar – Do not extract the contents of lone archives embedded in RAR archives, and do not prompt uue – Extract the contents of lone archives embedded in UUENCODED archives, without prompting –uue – Do not extract the contents of lone archives embedded in UUENCODED archives, and do not prompt xxe – Extract the contents of lone archives embedded in XXENCODED archives, without prompting –XXE – Do not extract the contents of lone archives embedded in XXENCODED archives, and do not prompt ZIP – Extract the contents of lone archives embedded in ZIP archives, without prompting –ZIP – Do not extract the contents of lone archives Example usage: Used with: 130 Name/Description: Value(s): Example usage: Used with: bzip2 – Creates a BZIP2 file Add files to save.zip and encode to UUE: add gzip – Creates a GZIP file pkzipc –add –encode save.zip * uue – Creates a UUENCODED file Add files to a TAR archive and encode to a GZIP archive: embedded in ZIP archives, and do not prompt --------------------Disabled by default. When used, a suboption must be set. encode As an option, used with add, creates an archive and converts it to the archive type specified by the suboption. As a standalone command, converts a specified existing archive. xxe – Creates an XXENCODED file Configurable --------------------- Note: PKZIP creates two files when the encode option is invoked: an intermediate archive of the type specified for the add command (ZIP, by default), and an archive of the type specified for the encode option. No default value Value if used on command line without a suboption = uue pkzipc –add –encode=gz save.tar Encode the archive as a GZIP archive and delete the intermediate archive created by the add command: pkzipc –add –encode=gz –movearchive save.tar * As a command, creates save.tar.gz from existing archive save.tar: pkzipc –encode=gz save.tar Use the movearchive option with encode to remove (delete) the intermediate archive. enterlicensekey None pkzipc –enterlicensekey standalone <warning number> – One or more warning numbers, separated by commas. To override a warning number configured for the option (and thus not treat that warning as an error), precede the number with a hyphen. pkzipc -extract -error=42,43 files.zip add, extract, test, view Displays dialog in which to enter product license key error Designates warning conditions, by warning number, to treat as error condition 73 (Warning configured as an error) Configurable pkzipc -extract -error=42,–43 files.zip 131 Name/Description: Value(s): Example usage: Used with: exclude The file(s) or file pattern (for example, *.doc) being excluded. Compression example: pkzipc –add –exclude=”*.doc” save.zip add, extract, delete, test, view, print, console No default value. Extraction example: Exclude files from being compressed or extracted. Configurable separately for add and extract operations. pkzipc –extract –exclude=”*.txt” save.zip Setting exclude default: Note: You must specify a sub-option (for example, file pattern or list file name preceded by an appropriate list character “@”) with the exclude option. extract Extracts files from an archive file Configurable pkzipc –config –exclude=”*.txt” Note: When you use the exclude option with the configuration command, PKZIP prompts you to configure the exclude default for add and/or extract operations. all – Extracts all files in an archive file pkzipc –extract save.zip standalone pkzipc –extract=update save.zip freshen – Extracts only files in the archive that are newer versions of files that already exist in the target directory update – Extracts files in the archive that are newer versions of files that already exist in the target directory or that do not exist in the target directory Default = all fast No sub-options. Uses the Deflate algorithm and sets the level of compression to level 2 on a scale of 0 - 9. Files having the following extensions are added uncompressed: bz2, bzip2, cab, gz, gzip, rar, gif, jpeg, jpg, mp3, mpeg, mpg, sxw No default value. Configurable pkzipc –add –fast save.zip *.doc pkzipc –config –fast add 132 Name/Description: Value(s): Example usage: Used with: fipsmode enabled – Turns the option on Turns on fipsmode for the current command line: disabled – Turns the option off (the default on UNIX) pkzipc –add –recipient="John Public" –fipsmode save.zip *.doc add, extract, test, listCryptAlgorithms, listHashAlgorithms On Windows XP and later, the option is enabled or disabled by default according to the Windows FIPS policy setting “System cryptography: Use FIPS compliant algorithms for encryption, hashing, and signing.” Otherwise, disabled by default. Overrides a configured default setting of fipsmode=enabled and turns off fipsmode for the current command line: Causes SecureZIP to use only algorithms that comply with the FIPS 140 standard to perform cryptographic operations. Use the commands listcryptalgorithms and listhashalgorithms with the fipsmode option to see lists of algorithms available with fipsmode. Configurable fix Attempts to repair a corrupt ZIP archive file header Creates a comment for a ZIP archive file in the header area of the file Configurable <filename> – The name of the ZIP archive to fix pkzipc –extract –fipsmode=disabled wedding_plans.zip *.* Lists encryption algorithms available with fipsmode: With file nameencrypted (FNE) archives, also applies to: comment, delete, header, view pkzipc –listcryptalgorithms –fipsmode pkzipc –fix save.zip standalone To include literal text: add, standalone No default value. <filename> – The file that contains the header comment. The file name must be prefixed with the ListChar symbol ("@" by default) to distinguish it from the other suboption <comment> – The literal comment to be used pkzipc –add –header save.zip *.doc Note: when you type this command, PKZIP will prompt you for the header text To include an existing file: pkzipc –add –[email protected] save.zip *.doc ------------------------No default value. hash Sets the hashing algorithm to use when signing an archive. Use listhashalgorithms to list hashing algorithms available. Configurable The hashing algorithm to use, as listed in the output from the listhashalgorithm s command. Default = sha1 pkzipc –add –certificate=”John Smith” –hash=sha1 save.zip *.doc add, delete, comment, header 133 Name/Description: Value(s): Example usage: Used with: help <command or option> – Any command or option for which help is desired. pkzipc –help standalone Displays help screen for PKZIP Display help for the add command: pkzipc –help=add No default value. include Include files to compress or extract. Configurable separately for add and extract operations. The file(s) or file pattern (for example, *.doc) being included. Specifies a file containing the private key for the certificate specified by the certificate option. The option is most useful when using SSL server certificates, which often have the private key and certificate in separate files. Configurable In this example, only .doc files will be compressed. add, extract, delete, test, view, print, console No default value. pkzipc –config –include=”*.txt” In this example, you are setting up .txt files as the files that you always want to compress or extract, until you change the default or override from the command line with the exclude option. Note: You must specify a sub-option (for example, file pattern or list file name preceded by an appropriate list character “@”) with the include option. keyfile pkzipc –add –include=”*.doc” save.zip Note: When you use the include option with the configuration command, PKZIP prompts you to configure the include default for add and/or extract operations. <filename> – The name and location of the file pkzipc –add –certificate=#mycert.pem –keyfile=mykey.key save.zip *.doc add, extract, test, view 134 Name/Description: Value(s): Example usage: Used with: keypassphrase <passphrase> – The passphrase, in quotes pkzipc –add –certificate=#mycert.p12 –keypassphrase="my password" save.zip *.doc add, extract, test, view Specifies the passphrase used to decrypt private key information. This can be the passphrase used for your certificate store (UNIX only), for a PKCS#12 file (specified with the certificate option), or a key file specified with the keyfile option. pkzipc –add –certificate=#mycert.pem –keyfile=mykey.key –keypassphrase="my password" save.zip *.doc 135 Name/Description: Value(s): Example usage: Used with: ldap Syntax (optional fields in brackets): pkzipc –add –ldap=john_p:mysecret @192.172.0.1 :389/cn=users,dc=xyz, dc=com –recipient=”Mary Samplename” save.zip *.doc add Specifies an LDAP directory for PKZIP to search before looking in local stores for certificates containing public keys for certificate-based encryption (see the recipient option). Note: The ldap option must appear before the recipient option when the two options are used together in a command line. Configurable Note: The ldap option is available only with SecureZIP. –ldap= [[userid :password@] server[:port]/] ldap_base where: userid (optional) is the user account with which to log in if the LDAP server requires a login password (optional) is the password associated with the user account server (optional) is the LDAP server name or TCP/IP address port (optional) is the TCP/IP port to use. The default is 389 if no port is specified. ldap_base (required) is the name of the entry that PKZIP should use as the base or root of the LDAP search for certificates, analogous to a root folder or directory in a file system The query string format for ldap_base can vary between LDAP implementations. Check with your LDAP or network administrator for the format to use. See "Accessing Recipients in an LDAP Directory" on page 39. pkzipc –add –ldap=/cn=users,dc=xyz, dc=com –recipient=e= [email protected] save.zip *.doc 136 Name/Description: Value(s): Example usage: Used with: larger Numerical value (in bytes) that indicates a minimum desired file size. pkzipc –add –larger=5000 save.zip * add, extract, test, view, delete, print console Process only those files whose size is greater than (in bytes) or equal to a specified file size. In this example, PKZIP adds only files that are at least 5000 bytes in size. No default value. Configurable separately for add and extract operations. level Set the level of compression. See also the options store, speed, fast, normal, and maximum, which provide non-numeric names for various compression settings with (except store) the Deflate compression method. Any digit from 0 through 9, with 0 being no compression at the fastest speed, and 9 being the most compression at the slowest speed. pkzipc –add –level=9 save.zip *.doc add pkzipc –license standalone pkzipc –config –listchar=+ All commands except list- Default = level 5 (normal) Configurable license No sub-options. Displays the product license information for PKZIP No default value. listchar Any character in the printable ASCII range. Must not be the same as OptionChar and must not be “–”. Set the list character to the specified ASCII character. Prefixing a file name with the list character identifies it as a list file. certificates, listcryptalgorithms, listsfxtypes, license, and version default = @ Configurable listcryptalgorithms Displays a list of the strong encryption algorithms available for use with the cryptalgorithm option. With fipsmode on, it lists only FIPS-validated algorithms. None pkzipc –listcryptalgorithms standalone 137 Name/Description: Value(s): Example usage: Used with: listfile Requires a name for the list file Create a list file of files that the command line minus the listfile option would add to myarchive.zip: add, extract Generates a file that lists the files to be added to or extracted from an archive. The option causes a list file to be created instead of actually adding or extracting files. No default value. pkzipc –add=update –listfile=mylist.txt myarchive.zip * Generate a list file that lists all files, with any saved path information, that the command line minus the listfile option would extract from the save.zip archive pkzipc –extract –listfile=list.txt save.zip None pkzipc –listhashalgorithms standalone listsfxtypes No sub-options. pkzipc –listsfxtypes standalone Display a list of the types of SFX files that can be created with PKZIP No default value. locale enable – Turns the option on Configure the option to be off by default: All commands except list- disable – Turns the option off pkzipc –config –locale=disable Default = enable Turn the option off for the current command line certificates, listcryptalgorithms, listsfxtypes, license, and version listhashalgorithms Displays a list of the hash algorithms available to the hash option. With fipsmode on, it lists only FIPS-validated algorithms. Sets the default PKZIP time and date settings to match your system time and date formats. When disabled, PKZIP uses a 12-hour time format and a date format of MMDDYY. pkzipc –add –locale=disable test.zip *.doc Configurable lowercase No sub-options. Extracts file names in lower case regardless of how they appear in the archive --------------------- Configurable No default value. pkzipc –extract –lowercase save.zip * extract 138 Name/Description: Value(s): Example usage: Used with: lzma No sub-options. pkzipc –add –lzma save.zip doc1.txt add Compress files using the LZMA method. --------------------- hidden – hidden attributes. pkzipc –add –attr=all –mask=hidden save.zip add, extract archive – archive attribute. pkzipc –extract –mask=none save.zip system – system attributes. pkzipc –config –mask=hidden No default value. Configurable Note: Files compressed with this method can be extracted by PKZIP versions 12.3 and later, but not all ZIP programs from other vendors can extract such files. mask Strips file attributes that the attribute option would otherwise cause to be stored or set for extracted files Configurable Note: You can only mask attributes that are specified using the attributes option. readonly – readonly attributes. none – no attributes (turns off attribute mask in the PKZIP Configurations Settings file for this instance only). all – all attributes <hex value> –The hex value of an attribute to be masked, or the logical OR of multiple hex values --------------------Default (add) = none Default (extract) = all Value if used on command line without a suboption (add and extract) = all 139 Name/Description: Value(s): Example usage: Used with: maximum No sub-options. pkzipc –add –maximum save.zip *.doc add Uses the Deflate compression method and sets the level of compression to level 9, the highest level on a 0 - 9 scale, but gives the lowest speed --------------------pkzipc –config –maximum No default value. Configurable more Pauses after one screen of output and prompts to continue. The number of rows of information you want to define as a screen pkzipc –view –more=22 save.zip all commands pkzipc –config –more --------------------Configurable Default = one screen of information move No sub-options. Removes (deletes) files from the source drive after adding them to an archive. --------------------- movearchive No sub-options. Deletes an archive that is created only as an intermediate archive—for example, to be converted by the encode option to an archive of a different type. --------------------- pkzipc –add –move save.zip *.doc add pkzipc –add –encode=gzip –movearchive myfiles.tar add pkzipc –sfx – namesfx=test.exe docs.zip sfx No default value. No default value. Configurable namesfx Specify a file name when converting to a self-extracting file. <file name> – File name for the SFX file --------------------No default value. 140 Name/Description: Value(s): Example usage: Used with: newer <numeric value> A number of days, hours, minutes, or seconds defining the interval, plus a suffix identifying the kind of units used: Adds files no older than 24 hours: add, extract, test, view, print, console Selects files that are no older than a specified interval, such as “five days” Configurable separately for add and extract operations. Note: Specifying a newer value is functionally equivalent to specifying an after value. pkzipc –add –newer=24h save.zip * Adds files no older than five days: Suffixes: d – Days (default) h – Hours m – Minutes s – Seconds pkzipc –add –newer=5d save.zip * pkzipc –add –newer=5 save.zip * --------------------No default value. noarchiveextension No sub-options. Suppresses adding a file name extension to the specified archive file name --------------------- pkzipc –add –noarchiveextension file.ibm *.doc All commands except listcertificates, listcryptalgorithms, listsfxtypes, license, and version No default value. Configurable Note: This option is identical to nozipextension, which is now deprecated. noextended No sub-options. Suppress the storage of extended attribute information (excluding file permission attributes --------------------- pkzipc –add –noextended save.zip * add pkzipc –add –nofix save.zip *.doc All commands except list- No default value. Configurable nofix No sub-options. Suppress the attempt to fix any problems PKZIP encounters in extracting from an archive --------------------- Configurable No default value. certificates, listcryptalgorithms, listsfxtypes, license, and version 141 Name/Description: Value(s): Example usage: Used with: normal No sub-options. pkzipc –add –normal save.zip add Uses the Deflate algorithm and sets the level of compression to 5 (normal) on a scale of 0 - 9 for a balance of compression and speed. Unlike with the fast option, all files are compressed. --------------------- pkzipc –config –normal No default value. Configurable nosmartcard No sub-options. Note: This option is deprecated. Instead of setting nosmartcard, turn off the smartcard suboption of cryptoptions. --------------------- pkzipc –add –recipient=”Thomas Francis, Jr.” nosmartcard save.zip *.doc add pkzipc –add –nozipextension file.ibm *.doc All commands No default value. Turns off smart card compatibility when set in conjunction with the recipient option. Set this option to enable users of versions of PKZIP prior to 6.1 to decrypt files encrypted using the recipient option. Note: Smart cards cannot decrypt files encrypted using a recipient list if this option is set. configurable nozipextension No sub-options. Note: This option is deprecated. Use the option noarchiveextension instead. --------------------- Suppress PKZIP’s adding of an identifying file extension to an archive file name Configurable No default value. 142 Name/Description: Value(s): Example usage: Used with: older <numeric value> A number of days, hours, minutes, or seconds defining the interval, plus a suffix identifying the kind of units used: Adds files older than 24 hours: add, extract, test, view, print, console Selects files that are older than a specified interval, such as “five days” Configurable separately for add and extract operations. Note: Specifying an older value is functionally equivalent to specifying a before value. pkzipc –add –older=24h save.zip * Adds files older than five days: Suffixes: d – Days (default) h – Hours m – Minutes s – Seconds pkzipc –add –older=5d save.zip * pkzipc –add –older=5 save.zip * --------------------No default value. OpenFile Determines whether to include files that are open for write access in another application Never - PKZIP does not include any open files. A warning will appear if a matching file is open All - PKZIP includes all matching open files without prompting first. A message noting each open file is included in the standard output. pkzipc –add – OpenFile=never test.zip *.bmp add pkzipc –add –OpenFile test.zip *.bmp pkzipc –add – OpenFile=prompt test.zip *.bmp Prompt - PKZIP notifies you when a matching file is open, and asks whether to add the open file or skip it. --------------------Default = Never optionchar Specifies the prefix character used to identify a command or option as such on the command line Note: On Windows, the “/” (slash) character can also always be used. Configurable Any valid single character. pkzipc –opt=+ +add save.zip *.doc --------------------- pkzipc +config –option=+ Default = – (hyphen) all commands 143 Name/Description: Value(s): Example usage: Used with: overwrite prompt – Prompt every file individually on whether to overwrite a file that has the same name as the one being added or extracted pkzipc –extract –overwrite=all save.zip add, extract Specifies whether to overwrite existing files with files being added or extracted. By default, PKZIP prompts before overwriting when extracting but not when adding. pkzipc –add –overwrite=prompt save.zip all – Overwrite all files that have the same name Configurable never – Never overwrite a file that already exists in the target directory or archive --------------------Value if used on command line without a suboption = all. passphrase Protects an archive with passphrasebased encryption PKZIP prompts for a passphrase if none is specified with the option. Configurable <passphrase> – The passphrase that must be supplied to extract and decrypt the files To include a passphrase in the command: pkzipc –add –passphrase=beowulf save.zip <file name> – Name of a file that contains the text of the passphrase. The file name must be prefixed with the list character (@ by default) defined with the listchar option. pkzipc –add –passphrase save.zip --------------------- pkzipc –add –[email protected] save.zip To have PKZIP prompt for a passphrase after you type the command: To have PKZIP get the passphrase from a file: No default value. To extract passphraseprotected files from an archive: pkzipc –extract –passphrase=beowulf9 save.zip add, extract, test, print, console 144 Name/Description: Value(s): Example usage: Used with: path current – Store the path from the current directory. Assuming you are in "/temp": add, extract Stores or restores directory path names for files within a .ZIP file By default, PKZIP does not store path information Configurable root or full – Store the entire path beginning at the root of the drive; also referred to as "full" path. specify or relative – Store path information relative to the specified directories, for their subdirectories pkzipc –add –path=root save.zip docs/* (the complete path is stored including "temp/docs/"). pkzipc –add –path=current save.zip docs/wp/* (the path stored is "docs/wp"). none – No path information stored --------------------Default = none when used with add; full when used with extract Value if used on command line without a suboption = current ppmd No sub-options. Compress files using the PPMd method. --------------------- pkzipc –add –ppmd save.zip doc1.txt add pkzipc –add –preview save.zip add, delete, header, comment No default value. Configurable Note: Files compressed with this method can be extracted by PKZIP versions 12.3 and later, but not all ZIP programs from other vendors can extract such files. preview No sub-options. Prints out messages to preview the results of a set of commands or options without actually performing the tasks --------------------No default value. 145 Name/Description: Value(s): Example usage: Used with: print <print device> – The print device use, for example, "lpt1". pkzipc –print=lpt1 save.zip readme.txt standalone Print a file within a .ZIP file. --------------------- If you do not specify a print device, your default printer is used. Default = the default printer on your system. recipient Specifies one or more recipients for certificate-based encryption. The option can appear more than once on the command line to specify multiple recipients. Configurable Note: Use the recipient option with the nosmartcard option if you want users of versions of PKZIP prior to 6.1 to be able to decrypt your files. Note: This option is available only with SecureZIP. cn=<Common name> – The Common Name (CN) field of the subject of the certificate. The “cn=” prefix is optional. This suboption is the default: PKZIP searches the Common Name field if no other field is specified. <Friendly name> – The friendly name associated with the certificate. This is often the same as the common name of the subject. e=<email address> – The email address embedded in the subject of a digital certificate. (Note: Not all certificates contain an email address.) The “e=” prefix is optional. f=<ldap filter> – An LDAP filter to use to filter a search for certificates on an LDAP server that you are accessing with the ldap option. @<filename> – Specifies a text file which contains the names of recipients, one on each line. #<filename> – Specifies a pkzipc –add –recipient=”Thomas Jones, Jr.” save.zip *.doc pkzipc –add –recipient=”cn=Thomas Jones, Jr.” save.zip *.doc pkzipc –add –recipient=e=john.public@ nowhere.com save.zip *.doc pkzipc –add –recipient=john.public@ nowhere.com save.zip *.doc pkzipc –add -recipient= f=(&(userCertificate=*) (ou=Sales)) save.zip *.doc pkzipc –add -recipient= ”f=(&(userCertificate=*) (ou=Sales With A Space))” save.zip *.doc pkzipc –add –[email protected] save.zip *.doc pkzipc –add –recipient=#recipients.p7b save.zip *.doc pkzipc –add –recipient=#recipients.p12 save.zip *.doc add 146 Name/Description: Value(s): Example usage: Used with: pkzipc –add –recurse save.zip * add PKCS#7 or PKCS#12 file that contains certificates of the recipients you want to list. --------------------Default = cn= recurse No sub-options. Search subdirectories for files to compress --------------------No default value. Use with path to store path information for files in subdirectories. Tip: You can use directories to combine the functionality of recurse and path. Configurable 147 Name/Description: Value(s): Example usage: Used with: runafter <file name> – The file to run or open Launch the file (for example, readme.txt) via the specified applications (for example, notepad.exe): (add) sfx Run or open a specified file after extraction by a selfextractor --------------------No default value. Configurable pkzipc –add –sfx –runafter="notepad.exe readme.txt" test.exe * Launch the file (for example, readme.txt) via the associated application (WIN32 only): pkzipc –add –sfx –runafter="${} readme.txt" test.exe * Run the install script (for example. install.inf) (WIN32 only): pkzipc –add –sfx –runafter="${install.inf}" test.exe * Run the install script (for example, install.inf) with the full short path pre–appended (for example, c:\program~1\temp) (Win32 only): pkzipc –add –sfx –runafter= "${install}%0install.inf" test.exe sfx With the add command, creates a self-extracting ZIP file with a .exe file name extension. As a standalone command, converts an existing ZIP file to a selfextracting archive. Configurable Note: For a listing of available selfextractors, use the listsfxtypes command. <no sub-option> – Create a native command line selfextractor win32_x86_g610 – Create a graphical Windows selfextractor that, when run, opens a dialog to let the user select a target extract folder --------------------Default = Create a native command line self-extractor for use in the command line environment of the operating system in which it was created To create myfiles.exe: pkzipc –add –sfx myfiles *.doc To convert existing ZIP file myfiles.zip to self-extracting graphical Windows archive myfiles.exe: pkzipc –sfx=win32_x86_g myfiles.zip To convert existing ZIP file myfiles.zip to a self-extractor and specify a name for the self-extractor: pkzipc –sfx –namesfx=newname myfiles.zip (Converts myfiles.zip to newname.exe.) add, standalone 148 Name/Description: Value(s): Example usage: Used with: sfxdestination <path> – Path to target folder pkzipc –add –sfx –sfxdestination=”My Documents\newstuff” mysfx *.doc add, sfx pkzipc –add –sfx –sfxdirectories –directories mysfx "docs\*.*" add, sfx pkzipc –add –sfx –sfxlogfile test.exe * (add) sfx Specifies a default target folder for files extracted from a selfextractor --------------------No default value Configurable sfxdirectories No sub-options Causes a selfextractor to restore a saved path structure on extraction. To recurse subdirectories and store path information when adding files to the archive, use with the directories option. --------------------No default value Configurable sfxlogfile No sub-options Creates an ASCII text error log (named pkerrlog.txt) in the destination directory on extraction --------------------- Configurable No default value 149 Name/Description: Value(s): Example usage: Used with: sfxoverwrite prompt – (Default) The user is asked whether to overwrite files pkzipc –add –sfx –sfxoverwrite=freshen mysfx *.doc add, sfx pkzipc –add –sfx –sfxuitype=regularsfx mysfx *.doc add, sfx Specifies when a selfextractor overwrites files that have the same name as a file being extracted Configurable always – Files that have the same name in the destination folders are overwritten without prompting update – Only files that do not already exist or are newer than same-named files freshen – Only newer versions of files that already exist in the destination folders are extracted; the older files are overwritten without prompting never – Files are never overwritten --------------------Default = prompt sfxuitype Specifies the type of graphical interface (GUI) that a selfextractor presents to the user. This option only affects GUI selfextractors. (Command line self-extractors do not present a GUI.) Configurable autosfx – Presents a dialog that displays a bar to show progress extracting, and a Cancel button easysfx – (Default) Presents a dialog that enables the user to select a destination folder and to turn off any runafter option set regularsfx – Presents a dialog that enables the user to change the destination folder and other options before the archive is extracted --------------------Default = easysfx 150 Name/Description: Value(s): Example usage: Used with: shortname dos – Convert long file names to DOSequivalent short file names (8+3) pkzipc –add –short=dos save.zip add pkzipc –add –move –shred=nsa myfiles.zip * add Convert long file names of files added to an archive to WIN32-equivalent "short" file names Configurable none – Do not convert file names --------------------Default = none Value if used on command line without a suboption = dos shred Overwrites PKZIP temporary files and files deleted by PKZIP to prevent recovery of their data none – turns off shredding: files are not overwritten random – Overwrites files once with random data Configurable Note: The shred option is the same as the older wipe option, which is now deprecated. dod5220 Overwrites files three times, to the DOD 5220.22-M specification nsa – Overwrites files seven times, to the NSA standard --------------------Default = none Value if used on command line without a suboption = random 151 Name/Description: Value(s): Example usage: Used with: silent none – Turns off the silent option; displays all messages pkzipc –add –silent save.zip *.doc All commands except list- pkzipc –config –silent certificates, listcryptalgorithms, listsfxtypes, license, and version Suppresses the display of some or all of PKZIP’s messages to the user, including warnings and errors. It can also suppress prompts for inputs. Configurable banner – Suppresses printing the banner copy – Suppresses “Copy file” messages when updating archives error – Suppresses all error and warning outputs fileheader – Suppresses file headers when using the console command input – Suppresses all requests for input. If any operation requests input, an error is given normal – Suppresses all message outputs except warnings, errors, and prompts for input output – Suppresses all normal, error, and warning outputs progress Suppresses “percent complete” messages all – Same as specifying both Input and Output. (Default if option is specified without a sub-option) --------------------No default value. 152 Name/Description: Value(s): Example usage: Used with: smaller Numerical value that indicates a maximum desired file size (in bytes) pkzipc –add –smaller=5000 save.zip * add, extract, test, view, delete, print, console Process only files that are smaller than or equal to a given file size, specified in bytes --------------------- In this example, PKZIP adds only files no larger than 5000 bytes in size. No default value. Configurable separately for add and extract operations. sort Sort files in an archive based on specific criteria (for example, by file size). Files are then viewed, added, and extracted in the order sorted. Configurable Note: The crc and ratio sub-options do not work with the add command and sort option. crc – sort by CRC value. pkzipc –add –sort=date save.zip *.doc date – sort by file date of file. pkzipc –config –sort=date extension – sort by file extension. name – alphabetically sort files and folders together in one series by path name. natural – sort in the order files were compressed. ratio – sort by compression ratio. size – sort by the original, uncompressed size of the file ("length" in display). comment – sort by file comment. none – first alphabetically sort path names that contain folders and then separately sort file names that lack folder information. (The default.) --------------------Default = none Value if used on command line without a suboption = name add, extract, test, view, delete, print, console 153 Name/Description: Value(s): Example usage: Used with: span Force – Fully format media without checking for existing files. pkzipc –add –span a:\save.zip *.doc add Forces PKZIP to create a split archive, even when creating the archive on nonremovable media. Also used to format or wipe removable media prior to writing the archive. This option is only available for use with ZIP archives. Note: On Windows, spanning should take place automatically; normally the feature does not need to be enabled from the command line Format – Fully format media before attempting to write to it Quick – Quickformat media before attempting to write to it Wipe – Delete contents of media before attempting to write to it None – Do not format or erase media before attempting to write to it Configurable <segment size> – Split archive into segments of predefined size (see choices below) or a specified size (in bytes) greater than 65535. Predefined sizes: 360 = 360KB floppy 720 = 720KB floppy 1.2 = 1.2MB floppy 1.44 = 1.44MB floppy 2.88 = 2.88MB floppy. 95.7 = 100MB ZIP disk 650 = 650MB CDROM 700 = 700MB CDROM --------------------Default = none pkzipc –add –span=format a:/save.zip *.doc pkzipc –add –span=1.44 c:/save.zip *.doc pkzipc –add –span=1457664 c:/save.zip *.doc 154 Name/Description: Value(s): Example usage: Used with: speed No sub-options. pkzipc –add –speed save.zip *.doc add Uses the Deflate algorithm and sets the level of compression to 1 on a scale of 0 9. Some files are stored (level 0) uncompressed. --------------------pkzipc –config –speed No default value. Provides the fastest performance but the least compression. Files having the following extensions are stored uncompressed: bz2, bzip2, cab, gz, gzip, rar, gif, jpeg, jpg, mp3, mpeg, mpg, sxw Configurable store No sub-options. Sets the level of compression to 0 (no compression) on a scale of 0 - 9; stores the files in the archive without compressing them --------------------- pkzipc –add –store save.zip *.doc add pkzipc –config –store No default value. Configurable strict No sub-options Applies strict checking to allow certificates to be used only if they are valid and are designated (on the certificate) for use for the intended type of operation (signing or encryption). --------------------- pkzipc –add –cryptalg –recipient="John Q. Public" –strict test.zip *.doc No default value pkzipc –add –recipient="John Q. Public" –crl –strict test.zip *.doc Available tokens. These are replaced by associated values on execution: This command line using tokens: add, delete, comment, header Configurable substitution Used with add, inserts a timestamp constructed from specified tokens in the name of a new or updated archive or, when used with the archiveeach option, in the name of the specified destination {archivename} – (For use only with extract) Base name of archive, without the extension pkzipc –add –substitution "Design Spec {yyyy}-{mm}{dd}-{h}-{MM}{SS}{ampm}.zip" plan.doc produces a ZIP file with a name like: Design Spec 2006-08-09-12- add, extract 155 Name/Description: directory. Used with extract, dynamically constructs the name of the destination folder from embedded tokens. A single command line can extract multiple archives each to a custom-named folder. Configurable Value(s): {archiveext} – (For use only with extract) The file name extension of the archive (without a leading dot) {archivepath} – (For use only with extract) The path of the archive, without the file name, preceded by a leading slash or backslash and excluding the drive letter or share path if the name is a UNC name {id} – A job ID specified separately with the jobid option {mm} – Month, 2digit {m} – Month, 1digit (if possible) {dd} – Day, 2-digit {d} – Day, 1-digit (if possible) {yyyy} – Year, 4digit {yy} – Year, 2-digit {HH} – Hour, 2digit, 24-hour format {H} – Hour, 1-digit (if possible), 24hour format {hh} – Hour, 2digit, 12-hour format {h} – Hour, 1-digit (if possible), 12hour format {MM} – Minute, 2digit {M} – Minute, 1digit (if possible) {SS} – Second, 2- Example usage: 06-29am.zip This command line uses the jobid option to set a value for {id}: pkzipc –add –jobid=myJob –substitution {id}{yyyy}.zip *.doc and results in a ZIP file with a name like: myJob2006.zip Extracts all ZIP files in the current directory, each to a subdirectory named after the ZIP archive extracted there pkzipc –extract –substitution *.zip {archivename}\ Used with: 156 Name/Description: Value(s): Example usage: Used with: pkzipc –add –temp=z:\public test.zip *.txt add, delete, header, comment digit {S} – Second, 1digit (if possible) {ampm} – a.m. or p.m. indicator to identify current 12hour segment of the day No sub-options --------------------No default value temp Specifies the directory to use for temporary files created by PKZIP Configurable The drive and/or path. For example: C: or /root/temp --------------------No default value. This example updates the .ZIP file test.zip and uses the z:\public directory location for temporary files. pkzipc –add –temp=/temp test.zip *.txt This example updates the .ZIP file test.zip and uses the /temp directory location for temporary files. test Tests the integrity of files within a .ZIP file Configurable all – all files in the archive file are tested freshen – tests only those files in the archive that are newer versions of files that already exist in the extract directory update – tests files in the archive that are newer versions of files that already exist in the extract directory or that do not already exist there --------------------Default = all pkzipc –test save.zip standalone 157 Name/Description: Value(s): Example usage: Used with: times access – restores the time of last access to file(s) on extraction. pkzipc –extract –times=access save.zip extract Specifies that PKZIP should restore the extended time fields, and/or other dates stored in the archive. Configurable modify – restores the time of last modification to files on extraction. create – restores the time of creation to files on extraction. all – all file times are restored. none – file times are not restored. --------------------Default = all 158 Name/Description: Value(s): Example usage: Used with: translate none – no translation is performed. pkzipc –extract –translate=unix save.zip add, extract, console, print Translates EOL (“end of line”) characters when adding or extracting files. For .ZIP archives, the translation occurs only for files which are marked as ASCII. For other archive types, the translation may occur on all files, including binary files. The ebcdic suboptions work only with data compressed using SecureZIP for z/OS or SecureZIP for i5/OS with the Zip Descriptor Word (ZDW) option to preserve variable length records. Configurable dos – translates text files so that lines end with a return/newline pair (Win32 default) mac – translates text files so lines end with a single carriage return unix – translates text files so lines end with a single newline ebcdic,nl – With ZDW files, substitute EBCDIC newline (0x15) ebcdic,lf – With ZDW files, substitute EBCDIC linefeed (0x25) ebcdic,crlf – With ZDW files, substitute EBCDIC carriage return/linefeed (0x0D25) ebcdic,lfcr – With ZDW files, substitute EBCDIC linefeed/carriage return (0x250D) ebcdic,crnl – With ZDW files, substitute EBCDIC carriage return/newline (0x0D15) --------------------Default = none Value if used on command line without a suboption = native operating system compatibility translation. pkzipc –add –translate=unix scripts.zip *.pl 159 Name/Description: Value(s): Example usage: Used with: utf8 No sub-options. pkzipc –add test.zip –utf8 *.* add, comment Enables UTF-8 characters in file names and file comments to be correctly displayed when an archive’s contents are viewed or extracted in compatible non-UTF8 locales No default value. pkzipc –extract –verifysigner=”Thomas Jones, Jr.” save.zip *.doc extract Configurable verifysigner Specifies one or more certificates and constrains PKZIP to extract only archives whose central directories are signed using one of these certificates. PKZIP must also find the specified certificates locally. The option can appear more than once in the same command line, to specify multiple certificates. Configurable cn=<Common name> – The Common Name (CN) field of the subject of the certificate. The “cn=” prefix is optional. <Friendly name> – The friendly name associated with the certificate. This is often the same as the common name of the subject. e=<email address> – The email address embedded in the subject of a digital certificate. (Note: Not all certificates contain an email address.) The “e=” prefix is optional. @<filename> – Specifies a text file which contains a list of certificates, one on each line. #<filename> – Specifies a PKCS#7 or PKCS#12 file that contains the certificates themselves. --------------------No default value. pkzipc –extract –verifysigner=”cn=Thomas Jones, Jr.” save.zip *.doc pkzipc –extract –verifysigner=e=john.public@ nowhere.com save.zip *.doc pkzipc –extract –verifysigner=john.public@ nowhere.com save.zip *.doc pkzipc –extract –verifysigner= f=(&(userCertificate=*) (ou=Sales)) save.zip *.doc pkzipc –extract –verifysigner= ”f=(&(userCertificate=*) (ou=Sales With A Space))” save.zip *.doc pkzipc –extract –[email protected] save.zip *.doc pkzipc –extract –verifysigner=#recipients.p7b save.zip *.doc pkzipc –extract –verifysigner=#recipients.p12 save.zip *.doc 160 Name/Description: Value(s): Example usage: Used with: version major – Returns the major release number. For example, if the version number is 12.10.1054, the value returned is 12. The command line: standalone Gives information about the version of the release. Displays complete version information; also returns to the shell particular version numbers specified by sub-options. minor – Returns the minor number of the release. For example, if the version number is 12.10.1054, the value returned is 10. pkzipc –version outputs two lines like the following after the usual header information: Program File Version (pkzipc): 12.30.1062 Product Version: 12.30.0004 The minor sub-option outputs just the minor version number, for example, 10: pkzipc –version=minor step – Returns the step, or patch value (minus 1000 if ≥ 1000). For example, if the program version is PKZIPC 12.10.1054, the value returned is 54. product – Returns the build number of the product. For example, if the product version is SecureZIP Server 12.10.0003, the value returned is 3. --------------------Default = major view Displays information about the files in an archive—for example, the compressed size of a file Configurable brief – present information in the most compact manner. detail – present information in the most detailed manner normal – present information in the normal manner. --------------------Default = normal pkzipc –view save.zip standalone 161 Name/Description: Value(s): Example usage: Used with: warning <warning number> – One or more warning numbers, separated by commas. To override a warning number configured for the option (and thus not pause and prompt on that warning), precede the number with a hyphen pkzipc –extract –warning=43 save.zip * add, extract, test, view Pauses after every specified warning and prompts whether to continue. If no warning is specified, pauses after every warning. Configurable pkzipc –extract –warning save.zip * pkzipc –extract –warning=–43 save.zip * --------------------No default value. wipe Overwrites PKZIP temporary files and files deleted by PKZIP to prevent recovery of their data none – turns off shredding: files are not overwritten random – Overwrites files once with random data Configurable Note: This option is deprecated. Use the functionally identical shred option instead. dod5220 Overwrites files three times, to the DOD 5220.22-M specification nsa – Overwrites files seven times, to the NSA standard --------------------Default = none Value if used on command line without a suboption = random pkzipc –add –move –wipe=nsa myfiles.zip * add 162 Name/Description: Value(s): Example usage: Used with: zipdate newest – set to the date of the newest file within the archive file. pkzipc –add=update –zipdate=retain save.zip *.txt add, delete, fix, header, comment Note: This option is deprecated. Use the functionally identical option archivedate instead. Set the file modification date of the archive file. Configurable oldest – set to the date of the oldest file in the archive file. retain – retain the original date of the archive file (the date when the file was created). none – disable the file date in the configuration file and set the archive date as the last modification date. --------------------Default = none 163 B Error and Warning Messages This appendix contains reference information on all error and warning messages that can occur in PKZIP. An error usually causes the canceling of the task you are performing such as compressing a file. A warning usually indicates that something is wrong, but it is not severe enough to cancel an entire task. It might also be a reminder or query prompt. PKZIP will also return any error codes to the shell. If there were no warnings or errors, 0 is returned. Error Messages When an error occurs, PKZIP displays an error message. The following is a description of each error message. Error Potential Cause(s) (E2) Ambiguous option or command specified - XXX. If you abbreviate an option on your command line, make sure that you are supplying enough characters in the option to delineate it from similarly spelled options. If, for example, you only specify -pr on your command line, PKZIP will generate the (E2) error because it cannot determine whether you are specifying the print or preview option. (E3) Ambiguous sub-option specified - XXX. If you abbreviate a sub-option on your command line, make sure that you are supplying enough characters in the sub-option to delineate it from similarly spelled sub-options. If, for example, you only specify sort=na on your command line, PKZIP will generate the (E3) error because it cannot determine whether you are specifying the name or natural sub-option. (E4) Unknown or illegal option - XXX. The option you specified on the command line is invalid. It does not match any known options. Verify that you typed the option correctly. Check the spelling. 164 Error Potential Cause(s) (E5) Unknown or illegal sub-option - XXX. The sub-option you specified on the command line is invalid. It does not match any known sub-options. Verify that you typed the suboption on your command line correctly. Verify that you are not using an illegal sub-option (add -sort=crc). Check the spelling. (E6) No .ZIP file specified. There was not a .ZIP file specified on the command line. PKZIP does not accept wildcards for .ZIP file name when adding files to a .ZIP archive. (E7) Can't create: XXX. PKZIP could not create a .ZIP file when fixing. PKZIP could not create a volume label on a spanned archive. PKZIP could not create a temporary file for a spanned archive. Verify that you have write access to the drive or diskette on which you are creating these files. (E8) Nothing to do! You did not do something that is required for a particular task. For example, PKZIP could not find the file you are trying to open or access. You might have specified to update a pattern such as *.txt and PKZIP did not find any files that matched or that needed updating. (E9) No file(s) were processed PKZIP cannot find the file you are trying to access. For example, you might be trying to extract files from a .ZIP archive that do not exist in that archive. Verify that the file(s) you specify on the command line exactly match the file(s) in the .ZIP file. If, for example, the file in the archive is stored with path information, and you attempt to extract it but specify only the file name, you will get the (E9) error. (E10) No files specified for deletion. There are no files or file patterns specified for deletion on the command line. In lieu of a specified file or file pattern, PKZIP will not assume that the user wishes to specify all (*) files. (E11) Disk full, file: XXX. The hard disk or floppy disk you are writing to is full. This error occurs when PKZIP attempts to write a .ZIP file, or extract a file contained in a .ZIP file to a hard or floppy disk that is full. Free up sufficient disk space and try again. (E12) Can't find file: XXX. PKZIP cannot find the .ZIP file you specified. This error will only occur when you use commands/options/sub-options that work with existing .ZIP files. Verify that the file is specified correctly. If you are adding files to an archive, verify that you place the .ZIP file name before specifying files to be added on the command line. If the .ZIP file is not in the same directory where you typed the command, make sure to include path information. (e.g., pkzipc -add=freshen /temp/test.zip *.txt) 165 Error Potential Cause(s) (E13) Can’t open .ZIP file: XXX. The named .ZIP file is read-only or locked by another application and cannot be modified. This may also occur on a Network drive if you do not have sufficient access rights to the file to allow you to modify it. (E14) Can't create archive: XXX. PKZIP is not able to create the archive file. Verify that the destination directory is not full, and the archive file does not already exist. If you are creating the file on a network drive, confirm that you have the appropriate rights to the network file system. (E15) Renaming temporary .ZIP file, saved as: XXX. PKZIP could not rename the temporary file to the specified .ZIP file name. Verify that the destination drive is not full. If you are updating a non-spanned .ZIP file on removable media (floppy diskette) and the updated archive exceeds the size available on the removable media, you will receive the (E15) error. You will need to recreate the archive for spanning. Keep in mind that you cannot update a spanned archive. If you are creating the file on a network drive, confirm that you have the appropriate rights to the network file system. (E16) Can't open for write access, file: XXX. PKZIP is unable to write to the specified file or device. Verify that you have write access to the file or that your printer is configured correctly. Additionally if you are using the PKSFXS.DAT file, verify that you have PKSFXSDATA environment variable configured correctly. (E17) Error encrypting file data. PKZIP encountered a problem with the compressed data that it was trying to encrypt. For example, the disk on which the compressed data was located was bad or corrupt. (E18) Can’t open list file: XXX. The named list file could not be found. It does not exist, was spelled incorrectly, is not located in the specified directory, or cannot be accessed because the user does not have the appropriate rights to the file. (E19) Aborted file extract. Extraction process was terminated by the user while changing disks during a disk spanning operation. (E20) Aborted file compression. Compression process was terminated by the user while changing disks during a disk spanning operation. (E21) Can’t modify a spanned or split .ZIP file Spanned or split .ZIP files cannot be modified. The archive will need to be recreated. (E22) Cannot format removable media. The media cannot be formatted. The media may be write-protected. (E23) Suboption is too long The option is too long; that is, longer than 270 characters. See if you can abbreviate the name of the option or its sub-option to make it shorter. 166 Error Potential Cause(s) (E24) Insufficient disk space for ZIP comment. There is not enough space on the system or media to write the ZIP comment. (E25) Insufficient disk space for updated file. Insufficient disk space for the new archive. If you are adding files to an archive on a removable media, the media may not be large enough to write the modified file (too large). (E26) Device not ready: XXX. The removable media device is not ready. The disk may not be in the drive properly. (E27) 2.04g compatibility cannot be used with the option - XXX Option 204, which creates an archive compatible with PKZIP for DOS v. 2.04g, was used with another option that is not supported for that version of PKZIP (E28) Share violation, file is in use by another process: XXX The archive XXX is not in a format which PKZIP can understand or contains errors. The errors could be caused by many things but usually mean the archive is corrupted. (E34) Invalid archive format: <archive name> The file is not in a format currently supported by PKZIP (E58) Invalid archive - method not supported. The archive uses a compression method that currently is not supported. (E65) Could not encode archive file: XXX. The file could not be encoded. (E71) Can’t open PKCS#7 file: XXX. PKZIP cannot open the PKCS#7 because the files does not exist, user cannot read the file, or file is not a valid PKCS#7. (E72) PKZIP wanted user input, but silent=input or silent=all was specified If PKZIP needs user input—for example, to say whether files should be overwritten—but silent=input or -silent=all is specified on the command line to hide PKZIP messages and prompts, PKZIP halts processing and issues this error. (E73) Warning configured as an error The warning immediately preceding this error message has been specified (with the error option) to be treated as a fatal error. (E75) Incorrect passphrase or certificate not found, unable to open ZIP archive: <archive name> The archive contains encrypted file names that PKZIP cannot decrypt. If the archive is passphrase-protected, you must include the passphrase option with the extract command in the command line. (E76) Cannot open alternate config file: <file name> The altconfig option was used, but the specified file could not be opened. (E77) Archive can only support one file inside! You tried to add more than one file to an archive of a type that cannot contain multiple files. For example, a GZIP archive can contain no more than one file. If you try to create a GZIP archive to contain three files, PKZIP displays this error and does not create the archive. (E78) Unable to FTP archive file: <file name> PKZIP could not transfer the specified file. 167 Error Potential Cause(s) (E79) Unable to E-mail archive file: XXX A problem, perhaps with the network or the mail server, prevented PKZIP from emailing the specified file. (E80) Unable to run anti-virus PKZIP was unable to run the anti-virus scanning program. The anti-virus program did not respond to the command line used to launch the program. (E81) Possible virus detected The anti-virus program returned a non-zero value after doing a scan. Most anti-virus programs use this return to indicate the possible presence of a virus. (E83) Specified SFX cannot extract archive created with the option – XXXX You tried to create an SFX that is not able to handle a feature turned on by the option XXXX. For example, you tried to create a strongly encrypted DOS SFX, or an SFX that uses FNE. (E84) Fatal policy error - nnnnn, contact your system administrator A critical problem has occurred with a policy file or policy certificate. The number is a policy error code to help your administrator resolve the problem. On this error, PKZIP goes into read-only mode. In read-only mode, PKZIP will still extract files from archives but will not add files to a new or existing archive and disables the related controls. (E85) Unable to encrypt, no certificates passed -strict check The strict option was used, and no recipient certificates passed strict checking, so no certificate was available to use to encrypt (E86) Archive is not signed by a specified verification certificate The verifysigner option was used to specify one or more certificates, but the archive to be extracted was not signed using any of these certificates (E87) Certificate not found: XXX The verifysigner option was used to specify one or more certificates, but not all of the certificates could be found, either locally or in a specified LDAP directory (E88) Multiple certificates found: XXX The verifysigner option was used to specify one or more certificates, and multiple certificates were found—probably in an LDAP directory—that matched the criterion XXX (E89) Policy requires the ZIP archive to be encrypted A policy requires encryption but no passphrase or recipient was specified (E90) Policy requires the ZIP archive and/or files to be signed A policy requires the archive to be signed but no signing certificate was specified or none is available (E91) Policy prohibits creation of non-ZIP archives Only ZIP archives can be created when a policy requires encryption or signing (E92) Timeout error on file: XXX The timeout period elapsed while PKZIP waited for a response from another process before reading or writing more of the specified archive file on a socket or block device 168 Error Potential Cause(s) (E100) Insufficient memory Insufficient memory is available to process the archive. Try making more memory available to PKZIP. If this does not rectify the problem, then the archive may be corrupted. The -fix command may correct the problem. If you receive this message when you try to create a new archive, possibly you are attempting to compress too many files. Reduce the number of files and try again. If you are using a LIST file in your PKZIP command, the LIST file may be too large. See page 53 for more information on LIST files. (E150) Error reading .ZIP file. PKZIP cannot read the .ZIP file or is unable to read the central directory record. The file might be located on a corrupt disk or part of a disk. This includes floppy disks. (E155) Too many files in XXX. PKZIP cannot add or extract files in excess of the limit of 16,383 with the 204 option enabled. Reduce the number of files you are trying to process. (E156) File is now too big for valid zip data. The .ZIP archive is too large and PKZIP is unable to locate the central end record in the .ZIP file. The file is not a valid .ZIP archive or has been corrupted. The fix command may repair the .ZIP file. (E157) This archive requires a product compliant with ZIP APPNOTE version XX.X The archive requires a more recent version of PKZIP, or other archiving program, that supports the version of the ZIP file format described in the specified APPNOTE (“application note”). The APPNOTE is a document that is available on the PKWARE Web site. (E158) Errors encountered reading archive PKZIP was unable to read the archive. (E200) FIPS 140 mode is enabled, but archive is not encrypted with a FIPS-approved algorithm With the fipsmode option, SecureZIP cannot work with (test, extract, add to, update, view, or open) an archive with encrypted file names that is encrypted using a non-FIPS-approved algorithm. (E201) FIPS 140 mode is enabled, but encryption requested is not a FIPS-approved algorithm With the fipsmode option, SecureZIP cannot use the specified algorithm to encrypt. Use listcryptalgorithms with the fipsmode option on to see FIPS-approved algorithms available. (E202) FIPS 140 mode is enabled, but signature hash requested is not a FIPSapproved algorithm With the fipsmode option, SecureZIP cannot use the specified hashing algorithm. Use listhashalgorithms with the fipsmode option on to see FIPS-approved algorithms available. (E203) FIPS 140 mode failed to initialize (UNIX only) FIPS 140 mode could not be initialized for the fipsmode option. The pkzipc binary may be corrupted. (E253) This program is not licensed for use on Windows Server platforms. Please contact PKWARE to obtain an appropriate server product for this machine. PKZIP for Windows Command Line is intended for single-user desktop use and cannot be run on server platforms such as Windows 2003 Server. 169 Error Potential Cause(s) (E254) Your evaluation period for PKZIP has expired. Please register to continue using this product. This copy of PKZIP is an evaluation version. If you have purchased PKZIP and have the serial number, enter it when prompted. (E255) User pressed ctrl-c or control-break. This error occurs when you press CTRL+BREAK or CTRL+C in the middle of a PKZIP operation. Warning Messages Sometimes a condition occurs that might cause a task to pause temporarily. This could be something that prevents part of a task from happening, or simply a message or reminder. For several of these conditions, PKZIP displays a warning message. When a warning occurs, PKZIP returns a value of 1 to the shell. The following is a description of each warning message: PKZIP Warning Potential Cause(s) (W1) Can't create: XXX. PKZIP could not create volume label, file, or directory. Verify that you have appropriate access rights to the file or directory. (W2) Illegal path or drive specified: XXX. The file being extracted has an invalid name or path. Verify that you have entered the correct path in your command line and that the file does not contain any inappropriate characters such as a colon or leading slash. (W3) Warning! This file requires a product compliant with ZIP APPNOTE version XX.X The file requires a more recent version of PKZIP, or other archiving program, that supports the version of the ZIP file format described in the specified APPNOTE (“application note”). The APPNOTE is a document that is available on the PKWARE Web site.. (W4) File fails CRC check. It is likely that the file PKZIP is trying to extract is corrupt, and was not extracted correctly. For more information, see the CRC section in Appendix D. (W7) file: XXX already exists. Overwrite (<Y>es/<N>o/<A>ll/ne<V>er/<R>ename/ <Esc>)? The file(s) you are trying to extract already exists in the location to which you are extracting. By default, PKZIP prompts you before overwriting a file. (W8) Could not open file: XXX. You may not have the proper permissions to access the file or the file may have been locked by another program while PKZIP was trying to access it. If the file is located on a network file system, consult your System Administrator to verify your access rights. (W9) Could not delete file: XXX. You do not have the proper permissions to access and delete the file, or another application has the file open. This warning only occurs when the move option is used on the command line. 170 PKZIP Warning Potential Cause(s) (W12) Unexpected end of compressed data. Corrupt data caused PKZIP to abort the extraction before it could finish. (W13) Skipping encrypted file: XXX. PKZIP encountered a file that has been passphrase protected. You need the passphrase to access this file. (W18) Unknown compression method for file: XXX. An unfamiliar compression method has been used with the current .ZIP file. (W19) Could not clear archive attribute on file: XXX. PKZIP could not clear the archive attribute on a file. The file will be compressed but the archive bit cannot be cleared. This warning usually occurs when the add=incremental option is used on the command line. (W20) Incorrect passphrase for file: XXX. Verify that you entered the correct passphrase for the file. When a file is passphrase protected, you can only access its contents with the correct passphrase. Note: Passphrases are case sensitive. (W21) Invalid temporary file directory: <dir> PKZIP creates a temporary file for the file(s) being compressed when updating a .ZIP file. PKZIP was unable to create the temporary .ZIP file in the specified location and so used the default temp directory for your system. (W22) Authenticity Verification Failed! The Authenticity Verification (AV) information contained in the .ZIP file is corrupt. Failure of AV indicates a file that has been tampered with or damaged. If the file has failed the AV check, the contents are suspect. (W23) Authenticity Verification Failed! The stored Authenticity Verification (AV) checksum value did not match the calculated checksum value. The .ZIP file has been tampered with or is perhaps corrupt. (W26) directory: XXX already exists. Overwrite (<Y>es/<N>o/<A>ll/ne<V>er/<Esc>)? Assuming the overwrite option is set to prompt, this warning appears when PKZIP attempts to extract a directory over an existing directory with the same name. Answering Y at this prompt will update any extended attributes (EAs) stored in the .ZIP file. (W29) Can't rename temporary file. Saved as XXX. PKZIP cannot rename the temporary archive created when updating an archive. The archive was saved under the specified name. (W36) Empty passphrase, files will not be passphrase protected. When trying to passphrase protect your file, you entered a passphrase containing no letters or numbers. (W37) Can't sign file. This warning appears when PKZIP fails to sign a file using the specified digital certificate. Common reasons are incorrect passphrase for the certificate (not all certificates have passphrases), no private key (certificate needs to have a private key). 171 PKZIP Warning Potential Cause(s) (W38) Can't sign central directory. PKZIP failed to sign the central directory. Common reasons are that an incorrect passphrase was supplied to access the certificate (not all certificates have passphrases) or the certificate lacks a private key (needed to apply a digital signature). (W39) Signature is invalid. Someone or something has changed the archive since it was digitally signed. For example, the archive may be corrupt. (W40) Certificate not trusted. The certificate is currently not to be trusted. (W41) Certificate expired. The certificate has expired. This does not necessarily mean that the certificate or signatures applied with it are not to be trusted. They may simply be old. (W42) Certificate was revoked. The issuer has revoked the certificate. (W43) Certificate not found: XXX. PKZIP was unable to find a certificate of that name on the system. (W45) Bad data in compressed stream. Something was wrong in the stream of compressed data. The ZIP file is corrupt. (W46) Encryption algorithm is not available. Using: XXX. PKZIP cannot use the specified algorithm on this system. Use the ListCryptAlgorithms command to view a list of the encryption algorithms that PKZIP can use. (W47) No recipients specified. Recipients will not be used. You specified the recipient option, but did not include any actual recipients (or specified bogus recipients). When this occurs, SecureZIP will not strongly encrypt files for recipients. If you did not tell it to use passphrases; that is, you did not use the – passphrase option, it will not encrypt files at all. In addition, if you specify passphrase and did not also specify -=cryptalgorithm, you will not get strong encryption. You will, however, get traditional encryption. (W48) Invalid item name The name of an item (file) in the archive is invalid. Possible reasons are: The file has the same name as another file in the same folder; the path name of the archive item contains a file or folder name that exceeds the maximum number of characters allowed (254 for Windows, 255 for UNIX); the name contains characters that may not be used in file names on your operating system (the characters :*?\"<>|" may not be used in file names on Windows). (W52) Certificate verification failed! Something is wrong with the certificate. (W53) Unknown exception caught: Exception code: XXX An internal error occurred. Please contact PKWARE Technical Support with the exact command you used and the error code. 172 PKZIP Warning Potential Cause(s) (W54) Option 'XXX' is not licensed for use in your copy of PKZIP Your license key does not allow you to use that option. You must purchase an appropriate license key from PKWARE to use it. (W55) Command 'XXX' is not licensed for use in your copy of PKZIP Your license key does not allow you to use that command. You must purchase an appropriate license key from PKWARE to use it (W56) Recipient not found for file: XXX The file was encrypted only for recipients, and PKZIP was unable to find a certificate for any of them. Verify that you have access to the private key for one of the recipients. (W57) Incorrect passphrase or recipient not found for file: XXX Verify that you entered the correct passphrase for the file. When an archived file is passphrase protected, you can only access the file if you have the correct passphrase. Passphrases are case sensitive. If the file is encrypted with a certificate, verify that you have access to the private key for one of the recipients. (W58) Problem reading .ZIP file: <zipfile name> The .ZIP archive is corrupted. PKZIP can read it, but probably other zipping programs cannot. Use the –fix command to fix the archive so that other programs can read it. (W59) Multiple certificates found Multiple digital certificates were found that match the same recipient. These certificates may belong to different people. The archive is encrypted using each of the certificates; the owner of any of them can decrypt. (W60) Unable to connect to LDAP server: <server name/address> PKZIP was unable to access certificates on an LDAP server specified using the ldap option: the server address was bad. (W61) Unable to login to LDAP server: <server name/address> PKZIP was unable to access certificates on an LDAP server specified using the ldap option: the LDAP login failed. (W62) Central Directory can only be encrypted with strong encryption. Central Directory will not be encrypted. The cd option was used, which requires strong encryption, but one or both of the following were neither explicitly specified nor configured for use by default: encryption method (passphrase, recipient options), encryption algorithm (cryptalgorithm option). (W63) You must specify –passphrase or –recipient to encrypt files! You specified –cryptalgorithm or – cd=encrypt but did not specify either the recipient or passphrase option. Files are not encrypted unless one of these options is used. (W68) Must specify MailTo, MailFrom and MailServer to email the archive. You tried to email an archive without specifying all three options MailTo, MailFrom and MailServer. Values for all three must be specified on the command line or configured for use by default. 173 PKZIP Warning Potential Cause(s) (W69) Skipping FTP file transfer because of encryption warning XXX. PKZIP encountered a problem encrypting an archive that you directed to send by FTP, so PKZIP did not send the archive. This warning occurs if, for example, PKZIP can encrypt for only some but not all recipients, or if no passphrase is supplied to use for passphrase encryption. (W70) Skipping mail file transfer because of encryption warning XXX. PKZIP encountered a problem encrypting an archive that you directed to send by email, so PKZIP did not send the archive. This warning occurs if, for example, PKZIP can encrypt for only some but not all recipients, or if no passphrase is supplied to use for passphrase encryption. (W71) Could not attach unzip instructions to the email message PKZIP failed to attach instructions on how to unzip, as specified by the MailOptions option. (W72) Could not find the unzip instructions PKZIP could not find the instructions on how to unzip. (W73) Some of the encryption recipients do not have email addresses PKZIP was told to encrypt for recipients but could not find email addresses for some of the recipients. (W74) PKZIP is unable to access the default user's private key. PKZIP is unable to access the private key of the default user. The logon passphrase needed to access the certificate that contains the key may have been reset or changed by an administrator. To fix this warning, the user must change his passphrase from his own computer, rather than let an administrator change it from another system. (W75) Unable to resolve link: XXXX While updating an archive, PKZIP could not find the original file or the new file. (W76) <certificate> does not pass the strict certificate checks, and will not be used. The certificate did not pass the strict checking applied by the strict option, used in a command line that updates an archive. The certificate will not be used for the intended signing or encryption. (W78) Policy error - nnnnn, contact your system administrator A noncritical problem has occurred with a policy file or policy certificate. Encryption may be disabled. The number is a policy error code to help your administrator resolve the problem. (W85) Warning! Error shredding file: XXX You used the shred option, but PKZIP was unable to overwrite the file. For example, PKZIP can delete a file on a network drive but cannot overwrite its data on disk. (W87) Skipping file that is not encrypted with a FIPS-approved algorithm The same algorithm that was used to encrypt must be used to decrypt. With the fipsmode option, SecureZIP uses only algorithms that are FIPS-validated for your operating system and skips—does not decrypt—any file that was encrypted using some other algorithm. On Windows 2000, for example, files encrypted with AES algorithms are skipped. 174 PKZIP Warning Potential Cause(s) (W88) Warning! Signature cannot be verified, because it does not use a FIPS-approved algorithm The file is signed, but the fipsmode option was used, and the signature hash algorithm is not FIPS-approved. The SHA-1 algorithm is not approved after 2010. On some versions of Windows, the algorithms SHA-256, SHA-384, and SHA-512 are not approved. (W92) Warning! File: <filename> is in use by another program. You might have problems opening the archived copy if it is currently saving changes. You are using the OpenFile option with the prompt sub-option. Choose from the options to Add the open file to your archive. 175 C Frequently Asked Questions This section lists some commonly asked questions about PKZIP and related subjects. We hope you will find this information helpful. Why do I get the message "SYS1041: The name specified is not recognized as an internal or external command, operable program or batch file." or " Bad command or file name" or "XXXX: not found"? These messages tell you that your operating system cannot find the program to which you are referring. This occurs because you are either not spelling the name of the program correctly, or you did not put a space between the program name and its options, or the program has not been properly installed. If you are trying to run PKZIP and you get this error, it may be because pkzipc.exe is not in your search path. Why didn't the files I zipped get any smaller? On occasion, you may find that the files you add to a .ZIP file do not compress. These files are "stored". This occurs when a file is either already compressed or encrypted. You will often find that files distributed with commercial applications are already compressed. I zipped up a bunch of files but now I have LESS disk space? When PKZIP compresses files, it makes a copy of the original file. The original file(s) still exist. If you wish to recover space that was taken up by the original file(s), you must either delete them yourself, or instruct PKZIP to delete the file(s) with the move option. What is the difference between add=freshen and add=update? The freshen and update sub-options are very similar. This may be confusing at first, but the difference between them is easy to understand. The freshen option tells PKZIP to archive any files which match those already in the .ZIP file. These files are re-compressed only if they are newer than the files already in the .ZIP file. Each file is evaluated individually. 176 The update sub-option archives all files, with one distinction. If the update option is not used, all files specified are compressed and added to the .ZIP file, even if they already exist in the .ZIP file. By using the update sub-option, you instruct PKZIP to compare what is already in the .ZIP file against what it was asked to compress. If a file is already present in the .ZIP file as well as the source directory, PKZIP compresses a file only if it is newer than the copy of the file within the .ZIP file. If a file in the source directory is not already present in the target .ZIP file, PKZIP adds it to the .ZIP file. Is PKZIP compression "lossy" or "lossless"? PKZIP uses a "lossless" compression scheme. This means that 100% of the original data is preserved and re-created. There is no difference between the data that you put in and the data that you get back out. There are other compression methods that are known as "lossy". The idea behind these compression methods is that if you throw away some of the data, it becomes less complex and therefore can be compressed more. This type of compression is only useful for data that need not be precise. This applies to some applications that use pictures and sound. How do I include subdirectory information in my .ZIP file? In order to include subdirectory information in your .ZIP file, you must recurse the subdirectories and preserve path names. This is done with the directories option. For example: pkzipc - add - directories test.zip * In this example, the current directory as well as all subdirectories and files contained therein are archived in a file called test.zip. When a .ZIP file is created with paths stored, these paths are visible in a view of the file (view). To re-create these subdirectories, or to place files into their original subdirectories, the directories option must be used with the extract command. I zipped up some subdirectories, but I cannot get them to come back. Did you remember to use the directories option when you originally created the .ZIP file? Did you use the directories option when you extracted the contents of your .ZIP file? To verify that there are paths in the .ZIP file, do a view of the file: pkzipc - view test.zip If you do not see paths as part of the file names within the .ZIP file, then paths are not stored and therefore cannot be recovered. If you do see paths make sure that you are using the directories option when you extract the files. For example: pkzipc - extract - directories test.zip 177 How do I unzip a single file that is in a subdirectory in the .ZIP file? Type pkzipc -extract with the name of the .ZIP file and the name of the particular file you want. With a .ZIP file that contains paths, the procedure is the same. Assume you are working with a file called test.zip that contains the following files: file1.txt temp/file2.txt temp/tut/file3.txt To extract only "file3.txt" from this .ZIP file, you must specify the complete name and path. pkzipc - extract test.zip temp/tut/file3.txt If you wanted to extract it with its subdirectory, simply include the directories option on the command line. How do I unzip a directory without also extracting its subdirectories? Using the test.zip file we discussed in the previous question, we could extract the entire contents of the temp subdirectory easily: pkzipc - extract - directories test.zip "temp/*" If we did it as shown above we would not only extract all the files in the "temp" subdirectory, but also the "tut" subdirectory below it and any files it contains. To extract only the "temp" subdirectories contents, and nothing else, we must exclude those directories we do not wish to extract: pkzipc - extract - directories test.zip "temp/*" - exclude= "temp/tut/*" If the "temp" subdirectory had multiple subdirectories nested in it, you would need to exclude each one individually on the command line. I forgot my passphrase; what do I do? • Try to remember the passphrase. • Try passphrases that are "close" to what you think it was. • Try mixed upper and lower case versions of your passphrase. Do not forget or lose your passphrases! PKWARE has no special means for "getting around" the encryption and may not be able to assist in the recovery of an encrypted file. To help avoid the loss of data, you may wish to keep a written copy of your passphrase(s) in a secure place. What does "Unknown Compression Method" mean? There are many different methods of compression. In the history of PKZIP alone, there have been seven different methods to date. The .ZIP file format was designed so that additional methods of compression can be added as they are developed. 178 Therefore, the .ZIP file format will never need to be abandoned. This means that the .ZIP file in question was created or updated by a newer version of PKZIP than is being used to extract the data. You must use a newer version of PKZIP to extract these files. How can I make PKZIP run faster? PKZIP defaults to a compression method that is average in both compression amount and speed. If you want to get the most speed out of PKZIP, try the following: • Specify a faster compression method with a level sub-option (e.g., -level=0) or with a speed compression option alone (e.g., -speed). See page 51 for more information. • Compression speeds are highly dependent on the location of files being added, as well as the temporary file PKZIP creates when performing certain compression operations. If these files are located on a network drive, you may want to move them to a local drive before running PKZIP. Be aware of the effects file location can have on PKZIP’s speed. How many files can be in a .ZIP file? There is no limit to the number of files you can add to a .ZIP file. However, if you use the 204 option for PKZIP 204g compatibility, your .ZIP file may contain no more than 16,383 file entries. Can I send a .ZIP file to a different type of computer? Because PKWARE has dedicated the .ZIP file format to the public domain, it is possible for other people to write programs which can read .ZIP files. We are aware of PKZIP compatible programs for a number of different platforms. A .ZIP file can be transferred to any platform for which you can find a compatible extraction program. Extraction and Compression programs not developed by PKWARE may not be completely compatible with the .ZIP file standard. Contact PKWARE for a list of platforms for which PKZIP and PKZIP compatible software is available. 179 D How PKZIP Works This Appendix provides a description of how PKZIP actually does its job. It is not necessary for you to know or understand the information presented here, any more than you need to know how your carburetor works to drive a car. It is presented to help you feel more knowledgeable about the software. Two Processes PKZIP performs two functions: compression and archiving. Although the two ideas may seem related, they are actually completely separate. • Compression is the process of representing a given piece of information with a smaller piece of information. • Archiving is the process of combining many files into a single unit, usually along with vital information about each file. Compression The actual process used by PKZIP for its compression is too complex to explain in detail. Instead, some of the general principles behind information theory and compression are explained. To understand data compression, you need to understand two ideas: Information Content and Binary Coding. Information Content Everything in your computer, everything you ever read, is "information". The more complex a message is, the higher the information content. The less complex, the less "random" a message is, the lower the information content. If a message contains a low amount of information, it should be possible to represent it in a smaller amount of space. Look at this page, for example. How much of the page is white space with no letters (information) on it? If you took away all of the 180 white space this page would be significantly smaller. How many times are the words "the", "information" and "compression" on this page? If you could replace each of these words with something smaller, you would save a significant amount of space. The more frequently the same group of symbols (in this case, letters) appear, the lower the information content of the message. The "Field of Information Theory" uses the term entropy to describe the "true" information content of a message. Formulas can be used to determine the entropy of a message. The idea behind data compression is to derive a new smaller message from a larger original message, while maintaining the entropy of the original message. As a simple example, consider this sentence: she sells sea shells by the sea shore This sentence is 37 characters long, including spaces. The spaces cannot be simply thrown away as the meaning of the original message would be lost. There are obvious patterns to the sentence. The combination 'se' appears three times, 'sh' three times, and 'lls' twice. In fact, the 'se' pairs all have a space in front of them, so these can be ' se'. she sells sea shells by the sea shore We can replace each of these patterns with a single character: #=" se" $="sh" %="lls" Note that the first replacement string includes a space at the beginning. If we reproduce the sentence with these symbols, it now looks like: $e#%#a $e% by the#a $ore The new representation is 24 characters long; this is a saving of 13 characters, or 36%. Binary Data Representation All information used, stored, and processed by computers is represented by two values, zero and one. Everything that you see on your screen, everything stored on disk, is represented by combinations of zero and one. You can think of it as a sort of Morse Code. In Morse Code there are also only two values, dot and dash. When a computer stores a character, it uses a combination of eight zeros and ones. 181 Having eight positions in which to store a zero or one gives the computer 256 different possible combinations. You arrive at this number of combinations in this way: If you have one coin, it can be in either of two positions: Heads(0) or Tails(1) 0 or 1 If you have two coins, there are four possible combinations: 00, 11, 10, 01 If you have three coins, there are eight possible combinations: 000, 001, 010, 011, 100, 101, 110, 111 As you can see, each time you add another coin (binary digit), the number of possible combinations doubles: 2, 4, 8, 16, 32, 64, 128, 256. The computer uses eight binary digits to get 256 possible values. These values are mapped onto a table called ASCII (American Standard Code for Information Interchange). Each different combination has a particular character that is mapped to it, such as a letter, number or symbol. Each of these positions of 0 or 1 is called a bit. she sells sea shells by the sea shore The sample message above would be represented by 296 bits (37x8 bits). If we follow standard ASCII, we have 256 different symbols being represented for our use. The sample sentence we are using only contains alphabetical characters, and only 11 of them at that. If we only need 11 different values, we could use a lower number of bits per character. The closest value to 11 using binary combinations is 16 combinations, using 4 bits per character. If we wrote a new table of our own using four bits per character, and used it to represent the message, we would use only 98 bits. This would be half as many bits, a considerable savings. We can do better! It is possible to have binary codes of varying length. To do this we must use codes with unique values that are not repeated as the beginning of another code. In this way, we can find the codes in a long stream of zeros and ones. If the codes were not constructed to have unique beginnings, it would not be possible to find each individual code within a long stream of zeroes and ones. There are many types of coding techniques that produce codes of varying length, based upon symbol frequency. Some well-known coding schemes are Huffman and Shannon-Fanno. PKZIP uses Huffman encoding. The scheme is too complex to document here fully, however, we will discuss some rudiments of encoding. It is necessary for you to understand the principles described here. 182 A table of variable length codes for 11 symbols would look like this: 11 110 101 001 1011 0010 1101 0100 1000 01010 00000 As you can see, the codes are getting longer and longer. Because of this, we will get the best results if we map the shortest code to the most common symbol in the message. If you know Morse code, or have occasion to look at it, you will notice that frequent characters, such as 'e', 't', 's' and so on have shorter codes assigned to them. Morse code tends to be about 25% more efficient because of this than it would have been had the codes been assigned at random. A useful idea here is to allow a symbol to be not only a character, but also a group of characters. Using the common patterns found in the first analysis of the message, we can map the following table: Occurrences 4 4 3 3 2 2 1 1 1 1 1 Symbol e (space) 'se' sh lls a b y t o r New Code 11 110 001 101 1011 0010 1101 0100 1000 01010 00000 Bits in Message 8 12 9 9 8 8 4 4 4 5 5 Our new coding scheme can represent the message with only 74 bits. This is a savings of 222 bits from the 296 bits used in the "natural" encoding. This is one quarter of the original message size. One important factor that would affect a real situation is the table we are using. In order for the data to be re-created from the "compressed" representation, we must include a copy of the table used to encode the data. This can be a seriously limiting factor. If the data is too complex, or the encoding scheme too inefficient, the table used can be as big as the space saved by the encoding. In the worst cases, an attempt to re-encode the message using a table results in the encoded message plus the table being larger than the original message. This is why data which uses a low number of symbols and frequently repeated combinations of symbols, such as a text file, compresses well. Complex, highly random data, such as the information representing a program on disk is difficult to encode efficiently, and therefore compresses less. 183 Speed vs. Size Searching for these patterns, and determining an efficient way to encode the data, takes a lot of computer power and time. The more time taken to analyze the data the better the compression will be. To get more speed, you must sacrifice some level of compression. There are other steps and methods used in powerful compression schemes such as those used by PKWARE products. Hopefully this explanation gives you a better understanding of what happens when PKZIP compresses data. Archiving Programs usually rely heavily on associated data files, or may actually consist of several related programs. Some programs may require dozens or even hundreds of files. In the "dawn" of the PC age, people wanted a way to keep all of these associated files in one location. "Library" programs were created to take a number of files and group them together into a single file. This made them easier to find, easier to store, and much easier to send to someone by modem. It makes much more sense to be able to send someone a single "package" instead of many files. If you forget a file, all sorts of problems arise. These programs were the birth of Archiving. In order for a single file to hold many files, information about each file also had to be stored in the archive. This information could then be used by the archival software to locate a file and pull it out, or to list information about the files contained within an archive. Compression was first available as a utility that would take a single file and produce its compressed equivalent. People began to group files together with a Library program and then compress the archive file. The next and obvious step in this process was to combine the two ideas. Compress the files and archive them. This made storage very simple; the compression was no longer a separate step and could be taken for granted as part of the archiving process. PKZIP is the second generation of these programs. PKZIP can not only compress and archive files, but also stores a great deal of vital information about the files. PKZIP even stores directory structures. How PKZIP builds a .ZIP File When you specify a PKZIP command line, PKZIP goes through several steps: 1. Parsing the command line. 2. Reserves the memory it will need to perform the compression, archiving and buffering. 184 3. Next, PKZIP looks for a .ZIP file with the same name as the one you specified on the command line. If it finds one, PKZIP reads the information on the files that it contains. 4. PKZIP then performs the requested action; it builds a new .ZIP file if none was found. 5. PKZIP reads the information from the command line specifying what files it is supposed to take, what files it should not take, and if there is an exclude command. How PKZIP Builds A .ZIP File Startup Read In Existing .ZIP File Old Files Are Compared Against New Ones To Determine Which Get Replaced Check For Existing .ZIP File Y N Y Freshen or Update .ZIP File? New .ZIP File Is Created In Same Directory As Old .ZIP File N New .ZIP File Created Unchanged Files Are Copied From OLD .ZIP File To New .ZIP File Local Header Written To .ZIP File New File Is Compressed And Written Directly To .ZIP File If A Password Is Specified, Compressed Data Is Encrypted Central End Directory Appended To .ZIP File Local Header Updated In .ZIP File .ZIP File Is Done N Last File? Y Any Pre-Existing .ZIP File Is Deleted Files Being "Moved" Are Deleted 185 • If a @list file is used, PKZIP reads it, then checks for which files exist. If a pattern is specified in the @list file, PKZIP generates a list of the files which match this pattern. • If directory recursion has been specified with the recurse option, PKZIP next looks for any subdirectories. If it locates subdirectories it goes into them and looks for any files matching the files specified on the command line or in the @list file. If PKZIP finds subdirectories in the subdirectories, it repeats the process. It will continue this process until it finds no additional subdirectories. Now PKZIP has a list in memory of all the files it should take. The files specified for exclusion are now compared against this list, and any that match are removed. If after this step is complete the list in memory is empty, PKZIP finishes with a message "Nothing to do!". Now PKZIP reads-in each file, one at a time, and compresses it. When it is finished compressing a file, it adds it to the .ZIP file being created. 6. As PKZIP reads each file, it computes a CRC value for it. This CRC value is stored as part of the information concerning the file. CRC This is an acronym for Cyclic Redundancy Check. When a CRC is performed, the data making up a file is passed through an algorithm. The algorithm computes a value based upon the contents resulting in an eight digit hexadecimal number representing the value of the file. If even a single bit of a file is altered, and the CRC is performed again, the resulting CRC value will be different. By using a CRC value, it can be determined that there is an exact match for a particular file. PKZIP calculates a CRC value for the original file before it is compressed. This value is then stored with a file in the .ZIP file. When a file is extracted it calculates a CRC value for the extracted data and compares it against the original CRC value. If the data has been damaged or altered, PKZIP can recognize and report this. 1. When PKZIP adds the compressed file to the .ZIP file, it first writes out a "Local Header" about the file. This Header contains useful information about the file, including: • The minimum version of PKZIP needed to extract this file. • The compression method used on this file. • File time. • File date. • The CRC value. • The size of the compressed data. 186 • The uncompressed size of the file. • The file name. 2. After PKZIP has written all of the files to disk, it appends the "Central Directory" to the end of the .ZIP file. This Directory contains the same information as the Local Header for every file, as well as additional information. Some of this additional information includes: • The version of PKZIP that created the file. • A comment about each file (if any). • File attributes (Hidden, Read Only, System). • Extended Attributes (If Specified). Deleting Files from a .ZIP File PKZIP deletes files from a .ZIP file in the following manner: 1. PKZIP reads in the names of all the files contained in the .ZIP file. 2. PKZIP compares this list against the files you wish to delete. 3. Whatever files remain are moved into a new .ZIP file. 4. The original .ZIP file is superseded by a newer version of the .ZIP file. This means that in order to delete files from a .ZIP file, you must have enough disk space to hold both the original .ZIP file and the new .ZIP file that lacks the deleted files. Adding to an Existing .ZIP File Adding files to a .ZIP file is the same as creating a .ZIP file, but with one difference. Before PKZIP begins to add files, it first reads in the files that were in the existing .ZIP file. These old files and the new files are then both written out to a new .ZIP file, the old files being superseded by the new .ZIP files. This means that there must be enough free space for the old .ZIP file as well as the new .ZIP file to co-exist. 187 Index A About This Manual, 1 Adding To an Existing .ZIP File, 185 Additional Methods for Storing Directory Path Information, 47 Archive Attribute, 27 archiveeach option, 58 archiving, 178, 182 Archiving, 182 ASCII, 180 Attributes Storing, 59 authentication, 82 avargs option, 79 avscan option, 79 B Binary, 178 Binary Data Representation, 179 BZIP2 compression method, 54 C certificate stores, 45 Clearing Archive Attributes, 26 Combining Options, 22 Command Line Including an Option, 22 syntax, 2 Command/Option Character Changing, 111 Commands and Options, 21 Abbreviating, 22 Default Values, 24 Difference, 21 Values, 22 Commands/Options 204, 61, 113 add, 24, 114 after, 18, 115, 117 altconfig, 108, 115 archivedate, 63, 116, 161 archiveeach, 116 archivetype, 117 ascii, 99 ASCII/BINARY, 99 attributes, 59, 118 avargs, 118 avscan, 118 before, 18, 119 binary, 99, 119 bzip2, 119 cd, 34, 120 certificate, 41 comment, 62, 121 configuration, 122 console, 82, 122 crl, 122 cryptalgorithm, 123 cryptoptions, 124 dclimplode, 125 default, 125 deflate64, 125 delete, 125 directories, 81, 126 embedded, 127 encode, 99, 129 enterlicensekey, 129 error, 96, 129 exclude, 20, 130 extract, 74, 130 fast, 51, 130 fipsmode, 36, 131 fix, 97, 131 generate list file, 100 hash, 43, 131 header, 63, 131 help, 6, 132 include, 20, 132 keyfile, 43, 132 keypassphrase, 43, 133 larger, 19, 135 ldap, 38, 134 level, 50, 135 license, 6, 135 listcertificates, 45 listchar, 111, 135 listcryptalgorithms, 135 188 listfile, 136 listhashalgorithms, 136 listsfxtypes, 136 locale, 110, 136 lowercase, 80, 136 lzma, 137 mask, 64 mask (Win), 137 maximum, 51, 138 more, 138 move, 66, 138 movearchive, 100, 138 namesfx, 138 newer, 18 noextended, 61, 139 nofix, 139 normal, 51, 140 nosmartcard, 140 nozipextension, 139, 140 older, 18, 141 optionchar, 111, 141 overwrite, 87, 142 passphrase, 29, 142 path, 47, 143 ppmd, 143 preview, 96, 143 print, 92, 144 recipient, 144 recurse, 46, 145 runafter, 71, 72, 146 sfx, 68, 146 sfxdestination, 147 sfxdirectories, 147 sfxlogfile, 147 sfxoverwrite, 148 sfxuitype, 148 shortname, 149 shred, 149 shred option, 67 sign, 44 silent, 98, 150 smaller, 19, 151 sort, 65, 81, 151 span, 56, 152 speed, 51, 153 store, 51, 153 strict, 153 substitution, 153 temp, 98, 155 test, 92, 155 times, 81, 156 translate, 89, 157 utf8, 158 verifysigner, 158 version, 159 view, 88, 159 warning, 95, 160 wipe, 160 zipdate, 63, 116, 161 Compressing All Files in a Directory, 24 ASCII/BINARY internal attribute, 99 certificate, 41 Compressing Files Compatible with DCL, 55 Compressing Files with BZIP2, 54 Compressing Files with Deflate64, 53 Compressing Files with LZMA, 54 Compressing Files with PPMd, 55 encode, 99 Files in SubDirectories, 46 Files With a List File, 52 generate list file, 100 hash, 43 Incremental Archiving, 26 listcertificates, 45 Only Files That Have Changed, 25 Only New Files, 25 Selected Files in the Current Directory, 14 Setting the Compression Level, 50 sign, 44 Single File in the Current Directory, 13 Specifying a Compression Level by Number, 50 Specifying a Compression Level by Option, 51 Storing Directory Path Information, 47 Compressing Files, 24 overview, 12 That Contain Certain Attributes, 59 Compressing Files to Diskette, 56 Compression, 178 Zipfile, 178 compression methods, 106 configuration file alternate, 108 converting a ZIP file to a self-extracting file, 69 CRC, 184 crl option, 93 cryptoptions command, 5 D Date and Time Environment Variables Changing, 110 Date of the .ZIP File, 63 Defaults Changing, 105 changing with Options dialog, 107 Resetting All Defaults, 108 Resetting Individual Defaults, 108 189 Resetting to Original Defaults, 107 Deleting Files from a .ZIP File, 185 digital certificates, 4, 41 certificate, 41 hash, 43 listcertificates, 45 sign, 44 digital signatures, 83 attaching, 41 authenticating, 82 digital signatures, 4 Displaying a Brief View of a .ZIP File, 88 Displaying a Detailed View of the .ZIP File, 88 E encode, 99 encrypting file names, 34 encrypting files, 12, 29 strong encryption, 31 traditional ZIP encryption, 31 with recipient list, 32 Entropy, 179 Error and Warning Messages, 162 Error Messages, 162 Extended Attribute Storage, 61 Extended Attributes and 204g Compatibility, 61 Extended Attributes and the OS, 61 Extracting Files Only for Display, 82 Files With a List File, 82 lowercase, 80 New and Existing Files, 73 Newer Versions of Existing Files and New Files, 74 Only Newer Versions of Files, 74 Overriding default settings, 74 Retaining Directory Structure, 81 Sorting, 81 times, 81 translate, 89 Extracting All Files from an Archive, 74 Extracting Files: overview, 16 G Getting License Information, 6 Getting Version Information, 7 H Header Comment, 63 How Does PKZIP Work, 178 How PKZIP Builds a .ZIP File, 182 I Including a Header Comment, 63 Including a Text Comment, 62 Including Additional Information in a .ZIP File, 62 Incremental Archiving Compression, 26 Information Content, 178 Introduction, 1 K keyfile option, 43 keypassphrase option, 43 L list files, 52, 82, 100 List Files Changing the List Character, 111 logging sfx messages, 70 LZMA compression method, 54 M Moving Files Into Your .ZIP File, 15 Moving Files to a .ZIP File, 66 N namesfx, 69 O Overwriting Files, 87 Overwriting Files That Already Exist in Your Directory, 17 F Field Of Information Theory, 179 File Naming Conventions, 12 FIPS mode, 36 Fixing a Corrupt .ZIP File, 97 format or wipe removable media, 57 Frequently Asked Questions, 174 P passphrase, 29, 176 PKZIP Options Reference, 113 PKZIP, How Does It Work?, 178 PPMd compression method, 55 Previewing Command and Option Operations, 96 Printing the Contents of a .ZIP File, 92 190 R recipient list, 32 Removing File Attributes When Compressing, 64 Run Programs with the Self-Extractor, 71 S selecting files, 18 Self-Extracting File converting to, 69 Creating, 68 Self-Extractor Options, 72 Setting Internal Attributes, 99 SFXDestination option, 70 SFXDirectories option, 70 SFXOverwrite option, 71 SFXUIType option, 71 shred option, 67 smart cards, 5 Sorting Files Within a .ZIP File, 65 Spanning/Splitting, 56 Speed vs. Size, 182 split sizes, 57 STDIN, 28 STDOUT, 27, 28 Storing File Attribute Information, 59 strict checking, 93 strict option, 93 Strong Encryption, 4 subdirectories, 175, 176, 184 sub-options, 22 substitution option, 90, 91 Suppressing Screen Output, 98 syntax, 2 T Technical Support, 8 Testing the Integrity of a .ZIP File, 92 Two Processes, 178 U UNIX Command Line, 2 Using Help, 6 utf8 option, 58 V verifysigner option, 84 version command, 7 Viewing Files Within a .ZIP File, 16 Viewing the Contents of a .ZIP File, 88 W Warning Messages, 168 Windows 2000, 5