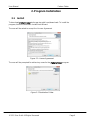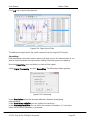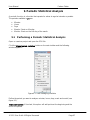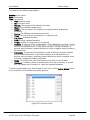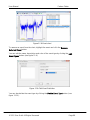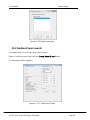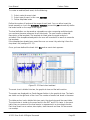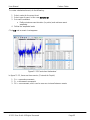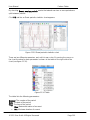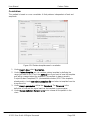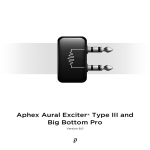
1
User Manual for PatternFinder Diagnostic Software for Time Series Data Skeidaras 12 210 Gardabaer Iceland Tel: +354 533 6060 [email protected] www.star-oddi.com User Manual ©2015 Star-Oddi. All Rights Reserved Pattern Finder Page 2 User Manual Pattern Finder Table of Contents 1. 1.2 2. 2.1 2.2 2.3 2.4 2.5 3. 3.1 3.2 3.3 3.4 4. 4.1 4.2 4.3 4.4 4.5 5. 5.1 5.2 5.3 5.4 5.5 5.6 6. 6.1 6.2 6.3 6.4 6.5 6.6 6.7 6.8 7. 7.1 7.2 7.3 7.4 7.5 7.6 7.7 7.8 8. 8.1 8.2 9. 9.1 Introduction ................................................................................................ 5 Key Features ............................................................................................ 5 Program Installation................................................................................... 6 Install ........................................................................................................ 6 Uninstall .................................................................................................... 7 Updates .................................................................................................... 7 Help and Tutorial files ............................................................................... 8 Directories created.................................................................................... 8 PatternFinder Interface .............................................................................. 9 The Menu Bar ........................................................................................... 9 Main Toolbar ........................................................................................... 16 Overview Pane ....................................................................................... 18 Aliasing ................................................................................................... 18 Single File Project (SFP) .......................................................................... 22 Create SFP ............................................................................................. 22 Project information Data ......................................................................... 24 Create SFP from SeaStar, Mercury and FoodStar ................................. 25 Adding Files to SFP ................................................................................ 26 Removing Files from SFP ....................................................................... 26 Multiple File Project (MFP) ...................................................................... 28 Create MFP ............................................................................................ 28 Adding Files to MFP ............................................................................... 30 Adding a SFP to MFP ............................................................................. 31 Adding SFP to MFP from SeaStar, Mercury and FoodStar .................... 32 Removing Files from MFP ...................................................................... 33 Removing SFP from MFP ....................................................................... 34 Files ........................................................................................................... 36 Projects................................................................................................... 36 SDX files ................................................................................................. 36 Overlay ................................................................................................... 37 Statistics files .......................................................................................... 37 Events..................................................................................................... 38 Patterns .................................................................................................. 38 Collaboration files ................................................................................... 38 Additional files ........................................................................................ 39 Charts ........................................................................................................ 40 DAT chart ............................................................................................... 40 DAT chart bar ......................................................................................... 40 Using the Mouse ..................................................................................... 43 Time Window Statistics........................................................................... 45 Table....................................................................................................... 45 SDX chart ............................................................................................... 46 SDX Chart bar ........................................................................................ 48 Edit Chart operations .............................................................................. 49 Filtering and Operations .......................................................................... 54 Filtering ................................................................................................... 54 Signal Operations ................................................................................... 64 Periodic Statistical Analysis ................................................................... 67 Performing a Periodic Statistical Analysis ............................................... 67 ©2015 Star-Oddi. All Rights Reserved Page 3 User Manual Pattern Finder 9.2 Extract Signal from STA file .................................................................... 71 10. Overlaying ................................................................................................. 73 10.1 View multiple signals .............................................................................. 73 10.2 Time Shifted Data ................................................................................... 75 10.3 Annual Comparison ................................................................................ 76 10.4 Daily comparison .................................................................................... 77 10.5 Burst comparison .................................................................................... 78 10.6 Overlay Statistics .................................................................................... 78 10.7 Extract signal from STO file .................................................................... 81 11. Event Analysis .......................................................................................... 83 11.1 Manual events ........................................................................................ 83 11.2 Ambient/level events............................................................................... 89 11.3 Behavioral Event Analysis ...................................................................... 91 11.4 Multiple Event Analysis ........................................................................... 93 11.5 Event operations ..................................................................................... 95 11.6 Event periodic statistics .......................................................................... 99 11.7 Extract signal from STE file .................................................................. 102 12. Pattern analysis ...................................................................................... 104 12.1 Manual patterns .................................................................................... 104 12.2 Creating user defined patterns ............................................................. 107 12.3 Scanning data for patterns.................................................................... 110 12.4 Multiple patterns ................................................................................... 115 12.5 Pattern operations ................................................................................ 117 12.6 Amplitude.............................................................................................. 120 12.7 Periodic pattern statistics ...................................................................... 121 12.8 Extracting signal from STP file .............................................................. 124 13. Import ...................................................................................................... 126 13.1 Importing files ....................................................................................... 127 14. Export ...................................................................................................... 131 14.1 Export via Edit chart.............................................................................. 131 14.2 Export events ........................................................................................ 134 14.3 Export patterns ..................................................................................... 136 15. Printing.................................................................................................... 137 15.1 Charts ................................................................................................... 137 15.2 History .................................................................................................. 139 15.3 Histogram ............................................................................................. 141 15.4 Data list files (only in DAT) ................................................................... 143 16. Create Mooring Line Chart .................................................................... 145 16.1 Prepping data in SeaStar...................................................................... 145 16.2 Transferring data to PatternFinder ........................................................ 145 16.3 Analyzing tilt data in PatternFinder ....................................................... 145 16.4 Mooring line analysis in PatternFinder .................................................. 147 ©2015 Star-Oddi. All Rights Reserved Page 4 User Manual Pattern Finder 1. Introduction PatternFinder is a graphic data analysis software designed to make data analysis faster, more efficient and easier. PatternFinder can further analyze all data from Star-Oddi loggers, but also data from other data logging systems. PatternFinder works seamlessly together with Star-Oddi supporting software SeaStar, Mercury and FoodStar, where data can be transferred to PatternFinder with the click of one button. Other text format data can be imported to PatternFinder for analysis by defining the data format In PatternFinder you can analyze data from several sources at the same time. Figure 1.1 PatternFinder interface This manual guides the users of PatternFinder through the operation of the software. 1.2 Key Features s key features are: Periodic statistical analysis of time series data Signal filtering Overlaying and analyzing multiple signals -normal trending -annual trending -multiple signals statistical analysis Event analysis -behavioral event analysis -ambient or level event analysis -periodic event analysis Pattern analysis -detecting occurrences of user defined patterns -scanning data for any possible patterns -periodic pattern analysis ©2015 Star-Oddi. All Rights Reserved Page 5 User Manual Pattern Finder 2. Program Installation 2.1 Install To download PatternFinder visit www.star-oddi.com/downloads. To install the program, follow the automatic InstallShield Wizard. The user will be asked to accept the License Agreement Figure 2.1 License Agreement The user will be prompted for a directory name for the PatternFinder program. Figure 2.2 Destination Folder ©2015 Star-Oddi. All Rights Reserved Page 6 User Manual Pattern Finder When the program is started for the first time, the following window appears: Figure 2.3 Registration Insert name, organization and the 12 character product key which is provided upon the purchase of the software. After you have registered, the program is activated. Once the program has been installed, a shortcut to the program will appear on the start menu and the desktop. 2.2 Uninstall To uninstall the program, do the following: 1. Click on the Start button in Windows. 2. Go to Settings and Control Panel. 3. Choose Add/Remove Programs 4. Choose PatternFinder and click on Change/Remove. Note that data files created after installation will not be deleted even though the program is uninstalled. 2.3 Updates To download updates, select Help-Check for updates Please note that the downloaded file has to be installed into the existing PF folder. The update alone is not a complete program and will not work as such. ©2015 Star-Oddi. All Rights Reserved Page 7 User Manual Pattern Finder 2.4 Help and Tutorial files Help and Tutorial files can be installed with the software. To access the files, select Help on the menu bar (see figure 2.4): Figure 2.4 Help Menu The Help menu offers the following options: 1. Tutorials 2. Case Studies 3. Manual 4. Release Notes 5. About 6. Check for updates 2.5 Directories created The default directory is installed on C:\PatternFinder. The user can select another location. The directory contains the following folders: \Help \Projects \SFP \MFP \Settings ©2015 Star-Oddi. All Rights Reserved Page 8 User Manual Pattern Finder 3. PatternFinder Interface Upon entering PatternFinder, you will be presented with the PatternFinder interface: Figure 3.1 PatternFinder interface The PF interface consists of: 3.1 The Menu Bar Figure 3.2 The Menu Bar Options can be selected by pressing Alt and the underlined character key simultaneously, i.e., pressing Alt and F is equivalent to clicking File. ©2015 Star-Oddi. All Rights Reserved Page 9 User Manual Pattern Finder File Figure 3.3 File menu Print Select Print to print out the chart which is activate on the screen. Import Select Import to import files into PF. See chapter 13 for more information. Exit Select Exit to exit PF Project Figure 3.4 Project menu SFP Select SFP to create a new Single file project or open an already created one. MFP Select MFP to create a new Multiple file project or open an already created one. Recent Select Recent to open a recently opened or created project. ©2015 Star-Oddi. All Rights Reserved Page 10 User Manual Pattern Finder Window Figure 3.5 Window menu The Window menu offers various options concerning the position of the chart windows. Settings Figure 3.6 Settings menu Directory Settings PatternFinder has a fixed directory structure that is created when installing the software. The user can define the location from where the DAT files, used for the projects, will be retrieved by selecting Settings-Directory Settings on the menu bar. Figure 3.7 Directory Settings ©2015 Star-Oddi. All Rights Reserved Page 11 User Manual Pattern Finder Units Select Units and the following window appears: Figure 3.8 Unit settings The user can create a new group of units by right-clicking on one of the groups and selecting New Group (see figure 3.9). Figure 3.9 New Group Enter a name and select a symbol and a color scheme for the new group. The color scheme is useful when viewing several signals with the same unit, for example, in overlays. The first five colors are default. The user can change the colors or add new ones by clicking on the color scheme. ©2015 Star-Oddi. All Rights Reserved Page 12 User Manual Pattern Finder Figure 3.10 New Group To create a new unit within a group, right-click on the group and select New Unit (see figure 3.9). Enter a name, abbreviation and a symbol/parameter for the unit (see figure 3.11). Figure 3.11 New Unit Note that standard units cannot be changed Use Alias Select Use Alias to shift between the original file name and the alias (see chapter 3.4). You can also shift between the names by clicking F12 on the keyboard. ©2015 Star-Oddi. All Rights Reserved Page 13 User Manual Pattern Finder Preferences Select Preferences and the following window appears: Figure 3.12 Preferences: General General Show about on launch: If checked the About window appears when opening the program. Open properties for projects: If checked the Project information window appears when opening projects. Open properties for files: If checked the History window appears when opening files. Update Select whether you want to update the program manually, every X number of days or every time PatternFinder is run (see figure 3.13). Figure 3.13 Preferences: Update ©2015 Star-Oddi. All Rights Reserved Page 14 User Manual Pattern Finder Help Figure 3.14 Help menu Tutorials Select Tutorials to view the PF tutorials in both PDF and AVI format. To be able to view PDF files Acrobatic Reader or similar programs must be installed. Case Studies Webpage Select Case Studies Webpage to view the PF case studies in PDF format. To be able to view PDF files Acrobatic Reader or similar programs must be installed. Manual Select Manual to open the PF User Manual. Release Notes Select Release Notes to view a description of the latest features added to PF, the date when they were added and a reference to the chapter number where the additions can be found. About Select About for general information about PF. Check for Updates Select Check for Updates to manually update the program, user manual, tutorials, case studies and release notes. The following window appears: ©2015 Star-Oddi. All Rights Reserved Page 15 User Manual Pattern Finder Figure 3.15 Select files to download Select the files you want to download and click OK. 3.2 Main Toolbar Figure 3.16 The Main Toolbar Main Toolbar Buttons Create a New Project Click this button to create a new project Open Project This button is used to open an already created PF project. Import File to new SFP The user can import other files than .DAT files into PF. Before importing a file it is necessary to make some modifications (see further instructions in chapter 13). ©2015 Star-Oddi. All Rights Reserved Page 16 User Manual Pattern Finder Add Files to Project Click this button to add files to a project. Remove Files from Project To remove files from a project, highlight the file you want to remove and click this button. Create Pattern Chart Click this button to create a pattern chart and pattern templates. More details in chapter 12. Create Event Chart Click this button to create and search for events. More details in chapter 11. Create Overlay Chart This button allows the user to create an overlay chart. More details in chapter 10. Create Multi Event Chart Click this button to overlay multiple event charts. More details in chapter 11. Create Multi Pattern Chart Click this button to overlay multiple pattern charts. More details in chapter x. Select Signal to Signal Chart Click this button to extract a signal and data range to view in a chart. Filter signal Click this button to filter the signal. Details can be found in chapter 8. Signal Period Statistics Click this button to perform a periodic statistics analysis. More details in chapter 9. Signal Operation Click this button to subtract and add signals. More details in chapter 8. ©2015 Star-Oddi. All Rights Reserved Page 17 User Manual Pattern Finder Perform an action on multiple sources Create Mooring Line Chart This button allows the user to create a chart showing the 3D graphical representation of loggers with 3D tilt sensors, for example, DST tilt and DST magnetic. Geolocation from light Click this button to create a geolocation map in Google Earth using data from light sensors. Heart Filters 3.3 Overview Pane Figure 3.17 Overview Pane The Overview Pane is divided into three categories: Collaborations: Lists charts with combined signals from multiple projects. Projects: Lists SFPs. Charts: Lists charts in a project. Files: Lists files in a project 3.4 Aliasing When working with multiple files which often have long and complicated names it can be useful to use an alias. When creating a project, the default name of the project is the name of the DAT file. The user can change the name, for example, Project1; by entering a new name under Project name (see figures 3.18 and 3.19). ©2015 Star-Oddi. All Rights Reserved Page 18 User Manual Pattern Finder Figure 3.18 SFP Figure 3.19 SFP You can also change the name of the collaborations, projects and charts by rightclicking on the file name you want to change on the Overview Pane (see figure 3.20). Figure 3.20 Change Alias ©2015 Star-Oddi. All Rights Reserved Page 19 User Manual Pattern Finder The following window appears: Figure 3.21 Change Alias Enter the alias you want to use and click OK. The alias will appear on the Overview Pane (see figure 3.22). Figure 3.22 Alias You can also create an alias when saving a chart (see figure 3.23). Click the Save chart button and the following window appears: Figure 3.23 Set Alias Enter the alias you want to use and click OK. ©2015 Star-Oddi. All Rights Reserved Page 20 User Manual Pattern Finder You can shift between the original name and the alias by selecting Settings-Use Alias F12 (see figure 3.24) or simply by clicking F12 on the keyboard. Figure 3.24 Use Alias ©2015 Star-Oddi. All Rights Reserved Page 21 User Manual Pattern Finder 4. Single File Project (SFP) 4.1 Create SFP Click the Create a New Project button and the following window appears: Figure 4.1 New Project Select Single File Project. Note that you can also create a SFP by selecting ProjectSFP-New. Figure 4.2 New SFP Once SFP has been chosen the following window appears: ©2015 Star-Oddi. All Rights Reserved Page 22 User Manual Pattern Finder Figure 4.3 New SFP Click the browse button to select the DAT file. Figure 4.4 SFP The default name of the project is the name of the DAT file. The user can change the name, for example, Project1, and enter a short description of the project. Figure 4.5 SFP Press OK and the name of the project as well as its location appears on the PF header (see figure 4.6). You can see the project name in the Overview Pane under Projects and the DAT file under Charts. ©2015 Star-Oddi. All Rights Reserved Page 23 User Manual Pattern Finder Figure 4.6 SFP The project will be stored in the PF directory on your computer under Projects-SFP 4.2 Project information Data Select Project-Properties and the following window appears: Figure 4.7 Project Information In the right window you can see the original name and the alias of the project files. In the left window you can add comments about the project. To print out the information select Print (see figure 4.8). ©2015 Star-Oddi. All Rights Reserved Page 24 User Manual Pattern Finder Figure 4.8 Print Preview 4.3 Create SFP from SeaStar, Mercury and FoodStar To transfer data from your Star- , do the following: 1. Enter the Star-Oddi application software (SeaStar, Mercury or FoodStar) 2. Select a recorder and a DAT file or import a DAT file for viewing 3. When the DAT chart is active, click the PF button on the chart bar When you click the PF button, PF will be activated. PF will be launched if it is not already running The SFP window in figure 4.9 appears: Figure 4.9 New SFP ©2015 Star-Oddi. All Rights Reserved Page 25 User Manual Pattern Finder The default Project name is the name of the recorder you transferred. You can change the name and enter a short description of the project. Click OK and the DAT file will be transferred and a SFP created which will appear in the Overview Pane (see figure 4.10). Figure 4.10 Overview Pane 4.4 Adding Files to SFP To add files to a SFP click the Add Files to Project button and select the file you want to add. Once the file has been added it is stored under Charts in the Overview Pane (see figure 4.11). Figure 4.11 Add Files to SFP 4.5 Removing Files from SFP To remove files from a SFP, highlight the file you want to remove in the Overview Pane and click the Remove Files from Project button. The following window appears: ©2015 Star-Oddi. All Rights Reserved Page 26 User Manual Pattern Finder Figure 4.12 Remove Chart from Project It is important to be careful when removing files from a project. If you check the Delete Chart Source box, the file will be removed both from the Overview Pane and the Project directory. If the file is not saved in another location it will be lost. If you do not check the Delete Chart Source box, the file will only be removed from the Overview Pane, but will still be accessible in the Project directory. Note that it is not possible to remove the original DAT file. ©2015 Star-Oddi. All Rights Reserved Page 27 User Manual Pattern Finder 5. Multiple File Project (MFP) 5.1 Create MFP Click the Create a New Project button and the following window appears: Figure 5.1 New Project Select Multiple File Project (MFP). Note that you can also create a MFP by choosing Project-MFP-New (see figure 5.2) Figure 5.2 New MFP Once MFP has been selected the following window appears: Figure 5.3 Select Subprojects ©2015 Star-Oddi. All Rights Reserved Page 28 User Manual Pattern Finder Enter a name and a short description of the project. Add the files you want to use in the project by clicking the Add button (see figure 5.4). You can add both DAT and SFP files. If a DAT file is added then a new SFP will be created. Figure 5.4 Select Subprojects Once all the files have been added, press OK and the name of the project as well as its location appears on the PF header (see figure 5.5). You can see the project name in the Overview Pane under Projects and the DAT file under Charts Figure 5.5 Overview Pane When double-clicking on one of the projects in the Overview Pane, the corresponding chart will be visible in the pane below (see figure 5.6). ©2015 Star-Oddi. All Rights Reserved Page 29 User Manual Pattern Finder Figure 5.6 Overview Pane 5.2 Adding Files to MFP To add files to a MFP, click on the Add Files to Project button. Files will be stored under Collaborations in the Overview Pane (see figure 5.7). The file will also be automatically stored in the MFP directory. Figure 5.7 Add Files to MFP ©2015 Star-Oddi. All Rights Reserved Page 30 User Manual Pattern Finder 5.3 Adding a SFP to MFP To add a SFP to a MFP choose Project-MFP-Add SFP. Figure 5.8 Add SFP to MFP The following window appears: Figure 5.9 Select subprojects Select the SFP you want to add to the project and click OK ©2015 Star-Oddi. All Rights Reserved Page 31 User Manual Pattern Finder The project will be stored under Projects in the Overview Pane (see figure 5.10). Figure 5.10 Add SFP to MFP 5.4 Adding SFP to MFP from SeaStar, Mercury and FoodStar To transfer a SFP from SeaStar, Mercury and FoodStar to a MFP, do the following: 1. 2. 3. 4. 5. Activate PF Open an already created MFP or create a new one. Enter the Star-Oddi application software (SeaStar, Mercury or FoodStar Select a recorder and a DAT file or import a DAT file for viewing When the DAT chart is active, click the PF button on the chart bar PF automatically opens on the screen and the SFP window appears: Figure 5.11 New SFP ©2015 Star-Oddi. All Rights Reserved Page 32 User Manual Pattern Finder The default Project name is the name of the recorder you transferred. You can change the name and enter a description. Click OK and the following window appears: Figure 5.12 Add to MFP Click Yes if you wish to add the file to the MFP. If you click No the file will not be added to the MFP but will become a regular SFP. The project will appear in the Overview Pane along with the other projects. Figure 5.13 Overview Pane 5.5 Removing Files from MFP To remove files from a MFP, highlight the file you wish to remove on the Overview Paneand click on the Remove Files from Project button. The following window appears: ©2015 Star-Oddi. All Rights Reserved Page 33 User Manual Pattern Finder Figure 5.14 Remove Files from MFP It is important to be careful when removing files. If you check the Delete Chart Source box, the file will be removed both from the Overview Paneand the Project directory. If the file is not saved in another location it will be lost. If you do not check the Delete Chart Source box, the file will only be removed from the Overview Pane, but will still be accessible in the Project directory. 5.6 Removing SFP from MFP To remove a SFP from a MFP, select Project-MFP-Remove SFP (see figure 5.15). Figure 5.15 Remove SFP from MFP The following window appears: ©2015 Star-Oddi. All Rights Reserved Page 34 User Manual Pattern Finder Figure 5.16 Remove SFP from MFP Highlight the SFP you want to remove and click the Remove button. The SFP will be removed from the Overview Pane. ©2015 Star-Oddi. All Rights Reserved Page 35 User Manual Pattern Finder 6. Files 6.1 Projects SFP MFP DAT Single File Project Multiple File Project Source file When creating projects, the user needs to define them as either Single file projects (SFP) or Multiple file projects (MFP). The default name of the SFP project is the name of the DAT file with a SFP extension. The user defines the name of the MFP. A subfolder for each project is created. SFPs are stored under PatternFinder\Projects\SFP. All the files that are created when working in a SFP are stored in the SFP folder. MFPs are stored under PatternFinder\Projects\MFP. All collaboration files that are created when working in a MFP are stored in the MFP folder. 6.2 SDX files SDX files are created when extracting data from a DAT file and each time the data is filtered or when performing a signal operation. The original SDX file is named after the SFP + _ + a letter indicating the parameter type + S + an incrementing number + .SDX. The last number is incremented each time an operation is performed on a signal and when the same parameter is extracted from a DAT/SDX file. The parameters are grouped according to Star-Oddi recorder parameters. The default letter for the groups is as follows: T P D S C A H M I U c t Temperature (°C, °F) Pressure (Bar, psi) Depth (m, fathoms) Salinity (psu) Conductivity (mS/cm) Angle (°) Compass heading (°) Tesla (nT, mGauss) Inclination (°) Pasteurization unit (PU) CO2 (mg/l) Time (time units) ©2015 Star-Oddi. All Rights Reserved Page 36 User Manual N L a Pattern Finder Count (number of items/points) Light (Lux, footcandle) Arbitrary (undefined) Example: You have a project named P1 with temperature and depth parameters. You extract the depth and the result file is named P1_DS1.SDX. You extract from the DAT file again. The name of the result file will be P1_DS2.SDX. If you filter the P1_DS2.SDX the resulting file will be named P1_DS2S1.SDX and so forth. 6.3 Overlay When creating an overlay solely from files from a singular SFP, the file will be named after the project + MO (multiple overlays) + a number + .ODX. The number is an incremental number for the overlays in a particular SFP. Example: The first overlay created from files from the project P1, will be named P1_MO1.ODX. The second overlay will be named P1_MO2.ODX. 6.4 Statistics files Periodic statistics There are three types of periodic statistics files. In each type the name of the file it is based on the source file name+ X+ a number. The number is incremented each time a statistical analysis is performed with that particular chart. The extension depends on the type. STA Created from signal (SDX) files STE Created from event (ESX) files STP Created from pattern (PSX) files Overlay statistics The name of the file is based on the overlay file name + X+ an incrementing number + a STO extension. The number is incremented each time a statistical analysis is performed with that particular chart. ©2015 Star-Oddi. All Rights Reserved Page 37 User Manual Pattern Finder STO Created from overlay (ODX) files 6.5 Events ESX The events files are named after the source file + E + an incrementing number + an ESX extension MEX-Multiple Events Multiple event files are created when overlaying two or more event files. The files are named after the project + _ + ME + an incrementing number + a MEX extension. 6.6 Patterns PSX The pattern files are named after the source file + P + an incrementing number + a PSX extension. MPX MPX files are Patterns created from multiple event files. The files are named after the source file + P + an incrementing number + a MPX extension. 6.7 Collaboration files When files from more than one SFP are used in an operation the resulting files are defined as collaboration files. These operations include: Overlaying Multiple events Patterns from multiple events Results from signal operations All subsequent operations on collaboration files are also defined as collaboration files. Collaboration file are named after the project + _ + MO + an incrementing number + the correct extension. ©2015 Star-Oddi. All Rights Reserved Page 38 User Manual Pattern Finder 6.8 Additional files BIN files Every time the user creates a new file, a BIN (binary) file is created simultaneously. The BIN file contains the series signal data. The BIN file is named after the source file with the extension BIN, for example, the file NAME.SDX would have the binary file NAME.SDX.BIN. SCT A SCT file is created when the user makes adjustments to the chart. The file is named after the source file with the extension SCT, for example, the file NAME.SDX would have the SCT file NAME.SDX.SCT. ©2015 Star-Oddi. All Rights Reserved Page 39 User Manual Pattern Finder 7. Charts 7.1 DAT chart Figure 7.1 DAT chart 7.2 DAT chart bar Figure 7.2 DAT chart bar Print Chart The chart can be printed. For more information see chapter 15. Active Series List This button can be useful when working with multiple signal units as it offers the option of selecting which unit to display in the chart. For example, when working with a chart displaying temperature and depth recordings, the user can hide the depth measurements. ©2015 Star-Oddi. All Rights Reserved Page 40 User Manual Pattern Finder Figure 7.3 Series list By checking Only show active table columns only the selected series will appear in the table. The table columns can also been changed manually by right-clicking on the table (see figure 7.4). Figure 7.4 Table Horizontal/Vertical Gridlines These two buttons give the option of hiding/displaying the horizontal/vertical gridlines in the chart. The horizontal lines refer to depth and temperature. It is not possible to have both lines available at the same time (see figure 7.5). Figure 7.5 Gridlines ©2015 Star-Oddi. All Rights Reserved Page 41 User Manual Pattern Finder A drop-down menu appears when clicking the Vertical gridlines button (see figure 7.6). Select the minimum grid size. Figure 7.6 Vertical gridlines Data Point Marker This button gives the option of displaying/hiding data points in the chart. Histogram The chart can be shown as histogram, showing various data statistics. Click the Histogram button and the following window appears: Figure 7.7 Histogram and data statistics Under Bin Settings there are two options, Default and User. Select User to select the number of bins and the minimum and maximum values you wish to display. In Name enter the title of the column. If you enter the following formulas [min] [mid] [max] in the Name column the numerical value will appear automatically. Data points are divided into groups defined by the From and To rows. If groups overlap the first valid group row is used. ©2015 Star-Oddi. All Rights Reserved Page 42 User Manual Pattern Finder You can display and hide the bin tags by clicking on the bins. The Histogram can be printed out by clicking the Print button. Zoom Out This button is used to zoom out the chart. Adjust axis to selected time This button adjusts the axis in order to display all data within the zoomed timeline. . Edit Chart This button gives several options regarding the look of the chart. For more information see chapter 7.5. Display table completely Partial table display Hide table 7.3 Using the Mouse Scroll the Chart A straight vertical line should be visible in the chart (see figure 3). By clicking on this line and holding down the left button on the mouse the line can be dragged through the chart and the data table will scroll along with the position of the line. The chart can be scrolled upward, downwards and to the sides, by holding down the right button of the mouse and moving the cursor in the desired direction. Zoom The chart can be zoomed in on by holding down the left button of the mouse, and using the cursor to create a box to the right around the area the user wants to view. Go Back to Initial View To go back to the initial view of the chart, simply hold down the left button of the mouse and make a box to the left with the cursor. The position of the box on the chart is irrelevant. ©2015 Star-Oddi. All Rights Reserved Page 43 User Manual Pattern Finder Change the Axis To change the time scale of the chart, click on the X axis. The window in figure 7.8 appears. Figure 7.8 Axis Settings: Measurement time By disabling the Automatic option, the minimum and maximum time values become active. By clicking on the Change buttons for the maximum and minimum values, the time range can be specified. By enabling the Automatic option, the measurement time will go back to the initial range. To change the unit range, click on the Y axis. The window in figure 7.9 appears. Figure 7.9 Axis Settings: Unit range By disabling the Automatic option, the minimum and maximum measurement values become active. By clicking on the Change buttons for the maximum and minimum ©2015 Star-Oddi. All Rights Reserved Page 44 User Manual Pattern Finder values, the unit range can be specified. By enabling the Automatic option, the measurements will go back to the initial range. Change the Title Click on the title name to change the title of the chart. The window in figure 7.10 appears. Figure 7.10 Chart title Enter a new chart title and click OK. 7.4 Time Window Statistics The time statistics window shows the minimum, maximum and average measurement values of the selected parameter. Figure 7.11 Time window statistics 7.5 Table The table in the chart window gives an overview of the data numbers, recording time, temperature and depth depending on which signal unit is visible. The user can browse through the numbers by using the arrows in the right corner (see figure 7.12). ©2015 Star-Oddi. All Rights Reserved Page 45 User Manual Pattern Finder Figure 7.12 Table 7.6 SDX chart Selecting data for analysis (creating SDX files) Double click on the DAT chart file in Overview Pane. The original DAT file appears in graphic form (see figure 7.13). Figure 7.13 Chart ©2015 Star-Oddi. All Rights Reserved Page 46 User Manual Pattern Finder To extract the series and data range you want to view in the chart, click the Select Signal to Signal Chart button on the main toolbar and the following window appears: Figure 7.14 Select series to export to signal chart Figure 7.15 Select series to export to signal chart Select the series and data range you want to use and click OK ©2015 Star-Oddi. All Rights Reserved Page 47 User Manual Pattern Finder A signal (SDX) chart appears: Figure 7.16 Signal Chart 7.7 SDX Chart bar When the SDX chart is opened, buttons related to the chart are displayed: Figure 7.17 The Chart Bar All of the buttons on the SDX chart bar have the same functions as the DAT chart buttons except that the SDX chart has a History button: ©2015 Star-Oddi. All Rights Reserved Page 48 User Manual Pattern Finder 7.8 Edit Chart operations Click the Edit Chart button on the chart bar to open the Chart Editor. The Chart Editor is a multi-option menu with a Tree View interface. There are four main branches on the tree: 1. Series 2. Chart 3. Data 4. Export Figure 7.20 Edit chart Series The Series window offers the same features as the Active Series List Button. Figure 7.21 Edit chart: series ©2015 Star-Oddi. All Rights Reserved Page 49 User Manual Pattern Finder When a particular series is selected, for example, the Depth series, a two tab menu opens, as seen in fig. 7.22. Under Format, the user can format each series. The Point tab has the same function as the Data Point Marker button on the chart, plus formatting of the points. Figure 7.22 Format Series Chart The chart branch has six sub branches: 1. 2. 3. 4. 5. 6. Axis Titles Legend Panel Paging Walls Figure 7.23 Axis Formatting Figure 7.23 shows a six tab Axis menu. There are numerous options, some of which can drastically change the behavior of the chart. For example, under Minimum and ©2015 Star-Oddi. All Rights Reserved Page 50 User Manual Pattern Finder Maximum the user can set the min. and max. measurement values which are displayed on the chart. The Ticks tab has the same function as the Horizontal/Vertical gridline buttons in the chart bar. Titles The Titles menu, figure 7.24, gives access to 4 titles. Each title presents a multi line text window which can be positioned anywhere on the chart. There are multiple formatting options. Figure 7.24 Titles menu Legend The legend menu (see figure 7.25) gives the user the option of displaying a series legend on the chart. The 10 tab menu offers various styling, positioning and formatting options of the legend. Figure 7.25 Legend Menu ©2015 Star-Oddi. All Rights Reserved Page 51 User Manual Pattern Finder Panel The Panel menu (see figure 7.26) offers various format options for the panel. Images, pictures and icons can be imported onto the panel as back images. Figure 7.26 Panel Menu Paging The data series can be split up into pages, with a user defined number of points per page. Only one page is displayed at a time, and the user can scroll through the pages using the arrow buttons which are enabled on the chart when paging is activated. Paging can be useful when viewing different time periods. It is not possible to define an offset and sampling periods and start time can limit the usefulness of this option. Figure 7.27 Paging Menu ©2015 Star-Oddi. All Rights Reserved Page 52 User Manual Pattern Finder Walls Figure 7.28 Walls Menu The Walls menu in figure 7.28 offers the option of formatting the four walls of the chart. The menu has similar options as the Panel menu, for example, by click the Pattern button the user can import an image and place it on the wall. Data The Data menu in figure 7.29 gives the user access to the database on which the chart is based. Here text labels can be set to each measurement point. The user can also change the time and measurement values. When making changes to the data the Save Window Data button is activated allowing the user to save the changes. Figure 7.29 Edit chart: data Export See chapter 14 for more information. ©2015 Star-Oddi. All Rights Reserved Page 53 User Manual Pattern Finder 8. Filtering and Operations This chapter explains the filter and signal operations available on the main toolbar. 8.1 Filtering Select a SDX file and click the Filter Signal button. The following options appear: Figure 8.1 Filter Signal All the filter options result in a new SDX file where the filtered signal is displayed and the difference between the original SDX signal and the filtered signal can be viewed. The difference signal can be accessed through the Active series button on the chart bar. Moving average Moving average is an efficient method to even out large irregularities in the signal. It is especially useful when preparing a signal for behavioral event analysis. Click the Filter Signal button and select Moving average. The window in figure 8.2 appears: Figure 8.2 Moving Average Filter ©2015 Star-Oddi. All Rights Reserved Page 54 User Manual Pattern Finder Under Window Length define the size of the window, i.e., the number of measurement values. The minimum is 3 values. Under Repetitions define how often the procedure is to be carried out. Click OK and a signal chart appears: Figure 8.3 Signal chart Click the Histogram button on the chart bar and select Difference. The histogram shows that Moving average mainly targets relatively small amplitude variations. Figure 8.4 Histogram Note that Moving Average inevitably results in amplitude distortion and time shifting. PF automatically corrects the time shift in the resulting signal. ©2015 Star-Oddi. All Rights Reserved Page 55 User Manual Pattern Finder Derivative 2 Point (ROC) 8 Point Pulse Pulse Detection Pulse Per Minute Digital Filters Low Pass High Pass Band Pass Signal Processing Average Round Off Round off is used, for example, when preparing a signal for ambient/level event analysis. Select Signal Processing and then Round off. The window in figure 8.5 appears: Figure 8.5 Round off The user can choose between Floating point and Integer. Floating point By selecting Floating point you can filter the decimal values. This can be useful when working with low bar values where the decimals play a significant role. First you select the decimal place you want to work with (see figure 8.5). ©2015 Star-Oddi. All Rights Reserved Page 56 User Manual Pattern Finder Secondly, select the Base number. The Base number defines the resolution of the selected decimal (see figure 8.5). Click OK and a signal chart appears: Figure 8.6 Round off: Floating point Integer The Integer round off is useful, for example, when preparing a signal for ambient analysis where you want to decrease the number of events around the level values. Figure 8.7 Round off When selecting Integer, the decimal values are rounded off. The integer values can be rounded down to a Base number defined in the unit values of the signal (m, °C, etc.). ©2015 Star-Oddi. All Rights Reserved Page 57 User Manual Pattern Finder Click OK and a signal chart appears: Figure 8.8 Round off: Integer Scale Select Signal Processing and then Scale. The following window appears: Figure 8.9 Scale Offset Offset values can be used to compensate for a known offset in the measurement signal. You can add or subtract a value by adding a + or in front of the number. The offset is defined in the unit value of the signal (m, °C, etc.). Note that you can use decimal values. Scaling factor: Scaling factor multiples or divides the signal after the offset has been applied. Note that you can use decimals values. ©2015 Star-Oddi. All Rights Reserved Page 58 User Manual Pattern Finder Click OK and a signal chart appears: Figure 8.10 Scale Single Spike Filter Single Spike Filter is used to remove erroneous spikes in a signal as well as preparing a signal for pattern identification. Select Signal Processing and then Single Spike Filter. The following window appears: Figure 8.13 Single Spike Filter Under Time define the maximum duration of the spike (sec, min or hours). Under Unit define the minimum amplitude in the signal unit value of the spike. Both positive and negative spikes are removed. ©2015 Star-Oddi. All Rights Reserved Page 59 User Manual Pattern Finder Click OK and a signal chart appears: Figure 8.14 Single Spike Filter The difference signal shows the spikes removed from the original SDX signal. Smoothing Data smoothing is primarily used to reduce low-level noise in the measurement. It can also be used to prepare the signal before finding behavioral events and patterns. Note that Smoothing does not distort or time-shift the signal. Select Signal Processing and then Smoothing. The following window appears: Figure 8.11 Smoothing Under Resolution define the minimum difference between two aligning measurements. Under Resolution multiplier you can multiple the resolution Under Maximum iterations you can define the number of iterations, i.e. how many times the smoothing operation is performed. ©2015 Star-Oddi. All Rights Reserved Page 60 User Manual Pattern Finder Click OK and a signal chart appears: Figure 8.12 Smoothing Square Regression Curve Fit The Regression curve fit can mainly be used to: Fit a curve to measurements Remove biased trends from signals Create normalized signals All regression curve fits are calculated at once. Figure 8.17 Curve fit chart ©2015 Star-Oddi. All Rights Reserved Page 61 User Manual Available curve fits are: m: Mean lr: Linear regression pr: Power regression er: Exponential regression q: Polynominal regression (3°) Pattern Finder R squared (not basically a curve fit) lr-r^2 prR^2 erR^2 qrR^2 R-squared value says how well the resulting trend matches the original data points. Differential values By subtracting the fitted curve from the signal, biased values can be removed resulting in an signal, i.e. an alternating signal around the fitted curve/zero. Dm = Signal-[m] Dl = Signal-[lr] Dp = Signal-[pr] De = Signal-[er] Dq = Signal-[qr] Positive (Offseted) differential values The subtraction of the minimal differential value from the differential value, provides the offsetted positive values. Dm+ = Da-[Min(Dm)] Dl+ = Dl-[Min(Dl)] Dp+ = Dp-[Min(Dp)] De+ = De-[Min(De)] Dq+ = Dq-[Min(Dq)] Normalized values with range from -1 to 1 Normalized values are good when comparing different signals. This is accomplished by dividing the differential values with half the differential range . Snm = 2Da/[Range(Dm)] Snl = 2Dl/[Range(Dl)] Snp = 2Dp/[Range(Dp)] Sne = 2De/[Range(De)] Snq = 2Dq/[Range(Dq)] Level/Band Compare ©2015 Star-Oddi. All Rights Reserved Page 62 User Manual Pattern Finder Set sampling rate Click the Filter Signal button and select Set sampling rate. The following window appears: Figure 8.15 Set sampling rate Set new start date, start time and sampling interval. Click OK and a signal chart appears: Figure 8.16 Set sampling rate If the start time is outside the signal the starting value will be zero. Points are added until the signal ends and each point is interpolated. ©2015 Star-Oddi. All Rights Reserved Page 63 User Manual Pattern Finder 8.2 Signal Operations Subtraction This chapter shows how to subtract one signal from another. Select the chart you want to work with. Once the chart is active click the Signal operation button on the main toolbar and select Subtract (see figure 8.17): Figure 8.17 Subtract The following window appears: Figure 8.18 Subtract signals You can filter the signals by selecting one of the options in the drop-down list (see figure 8.18). Note that this option is not available when working with a SFP. By checking the Absolute difference box (see figure 8.18) all resulting negative values are converted to positive values. ©2015 Star-Oddi. All Rights Reserved Page 64 User Manual Pattern Finder Select the signal you want to subtract and click OK. A signal chart appears: Figure 8.19 Signal Chart The values in the resulting chart are both negative and positive. The number of values in the resulting signal is the same as in the original signal. Compare The Compare option allows the user to compare two signals to check if their values match. Click the Signal operation button on the main toolbar and select Compare The following window appears: Figure 8.20 Compare signals ©2015 Star-Oddi. All Rights Reserved Page 65 User Manual Pattern Finder Level: The level (L) determines the value that each pair is compared with, default is less than one. Absolute: The absolute difference of the pair compared to the level. (If |a-b|<L then c=1 else c=0). Relative: The relative absolute difference of the pair compared to the level. (If a≠0 ^ |(a-b)/a|*100<L then c=1 else c=0). Ratio: The ratio of the pair compared to the level. (If a≠0 ^ |b/a|*100<L then c=1 else c=0). Discard zeroes: If either point is zero then the comparison is false (0). Larger values defines denominator: If using Relative or Ratio then the division will use the larger absolute value as denominator, and the smaller as numerator. Select the signal and click OK. A signal chart appears: Figure 8.21 Compare The result is always either zero or one. ©2015 Star-Oddi. All Rights Reserved Page 66 User Manual Pattern Finder 9. Periodic Statistical Analysis A periodic function is a function that repeats its values in regular intervals or periods. The periods available in PF are: Minutes Hours Days Weeks: Starts on Monday Months: Starts on the first day of the month 9.1 Performing a Periodic Statistical Analysis Open or create a project and open the SDX file. Click the Signal period statistics button on the main toolbar and the following window appears: Figure 9.1 Time-Averaging Statistics Define the period you want to analyze: minutes, hours, days, week and month (see figure 9.1). Interpolate period: If checked, this option will add points at the beginning and the end of the period. ©2015 Star-Oddi. All Rights Reserved Page 67 User Manual Pattern Finder Time weighted statistics: If checked, the statistics will be time weighted. Click OK and a statistics chart appears: Figure 9.2 Statistics Chart Each point in the chart represents a statistical value for the selected period. Save the chart and a STA file will be created. There are 15 parameters in total, each with its own color. By moving the cursor on the chart the value for each parameter is shown in the table on the right side of the chart (see figure 9.3). Figure 9.3 Table ©2015 Star-Oddi. All Rights Reserved Page 68 User Manual Pattern Finder The table lists the following parameters: Number of the period Date of the period Time of the period Max: Maximum value of the period Min: Minimum value of the period Middle: The average of the max and min value Mean: The time weighted average value Median: The mid value in the sequence of measurements arranged by amplitude Range: The difference between max and min Total: The total sum of all the values in the period Std. Dev.: Standard deviation RSD: Relative standard deviation Points: Number of points in the period Energy: An indication of the area the signal defines over time. The energy unit is the signal unit multiplied by the time unit in seconds, for example, a temperature signal (°C) has the energy unit =°C·s Kurtosis from the normal distribution. A zero value indicates a normal distribution. A positive value indicates a peaked distribution while a negative value indicates a flat distribution. Skewness: A measure of the asymmetry of the distribution and how it differs from a normal distribution. A zero value indicates a normal distribution. A positive value indicates a positively skewed distribution while a negative value indicates a negatively skewed distribution. Mode: The mode is the value that appears most often in a set of data. Variance: In statistics variance measures how far a set of numbers is spread out. The square root of variance is called the standard deviation. ©2015 Star-Oddi. All Rights Reserved Page 69 User Manual Pattern Finder To select the parameters you want to view in the chart, click the Active Series button on the chart bar. The following window appears: Figure 9.4 Active Series Select the parameters you want to view and click OK. In the chart in figure 9.5, all the parameters have been selected. Figure 9.5 Statistics chart ©2015 Star-Oddi. All Rights Reserved Page 70 User Manual Pattern Finder 9.2 Extract Signal from STA file To extract a signal from the STA file, click the Select signal to signal chart button on the main toolbar The following window appears: Figure 9.6 Select series to export to signal chart Figure 9.7 Create signal chart ©2015 Star-Oddi. All Rights Reserved Page 71 User Manual Pattern Finder Select the signal and the range you want to extract. Click Create and a chart with the extracted signal appears: Figure 9.8 Signal Chart ©2015 Star-Oddi. All Rights Reserved Page 72 User Manual Pattern Finder 10. Overlaying This chapter shows how to overlay multiple signals. 10.1 View multiple signals Create or open a project. Click on the Create Overlay Chart button on the main toolbar and the following window appears: Figure 10.1 Create Overlay Graph Select the signals you want to overlay. You can filter the signals by selecting one of the options in the drop-down list (see figure 10.2). Figure 10.2 Filter ©2015 Star-Oddi. All Rights Reserved Page 73 User Manual Pattern Finder Once the signals have been selected, click OK and an Overlay chart appears: Figure 10.3 Overlay Chart Each unit has an axis and a different color (see figure 10.3). Overlays with a single unit use colors outside of unit group colors (see figure 10.4). Figure 10.4 Overlay chart: single unit ©2015 Star-Oddi. All Rights Reserved Page 74 User Manual Pattern Finder 10.2 Time Shifted Data PF offers the option of shifting two or more signals to the same starting time. This is especially useful when analyzing data from multiple recorders that have been used in similar researches and have the same sampling frequency, but different start times. Before overlaying the signals, it is recommended to prepare the data by extracting the signal and data range you want to analyze. Select the signals you want to overlay and under Time Shift select Shift signals to same starting time and Interpolation (see figure 10.1). Interpolation Interpolation is necessary when measurements do not match when comparing them in time. Signals that have the same sampling frequency but are shifted in time will display erroneous results in the statistical overlay analysis. With interpolation matching measurement points are created and thus all signals are included in each measurement point. Once the signals have been selected, click OK and an overlay chart appears: Figure 10.5 Overlay chart Now both signals have the same start time. ©2015 Star-Oddi. All Rights Reserved Page 75 User Manual Pattern Finder 10.3 Annual Comparison When comparing signals on an annual basis, average values for days, weeks or months are often used. In PF any measurement values can be used. Select the signals you want to overlay. Under Time Shift select Apply annual comparison and Interpolation (see figure 10.1). Annual weeks: By selecting this option the values are split up into ISO weeks. Once the signals have been selected, click OK and an overlay chart appears: Figure 10.6 Overlay chart In the chart the signals are divided by years starting with the earliest year found in the signals. ©2015 Star-Oddi. All Rights Reserved Page 76 User Manual Pattern Finder It is also possible to perform an annual analysis using only one signal (see figure 10.7). Figure 10.7 Overlay chart 1 signal 10.4 Daily comparison Select the signals you want to overlay. Under Time Shift select Apply daily comparison and Interpolation (see figure 10.1). Once the signals have been selected, click OK An overlay chart appears: Figure 10.8 Overlay chart In the chart all the values have been distributed over a one day period. ©2015 Star-Oddi. All Rights Reserved Page 77 User Manual Pattern Finder 10.5 Burst comparison This option allows the user to gather a defined number of measurements (burst) together for analysis. Select the signals you want to overlay. Under Time Shift select Apply burst comparison and Interpolation (see figure 10.1). Define the number of burst under Burst count. Once the signals have been selected, click OK 10.6 Overlay Statistics To do a statistical analysis on the overlay chart, activate the chart and click the Overlay statistics button on the main toolbar. The following window appears: Figure 10.15 Select unit Select the unit you want to analyze under Select Unit. You can analyze the whole data by selecting All under Time Window or only the zoomed data by selecting Window Only. You can analyze all of the signals by selecting All under Signal Selection or only the selected signal by checking Visible Only. ©2015 Star-Oddi. All Rights Reserved Page 78 User Manual Pattern Finder Click OK and a statistics chart appears: Figure 10.16 Overlay statistics chart Each point in the chart represents a statistical value for each time stamp in the overlay chart. If points in the overlay chart do not match in time, PF will interpolate the signals. Save the chart and a STO file will be created. There are 12 parameters in total, each with its own color. By moving the cursor on the chart the value for each parameter is shown in the table on the right side of the chart (see figure 10.17). Figure 10.17 Table ©2015 Star-Oddi. All Rights Reserved Page 79 User Manual Pattern Finder The table lists the following parameters: Number of the period Date of the period Time of the period Max: Maximum value Min: Minimum value Middle: The average of the max and min value Mean: The standard average value Median: The mid value in the sequence of measurements arranged by amplitude Range: The difference between max and min Total: The sum of all the signal values in a singular point. Std. Dev.: Standard deviation RSD: Relative standard deviation Points: Number of signal points in the period Kurtosis from the normal distribution. A zero value indicates a normal distribution. A positive value indicates a peaked distribution while a negative value indicates a flat distribution. Skewness: A measure of the asymmetry of the distribution and how it differs from a normal distribution. A zero value indicates a normal distribution. A positive value indicates a positively skewed distribution while a negative value indicates a negatively skewed distribution. Mode: The mode is the value that appears most often in a set of data. Variance: In statistics variance measures how far a set of numbers is spread out. The square root of variance is called the standard deviation. To select the parameters you want to view in the chart, click the Active Series button on the chart bar and the following window appears: Figure 10.18 Active Series ©2015 Star-Oddi. All Rights Reserved Page 80 User Manual Pattern Finder In the chart below, all the parameters have been selected. Figure 10.19 Overlay statistics chart Save the chart and a STO file will be created. 10.7 Extract signal from STO file To extract a signal from the STO file, click the Select signal to signal chart button on the main toolbar and the following window appears: Figure 10.17 Select series to export to signal chart Select the signal and the data range you want to extract. ©2015 Star-Oddi. All Rights Reserved Page 81 User Manual Pattern Finder Click OK and a chart displaying the extracted signal appears: Figure 10.18 Signal chart ©2015 Star-Oddi. All Rights Reserved Page 82 User Manual Pattern Finder 11. Event Analysis As the name indicates, events are a state of the signal that has a beginning and an end. There are four types of events: 1. Manual 2. Ambient/level 3. Behavioral 4. Multiple 11.1 Manual events Open or create a project and click the Create Event Chart button on the main toolbar. The following window appears: Figure 11.1 Create event graph ©2015 Star-Oddi. All Rights Reserved Page 83 User Manual Pattern Finder To create a manual event, do the following: 1. Select series for event chart 2. Select type of event, in this case Manual 3. Click OK An event chart appears: Figure 11.2 Event chart Event chart bar There are five event operation buttons in the event chart (these options are available on every type of events charts: manual, ambient, behavioral, multiple): Edit Event Types Click this button to edit the name, description and color of an event type Delete Event Type Click this button to delete an event type Mark an Event Click this button to create a new event type and mark an event on the chart. Remove Selected Event Click this button to remove an event from the chart ©2015 Star-Oddi. All Rights Reserved Page 84 User Manual Pattern Finder Event operations Disable/show data series Histogram The event histogram has the same functions as the DAT histogram except that you can view the data either by Amplitude or Duration. Figure 11.3 Event histogram Export The multiple event file can be exported to Theme for further analysis. See chapter 14 for further instructions. Create an event type Before creating an event the user has to create an event type. Click the Mark an event button on the chart bar. The following window appears: ©2015 Star-Oddi. All Rights Reserved Page 85 User Manual Pattern Finder Figure 11.4 New Event Type Select New Event Type and the following window appears: Figure 11.5 New event Insert the event name and the parameter and choose a color. The event will be added to the list of event types (see figure 11.6). ©2015 Star-Oddi. All Rights Reserved Page 86 User Manual Pattern Finder Figure 11.6 New Event Type Mark an event To mark an event on the chart you first need to position the cursor on the point where you want to begin the event and click the Mark an event button on the chart bar. Select an event type from the list (see figure 11.7). Click OK and the following window appears: Figure 11.7 PatternFinder Move the cursor to the point where you want to end the event and click the Mark an Event button again. The event will be marked on the chart as can be seen in figure 11.8. ©2015 Star-Oddi. All Rights Reserved Page 87 User Manual Pattern Finder Figure 11.8 Event chart To remove an event from the chart, highlight the event and click the Remove Selected Event button. You can edit the name, description and color of the event type by clicking the Edit Event Types button (see figure 11.9). Figure 11.9 Edit Event Definition You can also delete the event type by clicking the Delete Event Type button (see figure 11.10). ©2015 Star-Oddi. All Rights Reserved Page 88 User Manual Pattern Finder Figure 11.10 Delete event type 11.2 Ambient/level events An ambient event is basically a level event analysis Open or create a project and click the Create Event Chart button. The following window appears: Figure 11.11 Create Event Graph ©2015 Star-Oddi. All Rights Reserved Page 89 User Manual Pattern Finder To create an ambient/level event, do the following: 1. Select series for event chart 2. Select type of event, in this case Ambient. 3. Define amplitude levels Define the number of levels and the range of each level. You can either insert the levels manually or check the Automatic definition box and let PF automatically define the levels based on the range of the signal. The level definition can be saved as a template so when comparing multiple signals you can have the same reference for all the signals. The user inserts a name and description of the template. The template is saved when the event analysis is activated. If the template already exists the user will be asked if he wants to overwrite the template. If the template has already been saved the user can reuse it by selecting it from the drop-down list (see figure 11.11). Once you have defined the levels click OK and an event chart appears: Figure 11.12 Event chart: ambient The event chart is divided into two, the graphical view and the table section. The events are displayed in a Gantt diagram fashion in the graphical view. The levels are visible on the right axis of the chart. The number of events and levels is the same. The table section is also divided into two parts, the signal view and the event table. The signal view is similar to the ones found in the DAT and SDX charts. In the event table, every occurrence of the level events is represented in a chronological order. Each level event has a number, description, start time and end time. No two events can overlap. ©2015 Star-Oddi. All Rights Reserved Page 90 User Manual Pattern Finder By zooming in on the chart and clicking on a particular event, the event is highlighted in the event table (see figure 11.13). Figure 11.13 Event chart: zoom 11.3 Behavioral Event Analysis Open or create a project and click the Create Event Chart button. The following window appears: Figure 11.14 Create event chart ©2015 Star-Oddi. All Rights Reserved Page 91 User Manual Pattern Finder To create a behavioral event, do the following: 1 Select series for the event chart 2 Select type of event, in this case Behavioral. 3 Set event conditions Define minimum event duration (in points) and minimum event amplitude. 4 Define the amplitude levels Click OK and an event chart appears: Figure 11.15 Event chart: behavioral In figure 11.15, there are three events, (D stands for Depth): 1. D+ = upwards movement, 2. D- = downwards movement 3. D0 = no movement, which can be seen as a interval between events ©2015 Star-Oddi. All Rights Reserved Page 92 User Manual Pattern Finder 11.4 Multiple Event Analysis All types of events can be used in multiple events analysis: manual, ambient and/or behavioral. To create a multi event chart, click the Create Multi Event Chart button A window listing the events appears: Figure 11.16 Create multi event chart You can filter the signals by selecting one of the options in the drop-down list (see figure 11.17). Figure 11.17 Filter ©2015 Star-Oddi. All Rights Reserved Page 93 User Manual Pattern Finder Select the events you want to include in the chart and click OK. A Multi Event Chart appears: Figure 11.18 Multi event chart You can only view one signal at a time. To switch between signals click the Active series button on the chart bar. The following window appears: Figure 11.19 Series list Select the signal you want to view on the chart and click OK. ©2015 Star-Oddi. All Rights Reserved Page 94 User Manual Pattern Finder Figure 11.20 Multi event chart 11.5 Event operations Click the Event operations button on the event chart bar and the following window appears: Figure 11.21 Event operations The window on the left lists the event types. Only the checked events will be used. ©2015 Star-Oddi. All Rights Reserved Page 95 User Manual Pattern Finder Filter Figure 11.22 Filter Amplitude Check Filter by amplitude to use this option. The values must be within the defined range. Hit percent: Check Filter by hit percent to use this option. The values must be within the defined range. Duration (seconds) Filter by duration Group close occurrences Combine occurrences Output Filter the type: All event occurrences outside the filter are removed. Filter to a new type: All event occurrences within the range are included in a new event type. Insert a name for the new type. ©2015 Star-Oddi. All Rights Reserved Page 96 User Manual Pattern Finder Combine Figure 11.23 Combine: Intersection of occurrences Operation Intersection of occurrences: Check this option to find intersecting occurrences. A new event type with all the intersecting occurrences is created (see figure 11.23). Overlapping occurrences: Check this option to find overlapping occurrences (see figure 11.24). The resulting pattern types cannot intersect. Figure 11.24 Overlapping occurrences Priority: There are two filters. The user needs to select which one is primary. Duration filters the overlapping event occurrences by length. Hit % filters the overlapping event occurrences with the higher hit percentage. Check Filter overlapping occurrences by priority in Output to activate the Priority option. By checking Combine adjacent and overlapping occurrences in Output all the overlapping occurrences will be combined into a single occurrence. ©2015 Star-Oddi. All Rights Reserved Page 97 User Manual Pattern Finder Union of occurrences: Finds all occurrences (see figure 11.25). The resulting event types cannot intersect. Priority works the same. Figure 11.25 Union of occurrences Amplitude Figure 11.26 Amplitude Amplitude recalculates the amplitude using a new source. Select the event types you want to recalculate and choose the signal source. Note that only overlapping values are recalculated. ©2015 Star-Oddi. All Rights Reserved Page 98 User Manual Pattern Finder Figure 11.27 shows the final results after all the operations have been performed. Figure 11.27 Event operations 11.6 Event periodic statistics To perform an event periodic statistics analysis, open an event chart and click the Event period statistics button on the main toolbar. The following window appears: Figure 11.28 Create event statistics Select the event and the time-averaging period you want to analyze. The user can choose to perform a statistical analysis either by Amplitude or Duration. ©2015 Star-Oddi. All Rights Reserved Page 99 User Manual Pattern Finder By checking Events overlap periods events that extend over two or more periods are split between periods. Click OK and the an Event periodic statistics chart appears: Figure 11.29 Event periodic statistics chart There are ten different parameters, each with its own color. By moving the cursor on the chart the value for each parameter is shown in the table on the right side of the chart (see figure 11.30). Figure 11.30 Table The table lists the following parameters: Number: The number of the period Date: The date of the period Time: The time of the period Max: Maximum duration of an event Min: Minimum duration of a event ©2015 Star-Oddi. All Rights Reserved Page 100 User Manual Pattern Finder Middle: The average of max and min Occurrences: Number of event occurrences Total: The combined total duration of all the events Mean: The standard average event duration Median: The mid value in the sequence of events arranged by duration Std. dev.: RSD: The relative standard deviation Mode: The mode is the value that appears most often in a set of data. Variance: In statistics variance measures how far a set of numbers is spread out. The square root of variance is called the standard deviation. Save the chart and a STE file will be created. To select the parameters you want to view in the chart, click the Active Series button on the chart bar. The following window appears: Figure 11.31 Series list Select the parameters you want to view and click OK. ©2015 Star-Oddi. All Rights Reserved Page 101 User Manual Pattern Finder In figure 11.32 all the parameters have been selected Figure 11.32 Event periodic statistics chart 11.7 Extract signal from STE file To extract a signal from the STE file, click the Select signal to signal chart button on the main toolbar and the following window appears: Figure 11.33 Select series to export to signal chart ©2015 Star-Oddi. All Rights Reserved Page 102 User Manual Pattern Finder Select the signal and the data range you want to extract. Click OK and a chart displaying the extracted signal appears: Figure 11.34 Signal chart ©2015 Star-Oddi. All Rights Reserved Page 103 User Manual Pattern Finder 12. Pattern analysis Pattern analysis is based on user defined patterns that can be saved as templates and used repeatedly 12.1 Manual patterns Open a PSX or a MPX file. Figure 12.1 Pattern chart There are five pattern operation buttons in the pattern chart: Edit pattern types Delete pattern type Add pattern occurrence Remove selected pattern occurrence Pattern operations ©2015 Star-Oddi. All Rights Reserved Page 104 User Manual Pattern Finder Disable/show data series Histogram Figure 12.2 Pattern histogram The pattern histogram has the same functions as the DAT histogram except that you can view the data either by Amplitude or Duration. Add pattern occurrence To mark a pattern on the chart you first need to position the cursor on the point where you want to place the pattern and click the Add pattern occurrence button on the chart bar. A drop-down menu appears. Select the pattern type. Figure 12.3 Add pattern occurrence The pattern will be marked on the chart as can be seen in figure 12.4. ©2015 Star-Oddi. All Rights Reserved Page 105 User Manual Pattern Finder Figure 12.4 Add pattern occurrence Remove selected pattern occurrence To remove a pattern from the chart, highlight the pattern and click the Remove selected pattern occurrence button. You can edit the name, description and color of the pattern type by clicking the Edit pattern types button (see figure 12.5). Figure 12.5 Edit pattern types You can also delete the pattern type by clicking the Delete pattern type button. ©2015 Star-Oddi. All Rights Reserved Page 106 User Manual Pattern Finder Figure12.6 Delete pattern type A drop-down menu appears. Select the pattern type you want to delete (see figure 12.6). 12.2 Creating user defined patterns Create or open a project and click the Create Pattern Chart button on the toolbar The following window appears: Figure 12.7 Pattern template search There are two main options when performing a pattern search: ©2015 Star-Oddi. All Rights Reserved Page 107 User Manual Pattern Finder Correlation: This method is based on cross-correlation. It finds patterns independent of level and amplitude. Figure 12.8 Pattern template search: correlation 1. Under Search type select Correlation 2. Under Pattern template you can create a pattern template by defining the range you want to use. Check the Save as box if you want to save the template and add a comment about the template. The template is always saved in: Projects\PatternTemplates\TPL (next available number).SDX. If the template already exists, check Use existing template file and select a template from the drop-down list. 3. Under Search parameters define the Threshold. The Threshold is the definition of how well the signal matches the template in percentages. 4. Under Output definition/Pattern name enter a name for the pattern in the chart. ©2015 Star-Oddi. All Rights Reserved Page 108 User Manual Pattern Finder Click OK and a pattern chart appears: Figure 12.9 Pattern chart: correlation Remove selected pattern To remove a selected pattern from the chart click on the pattern you want to remove on the chart or on the pattern table and click the Remove selected pattern button on the chart bar. Envelope This method is based on creating a user defined window/envelope around the pattern template. The user can choose to have the search level-dependent and/or amplitudedependent. Figure12.10 Pattern template search: envelope ©2015 Star-Oddi. All Rights Reserved Page 109 User Manual Pattern Finder 1. Under Search type select Envelope 2. Under Pattern template you can create a pattern template by defining the range you want to use. Click the save as box if you want to save the template and add a comment. The template is always saved in the Projects\PatternTemplates\TPL (next available number).SDX. If the template already exists, check Use existing template file and select a template from the drop-down list. 3. Under Search parameters define the Threshold and the Envelope size. The Envelope size determines the size of the envelope/window around the pattern template. 4. Select whether the search is to be Amplitude and/or Level dependant. If you select Level dependent you need to define the minimum and maximum range. Click OK and a pattern chart appears: Figure 12.11 Pattern chart: envelope 12.3 Scanning data for patterns Create or open a project and click the Create Event Chart button on the main toolbar or open an already created event chart. For further instructions on how to create an event chart see chapter 11. The event can be manual, ambient, behavioral or multiple. Once the event chart has been opened, click the Create Pattern Chart button on the main toolbar and the following window appears: ©2015 Star-Oddi. All Rights Reserved Page 110 User Manual Pattern Finder Figure 12.12 Create pattern chart The Create Pattern Chart window consists of: Pattern Search Results Figure 12.13 Pattern Search Results Number of events in a pattern Number of pattern types Maximum number of occurrences of a singular pattern Average number of occurrences of a singular pattern Total occurrences of all the patterns Minimum standard deviation interval Maximum standard deviation interval ©2015 Star-Oddi. All Rights Reserved Page 111 User Manual Pattern Finder Pattern Search: Figure 12.14 Pattern Search Event duration tolerance: Define how far the pattern search should deviate from the length of the event. Event interval tolerance: Define how far the pattern search should deviate from the interval between each event. Filter by amplitude: The amplitude parameter associated with the behavioral event is taken into account when performing a pattern search. If the amplitude is outside the tolerance (%), it is removed. Filter by level: The behavioral events also have a level parameter associated with them. By checking this option you can restrict the pattern search to the levels found in the behavioral event analysis. Filter similar patterns: If occurrences of the same pattern intersect, the shorter occurrence is removed. This means that patterns that have the same events where one pattern is a subset of another, the subset occurrence is removed. Ignore zero events: In behavioral event analysis, zero events signify very little movement which can be interpreted as a non-action event. By checking this option the zero events will not be included in the pattern search. ©2015 Star-Oddi. All Rights Reserved Page 112 User Manual Pattern Finder Pattern Selection for Pattern Chart Figure 12.15 Pattern Selection for Pattern Chart With events from/to: The patterns are categorized by the number of events they contain. Select the number of events you want to include in the pattern. With occurrences from/to: Define the range of occurrences. For example, if you choose occurrences from 5 to 6 this will restrict the selection of patterns to patterns that have 5 or 6 occurrences With standard interval deviation from/to: Select pattern types with limited interval standard deviation, for example, ranging from 2 hours to 5 hours. Maximum results from each event length: Results from each event length is weighted either by occurrences or standard interval deviation. Maximum patterns: Define the maximum number of patterns per page. Total patterns selected: The total number of found pattern types Total occurrences: Total occurrences of all the patterns Page selection: The user can define which page to view. Page selection: The user can define which page of the chart to view. ©2015 Star-Oddi. All Rights Reserved Page 113 User Manual Pattern Finder Scanning data PatternFinder performs an automatic scan of all possible patterns. As can be seen in figure 12.14 this will usually produce many patterns. Under Pattern Search, the user can filter the patterns and see how the total number of patterns and occurrences reduces by clicking Search. You can perform the pattern search as often as you want. Under Pattern Selection for Pattern Chart the user can also limit the number of selected patterns by filling in the definitions and clicking Update. Once the number of patterns has been reduced to a manageable number, click OK and a multi pattern chart appears: Figure 12.16 Multi Pattern Chart The user can zoom in on the chart to get a better view of each pattern (see figure 12.17). ©2015 Star-Oddi. All Rights Reserved Page 114 User Manual Pattern Finder Figure 12.17 Multi Pattern Chart: Zoom 12.4 Multiple patterns To create a multi pattern chart, click the Create Multi Pattern Chart button A window listing the patterns appears: Figure 12.18 Create multi pattern chart You can filter the signals by selecting one of the options in the drop-down list (see figure 12.19). ©2015 Star-Oddi. All Rights Reserved Page 115 User Manual Pattern Finder Figure 12 19 Filter Select the patterns you want to include in the chart and click OK. The following window appears: Figure 12.20 Multi pattern chart You can only view one signal at a time. To switch between signals click the Select active series button on the chart bar. ©2015 Star-Oddi. All Rights Reserved Page 116 User Manual Pattern Finder The following window appears: Figure 12.21 Series list Select the signal you want to view on the chart and click OK. 12.5 Pattern operations Click the Pattern operation button and the following window appears: Figure 12.22 Pattern Operation The window on the left lists the Pattern types. Only the checked patterns will be used. ©2015 Star-Oddi. All Rights Reserved Page 117 User Manual Pattern Finder Filter Figure 12.23 Filter Amplitude: Check Filter by amplitude to use this option. The values must be within the defined range. Hit percent: Check Filter by hit percent to use this option. The values must be within the defined range. Duration (seconds) Filter by duration Group close occurrences Combine occurrences Output Filter the pattern type: All pattern occurrences outside the filter are removed. Filter to a new pattern type: All pattern occurrences within the range are included in a new pattern type. Insert a name for the new type. ©2015 Star-Oddi. All Rights Reserved Page 118 User Manual Pattern Finder Combine Figure 12.24 Combine: Intersection of occurrences Operation Intersection of occurrences: Check this option to find intersecting occurrences. A new pattern type with all the intersecting occurrences is created. Overlapping occurrences: Check this option to find overlapping occurrences. The resulting pattern types cannot intersect. Figure 12.25 Overlapping of occurrences Priority: There are two filters. The user needs to select which one is primary. Duration filters the overlapping pattern occurrences by length. Hit % filters the overlapping pattern occurrences with the higher hit percentage. Check Filter overlapping occurrences by priority in Output to activate the Priority option. By checking Combine adjacent and overlapping occurrences in Output all the overlapping occurrences will be combined into a single occurrence. ©2015 Star-Oddi. All Rights Reserved Page 119 User Manual Pattern Finder Union of occurrences: Finds all occurrences. The resulting pattern types cannot intersect. Priority works the same. Figure 12.26 Union of occurrences 12.6 Amplitude Figure 12.27 Amplitude Amplitude recalculates the amplitude using a new source. Select the pattern types you want to recalculate and choose the signal source. Note that only overlapping values are recalculated. Figure 12.28 shows the final results after all the operations have been performed. ©2015 Star-Oddi. All Rights Reserved Page 120 User Manual Pattern Finder Figure 12.28 Final chart 12.7 Periodic pattern statistics Open a pattern chart and click the Pattern period statistics button on the main toolbar. The following window appears: Figure 12.29 Create pattern statistics Select a pattern template and define the time-averaging period you want to analyze. The user can choose to perform a statistical analysis either by Amplitude or Duration. By checking Patterns overlap periods patterns that extend over two or more periods are split between periods. ©2015 Star-Oddi. All Rights Reserved Page 121 User Manual Pattern Finder Click OK and a pattern periodic statistics chart appears: Figure 12.30 Pattern Periodic Statistics Chart Save the chart and a STP file will be created. There are ten different parameters, each with its own color. By moving the cursor on the chart the value for each parameter is shown in the table on the right side of the chart (see figure 12.31). Figure 12.31 Table The table lists the following parameters: Number: The number of the period Date: The date of the period Time: The time of the period Max: Maximum duration of a pattern Min: Minimum duration of a pattern Middle: The average of max and min Occurrences: Number of pattern occurrences Total: The combined total duration of all the patterns ©2015 Star-Oddi. All Rights Reserved Page 122 User Manual Pattern Finder Mean: The standard average pattern duration Median: The mid value in the sequence of patterns arranged by duration Std. dev.: RSD: The relative standard deviation Mode: The mode is the value that appears most often in a set of data. Variance: In statistics variance measures how far a set of numbers is spread out. The square root of variance is called the standard deviation. To select the parameters you want to view in the chart, click the Active Series button on the chart bar. The following window appears: Figure 12.32 Series list Select the parameters you want to view and click OK. ©2015 Star-Oddi. All Rights Reserved Page 123 User Manual Pattern Finder In figure 12.33, all the parameters have been selected. Figure 12.33 Pattern Periodic Statistics Chart 12.8 Extracting signal from STP file To extract a signal from the STP file, click the Select signal to signal chart button on the main toolbar and the following window appears: Figure 12.34 Select series to export to signal chart ©2015 Star-Oddi. All Rights Reserved Page 124 User Manual Pattern Finder Select the signal and the data range you want to extract. Click OK and a chart displaying the extracted signal appears: Figure 12.35 Signal chart ©2015 Star-Oddi. All Rights Reserved Page 125 User Manual Pattern Finder 13. Import Files can be imported into PF where a SFP is created and the imported file is transformed into a DAT file. The files you want to import have to be text files where the data is arranged in columns. The imported data will be converted to a time series data where each row is represented by a singular time stamp. The data in the import files can be arranged in three ways: 1. Date and time is included in the import file (each line includes the measurement time and date). Figure 13.1 Option 1 2. The start time and sampling rate is specified in the import file header. Figure 13.2 Option 2 ©2015 Star-Oddi. All Rights Reserved Page 126 User Manual Pattern Finder 3. No header is included in the file. The user defines the start date, time and the sampling frequency in the import window (see figure 13.4). Figure 13.3 Option 3 13.1 Importing files To import data from other systems into PF, click on the Import file to new SFP button on the main toolbar The following window appears: Figure 13.4 Import file to new SFP project Browse for the file you want to import and name the project (see figure 13.4). ©2015 Star-Oddi. All Rights Reserved Page 127 User Manual Pattern Finder Column Setup 1. Define the number of data columns 2. Define the organization of data in the file 3. Set Start time and Interval if it is not included in the file 4. Fill in the definitions on how the data is organized in the imported file: Decimal point: Comma/Dot Column separation: Tab/Semicolon/Space/Comma Date format: dd mm yy/mm dd yy Date separation: Dot/Slash/Dash Time separation: Colon/Dot Date and time column definition: Joined data and time/Separate data and time Figure 13.5 Import file to new SFP project Once the definition has been filled out, click OK and the window in figure 13.6 appears: ©2015 Star-Oddi. All Rights Reserved Page 128 User Manual Pattern Finder Figure 13.6 Channel 1 For each data channel the user needs to define the signal unit and the number of decimals. The Unit Settings (figure 13.7) can be changed by clicking on the arrow on the right side of the Unit column (see figure 13.6). Figure 13.7 Unit Settings Once the user has defined the data, click OK and the data will be imported into PF as a SFP (see figure 13.8). Figure 13.8 Overview Pane To see if a file has been imported to PF select Project-Properties and the following window appears: ©2015 Star-Oddi. All Rights Reserved Page 129 User Manual Pattern Finder Figure 13.9 Project information In Project Information the user can view information on the project files and add comments about the project (see figure 13.9). Select Print to print out the information (see figure 13.10). Figure 13.10 Report Preview ©2015 Star-Oddi. All Rights Reserved Page 130 User Manual Pattern Finder 14. Export 14.1 Export via Edit chart Click the Edit chart button on the chart bar. Under the Export menu, there are three options: Pictures Native (data) Data (file) Picture Figure 14.1 Export Menu: Picture Under Picture, the user can Copy, Save and Send the chart as a picture in the following formats: Metafile Bitmap JPEG GIF PDF VML (HTM) SVG ©2015 Star-Oddi. All Rights Reserved Page 131 User Manual Pattern Finder Native Figure 14.2 Export Menu: Native Under Native the user can Copy, Save and Send the data and chart settings in the following formats: TEE (Binary) TXT XML Data Figure 14.3 Export Menu: Data ©2015 Star-Oddi. All Rights Reserved Page 132 User Manual Pattern Finder Under Data, the user can Copy, Save and Send the chart file in four formats: Text file (.txt) (see figure 14.4) XML (.xml) HTML (.hml) Excel (.xls) (see figure 14.5). Note that there is a 65.534 row limit Figure 14.4 Text file Figure 14.5 Excel ©2015 Star-Oddi. All Rights Reserved Page 133 User Manual Pattern Finder There are four Include options: 1. Point Index The point index is the same as the measurement number, but offset by -1, as it starts in 0 instead of 1. 2. Point Labels If the user has added text labels to points in the Data menu, these can be included. 3. Header The same headers as are in the Data menu. 4. Point Colors This option is not relevant in PF. Another method of exporting data is by clicking Alt + PrintScreen on the keyboard to copy an image of the PF window to the clipboard. The image can be pasted to another Windows application. 14.2 Export events Events can be exported for further analysis. Click the Export Events button appears: on the event chart bar and the following window Figure 14.6 Export data Select the event definition and the output format. CSV The data will be exported into one file organized in comma separated values. ©2015 Star-Oddi. All Rights Reserved Page 134 User Manual Pattern Finder Theme Two files are created that contain all the events as well as information about time, amplitude and level associated with each event (see figures 14.7 and 14.8). Figure 14.7 Export to Theme Figure 14.8 Export to Theme ©2015 Star-Oddi. All Rights Reserved Page 135 User Manual Pattern Finder 14.3 Export patterns Patterns can be exported for further analysis. Click the Export Patterns button window appears: on the pattern chart bar and the following Figure 14.9 Export data Select the pattern definition. The data will be exported into one file organized in comma separated values. ©2015 Star-Oddi. All Rights Reserved Page 136 User Manual Pattern Finder 15. Printing 15.1 Charts There are two ways to print out a chart: Open the chart you want to print out and select File-Print on the menu bar. The following window appears: Figure 15.1 Print preview Orientation The chart can be printed in either portrait or landscape format. Margins -scaled. The margins can be varied by either changing the numbers given for the left, right, top and bottom margins, or by moving the margin lines with the mouse bypressing and holding the left button as the lines are dragged. Move When the cursor is located on the chart, a hand becomes visible. By clicking on the chart and holding down the left button of the mouse, the graph can be moved around the page to a desired position. Details The size of horizontal and vertical gridlines as well as the text on the X and Y-axis can be re-scaled by using the scroll bar. The number of gridlines is increased when the bar is moved to the left. Another way of printing out a chart is opening the chart you want to print out and clicking the Print chart button on the chart bar (see figure 15.2). ©2015 Star-Oddi. All Rights Reserved Page 137 User Manual Pattern Finder Figure 15.2 Print chart The following window appears: Figure 15.3 Print chart The dialog window in figure 15.3 has the functions as the one in figure 15.1. ©2015 Star-Oddi. All Rights Reserved Page 138 User Manual Pattern Finder 15.2 History Open the chart which operation history you want to print out and click the History button on the chart bar. Figure 15.4 History button The window in figure 15.5 appears: Figure 15.5 History ©2015 Star-Oddi. All Rights Reserved Page 139 User Manual Pattern Finder Click on the Print button and the following window appears: Figure 15.6 Output options To change the selected printer, click Setup and select another printer. To see a preview of the print out, select Preview under Report Destination and click OK (see figure 15.6 and 15.7). Figure 15.7 Print preview ©2015 Star-Oddi. All Rights Reserved Page 140 User Manual Pattern Finder 15.3 Histogram To print out a histogram, open the chart which histogram you want to print out and click on the Histogram button (see figure 15.8). Figure 15.8 Histogram button The following window appears: Figure 15.9 Histogram Click Print and the following window appears: ©2015 Star-Oddi. All Rights Reserved Page 141 User Manual Pattern Finder Figure 15.10 Output Options The dialog window in figure 15.10 has the same functions as the one in figure 15.6. Select Preview and OK to see a preview of the histogram: Figure 15.11 Report preview ©2015 Star-Oddi. All Rights Reserved Page 142 User Manual Pattern Finder 15.4 Data list files (only in DAT) Open a project and activate the DAT chart. Click the View File Data button on the chart bar (see figure 15.12). Figure 15.12 View File Data A window with the data file appears (see figure 15.13). Figure 15.13 Data file To print out the file select File-Print on the menu bar and the following window appears: ©2015 Star-Oddi. All Rights Reserved Page 143 User Manual Pattern Finder Figure 15.14 Output Options To see a preview of the file, highlight the data you want to view, select Preview and click OK (see figure 15.15). Figure 15.15 Report Preview ©2015 Star-Oddi. All Rights Reserved Page 144 User Manual Pattern Finder 16. Create Mooring Line Chart 16.1 Prepping data in SeaStar PatternFinder uses DAT files in tilt analysis and the tilt data must be in the 90°system. This means that the data has to be reconverted with SeaStar V.65 or later. The reason for this is that previous tilt measurements in SeaStar were expressed both in the +90° system (A90 file) and in the +-180° system (DAT file). The tilt measurements are based on acceleration measurements that naturally convert to +-90° tilt angles with reference to the horizontal plane. The reason for going back to the +-90° system is the horizontal reference plane and limitations in the +-180° conversion. To visualize tilting (movement) around an axis in the logger itself, the user must specify if the pitch or roll is 180° and the other limited to 90°. This functionality is available in PatternFinder. 16.2 Transferring data to PatternFinder There are two options: a) After reconverting the data, open the DAT graph view and use the PatternFinder button in the graph to send the data to PatternFinder. A SFP is created for each DAT file. Having reconverted all the data files, make a new MFP in PatternFinder with all the new SFPs. b) Reconvert all the data files needed and copy the DAT files to a separate folder Make a new MPF in PatternFinder and add all the DAT files in the folder. 16.3 Analyzing tilt data in PatternFinder When viewing a DAT graph that has 3-axes tilt measurements, i.e., data from DST tilt, and DST magnetic, then a 3D graphical representation of the recorder becomes available. Click the Display 3D logger button on the chart bar (see figure 16.1). ©2015 Star-Oddi. All Rights Reserved Page 145 User Manual Pattern Finder Figure 16.1 tilt chart When clicking the button the following window appears on the left side of the chart. Figure 16.2 3D representation By right clicking the mouse on the 3D window there is an option to define the primary axis (pitch or roll) that will be kept in the +-90° system and then the secondary axis to rotate about the primary in the +-180° system. The 3D image of the logger will change with the movement of the cursor. Automated animation can be activated using the play button in the graph. The speed of the animation is adjustable by pressing the blue arrow buttons. ©2015 Star-Oddi. All Rights Reserved Page 146 User Manual Pattern Finder 16.4 Mooring line analysis in PatternFinder The Mooring-line analysis function is based on DAT files depth and 3 axes tilt measurements. It is assumed that the loggers were tied parallel to the line, nose up, and the distances between the loggers are known. Click on the Create Mooring Line Chart on the main toolbar. If a mooring line analysis has been done previously, a resulting chart can be found in the Collaborations section. Having started a new Mooring line analysis (with the function button) the user selects all the DAT files involved and their rope position, see figure 3. The distance value has the same depth unit as defined in SeaStar. The mooring line image will change with the movement of the cursor, manual operation. Automated animation can be activated using the play button in the graph. The speed of the animation is adjustable by pressing the blue arrow buttons. ©2015 Star-Oddi. All Rights Reserved Page 147