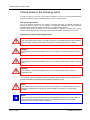
1
User Manual UM EN OPC 7015 / OPC 7022 Panel-PC with Touchscreen and Software-Keyboard, 15“,22”-Display with the frontsided protection IP65 UM EN OPC 7015/OPC 7022 8155_en_00 PHOENIX CONTACT UM EN OPC 7015/OPC 7022 AUTOMATION User Manual Panel-PC with Touchscreen and Software-Keyboard, 15“,22”Display with the frontsided protection IP65. 02/2011 Description: UM EN OPC 7015/OPC 7022 Revision: 00 This Manual is valid for the Panel PCs OPC 7015/OPC 7022 PxC Description 2700763 OPC 7015 S EXP 2700764 OPC 7015 S W7U 2700765 OPC 7015 S 2700766 OPC 7015 P W7U 2700767 OPC 7015 P 2700768 OPC 7022 S W7U 2700769 OPC 7022 S 2700770 OPC 7022 P W7U 2700771 OPC 7022 P PHOENIX CONTACT 8155_en_00 UM EN OPC 7015/OPC 7022 Please observe the following notes In order to ensure the safe use of the product described, you have to read and understand this manual. The following notes provide information on how to use this manual. User group of this manual The use of products described in this manual is oriented exclusively to qualified electricians or persons instructed by them, who are familiar with applicable standards and other regulations regarding electrical engineering and, in particular, the relevant safety concepts. Phoenix Contact accepts no liability for erroneous handling or damage to products from Phoenix Contact or third-party products resulting from disregard of information contained in this manual. Explanation of symbols used and signal words This is the safety alert symbol. It is used to alert you to potential personal injury hazards. Obey all safety messages that follow this symbol to avoid possible injury or death. Danger: This indicates a hazardous situation which, if not avoided, will result in death or serious injury. Warning: This indicates a hazardous situation which, if not avoided, could result in death or serious injury. Caution: This indicates a hazardous situation which, if not avoided, could result in minor or moderate injury. The following types of messages provide information about possible property damage and general information concerning proper operation and ease-of-use. Note: This symbol and the accompanying text alerts the reader to a situation which may cause damage or malfunction to the device, either hardware or software, or surrounding property. Note: This symbol and the accompanying text provides additional information to the reader. It is also used as a reference to other sources of information (manuals, data sheets, literature) on the subject matter, product, etc. 8155_en_00 PHOENIX CONTACT UM EN OPC 7015/OPC 7022 General terms and conditions of use for technical documentation Phoenix Contact reserves the right to alter, correct, and/or improve the technical documentation and the products described in the technical documentation at its own discretion and without giving prior notice, insofar as this is reasonable for the user. The same applies to any technical changes that serve the purpose of technical progress. The receipt of technical documentation (in particular data sheets, installation instructions, manuals, etc.) does not constitute any further duty on the part of Phoenix Contact to furnish information on alterations to products and/or technical documentation. Any other agreement shall only apply if expressly confirmed in writing by Phoenix Contact. Please note that the supplied documentation is product-specific documentation only and that you are responsible for checking the suitability and intended use of the products in your specific application, in particular with regard to observing the applicable standards and regulations. Although Phoenix Contact makes every effort to ensure that the information content is accurate, upto-date, and state-of-the-art, technical inaccuracies and/or printing errors in the information cannot be ruled out. Phoenix Contact does not offer any guarantees as to the reliability, accuracy or completeness of the information. All information made available in the technical data is supplied without any accompanying guarantee, whether expressly mentioned, implied or tacitly assumed. This information does not include any guarantees regarding quality, does not describe any fair marketable quality, and does not make any claims as to quality guarantees or guarantees regarding the suitability for a special purpose. Phoenix Contact accepts no liability or responsibility for errors or omissions in the content of the technical documentation (in particular data sheets, installation instructions, manuals, etc.). The aforementioned limitations of liability and exemptions from liability do not apply, in so far as liability must be assumed, e.g., according to product liability law, in cases of premeditation, gross negligence, on account of loss of life, physical injury or damage to health or on account of the violation of important contractual obligations. Claims for damages for the violation of important contractual obligations are, however, limited to contract-typical, predictable damages, provided there is no premeditation or gross negligence, or that liability is assumed on account of loss of life, physical injury or damage to health. This ruling does not imply a change in the burden of proof to the detriment of the user. PHOENIX CONTACT 8155_en_00 UM EN OPC 7015/OPC 7022 Statement of legal authority This manual, including all illustrations contained herein, is copyright protected. Use of this manual by any third party is forbidden. Reproduction, translation, and public disclosure, as well as electronic and photographic archiving or alteration requires the express written consent of Phoenix Contact. Violators are liable for damages. Phoenix Contact reserves all rights in the case of patent award or listing of a registered design. Third-party products are always named without reference to patent rights. The existence of such rights shall not be excluded. How to contact us Internet Up-to-date information on Phoenix Contact products and our Terms and Conditions can be found on the Internet at: http://www.phoenixcontact.com Make sure you always It can be downloaded at: www.phoenixcontact.net/catalog . use the latest documentation. Subsidiaries If there are any problems that cannot be solved using the documentation, please contact your Phoenix Contact subsidiary. Subsidiary contact information is available at www.phoenixcontact.com Published by PHOENIX CONTACT GmbH & Co. KG Flachsmarktstraße 8 32825 Blomberg DEUTSCHLAND Telefon +49 - (0) 52 35 - 3-00 Telefax +49 - (0) 52 35 - 3-4 12 00 PHOENIX CONTACT P.O. Box 4100 Harrisburg, PA 17111-0100 USA Phone +1-717-944-1300 Should you have any suggestions or recommendations for improvement of the contents and layout of our manuals, please send your comments to [email protected] . 8155_en_00 PHOENIX CONTACT UM EN OPC 7015/OPC 7022 INDEX 1 REMARKS ................................................................................................................................. 9 1.1 RELEVANT DOCUMENTATION FOR THE DEVICE .................................................................................. 9 1.2 DATA, FIGURES AND MODIFICATION .............................................................................................. 9 1.3 TRADE MARKS ........................................................................................................................ 9 1.4 7ENVIRONMENTAL CONDITIONS................................................................................................. 10 1.5 STANDARDS ......................................................................................................................... 11 1.6 EQUIPMENT VERSIONS ............................................................................................................ 11 1.7 SCOPE OF DELIVERY ............................................................................................................... 11 2 OPERATING INSTRUCTIONS ....................................................................................................... 12 2.1 OPERATING LOCATION ............................................................................................................ 12 2.2 DAMAGE DUE TO IMPROPER USE ................................................................................................ 12 2.3 WARRANTY / REPAIR .............................................................................................................. 13 2.4 TREATMENT AND DISPOSAL OF LITHIUM BATTERIES ......................................................................... 13 3 INSTALLATION ........................................................................................................................ 14 3.1 INSTALLATION OPTION ............................................................................................................ 14 3.2 EXTERNAL DIMENSIONS OF THE OPC 7013 MODEL ......................................................................... 15 3.3 INSTALLATION LAYOUT FOR OPC 7013 ....................................................................................... 16 3.4 EXTERNAL DIMENSIONS OF THE OPC 7015 MODEL ......................................................................... 17 3.5 INSTALLATION LAYOUT FOR OPC 7015 ....................................................................................... 18 3.6 EXTERNAL DIMENSIONS OF THE OPC 7022 MODEL ......................................................................... 19 3.7 INSTALLATION LAYOUT FOR OPC 7022 ....................................................................................... 20 3.8 ORDER OF INSTALLATION ........................................................................................................ 21 4 COMMISSIONING ..................................................................................................................... 24 4.1 AVAILABLE INTERFACES ........................................................................................................... 24 4.2 CABLE INSTALLATION ............................................................................................................. 24 4.3 ORDER OF STEPS DURING COMMISSIONING ................................................................................... 24 4.4 CHECK FOR OPERATIONAL READINESS.......................................................................................... 25 5 OPERATION ............................................................................................................................ 26 5.1 FRONT CONTROL KEYS ............................................................................................................ 26 5.2 SOFT KEYBOARD ................................................................................................................... 27 5.3 TOUCH SCREEN ..................................................................................................................... 28 5.4 STATUS INDICATORS .............................................................................................................. 28 6 INTERFACES............................................................................................................................ 29 6.1 INTERFACE SETUP .................................................................................................................. 29 6.2 24 V DC POWER SUPPLY ......................................................................................................... 29 6.3 USB CONNECTIONS ............................................................................................................... 29 6.4 NETWORK CONNECTION (RJ45) ................................................................................................ 30 6.5 SERIAL COM INTERFACE (RS232) ............................................................................................. 30 6.6 EXTERNAL DRIVES ................................................................................................................. 31 7 DRIVES .................................................................................................................................. 32 7.1 HARD DRIVE / SSD FLASH MEMORY ............................................................................................ 32 PHOENIX CONTACT 8155_en_00 UM EN OPC 7015/OPC 7022 SOFTWARE & DRIVER INSTALLATION .......................................................................................... 33 8 8.1 INSTALLING THE OPERATING SYSTEM ........................................................................................... 33 8.2 TOUCH SCREEN DRIVER INSTALLATION ......................................................................................... 34 8.3 SOFT KEYBOARD .................................................................................................................... 34 9 COMPONENT REPLACEMENT ....................................................................................................... 35 9.1 OPENING THE SERVICE SLOT ..................................................................................................... 35 9.2 1. HDD (HARD DISK) REPLACEMENT ........................................................................................... 37 9.3 2. FAN REPLACEMENT .............................................................................................................. 38 9.4 3. WORKING MEMORY (RAM) REPLACEMENT ................................................................................. 39 9.5 4. REPLACING THE LITHIUM BATTERY ........................................................................................... 40 9.6 5. REPLACING THE FLASH MODULES ............................................................................................. 41 nike Hinweise/Wirüber uns/Wir über uns @ 2\mod_1254923190378_6.doc @ 6522 @Pos: 2 /Datentechnik/Allgemeine Hinweise/Relevante Dokumentationen zum Gerät/Relevante Dokumentationen für OPC / CPC / OTC / VMT /STC @ 2\mod_1268662117522_6.doc @ 7352 @ 8155_en_00 PHOENIX CONTACT UM EN OPC 7015/OPC 7022 1 REMARKS 1.1 RELEVANT DOCUMENTATION FOR THE DEVICE The following documents are essential for setting up and operating this device: USER MANUAL (THIS DOCUMENTATION): Contains information for installation, commissioning and operating the device along with technical data of the device hardware. Pos: 3 /Datentechnik/Allgemeine Hinweise/Erläuterung zu den verwendeten Symbolen/Erläuterung zu den verwendeten Symbolen @ 0\mod_1158752779484_6.doc @ 141 @ Pos: 4 /Datentechnik/Allgemeine Hinweise/Daten, Abbildungen, Änderungen/Daten,Abbildungen,Änderungen @ 1\mod_1235480498775_6.doc @ 5162 @ 1.2 DATA, FIGURES AND MODIFICATION All texts, data and figures are non-binding. All these materials are subject to modification due to technological advances. Our products comply with all provisions and requirements of the legislation at the point in time when the products leave our company premises. The operator/operating company bears sole responsibility for the compliance with any consecutive new technological requirement and adherence to any consecutive new legislatory provision, as well as for the observance of their obligation as the operator/operating company. Pos: 5 /Datentechnik/Allgemeine Hinweise/Warenzeichen/Warenzeichen @ 2\mod_1263298182965_6.doc @ 6972 @ 1.3 TRADE MARKS We would like to emphasise that all names of hardware and software products used in this documentation, as well as all brand names of corresponding companies are subject to the general copyrights of the intellectual property in terms of trademarks, brand names and patents. Windows®, Windows® CE are registered trademarks of Microsoft Corp. Intel®, Pentium®, Atom™, Core™2, are registered trademarks of Intel Corp. IBM®, PS/2® and VGA® are registered trademarks of IBM Corp. CompactFlash® is a registered trademark of the Compact Flash Association. RITTAL® is a registered trademark of Rittal Werk Rudolf Loh GmbH & Co. KG. Pos: 6 /Datentechnik/Allgemeine Hinweise/Urheberrecht/Urheberrecht @ 0\mod_1158756954232_6.doc @ 153 @ Any other national and international trademarks and product names shall hereby also be recognised. PHOENIX CONTACT 8155_en_00 UM EN OPC 7015/OPC 7022 Pos: 7 /Datentechnik/Allgemeine Hinweise/Umweltbedingungen/Umwelbedingungen für OPC 7013 / 7015 / 7022 @ 2\mod_1257325662755_6.doc @ 6783 @ 1.4 7ENVIRONMENTAL CONDITIONS The device may be operated under the following conditions. Failure to observe these specifications will terminate any warranty for this device. Phoenix Contact cannot be held liable for any damages arising due to improper use and handling. Temperature for OPC7008 In operation -20 … +55°C* (*only with Flash SSD) for storage -30 … +75°C Temperature for devices OPC 7013/7015 In operation In operation +5 … +45°C -20 … +60°C* (*valid only with Flash SSD, Automotive HDD or 2,5" Industrial SSD) for storage -30 … +65°C for storage -30 … +75°C* (*valid only with Flash SSD, Automotive HDD or 2,5" Industrial SSD) Temperature for device OPC 7022 In operation +5 … +45°C for storage -20 … +60°C Humidity: In operation 10 … 85% without condensate For storage 10 … 85% without condensate Vibration resistance In operation 1 G, 10 … 500 Hz (DIN EN 60068-2-6) Shock resistance In operation 5 G, with a half-wave of 30 ms duration (DIN EN 60068-2-27) Pos: 8 /Datentechnik/Allgemeine Hinweise/Normen/Normen @ 1\mod_1219145812377_6.doc @ 3945 @ 8155_en_00 PHOENIX CONTACT UM EN OPC 7015/OPC 7022 1.5 STANDARDS This device complies with the requirements and protective aims of the following EC regulations: This device meets the test requirements for granting the CE sign according to the European test standards EN 61000-6-4 and EN 61000-6-2. This device complies with the test requirements in accordance with EN 60950 (VDE0805, IEC950) "Safety of Information Technology Equipment" The device meets the EN 60068-2-6 standard test requirements (sinus excitation). The device meets the EN 60068-2-27 standard test requirements (shock resistance test). Note: A respective conformity declaration for the authority in charge is available at the manufacturer and may be viewed on request. All connected components, as well as cable connections must also meet these requirements for compliance with the EMC legislation. For this reason, screened bus and LAN cables including screened connectors must be used and installed according to the instructions in this user manual. Pos: 9 /Datentechnik/Allgemeine Hinweise/Ausstattungsvarianten/Ausstattungsvarianten für OPC6000/7000 @ 2\mod_1265643750549_6.doc @ 7192 @ 1.6 EQUIPMENT VERSIONS The system is available in two equipment versions: Platform including a Flash SSD: Without any rotating mass storage device (hard disk, etc.) and including an embedded operating system (Windows CE / XP embedded) for stationary use. Platform including a hard disc: Pos: 10 /Datentechnik/Allgemeine Hinweise/Lieferumfang/Lieferumfang für OPC7008 / 7013 / 7015 / 7022 @ 2\mod_1257320771863_6.doc @ 6773 @ 1.7 Equipped with a hard disk for stationary use with a standard operating system, e.g. for applications in the manufacturing department. SCOPE OF DELIVERY Please check that all of the following components are contained in the packaging: 1 x device With 24 V DC devices: 3-pin lead-through plug from Phoenix Contact, 3-pin 3.81 OPC7 with a screw connection (already connected with device socket) Service CD Optional delivery scope Operating system Pos: 11 /Datentechnik/Betriebshinweise/Betriebsort/Betriebsort für OPC-Serie / IPC- Serie / CPC- Serie / PLC-Serie / ITC-Serie / OTC-Serie @ 0\mod_1158827335567_6.doc @ 217 @ PHOENIX CONTACT 8155_en_00 UM EN OPC 7015/OPC 7022 2 OPERATING INSTRUCTIONS This device contains electrical voltages and extremely sensitive components. User intervention is restricted to plugging in additional cards only. The manufacturer or a service partner authorised by the manufacturer should be consulted if you plan to make further modifications. For this type of work, the device must be switched off at the mains and the power lead must be disconnected. Suitable measures for avoiding electrostatic discharge towards parts of the components when touching the equipment must be taken. If the device is opened by an unauthorised person, hazards for the user might arise and any warranty claim will cease. General instructions: All users must read this manual and have access to it at all times. Installation, commissioning and operation may only be carried out by trained and qualified staff. The security instructions and the manual itself must be observed by all persons who work with this device. At the location of use the valid guidelines and regulations for accident prevention must be observed. The manual contains the most important instructions on how to use this device in a safe way. Appropriate storage, proper transport, installation and commissioning, as well as careful operation are prerequisites for ensuring safe and proper operation of the device. Warning: Any leads (e.g. power leads, interface cables) may only be connected if the device is switched off in order to avoid damaging the device. 2.1 OPERATING LOCATION The control system is designed for use inside a switching cabinet. You must ensure compliance with the specified environmental conditions. Using the device in non-specified environments, for example, on board ships, or in areas that might contain explosive gases or in extreme heights is prohibited. Warning: The device may only be switched on after acclimatising to the ambient temperature in order to avoid condensate accumulation. The same applies if the device has previously been exposed to extreme temperature variations. To avoid overheating: The device must not be exposed to direct radiation by sunlight or any other light or heat source. If the device is integrated in a panel, casing or similar enclosures, you must ensure that no heat accumulation builds up. The maximum permissible environmental temperature must never be exceeded. Pos: 12 /Datentechnik/Betriebshinweise/Schäden durch unsachgemäßen Gebrauch/Schäden durch unsachgemäßen Gebrauch @ 0\mod_1158827867958_6.doc @ 221 @ 2.2 DAMAGE DUE TO IMPROPER USE If the control system shows any obvious damage, e.g. caused by improper operating or storage conditions or by improper use or handling, you must immediately put the device out of operation and protect it from being accidentally switched on. Pos: 13 /Datentechnik/Betriebshinweise/Gewährleistung / Reparatur/Gewährleistung / Reparatur @ 0\mod_1158828054427_6.doc @ 223 @ 8155_en_00 PHOENIX CONTACT UM EN OPC 7015/OPC 7022 2.3 WARRANTY / REPAIR During the warranty period, any repair must be carried out by the manufacturer or by persons duly authorised by the manufacturer only. Pos: 14 /Datentechnik/Betriebshinweise/Behandlung und Entsorgung von Lithium-Batterien/Behandlung und Entsorgung von Lithium-Batterien @ 1\mod_1247056308470_6.doc @ 5922 @ 2.4 TREATMENT AND DISPOSAL OF LITHIUM BATTERIES This device contains a lithium battery for supplying the system clock with power as long as the supply voltage is not connected. The battery has a life cycle of 3 - 5 years depending on which load is applied. Note: The more the battery is exposed to higher temperatures, the faster it ages. Warning: There is an acute risk of explosion should the wrong type of battery be used. Warning: Do not put lithium batteries into a fire, do not solder on the cell body, do not recharge them, open them, short-circuit them, do not reverse their polarity or heat them up over 100°C; dispose of them properly and protect lithium batteries from direct sun light, humidity and condensation. Lithium batteries may only be replaced by the same type, or by a type recommended by the manufacturer. Pos: 15 /Datentechnik/Montage/Montagemöglichkeiten/Montagemöglichkeit für OPC7008 / 7013 / 7015 / 7022 @ 2\mod_1257329372078_6.doc @ 6802 @ The lithium battery must be disposed of according to the local legislation at the end of its life cycle. PHOENIX CONTACT 8155_en_00 UM EN OPC 7015/OPC 7022 3 INSTALLATION 3.1 INSTALLATION OPTION This device is intended for integration into switch panels or switching cabinets. In order to allow for a safe installation and operation (connector access), these switch panels or control desks must be accessible from the back. The device can be integrated into switching cabinets with a wall thickness of 2 to 13 mm. We recommend a minimum of 3 mm for correct installation with an IP65 front protection class. Warning: To avoid overheating in operation: The device must not be exposed to direct radiation by sunlight or any other light or heat source. If the device is integrated in a panel, casing or similar enclosures, you must ensure that no heat accumulation builds up. The maximum permissible environmental temperature must never be exceeded. Devices including a data drive must only perpendicularly be integrated. Any deviation must be agreed with Phoenix Contact. The IP65 protection class is only achieved after correct installation. Note: When selecting the enclosure for integration, the power dissipation total of the system including that of all integrated PCBs must be taken into account. The enclosure must be calculated in such a way that the maximum environmental temperature is not exceeded in any case. Pos: 16 /Datentechnik/Montage/Montageskizzen/Außenabmessungen des Geräts/Montageskizze des Geräts OPC 7013 / 7015 / 7022 @ 2\mod_1257325856744_6.doc @ 6786 @ 8155_en_00 PHOENIX CONTACT UM EN OPC 7015/OPC 7022 3.2 EXTERNAL DIMENSIONS OF THE OPC 7013 MODEL PHOENIX CONTACT 8155_en_00 UM EN OPC 7015/OPC 7022 3.3 INSTALLATION LAYOUT FOR OPC 7013 8155_en_00 PHOENIX CONTACT UM EN OPC 7015/OPC 7022 3.4 EXTERNAL DIMENSIONS OF THE OPC 7015 MODEL PHOENIX CONTACT 8155_en_00 UM EN OPC 7015/OPC 7022 3.5 INSTALLATION LAYOUT FOR OPC 7015 8155_en_00 PHOENIX CONTACT UM EN OPC 7015/OPC 7022 3.6 EXTERNAL DIMENSIONS OF THE OPC 7022 MODEL PHOENIX CONTACT 8155_en_00 UM EN OPC 7015/OPC 7022 3.7 INSTALLATION LAYOUT FOR OPC 7022 Pos: 17 /Datentechnik/Montage/Reihenfolge der Montage/Reihenfolge der Montage für OPC 7013 / 7015 / 7022 @ 2\mod_1257325957019_6.doc @ 6790 @ 8155_en_00 PHOENIX CONTACT UM EN OPC 7015/OPC 7022 3.8 ORDER OF INSTALLATION INTEGRATING THE DEVICE IN AN INSTALLATION RECESS Warning: The PC must be switched off before connecting or disconnecting any cables in order to prevent damage to the electronics! The device may only be switched on after acclimatising to the ambient temperature in order to avoid condensate accumulation. Make sure to meet the permissible voltage requirements for this device. After switching off and before switching on you must wait for at least 5 seconds. Note: The device is connected with the power supply network by using the enclosed power cable or by using a lead-through terminal incl. a screw connection. Establishing a separate earthing connection is not required since the earthing is done via the protective earth connection of the device plug / power supply connector. If additional earthing is provided, a wire cross section of at least 2.5mm² must be used. 1) Cut out the recess from the switch board or switching cabinet door in accordance with the installation layout. The fixing screws for the tensioners must be installed. The screws can be loosened by using a screw driver of size TX8. PHOENIX CONTACT 8155_en_00 UM EN OPC 7015/OPC 7022 2) Then insert the device into the recess created in the described way. The tensioners will snap back. 3) Please make sure to insert the device carefully into the switching cabinet. After that, the tensioners will snap back to the front. Now, the device is safely fixed in the installation recess. 8155_en_00 PHOENIX CONTACT UM EN OPC 7015/OPC 7022 4) Tensioners must be fastened hand-tight. Pos: 18 /Datentechnik/Inbetriebnahme/Systemmerkmale/Inbetriebnahme für OPC 7013 / 7015 / 7022 @ 2\mod_1257326026010_6.doc @ 6795 @ PHOENIX CONTACT 8155_en_00 UM EN OPC 7015/OPC 7022 4 COMMISSIONING Warning: The PC must be switched off before connecting or disconnecting any cables in order to prevent damage to the electronics! The device may only be switched on after acclimatising to the ambient temperature in order to avoid condensate accumulation. Make sure to meet the permissible voltage requirements for this device. After switching off and before switching on you must wait for at least 5 seconds. 4.1 AVAILABLE INTERFACES The devices have the following interfaces by default: Note: The screen of a data cable must always be connected with the connector housing (EMC). Under the embedded operating system, interfaces must explicitly be enabled and required drivers must be installed in order to be able to use them. Pos: 19 /Datentechnik/Inbetriebnahme/Kabelmontage/Kabelmontage für OPC7000-Serie @ 2\mod_1271079309582_6.doc @ 7602 @ 4.2 CABLE INSTALLATION The interfaces as well as power supply plugs for the device are accommodated in the device service slot. Pos: 20 /Datentechnik/Inbetriebnahme/Reihenfolge der Inbetriebnahme/Reihenfolge der Inbetriebnahme für OPC7000-Serie @ 2\mod_1271079348034_6.doc @ 7606 @ 4.3 ORDER OF STEPS DURING COMMISSIONING With 24 V DC devices: Connect the power supply cable with the terminals by using cable end sleeves Connect cable for serial / parallel data transmission and fasten the screws between the connector plug and socket Plug in all other required cables and protect from accidental disconnection Pos: 21 /Datentechnik/Inbetriebnahme/Betriebsbereitschaft prüfen/Betriebsbereitschaft prüfen für OPC/CPC/PLC/OTC/ITC/VMT-Serie(+Monitore) / IPC 5100/5500/2400/1100 @ 0\mod_1158905578361_6.doc @ 381 @ 8155_en_00 PHOENIX CONTACT UM EN OPC 7015/OPC 7022 4.4 CHECK FOR OPERATIONAL READINESS Check the device for any hidden damage potentially caused by improper transport, operating or storage conditions or by improper use or handling (e.g. smoke development from the device, etc.). If any damage is detected, the device must be put out of service immediately and protected from accidental switch-on. Pos: 22 /Datentechnik/Bedienung/Frontseitige Tasten/Frontseitige Bedientasten für OPC 7013 / 7015 / 7022 @ 2\mod_1257326176256_6.doc @ 6799 @ PHOENIX CONTACT 8155_en_00 UM EN OPC 7015/OPC 7022 5 OPERATION 5.1 FRONT CONTROL KEYS Depending on the equipment version, an operating system and a soft keyboard has previously been installed ex works. The keys on the front panel are occupied with the following functions by a specific driver in the soft keyboard: Level 1: Activate and deactivate the soft keyboard for letter/character input by using the touch screen. Level 2: Decrease display brightness. Level 1: Change task (Alt+ESC) in Windows. Level 2: Increase display brightness. Level 1: Not allocated. The configuration of this level can be customised by programming via the soft keyboard programme. Level 1: Right mouse-key function. Shift key (SHIFT) for activating the second keyboard level. This key must be pressed simultaneously with the desired function key. Note: If the software keyboard is not installed, only the functions for display settings are active. When changing the values, no representation is visible on the screen. The key functions can have been previously modified in accordance with customer specific requirements. The above described functions are pre-set ex works. Pos: 23 /Datentechnik/Bedienung/Softkeyboard/Softkeyboard für OPC / CPC / OTC / VMT / STC-Serie @ 1\mod_1204714082851_6.doc @ 3402 @ 8155_en_00 PHOENIX CONTACT UM EN OPC 7015/OPC 7022 5.2 SOFT KEYBOARD If an operating system is installed ex works, the soft keyboard is also preinstalled. If the operating system is delivered separately with the device, the soft keyboard must also be installed on site. By using the soft keyboard, data can be entered via the touch screen like with an external keyboard. HOW TO OPERATE THE SOFT KEYBOARD FROM VERSION 3.11: Activate and deactivate the soft keyboard for letter/character input using the touch screen Switches numeric keys on and off (only if numeric keys are visible) Switching between different representations (Alphanumeric keys Numeric keys Function key bar) Soft keyboard representation, zoom in Soft keyboard representation, zoom out Note: If a function is to be activated, which requires pressing two keys at the same time (e.g. Alt + F4), these keys have to be pushed one after another at the soft keyboard, and the special keys Shift, Alt and Ctrl must always be pushed first. Due to differences in programming of a large variety of software programmes, we cannot ensure that the soft keyboard works properly with all available software. When deactivating the soft keyboard, the previously active state (alphanumeric / numeric keys or function keys) will be stored and will be displayed when re-activating the keyboard. Pos: 24 /Datentechnik/Bedienung/Touch Screen/Touch Screen für VMT 60xx/OPC7000 @ 1\mod_1246361069977_6.doc @ 5853 @ PHOENIX CONTACT 8155_en_00 UM EN OPC 7015/OPC 7022 5.3 TOUCH SCREEN The control system is equipped with a touch screen monitor. The touch screen monitor is internally connected with the USB interface. The driver software required for using the touch screen is integrated in the corresponding operating system, or can alternatively be installed from the enclosed service CD. Pos: 25 /Datentechnik/Bedienung/Status-Anzeigen/SYS-LED/SYS-LED für OPC / CPC / PLC / OTC / ITC / VMT (+Monitore) - Serie / IPC 5100 / 5300 / 5500 / 1100 @ 1\mod_1204714132162_6.doc @ 3405 @ 5.4 STATUS INDICATORS SYS LED (BICOLOURED) Depending on the colour and type of flashing, different device states are displayed by the SYS LED. The following signals are displayed: LED lights green The device is ready for operation. (POWER ON) LED is off The device is switched off. (POWER OFF) Pos: 26 /Datentechnik/Schnittstellen/Schnittstelleneinstellung/Schnittstelleneinstellung für OPC 7013 / 7015 / 7022 @ 2\mod_1270819127289_6.doc @ 7586 @ 8155_en_00 PHOENIX CONTACT UM EN OPC 7015/OPC 7022 6 INTERFACES 6.1 INTERFACE SETUP INTERFACE IRQ ADDRESS COM1 4 3F8h-3FF Pos: 27 /Datentechnik/Schnittstellen/Spannungsversorgung/Spannungsversorgung für OPC7000-Serie @ 2\mod_1270724385376_6.doc @ 7572 @ 6.2 24 V DC POWER SUPPLY This power supply is provided to the device by using a lead-through terminal with a screw connection. (The figure shows the socket inside the device) PIN NUMBER SIGNAL NAME 1 24 V DC 2 PE 3 0 V DC Technical data of the power adapter Input voltage: 19…29 V DC Max. switch-on current: 7A (10ms) Pos: 28 /Datentechnik/Schnittstellen/USB-Anschluss/USB-Anschluss für OPC / IPC / CPC / PLC / OTC / ITC / VMT / MSD-Serie @ 0\mod_1158923823971_6.doc @ 547 @ 6.3 USB CONNECTIONS The USB interfaces are used for connecting peripherals with USB connection. The interface complies with the USB 2.0 standard. PIN NUMBER SIGNAL NAME 1 VDC 2 D- 3 D+ 4 GND Note: The USB interfaces can be locked by using the "Lock USB" software tool. USB CONNECTION IN THE FRONT PANEL One USB interface can be accessed from the front. The interface is located under a plastic cover underneath the display. The cover has a tab on the right-hand side, which is used for opening. The plastic cover of the USB interface must be returned in protective position after use. Pos: 29 /Datentechnik/Schnittstellen/Netzwerkanschluss RJ45/Netzwerkanschluss RJ45 für OPC / IPC / CPC / PLC / OTC / ITC / VMT-Serie/LSI 5015 SEW @ 0\mod_1158924094127_6.doc @ 549 @ PHOENIX CONTACT 8155_en_00 UM EN OPC 7015/OPC 7022 6.4 NETWORK CONNECTION (RJ45) If the drivers required for functioning are installed on the device, the control system may be integrated in an Ethernet network supporting the 10/100 Mbit standard by using the Ethernet 10/100BaseT network connector. Specifications of this network topology must be observed in this case. You can install the drivers required for the network function from the enclosed service CD, should they not be installed on the device. PIN NUMBER SIGNAL NAME 1 TX + 2 TX - 3 RX + 4 NC 5 NC 6 RX - 7 NC 8 NC Pos: 30 /Datentechnik/Schnittstellen/Serielle Schnittstelle COM RS232/Serielle Schnittstelle COM (RS232) für OPC / IPC / CPC / PLC / OTC / ITC / VMT / MSA-Serie @ 1\mod_1249303286408_6.doc @ 6104 @ 6.5 SERIAL COM INTERFACE (RS232) The serial interface is also used for digital data transmission. The RS232 interface can be connected by using a commercially available 9-pin SUB-D cable. PIN NUMBER SIGNAL NAME 1 DCD 2 RxD 3 TxD 4 DTR 5 GND 6 DSR 7 RTS 8 CTS 9 RI Note: This interface is not electrically isolated. Pos: 31 /Datentechnik/Laufwerke/Externe Laufwerke/Externe Laufwerke für OPC 5112 / 5115 / 5117 / IPC 1100 / CPC / PLC / OTC / ITC / VMT-Serie @ 0\mod_1158926656205_6.doc @ 563 @ 8155_en_00 PHOENIX CONTACT UM EN OPC 7015/OPC 7022 6.6 EXTERNAL DRIVES By default, no drive for removable media (CD/floppy disk) is integrated in the device. Instead, the system provides a USB interface, to which an external drive can be connected. In this case you'd have to ensure that the used device is suitable for industrial environments. Warning: Connecting or disconnecting external drives during operation is not admissible, since it cannot be excluded that the drive might be in use while connecting or disconnecting it. Data loss might result in the event of non-compliance! Pos: 32 /Datentechnik/Laufwerke/Festplatte / Compact Flash/Festplatte Compact Flash für OPC 7013/15/22-Serie @ 2\mod_1271079760321_6.doc @ 7611 @ PHOENIX CONTACT 8155_en_00 UM EN OPC 7015/OPC 7022 7 DRIVES 7.1 HARD DRIVE / SSD FLASH MEMORY The storage medium is selected according to the customer requirements. The following options are available for storage: SSD Flash memory: An SSD flash memory is used. Its capacity depends on the desired operating system and the additional programmes to be installed. Hard disk: A 2.5" hard disk with at least 40 GB (SATA) capacity is used. On delivery, the hard disk is formatted in NTFS format (default for Windows XP). Note: Recommendation for the choice of storage medium with a basic installation: SSD Flash memory: Windows CE.net / Windows XP embedded Hard disk: Windows XP Professional Pos: 33 /Datentechnik/Software / Treiber Installation/Installation des Betriebssystems/Installation des Bertiebssystems für/IPC 11/CPC/PLC/OTC/ VMT-Serie/OPC -Serie @ 2\mod_1265704862204_6.doc @ 7216 @ 8155_en_00 PHOENIX CONTACT UM EN OPC 7015/OPC 7022 8 SOFTWARE & DRIVER INSTALLATION The device will be delivered with a pre-installed Windows / Linux operating system depending on what the customer wants. The drivers required for this are already installed and the operating system will be enabled by entering the licence information. Should an initial installation be required, please proceed according to the following steps. With a newer operating system like Windows XP, the network card and graphics card will properly be recognised during the initial installation, so that only the touch screen driver and the soft keyboard must be installed separately. Note: If the hard drive was formatted, the operating system can be reinstalled by using one of the existing interfaces. An external keyboard is required for installation. 8.1 INSTALLING THE OPERATING SYSTEM The device does not have any integrated CD drive. The installation of the operating system can therefore only be carried out by using the USB interface. Procedure for installation: The boot drive in the system BIOS must be switched to USB in order to be able to boot the device from the USB interface. Restart the device and insert a Windows CD. Install Windows and set up the basic data. With devices including a touch screen monitor, the touch screen driver as well as the soft keyboard should be installed in order to ensure full functionality. With Windows CE or Windows XP embedded, a complete image can also be installed by using a USB stick. Pos: 34 /Datentechnik/Software / Treiber Installation/Touch Screen/Touch Screen Installation für OPC7000 @ 2\mod_1271148800775_6.doc @ 7622 @ PHOENIX CONTACT 8155_en_00 UM EN OPC 7015/OPC 7022 8.2 TOUCH SCREEN DRIVER INSTALLATION Note: When installing the driver, you'll have to take in account that the touch screen monitor is internally connected with the USB interface! The installation has to be carried out as described below: The device does not have any integrated CD drive. The installation of the operating system can therefore only be carried out by using the USB interface. Access the service CD by using the Explorer and start the Installer file in the TouchScreen folder. Follow the on-screen instructions and acknowledge the licence terms and conditions. Once the installer has completed the installation, shut down the computer and restart it subsequently. After restarting, the touch screen monitor has to be calibrated. If the driver does not automatically start, activate the setup menu via "Start => Settings => Control panel => Elo Touchscreen". Via the "Calibration data" menu, calibrating the touch screen monitor can be started, and the crosses appearing in a succession on the monitor have to be pushed for calibration. Once the cursor position perfectly matches the touch point of your finger, you can exit this control menu by pushing "OK". Pos: 35 /Datentechnik/Software / Treiber Installation/Softkeyboard/Softkeytastatur für alle Gerät ohne internes Laufwerk(CD/DVD) @ 0\mod_1159175310134_6.doc @ 667 @ 8.3 SOFT KEYBOARD The soft keyboard must be installed from the enclosed service CD-ROM in order to ensure usability of the five keys (except for the VMT series, where you have six keys) underneath the monitor. The installation has to be carried out as described below: Plug in connector of external drive at the device Switch on PC, insert driver CD into drive after booting Start installer from the service CD Follow on-screen instructions, install the driver, select the language and confirm the restart of the computer. Note: You can make further changes to the basic settings of the soft keyboard, if required. You'll find more information about this topic in the "Readme" file in the installation folder for the soft keyboard. Pos: 36 /Datentechnik/Technische Daten/OPC-Serie/OPC7000-Serie/Technische Daten OPC7000-Serie @ 2\mod_1257151646428_6.doc @ 6743 @ Pos: 37 /Datentechnik/Service und Support/Service & Support @ 2\mod_1254312498746_6.doc @ 6472 @ Pos: 38 /Datentechnik/Sondergeräte-Module/OPC7000-Serie/Wechsel von Komponenten 7013 / 7015 / 7022 @ 2\mod_1259594103307_6.doc @ 6842 @ 8155_en_00 PHOENIX CONTACT UM EN OPC 7015/OPC 7022 9 COMPONENT REPLACEMENT Warning: Make sure that all cable connections are removed and that all supply voltages are disconnected from the device! 9.1 OPENING THE SERVICE SLOT Remove the four screws holding the service slot on the rear of the device. The screws can be removed by using a screw driver of Tx10 size. By using the groove on the top of the slot cover, you can tilt the rear cover to the front and finally remove it. PHOENIX CONTACT 8155_en_00 UM EN OPC 7015/OPC 7022 Removing the service slot cover gives you the opportunity of replacing the following components: 8155_en_00 1 HDD 2 Fan 3 RAM 4 Lithium battery 5 Flash modules PHOENIX CONTACT UM EN OPC 7015/OPC 7022 9.2 1. HDD (HARD DISK) REPLACEMENT REMOVAL The pulling aid provided on the HDD should be used for removing the HDD from the device. Please pull the HDD carefully out. INSTALLATION The HDD must carefully be lowered into the slot and then pushed down until you feel that it has snapped in. PHOENIX CONTACT 8155_en_00 UM EN OPC 7015/OPC 7022 9.3 2. FAN REPLACEMENT Warning: The fan supply cable must be pulled off before replacing the fan! REMOVAL Remove the screws holding the fan by using a Tx10 size The fan can now be lifted from the body and be replaced with a new fan. screw driver. INSTALLATION Reinstall all previously removed screws and plug the fan supply cable in. 8155_en_00 PHOENIX CONTACT UM EN OPC 7015/OPC 7022 9.4 3. WORKING MEMORY (RAM) REPLACEMENT REMOVAL The RAM component is unlocked and released by pulling both retainer clamps to the outside (1+2) and can be replaced with a new RAM. INSTALLATION Put the new RAM into the designated slot and push it to the rear until the retainer clamps snap in and lock it in place. PHOENIX CONTACT 8155_en_00 UM EN OPC 7015/OPC 7022 9.5 4. REPLACING THE LITHIUM BATTERY LOOSENING / REMOVING THE RETAINER CLIP 1) The battery is kept in place with a plugged in retainer clip. The retainer clip can be removed from the battery compartment by carefully lifting the external tabs by using a flat-bladed tool (screw driver). INSTALLING / REPLACING THE BATTERY 2) Now the lithium battery can be removed. It must only be replaced by the same battery type. The type of battery to be used is: Lithium battery 1/2AA 3V (e.g. Phoenix Contact part number: DZ-SONS04100-0) Please observe the correct polarity when replacing the battery. Warning: There is a risk of explosion if the battery is replaced with the wrong type or with the wrong polarity. Adhere to the valid regulations for environmentally-friendly disposal of batteries if the battery has reached the end of its life cycle. 8155_en_00 PHOENIX CONTACT UM EN OPC 7015/OPC 7022 9.6 5. REPLACING THE FLASH MODULES Note: The HDD (hard disk) must be removed before installing or replacing any of the SSD flash modules. REMOVAL Remove the screw(s) of the spacer bolt by using a Tx10 screw driver. PHOENIX CONTACT 8155_en_00 UM EN OPC 7015/OPC 7022 INSTALLATION 1) Carefully place the SSD flash module on top of the SSD flash slot so that the contacts on both sides match and press it carefully down. 2) Make sure that the SSD flash module is correctly put in place, and that the contacts are properly connected with the SSD flash slot contacts. Fasten the SSD flash module in position by using the previously removed screw. ===== End of bill of materials ===== 8155_en_00 PHOENIX CONTACT