Download eTrust SSO Implementation Guide
Transcript
eTrust Single Sign-On Implementation Guide 7.0 G00106-2E This documentation and related computer software program (hereinafter referred to as the “Documentation”) is for the end user’s informational purposes only and is subject to change or withdrawal by Computer Associates International, Inc. (“CA”) at any time. This documentation may not be copied, transferred, reproduced, disclosed or duplicated, in whole or in part, without the prior written consent of CA. This documentation is proprietary information of CA and protected by the copyright laws of the United States and international treaties. Notwithstanding the foregoing, licensed users may print a reasonable number of copies of this documentation for their own internal use, provided that all CA copyright notices and legends are affixed to each reproduced copy. Only authorized employees, consultants, or agents of the user who are bound by the confidentiality provisions of the license for the software are permitted to have access to such copies. This right to print copies is limited to the period during which the license for the product remains in full force and effect. Should the license terminate for any reason, it shall be the user’s responsibility to return to CA the reproduced copies or to certify to CA that same have been destroyed. To the extent permitted by applicable law, CA provides this documentation “as is” without warranty of any kind, including without limitation, any implied warranties of merchantability, fitness for a particular purpose or noninfringement. In no event will CA be liable to the end user or any third party for any loss or damage, direct or indirect, from the use of this documentation, including without limitation, lost profits, business interruption, goodwill, or lost data, even if CA is expressly advised of such loss or damage. The use of any product referenced in this documentation and this documentation is governed by the end user’s applicable license agreement. The manufacturer of this documentation is Computer Associates International, Inc. Provided with “Restricted Rights” as set forth in 48 C.F.R. Section 12.212, 48 C.F.R. Sections 52.227-19(c)(1) and (2) or DFARS Section 252.227-7013(c)(1)(ii) or applicable successor provisions. 2004 Computer Associates International, Inc. All trademarks, trade names, service marks, and logos referenced herein belong to their respective companies. Contents Chapter 1: Planning Your eTrust SSO Implementation The Implementation Teams .................................................................... 1-1 The Technical Implementation Team ........................................................ 1-2 Responsibilities of the Technical Implementation Team ................................... 1-2 Preparing The Technical Implementation Team .......................................... 1-3 The Business Implementation Team......................................................... 1-3 Responsibilities of the Business Implementation Team .................................... 1-4 Preparing the Business Implementation Team ............................................ 1-5 Objectives .................................................................................... 1-6 Defining Project Objectives................................................................. 1-6 Formulating a Security Policy .............................................................. 1-6 Implementation Overview ..................................................................... 1-7 Overview of implementation ............................................................... 1-7 Plan the Implementation ................................................................... 1-7 The Initial Planning Session ............................................................ 1-7 Project Management ................................................................... 1-8 Collect Data .......................................................................... 1-8 Implement a Test Bed Installation ......................................................... 1-10 Conduct a Pilot Test ...................................................................... 1-10 Prepare the Installation Area .............................................................. 1-11 Deploy eTrust SSO ....................................................................... 1-11 Conduct End User Training ............................................................... 1-12 Chapter 2: Component Installation Overview Implementation Strategy ...................................................................... Step 1. Install the Policy Server ................................................................. Step 2. Install the Policy Manager............................................................... Step 3. Populate the Data Stores ................................................................ eTrust Access Control (Data Store) .......................................................... eTrust Directory (LDAP Data Store) ........................................................ 2-1 2-2 2-3 2-3 2-4 2-5 Contents iii Step 4. Install the Authentication Agents......................................................... 2-5 Step 5. Write Logon Scripts ..................................................................... 2-6 Step 6. Install the SSO Client.................................................................... 2-7 Step 7. Install the Session Administrator (Optional) ............................................... 2-8 Step 8. Install the Web Agent (Optional) ......................................................... 2-9 Step 9. Install the Password Synchronization Agent (Optional).................................... 2-10 Step 10. Install the One Time Password (OTP) Agent (Optional) .................................. 2-10 Step 11. Tune the SSO Installation .............................................................. 2-11 Chapter 3: Installing the Policy Server Before You Begin .............................................................................. 3-2 Overview ................................................................................. 3-2 Checklist ................................................................................. 3-4 Policy Server for Windows ..................................................................... 3-5 To Install the Policy Server for Windows ..................................................... 3-5 To Change the Default User Data Store ...................................................... 3-7 Policy Server for UNIX ........................................................................ 3-8 To Install the Policy Server for UNIX ........................................................ 3-8 Start the Policy Server After Installation ........................................................ 3-11 To Start the Policy Server on Windows ..................................................... 3-11 From the Start Menu .................................................................. 3-11 From the Windows Command Line .................................................... 3-11 To Start the Policy Server on UNIX ......................................................... 3-13 Windows and UNIX Post-Installation Information ........................................... 3-15 Encryption Keys ...................................................................... 3-15 About Populating the Data Store ....................................................... 3-15 Chapter 4: Installing the Policy Manager Before You Begin .............................................................................. 4-2 Overview ................................................................................. 4-2 Ways to install the Policy Manager ...................................................... 4-2 Decide Where to Install the Policy Manager .............................................. 4-2 Checklist ................................................................................. 4-3 Install the Policy Manager ...................................................................... 4-4 To Install the Policy Manager ............................................................... 4-4 Connect the Policy Manager to the Policy Server ................................................. 4-6 To Connect the Policy Manager to the Policy Server ........................................... 4-6 iv eTrust SSO Implementation Guide Chapter 5: Installing the SSO Client Wizard Installation ........................................................................... 5-2 Pre-Installation Considerations ............................................................. 5-2 Pre-Installation Checklist .................................................................. 5-3 Install Using the Wizard ................................................................... 5-3 Modifying SSO Client on Windows ......................................................... 5-5 Silent Installation ............................................................................. 5-6 About the Silent Installation ................................................................ 5-6 Pre-Installation Considerations ............................................................. 5-6 Pre-Installation Checklist .................................................................. 5-7 Install Using the Silent Installation .......................................................... 5-8 Command Line Settings ................................................................... 5-9 Configuring the SSO Client ................................................................... 5-10 SSO Client on a File Server—Network Installation .............................................. 5-11 Configuration Parameters................................................................. 5-11 Security ................................................................................. 5-12 Chapter 6: Implementing Authentication Agents How eTrust SSO Works with Third-Party Authentication Software ................................ 6-2 Summary of Authentication Agent Settings ..................................................... 6-3 Configuring the SSO Client ................................................................ 6-3 Set the Authentication Methods......................................................... 6-3 Set the Authentication Host and Port Number ........................................... 6-3 Configuring the Authentication Agent ...................................................... 6-4 Starting the Authentication Agent .............................................................. 6-5 Starting the Certificate, Entrust, LDAP, and RSA SecurID Authentication Agents................ 6-5 Starting the Windows Authentication Agent ................................................. 6-6 The Certificate Authentication Agent ........................................................... 6-7 System Requirements ..................................................................... 6-7 Pre installation Considerations ............................................................. 6-7 Trusted Certificates .................................................................... 6-7 Revocation ........................................................................... 6-8 Install the Certificate Authentication Agent ................................................. 6-10 Register the Authentication Host as an Agent Host ...................................... 6-10 To Install the Certificate Authentication Agent .......................................... 6-10 Configure the Windows Registry ...................................................... 6-14 Configure the SSO Client.............................................................. 6-17 Start CERT_AUTHHOST manually ........................................................ 6-17 Create an Authentication Host Entry on the Policy Server .................................... 6-18 Contents v Configuration Settings for the CERT Authentication Agent ................................... 6-18 The Entrust Authentication Agent ............................................................. 6-21 System Requirements ..................................................................... 6-21 Components Used in the Entrust Authentication Process ..................................... 6-21 Components Installed on the SSO Client ................................................ 6-22 Components Installed on the Entrust Authentication Host ................................ 6-22 Install the Entrust Authentication Agent .................................................... 6-22 Prepare the Entrust Authentication Agent Computer ..................................... 6-23 Configure eTrust Directory to Work with Entrust ........................................ 6-24 Create an Entrust User and Profile ...................................................... 6-26 Install and Configure the Entrust Authentication Agent .................................. 6-26 Configure the SSO Client .............................................................. 6-27 Configuration Settings for the Entrust Authentication Agent .................................. 6-27 The LDAP Authentication Agent .............................................................. 6-29 System Requirements ..................................................................... 6-29 To Install the LDAP Authentication Agent .................................................. 6-29 Create Users in the LDAP User Data Store .............................................. 6-29 Install the LDAP Authentication Agent ................................................. 6-30 Install the SSO Client (If It Is Not Already Installed) ...................................... 6-32 Configure the SSO Client (If It Is Already Installed) ...................................... 6-34 Test the LDAP Authentication Method.................................................. 6-35 Authenticate to an Active Directory Data Store Using the LDAP Authentication Agent .......... 6-36 Set Up the Active Directory Data Store .................................................. 6-37 Create A New User in the Active Directory Data Store.................................... 6-38 Install the LDAP Authentication Agent ................................................. 6-39 Configure the LDAP Authentication Agent .............................................. 6-41 Install the Policy Server and the Policy Manager ......................................... 6-41 Install the SSO Client .................................................................. 6-42 Test the LDAP Authentication Agent with Active Directory ............................... 6-42 Configuration Settings for the LDAP Authentication Agent ................................... 6-43 The NetWare Authentication Agent ............................................................ 6-45 System Requirements ..................................................................... 6-45 Install the Netware Authentication Agent ................................................... 6-45 Install the NetWare Client ............................................................. 6-45 Install the NetWare Authentication Agent ............................................... 6-46 Configure the NetWare Authentication Agent ........................................... 6-47 Configure the SSO Client .............................................................. 6-48 Allow Users to Access the Authentication Host .......................................... 6-48 Starting and Stopping the NetWare Authentication Agent .................................... 6-48 Viewing the NetWare Authentication Agent Trace Log ....................................... 6-48 The RSA SecurID Authentication Agent ........................................................ 6-49 vi eTrust SSO Implementation Guide System Requirements .................................................................... Install the RSA SecurID Authentication Agent .............................................. Register the Authentication Host as an Agent Host ...................................... Install the RSA SecurID Authentication Agent .......................................... Configure the SSO Client.............................................................. Re-install the RSA SecurID Authentication Agent ........................................... Restart RSA_AUTHHOST manually ....................................................... Create an Authentication Host Entry on the Policy Server .................................... Configuration Settings for the RSA Authentication Agent .................................... The SAFLINK Authentication Agent........................................................... System Requirements .................................................................... Install the SAFLINK Authentication Agent ................................................. Install the SAFLINK Drivers on the Policy Manager Computer ........................... Copy the SAFLINK DLLs onto the Policy Manager Computer ............................ Create and Apply a SAFLINK Authentication Method ................................... Enroll the User in SAFLINK Biometric Authentication ................................... Change a User’s SAFLINK Authentication Method ...................................... The Windows Authentication Agent ........................................................... System Requirements .................................................................... Install the Windows Authentication Agent ................................................. Configuration Settings for the Windows Authentication Agent ............................... Creating a New Authentication Agent ......................................................... Program Architecture .................................................................... The GUI Component ................................................................. The OAE Component ................................................................. The TGA Component ................................................................. 6-49 6-49 6-49 6-50 6-50 6-50 6-50 6-51 6-53 6-54 6-54 6-54 6-55 6-55 6-56 6-56 6-56 6-57 6-57 6-58 6-59 6-60 6-61 6-61 6-61 6-61 Chapter 7: Adding Applications to SSO Logon Scripts................................................................................. Developing Logon Scripts.................................................................. Logon Variables .......................................................................... Learn Mode (First Logon Situation) ......................................................... Logon Script Maintenance ................................................................. Where the Logon Scripts are Stored ......................................................... Application Authentication .................................................................... Setting Up Password Authentication (All Platforms).......................................... 7-2 7-3 7-3 7-4 7-5 7-5 7-6 7-7 Contents vii Chapter 8: Adding Web Applications to SSO About the Web Agent.......................................................................... 8-2 Installing the Web Agent on Windows .......................................................... 8-3 System Requirements ...................................................................... 8-3 Pre-Installation Considerations ............................................................. 8-3 Pre-Installation Checklist ................................................................... 8-3 Web Agent Installation on Windows ........................................................ 8-4 Post-Installation Procedures ................................................................ 8-5 Defining Applications, Resources, and Access Rules ...................................... 8-5 Defining Applications .................................................................. 8-5 Defining Regular Applications .......................................................... 8-6 Defining Script-Entry Applications ...................................................... 8-6 Defining Resources .................................................................... 8-7 Implementing New Resources .......................................................... 8-7 Defining Access Rules .................................................................. 8-8 Configuring the Web Agent .................................................................... 8-9 Setting Up Self-Registration ................................................................ 8-9 SSL Protocol ............................................................................. 8-10 Setting Up SSL for Directories on Windows 2000 ............................................ 8-11 Configuring the SSL Connection Between the Policy Server and eTrust Directory ........... 8-11 Configuring the SSL Connection Between the Policy Server and Microsoft’s Active Directory 8-16 Synchronizing Resources in the Local Cache ................................................ 8-20 Using Automatic Synchronization ...................................................... 8-20 Using Manual Synchronization......................................................... 8-20 Sharing Security Tokens Between Web Servers .............................................. 8-21 Changing the Personality User and Password ............................................... 8-22 Starting and Stopping Web Servers and Services ................................................ 8-23 Starting and Stopping the Web Agent ...................................................... 8-23 Checking the Web Agent Startup in Windows ........................................... 8-23 Starting and Stopping the Windows Web Server Services ..................................... 8-24 Starting and Stopping the Service for the Policy Server ....................................... 8-24 Starting and Stopping the Service for eTrust Access Control .................................. 8-25 Chapter 9: Implementing Session Management Automatic Session Management ................................................................ 9-2 Overview ................................................................................. 9-2 Pre-Installation Considerations ............................................................. 9-2 Configure the Policy Server ................................................................. 9-3 Windows Installations.................................................................. 9-3 viii eTrust SSO Implementation Guide UNIX Installations..................................................................... 9-3 Change the SSO Client Port Number ........................................................ 9-4 Creating and Applying Session Profiles with Policy Manager ................................. 9-4 Working with MetaFrame Application Migration ............................................ 9-4 Manual Session Management: Session Administrator............................................. 9-5 Overview ................................................................................ 9-5 Before You Begin.......................................................................... 9-5 Tomcat 4.1.24 ......................................................................... 9-6 Custom or Standard Installation ........................................................ 9-7 Install the Session Administrator ........................................................... 9-7 Create a New Certificate ................................................................... 9-7 Create a Self-Signed Certificate using Keytool ............................................ 9-8 Create a Certificate using a Certification Authority ....................................... 9-9 Configure the Session Administrator ....................................................... 9-10 Update the Web Server Host Name .................................................... 9-10 Update the Port on Which the Tomcat Server Listens for HTTPS messages ................. 9-10 Update the Locations of the Log Files .................................................. 9-11 Change the HTTPS Session Timeout Period ............................................. 9-12 Session Management Settings ................................................................. 9-12 Chapter 10: Implementing a Server Farm Before You Begin ............................................................................ 10-2 Overview ............................................................................... 10-2 Pre-Installation Options and Requirements ................................................. 10-4 Checklist ................................................................................ 10-4 Server Farms for Windows ................................................................... 10-5 Add a New Policy Server to a Server Farm ................................................. 10-6 To Install the Policy Server ............................................................ 10-6 Add or Update an Existing Policy Server in a Server Farm ................................... 10-9 Back Up Existing Data on the Policy Server ............................................. 10-9 Specify Servers to Send Data to ....................................................... 10-12 Specify Servers to Receive Data ....................................................... 10-15 Restore and Replicate Data ........................................................... 10-17 Troubleshooting .................................................................... 10-19 Server Farms for UNIX ...................................................................... 10-20 Add a New Policy Server to a Server Farm ................................................ 10-21 Add an Existing Policy Server to a Server Farm ............................................ 10-22 Back Up Existing Data on the Policy Server ............................................ 10-22 Specify Servers to Send Data to ....................................................... 10-23 Specify Servers to Receive Data From ................................................. 10-24 Contents ix Restore and Replicate Data ........................................................... 10-25 Chapter 11: Implementing Citrix Application Migration Client Experience of Application Migration ..................................................... 11-1 Overview of Application Migration Installation ................................................. 11-2 Example Applications..................................................................... 11-2 Pre-installation Considerations ................................................................ 11-3 Prerequisite Software ..................................................................... 11-3 Prerequisite Access and Logons ............................................................ 11-3 Pre-Installation Checklist .................................................................. 11-4 Install Application Migration .................................................................. 11-5 Install the SSO Client on an ICA Client Computer ........................................... 11-5 Install the SSO Client on the Citrix MetaFrame Server ........................................ 11-5 Write Script A ............................................................................ 11-6 Examples of Script A .................................................................. 11-6 Write Script B ............................................................................. 11-8 Examples of Script B .................................................................. 11-8 Define Script A on the Policy Server ....................................................... 11-10 Define Script B on the Policy Server ....................................................... 11-11 Create an SSO-Enabled Published Application ............................................. 11-12 Create an ICA Connection To The Published Application .................................... 11-14 More Information About the Logon Window ........................................... 11-16 Define the Application Credentials for Each User ........................................... 11-17 Test Application Migration ............................................................... 11-18 Troubleshooting ............................................................................ 11-19 MetaFrame Application Manager ............................................................. 11-20 Application States ....................................................................... 11-20 Application Manager Installation ......................................................... 11-20 Application Migration Configuration ......................................................... 11-21 Suspend ICA Client Connections During SSO Logoff ....................................... 11-21 Shared Workstations and Session Management ............................................. 11-21 Script A Samples ............................................................................ 11-22 Calculator in Seamless Window Mode ..................................................... 11-22 Calculator in Remote Desktop Mode ...................................................... 11-23 Chapter 12: Upgrading eTrust SSO 6.5 to 7.0 Upgrading the SSO Client (6.5 to 7.0) ........................................................... 12-2 Upgrading the SSO Assistant to the Policy Manager ............................................. 12-3 x eTrust SSO Implementation Guide Upgrading the Server (SSO Server to Policy Server) Windows .................................... 12-4 Step 1. Back Up Existing Data ............................................................. 12-4 Step 2. Uninstall Previous Versions ........................................................ 12-5 Uninstall the SSO Assistant............................................................ 12-5 Uninstall the SSO Server .............................................................. 12-5 Uninstall eTrust Access Control ....................................................... 12-5 Step 3. Install Policy Server ............................................................... 12-6 Step 4. Install the SSO Client 7.0 ........................................................... 12-6 Step 5. Restore the Database ............................................................... 12-6 Upgrading the Server (SSO Server to Policy Server) on UNIX .................................... 12-7 Step 1. Back up Existing Data.............................................................. 12-8 Step 2. Install Policy Server ............................................................... 12-8 Step 3. Restore the Database ............................................................... 12-8 Troubleshooting ............................................................................. 12-9 Trouble with Importing Rules into the database ............................................. 12-9 Trouble with Running Migratedb.bat ...................................................... 12-9 Known Issues........................................................................... 12-10 Migration from eTrust Access Control 4.1 to eTrust Directory............................ 12-10 Migration From eTrust Access Control 4.1 To eTrust Access Control 5.1 .................. 12-10 Further Information ..................................................................... 12-11 Appendix A: Uninstalling eTrust SSO About the Product Explorer .................................................................... A-1 Uninstalling the SSO Client .................................................................... A-2 SSO Client Uninstall ....................................................................... A-2 Modify or Delete SSO Client Components ................................................... A-3 Uninstalling the Policy Manager ............................................................... A-4 Uninstalling the Policy Server .................................................................. A-5 Policy Server for Windows Uninstall ........................................................ A-5 Policy Server for UNIX Uninstall ........................................................... A-6 Uninstalling an Authentication Agent .......................................................... A-6 Uninstalling the Password Synchronization Agent ............................................... A-7 Uninstalling the Web Agent ................................................................... A-7 Uninstalling the Documentation................................................................ A-8 Appendix B: Third Party Acknowledgements Apache Tomcat ............................................................................... B-1 Henry Spencer LibRegX ....................................................................... B-2 Contents xi OpenLDAP ................................................................................... B-3 OpenSSL ..................................................................................... B-4 Tcl . .......................................................................................... B-5 Microsoft ..................................................................................... B-6 JAVATM 2 Software Development Kit ......................................................... B-23 SUPPLEMENTAL LICENSE TERMS ....................................................... B-27 xii eTrust SSO Implementation Guide Chapter 1 Planning Your eTrust SSO Implementation This guide will help you install the eTrust Single Sign-On (eTrust SSO) system. This chapter is designed to get you thinking about what Project Planning you need to start to help you Implement eTrust SSO. For more information about the steps involved with the implementation, see “Component Installation Overview” in this guide. The Implementation Teams As with any other implementation project, the success of the eTrust SSO installation at your site will depend very much on human factors: the skills and performance of the implementation team and the cooperation of the end users. Before any serious deployment of new technology can begin, it is imperative that you assemble the proper implementation teams to facilitate the rollout of eTrust SSO within the business. Although you may have the actual vendor or a contractor run the project for your company, you should always own the implementation and have an internal team assigned to work with the deployment vendor. We recommend that you have two implementation teams, one for the technical deployment of eTrust SSO, and the other for the rollout within the business. Planning Your eTrust SSO Implementation 1–1 The Implementation Teams The Technical Implementation Team The system administrator should appoint the team. For best results the implementation team should include: ■ A project manager ■ A security administrator ■ An application administrator ■ A password administrator ■ Script developers ■ A technical support person (for software installation) ■ An eTrust SSO administration for day-to-day administration. Responsibilities of the Technical Implementation Team The implementation team is responsible for: ■ ■ ■ ■ ■ 1–2 Defining eTrust SSO security objectives Mapping and documenting the computing environment, including users and applications Preparing the implementation plan, including definition of the eTrust SSO database Installing and configuring servers and clients Defining security rules: primary authentication and application authentication ■ Populating the eTrust SSO database ■ Preparing logon scripts ■ Testing the implementation ■ Training end users to use the eTrust SSO Client eTrust SSO Implementation Guide The Implementation Teams Preparing The Technical Implementation Team All team members: All members should review eTrust SSO manuals, both the introductory chapters and the specific issues with which they will deal. They should also refresh their knowledge of the relevant aspects of the site’s hardware and software. Technical support personnel: Staff who will install eTrust SSO need to be familiar with migration considerations and with the steps required to install eTrust SSO. Users who maintain the SSO databases must be familiar with the material in eTrust SSO Selang Command Reference Guide. Knowledge of eTrust Access Control utilities is also advisable (see eTrust Access Control / Utilities). Script developers: The staff responsible for writing logon scripts for eTrust SSO should become familiar with eTrust SSO Tcl Scripting Reference Guide and should begin writing practice scripts as soon as possible. The Business Implementation Team The following sections explain how to identify the members of your business implementation team and define their roles and responsibilities. You business implementation team should in clued representatives from each of the following affected areas: Cooperation is Essential ■ Security administration ■ Systems software ■ Applications software ■ Operations ■ Auditors ■ Business users ■ End users It is important to note that a security implementation forces cooperation between corporate areas that may never have been forced to work together before. This cooperation, critical to the successful implementation of a security product, provides another reason why you need a clearly defined management commitment to the security implementation. Planning Your eTrust SSO Implementation 1–3 The Implementation Teams Responsibilities of the Business Implementation Team After you have identified the organizational groups that will be involved in the planning and implementation of the deployment of eTrust SSO, you need to ensure that each of their functions are clearly identified. Regardless of organizational responsibilities, the following roles should be considered and assigned to specific members of the implementation team: Project Manager—Owns the overall project management tasks, deliverables, communications, and timetables. Security Administrator—Responsible for the review and approval of design, architecture, and naming standards as they pertain to user IDs and resources. This team member is also responsible for the formation and distribution of audit reports. After the implementation is complete, the security administrator is responsible for the enforcement of the security policies and procedures established for eTrust SSO. Operations Representative—Responsible for the day-to-day operation of eTrust SSO in terms of the hardware, software, and procedures required to maintain the service levels agreed on. The Operations group is also responsible for disaster recovery, business continuum, failover, and backups. Network and Systems Representative—Responsible for maintaining the connectivity of the environment in which eTrust SSO runs. Since there are several components of eTrust SSO that can reside in multiple systems across the network, it is important to include these groups in the design and architecture phase of the implementation. During this implementation phase of eTrust SSO, you need to consider firewalls, protocols, DMZ, operating systems, authentication server, servers, and so on. End User Liaison—A business person who represents the end user experience when it comes to interface decisions or user awareness issues. This person should have full voting rights when deciding what the user sees and what procedures get implemented that will directly affect the experience of an end user. Business Representative—Responsible for the policies that will affect the end user’s experience with certain business applications. Management—The success of any project is the constant involvement and approval of senior management at every step of the way. This team member should be in a high enough position in the organizational structure to have jurisdiction over all the parties involved in the deployment of this technology. 1–4 eTrust SSO Implementation Guide The Implementation Teams Preparing the Business Implementation Team All team members should be given a demonstration of eTrust SSO and should be familiar with the basic benefits of installing eTrust SSO. Stakeholders should also be reassured, where necessary, about the minimal impact on end-users. Members of this team should be encouraged to read the eTrust SSO Getting Started. Planning Your eTrust SSO Implementation 1–5 Objectives Objectives Defining Project Objectives To begin implementation, you must first define what you want eTrust SSO to do for your system. For instance, what is your primary aim: To increase the security of your data processing installation and data? Or, is it to simplify the work environment of your end users? The answers to these types of questions help define your objectives and aid in forming policy guidelines and priorities for eTrust SSO implementation and operations. Formulating a Security Policy eTrust SSO provides a solution for security and productivity problems that result from users having to work with many different passwords. Like any security solution, eTrust SSO will be most effective when it is integrated into a welldefined and comprehensive system security plan. eTrust SSO implementation should conform to system security requirements regarding overall system security policies, password policies (either present policies or new, stronger policies that can take advantage of eTrust SSO features), physical protection of servers and backup servers, and auditing. In addition, general system requirements regarding response time and survivability should be considered when planning the number, location, and general configuration of Policy Servers and backup servers. The initial assignment of the security implementation project team may be to develop and recommend the security policy or the document of security objectives for your environment. You may be able to use or borrow concepts from the established policies within your company with the same generic security requirements, such as authentication and authorization. If the security policy or the document of security objectives has already been developed, the implementation team can use this document as its mandate. If these documents must be developed, the team is an ideal committee to do it since they can take into account the concerns of each affected area while developing the objectives. If each area agrees to the direction being set, which is more likely with active participation, then implementation can proceed smoothly without time-consuming discord among the business areas. After the security policy has been formulated, upper management should issue a position statement to all internal employees and appoint a security officer (or at least a security administrator). The security officer can then ensure that employees are made aware of the security policies and procedures that they must adhere to and the consequences of any security violation. 1–6 eTrust SSO Implementation Guide Implementation Overview Implementation Overview Overview of implementation You should always install the test a new system in a controlled environment. Here are the suggested steps involved with the eTrust SSO implementation. ■ Plan the implementation ■ Implement a Test bed installation ■ Conduct a Pilot Test Prepare the Installation Area ■ ■ Deploy eTrust SSO ■ Conduct End User training Plan the Implementation Although eTrust SSO installation is straightforward and flexible, it is affected by, and affects, much of the site’s system. You need an implementation plan in order to schedule and control the properly paced introduction of eTrust SSO into the nodes of the network and into the procedures of the workplace. For efficiency, the plan has to provide step-by-step procedures, guidelines, and timetables. The Initial Planning Session An initial planning session should be convened to define the eTrust SSO configuration. All the relevant servers and clients should be identified, together with the users and the applications to be secured. Relationships between applications and users have to be mapped. Once decisions have been made on configuration, the team has to detail each of the stages of implementation. The plan should also take into consideration any other significant events, such as installation of new hardware or software, that is planned for the same period and that could affect implementation. It is also advisable to define a pilot group that will have eTrust SSO installed first. A pilot group can provide valuable initial experience that can prevent problems in the full-scale implementation. You should make a decision about the size and location of the pilot group and the applications that you will include in the pilot study. Planning Your eTrust SSO Implementation 1–7 Implementation Overview Once the implementation plan is finalized, the team should prepare a project schedule for the pilot and final implementation. In a large computer system, it will probably not be practical to implement eTrust SSO for all applications and for all users in one stage. An advantage of eTrust SSO is that it allows for phased implementation, staggered by groups of users and/or groups of applications. The implementation team has to set priorities for adding user groups and application groups. Project Management Implementing eTrust SSO is a major project. As with any major endeavor, you need to follow good project management guidelines to ensure a successful implementation. In addition to creating an implementation team, you need to: ■ Hold regular meetings ■ Establish an archive of all pertinent documentation relating to this project ■ Review your corporation’s security policies and procedures Collect Data Before a detailed plan can be formulated, the implementation team will have to collect considerable relevant information. The team has to map and document the computing environment, in particular those elements that directly affect eTrust SSO implementation. It is essential that the data about system configuration, operating systems, applications, and authentication methods be detailed and up to date. It is advisable to use a form or checklist to collect information in a systematic way. 1–8 eTrust SSO Implementation Guide Implementation Overview Here is a list of the information that you will need to obtain. The scope and detail of initial database planning will depend on the scope of the final implementation project itself. It is important to define the entities shown in the following table. Entity Definitions must include All the applications to be accessible using SSO - Application name/identifier - Application host - Authentication method - The application group to which the application belongs, if any All the application groups (if application groups are planned) - Application group name - Application names/identifiers of the application that are to be linked to the application group All the authentication hosts that will be used by eTrust SSO - Authentication method - Authentication host names - The authentication host group to which the authentication host belongs, if any All the authentication host groups (if authentication host groups are planned) - Authentication host group name - Authentication host names of the authentication hosts that are to be linked to the authentication host group User groups planned - User group name - The names of users in the group - Application groups associated with the user group Planning Your eTrust SSO Implementation 1–9 Implementation Overview Implement a Test Bed Installation Before you move into the Pilot Testing Phase, you should install and configure the eTrust SSO system within a Test Bed environment, to make sure all the components are configured correctly. This step will facilitate the smooth introduction of eTrust SSO to users within your company and help with useracceptance, as well as assisting the implementation from a technical perspective. Conduct a Pilot Test In large systems, installation of the SSO Clients on end-user workstations will generally begin with a pilot group. When a pilot test is to be run, SSO Clients will first be installed on the pilot group’s workstations. The implementation team has to work closely with the pilot group for testing and for obtaining end user feedback. It is important to prepare testing procedures and worksheets for recording results. Every user has to be authorized to use the specific method of authentication. Generally, we recommend that you set the user’s AuthMethod token value to SSO when first implementing eTrust SSO. This will enable you to test the validity of the records in the USER and APPL classes, without being affected by any problems in primary authentication installation. However, once in production, the token must be set to its planned value. For example, to enable an end user to use Windows authentication, change the value of the AuthMethod token in the ssoauth section to Windows NT. If the Windows authentication agent is not installed on the primary domain controller, then change the value of the authhost token in the auth.NT section to be the actual name of the Windows authentication host, in uppercase letters. 1–10 eTrust SSO Implementation Guide Implementation Overview Prepare the Installation Area Before you begin the eTrust SSO installation, you should review and prepare the intended site. This stage, which can also be referred to as a walk-through, involves the implementation team arriving on site to review the equipment and facilities for the subsequent stages. Successful completion of this stage should be viewed as a prerequisite to continuing the implementation. The site staff should provide information about the hardware and software on the site. The implementation team should check technical details of servers, enduser workstations, and primary authentication systems against the preliminary data already received and analyzed. The team should look for potential obstacles and problems. Hardware and software prerequisites should be checked, including: ■ ■ ■ ■ ■ All client workstations must have with the network and TCP/IP configured Each SSO component (clients, servers, authentication hosts) should be able to ping its peer by name If you are using Windows authentication, SSO users should have a domain account and logon rights If you are using UNIX hosts for the Policy Server they should have a supported OS version (AIX, HP-UX, Solaris) installed and sufficient disk space Any third-party authentication software to be used (for example, RSA SecurID), should be properly installed and configured Deploy eTrust SSO In the production phase, the eTrust SSO Client software is installed on all the end-user workstations group by group (either by geographical groups or by business function groupings). If there is no pilot testing phase, it may be advisable to check the work of the previous stages by installing the SSO Client on one or two workstations in each user group. During each phase, auditing data and user feedback are collected and analyzed. This allows management to evaluate the success of the implementation and indicates what adjustments have to be made. During this stage, the implementation team will begin transferring responsibility for routine administration of eTrust SSO to the site’s IT organization. Planning Your eTrust SSO Implementation 1–11 Implementation Overview Conduct End User Training In itself, eTrust SSO implementation will require only minimal end-user training. Prior to implementation, end users should be told that changes in the network will automate their logging into password-protected applications. They need to be informed on how the specific implementation on the site will affect them in regard to system logon, first-time eTrust SSO logon, routine logon to applications, logon to sensitive applications, station lock release, reauthentication, and password change. End users should also be informed that where they will still be asked for passwords (such as for sensitive applications and password changes), they will need only their user ID, a primary authentication password, and, where applicable, an additional biometrics or token authentication. In addition, end users should be informed that when they log onto applications for the first time using SSO, they might be required to provide their application password to the Policy Server. Following installation of eTrust SSO Clients, end users will have to be told where they will find eTrust SSO’s application list and the various ways of selecting applications. If eTrust SSO is implemented together with new third-party authentication, new password rules and/or other security policies, then end users will have to be educated on these topics. 1–12 eTrust SSO Implementation Guide Chapter 2 Component Installation Overview This chapter gives you a step by step overview of what order to deploy the eTrust Single Sign-On (eTrust SSO) components in your organization. Implementation Strategy In many cases, the most efficient implementation strategy will be a sequential process. Here are the suggested implementation steps in order of components. Step 1. Install the Policy Server Step 2. Install the Policy Manager (administrator workstations) Step 3. Populate the Data Stores Step 4. Install the authentication agent(s) Step 5. Write the logon scripts (and other scripts) Step 6. Install the SSO Client (end-user workstations) Step 7. Install the Session Administrator (optional) Step 8. Install the Web agent (optional) Step 9. Install the Password Sync Agent (optional) Step 10. Install the One Time Password (OTP) Agent (optional) Step 11. Tune the SSO installation Tip: You may want to start development on Step 5. Write the Logon Scripts early, in parallel with the other steps, to make sure they ready in good time. After each installation and configuration step, we strongly recommend that you verify that the component added is working as expected. For example, after performing step 3, use the Policy Manager to perform an ad-hoc verification that User and Application data is assigned as expected. Component Installation Overview 2–1 Step 1. Install the Policy Server Note: All operating system clocks must produce a reliable and correct timestamp for the time-zone where each machine hosting any SSO components are located. For example, a machine located in New York hosting a Policy Server must have it’s OS clock set to US Eastern Daylight Time (EDT) whilst a machine located in San Francisco hosting a LDAP Auth Agent must have it’s OS clock set to US Pacific Daylight Time (PDT). Step 1. Install the Policy Server All Policy Servers should be installed and configured. You can install a server farm within the eTrust SSO architecture. This helps with load-balancing and failover, as well as scalability. After installation, check that all servers are accessible from the end-user networks. If possible, use the default name that the installation procedure suggests for the Policy Server. When the servers are installed, the databases should be populated with the rules that will allow eTrust SSO to be administrated from an administration workstation using the Policy Manager. Next, the replication mechanisms of the server farm are implemented and tested. When installing more than one server, use DNS name resolution, if possible, to map pre-selected names to the specific Policy Server hosts. This will allow flexibility in locating and upgrading the servers. For more information about Server Farms see the eTrust SSO Administrator Guide. 2–2 eTrust SSO Implementation Guide Step 2. Install the Policy Manager Step 2. Install the Policy Manager The Policy Manager is a Windows GUI for managing Policy Server and the data stores. It is usually installed on an administrator’s workstation with TCP/IP communication to the Policy Server. You can use the Policy Manager to communicate with both UNIX and Windows Policy Server computers. You should install the Policy Manager on all computers that your administrators’ use to control the Policy Server. Once you have installed the Policy Manager on an initial machine, you must set access rights for any other machines that will be authorized to access the Policy Manager. For more information about setting up the Policy Manager for administrators for the first time, see the “Basic Tasks in eTrust SSO” chapter of the eTrust Getting Started guide. Step 3. Populate the Data Stores eTrust SSO comes with two data stores, eTrust Access Control and eTrust Directory, that each give slightly different benefits. You can also integrate thirdparty LDAP data stores. You should use the eTrust Directory data store for storing user information and the eTrust Access Control database to store all other information relating to resources, applications, and administrators. You should plan how to populate the data stores. The eTrust SSO database includes the following entities: ■ ■ Users (USER records) or eTrust Directory entries (typically iNetOrgPerson) User groups (GROUP records) or eTrust Directory entries (typically eTrust SSOGroup) ■ Applications (APPL records) ■ Application groups (GAPPL records) ■ Authentication hosts (AUTHHOST records) ■ Authentication host groups (GAUTHHOST records) ■ Password policies (PWPOLICY records) ■ Terminals (TERMINAL records), which are the computers that will be used to administer eTrust SSO. Component Installation Overview 2–3 Step 3. Populate the Data Stores You can populate these data stores in two ways. If you are importing a large amount of data to either of these data stores, you might want to use a Command Line command, such as a selang script to import data into the eTrust Access Control data store or a Directory utility, such as Jxplorer to import data into the eTrust Directory data store. Selang is a CA-proprietary security language that can be used to control the eTrust Access Control data base. If you are just entering small amount of information you might use the Policy Manager. Based on the implementation decisions, the implementation team should define these entities and the relations among them, together with the associated access rules. eTrust Access Control (Data Store) eTrust SSO comes with eTrust Access Control. The eTrust Access Control is a database that stores all information about: ■ Resources ■ Applications ■ Access control rules ■ Administrators You can use either eTrust Access Control, eTrust Directory, or another LDAP directory to store information about: ■ Users ■ User groups ■ Logon information You can populate this database with user and group information from existing databases in your organization, during or after product installation. You can conveniently import user and group information by running a utility, or by using the command line interface. Other eTrust products also use the eTrust Access Control database. Once you load information in the database, these products can all read and update the shared database for their separate and common purposes. 2–4 eTrust SSO Implementation Guide Step 4. Install the Authentication Agents eTrust Directory (LDAP Data Store) eTrust SSO comes with eTrust Directory. eTrust Directory is designed to efficiently manage thousands of users, which significantly enhances the performance and scalability of eTrust SSO. The eTrust Directory data store is perfect for large enterprise installations. You can use eTrust Directory to store information previously stored on eTrust Access Control. eTrust Directory can store information about: ■ Users ■ User groups ■ Logon information Other eTrust products also use eTrust Directory. Once you load information in the data store, these products can all read and update the shared database for their separate and common purposes. You must use the eTrust Access Control data store for all information that does not relate to users, user groups and logon information. Step 4. Install the Authentication Agents If third-party software is to be used for either primary authentication (the user identifying them self to the SSO system) or application authentication (the method of identifying the user to the application they wish to access), it must be already installed at the site before eTrust SSO primary authentication agents are installed, however, each primary authentication agent will define their own installation requirements that you must follow. For further information about installing Authentication Agents, see the “Implementing Authentication Agents” chapter of this guide. Your CA representative can help you with your specific application requirements. eTrust SSO primary authentication agents are installed on an Authentication Host. This is typically on the computer where the third-party authentication server is installed. Authentication hosts have to be defined in the Policy Servers in order to grant users the authority to log into eTrust SSO having passed primary authentication on the authentication host. Component Installation Overview 2–5 
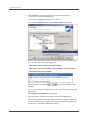
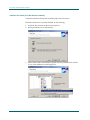
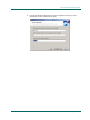
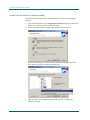
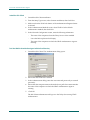
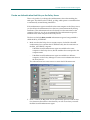
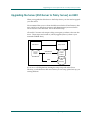
Step 5. Write Logon Scripts Step 5. Write Logon Scripts In the context of eTrust SSO the term “scripts” refers to Tcl programs that perform tasks for the user. Scripts can be used for a wide variety of tasks. A logon script, for example, is written to automatically log a user in to an application (automatically insert the correct user’s name and password in the relevant fields of the logon screens). eTrust SSO logon scripts are written in a special extended version of the Tcl scripting language. Prior experience with Tcl is not required to be able to write these, but some programming experience is an advantage. The security or system administrator in charge of eTrust SSO is responsible for preparing the logon scripts. These scripts are written during implementation and typically do not affect the day-to-day administration of eTrust SSO. Application logon scripts should be written in the order planned and then tested. You may also need to use JavaScript to launch Web applications using eTrust SSO. For more information about launching Web applications see the Launching Web Applications section in the “Common eTrust Processes” chapter in this guide. Tip: For a detailed explanation of how to write eTrust SSO logon scripts, see the guide called eTrust SSO Scripting Reference guide 2–6 eTrust SSO Implementation Guide Step 6. Install the SSO Client Step 6. Install the SSO Client The eTrust SSO Client is installed on every end-user workstation. The only exception to this, is some thin-client environments, where eTrust SSO is only used to facilitate web access. You can install the SSO Client on each users computer using the eTrust SSO product explorer wizard from the eTrust SSO CD, which is very straightforward, but also time consuming if you have to roll the SSO Client out to large numbers of users. Alternatively you can roll the SSO Client out to a large number of end users machines on a network using appropriate software. The SSO Client can be configured to work in a number of different ways. The SSO Client behavior is controlled by the SsoClnt.ini file. You must install the SSO Client at least once, using the product explorer wizard to get a copy of the SsoClnt.ini file. You can then customize this INI file and distribute it so that when you roll it the SSO Client to a large number of users, using the silent installation, the SSO Client is already customized. You should plan what functionality you want from the SSO Client and what you want your users to experience from the eTrust SSO system. Decisions you need to make, include: ■ ■ ■ ■ What method of authentication are you planning to implement. How you want users to access the SSO system and SSO-supported applications Whether you want shared workstation functionality Whether you want application migration (Citrix Metaframe environments only) Users can access the their SSO applications in a number of different ways including: as menu items in a Windows Program Group, as icons on the desktop, or using the SSO Toolbar. You also need to plan how you are going to install the SSO Client on end-user computers. Are you going to install it on individual computers using the installation wizard or are you going to do a silent installation on a large scale using a software distribution tool? For more information about customizing the SSO Client, see the “Working with the SSO Client” chapter in this guide. For a complete list of all SsoClnt.ini settings, see the “Configuring the SSO Client: SsoClnt.ini” appendix in this guide. For more information about silent installation of the SSO Client, see the “Installing the SSO Client” chapter in the Implementation Guide. Component Installation Overview 2–7 Step 7. Install the Session Administrator (Optional) Step 7. Install the Session Administrator (Optional) The Session Administrator is a web-based application that lets you view and terminate eTrust SSO sessions. In addition to storing automatic session profiles on the Policy Server, you can also manually track and terminate sessions using the Session Administrator. The Session Administrator is a web-based tool that lets you: ■ View and terminate users’ sessions ■ Check how long a session runs ■ Check what computers a session is running on The Session Administrator can be installed on any Windows computer on the network. It may be installed on the same computer as any other eTrust SSO component. The computer on which you install the Session Administrator is referred to as the Session Administrator Server. 2–8 eTrust SSO Implementation Guide Step 8. Install the Web Agent (Optional) Step 8. Install the Web Agent (Optional) The Web Agent intercepts any request to access a web resource and interacts with the Policy Server to authenticate the user and determine if access to the specific resource should be allowed. The Web Agent also passes a response to the application through the web server that allows personalizing page content to the needs and entitlements of each user. After you install and start eTrust SSO, the web server that hosts the web site requested by the user cannot send information to the user unless the Web Agent permits it. However, once the Web Agent permits the user access to one resource, the Web Agent handles the user’s logon to additional web resources and applications without requiring the user to enter user ID and password information again. Every request by the user for additional web resources is evaluated by the Web Agent to see if the user has authorization to access that additional resource. You must install the Web Agent on each of the web servers that host the web sites to be protected. After you have installed the Web Agent, define the resources and applications and the access rules that protect them in the policy data store. Until these definitions are created, the Web Agent grants all requests (access is unlimited). There are three ways to implement eTrust SSO to launch web applications and two of these methods require the web agent to be installed. You can install all of these methods within the same eTrust SSO system. ■ Cookie logon ■ Browser logon – requires the web agent ■ Client logon – requires the web agent Client logon The Client logon method launches web applications in the same way as any other eTrust SSO windows application. A Tcl script launches the web browser, inserts the application or page address, and then performs the logon actions. Cookie logon – requires the web agent to be installed. The Cookie logon method creates a cookie from the SSO ticket and this cookie is recognized as valid authentication by the Web Agent which then grants the user access to web applications and pages running on that server. Browser logon – requires the web agent to be installed Component Installation Overview 2–9 Step 9. Install the Password Synchronization Agent (Optional) The Browser logon method challenges users for web-based authentication when they try to access a web resource or page that is protected by the Web Agent. You can use this logon method in a thin-client environment, which means that you do not need to have the eTrust SSO Client installed on users’ computers. Step 9. Install the Password Synchronization Agent (Optional) eTrust SSO provides you with a Password Synchronization Agent for both Windows and mainframe platforms. The Password Synchronization Agent keeps passwords synchronized between external systems and the Policy Server. When a user changes their domain password, for example, that change is detected by the Password Synchronization Agent and the new password is updated on the Policy Server. The Password Synchronization Agent for NT can either be installed on the primary domain controller (PDC) or another machine on the network to enable password policy and password synchronization for Windows NT domain users. The Password Synchronization Agent for NT and the Policy Server must communicate with each other. Therefore, TCP/IP software must be installed on the PDC. The Password Synchronization Agent for mainframe ensures password are synchronized form the mainframe via and PDC, to the Policy Server. Step 10. Install the One Time Password (OTP) Agent (Optional) eTrust SSO comes with a built-in one-time password (OTP) agent for UNIX platforms only. The OTP authentication type can eliminate the security risk of sending passwords across a network in clear text. With OTP, passwords are still sent across the network, but they cannot be used to log on a second time, so they are useless to whoever intercepts them. Once the OPT agent detects that a password has been used, it generates a new password and sends this to be stored on the Policy Server. The OPT agent is installed on a UNIX computer that hosts SSO-supported applications. 2–10 eTrust SSO Implementation Guide Step 11. Tune the SSO Installation Step 11. Tune the SSO Installation After you have installed the SSO system and used it for some time, you may want to fine-tune the installation if the number of users and applications has grown. For an implementation with a significant number of users and applications it is worth considering using the Application List cache facility and we strongly recommend that you store user data on eTrust Directory if you have a large number of users, if they are not already stored there. For more information about the Application List cache facility, see the “Managing Services” chapter of the eTrust SSO Administrator Guide. Component Installation Overview 2–11 Chapter 3 Installing the Policy Server The Policy Server is the heart of eTrust Single Sign-On (eTrust SSO). It is located on a central UNIX or Windows server, and completely manages eTrust SSO. You can administer the Policy Server by using either: ■ ■ The Policy Manager GUI Selang or eTrust Directory commands from a command line interface or via a batch program. For more information about installing the Policy Manager see the “Installing the Policy Manager” chapter in this guide. For more information about selang, see the Selang Command Reference Guide. Policy Manager Administrator’s machine Administrator Policy Server Authentication Agent Authentication machine eTrust Access Control eTrust Directory Policy Server machine SSO Client Primary authentication End user’s machine End user Windows, UNIX, Mainframe applications machines Installing the Policy Server 3–1 Before You Begin Before You Begin The Before You Begin Section is designed to guide you through what you need to know before you install the Policy Server. Overview This section gives you an overview of the Policy Server installation and includes what you need to do to consider before you install the Policy Server. This section also explains the installation options to help you choose which method you should use. The Policy Server is very simple to install using the installation Wizard. You can also do a silent installation from a command line, but unless you are installing a large server farm, the silent installation will not save you much time. Pre-Installation Options and Requirements Your operating system must produce a reliable and correct timestamp for the local time-zone. If it does not, the product may not work. For example, the operating system clock of a Policy Server host in New York must be set to US Eastern Daylight Time (EDT), whilst the operating system clock of an LDAP Authentication Agent host in San Francisco must be set to US Pacific Daylight Time (PDT). If you plan to install the Policy Server and the Policy Manager on the same machine, make sure you install the Policy Server first. If you already have eTrust Access Control installed, see the “Upgrading” chapter in this guide. eTrust Access Control must be stopped and/or uninstalled before you install the Policy Server on the same machine. If you want to track down an issue or diagnose a problem you can set up logging. For more information, see the “Auditing, Logging, and Tracing” chapter of the eTrust SSO Administrator Guide. 3–2 eTrust SSO Implementation Guide Before You Begin If You Want to Install a Stand-Alone Policy Server This section explains each type of installation to help you choose which method you should use. Installation Type Wizard complete installation Wizard custom installation Options ■ Installation location for the Policy Server All the options for Complete installation plus: ■ Installation locations for the individual Policy Server components, including eTrust Access Control and eTrust Directory ■ Server farm member ■ Other servers in the server farm ■ Administrative computer, where the Policy Manager will be installed. Note: If you want to install the Policy Server as part of a server farm, see the “Installing a Server Farm” chapter in this guide. Silent installation ■ Installation location for Policy Server ■ Installation run from a command line If You Want to Install a Server Farm If you want to install a server farm of Policy Servers, see the chapters “Installing a Server Farm” in this guide. This chapter explains how to set up a new server farm, or add servers to an existing server farm. If You Want to Specify the User Data Store You have two choices of user data store. We recommend the default which is eTrust Directory unless you have legacy data and specifically want to continue to use eTrust Access Control. ■ ■ To use eTrust Directory as your user data store and eTrust Access Control as your resources data store (default), see the To Install the Policy Server section in this chapter. To use eTrust Access Control as your user data store, instead of eTrust Directory, and your resource data store, see the To Change the Default User Data Store section in this chapter. Installing the Policy Server 3–3 Before You Begin Where to Next? Once you have decided what type of installation you need and what options you are going to use, see the Checklist section of this chapter to make sure you are ready to install the Policy Server. Checklist Before you install the Policy Server make sure that the following requirements are met. Make sure you refer to the Readme for system requirements and any other relevant installation information. Make sure you disable or delay the screen saver on the computer so that it will not run while you are installing the Policy Server. Make sure you set administrator access rights. ■ ■ On a Windows machine you must be allocated as a member of the local administrators group before you install the Policy Server. You can do this through Control Panel, User Accounts from the start menu. On a UNIX machine you must be logged on a “root” Make sure you close any open applications on the computer. You will need to restart the computer at the end of this installation. Where to Next Once you have read the checklist and have fulfilled all the requirements listed, you can start your installation. 3–4 eTrust SSO Implementation Guide Policy Server for Windows Policy Server for Windows This section explains how to install the Policy Server on Windows. To Install the Policy Server for Windows This procedure tells you how to install the Policy Server. This procedure describes the default installation which will configure eTrust Directory as your user data store and eTrust Access Control as your resources data store. 1. From the eTrust Single Sign-On 7.0 Product Explorer wizard select Policy Server for Windows. The wizard should appear automatically when you insert the eTrust SSO disk. If not, open Windows Explorer and navigate to the CD-ROM directory and double-click the PE_i386.exe file. The Install button becomes active. 2. Click the Install button. The Welcome dialog appears. 4. Click the Next button then read and accept the license agreement. The Customer Information dialog appears. Installing the Policy Server 3–5 Policy Server for Windows 5. Enter your user name and organization information and click the Next button. The Setup Type dialog appears. 6. Select what type of installation you want. For more information about the Custom installation see the Before You Begin section in this chapter. The Destination Folder dialog appears. 7. Select the destination folder and click the Next button. The default destination for the Policy Server is: %Program Files%\CA\eTrust Policy Server\(where %Program Files% is the value of the Program Files environment variable on the local machine). The Administrator Information dialog appears. 8. Enter eTrust SSO administrator information (default username is ps-admin) then click the Next button. The administrator will have all access rights to the system. Make sure you remember this information. Avoid using ‘Administrator’ as a user name because it is the default and therefore insecure. The Directory User dialog appears. 9. Enter eTrust Directory SSO user information then click the Next button. Make sure you remember this information. The Ready to Install the Program dialog appears. 10. Click the Install button to complete the Policy Manager installation. The installation may take some time. When the installation is complete, you will be prompted to restart your computer. 3–6 eTrust SSO Implementation Guide Policy Server for Windows To Change the Default User Data Store This procedure tells you how to install the Policy Server on Windows. This procedure describes a custom installation which will configure eTrust Access Control as your user data store as well as your resources data store. We recommend that you only follow this procedure if you have good reason not to use eTrust Directory as the default user data store. 1. Insert the eTrust SSO CD into the disk drive. 2. Open a command window. 3. Change the directory to <X>:/Policy Server/Nt (where X is the CD drive). 4. Type setup.exe /v”LDAPDATASTORE=0” The installation wizard appears. 5. Follow the prompts for a standard installation. For more information, see the Install the Policy Server on Windows section of this chapter. Installing the Policy Server 3–7 Policy Server for UNIX Policy Server for UNIX This section tells you about installing the Policy Server on a UNIX platform. To Install the Policy Server for UNIX If you need to change the kernel configuration this will differ according to which UNIX platform you are using. Refer to the relevant UNIX administrator guide for further information. If you need to change the kernel configuration the installation will prompt you for this information. The Policy Server can be installed on the following UNIX systems: ■ AIX ■ HP-UX ■ Solaris This section describes how to install the Policy Server for SSO on UNIX. It also includes instructions about how to install the eTrust Access Control data store and the eTrust Directory data store which are necessary for the installation. Note: This UNIX installation is documented using the bash shell. If you are using either csh or ksh then the commands may differ slightly. 1. Begin installation by running ./setup script from the CD or installation executable. Mounting a CD will differ according to your platform and operating system configuration. Note: Make sure you logged on as “root”. 2. Press Enter to scroll through the 'SYSREQ' system requirements file. A list of existing file systems will be displayed, along with free space on each. 3. If you want to use one of these file systems type Y (default) or if you want to exit the installation to create or modify a file system prior to install type N. 4. Choose the number that corresponds to the file system you will install to. Free space required and available is displayed on this filesystem. 5. Select Y (default) to continue with the installation, or N to exit. 6. Specify the installation path (for example, /opt/CA). Note: The full installation path will be: /opt/CA/eTrustSingleSignOn/PolicyServer You should specify a path that corresponds to the filesystem you chose in step 4. If the path does not exist you will need to confirm it, Y, or type N to choose another path. 3–8 eTrust SSO Implementation Guide Policy Server for UNIX 7. Specify if eTrust Access Control is already installed. If eTrust Access Control is installed, make sure it is not running and type N. 8. Specify any security administrators other than root. (Default: none) Users other than root can be specified here, space separated, to be given permissions to start and stop the eTrust Access Control and Policy Server services. 9. The eTrust Access Control installation is now completed, you have the option to type Y (default) to install eTrust Directory, or type N and skip to step 23. 10. eTrust Directory will print its kernel parameter requirements and should explain how to go about making the system configuration modifications if required. If configuration is insufficient, you are asked if you would like to continue or exit and make the system changes. 11. Specify the default logon shell which the dsa user (eTrust Directory's UNIX admin user account) will use: Bash, C or Korn (default <path to C shell>). This user account, 'dsa', is used to start and stop eTrust Directory servers (dxserver). 12. Supply and confirm the password for the dsa account. This user will be added to the system, the root user should have the their PATH variable configured so that the useradd utility is accessible. 13. Specify path for DXserver (Default: /opt/ca/etrustdirectory/dxserver), confirm you do not wish to change it with N or type Y to retype (Default: N) - if a custom path is supplied for this or any of the following steps, a symbolic link will be created in the default location. 14. Supply the default shell which the Ingres user (Ingres' UNIX admin user account) will use: Bash, C or Korn (Default: <path to C shell>). This user account, 'Ingres', is used to start and stop Ingres services. 15. Supply and confirm the password for the Ingres account. 16. Specify path for Ingres (Default: /opt/CA/AdvantageIngresET/Ingres), confirm you do not wish to change it with N or type Y to retype (Default: N). 17. Choose to use a separate location for each database - Data, Work, Checkpoint, Dump and Journal (Default: N) or a single location for all. It is suggested that these databases, together or separate, should be on a separate physical disk to Ingres to maximize performance. 18. Specify paths for the entire database, or each individually, depending on step 19 (Default: /local/CA/AdvantageIngresET), confirm it is correct with N or type Y to retype. 19. Specify regions and sub-regions for system time-zones. For example, Australia, Australia-Victoria. This is not case sensitive. 20. Confirm time zone is correct or start over. You can also press enter if you type the first region incorrectly to start over. Installing the Policy Server 3–9 Policy Server for UNIX 21. Specify path for DXwebserver (Default: /opt/ca/etrustdirectory/dxwebserver), confirm you do not wish to change it with N or type Y to retype (Default: N). 22. Specify path for jre (Java Runtime Environment, Default: /opt/ca/etrustdirectory/jre), confirm you do not wish to change it with N or type Y to retype (Default: N). 23. The eTrust Directory and Ingres will now install. If you have chosen options that require kernel configuration changes these will also occur and the system will ask for a system reboot before starting its installation phase. Setup will resume from this position by reading the /etc/.etrust_policyserver_state file. If a reboot is required, do so and run the setup script as in step 1. 24. Choose if you would like to install as part of a Server Farm (Default: N). This can only be configured during install. For more information about server farms, see the “Working with Server Farms” chapter of the eTrust SSO Administrator Guide. 25. If a server farm is selected, you now need to enter a list of server farm station names (one per line), press enter on a new line when finished. 26. Specify an admin user for the eTrust Access Control data store (Default: psadmin) and confirm passwords. Make sure to remember the account details as they will be used to manage the Policy Server. 27. Specify any administrative station hostnames (Default: none). This list is space separated. These stations will be allowed incoming Policy Manager connections by the Policy Server. These can be configured later. 28. Specify any computer aliases (Default: none, space separated). These are any other hostnames by which this computer is known, by remote computers. 29. Specify an admin user for the eTrust Directory data store (Default: ldap-pers) and confirm passwords. Make sure to remember the account details as they will be used to manage the Policy Server. 30. You may be asked if you would like to modify the static hostname records in the /etc/hosts file to be compatible with the way Policy Server operates. It is suggested to accept this request where required (Default: Y). 31. Installation is now complete, you can have the installer run Policy Server (and eTrust Access Control) before finishing up. 3–10 eTrust SSO Implementation Guide Start the Policy Server After Installation Start the Policy Server After Installation This section describes how you launch the Policy Server in both Windows and UNIX environments. To Start the Policy Server on Windows From the Start Menu To run the Policy Server service: 1. From the Start menu select Control Panel, Administrator Tools, Services to access the Services dialog box. 2. Select eTrust Policy Server. 3. Click Start. From the Windows Command Line You can also start the Policy Server service from the Command Prompt with the following command: sso_directory\bin\PolicyServer.exe –start To control the Policy Server service from the Command Prompt, use the following syntax: Policysrver[.exe] -h | -i | -l | -p | -s | -r | -d Option Parameters Function -h[elp] N/A Shows an explanation of the ssod syntax -s[tart] N/A Starts the Policy Server service -d[ebug] N/A Runs the Policy Server as a console application for debugging. -i[nstall] N/A Installs the Policy Server service -l[logonid] domain\logonName The user name under which the Policy Server service runs. For a local user, the syntax is: .\logonid -[password] password The password of the user under which the Policy Server service runs. -r[emove] N/A Removes the Policy Server service Installing the Policy Server 3–11 Start the Policy Server After Installation For post-installation information see Windows and UNIX Post-Installation Information. Note: When you start the Policy Server service in the Services Window, the eTrust Access Control services are also started. When you reboot the Policy Server computer, the Policy Server and the eTrust Access Control services are started automatically. 3–12 eTrust SSO Implementation Guide Start the Policy Server After Installation To Start the Policy Server on UNIX Once the Policy Server is installed, the Policy Server will start automatically when you start the machine. Alternatively, you can stop and start is manually using the following commands: ■ To stop the Policy Server manually, log on as “root” or Admin User and use the stopserver command. For example, if you installed the Policy Server in the default location the command is: # /opt/CA/eTrustSingleSignOn/PolicyServer/bin/stopserver ■ To start the Policy Server manually, log on as “root” or Admin User and use the startserver command. For example, if you installed the Policy Server in the default location the command is: # /opt/CA/eTrustSingleSignOn/PolicyServer/bin/startserver Other command-line options (in addition to start) can be one or more of the following: Option Meaning -h[elp] Displays a help message. -c[fg] filePath Defines path to ssod ini file -f[orklimit] number Defines maximum number of concurrent connections to handle. Default: is 3 (unless overridden by ConfigFile). -N[odaemon] Specifies that ssod runs without daemonizing -p[ort] PortNumber Overrides the default port specified in ConfigFile. If -p is used without a port number the Default: is 13980 (unless overrriden by the ConfigFile). -v[erbose] Shows options being used. Note: If you did not use the default installation directory path (/usr/sso) when you installed the Policy Server, then you must use the -c option with the installation directory path you used during installation. Installing the Policy Server 3–13 Start the Policy Server After Installation Verify that four processes have been started — seosd, seoswd, seagent, and ssod. Use these commands: # # # # ps ps ps ps –ef –ef –ef –ef | | | | grep grep grep grep policyserver seosd seagent seoswd Note: Policy Server may fail if the server is not authorized to use a file it needs. Any file that has to be used by ssod (such as a script, a motd, an ini file, or a key file) should have read permission for the SSO administration group. Tip: By default all SSO files are owned by the Policy Server administrator (default: ps-admin) and by the SSO administrator group (default: _ps-adms). 3–14 eTrust SSO Implementation Guide Start the Policy Server After Installation Windows and UNIX Post-Installation Information The remainder of this chapter applies to Policy Servers on both Windows and UNIX platforms. Encryption Keys The Policy Server is installed with a default public/secret key pair. After installation we recommend that you generate a new unique public/secret key pair, using the utility found in the bin directory where you installed the product. Windows UNIX Run the /<SSO installation path>/bin/GenKeyPair.exe. 1. 2. Set the following environment variables: ■ eTrustPath=<SSO installation path> ■ POLICY SERVER_PATH=<SSO installation path> Run the /<SSO installation path>/bin/GenKeyPair About Populating the Data Store Before you can use eTrust SSO, you must populate the data store . Since there may be thousands of users at an enterprise site, entering all the necessary data from scratch would be a lengthy task. Fortunately, much of the information needed is already present and accessible in existing enterprise systems. eTrust SSO provides a number of methods to conveniently extract this information and use it to load the data store — saving you valuable time and streamlining your implementation. Sources Of Data The largest amount of information that must be entered into the data store is user information. In most organizations, this is already present in: ■ Operating systems, such as Windows NT and NetWare ■ Groupware, such as Lotus Notes or SAP ■ Enterprise management tools ■ Computerized employee records Installing the Policy Server 3–15 Start the Policy Server After Installation Using Existing Data To use existing data for an initial load of the data store , you can: ■ ■ ■ Selang Scripts Employ Identity Management tools such as eTrust Admin. Build Selang scripts (batch files) and load them into the eTrust Access Control data store. The Selang scripts must contain the necessary user and application information in the form of Selang commands. Create appropriate ldif files (batch files) and load them into the eTrust Directory data store. The ldif files must contain the necessary user information in the form of directory data. For more information see the eTrust Directory documentation. Selang scripts for building the data store must contain a line for each record to be loaded into the data store. See the following examples of Selang scripts: A Selang script to load user information: editusr ("JSmith") fullname("Jason Smith") phone("736-519-2526") location("Acme") org_unit("Loans") auth_type(Method5)\ when days(mon, tue, wed, thu, fri, sat, )\ time (AnyTime)) editusr ("BBrown") fullname("Betty Brown")\ phone("736-519-2519") location("Acme")\ org_unit("MIS") auth_type(Method5)\ when(days(mon, tue, wed, thu, fri, sat, )\ time (AnyTime)) editusr . . . A Selang script to load application data: editappl ("NewLoans") logon_type(Pwd) sensitive script(mortgage.tcl) editappl (“Contracts”) logon_type(Pwd) script('Negotiate.tcl') A Selang script to load logon data: editlogon ("JSmith") appl(NewLoans) logonid('jassmi') currpwd('B587jj34') editlogon ("JSmith") appl(Contracts) logonid('jassmi') currpwd('Olympus4X') There are two recommended methods for creating a Selang batch file. One method is using a utility to extract and configure data from an OS and convert the data to a Selang batch file. eTrust SSO currently provides two utilities, UxImport for UNIX and ntimport for Windows NT. For information on using these utilities, see the eTrust Access Control documentation. The second method is building an in-house utility to extract information from user and application files and configure them in Selang batch file format. For example, if a site keeps user information in a data store such as Oracle, the data store ’s report generator could be used to extract the data needed for SSO as an ascii file. Then, using awk in UNIX, the ascii file could be configured to the Selang batch file format needed. To run the Selang script use the command Selang -r filename 3–16 eTrust SSO Implementation Guide Start the Policy Server After Installation LDIF Files See the following examples of Ldif files (note that these contain the minimum attributes required. Other attributes specified in the standard inetOrgPerson schema may be added as required). An LDIF file to load user information: dn: cn=JSmith,o=ps objectClass: top objectClass: eTssoUser objectClass: inetOrgPerson objectClass: organizationalPerson objectClass: person cn: JSmith surname: Smith eTrustAutheMethod: Method 5 Note that application data is always stored in the eTrust Access Control database, so in order to load application data it is still necessary to use a Selang script: editappl ("NewLoans") logon_type(Pwd) sensitive script(mortgage.tcl) An LDIF file to load logon data: dn: cn=JSmith@NewLoans,ou=LoginInfos,o=ps objectClass: top objectClass: eTssoLoginInfo cn: JSmith@NewLoans eTssoApplName: NewLoans eTssoCurrPwd:: B587jj34 eTssoLoginID: JSmith eTssoUserDN: cn=Jsmith,o=PS To load the LDIF files, use the eTrust Directory dxModify tool. The syntax is as follows: dxmodify -a -f <ldif filename> -h <directory host> -p <directory port> -D <user dn> -w <password> By default the LDAP user store for the Policy Server is on the same machine as the Policy Server itself, and the default port is 13389. The default user name for accessing the LDAP user store is ldap-pers. If the machine name was Server1, the command line to load the user info from the LDIF file specified above would be as follows: dxmodify -a -f user-info.ldif -h server1 -p 13389 -D ldap-pers -w <password> See the eTrust Directory tools documentation for further details. Installing the Policy Server 3–17 Chapter 4 Installing the Policy Manager This chapter explains how to install the Policy Manager. Policy Manager is a tool that lets you manage the Policy Server and the data stores (eTrust Directory and eTrust Access Control). It is usually installed on an administrator’s workstation with TCP/IP communication to the Policy Server. You can use the Policy Manager to communicate with both UNIX and Windows Policy Server computers. You can use one Policy Manager to manage several Policy Servers, or several Policy Managers to communicate with one Policy Server. Policy Manager Administrator’s machine Administrator Policy Server Authentication Agent Authentication machine eTrust Access Control eTrust Directory Policy Server machine SSO Client Primary authentication End user’s machine End user Windows, UNIX, Mainframe applications machines Installing the Policy Manager 4–1 Before You Begin Before You Begin The Before You Begin Section is designed to guide you through what you need to know before you install the Policy Manager. Overview This section gives you an overview of the Policy Manager installation. For further information about things you should consider for your Policy Manager installation, see the Checklist section of this chapter. Ways to install the Policy Manager This section explains each type of installation to help you choose which method you should use. Installation Type Wizard Complete installation Configuration Options ■ File location for Policy Manager ■ Encryption method ■ Wizard Custom installation Products to be managed by the Policy Manager (eTrust AC, eTrust Web AC and/or eTrust SSO) All the options for Complete installation plus: ■ Installation locations for the individual Policy Manager components Note: If you are using the Policy Manager to control a server farm, you must apply the Policy Manager server farm patch after you have installed the Policy Manager. For more information see, the Readme document. Decide Where to Install the Policy Manager You can install the Policy Manager on an administrator’s workstation or on a Policy Server computer. If you are installing the Policy Manager on the same computer as the Policy Server, make sure that you install the Policy Server first. 4–2 eTrust SSO Implementation Guide Before You Begin Checklist Before you install the Policy Manager make sure that the following requirements are met. Make sure you have checked the System Requirements section of the Readme file for this product. Ensure that the computer you are installing the Policy Manager on has TCP/IP to communicate with the Policy Server (s) that you want to manage. Ensure that you have the name(s) of the Policy Server computer(s) that host the Policy Server that you want manage. This information is not needed until after the basic installation when you need to connect to the Policy Server for the first time. If you have eTrust Access Control running on your machine prior to installing the Policy Manager, installation of the Policy Manager restarts eTrust Access Control services. If you install the Policy Manager on a machine that is running eTrust Access Control, you should have administrative privileges in eTrust Access Control. You cannot install the Policy Manager to a location containing the % character in the folder path. You cannot install the Policy Manager on a system that is also running the Application Server Agent for WebSphere. If you plan to install the Policy Manager on a machine with eTrust Access Control installed, you must have eTrust Access Control Version 5.1 SP1 or later. If you want to track down an issue or diagnose a problem you can set up logging. For more information, see the eTrust SSO Administrator Guide, “Auditing, Logging, and Tracing” chapter. Installing the Policy Manager 4–3 Install the Policy Manager Install the Policy Manager This section explains how to install a the Policy Manager. The Policy Manager is a tool that lets you administer the Policy Server. The Policy Manager can only be installed on a Windows machine. To Install the Policy Manager This procedure tells you how to install the Policy Manager. 1. From the eTrust Single Sign-On 7.0 Product Explorer wizard select Policy Manager for Windows. The wizard should appear automatically when you insert the eTrust SSO disk. If not, open Windows Explorer and navigate to the CD-ROM directory and double-click the PE_i386.exe file. The Install button becomes active. 2. Click the Install button. The Welcome dialog appears. 3. Click next then accept the license agreement then enter your customer information and click Next. Note: You must scroll to the bottom of the license agreement. The Setup Type dialog appears. 4. Select what type of installation you want and click the Next button For more information about the Custom installation see the Pre-Installation Considerations in the previous section of this chapter. The eTrust Policy Manager Administrative Options dialog appears. 4–4 eTrust SSO Implementation Guide Install the Policy Manager 6. Select the Policy Manager Modes. You have the option to select other eTrust components that can be managed by the Policy Manager. Note: If you are using the Policy Manager to work with a server farm of Policy Servers, you must select the “eTrust Access Control” option. The Encryption Method dialog appears. 7. Select the Encryption Method you wish to use and click the Next button. Unless you have a specific reason not to, you should use the default method. A message appears to say that you are now ready to install the program message appears. 8. Click Install to complete the installation of the Policy Server. The default destination for the Policy Manager: ■ If the Policy Server is not already installed on this computer %Program Files%\CA\eTrust Access Control\Policy Manager ■ If the Policy Server is already installed on this computer %Program Files%\CA\eTrust Access Control\ Where to Next? Once you have installed the Policy Manager, see the Connect the Policy Manager to the Policy Server section of this chapter. Installing the Policy Manager 4–5 Connect the Policy Manager to the Policy Server Connect the Policy Manager to the Policy Server When you launch the Policy Manager you must direct it to the Policy Server that you want to manage. To Connect the Policy Manager to the Policy Server This procedure tells you how to connect to a Policy Server. 1. From the Windows Start menu launch the Policy Manager The logon dialog appears 2. Enter your user name, password and the host name. In the Host Name field, you should enter or browse for the computer that has the Policy Server installed on it. The username and password you entered here must be defined as an administrator and have access rights to the Policy Server computer. When the Policy Server was installed, a user was defined that can be used to administrator the Policy Server. By default, the name of this administrator user is ps-admin, but you may have changed this during the Policy Server installation. Where to Next? You have now completed the Policy Manager installation and connected to the Policy Server. 4–6 eTrust SSO Implementation Guide Chapter 5 Installing the SSO Client This chapter explains the different ways to install the SSO Client. The SSO Client is an application that allows users in your enterprise to work with eTrust Single Sign-On (eTrust SSO). This is the only eTrust SSO component that the end user sees and works with. The SSO Client runs on every workstation that uses eTrust SSO services. The SSO Client can be installed on each workstation, or it can be run on the workstations from a networked server. Policy Manager Administrator’s machine Administrator Policy Server Authentication Agent Authentication machine eTrust Access Control eTrust Directory Policy Server machine SSO Client Primary authentication End user’s machine End user Windows, UNIX, Mainframe applications machines For more information about how the SSO Client helps to authenticate users and launch applications see the ‘Common eTrust SSO Processes’ chapter in the eTrust SSO Getting Started guide. Installing the SSO Client 5–1 Wizard Installation There are two methods of installing the SSO Client: ■ Wizard installation (Windows GUI) ■ Silent installation (command line prompt) You must install the SSO Client using the wizard at lease once, even if you want to use the Silent installation method. This is required to create a modified SsoClnt.ini file relevant to your environment. Wizard Installation This section explains how to install the SSO Client using the Product Explorer wizard. This method is not always appropriate for large installations, because it is impractical to use the wizard on every user’s computer. Pre-Installation Considerations Part way through this installation you will be asked to choose whether you want to do a custom installation or a typical installation. Select custom installation when you want to install: ■ SSO GINA functionality (Windows NT/XP/2000 only) ■ Workstation Mode options (Windows NT/XP/2000 only) ■ ■ ■ Any authentication agents other than SSO and NT, which are installed by default Citrix Metaframe-supported functionality SSO Client Toolbar instead of SSO Client Tools. This affects how users access their eTrust SSO application list. SSO Client Tools is the default. For more information about Workstation Modes and GINA functionality, see the eTrust SSO Administrator Guide, “Customizing the SSO Client” chapter. You can set up logging to track down any issues although this is only recommend for when you have a specific reason, rather than leave it on all the time. For more information about logging, see the eTrust SSO Administrator Guide, “Auditing, Logging, and Tracing” chapter. 5–2 eTrust SSO Implementation Guide Wizard Installation Pre-Installation Checklist Before you begin, use this checklist to make sure you have all the information and software that you need to install the SSO Client. Have the name(s) of the Policy Server computer(s) and the backup Policy Server computer(s) (if you are using a backup server). Have the name(s) of the authentication server computer(s) (authentication host). Log in with administrative privileges if you want to implement the SSO GINA. Make sure you are running Windows 98SE or later. Make sure the computer you are installing the SSO Client on has a network connection with TCP/IP to communicate with the Policy Server. Make sure you shut down all other applications on the computer. Install Using the Wizard This procedure describes how to install the SSO Client using the Product Explorer Wizard. This is a good method to use when you are installing the SSO Client on a single computer. Tip: When you enter more than one computer name in a list you can separate the names with commas or spaces. 1. From the eTrust Single Sign-On 7.0 Product Explorer wizard select Single Sign-On Client 7.0. The wizard should appear automatically when you insert the eTrust SSO disk. If not, open Windows Explorer and navigate to the CD-ROM directory and double-click the PE_i386.exe file. 2. Click the Install button. The Welcome dialog appears. 3. Click the Next button then read and accept the license agreement. The Setup Type dialog appears. Installing the SSO Client 5–3 Wizard Installation 4. Select Custom if you want to install any of the custom features or components, and click the Next button. If you select the Typical installation, go to step 11. If you select Custom installation, the Custom Setup dialog appears. 5. Click on any component and a drop-down menu appears. From this menu you can select one of the following options: - This feature will be installed on local hard drive - This feature, and all subfeatures, will be installed on local hard drive - This feature will not be available All items marked with either computer. 6. or icons will be installed on the Once you have selected which features, if any, you want to install, click the Next button. The Authentication Methods dialog appears. 7. Select the default authentication method and click the Next button. This will set the default method, but the users of this computer will be able to access all authentication methods that you have enabled using the drop down menu on their SSO authentication dialog. 5–4 eTrust SSO Implementation Guide Wizard Installation If you selected the Station Lock component, the Station Lock dialog appears. 8. Select the Station Lock (Workstation Mode), you want to install and click the Next button. The Interface Configuration dialog appears. 9. Select the Interface Configuration option you want, and click the Next button. This sets how the user accesses the SSO Client. The Citrix Metaframe Support dialog appears. 10. Select the appropriate option and click Next. You must install the Citrix Metaframe support if you want to implement application migration. If you do not have a Citrix Metaframe server installed and operational, select No. The Network Configuration dialog appears. 11. Enter the names of the following computers: - The Policy Server computer(s) - The backup Policy Server computer(s) (if any) - The authentication server computer(s) Click the Next button. The Ready to Install the Program dialog appears. 12. You are now ready to install. You can select the Add a shortcut to “eTrust SSO Client” in the Startup folder on this screen. If you installed the GINA, this will be done automatically. The SSO Client will be installed on your computer. You may be required to restart the computer. Modifying SSO Client on Windows If you need to modify SSO Client components, you can run the wizard for SSO Client as you did for installation. You must shut down the SSO Client before you make any modifications. The wizard detects that the SSO Client is installed and shows the interface for modification and maintenance of SSO Client components. Note: After modifying SSO Client components, you must right-click the eTrust Single Sign-On Agent icon, select Exit, and re-run the SSO Client for the modifications to take effect. Installing the SSO Client 5–5 Silent Installation Silent Installation About the Silent Installation This method lets you install the SSO Client from the command line prompt. You must use a customized SsoClnt.ini file with the silent installation. To get the SsoClnt.ini file, you must install the SSO Client using the wizard at least once. For more details about how to customize the SsoClnt.ini file, see Appendix A in the eTrust SSO Administrator Guide. This method is ideal when you want to quickly install the SSO Client on multiple users’ computers. Pre-Installation Considerations You must configure the SsoClnt.ini file prior to installing the SSO Client using the silent installation method. You get the SsoClnt.ini file by installing the SSO Client using the wizard. If you accept the default locations that are set during the default installation of the SSO Client using the wizard, the SsoClnt.ini file is located in %Program Files%\CA\eTrust SSO\Client folder (where %Program Files% is the value of the Program Files environment variable on the local machine) The SsoClnt.ini file is broken into sections. Each section has one or more settings that you can change to alter the behavior of the SSO Client. Settings are also known as tokens or keynames. Each section is denoted by words or letters enclosed in square brackets, for example the first section is [sso]. For a complete list of all SsoClnt.ini file settings, see “Appendix A” of the eTrust SSO Administrator Guide or the SsoClnt_Readme that is installed with the SsoClnt.ini file To silently install the SSO Client on a large scale, copy the Client installation files to a network drive together with the customized SsoClnt.ini file. You can set up logging to track down any issues although this is only recommend for when you have a specific reason, rather than leave it on all the time. For more information about logging, see the eTrust SSO Administrator Guide, “Auditing, Logging, and Tracing” chapter. 5–6 eTrust SSO Implementation Guide Silent Installation Pre-Installation Checklist Before you begin, use this checklist to make sure you have all the information and software that you need to install the SSO Client. Make sure the computer you are installing the SSO Client on has a network connection with TCP/IP to communicate with the Policy Server. Make sure you have saved changes to the SsoClnt.ini file and put it in the installation directory. For more information about how to configure your SsoClnt.ini file, see Modifying the SsoClnt.ini File section later in this chapter, and Appendix A in the eTrust SSO Administrator Guide. Set administrator privileges if you intend to implement the SSO GINA. Have the name(s) of the authentication server computer(s) (authentication host). Make sure you shut down all the applications on the computer. Make sure you have you saved changes to the SsoClnt.ini file and put it in the installation directory. For more information about how to configure your SsoClnt.ini file, see Modifying the SsoClnt.ini File section later in this chapter, and Appendix A in the eTrust SSO Administrator Guide. If you wish to supply your own Readme.html file to your users, place this in the installation folder with the SsoClnt.ini file. Installing the SSO Client 5–7 Silent Installation Install Using the Silent Installation This method is particularly good when you want to implement the SSO Client quickly on many computers, but you also want to be able to configure multiple settings in the SsoClnt.ini file. 1. Install the SSO Client using the wizard. 2. Make changes to the SsoClnt.ini file. Unless you have specified a different location the SsoClnt.ini file is located in %Program Files%\CA\eTrust SSO\Client folder (where %Program Files% is the value of the program files environment variable on the local machine) 3. Modify the SsoClnt.ini file to suit your installation needs. For more information about how to configure your SsoClnt.ini file, see Appendix A in the eTrust SSO Administrator Guide or the SsoClnt_Readme.html file. 4. Copy the installation files to a network drive and put the customized SsoClnt.ini file in the same folder. You can also put a customized version of the Readme.html in this folder. 5. Open the command prompt and navigate to the location of the installation files. 6. From the command prompt, type: setup.exe /s /v"/qn <insert variables here>" You can specify certain information in the silent command line. For information about what values you can specify in the silent install, see the Command Line Settings section of this chapter. The SSO Client will install silently using the supplied SsoClnt.ini file for all the configuration information. 5–8 eTrust SSO Implementation Guide Silent Installation Command Line Settings You can set several values when you install the SSO Client using a silent installation. Description Setting Installation directory on the user’s computer INSTALLDIR = [enter location] Install all authentication methods (see below) INSTALLLEVEL= 110 Install all authentication methods plus the SSO GINA. INSTALLLEVEL=130 You cannot install the GINA silently without also installing all the authentication methods. We recommend that you only use INSALLLEVEL 110 or 130, not both. Specify whether the eTrust SSO application list will display in the user’s Windows Start menu. STARTUPFOLDER=[1|0] 0 = Don’t create in Start menu 1 = Do create in Start menu* *See SESSMGMTENABLED below. Enables Session Management GINA pass through option in the Windows Start menu. SESSMGMTENABLED=[1|0] If you: ■ ■ ■ are installing the GINA, and are creating Shortcut in the Start menu, and have selected GinaPassThrough = yes (in the SsoClnt.ini file) then we strongly recommend that you set SESSMGMTENABLED=0 Reboot the computer after installation? REBOOT=[F|R] F = Force a reboot R = Suppress a reboot Here is an example of a silent install command that includes variables: Setup.exe /s /v"/qn INSTALLLEVEL=110 STARTUPFOLDER=1 REBOOT=R" For more information about the SSO GINA see the eTrust SSO Administrator Guide “Configuration the Client” chapter. Installing the SSO Client 5–9 Configuring the SSO Client Configuring the SSO Client The behavior of the SSO Client is determined by the SsoClnt.ini file. The SsoClnt.ini files is broken into sections. Each section has one or more settings that you can change to alter the behavior of the SSO Client. Settings are also known as Tokens or keynames. Each section is denoted by words or letters enclosed in square brackets, for example the first section of the SsoCltn.ini file is [sso]. To set the behavior of the SSO Client you file you often have to make changes to several different sections of the SsoClnt.ini file in conjunction with each other. If you are installing the SSO Client on multiple different workstations, it is good practice to change the SsoClnt.ini to suit your needs before you install the SSO Client. For this reason we recommend that you install, configure, and test the SSO Client on one or two machines before you distribute it to the rest of your enterprise. For a complete list of all the SsoClnt.ini file settings, see “Appendix A” of the eTrust SSO Administrator Guide or the SsoClnt_Readme that is installed with the SsoClnt.ini file. For more information about how to configure the SSO Client for a shared workstation environment, see “SSO Client in a Shared Workstation Environment” chapter in this guide. 5–10 eTrust SSO Implementation Guide SSO Client on a File Server—Network Installation SSO Client on a File Server—Network Installation Although the SSO Client has essentially the same functionality in all operating system environments, an SSO Client for one environment will not function correctly in any other environment. In a network installation, the SSO Client executables, SsoClnt.ini, and all associated files are installed together on a network file server. The SSO Client is run on the user’s workstation from the file server. To implement this, a network installation places SSO Client shortcut folders in the Start Menu, Programs, and Startup folders of the Windows directory, and updates the registry. When the user selects SSO Client from the Start menu, the SSO Client starts running the executable from the file server on the user’s workstation, using configuration parameters. In order to provide different client configuration for different users, more than one SSO Client can be installed on the same file server. However, each SSO Client must be placed in a separate subdirectory. The administrator can set up different SSO Client configurations by giving each client a different SsoClnt.ini file and control access to them by setting the appropriate path in the SSO Client shortcut in the Profiles or Start Menu subdirectory on the users’ workstation. Important! You should not install and run on the same workstation both the SSO Client that is to be located on the user’s workstation and the SSO Client that is to be installed on the network. If an end user workstation belongs to a different domain to the one where the SSO Client file server is installed, and if there are no trust relations between the domains, a map network drive must be made from the user's workstation to the Client folder on the SSO Client file server. Otherwise, a user will need to run the setup program again or re-authenticate to the file server domain. Configuration Parameters The SSO Client obtains its initialization parameters from one of the following places: ■ ■ The SsoClnt.ini file, which is located in the same directory as the SSO Client executable: – In a network installation, on a network file server. – In a local installation, on the local workstation Local operating parameters – For Window clients, from the local Windows registry – For UNIX clients, from the SsoClnt.ini file in the home directory Installing the SSO Client 5–11 SSO Client on a File Server—Network Installation Security For security reasons, you may want to clear the username field in the NT Logon tab, so that by default, the last user who logged on is not listed. Also, you may want to hide the Shutdown button on the NT Only tab. To hide the name of the last user to log on, set the following registry key to 1: HKEY_LOCAL_MACHINE\SOFTWARE\Microsoft\Windows\CurrentVersion\policies\system\dont displaylastusername To disable the Shutdown button, set the following registry key to 0: HKEY_LOCAL_MACHINE\SOFTWARE\Microsoft\Windows\CurrentVersion\policies\system\shut downwithoutlogon 5–12 eTrust SSO Implementation Guide Chapter 6 Implementing Authentication Agents eTrust Single Sign-On (eTrust SSO) can be used with third-party authentication software. The process by which the end users identify themselves to eTrust SSO is called primary authentication. eTrust SSO offers a variety of different methods for primary authentication. In order to provide maximum operational flexibility, a separate authentication agent handles the interactions between the SSO Client and the third-party authentication server. Each of the authentication agents is a bridge for communication between the SSO Client and an authentication server. eTrust SSO includes ready-made agents for various authentication systems. This chapter describes how to implement each of the authentication agents that are supplied with eTrust SSO: ■ Certificate ■ Entrust ■ LDAP ■ Novell NetWare ■ RSA SecurID ■ SAFLINK ■ Windows You can also use the eTrust SSO Open Authentication Toolkit to create an authentication agent for other authentication systems used in your organization. This lets you use your existing authentication methods to authenticate users to eTrust SSO. One of the three components of each authentication agent is a ticket granting agent (TGA). The TGA is a Windows service. This component communicates with the authentication server and also communicates with the SSO Client library component through TCP/IP. Implementing Authentication Agents 6–1 How eTrust SSO Works with Third-Party Authentication Software How eTrust SSO Works with Third-Party Authentication Software This section gives you an overview of the primary authentication process. 1. The user starts the SSO Client on their workstation. 2. The SSO Client checks the AuthMethods keyname in the ssoauth section of the SsoClnt.ini file. All authentication methods listed in this section will be available to the user. The first in the list will be displayed as the default. 3. The SSO Client opens the logon dialog, which prompts the user for the following: - Select an authentication method (the list of methods is taken from the AuthMethods keyname in the SsoClnt.ini file) - Enter credentials, such as a user name and password, biometric information, or a smart card. 4. The SSO Client sends the user’s logon details and authentication method to the eTrust SSO authentication agent on the authentication host. 5. The authentication agent verifies that the credentials used to log on correspond to a valid user on the authentication host. If the authentication server does not approve the user’s primary authentication, it sends a rejection message to the authentication agent, which then notifies the SSO Client that the primary authentication has failed. 6. If the verification is successful, the authentication agent creates an SSO ticket, encrypts it using a secret key, and sends it to the SSO Client. The SSO ticket is a string that includes user identification, authentication method, and time stamp. The ticket is valid for a defined number of hours. 7. The SSO Client does two things with the SSO ticket: - The SSO Client caches the SSO ticket. Later, it uses the same ticket in the application logon process. - The SSO Client sends the SSO ticket to the Policy Server. 8. The Policy Server verifies the SSO ticket. 9. If the ticket is valid, the Policy Server retrieves from the user data store the list of the applications that the user is authorized to use, and sends the list to the SSO Client. 10. The SSO Client displays the list of applications. The user can now start work. 6–2 eTrust SSO Implementation Guide Summary of Authentication Agent Settings Summary of Authentication Agent Settings This section describes the configuration settings that are common to all authentication agents. These settings are also described for each authentication agent later in this chapter. Configuring the SSO Client To use any of the authentication methods for primary authentication, the following entries must exist in the SsoClnt.ini configuration file. The instructions that follow describe how and when to do this. For more information about configuring the SSO Client, see the appendix “Configuring the SSO Client: SsoClnt.ini.” Set the Authentication Methods The AuthMethods keyname in the ssoauth section must contain the short names of the desired authentication methods. For example: [ssoauth] AuthMethods=RSA, LDAP, SSO Set the Authentication Host and Port Number The authhost token in the auth.<short auth method name> section must specify the host where the Windows Service component of the Authentication Agent is running. For example: [auth.RSA] authhost=server598 It is also possible to specify the port number on which the SSO Client will attempt to communicate with the TGA. For example: [auth.RSA] authhost=server598:13880 The port number specified here must match the port number specified in the ticket granting agent (TGA). If the port number is not specified, a default port is used. NetWare and Windows authentication agents do not use TCP/IP ports. Instead, the Novell authentication agent uses the Novell APIs, and the Windows authentication agent uses named pipes. Implementing Authentication Agents 6–3 Summary of Authentication Agent Settings Configuring the Authentication Agent This section lists the settings you can configure in the authentication agents. All of these settings may be edited, but you must restart the authentication agent service for the changes to take effect. The settings for the Novell NetWare authentication agent are found in the ssoauth.ini file. See the section The NetWare Authentication Agent for the configuration settings in this file. The settings for the other authentication agents are found in the following Windows Registry keys: Certificate HKEY_LOCAL_MACHINE\SYSTEM\CurrentControlSet\Services\ sso_tga_cert_Agent1\Parameters\sso_tga_cert_Agent1 Entrust HKEY_LOCAL_MACHINE\SYSTEM\CurrentControlSet\Services\ sso_tga_ents_Agent1\Parameters\sso_tga_ents_Agent1 LDAP HKEY_LOCAL_MACHINE\SYSTEM\CurrentControlSet\Services\ sso_tga_ldap_Agent1\Parameters\sso_tga_ldap_Agent1 RSA SecurID HKEY_LOCAL_MACHINE\SYSTEM\CurrentControlSet\Services\ sso_tga_rsa_Agent1\Parameters\sso_tga_rsa_Agent1 SAFLINK HKEY_LOCAL_MACHINE\SOFTWARE\ComputerAssociates\ eTrustAccessControl\Client\ ClientType Windows HKLM\SOFTWARE\Computer Associates\eTrust SSO\ NT Authentication Agent 6–4 eTrust SSO Implementation Guide Starting the Authentication Agent Starting the Authentication Agent From time to time, you may need to start and stop the authentication agent services. The Novell and SAFLINK authentication agents do not need to be started and stopped. Starting the Certificate, Entrust, LDAP, and RSA SecurID Authentication Agents For the following three authentication agents, the ticket granting agent (TGA) can be started either as a service or on a command line: ■ Certificate ■ Entrust ■ LDAP ■ RSA SecurID The syntax for the command to start these three authentication agents is: tga_appl.exe <option> where <option> is one of the following: -start [name] Start the service corresponding to the specified name (or the default service, if the name hasn’t been specified) -stop [name] Stop the service corresponding to the specified name (or the default service, if the name hasn’t been specified) -i[nstall] [name] Create a service object using information based on the specified name (or the default set of information, if the name hasn’t been provided) and add it to the service control manager database -r[emove] [name] Mark the specified service for deletion from the service control manager database -d [name] Run the application from the command line, using configuration settings of the service corresponding to the specified name (or the default service, if the name hasn’t been specified) Implementing Authentication Agents 6–5 Starting the Authentication Agent Starting the Windows Authentication Agent The Windows authentication agent uses a similar list of commands, but without the name attribute, and the -d command does not apply.- same commands but no [name], and no d command The syntax for the command to start the Windows authentication agent is: tga_appl.exe <option> where <option> is one of the following: -start Start the Windows authentication agent service -stop Stop the Windows authentication agent service -i[nstall] Create a service object and add it to the service control manager database -r[emove] Mark the Windows authentication agent service for deletion from the service control manager database 6–6 eTrust SSO Implementation Guide The Certificate Authentication Agent The Certificate Authentication Agent eTrust SSO supports primary authentication using certificates. This section explains how to install the Certificate authentication agent. Throughout this implementation guide, the host on which the Certificate authentication agent is being installed is called the CERT_AUTHHOST. System Requirements For details about the systems requirements for this component please see the README document. Note: All operating system clocks must produce a reliable and correct timestamp for the time-zone where each machine hosting any SSO components are located. For example, a machine located in New York hosting a Policy Server must have it’s OS clock set to US Eastern Daylight Time (EDT) whilst a machine located in San Francisco hosting a LDAP Auth Agent must have it’s OS clock set to US Pacific Daylight Time (PDT). Pre installation Considerations This sections explains a few of the concepts and requirements that you must consider before you install the Certificate authentication agent. Trusted Certificates The CertAuthAgent uses this list of trusted certificates to determine if it should allow a user certificate to be verified. Unless the issuing certificate of the user certificate that is being used is included in this configuration option, the user certificate can not be verified by the CertAuthAgent. When you install the Certificate Authentication Agent you will be asked to specify a Trusted Certificate (at least one Trusted Certificate must be specified), you can use a ‘Browse’ button to navigate to the directory that contains the der encoded certificate. You must specify at least one Trusted Certificate to install the CertAuthAgent, but you may also specify multiple Trusted Certificates. These certificates must all reside in the same Directory. Implementing Authentication Agents 6–7 The Certificate Authentication Agent Revocation This section explains what certificate revocation is and tells you about the different revocation settings for the certificate authentication agent. Revocation refers to the fact that the system can block certain certificates. This is based upon the system knowing which certificates cannot be trusted. There are several ways that the system can identify untrustworthy certificates. CRL CRL stands for Certificate Revocation List. This is a list of certificates that have been revoked by the Certification Authority. The CRL is a blacklist that contains the certificates which are no longer valid. Fixed OCSP Fixed OCSP lets you specify a fixed address for an OCSP responder that can check the user certificates and verify whether they are valid or have been revoked. You will also need to have the full address (DNS/IP address and the Port) of the responder to use this option. AIA OCSP AIA OCSP lets the CertAuthAgent retrieve the OSCP responder address from the user certificate. This means that you don’t have to specify a fixed OCSP address. To use this option the users’ certificates must contain an OCSP responder address in the ‘Authority Information Access (AIA)’ attribute. CRL DP The CRLDP stands for CRL Distribution Points. This option lets the CertAuthAgent retrieve a CRL via either HTTP or LDAP by using an address listed in the ‘CRL Distribution Points’ attribute of the certificate. You will also need to have the issuing/signer certificate of the CRLs that will be used by the Cert Auth Agent. You are required to specify at least one issuing/signer certificate, and you can specify multiple issuing/signer certificates. These certificates must reside in the same Directory. 6–8 eTrust SSO Implementation Guide The Certificate Authentication Agent Combinations The CertAuthAgent lets you to use a combination of two of the available Revocation Status Checking Methods. All combinations consist of CRL together with another method. The available combinations are: ■ CRL and Fixed OCSP ■ CRL and AIA OCSP ■ CRL and CRLDP The benefit of using a combination of Revocation Status Checking Methods is that it will provide a more accurate result. The Certificate authentication agent will always first check that certificate with the CRL. If the certificate is listed as revoked here, the authentication agent will not check the second method. If the certificate is not listed as revoked on the CRL, the authentication agent will go on to check the second method. The configuration for each of the methods is the same as if you selected them individually. Implementing Authentication Agents 6–9 The Certificate Authentication Agent Install the Certificate Authentication Agent When installing the Certificate authentication agent you must install the necessary files and then install and start the Certificate authentication agent service. This section explains how to install the Certificate Authentication Agent, and how to start it once it has been installed. Register the Authentication Host as an Agent Host Your server administrator must register CERT_AUTHHOST as an Agent Host on the Police Server. ■ There must be a TCP/IP connection between the Policy Server and CERT_AUTHHOST. To Install the Certificate Authentication Agent This section explains how to install the Certificate Authentication Agent. 1. From the eTrust Single Sign-On 7.0 Product Explorer wizard expand the eTrust Single Sign-On Authentication Agents folder, and select Certificate Authentication Agent. The wizard should appear automatically when you insert the eTrust SSO disk. If not, open Windows Explorer and navigate to the CD-ROM directory and double-click the PE_i386.exe file. The Install button becomes active. 2. Click Install and accept the license agreement. The Select Trusted Certificate Files dialog appears. 3. 6–10 Navigate to the Directory that contains the DER-encoded certificate files of trusted issuing certificates. You must select at least one trusted issuing certificate. eTrust SSO Implementation Guide The Certificate Authentication Agent The CertAuthAgent uses this list of trusted certificates to determine if it should allow a user certificate to be verified. The user certificate cannot be verified unless the issuing certificate is specified here. You can specify multiple trust certificates, but they must all be in the same directory. The last input field allows you to specify how many certificates will be checked in the chain of certificates in the trusted set. The certification chain is also called verification chain. For more information, see The Configuration Settings for the CERT authentication Agent section of this chapter (the VerifyDepth keyname in the table). 4. Click Next. The Certificate Revocation Status Checking Method dialog appears. Implementing Authentication Agents 6–11 The Certificate Authentication Agent You can configure the CertAuthAgent to perform revocation status checking on the user certificates. There are six revocation status checking methods that you can use. These are: 6–12 ■ CRL ■ Fixed OCSP ■ AIA OCSP ■ CRLDP ■ None ■ A combination of CRL and either Fixed OCSP, AIA OCSP or CRLDP. eTrust SSO Implementation Guide The Certificate Authentication Agent 5. Select the appropriate Certificate Revocation Status Checking Method if you want to use a checking method, and click next. 6. Depending on which Certificate revocation status checking method you chose you will be prompted for different information.. The following table shows you what information you will need for each option. If you selected You will be prompted for this information CRL The Certificate Revocation List The CA (certificate authority) that issued the CRL (a DER file) The time interval between each poll for an updated CRL (optional). Fixed OCSP The hostname and port number of the OCSP Responder. The certificate that is used to sign the OCSP request to your responder. This must be a PKCS#12 file. HTTP Proxy configuration, if necessary for the CertAuthAgent to access the OCSP responder. AIA OCSP The certificate that is used to sign the OCSP request to your responder. This must be a PKCS#12 file. HTTP Proxy configuration, if necessary for the CertAuthAgent to access the OCSP responder. CRL DP A certificate that is used to issue the CRL. These files must be DER-encoded. The time interval between each poll for an updated CRL (optional). None of the above 7. None When you get to the Encryption Key dialog, enter the encryption key. Note: If you have defined the AuthHost on the Policy Server to have an Encryption Key, you will need to enter the same encryption key here. 8. Select Next to complete the installation. Implementing Authentication Agents 6–13 The Certificate Authentication Agent Configure the Windows Registry This section tells you how to edit the Windows Registry and what values to change according to which certificate revocation status checking method you chose. 1. Open regedit and navigate to HKEY_LOCAL_MACHINE\SYSTEM\CurrentControlSet\Services\sso_tga _cert_Agent1\Parameters\sso_tga_cert_Agent1. 2. Change the ‘AuthHostName’. This value must be the same as the AuthHostName in the Policy Server. Setting Explanation Example TrustedCertPath The full path to the directory that contains the Trusted Certificate files is set in this registry key C:\certs TrustedCertNames cert1.der,cert2.der The file name(s) of the trusted certificate(s). Each certificate must be separated by a comma, with no spaces. 3. 6–14 Change the Following settings according to which certificate revocation status checking method you chose, if any. If you chose Setting No CRL revocation RevocationMeth key= CRL revocation RevocationMeth = CRL CRL CrlFileName = [full path and file name of the der encoded CRL file] c:\certs\list.crl CrlIssuerCert = [full path and file name of the issuing/signing certificate of the CRL] c:\certs\root.der eTrust SSO Implementation Guide Example The Certificate Authentication Agent If you chose Setting Example Fixed OCSP RevocationMeth= FIXED_OCSP FIXED_OCSP OcspResponder=[address of the responder that you want to use] http://computernam e.com:3080 Optional settings: HttpProxy: [address of the proxy, if required] http://proxy.com:808 0 OcspSignCert=[path and name of the c:\certs\signingCert. .p12 filed used to sign the OCSP p12 request, if required] OcspSignCertPass= [The password to password access the .p12 file in the OcspSignCert attribute.] NOTE: This password is stored in clear text in the registry. Because of this you can add it to the registry manually. AIA OCSP RevocationMeth= AIA_OCSP AIA_OCSP Optional settings: HttpProxy: [address of the proxy, if required] http://proxy.com:808 0 OcspSignCert=[path and name of the c:\certs\signingCert. .p12 filed used to sign the OCSP p12 request, if required] OcspSignCertPass= [The password to password access the .p12 file in the OcspSignCert attribute, if required.] NOTE: This password is stored in clear text in the registry. Because of this you can add it to the registry manually. Implementing Authentication Agents 6–15 The Certificate Authentication Agent If you chose Setting Example CRLDP RevocationMeth= CRLDP CRLDP CrlDPIssuerCertPath: Full path of the c:\certs directory that contains the issuing/signing certificate(s) of the CRL(s) CrlDPIssuerCerts: File name(s) of the cert1.der,cert2.der issuing/signing certificate(s) of the CRL(s). CrlDPTimeOut: The time, in seconds, 90 that the CertAuthAgent should wait to try retrieve the CRL Optional settings: http://proxy.com:80 HttpProxy: Proxy address for the 80 CertAuthAgent to access the CRL via HTTP (if required) *CRL and CRLDP RevocationMeth = CRLDP+CRL CRLDP+CRL *CRL and Fixed OCSP RevocationMeth = FIXED_OCSP+CRL FIXED_OCSP+CRL *CRL and AIA OCSP RevocationMeth = AIA_OCSP+CRL AIA_OCSP+CRL *The CRL method is always checked first. *After making any change to the registry settings of the CertAuthAgent you will have to restart the Windows service before the changes will be picked up by the CertAuthAgent. 6–16 eTrust SSO Implementation Guide The Certificate Authentication Agent Configure the SSO Client This section explains what changes you need to make to the SsoClnt.ini file on the SSO Client computer to configure Certificate authentication: 1. Edit the SsoClnt.ini file to include CERT as one of the authentication methods, preferably the first method in the list. For example: [ServerSet0] AuthMethods=CERT authCERT=Server1:13987 [auth host name as it is listed in the Policy Server] The port number is optional. If the port number is not specified, the default port (13987) is used. 2. Specify the name of the other settings associated with certificate authentication in the authhost keyname in the SsoClnt.ini file. For example: [auth.CERT] certStore=PKCS11 FILE defaultPkcs11Slot= Pkcs11LibraryPath=C:\Program Files\Schlumberger\Smart Cards and Terminals\Cyberflex Access Kits\v4\slbck.dll Pkcs11PromptText= disablePasswordField=0 Pkcs11TokenAbsenceBehavior=1 For more information about the SsoClnt.ini file settings, see the “Configuring the SsoClnt.ini File” appendix in the eTrust SSO Administrator Guide. Start CERT_AUTHHOST manually When the service is running, the Certificate agent is ready to accept authorization queries from the eTrust SSO client. When you restart the CERT_AUTHHOST computer the Certificate service starts automatically. This procedure tells you how to start the service manually. 1. Go to the Control Panel and select Settings, Administrative Tools, Services 2. Find the Certificate authentication agent in the list and right-click and select Start. Implementing Authentication Agents 6–17 The Certificate Authentication Agent Create an Authentication Host Entry on the Policy Server This is only useful if you change the Authhostname registry value after installing the auth agent. The default value is LDAP-ps-ldap, which points to an authhost that is automatically created during installation. You may consider using a different Auth Host entry to the Policy Server than LDAP_pers-LDAP. If so, you will need to create an Auth Host entry that matches the name of the authhost name registry value. Configuration Settings for the CERT Authentication Agent This section lists the settings you can configure in the Certificate authentication agents. All of these settings may be edited, but you must restart the authentication agent service for the changes to take effect. The settings for the Certificate authentication agent are found in the following Windows Registry key: HKEY_LOCAL_MACHINE\SYSTEM\CurrentControlSet\Services\sso_tga_cert_Agent1\Paramete rs\sso_tga_cert_Agent1 The following table lists the settings in the registry key: Keyname Description Default Value AuthHostName LDAP_ps-ldap The name of the authentication host that is included in the SSO ticket. If you leave this blank, the computer name of the authentication host is used. You can use the same value for all authentication methods, which allows you to use only one authhost entry in the Policy Server. By default, the Policy Server is installed with one authhost already created: LDAP_ps-ldap. ChildLimit Determines the number of worker threads that get created for dealing with incoming client requests. 3 IdleFreq Idle frequency, in calls/second. 20 PortNumber Port number on which the TGA is listening for client requests. 13987 RecvBuffSize Length of the buffer used when receiving the data (in bytes). 131072 (128 KB) SendBuffSize Length of the buffer used when sending the data (in bytes). 131072 (128 KB) TicketKey Key used to encrypt the ticket that is created by the TGA (after successful authentication) and sent to the SSO client. - 6–18 eTrust SSO Implementation Guide The Certificate Authentication Agent Keyname Description Default Value TimeOutConnect Connection time-out value (in seconds). 60 TimeOutRecv Receive time-out value (in seconds). 60 TimeOutSend Send time-out value (in seconds). 30 CrlFileName Location of the DER-encoded CRL file. It can be a HTTP web address or a LDAP directory entry both in URL format, or a local file or a file located on a network drive. When specifying a local file or a file on a network drive, both direct path and the URL format can be used. CrlIssuerCert Path and name of the DER-encoded CRL issuer certificate file. CrlDPIssuerCertPat h Path to the directory where the CRL issuer certificates for CRLDP revocation checking are stored. CrlDPIssuerCerts Comma separated file name list of the CRL issuer certificates that are in the directory specified by the value of CrlDPIssuerCertPath. TrustedPath The directory where trusted certificates can be found. TrustedNames A list of der-encoded certificate file names that are in the directory defined by TrustedPath. The names must be separated by comma. RevocationMeth Defines a revocation method used for certificates validation. [Blank] When the method is specified it can have the following values: FIXED_OCSP, AIA_OCSP, CRL, FIXED_OCSP+CRL, AIA_OCSP+CRL, CRLDP, CRLDP+CRL The default value of empty, means that no revocation checking will be carried out. OcspSignCert The full path name of the certificate that will be used to sign requests sent to OCSP Responder. This must be in pkcs12 format. OcspSignCertPass Defines the password for OcspSignCert. OcspResponder The URL of the OCSP responder. HttpProxy The proxy name through which the OCSP request is sent and/or the CRL is retrieved over HTTP. Implementing Authentication Agents 6–19 The Certificate Authentication Agent Keyname Description Default Value VerifyDepth The maximum depth of the verification chain. If this is empty, it will be set to 2. The default installation of the TGA will also set this to 2. 2 The value of this depth will affect the checking of the certificates in the trusted set. If you want the verification and checking of expiration of all the certificates in the chain, you need to specify a big enough value here and include the self signed root certificate in the trusted set. For example, if you have a certification chain comprised of ROOT, CA and END_ENTITY, you need to set this value to 2 or more to make the verification on CA and END_ENTITY, and the expiration checking on all certificates in the chain to happen. CrlPollInterval 6–20 The time interval in seconds between each poll for new updates of CRL. The default is zero, which means no polling. eTrust SSO Implementation Guide 0 The Entrust Authentication Agent The Entrust Authentication Agent eTrust SSO supports primary authentication with Entrust, which is a public key infrastructure developed by Entrust Technologies Limited. eTrust SSO can use Entrust’s digital signing and digital signature verification capabilities to confirm the end user’s identity. You can create user aliases for the users who use the Entrust authentication method. This lets you manage those users by their short names instead of their X.500 names. For more information about creating user aliases, see the eTrust SSO Command Reference Guide. System Requirements For details about the systems requirements for this component please see the README document. Note: All operating system clocks must produce a reliable and correct timestamp for the time-zone where each machine hosting any SSO components are located. For example, a machine located in New York hosting a Policy Server must have it’s OS clock set to US Eastern Daylight Time (EDT) whilst a machine located in San Francisco hosting a LDAP Auth Agent must have it’s OS clock set to US Pacific Daylight Time (PDT). Components Used in the Entrust Authentication Process The setup process involves the following components that take part in eTrust SSO primary authentication with Entrust: ■ ■ ■ ■ Entrust server—The computer that the Entrust Directory Server resides on. Authentication host—The computer on which the Entrust authentication agent is installed SSO Client—Installed on the end-user workstation. eTrust SSO user data store—Resides on the Policy Server, and is accessed by the SSO Administrator using the Policy Manager or via selang. Implementing Authentication Agents 6–21 The Entrust Authentication Agent Components Installed on the SSO Client When it is configured for Entrust primary authentication, the SSO Client contains the following components in addition to the standard files: ■ ■ ■ ■ The eTrust SSO Open Authentication Engine (OAE) for Entrust The eTrust OAE GUI for Entrust, which displays a dialog box for user authentication The Entrust INI file (this is a standard Entrust file and should be copied from the Entrust server) The Entrust EPF files (these user profile files are standard Entrust files and should be copied from the Entrust server) Components Installed on the Entrust Authentication Host A properly configured authentication host contains: ■ ■ ■ ■ The executable for the eTrust Single Sign On agent for Entrust (this is the ticket granting agent, or TGA) An INI file for the eTrust Single Sign On agent for Entrust (for UNIX only) The Entrust INI file (this is a standard Entrust file and should be copied from the Entrust server) The Entrust EPF files (these user profile files are standard Entrust files and should be copied from the Entrust server) Entrust can function in either of two modes: Entrust Lite or Entrust Full. eTrust SSO supports both modes, by using the EntrustFile APIs. Install the Entrust Authentication Agent There are five steps to setting up the LDAP authentication agent: 6–22 1. Prepare the Entrust Authentication Agent Computer 2. Configure eTrust Directory to work with Entrust 3. Create an Entrust User and Profile 4. Install and Configure the Entrust Authentication Agent 5. Configure the SSO Client. eTrust SSO Implementation Guide The Entrust Authentication Agent Prepare the Entrust Authentication Agent Computer 1. Log in to the Entrust authentication agent computer as the administrator. 2. Insert the Entrust CD into the CD ROM drive. 3. Select and install Entrust/PKI Documentation. 4. If the computer runs Windows XP, install Update MDAC (Microsoft Data Access). 5. After familiarizing yourself with the documentation to make sure your computer satisfies minimum system requirements, install the Informix component. 6. During the Informix installation, if you encounter a Possible Problem Using Current Account pop-up window, informing you that the current user account was created with upper-case characters, click the Yes button. 7. When prompted in a Select Drive For Database window to select the drive that will host the ifmxdata directory, choose a drive letter from the pulldown menu. Entrust components should be located on the same drive as eTrust Directory files. 6. Install the latest JRE (Java Runtime Environment) if it is not already installed. 7. Install a directory of your choice, if one is not configured already. You can use eTrust Directory, which is installed with the Policy Server. Implementing Authentication Agents 6–23 The Entrust Authentication Agent Configure eTrust Directory to Work with Entrust The following instructions assume that you have installed eTrust Directory, and that you are working with the sample directory, Democorp. 1. Open the directory configuration file \schema\x500.dxc file. This is usually located at: C:\Program Files\CA\eTrustDirectory\dxserver\config\schema 2. Check that the DXC file contains definitions for the pmiUser object class and the attributeCertificateAttribute attribute. If this class and attribute are not defined, use the Entrust documentation and website to update your directory schema. 3. In the same directory, find the default.dxg file and add the following line if it is not already in the file: source “entrust.dxc”; 4. Open the command prompt and run the following command to check that Democorp is running: dxserver status 5. Run the following command to reload the configuration settings: dxserver init democorp 6. Click Start, Programs, eTrust Directory, JXplorer to open JXplorer. 7. In JXplorer, connect to the sample directory DEMOCORP, and create a new entry at the top level: a. Set the RDN to ou=Authority. b. Include the following classes: organizationalUnit and entrustCA. c. 8. Enter a password in the userPassword field. In the newly created Authority level, create another new entry: a. Set the RDN to cn=Administrator. b. Include the following classes: inetOrgPerson and entrustUser. c. Set the sn to Administrator. d. Enter a password in the userPassword field. 9. Insert the Entrust CD into the CDROM drive, and install the Entrust Authority component. This option is initially disabled, because Informix needs to be present on the system before the Entrust Authority database can be created. Entrust Authority must be installed on a Windows 2000 server. 10. Use the default locations for the Entrust/Authority data files and backup files (for example, use c:\authdata and c:\entbackup). These directories will be referred to as ENT_AUTH_DATA_DIR and ENT_AUTH_BACKUP_DIR for the rest of these instructions. 6–24 eTrust SSO Implementation Guide The Entrust Authentication Agent 11. In the Directory Node and Port dialog, use the default value for Directory Node Name, but enter 19389 as a value for Directory Listen Port. That is the port number used to connect to Democorp, and the Certification Authority was created under o=DEMOCORP. 12. You’ll be prompted to enter the Certification Authority distinguished name, the CA Directory Access password, the Directory Administrator distinguished name and the Directory Access password: the DN and password values should correspond to those of the Authority and Administrator entries created in the Configure eTrust Directory to Work with Entrust section. 13. To enter the Directory Administrator’s distinguished name, open JXplorer and right click on the newly created Administrator under the authority tree. Click Copy Node and paste this into the configuration utility. If any errors are reported in the log produced by Entrust Directory Verification Tool, make sure they are analyzed and addressed before proceeding with the installation. 14. Use the default values specified in ‘Advanced Directory Attributes’ window, and throughout the rest of the utility execution. 15. In the Setup Complete window, check the box to run the Entrust/Configuration utility, and click the Finish button. 16. In the ‘Configuration Complete’ window, tick the box to run Entrust/Master Control, before clicking on the OK button. 17. In the ‘Entrust/Authority Master Control’ dialog, click Login button, and enter passwords for three Master Users and the First Officer. Make sure you remember the password values or note them down, because you will be required to use them throughout Entrust authentication tests. 18. After Entrust/Authority installation is completed (Entrust Master Control and Entrust RA components are available in Start->Programs->Entrust PKI), edit the entrust.ini file in the [ENT_AUTH_DATA_DIR]\manager (e.g. c:\authdata\manager\) directory and comment out the entire [FIPS Mode] section. Failure to do so will result in inability to start Entrust Authentication Agent (tgaents.exe) later on. 19. Create one Entrust user in the Entrust database for each eTrust SSO user that will authenticate to eTrust SSO using Entrust. Implementing Authentication Agents 6–25 The Entrust Authentication Agent Create an Entrust User and Profile 1. Ensure Entrust/Authority service is running, by either checking Services list (Start->Settings->Control Panel->Administrative Tools->Services) or running Entrust/Master Control. 2. Open Entrust/RA (from Start->Programs->Entrust PKI) 3. Enter the First Officer password you created in the Configure eTrust Directory to Work with Entrust section. 4. Right-click on Users, and select the New User option. 5. Fill in the First Name and Last Name fields, and check the Create Profile box and click OK. 6. Enter a profile name and password, and verify the user creation request with First Officer’s password. Install and Configure the Entrust Authentication Agent 1. Log in to the Entrust authentication Agent computer as the administrator. 2. Install the Entrust Authentication Agent. a. During installation you will be asked to provide an encrption key. It is very important that you remember this key. You will need to use it later when setting up the Authentication host in the eTrust SSO. b. You will be asked to specify the location of the entrust.ini file, or a copy of this file on the Entrust authentication agent computer. This should be located in the following directory: [ENT_AUTH_DATA_DIR]\manager\ c. You will also be asked to provide a path to the Entrust Profile file, or a copy of this file on the Entrust authentication agent computer. The file should be one of the .epf files in the following directory: [ENT_AUTH_DATA_DIR]\manager\epf directory This must be a valid user, since it acts like a personality in SSO but there is no importance to which this user is. 3. 6–26 After the agent is installed, set the password, the UserNamePrefix, and the UserNameSuffix before the service can be started. See the section Configuration Settings for the Entrust Authentication Agent for the location of the Windows Registry key. eTrust SSO Implementation Guide The Entrust Authentication Agent Configure the SSO Client 1. Install the SSO Client. During installation, ensure that you use Custom Setup to select ENTS (under authentication engines sub-tree) authentication method as one of the methods to install support for. Also, specify the correct authentication host (the computer on which you have installed Entrust authentication agent) when prompted. 2. Copy the following files from the into the SSO Client directory: - entapi32.dll - enterr.dll - etfile32.dll If the files are not there, look for them in the Entrust Authentication agent computer, and copy them across to the SSO Client directory. Configuration Settings for the Entrust Authentication Agent This section lists the settings you can configure in the Entrust authentication agents. All of these settings may be edited, but you must restart the authentication agent service for the changes to take effect. The settings for the Entrust authentication agent are found in the following Windows Registry key: HKEY_LOCAL_MACHINE\SYSTEM\CurrentControlSet\Services\sso_tga_ents_Agent1\Paramete rs\sso_tga_ents_Agent1 The following table lists the settings in the registry key: Keyname Description Default Value AuthHostName Name of the authentication host in the SSO ticket. If blank, the computer name of the authentication host is used. LDAP_ps-ldap You can use the same value for all authentication methods, which allows you to use only one authhost entry in the Policy Server. By default, the Policy Server is installed with one authhost already created: LDAP_ps-ldap. ChildLimit Determines the number of worker threads that get created 3 for dealing with incoming client requests. EntrustIniFile The absolute path to the Entrust INI file - EntrustPassword Password to the EntrustProfile - Implementing Authentication Agents 6–27 The Entrust Authentication Agent Keyname Description Default Value EntrustProfile The absolute path to the Entrust EPF file - IdleFreq Idle frequency, in calls/second. 20 PortNumber Port number on which the TGA is listening for client requests. 13987 RecvBuffSize Length of the buffer used when receiving the data (in bytes). 131072 (128 KB) SendBuffSize Length of the buffer used when sending the data (in bytes). 131072 (128 KB) TicketKey Key used to encrypt the ticket that is created by the TGA (after successful authentication) and sent to the SSO client. - TimeOutConnect Connection time-out value (in seconds). 60 TimeOutRecv Receive time-out value (in seconds). 60 TimeOutSend Send time-out value (in seconds). 30 UserNamePrefix The text before the user name that will not be put in the SSO ticket during authentication. For example, set the UserNamePrefix to cn= to remove the first three characters from the following DN: - cn=Juanita Perez, ou=CompanyName This is useful if not using the default LDAP directory (eTrust Directory). UserNameSuffix The text after the user name that will not be put in the SSO ticket during authentication. For example, set the UserNameSuffix to , ou=CompanyName to remove the last sixteen characters from the following DN: cn=Juanita Perez, ou=CompanyName This is useful if not using the default LDAP directory (eTrust Directory). 6–28 eTrust SSO Implementation Guide - The LDAP Authentication Agent The LDAP Authentication Agent System Requirements For details about the systems requirements for this component please see the README document. Note: All operating system clocks must produce a reliable and correct timestamp for the time-zone where each machine hosting any SSO components are located. For example, a machine located in New York hosting a Policy Server must have it’s OS clock set to US Eastern Daylight Time (EDT) whilst a machine located in San Francisco hosting a LDAP Auth Agent must have it’s OS clock set to US Pacific Daylight Time (PDT). To Install the LDAP Authentication Agent There are three steps to setting up the LDAP authentication agent: 1. Create users in the LDAP User Data Store 2. Install the LDAP Authentication Agent 3. Install or configure the SSO Client. Create Users in the LDAP User Data Store 1. Install the Policy Server and the Policy Manager, as described in this book. 2. Open the Policy Manager. 3. Create two new users in the ps-ldap data store. Admin— You will use this user to configure the LDAP authentication agent LDAPuser—You will use this user account to test the LDAP authentication method 4. For both users, assign the LDAP authentication method, and set a password for the LDAP authentication method. 5. Click Resources, Single Sign-On Resources, Data Stores, User Data Stores, Properties, and note the following properties of the ps-ldap data store: - Base Path - Port Number The LDAP authentication agent will use these properties to bind to the Policy Server. Implementing Authentication Agents 6–29 The LDAP Authentication Agent Install the LDAP Authentication Agent To set up the LDAP authentication agent, follow the steps below. 6–30 1. In the Product Explorer, select the LDAP authentication agent and click Install. 2. On the Authentication page, enter the following information: - The name of the Policy Server computer - The ps-ldap data store port number (13389) - The DN of the user data store. This is the common name (cn=%) plus the base path you recorded from the User Data Store Properties dialog in the previous section. eTrust SSO Implementation Guide The LDAP Authentication Agent 3. 4. On the Credentials for Initial Bind page, enter the following information: - The DN of the Admin user you created previously. This is cn=Admin, o=PS. - The password of the Admin user. On the Encryption Key page, enter the encryption key for the ticket. This is the same key that is defined on the Policy Server. This encryption key must match the key entered for the LDAP_ps-ldap authentication host. 5. Continue with the installation. Implementing Authentication Agents 6–31 The LDAP Authentication Agent Install the SSO Client (If It Is Not Already Installed) Is the SSO Client has already been installed, skip to the next section. If the SSO Client has not yet been installed, do the following: 6–32 1. Install the SSO Client from the Product Explorer. 2. During installation, use Custom Setup. 3. Select LDAP (under authentication engines sub-tree) authentication method as one of the methods to install support for. eTrust SSO Implementation Guide The LDAP Authentication Agent 4. Specify the LDAP authentication host (the computer on which you have installed the LDAP authentication agent). Implementing Authentication Agents 6–33 The LDAP Authentication Agent Configure the SSO Client (If It Is Already Installed) If the SSO Client has already been installed, make the following configuration changes: 6–34 1. In the Product Explorer, select Single Sign-On Client 7.0 and click the Install button, then click Next on the installation dialog. 2. In the Program Maintenance page, select Modify, then click Next. 3. In the Custom Setup list, select the LDAP authentication agent, then click Next, then click Install to finish the modification. 4. Open the SSO Client configuration file SsoClnt.ini file, and make the following changes: eTrust SSO Implementation Guide The LDAP Authentication Agent a. In the ssoauth section, add the value LDAP to the Authmethod keyname. Put it first if you want it to be the default, or let the user change it later using the Authentication window. b. In the auth.LDAP section, set the Authhost keyname to the name or IP address of the authentication host (the computer on which the LDAP authentication agent is installed). Test the LDAP Authentication Method 1. Start the SSO Client. 2. Log in using the LDAP authentication method, using the LDAPuser username and password you created in the LDAP user data store. The user is authenticated using the LDAP authentication method, and is now able to use eTrust SSO. Implementing Authentication Agents 6–35 The LDAP Authentication Agent Authenticate to an Active Directory Data Store Using the LDAP Authentication Agent You can use the LDAP authentication agent to authenticate eTrust SSO to an Active Directory data store. To do this, you must be sure to install and configure all of the software components correctly. The four software components involved in the configuration setup are: ■ SSO Client ■ The Policy Server ■ The LDAP authentication agent for eTrust SSO ■ Active Directory It is possible to install all four of these components on one computer. Alternatively, each component can be on a separate computer. Note: Active Directory requires Windows 2000 Server You should only use these instructions if you are familiar with Active Directory and how it will affect the Policy Server. Also, make sure that you have a copy of the Windows 2000 Server CD-ROM, as you might be prompted to insert it during the configuration process. There are six steps to setting up the LDAP authentication agent to work with an Active Directory data store: 6–36 1. Set up the Active Directory data store 2. Create a new user in the Active Directory data store 3. Install the LDAP authentication agent 4. Configure the LDAP authentication agent 5. Install the Policy Server and the Policy Manager 6. Install the SSO Client eTrust SSO Implementation Guide The LDAP Authentication Agent Set Up the Active Directory Data Store 1. Install Windows 2000 Server operating system on a clean computer. 2. Log in as a Windows user with administrative privileges, preferably with a built-in Administrator account. 3. Select Start, Programs, Administrative Tools, Configure Your Server. 4. From the menu on the left, select the Active Directory service. 5. Scroll down the Active Directory page to find the Start the Active Directory wizard option, and click Start. 6. In the Domain Controller Type screen, select Domain controller for a new domain. 7. In the Create Tree or Child Domain screen, select Create a new domain tree. 8. In the Create or Join Forest screen, select Create a new forest of domain trees. 9. Enter the full DNS name for the new domain. The DNS name is typically of the form: newDomainName.parentDomain.rootDomain The following screenshots show a DNS name of server598.zz.com. 10. Enter the domain NetBIOS name. This should be the same as the newDomainName in the previous step, but a 15-character length limit applies. 11. Use the default locations specified in the Database and Log Locations and Shared System Volume screens, unless required otherwise. 12. If the following message appears, click OK. 13. In the Configure DNS screen, select the Yes, install and configure DNS on this computer (recommended) option. 14. In the Permissions screen, select the Permissions compatible with preWindows 2000 servers option. 15. Enter and confirm the password for the server's Administrator account. This account will be used when the computer is started in Directory Services Restore mode. 16. Check that the information displayed on the summary screen corresponds to the actions from steps above. Implementing Authentication Agents 6–37 The LDAP Authentication Agent 17. Click Next to start configuration. The Completing the Active Directory Installation wizard screen appears. 18. Click Finish to close the configuration wizard. 19. When prompted for a reboot, you should select Restart Now. If you do not choose this option, make sure that you restart the computer as soon as possible. Create A New User in the Active Directory Data Store 1. Log in as a Windows user with administrative privileges. 2. Select Start, Programs, Administrative Tools, Configure Your Server. 3. From the menu on the left, select the Active Directory service. 4. Select the Manage User Accounts And Group Settings option. The Active Directory Users and Computers console window opens. 5. From the Tree panel on the left, right-click on the Users folder, then select New, User. The New object – User dialog opens. 6–38 6. Fill in the fields to create a user, and click Next. 7. Enter and confirm the user password, while leaving the checkboxes empty, and then proceed to create the user object in Active Directory by finalizing your selection. eTrust SSO Implementation Guide The LDAP Authentication Agent Install the LDAP Authentication Agent 1. Install eTrust SSO LDAP Authentication Agent. 2. In the Authentication dialog enter the following information then click Next: - The name of the computer where the Active Directory service was installed - The port on which Active Directory is listening for communication queries (389 is the default) - The user repository. For this installation, enter: cn=%s,cn=Users,dc=server598,dc=ca,dc=com Implementing Authentication Agents 6–39 The LDAP Authentication Agent 3. 4. In the Credentials for Initial Bind dialog enter the following then click Next: - The full distinguished name of the user that you created in Active Directory - The password you specified when you created the user In the post-install completion screen, clear the Start eTrust SSO LDAP Authentication Agent service now checkbox. You will need to adjust some configuration settings before you start the LDAP Authentication Agent Windows service. 6–40 eTrust SSO Implementation Guide The LDAP Authentication Agent Configure the LDAP Authentication Agent 1. Open the Windows Registry Editor: select Start, Run, then enter regedit and click OK. 2. Navigate to the following registry key: HKEY_LOCAL_MACHINE\SYSTEM\CurrentControlSet\Services\sso_tga_ldap_Agent1\Para meters\sso_tga_ldap_Agent1 3. Set the value of AuthMethod to Bind. 4. Set the value of UserNameSuffix to allow the Policy Server to understand the Active Directory user name. To do this, use the DN that you created in step 2 of Installing LDAP auth agent, and enter everything that comes after cn=%s. For this example, you would enter: ,cn=Users,dc=server598,dc=ca,dc=com 4. Select Start, Settings, Control Panel, Administrative Tools, Services. 5. Start the select eTrust SSO – LDAP Authentication Agent – Agent1 service. Install the Policy Server and the Policy Manager 1. Install the Policy Server, using the default settings and the Typical installation type. 2. Install the Policy Manager. 3. Click Start, Programs, Computer Associates, eTrust, Access Control, Policy Manager to start the Policy Manager. 4. Connect to the Policy Server that was installed in step 1. 5. Create a user in the ps-ldap data store. Make sure the name of the user matches the user you created in Active Directory. 6. In the Create New User dialog, click Browse and then add LDAP to the list of selected authentication methods for the new user. Implementing Authentication Agents 6–41 The LDAP Authentication Agent Install the SSO Client 1. Launch the SSO Client installation. 2. From the Setup Type screen, select Custom installation, then click Next. 3. Make sure that the LDAP sub-feature of the Authentication Engines feature is selected. 4. In the Authentication Methods screen, select LDAP to be the default authentication method, then click Next. 5. In the Network Configuration screen, enter the following information: - The name of the computer where the Policy Server v2.0 is installed - Leave the Back-up Servers field empty - The name of the computer on which the LDAP Authentication Agent is running. Test the LDAP Authentication Agent with Active Directory 1. Launch the SSO Client. The Authentication dialog opens. 2. Ensure that the LDAP tab is selected. 3. In the Authentication dialog, enter the user name and password you created previously. 4. Ensure that the computer name in the Auth Server pull-down menu matches the name of the computer on which the LDAP Authentication Agent is running. 5. Click OK. The SSO Client authenticates and logs on to the Policy Server using LDAP authentication. 6–42 eTrust SSO Implementation Guide The LDAP Authentication Agent Configuration Settings for the LDAP Authentication Agent This section lists the settings you can configure in the LDAP authentication agents. All of these settings may be edited, but you must restart the authentication agent service for the changes to take effect. The settings for the LDAP authentication agent are found in the following Windows Registry key: HKEY_LOCAL_MACHINE\SYSTEM\CurrentControlSet\Services\sso_tga_ldap_Agent1\Paramete rs\sso_tga_ldap_Agent1 The following table lists the settings in the registry key: Keyname Description Default Value AuthHostName LDAP_ps-ldap The name of the authentication host that is included in the SSO ticket. If you leave this blank, the computer name of the authentication host is used. You can use the same value for all authentication methods, which allows you to use only one authhost entry in the Policy Server. By default, the Policy Server is installed with one authhost already created: LDAP_ps-ldap. AuthMethod Compare ChildLimit Determines the number of worker threads that get created for dealing with incoming client requests. 3 ConnectionLifetime The maximum time in seconds that the connection made by the LDAP authentication agent to the LDAP authentication server is maintained. If the information needed by the agent is obtained before this period elapses, the agent terminates the connection. 3600 IdleFreq Idle frequency, in calls/second. 20 MaxConnections The maximum number of connections that will be allowed to 10 be opened to the group (pool) of LDAP authentication servers defined in tga_ldapPolicy.ini. OfflineTimeout The time (in seconds) for which the LDAP authentication 120 server stays marked as offline after the LDAP authentication agent fails to communicate with it. PolicyFilePath Path to the tga_ldapPolicy.ini file C:Program Files\ CA\eTrust SSO\ LDAP Agent\ tga_ldapPolicy.ini Implementing Authentication Agents 6–43 The LDAP Authentication Agent Keyname Description Default Value PortNumber Port number on which the TGA is listening for client requests. 17979 StandbyConnections The minimum number of connections to the group (pool) of 5 LDAP authentication servers (defined in tga_ldapPolicy.ini) The number of connections maintained in the pool is kept within the range of StandbyConnections and MaxConnections. A minimum number of standby connections is maintained, and increased to the maximum number as required. When reducing the number of connections (due to not having been used recently) the standby is used as the minimum. TicketKey Key used to encrypt the ticket that is created by the TGA (after successful authentication) and sent to the SSO client. - TimeOutConnect Connection time-out value (in seconds). 60 TimeOutRecv Receive time-out value (in seconds). 60 TimeOutSend Send time-out value (in seconds). 30 UserNamePrefix The text before the user name that will not be put in the SSO ticket during authentication. For example, set the UserNamePrefix to cn= to remove the first three characters from the following DN: cn=Juanita Perez, ou=CompanyName This is useful if not using the default LDAP directory (eTrust Directory). UserNameSuffix The text after the user name that will not be put in the SSO ticket during authentication. For example, set the UserNameSuffix to , ou=CompanyName to remove the last sixteen characters from the following DN: cn=Juanita Perez, ou=CompanyName This is useful if not using the default LDAP directory (eTrust Directory). 6–44 eTrust SSO Implementation Guide - The NetWare Authentication Agent The NetWare Authentication Agent System Requirements For details about the systems requirements for this component please see the README document. Note: All operating system clocks must produce a reliable and correct timestamp for the time-zone where each machine hosting any SSO components are located. For example, a machine located in New York hosting a Policy Server must have it’s OS clock set to US Eastern Daylight Time (EDT) whilst a machine located in San Francisco hosting a LDAP Auth Agent must have it’s OS clock set to US Pacific Daylight Time (PDT). Install the Netware Authentication Agent There are five steps to setting up eTrust SSO to work with Netware authentication: 1. Install the Netware client. 2. Install the Netware authentication agent. 3. Configure the Netware agent. 4. Configure the SSO Client. 5. Allow users to access the authentication host. Install the NetWare Client 1. Make sure that the Novell NetWare client for Windows is already installed on the client workstation. This is because you will need to copy Novell agent files onto the NetWare server. 2. In the NetWare client, select Properties, Advanced Settings, then set the Station Time to off. This stops the time synchronization between the client computer and the NetWare server. Implementing Authentication Agents 6–45 The NetWare Authentication Agent Install the NetWare Authentication Agent 1. Install the NetWare authentication agent on a Novell server on the network. 2. After the NetWare authentication agent installation is complete, look in the /Agents/AuthNW directory for the following three files: 3. - ssoauth.nlm—The NetWare authentication agent module - ssoauth.dat—The file that contains the NetWare authentication agent key - ssoauth.ini—The NetWare authentication agent configuration file Copy these files into the SYSTEM directory of the NetWare server. If this is not possible, copy the file into any other directory on the NetWare server, and specify the path to this file when you load the module, and ensure that the configuration file ssoauth.ini contains the correct paths to the agent files. 6–46 4. Log in the Novell Client to access the NetWare file system from Windows. Refer to www.novell.com for information about using the Novell Client. 5. In Windows Explorer, right-click on the copied files, select Properties, and deselect the read-only attribute. eTrust SSO Implementation Guide The NetWare Authentication Agent Configure the NetWare Authentication Agent 1. List the NetWare authentication agent in autoexec.ncf to start the agent automatically when the system is rebooted. 2. Start the NetWare authentication agent manually: NW_server : load ssoauth 3. In the Netware authentication agent screen, select the Configuration option in the Available Options section. 4. Set the following parameters in the configuration dialog: Configuration Setting Values Use external NCP IN Yes No (this is the default) NCP ID 0 Provide Windows support Yes (this is the default) Key Location SYS:SYSTEM/SSOAUTH.DAT Trace file name SYS:SYSTEM/SSOTRACE.DAT Trace file size 4K Trace auto-backup Yes Trace file backup name SYS:SYSTEM/SSOBCK.LOG Use NDS user name Yes No No User name case As defined in NetWare—(This is the default) The NetWare agent will recognize the case that the administrator defines for the user in the database. Lower case only—The NetWare agent will recognize only lower-case letters in user names. Upper case only—The NetWare agent will recognize only upper-case letters in user names. Implementing Authentication Agents 6–47 The NetWare Authentication Agent Configure the SSO Client 1. Open the SsoClnt.ini file on the client workstation. 2. Edit the SsoClnt.ini file to include NOVELL as one of the authentication methods. For example: [ssoauth] AuthMethods=NOVELL 3. Edit the SsoClnt.ini to include the name of the NetWare authentication host in the authhost keyname. For example: [auth.NOVELL] authhost=server598 Allow Users to Access the Authentication Host You need to update the eTrust SSO user records so that users can use the NetWare authentication method. For each host that will be used for authentication, use the Policy Manager to create a new authentication host in the policy data store with the same key that was defined in the agent. Starting and Stopping the NetWare Authentication Agent To start the NetWare authentication agent manually, use the load command: NW_server : load ssoauth To disable the NetWare authentication agent, use the Esc key in the NetWare authentication agent main console, or enter the unload command: NW_server : unload ssoauth To run the agent without displaying the console, use the load command with the -NOSCREEN option: NW_server : load ssoauth -NOSCREEN Viewing the NetWare Authentication Agent Trace Log The file ssotrace.log is the NetWare authentication agent's trace and activity log. The SSO NetWare agent writes to this file, but if the agent doesn’t find an ssotrace.log file, it opens a new one in the designated directory. To view trace log of the SSO NetWare agent, select Activity Log and choose current log or backup log. The activity log window shows a list of agent-related activities. 6–48 eTrust SSO Implementation Guide The RSA SecurID Authentication Agent The RSA SecurID Authentication Agent eTrust SSO supports primary authentication with RSA SecurID, a product developed by RSA. Throughout this implementation guide, the host on which the RSA authentication agent is being installed is called the RSA_AUTHHOST. System Requirements For details about the systems requirements for this component please see the README document. Note: All operating system clocks must produce a reliable and correct timestamp for the time-zone where each machine hosting any SSO components are located. For example, a machine located in New York hosting a Policy Server must have it’s OS clock set to US Eastern Daylight Time (EDT) whilst a machine located in San Francisco hosting a LDAP Auth Agent must have it’s OS clock set to US Pacific Daylight Time (PDT). Install the RSA SecurID Authentication Agent When installing the RSA SecurID authentication agent you must install the necessary files and then install and start the RSA SecurID authentication agent service. Register the Authentication Host as an Agent Host Your ACE Server administrator must register RSA_AUTHHOST as an Agent Host. 1. There must be a TCP/IP connection between the ACE server and RSA_AUTHHOST. 2. Copy the sdconf.rec file given to you by your ACE Server administrator into your Windows system folder. For more information, contact your ACE Server administrator Note: The user in the Policy Server must have the same logon name as on the RSA ACE Server. Implementing Authentication Agents 6–49 The RSA SecurID Authentication Agent Install the RSA SecurID Authentication Agent 1. Open the CA Product Explorer, and run the RSA SecurID authentication agent installation. 2. When the installation prompts you to enter an encryption key, enter the same value that you entered in the Key field for the new authentication host. These values must be identical for the SSO Client to be granted authentication from the Policy Server. Configure the SSO Client Make the following modifications to the SsoClnt.ini file on the SSO Client computer: 1. Edit the SsoClnt.ini file to include RSA as one of the authentication methods, preferably the first method in the list. For example: [ssoauth] AuthMethods=RSA 2. Specify the name of the RSA SecurID authentication host and the agent port number in the authhost keyname in the SsoClnt.ini file. For example: [auth.SSO] authhost=server598:13880 The port number is optional. If the port number is not specified, the default port (13970) is used. Re-install the RSA SecurID Authentication Agent If you uninstall the RSA SecurID authentication agent and then re-install it, alter the configuration on the RSA ACE server: 1. Open the Edit Agent Host dialog. 2. De-select the Sent Secret Node check box. Restart RSA_AUTHHOST manually When the service is running, the RSA SecurID agent is ready to accept authorization queries from the eTrust SSO client. When you restart the RSA_AUTHHOST computer the RSA SecurID service starts automatically. ■ 6–50 To start the service manually, choose Programs, CA, eTrust, Single Sign-On, Start SecurID Auth Agent. eTrust SSO Implementation Guide The RSA SecurID Authentication Agent Create an Authentication Host Entry on the Policy Server This is only useful if you change the Authhostname value after installing the auth agent. The default value is LDAP_ps-ldap, which points to an authhost that is automatically created during installation. If the authentication agent is installed on the same computer as the Policy Server, you should use the authentication host that was created automatically during installation. This authentication host will already have the same name as the computer. However, we do not recommend that the authentication agent be installed on the same computer as the Policy Server. The host on which the RSA SecurID authentication agent is being installed is called the RSA_AUTHHOST. 1. Make sure that the Policy Server contains an entry for the RSA SecurID authentication host, and that the AUTHHOST entry has the same name as the RSA_AUTHHOST computer. - If the RSA SecurID authentication agent is installed on the same computer as the Policy Server, edit the authhost that corresponds to the computer name. - If the RSA SecurID authentication agent is installed on a different computer, use the Policy Manager to create a new authentication host on the Policy Server. The authentication host name must not contain the full domain name. 2. Enter a value in the Key field. Use an alphanumeric password with at least four characters. Record this value because you will use it when you install the RSA SecurID authentication agent. Implementing Authentication Agents 6–51 The RSA SecurID Authentication Agent 4 Click the Set Default Access button to open the Set Default Access dialog. Set the default access to the new authentication host to Read. 5 Change the authentication method of the new authentication host to RSA. 6 Use the Policy Manager to create two new authentication host identifiers on the Policy Server. Give the identifiers the following attributes: HOSTNAME—The IP address of the RSA_AUTHHOST computer HOSTNAME—The name of the RSA_AUTHHOST computer The user in the Policy Server must have the same logon name as on the ACE Server. 6–52 eTrust SSO Implementation Guide The RSA SecurID Authentication Agent Configuration Settings for the RSA Authentication Agent This section lists the settings you can configure in the Entrust authentication agents. All of these settings may be edited, but you must restart the authentication agent service for the changes to take effect. The settings for the RSA authentication agent are found in the following Windows Registry key: HKEY_LOCAL_MACHINE\SYSTEM\CurrentControlSet\Services\sso_tga_rsa_Agent1\Parameter s\sso_tga_rsa_Agent1 The following table lists the settings in the registry key: Keyname Description Default Value AuthHostName LDAP_ps-ldap The name of the authentication host that is included in the SSO ticket. If you leave this blank, the computer name of the authentication host is used. You can use the same value for all authentication methods, which allows you to use only one authhost entry in the Policy Server. By default, the Policy Server is installed with one authhost already created: LDAP_ps-ldap. ChildLimit Determines the number of worker threads that get created for dealing with incoming client requests. 3 IdleFreq Idle frequency, in calls/second. 20 PortNumber Port number on which the TGA is listening for client requests. 13969 RecvBuffSize Length of the buffer used when receiving the data (in bytes). 131072 (128 KB) SendBuffSize Length of the buffer used when sending the data (in bytes). 131072 (128 KB) StandbyConnections The minimum number of connections to the authentication servers. When reducing the number of connections (due to not having been used recently) the standby is used as the minimum. 5 TicketKey Key used to encrypt the ticket that is created by the TGA (after successful authentication) and sent to the SSO client. - TimeOutConnect Connection time-out value (in seconds). 60 TimeOutRecv Receive time-out value (in seconds). 60 TimeOutSend Send time-out value (in seconds). 30 Implementing Authentication Agents 6–53 The SAFLINK Authentication Agent The SAFLINK Authentication Agent eTrust SSO works seamlessly with SAFLINK biometric authentication. The SAFLINK authentication agent is developed by SAFLINK as a CA Partner. System Requirements See http://saflink.com/SAFaccess.html for platform support information, or contact SAFLINK directly. Note: All operating system clocks must produce a reliable and correct timestamp for the time-zone where each machine hosting any SSO components are located. For example, a machine located in New York hosting a Policy Server must have it’s OS clock set to US Eastern Daylight Time (EDT) whilst a machine located in San Francisco hosting a LDAP Auth Agent must have it’s OS clock set to US Pacific Daylight Time (PDT). Install the SAFLINK Authentication Agent There are four steps to setting up eTrust SSO to work with SAFLINK biometric authentication: 6–54 1. Install the SAFLINK drivers on the Policy Manager computer, or update the existing SAFLINK drivers. 2. Copy the SAFLINK DLLs onto the Policy Manager computer. 3. Create a SAFLINK authentication method in the Policy Manager and apply it to users. 4. If necessary, enroll users in the SAFLINK biometric authentication device. eTrust SSO Implementation Guide The SAFLINK Authentication Agent Install the SAFLINK Drivers on the Policy Manager Computer To allow you to configure the SAFLINK drivers, they must be installed on the Policy Manager computer. 1. List all of the SAFLINK biometric devices used in your enterprise. 2. Install the badge drivers for all of these devices on the Policy Manager computer. 3. Check for the following DLLs in the system32 directory on the Policy Manager computer: 4. - Haapi.dll - HAAPICIT.DLL - safntapi.dll If these DLLs are not on the Policy Manager computer, copy them from a SAFLINK server installation into the system32 directory on the Policy Manager computer. Copy the SAFLINK DLLs onto the Policy Manager Computer 1. 2. Get the following files from your SAFLINK representative: - SAFLNK00.dll - SAFLNK.dll Place these SAFLINK files into the following directory on the Policy Manager computer: <System-drive>: \Program Files\CA\eTrustAccessControl\Policy Manager\bin. If the Policy Server is installed on the Policy Manager computer, place the SAFLINK files in this directory instead: <System-drive>: \Program Files\CA\eTrustAccessControl\bin. 3. On the Policy Manager computer, open the Registry Editor, and find the following registry key: HKEY_LOCAL_MACHINE\SOFTWARE\ComputerAssociates\eTrustAccessControl\Client\ ClientType 4. Open the SSOMODE entry in the ClientType key, and change the value to 1, and select the hexadecimal option. 5. Open the SSO_CustomUserActionDLL entry in the ClientType key, and change the value to SAFLNK00.dll. Make sure you enter only the file name, not the full path. 6. Close the Registry Editor, and shut down the Policy Manager. The next time you open the Policy Manager, the Custom Admin option will be available in the user menu. Implementing Authentication Agents 6–55 The SAFLINK Authentication Agent Create and Apply a SAFLINK Authentication Method Use the instructions in the “Managing Resources with the Policy Manager” chapter to create an authentication method for SAFLINK and apply the new authentication method to the users. Enroll the User in SAFLINK Biometric Authentication To enroll a new user in SAFLINK: 1. Open the Policy Manager, and navigate to the Users window. 2. Right-click on a user name. The user menu appears. 3. Select the Custom Admin, Enroll User option. 4. Use the SAFLINK wizard to set up the user’s biometric details. If you have an existing SAFLINK installation, you may need to manually migrate the user data from SAFLINK to eTrust SSO. To do this, export the data from the SAFLINK database, then use LDIF to import the data into the eTrust Directory user data store. Change a User’s SAFLINK Authentication Method You can change the SAFLINK authentication method of a user. 1. Open the Policy Manager, and navigate to the Users window. 2. Right-click on a user name. The user menu appears. 3. Select the Custom Admin, Enroll User option. A list of all the SAFLINK biometric authentication methods that are available on this computer appears. 4. 6–56 Choose a different authentication method. eTrust SSO Implementation Guide The Windows Authentication Agent The Windows Authentication Agent System Requirements For details about the systems requirements for this component please see the README document. Note: All operating system clocks must produce a reliable and correct timestamp for the time-zone where each machine hosting any SSO components are located. For example, a machine located in New York hosting a Policy Server must have it’s OS clock set to US Eastern Daylight Time (EDT) whilst a machine located in San Francisco hosting a LDAP Auth Agent must have it’s OS clock set to US Pacific Daylight Time (PDT). Implementing Authentication Agents 6–57 The Windows Authentication Agent Install the Windows Authentication Agent 1. Set up your domain controller and create a user. 2. Put the computers you wish to run the client, the server and the Windows authentication agent from onto the network. Optionally, these can be the same computer. 3. Install the Policy Server onto a computer that it is also on the same domain. a. Create an authhost with the computer name of the domain controller, although not fully qualified. For example, CYCLOPS.DOMAIN.NET would be simply CYCLOPS. Enter a key into the key field for this authhost. b. Create an SSO user with the same name as a user on the domain controller and allow them to access the new authhost. For example fred would be fred.picard.net and have access to CYCLOPS c. Allow this new user to log on using the Windows auth method. d. Enter the following command into a selang session changing the authhost and user values for the ones you have used: “er authhost cyclops useralias(“fred.domain.net=fred”). 4. Log onto the client computer as the new user created on the domain controller and install the SSO Client. a. Edit the SsoClnt.ini file to include Windows as one of the authentication methods. For example: [ssoauth] AuthMethods=NT b. Specify the name of the Windows authentication host in the authhost keyname in the SsoClnt.ini file. For example: [auth.NT] authhost=server598 6–58 5. Log onto a computer on the network as the user that you created in step 1 and install the Windows authentication agent. While installing enter the key used in the authentication host in step 3a. 6. On the client computer, run the SSO Client, and select the Windows logon method. If a dialog appears, enter the user’s name plus the domain (for example, use fred.domain.net, rather than just fred), and the user’s domain password and ensure that the Auth Server field contains the name of the computer on which the Windows authentication agent is installed. eTrust SSO Implementation Guide The Windows Authentication Agent Configuration Settings for the Windows Authentication Agent This section lists the settings you can configure in the Entrust authentication agents. All of these settings may be edited, but you must restart the authentication agent service for the changes to take effect. The settings for the Windows authentication agent are found in the following Windows Registry key: HKLM\SOFTWARE\Computer Associates\eTrust SSO\NT Authentication Agent The following table lists the settings in the registry key: Keyname Description Default Value AuthHostName LDAP_ps-ldap The name of the authentication host that is included in the SSO ticket. If you leave this blank, the computer name of the authentication host is used. You can use the same value for all authentication methods, which allows you to use only one authhost entry in the Policy Server. By default, the Policy Server is installed with one authhost already created: LDAP_ps-ldap. encryption_key The encryption key that you entered during installation of the authentication agent. - This key must be the same key that was entered on the Policy Server when the authhost is created. LogCfg Points to the logging configuration file, in which you can define the level of logging. INFO level logs some events, and DEBUG level logs all events. Implementing Authentication Agents 6–59 Creating a New Authentication Agent Creating a New Authentication Agent eTrust Single Sign-On (eTrust SSO) offers a number of “out-of-the-box” methods for primary authentication, for example, SSO, Windows, and RSA SecureID. However, you may want to develop your own specific authentication mechanism, for example a biometric provider might want to integrate their solution into eTrust SSO. eTrust SSO provides the functionality to accomplish this by giving you the tools to develop code that integrates with a defined SSO code interface. This interface is defined and the information is supplemented using a simple sample integration MS VC++ project that can be requested from your CA representative. This sample demonstrates the steps you must follow can take to develop your own Authentication Agent that integrates with SSO. 6–60 eTrust SSO Implementation Guide Creating a New Authentication Agent Program Architecture All eTrust SSO authentication agents have a similar architecture. Each authentication agent has three components: ■ A graphical user interface (GUI) – resides on SSO Client ■ An open authentication engine (OAE) – resides on SSO Client ■ A ticket-granting agent (TGA) – resides on an SSO Authentication Host The GUI Component The GUI DLL provides the eTrust SSO Client with an Authentication dialog, which is defined by the interface function authenticate_Dlg. The OAE Component The open authentication engine is also known as the interface library. This library provides the SSO Client with an interface for requesting authentication defined by the oae_GetTicket function. The OAE also provides a call-back function for the GUI component defined by the AuthCb_Verify function. This function is triggered when the OK button is pressed on the Login dialog. The OAE then sends a TCP/IP request to the TGA component. In this way this part of the authentication agent is responsible for communication between the GUI and the TGA. The TGA Component This agent can be either a Windows service or Unix daemon. The TGA communicates directly with the authentication server. It also communicates with client-side library components through TCP/IP. The Windows and UNIX versions have the same architecture. The differences are caused by the differences between the tools that each operating system uses to create functions such as sub-processes, threads and inter-process communication. The encrypted TCP/IP communication between authentication agent components is implemented using core tcpxdr and tcpcomm components. Logging is done using log4cpp. Implementing Authentication Agents 6–61 Chapter 7 Adding Applications to SSO This chapter describes how to add applications to the eTrust Single Sign-On (eTrust SSO) system so that you can allocate them to users. eTrust Single Sign-On (eTrust SSO) automates the process of end-users logging on to the applications. Before end-users can start using eTrust SSO, a set of logon scripts have to be written. You need a logon script for every application that users need to access from eTrust SSO. For more information about adding applications to SSO, see the “Authenticating Users to Applications” chapter to the eTrust SSO Administrator Guide. Adding Applications to SSO 7–1 Logon Scripts Logon Scripts The logon script is a sequence of instructions that automate the logon process. The primary task of the logon script is to simulate users actions when they log into an application and insert their user credentials (user name and password, for example) when required. Additionally, a logon script may contain procedures for other tasks associated with the logon process, such as changing a password and letting the Policy Server know the outcome of the logon attempt. Whenever an authorized user selects an SSO-supported application, the SSO interpreter receives the logon script and the logon data from the Policy Server and executes the script. A logon script needs to conform exactly to the specific logon requirements of an application, mimicking the data entry and actions of an end-user of that application in your system. Therefore, the person writing eTrust SSO logon scripts needs to work together with an applications administrator who has a detailed knowledge of the logon process for each application. These logon scripts are written in an extended version of Tcl, a scripting language that gives you the use of variables, conditions, loops, procedures, and other common programming constructs with a minimum of complexity. Prior experience with Tcl is not required, but the scriptwriter should be familiar with the applications involved and, in particular, the logon processes. For a full description of the SSO scripting language and writing logon scripts, see the eTrust SSO Scripting Reference Guide. The SSO Interpreter is an eTrust SSO component that executes the Tcl scripts. Once the SSO Interpreter has carried out all the procedures in the logon script, the application continues to run with no further input from eTrust SSO. To enable application-specific logon scripts to serve various users, eTrust SSO maintains separate logon variables for each authorized user for each application. The logon scripts refer to these logon variables for individual logon name and password and other data that may be necessary. 7–2 eTrust SSO Implementation Guide Logon Scripts Developing Logon Scripts The security or system administrator in charge of eTrust SSO is usually responsible for preparing the logon scripts. Generally, programmers write logon scripts under the administrator’s supervision. Following is an example of the main portion of a logon script for a telnet client that comes with Windows NT: # run the NT telnet client sso run -path telnet.exe # connect to the remote host sso menu -item “Connect/Remote System” sso setfield -label “Host Name” -value $_HOST sso click -label Connect # verify that the telnet window appears sso window -title Telnet # wait for the user ID; respond sso waittext -text “logon:” sso type -text “$_LOGINNAME{enter}” # wait for the password prompt; respond sso waittext -text “password:” sso type -text “$_PASSWORD{enter}” # wait for the system prompt sso waittext -text “>“ ... The logon variables that appear in this logon script are $_HOST, $_LOGINNAME, and $_PASSWORD. The SSO Interpreter on the user’s workstation replaces these variables with the values received from the Policy Server. Symbol Meaning $ Tcl variables $_ SSO logon variables # Comment For a full explanation of logon scripts, see the eTrust SSO Tcl Scripting Reference Guide. Logon Variables The logon variables include the logon script and the logon data sent to the SSO Client. These variables are fetched from the data stores. Some variables pertain to the current application, some are specific to the current user in relation to the current application, and some may hold installation-wide data. Adding Applications to SSO 7–3 Logon Scripts The logon variables are stored in the LDAP or eTrust Access Control data store in the user’s record as properties of the LOGONINFO section. Some of the logon variables are used for authentication (logon credentials) and others provide operational and auditing information (such as time of last logon). For an illustration of how the logon variables are used, lets look at the following scenario. 1. Assume a user named Terri selects Terri selects CICS_TEST from the application list. The application record of CICS_TEST in the eTrust Access Control data store contains: – DIALOG_FILE property with the value CICS.TCL – LOGON_TYPE property with the value AppTicket – HOST property with the value MVS_TEST In Terri’s user record, in the LOGONINFO section relating to CICS_TEST, the property LOGONNAME contains the value UTST021. 2. The Policy Server generates an AppTicket and stores the result in the Tcl variable _PASSWORD. 3. The Policy Server places the logon name UTST021 in the Tcl variable _LOGONNAME. 4. The server sends the CICS.TCL logon script and the two logon variables _PASSWORD, _LOGONNAME, and _HOST to the SSO Client. 5. The SSO Client executes the supplied script, entering the username (_LOGONNAME) and ticket (__PASSWORD) as required. Learn Mode (First Logon Situation) In order to reduce the amount of configuration needed, eTrust SSO has a learn mode that functions during the first logon to an application and lets the end user provide the logon credentials for the application. If the user credentials needed for an application are not found in the user record and the application logon uses password authentication, the Policy Server and SSO Client assume that this is the first time the user is logging into the application via eTrust SSO. eTrust SSO then enters learn mode (also called the first logon situation), as follows: 7–4 1. The Policy Server notifies the SSO Client that no credentials are available. 2. The SSO Client displays a Learn Mode dialog box that prompts the user for user credentials (logon name and password for the application requested). eTrust SSO Implementation Guide Logon Scripts 3. After the user supplies the user credentials, the client sends the credentials to the server and the client repeats the logon process with the new logon credentials. Note: Learn mode only functions for users who are authorized to use an application and who have carried out primary authentication. Subsequent logon attempts to the same application by that user will automatically use the credentials they previously entered in learn mode. Logon Script Maintenance You should remember that eTrust SSO logon scripts use and interact with many variables and elements of the computing environment. Changes in the environment will affect the operation of logon scripts. For example: ■ ■ ■ Changes in hard disk organization that change the location of applications may cause SSO-run commands to fail because the pathname argument will no longer be correct. Upgrading an application may result in many changes: new executable name or new logon windows with different titles and field labels. eTrust SSO extensions that refer to these elements will no longer function as expected. Upgrades and changes to operating systems will have similar effects. Because of this, it is important that the administrator supporting eTrust SSO coordinate personnel responsible for version control and be in the loop on system environmental changes and application upgrades. Where the Logon Scripts are Stored The logon scripts are stored as ASCII files on the Policy Server host. The exact location of the logon scripts is determined by different methods according to the Policy Server host operating system - Windows or UNIX. Policy Server Host OS Whether the Script Location is set Windows Windows Registry: HKEY_Local_Machine ÆSoftwareÆComputer AssociatesÆeTrustÆSharedÆPolicy ServerÆ2.0Æ ssodÆ<ScriptPath> Default ScriptPath is: %Program Files%\CA\eTrust Policy Server\scripts UNIX PolicyServer.ini file. ScriptPath key value (or token). Adding Applications to SSO 7–5 Application Authentication Application Authentication All application logons supported by eTrust SSO follow the same overall process. The specific sub-section of application logon that handles the way the user is authenticated to the application is called application authentication. eTrust SSO offers two different methods of application authentication: ■ ■ Password authentication which can be used for applications on any platform (Windows, UNIX or Mainframe) Ticket authentication which is only used for Mainframe applications. Ticket authentication can be broken down into two subsections: - PassTickets - AppTickets The application authentication method used for an SSO-supported application is specified in the LOGON_TYPE property of the application’s record in the eTrust Access Control data store. If a value for the LOGON_TYPE property is not specified, the default method used is native SSO password. 7–6 eTrust SSO Implementation Guide Application Authentication Setting Up Password Authentication (All Platforms) The following steps describe how to set up password authentication for an application: 1. Define the application in the eTrust Access Control data store with logon type pwd. 2. Link the application to a password policy using the Policy Manager (if required). 3. Authorize users and user groups to the application using the Policy Manager. 4. Write the logon script using Tcl and place it in the scripts directory defined in the policyserver.ini file (for UNIX) or the ScriptPath in the Registry settings (Windows) on the Policy Server host. 5. Have a user log into the application. The first time the user logs in, check that Learn Mode is activated. 6. During the second and succeeding logons, the user is not prompted for a password. 7. Change the user’s password to check that the logon script and Policy Server process the new password correctly. For more information, see Changing the Primary Authentication Password and Defining the Lifetime of Passwords in the chapter “Administering eTrust SSO Users and Resources” and Logon script Maintenance in the chapter “Managing eTrust SSO Services.” Adding Applications to SSO 7–7 Chapter 8 Adding Web Applications to SSO There are three ways to implement eTrust SSO for web applications: ■ Client logon ■ Cookie logon – requires the Web Agent ■ Browser logon – requires the Web Agent There are multiple web logon methods because different methods are suited to different web applications and different architectures. You can install all of these methods within the same eTrust SSO system. There are multiple web logon methods because different methods are suited to different web applications and different architectures. The term ‘web applications’ in this chapter includes restricted web pages. For further information about the different ways to log on to web resources using eTrust SSO, see the ‘Authenticating Users to Web Applications’ chapter in the eTrust SSO Administrator Guide. Adding Web Applications to SSO 8–1 About the Web Agent About the Web Agent Web Agents enforce access control policy, authentication, and directory connectivity to web resources. The Web Agent intercepts any request to access a resource and interacts with the Policy Server to authenticate the user and determine if access to the specific resource should be allowed. The Web Agent also passes a response to the web server to personalize the page content for each user. You must install the Web Agent on each of the web servers that host the web sites to be protected. After you have installed the Web Agent, define the resources and applications and the access rules that protect them in the policy data store. Until these definitions are created, the Web Agent grants all requests (access is unlimited). Note: When a user tries to access a resource that is not defined as protected, access is granted without going through the authorization process. In this situation, the request is passed to the web server for regular processing. After you install and start the Web Agent, the web server that hosts the web site requested by the user cannot send information to the user unless the Web Agent permits it. However, once the Web Agent permits the user access to one resource, a cookie is created, and the Web Agent handles the user’s logon to additional web resources and applications without requiring the user to enter their credentials again. Every request by the user for access to an additional web application is evaluated by the Web Agent to determine if the user is authorized to access that web application . 8–2 eTrust SSO Implementation Guide Installing the Web Agent on Windows Installing the Web Agent on Windows This section guides you through the installation of the Web Agent. System Requirements For details about the systems requirements for this component please see the README document. Note: All operating system clocks must produce a reliable and correct timestamp for the time-zone where each machine hosting any SSO components are located. For example, a machine located in New York hosting a Policy Server must have it’s OS clock set to US Eastern Daylight Time (EDT) whilst a machine located in San Francisco hosting a LDAP Auth Agent must have it’s OS clock set to US Pacific Daylight Time (PDT). Pre-Installation Considerations You can set up logging to track down any issues although this is only recommend for when you have a specific reason, rather than leave it on all the time. For more information about logging, see the eTrust SSO Administrator Guide, “Auditing, Logging, and Tracing” chapter. Pre-Installation Checklist Before you begin, use this checklist to make sure you have all the information and software that you need to install the Policy Manager. Make sure the computer you are installing the web agent on has TCP/IP to communicate with the Policy Server. Shut down all the applications on the computer. Make sure you have a Web Server installed on the computer and that you have the name of the Web Server vendor Adding Web Applications to SSO 8–3 Installing the Web Agent on Windows Web Agent Installation on Windows The Web Agent is necessary for single sign-on access to web resources. This process describes how to install a Windows web agent using the Product Explorer. 1. From the eTrust Single Sign-On 7.0 Product Explorer wizard select Web Agent (IIS, iPlanet) or other web agent. You may have to expand the eTrust Single Sign-On Web Agents folder. The wizard should appear automatically when you insert the eTrust SSO disk. If not, open Windows Explorer and navigate to the CD-ROM directory and double-click the PE_i386.exe file. The Install button becomes active. 2. Click the Install button. The Welcome dialog appears. 3. Click the Next button. The Setup Type dialog appears. 5. Select what type of installation you want and click the Next button If you selected the Typical installation, skip step 7. If you selected the Custom installation , the eTrust Web Access Control Web Agent Destination dialog appears. 6. Select the destination folder, where the web agent will be installed and click the Next button. You can click the Browse button to select the location. The eTrust Web Access Control Web Agent Select dialog appears. 7. Select which components you want to install and click the Next button. The Core Files must be installed. The Web Server Vendor dialog appears. 8. Select which Web Server vendor has supplied that web server in your enterprise, and click the Next button. You are now Ready to Install the Program message appears. 9. 8–4 Click Install to complete the installation of the Web Agent. eTrust SSO Implementation Guide Installing the Web Agent on Windows Post-Installation Procedures After installing the Web Agent, there are still several tasks you must do. You have to define applications and resources, implement resources, and define access rules. The following paragraphs describe how to perform these tasks. Defining Applications, Resources, and Access Rules It is necessary to define the resources and applications to be protected and the access rules that should protect them in the data store. Until these definitions are created, the eTrust SSO for Web component grants all requests; it does not limit access at all. There are several ways to enter this information. You can use the Policy Manager or the command language Selang. Defining Applications If you want to protect an application, you must define it in the data store. Protection means that in order to access the application the user must have a valid ticket and permission to access the application. If there is no valid ticket, Web Agent prompts the user to authenticate and a ticket is created. Then, the user will be allowed or denied access to the application according to the definitions in the data store. eTrust SSO for Web differentiates between three kinds of web applications in the data store: ■ Regular web applications Protected URLs in the site. An authorized user can access the URL via his personalized application list from the SSO Client or by entering the URL directly. ■ Script-entry web applications Applications for which HTML scripts have been written so that eTrust SSO for Web supplies the usernames and passwords and automates the logon process for the applications. Authorized users can access the applications via the personalized application list. ■ Web resource applications Applications used for defining access rules to web resources. These applications are not displayed in the personalized application list of the authorized end user. Web resources can be either specific URLs or regular expressions. Adding Web Applications to SSO 8–5 Installing the Web Agent on Windows Defining Regular Applications To define regular applications with the Policy Manager: 1. Open the Policy Manager. 2. Select Resources, Application Resources. 3. Right-click in the Application list window, then select the New option. The New Application window appears. 4. Enter the application name, which should be the full URL. For example, enter: HTTP://<servername>:<port>/default.htm Note: You do not have to enter the port number if the web server’s default port is 80. If the web server is running on the default port, the path can be relative. For example, if you enter /default.htm, this will apply equally to all Web Agents sharing the Policy Server data. 5. Under Application Type select Web Application as the type of item to protect. For all the other application properties, choose them as if you were defining a desktop application. 6. Click OK. Defining Script-Entry Applications To define script-entry applications with the Policy Manager, do the following: 1. Open the Policy Manager. 2. Select Resources, Application Resources. 3. Right-click in the Application list window, then select the New option. The New Application window appears. 4. Enter the application name. You can choose a name. For example, enter: my_e_mail 8–6 5. In the Type section, select Web Application as the type of item to be protected. 6. Click Scripting, then enter the script file name. 7. Click Authentication. 8. In the Logon Type section, select Password (default). 9. Click OK to close the dialogs. eTrust SSO Implementation Guide Installing the Web Agent on Windows Defining Resources To define resources using the Policy Manager: 1. Open the Policy Manager. 2. Select Resources, Application Resources, Application. 3. Right-click in the Application list window, then select the New option. The Create New APPL Resource window appears. 4. Enter the web resource name as a regular expression. 5. In the Type section, select Web Resource as the type of item to protect. 6. Click the Set Default Access button, then set the default access for the application. 7. Click OK. Physical and virtual access to files can also be set through the webagent.ini file. This is independent of the Policy Server. This is done so that some files are always available, regardless of Policy Server configuration. You might choose to use this with help and error pages. Implementing New Resources In order to implement new resources defined during the run of the web server, you do not need to restart the web server. Type the following command in the address field of the browser: http://<Web_Server_Name>/?SSOCMD=SSOREFRESH&REFRESHAPPL=WEBAPPS Note: Only Policy Server admin users can issue this command. If another user is currently logged on to eTrust SSO for Web on the same computer (therefore, has a valid cookie) this error message appears: Operation failed If you receive this error, return to the eTrust SSO for Web application page and log off from eTrust SSO for Web. Then, issue the command again. This time the system prompts you to authenticate to SSO. Authenticating to SSO as the Web Agent personality user allows executing the command. An approval message appears: Operation completed successfully Adding Web Applications to SSO 8–7 Installing the Web Agent on Windows Defining Access Rules Define access rules for regular web applications, script-entry web applications, and web resources in the same way that you define access rules for desktop applications. For detailed instructions see the eTrust SSO Administrator Guide. 8–8 eTrust SSO Implementation Guide Configuring the Web Agent Configuring the Web Agent Setting Up Self-Registration eBusiness portals require that users have the ability to register themselves in the user data store, and then be assigned privileges and entitlements based on their roles and group memberships. This ability, called self-registration, means that users of your web site can add their authentication credentials to a specific application without help from your staff. After users have registered, they are identified as members—simplifying their logon and making their access to resources more efficient. As a result, self-registration allows large numbers of users to register easily, and reduces the cost and effort involved in managing these large user populations. The Web Agent supports self-registration by allowing users to enter private information in a dialog designed specifically for this purpose. Users may choose to complete this dialog the first time they arrive at the web site. After the user fills in the information, the browser sends the information to the web server on which the Web Agent is installed. The Web Agent sends the information to the Policy Server for storage in the policy data store. Since the user no longer has to repeat this information each time he logs in to a resource, access to the resource is more efficient. The Web Agent provides a basic dialog, which you can customize to reflect your corporate environment. To customize the self-registration dialog and process, you must supply values for parameters in the Self-Registration section of the webagent.ini file. See The Self-Registration Section in ‘Appendix C’ in the Administrator Guide for a list of parameters and instructions for specifying values for them. In addition, you must perform the following steps so that a new user can be created in any container of the user data store: 1. Define the proper default user data store in the ‘main’ section of the Policy Servers registry settings. 2. Define the proper user data store properties for the AUTHHOST record in the policy data store. 3. Define the proper container name for the DefaultContext token in the main section of the Policy Servers registry settings. The webagent ‘ContainerDN’ token should match this. 4. Define the proper ContainerFormat property for the AUTHHOST entry (for example, ou=containerName). 5. Restart the Policy Server after completing the changes. Adding Web Applications to SSO 8–9 Configuring the Web Agent SSL Protocol The Secure Sockets Layer (SSL) protocol is a standard on the Web for authenticating web sites and for web-encrypting communications between browser users and web servers. Because SSL is built into all major browsers and web servers, simply installing a Server Certificate enables SSL capabilities. SSL support requires you to have a web site certificate. A web site certificate states that a specific web site is secure and genuine. You must obtain a web site certificate and set your web server up to use it before you can start sending encrypted information. You can obtain a web site certificate from any company that generates these certificates. eTrust SSO does not supply certificates. Consult the documentation that came with your web site certificate and your web server for instructions. After your web server is configured to support SSL, you must install the Web Agent with the SSL option. After you have acquired a web site certificate, set your web server up to use it, and installed the Web Agent with the SSL option, you need to configure the Policy Server to use SSL when communicating with the directory containing your user data store. The procedure used to set up SSL is different for each environment and for each type of directory you can use as a user data store. Note: If your Policy Server and user data store reside on the same computer, SSL is unnecessary. 8–10 eTrust SSO Implementation Guide Configuring the Web Agent Setting Up SSL for Directories on Windows 2000 The following sections explain how to set up SSL when the computer containing your directory is running Windows 2000. The directory containing your user data store can be either eTrust Directory or Microsoft’s Active Directory. Instructions for setting up SSL differ depending on which directory you are using for your user data store. Configuring the SSL Connection Between the Policy Server and eTrust Directory There are four major steps to configure the SSL connection between the Policy Server and the eTrust Directory containing your user data store. They are: 1. Creating the proper Policy Manager definitions. 2. Creating a new service. 3. Configuring the Policy Server. 4. Verifying the SSL connection. The following sections explain how to perform each step. Adding Web Applications to SSO 8–11 Configuring the Web Agent Create the Policy Manager Definitions To create the Policy Manager definitions needed to support the SSL connection, follow these steps: 1. Open the Policy Manager, click the Users icon, and then open the ps-ldap user directory. You will see a list of users in the application window. 2. Open the Create New USER_DIR Resource dialog by clicking the Resources icon, expanding the Data Stores folder, and selecting New from the Edit menu. 3. Create a new user directory called ps-ldap-ssl with the following values. Specify these values on the View or Set USER_DIR Properties – General dialog: ■ Name—ps-ldap-ssl ■ Data Store Type—LDAP ■ Owner—ps-admin ■ Base Path—o=PS ■ Host—Supply your LDAP server name. ■ Port—13389 ■ SSL Connection—Click the check box to enable this function. Specify these values on the View or Set USER_DIR Properties – Data Store Configuration dialog: ■ ■ ■ Admin—Enter the DN for the directory administrator that will be used to authenticate access to users in the directory (for example, cn=new_user_name,o=PS). Password—Enter the password for the administrator that you specified for Admin. Confirm Password—Type the password again. Note: An error message appears if you try to open the ps-ldap-ssl directory at this time. Once you complete the definitions, you must create a new service so that eTrust Directory supports the SSL connection. 8–12 eTrust SSO Implementation Guide Configuring the Web Agent Create a New SSL Service for eTrust Directory To create the service needed to support the SSL connection, follow these steps: 1. Obtain a certificate using the name of your eTrust Directory service and copy it to this directory: C:\Program Files\CA\SharedComponents\eTrust Common Services\eTrust Directory\dxserver\config\ssld\personalities 2. Install the Certificate Authority’s certificate in this directory: C:\Program Files\CA\SharedComponents\eTrust Common Services\eTrust Directory\dxserver\config\ssld eTrust SSO provides sample test certificates in both of these directories. The sample test certificates are: Democorp.pem—A sample self-signed certificate located in the personalities directory. trusted.pem—A sample CA certificate located in the ssld directory. Note: To use the democorp.pem sample certificate, first locate democorp.pem in the personalities directory on your LDAP Server computer. Make a copy of the democorp.pem file and rename it to your eTrust Directory service. Place the file you just created in the same folder containing democorp.pem. 3. Open a Command Prompt and create a new service called sslServ using the following command: ssld install sslSrv –certfiles <”path_to_personalities_folder”> -ca <”path_to_CA.pem file”> A sample command is shown next: ssld install sslSrv –certfiles C:\Program Files\CA\SharedComponents\eTrust Common Services\eTrust Directory\dxserver\config\ssld\personalities –ca C:\Program Files\CA\SharedComponents\eTrust Common Services\eTrust Directory\dxserver\config\ssld\trusted.pem 4. Verify that the new service was created by checking for the eTrust Directory SSL daemon sslSrv in the Service window. After you create the service, you must configure the Policy Server to support the SSL connection. Adding Web Applications to SSO 8–13 Configuring the Web Agent Create and Locate a Log File If you experience problems, you can check a log file to help you in the debugging process. To see the log file, go to: C:\Program Files\CA\SharedComponents\eTrust Common Services\eTrust Directory\dxserver\logs\sslSrv.log If you cannot find the sslSrv.log file, you will need to create it. To create the log file, follow these steps: 8–14 1. Stop the sslSrv service. 2. Display the properties for the sslSrv service. 3. Enter –debug 9 in the Start parameters field of the General tab. 4. Restart the sslSrv service. eTrust SSO Implementation Guide Configuring the Web Agent Configure the Policy Server To configure the Policy Server so it supports the SSL connection, follow these steps: 1. If you used the sample certificates to perform the procedure in Create a New SSL Service for eTrust Directory, perform this step. On the Policy Server computer, locate and open the HOSTS file in the WINNT\System32\drivers\etc\HOSTS directory, and then add the following line: <IP_address_of_LDAP_server> dxserver 2. Copy your Certificate Authority certificate to C:\ and install the certificate by double-clicking it. 3. If you are using sample certificates, perform this step. Locate the trusted.pem file in the following directory, and copy it to C:\: C:\Program Files\CA\SharedComponents\eTrust Common Services\eTrust Directory\dxserver\config\ssld 4. Run the certconv.exe utility to convert the file. The file’s extension changes from .pem to .der. Double-click the trusted.der file and click the Install Certificate button on the Certificate window. Click Yes when the message prompt appears. 5. Open your Internet Explorer browser and enter the following URL: https://<LDAP_server_name>:<LDAP_port_number> When the Security Alert window appears, verify that the first two signs are green. If both signs are not green, click the View Certificate button, and then click the Install Certificate button. Reopen your browser with the same URL and both signs should be green. After you have configured the Policy Server, verify that your SSL connection is working. Verify the SSL Connection You can verify that the SSL connection to the LDAP database is working by opening the Policy Manager, and then opening the ps-ldap-ssl user directory. If you see a list of users in the directory and can manage them, then your connection is working. Adding Web Applications to SSO 8–15 Configuring the Web Agent Configuring the SSL Connection Between the Policy Server and Microsoft’s Active Directory There are four major steps to configure the SSL connection between the Policy Server and Microsoft’s eTrust Active Directory. They are: 1. Creating the proper Policy Manager definitions. 2. Adding certificate services. 3. Configuring the Policy Server. 4. Verifying the SSL connection. The following sections explain how to perform each step. 8–16 eTrust SSO Implementation Guide Configuring the Web Agent Create the Policy Manager Definitions To create the Policy Manager definitions needed to support the SSL connection, follow these steps: 1. Open the Policy Manager, click the Users icon, and then open the ps-ldap user directory. You will see a list of users in the application window. 2. Open the Create New USER_DIR Resource dialog by clicking the Resources icon, expanding the Data Stores folder, and selecting New from the Edit menu. 3. Create a new user directory called ps-ad-ssl with the following values. Specify these values on the View or Set USER_DIR Properties – General dialog: ■ Name—ps-ad-ssl ■ Data Store Type—AD ■ Owner—ps-admin ■ Base Path—cn-users,dc=domain_name,dc=URL_address Supply one dc= statement for each part of your URL address. ■ Host—Supply the complete path to your LDAP server (for example, computer-name.doman.your-company.com). ■ Port—636 ■ SSL Connection—Click the check box to enable this function. Specify these values on the View or Set USER_DIR Properties – Data Store Configuration dialog: ■ Admin—Enter the DN for the directory administrator that will be used to authenticate access to users in the directory (for example, cn=administrator,cn=users,dc=domain_name,dc=URL_address). Note: Supply one dc= statement for each part of your URL address. ■ ■ Password—Enter the password for the administrator that you specified for Admin Confirm Password—Type the password again. Note: An error message appears if you try to open the ps-ldap-ssl directory at this time. Once you complete the definitions, you must add the Certificate Service so that Active Directory supports the SSL connection. Adding Web Applications to SSO 8–17 Configuring the Web Agent Add Certificate Service To support the SSL connection, you need to add Certificate Services on your Active Directory LDAP server. Follow these steps: 1. On your LDAP Server computer, open the Add/Remove window and click the Add/Remove Components tab. Check the Certificate Services check box and click Next to continue the installation. 2. Select Enterprise root CA and complete these fields: CA name, Organization, Organization Unit, and City. Finish the installation. 3. Create the root certificate. From the Start button, select Programs, Administrative Tools, Domain Controller Security Policy, Public Key Policies, Automatic Certificate Request Settings. Right-click to display the pop-up menu and select New, Next, Finish. 4. Create the Server certificate for your LDAP Server. On your LDAP Server computer, open the Internet Explorer browser and enter this URL: http://localhost/certsrv In the opened page, click Request a certificate. Click Next and select Advanced request. Click Next and select Submit a certificate request to this CA using a form. Click Next and select Web Server for your certificate template. Then complete these fields: ■ Name—Enter your computer name in URL format (for example, computer-name.company.com). ■ Key Size—1024 ■ File Name—computer-name 5. Check Enable strong private key protection, Mark keys as exportable, and Export keys to file. If your LDAP Server and Policy Server are on the same computer, you also need to check Use local computer store. 6. Click Submit, enter the password that you specified when you installed the Certificate Services Component. Click Download CA certificate and save it on your disk. After you add the service, you must configure the Policy Server to support the SSL connection. 8–18 eTrust SSO Implementation Guide Configuring the Web Agent Configure the Policy Server To configure the Policy Server so it supports the SSL connection, you need to install the root certificate for the client. Follow these steps: 1. On the Policy Server computer, open your browser and enter this URL: http://< Active Directory Ldap Server>/certsrv 2. In the opened page, select Retrive the CA certificate and click Next. Click the link that installs this CA certification. 3. Locate the certificate in your browser. From the Tools menu, choose Internet Options, Content, Certificates. Go to the Trusted Root Certification tab and locate the certificate named machine-nameCAserver. 4. Open your Internet Explorer browser and enter the following URL: https://<Active Directory LDAP Server>:<Active Directory LDAP port number> When the Security Alert window appears, verify that the first two signs are green. If both signs are not green, click the View Certificate button, and then click the Install Certificate button. Reopen your browser with the same URL and both signs should be green. 5. Click View Certificate and copy the fully qualified name of the Active Directory LDAP Server that appears in the Issued to field on the General tab into the HOSTS file on the Policy Server computer. This file is located in the directory WINNT\System32\drivers\etc\HOSTS. 6. Open your browser and enter the following URL: https://< Active Directory LDAP Server>:<Active Directory LDAP port number> A sample name is https://machine-name.doman-name.company.com. The message “Page cannot be displayed” appears. After you have configured the Policy Server, verify that your SSL connection is working. Verify the SSL Connection You can verify that the SSL connection to the LDAP database is working by opening the Policy Manager, and then opening the ps-ad-ssl user directory. If you see a list of users in the directory and can manage them, then your connection is working. Adding Web Applications to SSO 8–19 Configuring the Web Agent Synchronizing Resources in the Local Cache To process requests for web resources more efficiently, the Web Agent stores a list of protected resources in a local cache. When a user requests access to a URL, the Web Agent first checks the local cache to see if this URL is in the protected resources list. If the requested URL is found on the list, then the Web Agent checks with the Policy Server to see if the user is allowed to access the resource. If the requested URL is not on the list, the user is allowed to access the resource with no further checking. Since the protected resources list on the Web Agent is separate from the list of protected resources maintained by the Policy Server, you must synchronize the two lists to keep the list on the Web Agent up-to-date. You can either automatically or manually synchronize these lists. Using Automatic Synchronization Automatic synchronization allows you to specify that the local cache on the Web Agent be synchronized with the Policy Server at regular intervals. You set how often you want the synchronization to occur by specifying a value for the SyncInterval parameter in the Config section of the webagent.ini file. Once set, synchronization occurs with no further user intervention. See Appendix C of the Administrator Guide for a complete explanation of this parameter. Using Manual Synchronization Manual synchronization allows you to immediately synchronize the local cache on the Web Server with the Policy Server. Only the eTrust SSO administrator can perform a manual synchronization. To perform this type of synchronization, type the following URL in the address field of your browser: http://<webserver>/webac/sync.htm 8–20 eTrust SSO Implementation Guide Configuring the Web Agent Sharing Security Tokens Between Web Servers When your web environment contains many web servers from different domains, there could be a problem with sharing a user’s security token (which is stored in a cookie) between the different web servers. To solve this problem, you can define primary and secondary web servers, which allows web servers from different domains to share security tokens. When you define primary and secondary web servers, you should configure one web server and its Web Agent as primary and configure all others as secondary. All authentication requests are done using the primary web server. The security token received from authenticating against the primary server will be shared between the primary Web Agent and all the secondary servers. If an unauthenticated user tries to authenticate against a secondary server, the user is automatically redirected to the primary Web Agent. To define primary and secondary web servers, define one web server as the primary and all the others as secondary. For each secondary web server, ensure that the webagent.ini file has the PrimaryWebServer token set correctly after installation. Note: You do not need to change the settings for the primary server, since all web servers are defined primary by default. After changing the webagent.ini, you must restart the Web Server service. Adding Web Applications to SSO 8–21 Configuring the Web Agent Changing the Personality User and Password When the Web Agent starts, the Web Agent personality logs in to eTrust SSO using the EAC authentication method, which is SSO native authentication. The Web Agent personality's username and password are stored in a file that is encrypted using the Triple DES encryption algorithm. The file’s name is defined in the webagent.ini configuration file in the General Configuration section with the key name CredFile. The PswdGen utility, provided as a part of the Web Agent, can be used to manipulate the contents of this file—allowing you to manage the personality's username and password. The following table lists the PswdGen utility commands and describes what each command does. Running PswdGen in Windows Command Description PswdGen Presents the help screen PswdGen -s <username> <password> Sets the personality user name and password PswdGen –g Shows (gets) the personality user name PswdGen –d Removes the personality user name and password The PswdGen utility is run from the command prompt. Before you run the utility, change the directory to the one where you have the Web Agent installed. The following example shows how to change the directory. cd \Program Files\CA\eTrustWebAccessControl\web agent Note: You must specify the full path when issuing any PswdGen commands if you do not initially change the directory. Now you are ready to run the utility using the commands shown in the previous table. For example, to change the password of user WebAdmin to 12345: PswdGen -s WebAdmin 12345 The following message appears: Selang 8–22 eTrust SSO Implementation Guide user credentials successfully stored. Starting and Stopping Web Servers and Services Starting and Stopping Web Servers and Services At times you may need to stop or start services for various components of eTrust SSO. The following sections explain how to start and stop these services. Starting and Stopping the Web Agent eTrust SSO for Web Agent starts up when the web server starts, therefore, you do not have to start it manually. Since the Web Agent has no separate processes than those of the web server, you need to use alternative methods for detecting if it is loaded. Checking the Web Agent Startup in Windows You can check if eTrust SSO for Web Agent started by looking in the webagentlog.log (default name) file in the Web Agent installation folder. If the Web Agent is started, there will be an entry stating ‘Successfully initialized’. Adding Web Applications to SSO 8–23 Starting and Stopping Web Servers and Services Starting and Stopping the Windows Web Server Services Open the Service dialog from the Control Panel. You can start or stop Windows web servers from the Services icon located on the Control Panel. The name of the service differs for each web server. The following table contains a list of Windows web servers and the names of their service. Windows Web Server Service Name Microsoft IIS Web Server World Wide Web Publishing Service Netscape iPlanet Web Server iWS(host_name) Note: Replace host_name with the computer’s name. Starting and Stopping the Service for the Policy Server The steps you take to start and stop the service associated with the Policy Server For Windows To start or stop the service for the Policy Server, perform these steps: Go to the Services of the native operating system (for example, open the Control Panel and double-click the Services icon). Locate the service named eTrust Policy Server 2. Start or stop the service. For UNIX To verify the status of the service for the Policy Server, run either of the following commands. ps –aef ps –aef | grep PolicyServer Note: The first command also checks the status of the services for eTrust Access Control. To start and stop the service for the Policy Server, go to the Policy Server file location in the /bin directory and run the appropriate utility. Run the startserver utility to start the service or the stopserver utility to stop the service. Note: The startserver utility also starts the services for eTrust Access Control. 8–24 eTrust SSO Implementation Guide Starting and Stopping Web Servers and Services Starting and Stopping the Service for eTrust Access Control Here are the steps you take to start and stop the service associated with eTrust Access Control. For Windows To verify the status of the services for eTrust Access Control, go to the Services of the native operating system (for example, open the Control Panel and double-click the Services icon) and check the status of these services: SeOS Agent, SeOS Engine, SeOS TD, and SeOS Watchdog. To start or stop these services, perform these steps: 1. Run the Command Prompt for your native operating system. 2. Go to the eTrust Access Control file location in the \bin directory. 3. Run one of the following commands to start or stop the services. secons –s seosd –start The secons –s command stops the services; the seosd –start command starts them. Adding Web Applications to SSO 8–25 Chapter 9 Implementing Session Management eTrust Single Sign-On (eTrust SSO) has the ability to control the number of sessions a user can have open concurrently. You can configure automatic session management by setting rules in the Policy Server, or you can you can work with sessions manually, using the Session Administrator tool. When you install eTrust SSO, the SSO Client is already capable of managing user sessions. To turn this feature on, you need to enable session management in the Policy Server, create a session profile and apply it to a user or a group using the Policy Manager. The session administrator is a separate tool that you can install off the eTrust SSO CD and use to terminate specific user sessions. Note: When Session Management is turned on in the Policy Server, all users will have a default policy applied. You can view a user’s default by going to the Policy Manager, clicking on a user, selecting their session profile list then clicking the Effective Profile button. Implementing Session Management 9–1 Automatic Session Management Automatic Session Management This section tells you how to set up automatic session management to limit the numbers of eTrust SSO sessions a user can have open simultaneously. Overview This section give you an overview of the steps involved with setting up automatic session management. To set up automatic session management that lets you limit the number of sessions a users can have open simultaneously you must perform these steps: ■ Configure the Policy Server ■ Change the SSO Client port number ■ Create and apply session profile Pre-Installation Considerations Here are the things you need before you start installing Session Management. ■ ■ 9–2 You must have the basic eTrust SSO components installed and working. This includes the following components: - SSO Client - Policy Server - Policy Manager - Authentication Agent (except for SSO authentication) - Authentication software installed (except for SSO and LDAP) You must synchronize the clocks between the Policy Server (or multiple Policy Servers if you have a server farm) and the authentication host machine. eTrust SSO Implementation Guide Automatic Session Management Configure the Policy Server This section tells you how to configure the Policy Server on both Windows and UNIX platforms to enable automatic sessions management. Windows Installations For Windows installations you must use the Windows Registry on the Policy Server to configure session management. The relevant registry values were set up when you installed the Policy Server. 1. From the Start menu on the Policy Server computer, select Run. 2. Type regedit, then click OK. This launches the Registry Editor. 3. Navigate to: HKEY_LOCAL_MACHINE, SOFTWARE, ComputerAssociates, eTrust, Shared, Policy Server, 2.0 SessionManagement. 4. Set the SessMgmtEnable variable to 1 or 2 to enable session management: 1 = Session management is enabled, but is not required This allows SSO Clients from eTrust SSO 6.5 to work without Session Management, and SSO Clients from eTrust SSO 7.0 to work with Session Management 2 = Session management is required If an eTrust SSO 6.5 Client (or earlier) is started, it attempts to connect to the Policy Server and then closes immediately. 5. Change any of the other settings that you require. For more information see the Session Management Settings section in this chapter. UNIX Installations For UNIX installations: 1. Open the policyserver.ini file. 2. Set the SessMgmtEnable variable to 1 or 2 to enable session management: 1 = Session management is enabled, but is not required This allows SSO Clients from eTrust SSO 6.5 to work without Session Management, and SSO Clients from eTrust SSO 7.0 to work with Session Management 2 = Session management is required If an eTrust SSO 6.5 Client (or earlier) is started, it attempts to connect to the Policy Server and then closes immediately. 3. Restart the Policy Server. Implementing Session Management 9–3 Automatic Session Management Change the SSO Client Port Number To use the Direct Notification method, the SSO Client must be listening for notification messages from the Policy Server on a particular port. You may need to change the range of port numbers if you know that an application on your network routinely uses a port in this range. The default range is 20001-20201. You can change this port in the Session Management section of the SsoClnt.ini file on each client computer. 1. Open the SsoClnt.ini file. 2. Find the Session Management section. 3. Change the range of port numbers listed for ClientPortRange keyname. Creating and Applying Session Profiles with Policy Manager For more information about creating and applying session profiles, see the Managing User Sessions chapter in the eTrust SSO Administrator Guide. Working with MetaFrame Application Migration If you have Citrix MetaFrame installed, you can use eTrust SSO to allow users to migrate their open applications from one workstation to another. For more information, see the MetaFrame Application Migration section in the eTrust SSO Administrator Guide. To partially automate the migration of MetaFrame applications with eTrust SSO, use the following session management settings: ■ ■ Enable session management (set SessMgmtEnable to 1 or 2) Apply a policy to each user that sets the maximum number of eTrust SSO sessions to 1. You will need a Tcl script that closes all applications launched from eTrust SSO. 9–4 eTrust SSO Implementation Guide Manual Session Management: Session Administrator Manual Session Management: Session Administrator The Session Administrator can be installed on any Windows computer on the network. It may be installed on the same computer as any other eTrust SSO component. The computer on which you install the Session Administrator is referred to as the Session Administrator Server. Overview This section give you an overview of the steps involved with setting up the Session Administrator. The Session Administrator is a web-based tool that lets you manage and terminate users’ sessions. To install the set up the Session Administrator you must perform these steps: ■ Install the Session Administrator ■ Create a New Certificate ■ Configure the Session Administrator Before You Begin The following descriptions use the variable name CATALINA_HOME to refer to the directory into which you have installed Tomcat, and JAVA_HOME to refer to the directory into which you installed the Java SDK. During installation, three items are installed or updated: ■ Java SDK 1.4.2 If a version of Java SDK is already installed on the computer and it is older that 1.4.2, it will be updated. ■ Tomcat 4.1.24 ■ The Session Administrator Web Application Implementing Session Management 9–5 Manual Session Management: Session Administrator Tomcat 4.1.24 The Session Administrator uses a lightweight version of the full Tomcat server. If you have an existing version of Tomcat already installed, you will have to install this lightweight version as well. Make sure that the following two ports are unique for each installation of Tomcat: ■ The port on which Tomcat listens for HTTP messages (the default is 8999) ■ The port which is used to start and stop the Tomcat server (the default is 8998) The eTrust SSO version of Tomcat is set to run as the eTrust SSO – Session Administrator service. Note: During the installation, the %CATALINA_HOME% environment variable is set to the location of the eTrust SSO version of Tomcat, which may override an existing environment variable. For more information about Tomcat, see http://jakarta.apache.org/tomcat/tomcat-4.1-doc/index.html 9–6 eTrust SSO Implementation Guide Manual Session Management: Session Administrator Custom or Standard Installation If you choose to run a standard installation, the three components listed above will be installed with default settings. The only values you will be prompted to change will be the port number and the host name. If you choose to run a custom installation, you can customize the following: Customizeable Setting Default Value Installation location C:\Program Files\CA\eTrust SSO\Session Administrator Site name localhost or the computer name The port on which the Tomcat server listens for HTTPS messages 8999 The port used to start and stop the Tomcat service 8998 HTTPS session timeout value 5 minutes Location of Session Administrator log files \\SessionAdministrator\\log\\ SessionMgtGUI_J.log Location of the communication log files \\SessionAdministrator\\log\\ SessionMgtGUI_C.log These items also can be changed after installation. Install the Session Administrator ■ Install the Session Administrator using the CA Product Explorer. Create a New Certificate The Session Administrator comes with a generic, automatically generated certificate. We strongly recommend that you create a new certificate immediately after you install the Session Administrator, and install it in the keystore. You can either do this using Keytool or using a commercial certificate generator. Then, use Keytool to install the certificate into the keystore. Implementing Session Management 9–7 Manual Session Management: Session Administrator Create a Self-Signed Certificate using Keytool 1. Open a command prompt and navigate to JAVA_HOME (the directory in which the Java SDK is installed). 2. Navigate to the bin directory. 3. At the prompt, type the following: keytool –genkey –alias tomcat –keyalg RSA –keystore MyNewKeystore.keystore where MyNewKeystore.keystore is the name of the new keystore you are about to generate. 4. When prompted, enter the password for the new keystore. 5. When prompted to enter your first and last name, enter the site name of the Session Administrator application. This will make the certificate match the site name. 6. When prompted, enter information about your organizational unit, organization name, and so on. 7. When the entire DN appears, type either yes or no. You cannot type y or n at this prompt. 8. When prompted to use the same password for Tomcat or create a different password, you can choose either option. The new keystore has now been created. 9. Copy the new keystore file to the CATALINA_HOME\conf directory. 10. Stop the eTrust SSO - Session Administrator Web Service: a. Open the services manager (in Windows, this is in the Administrator Tools section of the Control Panel). b. Select the eTrust SSO - Session Administrator Web Service, then stop the service. 11. Open the CATALINA_HOME\conf\server.xml file. 12. Make the following changes to the server.xml file: ■ ■ Change the name of the keystore from sessionKeystore to the new keystore file you created. Change the password from changeit to the new password you set. 13. Restart the service you stopped before: a. Open the services manager. b. Select the eTrust SSO - Session Administrator Web Service, then start the service. 14. Open the Session Administrator, log in, and check that the third item on the certificate dialog is checked. 9–8 eTrust SSO Implementation Guide Manual Session Management: Session Administrator Create a Certificate using a Certification Authority These instructions assume that you are familiar with the certificate management and certification authority concepts. Before you can get a certificate from a Certification Authority, you will have to create a Certificate Signing Request (CSR). The CSR will be used by the Certification Authority to create a certificate. For more information, see: http://jakarta.apache.org/tomcat/tomcat-4.1-doc/ssl-howto.html. 1. Create a local certificate: keytool -genkey -alias tomcat -keyalg RSA -keystore <your_keystore_filename> 2. When prompted to enter your last and first name, enter the site name. This will make sure that the certificate matches the site name. 3. Create a CSR named certreq.csr: keytool -certreq -keyalg RSA -alias tomcat -file certreq.csr -keystore <your_keystore_filename> 4. Submit it to the Certification Authority (look at the Certification Authority documentation for more information). In return you get a certificate. 5. Import the certificate into your local keystore: a. Download a chain certificate from the Certification Authority you obtained the certificate from. b. Import the chain certificate into your keystore: keytool -import -alias root -keystore <your_keystore_filename> \ -trustcacerts -file <filename_of_the_chain_certificate> 6. Import your new certificate: keytool -import -alias tomcat -keystore <your_keystore_filename> \ -trustcacerts -file <your_certificate_filename> Implementing Session Management 9–9 Manual Session Management: Session Administrator Configure the Session Administrator Update the Web Server Host Name You only need to update the Web Server Host Name if a site name for the Session Administrator has been set up. If a site name has not been set up, skip this step. 1. If a site name has been set up, open the CATALINA_HOME\conf\server.xml file. 2. Find the ENGINE tag: <Engine name="Standalone" defaultHost="localhost" debug="0"> 3. Change the reference to local_host (or the local computer name) to the site name in the ENGINE tag: 4. Change the reference to localhost (or the local computer name) to the site name in the HOST tag: <Host name="localhost" debug="0" appBase="webapps" unpackWARs="true" autoDeploy="true"> Update the Port on Which the Tomcat Server Listens for HTTPS messages If you have already set the port number during installation, you can skip this step. The port number is recorded in the server.xml file. To change the port number after installation: 1. In server.xml, find the <CONNECTER> tag. <Connector className="org.apache.coyote.tomcat4.CoyoteConnector" port="8999"> 2. 9–10 Update the value of the port attribute. eTrust SSO Implementation Guide Manual Session Management: Session Administrator Update the Locations of the Log Files There are two kinds of log file for the Session Administrator: ■ The Session Administrator’s communications with the Policy Server ■ The Session Administrator’s inner workings Also, you can read the logs of the Tomcat server. These logs are written to the CATALINA_HOME\logs directory. Note the use of the double back-slashes in the following instructions. To Change the Location of the Communication Log File 1. Find the following file: %CATALINA_HOME%\webapps\SessionAdministrator\log\log4c_config.cfg: 2. In the log4c_config.cfg file, find the following line: appender root pattern file \ ${CATALINA_HOME}\\webapps\\SessionAdministrator\\log\\SessionMgtGUI_C.log \ %d %p %c [%x] - %m%n 3. Change the path. For example, you could change it to: c:\\mydir\\logfiles\\mylogfile.txt To Change the Location of the Session Administrator Log File 1. Open the following file: %CATALINA_HOME%\webapps\SessionAdministrator\log\log4j_config.lcf 2. Find the following line: log4j.appender.R.File=${catalina.home}\\webapps\\SessionAdministrator\\log\\Sess ionMgtGUI_J.log 3. Change the line to refer to a different file location. For example: log4j.appender.R.File=c:\\mylogdir\\mylogfile.txt Implementing Session Management 9–11 Session Management Settings Change the HTTPS Session Timeout Period You can change the HTTPS session timeout period, which is stored in a file named web.xml. The timeout period is in minutes. The default value is 5 minutes. If you use 0, it will default to 30 minutes. All other integer values are acceptable. Important! Do not change any other values in web.xml. This file defines how the Session Administrator functions. 1. Open the webapps\SessionManagement\WEB_INF\web.xml file. 2. Find the <session-timeout> tag, which is contained within the <session-config> tag: <session-config> <session-timeout>5</session-timeout> </session-config> 3. Change the value of the <session-timeout> tag to any integer. Session Management Settings There are two ways to configure session management. Also, you can configure a backup method in case the main method fails. ■ ■ ■ 9–12 Method 1: Direct Notification (Default)—To terminate a session, the Policy Server sends a message directly to the SSO Client. This is the faster method of session termination. Method 2: Terminate Message in Heartbeat Response—The SSO Client sends a regular heartbeat to the Policy Server, and the Policy Server responds. To terminate a session, the Policy Server includes a message in one of its heartbeat responses. This is slower, but it can be used in systems that contain internal firewalls or gateway computers that affect IP addressing. Backup Method: No Heartbeat Heard—The SSO Client terminates a user session if the Policy Server does not reply to a certain number of heartbeats. This is useful as a backup in case the main method fails eTrust SSO Implementation Guide Chapter 10 Implementing a Server Farm This chapter explains how to set up a server farm for eTrust SSO for both Windows and UNIX environments. A server farm is a system of multiple networked Policy Server computers. If you have more than one Policy Server within your company you should connect them together in a server farm. The data on each server can then be replicated to all the other servers in the farm. The benefits of a server farm that has full replication and hot backup include: ■ ■ No need to maintain separate data stores Failover which is the ability of a server to take over if one server goes offline without affecting services For further information about fail-over, see the “Working with Server Farms” chapter of the eTrust SSO Administrator Guide. A computer that has a Policy Server installed on it is called a host computer. Implementing a Server Farm 10–1 Before You Begin Before You Begin The Before You Begin section is designed to guide you through what you need to know before you install a server farm of Policy Servers. Overview The purpose of a server farm is to enable each server to send data to, and receive data from, every other server in the farm to allow backup and failover. If you are installing a new server farm, and you have no existing Policy Servers, you can follow the Custom Installation wizard and specify each of the other servers in the server farm. This is a quick and simple process and after all the Policy Servers have been installed in this way, they will automatically communicate with each other and replicate data. If you are installing a server farm and you have one or more existing servers the process becomes a bit more involved. You must: 1. Install the new server(s) to the server farm using the Custom Installation wizard and specify all the other servers in the farm, new and existing. This is exactly the same process you follow to install a new server with no existing servers in the farm. The new server(s) can now send data to and receive data from all the other servers in the farm, but the existing servers must be configured to send data to and receive data from the new servers. 2. On the existing Policy Server computer, back up the data in the eTrust Access Control and eTrust Directory data stores. If you have more than one server already installed, we assume that they are already working as a server farm with full replication, so you only need to back up one server. If you have multiple Policy Servers and they are not replicating, you must manually back up each server in the farm and replicate the data at the end of the process. 4. On each existing server, manually specify the new server(s) to send data to. 5. On each existing server, manually specify the new servers to receive data from. 6. Manually restore the backed-up data to each of the new servers. Replication should occur automatically once all servers have been restarted. You can restart the servers consecutively so that you don’t have all servers offline at the same time. 10–2 eTrust SSO Implementation Guide Before You Begin Adding a New Server to a Server Farm Updating an Existing Server in a Server Farm Start Back up data eTrust Access Control and eTrust Directory data Install new Policy Server y y Select ‘Member’ during Wizard installation Specify all other servers in the server farm Specify servers to send data to eTrust Access Control and eTrust Directory. Yes Do you have more new Policy Servers to add? Specify servers to receive data from eTrust Access Control and eTrust Directory. No Do you have any existing Policy Servers to add? No Yes Yes Do you have other existing servers to add to the server farm? No Restore data to every new Policy Server Finish eTrust Access Control and eTrust Directory. Setting Up a Server Farm Implementing a Server Farm 10–3 Before You Begin Pre-Installation Options and Requirements Your operating system must produce a reliable and correct timestamp for the local time-zone. If it does not, the product may not work. For example, the operating system clock of a Policy Server host in New York must be set to US Eastern Daylight Time (EDT), whilst the operating system clock of an LDAP Authentication Agent host in San Francisco must be set to US Pacific Daylight Time (PDT). If you plan to install the Policy Server and the Policy Manager on the same computer, make sure you install the Policy Server first. If you already have eTrust Access Control installed, see the “Upgrading” chapter in this guide. eTrust Access Control must be stopped or uninstalled before you install the Policy Server on the same computer. If you want to track down an issue or diagnose a problem you can set up logging. For more information, see the “Auditing, Logging, and Tracing” chapter of the eTrust SSO Administrator Guide. Checklist Please list the information outlined below to help you with the installation. List the name(s) of all pre-existing Policy Server(s) that you want to include in the server farm. List all the new servers that you want to include in the server farm. Check that all servers are connected to the network and available to each other. Where To Next? Once you have all the information you need about the new servers that you are going to add to the server farm, see the Backup Existing Data on the Policy Server section of this chapter. 10–4 eTrust SSO Implementation Guide Server Farms for Windows Server Farms for Windows When you first install a Policy Server it is easy to configure it to work within a server farm using the installation wizard. This wizard lets you specify all the other servers in the server farm. However, you cannot use this method with existing servers. Existing servers must be manually configured to communicate with any new servers in the farm. If you have one or more Policy Servers already installed and you want set up a server farm or add new servers to the farm, we recommend that you do the following: 1. Install all new Policy Servers using the installation wizard to specify all the other new and existing servers in the server farm. 2. Configure the original server to communicate with the other servers in the farm. To install a new Policy Server and configure it to work within a server farm, see Add a New Policy Server to a Server Farm. To configure an existing Policy Server to communicate with others servers within a server farm, see Add an Existing Policy Server to a Server Farm. Implementing a Server Farm 10–5 Server Farms for Windows Add a New Policy Server to a Server Farm This section explains how to install a Policy Server to work within a server farm. The installation wizard will guide you through the Server Farm configuration and let you specify all the other servers in the server farm. To Install the Policy Server This procedure tells you how to install the Policy Server as part of a server farm. This assumes that you do not have any Policy Servers previously installed that were not specified as part of this server farm. 1. From the eTrust Single Sign-On 7.0 Product Explorer wizard select Policy Server for Windows. The wizard should appear automatically when you insert the eTrust SSO disk. If not, open Windows Explorer and navigate to the CD-ROM directory and double-click the PE_i386.exe file. The Install button becomes active. 2. Accept the license agreement, and when you get to the Setup Type dialog, select the ‘Custom’ option and click Next. The Custom Setup dialog appears. 3. You can change the installation path if you want to, but we do not recommend that you change the features on this dialog. Click Next. The Server Farm dialog appears. 4. Select the ‘Member’ option and click Next. The Server Farm Member Stations dialog appears. 5. Enter the names of the other Policy Server workstations that will be part of the server farm, then click Next. ■ ■ 10–6 Make sure you enter the server names in upper-case. Make sure you add every computer that you want to be part of the server farm. It is harder to add them after installation. eTrust SSO Implementation Guide Server Farms for Windows ■ Make sure you enter the host name, not the IP address of the other computers in the server farm. The Administrator Information dialog appears. 6. Enter the user name and password that will be used to administer the Policy Server. Make sure you remember this password because you will not be able to access the Policy Server computer without it. Click Next. The Directory User dialog appears. 7. Enter the user name and password that will be used to administer the directory. Make sure you remember this password as you will not be able to access the directory without it. Click Next. The Administrative Station dialog appears. 8. Specify the computer names of the administrative stations: You should specify the names of the Policy Server stations that will have administrative access to the Policy Server station you are currently installing. We recommend that you add each of the Policy Server stations that will be part of the server farm to this list. Click Next. The eTrust Products Support dialog appears. Implementing a Server Farm 10–7 Server Farms for Windows 9. Select only the Single Sign On option, not Web Access Control. Click Next. The Ready to Install the Program dialog appears. 10. Select Install. The Policy Server will install. You will need to reboot the computer after installation. 11. Repeat steps 1-9 on every computer that will be part of the server farm. Where To Next? If you have added every new Policy Server and you also have a pre-existing Policy Server that you want to add to the server farm, see the Add Existing Policy Server to a Server Farm section in this chapter. If you have added every new Policy Server to the server farm, and you don’t need to add a pre-existing Policy Server to the server farm, then you have finished the Policy Server installation and should now install the Policy Manager, if you have not already done so. Note: When you install the Policy Manager make sure that you select the installation for both Single Sign-On and Access Control. For more information see the “Install the Policy Manager” chapter in this guide. 10–8 eTrust SSO Implementation Guide Server Farms for Windows Add or Update an Existing Policy Server in a Server Farm This section explains how to configure a Windows server farm, if you already have one or more Policy Servers in operation. Make sure that when you installed the Policy Manager, you selected the “eTrust Access Control” mode, as well as the “eTrust SSO” mode. This ensures that you have all the correct menu options to configure a server farm. If you did not select this option when you installed the Policy Manager, use the “Modify” function on the eTrust SSO installation wizard to add it. Back Up Existing Data on the Policy Server Before you begin the process of adding one or more existing servers to a server farm, you must, back up the data from each data store that is going to be preserved and shared. This section explains how to back up data from the eTrust Access Control data store, as well as the eTrust Directory data store. This data will be restored and replicated later. Implementing a Server Farm 10–9 Server Farms for Windows To Back Up eTrust Access Control Data Stores To back up the eTrust Access Control data, follow this procedure. 1. Launch the Policy Manager. 2. From the Tools Menu, select Export Database. The Export Database Wizard dialog appears. 3. Click Next. The Export Options dialog appears. 4. Select the “Generate a command script from the eTrust database” option and click Next. 5. Select a location to save the files and follow the prompts to the end of the process. Note: Remember where you saved the files. 10–10 eTrust SSO Implementation Guide Server Farms for Windows To Back Up eTrust Directory Data Stores To back up the eTrust Directory data, follow this procedure. 1. Open a command line 2. Shut down the eTrust Directory DSAs by typing: dxserver stop all 3. Backup all data by typing: dxdumpdb -p "o=PS" ps > <FILENAME> This will create an LDIF format record of the eTrust Directory information <FILENAME> [kw40]which can be loaded into the other eTrust Directory data stores in the server farm. Note: Remember where you saved the file and what you called it. Where To Next? Once you have backed up the eTrust Access Control and eTrust Directory data stores, see the Specify Servers to Send Data to section. Implementing a Server Farm 10–11 Server Farms for Windows Specify Servers to Send Data to For replication to work, each Policy Server computer in the server farm must be able to send data to the other computers in the server farm. This section explains how to configure the settings of every server to allow it to “talk” to other servers in the farm. Note: This configuration is done automatically if you did the Automatic Server Farm Installation.[kw41] To Configure eTrust Access Control to Send Data To configure an eTrust Access Control data store to talk to other eTrust Access Control data stores in the server farm, follow this procedure: 1. Launch the Policy Manager. 2. Select the Tools sidebar button, then select the Policy Model sidebar icon. 3. Right-click on the Policy Model node and select Create Policy Model. 4. Select the General tab and enter a policy model name. For example: Policy Model Name = PS_Server01 Note: The Policy Model name must not contain any spaces. 10–12 eTrust SSO Implementation Guide Server Farms for Windows 5. Click on the Administrators icon and add an administrator. For example, administrator = ps-admin Note: You must specify an administrator that already exists in the Policy Server, so ps-admin and ps-pers are both acceptable choices. 6. Right-click on the newly created “<Policy Model>” and select Add Subscriber. You may need to “expand” the Policy Model using the “+” sign. 7. Supply the names of the servers that you want to be able to send data to. Note: Make sure you enter the server names in upper case. 8. Repeat steps 1 to 7 for every server in the farm. Note: You can use the same Policy Manager to connect to different Policy Servers. Implementing a Server Farm 10–13 Server Farms for Windows To Configure eTrust Directory To Send Data To configure eTrust Directory running on a Windows computer to send updates from other Windows Policy Servers, follow this procedure. This sets up both read and write access for eTrust Directory. 1. Open Windows Explorer on the standalone server and navigate to: C:\Program Files\CA\SharedComponents\eTrust Common Services\eTrust Directory\dxserver\config\knowledge 2. Open PS_<SERVERNAME>.dxc and PSTD_<SERVERNAME>.dxc files in a text editor and add the line “dsa-flags = multi-write”. Note: Make sure you enter the server names in upper-case. Note: The location of this new line is very important. It belongs below all the other values except the flag values, if they exist. For example: { prefix dsa-name dsa-password address disp-psap cmip-psap snmp-port console-port ssld-port auth-levels max-idle-time dsa-flags trust-flags { 3. = = = = = = = = = = = = = <o "PS"> <o "PS"><cn SERVERNAME> "secret" tcp "SERVERNAME" port 13389, tcp "localhost" port 13389 DISP CMIP 13389 19389 1112 anonymous, clear-password, ssl-auth 60 multi-write allow-check-password Save and close both files. Where To Next? Once you have specified which other servers your primary Policy Server can sent data to, see Specify Servers to Receive Data From. 10–14 eTrust SSO Implementation Guide Server Farms for Windows Specify Servers to Receive Data Each server in the server farm must have instructions about which other servers to receive data from. Therefore, you must edit the settings of every server to allow it to “listen” to other servers in the farm. Note: This configuration is done automatically if you did the Automatic Server Farm Installation. To Configure eTrust Access Control to Receive Data To configure eTrust Access Control running on a Windows computer to receive updates for other Windows Policy Servers, follow this procedure. 1. From the Start button, open the Run dialogand type “regedit” to launch the Windows Registry editing tool. 2. Navigate to the Windows registry key: HKEY_LOCAL_MACHINE\SOFTWARE\ComputerAssociates\ eTrustAccessControl\eTrustAccessControl\parent_pmd 3. Edit the parent_pmd string so that is lists the names of every other Policy Server computer that you want to be able to receive data from. Each Policy Server should be listed as <PMD>@<SERVERNAME>, where <PMD> is the name of the replication database you will create. Note: When you are listing more than one Policy Server they should be separated with a semi-colon with no spaces. For example: PS_PMDB@server01;PS_PMDB@server02 Implementing a Server Farm 10–15 Server Farms for Windows To Configure eTrust Directory to Receive Data Each computer in the server farm must have access to and knowledge of the eTrust Directory installation on each other computer. If you set up the Policy Server station using the Member option and specified the other computers in the server farm at the time of installation these knowledge files will already exist. But, if you installed this server in standalone mode, you will need to provide this information. You must distribute the PS and PSTD configuration files from each server to all other servers for eTrust Directory to be able to receive data from those servers. 1. Open Windows Explorer and navigate to: C:\Program Files\CA\ SharedComponents\eTrust Common Services\eTrust Directory\dxserver \config\knowledge 2. Copy PS_<SERVERNAME>.dxc and PSTD_<SERVERNAME>.dxc files to the same location on all the other servers. Note: Make sure you enter the server names in upper-case. 3. Repeat steps 1 and 2 for every server in the farm. 4. When you have copied all the files, open the PS_servers.dxg on every server, and make sure that it lists the configuration files of every other server in the farm (you should be able to see the files in the current directory). Checkpoint All servers should now: ■ Accept updates from all other servers ■ Send updates to all other servers Where To Next? After you have configured the stand-alone Policy Server computer to communicate (send and receive data) with every other server in the server farm. For information about this, see the Restore and Replicate Data section of this chapter. 10–16 eTrust SSO Implementation Guide Server Farms for Windows Restore and Replicate Data Now that you have set up communication within the server farm, you should restore the data. Because configuration is set up, when you restore the data on one computer it will replicate the data to every other computer in the server farm. To Restore and Replicate eTrust Access Control Data To restore eTrust Access Control data after you have installed a server farm, follow this procedure: 1. Open a command line. 2. Navigate to the location of the database backup. 3. Load the data from each of the backup files into the primary database using the selang command: -f <FILENAME> Note: You may see errors for records that already exists in the database, for example, ps-admin. You must manually reconcile these duplications. 4. Repeat steps 1-3 for every server in the server farm. Implementing a Server Farm 10–17 Server Farms for Windows To Restore and Replicate eTrust Directory Data To restore eTrust Directory data after you have installed a server farm, follow this procedure. WARNING! Make sure that all servers are started and can communicate with each other, because the eTrust Directory queue may overflow if some servers are offline. This is because- replication updates need to be stored in memory. 1. Make sure eTrust Directory is running. 2. Open a command line and navigate to the location of the Directory LDIF backup. By default this is: C:\Program Files\CA\SharedComponents\eTrust Common Services\eTrust Directory\dxserver\bin 3. Execute the command: dxmodify -a -c -h localhost:<PORT> -D "cn=<Directory_User>,o=PS" -w <User_Password> -f <FILENAME> The default <PORT> is 13389 This default <Directory_User> is ldap-pers. this is the name you entered during the installation of the Policy Server. The <User_Password> is what you entered fur Directory_User during the installation of the Policy Server. Note: You may see errors for records that already exists in the database, for example, ps-admin. You must manually reconcile these duplications. 4. Restart the computer. 5. Repeat steps 1-4 for every server in the server farm. Where To Next? You have now completed your server farm installation and configuration. 10–18 eTrust SSO Implementation Guide Server Farms for Windows Troubleshooting If replication is not working or you are receiving errors when trying to set up the server farm, check the following: ■ ■ ■ Have you supplied the eTrust Directory connection information for each station on the other stations? See the Configure eTrust Directory to Send section in this chapter. Have you added each station to the required registry entry? See the Configure eTrust Access Control to Receive Data section in this chapter. Is each station listed in the policy model on each station? See the Specify Servers to Send Data To section in this chapter. Implementing a Server Farm 10–19 Server Farms for UNIX Server Farms for UNIX When you first install a Policy Server is it easy to configure it to work within a server farm using the installation wizard. This wizard lets you specify all the other servers in the server farm. However, you cannot use this method with existing servers. Existing servers must be manually configured to communicate with any new servers in the farm. If you have one or more Policy Servers already installed and you want to set up a server farm or add new servers to the farm, we recommend that you do the following: 1. Install all new Policy Servers using the installation wizard to specify all the other new and existing servers in the server farm. 2. Configure the original server to communicate with the other servers in the farm. To install a new Policy Server and configure it to work within a server farm, see Add a New Policy Server to a Server Farm. To configure an existing Policy Server to communicate with others servers within a server farm, see Add an Existing Policy Server to a Server Farm. For more information and explanation about the two different types of server farm installation, see the Overview section of this chapter. For more information about how to install a Policy Server on a UNIX computer, see the “Installing a Policy Server” chapter of this guide. 10–20 eTrust SSO Implementation Guide Server Farms for UNIX Add a New Policy Server to a Server Farm This section explains how to install a Policy Server to work within a server farm. The installation wizard will guide you through the server farm configuration and let you specify all the other servers in the server farm. 1. Begin installation of the Policy Server by running ./setup script from the CD or installation executable. Mounting a CD will differ according to your platform and operating system configuration. Note: Make sure you logged on as “root”. 2. Follow the installation prompts and select the Server Farm option. Implementing a Server Farm 10–21 Server Farms for UNIX Add an Existing Policy Server to a Server Farm This section describes how to configure a UNIX server farm. The steps involved in configuring a server farm are: 1. Back up existing data in the eTrust Access Control and eTrust Directory data stores. 2. Specify servers to send data to. 3. Specify servers to receive data from. 4. Restore data. Back Up Existing Data on the Policy Server Before you begin the process of adding one or more existing servers to a server farm, you must, back up the data from each data store that is going to be preserved and shared. This section explains how to back up data from the eTrust Access Control data store, as well as the eTrust Directory data store. This data will be restored and replicated later. To Back Up eTrust Access Control Data To back up the eTrust Access Control data, follow this procedure. 1. Launch the Policy Manager 2. From the Tools Menu, select Export Database 3. Select the Generate Command Script option and follow the prompts Remember where you saved the files. To Back Up eTrust Directory Data To back up the eTrust Directory data, follow this procedure. 1. Log on as dsa user. 2. From the command line, shut down the Directory DSAs using the following command: dxserver stop all 3. Execute the following command to back up all data: dxdumpdb -p "o=PS" ps > <FILENAME> Remember where you saved the files. 10–22 eTrust SSO Implementation Guide Server Farms for UNIX Specify Servers to Send Data to Each server in the server farm must have instructions about which other servers to send data to. Therefore you must edit the settings of every server to allow it to “talk” to other servers in the farm. Note: This configuration is done automatically if you did the Automatic Server Farm Installation. To Configure eTrust Access Control to Send Data To configure eTrust Access Control to send data, follow this procedure. 1. Launch the Policy Manager. 2. Select the Tools SideBar Button, then the Policy Model Sidebar icon. 3. Right-click on 'Policy Model' and select Create Policy Model. 4. Enter a Policy Model Name and an Administrator, for example, PS_PMDB and ps-pers respectively. Note: The Policy Model name must not contain any spaces. 5. Right-click on the newly created '<Policy Model>' and select Add Subscriber You may need to “expand” the Policy Model using the “+” sign. 6. Supply the server name of computers that you want to be able to send data from. 7. Repeat steps 1 to 6 for every server in the farm. You can use the same Policy Manager to connect to all the different Policy Servers. To Configure eTrust Directory to Send Data To configure eTrust Directory running on a UNIX computer to receive updates from other UNIX Policy Servers, follow this procedure. This sets up both read and write access for eTrust Directory. 1. Navigate to: <install path for Directory dxserver>/config/knowledge 2. Open PS_<SERVER>.dxc and PSTD_<SERVER>.dxc files in a text editor and add the line dsa-flags = multi-write. This should be located below all the other values, except the flag values if they exist. For example: prefix = <o "PS"> dsa-name = <o "PS"><cn PS_SERVER598> dsa-password = "secret" … auth-levels = anonymous, clear-password, ssl-auth max-idle-time = 60 dsa-flags = multi-write trust-flags = allow-check-password 3. Save the file. Implementing a Server Farm 10–23 Server Farms for UNIX Specify Servers to Receive Data From Each server in the server farm, must have instructions about which other servers to receive data from. Therefore you must edit the settings of every server to allows it to “listen” to other servers in the farm. To Configure eTrust Access Control to Receive Data To configure a Policy Server that is running on a UNIX computer to receive updates from other UNIX Policy Servers, follow this procedure. 1. Log on as “root”. 2. Modify <AccessControl>/seos.ini parent_pmd=<PolicyServer>/farm.sso 3. Modify <PolicyServer>/farm.sso This file should contain a list of servers. Each server should be on a new line. For example: PS_PMDB@server1 PS_PMDB@server2 To Configure eTrust Directory to Receive Data To configure eTrust Directory to receive data, follow this procedure. Distribute the PS and PSTD configuration files from each server to all other servers. 1. Navigate to: <install path for Directory dxserver>/config/knowledge 2. Copy PS_<SERVER>.dxc and PSTD_<SERVER>.dxc files to the same location on all the other servers. 3. Repeat steps 1 and 2 for every server in the farm. 4. After all the files have been copied, open the PS_servers.dxg on every server, and make sure that it lists the configuration files of every other server in the farm (you should be able to see the files in the current directory). Checkpoint All servers should now: 10–24 ■ Accept updates from all other servers ■ Send updates to all other servers eTrust SSO Implementation Guide Server Farms for UNIX Restore and Replicate Data Now that you have set up communication within the server farm, you should restore the data. Because configuration is set up, when you restore the data on one computer it will replicate the data to every other computer in the server farm. To Restore and Replicate eTrust Access Control Data To restore eTrust Access Control data after you have installed a server farm, follow this procedure: 1. Open a command line. 2. Load the data from each of the backup files into the primary database using the selang command: -f <FILENAME> Note: You will see errors for all records that already exists in the database, for example, ps-admin. You must manually reconcile these duplications. To Restore and Replicate eTrust Directory Data To restore eTrust Directory data after you have installed a server farm, follow this procedure. 1. Log on as user dsa. 2. Make sure eTrust Directory is running. 3. Open a command line and navigate to: <install path for Directory dxserver>/bin 4. Execute the command: dxmodify -a -c -h localhost:<PORT> -D "cn=<Directory_User>,o=PS" -w <User_Password> -f <FILENAME> By default The port is 13389. You must enter the user and password that you entered during installation, by default the Directory_User is ldap-pers. Note: You may see errors for records that already exists in the database, for example, ps-admin. You must manually reconcile these duplications. WARNING! Make sure that all servers are started and reachable, as the Directory queue may overflow if some servers are offline. This is because replication updates need to be stored in memory. Implementing a Server Farm 10–25 Chapter 11 Implementing Citrix Application Migration This chapter explains how to set up Citrix MetaFrame application migration. Citrix MetaFrame application migration within eTrust SSO refers to the functionality that lets users transfer an application session launched through eTrust SSO from one workstation to another. Throughout this chapter we will refer to this functionality as ‘application migration.’ This functionality is only available when you deploy eTrust SSO within a Citrix MetaFrame client-server environment. Citrix products are sold independently of eTrust SSO. Client Experience of Application Migration Using application migration, a user can log on to eTrust SSO on workstation A, open an application from their eTrust SSO list, and start working on that application (this is standard eTrust SSO functionality). The user can then move to workstation B, log on to eTrust SSO, launch the same application, and continue working where they left off because their original session has been transferred (migrated) to the second workstation. Case study A doctor logs in to eTrust SSO on workstation A, and opens the Patient History application from the eTrust SSO list. The doctor then gets called away to another ward but wants to continue working on the same patient history in the new ward. The doctor can simply log on to workstation B, launch the application manager from his list of SSO applications, put Patient History into ‘suspend mode’ and reopen Patient History on the new workstation. The application automatically opens exactly where the doctor was last working. Implementing Citrix Application Migration 11–1 Overview of Application Migration Installation Overview of Application Migration Installation This section is a summary of the steps that you need to set up application migration using eTrust SSO. The rest of this chapter explains each step in detail. We recommend that you work through this chapter in the order it is written until you understand the process fully: 1. Check that you have all the pre-requisite software, access and logons and fill in the Pre-installation Checklist 2. Install the SSO Client on the Citrix MetaFrame Server 3. Install the SSO Client on the ICA Client workstation 4. Write Script A: This is the script you must write to launch the published application connection on the ICA Client computer 5. Write Script B: This is the script you must write to launch the SSO-enabled application on the MetaFrame Server computer 6. Define Script A on the Policy Server 7. Define Script B on the Policy Server 8. Create an SSO-enabled published application on the MetaFrame Server computer that 9. Create an ICA connection on the ICA Client computer to the published application on the MetaFrame Server 10. Define the logon credentials for the user for both scripts Example Applications To help you understand this process, we have used Application Manager and Calculator as examples that are described after every step in the process. At the end of this chapter you should be able to migrate these two applications. ■ ■ 11–2 You will probably already have Calculator installed on your computer as part of a standard Windows setup. You will install Application Manager automatically when you install the SSO Client installation on the Citrix MetaFrame Server later in this chapter. For more information about Application Manager see the MetaFrame Application Manager section later in this chapter. eTrust SSO Implementation Guide Pre-installation Considerations Pre-installation Considerations This section outlines all the software, connections and access rights you need to set before you start implementing application migration. Prerequisite Software You must have the following software installed and operational before you can set up application migration: ■ Citrix MetaFrame server installed on at least one server machine (Windows Server XP or 1.8) ■ ICA Client installed on at least two workstations (Windows 2000 or XP) ■ Policy Server installed on a server machine ■ ■ Policy Manager installed on a workstation (or server) and connected to the Policy Server Authentication method (for example, native SSO authentication) Prerequisite Access and Logons You must have access and logon information set up as follows. ■ Administrator logon details for the Policy Server ■ Administrator logon details for the Citrix Server ■ SSO user logon details to SSO ■ SSO user logon details for the Citrix MetaFrame Server There is space to write these details on the Pre-Installation Checklist. Note: Every SSO user must have a unique logon to the Citrix MetaFrame Server. Implementing Citrix Application Migration 11–3 Pre-installation Considerations Pre-Installation Checklist This is a checklist for all the information that you will need in order to implement application migration. Throughout this chapter you will be prompted to write information on this page, so you may want to print it out and write on it. Be careful to protect password security. You may not want to write passwords on this piece of paper. Policy Server machine name ____________________________ Policy Server administrator username ____________________________ Policy Server administrator password ____________________________ Citrix MetaFrame machine name ____________________________ Citrix MetaFrame administrator username ____________________________ Citrix MetaFrame administrator password ____________________________ Citrix MetaFrame test user username ____________________________ Citrix MetaFrame test user password ____________________________ SSO test user data store ____________________________ SSO test user username ____________________________ SSO test user password ____________________________ The following refers to logon Scripts A and B. You must write a Script A and a Script B for every application that you want users to be able to migrate. We have provided you with example scripts that are listed here and are explained in this chapter. 11–4 Example application name Application Manager Example Script A name appman_script_a.tcl Example Script B name appman_script_b.tcl Example application name Calculator Example Script A name calc_script_a.tcl Example Script B name calc_script_b.tcl eTrust SSO Implementation Guide Install Application Migration Install Application Migration Install the SSO Client on an ICA Client Computer This procedure tells you how to install the SSO Client on a Citrix ICA Client machine. 1. From the eTrust Single Sign-On Product Explorer wizard choose Single Sign-On Client. The wizard should appear automatically when you insert the eTrust SSO disk. If not, open Windows Explorer and navigate to the CD-ROM directory and double-click the PE_i386.exe file. 2. Follow the prompts to install, but make sure you: ■ ■ ■ Choose Custom installation and choose the options that are appropriate for your environment Choose I’m installing eTrust SSO on an ICA Client Workstation when prompted Choose authentication method that users must use The SSO Client will now be installed on the ICA Client machine. Install the SSO Client on the Citrix MetaFrame Server This procedure tells you how to install the eTrust SSO Client on the Citrix MetaFrame server. 1. From the eTrust Single Sign-On Product Explorer wizard choose Single Sign-On Client. The wizard should appear automatically when you insert the eTrust SSO disk. If not, open Windows Explorer and navigate to the CD-ROM directory and double-click the PE_i386.exe file. 2. Follow the prompts to install, and accept default values but make sure you: ■ Choose Custom installation ■ Choose I’m installing eTrust SSO on a Citrix MetaFrame Server. ■ Do not choose the SSO Client to run in Toolbar Mode. The SSO Client will now be installed on the Citrix MetaFrame Server machine. Note: You might want to consider making sure that the ssoagent.exe process is closed when the ssointrp.exe process ends in the Citrix session, when Script B is completed. To do this you should go to the [SSO Interpreter] section of the SsoClnt.ini file and set CloseAgentOnExit=yes. Implementing Citrix Application Migration 11–5 Install Application Migration Write Script A This procedure tells you how to write a Script A. Every application that you want SSO users to be able to migrate must have its own Script A. A Script A runs on the ICA Client machine and launches the Citrix published application connection. 1. Open a text editor and write Script A in Tcl. You will need this name later when you are making your ICA Client connection. 2. Save the Script A in the Scripts directory on the Policy Server. Be default, the Scripts directory is found at: C:\Program Files\CA\eTrust Policy Server\Scripts\ Examples of Script A This section shows you two examples of Script As, one for Application Manager and one for Calculator. Here are some things you should know about the following example Script As in this section: ■ ■ ■ ■ ■ 11–6 These are example scripts only and you will need to customize these scripts to suit your environment. For example, you may need to increase or decrease the SSO sleep time. The underlined text in these examples represents the published application name that is defined on the Citrix MetaFrame server (you do not need to underline any text in your script). These names must match each other in this script. The login name and password referred to in this script are the credentials that the user uses to log on to the Citrix MetaFrame Server. These credentials must be unique for each SSO user. These scripts assume that the ICA Client is installed in the following location on the workstation: C:\Program Files\Citrix\ICA Client\pn.exe These example script names are written on the example Pre-Installation Checklist at the start of this chapter. eTrust SSO Implementation Guide Install Application Migration Application Manager Example Script A Here is an example Script A for Application Manager to run in a Remote Desktop Citrix environment. This script will not work in a Seamless Windows Citrix Environment. Application name: Script A name: sso sso sso sso sso sso sso sso sso Application Manager appman_script_a.tcl run -path {C:\\Program Files\\Citrix\\ICA Client\\pn.exe /APP:"Application_Manager"} lockinput window -titleglob "Application Manager - Citrix ICA Client" sleep -time 4 type -text "$_LOGINNAME" type -text "{tab}" type -text "$_PASSWORD" type -text "{enter}" unlockinput For examples of more complex and robust scripts, see the Example Scripts section at the back of this chapter. Calculator Example Script A Here is an example Script A for Calculator to run in a Remote Desktop Citrix environment. This script will not work in a Seamless Windows Citrix Environment. Application name: Script A name: sso sso sso sso sso sso sso sso sso Calculator calc_script_a.tcl run -path {C:\\Program Files\\Citrix\\ICA Client\\pn.exe /APP:"Calculator"} lockinput window -titleglob "Calculator - Citrix ICA Client" sleep -time 4 type -text "$_LOGINNAME" type -text "{tab}" type -text "$_PASSWORD" type -text "{enter}" unlockinput For examples of more complex and robust scripts, see the Example Scripts section at the back of this chapter. Implementing Citrix Application Migration 11–7 Install Application Migration Write Script B This procedure tells you how to write a Script B. Every application that you want SSO users to be able to migrate must have its own Script B. A Script B runs on the Citrix MetaFrame Server and launches the SSO-enabled application. This script represents standard SSO functionality, but it is defined as a hidden application on the Policy Server. 1. Open a text editor and write Script B in Tcl. 2. Save the Script B in the Scripts directory on the Policy Server. For example: C:\Program Files\CA\eTrust Policy Server\Scripts\appman_script_b.tcl Examples of Script B This section shows you two example Script Bs, one for Application Manager and one for Calculator. Here are some things you should know about the following example Script Bs in this section: ■ ■ ■ ■ ■ 11–8 These are example scripts only and you will need to customize these scripts to suit your environment. You should write this script as if it was launching an application on a local workstation (normal eTrust SSO functionality). This is a simple example script that does not require a username and password. Most SSO-enabled applications would require a username and password. The scripts assume that Application Manager and Calculator are located at the defined locations. The M: drive may be a different drive letter on your Citrix MetaFrame server. These example script names are written on the example Pre-Installation Checklist at the start of this chapter. eTrust SSO Implementation Guide Install Application Migration Application Manager Example Script B Here is an example Script B for Application Manager. This script will work in either a Seamless Windows Citrix environment or a Remote Desktop Citrix environment. Application name: Script B name: Application Manager appman_script_b.tcl sso run -path {M:\\Program Files\\CA\\eTrust SSO\\Client\\mf_appl_migration.exe} Calculator Example Script B Here is an example Script B for Calculator. This script will work in either a Seamless Windows Citrix environment or a Remote Desktop Citrix environment. Application name: Script B name: Calculator calc_script_b.tcl sso run -path {M:\\WINNT\\system32\\calc.exe} Implementing Citrix Application Migration 11–9 Install Application Migration Define Script A on the Policy Server This procedure tells you how to define a Script A on the Policy Server. The Script A launches the Citrix published application connection on the ICA client machine. 1. Launch the Policy Manager 2. In the Program Bar navigate to Single Sign-On Resources, Application Resources, Application. 3. Right-click in the Application Window and choose New. The Create New APPL Resource – General dialog appears. 4. Fill in the details of the application. For example: Name: Caption: Type: Application Manager Script A Application Manager Desktop Application Note: The caption is what the user sees in their eTrust SSO Application List. 11–10 5. Click the Scripting button. The Scripting dialog appears. 6. Enter the Script A name in the Script File field, and then click OK. For example, appman_script_a.tcl. 7. Select the Authorize icon. The Create New APPL Recourse – Authorize dialog appears. 8. Right-click and choose Add. The Add Access Control List Accessor dialog appears. 9. Choose the users who will have access to this application, and then click OK. These should be the same users that you allocate to have access to Script B. eTrust SSO Implementation Guide Install Application Migration Define Script B on the Policy Server This procedure tells you how to define a Script B on the Policy Server. The Script B must be defined as a hidden application. This script will launch the SSO-enabled application on the Citrix Server. 1. Launch the Policy Manager 2. In the Program Bar navigate to Single Sign-On Resources, Application Resources, Applications. 3. Right-click in the Application Window and choose New. The Create New APPL Resource – General dialog appears. 4. Fill in the details of the application. For example: Name: Caption: Type: Application Manager Script B Application Manager (Hidden) Desktop Application 5. Click the Scripting button. The Scripting dialog appears. 6. Enter the Script B name in the Script File field and click OK. For example: appman_script_b.tcl. 7. Click the Attributes icon. The View or Set APPL Properties – Attributes dialog appears. 8. Choose the Hidden checkbox. 9. Select the Authorize icon. The Create New APPL Recourse – Authorize dialog appears. 10. Right-click and choose Add The Add Access Control List Accessor dialog appears. 11. Choose the user(s) who will have access to this application and click OK when you are finished. This user(s) should be the same users that you allocated access to Script A. Implementing Citrix Application Migration 11–11 Install Application Migration Create an SSO-Enabled Published Application This section tells you how to configure an application hosted on the Citrix Server so that it can be accessed from a user’s eTrust SSO list on the ICA Client machine. These instructions apply to Citrix XP. You can also configure Application Migration with Citrix 1.8. 1. Open the Citrix Management Console on the Citrix MetaFrame Server machine. 2. Choose the Publish Application icon. This launches the Application Publishing Wizard. 3. Enter the display name and descriptions for the application and press Next. For example: ■ ■ Display Name: Application Manager This is the name referred to in Script B. This name is not visible to end users. Application Description: Application Manager The display name is not visible to end users. The Specify What to Publish dialog appears. 4. In the Specify What to Publish dialog, chose the following: - Application (option button) - Command Line: Browse for ssointrp.exe then type the exact name of the application that has script B assigned to it (you defined this using the Policy Manager) - Working Directory: This is the folder in which the ssointrp.exe is stored. This will be populated automatically if you browse for ssointrp.exe. For example: C:\Program Files\CA\eTrust SSO\Client\ssointrp.exe “Application Manager Script B" When you click Next the Program Neighborhood Settings dialog appears. 11–12 5. Continue through the Publish Application screens until you get to the Specify Servers dialog appears (you can accept the default information for all intervening screens). 6. Add all servers that should be able to run the published application. eTrust SSO Implementation Guide Install Application Migration When you click Next the Specify Users dialog appears. 7. Add all users or user groups that need access to this application. Note: Do not choose Allow Anonymous Connections, because application migration only supports explicit applications. When you click Next the Specify File Type Associations dialog appears. 8. Specify any associations that you require (none by default). When you click Finish you return to the Citrix Management Console. 9. Check that the application that you just published is visible in the Applications folder. You should see the Display Name that you entered in step 3. Implementing Citrix Application Migration 11–13 Install Application Migration Create an ICA Connection To The Published Application This procedure tells you how to make the ICA Client connection to the MetaFrame server application. 1. On the ICA Client machine, open the Citrix Program Neighborhood from the Start menu. 2. Choose Application Set Manager 3. Choose Custom ICA Connections 4. Choose Add ICA Connection The Add New ICA Connection wizard appears 5. Choose the type of connection (this will usually be the LAN option) and click Next. 6. Enter the appropriate information, and make sure that you choose the Published Application option, then click Next. For example: - Description: Application Manager This description should exactly match the name of the published application defined in Script A. This is the Application Name on your Pre-Installation Checklist. 11–14 - Protocol drop-down: TCP/IP - Option: Published Application - Application drop-down: Application Manager (This drop-down menu shows the Display Names entered when you published the application on the Citrix MetaFrame Server). eTrust SSO Implementation Guide Install Application Migration 7. Choose View in a remote desktop window and click Next. Important! You must choose this option for MetaFrame Application Manager to work because there must be a separate Citrix session for every application. If you do not want to use the Application Manager and want your end users to run all of their applications in one Citrix session, you may chose to run the published applications in a Seamless Window. 8. Choose the encryption level and click Next. 9. You must uncheck Use local User name and Password and fill in the fields as show: User name: [Leave blank] Password: [Leave blank] Domain: [Specify the domain for the connection] This ensures the logon dialog is displayed when the ICA Client connection is launched. Script A will be used to automatically log the SSO user on to the Citrix Server using the relevant Citrix logon credentials defined on the Policy Server in the following section. 10. Finish the setup, you can accept the defaults. Implementing Citrix Application Migration 11–15 Install Application Migration More Information About the Logon Window The application logon dialog is only displayed when a new Citrix Session is established. The logon script A will insert the user’s authentication credentials. In a Remote Desktop Windows environment a new Citrix Session is established for every application that is launched on the Citrix MetaFrame Server. In a Seamless Windows environment a new Citrix Session is only established for the first application that is launched - all other applications are considered to be part of this first Citrix Session. 11–16 eTrust SSO Implementation Guide Install Application Migration Define the Application Credentials for Each User This procedure tells you how to define the logon credentials for the SSO user to log on to the: ■ Citrix MetaFrame server (Script A) ■ SSO-enabled published application (Script B) 1. Launch the Policy Manager and navigate to Single Sign-On Users, and find the test user. 2. Right-click on the test user and choose Properties. The View or Set User Properties – General dialog appears. 5. Choose Application List icon The View or Set User Properties – Application List dialog appears. 6. Choose the Script A application and click the Update Login Information button. The Update Login Information dialog appears. 7. Enter the appropriate username (login name) and password for this user on the domain that will let the user access the published application for access to the Citrix MetaFrame server then click OK. Remember that this is the script that launches the published application link on the ICA client machine, so these credentials are what the user would normally enter to logon to the Citrix MetaFrame server to access the application. Note: Every SSO user must have their own unique logon details to the Citrix MetaFrame Server so that SSO can recognize individual sessions. 8. Choose the Script B application and click the Update Login Information button. The Update Login Information dialog appears. 9. Enter the appropriate username (login name) and password for this user for the published application that runs on the MetaFrame Citrix server then click OK Note: In our example Script B for the Application Manager, we do not make reference to a username and password, because the Application Manager does not have a logon screen. You would normally need to specify a username and password for the application that runs Script B. This Update Login Information dialog is where you enter the username and password that would be inserted into Script B. Implementing Citrix Application Migration 11–17 Install Application Migration Test Application Migration This procedure tells you how to test application migration. This is the procedure that end-users would follow. 1. Using the test user, logon and authenticate to SSO on the ICA client machine. This means that you will have a current SSO ticket. 2. Choose the application from the list of SSO-enabled applications. For example, Calculator, if you have defined it. The scripts should now launch the application. 3. Enter some numbers into Calculator. Remember these numbers so that you can test that you are opening the same session on the new machine. 4. Using the test user, logon and authenticate to SSO on a second ICA client machine. 5. Launch Application Manager from the list of SSO-enabled applications. The Application Manager launches and you will see Calculator under the list of published applications. 7. Click the Disconnect button to put the application into suspend mode. You should notice the Calculator application session close on the first ICA Client machine. 8. Launch Calculator from the list of SSO-enabled applications. You should see the same session of Calculator with the numbers that you entered in step three. 11–18 eTrust SSO Implementation Guide Troubleshooting Troubleshooting Here are some trouble shooting tips to help you if you cannot get Application Migration working. ■ ■ ■ ■ Ensure the logon credentials that you used to access the Citrix MetaFrame Server are valid and that the user has the relevant Citrix privileges to run the published application. Make sure that you have a current valid SSO ticket by logging on the SSO user again. Check that the MetaFrame Manager has the Remote Procedure Call (RPC) Windows Service on the Citrix MetaFrame Server is running (this is only necessary for the Application Manager program). Check that every Citrix MetaFrame server that hosts published applications is listed in the SsoMetafrrame.ini file. These servers should be listed as shown: [Simple_Config] MetaframeServers=<names of servers, space separated> This is only necessary for the Application Manager program. ■ Check the Tcl logon scripts ■ Check the application script names in the Policy Manager ■ Check that the Description you entered when you made the ICA connection to the Published application matches the names that you entered in script A. If you are still having problems running the Application Manager, you can inspect the MetaFrameLog.cfg in the SSO Client directory on the Citrix Server. Implementing Citrix Application Migration 11–19 MetaFrame Application Manager MetaFrame Application Manager The MetaFrame Application Manager (Application Manager) is a software tool that lets users administer their own sessions. Whether you give users access to this tool is a choice you need to make based on how much control you want to give to your end users. The design of the Application Manager is based on a Citrix utility that is normally only available to administrators. The Application Manager lets users view all the instances of each SSO-enabled software package that they are currently logged onto. Although the Application Manager will work in both a Remote Desktop and Seamless Window environment, its full functionality is only realized in a Remote Desktop Window environment. This is because the Application Manager relies on a Citrix session hosting a single SSO application, not a Citrix session hosting multiple SSO applications (which is what happens in a Seamless Window environment). The Application Manager only works in a Remote Desktop Citrix environment, not a Seamless Windows environment. Application States The Application Manager lets users put application sessions into one of three states: Application State Result Connected This means that the application is currently running on a workstation. Disconnected This means that the application is ‘suspended’ but not closed and can be migrated to another workstation. Do not confuse this with “terminated”. Terminated This means that the application has been closed and is not available to be migrated to another workstation. Application Manager Installation The Application Manager runs on the Citrix Server. You will automatically install the Application Manager when you install the SSO Client on the Citrix Server. You then have the option of adding this as an SSO-enabled application to each user’s SSO application list. 11–20 eTrust SSO Implementation Guide Application Migration Configuration Application Migration Configuration This section tells you about ways you can configure Application Migration and a little bit more about how it works with the SSO Client. Suspend ICA Client Connections During SSO Logoff When the SSO Client is installed on the ICA Client workstations, a Tcl script called Citrix_SSO_Logoff.tcl is installed in the SSO Client directory. This script automatically converts all open ICA Client connections to the “disconnected” state on the Citrix MetaFrame server when the user logs off SSO on that workstation. If the same user then logs on to SSO on another ICA Client workstation and starts one of the disconnected applications, the previous instance of that application will be returned to the user. Shared Workstations and Session Management Application Migration functionality is often used in conjunction with session management in a shared workstation environment. If you give every user a session profile that limits them to one SSO session and automatically closes their previous instance of eTrust SSO then applications will “follow” users from workstation to workstation using the Citrix_SSO_Logoff.tcl logoff script discussed in the previous section. For more information about shared workstation mode see the “Working with the SSO Client” chapter of the eTrust SSO Administrator Guide. For more information about managing user sessions see the “Managing User Sessions” chapter of the eTrust SSO Administrator Guide. Implementing Citrix Application Migration 11–21 Script A Samples Script A Samples Here are some Script A examples for Application Manager and Calculator. These are similar to the examples shown in the Write Script A section earlier in this chapter, but are more robust and complex. Calculator in Seamless Window Mode Here is an example of a robust Script A written for Calculator that will run in a Seamless Windows Citrix environment. Application name: Calculator Script A name: calc_script_a.tcl # Is the application already running? If yes, set focus to ERRORMODE resume set wintitle [sso window -titleglob "Calculator - \\\\Remote"] # If not launch the ICA Client connection to run the published application if {! [string match "$wintitle" "Calculator - \\Remote"]} { set _ERRORMODE stop sso lockinput sso run -path {C:\\Program Files\Citrix\\ICA Client\\pn.exe /APP:Calculator} # Does the user already have a Citrix Session established? set _ERRORMODE resume set loginwintitle [sso window -titleglob "Log On to Windows - \\\\Remote"] # If not (i.e. prompted for Citrix login credentials), login to Citrix # to establish Citrix session if {[string match "$loginwintitle" "Log On to Windows - \\Remote"]} { set _ERRORMODE stop sso sleep -time 4 sso type -text "$_LOGINNAME" sso type -text "{tab}" sso type -text "$_PASSWORD" sso type -text "{enter}" } sso unlockinput } set _ERRORMODE stop Here is an example of a robust Script A written for Calculator that will run in a Remote Desktop Citrix environment. These are example scripts only and you may need to change these scripts to suit your environment. 11–22 eTrust SSO Implementation Guide Script A Samples Calculator in Remote Desktop Mode Here is an example Script A for Calculator to run in a Remote Desktop Citrix environment. Application name: Calculator Script A name: calc_script_a.tcl # Is the application already running? If yes, set focus to ERRORMODE resume set wintitle [sso window -titleglob "Calculator - Citrix ICA Client"] set _ERRORMODE stop # If not launch the ICA Client connection to run the published application and login to Citrix if {! [string match "$wintitle" "Calculator - Citrix ICA Client"]} { sso lockinput sso run -path {C:\\Program Files\Citrix\\ICA Client\\pn.exe /APP:Calculator} sso window -titleglob "Calculator - Citrix ICA Client" sso sleep -time 4 sso type -text "$_LOGINNAME" sso type -text "{tab}" sso type -text "$_PASSWORD" sso type -text "{enter}" sso unlockinput } Implementing Citrix Application Migration 11–23 Implementing Citrix Application Migration 11–1 Chapter 12 Upgrading eTrust SSO 6.5 to 7.0 The three basic components that make up the eTrust Single Sign-On (eTrust SSO) system that need upgrading are: ■ SSO Client 6.5 Æ SSO Client 7.0 ■ SSO Assistant Æ Policy Manager ■ SSO Server Æ Policy Server Upgrading eTrust SSO 6.5 to 7.0 12–1 Upgrading the SSO Client (6.5 to 7.0) Upgrading the SSO Client (6.5 to 7.0) Upgrading the SSO Client is done using the installation wizard. The eTrust SSO system detects that you have the old SSO Client and will install the new one over the top. 1. From the eTrust Single Sign-On 7.0 Product Explorer wizard select Single Sign-On Client 7.0. The wizard should appear automatically when you insert the eTrust SSO disk. If not, open Windows Explorer and navigate to the CD-ROM directory and double-click the PE_i386.exe file. 2. Click the Install button. The Welcome dialog appears. 3. Click the Next button then read and accept the license agreement. The Upgrade Type dialog appears with options to Upgrade or Uninstall. 4. Select Upgrade and click the Next button. The Ready to Upgrade the Program dialog appears. 5. Click the Install button. The SSO Client 7.0 will install over the SSO Client 6.5. 12–2 eTrust SSO Implementation Guide Upgrading the SSO Assistant to the Policy Manager Upgrading the SSO Assistant to the Policy Manager As part of your upgrade from eTrust SSO 6.5 to eTrust SSO 7.0 you must remove the SSO Assistant (eTrust SSO 6.5) and install the Policy Manager (eTrust SSO 7.0). 1. From the Windows Start menu select Settings, Control Panel. The Control Panel window appears. 2. Select the Add or Remove Programs option. A list of currently installed programs appears. 3. Select CA eTrust SSO Assistant 6.5 and click the Remove button. The SSO Assistant will be removed from your system. 4. Go to the “Installing the Policy Manager” chapter of this guide to install the Policy Manager. Upgrading eTrust SSO 6.5 to 7.0 12–3 Upgrading the Server (SSO Server to Policy Server) Windows Upgrading the Server (SSO Server to Policy Server) Windows When you upgrade the SSO Server to the Policy Server, you also need to upgrade your data stores. We recommend that your user data should be stored in the eTrust Directory data store, and all your other data (resources and administrators) are stored in the eTrust Access Control data base. This is the default setup. eTrust SSO 7.0 comes with scripts to help you migrate your data to the two data stores. These scripts are located in X:\PolicyServer\Upgrade (where X is your CDROM Drive). Windows SSO Server Access Control 4.x Windows Policy Server Administrators Resources Users Access Control 5.2 LDAP Directory 4.0 Step 1. Back Up Existing Data Before you upgrade your data store you need to back up your data. The script responsible for the backup is called Backup.bat. This script will back up: ■ The selang command files which can be used to recreate the existing eTrust database ■ Scripts found in <Policy Server>/Scripts ■ Files found in <Policy Server>/Motd To backup the existing data, perform the following steps. 1. Open a Command Prompt window. 2. Type Backup.bat <path to backup directory>. The first argument passed to the script tells it where to store the back up files. 12–4 eTrust SSO Implementation Guide Upgrading the Server (SSO Server to Policy Server) Windows Step 2. Uninstall Previous Versions All previous components of eTrust SSO 6.5 must be removed before the new components are installed. Uninstall the SSO Assistant If the SSO Assistant is installed on the computer you are migrating to eTrust Access Control 5.2, uninstall it. This can be done either by: ■ ■ Using the Windows Start menu, Control Panel, Add or Remove Programs Typing the following in a command window: %WinDir%\IsUninst.exe f"<Assistant Installation path>\Uninst.isu" (where %WinDir% is the value of the WinDir environment variable on the local machine, for example, C:\WINNT\). Uninstall the SSO Server Uninstall the SSO Server from the computer by either: ■ ■ Using the Windows Start menu, Control Panel, Add or Remove Programs Typing the following in a command window: %windir%\IsUninst.exe f"<SSO Server Installation path>\Uninst.isu" -c"<SSO Server Installation path >\SsodUnInst.dll" (where %WinDir% is the value of the WinDir environment variable on the local machine, for example, C:\WINNT\). Uninstall eTrust Access Control You must uninstall eTrust Access Control before you can install the new version of the Policy Server. The following describes how to stop and uninstall eTrust Access Control a Windows machine. 1. Open a command prompt and change directory to the eTrust Access Control directory. The default path is C:\Program Files\seos\bin. 2. Type secons –s and press enter. eTrust Access Control will be stopped. 3. Uninstall eTrust Access Control from the computer by either: ■ ■ Selecting Start menu, Control Panel, Add/Remove Programs Typing the following in a command window: %WinDir%\IsUninst.exe -f"<AC Installation path>\Uninst.isu" -c"<AC Installation path >\seuninst.dll" (where %WinDir% is the value of the WinDir environment variable on the local machine, for example, C:\WINNT\). Upgrading eTrust SSO 6.5 to 7.0 12–5 Upgrading the Server (SSO Server to Policy Server) Windows Step 3. Install Policy Server You should now install the Policy Server, which replaces the SSO Server. For instructions on how to install the Policy Server, see the “Installing the Policy Server” chapter in this guide. When the installation is complete, you will be prompted to restart your computer. The Policy Server is not installed by default in the same directory as the SSO Server, but you can specify the same directory if you wish. Note: During the installation, you should use your 6.5 administrator username and password. Step 4. Install the SSO Client 7.0 You must install the SSO Client 7.0 as part of upgrading to the Policy Server because the SSO Client 7.0 contains the SSO Interpreter which interprets and executes the restore data scripts. For instructions on how to install the SSO Client, see the “Installing the SSO Client” chapter in this guide. Step 5. Restore the Database This step restores the data to the data stores. The default setup, which is strongly recommended, is that all user data be stored in the eTrust Directory and all other data (resources and administrators) are stored on eTrust Access control. The following command will restore data in this configuration. 1. Open a command window. 2. Change the current directory to “<X>:/Policy Server/Upgrade” where X is the CD drive. 3. Type MigrateDB.bat <BACKUP DIRECTORY> LDAP and press Enter. BACKUP DIRECTORY is the path of the directory where all the back-up files are kept. This was set in Step 1. Back Up Existing Data. This will restore you user data to the eTrust Directory and all your other data to eTrust Access Control. Tip: If you specifically want to store your users in the eTrust Access Control data store, type MigrateDB.bat <BACKUP DIRECTORY> AC. This is not the default. 12–6 eTrust SSO Implementation Guide Upgrading the Server (SSO Server to Policy Server) on UNIX Upgrading the Server (SSO Server to Policy Server) on UNIX When you upgrade the SSO Server to the Policy Server, you also need to upgrade your data stores. We recommend that your user data should be stored in the eTrust Directory data store, and all your other data (resources and administrators) are stored in the eTrust Access Control data base. This is the default setup. eTrust SSO 7.0 comes with scripts to help you migrate your data to the new data stores. These scripts are located in /cdrom/upgrade (where /cdrom is your mounted CDROM drive). SSO Server Access Control Policy Server Administrators Resources Users Access Control LDAP Directory If you are on a UNIX platform, running the setup script will make eTrust Directory your default user data store. Before you run setup, please back up your existing database. Upgrading eTrust SSO 6.5 to 7.0 12–7 Upgrading the Server (SSO Server to Policy Server) on UNIX Step 1. Back up Existing Data Before you upgrade the Policy Server, and your data store you need to back up your data. To back up your existing database, use the scripts provided on the eTrust Single Sign-on 7.0 CD. 1. Put in the eTrust Single Sign-on CD. Depending on your operating system, the CD should automatically mount. If not, please mount the CD to make it readable. 2. Uncompress the tar ball if it is not already extracted. 3. Change the current directory to <cdrom> directory. By default, the backup directory is set to /ac_backup in the Backup.sh script. If you need to change that, open Backup.sh in a text editor and modify the backup directory. 4. Type “./Backup.sh” to run the Backup.sh script. You data will be backed up. Step 2. Install Policy Server You should now install the Policy Server, which replaces the SSO Server. 1. Begin installation by running ./setup script from the CD or installation executable. Note: Make sure you are logged on as “root”. 2. Follow the prompts for a standard installation. For more detailed information about installing the Policy Server on UNIX systems, please see the “Installing the Policy Server” chapter of this guide. Step 3. Restore the Database This section shows you how to restore the databse that you backed up in Step 1. 1. Run the MigrateDb.sh script by typing: “./MigrateDb.sh <BACKUP_DIR> <LDAP|AC>" BACKUP_DIR Type the location of the backup directory. LDAP|AC Type LDAP if you want to use the LDAP data store (eTrust Directory) as your user data store. This is the default. Type AC if you want to use eTrust Access Control as your user data store. Note: Make sure you are logged on as “root”. 12–8 eTrust SSO Implementation Guide Troubleshooting Troubleshooting Trouble with Importing Rules into the database The key to success is a correct import file. In this case the ac_backup.txt that is created using the ‘sedb2src –l’ command. If the syntax of this text file is incorrect then error will appear in the output file and the new entries will not be created in the database. Trouble with Running Migratedb.bat Errors that occur when executing the MigrateDb.bat script are normally caused by incorrect syntax which confuses the TCL parser. All entries that cause an error are placed in an error file – the filename and path are defined by the variable ERROR_FILE in MigrateDb.bat. Browse the error file and ensure that the entries do not contain special characters that have not been escaped (i.e. prefix with a backslash ‘\’). If so, modify the entry in the back up file [ac_backup.txt] by pre-pending the special character with a backslash. Upgrading eTrust SSO 6.5 to 7.0 12–9 Troubleshooting Known Issues Migration from eTrust Access Control 4.1 to eTrust Directory ■ ■ ■ ■ eTrust Access Control allows a user to have the same name as a user-group, however, but eTrust Directory will not allows this. During the migration, the LDIF file containing all the user information is sorted using the ldifsort executable, and this removes all entries with duplicate common names. These duplicates are written to a file: <backup directory>/ldif_dup.txt that can be sorted manually. In Policy Server 2.0, only users and user groups that are stored in the eTrust Access Control data store can be authorized to access a terminal. Using the migration scripts, all users are migrated across from eTrust Access Control 4.1 data store into the eTrust Directory 4.0 (LDAP) data store. All users that have been marked as an administrator in the eTrust Access Control data store are migrated across with this administrator status into the eTrust Directory, but their administrator status cannot be seen or changed using the Policy Manager. To verify this, use the selang command “showusr <username>”. On UNIX platforms, SPECIALPGM can be set so that some users or user groups can execute a program with the privileges of another user. When you select the default data store as eTrust Directory you cannot specify SPECIALPGM programs to run with the privileges of the user that is stored in the eTrust Directory (LDAP). Migration From eTrust Access Control 4.1 To eTrust Access Control 5.1 ■ ■ ■ 12–10 Authentication hosts that are migrated across now have a default data store which is dependent on the default user data store. If the default user data store is eTrust Directory, then the default data store of the migrated authentication host is “ps-ldap”. Otherwise, the default data store will be the eTrust Access Control data store. In eTrust Access Control 4.1, users be any of the following: “Administrator”, “Auditor” and “Password Manager”. However in version 5.1, users can only be “Administrator” and “TNG Administrator”. Therefore only the “Administrator” role will be migrated. In SSO Server v6.5, applications can be both a Container and a Desktop application. In Policy Server 2.0, an application must be either a container or a desktop application. Where the application was both a container and a desktop application in SSO Server 6.5, it will be migrated across as a container application only. eTrust SSO Implementation Guide Troubleshooting ■ In SSO Server v6.5, an application could be a “Web Resource”. This is not available on Policy Server version 2.0, so “Web Resource” applications will be migrated as ordinary applications in Policy Sever 2.0. Further Information The eTrust Access Control Administrator’s Guide describes the steps in exporting the database rules in greater detail than are covered here. The eTrust selang Command Reference Guide details the steps in using the selang command and importing rules into a new database. Upgrading eTrust SSO 6.5 to 7.0 12–11 Upgrading eTrust SSO 6.5 to 7.0 12–1 Appendix A Uninstalling eTrust SSO This chapter tells you how to uninstall the eTrust SSO Components. You can uninstall every component using the Product Explorer wizard, except a UNIX installation of the Policy Server. This chapter covers uninstalling the following eTrust SSO components: ■ SSO Client ■ SSO Client components ■ Policy Manager ■ Policy Server - Windows ■ Policy Server - UNIX ■ Authentication Agent ■ Password Synchronization Agent ■ Web Agent ■ Documentation You can also uninstall every component using the Windows Add/Remove programs utility located in Control Panel. That method is not documented in this chapter. About the Product Explorer You can use the Product Explorer to either install or uninstall any eTrust SSO component. In addition to this, you can use the Product Explorer to modify some of the components. You can tell if a component is already installed because it appears in bold in the Product Explorer window. Uninstalling eTrust SSO A–1 Uninstalling the SSO Client Uninstalling the SSO Client You can either choose to uninstall the SSO Client or just some SSO components. SSO Client Uninstall This procedure tells you how to uninstall the SSO Client. 1. Open the eTrust Single Sign-On 7.0 Product Explorer window. This window should appear automatically when you insert the eTrust SSO disk. If not, open Windows Explorer, navigate to the CD-ROM directory, and double-click the PE_i386.exe file. 2. Select the Single Sign-On Client 7.0 option. The Uninstall button becomes active. 3. Click the Uninstall button. The Welcome screen appears. 4. Click the Next button. The Program Maintenance dialog appears. 5. Select the Remove option and click the Next button. The Remove the Program dialog appears. 7. Click the Remove button. The eTrust SSO Client will be uninstalled and the InstallShield Wizard Completed dialog appears. 8. Click the Finish button. The eTrust SSO Client is now uninstalled. You may be asked to restart the machine. A–2 eTrust SSO Implementation Guide Uninstalling the SSO Client Modify or Delete SSO Client Components This procedure tells you how to uninstall the SSO Client components without uninstalling the SSO Client itself. The components that you can remove include: ■ GINA Upgrade ■ Station Lock ■ Gina Pass Through ■ Authentication Methods 1. Open the eTrust Single Sign-On 7.0 Product Explorer window. This window should appear automatically when you insert the eTrust SSO disk. If not, open Windows Explorer, navigate to the CD-ROM directory, and double-click the PE_i386.exe file. 2. Select the Single Sign-On Client 7.0 option. The Uninstall button becomes active. 3. Click the Uninstall button. The Welcome screen appears. 4. Click the Next button. The Program Maintenance dialog appears. 5. Select the Modify option and click the Next button. The Custom Setup dialog appears. 6. Use the drop-down menus for each SSO Client component to select or remove it from the current client installation, and click the Next button. The Ready to Modify the Program dialog appears. 7. Click the Install button. The eTrust SSO Client will be modified as you specified and the InstallShield Wizard Completed dialog appears. 8. Click the Finish button. The eTrust SSO Client is now modified. You may be asked to restart the machine. Uninstalling eTrust SSO A–3 Uninstalling the Policy Manager Uninstalling the Policy Manager This procedure tells you how to uninstall the Policy Manager on Windows. 1. Open the eTrust Single Sign-On 7.0 Product Explorer window. This window should appear automatically when you insert the eTrust SSO disk. If not, open Windows Explorer, navigate to the CD-ROM directory, and double-click the PE_i386.exe file. 2. Select the Policy Manager for Windows option. The Uninstall button becomes active. 3. Click the Uninstall button. The Welcome screen appears. 4. Click the Next button. The Program Maintenance dialog appears. 5. Select the Remove option and click the Next button. The Remove the Program dialog appears. 7. Click the Remove button. The Policy Manager will be uninstalled and the InstallShield Wizard Completed dialog appears. 8. Click the Finish button. The Policy Manager is now uninstalled. A–4 eTrust SSO Implementation Guide Uninstalling the Policy Server Uninstalling the Policy Server The Policy Server can be installed on either Windows or UNIX platforms. This section describes how to uninstall the Policy Server from both platforms. Policy Server for Windows Uninstall This procedure tells you how to uninstall the Policy Server on Windows. 1. Open the eTrust Single Sign-On 7.0 Product Explorer window. This window should appear automatically when you insert the eTrust SSO disk. If not, open Windows Explorer, navigate to the CD-ROM directory, and double-click the PE_i386.exe file. 2. Select the Policy Server for Windows option. The Uninstall button becomes active. 3. Click the Uninstall button. The Welcome screen appears. 4. Click the Next button. The Program Maintenance dialog appears. 5. Select the Remove option and click the Next button. The Remove the Program dialog appears. 7. Click the Remove button. The Policy Server will uninstall and the InstallShield Wizard Completed dialog appears. This may take some time. 8. Click the Finish button. The Policy Server is now uninstalled. You may be asked to restart the machine. Uninstalling eTrust SSO A–5 Uninstalling an Authentication Agent Policy Server for UNIX Uninstall This procedure tells you how to uninstall the Policy Server on UNIX. 1. Log on as “root” or Admin User 2. Type the Policy Server path and append the deinstall command. For example, if you installed the Policy Server in the default location the command is: # <user_specified_path>/eTrustSingleSignOn/PolicyServer/bin/deinstall 3. Follow the prompts to uninstall. The Policy Server will be uninstalled. eTrust Directory and Ingres and their associated data will be removed as part of the Policy Server uninstallation unless they are being used by another product. You are asked to confirm whether to uninstall eTrust Access Control. Uninstalling an Authentication Agent This procedure tells you how to uninstall an Authentication Agent. 1. Open the eTrust Single Sign-On 7.0 Product Explorer window. This window should appear automatically when you insert the eTrust SSO disk. If not, open Windows Explorer, navigate to the CD-ROM directory, and double-click the PE_i386.exe file. 2. Select the Authentication Agent you wish to uninstall. The Uninstall button becomes active. 3. Click the Uninstall button. The Welcome screen appears. 4. Click the Next button. The Program Maintenance dialog appears. 5. Select the Remove option and click the Next button. The Remove the Program dialog appears. 7. Click the Remove button. The Authentication Agent will be uninstalled and the InstallShield Wizard Completed dialog appears. 8. Click the Finish button. The Authentication Agent is now uninstalled. A–6 eTrust SSO Implementation Guide Uninstalling the Password Synchronization Agent Uninstalling the Password Synchronization Agent This procedure tells you how to uninstall the Single Sign-On Password Synchronization Agent. 1. Open the eTrust Single Sign-On 7.0 Product Explorer window. This window should appear automatically when you insert the eTrust SSO disk. If not, open Windows Explorer, navigate to the CD-ROM directory, and double-click the PE_i386.exe file. 2. Select the Single Sign-On Password Synchronization Agent option. The Uninstall button becomes active. 3. Click the Uninstall button. The Windows Installer confirmation dialog appears. 4. Select Yes to confirm that you want to uninstall. A notice that you must restart your computer appears. 5. Select Yes to restart the computer now, or No to restart the computer later. After rebooting, the Password Synchronization Agent is uninstalled. Uninstalling the Web Agent This procedure tells you how to uninstall the Web Agent. 1. Open the eTrust Single Sign-On 7.0 Product Explorer window. This window should appear automatically when you insert the eTrust SSO disk. If not, open Windows Explorer, navigate to the CD-ROM directory, and double-click the PE_i386.exe file. 2. Select the Web Agent you want to uninstall. The Uninstall button becomes active. 3. Click the Uninstall button. A Confirm File Deletion dialog appears. 4. Click the OK button. A Question dialog appears asking if you would like Web Agent data to be removed from the Policy Server data store. 5. Click the Yes or No option. The web agent is now uninstalled. You may be asked to restart the machine. Uninstalling eTrust SSO A–7 Uninstalling the Documentation Uninstalling the Documentation This procedure tells you how to uninstall the eTrust SSO documentation. 1. Open the eTrust Single Sign-On 7.0 Product Explorer window. This window should appear automatically when you insert the eTrust SSO disk. If not, open Windows Explorer, navigate to the CD-ROM directory, and double-click the PE_i386.exe file. 2. Select any of the items in the Documentation Folder. The Uninstall button becomes active. 3. Click the Uninstall button. The Windows Installer confirmation dialog appears. 4. Select Yes to confirm that you want to uninstall the documentation. The eTrust SSO documentation is now uninstalled. A–8 eTrust SSO Implementation Guide Appendix B Third Party Acknowledgements This appendix lists all the third party acknowledgments for eTrust SSO 7.0. Apache Tomcat This product includes software developed by the Apache Software Foundation (<http://www.apache.org/>). The Apache software is distributed in accordance with the following license agreements. The Apache Software License, Version 1.1 =========================================================== Copyright (c) 1999 The Apache Software Foundation. All rights reserved. Redistribution and use in source and binary forms, with or without modification, are permitted provided that the following conditions are met: 1. Redistributions of source code must retain the above copyright notice, this list of conditions and the following disclaimer. 2. Redistributions in binary form must reproduce the above copyright notice, this list of conditions and the following disclaimer in the documentation and/or other materials provided with the distribution. 3. The end-user documentation included with the redistribution, if any, must include the following acknowlegement: "This product includes software developed by the Apache Software Foundation (http://www.apache.org/)." Alternately, this acknowlegement may appear in the software itself, if and wherever such third-party acknowlegements normally appear. 4. The names "The Jakarta Project", "Tomcat", and "Apache Software Foundation" must not be used to endorse or promote products derived from this software without prior written permission. For written permission, please contact [email protected]. 5. Products derived from this software may not be called "Apache" nor may "Apache" appear in their names without prior written permission of the Apache Group. Third Party Acknowledgements B–1 Henry Spencer LibRegX THIS SOFTWARE IS PROVIDED ``AS IS'' AND ANY EXPRESSED OR IMPLIED WARRANTIES, INCLUDING, BUT NOT LIMITED TO, THE IMPLIED WARRANTIES OF MERCHANTABILITY AND FITNESS FOR A PARTICULAR PURPOSE ARE DISCLAIMED. IN NO EVENT SHALL THE APACHE SOFTWARE FOUNDATION OR ITS CONTRIBUTORS BE LIABLE FOR ANY DIRECT, INDIRECT, INCIDENTAL, SPECIAL, EXEMPLARY, OR CONSEQUENTIAL DAMAGES (INCLUDING, BUT NOT LIMITED TO, PROCUREMENT OF SUBSTITUTE GOODS OR SERVICES; LOSS OF USE, DATA, OR PROFITS; OR BUSINESS INTERRUPTION) HOWEVER CAUSED AND ON ANY THEORY OF LIABILITY, WHETHER IN CONTRACT, STRICT LIABILITY, OR TORT (INCLUDING NEGLIGENCE OR OTHERWISE) ARISING IN ANY WAY OUT OF THE USE OF THIS SOFTWARE, EVEN IF ADVISED OF THE POSSIBILITY OF SUCH DAMAGE. =========================================================== This software consists of voluntary contributions made by many individuals on behalf of the Apache Software Foundation. For more information on the Apache Software Foundation, please see . Henry Spencer LibRegX This product includes software developed by the University of California, Berkeley and its contributors. The software is distributed in accordance with the following agreement. Copyright (c) 1992 Henry Spencer. Copyright (c) 1992, 1993 The Regents of the University of California. All rights reserved. This code is derived from software contributed to Berkeley by Henry Spencer of the University of Toronto. Redistribution and use in source and binary forms, with or without modification, are permitted provided that the following conditions are met: 1. Redistributions of source code must retain the above copyright notice, this list of conditions and the following disclaimer. 2. Redistributions in binary form must reproduce the above copyright notice, this list of conditions and the following disclaimer in the documentation and/or other materials provided with the distribution. 3. All advertising materials mentioning features or use of this software must display the following acknowledgement: This product includes software developed by the University of California, Berkeley and its contributors. B–2 eTrust SSO Implementation Guide OpenLDAP 4. Neither the name of the University nor the names of its contributors may be used to endorse or promote products derived from this software without specific prior written permission. THIS SOFTWARE IS PROVIDED BY THE REGENTS AND CONTRIBUTORS ``AS IS'' AND ANY EXPRESS OR IMPLIED WARRANTIES, INCLUDING, BUT NOT LIMITED TO, THE IMPLIED WARRANTIES OF MERCHANTABILITY AND FITNESS FOR A PARTICULAR PURPOSE ARE DISCLAIMED. IN NO EVENT SHALL THE REGENTS OR CONTRIBUTORS BE LIABLE FOR ANY DIRECT, INDIRECT, INCIDENTAL, SPECIAL, EXEMPLARY, OR CONSEQUENTIAL DAMAGES (INCLUDING, BUT NOT LIMITED TO, PROCUREMENT OF SUBSTITUTE GOODS OR SERVICES; LOSS OF USE, DATA, OR PROFITS; OR BUSINESS INTERRUPTION) HOWEVER CAUSED AND ON ANY THEORY OF LIABILITY, WHETHER IN CONTRACT, STRICT LIABILITY, OR TORT (INCLUDING NEGLIGENCE OR OTHERWISE) ARISING IN ANY WAY OUT OF THE USE OF THIS SOFTWARE, EVEN IF ADVISED OF THE POSSIBILITY OF SUCH DAMAGE. @(#)regex.h 8.2 (Berkeley) 1/3/94 OpenLDAP This product includes software developed by the OpenLDAP Foundation, OpenLDAP Project (<http://www.openldap.org/>). The OpenLDAP software is distributed in accordance with the following agreement. The OpenLDAP Public License Version 2.3, 28 July 2000 Redistribution and use of this software and associated documentation ("Software"), with or without modification, are permitted provided that the following conditions are met: 1. Redistributions of source code must retain copyright statements and notices. 2. Redistributions in binary form must reproduce applicable copyright statements and notices, this list of conditions, and the following disclaimer in the documentation and/or other materials provided with the distribution. 3. Redistributions must contain a verbatim copy of this document. 4. The name "OpenLDAP" must not be used to endorse or promote products derived from this Software without prior written permission of the OpenLDAP Foundation. Third Party Acknowledgements B–3 OpenSSL 5. Products derived from this Software may not be called "OpenLDAP" nor may "OpenLDAP" appear in their names without prior written permission of the OpenLDAP Foundation. 6. Due credit should be given to the OpenLDAP Project (http://www.openldap.org/). 7. The OpenLDAP Foundation may revise this license from time to time. Each revision is distinguished by a version number. You may use the Software under terms of this license revision or under the terms of any subsequent revision of the license. THIS SOFTWARE IS PROVIDED BY THE OPENLDAP FOUNDATION AND CONTRIBUTORS ``AS IS'' AND ANY EXPRESSED OR IMPLIED WARRANTIES, INCLUDING, BUT NOT LIMITED TO, THE IMPLIED WARRANTIES OF MERCHANTABILITY AND FITNESS FOR A PARTICULAR PURPOSE ARE DISCLAIMED. IN NO EVENT SHALL THE OPENLDAP FOUNDATION OR ITS CONTRIBUTORS BE LIABLE FOR ANY DIRECT, INDIRECT, INCIDENTAL, SPECIAL, EXEMPLARY, OR CONSEQUENTIAL DAMAGES (INCLUDING, BUT NOT LIMITED TO, PROCUREMENT OF SUBSTITUTE GOODS OR SERVICES; LOSS OF USE, DATA, OR PROFITS; OR BUSINESS INTERRUPTION) HOWEVER CAUSED AND ON ANY THEORY OF LIABILITY, WHETHER IN CONTRACT, STRICT LIABILITY, OR TORT (INCLUDING NEGLIGENCE OR OTHERWISE) ARISING IN ANY WAY OUT OF THE USE OF THIS SOFTWARE, EVEN IF ADVISED OF THE POSSIBILITY OF SUCH DAMAGE. OpenLDAP is a trademark of the OpenLDAP Foundation. Copyright 1999-2000 The OpenLDAP Foundation, Redwood City, California, USA. All Rights Reserved. Permission to copy and distributed verbatim copies of this document is granted. OpenSSL This product includes software developed by the OpenSSL Project. The OpenSSL software is distributed in accordance with the following agreement. The OpenSSL toolkit stays under a dual license, i.e. both the conditions of the OpenSSL License and the original SSLeay license apply to the toolkit. See below for the actual license texts. Actually both licenses are BSD-style Open Source licenses. In case of any license issues related to OpenSSL please contact [email protected]. B–4 eTrust SSO Implementation Guide TCL Tcl This product includes software developed by third parties and is distributed in accordance with the following license agreement This software is copyrighted by the Regents of the University of California, Sun Microsystems, Inc., Scriptics Corporation, ActiveState Corporation and other parties. The following terms apply to all files associated with the software unless explicitly disclaimed in individual files. The authors hereby grant permission to use, copy, modify, distribute, and license this software and its documentation for any purpose, provided that existing copyright notices are retained in all copies and that this notice is included verbatim in any distributions. No written agreement, license, or royalty fee is required for any of the authorized uses. Modifications to this software may be copyrighted by their authors and need not follow the licensing terms described here, provided that the new terms are clearly indicated on the first page of each file where they apply. IN NO EVENT SHALL THE AUTHORS OR DISTRIBUTORS BE LIABLE TO ANY PARTY FOR DIRECT, INDIRECT, SPECIAL, INCIDENTAL, OR CONSEQUENTIAL DAMAGES ARISING OUT OF THE USE OF THIS SOFTWARE, ITS DOCUMENTATION, OR ANY DERIVATIVES THEREOF, EVEN IF THE AUTHORS HAVE BEEN ADVISED OF THE POSSIBILITY OF SUCH DAMAGE. THE AUTHORS AND DISTRIBUTORS SPECIFICALLY DISCLAIM ANY WARRANTIES, INCLUDING, BUT NOT LIMITED TO, THE IMPLIED WARRANTIES OF MERCHANTABILITY, FITNESS FOR A PARTICULAR PURPOSE, AND NON-INFRINGEMENT. THIS SOFTWARE IS PROVIDED ON AN "AS IS" BASIS, AND THE AUTHORS AND DISTRIBUTORS HAVE NO OBLIGATION TO PROVIDE MAINTENANCE, SUPPORT, UPDATES, ENHANCEMENTS, OR MODIFICATIONS. GOVERNMENT USE: If you are acquiring this software on behalf of the U.S. government, the Government shall have only "Restricted Rights" in the software and related documentation as defined in the Federal Acquisition Regulations (FARs) in Clause 52.227.19 (c) (2). If you are acquiring the software on behalf of the Department of Defense, the software shall be classified as "Commercial Computer Software" and the Government shall have only "Restricted Rights" as defined in Clause 252.227-7013 (c) (1) of DFARs. Notwithstanding the foregoing, the authors grant the U.S. Government and others acting in its behalf permission to use and distribute the software in accordance with the terms specified in this license. Third Party Acknowledgements B–5 Microsoft Microsoft END-USER LICENSE AGREEMENT FOR MICROSOFT SOFTWARE IMPORTANT-READ CAREFULLY: This Microsoft End-User License Agreement (''EULA'') is a legal agreement between you (either an individual or a single entity) and Microsoft Corporation for the Microsoft software product(s) accompanying this EULA, which include(s) computer software and may include "online" or electronic documentation, associated media, and printed materials (''SOFTWARE PRODUCT''). By installing, copying, or otherwise using the SOFTWARE PRODUCT or any UPDATES (as defined below), you agree to be bound by the terms of this EULA. If you do not agree to the terms of this EULA, do not install, copy, or otherwise use the SOFTWARE PRODUCT; you may, however, return it to your place of purchase for a full refund. In addition, by installing, copying, or otherwise using any updates or other components of the SOFTWARE PRODUCT that you receive separately as part of the SOFTWARE PRODUCT (''UPDATES''), you agree to be bound by any additional license terms that accompany such UPDATES. If you do not agree to the additional license terms that accompany such UPDATES, you may not install, copy, or otherwise use such UPDATES. SOFTWARE PRODUCT LICENSE The SOFTWARE PRODUCT is protected by copyright laws and international copyright treaties, as well as other intellectual property laws and treaties. The SOFTWARE PRODUCT is licensed, not sold. NOTE: The terms of a printed, paper EULA which may accompany the SOFTWARE PRODUCT supersede the terms of any on-screen EULA found within the SOFTWARE PRODUCT. 1. LICENSE TO USE SOFTWARE PRODUCT. 1.1 General License Grant. Microsoft grants to you as an individual, a personal, nonexclusive license to make and use copies of the SOFTWARE PRODUCT for the sole purposes of designing, developing, and testing your software product(s) that are designed to operate in conjunction with any Microsoft operating system product. You may install copies of the SOFTWARE PRODUCT on an unlimited number of computers provided that you are the only individual using the SOFTWARE PRODUCT. If you are an entity, Microsoft grants you the right to designate one individual within your organization to have the sole right to use the SOFTWARE PRODUCT in the manner provided above. B–6 eTrust SSO Implementation Guide Microsoft 1.2 Documentation. This EULA grants you, as an individual, a personal, nonexclusive license to make and use an unlimited number of copies of any documentation, provided that such copies shall be used only for personal purposes and are not to be republished or distributed (either in hard copy or electronic form) beyond the user's premises and with the following exception: you may use documentation identified in the MSDN Library portion of the SOFTWARE PRODUCT as the file format specification for Microsoft Word, Microsoft Excel, Microsoft Access, and/or Microsoft PowerPoint ("File Format Documentation") solely in connection with your development of software product(s) that operate in conjunction with Windows or Windows NT that are not general purpose word processing, spreadsheet, or database management software products or an integrated work or product suite whose components include one or more general purpose word processing, spreadsheet, or database management software products. Note: A product that includes limited word processing, spreadsheet, or database components along with other components that provide significant and primary value, such as an accounting product with limited spreadsheet capability, is not considered to be a "general purpose" product. 1.3 Storage/Network Use. You may also store or install a copy of the SOFTWARE PRODUCT on a storage device, such as a network server, used only to install or run the SOFTWARE PRODUCT on computers used by a licensed end user in accordance with Section 1.1. A single license for the SOFTWARE PRODUCT may not be shared or used concurrently by other end users. 1.4 Visual Studio-Effect of EULA. This Section 1.4 also applies if the SOFTWARE PRODUCT is Microsoft Visual Studio, a suite of development tools and other software programs (each such tool or software program, a "Component"). Components that you receive as part of the SOFTWARE PRODUCT may include a separate end-user license agreement (each, a "Component EULA"). Except as provided in Section 7, in the event of inconsistencies between this EULA and any Component EULA, the terms of this EULA shall control. 1.5 Microsoft Internet Explorer. You may make and use copies of the Microsoft Internet Explorer for use on all computers for which you have a validly licensed copy of Microsoft operating system products. 2. MICROSOFT BACKOFFICE SERVER DEVELOPER EDITION COMPONENTS. The SOFTWARE PRODUCT may include certain of Microsoft BackOffice Server (collectively, the "BackOffice Components"). Third Party Acknowledgements B–7 Microsoft 2.1 Installation and Grant of License. The BackOffice Components consist of software programs that provide services on a computer called a server ("Server Software; the computer running the Server Software shall be referred to as the "Server") and software programs that allow a computer or workstation to access or utilize the services provided by the Server Software ("Client Software"). You may make, use and install the Server Software and the Client Software on an unlimited number of computers solely in accordance with Section 1. The media on which the Server Software resides may contain several versions of the Server Software, each of which is compatible with a different microprocessor architecture (such as the x86 architecture or various RISC architectures). You may install the Server Software for use with only one of those architectures at any given time. The Server Software may not be used as the software on the server that supports your development of software product(s) (e.g., as a repository for source code). The components of the Server Software may only be used on one and the same Server. A maximum of ten (10) simultaneous connections may be made to access the services of the Server. (Note: See exception to this limitation for Microsoft SQL Server described below in Section 2.2.3). 2.2 ADDITIONAL RIGHTS AND RESTRICTIONS. 2.2.1 Microsoft SNA Server. The 3270 and 5250 terminal emulation applets and the ODBC/DRDA driver provided with SNA Server are licensed for use only by one user per licensed SNA Server. 2.2.2 Microsoft Exchange Server. Microsoft Exchange Server includes Microsoft Schedule+ ("Schedule+"), Forms Designers ("Forms Designers"), and Sample Applications ("Sample Applications"). Schedule+, the Forms Designers, and Sample Applications may only be installed and used in conjunction with the Microsoft Client Software. Microsoft Exchange Server also includes Source Extractor software, for migrating data from other electronic mail software; Administrator software; and Microsoft Mail Connector software. The Source Extractor, Administrator, and Microsoft Mail Connector programs contain components that may be installed on additional machines. Microsoft grants to you the additional right to modify the source code version of the Source Extractor programs. Such programs may only be used to migrate data to Microsoft Exchange Server. 2.2.3 Microsoft SQL Server. Notwithstanding Section 1.1, solely with respect to the Microsoft SQL Server portion of the BackOffice Components, the following additional rights apply: (a) a maximum of five users may access and use the Server Software for the sole purposes of designing, developing, and testing your software product(s) that are designed to operate in conjunction with Microsoft SQL Server; and (b) an unlimited number of simultaneous connections may be made to access the services of the Microsoft SQL Server Server Software. B–8 eTrust SSO Implementation Guide Microsoft 3. REDISTRIBUTABLE CODE-ADDITIONAL LICENSE RIGHTS. In addition to the rights granted in Section 1, certain portions of the SOFTWARE PRODUCT, as described in this Section 3, are provided to you with additional license rights provided that you comply with the terms of Section 4.1. 3.1 Sample Code. Microsoft grants you the right to use and modify the source code version of those portions of the SOFTWARE PRODUCT identified as "Samples" in REDIST.TXT or elsewhere in the SOFTWARE PRODUCT ("Sample Code") for the sole purposes of designing, developing, and testing your software product(s), and to reproduce and distribute the Sample Code, along with any modifications thereof, only in object code form. 3.2 Redistributable Code-Standard. Microsoft grants you a nonexclusive, royaltyfree right to reproduce and distribute the object code form of any portion of the SOFTWARE PRODUCT listed in REDIST.TXT ("Redistributable Code"). NOTE: certain Redistributable Code may be subject to the restrictions in Section 3.3 if it is also identified as "Limited Use Redistributable Code." 3.3 Redistributable Code-Limited Use. Provided that you ALSO comply with the terms of Section 4.1.3, Microsoft grants you a nonexclusive, royalty-free right to reproduce and distribute the object code form of those portions of the SOFTWARE PRODUCT listed in REDIST.TXT as Limited Use Redistributable Code ("Limited Use Redistributable Code"). 3.4 Redistributable Code-Microsoft Exchange-Note Regarding the Use of the Sample Applications and Outlook Web Access Software. 3.4.1 Sample Applications. Provided that you comply with the terms of Section 4.1.1, Microsoft grants you the nonexclusive, royalty-free right to use and modify the source code version of the Sample Applications and to reproduce and distribute the object code versions of such modifications in conjunction with your application that utilizes the services of Microsoft Exchange Server. 3.4.2 Outlook Web Access Software ("OWA Software"). Microsoft grants you the nonexclusive, royalty-free right to use, customize, reproduce and distribute the OWA Software, provided that (a) you comply with the terms of Section 4.1.1; and (b) you include an end-user license agreement with the OWA Software that grants a limited license to use the OWA Software and otherwise protects Microsoft's and its suppliers' intellectual property rights in the OWA Software. Third Party Acknowledgements B–9 Microsoft 3.5 Redistributable Code-Microsoft SQL Server-Note Regarding the Use of RunTime Software. Provided that you comply with the terms of Section 4.1.1, Microsoft grants you the nonexclusive, royalty-free right to reproduce and distribute those DB-Library, Net-Library, and ODBC files required for run-time execution of compiled applications ("SQL Run-Time Files") in conjunction with and as a part of your application software product that is created using the Microsoft SQL Server Software ("SQL Application"), provided that if your SQL Application contains ODBC Run-Time Files: (a) your SQL Application must operate in conjunction with Microsoft SQL Server; and (b) you agree to distribute all ODBC components specified in the Readme file in conjunction with your SQL Application. 3.6 Redistributable Code-Site Server Software Development Kits ("Site Server SDK Software"). Microsoft grants you the nonexclusive, royalty-free right to install and use copies of the Site Server SDK Software on one or more computers located at your premises solely for the purpose of designing, developing, and testing your applications that work in conjunction with Microsoft Site Server. You may modify the Site Server Sample Code to design, develop, and test your applications. For the purposes of this Section 3.6, "Site Server Sample Code" shall mean the sample source, HTML, and Active Server Pages (ASP) code located in Site Server "SDK" and "samples" directories. Portions of Site Server are designated as "Redistributable Code." The text files named REDIST.TXT and LICENSE.TXT located in the Site Server portion of the SOFTWARE PRODUCT, describe the distribution rights associated with each file of the Site Server Redistributable Code. 3.7 Redistributable Code-SNA Server Development Software. Microsoft grants you the following nonexclusive, royalty-free right to install and use copies of the OLE DB Data Provider for VSAM and AS/400 ("OLE DB Provider") and/or the COM Transaction Integrator for CICS and IMS ("COM Transaction Integrator") on one or more computers located at your premises solely for the purpose of designing, developing, and testing your applications that work in conjunction with Microsoft SNA Server. Portions of the SNA Server portion of the SOFTWARE PRODUCT are also designated as "Redistributable Code." The text file named REDIS.TXT in the SNA Server portion of the SOFTWARE PRODUCT contains a list of such files, as well as the distribution rights associated with the SNA Server Redistributable Code. B–10 eTrust SSO Implementation Guide Microsoft 3.8 Redistributable Code-Visual C++ and Visual Studio: Microsoft Foundation Classes (MFC), Template Libraries (ATL), and C runtimes (CRTs). If this EULA accompanies Visual C++ or Visual Studio, then in addition to the rights granted in Section 1, Microsoft grants you the right to use and modify the source code version of those portions of the SOFTWARE PRODUCT that are identified as MFC, ATL, or CRTs (collectively, the "VC Redistributables"), for the sole purposes of designing, developing, and testing your software product(s). Provided you comply with Section 4.1 and you rename any files created by you that are included in the Licensed Product (defined below), Microsoft grants you a nonexclusive, royalty-free right to reproduce and distribute the object code version of the VC Redistributables, including any modifications you make. For purposes of this section, "modifications" shall mean enhancements to the functionality of the VC Redistributables. 4. DISTRIBUTION REQUIREMENTS; LICENSE RESTRICTIONS. 4.1 General. The SOFTWARE PRODUCT may contain up to three categories of redistributable code, any redistribution of which by you requires compliance with the following terms. 4.1.1. Redistributable Code-Standard. If you are authorized and choose to redistribute Sample Code, Redistributable Code, Limited Use Redistributable Code, Sample Applications, and/or SQL Run-Time Files (collectively, the "Redistributables") as described in Section 3, you agree to: (a) distribute the Redistributables in object code only in conjunction with and as a part of a software application product developed by you using the product accompanying this EULA that adds significant and primary functionality to the SOFTWARE PRODUCT ("Licensed Product"); (b) not use Microsoft's name, logo, or trademarks to market the Licensed Product; (c) include a valid copyright notice on the Licensed Product; (d) indemnify, hold harmless, and defend Microsoft from and against any claims or lawsuits, including attorney's fees, that arise or result from the use or distribution of the Licensed Product; (e) include "Copyright Microsoft Systems Journal" in all Microsoft Systems Journal (MSJ) code used within your program(s); (f) otherwise comply with the terms of this EULA; and (g) agree that Microsoft reserves all rights not expressly granted. You also agree not to permit further distribution of the Redistributables by your end users except: (1) you may permit further redistribution of the Redistributables by your distributors to your end-user customers if your distributors only distribute the Redistributables in conjunction with, and as part of, the Licensed Product and you and your distributors comply with all other terms of this EULA; and (2) in the manner described in Section 4.1.2. Third Party Acknowledgements B–11 Microsoft 4.1.2 Redistributable Code-Extended Use. Visual Basic, Visual C++, Visual J++, and Visual Studio. If this EULA accompanies any of the Microsoft products listed in the heading of this subsection, you may permit your end users to reproduce and distribute the object code form of certain portions of the SOFTWARE PRODUCT (as listed in REDIST.TXT as "Extended Use Redistributable Code") only in conjunction with and part of a Licensed Product and/or Web page that adds significant and primary functionality to the Extended Use Redistributable Code. (NOTE: The foregoing license grant does not apply to files designated as Dbgrid.ocx and Graph32.ocx). You are authorized to exercise the foregoing rights provided that: (a) you comply with Section 4.1.1, and (b) your end user agrees to: (i) distribute the Extended Use Redistributable Code in object code only in conjunction with and as a part of a software application product developed by them that adds significant and primary functionality to the Extended Use Redistributable Code; (ii) not use Microsoft's name, logo, or trademarks to market the End-User Application; (iii) include a valid copyright notice on the End-User Application; (iv) indemnify, hold harmless, and defend Microsoft from and against any claims or lawsuits, including attorney's fees, that arise or result from the use or distribution of the End-User Application; and (v) not permit further distribution of the Extended Use Redistributable Code by the user of the End-User Application. 4.1.3 Redistributable Code-Limited Use. If you are authorized and choose to redistribute Limited Use Redistributable Code, in addition to the terms of Section 4.1.1, you must also comply with the following (as applicable to the corresponding portions of the SOFTWARE PRODUCT identified in REDIST.TXT as Limited Use Redistributable Code). 4.1.3.1 "Jet" Files. If you redistribute the "Jet Files" (as identified in the SOFTWARE PRODUCT ) you agree to comply with the following additional requirements: (a) your Licensed Product shall not substantially duplicate the capabilities of Microsoft Access or, in the reasonable opinion of Microsoft, compete with same; and (b) unless your Licensed Product requires your customers to license Microsoft Access in order to operate, you shall not reproduce or use any of the Jet Files for commercial distribution in conjunction with a general purpose word processing, spreadsheet or database management software product, or an integrated work or product suite whose components include a general purpose word processing, spreadsheet, or database management software product except for the exclusive use of importing data to the various formats supported by Microsoft Access. Note: A product that includes limited word processing, spreadsheet or database components along with other components which provide significant and primary value, such as an accounting product with limited spreadsheet capability, is not considered to be a "general purpose" product. B–12 eTrust SSO Implementation Guide Microsoft 4.1.3.2 Microsoft Data Access Components. If you redistribute the Microsoft Data Access Component file identified as MDAC_TYP.EXE, you also agree to redistribute such file in object code only in conjunction with and as a part of a Licensed Product developed by you with a Microsoft development tool product that adds significant and primary functionality to MDAC_TYP.EXE. 5. MICROSOFT WINDOWS NT OPTION PACK COMPONENTS. Notwithstanding anything to the contrary contained in this EULA, solely for those portions of the SOFTWARE PRODUCT identified as the Microsoft Windows NT Option Pack Components, the following provisions apply. Note that your use of the Microsoft Windows NT Option Pack Components is (a) subject to your prior acquisition of a validly licensed copy of certain Microsoft operating system or server products; and (b) all capitalized terms in this Section 5 refer to those terms as defined in the end user license agreement for the Windows NT Option Pack Component referenced in the respective paragraphs of this Section (all such terms are noted in brackets): 5.1 IF YOU USE THE SOFTWARE COMPONENTS AS PART OF MICROSOFT WINDOWS NT SERVER 4.0, MICROSOFT WINDOWS NT SERVER ENTERPRISE EDITION 4.0 OR MICROSOFT BACKOFFICE 2.5, THE FOLLOWING TERMS APPLY TO YOU: NOTE: IF YOU DO NOT HAVE A VALID LICENSE FOR MICROSOFT WINDOWS NT SERVER 4.0, MICROSOFT WINDOWS NT SERVER ENTERPRISE EDITION 4.0, OR MICROSOFT BACKOFFICE 2.5, YOU ARE NOT AUTHORIZED TO INSTALL, COPY OR OTHERWISE USE THE WINDOWS NT SOFTWARE COMPONENTS. FOR PURPOSES OF THIS SECTION 5.1, THE "WINDOWS NT SOFTWARE COMPONENTS" SHALL MEAN THE FOLLOWING SOFTWARE COMPONENTS: MICROSOFT MESSAGE QUEUE SERVER, MICROSOFT TRANSACTION SERVER, MICROSOFT INTERNET INFORMATION SERVER AND THE INTERNET CONNECTION SERVICES FOR MICROSOFT REMOTE ACCESS SERVICE. EVEN IF YOU HAVE A RIGHT TO USE THE WINDOWS NT SOFTWARE COMPONENTS, YOU DO NOT HAVE ANY RIGHT TO INSTALL, COPY OR OTHERWISE USE ANY OF THE OTHER WINDOWS NT OPTION PACK COMPONENTS, UNLESS OTHERWISE PROVIDED IN A DIFFERENT PARAGRAPH OF THIS SECTION. 5.1.1 General. The Windows NT Software Components contain server software and client software which are deemed part of the [Server Software] and [Client Software], respectively, of Microsoft Windows NT Server 4.0 (either as a standalone product or as a component of Microsoft BackOffice) or Microsoft Windows NT Server, Enterprise Edition 4.0, as applicable. If you have a valid license for Microsoft Windows NT Server 4.0, Microsoft Windows NT Server Enterprise Edition 4.0 or Microsoft BackOffice 2.5 (each referred to individually as a ["SOFTWARE PRODUCT"]), you are authorized to use the Windows NT Software Components under the terms and conditions of the EULA applicable to such product, except as set forth herein. Third Party Acknowledgements B–13 Microsoft 5.1.2 For Microsoft Windows NT Server-Client Access. In addition to the [Client Access] requirements currently set forth in the applicable EULA, you need a separate [Client Access License] for Windows NT Server in order to access or otherwise utilize the following Windows NT Server basic network/application services or [Server Software] components: Microsoft Message Queue Server (sending or receiving messages from Microsoft Message Queue Server), Microsoft Transaction Server (invoking component-based applications managed by Microsoft Transaction Server), and Remote Access Service (accessing the server from a remote location through a communications link). Note: Remote Access Service includes the use of Internet Connection Services, including Internet Authentication Services (validation or transference of a remote access request) or Connection Point Services (remotely configuring the Microsoft Connection Manager Client with new phone numbers or other data). Performance or Benchmark Testing. You may not disclose the results of any benchmark test of either the [Server Software] or [Client Software] for Microsoft Message Queue Server, Microsoft Transaction Server or Microsoft Internet Information Server to any third party without Microsoft's prior written approval. Installation on a Single [Server]. The [Server Software] components that make up the applicable [SOFTWARE PRODUCT] may only be installed together for use on one [Server] and may not be separated, unless otherwise provided herein. Note on Microsoft Site Server Express. You may freely copy and distribute Microsoft Site Server Express for your use on any computer within your organization 5.1.3 For Microsoft Internet Information Server-Use. Notwithstanding anything to the contrary contained in the applicable EULA, you do not need a separate [Client Access License] to access or otherwise utilize the services of Microsoft Internet Information Server, except to the extent that a [Server] or [Server Software] component which requires a [Client Access License] is accessed or utilized by Microsoft Internet Information Server. 5.1.4 Additional Rights and Restrictions. You also have the right to make additional copies of the Windows NT Software Components equal to the number of validly licensed copies of each [SOFTWARE PRODUCT] which you have, and you may use each copy in the manner specified above. If you do not have a valid license for Microsoft Windows NT Server 4.0, Microsoft Windows NT Server Enterprise Edition 4.0 or Microsoft BackOffice 2.5, you have no rights under the foregoing section. 5.2 IF YOU USE THE SOFTWARE COMPONENTS AS PART OF MICROSOFT WINDOWS NT WORKSTATION 4.0, THE FOLLOWING TERMS APPLY TO YOU: B–14 eTrust SSO Implementation Guide Microsoft NOTE: IF YOU DO NOT HAVE A VALID LICENSE FOR MICROSOFT WINDOWS NT WORKSTATION 4.0, YOU ARE NOT AUTHORIZED TO INSTALL, COPY OR OTHERWISE USE THE WINDOWS NT WORKSTATION SOFTWARE COMPONENTS. FOR PURPOSES OF THIS SECTION 5.2, THE "WINDOWS NT WORKSTATION SOFTWARE COMPONENTS" SHALL MEAN THE FOLLOWING SOFTWARE COMPONENTS: MICROSOFT TRANSACTION SERVER AND MICROSOFT PERSONAL WEB SERVER. EVEN IF YOU HAVE A RIGHT TO USE THE WINDOWS NT WORKSTATION SOFTWARE COMPONENTS, YOU DO NOT HAVE ANY RIGHT TO INSTALL, COPY OR USE ANY OF THE OTHER SOFTWARE COMPONENTS, UNLESS OTHERWISE PROVIDED IN A DIFFERENT PARAGRAPH OF THIS SECTION. 5.2.1 General. The Windows NT Workstation Software Components are deemed part of Microsoft Windows NT Workstation 4.0 (the ["SOFTWARE PRODUCT"]), and are therefore subject to the terms and conditions of its EULA, except as otherwise provided herein. Use Limitation. At any point in time, only a maximum of two (2) computers [instead of ten (10)] are permitted to use the services of the Microsoft Transaction Server component. The two (2) computer maximum includes any indirect uses made through software or hardware which pools or aggregates uses. Performance or Benchmark Testing. You may not disclose the results of any benchmark test of either of the Windows NT Workstation Software Components to any third party without Microsoft's prior written approval. 5.2.2 Additional Rights and Restrictions. You also have the right to make additional copies of the Windows NT Workstation Software Components equal to the number of validly licensed copies of Microsoft Windows NT Workstation 4.0 which you have, and you may use each copy in the manner specified above. If you do not have a valid license for Microsoft Windows NT Workstation 4.0, you have no rights under the foregoing section. 5.3 IF YOU USE THE SOFTWARE COMPONENTS AS PART OF MICROSOFT BACKOFFICE SMALL BUSINESS SERVER 4.0, THE FOLLOWING TERMS APPLY TO YOU: NOTE: IF YOU DO NOT HAVE A VALID LICENSE FOR MICROSOFT BACKOFFICE SMALL BUSINESS SERVER 4.0, YOU ARE NOT AUTHORIZED TO INSTALL, COPY, OR OTHERWISE USE THE WINDOWS NT SOFTWARE COMPONENTS (AS DEFINED PREVIOUSLY IN SECTION 5.1). EVEN IF YOU HAVE THE RIGHT TO USE THE WINDOWS NT SOFTWARE COMPONENTS, YOU DO NOT HAVE ANY RIGHT TO INSTALL, COPY, OR OTHERWISE USE ANY OF THE OTHER SOFTWARE COMPONENTS, UNLESS OTHERWISE PROVIDED IN A DIFFERENT PARAGRAPH OF THIS SECTION. Third Party Acknowledgements B–15 Microsoft 5.3.1 General. The Windows NT Software Components contain server software and client software which is deemed part of the [Server Software] and [Client Software], respectively, of Microsoft BackOffice Small Business Server 4.0, and is therefore subject to the terms and conditions of its EULA, except as otherwise provided herein. Note on Microsoft Site Server Express. You may freely copy and distribute Microsoft Site Server Express for your use on any computer within your organization. 5.3.2 Additional Rights and Restrictions. You also have the right to make additional copies of the Windows NT Software Components equal to the number of validly licensed copies of Microsoft BackOffice Small Business Server 4.0 which you have, and you may use each copy in the manner specified above. If you do not have a valid license for Microsoft BackOffice Small Business Server 4.0, you have no rights under the foregoing section. 5.4 IF YOU USE THE SOFTWARE COMPONENTS AS PART OF MICROSOFT WINDOWS 95, THE FOLLOWING TERMS APPLY TO YOU: NOTE: IF YOU DO NOT HAVE A VALID LICENSE FOR MICROSOFT WINDOWS 95, YOU ARE NOT AUTHORIZED TO INSTALL, COPY OR OTHERWISE USE THE WINDOWS 95 SOFTWARE COMPONENTS. FOR PURPOSES OF THIS SECTION 5.4, THE "WINDOWS 95 SOFTWARE COMPONENTS" SHALL MEAN THE FOLLOWING SOFTWARE COMPONENTS: MICROSOFT PERSONAL WEB SERVER AND MICROSOFT TRANSACTION SERVER FOR WINDOWS 95. EVEN IF YOU HAVE A RIGHT TO USE THE WINDOWS 95 SOFTWARE COMPONENTS, YOU DO NOT HAVE ANY RIGHT TO INSTALL, COPY OR USE ANY OF THE OTHER SOFTWARE COMPONENTS, UNLESS OTHERWISE PROVIDED IN A DIFFERENT PARAGRAPH OF THIS SECTION. 5.4.1 General. The Windows 95 Software Components are deemed part of Microsoft Windows 95 (the ["SOFTWARE PRODUCT"]), and are therefore subject to the terms and conditions of its EULA, except as otherwise provided herein. 5.4.2 Use Limitation. At any point in time, a maximum of ten (10) computers are permitted to use the services of the Microsoft Personal Web Server component. The ten (10) computer maximum includes any indirect uses made through software or hardware which pools or aggregates uses. The Microsoft Transaction Server for Windows 95 component may not be used as a network server; that is, no computers or workstations may access or utilize any network services of that component. Performance or Benchmark Testing. You may not disclose the results of any benchmark test of either of the Windows 95 Software Components to any third party without Microsoft's prior written approval. B–16 eTrust SSO Implementation Guide Microsoft 5.4.3 Additional Rights and Restrictions. You also have the right to make additional copies of the Windows 95 Software Components equal to the number of validly licensed copies of Microsoft Windows 95 which you have, and you may use each copy in the manner specified above. If you do not have a valid license for Microsoft Windows 95, you have no rights under the foregoing section. 6. DESCRIPTION OF OTHER RIGHTS AND LIMITATIONS 6.1 Not For Resale Software. If the SOFTWARE PRODUCT is labeled "Not For Resale" or "NFR," then you may not resell, or otherwise transfer for value, the SOFTWARE PRODUCT. 6.2 Limitations on Reverse Engineering, Decompilation, and Disassembly. You may not reverse engineer, decompile, or disassemble the SOFTWARE PRODUCT, except and only to the extent that such activity is expressly permitted by applicable law notwithstanding this limitation. 6.3 Rental. You may not rent, lease or lend the SOFTWARE PRODUCT. 6.4 Trademarks. This EULA does not grant you any rights in connection with any trademarks or service marks of Microsoft. 6.5 Support Services. Microsoft may provide you with support services related to the SOFTWARE PRODUCT ("Support Services"). Use of Support Services is governed by the Microsoft policies and programs described in the user manual, in "online" documentation and/or other Microsoft-provided materials. Any supplemental software code provided to you as part of the Support Services shall be considered part of the SOFTWARE PRODUCT and subject to the terms and conditions of this EULA. With respect to technical information you provide to Microsoft as part of the Support Services, Microsoft may use such information for its business purposes, including for product support and development. Microsoft will not utilize such technical information in a form that personally identifies you. 6.6 Software Transfer. The initial user of the SOFTWARE PRODUCT may make a one-time permanent transfer of this EULA and SOFTWARE PRODUCT only directly to an end user. This transfer must include all of the SOFTWARE PRODUCT (including all component parts, the media and printed materials, any upgrades, this EULA, and, if applicable, the Certificate of Authenticity). Such transfer may not be by way of consignment or any other indirect transfer. The transferee of such one-time transfer must agree to comply with the terms of this EULA, including the obligation not to further transfer this EULA and SOFTWARE PRODUCT. 6.7 Separation of Components. The SOFTWARE PRODUCT is licensed as a single product. Its component parts may not be separated for use by more than one user. Third Party Acknowledgements B–17 Microsoft 6.8 Production Use. The BackOffice Components of SOFTWARE PRODUCT may only be used for development purposes and may not be used in a production environment. 6.9 Version Limitation. The Server Software portion of the BackOffice Components contains a certain version number (such as version "3.5"). This License permits you to install: (1) one copy of the Server Software, (2) with the same (or a lower) version number as the Server Software version number listed above, (3) on a single computer (for example, if the version number listed above is "3.5," you may install Server Software that contains a "3.5" or "2.0" version number, but not a "3.6" version number). 6.10 Performance or Benchmark Testing. You may not disclose the results of any benchmark test of either the Server Software or Client Software for Microsoft SQL Server, Microsoft Exchange Server, Microsoft Transaction Server, Microsoft Message Queue Server, Microsoft Site Server, Microsoft Site Server, Microsoft Proxy Server, or Microsoft Internet Information Server to any third party without Microsoft's prior written approval. 6.11 Termination. Without prejudice to any other rights, Microsoft may terminate this EULA if you fail to comply with the terms and conditions of this EULA. In such event, you must destroy all copies of the SOFTWARE PRODUCT and all of its component parts. 7. PRERELEASE CODE. Portions of the SOFTWARE PRODUCT may be identified as prerelease code ("Prerelease Code"). Such Prerelease Code is not at the level of performance and compatibility of the final, generally available product offering. The Prerelease Code may not operate correctly and may be substantially modified prior to first commercial shipment. Microsoft is not obligated to make this or any later version of the Prerelease Code commercially available. The grant of license to use Prerelease Code expires upon availability of a commercial release of the Prerelease Code from Microsoft. NOTE: In the event that Prerelease Code contains a separate end-user license agreement, the terms and conditions of such end-user license agreement shall govern your use of the corresponding Prerelease Code. 8. UPGRADES. If the SOFTWARE PRODUCT is labeled as an upgrade, you must be properly licensed to use a product identified by Microsoft as being eligible for the upgrade in order to use the SOFTWARE PRODUCT. A SOFTWARE PRODUCT labeled as an upgrade replaces and/or supplements the product that formed the basis for your eligibility for the upgrade. You may use the resulting upgraded product only in accordance with the terms of this EULA. If the SOFTWARE PRODUCT is an upgrade of a component of a package of software programs that you licensed as a single product, the SOFTWARE PRODUCT may be used and transferred only as part of that single product package and may not be separated for use on more than one computer. B–18 eTrust SSO Implementation Guide Microsoft 9. COPYRIGHT. All title and intellectual property rights in and to the SOFTWARE PRODUCT (including but not limited to any images, photographs, animations, video, audio, music, text, and "applets" incorporated into the SOFTWARE PRODUCT), the accompanying printed materials, and any copies of the SOFTWARE PRODUCT are owned by Microsoft or its suppliers. All title and intellectual property rights in and to the content which may be accessed through use of the SOFTWARE PRODUCT is the property of the respective content owner and may be protected by applicable copyright or other intellectual property laws and treaties. This EULA grants you no rights to use such content. All rights not expressly granted are reserved by Microsoft. 10. U.S. GOVERNMENT RESTRICTED RIGHTS. The SOFTWARE PRODUCT and documentation are provided with RESTRICTED RIGHTS. Use, duplication, or disclosure by the Government is subject to restrictions as set forth in subparagraph (c)(1)(ii) of the Rights in Technical Data and Computer Software clause at DFARS 252.227-7013 or subparagraphs (c)(1) and (2) of the Commercial Computer Software-Restricted Rights at 58 CFR 52.227-19, as applicable. Manufacturer is Microsoft Corporation/One Microsoft Way/Redmond, WA 98052-6399. 11. EXPORT RESTRICTIONS. You agree that you will not export or re-export the SOFTWARE PRODUCT, any part thereof, or any process or service that is the direct product of the SOFTWARE PRODUCT (the foregoing collectively referred to as the "Restricted Components"), to any country, person, entity or end user subject to U.S. export restrictions. You specifically agree not to export or reexport any of the Restricted Components (i) to any country to which the U.S. has embargoed or restricted the export of goods or services, which currently include, but are not necessarily limited to Cuba, Iran, Iraq, Libya, North Korea, Sudan and Syria, or to any national of any such country, wherever located, who intends to transmit or transport the Restricted Components back to such country; (ii) to any end user who you know or have reason to know will utilize the Restricted Components in the design, development or production of nuclear, chemical or biological weapons; or (iii) to any end-user who has been prohibited from participating in U.S. export transactions by any federal agency of the U.S. government. You warrant and represent that neither the BXA nor any other U.S. federal agency has suspended, revoked or denied your export privileges. 12. NOTE ON JAVA SUPPORT. THE SOFTWARE PRODUCT CONTAINS SUPPORT FOR PROGRAMS WRITTEN IN JAVA. JAVA TECHNOLOGY IS NOT FAULT TOLERANT AND IS NOT DESIGNED, MANUFACTURED, OR INTENDED FOR USE OR RESALE AS ONLINE CONTROL EQUIPMENT IN HAZARDOUS ENVIRONMENTS REQUIRING FAIL-SAFE PERFORMANCE, SUCH AS IN THE OPERATION OF NUCLEAR FACILITIES, AIRCRAFT NAVIGATION OR COMMUNICATIONS SYSTEMS, AIR TRAFFIC CONTROL, DIRECT LIFE SUPPORT MACHINES, OR WEAPONS SYSTEMS, IN WHICH THE FAILURE OF JAVA TECHNOLOGY COULD LEAD DIRECTLY TO DEATH, PERSONAL INJURY, OR SEVERE PHYSICAL OR ENVIRONMENTAL DAMAGE. Third Party Acknowledgements B–19 Microsoft MISCELLANEOUS If you acquired this product in the United States, this EULA is governed by the laws of the State of Washington. If you acquired this product in Canada, this EULA is governed by the laws of the Province of Ontario, Canada. Each of the parties hereto irrevocably attorns to the jurisdiction of the courts of the Province of Ontario and further agrees to commence any litigation which may arise hereunder in the courts located in the Judicial District of York, Province of Ontario. If this product was acquired outside the United States, then local law may apply. Should you have any questions concerning this EULA, or if you desire to contact Microsoft for any reason, please contact Microsoft, or write: Microsoft Sales Information Center/One Microsoft Way/Redmond, WA 98052-6399. LIMITED WARRANTY LIMITED WARRANTY. Except with respect to the REDISTRIBUTABLES, which are provided "as is," without warranty of any kind, Microsoft warrants that (a) the SOFTWARE PRODUCT will perform substantially in accordance with the accompanying written materials for a period of ninety (90) days from the date of receipt, and (b) any Support Services provided by Microsoft shall be substantially as described in applicable written materials provided to you by Microsoft, and Microsoft support engineers will make commercially reasonable efforts to solve any problem. To the extent allowed by applicable law, implied warranties on the SOFTWARE PRODUCT, if any, are limited to ninety (90) days. Some states/jurisdictions do not allow limitations on duration of an implied warranty, so the above limitation may not apply to you. CUSTOMER REMEDIES. Microsoft's and its suppliers' entire liability and your exclusive remedy shall be, at Microsoft's option, either (a) return of the price paid, if any, or (b) repair or replacement of the SOFTWARE PRODUCT that does not meet Microsoft's Limited Warranty and that is returned to Microsoft with a copy of your receipt. This Limited Warranty is void if failure of the SOFTWARE PRODUCT has resulted from accident, abuse, or misapplication. Any replacement SOFTWARE PRODUCT will be warranted for the remainder of the original warranty period or thirty (30) days, whichever is longer. Outside the United States, neither these remedies nor any product support services offered by Microsoft are available without proof of purchase from an authorized international source. B–20 eTrust SSO Implementation Guide Microsoft NO OTHER WARRANTIES. TO THE MAXIMUM EXTENT PERMITTED BY APPLICABLE LAW, MICROSOFT AND ITS SUPPLIERS DISCLAIM ALL OTHER WARRANTIES AND CONDITIONS, EITHER EXPRESS OR IMPLIED, INCLUDING, BUT NOT LIMITED TO, IMPLIED WARRANTIES OR CONDITIONS OF MERCHANTABILITY, FITNESS FOR A PARTICULAR PURPOSE, TITLE AND NON-INFRINGEMENT, WITH REGARD TO THE SOFTWARE PRODUCT, AND THE PROVISION OF OR FAILURE TO PROVIDE SUPPORT SERVICES. THIS LIMITED WARRANTY GIVES YOU SPECIFIC LEGAL RIGHTS. YOU MAY HAVE OTHERS, WHICH VARY FROM STATE/JURISDICTION TO STATE/JURISDICTION. LIMITATION OF LIABILITY. TO THE MAXIMUM EXTENT PERMITTED BY APPLICABLE LAW, IN NO EVENT SHALL MICROSOFT OR ITS SUPPLIERS BE LIABLE FOR ANY SPECIAL, INCIDENTAL, INDIRECT, OR CONSEQUENTIAL DAMAGES WHATSOEVER (INCLUDING, WITHOUT LIMITATION, DAMAGES FOR LOSS OF BUSINESS PROFITS, BUSINESS INTERRUPTION, LOSS OF BUSINESS INFORMATION, OR ANY OTHER PECUNIARY LOSS) ARISING OUT OF THE USE OF OR INABILITY TO USE THE SOFTWARE PRODUCT OR THE FAILURE TO PROVIDE SUPPORT SERVICES, EVEN IF MICROSOFT HAS BEEN ADVISED OF THE POSSIBILITY OF SUCH DAMAGES. IN ANY CASE, MICROSOFT'S ENTIRE LIABILITY UNDER ANY PROVISION OF THIS EULA SHALL BE LIMITED TO THE GREATER OF THE AMOUNT ACTUALLY PAID BY YOU FOR THE SOFTWARE PRODUCT OR U.S.$5.00; PROVIDED, HOWEVER, IF YOU HAVE ENTERED INTO A MICROSOFT SUPPORT SERVICES AGREEMENT, MICROSOFT'S ENTIRE LIABILITY REGARDING SUPPORT SERVICES SHALL BE GOVERNED BY THE TERMS OF THAT AGREEMENT. BECAUSE SOME STATES/JURISDICTIONS DO NOT ALLOW THE EXCLUSION OR LIMITATION OF LIABILITY, THE ABOVE LIMITATION MAY NOT APPLY TO YOU. Si vous avez acquis votre produit Microsoft au CANADA, la garantie limit?e suivante vous concerne : Third Party Acknowledgements B–21 Microsoft GARANTIE LIMITEE GARANTIE LIMIT?E - Sauf pour celles du REDISTRIBUTABLES, qui sont fournies "comme telles," sans acune garantie quelle qu'elle soit, Microsoft garantit que (a) la performance du LOGICIEL sera substantiellement en conformit? avec la documentation qui accompagne le LOGICIEL, pour une p?riode de quatre-vingt-dix (90) jours ? compter de la date de r?ception; et (b) tout support technique fourni par Microsoft sera substantiellement en conformit? avec toute documentation aff?rente fournie par Microsoft et que les membres du support technique de Microsoft feront des efforts raisonnables pour r?soudre toute difficult? technique d?coulant de l'utilisation du LOGICIEL. Certaines juridictions ne permettent pas de limiter dans le temps l'application de la pr?sente garantie. Aussi, la limite stipul?e ci-haut pourrait ne pas s'appliquer dans votre cas. Dans la mesure permise par la loi, toute garantie implicite portant sur le LOGICIEL, le cas ?ch?ant, est limit?e ? une p?riode de quatre-vingt-dix (90) jours. RECOURS DU CLIENT - La seule obligation de Microsoft et de ses fournisseurs et votre recours exclusif seront, au choix de Microsoft, soit (a) le remboursement du prix pay?, si applicable, ou (b) la r?paration ou le remplacement du LOGICIEL qui n'est pas conforme ? la Garantie Limit?e de Microsoft et qui est retourn? ? Microsoft avec une copie de votre re?u. Cette Garantie Limit?e est nulle si le d?faut du LOGICIEL est caus? par un accident, un traitement abusif ou une mauvaise application. Tout LOGICIEL de remplacement sera garanti pour le reste de la p?riode de garantie initiale ou pour trente (30) jours, selon la plus longue de ces p?riodes. A l'ext?rieur des Etats-Unis, aucun de ces recours non plus que le support technique offert par Microsoft ne sont disponibles sans une preuve d'achat provenant d'une source authoris?e. AUCUNE AUTRE GARANTIE - DANS LA MESURE PREVUE PAR LA LOI, MICROSOFT ET SES FOURNISSEURS EXCLUENT TOUTE AUTRE GARANTIE OU CONDITION, EXPRESSE OU IMPLICITE, Y COMPRIS MAIS NE SE LIMITANT PAS AUX GARANTIES OU CONDITIONS IMPLICITES DU CARACTERE ADEQUAT POUR LA COMMERCIALISATION OU UN USAGE PARTICULIER EN CE QUI CONCERNE LE LOGICIEL OU CONCERNANT LE TITRE, L'ABSENCE DE CONTREFA?ON DUDIT LOGICIEL, ET TOUTE DOCUMENTATION ECRITE QUI L'ACCOMPAGNE, AINSI QUE POUR TOUTE DISPOSITION CONCERNANT LE SUPORT TECHNIQUE OU LA FA?ON DONT CELUI-CI A ETE RENDU. CETTE GARANTIE LIMITEE VOUS ACCORDE DES DROITS JURIDIQUES SPECIFIQUES. B–22 eTrust SSO Implementation Guide JAVATM 2 Software Development Kit PAS DE RESPONSABILITE POUR LES DOMMAGES INDIRECTS MICROSOFT OU SES FOURNISSEURS NE SERONT PAS RESPONSABLES, EN AUCUNE CIRCONSTANCE, POUR TOUT DOMMAGE SPECIAL, INCIDENT, INDIRECT, OU CONSEQUENT QUEL QU'IL SOIT (Y COMPRIS, SANS LIMITATION, LES DOMMAGES ENTRAINES PAR LA PERTE DE BENEFICES, L'INTERRUPTION DES ACTIVITES, LA PERTE D'INFORMATION OU TOUTE AUTRE PERTE PECUNIAIRE) DECOULANT DE OU RELIE A LA LICENCE D'ACCES DU CLIENTET CE, MEME SI MICROSOFT A ETE AVISEE DE LA POSSIBILITE DE TELS DOMMAGES. LA RESPONSABILITE DE MICROSOFT EN VERTU DE TOUTE DISPOSITION DE CETTE CONVENTION NE POURRA EN AUCUN TEMPS EXCEDER LE PLUS ELEVE ENTRE I) LE MONTANT EFFECTIVEMENT PAYE PAR VOUS POUR LA LICENCE D'ACCES DU CLIENT OU II) U.S.$5.00. ADVENANT QUE VOUS AYEZ CONTRACTE PAR ENTENTE DISTINCTE AVEC MICROSOFT POUR UN SUPPORT TECHNIQUE ETENDU, VOUS SEREZ LIE PAR LES TERMES D' UNE TELLE ENTENTE. La pr?sente Convention est r?gie par les lois en vigeur dans ela province d'Ontario, Canada. Chacune des parties ? la pr?sente reconna?t irr?vocablement la comp?tence des tribunaux de la province d'Ontario et consent ? instituer tout litige qui pourrait d?couler de la pr?sente aupr?s des tribunaux situ?s dans le district judiciaire de York, province d'Ontario. Au cas o? vous auriez des questions concernant cette licence ou que vous d?siriez vous mettre en rapport avec Microsoft pour quelque raison que ce soit, veuillez contacter la succursale Microsoft desservant votre pays, dont l'adresse est fournie dans ce produit, ou ?crire ?: Microsoft Sales Information Center, One Microsoft Way, Redmond, Washington 98052-6399. JAVATM 2 Software Development Kit Sun Microsystems, Inc. Binary Code License Agreement for the JAVATM 2 SOFTWARE DEVELOPMENT KIT (J2SDK), STANDARD EDITION, VERSION 1.4.2_X SUN MICROSYSTEMS, INC. ("SUN") IS WILLING TO LICENSE THE SOFTWARE IDENTIFIED BELOW TO YOU ONLY UPON THE CONDITION THAT YOU ACCEPT ALL OF THE TERMS CONTAINED IN THIS BINARY CODE LICENSE AGREEMENT AND SUPPLEMENTAL LICENSE TERMS (COLLECTIVELY "AGREEMENT"). PLEASE READ THE AGREEMENT CAREFULLY. BY DOWNLOADING OR INSTALLING THIS SOFTWARE, YOU ACCEPT THE TERMS OF THE AGREEMENT. INDICATE ACCEPTANCE BY SELECTING THE "ACCEPT" BUTTON AT THE BOTTOM OF THE AGREEMENT. IF YOU ARE NOT WILLING TO BE BOUND BY ALL THE TERMS, SELECT THE "DECLINE" BUTTON AT THE BOTTOM OF THE AGREEMENT AND THE DOWNLOAD OR INSTALL PROCESS WILL NOT CONTINUE. Third Party Acknowledgements B–23 JAVATM 2 Software Development Kit B–24 1. DEFINITIONS. "Software" means the identified above in binary form, any other machine readable materials (including, but not limited to, libraries, source files, header files, and data files), any updates or error corrections provided by Sun, and any user manuals, programming guides and other documentation provided to you by Sun under this Agreement. “Programs” mean Java applets and applications intended to run on the Java 2 Platform, Standard Edition (J2SETM platform) platform on Java-enabled general purpose desktop computers and servers. 2. LICENSE TO USE. Subject to the terms and conditions of this Agreement, including, but not limited to the Java Technology Restrictions of the Supplemental License Terms, Sun grants you a non-exclusive, nontransferable, limited license without license fees to reproduce and use internally Software complete and unmodified for the sole purpose of running Programs. Additional licenses for developers and/or publishers are granted in the Supplemental License Terms. 3. RESTRICTIONS. Software is confidential and copyrighted. Title to Software and all associated intellectual property rights is retained by Sun and/or its licensors. Unless enforcement is prohibited by applicable law, you may not modify, decompile, or reverse engineer Software. Licensee acknowledges that Licensed Software is not designed or intended for use in the design, construction, operation or maintenance of any nuclear facility. Sun Microsystems, Inc. disclaims any express or implied warranty of fitness for such uses. No right, title or interest in or to any trademark, service mark, logo or trade name of Sun or its licensors is granted under this Agreement. Additional restrictions for developers and/or publishers licenses are set forth in the Supplemental License Terms. 4. LIMITED WARRANTY. Sun warrants to you that for a period of ninety (90) days from the date of purchase, as evidenced by a copy of the receipt, the media on which Software is furnished (if any) will be free of defects in materials and workmanship under normal use. Except for the foregoing, Software is provided "AS IS". Your exclusive remedy and Sun's entire liability under this limited warranty will be at Sun's option to replace Software media or refund the fee paid for Software. Any implied warranties on the Software are limited to 90 days. Some states do not allow limitations on duration of an implied warranty, so the above may not apply to you. This limited warranty gives you specific legal rights. You may have others, which vary from state to state. 5. DISCLAIMER OF WARRANTY. UNLESS SPECIFIED IN THIS AGREEMENT, ALL EXPRESS OR IMPLIED CONDITIONS, REPRESENTATIONS AND WARRANTIES, INCLUDING ANY IMPLIED WARRANTY OF MERCHANTABILITY, FITNESS FOR A PARTICULAR PURPOSE OR NON-INFRINGEMENT ARE DISCLAIMED, EXCEPT TO THE EXTENT THAT THESE DISCLAIMERS ARE HELD TO BE LEGALLY INVALID. eTrust SSO Implementation Guide JAVATM 2 Software Development Kit 6. LIMITATION OF LIABILITY. TO THE EXTENT NOT PROHIBITED BY LAW, IN NO EVENT WILL SUN OR ITS LICENSORS BE LIABLE FOR ANY LOST REVENUE, PROFIT OR DATA, OR FOR SPECIAL, INDIRECT, CONSEQUENTIAL, INCIDENTAL OR PUNITIVE DAMAGES, HOWEVER CAUSED REGARDLESS OF THE THEORY OF LIABILITY, ARISING OUT OF OR RELATED TO THE USE OF OR INABILITY TO USE SOFTWARE, EVEN IF SUN HAS BEEN ADVISED OF THE POSSIBILITY OF SUCH DAMAGES. In no event will Sun's liability to you, whether in contract, tort (including negligence), or otherwise, exceed the amount paid by you for Software under this Agreement. The foregoing limitations will apply even if the above stated warranty fails of its essential purpose. Some states do not allow the exclusion of incidental or consequential damages, so some of the terms above may not be applicable to you. 7. SOFTWARE UPDATES FROM SUN. You acknowledge that at your request or consent optional features of the Software may download, install, and execute applets, applications, software extensions, and updated versions of the Software from Sun ("Software Updates"), which may require you to accept updated terms and conditions for installation. If additional terms and conditions are not presented on installation, the Software Updates will be considered part of the Software and subject to the terms and conditions of the Agreement. 8. SOFTWARE FROM SOURCES OTHER THAN SUN. You acknowledge that, by your use of optional features of the Software and/or by requesting services that require use of the optional features of the Software, the Software may automatically download, install, and execute software applications from sources other than Sun ("Other Software"). Sun makes no representations of a relationship of any kind to licensors of Other Software. TO THE EXTENT NOT PROHIBITED BY LAW, IN NO EVENT WILL SUN OR ITS LICENSORS BE LIABLE FOR ANY LOST REVENUE, PROFIT OR DATA, OR FOR SPECIAL, INDIRECT, CONSEQUENTIAL, INCIDENTAL OR PUNITIVE DAMAGES, HOWEVER CAUSED REGARDLESS OF THE THEORY OF LIABILITY, ARISING OUT OF OR RELATED TO THE USE OF OR INABILITY TO USE OTHER SOFTWARE, EVEN IF SUN HAS BEEN ADVISED OF THE POSSIBILITY OF SUCH DAMAGES. Some states do not allow the exclusion of incidental or consequential damages, so some of the terms above may not be applicable to you. 9. TERMINATION. This Agreement is effective until terminated. You may terminate this Agreement at any time by destroying all copies of Software. This Agreement will terminate immediately without notice from Sun if you fail to comply with any provision of this Agreement. Either party may terminate this Agreement immediately should any Software become, or in either party's opinion be likely to become, the subject of a claim of infringement of any intellectual property right. Upon Termination, you must destroy all copies of Software. Third Party Acknowledgements B–25 JAVATM 2 Software Development Kit 10. EXPORT REGULATIONS. All Software and technical data delivered under this Agreement are subject to US export control laws and may be subject to export or import regulations in other countries. You agree to comply strictly with all such laws and regulations and acknowledge that you have the responsibility to obtain such licenses to export, re-export, or import as may be required after delivery to you. 11. TRADEMARKS AND LOGOS. You acknowledge and agree as between you and Sun that Sun owns the SUN, SOLARIS, JAVA, JINI, FORTE, and iPLANET trademarks and all SUN, SOLARIS, JAVA, JINI, FORTE, and iPLANET-related trademarks, service marks, logos and other brand designations ("Sun Marks"), and you agree to comply with the Sun Trademark and Logo Usage Requirements currently located at http://www.sun.com/policies/trademarks. Any use you make of the Sun Marks inures to Sun's benefit. 12. U.S. GOVERNMENT RESTRICTED RIGHTS. If Software is being acquired by or on behalf of the U.S. Government or by a U.S. Government prime contractor or subcontractor (at any tier), then the Government's rights in Software and accompanying documentation will be only as set forth in this Agreement; this is in accordance with 48 CFR 227.7201 through 227.72024 (for Department of Defense (DOD) acquisitions) and with 48 CFR 2.101 and 12.212 (for non-DOD acquisitions). 13. GOVERNING LAW. Any action related to this Agreement will be governed by California law and controlling U.S. federal law. No choice of law rules of any jurisdiction will apply. 14. SEVERABILITY. If any provision of this Agreement is held to be unenforceable, this Agreement will remain in effect with the provision omitted, unless omission would frustrate the intent of the parties, in which case this Agreement will immediately terminate. 15. INTEGRATION. This Agreement is the entire agreement between you and Sun relating to its subject matter. It supersedes all prior or contemporaneous oral or written communications, proposals, representations and warranties and prevails over any conflicting or additional terms of any quote, order, acknowledgment, or other communication between the parties relating to its subject matter during the term of this Agreement. No modification of this Agreement will be binding, unless in writing and signed by an authorized representative of each party. B–26 eTrust SSO Implementation Guide JAVATM 2 Software Development Kit SUPPLEMENTAL LICENSE TERMS These Supplemental License Terms add to or modify the terms of the Binary Code License Agreement. Capitalized terms not defined in these Supplemental Terms shall have the same meanings ascribed to them in the Binary Code License Agreement . These Supplemental Terms shall supersede any inconsistent or conflicting terms in the Binary Code License Agreement, or in any license contained within the Software. A. Software Internal Use and Development License Grant. Subject to the terms and conditions of this Agreement, including, but not limited to the Java Technology Restrictions of these Supplemental Terms, Sun grants you a non-exclusive, non-transferable, limited license without fees to reproduce internally and use internally the Software complete and unmodified for the purpose of designing, developing, and testing your Programs. B. License to Distribute Software. Subject to the terms and conditions of this Agreement, including, but not limited to the Java Technology Restrictions of these Supplemental Terms, Sun grants you a non-exclusive, non-transferable, limited license without fees to reproduce and distribute the Software, provided that (i) you distribute the Software complete and unmodified (unless otherwise specified in the applicable README file) and only bundled as part of, and for the sole purpose of running, your Programs, (ii) the Programs add significant and primary functionality to the Software, (iii) you do not distribute additional software intended to replace any component(s) of the Software (unless otherwise specified in the applicable README file), (iv) you do not remove or alter any proprietary legends or notices contained in the Software, (v) you only distribute the Software subject to a license agreement that protects Sun's interests consistent with the terms contained in this Agreement, and (vi) you agree to defend and indemnify Sun and its licensors from and against any damages, costs, liabilities, settlement amounts and/or expenses (including attorneys' fees) incurred in connection with any claim, lawsuit or action by any third party that arises or results from the use or distribution of any and all Programs and/or Software. Third Party Acknowledgements B–27 JAVATM 2 Software Development Kit C. License to Distribute Redistributables. Subject to the terms and conditions of this Agreement, including but not limited to the Java Technology Restrictions of these Supplemental Terms, Sun grants you a non-exclusive, non-transferable, limited license without fees to reproduce and distribute those files specifically identified as redistributable in the Software "README" file ("Redistributables") provided that: (i) you distribute the Redistributables complete and unmodified (unless otherwise specified in the applicable README file), and only bundled as part of Programs, (ii) you do not distribute additional software intended to supersede any component(s) of the Redistributables (unless otherwise specified in the applicable README file), (iii) you do not remove or alter any proprietary legends or notices contained in or on the Redistributables, (iv) you only distribute the Redistributables pursuant to a license agreement that protects Sun's interests consistent with the terms contained in the Agreement, (v) you agree to defend and indemnify Sun and its licensors from and against any damages, costs, liabilities, settlement amounts and/or expenses (including attorneys' fees) incurred in connection with any claim, lawsuit or action by any third party that arises or results from the use or distribution of any and all Programs and/or Software. D. Java Technology Restrictions. You may not modify the Java Platform Interface ("JPI", identified as classes contained within the "java" package or any subpackages of the "java" package), by creating additional classes within the JPI or otherwise causing the addition to or modification of the classes in the JPI. In the event that you create an additional class and associated API(s) which (i) extends the functionality of the Java platform, and (ii) is exposed to third party software developers for the purpose of developing additional software which invokes such additional API, you must promptly publish broadly an accurate specification for such API for free use by all developers. You may not create, or authorize your licensees to create, additional classes, interfaces, or subpackages that are in any way identified as "java", "javax", "sun" or similar convention as specified by Sun in any naming convention designation. B–28 eTrust SSO Implementation Guide JAVATM 2 Software Development Kit E. Distribution by Publishers. This section pertains to your distribution of the Software with your printed book or magazine (as those terms are commonly used in the industry) relating to Java technology ("Publication"). Subject to and conditioned upon your compliance with the restrictions and obligations contained in the Agreement, in addition to the license granted in Paragraph 1 above, Sun hereby grants to you a non-exclusive, nontransferable limited right to reproduce complete and unmodified copies of the Software on electronic media (the "Media") for the sole purpose of inclusion and distribution with your Publication(s), subject to the following terms: (i) You may not distribute the Software on a stand-alone basis; it must be distributed with your Publication(s); (ii) You are responsible for downloading the Software from the applicable Sun web site; (iii) You must refer to the Software as JavaTM 2 Software Development Kit, Standard Edition, Version 1.4.2; (iv) The Software must be reproduced in its entirety and without any modification whatsoever (including, without limitation, the Binary Code License and Supplemental License Terms accompanying the Software and proprietary rights notices contained in the Software); (v) The Media label shall include the following information: Copyright 2003, Sun Microsystems, Inc. All rights reserved. Use is subject to license terms. Sun, Sun Microsystems, the Sun logo, Solaris, Java, the Java Coffee Cup logo, J2SE , and all trademarks and logos based on Java are trademarks or registered trademarks of Sun Microsystems, Inc. in the U.S. and other countries. This information must be placed on the Media label in such a manner as to only apply to the Sun Software; (vi) You must clearly identify the Software as Sun's product on the Media holder or Media label, and you may not state or imply that Sun is responsible for any third-party software contained on the Media; (vii) You may not include any third party software on the Media which is intended to be a replacement or substitute for the Software; (viii) You shall indemnify Sun for all damages arising from your failure to comply with the requirements of this Agreement. In addition, you shall defend, at your expense, any and all claims brought against Sun by third parties, and shall pay all damages awarded by a court of competent jurisdiction, or such settlement amount negotiated by you, arising out of or in connection with your use, reproduction or distribution of the Software and/or the Publication. Your obligation to provide indemnification under this section shall arise provided that Sun: (i) provides you prompt notice of the claim; (ii) gives you sole control of the defense and settlement of the claim; (iii) provides you, at your expense, with all available information, assistance and authority to defend; and (iv) has not compromised or settled such claim without your prior written consent; and (ix) You shall provide Sun with a written notice for each Publication; such notice shall include the following information: (1) title of Publication, (2) author(s), (3) date of Publication, and (4) ISBN or ISSN numbers. Such notice shall be sent to Sun Microsystems, Inc., 4150 Network Circle, M/S USCA12-110, Santa Clara, California 95054, U.S.A , Attention: Contracts Administration. Third Party Acknowledgements B–29 JAVATM 2 Software Development Kit F. Source Code. Software may contain source code that, unless expressly licensed for other purposes, is provided solely for reference purposes pursuant to the terms of this Agreement. Source code may not be redistributed unless expressly provided for in this Agreement. G. Third Party Code. Additional copyright notices and license terms applicable to portions of the Software are set forth in the THIRDPARTYLICENSEREADME.txt file. In addition to any terms and conditions of any third party opensource/freeware license identified in the THIRDPARTYLICENSEREADME.txt file, the disclaimer of warranty and limitation of liability provisions in paragraphs 5 and 6 of the Binary Code License Agreement shall apply to all Software in this distribution. For inquiries please contact: Sun Microsystems, Inc., 4150 Network Circle, Santa Clara, California 95054, U.S.A. (LFI#129530/Form ID#011801) B–30 eTrust SSO Implementation Guide Index A Active Directory from Microsoft setting up SSL, 8-16 Application authentication, 7-6 authentication method SAFLINK, 6-54 B business representative, implementation role, 1-4 C cache, synchronizing Web Agent’s with Policy Server, 8-20 cookie storing security tokens on, 8-21 customizing self-registration dialog, 8-9 D document of security objectives, 1-6 E end user liaison, implementation role, 1-4 Index–1 F First login situation, 7-4 I implementation plan creation of team, 1-8 tasks, 1-8 implementation team cooperation among members, 1-3 creating, 1-1, 1-8 formulating security policy, 1-6 identifying members, 1-3 identifying roles, 1-4 iWS service, 8-24 L Learn mode, 7-4 local cache, synchronizing Web Agent’s with Policy Server, 8-20 Log File use in SSL debugging, 8-14 Login dialogs, 7-2 logon dialogs maintenance, 7-5 logon variables definition, 7-3 storage, 7-4 N network representative, implementation role, 1-4 O operations representative, implementation role, 1-4 Index–2 eTrust SSO Implementation Guide P password synchronization agent for NT, 2-10 personality changing user and password, 8-22 how encrypted, 8-22 manipulating file containing, 8-22 using PswdGen utility commands, 8-22 when file name is defined, 8-22 Policy Server starting/stopping services, 8-24 synchronizing local cache of Web Agent with, 8-20 project manager, implementation role, 1-4 PswdGen utility, 8-22 R resources accessing unprotected, 8-2 S SAFLINK, 6-54 Scripts, 7-2 Secure Sockets Layer (SSL) setting up from browser to web server, 8-10 security administrator implementation role, 1-4 security officer, appointing, 1-6 security policy appointing security officer, 1-6 creating, 1-6 issuing position statement, 1-6 notifying employees, 1-6 security token sharing, 8-21 self-registration customizing dialog, 8-9 description of, 8-9 role of Web Agent in, 8-9 setting up, 8-9 Index–3 setting up new user creation, 8-9 senior management, implementation role, 1-5 server farms, 10-1 how authentication is handled, 8-21 required change to webagent.ini, 8-21 sharing security tokens among web servers, 8-21 services starting/stopping Policy Server, 8-24 starting/stopping Windows Web Server, 8-24 SSL adding certificate service for Active Directory, 8-18 configuring connection between Policy Server and Active Directory, 8-16 configuring connection between Policy Server and eTrust Directory, 8-11 configuring Policy Server for Active Directory, 8-19 configuring Policy Server for eTrust Directory, 8-15 creating new service for eTrust Directory, 8-13 creating Policy Manager definitions for Active Directory, 8-17 creating Policy Manager definitions for eTrust Directory, 8-12 setting up from browser to web server, 8-10 setting up on Windows 2000, 8-11 verifying connection, 8-15, 8-19 SSO Client components, 5-10 starting and stopping web servers Windows, 8-24 survivability with server farms, 10-1 synchronizing local cache automatically, 8-20 local cache manually, 8-20 Web Agent local cache with Policy Server, 8-20 SyncInterval parameter use in synchronizing local cache, 8-20 systems representative, implementation role, 1-4 U users defining new for self-registration, 8-9 W Web Agent changing personality user and password, 8-22 Index–4 eTrust SSO Implementation Guide configuring in server farm, 8-21 how it works, 2-9, 8-2 role in authorization, 2-9, 8-2 setting up SSL, 8-10 support of self-registration, 8-9 synchronizing local cache with Policy Server, 8-20 where to install, 2-9, 8-2 web server configuring primary and secondary, 8-21 sharing security tokens among, 8-21 starting/stopping services for Windows, 8-24 using primary and secondary, 8-21 Windows 2000, setting up SSL, 8-11 World Wide Web Publishing Service, 8-24 Index–5