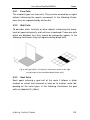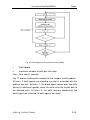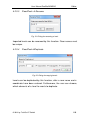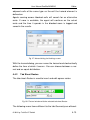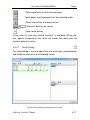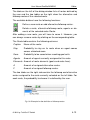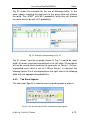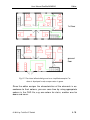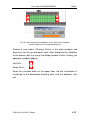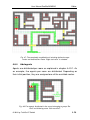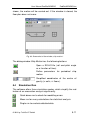
1
www.traffgo-ht.com
PedEd
AENEASed
PedGo
AENEASsim
PedView
AENEASview
User Manual
Version 2.6.1
TraffGo HT GmbH
Bismarckstraße 142
47057 Duisburg
Germany
© by TraffGo HT GmbH, 2013
User Manual PedGo/AENEAS
Introduction
PedGo and AENEAS
PedGo and AENEAS are software packages developed by
TraffGo HT GmbH for evacuation analyses. Both are based on the
same model but differin details of functionality. PedGo is the basic
version for everything and was developed for evacuation analyses
on land. AENEAS offers extra functions for maritime applications. It
is distributed in cooperation with Germanischer Lloyd AG and offers
a ship motion module.
As both programs are quite similar, this manual covers the functionalities of PedGo as well as of AENEAS. Terms like e.g. “editor”
or “simulation” refer to the following groups of programs:
Name
PedGo
AENEAS
Editor
PedEd
AENEASed
Simulation
PedGo
AENEASsim
Viewer
PedView
AENEASview
© 2013 by TraffGo HT GmbH
User Manual PedGo/AENEAS
Content
1
Introduction .......................................................................... 1-1
2 Software Overview ............................................................... 2-1
2.1 Editor .................................................................................. 2-1
2.2 Simulation ........................................................................... 2-1
2.3 Viewer ................................................................................. 2-2
2.4 Linking PedGo to the Start Menu ....................................... 2-3
2.4.1
Windows XP .................................................................. 2-3
2.4.2
Windows 7 ..................................................................... 2-5
3 Model ..................................................................................... 3-1
3.1 Discretising ......................................................................... 3-1
3.2 Cell Types........................................................................... 3-2
3.2.1
Free Cells ...................................................................... 3-3
3.2.2
Wall Cells ...................................................................... 3-3
3.2.3
Goal Cells ...................................................................... 3-3
3.2.4
Door Cells ...................................................................... 3-4
3.2.5
Virtual Doors.................................................................. 3-4
3.2.6
Stairs and Jump Points ................................................. 3-5
3.2.7
Hazard ........................................................................... 3-6
3.3 Routes and Orientation ...................................................... 3-7
3.3.1
Route Definition and Potential Spread .......................... 3-7
3.3.2
Parameters .................................................................... 3-9
3.3.3
Alternative Routes ....................................................... 3-11
3.3.4
Followup Routes.......................................................... 3-11
3.4 Agents .............................................................................. 3-12
3.4.1
Parameters .................................................................. 3-12
3.4.2
Orientation ................................................................... 3-13
3.4.3
Movement and Update ................................................ 3-15
4 Editor ..................................................................................... 4-1
4.1 Main Menu .......................................................................... 4-2
4.1.1
Buttons .......................................................................... 4-2
4.1.2
Menu Item Project ......................................................... 4-2
4.1.3
Menu Item Floor/Deck ................................................... 4-2
© 2013 by TraffGo HT GmbH
User Manual PedGo/AENEAS
4.1.4
4.1.5
4.1.5.1
Menu Item Cells ............................................................ 4-3
Dialogs of Menu Items .................................................. 4-4
ProjectColor Coding
...................................... 4-4
4.1.5.2
Floor Import
.................................................. 4-5
4.1.5.3
Floor/Deck Rename ............................................. 4-6
4.1.5.4
Floor/DeckDuplicate ............................................. 4-6
4.1.5.5
Floor/Deck New Floor .......................................... 4-7
4.1.5.6
Cells Go to cell..................................................... 4-7
4.2 View Window ...................................................................... 4-8
4.3 Tools Window ..................................................................... 4-8
4.3.1
Tab sheet “Geometry“ ................................................... 4-8
4.3.1.1
4.3.2
Adding a Hazard
............................................... 4-9
Tab Sheet Routes ....................................................... 4-10
4.3.2.1
4.3.3
Route Dialog
.................................................... 4-11
Tab Sheet Agents........................................................ 4-13
4.3.3.1
Adding Agents
................................................ 4-14
4.3.3.2
Editing Agents
................................................. 4-15
4.3.4
Groups Dialog
................................................ 4-16
4.4 Hotkeys ............................................................................. 4-17
4.5 Generating the project ...................................................... 4-17
4.5.1
Import Floors/Decks .................................................... 4-19
4.5.2
Stairs and Jump Points ............................................... 4-21
4.5.3
Define Routes.............................................................. 4-23
4.5.4
Add agents .................................................................. 4-26
4.5.5
Saving the project........................................................ 4-27
5 PedGo/AENEASsim ............................................................. 5-1
5.1 Licencing ............................................................................ 5-1
5.1.1
Activation ....................................................................... 5-1
5.1.2
Updating the Dongle ..................................................... 5-2
5.2 Elements............................................................................. 5-2
5.2.1
Menu ............................................................................. 5-3
© 2013 by TraffGo HT GmbH
User Manual PedGo/AENEAS
5.2.2
Tab Sheet Situation ....................................................... 5-4
5.2.3
Tab Sheet Density ......................................................... 5-5
5.2.4
Tab Sheet Directional Index .......................................... 5-6
5.3 Configurations .................................................................... 5-7
5.3.1
Program
5.3.2
Agents
5.3.3
Exits
................................................................. 5-7
.................................................................... 5-8
........................................................................ 5-9
5.3.4
Ship motion (only AENEAS)
................................ 5-10
5.4 Simulation Run ................................................................. 5-11
5.4.1
The Seed ..................................................................... 5-12
5.4.2
Quick Demo
.......................................................... 5-12
5.4.3
Mean
5.4.4
Single Calculation
.................................................................... 5-12
................................................. 5-14
6 PedView/AENEASview ......................................................... 6-1
6.1 Handling ............................................................................. 6-1
6.1.1
Menu ............................................................................. 6-2
6.1.2
The buttons ................................................................... 6-3
6.1.3
Hotkeys ......................................................................... 6-3
7 Results .................................................................................. 7-1
7.1 Mean calculations ............................................................... 7-1
7.1.1
demographics.xls .......................................................... 7-2
7.1.2
routedata.xls .................................................................. 7-2
7.1.3
durdist,seed=[StartSeed]-[EndSeed].bmp .................... 7-3
7.1.4
seed=[StartSeed]- [EndSeed].xls .................................. 7-3
7.1.5
/LogPointData Mean Run/[logpointname].xls................ 7-6
7.1.6
Evaluation Examples ..................................................... 7-7
7.2 Single Calculation ............................................................... 7-8
7.2.1
seed=[Seed].xls ............................................................. 7-9
7.2.2
LogPoints,seed=[Seed].xls.......................................... 7-11
8
Glossary ................................................................................ 8-1
© 2013 by TraffGo HT GmbH
User Manual PedGo/AENEAS
9
Literature ............................................................................... 9-1
© 2013 by TraffGo HT GmbH
User Manual PedGo/AENEAS
1
Introduction
Introduction
Thank your for choosing PedGo or AENEAS! Our software constitutes the current state of research and is based upon up to date
findings of science. Due to the consistent use of discrete algorithms
PedGo/AENEAS is one of the fastest simulation programs available. This in combination with the intuitively usable interface allows
for a fast and efficient analysis and a quick comparison of different
evacuation concepts.
We are working on providing you a robust, fast and reliable software and to support you in using it. Due to persistent development
and the implementation of scientific findings you can be assured
that our software represents an up to date state.
The following manual illustrates how the floor plan is modelled,
simulations are conducted and results are evaluated. The design of
the bodywork enables you to learn about the Simulation and the
Editor by working through it just like a textbook. Even though the
software is based on a sophisticated model you will soon find out,
that even good and efficient models can be understood and used
easily. All the software enclosed underlies a persistent development. Thus, slight differences between your software version and
the content presented are possible. In case of significant alterations
you will receive supplementary or renewed chapters.
Especially with software like an evacuation simulation, it is
important to comprehend how the model works in order to
interpret the outcomes correctly. As many information as the
simulation provides, it cannot be disregarded that it only reflects an idealized case and thus reality never can be reproduced with all its contingencies. A simulation is just as good
as its assumptions!
© 2013 by TraffGo HT GmbH
1-1
User Manual PedGo/AENEAS
Introduction
Information about new releases, fixed bugs and new functions can
be found on our homepage at http://www.traffgo-ht.com.
© 2013 by TraffGo HT GmbH
1-2
User Manual PedGo/AENEAS
2
Software Overview
Software Overview
The software package consists of several applications, which will
help you step by step through the evacuation analysis.
2.1
Editor
You will use the editor for the first steps. After the import of CAD
drawings you can use it to rework the geometries. The editor also
serves to define routes, which the agents will follow and you will
“populate” the floor plan by indicating which amount of agents will
be distributed where.
The editor is used to:
•
import of CAD drawings,
•
prepare the geometry,
•
define exits and routes
•
define blocked rooms (by hazards), and
•
to distribute agents.
It saves the project file with the file-extension pg2.
2.2
Simulation
The project file, generated by the Editor is loaded into the simulation which performs a sochastic analysis. This means that e.g. 500
© 2013 by TraffGo HT GmbH
2-1
User Manual PedGo/AENEAS
Software Overview
evacuation runs are simulated for each project. The results are then
evaluated statistically.
Each single run can be repeated in order to obtain detailed information.
The simulation loads the project file (file extension pg2) and is
used:
•
for stochastic analyses of the evacuation (500 runs), and
•
for the repetition of individual runs for detailed data.
The results are saved in tables, diagrams and a log-file with the file
extension 3dl.
2.3
Viewer
The tables and diagrams help to analyse and interpret the results.
The log-file (file extension 3dl) can be read by the viewer, which
visualizes the evacuation process in a three dimensional environment. The viewer is free of charge, thus it can be copied and
passed on your clients to enable them to look at the results themselves.
© 2013 by TraffGo HT GmbH
2-2
User Manual PedGo/AENEAS
Software Overview
The viewer loads the log-file (file-extension 3dl) and:
•
visualizes the process three dimensionally, and
•
creates screenshots.
It can be copied and distributed free of charge.
2.4
Linking PedGo to the Start Menu
Our software programs are compiled as so-called stand-alone versions. This means, that all libraries are compiled into the execution
files, so they can be run without any installation. In order to use
1
PedGo within your Windows environment, it is helpful to link the
exe files to your start menu.
2.4.1
Windows XP
By following the following steps, you can create a link in your start
menu:
1. Right-click on the Windows Start button.
2. Choose Open All Users (Fig. 1).
1
Windows is a registered trade mark of the Microsoft Corp.
© 2013 by TraffGo HT GmbH
2-3
User Manual PedGo/AENEAS
Software Overview
Fig. 1: Right-click on Start.
3. The opening Explorer window shows you the structure of the
start menu. You can create directories and links, which will
then appear in the start menu. Right-click in the wished area
and choose NewShortcut ().
Fig. 2: Generating a short cut.
4. Choose the exe file (e.g. PedGo.exe) in the following window
(Fig. 3).
© 2013 by TraffGo HT GmbH
2-4
User Manual PedGo/AENEAS
Software Overview
Fig. 3: Choose an exe file.
The new link can now be found in the start menu. You can also
move, copy and rename it by right clicking on it.
2.4.2
Windows 7
Under Windows 7 right-click on the exe file in the file explorer and
choose “attach to start menu”. The icon will now appear in your
start menu.
© 2013 by TraffGo HT GmbH
2-5
User Manual PedGo/AENEAS
3
Model
Model
The basis of the simulation model is a so called multi-agent-model,
which is based on a cellular automaton ([1], [2], [3], [4]). Thus
agents are represented as individuals (=agents) with independent
attitudes, abilities and goals in a discrete space and discrete time.
3.1
Discretising
The floor plan that is to be analyzed is fragmented into a grid of
quadratic cells (Fig. 4). The length of the cell edges is 0.4 meters,
thus the total cell area is 0.16 m². The agents occupy one cell and
when they move, they jump from cell to cell, just like the figures of a
chess game.
Fig. 4: Example for discretising the floor plan.
The cell area represents the area an agent uses within a congestion. It is based on scientific observations [5]. Hence the maximal
density of agents in this model accounts for 6,25 P/m².
© 2013 by TraffGo HT GmbH
3-1
User Manual PedGo/AENEAS
Model
The functional relation between the flow of agents (agents per meter width and seconds) in dependence of the density (agents per
square meter) was derived from empirical research [6]. The fundamental diagram shows, that the flow decreases, after a maximum
flow is reached and the density is further increased (Fig. 5).
1,800
1,600
Flow /(P/ms)
1,400
1,200
v2.5.0.7
Weidmann
Han.&Wright
P.&M.
1,000
0,800
0,600
0,400
0,200
0,000
0,0
0,5
1,0
1,5
2,0
2,5
3,0
3,5
4,0
4,5
5,0
5,5
6,0
6,5
7,0
Density /(P/m²)
Fig. 5: Fundamental diagrams of the simulation model (v2.5.0.7) and
empirical data (Weidmann, Hankin & Wright, Predtechenskii & Milinskii).
Fig. 5 clearly shows, that large differences exist between the empirical data sets. Therefore, the fundamental diagram of PedGo is
orientated along the diagram of Weidmann.
3.2
Cell Types
In order to represent the floor plan in a realistic manner, several cell
types are used. Most of them are generally influencing the walking
speed of agents passing over them.
© 2013 by TraffGo HT GmbH
3-2
User Manual PedGo/AENEAS
3.2.1
Model
Free Cells
The simplest types are free cells. They can be entered by an agent
without influencing the agents movement. In the following illustrations they are represented by white cells.
3.2.2
Wall Cells
To consider walls, furniture or other objects influencing the movement of agents physically, wall cells are introduced. These are cells
which are blocked, thus they cannot be entered by agents. In the
following illustrations they are represented by black cells.
Fig. 6: Cell type „Wall“. On the left in continuous space on the right
its equivalent in the simulation-Model (black cells)
3.2.3
Goal Cells
Each agent entering a goal cell of the route it follows is either
marked as saved and removed or lead on to another route (depending on the route type). In the following illustrations the goal
cells are labelled G (=Goal).
© 2013 by TraffGo HT GmbH
3-3
User Manual PedGo/AENEAS
Model
Fig. 7: Cell type „exit“. On the left in continuous space on the right
the equivalent of the simulation-model (G = Goal).
3.2.4
Door Cells
Doors decrease the flow of agents by reducing the agents walking
speed to ¼ of its maximum walking speed, when it passes. In the
following illustrations, door cells are labelled D (=Door).
Fig. 8: Cell type „door“. On the left in the continuous space on the
right its equivalent in the simulation-model (D = Door).
3.2.5
Virtual Doors
Virtual door cells have the same influence as normal door cells,
without influencing the walking speeds of passing agents. They are
© 2013 by TraffGo HT GmbH
3-4
User Manual PedGo/AENEAS
Model
used to model virtual rooms for e.g. agent distributions or to influence the spread of the potential.
3.2.6
Stairs and Jump Points
To take stairways into account, step cells are introduced. They influence the flow by approximately halving the velocity of agents. If a
stairway connects different floors, jump cells are introduced to
make agents switch between levels. Stairs are always projected on
the lower level of the two levels they connect, but agents can move
in both directions when passing them.
In the following illustrations, the steps of a stair are labelled S (step)
and cells, defining the direction are labelled UP and DN (down).
The sides of the steps have to be restricted by wall cells.
Fig. 9: Cell type „stair“ and information about the direction. On the
left in continuous space on the right its equivalent in the simulationmodel (S = step, UP, DN = down). The length of the stair depends
on its projected length.
© 2013 by TraffGo HT GmbH
3-5
User Manual PedGo/AENEAS
Model
Fig. 10: The UP- und DN-Cells at the beginning of each stairway define the direction, resulting in the paths displayed.
Due to the cells UP and DN an agent „knows“, whether it is moving
up or down on the stairway and when to change the level. Mainly
this is managed through the transition from a step cell (S) to the
down (DN) cell as follows:
present cell
following cell
action
S
DN
Move up one floor.
DN
S
Move down one floor.
3.2.7
Hazard
Rooms can be blocked at stochastically defined times in order to
take e.g. smoke, fire or floodings into account. If alternative routes
are defined (see Chpt. 3.3), agents choose an alternative route,
when discovering cells of a blocked room. The information about
the change of routes is then passed on to neighbouring agents.
If no alternative route is defined, agents will stick to their route but
the duration spent in a blocked room is logged.
© 2013 by TraffGo HT GmbH
3-6
User Manual PedGo/AENEAS
3.3
Model
Routes and Orientation
On their way to the goal cells, the agents follow the routes, which
are specified by the user. For orientation, agents make use of potentials. For each route, the cells have a value which is increasing
proportional to the distance from the goal cells. The agent finds its
way to the end of a route by comparing the potential value of the
cell it is standing on with the value of the neighbouring cells.
3.3.1
Route Definition and Potential Spread
In order to understand, how agents choose their way and in order to
lead them as wished, it is very important to understand, how the
potential is spread throughout the geometry, each time a project is
loaded in the simulation.
Starting at the user defined destination cells, the potential spreads
out over the accessible cells (free, jump point, door and stair cells).
Due to the users definition of the routes, the corresponding door
and stair cells are marked and thus the spread of the potential can
be controlled as follows:
1. From the goal cells, a potential value is assigned to all cells
of the assigned room. Its boundaries are wall, door, virtual
and jump cells. While the potential is spreading, all jump,
door and virtual cells which are marked as routes are saved
for the next step.
2. From the cells saved in step 1, which were marked as route
cells, the potential spreads into the following rooms as in
step 1. Once again, all the new cells which are marked as
routes are saved.
3. Step 2 is repeated, until no more new route cells are found.
4. The potential is spread room wise via door-, virtual and
jump cells, which were not marked as route cells, until all
accessible cells are given a potential value.
The impact of the definition of routes on the spread of the potential
(blue and green cells) can be seen in the following example. Regular doors are marked yellow; the ones that mark the route are red.
© 2013 by TraffGo HT GmbH
3-7
User Manual PedGo/AENEAS
Model
Step 1: The potential reaches Step 2: The potential spreads
the upper deck through the along the marked doors and
stairways.
stairway.
Step 3: Passing the last
marked door the potential
reaches the cabins.
Step 4: There are no further
marked route cells. Hence the
potential passes through the door
cells not marked by a route.
Step 5: The potential spreads Step 6: The spread of the potenacross all accessible cells.
tial is finished.
© 2013 by TraffGo HT GmbH
3-8
User Manual PedGo/AENEAS
Model
Fig. 11 shows another example for the spread of the potential. The
exit lies at the top right corner of the floor plan. Without the use of
route markings, agents in the centre room would exit via the dotted
line. If the doors along the continuous line would be marked, the
potential would spread as shown, so agents of the centre room
would choose the door at the lower side of the room.
Fig. 11: Spread of the potential in a simplified example (from top left to
lower right)
3.3.2
Parameters
Per route, the following set of parameters can be used to influence
the agents behaviour when reaching the goal cells.
Preparation:
During the preparation duration, the goal cells of
a route are blocked, so agents stop on these
cells and wait for the preparation duration to
pass.
Per Agent:
This duration defines, how long an agent will
© 2013 by TraffGo HT GmbH
3-9
User Manual PedGo/AENEAS
Model
individually wait on the goal cells before it is
saved or switches to a followup route.
Max. Capacity:
This value determines, how many agents can be
saved via the goal cells of a route. If the parameter Max. Cycles is used, the goal cells will be
blocked for the duration of Amid Time. If
Max Cycles is not defined, the following cycle will
immediately start, meaning that Max. Capacity
has no influence.
Open Duration:
Open Duration determines, how long goal cells
will be accessible before being blocked. If
Max Cycles is not defined, the following cycle will
immediately start, meaning that Open Duration
has no influence.
Amid Time:
If goal cells are blocked due to Max. Capacity or
Open Time, Amid Time defines the duration until
the goal cells are accessible again.
Max. Cycles:
Max. Cycles defines the number of cycles for
which the above named parameters work. If no
value is defined, the amount of cycles is endless.
Fig. 12: Route parameters and their influence.
Agents will stop on the goal cells, if the above named parameters
take effect and agents will be saved. If agents will move on to an© 2013 by TraffGo HT GmbH
3-10
User Manual PedGo/AENEAS
Model
other route (follow up), they will move one cell per second in a random direction.
3.3.3
Alternative Routes
For every route, a list of alternative routes can be defined. These
alternative routes are chosen, whenever the route of an agent leads
into a blocked room (due to a hazard). The alternative route is chosen according to the probabilities defined by the user.
Fig. 13: Schematic example for the use of alternative routes.
Fig. 13 shows a schematic example for the use of alternative
routes. Primarily, the agents would follow Route 1 from the left to
the right room. Route 2 and Route 3 are defined as alternative
routes to Route 1. If the center room is blocked due to a hazard
(hachures), agents trying to enter it will choose Route 2 or Route 3,
each with a probability of 50% and follow these alternatives to the
right room.
If no alternative routes are defined, agents will continue to use
Route 1 through the blocked room.
3.3.4
Followup Routes
When an agent reaches the goal cells of its route, the following
options exist, depending on the route settings: With a certain prob© 2013 by TraffGo HT GmbH
3-11
User Manual PedGo/AENEAS
Model
ability, the agent will be saved and taken out of the simulation, or it
chooses a following route according to given probabilities.
Fig. 14: Schematic example for the use of followup routes.
Fig. 14 shows a schematic example for the use of followup routes.
An agent following Route 1 and reaching its goal cells will choose
Route 2, 3 or 4 as next route to follow, according to the given probabilities. It will then follow this route to the final goal on the right.
3.4
Agents
The simulated persons (=agents) can enter all cells except for wall
cells. Only one agent per cell is allowed. When an agent stands still
or moves with 1 c/s (=cell per second), it occupies only one cell. At
higher speeds, the agent will block the cells it has passed in one
time step (=1 second).
Through this, a correlation between walking speed and needed
space, the curve of the fundamental diagram is formed (see Fig. 5).
This so called self organisation cannot be manipulated by the user.
3.4.1
Parameters
Each agent possesses its individual parameters which are assigned
at the beginning of each simulation run.
The following parameters are applied:
© 2013 by TraffGo HT GmbH
3-12
User Manual PedGo/AENEAS
Model
Vmax:
The amount of cells an agent can cover at max
within one time step (cells per second).
Patience:
The maximum duration, an agent can stand still
(e.g. in a congestion) before changing its route
and attempting to find an escape route leading in
the opposite direction.
Sway:
The accuracy, with which an agent follows the
course of the potential (see 1).
Reaction:
The duration, an agent needs to respond to the
evacuation signal, e.g. start moving.
Dawdle:
The probability, for an agent to reduce its walking
speed, e.g. to stand still for the rest of a sub time
step.
Inertia:
The agents try to continue on its walking direction
(see 1).
Clustering:
The grade of cohesion in a group (e.g. families,
groups).
The parameters can be assigned by normal or equal distributions.
They are defined by a maximum and minimum value and in case of
a normal distribution by the mean and standard deviation.
In addition the simulation offers several fixed parameter settings:
1. Parameter settings for the day and night case for passengers
and crew according to the IMO guideline MSC.1/Circ.1238 [4].
2. Parameter settings of the standard population defined in the
RiMEA guideline [22].
3.4.2
Orientation
The orientation of the agents is explained in the following example
([8], [9]):
© 2013 by TraffGo HT GmbH
3-13
User Manual PedGo/AENEAS
Model
Fig. 15: The cells are marked by indices. The agent is standing on
the cell with the index 0 and is turned to the right.
The agent can choose between 8 cells in the next step. The probability
pi for the choice of each cell i is calculated as follows:
p i =e
−
( P i −P0 )+ S
S
Thereby being:
pi
Probability for the choice of the cell i.
Pi
Potential value for the cell i.
P0
Potential value for the cell i=0.
S
Parameter Sway
S is the value for swaying (Sway). The greater this value, the bigger
the similarity of the eight probabilities. Hence the agent orientates
less by the decline of the potential, but instead moves more randomly.
After calculating the probabilities for the eight different directions
the probability of the current direction is being multiplied by the
value for inertia Θ. Hence the current walking direction has a bigger
influence and this is more likely to be chosen.
© 2013 by TraffGo HT GmbH
3-14
User Manual PedGo/AENEAS
Model
p direction , new = p direction ⋅ Θ
p direction , new
Probability for the choice of the next cell in running
direction considering inertia
p direction
Probability for the choice of the next cell in direction
of movement
Θ
3.4.3
Inertia
Movement and Update
The way and order the agents are moved is called update. There
are different versions, differing not only in degree of complexity but
also diversely affecting the fundamental diagram of the model (see
Fig. 5). The simulation uses a so called Random Shuffle Update,
which in its result is similar to a Parallel Update, but leads to higher
computational rates. In one time step (= one second), the agents
are moved in a certain number of sub updates. This number equals
the maximum walking speed of the whole population (e.g. 5 cells
per second leads to 5 sub updates). In one sub update the agents
are moved in a constant changing order by one cell until they are
blocked by the surrounding or they reached their maximum walking
speed.
© 2013 by TraffGo HT GmbH
3-15
User Manual PedGo/AENEAS
Model
Fig. 16: Flow diagram of the random shuffle update.
t
Sub Update
n
maximum number of cells per time step
time
time step (1 second)
Fig. 17 shows a schematic example for the random shuffle update:
At time = 0, both agents are standing in a row in a corridor with the
width of one cell. At time = 1, the black agent moves over two cells
(being its maximum speed), while the white one has to wait due to
the blocked cells. At time = 3, the cells formerly blocked by the
black agent are released, so both agents can walk.
© 2013 by TraffGo HT GmbH
3-16
User Manual PedGo/AENEAS
Model
Fig. 17: Example for the update:
The sub update of an agent is shown in the following flow chart:
© 2013 by TraffGo HT GmbH
3-17
User Manual PedGo/AENEAS
Model
Fig. 18: The movement algorithm of one agent in one sub update.
© 2013 by TraffGo HT GmbH
3-18
User Manual PedGo/AENEAS
4
Editor
Editor
The Editor is an independent program, which can import
CAD drawings in dxf format and convert them automatically into the simulations grid. Floor plans can be edited
by hand, for example by moving or drawing lines.
The Editor is not limited by your licence agreement, so
you can use it on a s many computers as needed.
The editor consists of three main elements, which control
each of its functions: the two control windows (View und
Tools), which can be placed arbitrarily and the menu on
the top of the editor window.
Each level is imported individually and appears on its own
tab sheet, which can be selected through the tab-field on
the right side of the window.
© 2013 by TraffGo HT GmbH
4-1
User Manual PedGo/AENEAS
4.2
4.2.1
Editor
Main Menu
Buttons
Start a new project (erase old data).
Open an existing project.
Reload the actual project.
Save current project.
Rapid saving (only tdf-files).
Define colour coding.
Import a level as a dxf file.
Move active level up.
Move active level down
Display the grid.
Display cell information.
Display original dxf- elements
Display filtered and rounded dxf-elements.
Show route tags.
Show bottlenecks.
4.2.2
Menu Item Project
Save as…
Saves the project under a new name.
Exit
Close the Editor.
4.2.3
Menu Item Floor/Deck
Rename
Rename the active level.
© 2013 by TraffGo HT GmbH
4-2
User Manual PedGo/AENEAS
Editor
Reverse order
Reverse the order of the levels.
Duplicate
Duplicate the active level.
Remove
Remove the active level.
New
Insert a new level.
Update extends
Refresh of the maximum extends of the project.
Statistics
Shows you statistics of the project.
Cleanup
Checks all drawing elements and selects all
which are superfluous. By pressing Del, you
can delete them and thus clean up a project.
4.2.4
Menu Item Cells
Go to cell…
Sets the focus on the specified cell.
Autocalc cells
Calculates the cell information automatically,
when elements are edited.
Autofill stairs
Marks cells as stair cells, when surrounded by
stair elements.
Calculate cells
Calculates the cell information.
Clear
Deletes the cell information.
© 2013 by TraffGo HT GmbH
4-3
User Manual PedGo/AENEAS
4.2.5
4.2.5.1
Editor
Dialogs of Menu Items
ProjectColor Coding
Fig. 19: The colour coding dialog for defining colour attributes.
Attributes like wall or door can be assigned to the colours used in
the dxf file. Hence the workflow is accelerated and automated.
Select a colour and push the button to assign an attribute. The following attributes are available: Wall, Door, Step, Up, Down, Ignore
and Virtual. Repeatedly pressing the button cancels the assignment.
By using the button Make default the defined colours can be fixed
for upcoming plans.
© 2013 by TraffGo HT GmbH
4-4
User Manual PedGo/AENEAS
4.2.5.2
Editor
Floor Import
Fig. 20: Dialog for importing dxf files.
When importing dxf files, the dialog shown in Fig. 20 occurs. By
selecting an entity, the Editor can scale the dxf file onto the cellular
grid. Since some CAD programs tend to scale CAD drawings when
exporting dxf files, the numeric dimensions help you to find the correct entity.
When importing dxf files, elements smaller in size then a given
threshold can be filtered. Filtered dxf elements are deleted and will
not show up, when the dxf file is shown in the background.
When filtering discrete elements, they will remain in the dxf file, but
they will not be imported, so no cells are influenced.
© 2013 by TraffGo HT GmbH
4-5
User Manual PedGo/AENEAS
4.2.5.3
Editor
Floor/Deck Rename
Fig. 21: Dialog for renaming a level.
Imported levels can be renamed by this function. Floor names must
be unique.
4.2.5.4
Floor/DeckDuplicate
Fig. 22: Dialog for copying levels.
Levels can be duplicated by this function, after a new name and zcoordinate have been entered. Furthermore, the user can choose,
which elements of a level he wants to duplicate.
© 2013 by TraffGo HT GmbH
4-6
User Manual PedGo/AENEAS
4.2.5.5
Editor
Floor/Deck New Floor
Fig. 23: Dialog for adding a new layer.
New layers without content can be added through the function
Floor New Floor. You can give the new layer an individual name
and define it’s dimensions. Minimum and maximum coordinates are
thereby oriented according to the coordinate origin. If the project
has other layers, their coordinates are shown.
4.2.5.6
Cells Go to cell
Fig. 24: Dialog to focus on a chosen cell.
In most cases of the simulation giving error messages, coordinates
for the cell in question are given. Enter these coordinates in this
dialog and the focus will be set onto this cell.
© 2013 by TraffGo HT GmbH
4-7
User Manual PedGo/AENEAS
4.3
Editor
View Window
Fig. 25: The view window.
The View window can be used to position and to enlarge the view
of the floor plan.
The buttons of the view window allow for the following functions:
Zoom in and out.
Zoom in on the complete level
Zoom in on the height of the level
Move the view according to the direction of the
arrow.
Set the zoom to its last value.
4.4
Tools Window
The tools window is used to edit the floor plan. It includes the tabsheets Geometry, Routes and Agents. Depending on the selected
tab, the buttons change and different actions can be conducted.
4.4.1
Tab sheet “Geometry“
The tab sheet Geometry contains buttons to edit the geometry of
the floor plan.
© 2013 by TraffGo HT GmbH
4-8
User Manual PedGo/AENEAS
Editor
Fig. 26: The tools window with the tab sheet Geometry selected.
The tab sheet Geometry offers the following functions:
Selecting elements. If elements are selected, the actions affect only these elements, until they are unselected. By clicking on an element, it will be unselected.
Unselect elements.
Delete element by clicking on it.
Undelete.
Move a node of an element. If elements are selected
only the nodes of the selected element are affected.
Move elements. If elements are selected, only selected elements are moved.
Draw a new element in the chosen colour.
Break elements.
Recolor an element.
Block a room at a stochastically chosen duration.
4.4.1.1
Adding a Hazard
By “Hazard”, a general hazard endangering the person is meant. It
can be caused by e.g. smoke, fire and flooding. If a hazard occurs,
it marks all cells of its room as blocked. “Room” thereby means the
© 2013 by TraffGo HT GmbH
4-9
User Manual PedGo/AENEAS
Editor
adjacent cells of the same type as the cell the hazard element is
defined on.
Agents coming across blocked cells will search for an alternative
route. If none is available, the agent will continue on the actual
route and the time it spends in the blocked room is logged and
saved in the results.
Fig. 27: Hazard dialog for blocking a room.
With the hazard dialog, you can name the hazard and stochastically
define the time at which it occurs. You can choose between a normal and an equal distribution.
4.4.2
Tab Sheet Routes
The tab-sheet Routes is used to insert and edit egress routes.
Fig. 28: The tool window with the selected tab sheet Routes.
The following menu items different to the tab Geometry are offered:
© 2013 by TraffGo HT GmbH
4-10
User Manual PedGo/AENEAS
Editor
Define goal cells for the selected route.
Mark doors and jump points for the selected route.
Show information of chosen routes.
Choose or define new routes.
Open route dialog.
In the route list, one entry called “shortest” is available. When chosen, agents assigned to this route will chose the route with the
smallest potential value.
4.4.2.1
Route Dialog
The route dialog is used to administer the route data (create/delete)
and to define alternative and followup routes.
Fig. 29: Route dialog to administer your routes.
© 2013 by TraffGo HT GmbH
4-11
User Manual PedGo/AENEAS
Editor
The table on the left of the dialog window lists all routes defined by
the user and the two tables on the right show the alternative and
followup routes of the selected route.
The available buttons have the following functions:
Define a new route or add alternative/followup routes.
Delete a route, alternative/followup route, agents or elements of the selected route. Route.
After adding a new route, you will have to name it. However, you
can always rename routes by clicking on the corresponding table.
The Route table contains the following columns:
Caption
Name of the route..
Stay
Probability to stay on its route when an agent comes
across a blocked room.
Save
Probability to be saved when reaching goal cells.
Agents
Amount of agents currently assigned to this route.
Elements Amount of route elements (goals and route lines).
A
Amount of assigned alternative routes.
F
Amount of assigned followup routes.
The two tables on the right side contain the followup and alternative
routes assigned to the route currently selected on the left table. For
each route, the probability to choose it is defined by the user.
Fig. 30: Example for the definition of followup routes.
© 2013 by TraffGo HT GmbH
4-12
User Manual PedGo/AENEAS
Editor
Fig. 30 shows the example for the use of followup routes. In this
case, agents reaching the goal cells of the given route will choose
the route “Pax, MVZ1” with 60% probability, while they will choose
the route closest by with 40% probability.
Fig. 31: Example corresponding to Fig. 14.
Fig. 31 shows, how the example shown in Fig. 14 would be modelled. All routes used must be defined in the left table. Since agents
will not be saved when reaching the goal cells of Route 1, the corresponding save value is set to 0. When Route 1 is selected, the
followup routes 2 to 4 are displayed on the right side in the followup
table with the appropriate probabilities.
4.4.3
Tab Sheet Agents
The tab-sheet Agents is used to insert and edit groups of agents.
Fig. 32: The tool window with the selected tab sheet Agents.
© 2013 by TraffGo HT GmbH
4-13
User Manual PedGo/AENEAS
Editor
It offers the following additional functions to Geometry:
Add new agents.
Change agent data.
Insert a log point to record the number of agents
per time for the marked room.
Show information of chosen groups.
Active route to which the agents are assigned.
Open route dialog.
Define agent groups.
4.4.3.1
Adding Agents
When clicking on the floor plan, you will select the cell and thus the
room in which the agents are distributed. With the opening dialog,
you can determine the amount of agents to be distributed, the route
they will be assigned to and the group they will belong to.
Fig. 33: The dialog window to insert agents.
The parameter “Group” allows you to define groups with different
demographic parameters (e.g. old/young, fast/slow).
© 2013 by TraffGo HT GmbH
4-14
User Manual PedGo/AENEAS
Editor
Next to the routes defined, the parameter “shortest” can be chosen
as route, so the agent will use the route with the smallest potential
amount on the cell it is standing on.
Agents can be assigned to either a room or an area (see Fig. 34). A
room is thereby defined by all neighbouring cells with the same
property as the cell with the agent element. To define the area, a
rectangle can be created by enlarging the definition-rectangle
through pulling it, after the button for moving nodes
has been
chosen in the Tools-window. To do this, the actual route has to be
selected in the same window.
Fig. 34: Two possibilities of agent distributions: On the left, four
agents are assigned stochastically over all cells of the room. On the
right, they are assigned on the marked area.
4.4.3.2
Editing Agents
Agent elements can be edited by clicking on them. You can edit the
amount, the assigned route and the group. Several agent elements
can be edited in one step by selecting them. The following window
for editing the agents (Fig. 35) opens.
© 2013 by TraffGo HT GmbH
4-15
User Manual PedGo/AENEAS
Editor
Fig. 35: Window for editing agents if several agents are selected
By selecting the appropriate check mark, you can choose, which
attribute should be edited.
4.4.4
Groups Dialog
Groups help to assign different characteristics to agents, like a passenger and a crew group which will react in different speeds.
Fig. 36: The dialog for defining groups and their attributes.
By pressing the groups button in the tab sheet Agents a new window is opened (Fig. 36) in which you can define groups or edit
groups that are already defined. The demographic parameters of a
group are defined in the simulation.
© 2013 by TraffGo HT GmbH
4-16
User Manual PedGo/AENEAS
4.5
Editor
Hotkeys
The following functions help to improve handling:
‘right mouse button’
Zoom into the rectangle created by
moving the mouse.
‘alt’ + ‘right mouse button’: Pan the plan by moving the mouse.
‘ctrl’ + ‘left mouse button’:
Select all elements within the rectangle created by moving the mouse.
‘shift’ + ‘left mouse button’: Elements can be selected or unselected by clicking on them.
‘del’:
Delete selected elements.
turn mouse wheel
Zoom in/out
Press mouse wheel
Pan the plan by moving the mouse.
4.6
Generating the project
The handling of the editor can best be learned by practical appliance. In the following example, modelling and defining a project is
explained by a virtual office building.
© 2013 by TraffGo HT GmbH
4-17
User Manual PedGo/AENEAS
Editor
1st floor
ground
floor
Fig. 37: The virtual office building used as a simplified example. Furniture is displayed in red, escape routes in green.
Since the editor assigns the characteristics of the elements in accordance to their colours, you can save time by using appropriate
colours in the CAD file, e.g. one colour for stairs, another one for
doors and so on.
© 2013 by TraffGo HT GmbH
4-18
User Manual PedGo/AENEAS
Editor
1st floor
ground
floor
Fig. 38: The correctly dyed office building. In this case the colours
mark the following characteristics: black = wall, red = wall, dark
green = stair, turquoise = ignore, yellow = door, light-green = escape
routes.
To explain the function of the escape routes (see 4.6.2), the routes
run out of the room on the upper right through the bordering room
instead of leading directly towards the corridor.
4.6.1
Import Floors/Decks
To import a level, the corresponding file has to be selected after
pressing the
key. Start importing from the lowest deck on, since
new levels are positioned on top of the actual level.
© 2013 by TraffGo HT GmbH
4-19
User Manual PedGo/AENEAS
Editor
In order for the agents to jump correctly between levels (via
step/down cells), the levels have to be positioned precisely on top
of each other. This can be achieved by positioning the origin of
each CAD drawing at the exact same spot.
Fig. 39: View of the first imported floor. Since the button „dxf“ is not
pressed only rounded elements are shown. Projection errors may
occur.
After all levels have been imported the original dxf-elements can be
viewed by pressing the
button. The button
displays the same
elements but they are rounded onto the cells. This may lead to
rounding errors, e.g. a wall might be shifted. This can be repaired
with the use of the
button of the Editor.
After the colours of the elements have been defined through the
use of the dialog Colour Coding, the Editor assigns the corresponding attributes to the cells and they appear coloured.
© 2013 by TraffGo HT GmbH
4-20
User Manual PedGo/AENEAS
Editor
Fig. 40: The calculated cells, after the colours have been defined
with Colour Coding. Turquoise and light green elements have been
filtered out. Rounding errors were removed.
4.6.2
Stairs and Jump Points
Fig. 41: Bottom and top of the stair are marked with new colours.
Due to the dark green lines denoting steps in the dxf-file the editor
automatically assigned the characteristic ‘steps’ to the corresponding cells.
© 2013 by TraffGo HT GmbH
4-21
User Manual PedGo/AENEAS
Editor
Fig. 42: After allocating the attributes to the colours the adequate
symbols appear in the corresponding cells.
Choose a new colour (Drawing Colour in the tools window) and
draw lines for the up and down cells. After allocating the attributes
to the colours with the use of the dialog window Colour Coding, the
adequate symbols appear:
Up-Cells:
Down-Cells:
Since the staircase ends on the upper floor, the cell information is
restrained to the downward directing cells and the adjacent stair
cell.
© 2013 by TraffGo HT GmbH
4-22
User Manual PedGo/AENEAS
Editor
Fig. 43: Modelling the stairway in the upper floor. Since it just leads
down a cell line of ‘down’-cells and a following row of ‘step’ cells is
sufficient.
4.6.3
Define Routes
Routes have to be defined before they can be assigned in the floor
plan. Pressing the button
opens the corresponding dialog window (Fig. 44). In this case, one route leads along the left stair case
(Left staircase) and the other via the right (Right staircase). In order
to demonstrate the possibilities, another route leads along both stair
cases to the upper floor (Counter-flow). Arriving there, the agents
will choose the closest route to the exit.
Fig. 44: The route window with all defined routes.
© 2013 by TraffGo HT GmbH
4-23
User Manual PedGo/AENEAS
Editor
In order to define a destination of a chosen route, draw a line while
the button Exit
is pressed. The destination elements are displayed in thicker lines compared to the lines marking the routes.
Fig. 45: Goal cells of a route.
It is useful to position goal cells of an exit not adjacent to the door
cells, but with a distance of three cells. This reduces the influence
of the agents being taken out of the floor plan onto the flow through
the door.
© 2013 by TraffGo HT GmbH
4-24
User Manual PedGo/AENEAS
Editor
Fig. 46: All three routes in the floor plan.
The definition of the routes influences the spread of the potential.
Using the route lines, doors and stairs are marked, by which the
potential primarily spreads. If no further marked door and jump cells
can be identified the potential spreads through the remaining rooms
(see 3.3.1).
In this example, the route lines mark the necessary doors and
stairs, so the potentials of the route are spread as shown in Fig. 46.
© 2013 by TraffGo HT GmbH
4-25
User Manual PedGo/AENEAS
Editor
Fig. 47: The completely modelled level including defined escape
routes and destinations Route “Right stair case” is selected.
4.6.4
Add agents
Agents are distributed per room as explained in chapter 4.4.3.1. As
an example, five agents per room are distributed. Depending on
their initial position, they are assigned one of the available routes.
Fig. 48: Five agents distributed in the room, belonging to group “Default” and following route “Stair case left”.
© 2013 by TraffGo HT GmbH
4-26
User Manual PedGo/AENEAS
4.6.5
Editor
Saving the project
When saving the project, the editor creates the following directory
structure in the project directory (here: /Projectname):
Projektname
dxf
stock0.dxf
stock1.dxf
tdf
stock0.tdf
stock1.tdf
Projektname.pg2
Fig. 49: The directory and file structure of simulation-projects.
All paths of the project are saved relative to each other, so you can
copy the complete directory without causing problems. Simplified
dxf files are saved in the directory /dxf, while the data of the rounded elements as well as all newly drawn elements, route and agent
data are saved in the directory /tdf. The project file (Projectname.pg2), which provides all the data necessary for the simulation, is situated in the project directory. It can be opened by PedGo
or AENEASsim.
Each project should be saved in its own directory in order to
avoid overwriting of existing tdf files.
© 2013 by TraffGo HT GmbH
4-27
User Manual PedGo/AENEAS
5
PedGo/AENEASsim
PedGo/AENEASsim
The simulation is the core of the software package. It runs the simulation and allows for analysing, evaluating and saving the results.
Since each real evacuation varies in its sequence, the simulation is
not just run once but several times (typically 500 times). Thereby,
the demographic parameters are newly assigned before every run,
stochastic decisions happen and events like hazards also happen
at stochastical times. The results are analyzed statistically and each
run can be repeated to get more detailed information.
5.1
5.1.1
Licencing
Activation
The software is activated by a dongle, which means that it is not
linked to one computer. As long as the licence duration (saved on
the dongle) is valid and the dongle is plugged into the USB port of
your computer, the software runs for an unlimited amount of agents.
With the dongle missing, projects with up to twenty agents can be
simulated.
Fig. 50: Dongle to activate the software.
© 2013 by TraffGo HT GmbH
5-1
User Manual PedGo/AENEAS
PedGo/AENEASsim
The duration of usage, the customer name, number and the dongle
number are saved on the dongle.
To use the software, please plug the dongle into a free USB port of
your computer and start the software. The data saved on the dongle can be shown by clicking Settings Licence in the menu.
Fig. 51: Window showing the dongle information.
In the status bar of the simulation window, you can see, if the dongle is plugged into your computer and is recognized (Dongle: ok)
and if the licence is valid (Lic: ok).
5.1.2
Updating the Dongle
To update the dongle, you get a license file (*.lic) via email. Plug
the dongle into a free USB port of your computer. Start the software
and choose Settings Licence in the menu. The licence window
(see Fig. 51) opens. Click the
licence file.
5.2
-Button to select and open the
Elements
The program window consists of two main elements by which you
can controle all functions: The menu buttons at the upper end of the
window and the three tab sheets Situation, Density and Dir. Index.
© 2013 by TraffGo HT GmbH
5-2
User Manual PedGo/AENEAS
PedGo/AENEASsim
Fig. 52: Screenshot of the simulation software.
5.2.1
Menu
The menu of the main window consists of the following buttons:
Load project.
Save project.
Refresh project. Reload it after implementing changes in the Editor
Modify simulation settings.
Modify demographic settings.
Modify exit settings.
Only AENEAS: Add ship motion.
Perform demo simulation.
© 2013 by TraffGo HT GmbH
5-3
User Manual PedGo/AENEAS
PedGo/AENEASsim
Perform mean value simulation.
Perform single simulation.
Stop current simulation.
Show start window.
Set zoom.
5.2.2
Tab Sheet Situation
The tab sheet Situation shows the current situation. Cells representing walls are displayed grey, stairs and doors in various shades
of blue. Agents are visualized by moving dots, changing their colour
according to their walking speed. The colour gradient varies from
green (maximum walking speed) via orange to red (no speed). The
cellular structure gets visible when you increase the zoom level.
Fig. 53: Screenshot of the tab sheet ‘Situation’. It visualizes the actual situation.
The Situation tab offers the following buttons:
© 2013 by TraffGo HT GmbH
5-4
User Manual PedGo/AENEAS
PedGo/AENEASsim
Do/do not update the visualization. If it is not updated,
computational speeds are increased (used for mean run).
5.2.3
Tab Sheet Density
The tab sheet Density visualizes significant congestions. Significant
congestions are defined in the appropriate guidelines ([4], [22]).
Because of the discrete grid, the density for one cell can easily be
calculated, taking this cell and its surrounding eight cells into account (see Fig. 54). The result is a value with the entity agents per
square meter.
Fig. 54: Example for the calculation of densities in the cellular grid. In
this case, the density is 3,5 P/m².
In order to accentuate significant congestions (=congestions significantly influencing the result), the following steps are made: According to the definitions ([4], [7]), a significant congestion occurs, when
the agent density is 4 P/m² or higher during 10% of theevacuation
duration.
After each time step, the density for all cells is calculated. If it is
equal or higher than the threshold mentioned above, the counter of
the cell is increased by one. After the simulation is completed, it can
be evaluated, how many seconds the marginal value per cell was
exceeded. This value is visualized through a colour gradient from
red to green.
© 2013 by TraffGo HT GmbH
5-5
User Manual PedGo/AENEAS
PedGo/AENEASsim
Fig. 55: Screenshot of the tab sheet ‚Density’, that shows the exceeding of the marginal density value.
The track bar and the buttons at the top of the tab sheet allow for a
more detailed analysis of the simulation. E.g. if the ten percent button is pressed, the cells having a local density of 4 P/m² or more
during 10 % of the evacuation duration are displayed red. These
areas are called “significant congestion” [4]. The track bar moves
according to the pressed button. The save button stores the displayed picture.
To achieve higher computational rates the density plot is not
being updated during the mean calculation.
5.2.4
Tab Sheet Directional Index
The directional index (Dir. index) visualizes the course of the lines
connecting cells with equal potential value through the blue-green
colour gradient of a chosen route. It can be selected from the menu
on top of the tab sheet. Walls are displayed grey and cells not recorded or cells having a value of zero are displayed white.
© 2013 by TraffGo HT GmbH
5-6
User Manual PedGo/AENEAS
PedGo/AENEASsim
Fig. 56: Screenshot of the tab sheet “Directional Index“, that shows
the information of the direction.
By clicking on the cells of the floor plan, the potential value of the
cell is shown in the status bar at the bottom of the window.
5.3
5.3.1
Configurations
Program
In the dialog window Settings, you can select which levels should
be displayed. However, the result files (animations and screenshots) only show the floors selected.
© 2013 by TraffGo HT GmbH
5-7
User Manual PedGo/AENEAS
PedGo/AENEASsim
Fig. 57: Screenshot of the dialog window “Settings“.
Additionally, the following settings are available:
Temporary file:
Directory used to save temporary files.
PC speaker:
Your PC will make a sound, when a simulation
run has ended.
Prompt…:
When an existing result file is overwritten, you
will be prompted.
5.3.2
Agents
In the Demographics dialog, the demographic parameters for the
defined population groups are adjusted.
Except for the parameter Clustering all parameters can be assigned
equal or normal distributed. The normal distribution is defined by a
minimum-, maximum-, mean and the standard deviation value, the
equal distribution by the minimum and maximum value.
Additionally, predefined parameters settings (IMO [4], RiMEA [22])
can also be assigned.
© 2013 by TraffGo HT GmbH
5-8
User Manual PedGo/AENEAS
PedGo/AENEASsim
Fig. 58: Screenshot of the demographics dialog.
The dialog offers the following buttons and functions:
Select agent group.
Assign the chosen parameter set to selected
groups.
Save demographics.
Load demographics.
Reset to default parameters.
Parameters according to RiMEA [22].
IMO parameters (day/night/pax/crew).
Assign normal distribution.
Assign equal distribution.
5.3.3
Exits
Interval- and blocking times can be assigned to the destination cells
of each route to simulate different situations.
© 2013 by TraffGo HT GmbH
5-9
User Manual PedGo/AENEAS
PedGo/AENEASsim
Fig. 59: Screenshot of the dialog window for blocking times.
The dialog window Route Data has the following buttons:
Select route.
Assign the chosen parameter set to
selected routes.
Assign normal distribution.
Assign equal distribution.
Open help window.
5.3.4
Ship motion (only AENEAS)
With the software AENEAS you can “move” the floor plan according
to a file or to predefined parameters (periodic movement) in order to
simulate the rolling and pitching of a ship. As long as the window is
© 2013 by TraffGo HT GmbH
5-10
User Manual PedGo/AENEAS
PedGo/AENEASsim
shown, the motion will be carried out. If the window is closed, the
floor plan does not move.
Fig. 60: Screenshot of the window „ship motion“.
The dialog window Ship Motion has the following buttons:
Open a ROLLS-file (roll and pitch angle
as a function of time).
Define parameters for periodical ship
motion.
Simplified coordinates of the centre of
gravity (x: cells, z: floors).
5.4
Simulation Run
The software offers three simulation modes, which simplify the realization of an evacuation analysis significantly.
Quick demo run to check for modelling errors.
Mean run for many calculations for statistical analysis.
Single run to evaluate detailed data.
© 2013 by TraffGo HT GmbH
5-11
User Manual PedGo/AENEAS
5.4.1
PedGo/AENEASsim
The Seed
The seed is the central value for stochastic analyses performed by
a computer. It is the value, with which the random generator is initialized. Since computer programs cannot calculate real random
numbers, specific algorithms are used and a starting value must be
assigned to the random generator. This allows for a specific reproduction of sochastic events. The same seed will always provide the
same results independent of all other settings.
Before each run, the random generator algorithm is initialized with
the seed value. After a mean calculation the software saves a list of
evacuation times and the corresponding seeds. By defining a seed,
you can repeat runs in the single calculation run. This means that
each run is reproducible.
5.4.2
Quick Demo
The quick demo is used to control the modelling of the floor plan.
The seed is being determined by the system time, thus each run
provides different results. The results are not saved. The density
plot (Fig. 55) is being up-dated and can be saved on demand.
5.4.3
Mean
The mean calculation delivers the results of a stochastic analysis.
Beginning at the given start-seed the amount of wished calculations
is being conducted. Before each simulation run, the seed is increased by one, agents are newly distributed and parameters assigned. Hence each run simulates a different population within predetermined boundaries.
© 2013 by TraffGo HT GmbH
5-12
User Manual PedGo/AENEAS
PedGo/AENEASsim
Fig. 61: Dialog window for the choice of parameters for a mean calculation.
The dialog offers the following settings:
Seed:
Start seed which is increased by one before initializing every run.
Number..:
Amount of simulation runs.
Save…:
Directory in which results are saved.
Duration…:
Saving duration distribution diagram.
Log point…:
Saving file with log point results.
Hibernate:
Set computer in hibernation mode, after simulations are finished.
To increase computational rate, the density plot is not updated
when performing a mean calculation. To further increase the rate of
computation, you can switch off the update button
. As a result,
that the present evacuation time and the amount of rescued agents
is updated. The number of runs carried out is shown in the status
bar.
The following files can be generated (see chpt. 7.1):
1. The results of all realizations are saved in an ASCII text file in
the chosen directory. The file is formatted with tabs and since it
2
has the extension .xls (Microsoft Excel ), Excel automatically
2
Excel is an official trademark of the Microsoft Corp.
© 2013 by TraffGo HT GmbH
5-13
User Manual PedGo/AENEAS
PedGo/AENEASsim
starts and opens the file, when you double click on it in the file
explorer. Of course, you can also use other spread sheet programs.
2. For documentation of the used demographic and route parameters, twi text files are generated.
3. A bitmap file showing the statistical distribution of durations.
4. If defined, data of log points can be saved for all runs. Due to
the amount of data, one file per room will be generated.
5.4.4
Single Calculation
After determining the distribution of evacuation durations by the
mean simulation, further single calculations can be conducted to
analyze the appropriate run in more detail. The output file of the
mean calculation provides a list of Seeds (see chapter 7.1) Thus
calculations can be repeated that e.g. represent the mean or the
maximum evacuation duration.
Fig. 62: Screenshot of the dialog window to define the seeds and
output data of a single simulation run.
The seed can be defined in the corresponding field, while you can
choose, which result files should be saved.
© 2013 by TraffGo HT GmbH
5-14
User Manual PedGo/AENEAS
PedGo/AENEASsim
The following output data (see chpt. 7.2) can be generated:
Agent Data:
Individual agent data, e.g. start and destination
coordinates, individual walking duration etc.
Animation:
An animation file of the evacuation process for
the shown levels. Through the settings button
, you can choose the frame rate as well as
displaying the current time within the animation.
Density Plot:
An image file showing the significant congestions according to chpt. 5.2.3.
3D Log File:
The trajectories of all agents in the specific
format 3dl which the viewer opens to visualize
the evacuation process in a three dimensional
environment. You can limit time interval of the
output, since big floor plans with many agents
and long durations can lead to very big files.
Logpoints:
If you have defined a log point as described in
chapter 4.4.3 the number of agents per time
for the defined rooms are saved in this file.
Screenshots:
Screenshots of the process in arbitrary intervals (seconds).
© 2013 by TraffGo HT GmbH
5-15
User Manual PedGo/AENEAS
6
PedView/AENEASview
PedView/AENEASview
Like the Editor, the Viewer is an independent program, which visualizes the evacuation process in a three dimensional environment.
The simulation generates 3D log files (extension: 3dl) that contain
all information that is necessary for the visualisation.
The Viewer is freeware, you can share everything with your customers, so they can watch and analyse the simulation results from
an arbitrary point of view. For a documentation or a presentation,
you can save screenshots or series of screenshots.
6.1
Handling
The button menu is located at the lower part of the program window
by which the Viewer can be handled like a video player. The status
bar informs you about the number of lights used (Lights), the actual
evacuation time (Time) and the number of saved agents (Saved).
Fig. 63: Program window of the Viewer.
© 2013 by TraffGo HT GmbH
6-1
User Manual PedGo/AENEAS
6.1.1
PedView/AENEASview
Menu
The menu provides the following functions:
File:
Load Logfile:
Opens the dialog to load a 3dl file.
Single
Shot:
Screen
Saves the actual view according to the settings
(SettingsOptions).
Screen Shot Series:
Saves the actual view automatically, whenever
it is updated.
Views:
Deck Up:
Shows the next floor above.
Deck Down:
Shows the next floor below.
Zoom In:
Zooms in.
Zoom Out:
Zooms out.
Animation:
Run/Pause:
Starts and stops the animation.
Reset To Start:
Resets the animation to the start.
Step Forward:
Sets the animation one second forward.
Step Backward:
Sets the animation one second backward.
Settings:
Show Origin:
Shows the centre of your view by a coordinate
cross.
Add Light:
Inserts one of eight possible lights above the
position of your view center.
Remove Light:
Removes the light that is closest to your view
center.
Options:
Change Viewer options (e.g. screen shot settings).
Statistics:
Statistics of the project.
© 2013 by TraffGo HT GmbH
6-2
User Manual PedGo/AENEAS
6.1.2
PedView/AENEASview
The buttons
The Viewer has the following buttons:
Load project.
Show project statistics.
Choose floor.
Go back to start.
Play / Pause.
One second backward.
One second forward.
Single screen shot.
Screen shot series.
6.1.3
Hotkeys
To improve the Viewers handling the following functions are connected to hotkeys:
left mouse button: Rotate the view by moving the mouse.
scroll wheel: Zoom in and out by rotating the wheel.
right mouse button: Strafe the view by moving the mouse.
Ctrl + L: Load a 3dl file.
Y: Single screen shot.
X: Start a series of screen shots.
W: Jump up one floor.
S: Jump down one floor.
Q: Zoom in.
A: Zoom out.
1: Rewind to the beginning.
2: Play / Pause.
© 2013 by TraffGo HT GmbH
6-3
User Manual PedGo/AENEAS
PedView/AENEASview
3: One second forward.
4: One second backward.
L: Add a light over the centre of your view.
Shift + L: Remove the light closest to the centre of
your view.
© 2013 by TraffGo HT GmbH
6-4
User Manual PedGo/AENEAS
7
7.1
Results
Results
Mean calculations
The mean calculation saves the four following files in the chosen
directory.
© 2013 by TraffGo HT GmbH
7-1
User Manual PedGo/AENEAS
7.1.1
Results
demographics.xls
The demographics file demographics.xls documents the demographics parameters of each group of agents. It is structured as follows:
File
PedGo demographics log file
customer: TraffGo HT
project file: d:\Example\Example.pg2
program version: 2.5.0.6
Group 0 'All':
Demographics saved in:
min
max
mean
VMax:
2
5
3
Patience:
Not distributed
Sway:
1
5
3
Reaction:
0
10
5
Dawdle:
0
30
15
Inertia:
1
5
3
Clustering:
none
Explanation
Name of the licensee
Name of the project file
Program version number
Name of the first group
Path of the file (if existent)
stddev
1
distribution
normal
2
2
5
2
normal
normal
normal
normal
Next group (if existent)
Group 1 'Crew':
…
7.1.2
Velocity
Patience
Sway
Reaction time
Dawdle
Inertia
Clustering
routedata.xls
The route file routedata.xls documents the route settings of all groups. It is structured as follows:
File
PedGo route data file
customer: TraffGo HT
project file: d:\Example\Example.pg2
program version: 2.5.0.6
Explanation
Name of the licensee
Name of the project file
Program version number
Name of the first route
Route 0 'Pax':
Preparation:
Per Agent:
Max Capa.:
Open Time:
Amid Time:
Max Cycles:
min
not
not
not
not
not
not
Route 1 'Crew':
…
© 2013 by TraffGo HT GmbH
max
mean
distributed
distributed
distributed
distributed
distributed
distributed
stddev
dist.
Preparation
Blocking duration per agent
Maximum capacity
Open duration
Amid duration
Maximum number of cycles
Next route (if existent)
7-2
User Manual PedGo/AENEAS
7.1.3
Results
durdist,seed=[StartSeed]-[EndSeed].bmp
The frequency distribution shows the distribution of evacuation durations. In most cases the distribution is similar to a normal distribution, but you need a certain amount of runs for a smooth distribution.
The bitmap file is generated automatically and is saved in the chosen directory. Fig. 64 shows an example of a frequency distribution.
The green bar marks the significant duration (larger then 95% of the
determined durations) and on the duration axis, every multiple of
60 s is marked red.
Fig. 64: Example of an automatically generated bitmap for the frequency distribution
7.1.4
seed=[StartSeed]- [EndSeed].xls
The result file can be divided into two parts: The first contains the
used input data and a statistical overview of the results, while the
second part lists the results of each run. The first part is structured
as described below:
© 2013 by TraffGo HT GmbH
7-3
User Manual PedGo/AENEAS
Results
File
PedGo result file, mean run:
customer: TraffGo HT
project file: d:\demo\demo.pg2
program version: 2.5.0.6
Explanation
Name of licensee
Name of the project file
Program version number
simulation time:
start:
12:21:56
end:
12:42:49
System time at the start and end of the simulation
statistics:
simulations:
agents:
success:
no success:
500
1019
500
0
Statistical results
Amount of simulation runs
Amount of simulated agents
Amount of successful runs
Amount of unsuccessful runs
mean
stddev
95% <
min
max
/s
295
5
303
283
310
Group Data:
Number
/(min:s)
04:55
00:05
05:03
04:43
05:10
Name
0 Pax
1 Crew
Route Data (see 'routedata.xls' for details):
Number
Name
0
Crew
1
Pax
© 2013 by TraffGo HT GmbH
Statistical durations
Mean duration
Standard deviation
Significant duration
Minimum duration
Maximum duration
seed
4715
--4850
4934
4870
File name
no file
no file
Group numbers and names
Route numbers and names
7-4
User Manual PedGo/AENEAS
Results
File
time distribution:
time /s:
741
frequency:
1
742
0
743
0
evacuation curves:
agents:
0
mean /s:
0
sign. /s:
0
max /s:
0
min /s:
0
31
34
38
41
28
62
44
48
49
38
calculated durations:
saved
seed
duration
4711
388
1019
4712
391
1019
4713
389
1019
4714
396
1019
…
…
© 2013 by TraffGo HT GmbH
saved agents
0
10 20
0
26 35
0
31 36
0
32 37
0
38 45
…
…
…
Explanation
Distribution of the calculated durations
Evacuation duration
Frequency of duration
744 …
8 …
93
52
53
57
45
Evacuation curves
Amount of saved agents
Time for the mean run
Time for the significant run
Time for the maximum run
Time for the minimum run
…
…
…
…
…
and times /s:
30
40
50
40
46
51
42
48
53
42
46
52
49
57
61
…
…
…
…
…
…
…
…
…
Amount of saved agents
One line per run with seed, duration, amount of
saved agents and the time when the amount of
agents named above where saved.
7-5
User Manual PedGo/AENEAS
7.1.5
Results
/LogPointData Mean Run/[logpointname].xls
For each log point, a file with its name is created containing all statistical data of all runs:
File
Explanation
PedGo mean run log points file:
customer: TraffGo HT
Name of licensee
project file: C:\logpoint\logpoint.pg2
Name of the project file
program version: 2.5.1.15
Program version number
log point name: Log
Name of logpoint
log point coordinates: (47, 23, 0)
Logpoints coordinates
size /m²: 1.1E3
Size of room
Beware: Older spread sheet calculation programs will have problems…
Reminder
Evaluation for this room only:
mean
/s
/(h:min:s)
seed
135
00:02:15
4721
Statistic data of room
Mean duration
significant
158
00:02:38
4790
Significant duration
min
106
00:01:46
4763
Minimum duration
max
174
00:02:54
4731
Maximum duration
time
quantil
agents/seed
/s
sign.
4711
4712
4713
4714
…
Agent amount for each run and
45
100
100
100
100
100
…
95% quantil of all runs
46
100
99
99
99
99
…
47
100
96
98
98
97
…
© 2013 by TraffGo HT GmbH
7-6
User Manual PedGo/AENEAS
7.1.6
Results
Evaluation Examples
With the use of a spread sheet software, various diagrams can be
created using the output file. One example is the evacuation curve.
It shows how many people were saved depending on time.
Evacuation Curve
3500
saved persons
3000
2500
2000
1500
1000
mean
min
500
max
0
0
60
120
180
240
300
360
420
480
540
600
660
720
780
840
900
960 1020 1080 1140 1200 1260
time /s
Fig. 65: The evacuation curve can be created using the mean result
file.
Fig. 66: Agent amounts in three rooms over time, generated from logpoint data.
© 2013 by TraffGo HT GmbH
7-7
User Manual PedGo/AENEAS
7.2
Results
Single Calculation
Most result files of the single run do not need any further explanation (animation, screenshots) or have already been described (density plot, 3D log file). Hence only the ASCII files of the options
Agent Data and Log points are described in detail. Like the mean
calculation the single run automatically creates the files demographics.xls and routedata.xls for documentation.
© 2013 by TraffGo HT GmbH
7-8
User Manual PedGo/AENEAS
7.2.1
Results
seed=[Seed].xls
The result file of a single run summarises the agent data and is divided in the two parts that are described below.
File
PedGo result file, single run:
customer: TraffGo HT
Project file: c:\demo\demo.pg2
Program version: 2.5.0.6
Explanation
Name of licensee
Name of the project file
Program version number
simulation time:
start:
12:21:56
end:
12:42:49
Seed:
duration /s:
Duration /(h:min:s):
agents:
Group Data:
Number
0
1
Name
Pax
Crew
System time at the start and end of the simulation
Seed of the calculation
Duration of run in seconds
Duration of run in hours:minutes:seconds
Amount of agents
4727
1062
542
File Name
no file
no file
Route Data (see 'routedata.xls' for details):
Number
Name
0
Crew
1
Pax
© 201 by TraffGo HT GmbH
Group numbers and names
Route numbers and names
7-9
User Manual PedGo/AENEAS
Results
sx
sy
sz
dx
dy
dz
#
[s]
Cells 0
0,25
0,5
0,75
1,0
<1
0 P/m²
mean v. 455
0
36
69
2
55
51
1
1
450
442
70
44
1
0
1
1
1
0
1
0
18
14
0
0
253
195
0
0
111
97
54
31
2
2
115
115
41
41
1
1
1
0,1
448
450
83
75
0
1
0
1
0
0
0
3
20
22
8
296
1
0
105
23
59
39
3
3
115
56
40
33
1
1
0,1
1
454
454
95
53
2
1
1
0
4
0
0
1
17
17
Individual walking duration
© 201 by TraffGo HT GmbH
<2
P/m²
<3
P/m²
<4
P/m²
<5
P/m²
<6
P/m²
>=6
P/m²
20
65
18
27
3
20
2
4
0
0
0
0
0
0
0
0
36
26
26
21
21
19
1
4
0
7
0
0
0
0
0
0
28
31
12
18
11
13
2
4
1
2
0
0
0
0
Duration, each agent spent in
the given densities.
Group
group
Explanation
Number of agent
File
Agent
risk density log /s
timer
Duration, the agent spent in a
room, blocked by a hazard.
dist. multiple of Vmax
Frequency at which the multiple
of the maximum walking
speed was used
time
Distance walked (in cells)
goal
Destination coordinates
dest. coord.
Start coordinates
start coord.
Addressed destinations
The second part contains the data of each agent sorted in lines. The last column with the demographic parameters of each agent is missing in the following table.
7-10
User Manual PedGo/AENEAS
7.2.2
Results
LogPoints,seed=[Seed].xls
Explanation
Name of licensee
Name of project file
Program version
Overview of log points
(see below)
Cell type
Name of log point
Coordinates
Number of log point
Size of room in m²
Result file
PedGo log points file:
customer: TraffGo HT
project file: C:\Users\Tim\temp\debug\logpoint\logpoint.pg2
program version: 2.5.1.15
defined points:
Number
x
y
z
name
size /m²
Type
0
15
24
0 Room 1
3.9E2
Floor
1
48
25
0 Room 2
4,00E+02 Door
2
80
25
0 Room 3
3.4E2
Floor
Explanation
File
In the log point file the amount of agents per time, densities and flows are listed for the defined log points. It is structured as follows:
First room
© 201 by TraffGo HT GmbH
…
Agent flow in room
0
0
2
1
1
…
Agents leaving
room
0
0
0
0
0
…
Room 2
density flow
Agents
…
/P/m²
/P/ms
/1
…
0.26
0
0 …
0.26
0.21
0 …
0.25
0.23
2 …
0.25
0.24
3 …
0.25
0.24
4 …
…
…
… …
Agent density in
room
out
/1
Agents entering
room
45
46
47
48
49
…
Room 1
Agents
in
/1
/1
100
100
98
97
96
…
Amount of agents in
room
Time
/s
Time in seconds
Explanation
Result file
Following, the log point data is listed:
Second room
7-11
User Manual PedGo/AENEAS
8
Glossary
Glossary
Agent
Here: A simulated person.
Cell
The grid area after discretising is called
cell.
Cellular automaton
Models used in discrete space to simulate
dynamic systems. The development of a
cell at the moment t+1 depends on the
state of this cell and its neighbouring cells
at the time t.
Day case
Demographic parameter distribution for the
day
case
according
to
IMO MSC./Circ.1238
Demographics
Here: The parameters describing the abilities of a group of agents.
Discrete space
Space divided in finite sections.
Discrete time
Time divided in finite sections.
Discretising
The extraction of a finite amount of data
from an infinite quantity of data.
Fundamental diagram
Diagram that shows the connection between agent density and agent flow. The
flow rises to a maximum. As soon as a
specific density of agents is reached the
flow drops.
IMO
International
www.imo.org
Initialize
Adjust the parameters to an initial situation.
Model
Simplified abstract copy of the reality for
scientific analyses.
Multi-agent-model
A system consisting of several similar or
different specialized acting agents that
© 2013 by TraffGo HT GmbH
Maritime
Organization:
8-1
User Manual PedGo/AENEAS
Glossary
solve a problem collectively.
Night case
Agent- and parameter distribution for the
night
case
according
to
IMO MSC.1/Circ.1238
Potential
Here: Value of a cell to calculate the direction. From a destination cell (lowest value)
the potential spreads via the neighbour
cells with rising value.
Random Shuffle
Here: The agents move in a random order.
Run
A simulation run from initialisation until all
agents are “saved”.
Seed
Initial value of a row of random numbers.
Self organisation
In the system theory basically describing a
form of system development, where forming, designing and restricting influences
come from the elements of the system
themselves.
Significant Duration
The duration which is longer then 95% of
several determined durations.
Specific flow
Unit: Agents per meter aisle width and
second.
Sub update
Part of an update. Each agent is moved at
max for one cell in a sub update.
Tdf-file
TraffGo-Data-File; In this file all drawing
data rounded on cells is saved.
Time step
The time that elapses during one update
step. Here: 1 second.
Trajectory
Path of an agent.
Update
The mode and order in that agents are
moved. The update takes one second and
consists of several sub update steps.
© 2013 by TraffGo HT GmbH
8-2
User Manual PedGo/AENEAS
9
Literature
Literature
You can find a broad bibliography on the homepage of
TraffGo HT GmbH.
[1]
Tim Meyer-König et al, Assessment and Analysis of
Evacuation Processes on Passenger Ships by Microscopic
Simulation, Pedestrian Evacuation Dynamics, Springer
Verlag 2001, (pp.297-302).
[2]
Klüpfel, H.; Meyer-König, T.; Wahle, J. & Schreckenberg, M.
(2000), Microscopic Simulation of Evacuation Processes on
Passenger Ships, in S. Bandini & T. Worsch, ed., 'ACRI
2000', Springer, London, (pp. 63—71).
[3]
Meyer-König, T. (2000), 'Simulation von Evakuierungsprozessen auf Fahrgastschiffen', Diploma Thesis, GerhardMercator-Universität Duisburg.
[4]
International Maritime Organization, MSC.1/Circ.1238,
Guidelines for Evacuation Analyses for new and Existing
Passenger Ships, IMO, Technical report, International Maritime Organization, Marine Safety Committee, London,
MSC/Circ. 1033.
[5]
Dirk Helbing; Verkehrsdynamik, Neue Physikalische Modellierungskonzepte; Springer Verlag; 1996.
[6]
Ulrich Weidmann; Transporttechnik der Fußgänger; Transporttechnische Eigenschaften des Fußgängerverkehrs; Literaturauswertung; Schriftenreihe des IVT Nr. 90; Januar 1992.
[7]
International Maritime Organization, FP46/WP.2, ANNEX 2,
Seite 4, Recommendation on Evacuation Analysis for
Passenger Ships and High-Speed Passenger Craft.
[8]
Hubert Klüpfel; A Cellular Automaton Model for Crowd
Movement and Egress Simulation, Dissertation, Universität
Duisburg, 2003.
© 2013 by TraffGo HT GmbH
9-1
User Manual PedGo/AENEAS
Literature
[9]
Ansgar Kirchner, Modellierung und Statistische Physik
Biologischer und Sozialer Systeme, Dissertation, Köln
University, 2002.
[10]
MSC-Circ.909 (1999), 'Interim Guidelines for a simplified
evacuation analysis on ro-ro passengers ships', IMO, Technical report, International Maritime Organization, MSC/Circ.
909 (replaced by MSC/Circ. 1033).
[11]
Dogliani, M. (2001), An Overview of Present and UnderDevelopment IMO's Requirements Concerning Evacuation
from Ships, in 'Pedestrian and Evacuation Dynamics', (pp.
339—354).
[12]
FSS-Code (2000), 'International Code For Fire Safety Systems (FSS Code)', IMO, Technical report, International Maritime Organization (IMO), Resolution MSC.98(73).
[13]
MSC-Circ.1001 (2001), 'Interim Guidelines for a Simplified
Evacuation Analysis Of High-Speed Passenger Craft', Technical report, International Maritime Organisation.
[14]
MSC-Circ.1033 (2002), 'Interim Guidelines for Evacuation
Analyses for New and Existing Passenger Ships', IMO, Technical report, International Maritime Organization, Marine Safety Committee, London, MSC/Circ. 1033. (superseded by
MSC.1/Circ.1238).
[15]
MSC-Circ.1166 (2005), 'Guidelines for a Simplified Evacuation Analysis for High-Speed Passenger Craft', Technical report, International Maritime Organisation.
[16]
IMO, ed. (2000), Safety of Life at Sea (SOLAS), Bath Press,
London.
[17]
Schadschneider, A.; Klingsch, W.; Klüpfel, H.; Kretz, T.; Rogsch, C. & Seyfried, A. (2009), Evacuation Dynamics: Empirical Results, Modeling and Applications, in Bob Meyers, ed.,
'Encyclopedia of Complexity and System Science', Springer, ,
pp. accepted for publication.
© 2013 by TraffGo HT GmbH
9-2
User Manual PedGo/AENEAS
Literature
[18]
Klingsch, W. & Schreckenberg, M., ed. (2008), Pedestrian
and Evacuation Dynamics 2008, Springer, Berlin.
[19]
Gattermann, P.; Waldau, N. & Schreckenberg, M., ed. (2006),
Pedestrian and Evacuation Dynamics 2005, Springer, Berlin.
[20]
Galea, E. R., ed. (2003), Pedestrian and Evacuation Dynamics 2003, CMS Press, London.
[21]
Schreckenberg, M. & Sharma, S., ed. (2002), Pedestrian and
Evacuation Dynamics 2001, Springer, Berlin.
[22]
Guideline on Microscopic Evacuation Analyses, RiMEA,
www.rimea.de
© 2013 by TraffGo HT GmbH
9-3