1
Schedulon
User Manual
Version 1.0
How to work with the Technomad Schedulon
Licensee Information
This document and its contents are furnished "as is" for informational purposes only,
and are subject to change without notice. Technomad does not represent or warrant
that any product or business plans expressed or implied will be fulfilled in any way. Any
actions taken by the user of this document in response to the document or its contents
will be solely at the risk of the user.
TECHNOMAD MAKES NO WARRANTIES, EXPRESSED OR IMPLIED, WITH
RESPECT TO THIS DOCUMENT OR ITS CONTENTS, AND HEREBY EXPRESSLY
DISCLAIMS ANY AND ALL IMPLIED WARRANTIES OF MERCHANTABILITY,
FITNESS FOR A PARTICULAR USE OR NON-INFRINGEMENT. IN NO EVENT
SHALL TECHNOMAD BE HELD LIABLE FOR ANY DIRECT, INDIRECT, SPECIAL
OR CONSEQUENTIAL DAMAGES IN CONNECTION WITH OR ARISING FROM
THE USE OF ANY PORTION OF THE INFORMATION.
Copyright © 2008 by Technomad. All rights reserved.
This document may not be reproduced, photocopied, displayed, transmitted or
otherwise copied, in whole or in part, in any form or by any means now known or later
developed, such as electronic, optical or mechanical means, without the written
agreement of Technomad . Any unauthorized use may be a violation of domestic or
international law.
Trademarks and Copyright
Technomad and the Technomad logo are trademarks of Technomad.
All other product or company names mentioned are used for identification purposes
only, and may be trademarks of their respective owner.
Technomad Schedulon User’s Manual
Page i of 65
Contents
Licensee Information..................................................................................................i
Trademarks and Copyright.........................................................................................i
Contents.....................................................................................................................i
About Schedulon.......................................................................................................3
Welcome.............................................................................................................3
Values and Benefits............................................................................................3
Undertanding this Manual..................................................................................3
Conventions.................................................................................................4
Schedulon Unit..........................................................................................................4
Audio Specifications...........................................................................................5
Playback:.....................................................................................................5
Recording:....................................................................................................5
Physical Specifications.......................................................................................5
Local Control Mode (LCM).................................................................................5
Controls..............................................................................................................6
Ports and Inputs.................................................................................................6
Front Panel..................................................................................................6
Back panel...................................................................................................6
The LCD Panel...................................................................................................7
Startup................................................................................................................7
Setup and Configuration...........................................................................................8
Configuring the Schedulon.................................................................................8
The LCM
............................................................................................................................8
Timing..........................................................................................................9
IP Address..................................................................................................10
Subnet........................................................................................................11
Router.........................................................................................................11
The Web Control Panel....................................................................................12
Logging In.........................................................................................................15
LCM Login..................................................................................................15
Web Interface.............................................................................................15
Interface..................................................................................................................17
The Local Control Mode (LCM)........................................................................17
Exiting........................................................................................................18
Quick Access.............................................................................................18
Web Control Panel...........................................................................................19
Exiting........................................................................................................20
Working With the Schedulon...................................................................................20
Status................................................................................................................21
Settings.............................................................................................................22
Web Based Control Panel.........................................................................22
LCM............................................................................................................25
Technomad Schedulon User’s Manual
Page i of 65
Remote Control.......................................................................................................32
Enabling the Remote Control...........................................................................32
Web Interface...................................................................................................32
Recording Audio......................................................................................................34
Web Interface...................................................................................................34
LCM..................................................................................................................35
Managing Files........................................................................................................37
Requirements...................................................................................................37
Uploading..........................................................................................................37
Renaming Files.................................................................................................38
Web Interface.............................................................................................39
Deleting Files....................................................................................................40
Web Interface.............................................................................................40
Knob Management..................................................................................................42
Setting Knob Positions.....................................................................................42
Web Interface.............................................................................................42
LCM............................................................................................................44
Clearing Knob Positions...................................................................................45
Web Interface.............................................................................................45
Scheduling...............................................................................................................46
Web Interface...................................................................................................46
Creating a Scheduled Task........................................................................47
Managing Existing Tasks...........................................................................48
LCM..................................................................................................................48
Editing a Scheduled Task..........................................................................49
Delete a Scheduled Task...........................................................................51
Turning a Scheduled Task On/Off..............................................................52
Moving a Scheduled Task..........................................................................52
Adding a Scheduled Item...........................................................................53
Playing Sounds.......................................................................................................55
Via Remote Control..........................................................................................55
Via the Knob.....................................................................................................55
Via CGI Command...........................................................................................55
Security...................................................................................................................56
Web Interface...................................................................................................56
LCM..................................................................................................................56
Appendix A: CGI Commands..................................................................................57
Parameters.......................................................................................................57
Syntax...............................................................................................................58
Appendix B: Quick LCM Access.............................................................................61
Technomad Schedulon User’s Manual
Page ii of 65
CHAPTER 1: ABOUT SCHEDULON
1
Chapter
About Schedulon
Welcome
The Schedulon is a 1U, rack-mountable automatic MP3 player/recorder with internal
clock and is ideal for themed entertainment, airport announcements, SFX, sports
facilities, and more. The TCP/IP-based Schedulon provides 1500 minutes of internal
storage, is upgradable via firmware flashing, and is completely configurable through a
web-based interface or an LCD front panel.
Values and Benefits
The Technomad Schedulon has a number of valuable benefits:
! Networkable—the Schedulon is easily networked so that it can be
configured and controlled remotely (including audio playback)
! Schedulable—the Schedulon can be schedule to play music at a certain
time or a certain interval (i.e., every 30 minutes). A robust internal Real-Time
Clock (RTC) or internet Time Server ensures accurate time
! Audio Line-in—the Schedulon includes stereo line-in jacks that encodes
recorded audio as high-quality (192kbps) MP3 sound files
! Multi-assignments—through the web-interface or front panel, music files
stored on the Schedulon can be assigned to one or more knob positions.
! Integration—the Schedulon integrates with your existing audio systems (i.e.
internal building audio systems) using standard line-level cables, or order it
with any Technomad Turnkey PA System.
Undertanding this Manual
This manual is organized accordingly:
! First, the manual gives you an understanding of how to operate and interact
with the Schedulon.
Technomad Schedulon User’s Guide
Page 3 of 65
CHAPTER 1: ABOUT SCHEDULON
! Next, the manual provides an understanding of how to setup and install the
device
! After that, the manual delves into the interfaces (both Web and LCM)
! Finally, each feature is broken down according to a tab in the web interface.
Where appropriate, these feature-based sections include the LCM
equivalent.
Conventions
This guide uses the following conventions to highlight certain words and phrases that
differentiate their meaning visually.
This style…
Indicates
For example:
italics
Notes regarding special
information about a feature
Note: You can also…
bold
A feature of the interface or
functionality within the
Technomad Schedulon
To open the document click on the
Open button.
2
Chapter
.
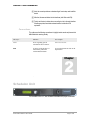
Schedulon Unit
The Schedulon Unit is a 1U, rack-mountable schedulable MP3 player and recorder.
Technomad Schedulon User’s Guide
Page 4 of 65
CHAPTER 1: ABOUT SCHEDULON
Audio Specifications
Playback:
! MP3 format audio, 32kbps to 320kbps
! Stereo or Mono
! Fixed or Variable Bit Rate
Recording:
! MP3 format audio, 192kbps, fixed bit rate, stereo
Physical Specifications
Attribute
Value
Dimensions
19”w x 1.75”h x 10”d
Weight
4lbs
Data input
RJ45 Ethernet jack
Audio input
1 x !” TRS (stereo), unbalanced, RCA standard, other connector types
available by special order
Audio output
1 x !” TRS (stereo), unbalanced, RCA standard, other connector types
available by special order
Mounting
Rackmount, 19” standard
Local Control Mode (LCM)
The Schedulon includes a Local Control Mode that allows complete control and
manipulation of the unit’s features without having to interact with it via the web-based
interface.
To access the LCM:
! Scroll to the last knob position with a sound assigned to it. If all positions are
filled, the last knob position will be 99.
Technomad Schedulon User’s Guide
Page 5 of 65
CHAPTER 1: ABOUT SCHEDULON
! Once the last position is reached, turn the knob clockwise one additional
time. This will display the LCM entry screen
Note: when the LCM entry screen displays, it will indicate the process for committing
changes, via the LCM, to the Schedulon unit. After changes are made using the LCM,
reset the device to set the changes.
Controls
The Schedulon unit has two primary controls:
! Knob—the knob turns clockwise and counterclockwise to navigate through
functionality and assigned music. It also presses inward to commit selections
and changes.
! Power Switch—the power switch turns the unit on and off
Ports and Inputs
The Schedulon unit has the following ports:
Front Panel
! RJ45—the RJ45 port on the front of the unit provides connectivity to a
standard network
! Serial Port—available through hatch
Back panel
! Line-Out—two standard 1 x !” TRS stereo speaker connections to connect
to your sound system
! Line-In—one standard 1 x !” TRS stereo connection for microphone
connection and audio recording
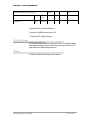
! Power—the table below provides information about the Schedulon power
requirements.
Item
Technomad Schedulon User’s Guide
output
P-P
output
RMS
working watts
V
current mA current mA AC
DC
Page 6 of 65
CHAPTER 1: ABOUT SCHEDULON
Schedulon in chassis w/ CD (not on)*
Schedulon**
2.7vac
max .
9vrms
Schedulon***
1.2vac
.250vrms
115vac
13
12vdc
8
130
250
100
* playing song .MP3 measured with Watts up
** measure p-p and RMS siren wail output 100%
*** output set to 70% matches CD player
The LCD Panel
The Schedulon’s primary interface is through the LCD panel. This LCD panel displays
all information accessible through the control. Upon system start (and idle), the LCD
panel displays the IP address assigned to the unit.
Startup
To startup the Schedulon, flick the power switch upwards.
Technomad Schedulon User’s Guide
Page 7 of 65
CHAPTER 3: SETUP AND CONFIGURATION
3
Chapter
Setup and Configuration
Prior to using the Schedulon, you must connect it to your network so that it can be
easily controlled via the web-based interface. The unit comes standard with the
following IP configuration:
! IP—192.168.1.2
! Subnet—255.255.255.0
Configuring the Schedulon
In order to configure the Schedulon, you must first enable it to connect to your
network. This can be done either through the LCM or Web-interface
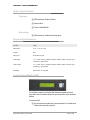
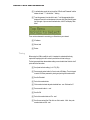
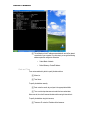
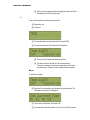
The LCM
! First, set the unit into local configuration mode (LCM) by turning the knob
one turn past the last music assignment until the above message appears.
! Press the knob until “Configuration” becomes “Entering Local Configuration
Mode” (approximately 5 seconds)
! Upon first entering the LCM , you will be required to specify your password.
The unit comes pre-configured with a default password of 0000.
CHAPTER 3: SETUP AND CONFIGURATION
! In authentication mode, the top line of the LCD will read “Password” and the
bottom will read “****” with the first “*” blinking.
! To set the password, turn the dial for each “*” until the appropriate digit is
displayed. Press the knob to advance to the next digit. When finished, press
the knob again. Upon successful authentication, the LCD will display “Main
Menu”
There are three elements to connecting your Schedulon to your network:
! IP address
! Subnet, and
! Router.
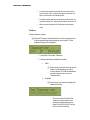
Timing
Before using the LCM to modify the unit, it is important to understand the timing
required for employing the knob in order to prevent the unit from locking up.
The timing example below demonstrates setting a new schedule item. Note the “wait”
points within the instructions.
! Scroll past last knob setting (i.e. 41: FX_XPL):
! Press encoder center button for 5 sec to enter LCM dialog. Then click again
to enter LCM. Enter password by turning and pushing the encoder switch.
! Scroll to 'Schedule'
! Push-click encoder button
! Click encoder clockwise beyond scheduled lines…see: "Add new line"?
! Press encoder button in…wait
! Scroll to 'file'
! Push-click encoder button on File…wait
! Scroll to see various files. Push-click on a file to select…Wait…then push
encoder button on Edit…wait
CHAPTER 3: SETUP AND CONFIGURATION
! Right click to Day. Scroll right to Daily, Monday etc. Push-click on choice and
wait…
! Back to Edit. Push-click then Right-click scroll to Time. Push-click on Time.
Set time using the encoder push and click functions…wait.
! Push click on Edit to continue editing or scroll to Exit and push-click…wait
! Push-click to Exit and Save. Wait…
! Scroll right to Exit and Push-click. Toggle-right with encoder switch between
Yes or No
! Push-click Yes to Exit
! This brings you to the IP display
! Reset the unit.
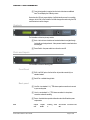
IP Address
To set the IP address using the LCM,
! From the Main Menu, turn the knob until the LCD reads “IP ADDRESS”
! Press the knob to select
! When the “IP ADDRESS” option is selected, the top line of the LCD will read
“Set IP Address” and the bottom line will display the IP address in the format
of “XXX.XXX.XXX.XXX” with the first “X” of the first set blinking.
! To set each digit of the IP address, turn the dial for each “X” until the
appropriate digit is displayed (0-9). Press the knob to advance to the next
digit.
! When all digits are set, the top line of the LCD will display “IP Address Set
to…” then “Click to Continue
CHAPTER 3: SETUP AND CONFIGURATION
Subnet
To set the subnet using the LCM,
! From the Main Menu, turn the knob until the LCD reads “SUBNET”
! Press the knob to select
! When the “SUBNET” option is selected, the top line of the LCD will read “Set
Subnet” and the bottom line will display the IP address in the format of
“XXX.XXX.XXX.XXX” with the first “X” of the first set blinking
! To set each digit of the subnet address, turn the dial for each “X” until the
appropriate digit is displayed (0-9). Press the knob to advance to the next
digit.
! When all digits are set, the top line of the LCD will display “Subnet Address
Set to…” then “Click to Continue
Router
To set the Router IP using the LCM,
! From the Main Menu, turn the knob until the LCD reads “ROUTER IP”
! Press the knob to select
! When the “ROUTER IP” option is selected, the top line of the LCD will read
“Set Router IP” and the bottom line will display the IP address in the format
of “XXX.XXX.XXX.XXX” with the first “X” of the first set blinking
CHAPTER 3: SETUP AND CONFIGURATION
! To set each digit of the Router IP address, turn the dial for each “X” until the
appropriate digit is displayed (0-9). Press the knob to advance to the next
digit.
! When all digits are set, the top line of the LCD will display “Router IP Address
Set to…” then “Click to Continue
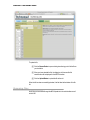
The Web Control Panel
To set the IP address via the Web control panel,
! Plug the unit, via the RJ45 port, to a computer using a crossover cable
! Configure the computer’s IP address to an address that matches the
configuration of the unit. So, if your Schedulon is set to 192.168.1.2 (default)
you might set your computer’s Local Area Connection to the following:
o
IP—192.168.1.200
! In configuring the unit the first time, you do not need to worry about the
gateway IP or DNS servers when manually setting your computer’s network
connection.
! Once you have configured your computer with the appropriate IP address
(so that it exists within the same network as the unit), open your web
browser to 192.168.1.2 This will allow you to configure the unit via the Webbased interface
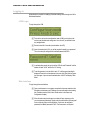
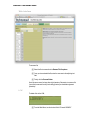
CHAPTER 3: SETUP AND CONFIGURATION
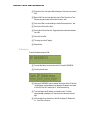
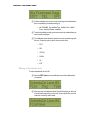
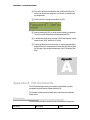
! When first entering the Web-based interface, you will be asked to
authenticate your identity. Simply enter the password (the username field is
not used). The default password is 0000.
! Upon successful authentication, you can navigate through the interface.
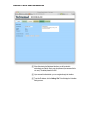
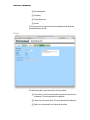
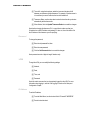
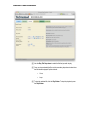
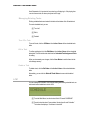
! To set the IP address, click the Settings Tab. This will display the Schedulon
Settings screen.
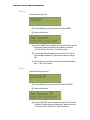
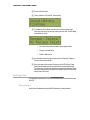
CHAPTER 3: SETUP AND CONFIGURATION
The configuration of the Schedulon’s network settings is specified in three fields:
! IP Address,
! Netmask (or Subnet), and
! Router IP Address
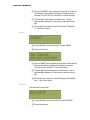
! For each of the specific fields, simply enter the appropriate IP address (as
per your network requirements) and click the Reboot Device Button. This
will reboot the Schedulon with the new network settings.
! At this time, you should reset your computer’s original network information
and connect the Schedulon to a switch or hub managed by your network.
! Once the Schedulon is properly situated in your network, open the web
browser on any PC connected to your network and browse to the IP address
you specified above.
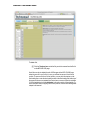
CHAPTER 3: SETUP AND CONFIGURATION
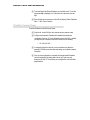
Logging In
Authentication is required for modifying Schedulon settings either through the LCM or
Web-based interface.
LCM Login
To login through the LCM,
! First, set the unit into local configuration mode (LCM) by turning the knob
one turn past the last music assignment. In a new unit, you shouldn’t have
any assigned slots.
! Press the knob for 5 seconds (as indicated on the LCD)
! Upon first entering the LCM , you will be required to specify your password.
The unit comes pre-configured with a default password of 0000.
! In authentication mode, the top line of the LCD will read “Password” and the
bottom will read “XXXX” with the first “X” blinking.
! To set the password, turn the dial for each “X” until the appropriate digit is
displayed. Press the knob to advance to the next digit. When finished, press
the knob again. Upon successful authentication, the LCD will display “Main
Menu”
Web Interface
To login through the web-interface,
! Open a web-browser on a computer connected to the same network as the
Schedulon and browse to its IP Address (for more information about setting
this IP address, see the Web Control Panel section in the Setup and
Configuration chapter)
! When the web-control panel opens, a window will pop-up asking you for
your username and password. Simply enter the password that you assigned
to the unit during Setup and Configuration. If you have not assigned a
password, the default password is 0000. The username is not required.
CHAPTER 3: SETUP AND CONFIGURATION
CHAPTER 4: INTERFACE
4
Chapter
Interface
The Schedulon provides two interfaces:
! The Local Control Mode (LCM), and
! The Web Control Panel.
The Local Control Mode (LCM)
The Local Control Mode (LCM) is accessible through the knob and LCD panel on the
front of the unit:
! By turning the knob, you can cycle through current music that has been
uploaded to the unit and select one to begin playing immediately
! You can perform a number of configuration and settings tasks by logging in
and navigating the LCM menu options. Note: these options will be described
in more detail in the appropriate section of this manual.
o
SET PASSWORD
o
TIME
o
DATE
o
LIBRARY
o
KNOB SET/RECORD
o
IP ADDRESS
o
SUBNET
o
ROUTER IP
o
REMOTE CONTROL
CHAPTER 4: INTERFACE
o
LOCKOUT
o
SCHEDULE
o
EXIT
! Upon successfully logging in to the LCM, you can navigate through the
menu options listed above by turning the knob.
! To dive into a menu option, simply press the knob
For more information about logging into the LCM, see the Logging-in section of this
manual.
Exiting
To exit the LCM mode and save any changes you have made, browse to the EXIT
top-level menu and press the knob. This will commit your changes to the unit’s nonvolatile memory and reboot the unit for the changes to take effect.
Quick Access
See Appendix B for a one-page quick-access guide to operating the LCM.
CHAPTER 4: INTERFACE
Web Control Panel
The Web Control Panel is divided into six main tabs:
! Status
! Settings
! Control
! MP3 Upload
! Knob Set, and
! Scheduler
To access the feature, simply click on the appropriate tab.
Each screen is divided into two main areas:
! Left—on the left-hand side of each tab screen are the tab controls. These
allow you to set unit-specific information
CHAPTER 4: INTERFACE
! Right—on the right-hand side of each tab screen are directions and
identifiers for the controls on the left.
Exiting
To exit from the Web-control panel, simply close your web browser. If you wish to
commit changes made during your session, you must click the appropriate buttons:
! Settings—if you change anything on the Settings tab, you need to click the
Reboot Button at the bottom to commit the changes to the unit’s nonvolatile flash memory and reboot the Schedulon
! Knob Set and Scheduler—click the Save Button to commit choices and
changes
Note: if you leave the unit in the LCM, you cannot make any changes. The unit must
be enabled and operating in normal mode for changes to be made through the webcontrol panel.
5
Chapter
.
Working With the Schedulon
Whether it’s working through the LCM or the Web-based interface, the Schedulon is
easily controlled and configured to meet your specific audio needs.
The following represent the features of the Technomad Schedulon:
! Status,
! Settings,
! Remote Control,
! Recording Audio,
! MP3 Files,
CHAPTER 4: INTERFACE
! Knob Management,
! Scheduling,
! Playing Sounds, and
! Security.
For this manual, each of the above features (where applicable) will be divided into
Web-based interface and LCM.
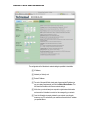
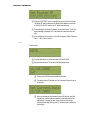
Status
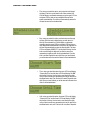
The Status tab provides a quick overview of the unit’s current status:
! Current Time—the unit’s current time (either using the unit’s internal clock or
a timeserver). This can be specified in the Settings tab.
! Volume—the unit’s current volume. This can be specified in the Settings tab.
! Mode—the current state of the unit. Options for this include:
CHAPTER 4: INTERFACE
o
Inactive—the unit is currently idle
o
{file name}—if a music file is currently playing, it is displayed here
o
Configuration—the unit is in LCM mode
! Timeserver—the IP address of the time server (if specified)
! Current refresh rate—how often the Web-based interface will refresh. To
change the rate, click the appropriate button:
o
Refresh every 2 seconds
o
Refresh every 5 seconds
o
Refresh every 10 seconds
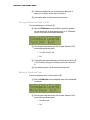
Settings
Web Based Control Panel
CHAPTER 4: INTERFACE
The Settings tab provides access to a number of Schedulon configuration settings
including:
! Volume,
! Network,
! Date/Time, and
! Password.
Volume
Use the drop-down menu to select the volume level in increments of 5%.
Network
You can specify the following:
! IP Address—the IP Address of the unit
! Netmask—the Subnet address of the unit
! Router IP address—the IP address of the router to be used by the unit (this
is for remote control and time-server connectivity)
If you don’t have critical network information available (i.e., subnet mask and routerIP/
gateway), you can obtain that information from the computer on which you are
working:
! Open a command prompt on your computer
! When the command prompt opens, enter “configip/all” and press the Enter
Key.
CHAPTER 4: INTERFACE
! This will display a list of IP addresses associated with each of the network
connections on your computer. From this output, you can get the following
address required to configure the Schedulon:
o
Subnet Mask = Netmask
o
Default Gateway = RouterIP Address
Date and Time
There are two methods by which to specify the date and time:
! Manual, or
! Time Server.
To specify the date/time manually:
! Date—enter the month, day, and year in the appropriate text fields.
! Time—use the drop-down menus to select the hours and minutes.
Note: once set, the unit will increment the date and time using its internal clock.
To specify the date/time using the time server,
! Timeserver IP—enter the IP address of the timeserver
CHAPTER 4: INTERFACE
! Time shift—using the drop-down, select the hours and minutes of shift
between your timezone and the timeserver. For example, if the time server is
in London and you are in California, the hour shift would be 8
! Timeserver State—use the drop-down to select to have the unit synchronize
automatically with the time server
! When finished, click the Update Timeserver Button to commit the changes
Note: before changing the timeserver IP, it is a good idea to make sure that your
Schedulon has a valid IP address and gateway. If it does not, it won’t be able to find
the IP address of the timeserver you are specifying.
Password
To change the password,
! Enter the old password first, then
! Enter the new password
! Click the Set Password button to commit the changes
Note: password must be 4 digits in length. Numbers only.
LCM
Through the LCM, you can modify the following settings:
! Network,
! Date,
! Time, and
! Password.
Note: this section assumes that you have already logged into the LCM. For more
information about logging in, see the LCM Logging-in Section of the Setup and
Configuration Chapter.
IP Address
To set the IP address,
! From the Main Menu, turn the knob until the LCD reads “IP ADDRESS”
! Press the knob to select
CHAPTER 4: INTERFACE
! When the “IP ADDRESS” option is selected, the top line of the LCD will read
“Set IP Address” and the bottom line will display an IP address masking in
the format of “XXX.XXX.XXX.XXX” with the first “X” of the first set blinking
! To set each digit of the IP address, turn the dial for each “X” until the
appropriate digit is displayed (0-9). Press the knob to advance to the next
digit.
! When all digits are set, the top line of the LCD will display “IP Address Set
to…” then “Click to Continue
Subnet
! From the Main Menu, turn the knob until the LCD reads “SUBNET”
! Press the knob to select
! When the “SUBNET” option is selected, the top line of the LCD will read “Set
Subnet” and the bottom line will display the IP address in the format of
“XXX.XXX.XXX.XXX” with the first “X” of the first set blinking
! To set each digit of the subnet address, turn the dial for each “X” until the
appropriate digit is displayed (0-9). Press the knob to advance to the next
digit.
! When all digits are set, the top line of the LCD will display “Subnet Address
Set to…” then “Click to Continue
Router IP
To set the Router IP using the LCM,
! From the Main Menu, turn the knob until the LCD reads “ROUTER IP”
! Press the knob to select
CHAPTER 4: INTERFACE
! When the “ROUTER IP” option is selected, the top line of the LCD will read
“Set Router IP” and the bottom line will display the IP address in the format
of “XXX.XXX.XXX.XXX” with the first “X” of the first set blinking
! To set each digit of the Router IP address, turn the dial for each “X” until the
appropriate digit is displayed (0-9). Press the knob to advance to the next
digit.
! When all digits are set, the top line of the LCD will display “Router IP Address
Set to…” then “Click to Continue
Date
To set the Date,
! From the Main Menu, turn the knob until the LCD reads “DATE”
! Press the knob to select. This will enter the Date Setting feature.
! The top of the LCD display will read the current date
! The bottom of the LCD will flash the “Set” command. Press the knob to
set the date.
! When you activate the Set command, the top LCD will then read “Set
Current Date” and the bottom will read the current date with the first
digit flashing. To change the date, simply use the knob to change
currently-activate digit (blinking) from 0-9. Press the knob to advance to
the next digit.
CHAPTER 4: INTERFACE
! When you have navigated through all the digits in the date, the LCM will
automatically return to the top-level menu
Time
There are two elements to time setting through the LCM:
! Manual time, and
! Timeserver
! From the Main Menu, turn the knob until the LCD reads “TIME”
! Press the knob to select. This will enter the Time set feature:
! The top of the LCD display will read the current time
! The bottom of the LCD will flash the “Set” command and the
“Timeserver” command. Use the knob to select either the “Set” option
(for manual) or the “Timeserver” option to specify timeserver settings.
Manual
To set the time manually,
! Select the “Set” command from the Time menu by pushing the knob. This
will display the following LCD configuration:
! The top of the LCD will read, “Set Current Time”
! The bottom of the LCD will be split into “H” (for hours”) and “M” (for minutes).
CHAPTER 4: INTERFACE
o
To set the hours, press the knob when the current value for the
hours is blinking. Then, use the knob to select a value from 1-24.
When you set the hour, the minutes will blink.
o
To set the minutes, press the knob when the current value for the
minutes is blinking. Then, use the knob to select a value from 1-60.
o
When you set the minutes, the LCM will return to the top-level
menu.
TimeServer
To specify timeserver settings,
! Select the “Timeserver” command from the Time menu by turning the knob
to set the command blinking and pushing the knob to select it. This will
display the following LCD configuration:
o
The top of the LCD will read, “Timeserver”
o
The bottom will have three additional commands:
!
Off/On:
! When blinking, press the knob to either turn the
feature on or off (depending upon what is
currently selected). The LCM will automatically
save the settings and return you to the
TimeServer menu.
!
IP address:
! When blinking, press the knob to display an IP
Address entry screen.
o
The top line of the LCD will read “Set
Timeserver” and the bottom line will
display an IP address masking in the
format of “XXX.XXX.XXX.XXX” with the
first “X” of the first set blinking
CHAPTER 4: INTERFACE
!
o
To set each digit of the timeserver address,
turn the dial for each “X” until the
appropriate digit is displayed (0-9). Press
the knob to advance to the next digit.
o
When all digits are set, the top line of the
LCD will display “Timeserver Address Set
to…” then “Click to Continue
Offset:
! When blinking, press the knob to display an
entry mechanism for an hour and minute offset
from the timeserver:
! The top line of the LCD will read
“Enter the time offset from the
timeserver to your location”
! The bottom of the LCD will flash the
“Set” command and the “Timeserver”
command. Use the knob to select
either the “Set” option (for manual) or
the “TimeServer” option to specify
timeserver settings.
Password
To specify a new password:
! From the Main Menu, turn the knob until the LCD reads “SET PASSWORD”
! Press the knob to select. This will enter the Password Set feature.
! The top line of the LCD will read “Set Password” and the bottom will
read “XXXX” with the first “X” blinking.
! To set the password, turn the dial for each “X” until the appropriate digit
is displayed. Press the knob to advance to the next digit. When finished,
press the knob again. This will automatically commit the settings and
return you to the main LCM menu.
CHAPTER 4: INTERFACE
.
CHAPTER 6: REMOTE CONTROL
6
Chapter
Remote Control
The remote control feature allows you to play sounds on the Schedulon unit from
within the web interface.
Enabling the Remote Control
The Remote control feature, by default, is enabled.
Web Interface
To play a file from the web interface,
CHAPTER 6: REMOTE CONTROL
! Use the Play File Drop-down to select the file that you wish to play
! Once you have selected the file, use the secondary drop-down to select how
the file should be played. Options include:
o
Once,
o
Loop
! To play the selected file, click the Play Button. To stop the playback, press
the Stop Button.
CHAPTER 7: RECORDING AUDIO
7
Chapter
Recording Audio
The Technomad Schedulon features a dedicated line-in to enable direct recording
(rather than file upload). Once a microphone is connected to the line-in, audio
recording can be controlled by the web-interface and the LCM.
Note: the Schedulon records in .MP3 format.
The Technomad Schedulon features a dedicated line-in audio input to enable direct
recording (rather than file upload). Like any recording device, audio levels should be
set before making the audio recording (connection to line level mixer output best) and
a quick test recording should be made.
The actual audio recording will take place through an audio input device (i.e.
microphone) connected to the sound system that is connected to your Schedulon
through the dedicated, stereo Line In connection on the back of the unit.
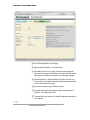
Web Interface
Recording audio from the web-interface is carried out through the Control Tab.
CHAPTER 7: RECORDING AUDIO
! Scroll to Recording Status on Control page
! Select unused knob position i.e. 41 (Knob Position)
! Set record level: Click on ‘Rec’ (Action) and send an audio signal to the
stereo Line Rec inputs of the Schedulon for 15 seconds. Click ‘Stop’ (action)
Note: Stereo Line Outputs are connected to your audio playback system
! Select knob position 41 (Play Knob Position) click ‘Play’. If the level is the
level you want. Proceed with recording process. Set the desired record level
now. Do not overdrive the Rec inputs.
! When your recording is through, click ‘Stop’. (Actions)
! Your audio recording has been assigned an alpha-numeric file name i.e.
060606F4 and is assigned to knob 41
! To rename this file, you must go to the “Knob Set’ page and save position 41
to ‘not selected’
LCM
To record audio via the LCM,
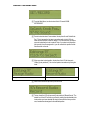
CHAPTER 7: RECORDING AUDIO
! From the Main Menu, turn the knob until the LCD reads “KNOB
SET/RECORD”
! Press the knob to select. Once selected, the top line will read “Select Knob
Pos.” This is because the first step to recording audio via the LCM is to
select the knob position to which to assign it. Turn the knob until you find an
open slot and press the knob to select it. Note: if you select a knob position
that currently has a file assigned to it, you will overwrite the position but the
file will remain on the unit.
! When you select a knob position, the top line of the LCD will change to
“Editing: {knob position #}.” You can then perform two actions by turning the
knob:
Assign Audio
Record Audio
! Select the record audio option and press the knob.
! The top line of the LCD will now read “{knob position #} Record Sound.” The
bottom line of the LCD will inform you that any existing sound attached to the
knob position you have selected will simply be moved to the library and the
new, recorded sound assigned to the selected position.
CHAPTER 7: RECORDING AUDIO
! To record the audio, turn the knob until the option on the bottom line of the
LCD reads “record.” Press the knob to begin recording. The bottom line of
the LCD will read, “recording…”
! To stop recording, press the knob again
! When you stop recording, the LCD will display a success message and then
present options for playback mode for the newly recorded file:
o
Loop
o
One-Time
o
Push-Hold
! Once you select a playback mode, you will be returned to the top-level
menu.
8
Chapter
Managing Files
The Technomad Schedulon includes 1GB of non-volatile storage for uploaded and
recorded audio files in .mp3 format.
Requirements
The Schedulon has the following audio file requirements:
! .MP3 only at present (but will play any bitrate up to 320kbps, fixed or VBR.
Uploading
Audio files can be uploaded through the MP3 Upload tab in the web-interface.
CHAPTER 7: RECORDING AUDIO
To upload a file,
! Click the Browse Button to open a dialog box allowing you to find the file on
your hard drive.
! When you have selected the file, the dialog box will close and the file
name/location will be displayed in the MP3 File textbox
! Click the Upload Button to upload the file to the unit
When the file has been successfully uploaded, it will be listed at the bottom of the file
list.
Renaming Files
Audio files can be renamed through the MP3 Upload tab in the web-interface as well
as the LCM
CHAPTER 7: RECORDING AUDIO
Web Interface
To rename a file,
! Select the file to rename from the Rename File Drop-down.
! Once you have selected the file, enter the new name in the adjoining text
field.
! Finally, click the Rename Button.
Note: file names cannot be longer than eight characters. Remember, to rename a file,
it must first be removed from any knob setting [knobset] or scheduled assignment
[scheduler].
LCM
To delete a file via the LCM,
! From the Main Menu, turn the knob until the LCD reads “LIBRARY”
CHAPTER 7: RECORDING AUDIO
! Press the knob to select
! The top line of the LCD will read, “Sound Library”
! To navigate to a file to delete, use the knob to scroll through the library.
When you reach the file you wish to remove, push the knob. This will display
three options for the file:
o
No—return to the library and take no action against the file
o
Rename—rename the file
o
Delete—delete the file
! Use the wheel to scroll through the options until the “Rename” is flashing.
Press the knob to select the file.
! When you select a file to rename, the top line of the LCD will read, “New
Name” and the bottom line will be the file with the first character flashing.
Turn the knob to cycle through numerical and alphabetical characters. Press
the knob to advance to the next letter. When finished, you will be returned to
the top level of the Library.
Deleting Files
Files uploaded or recorded to the unit can be deleted from both the web-interface and
the LCM.
Web Interface
Audio files can be deleted through the MP3 Upload tab in the web-interface.
CHAPTER 7: RECORDING AUDIO
To delete a file,
! Click the Trashcan Icon next to the file you wish to remove from the file list
on the MP3 UPLOAD page.
Note: files can only be deleted from the USB storage via the MP3 UPLOAD page
when they are not in use. If a file is in use, you will need to remove it from its knob
position. To remove a file from it’s Knob position, you may click the trashcan on the
knob setting line or enter the knob setting number in the knob setting field at the top of
the page and choose ‘not selected’ then set and save or remove it from the scheduler.
If it is a scheduled task, click the del button in the action section of the schedule. For
more information about configuring files to knob positions, see the Knob Management
chapter in this manual.
CHAPTER 7: RECORDING AUDIO
9
Chapter
Knob Management
The knob is the primary method by which audio is played on the unit. By assigning a
file to a knob position (from 1 to 99), the audio file can be easily played from the unit
simply by turning the knob to that position and pressing.
Through the web-interface and LCM, knob positions can be set and deleted.
Setting Knob Positions
The knob positions can be set via the web-interface and the LCM
Web Interface
Knob positions are set in the web-interface from the Knob Set Tab.
CHAPTER 7: RECORDING AUDIO
To set a knob position,
! First, enter a knob position in the Knob Text Field. Note: if you select a knob
position that is already filled, the new file will replace the existing file for that
position (the file will not be deleted).
! Next, select the file you want to assign to that position by using the File
Drop-down
! Then, select the playback mode for the knob position using the Mode Dropdown. Options include:
o
Once,
o
Loop, and
o
Push (the file will play as long as the knob is pressed in).
! Finally, click the Set Button to set the knob position.
! When you have made all the changes you wish to make to knob positions,
click the Save Button to confirm the changes to the unit
CHAPTER 7: RECORDING AUDIO
LCM
To assign an audio file to a knob position via the LCM,
! From the Main Menu, turn the knob until the LCD reads “KNOB
SET/RECORD”
! Press the knob to select. Once selected, the top line will read “Select Knob
Pos.” This is because the first step to recording audio via the LCM is to
select the knob position to which to assign it. Turn the knob until you find an
open slot and press the knob to select it. Note: if you select a knob position
that currently has a file assigned to it, you will overwrite the position but the
file will remain on the unit.
! When you select a knob position, the top line of the LCD will change to
“Editing: {knob position #}.” You can then perform two actions by turning the
knob:
Assign Audio
Record Audio
! Select the Assign Audio option and press the knob.
! The top line of the LCD will now read “{knob position #} Assign Sound.” Use
the knob to cycle through the library of sounds. The names of each file will
appear in the bottom line of the LCD.
CHAPTER 7: RECORDING AUDIO
! When you have identified the file to assign to the selected knob position,
press the knob. You will be returned to the top-level menu.
Clearing Knob Positions
The knob positions can be cleared via the web-interface and the LCM
Web Interface
Knob positions are cleared in the web-interface from the Knob Set Tab.
To clear a knob position,
! Click the Trash Can Icon next to the knob position you want to clear. Note:
the file will not be deleted.
CHAPTER 7: RECORDING AUDIO
10
Chapter
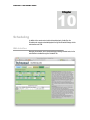
Scheduling
In addition to the remote control and knob-based playback of audio files, the
Schedulon also supports scheduled playback through the Schedule Manager via the
web-interface and LCM.
Web Interface
Managing the schedule, which includes adding and deleting schedule tasks, via the
web-interface is handled through the Scheduler Tab.
CHAPTER 7: RECORDING AUDIO
The Scheduler tab is broken into two primary areas:
! Creating a scheduled task, and
! Managing existing tasks.
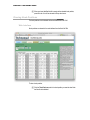
Creating a Scheduled Task
A scheduled task represents the playback of an audio file according to specific
parameters (such as day/time to play, file to play, and how to play it). For each
scheduled task, you can specify the following through the Scheduled Task
Assignment Table:
! Insert—each task can be scheduled in relation to other tasks. Select where
the new task should be inserted:
o
Before,
o
After, or
o
Replace an existing task.
! Task—set the task number that applies to the order of insertion
! Status—use the Status Drop-down to set the task to either Active or
Inactive
! File—use the drop-down to select the file to which the task applies
! Date/Day—select a specific date (using the date drop-downs) or a day (for
every week playback)
! Frequency—using the At, until, Every, and Repeat fields, you can specify
the frequency of the task
o
At—select the time at which to start the playback of the select
audio file
o
Until—select a time at which to stop the playback.
o
Every—set a number of minutes at which to repeat the file
o
Repeat—set a number of times the file should repeat
! To save the task immediately, click the Set Task Button. This will store the
task in memory.
! To permanently save the task to the unit’s non-volatile flash memory, click
the Save Button.
CHAPTER 7: RECORDING AUDIO
Note: Remember: It is important to know how long a file playing is. If the playing time
runs into the next task, the lower priority task will not play.
Managing Existing Tasks
Existing scheduled tasks are located in the table at the bottom of the Scheduler tab.
For each scheduled task, you can:
! Turn it off,
! Edit it,
! Delete it.
Turn Off a Task
To turn off a task, click the Off Button in the Action Column of the scheduled tasks
table.
Edit a Task
To edit an existing task, click the Edit Button in the Action Column of the scheduled
tasks table. This will load the task detail into the Scheduled Task Assignment Fields
for editing.
When you have made your changes, click the Save Button to confirm them into the
units storage memory.
Delete a Task
To delete a task, click the Del Button in the Action Column of the scheduled tasks
table.
Alternatively, you can click the Delete All Tasks Button to remove all scheduled
tasks.
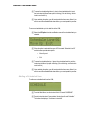
LCM
You can manage the schedule, which includes editing and deleting schedule tasks, as
well as add new schedule items via the LCM.
! From the Main Menu, turn the knob until the LCD reads “SCHEDULE”
! Press the knob to select. Once selected, the top line will read “Schedule.”
The bottom line displays, “Scroll down to view/edit”
CHAPTER 7: RECORDING AUDIO
! To find a scheduled task, turn the knob to scroll through the scheduled tasks.
Each one will display (horizontally scrolling) as;
o
##: FILENAME Day: datefield Time: timefield Until: untilfield
Every: everyfield Repeat: repeatfield
! To enter the modification mode, push the knob when the scheduled task you
want to modify is displayed.
! The modification mode includes six options that can be scrolled through with
the knob. To select an option, push the knob in when it blinks:
o
EDIT
o
DEL
o
OFF/ON
o
DOWN
o
UP
o
EXIT
Editing a Scheduled Task
To edit a scheduled task via the LCM,
! Select the EDIT Option from the modification menu of the scheduled task
you selected.
! When you select a schedule task to edit, the LCM will present you with a list
of menu items through which you can scroll. To set a specific item, push the
knob when it is blinking. Items include:
CHAPTER 7: RECORDING AUDIO
o
File—when you select this option, use the knob to scroll through
the library. Push the knob to select the file. When selected, the
LCM will display a confirmation message (using the upper LCD line
and lower LCD line) that you have assigned the sound to the
specific scheduled task. You will then be automatically returned to
the item list menu for the scheduled task.
o
Day—when you select this option, use the knob to scroll through
the days. Push the knob to select the day you wish when it is
blinking. When selected, the LCM will display a confirmation
message (using the upper LCD line and lower LCD line) that you
have assigned the scheduled task to the specific day selected. You
will then be presented with an option to select the date. The lower
LCD line will display “MM/DD/YY” with the first M blinking. Use the
knob to scroll through the digits until you find the correct one
representing the date you wish for the scheduled task. Push the
knob in to select. Repeat for each digit. When you have finished,
you will be returned to the main item menu for the scheduled task.
o
Time—when you select this option, the upper LCD line will display
“Choose Start Time” and the lower LCD line will display “HH:MM”
with the first H blinking. Use the knob to scroll through the digits
until you find the correct one representing the time you wish for the
scheduled task to start. Push the knob in to select. Repeat for each
digit. When you have finished, you will be returned to the main item
menu for the scheduled task.
o
Until—when you select this option, the upper LCD line will display
“Choose Until Time” and the lower LCD line will display “HH:MM”
with the first H blinking. Use the knob to scroll through the digits
until you find the correct one representing the time you wish for the
scheduled task to work until. Push the knob in to select. Repeat for
CHAPTER 7: RECORDING AUDIO
each digit. When you have finished, you will be returned to the
main item menu for the scheduled task.
o
Every—when you select this option, the upper LCD line will display
“Choose Every Interval” and the lower LCD line will display “MMM”
with the first M blinking. Use the knob to scroll through the digits
until you find the correct one representing the number of minutes
you wish for the scheduled task to work. Push the knob in to select.
Repeat for each digit. When you have finished, you will be returned
to the main item menu for the scheduled task.
o
Repeat—when you select this option, the upper LCD line will
display “Choose Repeat” and the lower LCD line will display “**”
with the first * blinking. Use the knob to scroll through the digits until
you find the correct one representing the number of times you wish
the scheduled task to repeat within the time frame specified. Push
the knob in to select. Repeat for each digit. When you have
finished, you will be returned to the main item menu for the
scheduled task.
o
Exit—save settings and return to the list of scheduled tasks
Delete a Scheduled Task
To delete a scheduled task via the LCM,
! Select the DEL Option from the modification menu of the scheduled task
you selected.
! When the DEL option is selected, the upper LCD line reads “Schedule Line
XX” and the bottom provides two options:
o
Delete, and
o
Exit
CHAPTER 7: RECORDING AUDIO
! To delete the scheduled item, push the knob when the delete option is
blinking (if it’s not blinking, use the knob to scroll until it is)
! Upon selecting delete, you will be returned to the item menu
Turning a Scheduled Task On/Off
To turn a scheduled task on or off via the LCM,
! Select the OFF/ON Option from the modification menu of the scheduled
task you selected. Note: the actual name of the item “On” or “Off” depends
upon the current state of the selected scheduled task.
! When the option is selected, the upper LCD line reads “Schedule Line XX”
and the bottom provides two options:
o
Turn Off (or Turn On), and
o
Exit
! To change the state of the scheduled item, push the knob when the Turn Off
or Turn On option is blinking (if it’s not blinking, use the knob to scroll until it
is)
! Upon selecting the option, you will be returned to the item menu
Moving a Scheduled Task
To move a scheduled task down in the task list via the LCM,
! Select the DOWN Option from the modification menu of the scheduled task
you selected.
! When the option is selected, the upper LCD line reads “Schedule Line XX”
and the bottom provides two options:
o
Move Down, and
o
Exit
CHAPTER 7: RECORDING AUDIO
! To move the scheduled task down 1 place in the scheduled task list, push
the knob when the Move Down option is blinking (if it’s not blinking, use the
knob to scroll until it is)
! Upon selecting the option, you will be returned to the item menu. Note: if you
wish to move the scheduled task down further, you must repeat this process.
To move a scheduled task up in the task list via the LCM,
! Select the UP Option from the modification menu of the scheduled task you
selected.
! When the option is selected, the upper LCD line reads “Schedule Line XX”
and the bottom provides two options:
o
Move Up, and
o
Exit
! To move the scheduled task up 1 place in the scheduled task list, push the
knob when the Move Up option is blinking (if it’s not blinking, use the knob to
scroll until it is)
! Upon selecting the option, you will be returned to the item menu. Note: if you
wish to move the scheduled task down further, you must repeat this process.
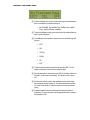
Adding a Scheduled Item
To add a new scheduled task from the LCM,
! From the Main Menu, turn the knob until the LCD reads “SCHEDULE”
! Press the knob to select. Once selected, the top line will read “Schedule.”
The bottom line displays, “Scroll down to view/edit”
CHAPTER 7: RECORDING AUDIO
! To find a scheduled task, turn the knob to scroll through the scheduled tasks.
Each one will display (horizontally scrolling) as;
o
##: FILENAME Day: datefield Time: timefield Until: untilfield
Every: everyfield Repeat: repeatfield
! To enter the modification mode, push the knob when the scheduled task you
want to modify is displayed.
! The modification mode includes six options that can be scrolled through with
the knob:
o
EDIT
o
DEL
o
OFF/ON
o
DOWN
o
UP
o
EXIT
! To add the new item, scroll once past the last menu item (Exit). This will
display an Add option. Press the knob to select this option.
! When the Add option is selected, the upper LCD line will display “Add Line to
Schedule?” and the lower line will display, “Click to add, or scroll on top to
exit”
! Push the knob button to create a new scheduled task one number higher
than the highest schedule number. So, if the last scheduled task is number
15, this will create number 16. Note: this makes the new task the lowest in
priority.
! Creating the details of the new scheduled task is identical to editing an
existing task. For more information, read the appropriate section on editing a
task through the LCM.
CHAPTER 11: PLAYING SOUNDS
11
Chapter
Playing Sounds
The Schedulon has two output connections (left and right) on the back panel for stereo
output to your sound system.
Audio files loaded onto the Schedulon can be played back in a number of ways:
! Via remote control (through the web-interface),
! Via the knob on the unit, and
! Via CGI network command.
Via Remote Control
Playback of audio files by remote control through the web-interface is explained in the
Remote Control chapter.
Via the Knob
To playback audio files using the knob on the Schedulon unit,
! From the unit, turn the knob until you find the file you wish to play and press
the knob. This will display on the top-line of the LCD. When you press the
knob, the file will immediately begin to play.
! You can then also assign a follow-up file to play via the second line of the
LCD, following the same instructions as above.
Note: Any sounds triggered from the front knob and screen interrupt any scheduled
sounds playing - but the scheduled sounds resume at the next event once front-knob
playback stops.
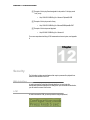
Via CGI Command
You can also initiate playback of audio through CGI command sent to the IP address
of the unit. For example:
CHAPTER 11: PLAYING SOUNDS
! Example of link to play Sound assigned to knob position 7 with play mode
"one" (once):
o
http://192.168.0.30/BAS.cgi?rc=1&sound=7&plmod$=ONE
! Example of link to play sound in library,
o
http://192.168.0.30/BAS.cgi?rc=2&name$=BS&plmod$=ONE
! Example of link to stop sound playback:
o
http://66.92.95.105/BAS.cgi?rc=1&sound=0
For a more comprehensive listing of CGI commands and correct syntax, see Appendix
A.
12
Chapter
Security
The Schedulon includes security features that require a password for playback from
either the web-interface or the LCM.
Web Interface
In order to access the Control tab of the web-interface, you must enter the
authentication password specified in the Settings tab. Upon successful authentication,
you will be able to access all of the tabs.
LCM
In order to access the LCM, you must provide the assigned password,
CHAPTER 11: PLAYING SOUNDS
! First, set the unit into local configuration mode (LCM) by turning the knob
one turn past the last music assignment. In a new unit, you shouldn’t have
any assigned slots.
! Press the knob for 5 seconds (as indicated on the LCD)
! Upon first entering the LCM , you will be required to specify your password.
The unit comes pre-configured with a default password of 0000.
! In authentication mode, the top line of the LCD will read “Password” and the
bottom will read “XXXX” with the first “X” blinking.
! To enter the password, turn the dial for each “X” until the appropriate digit is
displayed. Press the knob to advance to the next digit. When finished, press
the knob again. Upon successful authentication, the LCD will display “Main
Menu”
A
Appendix
Appendix A: CGI Commands
The CGI Command feature allows you to remotely control playback by sending
commands through the Common Gateway Interface (CGI).
The Schedulon includes a small, light-weight web server that receives commands
through Port 80.
Parameters
The following table provides an overview of some of the available CGI parameters:
Parameter
Description
Values
CHAPTER 11: PLAYING SOUNDS
rc
Numerical command issued to unit
to begin action
1, 2, 3
name$
The name of the file without
extension
NA
plmod$
The play mode for the file.
ONE=play once
LOOP=play continuously
Sound
Starting and stopping playback
0=stop playback
1=start playback
B524
Knob lockout
0 = lockout
1 = not lockout
KREC
Knob position
Number associated with a
free knob position (for
recording)
L
Name of page that initiates
command to unit
i.e., control.html
Syntax
The following is the syntax for all CGI commands:
! Location: the URL of your Schedulon unit. For example: “http://192.168.1.5/
! CGI Application: the name of the CGI application (BAS.cgi)
! rc command
! file name (optional)
! command
Below are some examples of CGI commands and an explanation of the actions they
perform. Note: this examples utilize an IP address of 192.168.0.30. For correct
operation with your Schedulon unit, you must replace this IP address with the actual IP
address of your unit.
! Play a Knob Sound
o
COMMAND: http://192.168.0.30/BAS.cgi?
rc=1&sound=1&plmod$=ONE
!
PARAMETERS:
!
rc = 1 (play knob sound function)
CHAPTER 11: PLAYING SOUNDS
!
sound = knob position to play, 1, 2 ... to 99
!
plmod = play mode, ONE or LOO
! Play a file
o
COMMAND: http://192.168.0.30/BAS.cgi?
rc=2&name$=NINETEEN&plmod$=ONE
!
PARAMETERS
!
rc = 2 (play a file function)
!
name = file name to play, 1, 2 ... to 99
!
plmod = play mode, ONE or LOO
! Stop Playing
o
COMMAND: http://192.168.0.30/BAS.cgi?rc=1&sound=0
o
COMMAND: http://192.168.0.30/BAS.cgi?rc=2&name$=
o
PARAMETERS:
!
None
! Knob Lockout
o
COMMAND: http://192.168.0.30/setup.cgi?L=reboot.html&B524=1
o
COMMAND: http://192.168.0.30/setup.cgi?L=reboot.html&B524=1
!
PARAMETERS:
! B524=1 set knob lockout on
! B524=0 set knob lockout off
Note: this command stores the setting in the non-volatile memory and
causes a device reset.
!
Start Recording
o
COMMAND: http://192.168.0.30/BAS.cgi?
KREC=0&RC=3&L=control.html
o
PARAMETERS:
!
rc = 3 (start recording function)
CHAPTER 11: PLAYING SOUNDS
!
!
KREC is a free knob position
Stop Recording
o
COMMAND: http://192.168.0.30/BAS.cgi?KREC=0&L=control.html
o
PARAMETERS:
!
None
APPENDIX B: LCM QUICK ACCESS
B
Appendix
Appendix B: Quick LCM Access
LCM Function
Steps
Configuration Mode
Scroll past last knob setting
Push and hold control knob until password displays
Enter password by turning knob at each star until
correct digit displays and then pressing the knob
Play a Sound
Cycle knob through sounds
Press knob to play selected sound
Reset Device (in the event that the firmware is
update or the device freezes)
depress the reset button all the way for one second