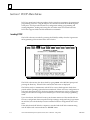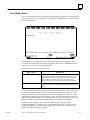
1
ÎÎ
GE Fanuc Automation
Programmable Control Products
t
Series 90 PCM
Development Software
(PCOP)
User’s Manual
GFK-0487C
May 1993
GFL–002
Warnings, Cautions, and Notes
as Used in this Publication
Warning
Warning notices are used in this publication to emphasize that hazardous voltages,
currents, temperatures, or other conditions that could cause personal injury exist in this
equipment or may be associated with its use.
In situations where inattention could cause either personal injury or damage to
equipment, a Warning notice is used.
Caution
Caution notices are used where equipment might be damaged if care is not taken.
Note
Notes merely call attention to information that is especially significant to understanding
and operating the equipment.
This document is based on information available at the time of its publication. While
efforts have been made to be accurate, the information contained herein does not
purport to cover all details or variations in hardware or software, nor to provide for
every possible contingency in connection with installation, operation, or maintenance.
Features may be described herein which are not present in all hardware and software
systems. GE Fanuc Automation assumes no obligation of notice to holders of this
document with respect to changes subsequently made.
GE Fanuc Automation makes no representation or warranty, expressed, implied, or
statutory with respect to, and assumes no responsibility for the accuracy, completeness,
sufficiency, or usefulness of the information contained herein. No warranties of
merchantability or fitness for purpose shall apply.
The following are trademarks of GE Fanuc Automation North America, Inc.
Alarm Master
CIMPLICITY
CIMPLICITY 90–ADS
CIMPLICITY PowerTRAC
CIMSTAR
GEnet
Genius
Genius PowerTRAC
Helpmate
Logicmaster
Modelmaster
ProLoop
PROMACRO
Series One
Series Three
Series Five
Copyright 1993 GE Fanuc Automation North America, Inc.
All Rights Reserved
Series Six
Series 90
VuMaster
Workmaster
Preface
The Programmable Coprocessor Module (PCM), from GE Fanuc Automation North
America, Inc., is a high-performance microcomputer designed to perform coprocessor
functions in a Series 90 PLC system. It combines the function of the Communications
Module (CCM) and the ASCII/BASIC Module (ABM), used on the Series Six
programmable logic controller (PLC), into a single module with significantly greater
capacity and performance than that of the ASCII/BASIC Module.
t
t
Content of this Manual
This manual contains the following chapters and appendixes:
Chapter 1. Introduction: provides a brief introduction to the PCM development
software, referred to as PCOP.
Chapter 2. Installing the PCM Software: describes how to install PCOP on the hard
disk of your computer.
Chapter 3. Using PCOP to Program the PCM: describes how to use PCOP functions for
configuration editing, programming, and running MegaBasic; loading and saving files;
and other status and control functions.
Chapter 4. Using PCOP to Configure the PCM: describes how to use the configuration
editor and the configuration data used to configure the PCM.
Chapter 5. Using PCOP in Expert Mode: describes how to use PCOP commands
instead of the menu function softkeys.
Appendix A. PCOP Menu Structure: diagrams the PCOP menu structure and available
software function keys.
Appendix B. Configuration Data: lists the assigned values and default value for each
field on the configuration data records.
Appendix C. PCOP File Descriptions: lists the files placed on the PCM programmer’s
hard disk during the INSTALL procedure.
Appendix D. CONFIG.SYS File: describes how to edit a CONFIG.SYS file using the
EDLIN line editor. For more complete information on using EDLIN commands and
features, refer to your MS-DOS manual.
GFK-0487
iii
Preface
Related PCM Publications
For more information on PCM, refer to these publications:
t
Series 90 Programmable Coprocessor Module and Support Software User’s Manual
(GFK-0255).
t Programming Language Reference Manual (GFK-0256).
MegaBasic
Programmable Coprocessor Module (PCM) Quick Reference Guide (GFK-0260).
PCM Development Software (PCOP) Quick Reference Guide (GFK-0657).
PCM Support Software (TERMF) Quick Reference Guide (GFK-0655).
Important Product Information for PCM Development Software (PCOP) (GFK-0352).
Important Product Information for PCM Support Software (TERMF) (GFK-0654).
t
Important Product Information for Series 90t-30 PCM (GFK-0494).
Important Product Information for Series 90 -70 PCM (GFK-0351).
Related Series 90 Publications
For more information on Series 90 programmable controllers, refer to these publications:
t
Series 90 -70 Programmable Controller Installation Manual (GFK-0262).
t 90-70 Programming Software User’s Manual (GFK-0263).
Logicmaster
t
Series 90t-30 Programmable Controller Installation Manual (GFK-0356).
Logicmastert 90 Series 90t-30 and 90-20 Programming Software User’s Manual (GFK-0466).
Series 90t-30/90-20 Programmable Controllers Reference Manual (GFK-0467).
Series 90t PLC Serial Communications User’s Manual (GFK-0582).
Series Sixt Data Communications Manual (GEK-25364).
Series 90t-70 Programmable Controller User’s Guide to the Integration of Third Party VME
Series 90 -70 Programmable Controller Reference Manual (GFK-0265).
Modules (GFK-0448).
We Welcome Your Comments and Suggestions
At GE Fanuc Automation, we strive to produce quality technical documentation. After
you have used this manual, please take a few moments to complete and return the
Reader ’s Comment Card located on the next page.
Linda R. McCoy
Sr. Technical Writer
iv
Series 90 PCM Development Software (PCOP) User’s Manual – May 1993
GFK-0487
Contents
Chapter 1
Chapter 2
Chapter 3
Introduction . . . . . . . . . . . . . . . . . . . . . . . . . . . . . . . . . . . . . . . . . . . . . . .
1-1
PCOP Functions . . . . . . . . . . . . . . . . . . . . . . . . . . . . . . . . . . . . . . . . . . . . . . .
Using PCOP to Configure the PCM . . . . . . . . . . . . . . . . . . . . . . . . . . . . . . .
Expert Mode . . . . . . . . . . . . . . . . . . . . . . . . . . . . . . . . . . . . . . . . . . . . . . . . . .
1-1
1-1
1-1
Installing the PCM Software . . . . . . . . . . . . . . . . . . . . . . . . . . . . . . . .
2-1
AUTOEXEC.BAT and CONFIG.SYS Files . . . . . . . . . . . . . . . . . . . . . . . . . .
Installing PCOP . . . . . . . . . . . . . . . . . . . . . . . . . . . . . . . . . . . . . . . . . . . . . . .
Local Configuration File . . . . . . . . . . . . . . . . . . . . . . . . . . . . . . . . . . . . . . . .
Connecting the PCM to the Programmer . . . . . . . . . . . . . . . . . . . . . . . . . .
Diagnosing Serial Communication Problems . . . . . . . . . . . . . . . . . . . . . . .
2-1
2-2
2-6
2-7
2-8
Using PCOP to Program the PCM . . . . . . . . . . . . . . . . . . . . . . . . . . . .
3-1
Section 1: PCOP Main Menu . . . . . . . . . . . . . . . . . . . . . . . . . . . . . . .
3-2
Invoking PCOP . . . . . . . . . . . . . . . . . . . . . . . . . . . . . . . . . . . . . . . . . . . . . . . .
Initially Selecting/Creating a Program Folder . . . . . . . . . . . . . . . . . . . . . . .
Accessing the PCOP Main Menu . . . . . . . . . . . . . . . . . . . . . . . . . . . . . . . . .
Message Line . . . . . . . . . . . . . . . . . . . . . . . . . . . . . . . . . . . . . . . . . . . . . . . . .
Expert Mode . . . . . . . . . . . . . . . . . . . . . . . . . . . . . . . . . . . . . . . . . . . . . . . . . .
Special Key Commands . . . . . . . . . . . . . . . . . . . . . . . . . . . . . . . . . . . . . . . . .
Key Summary . . . . . . . . . . . . . . . . . . . . . . . . . . . . . . . . . . . . . . . . . . . . . . . . .
Section 2: MegaBasic . . . . . . . . . . . . . . . . . . . . . . . . . . . . . . . . . . . . . .
Accessing MegaBasic from PCOP . . . . . . . . . . . . . . . . . . . . . . . . . . . . . . . .
Returning to PCOP . . . . . . . . . . . . . . . . . . . . . . . . . . . . . . . . . . . . . . . . . . . .
Section 3: TERMF . . . . . . . . . . . . . . . . . . . . . . . . . . . . . . . . . . . . . . . . .
Invoking TERMF . . . . . . . . . . . . . . . . . . . . . . . . . . . . . . . . . . . . . . . . . . . . . .
Returning to PCOP . . . . . . . . . . . . . . . . . . . . . . . . . . . . . . . . . . . . . . . . . . . .
Section 4: Status Functions . . . . . . . . . . . . . . . . . . . . . . . . . . . . . . . . .
Error Display Screen . . . . . . . . . . . . . . . . . . . . . . . . . . . . . . . . . . . . . . . . . . .
Section 5: Control Functions . . . . . . . . . . . . . . . . . . . . . . . . . . . . . . . .
Changing PCM Configuration Mode . . . . . . . . . . . . . . . . . . . . . . . . . . . . .
Executing a Task . . . . . . . . . . . . . . . . . . . . . . . . . . . . . . . . . . . . . . . . . . . . . . .
Stopping a Task . . . . . . . . . . . . . . . . . . . . . . . . . . . . . . . . . . . . . . . . . . . . . . . .
Redefining the User LEDs . . . . . . . . . . . . . . . . . . . . . . . . . . . . . . . . . . . . . . .
Section 6: Program Folder Functions . . . . . . . . . . . . . . . . . . . . . . . . .
Creating/Selectinga Program Folder . . . . . . . . . . . . . . . . . . . . . . . . . . . . . .
Deleting a Program Folder . . . . . . . . . . . . . . . . . . . . . . . . . . . . . . . . . . . . . .
Backing up the Current Program Folder . . . . . . . . . . . . . . . . . . . . . . . . . . .
Restoring the Current Program Folder . . . . . . . . . . . . . . . . . . . . . . . . . . . .
Clearing the Current Program Folder . . . . . . . . . . . . . . . . . . . . . . . . . . . . .
Listing the Contents of the Current Program Folder . . . . . . . . . . . . . . . .
Copying a Program Folder . . . . . . . . . . . . . . . . . . . . . . . . . . . . . . . . . . . . . .
GFK–0487C
Series 90 PCM Development Software (PCOP) User’s Manual – May 1993
v
3-2
3-4
3-5
3-6
3-6
3-7
3-7
3-8
3-8
3-8
3-9
3-9
3-9
3-10
3-11
3-12
3-13
3-14
3-15
3-16
3-18
3-19
3-20
3-21
3-22
3-23
3-24
3-25
Contents
Section 7: Program Utility Functions . . . . . . . . . . . . . . . . . . . . . . . . .
Chapter 4
Saving a File from the PCM . . . . . . . . . . . . . . . . . . . . . . . . . . . . . . . . . . . . .
3-28
Loading a File to the PCM . . . . . . . . . . . . . . . . . . . . . . . . . . . . . . . . . . . . . . .
3-29
Directory of Files . . . . . . . . . . . . . . . . . . . . . . . . . . . . . . . . . . . . . . . . . . . . . .
3-30
Deleting a File . . . . . . . . . . . . . . . . . . . . . . . . . . . . . . . . . . . . . . . . . . . . . . . . .
3-31
Deleting all Files on the PCM . . . . . . . . . . . . . . . . . . . . . . . . . . . . . . . . . . . .
3-32
Using ADS Software . . . . . . . . . . . . . . . . . . . . . . . . . . . . . . . . . . . . . . . . . . .
3-33
Using the GDS Software . . . . . . . . . . . . . . . . . . . . . . . . . . . . . . . . . . . . . . . .
3-34
Using PCOP to Configure the PCM . . . . . . . . . . . . . . . . . . . . . . . . . .
4-1
Section 1: Configuration Editor . . . . . . . . . . . . . . . . . . . . . . . . . . . . .
4-2
Section 2: Edit Configuration Data Menu . . . . . . . . . . . . . . . . . . . .
4-3
Saving a Configuration . . . . . . . . . . . . . . . . . . . . . . . . . . . . . . . . . . . . . . . . .
4-5
Screen Definitions . . . . . . . . . . . . . . . . . . . . . . . . . . . . . . . . . . . . . . . . . . . . .
4-5
Help Text . . . . . . . . . . . . . . . . . . . . . . . . . . . . . . . . . . . . . . . . . . . . . . . . . . . . .
4-6
Select Field . . . . . . . . . . . . . . . . . . . . . . . . . . . . . . . . . . . . . . . . . . . . . . . . . . . .
4-6
Section 3: Standard Configuration Functions . . . . . . . . . . . . . . . . .
4-7
Default Configuration Data . . . . . . . . . . . . . . . . . . . . . . . . . . . . . . . . . . . . .
4-7
Hardware Configuration Data . . . . . . . . . . . . . . . . . . . . . . . . . . . . . . . . . . .
4-8
MegaBasic Interpreter Data . . . . . . . . . . . . . . . . . . . . . . . . . . . . . . . . . . . . .
4-9
Configuring a PCM for MegaBasic Programs . . . . . . . . . . . . . . . . . . . . . . .
4-11
CCM Configuration Data . . . . . . . . . . . . . . . . . . . . . . . . . . . . . . . . . . . . . . .
4-12
CCM Detail Data . . . . . . . . . . . . . . . . . . . . . . . . . . . . . . . . . . . . . . . . . . . . . .
4-15
Serial Port Initialization Data . . . . . . . . . . . . . . . . . . . . . . . . . . . . . . . . . . . .
4-16
Redefining the User LEDs . . . . . . . . . . . . . . . . . . . . . . . . . . . . . . . . . . . . . . .
4-18
Section 4: Advanced Configuration Functions . . . . . . . . . . . . . . . .
Chapter 5
3-26
4-20
Programmer Communications and File Server Data . . . . . . . . . . . . . . . .
4-20
Commentary Data . . . . . . . . . . . . . . . . . . . . . . . . . . . . . . . . . . . . . . . . . . . . .
4-22
Read Configuration Data . . . . . . . . . . . . . . . . . . . . . . . . . . . . . . . . . . . . . . .
4-23
Write Configuration Data . . . . . . . . . . . . . . . . . . . . . . . . . . . . . . . . . . . . . . .
4-24
Using PCOP in Expert Mode . . . . . . . . . . . . . . . . . . . . . . . . . . . . . . . .
5-1
ADS . . . . . . . . . . . . . . . . . . . . . . . . . . . . . . . . . . . . . . . . . . . . . . . . . . . . . . . . .
5-2
ADV . . . . . . . . . . . . . . . . . . . . . . . . . . . . . . . . . . . . . . . . . . . . . . . . . . . . . . . . .
5-3
BASIC . . . . . . . . . . . . . . . . . . . . . . . . . . . . . . . . . . . . . . . . . . . . . . . . . . . . . . . .
5-3
CCM . . . . . . . . . . . . . . . . . . . . . . . . . . . . . . . . . . . . . . . . . . . . . . . . . . . . . . . . .
5-3
GFK–0487C
Series 90 PCM Development Software (PCOP) User’s Manual – May 1993
vi
Contents
CFG and CHE . . . . . . . . . . . . . . . . . . . . . . . . . . . . . . . . . . . . . . . . . . . . . . . .
CLEAR . . . . . . . . . . . . . . . . . . . . . . . . . . . . . . . . . . . . . . . . . . . . . . . . . . . . . . .
COMMNT . . . . . . . . . . . . . . . . . . . . . . . . . . . . . . . . . . . . . . . . . . . . . . . . . . . .
CONFIG . . . . . . . . . . . . . . . . . . . . . . . . . . . . . . . . . . . . . . . . . . . . . . . . . . . . .
CTL . . . . . . . . . . . . . . . . . . . . . . . . . . . . . . . . . . . . . . . . . . . . . . . . . . . . . . . . . .
DEFLTS . . . . . . . . . . . . . . . . . . . . . . . . . . . . . . . . . . . . . . . . . . . . . . . . . . . . . .
ERRORS . . . . . . . . . . . . . . . . . . . . . . . . . . . . . . . . . . . . . . . . . . . . . . . . . . . . . .
EXIT . . . . . . . . . . . . . . . . . . . . . . . . . . . . . . . . . . . . . . . . . . . . . . . . . . . . . . . . .
FBAKUP . . . . . . . . . . . . . . . . . . . . . . . . . . . . . . . . . . . . . . . . . . . . . . . . . . . . . .
FCLEAR . . . . . . . . . . . . . . . . . . . . . . . . . . . . . . . . . . . . . . . . . . . . . . . . . . . . . .
FCOPY . . . . . . . . . . . . . . . . . . . . . . . . . . . . . . . . . . . . . . . . . . . . . . . . . . . . . . .
FDEL . . . . . . . . . . . . . . . . . . . . . . . . . . . . . . . . . . . . . . . . . . . . . . . . . . . . . . . .
FDIR . . . . . . . . . . . . . . . . . . . . . . . . . . . . . . . . . . . . . . . . . . . . . . . . . . . . . . . . .
FOLDER . . . . . . . . . . . . . . . . . . . . . . . . . . . . . . . . . . . . . . . . . . . . . . . . . . . . .
FLOCK . . . . . . . . . . . . . . . . . . . . . . . . . . . . . . . . . . . . . . . . . . . . . . . . . . . . . . .
FRESTR . . . . . . . . . . . . . . . . . . . . . . . . . . . . . . . . . . . . . . . . . . . . . . . . . . . . . .
FSEL . . . . . . . . . . . . . . . . . . . . . . . . . . . . . . . . . . . . . . . . . . . . . . . . . . . . . . . . .
GDS . . . . . . . . . . . . . . . . . . . . . . . . . . . . . . . . . . . . . . . . . . . . . . . . . . . . . . . . .
HELP . . . . . . . . . . . . . . . . . . . . . . . . . . . . . . . . . . . . . . . . . . . . . . . . . . . . . . . .
LED . . . . . . . . . . . . . . . . . . . . . . . . . . . . . . . . . . . . . . . . . . . . . . . . . . . . . . . . . .
LOAD . . . . . . . . . . . . . . . . . . . . . . . . . . . . . . . . . . . . . . . . . . . . . . . . . . . . . . . .
MB . . . . . . . . . . . . . . . . . . . . . . . . . . . . . . . . . . . . . . . . . . . . . . . . . . . . . . . . . .
MDEL . . . . . . . . . . . . . . . . . . . . . . . . . . . . . . . . . . . . . . . . . . . . . . . . . . . . . . . .
MDIR . . . . . . . . . . . . . . . . . . . . . . . . . . . . . . . . . . . . . . . . . . . . . . . . . . . . . . . .
PORTS . . . . . . . . . . . . . . . . . . . . . . . . . . . . . . . . . . . . . . . . . . . . . . . . . . . . . . .
READ . . . . . . . . . . . . . . . . . . . . . . . . . . . . . . . . . . . . . . . . . . . . . . . . . . . . . . . .
RUN . . . . . . . . . . . . . . . . . . . . . . . . . . . . . . . . . . . . . . . . . . . . . . . . . . . . . . . . .
SAVE . . . . . . . . . . . . . . . . . . . . . . . . . . . . . . . . . . . . . . . . . . . . . . . . . . . . . . . . .
STASK . . . . . . . . . . . . . . . . . . . . . . . . . . . . . . . . . . . . . . . . . . . . . . . . . . . . . . . .
STATUS . . . . . . . . . . . . . . . . . . . . . . . . . . . . . . . . . . . . . . . . . . . . . . . . . . . . . .
STN . . . . . . . . . . . . . . . . . . . . . . . . . . . . . . . . . . . . . . . . . . . . . . . . . . . . . . . . . .
STOP . . . . . . . . . . . . . . . . . . . . . . . . . . . . . . . . . . . . . . . . . . . . . . . . . . . . . . . .
TERMF . . . . . . . . . . . . . . . . . . . . . . . . . . . . . . . . . . . . . . . . . . . . . . . . . . . . . . .
USE . . . . . . . . . . . . . . . . . . . . . . . . . . . . . . . . . . . . . . . . . . . . . . . . . . . . . . . . . .
UTILTY . . . . . . . . . . . . . . . . . . . . . . . . . . . . . . . . . . . . . . . . . . . . . . . . . . . . . . .
VERSION . . . . . . . . . . . . . . . . . . . . . . . . . . . . . . . . . . . . . . . . . . . . . . . . . . . .
WRITE . . . . . . . . . . . . . . . . . . . . . . . . . . . . . . . . . . . . . . . . . . . . . . . . . . . . . . .
5-4
5-4
5-5
5-5
5-5
5-6
5-6
5-6
5-7
5-7
5-8
5-8
5-9
5-9
5-9
5-10
5-10
5-11
5-11
5-12
5-13
5-14
5-14
5-15
5-15
5-15
5-16
5-17
5-17
5-18
5-18
5-19
5-19
5-20
5-21
5-21
5-21
Appendix A
PCOP Menu Structure . . . . . . . . . . . . . . . . . . . . . . . . . . . . . . . . . . . . . .
A-1
Appendix B
Configuration Data . . . . . . . . . . . . . . . . . . . . . . . . . . . . . . . . . . . . . . . . .
B-1
Appendix C
PCOP File Descriptions . . . . . . . . . . . . . . . . . . . . . . . . . . . . . . . . . . . . .
C-1
Appendix D
CONFIG.SYS File . . . . . . . . . . . . . . . . . . . . . . . . . . . . . . . . . . . . . . . . . .
D-1
GFK–0487C
Series 90 PCM Development Software (PCOP) User’s Manual – May 1993
vii
Contents
Figure A-1. PCOP Main Menu . . . . . . . . . . . . . . . . . . . . . . . . . . . . . . . . . . . . . . . . . . . . . . . . . . . . . . . . . . .
A-1
Figure A-2. Edit Configuration Data . . . . . . . . . . . . . . . . . . . . . . . . . . . . . . . . . . . . . . . . . . . . . . . . . . . . . .
A-2
GFK–0487C
Series 90 PCM Development Software (PCOP) User’s Manual – May 1993
ix
Contents
Table B-1. HWID Data . . . . . . . . . . . . . . . . . . . . . . . . . . . . . . . . . . . . . . . . . . . . . . . . . . . . . . . . . . . . . . . . . .
B-1
Table B-2. MegaBasic Interpreter Data . . . . . . . . . . . . . . . . . . . . . . . . . . . . . . . . . . . . . . . . . . . . . . . . . . . .
B-1
Table B-3. CCM Configuration Data . . . . . . . . . . . . . . . . . . . . . . . . . . . . . . . . . . . . . . . . . . . . . . . . . . . . . .
B-2
Table B-4. CCM Detail Data . . . . . . . . . . . . . . . . . . . . . . . . . . . . . . . . . . . . . . . . . . . . . . . . . . . . . . . . . . . . . .
B-2
Table B-5. Serial Port Initialization Data . . . . . . . . . . . . . . . . . . . . . . . . . . . . . . . . . . . . . . . . . . . . . . . . . . .
B-3
Table B-6. LED Data
...................................................................
B-3
Table B-7. Edit Annotation Data . . . . . . . . . . . . . . . . . . . . . . . . . . . . . . . . . . . . . . . . . . . . . . . . . . . . . . . . . .
B-3
Table B-8. Programmer and File Server Data . . . . . . . . . . . . . . . . . . . . . . . . . . . . . . . . . . . . . . . . . . . . . . .
B-4
GFK–0487C
Series 90 PCM Development Software (PCOP) User’s Manual – May 1993
x
Restarts for autonumbers that do not restart in each chapter. figure bi level 1, reset table_big level 1, reset chap_big level 1, reset1 Lowapp
0lwbox 0app_big level 1, resetA figure_ap level 1, reset table_ap level 1, reset figure level 1, reset table level 1, reset these restarts oddbox
reset: 0evenbox reset: 0must be in the header frame of chapter 1. a:ebx, l 1 resetA a:obx:l 1, resetA a:bigbx level 1 resetA a:ftr level 1 resetA
c:ebx, l 1 reset1 c:obx:l 1, reset1 c:bigbx level 1 reset1 c:ftr level 1 reset1 Reminders for autonumbers that need to be restarted manually (first
instance will always be 4) let_in level 1: A. B. C. letter level 1:A.B.C. num level 1: 1. 2. 3. num_in level 1: 1. 2. 3. rom_in level 1: I. II. III. roman
level 1: I. II. III. steps level 1: 1. 2. 3.
Chapter
1 Introduction
1
section level 1 1
figure bi level 1
table_big level 1
This manual describes how to use the PCM development software (PCOP) to develop
applications for the PCM. If the PCOP software is not yet installed, please refer to
chapter 2 of this manual for instructions. For information on installing the PCM
hardware and configuring the PCM using Logicmaster 90 programming software,
please refer to the Series 90 Programmable Coprocessor Module and Support Software User’s
Manual, GFK-0255.
t
PCOP Functions
The PCM development software (PCOP) provides functions for configuration editing,
programming and running MegaBasic; loading and saving files; and other status and
control functions. PCOP also supports folder and file maintenance commands. All of
these functions are accessed through the PCOP main menu, which is described in
chapter 3, Using PCOP to Program the PCM.
Using PCOP to Configure the PCM
The PCM configuration editor allows you to edit the User Configuration Data (UCDF)
that controls the PCM system configuration. Chapter 4, Using PCOP to Configure the
PCM, describes how to access standard and advanced configuration functions through
the Edit Configuration Data menu.
Expert Mode
Expert mode in PCOP reduces the number of keystrokes required for entering
commands by providing shortcuts which may be used in place of the menu function
softkeys. Refer to chapter 5, Using PCOP in Expert Mode, for information on this
advanced programming feature of PCOP.
GFK-0487
1-1
Chapter
2
2 Installing the PCM Software
section level 1 1
figure bi level 1
table_big level 1
In order to use the PCM development software (PCOP), it must be installed on the hard
disk of the programmer. This chapter explains the INSTALL procedure.
Note
MS-DOS version 3.1, or higher, must already be installed on the hard
disk of your MS-DOS based computer.
The installation procedure creates or updates the \PCOP and \PCOP\BAT
subdirectories on the hard disk. The files that are installed in these directories are listed
in appendix C, PCOP File Descriptions.
AUTOEXEC.BAT and CONFIG.SYS Files
Before starting to install the PCM software, check the content of the hard disk root
directory (you can use the DIR function) to see whether there are already files named
CONFIG.SYS and AUTOEXEC.BAT present. PCOP requires files with these names in
the root directory.
Copies of both files are provided with the software; they can be installed automatically.
If the hard disk already has these two files, you will be asked during the installation
process whether to modify them; or, if you prefer, you can edit the existing files for use
with the programmer software.
Caution
If Logicmaster 90 software has already been installed on your
computer, it saved your original AUTOEXEC.BAT and CONFIG.SYS
files as AUTOEXEC.L90 and CONFIG.L90, respectively. When you
install PCOP, the current versions of AUTOEXEC.BAT and
CONFIG.SYS will be copied to AUTOEXEC.L90 and CONFIG.L90,
destroying the backup copies of your original files.
If you want to keep backup copies of your original files, copy them to
files with different extensions:
copy AUTOEXEC.L90 AUTOEXEC.BAK
copy CONFIG.L90 CONFIG.BAK
GFK-0487
2-1
2
The System Configuration file ( CONFIG.SYS ) is a text file which establishes the system
configuration for the software. Different software packages use different system
configuration files. For all PCM applications, the file must contain at least these two
lines, which can be added by the INSTALL program:
Buffers=15
Files=20
You can use the TYPE command to check the content of an existing CONFIG.SYS file.
For information about editing the CONFIG.SYS file, please refer to appendix D,
CONFIG.SYS File.
The AUTOEXEC.BAT file must have the following added to the existing path:
(drive ID):\PCOP\BAT
where (drive ID) is the hard disk drive where PCOP is installed. This can be done by
the INSTALL procedure. After you have checked the root directory, continue with the
installation steps below.
Running Other Software with the CONFIG.SYS File for PCM
Other types of software may require different entries in the CONFIG.SYS file. It is not
always possible to combine the requirements for multiple software packages in one
CONFIG.SYS file. In that case, you must maintain multiple versions of the
CONFIG.SYS file. Your MS-DOS manual contains more information about the
CONFIG.SYS file.
Installing PCOP
The following procedure describes how to use the INSTALL procedure on a programmer
with a hard disk.
2-2
1.
If you have not already done so, start up the computer using MS-DOS.
2.
Insert the PCOP diskette into the computer’s diskette drive.
3.
At the MS-DOS prompt, enter the designation of the diskette drive followed by a
colon. For example, if the diskette is in drive A, type: A: and press the Enter key.
4.
Begin the installation procedure by typing: INSTALL and pressing the Enter key.
5.
Read the licensing agreement.
Series 90 PCM Development Software (PCOP) User’s Manual – May 1993
GFK-0487
2
GE FANUC AUTOMATION
NORTH AMERICA, INC.
PCOP (c)
INSTALLATION PROGRAM
COPYRIGHT (c) 1988 GE FANUC AUTOMATION NORTH AMERICA, INC.
Published in a limited, copyright sense and all rights,
including trade secret rights are reserved. Unauthorized
use of the information or program is strictly prohibited.
Installation of this software reaffirms acceptance of the
terms and conditions of the license agreement distributed
with this product.
PRESS <ENTER> TO CONTINUE INSTALLATION OR <ESC> TO EXIT
Pressing the Enter key after reading this screen means you agree to comply with the
stated terms. Pressing the Escape key terminates INSTALL and returns you to
MS-DOS.
If you press the Enter key, the screen displays:
The PCOP installation process involves transferring files from one
or more distribution diskettes to the hard disk on your computer.
Please enter the destination drive (or use the default drive that
is provided).
DESTINATION DRIVE
(Hard disk)
: C
Press <ENTER> to accept selection or <ESC> to exit
GFK-0487
6.
Specify the hard disk drive and press the Enter key, or just press the Enter key if the
default is correct.
7.
First, the INSTALL procedure creates the PCOP directory in the root directory of the
specified drive.
Chapter 2 Installing the PCM Software
2-3
2
8.
INSTALL checks the AUTOEXEC.BAT and CONFIG.SYS files in the root directory
of the hard disk. These files must contain certain commands to ensure that the PCM
software executes properly. If neither file exists, they are both created. If either file
already exists, INSTALL will ask you if the file should be automatically updated.
Modifications must be made to the AUTOEXEC.BAT and CONFIG.SYS
files in order for the PCOP software to execute properly.
Should these changes be made automatically (Y/N) ?
Y
If you want the AUTOEXEC.BAT and CONFIG.SYS files to be automatically
modified, enter Y or press the Enter key. If there were already versions of those
files in the root directory, they are renamed to AUTOEXEC.L90 and CONFIG.L90,
respectively.
Note
If your computer has more than one hard disk drive (or you have a large
hard drive which is partitioned into two or more logical drives), and you
install PCOP on a hard drive which is not the one your computer boots
from, the AUTOEXEC.BAT and CONFIG.SYS files created by the
install program will have no effect. For example, if your computer has a
C: and D: drive and it boots from the C: drive, then installing PCOP on
the D: drive will cause new AUTOEXEC.BAT and CONFIG.SYS files to
be created on the D: drive. These will have no effect when your
computer is powered up or reset.
In this case, you will need to modify the AUTOEXEC.BAT and
CONFIG.SYS files on your boot drive manually. See appendix D,
CONFIG.SYS File, for instructions on using the EDLIN utility to modify
the CONFIG.SYS file. You can also use any text editor program which
produces ASCII text files.
It is easy to identify your boot drive. It is the current drive (usually C:)
after your computer completes its power-up initialization.
Caution
If Logicmaster 90 software has already been installed on your
computer, it saved your original AUTOEXEC.BAT and CONFIG.SYS
files as AUTOEXEC.L90 and CONFIG.L90, respectively. When you
install PCOP, the current versions of AUTOEXEC.BAT and
CONFIG.SYS will be copied to AUTOEXEC.L90 and CONFIG.L90,
destroying the backup copies of your original files.
If you want to keep backup copies of your original files, copy them to
files with different extensions:
copy AUTOEXEC.L90 AUTOEXEC.BAK
copy CONFIG.L90 CONFIG.BAK
2-4
Series 90 PCM Development Software (PCOP) User’s Manual – May 1993
GFK-0487
2
If you already have AUTOEXEC.BAT and/or CONFIG.SYS files and plan to edit
them, enter N. The following screen is displayed:
The following modifications must be made to the AUTOEXEC.BAT and
CONFIG.SYS files for the PCOP software to execute properly.
AUTOEXEC.BAT
Append the following subdirectory name to the existing path:
C:\PCOP\BAT
CONFIG.SYS
Modify the maximum number of files and buffers to at least:
BUFFERS=15
FILES=20
Delete the following line, if present:
DEVICE=GEXDISK.SYS
CONFIRM : Should these changes be made automatically (Y/N) ?
9.
N
If you change your mind and want INSTALL to update the AUTOEXEC.BAT and
CONFIG.SYS files automatically, press Y. Otherwise, press N or the Enter key.
10. All the files needed for PCOP are now installed. INSTALL attempts to create two
subdirectories on the hard disk and transfers the appropriate files to those
subdirectories.
Installing PCOP on C:
If this is a first time installation, all necessary subdirectories
will be created and the files copied. If PCOP already exists, it
will be updated from the distribution diskette. This installation
will take several minutes.
WORKING
If the subdirectories already exist, any files in them are overwritten with the new
files being installed.
GFK-0487
Chapter 2 Installing the PCM Software
2-5
2
11. After all the files have been transferred, the final installation screen is displayed:
The PCOP software installation is complete. Please remove the
distribution diskette from the floppy drive and reboot the
computer by pressing the key sequence CTRL–ALT–DEL. When the
DOS prompt returns, type PCOP to run the PCOP software.
12. Remove the diskette from the disk drive, and store the diskettes in a safe location.
13. The computer must now be re-booted in order to complete the INSTALL procedure.
Press CTRL-ALT-DELETE to re-boot the computer.
14. If you are using a Workmaster industrial computer, skip to step 15. If you are using a
Workmaster II industrial computer or other MS-DOS based computer, you need to
use the TERMSET program to modify the TERM.DAT file for your computer. For
more information, refer to chapter 2, section 4, TERMF Installation and Configuration,
of the Series 90 Programmable Coprocessor Module and Support Software User’s Manual,
GFK-0255.
15. Then, continue with the information on the next page on connecting the PCM to the
programmer.
Local Configuration File
If you frequently use more than one setup, you can save each configuration in its own
file. You can name the local configuration file by specifying it when you invoke
TERMSET, as follows:
TERMSET [new filename]
For example, to run PCOP on an IBM personal computer with an EGA display and on an
IBM personal computer with a monochrome display, type TERMSET TERM.EGA and
answer the questions about your first setup (a color monitor driven by an EGA graphics
card). TERMSET saves this data to a file named TERM.EGA, instead of TERM.DAT.
Then, create a file named TERM.MON to describe the monochrome monitor by typing
TERMSET TERM.MON.
Whenever you need to change your configuration to the EGA setup, type:
COPY TERM.EGA TERM.DAT
PCOP
Or, for the monochrome monitor, type:
COPY TERM.MON TERM.DAT
PCOP
You could also specify which file to use when you invoke PCOP, as follows:
PCOP TERM.MON
2-6
Series 90 PCM Development Software (PCOP) User’s Manual – May 1993
GFK-0487
2
Connecting the PCM to the Programmer
To connect the PCM to the programmer:
1.
Connect the cable between the PCM and the IBM PC-XT, PC-AT, Workmaster II,
Workmaster, or CIMSTAR I industrial computer, to the top port on the PCM and the
serial port on the PC.
2.
After the MS-DOS prompt is displayed on the command line, type PCOP.
3.
Press the Restart/Reset pushbutton for more than 5 seconds to initiate a hard reset
and place the PCM in program mode.
4.
PCOP can detect when the PCM is connected and should set (within approximately
10 seconds) the ONLINE flag. This flag is displayed close to the bottom of the
display screen. PCOP can also detect when the PCM is disconnected and will then
display the NO COMM flag, after a short delay.
The information displayed on this screen includes a copyright statement and software
version number. Please note this version number. If the software version on the PCM is
not compatible with PCOP, an error message is reported and PCOP will not continue.
If you are using the special 91-key keyboard, which was designed for Logicmaster
programming software packages, some of the cursor-positioning keys are not available.
However, this keyboard can be put into an IBM PC-compatible mode by pressing
CTRL-ALT-S. It is highly recommended that you use an IBM PC-XT keyboard so that
you can use these special cursor keys.
GFK-0487
Chapter 2 Installing the PCM Software
2-7
2
Diagnosing Serial Communication Problems
Before proceeding, verify that the OK LED on the PCM is on. If the LED is off, refer to
the Series 90 Programmable Coprocessor Module and Support Software User’s Manual,
GFK-0255.
This procedure is used to determine if there is a hardware problem with the PCM, cable,
or programmer serial ports.
1.
Verify that both the PCM and the programmer are using the same type of
handshaking ( HARDWARE, SOFTWARE, or NONE ).
2.
Verify that the cable connections are correct, and that the cable is firmly secured at
both ends. (Refer to appendix A, PCM Cabling Information, in GFK-0255.)
3.
Press the PCM Restart/Reset pushbutton for more than 5 seconds. The middle light
on the PCM should blink. If it does not, remove the connector from the PCM,
jumper pins 4 and 5 on the PCM with a paper clip, and press the Restart/Reset
pushbutton again for more than 5 seconds. If the LED still does not blink at least
once, there is a problem with the PCM. Otherwise, the cable, programmer
configuration, or programmer hardware is the problem; continue with step 4.
4.
Reconnect the cable to the PCM. If the programmer has more than one serial port,
be sure the cable is connected to COM1. Set the programmer serial port to the PCM
default settings. To do this when using a computer as the programmer, type
TERMF DEFAULT.DAT at the MS-DOS prompt and press the Enter key.
5.
Press and hold the PCM Restart/Reset pushbutton for more than 5 seconds to
initialize the PCM to its factory default settings.
6.
Press the programmer Enter key while watching the USER1 LED for serial port 1 or
USER2 LED for serial port 2. Each time the key is pressed the LED should blink. If
the PCM has been configured by Logicmaster 90 software in BASIC or BAS/CCM
mode, the “Ready” prompt should also be repeated on the programmer screen;
otherwise, the “>” prompt should appear. If the LED does not blink or the
“Ready” or “>” prompt is not displayed, either the connection from the
programmer to the PCM is bad or the programmer hardware is defective.
7.
Cycle power on the programmer to make sure the serial controller is fully reset.
Problems with the programmer are very rare. When they do occur, they can often
be fixed with a power cycle. If your programmer is a computer, type
TERMF DEFAULT.DAT again. If the LED still does not blink when a key is pressed,
there is a problem with the cable or the programmer serial port hardware. If TERMF
communicates with the PCM but PCOP does not, continue with step 8.
8.
Press CTRL-BREAK or ALT-Z to exit TERMF.
9.
Type PCOP at the MS-DOS prompt on the command line. If you again encounter
communication problems between PCOP and the PCM, the problem may be with
PCOP on your programmer. Try to return to MS-DOS by pressing CTRL-BREAK. If
this does not work, press CTRL-ALT-DELETE to re-boot the PC. Now, start up the
software again.
10. If PCOP still does not go ONLINE, there is probably a configuration mismatch. Exit
PCOP. Restart the PCM with a hard reset. Type PCOP DEFAULT.DAT at the
prompt on the command line, and press and hold the Restart/Reset pushbutton on
the PCM for more than 5 seconds.
2-8
Series 90 PCM Development Software (PCOP) User’s Manual – May 1993
GFK-0487
Chapter
3
3 Using PCOP to Program the PCM
section level 1 1
figure bi level 1
table_big level 1
The PCM development software, PCOP, runs on an MS-DOS based computer and
communicates with the PCM over a serial link. PCOP enables you to edit configuration,
program and run MegaBasic, load and save files, and perform other status and control
functions. PCOP also supports folder and file maintenance commands.
This chapter contains the following sections:
Section 1. PCOP Main Menu: describes how to invoke PCOP and the PCOP main
menu.
Section 2. MegaBasic: describes how to access MegaBasic from PCOP.
Section 3. TERMF: describes how to make the PC emulate a VT100 terminal and how
to transfer files to and from the PCM.
Section 4. Status Functions: describes how to display errors accumulated from the PCM
and display information about currently active tasks.
Section 5. Control Functions: describes how to change the configuration mode of the
PCM, start and stop user tasks, and redefine the user LEDs.
Section 6. Program Folder Functions: describes how to organize program and
configuration files in a common program folder.
Section 7. Program Utility Functions: describes how to manipulate files and memory
modules on the PCM.
GFK-0487
3-1
3
Section 1: PCOP Main Menu
PCOP is a menu-based software package which is similar in operation to Logicmaster 90
programming software. Using PCOP, you can communicate with the PCM through the
serial ports. PCOP provides functions for configuration editing, programming and
running MegaBasic, loading and saving files, and other status and control functions.
PCOP also supports folder and file maintenance commands.
Invoking PCOP
The PCOP software is invoked by pressing the PCM (F3) softkey from the Logicmaster
90 Programming Software main menu shown below.
The PCOP software may also be invoked by typing PCOP at the MS-DOS prompt and
pressing the Enter key. When PCOP is started, the title screen is displayed.
The PCM is ready to communicate with PCOP as soon as the diagnostic checks have
passed and the operating system has been initialized. If there is no user configuration or
soft switch data from the PLC, the factory default configuration is used to configure the
serial ports and PCOP is assigned to PCM serial port 1. This is the usual programming
mode.
Upon a hard reset, the PCM will come up in the same manner as if the module did not
have any configuration data except the serial port settings configured using Logicmaster
90 software, but with the ability to restart with the PCM user configuration after a soft
reset.
If the cable from the PCM to the computer is attached and the PCM is communicating
with PCOP, the title screen indicates an ONLINE status.
3-2
Series 90 PCM Development Software (PCOP) User’s Manual – May 1993
GFK-0487
3
If PCOP is started after the PCM has powered up, the current screen should
immediately indicate ONLINE status, as shown above.
If the PCM powers up while PCOP is on the title screen and the programmer is still
assigned to the port, the screen will first indicate a NO COMM (No Communications)
status and will then change to ONLINE status.
If the PCM is no longer communicating over the port and no output occurs on this port,
PCOP will change to NO COMM status.
If the PCM powers up or is reset with MegaBasic or CCM attached to the port and
sending data, PCOP will automatically go into terminal emulation mode.
Press the Enter key to leave the banner/copyright screen.
GFK-0487
Chapter 3 Using PCOP to Program the PCM
3-3
3
Initially Selecting/Creating a Program Folder
After pressing the Enter key from the title screen, the Select or Create Program Folder
screen is displayed if the current default directory is not an existing PCM program folder
(as when PCOP is entered for the first time).
If the current default directory is a PCM program folder and has the directory extension
.PCM, the main menu is displayed after pressing the Enter key.
After creating or selecting a program folder from this screen, the main menu is
displayed.
3-4
Series 90 PCM Development Software (PCOP) User’s Manual – May 1993
GFK-0487
3
Accessing the PCOP Main Menu
After selecting the current folder, the PCOP main menu is displayed.
The F1 through F10 function softkeys, displayed at the top of each screen, are used to
select the desired function. Each of these selections will access another screen. The
function of each shifted function key is displayed on the top line in all capital letters.
These are generally the function keys available on the previous menu.
The Escape key can be used at any time to abort the current menu and return to the
previous display screen, unless there is an active command for the PCM in progress.
CTRL-BREAK can be pressed at any time to abort the current menu and return to either
MS-DOS or the Logicmaster 90 Programming Software main menu.
The PCM RUNTIME ERRORS indication is displayed on the PCOP menu screens if
errors have been reported by the PCM. Press Status (F4) from the PCOP main menu
and then press F1 from the Status Functions menu to display the errors.
The ONLINE indication is displayed as long as the PCM is communicating with PCOP.
If the PCM becomes disabled or PCOP communication is assigned to another device, the
ONLINE indication changes to NO COMM. In order to configure or program the PCM,
PCOP must be on-line. If this is not the case, refer to the troubleshooting information,
”Diagnosing Serial Communication Problems,” in chapter 2, Installing the PCM Software.
GFK-0487
Chapter 3 Using PCOP to Program the PCM
3-5
3
If the PCM powers up or is reset with MegaBasic or CCM attached to the port and
sending data, the screen is cleared and then displays the TERMF banner. PCOP
communication has been detached. If necessary, PCOP to PCM communication can be
re-established by pressing the Restart/Reset pushbutton continuously for more than 5
seconds to initiate a hard reset.
The Current Configuration field in the lower right corner of the screen indicates
whether there is no Logicmaster 90 or PCOP user configuration (FACTORY), there is a
Logicmaster 90 configuration for the PCM programmer port and a hard reset has
occurred (FAC MOD), a Logicmaster 90 configuration is active after a soft reset occurred
(LM CFG), or a PCOP user configuration is active after a soft reset (USER).
The PCM ID is the name of the PCM board supplied by the user configuration data, if
any. Rack, slot, and CPU ID data are supplied from the backplane and from the
power-up information supplied by the PLC CPU. The ONLINE/NOCOMM indication,
current configuration, and PCM ID, rack, slot, CPU ID entries are displayed in reverse
video at the bottom of each display screen.
Message Line
Errors in command syntax, or those discovered while executing commands or selections,
are displayed on the message line. The message line is located directly below the softkey
labels on the display screen.
Prompts for additional information required from the user and general help information
are also displayed on the message line.
Expert Mode
Expert mode in PCOP provides shortcuts and reduces the keystrokes required when
using the menu softkeys. Once you are familiar with PCOP, you may select expert mode
at any time by pressing ALT-J. (PCOP always starts up in non-expert mode.) Pressing
ALT-J a second time will toggle expert mode off again.
Commands may be entered on the command line at the “>” prompt in expert mode,
instead of, or in addition to, using the function softkeys. Commands are not limited to
those selections shown on a particular screen, as they are when using the function
softkeys.
The commands for expert mode are the same as the labels displayed on the function
softkeys. Only the first three characters are significant. Although additional characters
may be entered, they are ignored.
Parameters are prompted for on the message line. Read the prompt carefully and
respond to each question. Chapter 5, Using PCOP in Expert Mode, describes the
command format for each command.
3-6
Series 90 PCM Development Software (PCOP) User’s Manual – May 1993
GFK-0487
3
Special Key Commands
The five special key commands are listed in the following table.
Description
Key
CTRL-BREAK
Exit PCOP and return to MS-DOS or the Logicmaster 90 Programming
Software main menu.
Escape
Display the previous screen. Incomplete commands are aborted.
ALT-A
Abort the current command.
ALT-H
Display Help text in the configuration editor.
ALT-J
Toggle between expert and non-expert mode.
Key Summary
The PCOP main menu displays the following function softkeys, summarized below.
These function keys are described in more detail in subsequent sections of this chapter.
GFK-0487
Function
Key
Function
F1
ConfigurationEditor
Enter the PCOP configuration editor. For more
information on the configuration editor, refer to chapter 3,
Using PCOP to Configure the PCM.
F2
MegaBasic
Interpreter
Start the MegaBasic interpreter. After entering MegaBasic,
you may develop, run, alter, and debug an application
program.
F3
TERMF
F4
Status Functions
F5
Control Functions
F8
Program Folder
Functions
Display the Program Folder Functions menu. These
commands are used to organize program and
configuration files in a common program folder.
F9
ProgramUtility
Functions
Access the Program Utility Functions menu. These
commands are used to load and save programs,
configuration files, and directories, to delete files, and
to clear files located on the PCM.
Description
Enter the terminal emulation software part of PCOP.
This screen can be used for program output while
debugging programs, or for any other terminal type
activity.
Display the Status Functions menu. These commands are
used to access information about the operating status
of the PCM.
Display the Control Functions menu. These commands
are used to change the PCM active configuration,
temporary assignment of the user LEDs, and to run or
stop user tasks. Control functions are only available in
On-Line mode.
Chapter 3 Using PCOP to Program the PCM
3-7
3
Section 2: MegaBasic
MegaBasic is a powerful implementation of the BASIC programming language. To learn
about the features of MegaBasic, refer to the MegaBasic Programming Language Reference
Manual, GFK-0256.
MegaBasic is built into the PCM and has been provided with extensions which provide
access to the PCM and the PLC in which it is installed. For information about special
features of MegaBasic in the PCM, refer to the Series 90 Programmable Coprocessor Module
and Support Software User’s Manual, GFK-0255.
Accessing MegaBasic from PCOP
When PCOP is on-line with the PCM, you can access MegaBasic in the PCM by pressing
the F2 function key at the PCOP main menu. The MegaBasic start-up banner should
appear.
Returning to PCOP
From the MegaBasic “Ready” prompt, you can return to PCOP by typing the BYE
command and pressing the Enter key. When a MegaBasic program is running, you can
usually halt it by pressing CTRL-C. (Press and hold the CTRL key down while pressing
the C key.) MegaBasic should display a CTRL-C stop message, followed by the Ready
prompt. However, some MegaBasic programs disable CTRL-C. If CTRL-C does not stop
the program, hold the PCM Restart/Reset pushbutton for more than 5 seconds to initiate
a hard reset. When you see a “–>” prompt, press ALT-Z to return to PCOP.
3-8
Series 90 PCM Development Software (PCOP) User’s Manual – May 1993
GFK-0487
3
Section 3: TERMF
TERMF is a terminal emulation software package, invoked from PCOP or MS-DOS. It is
used to make the PC emulate a VT100 terminal and to transfer files. Not all VT100
escape sequences are supported; those which are not supported are either displayed on
the screen or ignored.
Features of the TERMF terminal emulation software package include:
D
D
D
The small size of TERMF, as compared with other terminal emulation packages.
PC-to-PCM file transfer protocol.
The ability to redefine keys.
TERMF is also available separately as catalog number IC641SWP063. For additional
information on using TERMF, see the Series 90 Programmable Coprocessor Module and
Support Software User’s Manual, GFK-0255.
Invoking TERMF
The TERMF terminal emulation software is invoked directly from the PCOP main menu
by selecting TERMF (F3). This allows monitoring of a MegaBasic program that is
currently executing. TERMF may also be invoked directly from MS-DOS instead of
PCOP.
TERMF is also invoked automatically when the PCM sends output on the serial port
attached to PCOP. This happens, for example, when a soft reset starts MegaBasic.
Along with TERMF software, which is integrated very closely with PCOP, an additional
terminal emulation program is supplied. This program is called TERM.EXE and is
generally the same as TERMF, except that it does not include the PC-to-PCM file transfer
protocol.
The setup of configuration data for the programmer is done through a companion
program called TERMSET.EXE, which sets up the data file TERM.DAT that TERMF
reads and uses for configuration data. The TERMF configuration data in TERM.DAT
includes serial port setup for the PC, monitor selection, and an off-line default for PCOP
configuration (30 vs 70).
Returning to PCOP
To return to PCOP from TERMF, press ALT-Z. Press CTRL-BREAK to exit to MS-DOS.
When the “>” symbol is displayed on the TERMF screen, a PCM reset has occurred.
You may need to return to PCOP. If you were in PCOP, press ALT-Z to return to PCOP.
Or, press CTRL-BREAK to exit to MS-DOS and re-enter PCOP.
GFK-0487
Chapter 3 Using PCOP to Program the PCM
3-9
3
Section 4: Status Functions
The Status Functions menu provides access to status information about the PCM. Status
information includes errors accumulated from the PCM while the PCOP package is
attached and also information about the currently active tasks and configuration. To
display this screen, press the STATUS (F4) softkey from the PCOP main menu.
3-10
Series 90 PCM Development Software (PCOP) User’s Manual – May 1993
GFK-0487
3
Error Display Screen
Errors accumulated from the PCM while the PCOP package is attached are displayed on
the Error Display screen. To display this screen, press the ERRORS (F1) softkey from the
Status Display menu.
If there are more than eight errors, only the most recent eight are displayed. These
errors are cleared from the screen after exiting this screen. The ”PCM Runtime Errors”
message is also cleared after exiting this screen.
Two types of errors are processed by PCOP:
Type of Error
User Command Syntax Errors
Execution Errors
Description
All syntax errors are found and reported locally on the
message line within the PCOP routine. These errors are not
accumulated for display on the PCM Runtime Errors screen.
For example, errors in file names that can be detected by
PCOP will report an error message above the command line.
Execution errors are detected by the PCM and passed to PCOP
for display. These errors are listed on the PCM Runtime Errors
screen.
PCOP will determine the error type and associated message, and store execution errors
for display on the Error Display screen. A maximum of eight execution errors can be
stored by PCOP; these are the last eight errors stored from the PCM. They are stored
until they are displayed on the Error Display screen, at which time they are cleared, or
until PCOP is disconnected or exited. The runtime error line on the display screen will
indicate whether any new error messages have been received from the PCM.
Possible error messages reported on the PCM Runtime Errors screen include
”Insufficient Memory,” ”File not Found,” and ”Module not Found.” These errors are
usually displayed when something is missing from a configuration or program file.
Reload the PCM software and try again.
GFK-0487
Chapter 3 Using PCOP to Program the PCM
3-11
3
Section 5: Control Functions
Control functions are used to change the configuration mode of the PCM, start and stop
user tasks, and redefine the user LEDs. The Control Functions menu is only available in
On-Line mode. To display this screen, press the CTL (F5) softkey from the PCOP main
menu.
Function Key
3-12
Function
Description
F1
Use
Display the Use Configuration menu screen.
F3
Run
Display the Run User Task screen. A task, or group of tasks,
specified by a module name begin executing.
F4
Stop
Display the Stop User Task screen.
F6
LED 1
Redefine the assignments for User LED 1.
F7
LED 2
Redefine the assignments for User LED 2.
Series 90 PCM Development Software (PCOP) User’s Manual – May 1993
GFK-0487
3
Changing PCM Configuration Mode
The USE command establishes the chosen data as the current active configuration.
Selecting factory on the USE Configuration Data screen is the same as initiating a hard
reset, while selecting user initiates a soft reset. This provides a remote reset function, as
long as PCOP remains connected and on-line with the PCM.
The USE Configuration Data screen is only available in On-Line mode. To display this
screen, press the USE (F1) softkey from the Control Functions menu.
GFK-0487
Chapter 3 Using PCOP to Program the PCM
3-13
3
Executing a Task
The RUN command causes a task, or group of tasks, specified by a module name to
begin executing. In foreground mode, the PCM cannot be used for anything else while
the task is executing. In background mode, the PCM can be used for other activities
while the task is executing.
The RUN User Task screen is only available in On-Line mode. To display this screen,
press the RUN (F3) softkey from the Control Functions menu.
This screen provides selections for the name of the task to run,theinput/output/error
devices, the stack and data size for the user task, background or foreground mode, task
priority, and link modules.
Caution
This function is not intended for normal use of PCOP and the PCM in
this release.
3-14
Series 90 PCM Development Software (PCOP) User’s Manual – May 1993
GFK-0487
3
Stopping a Task
The STOP command stops a task from executing.
The STOP User Task screen is only available in On-Line mode. To display this screen,
press the STOP (F4) softkey from the Control Functions menu.
After the command is executed, the ”Command Complete” message is displayed on the
message line.
This function is not intended for normal use of PCOP and the PCM in this release.
Caution
The STOP command is not fully supported for this release. It is
recommended that you perform a reset instead of using the STOP
command.
GFK-0487
Chapter 3 Using PCOP to Program the PCM
3-15
3
Redefining the User LEDs
The LED USE command allows you to interactively and temporarily redefine the
assignments for the user LEDs.
The User LED Definition Attributes screen is only available in On-Line mode. To display
this screen, press the LED 1 (F6) softkey for LED 1.
Press the LED 2 (F7) softkey to display the User LED Definition Attributes screen for LED
2.
3-16
Series 90 PCM Development Software (PCOP) User’s Manual – May 1993
GFK-0487
3
The current definition of the LED is displayed on the screens shown above. To select or
deselect an attribute, position the cursor on the desired attribute and press the Tab key to
toggle the bit. A 1 means the attribute is enabled; 0 means it is disabled. Multiple
attributes may be selected.
When the user task is chosen, the task number that will control the LED must be entered
at the prompt. The task number is the same as the task priority.
GFK-0487
Chapter 3 Using PCOP to Program the PCM
3-17
3
Section 6: Program Folder Functions
Program folder functions are used to organize program and configuration files in a
common PCM program folder. A program folder is actually a subdirectory of files. PCM
folders are similar to Logicmaster 90 folders, except that PCM folder names have the
extension .PCM. To display this screen, press the FOLDER (F8) softkey from the PCOP
main menu.
Function Key
3-18
Function
Description
F1
Select Folder
Create or select a program folder.
F2
Delete Folder
Delete a program folder.
F4
Backup Folder
Create a backup copy of the current program folder.
F5
Restore Folder
Restore a program folder from its backup copy.
F7
Clear Folder
F9
Folder Directory
F10
Copy Folder
Clear the contents of the current program folder.
List the contents of the current program folder.
Copy the contents of a specified program folder to
the current program folder.
Series 90 PCM Development Software (PCOP) User’s Manual – May 1993
GFK-0487
3
Creating/Selecting a Program Folder
To create a new program folder or select one that already exists, press the FSEL (F1)
softkey from the Program Folder Functions menu.
The names of the program folders in the current drawer are listed on the screen. To
select a folder in the current drawer, enter the name of the program folder and press the
Enter key. It is not necessary to enter the extension .PCM; it is assumed. However,
entering .PCM does not cause a problem.
Note
For Release 2.02 and earlier of the PCM development software (PCOP),
the folder must be on the same disk drive as the PCOP software.
If the program folder does not already exist, the system will ask for confirmation. This
helps you avoid accidentally creating a program folder due to a typing mistake.
The directory created by this function will always have the extension .PCM.
To cancel any changes made to this screen, press ALT-A (abort). To return to the Program
Folder Functions menu, press the Escape key.
GFK-0487
Chapter 3 Using PCOP to Program the PCM
3-19
3
Deleting a Program Folder
Use this function to remove a program folder that is no longer needed. If the program
folder has a backup copy, the backup is automatically deleted. If any directories have
been created beneath the program folder to be deleted (by using MS-DOS commands),
you must remove them before using the delete function. The last remaining program
folder cannot be deleted.
If a program folder is locked (lock status is shown in the lower right corner of your
screen), it cannot be deleted. Refer to the information on locking and unlocking a
program folder, provided later in this section.
Press the FDEL (F2) softkey from the Program Folder Functions menu.
Enter the name of the program folder to be deleted. The currently selected program
folder cannot be deleted.
Then, press the Enter key. Respond to the confirmation prompt to continue with the
deletion. Once started, the delete operation cannot be stopped. To return to the Program
Folder Functions menu, press the Escape key.
3-20
Series 90 PCM Development Software (PCOP) User’s Manual – May 1993
GFK-0487
3
Backing up the Current Program Folder
To create a backup copy of the currently selected program folder, press the FBAKUP (F4)
softkey from the Program Folder Functions menu.
The backup folder is located in a subdirectory under the program folder. If no backup
folder exists for the current program folder, one is automatically created. If the program
folder has been backed up previously, the backup function will write over the previous
backup copy.
Note
Multiple backups of the same program folder are not maintained.
To back up the current program folder, press the Enter key. Press the Escape key to
return to the Program Folder Functions menu.
GFK-0487
Chapter 3 Using PCOP to Program the PCM
3-21
3
Restoring the Current Program Folder
To replace the contents of the current program folder by its backup copy, press the
FRESTR (F5) softkey from the Program Folder Functions menu. In order to restore a
program folder, a backup copy must already exist.
If the program folder is locked (locked status is shown in the lower right corner of the
screen), you must change the status to unlocked before restoring the program folder.
Refer to the information on locking and unlocking a program folder, provided later in
this section.
To begin the restore operation, press the Enter key. If any information exists in the
current program folder that would be written over by the backup information, you must
confirm the request in order to proceed. Once started, the restore operation cannot be
stopped.
To return to the Program Folder Functions menu, press the Escape key.
3-22
Series 90 PCM Development Software (PCOP) User’s Manual – May 1993
GFK-0487
3
Clearing the Current Program Folder
To delete the contents of the current program folder while keeping the folder for future
use, press the FCLEAR (F7) softkey from the Program Folder Functions menu.
If a program folder is locked (look at the lower right corner of the screen), it cannot be
cleared. Refer to the information on locking and unlocking a program folder, provided
later in this section.
To clear the current program folder, press the Enter key. If there is any information in
the program folder, you must confirm the request in order to continue the clear
operation.
If you press Y to the continuation prompt, you will have a chance to back up the
current program folder. To create a backup version of the information, press Y again.
Press N if you do not want to back up the information first.
To return to the Program Folder Functions menu, press the Escape key.
GFK-0487
Chapter 3 Using PCOP to Program the PCM
3-23
3
Listing the Contents of the Current Program Folder
Use the Folder Directory function to obtain a list of the files that are in the current
program folder. To obtain the list, press the FDIR (F9) softkey from the Program Folder
Functions menu.
In addition to a list of the files in the current folder, the number of bytes available on the
disk and the number of bytes that are being used by the current folder are also displayed
on this screen.
If more file names are in the current folder than can be displayed on the screen at one
time, use the Page Up/Down cursor keys to page through the file names.
To return to the Program Folder Functions menu, press the Escape key.
3-24
Series 90 PCM Development Software (PCOP) User’s Manual – May 1993
GFK-0487
3
Copying a Program Folder
Use the Copy function to copy from another program folder into the current program
folder. The contents of the source program folder are copied into the current program
folder. If any files have the same name in the current program folder as in the source
program folder, they are overwritten.
To make a copy of a program folder, press the FCOPY (F10) softkey from the Program
Folder Functions menu.
Enter the name of the program folder whose contents are to be copied into the currently
selected program folder.
Then, press the Enter key to copy the files. To return to the Program Folder Functions
menu, press the Escape key.
GFK-0487
Chapter 3 Using PCOP to Program the PCM
3-25
3
Section 7: Program Utility Functions
Program utility functions are used to manipulate files and memory modules on the
PCM. The Program Utilities menu is only available in On-Line mode. To display this
screen, press the UTILTY (F9) softkey from the PCOP main menu.
3-26
Series 90 PCM Development Software (PCOP) User’s Manual – May 1993
GFK-0487
3
Function
Key
Function
F1
Save File
Description
Copy user programs, data, and configuration files from the PCM
RAM Disk into a PC folder.
For versions prior to 2.04 of the PCM development software,
data files and memory modules can be saved, but executable files
(those with the extension .EXE) cannot be saved. MegaBasic
has a similar SAVE command for saving MegaBasic source
programs to any valid device.
F2
Load File
Load programs, user files, and configuration files from the PC to
the PCM RAM Disk. MegaBasic programs must be loaded into
the MegaBasic workspace by MegaBasic, but the files may be
loaded to the RAM Disk for fast access and onboard storage by
using the PCOP Load File utility.
F4
File Directory
Display a listing of the files and modules that have been loaded
to the PCM and the amount of remaining memory available.
Additional entries may be displayed on the screen by pressing
the Page Up or Page Down key.
F6
Delete File
F7
Clear
Remove any files currently located in PCM user memory,
programs, data files, and configuration files. The purpose of the
command is to return the memory to its as-shipped state,
with no user memory files or other data in user memory.
F9
ADS
Initially install the CIMPLICITY 90-ADS software or change the
executable environment of the CIMPLICITY 90-ADS software.
This command automatically performs a soft reset and establishes
the PC: drive as the current folder directory.
Delete a single file on the PCM.
CIMPLICITY90-ADS software is purchased separately from PCOP.
It requires an Alphanumeric Display Coprocessor Module in order
to use the software.
F10
GDS
Initially install the Graphics Display System (GDS) software.
This command automatically performs a soft reset and establishes
the PC: drive as the current folder directory. The GDS software is
purchased separately from PCOP.
Press the Escape key at any time to abort the current menu and return to the previous
display screen, unless there is an active command for the PCM in progress.
GFK-0487
Chapter 3 Using PCOP to Program the PCM
3-27
3
Saving a File from the PCM
The SAVE command is used to copy user programs, data, and configuration files from
PCM RAM:Disk memory into a file. It is similar to the load function in the Logicmaster
90 utilities. For versions prior to 2.04 of the PCM development software, executable files
(those with the extension .EXE) cannot be saved. MegaBasic has a similar SAVE
command for saving MegaBasic programs from its memory.
The Save File(s) screen is only available in On-Line mode. To display this screen, press
the SAVE (F1) softkey from the Program Utilities menu.
Select the type of file(s) to be saved at the Files to save field. Use the Tab key to scroll
through the choices listed in the following table. When the correct selection is displayed,
press the Enter key.
Selection
Program *
Config
Program and Config
Specified
Description
Save all user files, except the user configuration, from the PCM to the
current folder.
Save user configuration data to the current folder.
Save all user files on the PCM to the current folder on the PC.
Save a named file from the PCM to the PC. SPECIFIED can be used to
save a single user program or data file, or any other file on the PCM to
the PC. The name of the file to be saved must be entered on the
screen.
* Default selection.
If the specified file cannot be located, the command is aborted and a ”File not Found”
error is displayed.
3-28
Series 90 PCM Development Software (PCOP) User’s Manual – May 1993
GFK-0487
3
Loading a File to the PCM
The LOAD command is used to load user programs, data files, and configuration data
from the PC into the PCM RAM Disk. It is similar to the store function in the
Logicmaster 90 utilities. MegaBasic programs must be loaded into the MegaBasic
workspace by MegaBasic. The files may be loaded to the RAM Disk for fast access and
onboard storage by using the PCOP LOAD command.
The Load File(s) screen is only available in On-Line mode. To display this screen, press
the LOAD (F2) softkey from the Program Utilities menu.
Select the type of file(s) to be loaded at the Files to load selection. Use the Tab key to
scroll through the choices listed in the following table. When the correct selection is
displayed, press the Enter key.
Selection
Program *
Config
Program and Config
Specified
Description
Load all user files, except the user configuration, in the current folder.
Load user configuration data located in the current folder.
Load all user files in the current folder to the PCM.
Load a named file to the PCM. SPECIFIED can be used to load a single
user program or data file, or any other file to the PC. The name of the
file to be loaded must be entered on the screen.
* Default selection.
If the specified file cannot be located, the command is aborted and a ”File not Found”
error is displayed.
GFK-0487
Chapter 3 Using PCOP to Program the PCM
3-29
3
Directory of Files
The MDIR command is used to list the user programs, data files, and configuration data
located on the PCM RAM Disk or in the current folder.
The Directory of Files screen is only available in On-line mode. To display this screen,
press the MDIR (F4) softkey from the Program Utilities menu.
Select the list of files at the Source of files selection. Use the Tab key to scroll through the
choices for the directory listing, as shown in the following table. When the correct
selection is displayed, press the Enter key.
Selection
Description
PCM RAM: *
List all user files on the PCM RAM: Disk.
PCM ROM:
Not available for this release.
FOLDER
List all files located in the current folder.
* Default selection.
3-30
Series 90 PCM Development Software (PCOP) User’s Manual – May 1993
GFK-0487
3
Deleting a File
The MDEL command is used to delete user programs, data files, and configuration data
from the PCM RAM Disk or in the current folder.
The Delete File(s) screen is only available in On-Line mode. To display this screen, press
the MDEL (F6) softkey from the Program Utilities menu.
Select the location of the file to be deleted at the Source of File selection. Use the Tab
key to scroll through the choices, as listed in the following table. When the correct
selection is displayed, press the Enter key.
Selection
Description
PCM *
Select the PCM RAM Disk as the location of the file to be deleted.
Folder
Indicates that the file is located in the current folder.
* Default selection.
After selecting the source of the file to be deleted, a directory of the destination location
is displayed in the window on the screen. Enter the name of the file to be deleted at
Name of File.
Confirm Before Delete is an optional entry for initiating a confirmation prompt before
any file is deleted. To use the confirmation prompt, toggle this entry to YES before
pressing the Enter key. Otherwise, toggle the value to NO. Once the confirmation
prompt has been changed in a particular session of PCOP, the default will retain this new
value until it is changed again.
If the specified file cannot be located, the command is aborted and a ”File not Found”
error is displayed.
GFK-0487
Chapter 3 Using PCOP to Program the PCM
3-31
3
Deleting all Files on the PCM
The CLEAR command is used to delete all files located on the PCM RAM Disk.
The Clear PCM screen is only available in On-Line mode. To display this screen, press
the CLEAR (F7) softkey from the Program Utilities menu.
A listing of the files located on the PCM is displayed in the window. Press the Enter key
to complete this command.
3-32
Series 90 PCM Development Software (PCOP) User’s Manual – May 1993
GFK-0487
3
Using ADS Software
The ADS command is used to initially install the CIMPLICITY 90-ADS software or to
change the executable environment of the CIMPLICITY 90-ADS software. This
command automatically performs a soft reset and establishes the PC: drive as the
current folder directory.
The ADS software screen is only available in On-Line mode. You must purchase the
ADS software before this function can be used. To display this screen, press the ADS (F9)
softkey from the Program Utilities menu.
Select the ADS environment by using the Tab key to toggle between the selections
(DEVELOPMENT or EXECUTE ONLY). When the correct selection is displayed, press
the Enter key.
When EXECUTE ONLY is selected, the following fields are displayed:
Field
Description
System Name
System ID. (Default = RAM:EMPTY)
Terminal Table
Terminal type. (Default = OIT.TBL)
Printer Table
The type of printer you are using. (Default = ASCII.TBL)
If these fields are left blank, PCOP uses the default values.
Note
CIMPLICITY 90-ADS software is purchased separately from PCOP. It
requires an Alphanumeric Display Coprocessor Module in order to use
the software. For more information on the CIMPLICITY 90-ADS
system, refer to the CIMPLICITY 90-ADS User’s Manual, GFK-0499.
GFK-0487
Chapter 3 Using PCOP to Program the PCM
3-33
3
Using the GDS Software
The GDS command is used to initially install the CIMPLICITY-70 Graphics Display
System (GDS) software. This command automatically performs a soft reset and
establishes the PC: drive as the current folder directory.
The GDS screen is only available in On-Line mode.
To display this screen, press the GDS (F10) softkey from the Program Utilities menu.
Press the Enter key to begin GDS installation.
Note
CIMPLICITY-70 GDS software is purchased separately from PCOP. For
more information on the CIMPLICITY-70 Graphics Display System,
refer to the CIMPLICITY-70 Graphics Display System User’s Manual,
GFK-0534.
3-34
Series 90 PCM Development Software (PCOP) User’s Manual – May 1993
GFK-0487
Chapter
4 Using PCOP to Configure the PCM
4
section level 1 1
figure bi level 1
table_big level 1
This chapter explains how to use PCOP to create local user configurations. It contains
information on:
D
D
D
D
The configuration editor.
The Edit Configuration Data menu.
Configuration data.
Help text.
This chapter contains the following sections:
Section 1. Configuration Editor: describes the configuration editor and the
configuration data which is used to configure the PCM.
Section 2. Edit Configuration Data Menu: describes the Edit Configuration Data menu,
how to access the menu, and its format. An explanation of the Help text is also included.
Section 3. Standard Configuration Functions: provides information on the standard
configuration functions, which are available from the Edit Configuration Data menu.
Section 4. Advanced Configuration Functions: provides information on the advanced
configuration functions, which are available from the Edit Configuration Data menu.
GFK-0487
4-1
4
Section 1: Configuration Editor
Configuration data is used to configure the PCM. There are three sources of local
configuration data used in the Programmable Coprocessor Module:
Configuration
Description
User Configuration Data
UCDF is a user configuration that you load into the
PCM’s battery-backed RAM memory. User configuration
identifies the configuration used for normal operation
and execution of the PCM application. User
configuration data is used to:
D
Specify the configuration of the PCM to be used
during the power-up sequence.
D
Initialize the hardware on the PCM.
D
Specify the user or system tasks to be started,
including MegaBasic programs or CCM.
Factory Default Configuration Data
FCDF provides the minimum amount of configuration
data needed to interact with the programmer and/or run
MegaBasic. By default, the serial ports are set up as
described in this section, with the programmer and
MegaBasic connected to port 1.
Current Configuration Data
CCDF contains changes that have occurred in the
configuration under user program or PCOP control.
It is also referred to as active or temporaryconfiguration.
Each has an associated checksum to guarantee the integrity of its data.
Configuration may also be supplied externally to the PCM through a Logicmaster 90
configuration or by autoconfig in the Series 90-30 PLC, which supplies a configuration
equivalent to the Logicmaster 90 default configuration. Generally, Logicmaster 90 or
local PCM configuration is used, but not both. For more information on Logicmaster 90
configuration, refer to the Series 90 Programmable Coprocessor Module and Support Software
User’s Manual, GFK-0255.
The configuration editor in PCOP allows you to edit configuration data files in either
Off-Line or On-Line mode.
For more information on the content of the configuration data and the assigned default
values, refer to appendix B, Configuration Data.
4-2
Series 90 PCM Development Software (PCOP) User’s Manual – May 1993
GFK-0487
4
Section 2: Edit Configuration Data Menu
The configuration editor is used to edit user configuration data. Configuration selections
are displayed on the Edit Configuration Data menu, shown below, by pressing the
CONFIG (F1) softkey from the PCOP main menu. These selections are available in
either On-Line or No Comm mode. All data is initialized to the default values or to the
previous user configuration, if one exists in the folder.
Use the function keys highlighted at the top of this screen to select configuration
functions.
GFK-0487
Chapter 4 Using PCOP to Configure the PCM
4-3
4
Function Key
Function
Description
F1
Defaults
Display the Default Configuration Data menu. This menu is
used to select a default initialization for the user configuration
data.
F3
Basic
Display the MegaBasic Data screen. This screen is used to
enable/disable and configure the MegaBasic task and program.
F4
CCM
Display the CCM screen. This screen contains data specific to
the resident CCM task. The CCM command will access the
CCM Configuration screen for port 1, which contains a selection
for port 2.
In order for CCM to function, it must be enabled on this screen
or in Logicmaster 90 software, if there is no user configuration.
F6
Ports
Select parameters for the low-level serial driver on the PCM.
The system will display the Port Configuration screen for port 1,
which contains a selection for port 2. The values entered on the
port screen may be superseded by other device drivers or
installable user drivers that occupy the serial port. If CCM is
chosen for a given port, the CCM selection is used on that port
and the serial port configuration is not used .
F7
LEDs
Display the LED screen. This screen allows you to assign the
function of the user LEDs. The LED command will access the
LED Configuration screen for LED 1, which contains a selection
for LED 2.
F8
Hardware
Display the Hardware Configuration Data screen. This screen
allows you to change the total memory size for a Series 90-30
PCM or the daughter board size for a Series 90-70 PCM.
F10
Advanced
Display the Advanced Configuration Data menu. This menu
contains additional, usually optional, selections for configuring
the system tasks, such as the programmer, adding annotation,
and reading/writing specified configuration files. Refer to
section 4, AdvancedConfigurationFunctions, for more
information on advanced configuration functions.
These keys can be used to move among the various fields on an editor screen:
Key
Description
Cursor and Enter
Move among the entry fields on all configuration edit screens requiring data
entry.
D
D
D
D
Backspace
Delete the character to the left of the cursor position.
Delete
Delete the character at the cursor position.
Home
Return to the first data field on the page.
End
Escape
CTRL-BREAK
4-4
The Cursor Down and Enter keys move to the next character or field.
The Cursor Up key moves to the previous character or field.
The Cursor Right key moves to the next character or field.
The Cursor Left key moves to the previous character or field.
Go to the last field on the currently displayed screen.
Abort the current menu or command, and return to the previous display
screen.
Exit PCOP.
Series 90 PCM Development Software (PCOP) User’s Manual – May 1993
GFK-0487
4
Saving a Configuration
To save the configuration changes to a file ( PC:UCDF.CDF ), continue to press the
Escape key. Before you return to the PCOP main menu, a prompt asks you whether you
want to save your changes. If you press Y, a new UCDF.CDF configuration file is
created with your changes. The old UCDF.CDF file is lost, so you may first want to
rename the old UCDF.CDF file or write a backup file to XXX.CDF, where XXX is your
selected file name. If you press N, no changes are made.
Caution
Before executing your request to return to the PCOP main menu, the
system prompts you for confirmation if the configuration data has
been changed since the last time it was saved. If you type N (No), all
changes made since the last save are lost.
Screen Definitions
The following information appears at the bottom of the screen on all configuration
editor screens. Some of the fields, however, are only available in On-Line mode.
Field
ONLINE/NOCOMM
GFK-0487
Description
Indicates whether PCOP and the configuration editor are currently attached to the PCM. If they are, ONLINE is highlighted;
otherwise, NO COMM is highlighted. The transition from
On-Line to No Comm mode (or No Comm to On-Line) may take
up to 15 seconds.
PCM ID
Name of the PCM board supplied by the user configuration data,
if any. If there is none, this field is blank.
Rack, Slot, CPU ID
The information displayed in these fields is supplied from the
backplane and/or the power-up information supplied by the CPU.
Chapter 4 Using PCOP to Configure the PCM
4-5
4
Help Text
Help text provides a concise list of information about keys used to move between fields
and screens, and to select values. Press ALT-H on any configuration editor screen to
access Help text.
Key
Description
CursorMovement Keys:
Left, Right
Up, Down
Enter
Home
End
Move the cursor one character in a field.
Move to the previous or next field.
Move to the next field, ENTER command.
Return to the first edit field.
Move to the last edit field.
Data Editing Keys:
Backspace
Delete
Tab or +, Shift-Tab or –
ALT-J
ALT-A
ALT-H
Delete the previous character.
Erase the current character.
Increment or decrement the select field values.
Toggle between expert and novice modes.
Abort the active command (valid in expert mode).
This help screen.
Press any key to exit the Help screen and continue editing.
Select Field
A select field, on any configuration editor screen, is a field with more than one standard
value. The standard values are displayed in successive order in the select field. Use the
Tab and Shift/Tab keys to scroll through the values.
For example, the Turnaround Delay field, shown on the CCM screen, displays the word
NONE initially. Use the Tab and Shift/Tab keys to scroll through the values for this field.
When the correct value is displayed, move to the next field or to another screen.
4-6
Series 90 PCM Development Software (PCOP) User’s Manual – May 1993
GFK-0487
4
Section 3: Standard Configuration Functions
The following standard configuration functions are available from the Edit
Configuration Data menu:
Function Key
Function
F1
Defaults
Select the default configuration.
F3
Basic
Edit a MegaBasic configuration.
F4
CCM
Edit the CCM configuration.
F6
Ports
Edit the serial port configuration for ports 1 and 2.
F7
LEDs
Edit the definition selections for LEDs 1 and 2.
F8
Hardware
Change the total memory size for a Series 90-30 PCM or the
daughter board size for a Series 90-70 PCM.
F10
Advanced
Access advanced menu items. For information on advanced
menu selections, refer to section 4, AdvancedConfiguration
Functions.
Description
Default Configuration Data
To display the Default Configuration Data menu, press the DEFLTS (F1) softkey from the
Edit Configuration Data menu (see section 2, Edit Configuration Data Menu).
Then, press one of the function keys (F1, F2, F3, F4, or F5) to select the default values for
your configuration. This initializes the configuration data to the default values for your
application.
GFK-0487
Chapter 4 Using PCOP to Configure the PCM
4-7
4
The default values are best for most applications. A good rule of thumb is to change as
few values as possible to customize the PCM for your application.
Note
A specific file name can be used as the source or destination for the
configuration data. Refer to section 4, Advanced Configuration Functions,
for information on the WRITE and READ commands.
Press the Escape key to return to the Edit Configuration Data menu.
Hardware Configuration Data
To display the Hardware Configuration Data screen, press the HWID (F8) softkey from
the Edit Configuration Data menu.
In Off-Line mode, PCOP uses a setting in TERM.DAT to determine whether a Series
90-30 or Series 90-70 PCM will be attached. (Default = Series 90-70 PCM.) If a different
PCM type is actually attached, a warning that the type of PCM has changed is displayed
during power-up.
The Total Memory Size field is displayed for a Series 90-30 PCM (default = 192K). For
the Series 90-70 PCM, the Daughter Board Size field is displayed (default = 128K). Only
one of these fields is present at any one time.
If this is a MegaBasic configuration, the daughter board size or total RAM size is used to
give a default memory size to the MegaBasic task. When editing configuration data, set
the daughter board size or total RAM size before configuring MegaBasic to ensure that
enough memory is allocated to the MegaBasic task.
4-8
Series 90 PCM Development Software (PCOP) User’s Manual – May 1993
GFK-0487
4
MegaBasic Interpreter Data
To display the Edit MegaBasic Data screen, press the BASIC (F3) softkey from the Edit
Configuration Data menu.
GFK-0487
Chapter 4 Using PCOP to Configure the PCM
4-9
4
Refer to these definitions when completing the entries on the MegaBasic Interpreter
Task screen:
Field
Description
Enable MegaBasic Task
Enable or disable the MegaBasic task.
Start MB Task on Soft Reset
This selection will cause the MegaBasic interpreter to run automatically after a
power cycle or soft reset. If MegaBasic is set to start automatically after a power
cycle or soft reset, the programmer is normally detached from the port. PCOP
cannot communicate in USER or LM CFG configuration mode.
Program to Run at Reset 1
Enter the program file name in this field in order to automatically start a
MegaBasic program after a soft reset. This will cause your program to run without
user intervention. You may also have MegaBasic automatically load the program
upon invoking MegaBasic, even if MegaBasic is not started on reset. Or, you may
have MegaBasic started without a program to run. In these two cases, some action
by the user is required in order to execute the application.
User ProgramI/O1,2
The
Input/Output/Error fields have a fixed number of selections: COM1:,
COM2:, RAM:, PC:, and NULL:. For RAM: and PC:, you must also
enter the file name (fn) on that device.
Set the Input and Output for MegaBasic to the devices that the program input and
output should go to by default. For example, if the programmer is attached to
PCM port 1 and running TERMF, program output is displayed on your screen if
the output is set to COM1:. The user program may open other devices for input
and output in addition to the standard I/O devices.
Task Priority
Default task priority for the MegaBasic interpreter, also known as the task
number. Most users do not need to change this value.
MegaBasic Command Line
This field is normally used for parameters for the user MegaBasic application. Any
valid RUN command line entries, except /B for background, may also be chosen
for this field.
Allocated Data Size
Size, in bytes, of memory allocated to the MegaBasic task. This value is entered
as a decimal integer. For the Series 90-70 PCM, the default value is based on the
selected option daughter board size. For the Series 90-30 PCM, the default value
is based on the selected total memory size. For more information on MegaBasic
program and data size, refer to the Series 90 Programmable Coprocessor Module and
Support Software User’s Manual, GFK-0255.
1
2
4-10
When the MegaBasic program will start on reset and the standard I/O is set to the programming port, the programmer is
inaccessible (PCOP displays NO COMM). If you will use a different device than COM1: for MegaBasic I/O, change the I/O
devices first and then select the program to run on reset.
If you change values on this screen so that the programmer is disconnected or may be disconnected (e.g., by selecting the
MegaBasic task to start running on reset with any input/output/error on COM1:), you will be informed that the programmer
has been disabled. If you later remove all input/output/error from COM1:, PCOP will ask if you want the programmer
reconnected.
Series 90 PCM Development Software (PCOP) User’s Manual – May 1993
GFK-0487
4
Configuring a PCM for MegaBasic Programs
The following procedure describes how to start up the MegaBasic interpreter on a soft
reset or power cycle, load a program automatically into MegaBasic, and run it without
the programmer attached or without any user intervention.
1.
Develop a program in MegaBasic.
2.
Save the program, preferably with the file name BASIC.PGM, to the PCM RAM
Disk (the default device) before exiting the MegaBasic interpreter. Otherwise, your
work is lost. The file should also be saved to PC: to provide a backup copy.
3.
When you are satisfied with the program, exit MegaBasic by typing BYE and
re-enter PCOP.
4.
Edit configuration data for MegaBasic by pressing the CONFIG (F1) softkey from the
PCOP main menu.
5.
Press the DEFLTS (F1) softkey and then the MegaBasic Interpreter on Port 1 (F1)
softkey. Then, press the Escape key.
6.
Set the daughter board size for a Series 90-70 PCM or the total memory size for a
Series 90-30 PCM before configuring MegaBasic to ensure that enough memory is
allocated to the MegaBasic task. The default daughter board size is 128K. The
default Series 90-30 PCM memory size is 192K. This is done on the Hardware
Configuration Data screen (F8). For more information on MegaBasic program and
data sizes, refer to the Series 90 Programmable Coprocessor Module and Support Software
User’s Manual, GFK-0255.
7.
Press the Edit MegaBasic Configuration (F3) softkey from the Edit Configuration
Data menu to display the Edit MegaBasic Configuration Data screen. Verify that
MegaBasic is enabled. The program file name to run should be RAM:fn, where fn is
the file name you specified when you saved the program to the PCM RAM Disk.
8.
Start MB on Soft Reset should be selected as YES. Change any other configuration
parameters required for the application.
9.
Press the Escape key to return to the Edit Configuration Data menu. Then, press the
Escape key to save the configuration data. Respond to the prompt by typing Y.
10. Press the Select Utility Functions (F9) softkey, and then press Load (F2). Select
CONFIGURATION so that the configuration data that was just saved by the PCOP
configuration editor is loaded to the PCM.
11. When the load is completed, exit PCOP and disconnect the PCM from the
programmer. Attach any output devices required by the application. Note that the
programmer may be used as a terminal at this point by entering TERM or TERMF,
either from PCOP or MS-DOS.
12. Press the Restart/Reset pushbutton for less than 5 seconds to initiate a soft reset. The
program will begin running.
13. A hard reset (pressing and holding the Restart/Reset pushbutton for more than 5
seconds) will stop the program.
GFK-0487
Chapter 4 Using PCOP to Configure the PCM
4-11
4
Note
When the user configuration specifies to start MegaBasic on a soft reset,
if the program is interrupted by pressing CTRL-C and then MegaBasic is
exited by typing BYE, you must perform a hard reset of the PCM so
that PCOP can communicate. Press and hold the Restart/Reset
pushbutton for at least 5 seconds to perform a hard reset; then press
ALT-Z to return to PCOP.
CCM Configuration Data
To display the Edit CCM Configuration Data screen for CCM on port 1, press the CCM
(F4) softkey from the Edit Configuration Data menu. The fields on this screen contain
these default values.
4-12
Series 90 PCM Development Software (PCOP) User’s Manual – May 1993
GFK-0487
4
To configure CCM on port 2, press the PORT 2 (F2) softkey.
Refer to the following definitions when completing the entries on the Edit CCM
Configuration Data screen. For select fields, use the Tab and Shift/Tab keys to scroll
through the list of selections.
The default value for the port 2 hardware interface for the Series 90-30 PCM is RS-232
for the 32K, 192K and 640K PCMs. The 160K Series 90-30 PCM port 2 value is fixed at
RS-485.
GFK-0487
Chapter 4 Using PCOP to Configure the PCM
4-13
4
Field
Enable CCM Task
on Port
Description
If CCM is enabled on the same port as the programmer or
MegaBasic, the system will prompt you to disable MB and set the
programmer devices to NULL:.
To access other fields on this screen, set this field to YES. If NO is
selected, CCM is not enabled. (Default = NO )
CCM CPU ID
Mode
Turnaround Delay,
Timeout, Retry Count
This field identifies CCM on this PCM serial port.
The choices for this field are PEER, MASTER, or SLAVE.
These are all select fields. You may select a standard value, or enter
a non-standard value on the detail screen. Press the NXTPG (F10)
softkey to view standard values or enter non-standard values.
D
Choices for Timeout are LONG, MEDIUM, SHORT, NONE,
or OTHER.
D
Choices for Retry Count are NORMAL, SHORT, or OTHER.
D
Choices for Turnaround Delay are NONE, 10 ms, 100 ms,
500 ms, or OTHER.
If standard values are selected for any of these fields, those values
are automatically entered on the Detail Data screen. If OTHER is
selected, the values must be entered on the Detail Data screen. If a
standard value is changed on the Detail Data screen, the selection
on the Edit CCM Configuration Data menu automatically changes
to OTHER.
For more information on turnaround delays, timeouts, and retry
counts, refer to the Series Six Programmable Controllers Data
CommunicationsManual, GEK-25364.
Interface
Hardware interface to be used on this CCM port. Choices are
RS-232 and RS-485. This field is not displayed for port 1
of a Series 90-30 PCM or port 2 of a 160K Series 90-30 PCM.
Data Rate, Parity,
Flow Control
These are all select fields. Choices for data rate are 300, 600,
1200, 2400, 4800, 9600, and 19,200. 38,400 is also
available in RS-485 mode only.
Parity may be ODD or NONE.
Selections for flow control are NONE and HARDWARE.
Task Priority
This field allows you to assign priorities for the CCM task(s). Most
users, however, should not change this value.
Caution
Changes in system task priority may seriously affect overall
performance.
4-14
Series 90 PCM Development Software (PCOP) User’s Manual – May 1993
GFK-0487
4
CCM Detail Data
When the NXTPG (F10) softkey is pressed from the Edit CCM Configuration Data
screen, the Edit CCM Configuration Detailed Data screen is displayed. This screen is
used to display the values associated with the standard selections made on the Edit CCM
Configuration Data screen. Non-standard values for the CCM protocol task data may
also be entered here. If a standard value is changed on this screen, the selection for that
table on the Edit CCM Configuration Data screen is automatically updated to OTHER.
To change the value of an entry on this screen, move the cursor to that entry and enter
the new value.
Valid ranges for the configuration data on this screen are 0 through 65,535 in
milliseconds for timeout values and turnaround delay, and in counts for retry counts.
Press the NXTPG (F10) softkey to return to the CCM Configuration Data screen, or press
the Escape key to return to the Edit Configuration Data menu.
GFK-0487
Chapter 4 Using PCOP to Configure the PCM
4-15
4
Serial Port Initialization Data
To display the Serial Port Data screen for port 1, press the PORTS (F6) softkey from the
Edit Configuration Data menu.
Press F2 for port 2.
4-16
Series 90 PCM Development Software (PCOP) User’s Manual – May 1993
GFK-0487
4
Values are not required on this screen if the port is to be used by CCM. If values are
placed here under those conditions, they are not used at initialization time.
When the port has been selected for use by MegaBasic or the programmer, values may
be entered for the port setup on this screen. If no user entries are made, the default
settings are used.
The default value for the port 2 hardware interface for the Series 90-30 PCM is RS-232
for the 32K, 192K and 640K PCM. The 160K Series 90-30 PCM port 2 value is fixed at
RS-485.
Refer to the following definitions when completing the entries on the Serial Port Data
screen. For select fields, use the Tab and Shift/Tab keys to scroll through the list of
selections.
Field
Description
Interface
The hardware interface standard to be used on this port. The choices are
RS-232* and RS-485. The hardware interface selection is not
available for port 1 of the Series 90-30 PCM or port 2 of the Series 90-30
PCM with 160K memory.
Data Rate
The values of this field range from 300 to 38,400.
(Default = 19,200 bps) 38,400 is only permitted in RS-485 mode.
Standard selections are listed in the select entries.
Parity
Flow Control
Type of parity to be used. Choices are NONE*, ODD, or EVEN.
Type of flow control to be used. Choices are HARDWARE*, SOFTWARE, or
NONE. If this is the file server port, hardware flow control is strongly
recommended. Do not use software flow control for the file server port.
Be careful to select the proper flow control for the device (including OITs
and printers) that you intend to attach to each port. Improper flow
control can cause either the PCM or the attached device to appear to hang
up, or any operation to fail or appear not to work.
Stop Bits
Bits per Character
Number of stop bits. Choices are 1* or 2.
Number of bits per character for data transfer. Choices are 7 or 8*.
8 must be used for the file server port.
* Default selection.
GFK-0487
Chapter 4 Using PCOP to Configure the PCM
4-17
4
Redefining the User LEDs
Assignments for the user LEDs can be redefined by pressing the LEDS (F7) softkey from
the Edit Configuration Data menu. The User LED Definition Attributes screen for LED 1
is displayed.
Press the LED 2 (F2) softkey from the User LED Definition Attributes screen to display
the User LED definition attributes for LED 2.
4-18
Series 90 PCM Development Software (PCOP) User’s Manual – May 1993
GFK-0487
4
The default definition of each LED is displayed on the screens shown above. To select or
deselect an attribute, cursor to the desired attribute and press the Tab key to toggle the
bit. A 1 means the attribute is enabled; a 0 means it is disabled. Multiple attributes
may be chosen for each LED.
When the user task is chosen, the task number that will control the LED must be entered
at the prompt. The task number is the same as the task priority.
GFK-0487
Chapter 4 Using PCOP to Configure the PCM
4-19
4
Section 4: Advanced Configuration Functions
The following advanced configuration functions are available from the Advanced
Configuration Data menu:
Function Key
Function
Description
F1
System Task
Edit programmer communications and file server data.
F7
Comment
F8
ReadConfiguration
Read configuration data from a file.
F9
Write Configuration
Write configuration data to a file.
F10
Standard
Edit annotation describing the configuration data.
Access standard menu items.
To access these advanced configuration functions, press the ADVNCD (F10) softkey from
the Edit Configuration Data menu (see section 2, Edit Configuration Data Menu). Press
F10 again to return to the standard menu items.
For information on the standard menu selections, please refer to section 3, Standard
Configuration Functions.
Programmer Communications and File Server Data
To display the Programmer Communications and File Server Data screen, press F1 from
the Advanced Configuration Data menu.
4-20
Series 90 PCM Development Software (PCOP) User’s Manual – May 1993
GFK-0487
4
The only configuration items allowed for programmer and file server are Task Priority
and the Standard In/Out/Error devices.
Field
Priority
I/ODevices
Description
This field is displayed with the default system programmer or file server task
priority. Do not enter zero in this field. Changes in task priority may seriously
affectoverallperformance. Most users should not change this value.
TheStandardIn/Out/Error fields have a fixed number of choices for the standard
device names, accessed by pressing the Tab key. For the programmer, the
possible selections include COM1:, COM2:, RAM:, PC:, and NULL:.
For PC: and RAM:, you must also enter the file name on that device.
For file server, the selections include COM1: and COM2:.
When the MegaBasic program is configured to start on reset and the standard I/O for
MegaBasic is set to the programmer port, the programmer I/O is set to NULL:. If you
plan to use a different device than COM1: for MegaBasic I/O, change the MegaBasic and
programmer I/O devices first and then specify the program to run on reset. If you want
the programmer to run on port 2, select COM2: on this screen.
If you change values on this page so that the programmer is or may be disconnected (i.e.,
by selecting the MegaBasic task to start running on reset with any of its standard I/O
channels (input, output, or error) assigned to COM1:, you must confirm this
configuration. If you later remove all other input/output/error from COM1:, PCOP will
ask if you want the programmer reconnected.
GFK-0487
Chapter 4 Using PCOP to Configure the PCM
4-21
4
Commentary Data
Press the COMMNT (F7) softkey from the Advanced Configuration Data menu to
display the Edit Annotation Describing the Configuration Data screen.
Note
None of the fields displayed on this screen requires an entry.
Field
Description
PCM ID
A 7-character or smaller user name for the configuration specified by the file
being edited. This field allows you to identify this configuration after it has
been loaded to a PCM; however, it does not require an entry. If no name is
entered, the field is blank on all Config Edit and PCOP screens.
Comment
This field may contain any information which allows further identification
of the particular configuration. The maximum length of this field is
183characters.
Earliest PCM
S/WRevision
The lowest software release number required to support both this
configuration and the user software and options specified in it.
If no particular software revision is required, select ANY.
Software revision is not checked during configuration at this time.
Press the Escape key to return to the Advanced Configuration Data menu.
4-22
Series 90 PCM Development Software (PCOP) User’s Manual – May 1993
GFK-0487
4
Read Configuration Data
To display the Read Configuration Data screen, press the READ (F8) softkey from the
Advanced Configuration Data menu.
Enter the name of the file from which the configuration data is to be read. Then, press
the Enter key to begin the read operation.
Using the read and write configuration data functions is the only way to maintain
multiple (different) configurations in the same folder. Otherwise, the configuration file
UCDF.CDF will have only the most recent configuration parameters. UCDF.CDF is the
file that is saved to the folder on the hard disk when leaving the editor. It is also loaded
to the PCM by the Load Config utility.
Each file may have a unique name by which the system identifies it. The name you give
a configuration can be any valid MS-DOS file name, and it may include a path. It is
recommended, however, that you use file names with an extension of .CDF. This name
is used to identify the configuration data and other data associated with it. A file name
without an extension will automatically be given the extension .CDF.
Note
Do not begin a file name with any of the following: AUX, COMx, CON,
or LPTx. These have special meanings to the MS-DOS operating
system. Other reserved file names include: UCDF, UCDF.CFG,
LIST.CFG, *.ENV, *.DAT, *.SYS, and *.* (leading underscore character
in the file name). In addition, do not use the wildcard characters * or ?
as part of a file name.
GFK-0487
Chapter 4 Using PCOP to Configure the PCM
4-23
4
Write Configuration Data
To display the Write Configuration Data screen, press the WRITE (F9) softkey from the
Advanced Configuration Data menu.
Enter the name of the file to which the configuration data is to be written. Then, press
the Enter key to begin the write operation.
Using the read and write configuration data functions is the only way to maintain
multiple (different) configurations in the same folder. Otherwise, the configuration file
UCDF.CDF will have only the most recent configuration parameters. UCDF.CDF is the
file that is saved to the folder on the hard disk when leaving the editor. It is also loaded
to the PCM by the Load Config utility.
Each file may have a unique name by which the system identifies it. The name you give
a configuration can be any valid MS-DOS file name, and it may include a path. It is
recommended, however, that you use file names with an extension of .CDF. This
name is used to identify the configuration data and other data associated with it. A file
name without an extension will automatically be given the extension .CDF.
Note
Do not begin a file name with any of the following: AUX, COMx, CON,
or LPTx. These have special meanings to the MS-DOS operating
system. Other reserved file names include: UCDF, UCDF.CFG,
LIST.CFG, *.ENV, *.DAT, *.SYS, and *.* (leading underscore character
in the file name). In addition, do not use the wildcard characters * or ?
as part of a file name.
4-24
Series 90 PCM Development Software (PCOP) User’s Manual – May 1993
GFK-0487
Chapter
5
5 Using PCOP in Expert Mode
section level 1 1
figure bi level 1
table_big level 1
Expert mode in PCOP provides shortcuts for entering commands. This mode uses fewer
keystrokes than when using the menu function softkeys.
PCOP starts up in non-expert mode. Expert mode may be selected at any time by
pressing ALT-J. ALT-J functions as a toggle key between expert and non-expert mode.
To return to non-expert mode, simply press ALT-J again.
In expert mode, commands are entered on the command line at the “>” prompt
instead of, or in addition to, using the function softkeys. The command line, which only
appears on the display screen in expert mode, contains the “>” prompt and a cursor,
and is located below the message line on the screen. In non-expert mode, the “>”
prompt and cursor are not displayed on the command line.
The commands for expert mode are the same as the function softkey names on each
screen or menu. Only the first three characters of a command are significant and must
be entered. Additional characters may be entered, but they are ignored. The commands
which may be entered on any screen are not limited to just those function softkeys
displayed on a particular screen. The Space Bar and Enter keys are used to indicate
completion of the current command or parameter.
Parameters for each command, if any, are prompted for on the message line in a specific
order. Read the prompt carefully and respond to each question. Information about the
command format of each command is included on the following pages in this chapter.
While you are in the configuration editor in expert mode, you can use the cursor and
Enter keys to move from the command line to the other fields on each screen. However,
expert mode commands can be entered only when the cursor is on the command line.
When you have completed the entries on a screen, cursor back to the command line.
PCOP expert mode commands do not support using the cursor keys to move to a field
on the screen. You must toggle back to non-expert mode to move off the command line
when using PCOP commands.
Some commands are only available in On-Line mode. If one of these commands is
entered in Off-Line mode, an ”Invalid Command” message is displayed.
Other commands are only available inside the configuration editor (referred to as
CONFIG commands) or outside the editor (referred to as PCOP commands). If a
CONFIG command is initiated outside of the configuration editor, or vice versa, an
”Invalid Command” message is displayed. All expert mode commands in the editor are
menu shortcut commands, except for the READ, WRITE, and EXIT commands. The
validity (On-Line mode and PCOP vs. CONFIG) of each command is included in the
description of each command in this chapter.
GFK-0487
5-1
5
After an expert mode command is completed, it is not automatically reactivated. For
example, after typing LOAD MY.PGM, you are still on the Load screen. However, in
order to load another file, you must enter the command again (e.g., LOAD MY2.PGM ).
ADS
The ADS command is used to initially install the CIMPLICITY 90-ADS software or to
change the executable environment of the CIMPLICITY 90-ADS software. This
command automatically performs a soft reset and establishes the PC: drive as the
current folder directory. The ADS software screen is only available in On-Line mode.
The format of the ADS command is:
ADS D
or
ADS E sn tt pt
D
Development.
E
Execute only. When Execute only is selected, you
must also supply the system name, terminal table,
and printer table.
sn
System name.
tt
Teminal table.
pt
Printer table.
For more information on the ADS command, refer to chapter 3, section 7, Program Utility
Functions.
Note
CIMPLICITY 90-ADS software is purchased separately from PCOP. It
requires an Alphanumeric Display Coprocessor Module in order to use
the software. For more information on the CIMPLICITY 90-ADS
system, refer to the CIMPLICITY 90-ADS User’s Manual, GFK-0499.
Command Restriction: PCOP, ONLINE.
5-2
Series 90 PCM Development Software (PCOP) User’s Manual – May 1993
GFK-0487
5
ADV
The Advance ( ADV ) command is used to display the Advanced Configuration Data
menu in the configuration editor. This menu contains additional, though usually
optional, selections for configuring the system tasks, such as the programmer, adding
annotation, and reading/writing specified configuration files.
To display this menu, type adv on the command line and press the Enter key.
For more information on the ADV command, refer to chapter 4, section 4, Advanced
Configuration Functions.
Command Restriction: CONFIG.
BASIC
The BASIC command is used to display the MegaBasic Data screen. This screen is used
to enable/disable MegaBasic and to configure the MegaBasic task and program.
To display the Edit MegaBasic Data screen, type bas and press the Enter key. Then,
complete the entries on the screen.
Refer to chapter 4, section 3, Standard Configuration Functions, for an explanation of the
entries on this screen.
Command Restriction: CONFIG.
CCM
The CCM command is used to display the Edit CCM Configuration Data screen for CCM
1 on port 1. You can use the Tab key to toggle between CCM 1 (port 1) and CCM 2 (port
2).
The format of the CCM command is:
CCM [pn]
where [pn] represents the CCM port number (1 or 2). For example, to go to the CCM
screen for port 2 from anywhere in the configuration editor, type ccm and press the
Enter key. Then, type 2 and press the Enter key to select port 2.
The fields on this screen contain default values. Refer to chapter 4, section 3, Standard
Configuration Functions, for an explanation of the entries on this screen.
Command Restriction: CONFIG.
GFK-0487
Chapter 5 Using PCOP in Expert Mode
5-3
5
CFG and CHE
The Checksum ( CHE ) and Config ( CFG ) commands are identical. They are used to
calculate the checksum and display other identifying information about specific
configuration data. Checksum information can be displayed for user configuration data
(UCDF) or a configuration file, as shown in the table below.
To use this command, type che on the command line.
The format of the CHE command is:
CHECK UCDF
or
CHECK fn
UCDF
fn
The user configuration data on the PCM.
A local file, or file located on the PCM RAM Disk (RAM:fn).
Command Restriction: PCOP.
CLEAR
The CLEAR command is used to remove any modules currently located in PCM user
memory, programs, data modules, and configuration files. The Clear PCM screen is only
available in On-Line mode.
Note
Using the CLEAR command returns the memory to its as-shipped state,
with no user files or other data in user memory.
To display this screen, type cle on the command line. A list of the files located on the
PCM is displayed in the window. Press the Enter key to complete this command. Then,
press the Enter key again to clear the PCM.
For more information on the CLEAR command, refer to chapter 3, section 7, Program
Utility Functions.
Command Restriction: PCOP, ONLINE.
5-4
Series 90 PCM Development Software (PCOP) User’s Manual – May 1993
GFK-0487
5
COMMNT
The Comment ( COMMNT ) command is used to display the Edit Annotation Data screen.
To display this screen, type com on the command line and press the Enter key. Entering
data in the fields displayed on this screen is optional.
For more information on the COMMNT command, refer to chapter 4, section 4, Advanced
Configuration Functions.
Command Restriction: CONFIG.
CONFIG
The Configuration ( CONFIG ) command is used to enter the PCOP configuration editor
and display the Edit Configuration Data menu. This can be done in either On-Line or
No Comm mode.
To use the CONFIG command, type con on the command line and press the Enter key.
For more information on the Edit Configuration Data menu, please refer to chapter 4,
section 2, Edit Configuration Data Menu.
Command Restriction: PCOP.
CTL
Control functions are used to change the configuration mode of the PCM, start and stop
user tasks, and redefine the user LEDs. The Control Functions menu is only available in
On-Line mode.
To display this menu, type ctl on the command line and press the Enter key. Then,
select the particular function you wish to perform.
For more information on control functions, refer to chapter 3, section 5, Control Functions.
Command Restriction: PCOP, ONLINE.
GFK-0487
Chapter 5 Using PCOP in Expert Mode
5-5
5
DEFLTS
The Defaults ( DEFLTS ) command is used to select various default initializations for user
configuration data. To use this command, type def on the command line and press
the Enter key. Then, select the default values for your particular configuration. Note
that the configuration type must be selected using the function keys on this screen. No
expert command is provided for the configuration default types.
For more information on the DEFLTS command, refer to chapter 4, section 3, Standard
Configuration Functions.
Command Restriction: CONFIG.
ERRORS
The ERRORS command is used to display errors accumulated from the PCM while the
PCOP package is attached. These errors are listed on the Error Display screen. Only the
most recent eight errors are displayed. These errors are then cleared from the screen
after exiting the Error Display screen.
To display this screen, type err on the command line and press the Enter key.
For more information on the ERRORS command and the Error Display screen, refer to
chapter 3, section 4, Status Display Functions.
Command Restriction: PCOP.
EXIT
The EXIT command is used to terminate the PCOP session from any menu and return
to MS-DOS or the Logicmaster 90 Programming Software main menu. To use this
command, type exi on the command line and press the Enter key.
5-6
Series 90 PCM Development Software (PCOP) User’s Manual – May 1993
GFK-0487
5
FBAKUP
The Backup Folder ( FBAKUP ) command is used to create a backup copy of the currently
selected program folder. To display the Backup a Current Program Folder screen, type
fba on the command line and press the Enter key. The name of the current folder is
displayed on this screen. Press the Enter key to start the backup function.
The backup folder is located in a subdirectory under the program folder. If no backup
folder exists for the current program folder, one is automatically created. If the program
folder has been backed up previously, the backup function writes over the previous
backup version.
Note
Multiple backups of the same program folder are not maintained.
For more information on the FBAKUP command, refer to chapter 3, section 6, Program
Folder Functions.
Command Restriction: PCOP.
FCLEAR
The Clear Folder ( FCLEAR ) command is used to delete the contents of the current
program folder, while keeping the folder itself for future use. If the program folder is
locked, it cannot be cleared.
To display the Clear Current Program Folder screen, type fcl on the command line on
the command line and press the Enter key. The name of the current folder is displayed
on the screen. Press the Enter key to start the clear operation. If there is any
information in the program folder, you must confirm this request before continuing.
For more information on the FCLEAR command, refer to chapter 3, section 6, Program
Folder Functions.
Command Restriction: PCOP.
GFK-0487
Chapter 5 Using PCOP in Expert Mode
5-7
5
FCOPY
The Copy Folder ( FCOPY ) command is used to copy from another program folder into
the current program folder. The contents of the source program folder are copied into
the current program folder. If any files have the same name in the current program
folder as in the source program folder, they are overwritten.
The format of the FCOPY command is:
FCO fol
where fol is the name of the program folder whose contents are to be copied into the
currently selected program folder. Press the Enter key to begin the copy operation.
For more information on the FCOPY command, refer to chapter 3, section 6, Program
Folder Functions.
Command Restriction: PCOP.
FDEL
The Delete Folder ( FDEL ) command is used to remove a program folder that is no
longer needed. If the program folder has a backup, the backup is automatically deleted.
If any directories have been created beneath the program folder to be deleted, these
must be removed before using the FDEL command. The last remaining program folder
cannot be deleted.
Note
If a program folder is locked, it cannot be deleted. You must first use the
FLOCK command to unlock the folder.
The format of the FDEL command is:
FDE fol
where fol is the name of the program folder to be deleted. Press the Enter key again.
Respond to the confirmation prompt to continue with the deletion. Once started, the
delete operation cannot be stopped.
For more information on the FDEL command, refer to chapter 3, section 6, Program
Folder Functions.
Command Restriction: PCOP.
5-8
Series 90 PCM Development Software (PCOP) User’s Manual – May 1993
GFK-0487
5
FDIR
The Folder Directory ( FDIR ) command is used to obtain a list of the files in the current
program folder. The list is displayed on the List Contents of the Current Program Folder
screen. The number of bytes available on the disk and the number of bytes that are
being used by the current folder are also displayed on this screen.
To display this screen, type fdi on the command line and press the Enter key.
If more file names are in the current folder than can be displayed on the screen at one
time, use the PageUp/Page Down cursor keys to page through the file names.
For more information on the FDIR command, refer to chapter 3, section 6, Program
Folder Functions.
Command Restriction: PCOP.
FOLDER
Program folder functions are used to organize program and configuration files in a
common program folder. A program folder is actually a subdirectory of files.
To display the Program Folder Functions menu, type fol on the command line and
press the Enter key. Then, select the particular function you wish to perform.
For more information on folder functions, refer to chapter 3, section 6, Program Folder
Functions.
Command Restriction: PCOP.
FLOCK
Locking a program folder protects its files against accidental alteration or deletion. To
toggle the LOCKED/UNLOCKED status of the current folder, type flo and press the
Enter key. The new status will appear in the lower right corner of the screen.
Note
The folder lock function is not available for release 2.06 and earlier.
Command Restriction: PCOP.
GFK-0487
Chapter 5 Using PCOP in Expert Mode
5-9
5
FRESTR
The Restore Folder ( FRESTR ) command is used to replace the contents of the current
program folder with the contents of the backup copy. In order to use this command, a
backup version must already exist. If the program folder is locked, you must change the
status to unlocked before restoring the program folder.
To display the Restore Current Program Folder screen, type fre on the on the
command line and press the Enter key. The name of the current folder is displayed on
the screen. Then, press the Enter key to start the restore operation.
If any information exists in the current program folder that would be written over by the
backup information, you must confirm this request. Once started, the restore operation
cannot be stopped.
For more information on the FRESTR command, refer to chapter 3, section 6, Program
Folder Functions.
Command Restriction: PCOP.
FSEL
The Select Folder ( FSEL ) command is used to create a new program folder or select one
that already exists.
The format of the FSEL command is:
FSEL fol
where fol is the name of the program folder.
The names of the program folders that are in the current drawer are listed on the screen.
To select a folder in another drawer, fully specify the file name with a directory.
To select a folder that does not already exist, enter the name of the new folder and press
the Enter key. You must then confirm this request in order to prevent accidentally
creating a program folder due to a typing mistake.
The directory created by this function will always have the extension .PCM. You do not
need to include .PCM in the folder name; it is provided automatically.
For more information on the FSEL command, refer to chapter 3, section 6, Program
Folder Functions.
Command Restriction: PCOP.
5-10
Series 90 PCM Development Software (PCOP) User’s Manual – May 1993
GFK-0487
5
GDS
The GDS command is used to initially install the CIMPLICITY-70 Graphics Display
System (GDS) software. This command automatically performs a soft reset and
establishes the PC: drive as the current folder directory. The GDS screen is only
available in On-Line mode.
To display this screen, type gds on the command line and press the Enter key.
For more information on the GDS command, refer to chapter 3, section 7, Program Utility
Functions.
Note
The GDS software must be purchased separately from PCOP. For more
information on the CIMPLICITY-70 Graphics Display System, refer to
the CIMPLICITY-70 Graphics Display System User’s Manual, GFK-0534.
Command Restriction: PCOP, ONLINE.
HELP
Help text provides a concise list of information about moving between fields and
screens, and selecting values. To display Help text, press ALT-H on any configuration
editor screen or type hel on the command line and press the Enter key. Press any key
to exit from the Help screen and continue editing.
Command Restriction: CONFIG.
GFK-0487
Chapter 5 Using PCOP in Expert Mode
5-11
5
LED
LED is both a PCOP command and a CONFIG command. Outside the editor, it
displays the User LED Definition Attributes screen in On-Line mode. This screen allows
you to interactively and temporarily redefine the assignments of the user LEDs. Within
config, the LED command is used to edit the configured definition of the user LEDs.
The format of the LED command is:
LED ln
where ln is the LED number 1 or 2. The current definition of the LED is displayed.
Position the cursor on the desired LED attribute, and use the Tab key to toggle the bits on
and off.
Note
Changes made in the definition of the user LEDs in PCOP will also
update/override the current active configuration data (but not the
UCDF). All changes made using this command are lost upon
reset/power cycle of the PCM. To change the user configuration
(UCDF), use the configuration editor.
When the user task is chosen, the task number or number of the driver that will control
the LED must be entered at the prompt. The task number is the same as the task
priority.
Command Restriction:
5-12
PCOP, CONFIG.
Series 90 PCM Development Software (PCOP) User’s Manual – May 1993
GFK-0487
5
LOAD
The LOAD command is used to load user MegaBasic programs and configuration files
from the PC file system into user memory. User programs must be loaded into the
MegaBasic workspace by MegaBasic interpreter. The files may be loaded to the RAM
Disk for fast access and onboard storage by using the LOAD command.
To use the LOAD command, type loa on the command line, and press the Enter key.
The format of the LOAD command:
LOAD fn [pf] [R]
or
LOAD fn UCDF
fn
The name of the file to be loaded.
pf
The name of the file on the PCM RAM Disk. This is an optional parameter; if not
required, simply press the Enter key in response to the prompt. If no PCM
file name is entered, the PC file name is used.
UCDF
R
The user configuration data on the PCM.
Read only (protection level). This is an optional parameter; if not required,
simply press the Enter key in response to the prompt. If no protection level is
assigned, the module is not protected from writes.
For example, to load the standard configuration MB1.CBF to the PCM as UCDF, type:
Load \PCOP\MB1\UCDF
To load a user program called BASIC.PGM to a PCM RAM disk file called MY.PGM, type:
Load BASIC.PGM MY.PGM
Note
The UCDF module can also be loaded to the PCM by using the USE
command, as described later in this chapter.
If the file cannot be located, the following error is displayed:
PCM Error, Command Aborted:
File Not Found
For more information on the LOAD command, refer to chapter 3, section 7, Program
Utility Functions.
Command Restriction: PCOP, ONLINE.
GFK-0487
Chapter 5 Using PCOP in Expert Mode
5-13
5
MB
The MegaBasic ( MB ) command is used to start the MegaBasic interpreter. After entering
MegaBasic, you may develop, run, alter, and debug an application program.
To start MegaBasic, type MB on the command line and press the Enter key. This
command places you at the MegaBasic command level, from which you can enter
program lines and MegaBasic commands.
For more information on MegaBasic, refer to the Series 90 Programmable Coprocessor
Module and Support Software User’s Manual, GFK-0255.
Command Restriction: PCOP, ONLINE.
MDEL
The Module Delete ( MDEL ) command is used to delete user programs, data files, and
configuration data from the PCM RAM Disk, or in the current folder. This command is
only available in On-Line mode.
To use the MDEL command, type mde on the command line and press the Enter key.
The format of the MDEL command is:
MDEL pf
or
MDEL UCDF
pf
UCDF
The name of the file on the PCM RAM Disk.
The user configuration data on the PCM.
If the specified file cannot be located, the command is aborted and a ”File Not Found”
error is displayed.
MDEL UCDF deletes all configuration information associated with the user
configuration. This will cause a hard reset before the modules are deleted, which the
system will first ask you to confirm.
Note
The serial port setup for the PCM port will revert to the factory settings
when UCDF is deleted.
For more information on the MDEL command, refer to chapter 3, section 7, Program
Utility Functions.
Command Restriction: PCOP, ONLINE.
5-14
Series 90 PCM Development Software (PCOP) User’s Manual – May 1993
GFK-0487
5
MDIR
The Module Directory ( MDIR ) command is used to list user programs, data files, and
configuration data located on the PCM RAM Disk. This command is only available in
On-Line mode.
To use the MDIR command, type mdi on the command line and press the Enter key.
For more information on the MDIR command, refer to chapter 3, section 7, Program
Utility Functions.
Command Restriction: PCOP, ONLINE.
PORTS
The PORTS command is used to edit the serial port configuration for ports 1 and 2 on
the Serial Port Data screen. Values are not required on this screen if the port is to be used
by CCM. When the port has been selected for use by MegaBasic or the programmer,
values may be entered for the port setup on this screen. If no user entries are made, the
default settings are used.
To display the Serial Port Data screen, type por on the command line. When
prompted, enter 1 or 2, or use the Tab key to specify which port to modify.
The format of the PORTS command is:
POR [pn]
where pn is the port number.
For more information on the Serial Port Data screen, refer to chapter 4, section 3,
Standard Configuration Functions.
Command Restriction: CONFIG.
READ
The Read Configuration Data ( READ ) command is used to read configuration data from
a specified file.
The format of the READ command is:
READ fn
where fn is a file on the PC or on the PCM RAM Disk (RAM:fn). Press the Enter key
again to begin the read operation.
For more information on the READ command, refer to chapter 4, section 4, Advanced
Configuration Functions.
Command Restriction: CONFIG.
GFK-0487
Chapter 5 Using PCOP in Expert Mode
5-15
5
RUN
The RUN command is used to display the RUN User Task screen in On-Line mode. This
screen is used to begin executing a task or group of tasks, specified by a module name.
Selections are provided for the name of the task to run,theinput/output/error devices,
the stack and data size for the user task, background or foreground mode, task priority,
and link modules.
To display the RUN User Task screen, type run on the command line and press the
Enter key.
The format of the RUN command is:
RUN tn [options]
where tn is the task name to be run. Available options include:
Option
>outchn1
<inchn1
?erchn1
/sXXXX
/dXXXX
/eX
/ix
/mName
/b
/k
Description
Redirect standard output to channel 1.
Redirect standard input to channel 1.
Redirect standard error to channel 1.
Use stack size of XXXX hex (200 default).
Use data size of XXXX hex (also in code module).
Executable type, 1 (PRIORITY) by default.
Task ID.
Link to module ”Name.”
Run the module in background mode.
Keep the environment block after task terminates.
Valid arguments for the task to be run may also be entered.
Caution
The RUN command is not fully supported for this release. It is
recommended that you perform a reset instead of using the RUN
command.
For more information on the RUN command, refer to chapter 3, section 5, Control
Functions.
Command Restriction: PCOP, ONLINE.
5-16
Series 90 PCM Development Software (PCOP) User’s Manual – May 1993
GFK-0487
5
SAVE
The SAVE command is used to copy user programs, data, and configuration files from
memory into a PC file. (MegaBasic has a similar SAVE command for saving MegaBasic
source programs.)
To use the SAVE command, type sav on the command line and press the Enter key.
The format of the SAVE command is:
SAVE pf [fn]
where:
pf
The name of any file located on the PCM RAM Disk.
fn
The name of the file to be saved to.
For more information on the SAVE command, refer to chapter 3, section 7, Program
Utility Functions.
Command Restriction: PCOP, ONLINE.
STASK
The System Task ( STASK ) command is used to display the Edit Programmer
Communications and File Server Data screen. This screen allows you to edit
programmer communications and file server data.
To display this screen, type sta on the command line and press the Enter key. Use the
cursor or Enter keys to move to the field you want to edit, and then use the Tab key to
select the desired standard device. If you change the values on this page, PCOP will
prompt you to confirm these changes.
For more information on the STASK command, refer to chapter 4, section 4, Advanced
Configuration Functions.
Command Restriction: CONFIG.
GFK-0487
Chapter 5 Using PCOP in Expert Mode
5-17
5
STATUS
Status functions are used to access status information about the PCM. Status
information includes errors accumulated from the PCM while the PCOP package is
attached, and also information about the currently active tasks and configuration.
To display the Status Functions menu, type sta on the command line and press the
Enter key. Then, select the particular function you wish to perform.
For more information on status display functions, refer to chapter 3, section 4, Status
Functions.
Command Restriction: PCOP.
STN
The STNDRD ( STN ) command is used to display the Edit Standard Configuration Data
menu in the configuration editor. This menu contains the standard configuration
functions.
To display this menu, type stn on the command line and press the Enter key.
For more information on the STN command, refer to chapter 4, section 3, Standard
Configuration Functions.
Command Restriction: CONFIG.
5-18
Series 90 PCM Development Software (PCOP) User’s Manual – May 1993
GFK-0487
5
STOP
The STOP command is used to display the STOP User Task screen in On-Line mode.
This screen is used to stop a task from executing. To display this screen, type stop on
the command line and press the Enter key.
The format of the STOP command is:
STOP tn
where tn is the task ID number to be stopped.
Enter the user task ID, or the numeral 8 if no user task number was specifed for run.
After the command is executed, the message ”Command Complete” is displayed on the
message line.
Caution
The STOP command is not fully supported for this release. It is
recommended that you perform a reset instead of using the STOP
command.
For more information on the STOP command, refer to chapter 3, section 5, Control
Functions.
Command Restriction: PCOP, ONLINE.
TERMF
The TERMF command is used to invoke the TERMF terminal emulation software
package. This allows monitoring of a MegaBasic program which is currently executing.
TERMF may also be invoked automatically if the PCM sends output on the serial port
attached to PCOP. This happens, for example, when a soft reset starts MegaBasic.
To use the TERMF command, type ter on the command line and press the Enter key.
The ALT-Z key combination enables you to return to PCOP from TERMF. Pressing
CTRL-BREAK exits directly to MS-DOS.
For more information on TERMF, refer to chapter 3, section 3, TERMF.
Command Restriction: PCOP.
GFK-0487
Chapter 5 Using PCOP in Expert Mode
5-19
5
USE
The USE command is used to activate a given configuration on the PCM in On-Line
mode. This establishes the chosen data as the current active configuration.
The format of the USE command is:
USE UCDF
or
USE FCDF
or
USE fn
UCDF
The user configuration data file on the PCM.
FCDF
The factory default configuration.
fn
A user configuration file on the PC or on the PCM (RAM:).
Selecting FCDF on this screen is the same as initiating a hard reset, while selecting
UCDF initiates a soft reset. This provides a remote reset function, as long as PCOP
remains connected and on-line with the PCM.
If fn is specified after the USE command on the command line, the configuration data
in the given file is loaded to the PCM. After loading, USE fn initiates a soft reset.
Note
If the configuration file being used will disconnect PCOP from the PCM
or change serial port defaults, the USE command will time out rather
than indicating completion. It is preferable, in this case, to use the LOAD
command and then press the Restart/Reset pushbutton.
For more information on the USE command, refer to chapter 3, section 5, Control
Functions.
Command Restriction: PCOP, ONLINE.
5-20
Series 90 PCM Development Software (PCOP) User’s Manual – May 1993
GFK-0487
5
UTILTY
Program utility functions are used to manipulate files and memory modules on the
PCM. The Program Utilities menu is only available in On-Line mode.
To display this menu, type uti on the command line and press the Enter key. Then,
select the particular function you wish to perform.
For more information on program utility functions, refer to chapter 3, section 7, Program
Utility Functions.
Command Restriction: PCOP, ONLINE.
VERSION
The VERSION command is used to view the PCM software version information. To
display the current PCM software version information, type ver on the command line
and press the Enter key.
Command Restriction: PCOP, ONLINE.
WRITE
The Write Configuration Data ( WRITE ) command is used to write configuration data
from a specified file.
The format of the WRITE command is:
WRITE fn
where fn is a file on the PC or on the PCM RAM Disk (RAM:fn). Press the Enter key
again to begin the write operation
For more information on the WRITE command, refer to chapter 4, section 4, Advanced
Configuration Functions.
Command Restriction: CONFIG.
GFK-0487
Chapter 5 Using PCOP in Expert Mode
5-21
Appendix A PCOP Menu Structure
A
The illustrations in this appendix show the PCOP menu structure and the available
software function keys.
a44243
PCOP
MAIN MENU
F1
F2
EDIT
CONFIGURATION
DATA
F1
MegaBasic
F3
F4
TERMF
PCM
STATUS
FUNCTIONS
F5
F1
SELECT
DEFAULT
F3
RUN–TIME
ERRORS
F4
EDIT
MegaBasic
F4
EDIT
CCM
F6
EDIT
PORTS
F7
F6
F 10
F9
F 10
PROGRAM
UTILITY
FUNCTIONS
F1
F1
F1
USE FCDF
OR UCDF
F3
RUN
USER TASK
F5
F4
SELECT
FOLDER
F2
DELETE
FOLDER
F4
STOP
USER TASK
F6
BACKUP
FOLDER
F5
REDEFINE
USER LED1
F7
EDIT
LEDs
F8
PROGRAM
FOLDER
FUNCTIONS
S/W VERSION
INFORMATION
CONFIGURATION
INFORMATION
F7
PCM
CONTROL
FUNCTIONS
RESTORE
FOLDER
F7
REDEFINE
USER LED2
CLEAR
FOLDER
F9
ADVANCED
FUNCTIONS
LIST
CONTENTS
F10
COPY
FOLDER
SAVE
FILE
F2
LOAD
FILE
F4
DIRECTORY
OF FILES
F6
DELETE
FILE
F7
DELETE
ALL FILES
F9
ADS
F 10
GDS
Figure A-1. PCOP Main Menu
GFK-0487
A-1
A
F1
a44244
EDIT
CONFIGURATION
DATA
F1
F2
SELECT
DEFAULT
F3
F5
F4
EDIT
MegaBasic
EDIT
CCM
F6
F7
EDIT
PORTS
F8
EDIT
LEDs
F 1 MB PORT 1
F 1 PORT 1
F 1 PORT 1
F 1 LED 1
F 2 MB PORT 1
CCM PORT 2
F 2 PORT 2
F 2 PORT 2
F 2 LED 2
F 4 INITIALIZE
F 4 INITIALIZE
F 4 INITIALIZE
F 3 CCM PORT 1
F 4 INITIALIZE
F9
EDIT
HWID
F 4 INITIALIZE
F 10 NEXT PAGE
F 10
ADVANCED
FUNCTIONS
F 1 SYSTEM
TASKS
F 7 COMMENT
F 8 READ
F 4 CCM PORT 2
F 9 WRITE
F 5 CCM PORT 1
CCM PORT 2
F 10 STANDARD
FUNCTIONS
Figure A-2. Edit Configuration Data
A-2
Series 90 PCM Development Software (PCOP) User’s Manual – May 1993
GFK-0487
Appendix B Configuration Data
section level 1 1
figure_ap level 1
table_ap level 1
B
The configuration data consists of a group of records which contain assigned values for
the various fields. This appendix lists the contents of these records, along with the range
of values and default value for each field.
Table B-1. HWID Data
Field Name
Range of Values
Default Value
Total Ram Size (90–30 only)
32K, 160K, 192K
192K
Daughter Board Size (90–70 only)
None, 64K, 128K, 256K 512K
128K
Table B-2. MegaBasic Interpreter Data
Field Name
GFK-0487
Range of Values
Default Value
Enable MegaBasic Task
Yes, No
YES
Start MB on Soft Reset
Yes, No
NO
Program to Run at Reset
If you want MegaBasic to start automatically
upon a soft reset, enter the program file name.
User ProgramI/O: Input
COM1:, COM2:, RAM:fn, PC:fn, NULL:
COM1:
User ProgramI/O: Output
COM1:, COM2:, RAM:fn, PC:fn, NULL:
COM1:
User ProgramI/O: Error
COM1:, COM2:, RAM:fn, PC:fn, NULL:
COM1:
Task Priority
0 thru 8
MegaBasic Command Line
Generally, the MegaBasic program file name.
No default value
Allocated Data Size
Any valid integer 0 – 65,535
No default value
No default value
6
B-1
B
Table B-3. CCM Configuration Data
Field Name
Range of Values
Default Value
Enable CCM on Port
Yes, No
NO
CCM CPU ID
1 thru 254
Mode
Peer, Master, Slave
PEER
Turnaround Delay
None, 10 ms, 100 ms, 500 ms, Other
NONE
Timeout
Long, Medium, Short, None, Other
LONG
Retry Count
Normal, Short, Other
NORMAL
Data Rate
300, 600, 1200, 2400, 4800, 9600, 19200, 38400 bps
19200 bps
Parity
Odd, None
Flow Control
None, Hardware
Task Priority
0 thru 8 (0 disables). 1 thru 4 are usually
reserved for system tasks.
1
ODD
NONE
5 or 6
Table B-4. CCM Detail Data
Field Name
Range of Values
Default Value
Timeout Values
ACK/NAKafter ENQ
Any valid integer 0 – 65,535
800 ms
Delay Retry of ENQ
Any valid integer 0 – 65,535
10 ms
ENQ Collision Backoff
Any valid integer 0 – 65,535
80 ms
Req Dead Time/ENQ
Any valid integer 0 – 65,535
20 ms
SOH after ENQ ACK
Any valid integer 0 – 65,535
800 ms
BCC after SOH
Any valid integer 0 – 65,535
670 ms
ACK after Hdr BCC
Any valid integer 0 – 65,535
2000 ms
STC after Hdr ACK
Any valid integer 0 – 65,535
20,000 ms
BCC after STX
Any valid integer 0 – 65,535
8340 ms
ACK after Data Blk BCC
Any valid integer 0 – 65,535
20,000 ms
EOT after last ACK
Any valid integer 0 – 65,535
800 ms
Delay Read ACK to Data Block
Any valid integer 0 – 65,535
10 ms
Turnaround Delay
Any valid integer 0 – 65,535
Delay Values
0 ms
Retry Counts
B-2
Header Block NAK
Any valid integer 0 – 65,535
Data Block NAK
Any valid integer 0 – 65,535
3
ENQ Sequence Timeout/NAK
Any valid integer 0 – 65,535
32
Series 90 PCM Development Software (PCOP) User’s Manual – May 1993
3
GFK-0487
F
Table B-5. Serial Port Initialization Data
Field Name
Range of Values
Default Value
Interface
RS–232, RS–485
RS–232
Data Rate
300, 600, 1200, 2400, 4800, 9600, 19200, 38400 bps
Parity
Odd, Even, None
Flow Control
None, Hardware, Software
Stop Bits
1 or 2
1
Bits per Character
7 or 8
8
19200 bps
NONE
HARDWARE
Table B-6. LED Data
Field Name
Range of Values
Default Value
User Task Controlled
0/1
0
Rx Backplane Activity
0/1
0
Tx Backplane Activity
0/1
0
Rx Serial Port 2
0/1
0
Rx Serial Port 1
0/1
1
Tx Serial Port 2
0/1
0
Tx Serial Port 1
0/1
1
Table B-7. Edit Annotation Data
Field Name
GFK-0487
Range of Values
Default Value
PCM ID
7–character name
No default value
Comment
0 thru 256 characters
No default value
EarliestPCMS/WRevision
Any, 2.0
2.0
Appendix B Configuration Data
B-3
B
Table B-8. Programmer and File Server Data
Field Name
Range of Values
Default Value
Programmer Communications Data
Input
COM1:, COM2:, RAM:fn, PC:fn, NULL:
COM1:
Output
COM1:, COM2:, RAM:fn, PC:fn, NULL:
COM1:
Error
COM1:, COM2:, RAM:fn, PC:fn, NULL:
COM1:
Task Priority
1 thru 8
4
File Server Data
Input
COM1:, COM2:
COM1:
Output
COM1:, COM2:
COM1:
Error
COM1:, COM2:
COM1:
Task Priority
B-4
1 thru 8
Series 90 PCM Development Software (PCOP) User’s Manual – May 1993
3
GFK-0487
Appendix C PCOP File Descriptions
section level 1 1
figure_ap level 1
table_ap level 1
C
The following files are placed on the hard disk during the PCOP INSTALL procedure.
The AUTOEXEC.BAT and CONFIG.SYS files are optional; you can select not to install
them.
File
\PCOP
Description
Adirectory.
ALM_RD.PGM
MegaBasic example reading %M bits.
ASMCHK.PGM
Refer to GFK-0256.
ASMDEFS.ASM
Refer to GFK-0256.
ASMPKG.BAT
Refer to GFK-0256.
BINARIES.DOC
Documents features of BYTESWAP.BIN and PORT_CTL.BIN.
BITFUNCS.ASM
Source file with documentation for BITFUNCS.BIN.
BITFUNCS.BIN
MegaBasic Utilities package for bit string operations.
BYTESWAP.BIN
MegaBasic utilities for checksum and reversing byte order of words.
CCM1.CDF
Default user configuration with CCM on port 1.
CCM12.CDF
Default user configuration with CCM on ports 1 and 2.
CCM1MB2.CDF
Default user configuration with CCM on port 1 and MegaBasic on port 2.
CCM2.CDF
Default user configuration with CCM on port 2.
CRUNCH.EXE
Compaction and encryption utility for MegaBasic program.
DEFAULT.DAT
TERM settings for factory mode on a Workmastercomputer.
EXAMPLE.CDF
Simple configuration example that starts a MegaBasic program automatically in user
mode.
EXAMPLES.DOC
Documentation of MegaBasic .PGM packages.
GENERIC.DOC
Line number referenced documentation of GENERIC.PGM and GEN_TEST.PGM.
GENERIC.PGM
Definitions and procedures to access user references not directly supported by the PCM’s
backplane driver.
GEN_TEST.PGM
Sample program using GENERIC.PGM.
GRAPH.PGM
Sample graph program.
LM90.DAT
GFK-0487
MB1.CDF
Default user configuration with MegaBasic on port 1.
MB1CCM2.CDF
Default user configuration with MegaBasic on port 1 and CCM on port 2.
MB2.CDF
Default user configuration with MegaBasic on port 2.
MBCRC.LST
Source file for MBCRC.PGM
C-1
C
File
\PCOP
(cont’d)
Adirectory.
MBCRC.PGM
MegaBasic CRC checksum package.
PCOP.EXE
PCM software (PCOP).
PORT_CTL.BIN
PCM serial port control and status utilities.
PRN_FLT.PGM
MegaBasic functions and procedures to analize and print PLC and I/O fault records.
README.DOC
MegaBasic release notes.
README.TXT
Additionalinformation file.
READ_FLT.PGM
MegaBasic functions and procedures to access PLC and I/O fault tables.
SAMPLE.PGM
Sample MegaBasic program.
TERM.DAT
TERM settings for factory mode on a Workmastercomputer.
TERM.EXE
Terminal emulator without file transfer protocol.
TERMF.EXE
Terminal emulator with file transfer protocol.
TERMSET.EXE
Installation utility for setting TERM parameters.
TEST_FLT.PGM
How to use READ_FLT.PGM and PRN_FAULT.PGM to read and display fault
information.
UTILITY.DOC
Documentation for using UTILITY.PGM.
UTILITY.PGM
Procedures for gathering system information from the Series 90 CPU.
VT100.PGM
PCM MegaBasic extensions for VT100-style escape sequences. This file prints to STDOUT.
VT100_5.PGM
A companion file to VT100.PGM that prints to the device opening as #5.
\PCOP\BAT
PCOP.BAT
C-2
Description
Adirectory.
Batch file to run PCOP from any directory.
Series 90 PCM Development Software (PCOP) User’s Manual – May 1993
GFK-0487
Appendix D CONFIG.SYS File
D
This appendix briefly describes how to edit a CONFIG.SYS file using the EDLIN line
editor. For more complete information on using EDLIN commands and features, refer
to your MS-DOS manual.
If you need to stop using EDLIN without saving the file, use the QUIT command (type
*Q and press the Return key) to return to the command prompt.
Note
The following example entries assume that the file being edited is on
drive C.
To edit the CONFIG.SYS file:
1.
First, use the DIR command to display the contents of the root directory on your
hard disk. If there is a CONFIG.SYS file on the disk, you can display its contents by
typing TYPE CONFIG.SYS and pressing the Return key.
2.
Enter the EDLIN command and the name of the file by typing
C>EDLIN CONFIG.SYS. Then, press the Return key. EDLIN will prompt:
End of input file
*
The asterisk (*) is the EDLIN prompt.
3.
The first step in editing the file is to display the file contents. Enter the LIST
command by typing *L and pressing the Return key. The CONFIG.SYS file is
listed as individual numbered lines. For example:
*L
1:
2:
3:
4:
GFK-0487
break=on
buffers=5
files=20
device=ansi.sys
D-1
D
4.
Compare the contents of your file with the entries required to run the PCM
software. You can insert, delete, or edit lines, as described below. EDLIN
commands can only be executed at the EDLIN asterisk prompt at the left side of the
screen (not from a numbered line). To execute an EDLIN command, return to the
asterisk prompt by pressing CTRL-C like this:
2: buffers=5
3: files=20
4: device=ansi.sys
5:*^C
A. Adding a Line:
(1) To insert a line in the file, enter the INSERT command at the EDLIN
asterisk prompt by typing *I and pressing the Return key.
(2) The sequence of items in the CONFIG.SYS file is not important. However,
if you want to insert the line in a particular order, you can specify a line
number before entering the INSERT command. For example, to insert a
line as line 5 in the file, type *5I and press the Return key. The line
number will appear beside the asterisk prompt.
(3) Now, type in the content for the line, and press the Return key at the end of
the line.
(4) Continue until all the necessary lines have been added to the file. After
entering the last new line, press the Return key again. The next line number
appears.
(5) Press CTRL-C to return to the EDLIN asterisk prompt.
B. Removing a Line:
(1) To delete a line from the file, enter the DELETE command at the asterisk
prompt (at the left side of the screen).
(2) Include the number of the line to delete.
(3) Then, use the LIST command to verify the deletion.
C. Editing a Line:
(1) To change part of an existing line, enter the line number at the asterisk
prompt. In this next example, line 2 is selected for editing:
1: break=on
2: buffers=5
3: file=20
4: device=ansi.sys
5:*device=wmclock.sys
*2
(2) The line appears again on the screen:
2: buffes=5
2:*
D-2
Series 90 PCM Development Software (PCOP) User’s Manual – May 1993
GFK-0487
D
(3) Enter the correct line and press the Return key.
2: buffers=5
2:*buffers=15
(4) Press CTRL-C to return to the EDLIN asterisk prompt:
6:*^C
*
5.
To finish using EDLIN, enter the END command by typing *E and pressing the
Return key. The END command saves the new version of the file under the original
file name ( CONFIG.SYS ). It also automatically creates a backup version of the file
named CONFIG.BAK.
6.
After you enter the END command and press the Return key, the MS-DOS
command prompt appears. Type TYPE CONFIG.SYS and press the Return key to
check the contents of the file.
After editing the CONFIG.SYS file, restart the computer. This must be done in order to
use the entries in the new file. If the computer is not restarted, the previous version of
the CONFIG.SYS file that was present the last time the computer was started up will
continue to be used.
GFK-0487
Appendix D CONFIG.SYS File
D-3
Index
A
Accessing MegaBasic from PCOP, 3-8 ,
5-14
BYTESWAP.BIN, C-1
C
Accessing the PCOP main menu, 3-5
CCDF, 4-2
ADS (F9), 3-27 , 3-33
CCM (F4), 4-4 , 4-7
ADS command, 3-33 , 5-2
CCM command, 5-3
ADS software, 3-33 , 5-2
CCM configuration data, 4-12 , 5-3 , B-2
definitions of entries on the edit CCM
configuration data screen
ADV command, 5-3
Advanced (F10), 4-4 , 4-7
Advanced configuration functions, 4-20 ,
5-3
comment (F7), 4-20
commentary data, 4-22 , 5-5
programmer communications and file
server data, 4-20 , 5-17
read configuration (F8), 4-20
read configuration data, 4-23 , 5-15
standard (F10), 4-20
system task (F1), 4-20
write configuration (F9), 4-20
write configuration data, 4-24 , 5-21
CCM detail data, 4-15 , B-2
CCM1.CDF, C-1
CCM12.CDF, C-1
CCM1MB2.CDF, C-1
ALM_RD.PGM, C-1
CCM2.CDF, C-1
Alphanumeric display coprocessor module, 3-33
CFG command, 5-4
ALT keys, 3-7
ASMCHK.PGM, C-1
ASMDEFS.ASM,C-1
ASMPKG.BAT, C-1
Changing PCM configuration mode, 3-13 ,
5-20
CHE command, 5-4
CIMPLICITY 90-ADS software, 3-33 , 5-2
CIMPLICITY 90-ADS system, 3-33 , 5-2
AUTOEXEC.BAT, 2-1 , 2-2 , 2-4 , 2-5
CIMPLICITY-70 graphics display system
software, 3-34 , 5-11
AUTOEXEC.L90, 2-1 , 2-4
Clear (F7), 3-27 , 3-32
CLEAR command, 3-32 , 5-4
B
Backing up the current program folder,
3-21 , 5-7
Backup folder (F4), 3-18 , 3-21
Basic (F3), 4-4 , 4-7 , 4-9
BASIC command, 5-3
BASIC.PGM, 4-11
BINARIES.DOC, C-1
BITFUNCS.ASM, C-1
Clear folder (F7), 3-18 , 3-23
Clearing the current program folder, 3-23 ,
5-4 , 5-7
Comment (F7), 4-20
Commentary data, 4-22 , 5-5
definitions of the entries on the edit annotation screen
COMMNT command, 5-5
Communications, programmer, 4-20 , 5-17
BITFUNCS.BIN, C-1
GFK-0487
Index-1
Index
A
Accessing MegaBasic from PCOP, 3-8 ,
5-14
BYTESWAP.BIN, C-1
C
Accessing the PCOP main menu, 3-5
CCDF, 4-2
ADS (F9), 3-27 , 3-33
CCM (F4), 4-4 , 4-7
ADS command, 3-33 , 5-2
CCM command, 5-3
ADS software, 3-33 , 5-2
CCM configuration data, 4-12 , 5-3 , B-2
definitions of entries on the edit CCM
configuration data screen
CCM CPU ID, 4-14
data rate, parity, flow control, 4-14
enable CCM task on port, 4-14
interface, 4-14
mode, 4-14
task priority, 4-14
turnaround delay, timeout, retry
count, 4-14
ADV command, 5-3
Advanced (F10), 4-4 , 4-7
Advanced configuration functions, 4-20 ,
5-3
comment (F7), 4-20
commentary data, 4-22 , 5-5
programmer communications and file
server data, 4-20 , 5-17
read configuration (F8), 4-20
read configuration data, 4-23 , 5-15
standard (F10), 4-20
system task (F1), 4-20
write configuration (F9), 4-20
write configuration data, 4-24 , 5-21
CCM detail data, 4-15 , B-2
CCM1.CDF, C-1
CCM12.CDF, C-1
CCM1MB2.CDF, C-1
ALM_RD.PGM, C-1
CCM2.CDF, C-1
Alphanumeric display coprocessor module, 3-33
CFG command, 5-4
ALT keys, 3-7
ASMCHK.PGM, C-1
ASMDEFS.ASM,C-1
ASMPKG.BAT, C-1
Changing PCM configuration mode, 3-13 ,
5-20
CHE command, 5-4
CIMPLICITY 90-ADS software, 3-33 , 5-2
CIMPLICITY 90-ADS system, 3-33 , 5-2
AUTOEXEC.BAT, 2-1 , 2-2 , 2-4 , 2-5
CIMPLICITY-70 graphics display system
software, 3-34 , 5-11
AUTOEXEC.L90, 2-1 , 2-4
Clear (F7), 3-27 , 3-32
CLEAR command, 3-32 , 5-4
B
Backing up the current program folder,
3-21 , 5-7
Backup folder (F4), 3-18 , 3-21
Basic (F3), 4-4 , 4-7 , 4-9
BASIC command, 5-3
BASIC.PGM, 4-11
BINARIES.DOC, C-1
BITFUNCS.ASM, C-1
Clear folder (F7), 3-18 , 3-23
Clearing the current program folder, 3-23 ,
5-4 , 5-7
Comment (F7), 4-20
Commentary data, 4-22 , 5-5
definitions of the entries on the edit annotation screen
comment, 4-22
earliest PCM software revision, 4-22
PCM ID, 4-22
COMMNT command, 5-5
Communications, programmer, 4-20 , 5-17
BITFUNCS.BIN, C-1
GFK-0487
Index-1
Index
CONFIG command, 5-5
CONFIG.L90, 2-1 , 2-4
CONFIG.SYS, 2-1 , 2-2 , 2-4 , 2-5
local configuration file, 2-6
using EDLIN to edit a CONFIG.SYS file,
D-1
using the CONFIG.SYS file to run other
software, 2-2
Configuration data, 4-2 , B-1
CCM configuration data, B-2
CCM detail data, B-2
edit annotation data, B-3
HWID data, B-1
LED data, B-3
MegaBasic interpreter data, B-1
programmer and file server data, B-4
serial port initialization data, B-3
Configuration editor, 4-2
advanced configuration functions, 4-20 ,
5-3
CCM configuration data, 4-12 , 5-3
CCM detail data, 4-15
commentary data, 4-22 , 5-5
configuration data, 4-2
configuration editor screen definitions,
4-5
configuring a PCM for MegaBasic programs, 4-11
current configuration data, 4-2
default configuration data, 4-7 , 5-6
edit configuration data menu, 4-3 , 5-5
Advanced (F10), 4-4
basic (F3), 4-4
CCM (F4), 4-4
defaults (F1), 4-4
hardware (F8), 4-4
LEDs (F7), 4-4
ports (F6), 4-4
expert mode, 5-1
factory default configuration data, 4-2
hardware configuration data, 4-8
help text, 4-6
MegaBasic interpreter data, 4-9 , 5-3
moving among the fields on an editor
screen
backspace, 4-4
CTRL-BREAK, 4-4
cursor and enter, 4-4
delete, 4-4
end, 4-4
escape, 4-4
home, 4-4
Index-2
programmer communications and file
server data, 4-20 , 5-17
read configuration data, 4-23 , 5-15
redefining the user LEDs, 4-18
saving a configuration, 4-5
selecting field values, 4-6
serial port initialization data, 4-16 , 5-15
standard configuration functions, 4-7 ,
5-18
user configuration data, 4-2
write configuration data, 4-24 , 5-21
Configuration editor (F1), 3-7
Configuration file, local, 2-6
TERMSET, 2-6
Configuration functions, advanced, 4-20 ,
5-3
comment (F7), 4-20
commentary data, 4-22 , 5-5
programmer communications and file
server data, 4-20 , 5-17
read configuration (F8), 4-20
read configuration data, 4-23 , 5-15
standard (F10), 4-20
system task (F1), 4-20
write configuration (F9), 4-20
write configuration data, 4-24 , 5-21
Configuration functions, standard, 4-7 ,
5-18
Advanced (F10), 4-7
basic (F3), 4-7 , 4-9
CCM (F4), 4-7
CCM configuration data, 4-12 , 5-3
CCM detail data, 4-15
default configuration data, 4-7 , 5-6
defaults (F1), 4-7
hardware (F8), 4-7
hardware configuration data, 4-8
LEDs (F7), 4-7
MegaBasic interpreter data, 4-9 , 5-3
ports (6), 4-7
redefining the user LEDs, 4-18
serial port initialization data, 4-16 , 5-15
Configuration mismatch, 2-8
Configuring a PCM for MegaBasic programs, 4-11
Configuring the PCM using PCOP, 4-1
advanced configuration functions, 4-20 ,
5-3
CCM configuration data, 4-12 , 5-3
CCM detail data, 4-15
commentary data, 4-22 , 5-5
configuration data, 4-2
GFK-0487
Index
configuration editor, 4-2
configuration editor screen definitions,
4-5
configuring a PCM for MegaBasic programs, 4-11
current configuration data, 4-2
default configuration data, 4-7 , 5-6
edit configuration data menu, 4-3 , 5-5
factory default configuration data, 4-2
hardware configuration data, 4-8
help text, 4-6
MegaBasic interpreter data, 4-9 , 5-3
programmer communications and file
server data, 4-20 , 5-17
read configuration data, 4-23 , 5-15
redefining the user LEDs, 4-18
saving a configuration, 4-5
selecting field values, 4-6
serial port initialization data, 4-16 , 5-15
standard configuration functions, 4-7 ,
5-18
user configuration data, 4-2
write configuration data, 4-24 , 5-21
Control functions, 3-12 , 5-5
changing PCM configuration mode,
3-13 , 5-20
executing a task, 3-14 , 5-16
LED 1 (F6), 3-12 , 3-16
LED 2 (F7), 3-12 , 3-16
redefining the user LEDs, 3-16
run (F3), 3-12 , 3-14
stop (F4), 3-12 , 3-15
stopping a task, 3-15 , 5-19
use (F1), 3-12 , 3-13
Control functions (F5), 3-7 , 3-12 , 5-5
Copy folder (F10), 3-18 , 3-25
Copying a program folder, 3-25 , 5-8
Creating a program folder, 3-4 , 3-19 , 5-10
CRUNCH.EXE, C-1
DEFLTS command, 5-6
Delete file (F6), 3-27 , 3-31
Delete folder (F2), 3-18 , 3-20
Deleting a file, 3-31 , 5-14
Deleting a program folder, 3-20 , 5-8
Deleting all files on the PCM, 3-32
Directory of files, 3-30 , 5-15
E
Edit annotation data, B-3
Edit configuration data menu, 4-3 , 5-5
Advanced (F10), 4-4
basic (F3), 4-4
CCM (F4), 4-4
Defaults (F1), 4-4
hardware (F8), 4-4
LEDs (F7), 4-4
ports (F6), 4-4
EDLIN, 2-4
using EDLIN to edit a CONFIG.SYS file,
D-1
adding a line, D-2
editing a line, D-2
removing a line, D-2
Error display screen, 3-11
execution errors, 3-11
user command syntax errors, 3-11
ERRORS command, 5-6
Escape key, 3-5 , 3-7
EXAMPLE.CDF, C-1
EXAMPLES.DOC, C-1
Executing a task, 3-14 , 5-16
Execution errors, 3-11
CTL command, 5-5
EXIT command, 5-6
CTRL-BREAK, 3-5 , 3-7
Exiting TERMF, 2-8
Current configuration data, 4-2
Expert mode, 3-6
ADS, 5-2
ADV, 5-3
BASIC, 5-3
CCM, 5-3
CFG, 5-4
CHE, 5-4
CLEAR, 5-4
COMMNT, 5-5
D
Daughter board size, 4-8
Default configuration data, 4-7 , 5-6
DEFAULT.DAT, 2-8 , C-1
GFK-0487
Defaults (F1), 4-4 , 4-7
Index-3
Index
CONFIG, 5-5
CTL, 5-5
DEFLTS, 5-6
ERRORS, 5-6
EXIT, 5-6
FBAKUP, 5-7
FCLEAR, 5-7
FCOPY, 5-8
FDEL, 5-8
FDIR, 5-9
FLOCK, 5-9
FOLDER, 5-9
FRESTR, 5-10
FSEL, 5-10
GDS, 5-11
HELP, 5-11
LED, 5-12
LOAD, 5-13
MB, 5-14
MDEL, 5-14
MDIR, 5-15
PORTS, 5-15
READ, 5-15
RUN, 5-16
SAVE, 5-17
STASK, 5-17
STATUS, 5-18
STN, 5-18
STOP, 5-19
TERMF, 5-19
USE, 5-20
using ALT-J to toggle between expert
and non-expert mode, 5-1
using commands for expert mode, 5-1
using PCOP in expert mode, 5-1
UTILTY, 5-21
VERSION, 5-21
WRITE, 5-21
Factory default configuration, 3-2
File descriptions, PCOP, C-1
ALM_RD.PGM, C-1
ASMCHK.PGM, C-1
ASMDEFS.ASM,C-1
ASMPKG.BAT, C-1
BINARIES.DOC, C-1
BITFUNCS.ASM, C-1
BITFUNCS.BIN, C-1
BYTESWAP.BIN, C-1
CCM1.CDF, C-1
CCM12.CDF, C-1
CCM1MB2.CDF, C-1
CCM2.CDF, C-1
CRUNCH.EXE, C-1
DEFAULT.DAT, C-1
EXAMPLE.CDF, C-1
EXAMPLES.DOC, C-1
GEN_TEST.PGM, C-1
GENERIC.DOC, C-1
GENERIC.PGM, C-1
GRAPH.PGM, C-1
LM90.DAT, C-1
MB1.CDF, C-1
MB1CCM2.CDF, C-1
MB2.CDF, C-1
MBCRC.LST, C-1
MBCRC.PGM, C-2
PCOP.BAT, C-2
PCOP.EXE, C-2
PORT_CTL.BIN, C-2
PRN_FLT.PGM, C-2
READ_FLT.PGM, C-2
README.DOC, C-2
README.TXT, C-2
SAMPLE.PGM, C-2
TERM.DAT, C-2
TERM.EXE, C-2
TERMF.EXE, C-2
TERMSET.EXE, C-2
TEST_FLT.PGM, C-2
UTILITY.DOC, C-2
UTILITY.PGM, C-2
VT100.PGM, C-2
VT100_5.PGM, C-2
Factory default configuration data, 4-2
File directory (F4), 3-27 , 3-30
FBAKUP command, 5-7
File server data, 4-20 , 5-17
F
FCDF, 4-2
FCLEAR command, 5-7
FCOPY command, 5-8
FDEL command, 5-8
FDIR command, 5-9
Index-4
FLOCK command, 5-9
FOLDER command, 5-9
Folder directory (F9), 3-18 , 3-24
Folder functions (F8), 3-7 , 3-18 , 5-9
Folder, program, initially selecting/creating a program folder, 3-4
GFK-0487
Index
FRESTR command, 5-10
FSEL command, 5-10
Function softkeys, 3-5
G
GDS (F10), 3-27 , 3-34
GDS command, 3-34 , 5-11
GDS software, 3-34 , 5-11
GEN_TEST.PGM, C-1
GENERIC.DOC, C-1
GENERIC.PGM, C-1
GRAPH.PGM, C-1
H
Hard reset, 3-2 , 3-6
initiating a hard reset by selecting “factory”, 3-13
placing the PCM in program mode, 2-7
TERMF DEFAULT.DAT, 2-8
using the CONFIG.SYS file to run other
software, 2-2
using the EDLIN utility to modify your
CONFIG.SYS file, 2-4
Installing the PCOP development software (PCOP), software version number, 2-7
Invoking TERMF, 3-9
K
Key commands, 3-7
ALT keys, 3-7
CTRL-BREAK, 3-7
Escape key, 3-7
Key summary, 3-7
configuration editor (F1), 3-7
control functions (F5), 3-7 , 3-12 , 5-5
folder functions (F8), 3-7 , 3-18 , 5-9
MegaBasic interpreter (F2), 3-7 , 3-8
status functions (F4), 3-7 , 3-10 , 5-18
TERMF (F3), 3-7 , 3-9 , 5-19
utility functions (F9), 3-7 , 3-26 , 5-21
Hardware (F8), 4-4 , 4-7
Hardware configuration data, 4-8
daughter board size, 4-8
total memory size, 4-8
Hardware ID data, B-1
HELP command, 5-11
Help text, 4-6
cursor movement keys, 4-6
data editing keys, 4-6
I
Installing the PCM development software
(PCOP), 2-1
AUTOEXEC.BAT and CONFIG.SYS, 2-1
, D-1
connecting the PCM to the programmer, 2-7
DEFAULT.DAT, 2-8
descriptions of files placed on the hard
disk during INSTALL, C-1
diagnosing serial communication problems, 2-8
INSTALL procedure, 2-2
local configuration file, 2-6
PCOP DEFAULT.DAT, 2-8
GFK-0487
L
LED 1 (F6), 3-12 , 3-16
LED 2 (F7), 3-12 , 3-16
LED command, 5-12
LED data, B-3
LED indicators
USER1, 2-8
USER2, 2-8
LED USE command, 3-16
LEDs (F7), 4-4 , 4-7
Listing the contents of the current program folder, 3-24 , 5-9
LM90.DAT, C-1
LOAD command, 3-29 , 5-13
Load file (F2), 3-27 , 3-29
LOAD MY.PGM, 5-2
Loading a file to the PCM, 3-29 , 5-13
Locking the current program folder, 5-9
M
Main menu for PCOP, 3-2
accessing the main menu, 3-5
Index-5
Index
backing up the current program folder,
3-21 , 5-7
changing PCM configuration mode,
3-13 , 5-20
clearing the current program folder,
3-23 , 5-4 , 5-7
copying a program folder, 3-25 , 5-8
creating/selecting a program folder, 3-19
, 5-10
current configuration field, 3-6
deleting a file, 3-31 , 5-14
deleting a program folder, 3-20 , 5-8
deleting all files on the PCM, 3-32
directory of files, 3-30 , 5-15
error display screen, 3-11
executing a task, 3-14 , 5-16
key summary, 3-7
configuration editor (F1), 3-7
control functions (F5), 3-7 , 3-12 , 5-5
folder functions (F8), 3-7 , 3-18 , 5-9
MegaBasic interpreter (F2), 3-7 , 3-8
status functions (F4), 3-7 , 3-10 , 5-18
TERMF (F3), 3-7 , 3-9 , 5-19
utility functions (F9), 3-7 , 3-26 , 5-21
listing the contents of the current program folder, 3-24 , 5-9
loading a file to the PCM, 3-29 , 5-13
locking/unlocking the current program
folder, 5-9
message line, 3-6
ONLINE status, 3-5
PCM ID, 3-6
redefining the user LEDs, 3-16
restoring the current program folder,
3-22 , 5-10
returning to PCOP, 3-9
runtime errors, 3-5
saving a file from the PCM, 3-28 , 5-17
stopping a task, 3-15 , 5-19
using ADS software, 3-33 , 5-2
using GDS software, 3-34 , 5-11
MB command, 5-14
MB1.CDF, C-1
MB1CCM2.CDF, C-1
MB2.CDF, C-1
MBCRC.LST, C-1
MBCRC.PGM, C-2
MDEL command, 3-31 , 5-14
MDIR command, 3-30 , 5-15
Index-6
MegaBasic, 3-8
accessing MegaBasic from PCOP, 3-8 ,
5-14
returning to PCOP, 3-8
MegaBasic interpreter (F2), 3-7 , 3-8
MegaBasic interpreter data, 4-9 , 5-3 , B-1
definitions of entries on the MegaBasic
interpreter task screen
allocated data size, 4-10
enable MegaBasic task, 4-10
MegaBasic command line, 4-10
program to run at reset, 4-10
start MB task on soft reset, 4-10
task priority, 4-10
user program I/O, 4-10
Memory size, total, 4-8
Message line, 3-6
N
NO COMM status, 3-3
O
ONLINE status, 3-3
P
PC:UCDF.CDF, 4-5
PCOP, 3-1 , C-1 , C-2
accessing MegaBasic from PCOP, 3-8 ,
5-14
accessing the PCOP main menu, 3-5
ALT keys, 3-7
backing up the current program folder,
3-21 , 5-7
changing PCM configuration mode,
3-13 , 5-20
clearing the current program folder,
3-23 , 5-4 , 5-7
control functions, 3-12 , 5-5
LED 1 (F6), 3-12 , 3-16
LED 2 (F7), 3-12 , 3-16
run (F3), 3-12 , 3-14
stop (F4), 3-12 , 3-15
use (F1), 3-12 , 3-13
copying a program folder, 3-25 , 5-8
creating/selecting a program folder, 3-19
, 5-10
CTRL-BREAK, 3-7
GFK-0487
Index
deleting a file, 3-31 , 5-14
deleting a program folder, 3-20 , 5-8
deleting all files on the PCM, 3-32
descriptions of files placed on the hard
disk during INSTALL, C-1
ALM_RD.PGM, C-1
ASMCHK.PGM, C-1
ASMDEFS.ASM,C-1
ASMPKG.BAT, C-1
BINARIES.DOC, C-1
BITFUNCS.ASM, C-1
BITFUNCS.BIN, C-1
BYTESWAP.BIN, C-1
CCM1.CDF, C-1
CCM12.CDF, C-1
CCM1MB2.CDF, C-1
CCM2.CDF, C-1
CRUNCH.EXE, C-1
DEFAULT.DAT, C-1
EXAMPLE.CDF, C-1
EXAMPLES.DOC, C-1
GEN_TEST.PGM, C-1
GENERIC.DOC, C-1
GENERIC.PGM, C-1
GRAPH.PGM, C-1
LM90.DAT, C-1
MB1.CDF, C-1
MB1CCM2.CDF, C-1
MB2.CDF, C-1
MBCRC.LST, C-1
MBCRC.PGM, C-2
PCOP.BAT, C-2
PCOP.EXE, C-2
PORT_CTL.BIN, C-2
PRN_FLT.PGM, C-2
READ_FLT.PGM, C-2
README.DOC, C-2
README.TXT, C-2
SAMPLE.PGM, C-2
TERM.DAT, C-2
TERM.EXE, C-2
TERMF.EXE, C-2
TERMSET.EXE, C-2
TEST_FLT.PGM, C-2
UTILITY.DOC, C-2
UTILITY.PGM, C-2
VT100.PGM, C-2
VT100_5.PGM, C-2
directory of files, 3-30 , 5-15
edit configuration data menu structure,
A-1
error display screen, 3-11
Escape key, 3-7
executing a task, 3-14 , 5-16
GFK-0487
expert mode, 3-6
ADS, 5-2
ADV, 5-3
BASIC, 5-3
CCM, 5-3
CFG, 5-4
CHE, 5-4
CLEAR, 5-4
COMMNT, 5-5
CONFIG, 5-5
CTL, 5-5
DEFLTS, 5-6
ERRORS, 5-6
EXIT, 5-6
FBAKUP, 5-7
FCLEAR, 5-7
FCOPY, 5-8
FDEL, 5-8
FDIR, 5-9
FLOCK, 5-9
FOLDER, 5-9
FRESTR, 5-10
FSEL, 5-10
GDS, 5-11
HELP, 5-11
LED, 5-12
LOAD, 5-13
MB, 5-14
MDEL, 5-14
MDIR, 5-15
PORTS, 5-15
READ, 5-15
RUN, 5-16
SAVE, 5-17
STASK, 5-17
STATUS, 5-18
STN, 5-18
STOP, 5-19
TERMF, 5-19
USE, 5-20
UTILTY, 5-21
VERSION, 5-21
WRITE, 5-21
function softkeys, 3-5
initially selecting/creating a program
folder, 3-4
invoking PCOP, 3-2
invoking TERMF, 3-9
key summary, 3-7
listing the contents of the current program folder, 3-24 , 5-9
loading a file to the PCM, 3-29 , 5-13
locking/unlocking the current program
folder, 5-9
main menu, 3-2 , A-1
Index-7
Index
menu structure, A-1
NO COMM status, 3-3
ONLINE status, 3-3
program folder functions, 3-18 , 5-9
backup folder (F4), 3-18 , 3-21
clear folder (F7), 3-18 , 3-23
copy folder (F10), 3-18 , 3-25
delete folder (F2), 3-18 , 3-20
folder directory (F9), 3-18 , 3-24
restore folder (F5), 3-18 , 3-22
select folder (F1), 3-18 , 3-19
program utility functions
ADS (F9), 3-27 , 3-33
clear (F7), 3-27 , 3-32
delete file (F6), 3-27 , 3-31
file directory (F4), 3-27 , 3-30
GDS (F10), 3-27 , 3-34
load file (F2), 3-27 , 3-29
save file (F1), 3-27 , 3-28
redefining the user LEDs, 3-16
restoring the current program folder,
3-22 , 5-10
returning to PCOP, 3-8 , 3-9
runtime errors, 3-5
saving a file from the PCM, 3-28 , 5-17
special key commands, 3-7
status display functions, 5-18
status functions, 3-10
stopping a task, 3-15 , 5-19
TERMF, 3-9 , 5-19
types of errors processed by PCOP, 3-11
using ADS software, 3-33 , 5-2
using GDS software, 3-34 , 5-11
using PCOP in expert mode, 5-1
utility functions, 3-26 , 5-21
PCOP DEFAULT.DAT, 2-8
PCOP.BAT, C-2
PCOP.EXE, C-2
PORT_CTL.BIN, C-2
Ports (F6), 4-4 , 4-7
PORTS command, 5-15
PRN_FLT.PGM, C-2
Program folder,initiallyselecting/creating
a program folder, 3-4
Program folder functions, 3-18 , 5-9
backing up the current program folder,
3-21 , 5-7
backup folder (F4), 3-18 , 3-21
clear folder (F7), 3-18 , 3-23
Index-8
clearing the current program folder,
3-23 , 5-4 , 5-7
copy folder (F10), 3-18 , 3-25
copying a program folder, 3-25 , 5-8
creating/selecting a program folder, 3-19
, 5-10
delete folder (F2), 3-18 , 3-20
deleting a program folder, 3-20 , 5-8
folder directory (F9), 3-18 , 3-24
listing the contents of the current program folder, 3-24 , 5-9
locking/unlocking the current program
folder, 5-9
restore folder (F5), 3-18 , 3-22
restoring the current program folder,
3-22 , 5-10
select folder (F1), 3-18 , 3-19
Program folder functions (F8), 3-18 , 5-9
Program folders, 3-18 , 5-9
backing up the current program folder,
3-21 , 5-7
clearing the current program folder,
3-23 , 5-4 , 5-7
copying a program folder, 3-25 , 5-8
creating/selecting a folder, 3-19 , 5-10
deleting a program folder, 3-20 , 5-8
listing the contents of the current program folder, 3-24 , 5-9
locking/unlocking the current program
folder, 5-9
restoring the current program folder,
3-22 , 5-10
Program mode, 2-7
Program utility functions
ADS (F9), 3-27 , 3-33
clear (F7), 3-27 , 3-32
delete file (F6), 3-27 , 3-31
deleting a file, 3-31 , 5-14
deleting all files on the PCM, 3-32
directory of files, 3-30 , 5-15
file directory (F4), 3-27 , 3-30
GDS (F10), 3-27 , 3-34
load file (F2), 3-27 , 3-29
loading a file to the PCM, 3-29 , 5-13
save file (F1), 3-27 , 3-28
saving a file from the PCM, 3-28 , 5-17
using ADS software, 3-33 , 5-2
using GDS software, 3-34 , 5-11
Programmer and file server data, B-4
Programmer communications, 4-20 , 5-17
Programming the PCM using PCOP, 3-1
accessing MegaBasic from PCOP, 3-8 ,
5-14
GFK-0487
Index
accessing the PCOP main menu, 3-5
ALT keys, 3-7
backing up the current program folder,
3-21 , 5-7
changing PCM configuration mode,
3-13 , 5-20
clearing the current program folder,
3-23 , 5-4 , 5-7
control functions, 3-12 , 5-5
copying a program folder, 3-25 , 5-8
creating/selecting a program folder, 3-19
, 5-10
CTRL-BREAK, 3-7
deleting a file, 3-31 , 5-14
deleting a program folder, 3-20 , 5-8
deleting all files on the PCM, 3-32
directory of files, 3-30 , 5-15
error display screen, 3-11
Escape key, 3-7
executing a task, 3-14 , 5-16
expert mode, 3-6
function softkeys, 3-5
initially selecting/creating a program
folder, 3-4
invoking PCOP, 3-2
invoking TERMF, 3-9
key summary, 3-7
listing the contents of the current program folder, 3-24 , 5-9
loading a file to the PCM, 3-29 , 5-13
locking/unlocking the current program
folder, 5-9
NO COMM status, 3-3
ONLINE status, 3-3
PCOP main menu, 3-2
program folder functions, 3-18 , 5-9
redefining the user LEDs, 3-16
restoring the current program folder,
3-22 , 5-10
returning to PCOP, 3-8 , 3-9
runtime errors, 3-5
saving a file from the PCM, 3-28 , 5-17
special key commands, 3-7
status display functions, 5-18
status functions, 3-10
stopping a task, 3-15 , 5-19
TERMF, 3-9 , 5-19
using ADS software, 3-33 , 5-2
using GDS software, 3-34 , 5-11
utility functions, 3-26 , 5-21
GFK-0487
R
READ command, 5-15
Read configuration (F8), 4-20
Read configuration data, 4-23 , 5-15
READ_FLT.PGM, C-2
README.DOC, C-2
README.TXT, C-2
Redefining the user LEDs, 3-16 , 4-18
Restore folder (F5), 3-18 , 3-22
Restoring the current program folder, 3-22
, 5-10
Returning to PCOP, 3-8 , 3-9
Run (F3), 3-12 , 3-14
RUN command, 3-14 , 5-16
Runtime errors, 3-5
S
SAMPLE.PGM, C-2
SAVE command, 3-28 , 5-17
Save file (F1), 3-27 , 3-28
Saving a configuration, 4-5
Saving a file from the PCM, 3-28 , 5-17
Select folder (F1), 3-18 , 3-19
Selecting a program folder, 3-4 , 3-19 , 5-10
Selecting configuration field values, 4-6
Serial communication problems, 2-8
Serial port initialization data, 4-16 , 5-15 ,
B-3
definitions of entries on the serial port
data screen
bits per character, 4-17
data rate, 4-17
flow control, 4-17
interface, 4-17
parity, 4-17
stop bits, 4-17
Soft reset, 3-2 , 3-6
initiating a soft reset by selecting “user”,
3-13
Software version number, 2-7
Standard (F10), 4-20
Index-9
Index
Standard configuration functions, 4-7 ,
5-18
Advanced (F10), 4-7
basic (F3), 4-7 , 4-9
CCM (F4), 4-7
CCM configuration data, 4-12 , 5-3
CCM detail data, 4-15
configuring a PCM for MegaBasic programs, 4-11
default configuration data, 4-7 , 5-6
defaults (F1), 4-7
hardware (F8), 4-7
hardware configuration data, 4-8
LEDs (F7), 4-7
MegaBasic interpreter data, 4-9 , 5-3
ports (F6), 4-7
redefining the user LEDs, 4-18
serial port initialization data, 4-16 , 5-15
STASK command, 5-17
STATUS command, 5-18
TERMSET, 2-6
TERM.EGA, 2-6
TERM.MON, 2-6
TERMSET.EXE, 3-9 , C-2
TEST_FLT.PGM, C-2
Total memory size, 4-8
Troubleshooting, 2-8
configuration mismatch, 2-8
diagnosing serial communication problems, 2-8
TYPE command, 2-2
U
UCDF, 4-2
UCDF.CDF, 4-23 , 4-24
Unlocking the current program folder, 5-9
Status display functions, 5-18
Use (F1), 3-12 , 3-13
Status functions, 3-10
error display screen, 3-11
USE command, 3-13 , 5-20
Status functions (F4), 3-7 , 3-10 , 5-18
STN command, 5-18
Stop (F4), 3-12 , 3-15
STOP command, 3-15 , 5-19
Stopping a task, 3-15 , 5-19
System task (F1), 4-20
User command syntax errors, 3-11
User configuration data, 4-2
USER1 LED, 2-8
USER2 LED, 2-8
Utility functions, 3-26 , 5-21
Utility functions (F9), 3-7 , 3-26 , 5-21
UTILITY.DOC, C-2
UTILITY.PGM, C-2
T
TERM.DAT, 2-6 , 3-9 , C-2
TERM.EGA, 2-6
V
TERM.EXE, 3-9 , C-2
VERSION command, 5-21
TERM.MON, 2-6
VT100.PGM, C-2
TERMF, 3-9 , 5-19
exiting TERMF, 2-8
invoking TERMF, 3-9
VT100_5.PGM, C-2
TERMF (F3), 3-7 , 3-9 , 5-19
Index-10
UTILTY command, 5-21
W
TERMF command, 5-19
WRITE command, 5-21
TERMF DEFAULT.DAT, 2-8
Write configuration (F9), 4-20
TERMF.EXE, C-2
Write configuration data, 4-24 , 5-21
GFK-0487