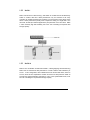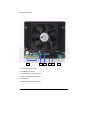
1
eRAID
Multi interface
RAID system
Manual
Version 1.0
eRAID User’s Manual
Features
The eRAID system is designed in a space saving portable tower TBD x TBD x TBD
for easy implement RAID system into workstations or servers. The eRAID system
provides USB2.0, FireWire (a/b) & SATA 1.0 interface for the host and five IDE
channels for disk drives. The eRAID system is a high-performance IDE drive bus disk
array Controller. When properly configured, the eRAID system can provide non-stop
service with a high degree of fault tolerance through the use of RAID technology and
advanced array management features. The eRAID system connects to the host
system through an USB2.0/1394a/1394b and/or Serial ATA interface. The eRAID
system can be hot-plug to HOST system and each IDE HDD can be hot-swap to
replace or exchange.
The eRAID system allows easy scalability from JBOD to RAID. It can be configured
to RAID levels 0, 1 (0+1), 3, and 5. The RAID function allows one HDD failure without
impact on the existing data and failed drive data can be reconstructed from the
remaining data and parity drives. RAID configuration and monitoring can be done
through the LCD front control panel (option) or serial port. The eRAID system is the
most cost-effective IDE disk drive RAID systems with completely integrated highperformance and data-protection capabilities, which meet the performance and
features of a midrange storage product at an entry-level price.
The eRAID’s IDE-RAID-USB/FireWire/Serial ATA controller is the only RAID solution
available that offers Share Volume with multiple hosts. It uses the standard IDE
protocol to connect the host system IDE controller. The eRAID don’t need an extra
controller card and can fully utilize the IDE bus (100MB/S) performance. With Intel
Accelerated Hub Architecture and VIA Link architecture (It provides twice the
bandwidth of the traditional PCI bus architecture at 266 MB per second.), the IDE bus
bandwidth is independent of the PCI bus in the chip set design, giving the best PCI
performance for Ethernet Card the IDE driver is also a standard part of all major
operating systems such as Windows 95/98/2000/NT/ME/XP, Novell, MAC, Linux,
UNIX, etc., the host system does not require additional or proprietary software to work
with our eRAID system.
eRAID Series User’s Manual
1.1
System Architecture
Host
USB2.0/FireWire 400/800
and / or SATA 1.0
eRAID system
ATA/133
ATA/133 Drives
(Max 5)
1.1.1
USB2.0/1394a/1394b and/or SATA 1.0 Host Interface
The eRAID system interface appears to the host system as an USB2.0, 1394a, 1394b
and/or SATA 1.0 target device. The USB2.0, 1394a, 1394b can support transfer rates
up to 60MB/s, 50MB/s , 100M/B/s respectively. The SATA can support transfer rates
up to 150MB per second. Both Ultra ATA/133 and SATA 1.0 can concurrently access
different volume sets (logical drives)
1.1.2
N/A
1.1.3
Ultra ATA/133 Drive Interface
The eRAID controller board communicates directly with the array’s 5 Ultra ATA/133
drives via a built-in Ultra ATA/133 interface. When the host is directly controlling the
drives, the RAID subsystem controller board translates all communications between
the HOST USB/FireWire or S-ATA and UDMA devices. The eRAID system uses the
RAID subsystem IDE I/O controller chip on each IDE channel to allow the controller to
simultaneously communicate with the host system, and read or write data on several
drives. Up to five disk drives can be connected to each eRAID system. It supports the
ATA/133 standard, which is backward compatible with earlier ATA standards.
eRAID User’s Manual
1.2
eRAID system Controller Board
The eRAID system has an IDE controller which supports an ATA/133 host interface
section, and a drive interface to five (5) Ultra ATA/133 hard drives. The IDE controller
supports a XOR engine parity generator/checker, one RS-232 interface for system
management (Remote Control, and Local Monitor) and an interface to a
display/operation panel. Within the array, the controller acts as a bridge between IDE
channels host and drive IDE channels via Ultra ATA/133 bus, and implements the
RAID function.
1.2.1
Cache Memory Subsystem
The eRAID system new high-performance architecture comes from its low power 64bit RISC processor, a 66MHz/32-bit PCI, and 64-bit memory architecture. The data
flow at 66MHz /32 bit PCI bus and 64-bit ECC SDRAM makes its high data throughput
more than sufficient for entry-level or high-end PC. Data can be transferred between
the controller and the drives through a high-speed 66MHz/32-bit path at a burst rate
up to 266MB/sec. The system's overall performance can support up to 133MB/second
per ATA drive channel.
The eRAID system has configured with 64 Megabytes of SDRAM cache on the
controller board. The system supports Write-Through and Write-Back cache.
In Write-Through Cache, the controller sends a data transfer completion signal to the
host operating system when the data have written to the ATA Drive. This caching
method is considered more secure, but a Write-Through cache has a lower
performance than Write-Back cache. In Write-Back Cache, the controller sends a data
transfer completion signal to the host operating system when the controller cache has
received all the data in a transaction. If a power failure occurs before the data have
written to the disk drives, data in the cache memory will be lost. Therefore, it is
recommended that a backup power source (For Example UPS) be used when
enabling the write back caching mode option
1.2.2
User Interface
Manual configuration and monitoring can be done through the LCD front control panel
(option). The firmware also contains an embedded management program that can
support the RS-232C (Serial Console) port out-of-band management. The controller
can use any of the interfaces to simplify the setup and management of their
associated disk drives. This out-of-band method is a convenient platform-independent
management utility. User can through this port to implement Bootable CD VT-100, VT100 Terminal and HTTP Proxy browser-based management utility.
1.2.3
Controller Firmware
The eRAID system provides RAID levels 0, 1 (0+1), 3, and 5 RAID configurations. It
can be managed either through the LCD control panel or by the system-embedded
configuration utilities. Its high data availability and protection derives from the following
capabilities: Online Capacity Expansion, Online RAID Level Migration, Logical Drive
eRAID Series User’s Manual
Capacity Extension, Array Roaming, Global Online Spare, Automatic Drive Failure
Detection, Automatic Failed Drive Rebuilding, Disk Hot Spare, and Instant
Availability/Background Initialization.
The eRAID system firmware is stored on the controller flash ROM and is executed by
the RISC CPU. The firmware can also be updated through the RS-232 port without
the need to replace any hardware chips. During the controller ROM flash process, it is
possible for a problem to occur resulting in corruption of the controller firmware. A
corrupted firmware in the controller firmware would make the controller inoperable and
bring the system down. The Redundant Flash provides a unique redundancy feature
that helps ensure against controller availability. This reduces the risk of system failure
due to firmware crash.
In addition to the stored programs in ROM, the NVRAM stores data on the current
configuration of the controller and its attached disk drives. As the disk drive
configurations change, the NVRAM keeps a record of the changes.
1.3
1.3.1
Array Definition
Raid Set
A Raid Set is a group of disks containing one or more volume sets. It has the following
features in the RAID subsystem controller:
1. Up to five Raid Sets are supported per RAID subsystem controller.
2. From one to five drives can be included in an individual Raid Set.
3. It is impossible to have multiple Raid Sets on the same disks.
A Volume Set must be created either on an existing raid set or on a group of available
individual disks (disks that are not yet a part of an raid set). If there are pre-existing
raid sets with available capacity and enough disks for specified RAID level desired,
then the volume set will be created in the existing raid set of the user’s choice. If
physical disks of different capacity are grouped together in a raid set, then the
capacity of the smallest disk will become the effective capacity of all the disks in the
raid set.
1.3.2
Volume Set
A Volume Set is seen by the host system as a single logical device. It is organized in a
RAID level with one or more physical disks. RAID level refers to the level of data
performance and protection of a Volume Set. A Volume Set capacity can consume all
or a portion of the disk capacity available in a Raid Set. Multiple Volume Sets can exist
on a group of disks in a Raid Set. Additional Volume Sets created in a specified Raid
Set will reside on all the physical disks in the Raid Set. Thus each Volume Set on the
Raid Set will have its data spread evenly across all the disks in the Raid Set.
1. Volume Sets of different RAID levels may coexist on the same Raid Set.
2. The maximum addressable size of a single volume set is 2 TB.
3. Up to sixteen volume sets can be created in a raid set.
eRAID User’s Manual
In the illustration below, Volume 1 can be assigned a RAID 5 level of operation while
Volume 0 might be assigned a RAID 0+1 level of operation.
Raid Set 1 (3 Individual Disks)
Free Space
Volume 1 (RAID 5)
Volume 0 (RAID 0+1)
Disk 0
1.3.3
Disk 1
Disk 2
Easy of Use features
1.3.3.1 Instant Availability/Background Initialization
RAID 0 and RAID 1 volume set can be used immediately after the creation. But the
RAID 3 and 5 volume sets must be initialized to generate the parity. In the Normal
Initialization, the initialization proceeds as a background task, the volume set is fully
accessible for system reads and writes. The operating system can instantly access to
the newly created arrays without requiring a reboot and waiting the initialization
complete. Furthermore, the RAID volume set is also protected against a single disk
failure while initialing. In Fast Initialization, the initialization proceeds must be
completed before the volume set ready for system accesses.
1.3.3.2 Array Roaming
The RAID subsystem stores configuration information both in NVRAM and on the disk
drives It can protect the configuration settings in the case of a disk drive or controller
failure. Array roaming allows the administrators the ability to move a completely raid
set to another system without losing RAID configuration and data on that raid set. If a
server fails to work, the raid set disk drives can be moved to another server and
inserted in any order.
1.3.3.3 Online Capacity Expansion
Online Capacity Expansion makes it possible to add one or more physical drive to a
volume set, while the server is in operation, eliminating the need to store and restore
after reconfiguring the raid set. When disks are added to a raid set, unused capacity is
added to the end of the raid set. Data on the existing volume sets residing on that raid
set is redistributed evenly across all the disks. A contiguous block of unused capacity
eRAID Series User’s Manual
is made available on the raid set. The unused capacity can create additional volume
set. The expansion process is illustrated as following figure.
Before Array Expansion
Free Space = 40GB
Volume 1 = 40GB (D:)
Volume 0 = 40GB (C:)
Disk 0
40GB
Disk 1
40GB
Array-A 120GB
Disk 2
40GB
The RAID system controller redistributes the original volume set over the original and
newly added disks, using the same fault-tolerance configuration. The unused capacity
on the expand raid set can then be used to create an additional volume sets, with a
different fault tolerance setting if user need to change.
After Array Expansion (Adding One Disk)
Free Space = 80GB
Volume 1 = 40GB (D:)
Volume 0 = 40GB (C:
Disk 0
40GB
Disk 1
40GB
Disk2
40GB
Disk 3
40GB
Array-A 160GB
1.3.3.4 Online RAID Level and Stripe Size Migration
User can migrate both the RAID level and stripe size of an existing volume set, while
the server is online and the volume set is in use. Online RAID level/stripe size
migration can prove helpful during performance tuning activities as well as in the event
that additional physical disks are added to the RAID subsystem. For example, in a
system using two drives in RAID level 1, you could add capacity and retain fault
tolerance by adding one drive. With the addition of third disk, you have the option of
adding this disk to your existing RAID logical drive and migrating from RAID level 1 to
5. The result would be parity fault tolerance and double the available capacity without
taking the system off.
eRAID User’s Manual
1.4
1.4.1
High availability
Creating Hot Spares
A hot spare drive is an unused online available drive, which is ready for replacing the
failure disk drive. In a RAID level 1, 0+1, 3, or 5 raid set, any unused online available
drive installed but not belonging to a raid set can define as a hot spare drive. Hot
spares permit you to replace failed drives without powering down the system. When
RAID subsystem detects a UDMA drive failure, the system will automatic and
transparent rebuilds using hot spare drives. The raid set will be reconfigured and
rebuilt in the background, while the RAID subsystem continues to handle system
request. During the automatic rebuild process, system activity will continue as normal,
however, the system performance and fault tolerance will be affected.
Important
The hot spare must have at least the same capacity as the drive it replaces.
1.4.2
Hot-Swap Disk Drive Support
The RAID subsystem has built the protection circuit to support the replacement of
UDMA hard disk drives without having to shut down or reboot the system. The
removable hard drive tray can deliver “hot swappable,” fault-tolerant RAID solutions at
prices much less than the cost of conventional SCSI hard disk RAID subsystems. We
provide this feature for subsystems to provide the advanced fault tolerant RAID
protection and “online” drive replacement.
1.4.3
Hot-Swap Disk Rebuild
A Hot-Swap function can be used to rebuild disk drives in arrays with data redundancy
such as RAID level 1(0+1), 3, and 5. If a hot spare is not available, the failed disk drive
must be replaced with a new disk drive so that the data on the failed drive can be
rebuilt. If a hot spare is available, the rebuild starts automatically when a drive fails.
The RAID subsystem automatically and transparently rebuilds failed drives in the
background with user-definable rebuild rates. The RAID subsystem will automatically
restart the system and the rebuild if the system is shut down or powered off
abnormally during a reconstruction procedure condition. When a disk is Hot Swap,
although the system is functionally operational, the system may no longer be fault
tolerant. Fault tolerance will be lost until the removed drive is replaced and the rebuild
operation is completed.
eRAID Series User’s Manual
1.5
Understanding RAID
RAID is an acronym for Redundant Array of Independent Disks. It is an array of
multiple independent hard disk drives that provide high performance and fault
tolerance. The RAID subsystem controller implements several levels of the Berkeley
RAID technology. An appropriate RAID level is selected when the volume sets are
defined or created. This decision is based on disk capacity, data availability (fault
tolerance or redundancy), and disk performance. The following is the RAID level,
which support in the RAID subsystem.
The RAID subsystem controller makes the RAID implementation and the disks’
physical configuration transparent to the host operating system. This means that the
host operating system drivers and software utilities are not affected, regardless of the
RAID level selected. Correct installation of the disk array and the controller requires a
proper understanding of RAID technology and the concepts.
1.5.1
RAID 0
RAID 0, also referred to as striping, writes stripping of data across multiple disk drives
instead of just one disk drive. RAID 0 does not provide any data redundancy, but does
offer the best high-speed data throughput. RAID 0 breaks up data into smaller blocks
and then writes a block to each drive in the array. Disk striping enhances performance
because multiple drives are accessed simultaneously; but the reliability of RAID Level
0 is less than any of its member disk drives due to its lack of redundancy.
eRAID User’s Manual
1.5.2
RAID 1
RAID 1 also known as “disk mirroring”, data written to one disk drive is simultaneously
written to another disk drive. Read performance may be enhanced if the array
controller can parallel accesses both members of a mirrored pair. During writes, there
will be a minor performance penalty when compared to writing to a single disk. If one
drive fails, all data (and software applications) are preserved on the other drive. RAID
1 offers extremely high data reliability, but at the cost of doubling the required data
storage capacity.
1.5.3
RAID 10
RAID 10 is a combination of RAID 0 and RAID 1, combing stripping with disk mirroring.
RAID Level 10 combines the fast performance of Level 0 with the data redundancy of
Leve1 1. In this configuration, data is distributed across several disk drives, similar to
Level 0, which are then duplicated to another set of drive for data protection. RAID 10
provides the highest read/write performance of any of the Hybrid RAID levels, but at
the cost of doubling the required data storage capacity.
eRAID Series User’s Manual
1.5.4
RAID 3
RAID 3 provides disk striping and complete data redundancy though a dedicated
parity drive. RAID 3 breaks up data into smaller blocks, calculates parity by performing
an exclusive-or on the blocks, and then writes the blocks to all but one drive in the
array. The parity data created during the exclusive-or is then written to the last drive in
the array. If a single drive fails, data is still available by computing the exclusive-or of
the contents corresponding strips of the surviving member disk. RAID-3 is best for
applications that require very fast data- transfer rates or long data blocks
eRAID User’s Manual
1.5.5
RAID 5
RAID 5 is sometimes called striping with parity at byte level. In RAID 5, the parity
information is written to all of the drives in the subsystems rather than concentrated on
a dedicated parity disk. If one drive in the system fails, the parity information can be
used to reconstruct the data from that drive. All drives in the array system can be used
to seek operation at the same time, greatly increasing the performance of the RAID
system This relieves the write bottleneck that characterizes RAID 4, and is the primary
reason that RAID 5 is more often implemented in RAID arrays.
eRAID Series User’s Manual
1.5.6
Summary of RAID Levels
RAID subsystem supports RAID Levels 0, 1(0+1), 3, and 5. The following table
provides a summary of RAID levels.
IDE-RAID-IDE Features and Performance
RAID
Level
0
Description
Min.
Drives
Also known as stripping
Data distributed across
multiple drives in the array.
There is no data protection
1 Also known as mirroring
All data replicated on N
Separated disks. N is almost
always 2.
This is a high availability
Solution, but due to the 100%
duplication, it is also a costly
solution.
0+1 Also known Block-Interleaved
Parity.
Data and parity information is
subdivided and distributed
across all disk. Parity must be
the equal to the smallest disk
capacity in the array. Parity
information normally stored on
a dedicated parity disk.
3 Also known Bit-Interleaved
Parity.
Data and parity information is
subdivided and distributed
across all disk. Parity must be
the equal to the smallest disk
capacity in the array. Parity
information normally stored on
a dedicated parity disk.
5 Also known Block-Interleaved
Distributed Parity.
Data and parity information is
subdivided and distributed
across all disk. Parity must be
the equal to the smallest disk
capacity in the array. Parity
information normally stored on
a dedicated parity disk.
Max.
Drives
Data
Reliability
1
5
No data
Protection
2
2
Lower than
RAID 6;
Higher than
RAID 3,5
Data
Transfer
Rate
Very High
I/O
Request
Rates
Very High for
Both Reads and
Writes
Reads are higher Reads are twice
Than a single
faster than a
disk;
single disk;
Writes similar to Write are
a single disk
similar to a
single disk.
3
5
Lower than
RAID 6;
Higher than
RAID 3,5
Transfer rates
more similar to
RAID 1 than
RAID 0
Reads are twice
faster than a
single disk;
Writes are
similar to a
single disk.
3
3
5
5
Lower than
Reads are
RAID 1, 10, 6; similar to
RAID 0;
Higher than a
single drive
Writes are
slower than a
single disk
Reads are
similar twice
faster than a
single disk;
Lower than
Reads are
RAID 1, 10, 6; similar to
RAID 0;
Higher than a
Writes are
single drive
slower than a
single disk
Reads are
similar to
RAID 0;
eRAID User’s Manual
Writes are
similar to a
single disk.
Writes are
slower than a
single disk.
1 Installing the Hardware
1.6
Overview
This chapter describes how to install the eRAID system and connect IDE HDD to
make the eRAID system ready to use. The following contains step-by-step instructions
to successfully install your new RAID subsystem in your computer system.
1.7
RAID system Requirements
eRAID is designed to fit into small space, but there is some requirements
need to be meet, since force air is required therefore a minimum of 4 inches
space required at the back of the eRAID tower.
Step Action
1.
2.
3.
4.
5.
6.
7.
8.
9.
Unpack the eRAID system and inspect for damage. Make sure all items are
in the package.
Identify RAID subsystem Part.
Connect AC power cord to eRAID and AC power source
Connecting eRAID system to Host computer via USB/FireWire or Serial ATA
Setting UDMA devices.
Loading IDE Drive to the Drive Tray
RAID Creation Method
Turn on the host computer Power
Configure the RAID subsystem
Step 1 Unpack
Unpack and install the hardware in a static-free environment. The eRAID system is
packed inside an anti-static bag between two sponge sheets. Remove it and inspect it
for damage. If the RAID system appears damaged, or if any items of the contents
listed below are missing or damaged, please contact your dealer or distributor
immediately.
Checklist
The eRAID system kit may have included the following items in the ship package:
• eRAID system tower
• USB to Serial adapter – including software drivers
• USB, 1394a, 1394b and Serial-ATA cables to interconnect the eRAID system
• AC power cord,
• User Manual,
• Serial communications null-modem cable
eRAID Series User’s Manual
Step 2 Identify RAID subsystem part
The following figures illustrate the connector locations for the RAID subsystem
Front View for eRAID
1
2
3
1.
Voltage level, Temperature, Fan Indicator
2.
HDD LED Indicator Status
3.
HDD Tray 1~5
eRAID User’s Manual
Back View of eRAID
1
2
3
4
5
1. DC Power Input Connector
2. LCD Module Connector
3. DC Cooling Fan Power Connector
4. PATA Host Channel Adapter Port
5. RS-232 Port
6. SATA Host Channel Adapter Port
eRAID Series User’s Manual
6
Step 4 Configuring IDE Drives
Each UDMA drive installing in the RAID subsystem must be configured as a “master”
drive for your system. If your UDMA drive is configured as to the “Slave” drive, you
must change it as a “Master” drive. Changing jumper settings on the drive can switch
from slave to master mode. Most hard drives are always shipped with the Master
jumper setting enabled. Please refer to HDD manufacture manual for more detail.
Step 5 Loading Drive to the Drive Tray
The eRAID supports five channel Ultra ATA/133 IDE channels. Each channel can run
up to 133MB/S.
1. Gently take out the drive trays from the RAID system by pulling out on the lever.
2.
3.
4.
5.
6.
7.
Remove the tray blank from hot-swap tray.
Attach the drive trays power cable to the disk drive first, and carefully push drive
trays data cable to the disk drive. Those connectors are keyed and will only fit one
way. Make sure the connectors are firmly seated; secure the drive to the hot-swap
tray with #6-23x5L screws.
After all drives are in the drive tray, place all of them back into the RAID
subsystem. To do this slide in drive tray as show in Fig. 5 making sure lever is at
90-degree angle from the RAID subsystem. This is important so as not to damage
the hot-swap trays.
Make sure you let the lever engage by itself.
Give a final push of the drive tray to make sure it is seated firmly into the back
plane.
Once it is seated firmly, lock the lever in place.
Step 7 Connecting RAID subsystem Power
Make sure power AC is set properly, connect power to eRAID system
Step 8 Connecting eRAID system to HOSTcomputer
The eRAID system supports USB2.0/FireWIre 400/800 and / or Serial ATA on the
back plane. User can use either USB/FireWire or Serial ATA or both two. Follow
these steps to connect HOST computer to the RAID subsystem
1. Connect either USB2.0 or FireWire or Serial cable to Host computer
Please note:
USB2.0 and FireWire is Group 1, where
Serial ATA is Group 2
2. Connect Serial ATA to another Host computer if share vlolume is required
eRAID User’s Manual
Step 10 RAID Creation Method
There are two ways of create/configure RAID with eRAID.
Method 1: LCD Panel with Keypad
The LCD status panel informs you of the Disk Array's current operating status at a
glance. If you need to add the front panel and keypad function, you also need one
another drive bay space. Install the LCD Module on the controller backplane in order
to operate the LCD interface function. For additional information on using the LCD
panel and keypad to configure the RAID subsystem see ‘LCD Configuration” on
Chapter 6.
Note:
There are a variety of failure conditions that cause the RAID subsystem monitoring
LED to light. Table1-1 provides a summary of the front panel LED and RAID
subsystem LED.
LED
Power LED
Host
LED
Disk
LED
Normal Status
Bright Green
Access Blink green during host
computer accessing the RAID
subsystem.
Activity This LED blinks during hard
drive read and write activity
LED
Disk drive Fail
LED
Disk
Activity
LED
Voltage LED
Temperature
LED
Fan LED
Normal Status
LED never light up
This LED blinks during hard
drive read and write activity
LED light up bright green
LED light up bright green
LED light up bright green
Problem Indication
This LED does not light up after
power switched on
LED never flickers
LED not light up
Problem Indication
This LED will blink amber if there
is a disk error.
LED not light up
This LED will blink if there is a
voltage error.
This LED will blink if there is a fan
problem
This LED will blink if the internal
temperature rises above the Spec
setting
Method 2: Serial Port Connection
The eRAID system can be configured via a VT-100 compatible terminal on any
computer which has VT-100 terminal emulation program. The provided interface cable
converts the RS232 signal of the 10-pin header connector on the RAID subsystem
into a 9-pin D-Sub male connector. You can attach a serial (Character-Based) terminal
or server com port to the RAID subsystem for access to the text-based Setup Menu.
The following setup is connecting the server com port to the RAID subsystem for
access to the text-based Setup Menu
eRAID Series User’s Manual
1.
Connect internal RS-232 cable supplied with eRAID to the Host com port
Method 3: USB Port Connection
The eRAID system can be configured via a VT-100 compatible terminal on any
computer which has VT-100 terminal emulation program. The provided interface cable
converts the RS232 signal of the 10-pin header connector on the RAID subsystem
into a USB to Serial adapter onnector. You can attach a serial (Character-Based)
terminal or server com port to the RAID subsystem for access to the text-based Setup
Menu. The following setup is connecting the server com port to the RAID subsystem
for access to the text-based Setup Menu
1.
Connect USB-RS-232 cable supplied with eRAID to the Host com port
2.
Load the USB driver from USB converter CD to Host system to configure USB
port
Step 12 Configure RAID Subsystems
You can configure RAID subsystem either through the LCD Configuration utility or
RS232C out of band management utility. The RAID subsystem supports VT-100
terminal or CD-ROM bootable VT-100 utility and HTTP Proxy web-browser
management through the RS-232C port. Please reference the Chapter 4, Chapter 5
and Chapter 6 for the configuration.
1.8
Hot-plug Drive Replacement
The RAID subsystem supports the ability of performing a hot-swap drive replacement
without powering down the system. A disk can be disconnected, removed, or replaced
with a different disk without taking the system off-line. The RAID rebuilding will be
processed automatically in the background. When a disk is hot swap, the RAID
subsystem may no longer be fault tolerant. Fault tolerance will be lost until the hot
swap drive is subsequently replaced and the rebuild operation is completed.
1.8.1
Recognizing a Drive Failure
A drive failure can be identified in the following way:
Amber LED illuminates on the front of RAID subsystem system if failed drives are
inside.
1.8.2
Replacing a Failed Drive
With our RAID subsystem drive tray, you can replace a defective physical drive while
your computer is still operating. When a new drive has been installed, data
reconstruction will be automatically started to rebuild the contents of the disk drive.
Follow the follow below and refer to the pictures to replace the "Hot-Swap" drive.
Step a. Gently pull-out the HDD tray
(When a HDD error occurs, the HDD LED indicator lights up "Amber")
Remove the drive tray you wish to replace from the RAID subsystem by firmly pulling
on the drive carrier’s handle and sliding out the drive tray.
Step b Unscrew
eRAID User’s Manual
Remove all the four mounting screws before remove the power and data cable.
Step c. Unplug the Cables
Unplug the power and data cable and remove the defective disk drive from hot-swap
frame. Please be careful to remove the data cable to prevent it from damaging.
Note: The capacity of the replacement drives must be at least as large as the capacity
of the other drives in the raid set. Drives of insufficient capacity will be failed
immediately by the RAID subsystem without starting the Automatic Data Rebuild.
eRAID Series User’s Manual
2. Configuration Methods
2.1
Overview
After the hardware installation, the IDE HDD drives connected to the internal RAID
subsystem must be configured and the volume set units initialized before they are
ready to use. This can be accomplished by one of the following methods:
• Front panel touch-control keypad
• Bootable CD VT100 utility connected through the controller’s serial port
• VT100 terminal connected through the controller’s serial port
• Web browser-based RAID management via HTTP Proxy through the controller’s
serial port
Those user interfaces can access the built-in configuration and administration utility
that resides in the controller’s firmware. They provide complete control and
management of the controller and disk arrays, eliminating the need for additional
hardware or software.
Note: The internal RAID subsystem allows only one method to access menus at a
time.
2.2
Using local front panel touch-control keypad
The front panel keypad and liquid crystal display (LCD) is the primary user interface
for the RAID subsystem. All configuration and management of the controller and its
properly connected disk arrays can be performed from this interface.
The front panel keypad and LCD are connected to the RAID subsystem to access the
built-in configuration and administration utility that resides in the controller’s firmware.
Complete control and management of the array’s physical drives and logical units can
be performed from the front panel, requiring no additional hardware or software drivers
for that purpose.
This technical manual provides, in quick reference form, procedures that use the builtin LCD panel to configure and operate the controller.
A touch-control keypad and a liquid crystal display (LCD) mounted on the front panel
of the RAID subsystem is the primary operational interface and monitor display for the
disk array controller. This user interface controls all configuration and management
functions for the RAID subsystem controller and for all UDMA disk array subsystems
to which it is properly connected.
The LCD provides a system of screens with areas for information, status indication, or
menus. The LCD screen displays up to two lines at a time of menu items or other
information.
2.3
VT100 terminal (Using the controller’s serial port)
The serial port on the controller’s back panel can be used in VT100 mode The RAID
subsystem comes with 10-pin RS-232 serial port, which, using a null modem cable,
can be connected to any COM port on a host computer for VT-100 terminal
eRAID User’s Manual
management purposes. It can also transfer to external for a VT100 compatible
terminal (or a PC running appropriate terminal emulation software). The firmwarebased terminal array management interface can access the array through this RS-232
port.
Note: You may allow connecting a terminal while the RAID subsystem is at power on
state.
To ensure proper communications between the RAID subsystem and the VT-100
Terminal Emulation, Please configure the VT100 terminal emulation settings to the
values shown below:
Connection
Baud Rate
Data bits
Stop
2.3.1
Terminal requirement
Null-modem cable
115,200
8
1
RAID subsystemRS-232C Port Pin Assignment
To ensure proper communications between the RAID subsystem and the VT-100
Terminal Emulation, Please connect one end of the DB9 female-to-female Cable to
the Serial port on the computer and Connect the other end of the DB9 female-tofemale cable to the Serial port on the RAID subsystem. The RS-232C pin assignments
are defined as below.
Pin
1
2
3
4
5
2.3.2
RS-232C Pin Assignments
Description
Pin
Description
N/C
6
TXD
TXD
7
CTS
RXD
8
RTS
DSR
9
N/C
GND
10
N/C
Start-up VT100 Screen
By connecting a VT100 compatible terminal, or a PC operating in an equivalent
terminal emulation mode, all RAID subsystem monitoring, configuration and
administration functions can be exercised from the VT100 terminal.
There are a wide variety of Terminal Emulation packages, but for the most part they
should be very similar. The following setup procedure is an example Setup VT100
Terminal in Windows system using Hyper Terminal use Version 3.0 or higher.
STEP 1. FROM THE DESKTOP OPEN THE START MENU. PICK PROGRAMS,
ACCESSORIES, COMMUNICATIONS AND HYPER TERMINAL. OPEN HYPER
TERMINAL (REQUIRES VERSION 3.0 OR HIGHER)
eRAID Series User’s Manual
Step 2. Open HYPERTRM.EXE.
Step 3. Enter a name for your Terminal. Click OK.
eRAID User’s Manual
Step 4. Select an appropriate connecting port in your Terminal. Click OK
Step 5. Configure the port parameter settings. Bits per second: “115200”, Data bits:
“8”, Parity: “None”, Stop bits: “1”, Flow control: “None”. Click OK
eRAID Series User’s Manual
Step 6. Open the File menu, and then open Properties.
Step 7. Open the Settings Tab.
eRAID User’s Manual
Step 8. Open the Settings Tab. Function, arrow and ctrl keys act as: Terminal Keys, Backspace
key sends: Crtl+H, Emulation: VT100, Telnet terminal: VT100, Back scroll buffer lines: 500.
Click OK.
Now, the VT100 is ready to use.
After you have finished the VT100 Terminal setup, you may press " X " key (in your
Terminal) to link the RAID subsystem and Terminal together.
Press “X’ key to display the disk array Monitor Utility screen on your VT100 Terminal.
2.4
Bootable CD VT100 utility (Using the controller’s serial
port)
RAID subsystem now offers an alternative means of communication for the internal
RAID Subsystem - Bootable CD VT-100 emulation program. The traditional RS-232C
eRAID Series User’s Manual
way configures the controller via a dedicated VT-100 terminal or system starting up
running the Hyper Terminal utilities. With the Bootable CD VT-100 emulation has more
flexibility. User can access the built-in configuration without needing VT-100 terminal
or system starting up running the Hyper Terminal. The Bootable CD VT-100 emulation
program is an X86-based system utility used to configure RAID volumes prior to OS
installation without needing a front panel touch-control keypad.
The RAID subsystem CD-ROM provides information on OS-independent Bootable CD
VT-100 setting utilities. The RAID subsystem CD-ROM is self-booting, assuming
you’re your system supports booting from the CD-ROM drive. This feature is useful
because the utilities discussed below are run directly from the CD-ROM.A Bootable
CD VT100 compatible terminal is used to access to the built-in configuration and
administration utility that resides in the controller’s firmware.
2.4.1
Bootable CD VT100 terminal emulation setting value
requirement
To ensure proper communications between the RAID subsystem and the Bootable CD
Terminal Emulation, Please connect the RAID subsystem series RS-232 serial port, to
any COM port on a host computer and configure the Bootable CD VT100 terminal
emulation settings to the values shown below:
Baud Rate
Data bits
Stop bits
2.4.2
Terminal requirement
115,200
8
1
Start-up ROM-DOS VT100 Screen
Change the main board BIOS setup so that your system boots from the CD-ROM.
Insert the RAID subsystem CD-ROM into the system CD-ROM drive and power on the
system. The ROM-DOS Startup Menu appears and follows the step to setup the
ROM-DOS VT-100 terminal emulation parameter.
eRAID User’s Manual
If you copy the file to floppy and boot from Floppy, then you can use the <F9-File>
Function to save the new setting to the floppy disk.
Step 1. Configure the port parameter settings. COM port: 1, Baud rate: “115200”, Data
bits: “8”, Parity: “None”, Stop bits: “1”.
Step 2. Press the “ESC” key to go back to the previous screen.
eRAID Series User’s Manual
Step 3. After you have finished the VT100 Terminal setup, you may press " Ctrl "+ “D”
keys to link the Disk Array and Terminal together.
Press" Ctrl "+ “D” keys to display the disk array Monitor Utility screen on your VT100
emulation Terminal.
2.5
Web browser-based RAID management via HTTP
Proxy (Using the controller’s serial port)
If you need to boot the operating system from a RAID system, you must first create a
RAID volume by using front panel touch-control keypad, Bootable CD VT-100 utility at
X86-based system or VT-100 terminal.
Configuration of the internal RAID subsystem web browser-based RAID management
is an HTTP –based application, which utilizes the browser installed on your operating
system. Web browser-based RAID management can be used to manage all the raid
function. Detail procedure please reference the Chapter 6 Web Browser-based
configuration method
eRAID User’s Manual
2.6
Configuration Menu Tree
The following is an expansion of the menus in configuration Utility that can be
accessed through the LCD panel and RS-232 serial port.
Main Menus
Quick Volume/Raid Setup
Raid Set Function
Create Raid Set
Delete Raid Set
Expand Raid Set
Create Hot Spare
Delete Hot Spare
Raid Set Information
Volume Set Function
Create Volume Set
Delete Volume Set
Modify Volume Set
Check Volume Set Consistency
Stop Volume Set Consistency
Display Volume Info.
Physical Drives
View Drive Information
Create Pass-Through Disk
Modify Pass-Through Disk
Delete Pass-Through Disk
Identify Selected Drive
Identify Bad Drive
Raid System Function
Mute The Alert Beeper
Alert Beep Setting
Change Password
Raid Rebuilding Priority
Maximum ATA Mode
COMA Configuration
Update Firmware
Reset Controller
Show System Events
Clear All Event Buffers
Hardware Monitor
System Information
eRAID Series User’s Manual
3. LCD Configuration Menu
The RAID subsystem LCD configuration utility is a character-based utility that you can
run after powering the unit. Use LCD Configuration Utility to:
· Create raid set,
. Expand raid set,
· Define volume set,
· Add physical drive
· Modify volume set
· Modify RAID level/stripe size,
. Define pass-through disk drives,
. Modify system function and
· Designate drives as hot spares.
The LCD display front panel function keys are the primary user interface for the RAID
subsystem. Except for the "Firmware update", all configurations can be performed
through this interface.
Function Key Definitions
The four function keys at the button of the front panel perform the following functions:
Key
Up Arrow
Down Arrow
ENT Key
ESC Key
3.1
Function
Use to scroll the cursor Upward / Rightward
Use to scroll the cursor Downward / Leftward
Submit Select ion Function (Confirm a selected item)
Return to Previous Screen (Exit a selection
configuration)
Starting LCD Configuration Utility
The main menu appears on the LCD screen, as shown below:
Use the up and down arrow buttons to move left and right and highlight a menu item.
Press ENT to select the highlighted item. Press the UP/DOWN to browse the
selection. Press ESC to return to the previous screen.
3.2
LCD Configuration Utility Main Menu Options
Select an option and the related information or submenu items display beneath it. The
submenus for each item are explained on the section 4.8.3. The configuration utility
main menu options are:
Option
Quick Volume And
Raid Set Setup
Raid Set Functions
Volume Set Functions
Description
Create a default configurations which are based on the
number of physical disk installed
Create a customized raid set
Create a customized volume set
Physical Drive
Functions
View individual disk information
eRAID User’s Manual
Raid System
Setting the raid system configurations
Functions
Views System Events Record all system events in the buffer
Clear Event Buffer
Clear all event buffer information
Hardware Monitor
System Information
Show all system environment status
View the controller information
3.3
Configuring Raid Sets and Volume Sets
You can configure raid sets and volume sets with LCD configuration utility using Quick
Volume And Raid Set Setup, Raid Set Functions/Volume Set Functions configuration
method. Each configuration method requires a different level of user input. The
general flow of operations for raid set and volume set configuration is:
Step
3.4
Action
1
Designate hot spares/pass-through (optional).
2
Choose a configuration method.
3
Create raid set using the available physical drives.
4
Define volume set using the space in the raid set.
5
Initialize the volume set and use volume set in the HOST OS.
Designating Drives as Hot Spares
To designate drives as hot spares, press ENT to enter the Main menu. Press
UP/DOWN to select the Raid Set Functions option and then press ENT. All raid set
functions will be displayed. Press UP/DOWN to select the Create Hot Spare Disk
option and then press ENT. The first unused physical device connected to the current
controller appears: Press UP/DOWN to scroll the unused physical devices and select
the target disk to assign as a Hot Spare and press ENT to designate it as
a hot spare.
3.5
Using Quick Volume and Raid Set Setup
In Quick Volume And Raid Setup Configuration, The raid set you create is associated
with exactly one volume set, and you can modify the RAID level, stripe size, and
capacity. Designating Drives as Hot Spares will also combine with raid level in this
setup.
The volume set default settings will be:
Parameter
Setting
Volume Name
Volume Set # 00
IDE Host Channel/IDE Drive Select
0/0-Master (For eRAID)
Cache Mode
Write Back
eRAID Series User’s Manual
Tag Queuing
Yes
IDE Xfer Mode
Depend your host adapter setting (For
ERAID)
The default setting values can be changed after configuration is complete.
Follow the steps below to create raid set using Quick Volume And Raid Setup
Configuration:
Step
1
2
3
4
5
6
Action
Choose Quick Volume And Raid Setup from the main menu. The
available RAID levels and associated Hot Spare for the current volume set
drive are displayed.
RAID Level Try to use drives of the same capacity in a specific array. If you
use drives with different capacities in an array, all the drives in the array is
treated as though they have the capacity of the smallest drive in the array.
The number of physical drives in a specific array determines the RAID
levels that can be implemented with the array.
RAID 0 requires one or more physical drives,
RAID 1 requires at least 2 physical drives,
RAID 1+ Spare requires more than 2 physical drives,
RAID 3 requires at least three physical drives,
RAID 5 requires at least three physical drives,
RAID 3+ Spare requires at least four physical drives, and
RAID 5 + Spare requires at least four physical drives.
Using the UP/DOWN key to select the RAID for the volume set and presses
ENT to confirm it.
Available Capacity Set the capacity size for the volume set. After select
RAID level and press ENT.
The selected capacity for the current volume set is displayed. Using the
UP/DOWN to create the current volume set capacity size and press ENT to
confirm it. The available stripe sizes for the current volume set are
displayed.
Select Stripe size This parameter specifies the size of the stripes written to
each disk in a RAID 0, 1, 3, or 5 Volume Set. You can set the stripe size to
4 KB, 8 KB, 16 KB, 32 KB, 64 KB, or 128 KB. A larger stripe size provides
better-read performance, especially if your computer does mostly
sequential reads. However, if you are sure that your computer does random
read requests more often, choose a small stripe size. Using the UP/DOWN
to select stripe size and press. ENT to confirm it.
When you are finished defining the volume set, press ENT to confirm the
Quick Volume And Raid Set Setup function.
Fast Initialization Press ENT to define fast initialization and ESC to normal
initialization. In the Normal Initialization, the initialization proceeds as a
background task, the volume set is fully accessible for system reads and
writes. The operating system can instantly access to the newly created
arrays without requiring a reboot and waiting the initialization complete. In
Fast Initialization, the initialization proceeds must be completed before the
volume set ready for system accesses.
eRAID User’s Manual
7
8
3.6
The controller will begin to Initialize the volume set you have just configured
If you need to add additional volume set using main menu Create Raid
Volume Set function.
Using Raid Set and Volume Set Functions
In Raid Set Function, you can use the Create Raid Set function to generate the new
raid set. In Volume Set Function, you can use the create volume set function to
generate its associated volume set and parameters.
If the current controller has unused physical devices connected, you can choose the
Create Hot Spare option in the Raid Set Function to define a global hot spare.
Select this method to configure new raid sets and volume sets. This configuration
option allows you to associate volume set with partial and full raid set.
Step
1
2
3
4
5
6
7
8
9
Action
To setup the Hot Spare (option), choose Raid Set Functions from the
main menu. Select the Create Hot Spare Disk to set the Hot Spare.
Choose Raid Set Function from the main menu. Select the Create A
New Raid Set.
A Select Drive IDE Channel in the next displayed showing the IDE drive
connected to the current controller.
Press the UP/ DOWN to select specific physical drives. Press the ENT to
associate the selected physical drive with the current raid set.
Try to use drives of the same capacity in a specific raid set. If you use
drives with different capacities in an array, all the drives in the array is
treated as though they have the capacity of the smallest drive in the array.
The number of physical drives in a specific raid set determines the RAID
levels that can be implemented with the raid set.
RAID 0 requires one or more physical drives per raid set.
RAID 1 requires at least two physical drives per raid set.
RAID 1 + Spare requires at least three physical drives per raid set.
RAID 3 requires at least three physical drives per raid set.
RAID 5 requires at least three physical drives per raid set.
RAID 3 + Spare requires at least four physical drives per raid set.
RAID 5 + Spare requires at least four physical drives per raid set.
After adding physical drives to the current raid set as desired, press ESC
to confirm the Select Drive IDE Channel function.
Press ENT when you are finished creating the current raid set. To
continue defining another raid set, repeat step 3. To begin volume set
configuration, go to step 7.
Choose Volume Set Functions from the main menu. Select the Create
Raid Volume Set and press ENT.
Choose one raid set from the Select Raid Set screen. Press ENT to
confirm it.
The volume set attributes screen appears:
The volume set attributes screen shows the volume set default
configuration value that is currently being configured. The volume set
attributes are:
eRAID Series User’s Manual
10
11
12
3.7
The Raid Level,
The Stripe Size,
The IDE Host Channel/IDE Drive Select (For ERAID),
The Cache Mode,
The Tagged Queuing,
The IDE Xfer Mode (For ERAID), and
The Volume Name (number).
All value can be changing by the user. Press the UP/ DOWN to select the
attributes. Press the ENT to modify each attribute of the default value.
Using the UP/DOWN to select attribute value and press the ENT to
accept the default value
After user completes modifying the attribute, press the ESC to enter the
Select Capacity for the volume set. Using the UP/DOWN to set the
volume set capacity and press ENT to confirm it.
When you are finished defining the volume set, press ENT to confirm the
Create function.
Press ENT to define fast initialization and ESC to normal initialization. The
controller will begin to Initialize the volume set you have just configured. If
space remains in the raid set, the next volume set can be configured.
Repeat steps 7 to 12 to configure another volume set.
Navigation Map of the LCD of eRAID
The password option allows user to set or clear the raid subsystem’s password
protection feature. Once the password has been set, the user can only monitor and
configure the raid subsystem by providing the correct password. The password is
used to protect the internal RAID subsystem from unauthorized entry. The controller
will check the password only when entering the Main menu from the initial screen. The
RAID subsystem will automatically go back to the initial screen when it does not
receive any command in twenty seconds. The RAID subsystem password is default
setting at 0000 by the manufacture.
3.7.1
Quick Volume/Raid Setup
Quick Volume And Raid Setup is the fastest way to prepare a raid set and volume set.
It only needs a few keystrokes to complete it. Although disk drives of different capacity
may be used in the raid set, it will use the smallest capacity of the disk drive as the
capacity of all disk drives in the raid set. The Quick Volume And Raid Setup option
creates a raid set with the following properties:
1. All of the physical disk drives are contained in a raid set.
2. The raid levels associated with hot spare, capacity, and stripe size are selected
during the configuration process.
3. A single volume set is created and consumed all or a portion of the disk capacity
available in this raid set.
4. If you need to add additional volume set, using main menu Volume Set functions
Detail procedure references to this chapter section 4.5.
eRAID User’s Manual
3.7.2
Raid Set Function
User manual configuration can complete control of the raid set setting, but it will take
longer time to complete than the Quick Volume And Raid Setup configuration. Select
the Raid Set Function to manually configure the raid set for the first time or deletes
existing raid set and reconfigures the raid set.
To enter a Raid Set Functions, press ENT to enter the Main menu. Press UP/DOWN
to select the Raid Set Functions option and then press ENT to enter further
submenus. All raid set submenus will be displayed.
3.7.2.1 Create A New Raid Set
Detail procedure references to this chapter section 4.6.
eRAID Series User’s Manual
3.7.2.2
Delete Existed Raid Set
Press UP/DOWN to choose the Delete Existed Raid Set option. Using UP/DOWN to
select the raid set number that user want to delete and then press ENT to accept the
raid set number. The Confirmation screen appears, then press ENT to accept the
delete existed raid set function. The double confirmation screen appears, then press
Yes to make sure of the delete existed raid set function
eRAID User’s Manual
3.7.2.3 Expand Existed Raid Set
Instead of deleting a raid set and recreating it with additional disk drives, the Expand
Existed Raid Set function allows the user to add disk drives to the raid set that was
created.
To expand existed raid set, press UP/DOWN to choose the Expand Existed Raid Set
option. Using UP/DOWN to select the raid set number that user want to expand and
then press ENT to accept the raid set number. If there is an available disk, then the
Select Drive IDE Channel x appears. Using UP/DOWN to select the target disk and
then press ENT to select it. Press ENT to start expanding the existed raid set.
The new add capacity will be define one or more volume sets. Follow the instruction
presented in the Volume Set Function to create the volume sets.
eRAID Series User’s Manual
Note:
1. Once the Expand Raid Set process has started, user cannot stop it. The process
must be completed.
2. If a disk drive fails during raid set expansion and a hot spare is available, an auto
rebuild operation will occur after the raid set expansion completes.
Migrating occurs when a disk is added to a raid set. Migration status is displayed in
the raid status area of the Raid Set information when a disk is added to a raid set.
Migrating status is also displayed in the associated volume status area of the volume
set Information when a disk is added to a raid set
3.7.2.4 Activate Incomplete Raid set
When one of the disk drive is removed in power off state, the raid set state will change
to Incomplete State. If user wants to continue to work, when the eRAID system is
powered on. User can use the Activate Incomplete RaidSet option to active the raid
set. After user complete the function, the Raid State will change to Degraded Mode.
3.7.2.5 Create Hot Spare Disk
Please reference this chapter section 4.4: Designating Drives as Hot Spares.
3.7.2.6 Delete Hot Spare Disk
To delete hot spare, press UP/DOWN to choose the Delete Hot Spare Disk option.
Using UP/DOWN to select the hot spare number that user want to delete and then
press ENT to select it. The confirmation screens appear and press ENT to delete the
hot spare.
3.7.2.7 Display Raid Set Information
Using UP/DOWN to choose the Display Raid Set Information option and press ENT.
Using UP/DOWN to select the raid set number that user want to display. The raid set
information will be displayed.
Using UP/DOWN to scroll the raid set information, it shows Raid Set Name, Total
Capacity, Free Capacity, Number of Member Disks, Min. Member Disk Capacity and
Raid Set State.
3.7.3
Volume Set Function
A volume set is seen by the host system as a single logical device. It is organized in a
RAID level with one or more physical disks. RAID level refers to the level of data
performance and protection of a Volume Set. A Volume Set capacity can consume all
or a portion of the disk capacity available in a Raid Set. Multiple Volume Sets can exist
on a group of disks in a Raid Set. Additional Volume Sets created in a specified Raid
Set will reside on all the physical disks in the Raid Set. Thus each Volume Set on the
Raid Set will have its data spread evenly across all the disks in the Raid Set.
To enter a Volume Set Functions, press ENT to enter the main menu. Press
UP/DOWN to select the Volume Set Functions option and then press ENT to enter
further submenus. All volume set submenus will be displayed.
eRAID User’s Manual
3.7.3.1 Create Raid Volume Set
To create a volume set, Please reference this chapter section 4.6: Using Raid Set and
Volume Set Functions. The volume set attributes screen shows the volume set default
configuration value that is currently being configured. The attributes are Raid Level,
Stripe Size, Cache Mode, SCSI HOST, SCSI ID, SCSI LUN, Tagged Queuing, SCSI
Max Rate, and Volume Name (number).
All value can be changing by the user. Press the UP/DOWN to select attribute. Press
the ENT to modify the default value. Using the UP/DOWN to select attribute value and
press the ENT to accept the default value. The following is the attributes descriptions.
Please reference this chapter section 4.6 Using Raid Set and Volume Set Functions to
complete the create volume set function.
3.7.3.1.1
Capacity
The maximum volume size is default in the first setting. Enter the appropriate volume
size to fit your application. The capacity can also increase or decrease by the .UP and
DOWN arrow key. Each volume set has a selected capacity which is less than or
equal to the total capacity of the raid set on which it resides.
3.7.3.1.2
Raid Level
eRAID can support raid level 0,1(0+1),3 and 5.
3.7.3.1.3
Strip Size
This parameter sets the size of the segment written to each disk in a RAID 0, 1, 3, or 5
logical drive. You can set the stripe size to 4 KB, 8 KB, 16 KB, 32 KB, 64 KB, or 128
KB.
A larger stripe size produces better-read performance, especially if your computer
does mostly sequential reads. However, if you are sure that your computer does
random reads more often, select a small stripe size.
3.7.3.1.4
Volume Name
The default volume name will always appear as Volume Set. #. You can rename the
volume set name providing it does not exceed the 15 characters limit.
3.7.3.1.5
IDE Host Channel
IDE Channel: The eRAID can support dual ATA channel- Parallel ATA (Channel 0)
and Serial ATA (Channel 1). Multiple IDE channel can be applied to the internal RAID
subsystem if user selects the Independent option in the Interface Mode at Raid
System Function. Single IDE channel can be applied to the internal RAID subsystem if
user selects the Share Volume option in the Interface Mode at Raid System Function.
Both PATA and SATA connection are setting as Channel 0.
3.7.3.1.6
IDE Drive Select
Host Channel setting at Independent-PATA and SATA host channel can
concurrently access different volume sets. The PATA (Channel 0) can support Master
and Slave volume set. The SATA (Channel 1) can support one master volume set.
The Max volume set can be accessed by ERAID is 3.
eRAID Series User’s Manual
Host Channel setting at Share Volume-The eRAID can support dual ATA channelParallel ATA Master and Serial ATA accesses same volume set. But user can only
connect one channel at one time. If user connects the PATA (Host Channel 0), the
RAID subsystem supports 2 volumes (Master/Slave). If user connects the SATA, the
RAID subsystem supports 1 volume (Master) (Host Channel 0). Both PATA and SATA
connection are setting as Channel 0.
eRAID User’s Manual
3.7.3.1.7
Cache Mode
User can set the cache mode as Write-Through Cache or Write-Back Cache.
3.7.3.1.8
Tag Queuing
The Enabled option is useful for enhancing overall system performance under multitasking operating systems. The Command Tag (Drive Channel) function controls the
SCSI command tag queuing support for each drive channel. This function should
normally remain enabled. Disable this function only when using older SCSI drives that
do not support command tag queuing
3.7.3.1.9
IDE Transfer Mode
The eRAID Internal RAID subsystem supports ATA150, ATA133, ATA100, ATA66,
and ATA33 Mode. The ATA150 is defined by ARC-600 chip.
3.7.3.2 Delete Volume Set
Press UP/DOWN to choose the Delete Existed Volume Set option. Using UP/DOWN
to select the raid set number that user want to delete and press ENT. Scrolling the
UP/DOWN to select the volume set number that user want to delete and press ENT.
The Confirmation screen appears, and then press ENT to accept the delete volume
set function. The double confirmation screen appears, then press Yes to make sure of
the delete volume set function.
3.7.3.3 Modify Volume Set
Use this option to modify volume set configuration. To modify volume set attributes
from raid set system function, press UP/DOWN to choose the Modify Volume Set
Attribute option. Using UP/DOWN to select the raid set number that user want to
modify and press ENT. Scrolling the UP/DOWN to select the volume set number that
user want to modify and press ENT. Press ENT to select the existed volume set
attribute. The volume set attributes screen shows the volume set setting configuration
attributes that was currently being configured. The attributes are Raid Level, Stripe
Size, Cache Mode, SCSI HOST, SCSI ID, SCSI LUN, Tagged Queuing, SCSI Max
Rate, and Volume Name (number).
All value can be modifying by the user. Press the UP/DOWN to select attribute. Press
the ENT to modify the default value. Using the UP/DOWN to select attribute value and
press the ENT to accept the selection value. Choose this option to display the
properties of the selected Volume Set; you can modify all values except the capacity.
3.7.3.3.1
Volume Set Migration
Migrating occurs when a volume set is migrating from one RAID level to another, a
volume set strip size changes, or when a disk is added to a raid set. Migration status
is displayed in the volume state area of the Display Volume Set Information when
one RAID level to another, a Volume set strip size changes or when a disk is added to
a raid set.
eRAID Series User’s Manual
3.7.3.4 Check Volume Set Consistency
Use this option to check volume set consistency. To check volume set consistency
from volume set system function, press UP/DOWN to choose the Check Volume Set
Consistency option. Using UP/DOWN to select the raid set number that user want to
check and press ENT. Scrolling the UP/DOWN to select the volume set number that
user want to check and press ENT. The Confirmation screen appears, press ENT to
start the check volume set consistency.
3.7.3.5 Stop Volume Set Consistency Check
Use this option to stop volume set consistency check. To stop volume set consistency
check from volume set system function, press UP/DOWN to choose the Stop Volume
Set Consistency Check option and then press ENT to stop the check volume set
consistency.
3.7.3.6 Display Volume Set Information
Use this option to display volume set information. To display volume set information
from Volume set system function, press UP/DOWN to choose the Display Volume
Set Information option. Using UP/DOWN to select the raid set number that user
wants to show and press ENT. Scrolling the UP/DOWN to select the volume set
number that user want to display and press ENT. The volume set attributes screen
shows the volume set setting configuration value that was currently being configured.
The attributes are Raid Level, Stripe Size, Cache Mode, SCSI HOST, SCSI ID, SCSI
LUN, Tagged Queuing, SCSI Max Rate, and Volume Name (number). All value cannot
be modifying by this option.
3.7.4
Physical Drive
Choose this option from the Main Menu to select a physical disk and to perform the
operations listed below. To enter a Physical Drive Functions, press ENT to enter the
main menu. Press UP/DOWN to select the Physical Drive Functions option and then
press ENT to enter further submenus. All physical drive submenus will be displayed.
3.7.4.1 Display Drive Information
Using UP/DOWN to choose the View Drive Information option and press ENT. Using
UP/DOWN to select the drive IDE number that user want to display. The drive
information will be displayed. The drive information screen shows the Model Name,
Serial Number, Firmware Rev., Device Capacity, Device PIO Mode, Current UDMA,
Supported UDMA, and Device State.
3.7.4.2 Create Pass-Through Disk
Disk is no controlled by the RAID subsystem firmware and thus cannot be a part of a
raid set. The disk is available to the operating system as an individual disk. It is
typically used on a system where the operating system is on a disk not controlled by
the RAID subsystem firmware.
Using UP/DOWN to choose the Create Pass-Through Disk option and press ENT.
Using UP/DOWN to select the drive IDE number that user want to create. The drive
attributes will be displayed. The drive attributes show the Cache Model, SCSI Host,
SCSI ID, SCSI LUN, Tagged Queuing, and SCSI Sync Rate.
eRAID User’s Manual
All values can be changing by the user. Press the UP/DOWN to select attribute and
then press the ENT to modify the default value. Using the UP/ DOWN to select
attribute value and press the ENT to accept the selection value.
eRAID Series User’s Manual
3.7.4.3 Modify Pass-Through Disk
Use this option to modify the Pass-Through Disk attributes. To modify Pass-Through
Disk attributes from Pass-Through Disk pool, press UP/DOWN to choose the Modify
Pass-Through Drive option, and then press ENT key. The Select Drive Function
menu will show all Pass-Through Drive number items. Using UP/DOWN to select the
Pass-Through Disk that user want to modify and press ENT. The attributes screen
shows the Pass-Through Disk setting value that was currently being configured. The
attributes are Cache Mode, SCSI HOST, SCSI ID, SCSI LUN, Tagged Queuing, and
SCSI Max Rate.
All value can be modifying by the user. Press the UP/DOWN arrow keys to select
attribute. Press the ENT to modify the default value. Using the UP/ DOWN key to
select attribute value and press the ENT to accept the selection value. After
completing the modification, press ESC to enter the confirmation screen and then
press ENT to accept the Modify Pass-Through Disk function.
3.7.4.4 Delete Pass-Through Disk
To delete pass-through drive from the pass-through drive pool, press UP/DOWN to
choose the Delete Pass-Through Drive option, and then press ENT. The Select
Drive Function menu will show all Pass-Through Drive number items. Using
eRAID User’s Manual
UP/DOWN to select the Pass-Through Disk that user want to delete and press ENT.
The Delete Pass-Through confirmation screen will appear, presses ENT to delete it.
3.7.4.5 Identify Selected Drive
To prevent removing the wrong drive, the selected disk HDD LED Indicator will light for
physically locating the selected disk when the Identify Selected Drive function is
selected..
To identify selected drive from the physical drive pool, press UP/DOWN to choose the
Identify Selected Drive option, then press ENT key. The Select Drive function menu
will show all physical drive number items. Using UP/DOWN to select the Disk that user
want to identify and press ENT. The selected disk HDD LED indicator will flash.
3.7.5
Raid System Function
To enter a Raid System Function, press ENT to enter the Main menu. Press
UP/DOWN to select the Raid System Function option and then press ENT to enter
further submenus. All raid system submenus will be displayed. Using UP/DOWN to
select the submenus option and then press ENT to enter the selection function.
3.7.5.1 Mute The Alert Beeper
The Mute The Alert Beeper function item is used to control the RAID subsystem
Beeper. Select the “No” and press Enter key in the dialog box to turn the beeper off
temporarily. The beeper will still activate on the next event.
3.7.5.2 Alert Beeper Setting
The Alert Beeper function item is used to Disabled or Enable the RAID subsystem
controller alarm tone generator. Using the UP/DOWN to select alert beeper and then
press the ENT to accept the selection. After completing the selection, the confirmation
screen will be displayed and then press ENT to accept the function
Select the Disabled and press Enter key in the dialog box to turn the beeper off
temporarily. The beeper will still activate on the next event.
3.7.5.3 Change Password
To set or change the RAID subsystem password, press the UP/DOWN to select
Change Password and then press the ENT to accept the selection. The New
Password: screen appears and enter new password that user want to change.
Using the UP/DOWN to set the password value. After completing the modification, the
confirmation screen will be displayed and then press ENT to accept the function
To disable the password, presses ENT only in the New Password: column. The
existing password will be cleared. No password checking will occur when entering the
main menu from the starting screen.
eRAID Series User’s Manual
E
Mute The Alert
Beeper
The “ Update Firmware” is not available in LCD mode
Alert Beeper
Setting
Alert Beeper
* Disabled
Confirm Change ?
ENT:Yes, ESC:No
<Disabled, Enable>
Wraps Around
Change
Password
New Password:
_
Change Password ?
ENT:Yes, ESC:No
Interface Mode
For Host
Raid System
Function
Interface Mode
*Share Volume
Raid Rebuild
Priority
Confirm Change ?
ENT:Yes, ESC:No
< Independent, Share Volume > Wraps Around
Rebuild Priority
* Low
Confirm Change ?
ENT:Yes, ESC:No
<Low, Normal, High>
Wraps Around
Maximum ATA Mode
Supported
Maximum ATA Mode
* ATA 133
Confirm Change ?
ENT:Yes, ESC:No
<133, 100, 66, 33>
Wraps Around
Select Baud Rate
* 115200
Confirm Change ?
ENT:Yes, ESC:No
<1200, 2400, … .., 11520>
Wraps Around
Baud Rate
Setting
Terminal Port
Configuration
Number of Stop
Bit
Select Stop Bits
* 1 Bit
Reset The
Controller
Show System
Events
Confirm Change ?
ENT:Yes, ESC:No
<1, 2> Wraps
Around
Confirm Reset ?
ENT:Yes, ESC:No
Controller Temp.
Clear All Event
Buffer
ENT : To Clear
ESC : To Abort
BackPlane Temp.
Fan Speed (RPM)
Power +12V
Hardware Monitor
Information
Power +5V
Main Processor
Power +3.3V
CPU ICache Size
Power +1.5V
CPU DCache Size
System Memory
Firmware Version
Show System
Information
Serial Number
Controller Name
END
3.7.5.4 Interface Mode
This function can only active at no volume set defined in any raid set.
Host Interface Mode:
eRAID User’s Manual
Independent-PATA and SATA host channel can concurrently access different volume
sets. The PATA can support Master and Slave volume set. The SATA can support
one master volume set. The Max volume set can be accessed by eRAID is 3.
Share Volume-The ERAID can support dual ATA channel- Parallel ATA Master and
Serial ATA accesses same volume set. But user can only connect one channel at one
time. If user connects the PATA (Host Channel 0), the RAID subsystem supports 2
volumes (Master/Slave). If user connects the SATA, the RAID subsystem supports 1
volume (Master) (Host Channel 0). Both PATA and SATA connection are setting as
Channel 0.
To set or change the RAID subsystem RAID Host Channel Mode, press the
UP/DOWN to select Interface Mode and press the ENT to accept the selection. The
interface mode selection screen appears and uses the UP/DOWN to set the interface
mode. After completing the modification, the confirmation screen will be displayed and
then press ENT to accept the function
3.7.5.5 RAID Rebuild Priority
The “Raid Rebuild Priority’ is a relative indication of how much time the controller
devotes to a rebuild operation. The RAID subsystem allows user to choose the rebuild
priority (low, normal, high) to balance volume set access and rebuild tasks
appropriately.
To set or change the RAID subsystem RAID Rebuild Priority, press the UP/DOWN to
select RAID Rebuild Priority and press the ENT to accept the selection. The rebuild
priority selection screen appears and uses the UP/DOWN to set the rebuild value.
After completing the modification, the confirmation screen will be displayed and then
press ENT to accept the function
3.7.5.6 Maximum ATA Mode
Within the subsystem, one Ultra 160 SCSI chip acts as a target and 5 Ultra ATA bus
are connected to the drive. The 5 Ultra ATA drive channel can support up to ATA133,
which runs up to 133MB/s.
To set or change the RAID subsystem maximum ATA mode, press the UP/ DOWN to
select Maximum ATA Mode and then press the ENT to accept the selection. The
maximum ATA mode selection screen appears and uses the UP/DOWN to set the
maximum ATA mode. After completing the modification, the confirmation screen will
be displayed and then press ENT to accept the function.
3.7.5.7 COMA Configuration
Parity value is fixed at None.
Handshaking value is fixed at None.
Speed setting values are 1200, 2400, 4800, 9600, 19200,38400, 57600, and 115200.
Stop Bits values are 1 bit and 2 bits.
To set or change the RAID subsystem COMA configuration, press the UP/ DOWN to
select COMA Configuration and then press the ENT to accept the selection. The
baud rate setting or number of stop bit screen appears and uses the UP/DOWN select
the setting function. The respect selection screen appears and uses the UP/DOWN
arrow to set the value. After completing the modification, the confirmation
screen will be displayed and then press ENT to accept the function.
eRAID Series User’s Manual
3.7.5.8 Reset Controller
Use the Reset Controller to reset the entire configuration from the RAID subsystem
controller non-volatile memory. To reset the RAID subsystem, press the UP/ DOWN to
select Reset Controller and then press the ENT to accept the selection. The
confirmation screen will be displayed and then press ENT to accept the function.
Note: It can only work properly at Host and Drive without any activity.
3.7.6
Show System Events
To view the RAID subsystem events, press ENT to enter the Main menu. Press
UP/DOWN key to select the Show System Events option, and then press ENT. The
system events will be displayed. Press UP/DOWN to browse all the system events.
3.7.7
Clear all Event Buffers
Use this feature to clear the entire events buffer information.
To clear all event buffers, press ENT to enter the main menu. Press UP/DOWN to
select the Clear all Event Buffers option, and then press ENT. The confirmation
message will be displayed and press the ENT to clear all event buffers or ESC to
abort the action.
3.7.8
Hardware Information
To view the RAID subsystem controller’s hardware monitor information, press ENT to
enter the main menu. Press UP/DOWN to select the Hardware Information option,
and then press ENT. All hardware information will be displayed. Press UP/DOWN to
browse all the hardware information.
The Hardware Monitor Information provides the temperature, fan speed (chassis fan)
and voltage of the internal RAID subsystem. The temperature items list the current
states of the controller board and backplane. All items are also unchangeable. The
warning messages will indicate through the LCM, LED and alarm buzzer.
Item
Controller Board Temperature
Backplane Temperature
Warning Condition
> 60 Celsius
> 60 Celsius
Controller Fan Speed
< 1900 RPM
Power Supply +12V
< 10.5V or > 13.5V
Power Supply +5V
< 4.7V or > 5.3V
Power Supply +3.3V
< 3.0V or > 3.6V
CPU Core Voltage +1.5V
< 1.35V or > 1.65V
3.7.9
System Information
Choose this option to display Main processor, CPU Instruction cache/ and data cache size,
firmware version, serial number, controller model name, and the cache memory size. To check
the system information, press ENT to enter the main menu. Press UP/DOWN to select the
Show System Information option, and then press ENT. All major controller system
information will be displayed. Press UP/DOWN to browse all the system information.
eRAID User’s Manual
4. VT-100 Utility Configuration
The RAID subsystem configuration utility is firmware-based and uses to configure raid
sets and volume sets. Because the utility resides in the RAID controller firmware, its
operation is independent of the operating systems on your computer. Use this utility to:
· Create raid set,
. Expand raid set,
· Define volume set,
· Add physical drive,
· Modify volume set,
· Modify RAID level/stripe size,
. Define pass-through disk drives,
. Update firmware,
. Modify system function, and
· Designate drives as hot spares.
Keyboard Navigation
The following definition is the VT-100 RAID configuration utility keyboard navigation.
Key
Arrow Key
Move cursor
Enter Key
Submit selection function
ESC Key
L Key
Return to previous screen
Line draw
X Key
4.1
Function
Redraw
Configuring Raid Sets and Volume Sets
You can configure raid sets and volume sets with VT-100 terminal function using
Quick Volume/Raid Setup, or Raid Set/Volume Set Function configuration method.
Each configuration method requires a different level of user input. The general flow of
operations for raid set and volume set configuration is:
Step
Action
1
Designate hot spares/pass-through (optional).
2
Choose a configuration method.
3
Create raid sets using the available physical drives.
4
Define volume sets using the space in the raid set.
5
Initialize the volume sets (logical drives) and use volume sets in the
host OS.
eRAID Series User’s Manual
4.2
Designating Drives as Hot Spares
All unused disk drive that is not part of a raid set can be created as a Hot Spare. The
Quick Volume/Raid Setup configuration will automatically add the spare disk drive with
the raid level for user to select. For the Raid Set Function configuration, user can use
the Create Hot Spare option to define the hot spare disk drive.
A Hot Spare disk drive can be created when you choose the Create Hot Spare option
in the Raid Set Function, all unused physical devices connected to the current
controller appear: Select the target disk by clicking on the appropriate check box.
Press the Enter key to select a disk drive, and press Yes in the Create Hot Spare to
designate it as a hot spare.
4.3
Using Quick Volume /Raid Setup Configuration
In Quick Volume /Raid Setup Configuration, the raid set you create is associated with
exactly one volume set, and you can modify the default RAID level, stripe size, and
capacity of the volume set. Designating Drives as Hot Spares will also show in the raid
level selection option. The volume set default settings will be:
Parameter
Setting
Volume Name
Volume Set # 00
IDE Host Channel/IDE Drive Select
0/0-Master
Cache Mode
Write Back
Tag Queuing
Yes
IDE Xfer Mode
Depend your host adapter setting
The default setting values can be changed after configuration is complete.
Follow the steps below to create arrays using Quick Volume /Raid Setup
Configuration:
Step
1
2
3
Action
Choose Quick Volume /Raid Setup from the main menu. The available
RAID levels with hot spare for the current volume set drive are displayed.
Try to use drives of the same capacity in a specific array. If you use drives
with different capacities in an array, all the drives in the raid set is treated
as though they have the capacity of the smallest drive in the raid set.
The numbers of physical drives in a specific array determine the RAID
levels that can be implemented with the array.
RAID 0 requires one or more physical drives,
RAID 1 requires at least two physical drives,
RAID 1+Spare requires at least three physical drives,
RAID 3 requires at least three physical drives,
RAID 5 requires at least three physical drives.
RAID 3 +Spare requires at least four physical drives, and
RAID 5 + Spare requires at least four physical drives.
Highlight RAID level for the volume set and press Enter key to confirm.
Set the capacity size for the current volume set. After Highlight RAID level
and press Enter key.
eRAID User’s Manual
4
5
6
7
8
4.4
The selected capacity for the current volume set is displayed. Using the UP
and DOWN arrow key to create the current volume set capacity size and
press Enter key to confirm. The available stripe sizes for the current
volume set are displayed.
Using the UP and DOWN arrow key to select the current volume set stripe
size and press Enter key to confirm it. This parameter specifies the size of
the stripes written to each disk in a RAID 0, 1, 3, or 5 Volume Set. You can
set the stripe size to 4 KB, 8 KB, 16 KB, 32 KB, 64 KB, or 128 KB. A larger
stripe size provides better-read performance, especially if your computer
does mostly sequential reads. However, if you are sure that your computer
does random read requests more often, choose a small stripe size.
When you are finished defining the volume set, press Enter key to confirm
the Quick Volume And Raid Set Setup function.
Fast Initialization Press Enter key to define fast initialization and Esc key to
normal initialization. In the Normal Initialization, the initialization proceeds
as a background task, the volume set is fully accessible for system reads
and writes. The operating system can instantly access to the newly created
arrays without requiring a reboot and waiting the initialization complete. In
Fast Initialization, the initialization proceeds must be completed before the
volume set ready for system accesses.
Initialize the volume set you have just configured
If you need to add additional volume set, using main menu Create Volume
Set function
Using Raid Set/Volume Set Function Method
In Raid Set Function, you can use the Create Raid Set function to generate the new
raid set. In Volume Set Function, you can use the create volume set function to
generate its associated volume set and parameters.
If the current controller has unused physical devices connected, you can choose the
Create Hot Spare option in the Raid Set Function to define a global hot spare.
Select this method to configure new raid sets and volume sets. The Raid Set/Volume
Set Function configuration option allows you to associate volume set with partial and
full raid set.
Step
1
2
3
4
Action
To setup the Hot Spare (option), choose Raid Set Function from the
main menu. Select the Create Hot Spare and press Enter key to set the
Hot Spare.
Choose Raid Set Function from the main menu. Select the Create Raid
Set and press Enter key.
A Select IDE Drive For Raid Set window is displayed showing the IDE
drive connected to the current controller.
Press the UP and DOWN arrow keys to select specific physical drives.
Press the Enter key to associate the selected physical drive with the
current raid set.
Try to use drives of the same capacity in a specific raid set. If you use
eRAID Series User’s Manual
6
5
6
7
8
9
10
11
12
drives with different capacities in an array, all the drives in the array is
treated as though they have the capacity of the smallest drive in the array.
The numbers of physical drives in a specific raid set determine the RAID
levels that can be implemented with the raid set.
RAID 0 requires one or more physical drives per raid set.
RAID 1 requires at least two physical drives per raid set.
RAID 3 requires at least three physical drives per raid set.
RAID 5 requires at least three physical drives per raid set.
An Edit The Raid Set Name dialog box appears. Enter 1 to 15
alphanumeric characters to define a unique identifier for a raid set. The
default raid set name will always appear as Raid Set. #. Press Enter to
finish the name editing.
After adding physical drives to the current raid set as desired, press Yes
to confirm the Create Raid Set function.
An Edit The Raid Set Name dialog box appears. Enter 1 to 15
alphanumeric characters to define a unique identifier for a raid set. The
default raid set name will always appear as Raid Set. #.
Press Enter key when you are finished creating the current raid set. To
continue defining another raid set, repeat step 3. To begin volume set
configuration, go to step 8.
Choose Volume Set Function from the Main menu. Select the Create
Volume Set and press Enter key.
Choose one raid set from the Create Volume From Raid Set window.
Press Enter key to confirm it.
The Volume Creation screen shows the volume set default attribute
values that are currently being configured. The attribute column headings
are:
The Raid Level,
The Stripe Size,
The IDE Host Channel/IDE Drive Select
The Cache Mode,
The Tagged Queuing,
The IDE Xfer Mode
The Volume Name (number).
The user can change all values
After the current volume set attributes are defined, press Esc key to enter
Initialization selection screen..
Fast Initialization Press Enter key to define fast initialization and Esc key
to normal initialization. In the Normal Initialization, the initialization
proceeds as a background task, the volume set is fully accessible for
system reads and writes. The operating system can instantly access to
the newly created arrays without requiring a reboot and waiting the
initialization complete. In Fast Initialization, the initialization proceeds
must be completed before the volume set ready for system accesses.
If space remains in the raid set, the next volume set can be configured.
Repeat steps 8 to 11 to configure another volume set.
Note: User can use this method to examine the existing configuration. Modify volume
set configuration method provides the same functions as create volume set
eRAID User’s Manual
configuration method. In volume set function, you can use the modify volume set
function to modify the volume set parameters except the capacity size:
4.5
Main Menu
The main menu shows all function that enables the customer to execute actions by
clicking on the appropriate link.
Option
Quick Volume And
Raid Set Setup
Raid Set Functions
Volume Set
Functions
Physical Drive
Functions
Raid System
Functions
Views System
Events
Clear Event Buffer
Description
Create a default configurations which are based on the
number of physical disk installed
Create a customized raid set
Create a customized volume set
Hardware Monitor
System Information
Show all system environment status
View the controller information
View individual disk information
Setting the raid system configurations
Record all system events in the buffer
Clear all event buffer information
The password option allows user to set or clear the raid subsystem’s password
protection feature. Once the password has been set, the user can only monitor and
configure the raid subsystem by providing the correct password. The password is
used to protect the internal RAID subsystem from unauthorized entry. The controller
will check the password only when entering the Main menu from the initial screen. The
RAID subsystem will automatically go back to the initial screen when it does not
receive any command in twenty seconds. The RAID subsystem password is default
eRAID Series User’s Manual
setting at 0000 by the manufacture.
4.5.1
Quick Volume/Raid Setup
Quick Volume/Raid Setup is the fastest way to prepare a raid set and volume set. It
only needs a few keystrokes to complete it. Although disk drives of different capacity
may be used in the raid set, it will use the smallest capacity of the disk drive as the
capacity of all disk drives in the raid set. The Quick Volume/Raid Setup option creates
a raid set with the following properties:
5. All of the physical disk drives are contained in a raid set.
6. The raid levels associated with hot spare, capacity, and stripe size are selected
during the configuration process.
7. A single volume set is created and consumed all or a portion of the disk capacity
available in this raid set.
8. If you need to add additional volume set, using main menu Create Volume Set
function
The total physical drives in a specific raid set determine the RAID levels that can be
implemented with the raid set. Press the Quick Volume/Raid Setup from the main
menu; all possible RAID levels screen will be displayed.
A single volume set is created and consumed all or a portion of the disk capacity
available in this raid set. Define the capacity of volume set in the Available Capacity
popup. The default value for the volume set is displayed in the selected capacity. To
enter a value less than the available capacity, type the value and press the Enter key
to accept this value. If it only use part of the raid set capacity, you can use the Create
Volume Set option to define another volume sets
eRAID User’s Manual
Stripe size This parameter sets the size of the stripe written to each disk in a RAID 0,
1, 3, or 5 logical drive. You can set the stripe size to 4 KB, 8 KB, 16 KB, 32 KB, 64 KB,
or 128 KB.
A larger stripe size produces better-read performance, especially if your computer
does mostly sequential reads. However, if you are sure that your computer does
random reads more often, select a small stripe size.
Press the Yes key in the Create Vol/Raid Set dialog box, the raid set and volume set
will start to initialize it.
eRAID Series User’s Manual
4.5.2
Raid Set Function
User manual configuration can complete control of the raid set setting, but it will take
longer to complete than the Quick Volume/Raid Setup configuration. Select the Raid
Set Function to manually configure the raid set for the first time or deletes existing raid
set and reconfigures the raid set.
4.5.2.1 Create Raid Set
To define raid set, follow the procedure below:
1. Select Raid Set Function from the main menu.
2. Select Create Raid Set option from the Raid Set Function dialog box.
3. A Select IDE Drive For Raid Set window is displayed showing the IDE drive
connected to the current controller. Press the UP and DOWN arrow keys to select
specific physical drives. Press the Enter key to associate the selected physical
drive with the current raid set. Repeat this step, as many disk drives as user want to
eRAID User’s Manual
add in a single raid set.
To finish selecting IDE drives For Raid Set, press Esc key. A Create Raid Set
confirmation screen appears, Press Yes key to confirm it.
4. An Edit The Raid Set Name dialog box appears. Enter 1 to 15 alphanumeric
characters to define a unique identifier for a raid set. The default raid set name will
always appear as Raid Set. #.
4.5.2.2 Delete Raid Set
To change a raid set, you should first delete it and recreate the raid set. To delete a
raid set, select the raid set number that user want o delete in the Select Raid Set to
Delete screen. The Delete Raid Set dialog box appears, then press Yes key to delete
it.
eRAID Series User’s Manual
4.5.2.3
Expand Raid Set
Instead of deleting a raid set and recreating it with additional disk drives, the Expand
Raid Set function allows the users to add disk drive to the raid set that was created.
To expand a raid set:
Click on Expand Raid Set option. If there is an available disk, then the Select IDE
Drives For Raid Set Expansion screen appears.
Select the target Raid Set by clicking on the appropriate radial button. Select the
target disk by clicking on the appropriate check box.
Presses Yes key to start expand the raid set.
The new add capacity will be define one or more volume sets. Follow the instruction
presented in the Volume Set Function to create the volume set s.
Note:
eRAID User’s Manual
3. Once the Expand Raid Set process has started, user cannot stop it. The process
must be completed.
4. If a disk drive fails during raid set expansion and a hot spare is available, an auto
rebuild operation will occur after the raid set expansion completes.
4.5.2.3.1
Migrating
Migrating occurs when a disk is added to a Raid Set. Migration status is displayed in
the raid status area of the Raid Set information when a disk is added to a raid set.
Migrating status is also displayed in the associated volume status area of the Volume
Set Information when a disk is added to a raid set.
4.5.2.4 Activate Incomplete Raid Set
The following screen is the Raid Set Information after one of its disk drive has removed in the
power off state.
eRAID Series User’s Manual
When one of the disk drive is removed in power off state, the raid set state will change
to Incomplete State. If user wants to continue to work, when the RAID subsystem is
power on. User can use the Activate Raid Set option to active the raid set. After user
complete the function, the Raid State will change to Degraded Mode.
4.5.2.5
Create Hot Spare
When you choose the Create Hot Spare option in the Raid Set Function, all unused
physical devices connected to the current controller appear: Select the target disk by
clicking on the appropriate check box.
Press the Enter key to select a disk drive and press Yes in the Create Hot Spare to
designate it as a hot spare.
The create Hot Spare option gives you the ability to define a global hot spare.
eRAID User’s Manual
4.5.2.6
Delete Hot Spare
Select the target Hot Spare disk to delete by clicking on the appropriate check box.
Press the Enter keys to select a disk drive, and press Yes in the Delete Hot Spare to
delete the hot spare.
4.5.2.7 Raid Set Information
To display Raid Set information, move the cursor bar to the desired Raid Set number,
then press Enter key. The Raid Set Information will show as above.
You can only view the information of this Raid Set.
eRAID Series User’s Manual
4.5.3
Volume Set Function
A Volume Set is seen by the host system as a single logical device. It is organized in a
RAID level with one or more physical disks. RAID level refers to the level of data
performance and protection of a Volume Set. A Volume Set capacity can consume all
or a portion of the disk capacity available in a Raid Set. Multiple Volume Sets can exist
on a group of disks in a Raid Set. Additional Volume Sets created in a specified Raid
Set will reside on all the physical disks in the Raid Set. Thus each Volume Set on the
Raid Set will have its data spread evenly across all the disks in the Raid Set.
4.5.3.1 Create Volume Set
4.5.3.1.1
eRAID
The following is the volume set features for the eRAID system
1. Volume sets of different RAID levels may coexist on the same raid set.
2. Up to 3 volume sets in a raid set can be created by the RAID subsystem
controller.(PATA support Master/Slave volume set, SATA supports Master volume
set)
3.The maximum addressable size of a single volume set is 2 TB.
To create a volume set, follow the following steps:
1.Select the Volume Set Function from the Main menu.
2.Choose the Create Volume Set from Volume Set Functions dialog box screen.
3.The Create Volume From Raid Set dialog box appears. This screen displays the
existing arranged raid sets. Select the raid set number and press Enter key. The
Volume Creation is displayed in the screen.
eRAID User’s Manual
1. A window with a summary of the current volume set’s settings. The “Volume
Creation” option allows user to select the Volume name, capacity, RAID level, strip
size, IDE Channel/IDE Drive Select, Cache mode, tag queuing and IDE Xfer Mode.
User can modify the default values in this screen; the modification procedures are
at 7.4.1.1 to 7.4.1.10 section.
2. After completing the modification of the volume set, press Esc key to confirm it. A
Fast Initialization screen is presented.
. Select Yes key to start the Fast Initialization of the selected volume set.
. Select No key to start the Normal Initialization of the selected volume set.
eRAID Series User’s Manual
3. Repeat steps 3 to 5 to create additional volume sets.
4. The initialization percentage of volume set will be displayed at the button line.
4.5.3.1.1.1
Volume Name
The default volume name will always appear as Volume Set. #. You can rename the
volume set name providing it does not exceed the 15 characters limit.
eRAID User’s Manual
4.5.3.1.1.2
Capacity
The maximum volume size is default in the first setting. Enter the appropriate volume
size to fit your application. The capacity can also increase or decrease by the .UP and
DOWN arrow key. Each volume set has a selected capacity which is less than or
equal to the total capacity of the raid set on which it resides.
4.5.3.1.1.3
Raid Level
Set the RAID level for the Volume Set. Highlight Raid Level and press <Enter>.
The available RAID levels for the current Volume Set are displayed. Select a RAID
level and press Enter key to confirm.
4.5.3.1.1.4
Strip Size
This parameter sets the size of the segment written to each disk in a RAID 0, 1, 3, or 5
logical drive. You can set the stripe size to 4 KB, 8 KB, 16 KB, 32 KB, 64 KB, or 128
KB.
eRAID Series User’s Manual
4.5.3.1.1.5
IDE Channel
IDE Channel: The eRAID can support dual ATA channel- Parallel ATA and Serial ATA.
Multiple IDE channel can be applied to the internal RAID subsystem if user selects the
Independent option in the Host Interface Mode at Raid System Function. Choose the
IDE Channel. A Select IDE Channel dialog box appears, select the channel number
and press Enter key to confirm it.
eRAID User’s Manual
IDE Channel: The eRAID can support dual ATA channel- Parallel ATA and Serial ATA.
Single IDE channel can be applied to the internal RAID subsystem if user selects the
Share Volume option in the Host Interface Mode at Raid System Function. Choose
the IDE Channel. A Select IDE Channel dialog box appears, the Channel I will share
volume set with Channel 0, it only show Channel 0 in the dialog box.
4.5.3.1.1.6
Drive Select
Host Channel setting at Independent-PATA and SATA host channel can
concurrently access different volume sets. The PATA (Channel 0) can support Master
and Slave volume set. The SATA (Channel 1) can support one master volume set.
The Max volume set can be accessed by eRAID is 3.
Host Channel setting at Share Volume-The eRAID can support dual ATA channelParallel ATA Master and Serial ATA accesses same volume set. But user can only
connect one channel at one time. If user connects the PATA (Host Channel 0), the
RAID subsystem supports 2 volumes (Master/Slave). If user connects the SATA, the
RAID subsystem supports 1 volume (Master) (Host Channel 0). Both PATA and SATA
connection are setting as Channel 0.
eRAID Series User’s Manual
4.5.3.1.1.7
Cache Mode
User can set the cache mode to: Write-Through Cache or Write-Back Cache.
4.5.3.1.1.8
Tag Queuing
The Enabled option is useful for enhancing overall system performance under multitasking operating systems. The Command Tag (Drive Channel) function controls the
SCSI command tag queuing support for each drive channel. This function should
normally remain enabled. Disable this function only when using older SCSI drives that
do not support command tag queuing
4.5.3.1.1.9
IDE Xfer Mode
The eRAID Internal RAID subsystem supports ATA150, ATA133, ATA100, ATA66,
and ATA33 Mode. The ATA150 is defined by ARC-600 chip.
eRAID User’s Manual
4.5.3.2 Delete Volume Set
To delete Volume set from raid set system function, move the cursor bar to the
Volume Set Functions menu and select the Delete Volume Set item, then press
“Enter” key. The Volume Set Functions menu will show all Raid Set # item. Move the
cursor bar to an RAID Set number, then press “Enter” key to show all Volume Set # in
the raid set. Move cursor to the deleted Volume Set number, press “Enter” key to
delete it.
eRAID Series User’s Manual
4.5.3.3 Modify Volume Set
Use this option to modify volume set configuration. To modify Volume Set values from
Raid Set system function, move the cursor bar to the Volume Set Functions menu and
select the Modify Volume Set item, then press Enter key. The Volume Set Functions
menu will show all Raid Set number items. Move the cursor bar to an Raid Set number
item, then press Enter key to show all Volume Set item Select the Volume Set from
the list you which to change, press Enter key to modify it.
4.5.3.3.1
Modifying eRAID Volume Set
As shown in the above can be modified at this screen. Choose this option to display
the properties of the selected Volume Set; you can modify all values except the
capacity.
eRAID User’s Manual
4.5.3.3.2
Volume Set Migration
Migrating occurs when a volume set is migrating from one RAID level to another, a
Volume set strip size changes, or when a disk is added to a Raid Set. Migration status
is displayed in the volume status area of the Volume Set Information when one RAID
level to another, a Volume set strip size changes or when a disk is added to a raid set.
4.5.3.4 Check Volume Set
Use this option to verify the correctness pf the redundant data in a volume set. For
example, in a system with dedicated parity, volume set check means computing the
parity of the data disk drives and comparing the results to the contents of the
dedicated parity disk drive. To check Volume Set from Raid Set system function, move
the cursor bar to the Volume Set Functions menu and select the Check Volume Set
item, then press Enter key. The Volume Set Functions menu will show all Raid Set
number items. Move the cursor bar to an Raid Set number item, then press Enter key
to show all Volume Set item Select the Volume Set from the list you which to check,
press Enter key to select it. After completing the selection, the confirmation screen
appears, presses Yes to start check.
eRAID Series User’s Manual
4.5.3.5 Stop Volume Set Check
Use this option to stop all the Check Volume Set function.
4.5.3.6 Display Volume Set Info.
To display Volume Set information, move the cursor bar to the desired Volume Set
number, then press Enter key. The Volume Set Information will show as following.
You can only view the information of this Volume Set.
eRAID User’s Manual
4.5.3.6.1
4.5.4
eRAID
Physical Drive
Choose this option from the Main Menu to select a physical disk and to perform the
operations listed above.
eRAID Series User’s Manual
4.5.4.1 View Drive Information
When you choose this option, the physical disks in the RAID subsystem are listed.
Move the cursor to the desired drive and press Enter. The following appears:
4.5.4.2 Create Pass-Through Disk
4.5.4.2.1
eRAID
Disk is no controlled by the RAID subsystem firmware and thus cannot be a part of a
volume set. The disk is available to the operating system as an individual disk. It is
typically used on a system where the operating system is on a disk not controlled by
the RAID subsystem firmware. The IDE Channel, Drive Select, Cache Mode, Tag
Queuing, and Max IDE Xfer Mode items detail description can reference the Create
Volume Set for eRAID section.
eRAID User’s Manual
4.5.4.3 Modify Pass-Through Disk
Use this option to modify the Pass-Through Disk Attribute. To modify Pass-Through
Disk parameters values from Pass-Through Disk pool, move the cursor bar to the
Physical Drive Function menu and select the Modify Pass-Through Drive option and
then press Enter key. The Physical Drive Function menu will show all Raid PassThrough Drive number option. Move the cursor bar to a desired item, then press Enter
key to show all Pass-Through Disk Attribute. Select the parameter from the list you
which to change, press Enter key to modify it.
4.5.4.4 Delete Pass-Through Disk
To delete Pass-through drive from the Pass-through drive pool, move the cursor bar to
the Physical Drive Function menu and select the Delete pass-through drive item, then
press Enter key. The Delete Pass-Through confirmation screen will appear and press
Yes key to delete it.
eRAID Series User’s Manual
4.5.4.5 Identify Selected Drive
To prevent removing the wrong drive, the selected disk HDD LED Indicator will light for
physically locating the selected disk when the Identify Selected Device is selected.
4.5.5
Raid System Function
To set the raid system function, move the cursor bar to the main menu and select the
‘Raid System Function” item and then press Enter key. The Raid System Function
menu will show all items. Move the cursor bar to an item, then press Enter key to
select the desired function.
eRAID User’s Manual
4.5.5.1 Mute Alert Beeper
The Mute The Alert Beeper function item is used to control the RAID subsystem
Beeper. Select the No and press Enter key in the dialog box to turn the beeper off
temporarily. The beeper will still activate on the next event.
4.5.5.2 Alert Beeper Setting
The Alert Beeper function item is used to Disabled or Enable the RAID subsystem
controller alarm tone generator. Select the Disabled and press Enter key in the dialog
box to turn the beeper off.
eRAID Series User’s Manual
4.5.5.3 Host Interface Mode (IDE)
This function can only active at no volume set defined in any raid set.
Host Interface Mode:
Independent-PATA and SATA host channel can concurrently access different volume
sets. The PATA can support Master and Slave volume set. The SATA can support
one master volume set. The Max volume set can be accessed by eRAID is 3.
Share Volume-The eRAID can support dual ATA channel- Parallel ATA Master and
Serial ATA accesses same volume set. But user can only connect one channel at one
time. If user connects the PATA (Host Channel 0), the RAID subsystem supports 2
volumes (Master/Slave). If user connects the SATA, the RAID subsystem supports 1
volume (Master) (Host Channel 0). Both PATA and SATA connection are setting as
Channel 0.
4.5.5.4 Change Password
The password option allows user to set or clear the raid subsystem’s password
protection feature. Once the password has been set, the user can only monitor and
configure the raid subsystem by providing the correct password. The password is
used to protect the internal RAID subsystem from unauthorized entry. The controller
will check the password only when entering the Main menu from the initial screen. The
RAID subsystem will automatically go back to the initial screen when it does not
receive any command in twenty seconds.
To set or change the RAID subsystem password, move the cursor to Raid System
Function screen, press the Change Password item. The Enter New Password screen
appears.
To disable the password, press Enter only in both the Enter New Password and ReEnter New Password column. The existing password will be cleared. No password
checking will occur when entering the main menu from the starting screen.
eRAID User’s Manual
4.5.5.5 RAID Rebuild Priority
The “Raid Rebuild Priority’ is a relative indication of how much time the controller
devotes to a rebuild operation. The RAID subsystem allows user to choose the rebuild
priority (low, normal, high) to balance volume set access and rebuild tasks
appropriately.
4.5.5.6 Maximum ATA Mode
Within the eRAID Internal RAID subsystem, there are 5 Ultra ATA connected to the
drive. The 5 Ultra ATA drive channel can support up to ATA133, which runs up to
133MB/s.
eRAID Series User’s Manual
4.5.5.7 COMA Configuration
Parity value is fixed at None.
Handshaking value is fixed at None.
Speed setting values are 1200, 2400, 4800, 9600, 19200,38400, 57600, and 115200.
eRAID User’s Manual
Stop Bits values are 1 bit and 2 bits.
4.5.5.8 Update Firmware
Please reference the appendix B firmware utility for updating firmware.
Note:
1. The Bootable CD VT100 utility connected through the controller’s serial port cannot
support the update firmware feature.
2. User can only update the firmware through the VT100 terminal or Web browserbased RAID management via HTTP Proxy through the controller’s serial port
4.5.5.9 Reset Controller
Use the Reset Controller Function to reset the entire configuration from the RAID
subsystem controller non-volatile memory. To reset the controller, move the cursor bar
to the Main menu Raid System Function item and then press the Enter key. The Raid
System Function menu appears on the screen. Press Enter key to the Reset
Controller item. The Reset Controller confirmation screen appears. Select Yes key to
reset entire RAID system.
Note: It can only work properly at Host and Drive without any activity.
eRAID Series User’s Manual
4.5.5.10 View Events
To view the RAID subsystem controller’s information, move the cursor bar to the main
menu and select the View Events link, then press the Enter key The RAID subsystem
events screen appear.
Choose this option to view the system events information: Timer, Device, Event type,
Elapse Time and Errors. The RAID system does not built the real time clock. The Time
information is the relative time from the RAID subsystem power on.
4.5.6
Clear Events Buffer
Use this feature to clear the entire events buffer information.
eRAID User’s Manual
4.5.7
Hardware Information
The Hardware Monitor Information provides the temperature, fan speed (chassis fan)
and voltage of the internal RAID subsystem. The temperature items list the current
states of the controller board and backplane. All items are also unchangeable. The
warning messages will indicate through the LCM, LED and alarm buzzer.
Item
Controller Board Temperature
Backplane Temperature
Warning Condition
> 60 Celsius
> 60 Celsius
Controller Fan Speed
< 1900 RPM
Power Supply +12V
< 10.5V or > 13.5V
Power Supply +5V
< 4.7V or > 5.3V
Power Supply +3.3V
< 3.0V or > 3.6V
CPU Core Voltage +1.5V
< 1.35V or > 1.65V
eRAID Series User’s Manual
4.5.8
System Information
Choose this option to display Main processor, CPU Instruction cache and data cache
size, firmware version, serial number, controller model name, and the cache memory
size. To check the system information, move the cursor bar to System Information
item, then press Enter key. All major controller system information will be displayed.
eRAID User’s Manual