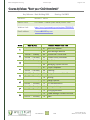
1
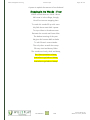
Revit Management Training “Revit your CAD Standards” "Lecture Topics" Fall Series 2009 : Autodesk® Revit® 2010 Revit Management Training Lecture Topics Page 2 / 60 Course Syllabus: “Revit your CAD Standards” Key Software: Revit Building 2010 Starting: Fall 2009 Instructor: William C. Harris Session Time: TH 1:00PM - 2:00PM (GMT–08:00) Pacific Time Webinar Link: https://www1.gotomeeting.com/register/730235670 Email address: [email protected] Week 1 2 3 4 5 6 7 8 Date & Day Sep-29 : Tuesday Session Number and Title 01 Revit User Manual Oct-01 : Thursday 02 Revit Manager Manual Oct-06 : Tuesday 03 Central files / Local Files Oct-08 : Thursday 04 Loaded Family Standards Oct-13 : Tuesday 05 Title Blocks Oct-15 : Thursday 06 Managing System Families Oct-20 : Tuesday 07 Project Templates Oct-22 : Thursday 08 Detailing Oct-27 : Tuesday 09 Design Process and Workflow Oct-29 : Thursday 10 Phasing Nov-03 : Tuesday 11 Design Options Nov-05 : Thursday 12 CD Standardization Nov-10 : Tuesday 13 Printing Archiving Nov-12 : Thursday 14 Changing Releases Nov-17 : Tuesday 15 A BIM Manager Guide to Success Nov-19 : Thursday 16 Q&A Fall 2009 Revit 2010 Content Written by: William C. Harris, Oct-09 Revit Management Training Lecture Topics Page 3 / 60 Course Objectives: Over the 16 session class you will learn both the conceptual and practical process of standardizing all of the Revit product solutions. Each session addresses key topics first conceptually, then in the product, followed by open discussion. Each Sessions Major and Minor topics additional Class Resources are provided for some sessions. Required Materials: 1. Web Access 2. Audio Device with Mute Control 3. Autodesk Revit Building 2010 Missed Live Presentation: Should you have an emergency and miss a Session you will have access to that Session until the end of the Series. You are responsible for scheduling time to view the Archive, review and understand the material. Questions specific to the Session should be emailed to the instructor in a timely manner. GreenBoard: The course syllabus, important course announcements, Presentation Outlines, Briefing Notes, Instruction Manuals, or Additional Session Resources, will be made available via GreenBoard. Please contact the Instructor as soon as possible if you cannot access the website or if you have any technical difficulties. Fall 2009 Revit 2010 Content Written by: William C. Harris, Oct-09 Revit Management Training Lecture Topics Page 4 / 60 Table of Contents Session01 BIM User Manual .............................................................................................................. 7 Introduction & CAD Standards Concept............................................................................................ 7 Best Practices ...................................................................................................................................... 7 Best Practices ...................................................................................................................................... 8 How-to’s .............................................................................................................................................. 9 The Real Process – Using Imported CAD Details ........................................................................... 10 Detail Library.................................................................................................................................... 11 Plotting .............................................................................................................................................. 11 Project Development - PD –DD – CD .............................................................................................. 12 Acknowledgement Form .................................................................................................................. 12 Session02 Revit User Guide ............................................................................................................. 13 Project Templates ............................................................................................................................. 13 View Templates ................................................................................................................................ 13 Options ............................................................................................................................................. 13 Rendering ......................................................................................................................................... 13 Import/export Settings ...................................................................................................................... 14 Families and family types ................................................................................................................ 14 Shared Parameters ........................................................................................................................... 14 Worksets ........................................................................................................................................... 14 Project Settings ................................................................................................................................. 14 Session03 Central files / Local Files ................................................................................................ 15 Naming and file locations ............................................................................................................... 15 File Naming ...................................................................................................................................... 16 Worksets, the how and why ............................................................................................................. 16 Management issues .......................................................................................................................... 17 New Project Setup Revit ................................................................................................................... 17 Overview .......................................................................................................................................... 17 File location ...................................................................................................................................... 18 File Naming ...................................................................................................................................... 18 Session04 Loaded Family Standards ............................................................................................... 19 Standard File Locations and Setup .................................................................................................. 19 Audit Process and Upgrades ........................................................................................................... 19 Best Practices for Creating Families ................................................................................................ 19 Session04 Resource Family Content Folders .................................................................................... 21 Fall 2009 Revit 2010 Content Written by: William C. Harris, Oct-09 Revit Management Training Lecture Topics Page 5 / 60 3 Mandatory & 2 Optional Content Folders ................................................................................... 21 In-House Content .............................................................................................................................. 21 External Content ............................................................................................................................... 22 Optional Content Folders ................................................................................................................ 22 Session05 Title Blocks ...................................................................................................................... 24 Labels and Text and Lines ............................................................................................................... 24 Revit Title Blocks............................................................................................................................... 24 Parameters ........................................................................................................................................ 24 Best Practices .................................................................................................................................... 25 Creation ............................................................................................................................................ 26 Session06 Managing “System Families”........................................................................................... 28 Yes they are different than “Standard Families” ............................................................................. 28 File location / Content / reason ...................................................................................................... 28 Using Standard Families & the “Audit Process” .............................................................................. 29 Upgrading to 10 ............................................................................................................................... 29 Session07 Project Templates ............................................................................................................ 30 Check List for Project Templates ..................................................................................................... 30 Template Location / Content / Reason............................................................................................ 31 Other................................................................................................................................................. 31 Session08 – Detailing ...................................................................................................................... 32 Detail Overview ............................................................................................................................... 32 Detail Concepts ................................................................................................................................ 32 “Tools and Process” ......................................................................................................................... 33 Long-term Management ................................................................................................................... 34 Session09 Design Process and Workflow ........................................................................................ 36 Key points for SD ............................................................................................................................. 36 Key points for PD ............................................................................................................................. 38 Key points for DD............................................................................................................................. 38 Key points for CD ............................................................................................................................. 39 Key points for Archiving and milestones ......................................................................................... 40 Session10 Phasing ........................................................................................................................... 41 What is Phasing ................................................................................................................................ 41 Using ................................................................................................................................................. 41 Value Added..................................................................................................................................... 42 Session11 Design Options ............................................................................................................... 43 Fall 2009 Revit 2010 Content Written by: William C. Harris, Oct-09 Revit Management Training Lecture Topics Page 6 / 60 What are Design Options ................................................................................................................ 43 Design Options ................................................................................................................................ 44 During PD/ DD Phase ...................................................................................................................... 44 Forward thinking .............................................................................................................................. 44 Project work...................................................................................................................................... 45 Session12 CD Standardization ........................................................................................................ 46 Object Styles..................................................................................................................................... 46 Line Styles ......................................................................................................................................... 46 Workaround / Tips ........................................................................................................................... 48 How to Deal with Details ................................................................................................................. 48 Session13 Printing Archiving ............................................................................................................ 49 The Project Browser – Sheets ........................................................................................................... 49 The Print Dialog Box ........................................................................................................................ 49 Managing It All ................................................................................................................................ 49 Other Cool tools............................................................................................................................... 50 Installation issues ............................................................................................................................. 51 Deployment location ........................................................................................................................ 51 Moving your content ........................................................................................................................ 51 Moving your project ......................................................................................................................... 51 Other Key Points............................................................................................................................... 52 People issues .................................................................................................................................... 52 Session15 A BIM Manager Guide to Success .................................................................................. 53 To Do List / Action Items .................................................................................................................. 53 The Outline ....................................................................................................................................... 54 The Meaning..................................................................................................................................... 54 Resources .......................................................................................................................................... 56 10 X Events ........................................................................................................................................ 57 Session16 Series Question & Answer .............................................................................................. 60 Fall 2009 Revit 2010 Content Written by: William C. Harris, Oct-09 Revit Management Training Lecture Topics Page 7 / 60 Session01 BIM User Manual Topics I N T RO D UC T I O N & C A D S T A N DA R DS C O N C E P T BE S T P RA C T I C E S HO W -T O ’ S DE T A I L LI BRA RY PLOTTING A C KN O W LE DGE M E N T F O RM Introduction & CAD Standards Concept Who What When Why – the big one My thoughts If they don’t understand your position, your reasons and the value to their own working environment they will not follow your standards KISS / Path of least Resistance Best Practices CAD v. Revit Job Numbers, Project Folders & Project Setup All these are the same / however; you will want to specific who sets up the new project Key points Folder location / Structure Project Template Title Blocks Loading Using Local File / Central File issue File Naming AND Sheet Numbering Now Sheet and Sheet number naming Fall 2009 Revit 2010 Content Written by: William C. Harris, Oct-09 Revit Management Training Lecture Topics Page 8 / 60 I suggest building these into the project template However have documented Examples of names / prefixes / numbers Layers Becomes Categories for basic modeling views Becomes linetypes for Drafting views Standard Color Table Explain that this doesn’t matter When you are printing in black and white Understand / explain Gray scale equivalent LOCATION FOR PRINT SETUPS WHO IS IN CHARGE OF THEM Best Practices Project open and close Opening a Project = opening all Views that were open when the project was saved Window>>Close Inactive Windows TIP: The Open/Close or Welcome Page Central File / Local File “Save before Standing” Save locally Save to Central Relinquish All Dimensions locations Include picture Keynotes Tips and Tricks Create Similar (CS) Select All Instances Project Browser View Settings “Activate View” on Sheets View Templates Family Creations Text Style, Fonts & Drawing Scale Factors Fall 2009 Revit 2010 Content Written by: William C. Harris, Oct-09 Revit Management Training Lecture Topics Page 9 / 60 Scaling is irrelevant in Revit. All Model Categories scale based on the view settings All Annotation is Scale independent How-to’s Loading System Families Loading FILE>Transfer Project Standards Bothe the Current and the Standard Content Project have to be open! Location Server\BIM Standards\2009\Revit Templates\System Families File Information Include a Screen shot of files Include a table with file names and families contained Loading Standard Families Default Company Internet Process for bringing in CAD drawings Always bring in from sub folder under Revit. Import/Link Dialog I suggest you take a screen capture of this dialog Always Use link Origin to Origin Invert colors Sometimes Scaling Orient to view Know what level you are placing at Detailing One of Two ways The Good Process – Using the Revit Model and Views Fall 2009 Revit 2010 Content Written by: William C. Harris, Oct-09 Revit Management Training Lecture Topics Use Sections and Callouts of the Model Set Detail Level and Scale Finish up detail using Masking and Filled Regions Detail Components Detail Linework Text with leaders Page 10 / 60 The Real Process – Using Imported CAD Details Real Process - Start with a Blank Drafting View Import CAD Drawings (see “Import link Dialog”) Finish up detail using Masking and Filled Regions Detail Components Detail Linework Text with leaders Placing the CAD Detail location Use Sections or Callouts Before placing the Section / Callout In the Options Bar Check “References another View” Select the Drafting View Place the Section /Callout appropriate to the detail Detail components Are Revit Families that are 2D representations of 3D objects? Use these in Drafting / Detail Views of the model to convey specific Design Intent. Loading FILE>Load from Library>>Load Family Location Revit Standard Content> Detail Components Placing Drafting Design Bar >> Detail Component Multi-category tag This is up to you. This is a Tag that can reference parameters common to all families Fall 2009 Revit 2010 Content Written by: William C. Harris, Oct-09 Revit Management Training Lecture Topics Page 11 / 60 Quick Demo….. Detail Library Location / folder name o \\Server\Revit_Standards\Revit Details o Instruction Documentation o Revit Details.rfa o \CAD Details Who can update it? Plotting Revit Plotting Standards Project location o Contains plot settings for all printers a`d print types View/Sheet Sets o Reasons for using o Saving Exporting to CAD / PDF Uses Same View/Sheet Sets Archiving / Saving location Fall 2009 Revit 2010 Content Written by: William C. Harris, Oct-09 Revit Management Training Lecture Topics Page 12 / 60 Project Development - PD –DD – CD Primary Design Key Points Minimal custom content – Place Holders Almost no new families Shell and Core Design Intent Form and Function Schedules and Costs can be generated Project Information flushed out Design Development Flushing out the Model Cleaning major construction components o Wall and Floor/Roof Joins Moving “Placeholders” to Final Components Project Browser showing “Views not on a Sheet” Sheet layouts built Construction Document Use of Drafting tab for View Specific Content Use of “Lines” for 3D Linework Lots of Sections and Callouts Drafting Views Created where necessary Importing Revit Details Project Browser showing “Views on a Sheet” Use of “Activate View” for “White Space Management” Acknowledgement Form BIM Standards - Acknowledgement Form o Team member signature o BIM Manager Signature Fall 2009 Revit 2010 Content Written by: William C. Harris, Oct-09 Revit Management Training Lecture Topics Page 13 / 60 Session02 Revit User Guide Topics P RO J E C T T E M P LA T E S VIEW TEMPLATES OPTIONS RE N DE R I N G I M P O RT / E XP O RT S E T T I N GS F A M I LI E S A N D F A M I LY T YP E S S HA RE D P A RA M E T E RS W O RKS E T S P RO J E C T S E T T I N GS Project Templates File location Template Types Settings within them – Project Unit View Templates System Family – Separate Project Location: Office BIM Standards \ Revit Templates\System Families Best Practices = each view has a “Default View Template” I’m wondering about naming the folder “System Families” Options General Saving interval User Information Journal File Clean up File Locations Rendering SteeringWheels ViewCube Fall 2009 Revit 2010 Content Written by: William C. Harris, Oct-09 Revit Management Training Lecture Topics Page 14 / 60 Import/export Settings Don’t change export to CAD IFC Import/Export settings Families and family types System Family – Separate Project Location: Office BIM Standards \ Templates \ Settings Standard Families Location: Office BIM Standards \ Office Content \ division? Naming: + W2P Be aware of Schedule names…. Shared Parameters Danger! Check/ Read/ understand them Location: Office BIM Standards \ Shared Parameter files Group appropriately Once created, can’t be modified Some need to be added to “Project Parameters” Worksets The hardest of all to understand Best Practices – Don’t open Sets not in use Editable v. useable Naming issues Management of worksets User Name Local File – Location – server / Project / Project Standards_ADMIN Don’t relinquish Project Settings Pre-work for project Advancing the CD will set object styles 3 projects to finalize See excel file Fall 2009 Revit 2010 Content Written by: William C. Harris, Oct-09 Revit Management Training Lecture Topics Page 15 / 60 Session03 Central files / Local Files New vocabulary, new ideas, new ways to work. There are two project file types for Revit The Central File The Local File The Central File The Central file is the Holy Grail; Users never ever open, move, edit or touch it! Local File This is the file that users will open and work on everyday At times, users will have to recreate the local file from the central file; this will keep the local file error free. You will want to set up a company standard for creation of a local file Topics N am i n g an d fi l e l oc at i on s W ork s e t s , t h e h ow a n d wh y M an a ge m e n t i s s u e s N e w P roj e ct S e t u p Naming and file locations File location The Central File The Revit Project will reside inside the Project folder o P:\year\project# project Name\Dwg\ Architectural\Revit\CentralFile Example: o P:\2006\12806 Rockstar\Dwg\Architectural\Revit\CentralFile Local File The local file will reside on your C: drive. NOT your Desktop or “My Documents!” Create a Folder on the root of your C: drive, “C:\Revit Projects” You may be working on multiple Revit projects at the same time, please created a subfolder for each project. o C:\Revit Projects\Project Name\Project Name_<YourInitials> Example: Fall 2009 Revit 2010 Content Written by: William C. Harris, Oct-09 Revit Management Training o Lecture Topics Page 16 / 60 C:\Revit Projects\Rockstar \ File Naming Central File Name All Central files will be saved with _CentralFile at the end of the file name. Example: o Rockstar_CentralFile Local File Name All local files will be saved with your Initials at the end of the file name. Example: o Rockstar_WH Worksets, the how and why Worksets are Revits way of breaking a project up so that multiple people can work on it. There is no “Right” way to use worksets to a project. I will give you some guidelines to conceder while creating worksets for a project. Red Pill, Blue Pill Once you enable works sets you cannot go back. Not all projects will need to have worksets enabled. – Groups. Most project will have to have worksets enabled for the following reasons: project management; office workflow; standards adherence Necessary Worksets: User Created - Shared levels and grids Project Standards – always have checked out Views – View Templates, working v. CD v. Temporary Families – System v. Standard Possible Worksets: Level Based Building Based – Shell & Core Project Area Based – East, West, North, South Room Based – Bathrooms = Group? Job type Based Other Help File Information Fall 2009 Revit 2010 Content Written by: William C. Harris, Oct-09 Revit Management Training Lecture Topics Page 17 / 60 Decisions you make when using worksharing and setting up worksets can have long-lasting effects on the project team. AutoCAD users will recognize some of these implications from setting up xref structures for projects. In general, when setting up worksets, you should consider the following: Project size Worksets and templates Team size Team member roles Default Worksets visibility Management issues The Central File Folder Permissions Who creates these? Who modifies these? Backups – always backed up! Local File C:\Revit Projects\Rockstar\ Detach From Central Worksets Worksets are crap! They don’t control the location of the objects created I don’t have to be in the Worksets to edit it Worksets are great! The “Open” Option “When opening a shared project, you can select which worksets to open. When you open only selected worksets and leave others closed, program performance improves. Because Revit Architecture does not display closed worksets, less time is required for common operations such as opening files, opening new views, redrawing the screen, and snapping.” ~ Help File The “Gray Inactive” setting New Project Setup Revit Overview There are two project file types for Revit o The Central File Fall 2009 Revit 2010 Content Written by: William C. Harris, Oct-09 Revit Management Training o Lecture Topics Page 18 / 60 The Local File The Central File The Central file is the Holy Grail, never ever open it or move it or edit or touch it! Local File This is the file that you will open and work on everyday At times, you will have to recreate the local file from the central file; this will keep the local file error free. Please follow company standards on creating a new local file File location The Central File The Revit Project will reside inside the Project folder P:\year\project# project Name\Dwgs\ Architectural\Revit\CentralFile Example: o P:\2006\12806 Rockstar\Dwgs\Architectural\Revit\CentralFile Local File The local file will reside on your C: drive. NOT your Desktop or “My Documents!” Create a Folder on the root of your C: drive, “C:\Revit Projects” You may be working on multiple revit projects at the same time, please created a subfolder for each project. o C:\Revit Projects\Project Name\Project Name_<YourInitials> Example: o C:\Revit Projects\Rockstar \ File Naming Central File Name All Central files will be saved with _CentralFile at the end of the file name. Example: o Rockstar_CentralFile Local File Name All local files will be saved with your Initials at the end of the file name. Example: o Rockstar_WH Fall 2009 Revit 2010 Content Written by: William C. Harris, Oct-09 Revit Management Training Lecture Topics Page 19 / 60 Session04 Loaded Family Standards How do you standardize standard families? We’ll talk file location, naming and best practices. What about the upcoming move to 2009? Did you plan ahead? Topics S t an d ar d F i l e l oc at i o n s an d s e t u p A u di t P r oce s s an d U pg ra de s Be s t P r act i ce s f or C r e at i n g F am i l i e s Standard File Locations and Setup Family Content Folders Who has access Creation Modify the Family Create new types Audit Process and Upgrades Audit Process – Increasing your Standard Library Checking for Usefulness Parameters File size (save as) Best Practices for Creating Families Training 1. Basic – Family types 2. Advance – basic creation / updates 3. Expert – formulas and trouble shooting Who can Create Families BIM Manager, Project Manager, Senior Drafter One v. Many debate The “Family Person” Issues Fall 2009 Revit 2010 Content Written by: William C. Harris, Oct-09 Revit Management Training Categories Subcategories (big issue) The “rabbit hole” Lecture Topics Page 20 / 60 2D – 3D Toilette Setting up for Speed Settings>>Options>>File Locations Fall 2009 Revit 2010 Content Written by: William C. Harris, Oct-09 Revit Management Training Lecture Topics Page 21 / 60 Session04 Resource Family Content Folders Topics 3 m an d at o ry & 2 opt i on al C on t e n t F ol de r s I n -H ou s e C on t e n t E xt e rn al C on t e n t O pt i on al C on t e n t F o l de rs 3 Mandatory & 2 Optional Content Folders Breaking this down into in-house content and external content In-House Content Any content Company Standard Content Information o This content is COMPANY standard for all projects o Use Families from this folder when your project dictates o All Title Blocks and Annotation Families are stored here Permissions / Responsibility o This folder is READ ONLY o The CAD Manager is responsible for all content o ONLY approved content may be added to this Folder Location o DriveLetter:\Revit Building <ReleaseVersion>\ COMPANY Content Example: o R:\Revit Building 2009\Rockstar Content Project Specific Content Information o During the development of a project you will have to create some custom families this is the location for all content created for the project o Please follow Family creation guidelines when creating these families. o These Families DO NOT have to be perfect; we may only have to use them once. o If you need to pull a family from another project, DON’T Fall 2009 Revit 2010 Content Written by: William C. Harris, Oct-09 Revit Management Training o Page 22 / 60 Please advise the CAD Manager, who will approve the content to be moved into the Company Standard Content Folder Permissions / Responsibility o You may create, edit, and save any content in this folder o You are responsible for any content you create here o At the end of project, please advise CAD Manager of potential Company Standard Content o This will allow us to build/improve our Company Standards Location o Lecture Topics R:<Project Number>\ Revit Project Content Example: o R:\2009\100101\ Revit Project Content External Content You don’t ever have to manage the default for Autodesk. If you ever modify any Autodesk content, then it has become Project content. If you modify download content you should create an audit process for it. Either create a sub folder under the “Downloaded Content” folder or some other process. Don’t just move it into your Project Content, you don’t know what it does; you don’t know what release it was created in. Revit Default Content: Information o This is default content that is release specific. Every new release all of the content gets updated to the current version of Revit o The more content you use from here the less content YOU will have to manage! Permissions / Responsibility o This folder is READ ONLY o Nothing EVER gets saved here o The CAD Manager is responsible for all content Location o DriveLetter:\Revit Building <ReleaseVersion>\Content Example: o R:\Revit Building 2010\Content Optional Content Folders Be aware of these possible content locations it’s up to you as the BIM manager to decide how you would like to handles them. Downloaded Content - Project specific Fall 2009 Revit 2010 Content Written by: William C. Harris, Oct-09 Revit Management Training If you want to keep your project “clean” I would suggest that you also have a folder for any family that is download from internet sites. Although most downloaded families should not cause problems with will at least allow you to audit your office’s download practice. Permissions / Responsibility o You may download and save any content in this folder o You are responsible for any content you create here o At the end of project, please advise CAD Manager of potential Company Standard Content o This will allow us to build/improve our Company Standards Location o Page 23 / 60 Information o Lecture Topics R:<Project Number>\ Revit Project Content Example: o R:\2008\100101\ Revit Downloaded Content Downloaded Manufacture Content - Project specific Information o By keeping your manufacture content separate you have create some things. o You know what manufacture you are pulling content down from o You create an Audit Process for their content o The next time a manufacture comes by to sell you their goods, well. Show them your content. Permissions / Responsibility o You may download, and save any content in this folder o You are responsible for any content you create here o At the End of project, please advise CAD Manager of potential Company Standard Content o This will allow us to build/improve our Company Standards Location o R:<Project Number>\ Revit Project Content Example: o R:\2008\100101\ Revit <ManufactureName> Content Fall 2009 Revit 2010 Content Written by: William C. Harris, Oct-09 Revit Management Training Lecture Topics Page 24 / 60 Session05 Title Blocks We have them for CAD, we need them for Revit. Get from A to B, ASAP! You have to understand the process and path before you start this journey; here is your Road Map. Topics Labe l s an d T e x t an d Li n e s ( wh y a re t h e s e al l t oge t h e r? ) P ar am e t e rs Be s t P r act i ce s A u t oC A D t o Re vi t D r awi n g P r ob l e m s S cal e , t e xt , l a be l s (at t ri bu t e d bl ock s b at ) S i ze s C A D l i n e w ork v. Re vi t Li n e S t yl e s Dyn am i c T i t l e Bl ock s Labels and Text and Lines Key Points: Naming Convention for EVERYTHING! Line Types, Text, Label, Type, Family NEVER USE “AutoCAD based” TITLE BLOCKS Revit Title Blocks This will cover the concepts of Labels, Text and Lines you use in Revit’s Title Blocks Naming convention for: Text, Labels, Line Types, Family Types Text – ex: W2P-Arial-1/8-1.10 Labels – ex: W2P-Arial-B-1/4 Company Name – Text Name – Bold – Size – Width Factor Line types – ex: Title Block-Thin Controlled/Created with OBJECT STYLES Reason: Export to AutoCAD Line types and Weight Family Types Design Phase? Sheet Type? Parameters Fall 2009 Revit 2010 Content Written by: William C. Harris, Oct-09 Revit Management Training Lecture Topics Page 25 / 60 There are only two “kinds” of parameters in Revit Title Blocks: Dimensional and Visibility. Yes, of course you still have access to all possible parameters, but you’re only going to use the two I mentioned. Dimensional If you need to change sheet sizes, you will have to Dimension and Label the extents of your sheet. Any “Relational Distance” between line work will have to be changed parametrically too Adding Dimensional Parameters Steps Dimension Label Add Parameter (Naming Convention) Visibility This parameter allows you to turn on and off objects. Think about your SEAL. You want to have it turned off for all of your plotting during DD and CD phase. Then at 100% CD, you will turn on your SEAL. Uses for Visibility Architect’s Stamp (SEAL) Title Sheet v. General Notes v. Drawing Sheets AND THE BIG ONE – TEXT and LABELS Text and Labels, unlike Linework, cannot be moved parametrically. Adding Visibility Parameters Steps Create the Element Edit it’s Properties Label the Visibility Parameter Using the Parameters Family Type Dialog Box Create New Types Instance v. Type Parameters. What should your SEAL be? Best Practices There are both Use and Creation Best Practices. USE How do you move from PD to DD? What about the creation of your entire CD package, Title/Cover Sheet, General Notes, Details and Schedules? A number of companies use multiple sizes, do you? Fall 2009 Revit 2010 Content Written by: William C. Harris, Oct-09 Revit Management Training Lecture Topics Page 26 / 60 The Issues and Possibilities Sizes Two different Families v. Two different types in one Family Two different Families o W2P Titleblock – E1: Cover Sheet o W2P Titleblock – D: Cover Sheet o Two files to manage and maintain less types in a given project Two different types in One Family o W2P Titleblock: E1 Size – Cover Sheet o W2P Titleblock: D Size – Cover Sheet o One File to manage and maintain more Types in a given project Types Type Parameters for Sheets: o Title/Cover Sheet o General Notes o Details and Schedules Instance Parameters for: o Grid lines? o Revision Schedule? o SEAL? Creation Now here is where you don’t like what I have to say: “RECREATE EVERYTHING!” I know you just spent a ton of time making your CAD Titleblock look great and you can use it as a reference; however, you still want to recreate it all in Revit. DO NOT EXPLODE! You only have to create your Titleblock once and it will be used a number of times in each project, for all your future Revit Projects! Don’t risk bringing in bad CAD data. The Loop from scratch New “Scratch” Titleblock Family Insert your CAD file Explode or draw over Copy and Paste into New “W2P Titleblock” Family Insert into “TEST” Project to check Repeat loop for all Titleblock Types and Information. Insert into project Fall 2009 Revit 2010 Content Written by: William C. Harris, Oct-09 Revit Management Training Lecture Topics Page 27 / 60 Dealing with Issues Text and Labels Match as best a possible but use real Sizes 1/4 3/8 Text and Labels each have their own types: it doubles the work Copy and Paste for duplicate text and labels Line Types Color may or may not matter “Redraw” your CAD Linework using “Pick” If you explode, you may get pieces of Linework. Uses trim/extend TR for cleanup. Apply Visibility All at once, or one object at a time Printing All elements must fall within the boundary of the size Fall 2009 Revit 2010 Content Written by: William C. Harris, Oct-09 Revit Management Training Lecture Topics Page 28 / 60 Session06 Managing “System Families” Families… You got those. Now let’s talk about System Families, View Templates, and other key template information you need to address. Value: clear and concise sets of Revit Standards for System Families. Make use of standards easier for end user. Makes managing System Families standards extremely easy. Makes the update process quicker and isolates failure points. Topics Ye s t h e y are di f fe re n t t h an “ S t an da rd F a m i l i e s ” F i l e l oc at i on / C on t e n t / Re as on Us i n g S t an da rd F am i l i e s & t h e “ A u di t P r o ce s s ” Yes they are different than “Standard Families” Differences Standard Families = loaded into a project System Families = created in a project System Families = part of “Template Files” Edit/New – Duplicate File location / Content / reason File location \\Server\BIM Standards\Revit Templates\System Families Protected? Update process? Possible Project Names Wall Standards - W2P.rvt Object Styles Standards - W2P.rvt Roofs + Floors Standards.rvt View Templates Standards.rvt Annotation Standards.rvt What about materials? Reason behind it all Separation for easy management Audit process Fall 2009 Revit 2010 Content Written by: William C. Harris, Oct-09 Revit Management Training Lecture Topics Page 29 / 60 Material Types Using Standard Families & the “Audit Process” Tools Transfer Project Standards Copy and Past Setting Loc Lines and using Create Similar Audit Process Walls Layer function Material Thickness Identity Data Upgrading to 10 All projects should be copied to a 09 folder Why What about Central Files Open the original in 10 Save to 10 folder structure Double check the function Time, Time. Time! Standard Families If you created them, update them, with the same process If default 09 content, leave alone If default 10 content, use in 10 projects Note : Autodesk’s Web Library Fall 2009 Revit 2010 Content Written by: William C. Harris, Oct-09 Revit Management Training Lecture Topics Page 30 / 60 Session07 Project Templates Depending on your firm’s project types you may need multiple templates. In the days of yore, the CAD days, we saw template files as, typical floor or ceiling or detail drawing templates. Now, with Revit, we must see not the sheet that determines the template but the project type. Value: by the end of this session you will understand what makes Revit project templates critical to your success. You’ll see where they should be stored and what should be contained within them. Keep in mind how Revit “place holders” will affect what’s “default” in your project compared to what will be used in CD’s. Topics C h e ck l i s t f or P roj e ct T e m pl at e s T e m pl at e L oc at i on / C on t e n t / Re as on Other Check List for Project Templates Include Graphical Standards Content Titleblocks Default PD/SD content Wall Types (drawn in FP with Labels) Views Project Browser View Types Schedules Legends Level Naming / View Template Default View Template for Exporting Filters Other? Exclude Details DD/CD Content Titleblocks Other Fall 2009 Revit 2010 Content Written by: William C. Harris, Oct-09 Revit Management Training Lecture Topics Page 31 / 60 Why Project Speed and Size The Revit Design Process Place Holders Milestone Based Content Template Location / Content / Reason \\Server\BIM Standards\Revit Templates\ Project Templates What about System and Standard Families Sub Folder under Project Templates Other Other Disciplines Import / Export Templates Quick Conversion between Design Phases Fall 2009 Revit 2010 Content Written by: William C. Harris, Oct-09 Revit Management Training Lecture Topics Page 32 / 60 Session08 – Detailing Topics De t ai l O ve rvi e w De t ai l C on ce pt s “ T ool s an d P roce s s ” Lon g -t e rm M an a ge m e n t Detail Overview In Revit there are three ways to detail your building Create Details for scratch in Revit “The Wrong Way” Importing details that have already been drawn “The Real Way” Creating the detail from the model and embellishing it using 2D detailing tools “The Right Way” Detail Concepts Creating drafting Views It isn’t feasible to model every construction detail in 3D Revit Drafting Views are used for detail drawings or importing details or creating legends, maps, text or any of a variety of things necessary for a construction documentation set. Importing or linking CAD formats The data you import or link into your model can be view specific. Linking v. Importing Linking Linking creates a live connection to a file. If you link a file, any changes made in the original file will be apparent in the Revit file. Importing Import inserts the data into the project Allows you to explode the file and modify the objects directly in Revit Linking CAD formats File>> Import/Link >> ….. File>> Manage Links Reload, unload, import, and remove Fall 2009 Revit 2010 Content Written by: William C. Harris, Oct-09 Revit Management Training Lecture Topics Page 33 / 60 “Tools and Process” In Revit there are three ways to detail your building Create Details for scratch in Revit “The Wrong Way” Importing details that have already been drawn “The Real Way” Creating the detail from the model and embellishing it using 2D detailing tools “The Right Way” Detail Tools Detail Groups Collections of 2D Graphics Detail Component Parametric 2D families Created in a Family Editor Regions Filled Region - 2D hatch and solid fill shapes Masking Region - “Whiteout” Invisible line style Other Line Styles Repeating Detail Takes a “Detail Component” and arrays it along a straight line Combines Standard Family “Detail Component” with System Family “Repeated Detail” Custom line types using repeating details You can use the detail component tool to create custom line type Miscellaneous line tools Insulation Symbolic Representation for Batt insulation Show Hidden Lines Shows “hidden lines” for recognizing obscured elements and representing the portion that is hidden with dashed lines. Show hidden lines applies to 2D and 3D elements in all possible combinations Importing CAD Details 1. Copy the CAD file to a subdirectory of you project 2. Project00102\CAD Details 3. Delete all superfluous data in the CAD file before importing 4. Annotate the detail in Revit using text Fall 2009 Revit 2010 Content Written by: William C. Harris, Oct-09 Revit Management Training Lecture Topics Page 34 / 60 If a CAD drawing has a series of details in it, then: 1. Break the CAD drawing up into multiple drawings 2. W-Block 3. Insert the individual files into Revit 4. Never Explode the CAD File in Revit Adding Information to your details Adding detail components Some elements are going to be used in multiple views, make them detail components File> load from library> Load Family You can use Detail Components at every scale What do you use to edit Detail Components? Finishing the Detail Detail Tools Generic Tags – material Think about nesting Naming / Scales / Detail number on sheets Long-term Management Revit – CAD Detail Standardization process overview 4. COPY details from your CAD detail library to “BIM Standards\Details\CAD Details – Import” or “Project\CAD Details” folders. 5. Clean out superfluous data – ALL DATA 6. Change CAD layers names to “Thin Lines” exc. 7. Link “Revit – CAD Detail” drawing into “Revit Details.rft” project 8. Annotate the detail in Revit using text and data Revit Detail.rft This file will always have linked CAD files in it. ONLY linked CAD Files Set the View scale and view name appropriately here Revit Project Details File>>Insert from File>>Views . . . Revit Detail.rft CAD files were “Linked” in Revit Detail.rft CAD files are “Inserted” in the inserted Drafting View Explode – WHAT? Fall 2009 Revit 2010 Content Written by: William C. Harris, Oct-09 Revit Management Training Lecture Topics Page 35 / 60 See Step “2. Clean out superfluous Data – ALL DATA” Cleaning the CAD drawing Superfluous Data? Layer Translator W-Block to be sure Side Note Detail Component from CAD Drawings? W-Block, Copy & Past into new “Detail Component” Family Fall 2009 Revit 2010 Content Written by: William C. Harris, Oct-09 Revit Management Training Lecture Topics Page 36 / 60 Session09 Design Process and Workflow Topics Ke y p oi n t s f or S D Ke y p oi n t s f or P D Ke y p oi n t s f or D D Ke y p oi n t s f or C D Ke y p oi n t s f or Ke y p oi n t s f or A rch i v i n g an d m i l e s t on e s Before we begin Data disconnect!!! Create similar Select all instances Edit>Past Aligned> Select Levels/ views by Name 559-917-3146 Key points for SD Key points Don’t waste time; if the designer is not using Revit; you are not using Revit! Use masses for building the building; then major changes happen: update the mass; “REMAKE” the elements Keep it as “cartoon” as possible – manages client expectations Almost nothing custom give them as much as they need; no more think data disconnect = loss of time/work/$$$ Sustainable isn’t going away Incorporate a sustainable approach from project inception Track recycled materials and other sustainable strategies using schedules Based on element properties Any view regardless of type Always synchronized Non-type specific Multi-Category Fall 2009 Revit 2010 Content Written by: William C. Harris, Oct-09 Revit Management Training Lecture Topics Area gross Area rentable Other Schedules VIEW>>NEW>>SCHEDULE Material takeoff View List Drawing list Note block Keynote legend Page 37 / 60 MASSES Other Tools Floor Area Faces Floor by Face Wall by Face Roof by Face Curtain System by Face -REMAKEFeasibility tools with masses Area calculations – FAR , LCR Multi-Family TAG Room Tags Area Plans Area Tags o Gross Area o Rentable Area Sun studies – project north / v. True north Mass based cost estimating Site Data Scale – Problems? Orientation Shared coordinates “Shared Positioning” – Revit Help file Other SD Points Design Options Fall 2009 Revit 2010 Content Written by: William C. Harris, Oct-09 Revit Management Training Imported Geometry Green Building Studio Lecture Topics Page 38 / 60 Key points for PD Key points Designers in other software = use links and SAT/IFC files Talk more! Explain that the shell is all you need, the “guts” are not important Wait for major envelope changes to be resolved before moving into Revit Check project standards / folder locations / printing for office compliance Project information page build o http://irevit.blogspot.com/2008/05/tip-openclose-or-welcome-page.html Form and Function Default content Revit + Company Downloaded content Design Options & Final Design Solution Never “Accept Primary” except… Schedules - YES You Can Key points for DD Key points Major building types (walls/floors/roofs) finalized Extensive use of “Place Holders” Managing expectations of design set – looks different than CAD Levels and gridlines finalized o Application of view templates to all “views on sheets” Schedule Keys Uses Hardware Schedules Room Finish Schedules o Shared Parameters Shared Parameter Notes and Cautions Once Added it can’t be changed GUID – Global Unique Identifiers Fall 2009 Revit 2010 Content Written by: William C. Harris, Oct-09 Revit Management Training Lecture Topics Page 39 / 60 Groups v. Links Issues Linked Walls do not clean up with Model Walls o “Binding” a link makes it a group and Walls Clean up Changing a Group to a Link File size o Groups = bigger file size than Links GroupsEdit the Group Instance o TAB IS YOUR FRIEND o Exclude from Instance o Restore to Instance Detail Group Inserting the Group Edit>Past Aligned> Select Levels by Name Key points for CD Key points Switching “Placeholders” to final Objects Choosing CAD v. Revit Details (often Both) Drafting Views / Detail Components / Drafting Lines Tons of Family editing / updating / creation Survive the project DEADLINE anyway possible Annotation your views Tags, dimensions, text and key Edit>Past Aligned> Select Views by Name Displaying Information about rooms Rooms in Section View Tag Rooms Additional information based on the room object Room Height Tag Text Large amounts of text. Use drafting views to control layout issues Fall 2009 Revit 2010 Content Written by: William C. Harris, Oct-09 Revit Management Training Lecture Topics Page 40 / 60 Using schedules “unused categories” to create your own The keynoting issues Keynotes file Other ways to Families Modeling parametric 3D Families = Design Intent? Smart Workflow: Nesting One Family into Another Conditional Visibility – Fine , Medium, Corse Kinds of Families Detail / Line Based Host-Based / Generic Model Key points for Archiving and milestones Printing = archiving Saving the Central file 1. Create the Archive Location 2. Open with “Detach from Central” 3. Save the File in the Archive Location 4. Naming = Project_Archived_Central_Date 5. DO NOT MOVE OR COPY THE ARCHIVED FILE Other Archiving thoughts Purge the project Accept Primary Move linked files Fall 2009 Revit 2010 Content Written by: William C. Harris, Oct-09 Revit Management Training Lecture Topics Page 41 / 60 Session10 Phasing Phasing is critical for TI projects. This will review how to setup phases in your project and project template. Then show a quick demo on how to apply phases both to objects and to views. The session ends with a big bang “how to make Revit make you more money.” Topics W h at i s P h as i n g Us i n g N am i n g C on ve n t i on – W h y Val u e A d de d What is Phasing Help File: Many projects, such as renovations, proceed in phases, each representing a distinct time period in the life of the project. Revit Architecture tracks the phase in which views or components are created or demolished, and lets you apply phase-specific filters to views so that you can define how the project appears during various stages of work. You can also use phase filters to control the flow of building model information into views and schedules. This allows you to create phase-specific project documentation, complete with schedules Project Phases As many as you need Start Small, and Grow! Combining Phase Filters Linear process Naming helps The Bits and Pieces Graphic Overrides Set them once! Transfer File >> Transfer Project Settings >> Phase Settings Filters and Overrides only Using Fall 2009 Revit 2010 Content Written by: William C. Harris, Oct-09 Revit Management Training Lecture Topics Page 42 / 60 Elements Each object is built at some point in time You can Demolish an Element If build and Demolished in the same Phase = Temporary Object Views Views are Phases specific Controlled in View Properties Phases - What “Time” is this view looking at Phase Filters – How do you want to see the present and past Naming Convention – Why KISS. If all your doing is TI, great, you’ll only need Existing and New. If you what to move past the basic, naming based on construction Phases may be a good solution. Value Added Here is where phases really show their strength. Look at your project as a General Contractor. How would they construct that project? What materials would they need and when? What about manpower? This is a sellable package. Schedule of Materials Costs per phase 3D Models 3D Walkthroughs Animated “Buildup” – Navisworks Fall 2009 Revit 2010 Content Written by: William C. Harris, Oct-09 Revit Management Training Lecture Topics Page 43 / 60 Session11 Design Options You know it. I know you know design options but…. While working with a firm in San Diego I realized that there is a lot to manage. Did you know you can work on two projects at the exact same time? Now that’s using multipliers to make money! Topics W h at are de s i gn O p t i on s N am i n g C on ve n t i on - W h y Du ri n g P D/ D D P h as e F or wa rd t h i n k i n g P roj e ct w ork What are Design Options Design Options Design options provide a way to develop alternative designs in a project, whether to adapt to changes in project scope, to review other designs, or to show different options to a client. Option Concept Master Project for Options Commercial Shell and Core Levels Lobbies Floor layout Rentable Area Layouts Residential / Track Homes Overarching Floor Plan Layouts o 2 bed 1 bath o 3 bed 1 ½ bath Specific Garages Level Layouts Kitchen Design Fall 2009 Revit 2010 Content Written by: William C. Harris, Oct-09 Revit Management Training Lecture Topics Page 44 / 60 Bathroom Layouts Views / Schedules Under the VG and VP dialogs you can select the option that is seen in the view. Oh, and this is also true for Schedules! The key points here Always leave your Sheet Views to “Automatic” Automatic will display whichever option is “Primary” Don’t be confused – if a Option is “Primary” and you set that Option to be displayed in a view, that view will always display the Option you selected! Always Name your Views appropriately Naming Convention - Why Design Options Naming Convention is important; however, not critical like most things having to with CAD/BIM. Design Options are stored and seen only in projects. There is just one dialog box that you use to create/edit Design Options. Naming becomes an issue when “Pushing” Objects to specific Design Options. Naming is also seen in the VP & VG dialog boxes. Views and Schedules Any View that is Option “Specific” should be named with that in mind. Think about, your view names will only matter when they are printed on sheet. The only views on a CD Set will be the views set to primary. During PD/ DD Phase where you are still deciding what option to go with…. You will create Multiple Views, one for each option or combination of option You will print Multiple Options on one sheet for side by side comparison Your view name will then have the specific option information on the sheet Forward thinking Many Companies already use their first project as their template for future projects. Same with Design Options, once you have Design Options, Keep them! Never, Never, Never “Accept Primary” Unless you are “Archiving” or sending Project out You cannot “Transfer Design Options” Archiving File Save As – “reason for archive” Fall 2009 Revit 2010 Content Written by: William C. Harris, Oct-09 Revit Management Training Lecture Topics Save project under sub folder Accept all Primary Options Purge all unused Data = no confusion Page 45 / 60 Project work Always work in the Project with all design options available. Our clients Never change their minds right! Easier to clean out data at the archive than to recreate tomorrow Fall 2009 Revit 2010 Content Written by: William C. Harris, Oct-09 Revit Management Training Lecture Topics Page 46 / 60 Session12 CD Standardization Revit from Box to Paper; addressing the myth that you can’t make Revit look like your CAD drawings. Topics O bj e ct S t yl e s Line Styles W ork a rou n d / T i ps Ho w t o De al wi t h D e t ai l s Object Styles First, let’s break down what object styles are… straight from the help file: "Object styles" Help File: The Object Styles command specifies line weights, line colors, line patterns, and materials for different categories and subcategories of model objects, annotation objects, and imported objects in a project. You can override project object styles on a view-by-view basis. For more information, see Visibility and Graphic Display in Project Views. Topics in this section Creating Object Style Subcategories Modifying Object Styles Deleting an Object Styles Renaming an Object Styles What you need to know: THEY ARE PROJECT BASED! When I say project based, you need to understand that this creates management issues. How do you create them How do you maintain them Where are they (the project) save This also brings your network and your BIM Standard Files into question Do you have multiple servers hosting your Company Standard files – please say no! Do you want to hold all your system families in one file or break them down? How to you Use / Protect / Audit these Project files? Line Styles Fall 2009 Revit 2010 Content Written by: William C. Harris, Oct-09 Revit Management Training Lecture Topics Page 47 / 60 Well this is so close to AutoCAD that it should be a review for you; however, as with all things, there are “gotchas” Let’s knock one thing off the table right now!!! Do not mess with line weights. What is the point? Is it - 1. worth your emotional effort 2. worth your time/money Issues Creation Inserting Families (yes, this is a problem) Importing CAD files!!!!! (The BIG ONE!) Creation / Inserting Into Projects No one should know but you! AND apply a naming convention to your line styles so you know you created them Inserting: File>>Load into Projects o Run this from your “LineStyles.rvt” Project o This may get you more than you bargained for Inserting Families (yes this is a problem and a solution) When creating families, if you create new Object Styles for Lines or Symbolic lines, you are creating new “Subcategories” in that families’ “Category.” When you insert that family into a project you now have more “Subcategories” the project. Importing CAD files!!!!! (THE BIG ONE!) There are two ways to looking at this. The “oh that’s horrible” way and the “sweet, just what I wanted” way. You will have to know your CAD Detail Library status to choose one of the two ways. Useable text and verbiage When you insert and explode a CAD detail in Revit, it will create new line styles in the Revit project. These line styles are based off the CAD file’s layer name. Be sure to use the same layer names in all your CAD details. Then control the weight of the printed line from the one line style in Revit. CAREFUL *** CAREFUL *** CAREFUL You have to know what is inserted when you explode CAD files. Line Styles Line Patterns Fill Patterns Materials Text Types Fall 2009 Revit 2010 Content Written by: William C. Harris, Oct-09 Revit Management Training Lecture Topics Page 48 / 60 Workaround / Tips Template Project files… no, not Project Template Files… Template files that are project based. There are two KINDS of Family’s in Revit: Standard - doors, windows exc: these can be loaded at any time System - Walls, Line Styles, text types exc: these should be Template Projects These two things are going to create issues. Files management issues, we will address these in future BMSS sessions. How to Deal with Details Don’t use your CAD Details Library, I’m not saying don’t use the DWG’s that are there! Under your Revit Project Folder, create a “CAD Details” Folder. Then, LINK in the CAD details as DWG. This will allow you to, modify the CAD detail’s layer standard and then, Explode the Detail. Again, be aware of what happens when you explode the DWG file. Fall 2009 Revit 2010 Content Written by: William C. Harris, Oct-09 Revit Management Training Lecture Topics Page 49 / 60 Session13 Printing Archiving How many hours have we wasted printing in AutoCAD? Did your company start to use the sheet set manager? Printing in Revit is so easy and uncomplicated that you may miss some of the key features Revit has for your printing process. Topics t h e pr oj e ct br ows e r - s h e e t s t h e pri n t di al o g box m an ag i n g i t al l The Project Browser – Sheets Using Sheets Drag and Drop Views View/Sheet/Project – Information WYSISYG Sorting sheets Default Parameters Custom Parameters Folder v. Filter The Print Dialog Box Printers = Windows System Printers Settings (Printing Defaults) Save /Saves! Print Range (Print Sets) Views / Sheets Save /Save As! Naming Convention Managing It All Outside the Project \Revit Standards\Print Defaults.rvt File>>Transfer Project Standards \Revit Standards\Default Sheets Fall 2009 Revit 2010 Content Written by: William C. Harris, Oct-09 Revit Management Training Lecture Topics Page 50 / 60 File>>Insert from File>>Views Archiving: Project\50%CD\ Purge/Accept Primary Export to DWG (Same Print Range) Inside the Project Blank Sheets for Consultants (parameters) View>>New>>Drawing List Other Cool tools Batch Printing Default Windows printer All Caps Font or … Fall 2009 Revit 2010 Content Written by: William C. Harris, Oct-09 Revit Management Training Lecture Topics Page 51 / 60 Session14 Changing Releases The title speaks for itself Topics I n s t al l at i on i s s u e s De pl oym e n t l oc at i on M ovi n g you r c on t e n t M ovi n g you r p r o j e ct P e opl e i s s u e s Installation issues Check your media Install tips(login, AV and 3rd Party apps) Installing times, on XP v. Vista Deployment v. stand alone Don’t forget to configure(tools and content locations) New to, 08, 09 and 10, license server option Deployment location Storage organization Log files (troubleshooting) Permissions to the install dir Modifying Moving…..don’t do it Moving your content Revit Shipping Content Office “Standard Family” content Office “System Family” Content Other Family Content Title Blocks Materials Moving your project Fall 2009 Revit 2010 Content Written by: William C. Harris, Oct-09 Revit Management Training Lecture Topics Check with consultants Save a Backup Separate Revit 2009 Project Directory? Testing and upgrading Error Messages Page 52 / 60 Other Key Points New Tools New Training New Dimension Styles 2009 New Processes o Central/Local File 2010 Online content People issues Who Pulls the Trigger? Layout the Plan o Hardware o Software license o Viewer of the Model – PM’s When to Pull the Trigger Why People Cry. Fall 2009 Revit 2010 Content Written by: William C. Harris, Oct-09 Revit Management Training Lecture Topics Page 53 / 60 Session15 A BIM Manager Guide to Success Opening You are not alone. You are not alone. You are not alone! This entire industry is changing completely. BIM has created a paradigm shift similar to the paradigm shift of CAD, moving from pen and paper to CAD. Companies that see BIM as a trend and try to ride it out will (fill in the blank with an image of doom and despair). You, my overwork CAD manager, are about to embark on a quest for job sanity. Today we’ll give you a rock-solid outline to cling to as we set off for this distant treasure. Topics T o D o Li s t / A c t i on I t e m s The Outline T h e M e an i n g , s t o ry t i m e t o m ak e i t al l e a t abl e Re s ou rce s t o h ol d cl os e wh i l e you Alvin Toffler: “If you don’t have a viable strategy, you will be defeated by someone who does.” To Do List / Action Items Revit Standards Check List Template Files Project Templates System Families and Settings Templates Project Folders Updated to a BIM Paradigm Project Families Folder Talk to Subs about Revit What Release are they own Get on Subscription Revit User Groups (AUGI) Implement DWF for Revision Checks Update Next year’s Budget: 1 user = $10,000 Software Cost Training Cost Opportunity Cost Standardize Hardware (Joe Duran – W2P) Allows for Ghosting Fall 2009 Revit 2010 Content Written by: William C. Harris, Oct-09 Revit Management Training Lecture Topics Start In-house Training Video’s and Archives Snagit Camtasia Go To Meeting Page 54 / 60 The Outline Managing turbulent times 1. Mission 2. Confront Brutal truth 3. Ambiguity/ Order 4. The Bus : Jim Collins 5. Post Action Briefing : “Monday morning quarterback” 6. Cassandra and Polina 7. Speed ( Jack Welch) 8. Resilience : getting back after being knocked down 9. Risk Taking 10. “Celebrate for a nanosecond“ The Meaning Mission: Mission = North Star (unchanging) Good: Johnson and Johnson Tylenol Crisis of 1982 “Our reason for being is the men, women, and children, that use our products”- Johnson and Johnson mission statement “Empower people through great software, anytime, through any device.” –Microsoft mission statement Bad: Kodak ignored digital Camus “not to choose is also to choose” Bottom Line: Your company must grow to survive and change is a necessary part of growth. Perhaps, Revit will not line up with your companies mission statement. Perhaps, you are unwilling to change for either, lack of resources, lack of desire, or, an inability to overcome fear. I cannot change that for you; however, if you are willing to move forward with Revit, NOW is the time to start. Revit will not be a part of your mission statement. It should be a Strategic initiative “Implement Revit Building/Structure/Systems” on your company’s Strategic Plan (see resources). Each Strategic initiative will have its own Strategic Plan and the Mission statement on that plan should be something like the following: Fall 2009 Revit 2010 Content Written by: William C. Harris, Oct-09 Revit Management Training Lecture Topics Page 55 / 60 Your Mission Statement for Revit: though a Kaizen approach for implementation, achieve a 100% Revit Based Project environment Confront Brutal truth This is a 10X Event for our industry What happens when you don’t? o Merrill Lynch = Sub Prim Mortgage Why People CAN’T Psychology of it all I don’t need to change I’m making Enough I don’t have the resources to change What happens if I fail Real or an anomaly THIS IS AS BIG AS CAD was…. Andy Grove "only the paranoid survive" Ambiguity/ Order Andy Grove" you need a high tolerance for ambiguity but must strive to order that which is around you." Managing Expectations Changes Work Flow / Design Process / Standards Michelangelo ’s David o This is a big hunk of Marble o This will not come easy o It will not be linear How do you eat an elephant? The Bus: Jim Collins The right people on the bus, the wrong people off the bus and everyone in the right seats! first ask who not what PS: Read / listen to his book ~ Good to Great Jack Welsh - 600 … knows firsthand people… 60% of his time on people working on people relations = HR Post Action Briefing: “Monday morning quarterback” What worked, what didn’t, and WHY Suggested Time Interval Fall 2009 Revit 2010 Content Written by: William C. Harris, Oct-09 Revit Management Training Post Training event Weekly project prints Monthly Progress Reports Entire Project Lecture Topics Page 56 / 60 Cassandra and Polina ~ the "Fall of Troy" P = outgoing / trusting / never doubts / bring it in C = skeptical / trusts no one / people are failed / leave it out You must be P in the ultimate outcome, u need the C to get there. Speed Speed exhilarates and energizes (Jack Welsh) Test fast, fail fast, adjust fast Ready, fire, aim Resilience: getting back after being knocked down Steve jobs. Apple Pixar Risk Taking GE Financial 1930 For you… Key Financing o Software o Training o TT your Sales Rep. Celebrate! “Success is the progressive realization of a worthy ideal” Earl Nightingale “After the victory, tighten your helmet cord.” Bushido (Japan) Resources Strategic planning model (blueprint)6 steps (elements) Mission North Star (unchanging) o Johnson and Johnson Tylenol Crisis of 1982 o Wal-Mart Sam Walton Died 1992 = He Saw the vision of where Wal-Mart would be today. Satellite Snap Shot Fall 2009 Revit 2010 Content Written by: William C. Harris, Oct-09 Revit Management Training Lecture Topics Page 57 / 60 Current operating environment (detailed way) SW/PEST Future scan What will tomorrow's opt environment will look like OT CCS PETC Strategic initiative < 10 words o One reason = to achieve the mission o 3words + 1 sentence o Long term, Mission critical, Heavily Resourced, Action plan, HW^4 Performance target Test the effectiveness of strategies Review just how well they are working (quarterly) Required resources Labor / Capital / Time 10 X Events Hedgehog Boeing, Cessna, Embracer -specialization Oil $100+/B was $30 3yAgo, US 80 MBD Big box: Power shift from manufacturers to retailers. To fight: sell direct, buy other brands open their own stores. Sarbanes Oxley CEO / BOARD Sign financial data. Response to Enron and WorldCom Discerning customers Internet/ Competitors / Distribution Demographics 77 M baby boomers, inherit $10 T 300 M - US 6.3 B - Earth Meritocracy William Perez (Wrigley), Antonio Perez (Kodak), Carlos Gutiérrez (Kellog) Books From The Battlefield to the Board Room - Chip Parker Good to Great - Jim Collins The Art of War - Sun Tzu Fall 2009 Revit 2010 Content Written by: William C. Harris, Oct-09 Revit Management Training Lecture Topics Page 58 / 60 Audio files Earl Nightingale –The Strangest Secrete (audio file only) Here is a link to the file; this is the only free recording I can find of the speech. There are actually two speakers: Earl and someone else. I would skip over the other speaker; he is just selling the speech. Oh yeah and you may want to have a pen and paper handy. Background on the speech and speaker http://www.markvictorhansen.com/strangest_secret.php Fall 2009 Revit 2010 Content Written by: William C. Harris, Oct-09 Revit Management Training Lecture Topics Page 59 / 60 A poem to explain the amount of work ahead Stopping in the Woods - Frost Whose woods these are I think I know. His house is in the village, though; He will not see me stopping here To watch his woods fill up with snow. My little horse must think it queer To stop without a farmhouse near Between the woods and frozen lake The darkest evening of the year. He gives his harness bells a shake To ask if there's some mistake. The only other sound's the sweep Of easy wind and downy flake. The woods are lovely, dark and deep, But I have promises to keep, And miles to go before I sleep, And miles to go before I sleep. Fall 2009 Revit 2010 Content Written by: William C. Harris, Oct-09 Revit Management Training Lecture Topics Page 60 / 60 Session16 Series Question & Answer Fall 2009 Revit 2010 Content Written by: William C. Harris, Oct-09