1
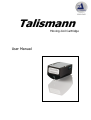
Talismann
Moving-Coil Cartridge
User Manual
Thank you.
Welcome to the GENERATION of clearaudio MC-Cartridges. You have
purchased a product of truly high-end-class with new design features
never done before.
Clearaudio-MC-cartridges represent top quality of german craftmentship
and their superior quality has been proved and documented in numerous
reviews world wide over almost 3 decades.
Starting at the source, the reproduction via vinyl, we can assure you
flawless musical satisfaction which is a basic feeling for those who love
music as we do.
Clearaudio has developed in research and refined the manufacturing that
we could claim:
- this is the reason for a pole position worldwide and you have bought an
incomparable product.
Please note:
These operating instructions provide valuable advice for the correct
installation of your new Clearaudio pick-up cartridge. For the fine
adjustment however they can only be taken as approximate values and
give only a nearly indication since optimum adjustment will depend to a
large extent on the quality of your record player or tonearm and the data
given in the operating instructions of them.
To ensure complete and accurate installation you should use the
available support from your dealer. A minimum supporting device
recommendation are:
- Test record (Art. No. LP43033/180)
- Setting template (Art. No. AC005/IEC).
- Adjusting mirror or the Clearaudio Azimuth Optimizer (Art. No. EL020)
- Stylus pressure gauge (Art. No. AC094)
Your dealer will be glad to give you any further support, because he
keeps all precision accessories from Clearaudio given for precise
adjustments.
You now own a fine, scientific instrument. We congratulate you having
done an excellent choice for authentic reproduction of music.
1
Mounting Procedure:
1. Align the mounting holes of the headshell or tonearm with the holes in
the cartridge.
2. Attach tonearm wires to cartridge pins, being careful not to add too
much force. Also be sure proper channel and polarity is maintained.
The signalpins are with the following
coloures marked:
→
→
→
→
Left output(L+)
Left ground
Right output (R+)
Right ground
white
blue
red
green
3. Insert the screws through the headshell holes and screw them into
the inner threads of the cartridge body. Tighten only enough so there is
no movement of cartridge. Don´t overtight the inner threads of the
cartridge body.
NOTE: Always try to use Clearaudio cartridge gold clips (Art.No.
CO011) or damage may result on cartridge pins.
4. Mount the headshell onto the tonearm (if not intergrated), and adjust
the overhang as per tonearm manufacturer's specifications and
tighten cartridge mounting screws fully with the accesssory
screwdriver. Take care that the cartridge is sitting flat and have a full
contact to the headshell.
Adjusting The Tracking Force
The correct tracking force is approximately 2,4 grams. Please use only
these values, as a light tracking force (1 gram or less) would allow the
stylus to jump an the record grooves will cause damage. NEVER exceed
5 grams tracking force or damage to stylus or cartridge may result. If
optimum tracking force cannot be set because the cartridge is too light
for the arm, please use Clearaudio headshell spacers, available from the
Importer / Dealer.
Other Adjustments
Proper VTA is set by plain leveling onto the platter with an distance of
0,3 and 0,5mm between LP and lowest part of the body.
2
The output of the cartridge is about 0.5 mV and most high end phono
preamplifiers can handle this output level. You may also use a MC head
amplifier. Cartridge loading depends upon the specific electronics in use,
but generally 47 kOhms is recommended with most tube equipment and
some solid state . Loading between 100 Ohms and 1 Kohms may be
used with some solid state for best results. We strongly recommend
starting at 47 kOhm loading down until breaking in has been completed.
All Clearaudio phonostages are always an ideal partner. We achieved the
best results with a loading of 400 ohms.
MAINTAINANCE:
Always keep the stylus tip clean. When dirt is allowed to build-up and
records are played with a dirty or clogged stylus, a " buzzing noise " can
be heard. Use a high quality cleaning brush or Clearaudio cleaning fluid
(Art.No. AC003) to clean the stylus tip. Be extremely careful and always
brush only from the back to front.
When using a liquid such as Clearaudio or other organic cleaner, always
take care not to spill any on the cartridge body.
Make sure the liquid will always contact only the stylus tip or cantilever.
ATTENTION!
Please read these instructions carefully before attempting to connect or
install your MC-Cartridge to avoid any loss of warranty. There is a very
high possibility of damaging your moving coil cartridge, while
connecting or disconnecting to a preamplifier or phonostage which is
not properly grounded.
If the ground of your preamplifier and ground of your tonearm and
turntable are not connected together, there could be a dangerous
situation for your MC-Cartridge (which will be not covered under
warranty). Under such conditions during the procedure of your tonearm
first cable-connecting to your preamplifier, there could be a high hum
voltage of up to 150 V present! (Depending on preamplifier-circuit
design!)
High current which could flow through your MC-Cartridge during the plug
in procedure could result in damaging and melting very fine MC-Coil
wires. This would be not covered by clearaudio warranty! Therefore, be
careful and follow instructions below:
1. Connect tonearm turntable ground with preamplifier ground
(before plugging in the electrical power supply)
2. Mount MC-Cartridge into the tonearm
3
3. First plug the tonearm cable into the phono inputs an your
preamplifier
4. Preamplifier volume control must be placed fully down
(position " 0 ")
5. Plug the main power cord into your electrical power supply
6. Switch " ON "your preamplifier
7. Your MC-Cartridge is ready to play! Enjoy the music.
ATTENTION!
Never disconnect your tonearm cable from your preamplifier, while your
unit is still " ON ". Please switch your preamplifier " OFF ", before
starting to disconnect your tonearm connectors from the phono inputs
of your preamplifier.
ATTENTION!
Every new generation Clearaudio MC cartridge consists of very powerful
magnets (currently the most powerful magnets available in this size),
therefore use extreme care and not to use any steel or magnetic parts
near the cartridge, which may be attracted to it and possibly damage the
stylus or cantilever. Before playing a record, please remove all dust and
dirt from the record surface using a quality cleaning device.
For the best results, a record cleaning machine should be used. Ask
your dealer for clearaudio´s Matrix-cleaning machines. (e.g. Double
Side Matix, cleaning both sides of LP-record at once!)
AVOID!
Always avoid storing your cartridge near any objects using electrical
transformers and motors, which may generate magnetic fields. Any
demagnetisational contact will result in a drop of output voltage and
possible case of distortion or degradation.
Once again:
Keep cool and concentrated when adjusting the cartridge. As a music
lover you should have all adjustment accessories even if you think they
are expensive or difficult to use.
Damaged music reproduction or cartridge fault will never reproduce the
one we love: music.
4
ACCESSORIES
-Precision metal screwdriver
-Cartridge mounting screws and nuts
Technical Specifications:
Stylus shape:
elliptical
Cartridge weight:
11g
Recommended tracking force:
2,4g
Compliance:
6 x 10⁻⁶ cm/dyne
Output voltage:
0,5 mV at 5 cm/s
Cartridge Impedance:
45 Ohms
Cartridge body:
tonewood ebony
Clearaudio electronic GmbH
Spardorfer Str 150
91054 Erlangen
Germany
Tel/Phone: +49-(0)1805/059595
www.clearaudio.de
[email protected]
Analog accessories are available at: www.analogshop.de
5