1
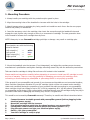
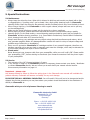
MC Concept
Moving-Coil Cartridge, Moving-Coil Tonabnehmer
User manual
Bedienungsanleitung
Made in Germany
Hi-Fi Components
clearaudio electronic® GmbH
Spardorfer Str. 150 • D-91054 Erlangen • Tel. +49 9131 40300100 • FAX + 49 9131 40300119
www.clearaudio.de • www.analogshop.de • [email protected]
©clearaudio electronic GmbH
Version: 1.5_E+D_07.10.2015
MC Concept
User manual / Bedienungsanleitung
Dear audio enthusiast,
Thank you and welcome to the GENERATION of Clearaudio MC Cartridges. You have purchased a product
of truly high-end-class with new design features never done before.
Clearaudio MC cartridges represent top quality of German craftsmanship and their superior quality has
been proved and documented in numerous reviews world wide over almost 3 decades.
Starting at the source, the reproduction via vinyl, we can assure you flawless musical satisfaction which is a
basic feeling for those who love music as we do.
Clearaudio has developed in research and refined the manufacturing that we could claim:
- this is the reason for a pole position worldwide and you have bought an incomparable product.
Please note:
These operating instructions provide valuable advice for the correct installation of your new Clearaudio
pick-up cartridge. For the fine adjustment however they can only be taken as approximate values and give
only a nearly indication since optimum adjustment will depend to a large extent on the quality of your
record player or tonearm and the data given in the operating instructions of them.
To ensure complete and accurate installation you should use the available support from your dealer.
A minimum supporting device recommendation are:
-
Clearaudio Test record (Art. No. LP43033)
Clearaudio Setting template (Art. No. AC005/IEC).
Adjusting mirror or the Clearaudio Azimuth Optimizer (Art. No. EL020)
Clearaudio Stylus pressure gauge (Art. No. AC094)
Your dealer will be glad to give you any further support, because he keeps all precision accessories from
Clearaudio given for precise adjustments.
You now own a fine, scientific instrument.
We congratulate you having done an excellent choice for authentic reproduction of music.
Page /Seite 2
© clearaudio electronic GmbH 2015
MC Concept
User manual / Bedienungsanleitung
User manual2 – 7
Bedienungsanleitung8 – 13
Contents
1.
Mounting procedure4
2.
Adjusting the Tracking Force5
3.
Further adjustments5
4.
Delivered Accessories 5
5.
Special instructions6
6.
Technical data7
Warranty information14
Page / Seite 3
© clearaudio electronic GmbH 2015
MC Concept
User manual / Bedienungsanleitung
1. Mounting Procedure
1. Always handle your cartridge with the protective stylus guard in place.
2. Align the mounting holes of the headshell or tonearm with the holes in the cartridge.
3. Attach tonearm wires to cartridge pins, being careful not to add too much force. Also be sure proper
channel and polarity is maintained.
4. Insert the accessory nuts in the cartridge, then insert the screws through the headshell holes and
engage the nuts, tighten only enough so there is no movement of cartridge. The new generation have
inner threads for screws don‘t overtight them by force.
NOTE: Always try to use Clearaudio cartridge gold clips or damage may result on cartridge pins.
The signalpins are with the following
coloures marked:
Left output(L+)
Left ground
Right output (R+)
Right ground
->
->
->
->
white
blue
red
green
Pic. 1: Color marking of the signalpins
5. Mount the headshell onto the tonearm (if not intergrated), and adjust the overhang as per tonearm
manufacturer‘s specifications and tighten cartridge mounting screws fully with the accesssory screwdriver.
Take care that the cartridge is sitting flat and have a full contact to the headshell.
Please read these instructions carefully before attempting to connect or install your MC cartridge to avoid
any loss of warranty. There is a very high possibility of damaging your moving coil cartridge, while
connecting or disconnecting to a preamplifier or phonostage which is not properly grounded.
If the ground of your preamplifier and ground of your tonearm and turntable are not connected together,
there could be a dangerous situation for your MC cartridge (which will be not covered under warranty).
Under such conditions during the procedure of your tonearm first cable connecting to your preamplifier,
there could be a high hum voltage of up to 150 V 150 Hz respectively 80 V 160 Hz present! (Depending
on preamplifier-circuit design!) High current which could flow through your MC cartridge during the plug in
procedure could result in damaging and melting very fine MC Coil gold wires.
This would be not covered by Clearaudio warranty! Therefore, be careful and follow instructions below:
1.
2.
3.
4.
5.
6.
7.
Connect tonearm turntable ground with preamplifier ground (before plugging in the
electrical power supply)
Mount MC cartridge into the tonearm
First plug the tonearm cable into the phono inputs an your preamplifier
Preamplifier volume control must be placed fully down (position „ 0 „)
Plug the main power cord into your electrical power supply
Switch „ ON „your preamplifier
Your MC-Cartridge is ready to play!
Page / Seite 4
© clearaudio electronic GmbH 2015
MC Concept
User manual / Bedienungsanleitung
Keep calm and concentrated when adjusting the cartridge. As a music lover you should have all adjustment
accessories even if you think they are expensive or difficult to use.
Damaged music reproduction or cartridge fault will never reproduce the one we love: music
ATTENTION:
NOT FOR SHELLAC (78RPM) RECORDS SUITABLE!
2. Adjusting the Tracking Force
Carefully remove the stylus protection guard. This can be done by grasping it from the rear with thumb and
index finger and pulling it rearward gently. The correct tracking force is approximately 2,0 grams (optimum
tracking force can be found in the enclosed response diagram). Please use only these values, as a light
tracking force (1 gram or less) would allow the stylus to jump an the record grooves will cause damage.
NEVER exceed 5 grams tracking force or damage to stylus or cartridge may result. If optimum tracking
force cannot be set because the cartridge is too light for the arm, please use Clearaudio headshell
spacers, available from the importer / dealer. (1 pcs. included)
3. Further adjustments
1. The correct position of the cartridge (overhang setting) depends of the length and shape of the tonearm
and of the mounting point of the tonearm bearing. For precise setting you need a setting tempelate, which
is usually supplied or offered by the manufacturer of the respective turntable or tonearm. Often quite inaccurate paper- or plastic templates are attached, which do not allow precise adjustments due to the material. Special overhang templates are available through your local dealer or from Clearaudio
(Art. No. AC005/IEC).
2. The distance between the lower edge of the cartridge when lowered to the record surface should
be 0.8 mm.
3. Please adjust the tracking force according to the enclosed original measurement protocol and the given
optimal tracking force. To check the adjustment (trackability) you can use a test records which is available
through you dealer (for example Clearaudio Art. No. LPT83063).
4. Setting the Anti-skating: Many tonearms have a device to compensate the anti-skating force.
Please proceed according to the user manual of your tonearm manufacturer.
For absolutely correct setting we would also like to recommend a test record.
4. Delivered accessories
- Precision metal screwdriver
- Cartridge mounting screws and nuts
Analogue accessories are available at: www.analogshop.de
Page / Seite 5
© clearaudio electronic GmbH 2015
MC Concept
User manual / Bedienungsanleitung
5. Special Instructions
5.1 Maintenance
• Always keep the stylus tip clean. When dirt is allowed to build-up and records are played with a dirty
or clogged stylus, a „buzzing noise“ can be heard. Use a high quality cleaning brush or Clearaudio
cleaning fluid to clean the stylus tip. Be extremely careful and always brush only from the back to front.
• When using a liquid e.g. from Clearaudio or other organic cleaner, always take care not to spill any on the cartridge body.
• Make sure the liquid will always contact only the stylus tip or boron cantilever.
• Before playing a record, please remove all dust and dirt from the record surface using a quality
• cleaning device. For the best results, a record cleaning machine should be used. Ask your dealer for
Clearaudio´s Matrix-cleaning machines. (e.g. Smart Matrix Professional, Double Matrix Professional
Sonic, cleaning both sides of LP-record at once!)
• Always avoid storing your cartridge near any objects using electrical transformers and motors, which
may generate magnetic fields. Any demagnetisation contact will result in a drop of output voltage and
possible case of distortion or degradation.
• Every new V2 generation Clearaudio MC cartridge consists of very powerful magnets, therefore use
extreme care and not to use any steel or magnetic parts near the cartridge, which may be attracted to
it and possibly damage the stylus or boron cantilever.
• Please note:
Never disconnect your tonearm cable from your preamplifier, while your unit is still „ON“. Please switch
your preamplifier „OFF“, before starting to disconnect your tonearm connectors from the phono inputs
of your preamplifier.
5.2 Service
• The warranty of the MC Concept cartridge is 2 years.
• If any service or repair on all Clearaudio products is necessary, please contact your dealer / distributor
or contact Clearaudio directly. We can inform you as well about your nearest service location More warranty information on page 14.
Important - please note:
Any damage caused by failure to follow the advice given in the Clearaudio user manual will invalidate the
product warranty. Clearaudio will assume no liability for any such damage.
PLEASE RETAIN ALL ORIGINAL PACKAGING. You will need it if this unit has to be transported and/or
shipped. Any further questions you may have about your product should be directed to the distributor or
directly to Clearaudio at:
Clearaudio wish you a lot of pleasure listening to music!
Clearaudio electronic GmbH
Spardorfer Str. 150
91054 Erlangen
Germany
Phone: +49 9131 40300 100
Fax: +49 9131 40300 119
www.clearaudio.de
www.analogshop.de
[email protected]
Page / Seite 6
© clearaudio electronic GmbH 2015
MC Concept
User manual / Bedienungsanleitung
6. Technical data
Cartridge weight:
Frequency response:
Stylus shape:
Cantilever:
Coil material:
Compliance:
Recommended tracking force:
Crosstalk:
Channel difference
Output voltage:
Cartridge Impedance:
Cartridge body:
Warranty:
8.0 gram
20 Hz - 40 kHz
Micro Line
Boron
OFC - copper
9/9 μ/mN
2.0 gram (+/- 0.2 gram)
> 30 dB
<0.5 dB
0.4 mV at 5 cm/s
11 Ohms
Aluminum - Magnesium alloy with ceramic surface
layer
2 years*
*Provided the warranty registration card is correctly filled out by the owner and sent back to Clearaudio within the stated time.
Clearaudio electronic is not responsible for typographical errors in descriptions.
Technical specifications subject to change or improvement without prior notice.
Availability as long as stock lasts. Copies and imprints, including extracts, require written conformation from
Clearaudio electronic GmbH; Germany
Last review: October 2015
Page / Seite 7
© clearaudio electronic GmbH 2015
MC Concept
User manual / Bedienungsanleitung
Sehr geehrte clearaudio - Kundin, sehr geehrter clearaudio - Kunde,
Sie erwarben ein hochwertiges Produkt aus dem Hause clearaudio.
Clearaudio Tonabnehmer entsprechen dem höchstmöglichen Standard „Made in Germany“.
Jeder clearaudio Tonabnehmer ist ein handselektiertes Juwel, entwickelt und konstruiert, um Ihrer
HiFi-Anlage die entscheidende Klangverbesserung an der analogen Quelle zu verleihen.
Durch nationale und internationale Tests sind diese überlegenen Merkmale seit Jahrzehnten dokumentiert.
Wir sind überzeugt, dass Sie mit diesem Produkt sehr zufrieden sein werden und wünschen Ihnen Freude
an der Musik, welche Sie vielleicht auch begeistert an andere Musikliebhaber und Freunde weitergeben.
Die konsequente weitere Forschung in der Entwicklung von MC Tonabnehmern führt bei clearaudio zu
einer bis heute andauernden Alleinstellung. Es steht Ihnen damit ein unvergleichliches und einzigartiges
Produkt zur Verfügung.
Die von clearaudio entwickelte Spitzentechnologie im Moving Coil Tonabnehmerbau führte zu immer
leichteren Schwingungselementen. Je leichter diese MC-Schwingungselemente sind, desto besser ist die
erreichbare Klangwiedergabe. Der Aufbau der clearaudio MC Tonabnehmer sorgt für geringste bewegte
Masse. Der singuläre Charakter dieser feinmechanischen Ausgefeiltheit erfordert sorgsame Beachtung der
im folgenden Text beschriebenen Hinweise.
Clearaudio wünscht Ihnen viel Freude mit Ihrem neuen MC Concept Tonabnehmersystem!
Bitte beachten:
Diese Bedienungsanleitung gibt Ihnen wertvolle Hinweise zum richtigen Einbau Ihres Tonabnehmersystems.
Für die Feineinstellung können jedoch nur Richtwerte und Anhaltspunkte geliefert werden, denn die
optimale Justage ist zum großen Teil von Ihrem Tonarm/Plattenspieler abhängig. Zum genauesten Einbau
sollten Sie folgende Hilfsmittel, die im Fachhandel angeboten werden, verwenden, die eine
Mindestausstattung darstellen:
- clearaudio Musik-Pickup Test Record (Art. No. LP43033)
- Einstellschablone (Art. No. AC005/IEC).
- Justagespiegel oder clearaudio Azimuth Optimizer (Art. No EL020)
- Tonarmwaage (Art. No. AC094)
Darüber hinaus hilft Ihnen Ihr Fachhändler gerne weiter. Unsere Fachhändler halten sinnvolle Hilfsmittel
aus dem Hause clearaudio und Fachkenntnis des Produkts bereit.
Version: September 2015
Page / Seite 8
© clearaudio electronic GmbH 2015
MC Concept
User manual / Bedienungsanleitung
Inhaltsverzeichnis
1.
Montage und Justage 10
2.
Einstellen der Auflagekraft
11
3.
Weitere Einstellungen11
4.
Zubehör im Lieferumfang
11
5.
Besondere Hinweise
12
6.
Technische Daten13
Garantiehinweise14
Page / Seite 9
© clearaudio electronic GmbH 2015
MC Concept
User manual / Bedienungsanleitung
1. Montage und Justage
1. Nehmen Sie den Tonabnehmer aus der Verpackung. (Schrauben lösen).
2. Bitte lassen Sie während der Montage stets den Nadelschutz auf dem Tonabnehmer, um Beschädigungen
des Nadelträgers zu vermeiden.
3. Verbinden Sie die Anschlussstifte Ihres clearaudio Tonabnehmers mit den Buchsen des Headshell- oder
Tonarm - Kabels.
Beachten Sie dabei unbedingt die vorgegebenen Farbcodierungen. Nur dann ist die absolute Phase bei der
Musikwiedergabe korrekt, andernfalls wäre eine deutlich hörbare Klangverschlechterung die Folge.
4. Montieren Sie mit Hilfe der beiliegenden SchraubenIhren clearaudio Tonabnehmer in den Tonarm. Die
Aufnahmegewinde im Tonabnehmergehäuse entsprechen der metrischen Norm für M 2,5 mm Schrauben
und weisen den international genormten Abstand von 12,7 mm auf.
Die Anschlussstifte werden mit folgenden
Farben der Tonarmverkabelung verbunden:
Linker Signalstift (L+)
Linker Erdungsstift
Rechter Signalstift (R+)
Rechter Erdungsstift
->
->
->
->
weiß
blau
rot
grün
Abb. 1: Farben der Tonarmverkabelung
5. Jedem clearaudio MC Tonabnehmer liegen spezielle, absolut nichtmagnetische clearaudio
Goldbuchsen bei. Generell wird empfohlen die mitgelieferten clearaudio - Goldbuchsen zu verwenden.
Folgende Reihenfolge sollte bei der Montage unbedingt eingehalten werden:
1. Masseverbindung zwischen Plattenspieler bzw. Tonarm und Vorvorverstärker oder Phonovorverstärker
herstellen.
2. MC Tonabnehmer im Tonarm einbauen und anschließen
3. Cinch (RCA) Stecker in die Eingangsbuchsen des Vorverstärkers stecken
4. Vorverstärker-Lautstärke Stellung immer auf „0“ stellen
5. Netzstecker des Vorverstärkers an das Stromnetz anschließen
6. Vorverstärker einschalten
Die Headshell - Tonarmkabel mit den clearaudio Goldbuchsen ohne große Krafteinwirkung auf die farbcodierten Kontaktstifte des Systems schieben. Dabei ist zu beachten, dass die Goldbuchsen nicht verkantet
werden. Verwenden Sie eine geeignete Präzisionszange oder Pinzette.
Page / Seite 10
© clearaudio electronic GmbH 2015
MC Concept
User manual / Bedienungsanleitung
Unser Tipp für die Tonabnehmereinstellung:
Wählen Sie einen hellen Arbeitsplatz, gutes Werkzeug und bewahren Sie Ruhe und Konzentration.
Wichtige Information:
Bei allen clearaudio Moving Coil Systemen sind die einzelnen Bauteile unlösbar miteinander verklebt. Mit
Ausnahme des Diamanten lässt sich nichts austauschen. Behandeln sie deshalb Ihr MC System vorsichtig.
Bei richtiger und sorgfältiger Handhabung werden Sie viele Jahre Musik hören und genießen können.
ACHTUNG:
NICHT FÜR SCHELLACK PLATTEN (78 RPM) GEEIGNET
2. Einstellen der Auflagekraft
Entfernen Sie vorsichtig den Nadelschutz vom Tonabnehmer, indem Sie diesen mit Daumen und Zeigefinger
greifen und vorsichtig nach vorne abziehen.
Die korrekte Auflagekraft liegt bei etwa 2,0 Gramm (optimale Auflagekraft ist im beiliegenden Diagramm zu
finden). Bitte verwenden Sie nur diese Werte, da bei einer zu leichten Auflagekraft (1 Gramm oder weniger)
der Tonabnehmer aus der Plattenrille springen könnte und somit die Nadel beschädigen könnte.
Jedoch sollten Sie auch niemals mehr als 5 Gramm einstellen, da auch dies Schäden am Diamanten und
somit am Tonabnehmer verursachen könnte. Wenn es Ihnen nicht möglich ist, die optimale Auflagekraft
einzustellen, da der Tonabnehmer zu leicht ist, sollten Sie ein Abstands-Plättchen verwenden, diese sind bei
Ihrem clearaudio Importeur / Händler erhältlich (1. Stk. ist im Lieferumfang enthalten).
3. Weitere Einstellungen
1. Die richtige Lage des Tonabnehmers (Überhangeinstellung) ist von der Länge und der Bauform des
Tonarms sowie dem Montagepunkt des Tonarmlagers abhängig. Zur exakten Einstellung benötigen Sie eine
Einstellschablone, die üblicherweise vom Hersteller des jeweiligen Plattenspielers oder Tonarms mitgeliefert
bzw. angeboten wird. Oft werden recht ungenaue Papier - und Plastikschablonen beigelegt, welche
materialbedingt nicht präzise Einstellarbeiten ermöglichen. Spezielle Überhangschablonen erhalten Sie
außerdem im Fachhandel oder von clearaudio (Art. Nr. AC005(IEC)).
2. Der Abstand zwischen der Unterkante des Tonabnehmers im abgesenkten Zustand und der
Schallplattenoberfläche bei laufender Platte sollte ca. 0,8 mm betragen.
3. Die Auflagekraft stellen Sie bitte gemäß dem mitgelieferten Original-Messprotokoll und dem darin
angegebenen optimalen Auflagegewicht ein. Eine Kontrolle der Einstellung (Abtastfähigkeit) erreichen Sie
mithilfe einer Testschallplatte, die im Fachhandel erhältlich ist und in die Ausstattung jedes ernsthaften
Musikliebhabers gehört. (z.B. von clearaudio Art.Nr. LPT43039)
4. Einstellen der Anti-Skating-Kraft: Viele Tonarme besitzen eine Vorrichtung zur Kompensation der
Anti-Skating-Kraft. Verfahren Sie dazu gemäß den Bedienungsanweisungen Ihres Tonarmherstellers.
Zur absolut korrekten Einstellung empfiehlt sich ebenfalls eine Testschallplatte.
4. Zubehör im Lieferumfang
-
-
Präzisionsschraubendreher
Befestigungsschrauben
Analog-Zubehör erhältlich unter: www.analogshop.de
Page / Seite 11
© clearaudio electronic GmbH 2015
MC Concept
User manual / Bedienungsanleitung
5. Besondere Hinweise
5.1 Wartung
• Reinigen Sie bitte jede Platte vor dem Erst-Abspielen mit einer Plattenwaschmaschine (z.B. clearaudio
Smart Matrix Professional oder Double Matrix Professional Sonic). Sie erreichen dadurch eine viel ruhigere Musikwiedergabe (um ca. 10dB verbesserter „SIGNAL TO NOISE“ Abstand!)
• Reinigen Sie auch die Nadel regelmäßig mit einem weichen Pinsel oder mit einer im Fachhandel erhältlichen Reinigungsflüssigkeit (clearaudio Nadelreiniger Art. Nr. AC003). Bitte achten Sie darauf,
dass hierbei kein Tropfen auf den Tonabnehmer Körper gelangt.
• Die Lebensdauer des clearaudio HD-Abtastdiamanten beträgt normalerweise bei pfleglicher
Behandlung und richtiger Justage bis zu 8000 Stunden!
• Die Güte der Politur und die Form des Abtastdiamanten ist maßgebend für die Größe der Anti-SkatingKraft, ebenso die Güte der Oberfläche der Schallplattenrille. Die bei clearaudio Abtastdiamanten durch den zweifach wiederholten Politurvorgang - erreichte sehr gute Oberflächenpolitur ergibt eine
geringere Reibung und dadurch geringere Anti-Skating-Kraft. Die Abtastfähigkeit wird mit einer Messschallplatte überprüft und sollte 70 bis 80 µm erreichen.
• Vermeiden Sie die Lagerung des Tonabnehmers in Nähe von Geräten mit elektrischen Transformatoren
und Motoren, die Magnetfelder erzeugen können. Jede Entmagnetisierung könnte einen Ausfall der
Ausgangsspannung und somit zu einer Verzerrung oder Verschlechterung im Klang führen.
• Jeder clearaudio MC Tonabnehmer der neuen V2 Generation besitzt sehr starke Magnete, deshalb
bitten wir um größte Sorgfalt damit keine Stahl- oder magnetische Teile in der Nähe des Tonabnehmers verwendet werden, die von ihm angezogen werden und somit die Nadel beschädigen könnten.
• Bitte beachten:
Trennen Sie niemals das Tonarm Kabel vom Verstärker, während Ihr Gerät immer noch eingeschaltet ist.
Bitte schalten Sie den Vorverstärker aus, bevor Sie die Tonarm-Anschlüsse von den Phono-Eingängen
des Vorverstärkers trennen.
5.2 Service
• Die Garantiezeit für den MC Concept Tonabnehmer beträgt 2 Jahre.
• Bei Rücksendung an clearaudio immer die Originalverpackung nehmen.
• Sollte eine Wartung oder Reparatur an Ihren clearaudio Produkt erforderlich sein, kontaktieren Sie
bitte Ihren Händler oder Vertrieb oder clearaudio direkt. Gerne können wir Sie auch über die nächste Servicestelle informieren.Weitere Garantieinformationen finden Sie auf Seite 14.
WICHTIG! Unbedingt lesen!
Bei Schäden, die durch Nichtbeachtung der Bedienungsanleitung entstehen, erlischt der Garantieanspruch.
Für Folgeschäden, die daraus resultieren, übernehmen wir keine Haftung. Sollten Sie darüber hinaus
weitere Fragen haben, so wenden Sie sich vertrauensvoll an den Fachhändler oder an clearaudio direkt.
BITTE BEWAHREN SIE DIE ORIGINAL-VERPACKUNG AUF. Diese werden Sie benötigen, wenn Ihr
Gerät transportiert und/oder versendet werden muss. Alle weiteren Fragen können Sie an Ihren Händler
oder an clearaudio richten.
Clearaudio wünscht Ihnen viel Spass beim Musikhören!
clearaudio electronic GmbH
Spardorfer Str. 150
91054 Erlangen
Germany
Tel: +49 9131 / 40300 100
Fax: +49 9131 / 40 300 119
www.clearaudio.de
www.analogshop.de
[email protected]
Page / Seite 12
© clearaudio electronic GmbH 2015
MC Concept
User manual / Bedienungsanleitung
6. Technische Daten
Masse des Gesamtsystems:
Übertragungsbandbreite:
Abtastdiamant:
Nadelträger:
Material der Spulen:
Nachgiebigkeit:
Empfohlene Auflagekraft:
Übersprechdämpfung:
Kanalabweichung:
Ausgangsspannung:
Systemimpedanz:
Systemkörper:
Garantie:
8,0 gr.
20 Hz - 40 kHz
Micro Line
Boron
Kupfer
9/9 μ/mN
2,0 gram (+/- 0,2 gram)
> 30 dB
<0,5 dB
0,4 mV at 5 cm/s
11 Ohm
Aluminium-Magnesium Legierung mit keramischer
Beschichtung
2 Jahre*
* Bitte Garantiekarte ausfüllen innerhalb von 14 Tagen an clearaudio zurück senden
Änderungen bleiben vorbehalten. Lieferbar solange Vorrat reicht. Für Druckfehler keine Haftung.
Irrtümer vorbehalten- Kopien und Abdrucke – auch nur auszugsweise – bedürfen der schriftlichen Genehmigung durch
die clearaudio electronic GmbH.
Letzte Änderung: Oktober 2015
Page / Seite 13
© clearaudio electronic GmbH 2015
MC Concept
User manual / Bedienungsanleitung
To achieve the full Clearaudio warranty, it is necessary that you fill out and send the corresponding part of the
warranty registration certificate /card back to Clearaudio, within two weeks after purchase. Only if the product is
returned in its original packing Clearaudio can provide the warranty of 2 years.
Um die volle clearaudio Garantie von 2 Jahren zu erhalten, senden sie uns bitte die beigefügte Garantie / Registrierkarte vollständig ausgefüllt und innerhalb von 2 Wochen zurück. Bei Rücksendung der Ware ist bitte darauf zu achten
die Originalverpackung zu verwenden.
ENGLISH
WARRANTY
For warranty information, contact your local Clearaudio distributor.
RETAIN YOUR PURCHASE RECEIPT
Your purchase receipt is your permanent record of a valuable purchase.
It should be kept in a safe place to be referred to as necessary for insurance purposes or when corresponding with Clearaudio.
IMPORTANT
When seeking warranty service, it is the responsibility of the consumer to establish proof and date of purchase. Your purchase receipt or invoice is
adequate for such proof.
FOR U.K. ONLY
This undertaking is in addition to a consumer‘s statutory rights and does not affect those rights in any way.
FRANÇAIS
GARANTIE
Pour des informations sur la garantie, contacter le distributeur local clearaudio.
CONSERVER L‘ATTESTATION D‘ACHAT
L‘attestation d‘achat est la preuve permanente d‘un achat de valeur. La conserver en lieu sur pour s‘y reporter aux fins d‘obtention d‘une couverture
d‘assurance ou dans le cadre de correspondances avec clearaudio.
IMPORTANT
Pour l‘obtention d‘un service couvert par la garantie, il incombe au client d‘établir la preuve de l‘achat et d‘en corroborer la date. Le reçu ou la
facture constituent des preuves suffisantes.
DEUTSCH
GARANTIE
Bei Garantiefragen wenden Sie sich bitte zunächst an Ihren clearaudio Händler.
Heben Sie Ihren Kaufbeleg gut auf.
WICHTIG!
Die Angaben auf Ihrer Quittung erlauben uns die Identifizierung Ihres Gerätes und belegen mit dem Kaufdatum die Dauer Ihrer GarantieAnsprüche. Für Serviceleistungen benötigen wir stets die Gerätenummer.
Diese finden Sie auf dem Typenschild auf der Rückseite des Gerätes oder auch in der beigefügten Garantie-Registrierkarte.
NEDERLANDS
GARANTIE
Voor inlichtingen omtrent garantie dient u zich tot uw plaatselijke clearaudio.
UW KWITANTIE, KASSABON E.D. BEWAREN
Uw kwitantie, kassabon e.d. vormen uw bewijs van aankoop van een waardevol artikel en dienen op een veilige plaats bewaard te worden voor evt,
verwijzing bijv, in verbend met verzekering of bij correspondentie met clearaudio.
BELANGRIJK
Bij een evt, beroep op de garantie is het de verantwoordelijkheid van de consument een gedateerd bewijs van aankoop te tonen. Uw kassabon of
factuurzijn voldoende bewijs.
ITALIANO
GARANZIA
L’apparecchio è coperto da una garanzia di buon funzionamento della durata di un anno, o del periodo previsto dalla legge, a partire dalla data di
acquisto comprovata da un documento attestante il nominativo del Rivenditore e la data di vendita. La garanzia sarà prestata con la sostituzione o
la riparazione gratuita delle parti difettose.
Non sono coperti da garanzia difetti derivanti da uso improprio, errata installazione, manutenzione effettuata da personale non autorizzato o,
comunque, da circostanze che non possano riferirsi a difetti di funzionamento dell’apparecchio. Sono inoltre esclusi dalla garanzia gli interventi
inerenti l’installazione e l’allacciamento agli impianti di alimentazione.
Gli apparecchi verranno riparati presso i nostri Centri di Assistenza Autorizzati. Le spese ed i rischi di trasporto sono a carico del cliente. La casa
costruttrice declina ogni responsabilità per danni diretti o indiretti provocati dalla inosservanza delle prescrizioni di installazione, uso e manutenzione
dettagliate nel presente manuale o per guasti dovuti ad uso continuato a fini professionali.
ESPAÑOL
GARANTIA
Para obtener información acerca de la garantia póngase en contacto con su distribuidor clearaudio.
GUARDE SU RECIBO DE COMPRA
Su recibo de compra es su prueba permanente de haber adquirido un aparato de valor, Este recibo deberá guardarlo en un lugar seguro y utilizarlo
como referencia cuando tenga que hacer uso del seguro o se ponga en contacto con clearaudio.
IMPORTANTE
Cuando solicite el servicio otorgado por la garantia el usuario tiene la responsabilidad de demonstrar cuándo efectuó la compra. En este caso, su
recibo de compra será la prueba apropiada.
Page / Seite 14
© clearaudio electronic GmbH 2015