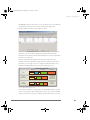
1
p2v_manual.book Page 1 Thursday, July 17, 2003 11:32 AM
VERSION 1.0
VMware P2V Assistant
TM
User’s Manual
p2v_manual.book Page 2 Thursday, July 17, 2003 11:32 AM
VMware, Inc.
Please note that you will always find the most up-to-date technical documentation on our Web site at http://www.vmware.com/support/.
The VMware Web site also provides the latest product updates.
3145 Porter Drive
Palo Alto, CA 94304
www.vmware.com
Copyright © 1998-2003 VMware, Inc. All rights reserved. Protected by one or more of U.S. Patent Nos. 6,397,242
and 6,496,847; patents pending. VMware, the VMware boxes logo, GSX Server and ESX Server are trademarks of
VMware, Inc. Microsoft, Windows, and Windows NT are registered trademarks of Microsoft Corporation. Linux is
a registered trademark of Linus Torvalds. All other marks and names mentioned herein may be trademarks of
their respective companies. Revision 20030715 Item: P2V-ENG-Q203-024
p2v_manual.book Page 3 Thursday, July 17, 2003 11:32 AM
Table of Contents
Introducing VMware P2V Assistant ________________________________7
Clones for GSX Server and Workstation _______________________________9
Create a Clone as a Bootable Disk _________________________________9
Reconfigure an Existing Clone into a Bootable Disk ___________________10
Use a Third Party Image to Create a Clone __________________________11
Clones for ESX Server ____________________________________________12
Create a VMware ESX Server Clone Using the Direct to Disk Device Mode _12
Reconfigure an Existing ESX Server Clone into a Bootable Disk __________14
Convert a Third Party Image to an ESX Server Formatted Clone _________14
Convert a .vmdk Disk File to VMware ESX Server Format _______________15
Using the Clone in a Virtual Machine ________________________________16
About the New Virtual Machine __________________________________17
Application Compatibility _________________________________________18
About This Manual ______________________________________________18
Intended Audience ___________________________________________19
Additional Resources __________________________________________19
Document History ____________________________________________19
Installing VMware P2V Assistant ________________________________ 21
Installation Requirements _________________________________________22
Requirements for the Source Computer ___________________________22
Requirements for the VMware P2V Assistant Machine _________________23
Supported Versions of VMware Products ___________________________24
Installing the VMware P2V Assistant _________________________________25
Uninstalling and Reinstalling the VMware P2V Assistant _________________26
Creating Clones ______________________________________________ 27
Cloning and Configuring Considerations _____________________________28
ESX Server versus GSX Server and Workstation Compatible Clones _________28
Cloning a Disk Using a Third Party Tool _______________________________29
Cloning a Disk Using the P2V Assistant _______________________________31
Preparing the Source Disk ______________________________________31
Starting the P2V Assistant and the Cloning Process ___________________34
Identifying the Source Disk _____________________________________37
Choosing a System Reconfiguration Option ________________________40
Selecting Disk Cloning Options __________________________________41
3
p2v_manual.book Page 4 Thursday, July 17, 2003 11:32 AM
Specifying the Target Disk ______________________________________42
Setting the Partition Sizes ______________________________________44
Locating Service Packs _________________________________________47
Locating Hot Fixes ____________________________________________49
Selecting System Reconfiguration Options _________________________50
Completing the Cloning Process _________________________________51
Reconfiguring Clones __________________________________________ 53
Starting the P2V Assistant _________________________________________54
Identifying the Virtual Disk to Reconfigure ____________________________56
Locating Service Packs ___________________________________________58
Locating Hot Fixes ______________________________________________59
Selecting Reconfiguration Options __________________________________60
Completing the System Reconfiguration _____________________________61
Creating a New Virtual Machine _________________________________ 63
New Virtual Machine Considerations ________________________________64
New Virtual Machine Guidelines ____________________________________65
Creating a New Virtual Machine with GSX Server _______________________65
Creating a New Virtual Machine with ESX Server _______________________65
Using vmkfstools to Import a Virtual Disk __________________________66
Using the VMware Management Interface to Import a Virtual Disk _______66
Booting the New Virtual Machine ___________________________________67
Configuring the Guest OS and Testing the New Virtual Machine ______ 69
Configuration Tasks for Both Windows NT and Windows 2000 ____________70
Network Interface Cards _______________________________________70
VMware SVGA Graphics Card ____________________________________71
Configuring Windows NT _________________________________________71
Network Adapters ____________________________________________71
Other Drivers or Services _______________________________________72
Configuring Windows 2000 _______________________________________72
Testing and Tuning ______________________________________________73
Troubleshooting ______________________________________________ 75
Troubleshooting Issues and Solutions _______________________________76
Issues with Installing P2V Assistant _______________________________76
Issues with Pre-Installed Software in Clone _________________________76
Issues with Using a Third Party Tool to Create a Clone _________________77
Issues with Creating a Clone Using the P2V Assistant _________________77
4
www.vmware.com
p2v_manual.book Page 5 Thursday, July 17, 2003 11:32 AM
Issues with Performing a System Reconfiguration ____________________78
Issues with Booting a Virtual Machine with a Clone ___________________79
Technical Support Resources ______________________________________80
5
p2v_manual.book Page 6 Thursday, July 17, 2003 11:32 AM
6
www.vmware.com
p2v_manual.book Page 7 Thursday, July 17, 2003 11:32 AM
1
CHAPTER 1
Introducing VMware P2V
Assistant
7
p2v_manual.book Page 8 Thursday, July 17, 2003 11:32 AM
VMware P2V Assistant User’s Manual
Introducing the VMware P2V Assistant
This manual describes how to install and use the VMware™ P2V Assistant to migrate
disk data from a physical (source) machine to a target virtual machine, without
making any changes to the source machine. This includes:
Cloning — The process of creating a clone, where the clone is a virtual disk that is an
exact copy of the source physical disk. This involves copying the data on a physical
(source) machine’s hard disk and transferring that data to a target virtual disk (the new
clone). This process can be performed using the P2V Assistant installed on an
intermediary machine (physical or virtual) or using a third party imaging tool running
in an intermediary virtual machine.
System Reconfiguration — Adjusting the migrated operating system to enable it to
function on virtual hardware. This is performed on the target virtual disk after the
cloning and enables the target virtual disk to function as a boot disk in a virtual
machine. This is not required if the target virtual disk will not be used as a boot disk.
This process is performed using the P2V Assistant installed on an intermediary
machine (physical or virtual).
Creating the Virtual Machine — Using the new, and optionally system reconfigured,
virtual disks in a new virtual machine. The new virtual machine retains the identity and
settings of the original physical machine. This includes: machine name, SID, hard disks
(partitions), data files, application and user settings. This process does not require the
P2V Assistant or an intermediary machine (physical or virtual). It does require that the
clone be detached from the intermediary virtual machine, if that was used.
This chapter includes:
•
Clones for GSX Server and Workstation
•
Clones for ESX Server
•
Using the Clone in a Virtual Machine
•
Application Compatibility
•
About This Manual
Note: While the P2V Assistant simplifies the physical to virtual migration process by
automating several steps, it is not intended to serve as an unattended migration tool
for casual use. Migration is complex — and whether using the P2V Assistant or not,
the physical to virtual migration process should only be attempted by technical
system administrators with a good understanding of and familiarity with operating
systems, drivers, imaging tools, and VMware products.
8
www.vmware.com
p2v_manual.book Page 9 Thursday, July 17, 2003 11:32 AM
C H A P T E R 1 Introducing VMware P2V Assistant
Note: We strongly recommend attending VMware server training and P2V training
before employing this tool on a large-scale or mission-critical basis. All users, at a
minimum, must have passed the appropriate P2V Assistant training and/or
certification courses as specified in your End User License Agreement.
Clones for GSX Server and Workstation
The VMware P2V Assistant is a migration tool. It creates virtual disk files that can
function as bootable disk devices or data disk devices in VMware virtual machines.
The following sections provide overviews of essential P2V Assistant migration
processes.
Create a Clone as a Bootable Disk
The VMware P2V Assistant copies all files that are resident on a physical source disk
attached to a source computer and stores them to a virtual disk file, also known as a
target disk. If an operating system is present in the source disk, that is also copied
onto the target disk. This target disk is the new clone.
The cloning process requires a P2V Assistant Boot CD that is used to boot the source
computer and retrieve identification information about the source computer. In
addition, the P2V Assistant must be running on a computer (physical or virtual) that is
not the source computer. For a description of creating a clone without the P2V
Assistant, refer to Use a Third Party Image to Create a Clone.
The resulting clone is contained in a set of files, in .vmdk format. This type of clone
can be used in VMware GSX Server and VMware Workstation virtual machines.
Physical source disk
P2V Boot CD
Clone as virtual disk
P2V assistant
Source disk
Source
computer
Computer
running P2V
Create clone
Target disk
filename.vmdk
Basic P2V Assistant Cloning Process
9
p2v_manual.book Page 10 Thursday, July 17, 2003 11:32 AM
VMware P2V Assistant User’s Manual
Even if a clone contains an operating system, the clone is not a bootable disk until a
P2V Assistant system reconfiguration has been performed and it is designated as the
system partition in the virtual machine. The system reconfiguration process
configures selected drivers so that the operating system can boot in a virtual machine.
To simplify the process, if the P2V Assistant detects a supported operating system
(Windows NT or Windows 2000) on the source disk, you are given the option to
perform a system reconfiguration on the new virtual disk (clone) after it is created and
populated with files copied from the source disk.
Basic Cloning with System Reconfiguration
If you did not opt to convert the virtual disk clone into a bootable disk at this time, you
can convert it later using the P2V Assistant. Refer to the following section, Reconfigure
an Existing Clone into a Bootable Disk.
Reconfigure an Existing Clone into a Bootable Disk
The P2V Assistant provides the option to perform a system reconfiguration on an
existing clone. The existing clone can have been created either by the P2V Assistant
or a third party imaging tool.
When you start the P2V Assistant, you are asked to identify the existing clone, then the
P2V Assistant performs the system reconfiguration. For this activity, since the clone is
already created, you do not need the P2V Assistant Boot CD, source computer, or
source disk device. The target disk, which is the clone, is both the source file and the
target file.
Reconfiguring an Existing Clone
10
www.vmware.com
p2v_manual.book Page 11 Thursday, July 17, 2003 11:32 AM
C H A P T E R 1 Introducing VMware P2V Assistant
After the clone is created, detach the clone, if needed, then create the new virtual
machine and attach the clone to the new virtual machine. If you performed a system
reconfiguration, the clone can be the boot disk for the virtual machine. Refer to the
chapter, Creating a New Virtual Machine.
Use a Third Party Image to Create a Clone
Running a third party imaging, backup, or restore tool from within a virtual machine,
you can create a virtual disk that is compatible with VMware virtual machines. This
process does not use the P2V Assistant, but does create a virtual disk that then can be
reconfigured by the P2V Assistant.
The process requires a helper virtual machine with a target virtual disk attached to it,
and the third party tool with its associated third party image. The target virtual disk
must be an additional disk attached to the virtual machine and cannot be the virtual
machine’s boot disk. The helper machine is an intermediary machine that allows the
P2V Assistant to interact with the target machine’s virtual disks.
Use the third party tool to create an image of the physical disk you want to use as a
virtual disk. If the tool requires it, copy that image to the helper virtual machine. From
the helper virtual machine, run the third party tool and direct the tool to use the
image it created to populate the target virtual disk. Depending upon the tool, this
process could be called, expand, deploy, restore, and so on. Also as required by the
third party tool, you might be asked boot up the virtual machine with a DOS or
Windows boot disk or a third party CD. By running the tool from within a virtual
machine, the tool behaves as it would in a physical environment, except that it
populates a virtual disk rather than a physical disk. If any data exists on the target
virtual disk, it is overwritten.
Prepare helper VM
Create third party image
Third party tool
Source disk
w/ operating system
Populate target disk
Helper virtual machine
Source computer
Third
party
image
Third
party
tool
Third party
image
Populated
target disk
Disk w/OS
running VM
Target disk
to populate
Creating a Clone from a Third Party Image
11
p2v_manual.book Page 12 Thursday, July 17, 2003 11:32 AM
VMware P2V Assistant User’s Manual
After the clone is created through the third party tool, and if appropriate, perform a
system reconfiguration using the (advanced) direct to disk P2V Assistant option to
convert the virtual disk into a bootable disk. Refer to Reconfigure an Existing Clone
into a Bootable Disk. When the clone is complete, detach it from the helper virtual
machine, then create the new virtual machine and attach the clone. If you performed
a system reconfiguration, the clone can be the boot disk for the virtual machine. Refer
to the chapter, Creating a New Virtual Machine.
Clones for ESX Server
The process for creating clones compatible with ESX Server virtual machines differs in
various aspects from the process for creating clones compatible with GSX Server or
Workstation virtual machines. The primary difference is that for ESX Servers, the P2V
Assistant must be run inside a helper machine that is a virtual machine in order to
properly work with virtual disks. This process can be used with GSX Server and
Workstation virtual machines, but must be used with ESX Server virtual machines.
This section introduces the some of the options available for creating clones for ESX
Server virtual machines. Some of these options use the P2V Assistant, other options
use a third party cloning tool running in an ESX Server virtual machine.
Create a VMware ESX Server Clone Using the Direct to Disk
Device Mode
When you create a clone directly to a disk device the P2V Assistant populates an
existing target disk with the source disk data. This is a useful mechanism for creating
an ESX Server compatible, .dsk formatted target disk from a physical source disk using
the P2V Assistant.
In order to do this the target disk must be attached as a secondary disk to an existing
ESX Server virtual machine. The virtual machine must have a functional Windows
2000/XP operating system on its primary disk and the P2V Assistant installed in it.
12
www.vmware.com
p2v_manual.book Page 13 Thursday, July 17, 2003 11:32 AM
C H A P T E R 1 Introducing VMware P2V Assistant
When directed to use the direct to disk device option, the P2V Assistant searches for
local disks. You select which disk to use, and the P2V Assistant uses the designated
disk as the clone. If any data is stored on this target disk, it is overwritten.
Physical source disk
ESX helper VM
Clone as ESX virtual disk
Source computer
ESX server helper
virtual computer
P2V boot CD
P2V
assistant
Create clone
Source disk
w/operating system
Target disk
filename.dsk
Disk w/OS
running VM
Target disk to
receive clone
Cloning Direct to Disk in a VMware ESX Server Virtual Machine
If the source disk contains a supported operating system, the P2V Assistant displays
the option to perform a system reconfiguration on the new clone. The clone
produced, with or without the system reconfiguration is in ESX Server, .dsk, format.
If you did not opt to convert the virtual disk clone into a bootable disk at this time, you
can convert it later using the P2V Assistant. Refer to the section, Reconfigure an
Existing ESX Server Clone into a Bootable Disk.
To actually use the .dsk, power off the helper virtual machine running the P2V
Assistant, then detach the .dsk and attach it to the virtual machine where it will be
used.
Cloning and Reconfiguring Direct to Disk in a VMware ESX Server Virtual Machine
13
p2v_manual.book Page 14 Thursday, July 17, 2003 11:32 AM
VMware P2V Assistant User’s Manual
Reconfigure an Existing ESX Server Clone into a Bootable Disk
The P2V Assistant provides an option to perform a system reconfiguration on an
existing clone. The existing clone can have been created either by the P2V Assistant
or a third party imaging tool. It must be in .dsk format to be reconfigured as a
bootable disk in an ESX Server virtual machine.
Reconfiguring an ESX Server clone for use as a bootable disk involves several steps.:
•
Start with a helper virtual machine running either Windows 2000/XP as a guest
operating system. It must have the P2V Assistant installed in it. This virtual
machine must be in ESX Server format.
•
Then, attach the .dsk clone as an additional virtual disk to the helper virtual
machine using the ESX Server Management Interface’s configuration editor and
power on the virtual machine.
•
Finally, run the P2V Assistant from within the virtual machine and select both the
System Reconfiguration and the Direct to Disk Device options.
For this activity, since the clone is already created, you do not need the P2V Assistant
Boot CD, source computer, or source disk device. The target disk, which is the clone, is
both the source file and the target file.
Reconfiguring an Existing ESX Server Clone
Convert a Third Party Image to an ESX Server Formatted Clone
Running a third party imaging, backup, or restore tool within an ESX Server virtual
machine, you can create a virtual disk that is compatible with VMware ESX Server
virtual machines. This process does not use the P2V Assistant, but does create a virtual
disk that then can be reconfigured by the P2V Assistant.
This process is the same as the process outlined in Use a Third Party Image to Create a
Clone, except that the virtual machine is running on an ESX Server. The resulting
virtual disk is in ESX Server compatible format, a .dsk file.
14
www.vmware.com
p2v_manual.book Page 15 Thursday, July 17, 2003 11:32 AM
C H A P T E R 1 Introducing VMware P2V Assistant
The process requires a helper virtual machine with a target virtual disk attached to it,
and the third party tool with its associated third party image. Note that the target
virtual disk is an additional disk attached to the virtual machine and is not the virtual
machine’s boot disk.
Use the third party tool to create an image of the physical disk you want to use as a
virtual disk. If the tool requires it, copy that image to a network share, the helper ESX
Server virtual machine or other device accessible by your third party tool. From the
helper virtual machine, run the third party tool and direct the tool to use the image it
created to populate the target virtual disk. Depending upon the tool, this process
could be called, expand, deploy, restore, and so on. By running the tool from within a
virtual machine, the tool behaves as it would in a physical environment, except that it
populates a virtual disk rather than a physical disk. If any data existed on the target
virtual disk, it is overwritten.
Create third party image
Prepare ESX helper VM
Third party tool
Source disk
w/ operating system
Populate target disk
ESX helper virtual machine
Source computer
Third
party
image
Third
party
tool
Third party
image
Disk w/OS
running VM
Target disk
to populate
Populated
target disk
filename.dsk
Creating a VMware ESX Server Clone from a Third Party Tool
After the clone is created through the third party tool perform a system
reconfiguration using the (advanced) direct to disk P2V Assistant option to convert
the virtual disk into a bootable disk. Refer to Reconfigure an Existing ESX Server Clone
into a Bootable Disk.
Convert a .vmdk Disk File to VMware ESX Server Format
If you have a clone in .vmdk format and wish to use it in a VMware ESX Server virtual
machine, convert it to .dsk format.
The VMware ESX Server provides two tools that can perform this conversion, the
graphical Management Interface and a vmkfstools command line interface.
If the .vmdk disk was already converted for use as a bootable disk (had a system
reconfiguration applied), then the converted .dsk disk is also ready for use as a
bootable disk.
15
p2v_manual.book Page 16 Thursday, July 17, 2003 11:32 AM
VMware P2V Assistant User’s Manual
If the .vmdk disk was not reconfigured, then you use the P2V Assistant to perform a
system reconfiguration to convert the .dsk into a bootable disk. Refer to Reconfigure
an Existing Clone into a Bootable Disk.
Using the Clone in a Virtual Machine
To function in a virtual machine, the virtual disk must be in a format that corresponds
to the type of virtual machine you are going to use.
•
VMware GSX Server and VMware Workstation use .vmdk virtual disks. These disks
are automatically created through the P2V Assistant.
•
VMware ESX Server uses a .dsk virtual disk.
To function as the boot disk in a virtual machine, it must also:
•
Contain a supported operating system and associated service pack.
•
Have been reconfigured, through the P2V Assistant, to meet virtual machine
driver requirements.
To add a clone to a virtual machine:
1. If the clone is going to be used as the boot disk in a virtual machine, ensure that
it has been reconfigured to do so.
The P2V Assistant does this when the clone was created or after the clone is
created, as directed.
2. Run your selected VMware product, VMware ESX Server, VMware GSX Server, or
VMware Workstation interface.
3. Create a new virtual machine without a virtual disk.
4. Attach the reconfigured clone to the new virtual machine as the primary disk.
Note: You must match the virtual disk format to the virtual machine. That is
.vmdk disks for VMware GSX Server, or VMware Workstation virtual machines and
.dsk disks for VMware ESX Server virtual machine.s
5. Boot the virtual machine.
If the disk contains a supported operating system and has been reconfigured,
the machine will boot from the new disk.
6. Perform the cleanup tasks on the virtual machine.
Depending upon the resident operating system, make relevant device and
network configuration changes. Refer to Configuring the Guest OS and Testing
the New Virtual Machine for specific information.
16
www.vmware.com
p2v_manual.book Page 17 Thursday, July 17, 2003 11:32 AM
C H A P T E R 1 Introducing VMware P2V Assistant
About the New Virtual Machine
The virtual machine (target computer) that you create from a source computer
contains an exact copy of the disk state from the source computer, with the exception
of some hardware-dependent drivers and sometimes the mapped drive letters.
Settings from the source computer that remain identical include:
•
Operating system configuration (computer name, security ID, user accounts,
profiles and preferences, and so forth)
•
The number of disks, partition layout, and drive letters (however, if an imaging
tool is used, it must also preserve the drive lettering)
•
Applications and data files
•
Each disk partition's volume serial number
Since the target computer and the source computer have the same identities (name,
SID, and so on), running both on the same network can result in conflicts. If you are
migrating a source computer into a target computer as part of server consolidation,
and are planning to retire or redeploy the source computer, be aware of this issue and
do not run both the source computer and target computer with the cloned disk on
the same network at the same time.
If you are using the P2V process as a way to migrate virtual machines, you can resolve
the duplicate ID problem by using additional tools, such as the Windows 2000 System
Preparation Tool (Sysprep). For example, if you are using the P2V Assistant to test the
viability of running a physical machine as a virtual machine without first
decommissioning the original machine.
17
p2v_manual.book Page 18 Thursday, July 17, 2003 11:32 AM
VMware P2V Assistant User’s Manual
Application Compatibility
Most migrated applications should function correctly in the target computer because
their configuration and data files are replicated and are found at the same locations
(paths) as on the source computer. Applications that depend on the specific
characteristics (such as the serial number or the device manufacturer) of the
underlying hardware might not work.
When troubleshooting a malfunctioning application, keep in mind the following
hardware changes when migrating to a virtual machine:
•
The CPU model and serial number (if activated) may be different; they
correspond to the physical computer hosting the virtual machine.
•
The network interface card (NIC) is different (AMD™ PCNet™ or VMXnet NIC) with
a different MAC address. Each interface’s IP address has to be individually
reconfigured.
•
The graphics card is different (VMware SVGA card).
•
The number of disks and partitions is the same, but each disk device has a
different model and manufacturer strings.
•
The primary disk controller(s) is different (BusLogic SCSI over IDE or other SCSI).
•
Applications that depend on devices that are not available from within a virtual
machine may not work.
About This Manual
This manual describes how to use the VMware P2V Assistant, how to install it and use
it to create virtual disks for use as archives and/or for use with VMware virtual
machines. Contents include:
18
•
Chapter 1, Introducing VMware P2V Assistant
•
Chapter 2, Installing VMware P2V Assistant
•
Chapter 3, Creating Clones
•
Chapter 4, Reconfiguring Clones
•
Chapter 5, Creating a New Virtual Machine
•
Chapter 6, Configuring the Guest OS and Testing the New Virtual Machine
•
Chapter 7, Troubleshooting
www.vmware.com
p2v_manual.book Page 19 Thursday, July 17, 2003 11:32 AM
C H A P T E R 1 Introducing VMware P2V Assistant
Intended Audience
The P2V Assistant helps you in the physical to virtual disk migration process by
automating several steps. However, it is not intended to serve as an unattended
migration tool for casual use. The physical to virtual migration process is complex and
should only be attempted by technical system administrators with a good
understanding of, and familiarity with, operating systems, drivers, imaging tools,
common operating system concepts (such as a hardware abstraction layer [HAL]), and
VMware products.
This version of the VMware P2V Assistant is in Beta. You are encouraged to take P2V
training, offered by VMware Professional Services, before using this application.
VMware partners must pass Certification by VMware before using this application.
Additional Resources
Refer to the following for additional information.
•
General VMware Web site — http://www.vmware.com
•
Log case issues Web site — http://www.vmware.com/support
•
New features requests email address — [email protected]
•
Education services email — [email protected]
•
Technical support Web site — http://www.vmware.com/support
•
Consulting services email — [email protected]
Document History
This manual is revised with each release of the product or when deemed necessary. A
revised version can contain minor or major changes.
Release
Date
FCS
July 21, 2003
19
p2v_manual.book Page 20 Thursday, July 17, 2003 11:32 AM
VMware P2V Assistant User’s Manual
20
www.vmware.com
p2v_manual.book Page 21 Thursday, July 17, 2003 11:32 AM
2
CHAPTER 2
Installing VMware P2V
Assistant
21
p2v_manual.book Page 22 Thursday, July 17, 2003 11:32 AM
VMware P2V Assistant User’s Manual
Installing the VMware P2V Assistant
This chapter includes:
•
Installation Requirements
•
Installing the VMware P2V Assistant
•
Uninstalling and Reinstalling the VMware P2V Assistant
Installation Requirements
The following sections list the software requirements for cloning a source computer
into a target computer, including requirements for the P2V Assistant machine.
Requirements for the Source Computer
The source computer that you are cloning into a target computer must run one of the
following operating systems:
•
Microsoft® Windows NT® Server 4.0 or Microsoft Windows NT 4.0 with service
pack 4 or later.
Note: You must have service pack 4 or later installed; the base operating system
and service packs 1, 2, and 3 are not supported for cloning into a virtual machine.
You can determine the service pack level on your Windows NT machine by
reading the text in the blue screen that appears when booting your computer or
running winver at the command line.
•
Microsoft® Windows® 2000 Professional, Microsoft Windows 2000 Server,
Microsoft Windows 2000 Advanced Server, with service packs 1 or later.
Note: You must have service pack 1 or later installed; the base operating system
is not supported for cloning into a virtual machine.
You can determine the service pack level on your Windows 2000 machine by
right-clicking the My Computer icon and choosing Properties. The service pack
level appears on the General tab.
You also need:
•
A copy of the service pack that is installed on the source computer:
If you applied a service pack on the source computer, you need a copy of that
service pack in the form of an official Microsoft Service Pack Self-Extracting
Archive.
22
www.vmware.com
p2v_manual.book Page 23 Thursday, July 17, 2003 11:32 AM
C H A P T E R 2 Installing VMware P2V Assistant
The P2V Assistant guides you to the official Microsoft Service Pack Self-Extracting
Archive when you click the I don’t have the service pack archive. Help me find
it on the Web... button. This button takes you to the following Web page:
www.vmware.com/download/p2v.html
Note: If you are presented with a choice of installing the service pack using the
express installation or the network install icon, be sure to select the network
installation. Otherwise, the reconfiguration will fail.
Caution: Do not select Open and install the service pack. Click Save and
download the service pack. You specify the location of this service pack when
running the P2V Assistant application.
Service packs are also distributed in a pre-expanded form on a CD. However, the
VMware P2V Assistant currently does not support that format.
Requirements for the VMware P2V Assistant Machine
The VMware P2V Assistant machine is a physical or virtual machine that contains the
P2V Assistant application. This machine performs the cloning operation and saves the
new cloned virtual disk in a location you specify. The P2V Assistant machine also
performs the reconfiguration phase on cloned disks containing a supported
operating system.
You install the VMware P2V Assistant on a physical machine or a virtual machine
running a Windows 2000 or XP operating system. For example, you can install it in a
workstation, a laptop, or in a virtual machine running on a dGSX Server, ESX Server, or
Workstation.
Note: It is recommended that you do not install the VMware P2V Assistant directly
on a business critical GSX Server host machine because the P2V Assistant can
consume memory and CPU resources.
The machine, on which VMware P2V Assistant is installed, should meet the following
requirements:
•
Have a Windows 2000 Professional, Windows 2000 Server, Windows 2000
Advanced Server (any service pack versions), or Windows XP operating system.
•
Have at least 10MB free disk space for the application, 200MB free disk space for
temporary files, and available disk space for the new virtual disk(s).
•
Have access to the Microsoft Service Pack Self-Extracting Archive. You can either
store the archive in the machine itself, or in a network drive accessible from the
machine.
23
p2v_manual.book Page 24 Thursday, July 17, 2003 11:32 AM
VMware P2V Assistant User’s Manual
•
When you are using a helper virtual machine to create a clone or reconfigure a
clone, the virtual machine must run on an appropriate virtualization platform:
• VMware ESX Server™, all versions
• VMware GSX Server™, all versions
• VMware Workstation 3.2
Note: Do not have the P2V Assistant create a clone disk from within VMware
Workstation 4.0. The P2V Assistant does not support Workstation 4.0 virtual disk
formats. You can however, create a disk outside of Workstation 4.0 and attach it
to the helper virtual machine running in Workstation 4.0.
•
Have at least one NTFS volume on a basic disk.
•
Be on the network.
•
It is also recommended that the machine has internet access, this might be
needed for downloading service packs or hot fixes.
Supported Versions of VMware Products
As of this writing, you can clone a physical machine into a virtual machine for use with
the following VMware products:
•
VMware Workstation 3.x
•
VMware Workstation 4.0
Note: Any virtual machine created using a P2V Assistant virtual disk, runs in
legacy mode. Which means that the virtual machine does not take advantage of
Workstation 4.0's advanced hardware features, such as ACPI, until the virtual
machine disk and hardware are upgraded in Workstation 4.0.
24
•
VMware GSX Server 2.x
•
VMware ESX Server 1.5.1 or later
www.vmware.com
p2v_manual.book Page 25 Thursday, July 17, 2003 11:32 AM
C H A P T E R 2 Installing VMware P2V Assistant
Installing the VMware P2V Assistant
Install the VMware P2V Assistant onto the VMware P2V Assistant machine. This can be
a physical machine or virtual machine.
Follow these steps to install the VMware P2V Assistant:
1. Obtain the latest version of the VMware P2V Assistant.
Check with your VMware Sales representative.
2. Log on to the P2V Assistant machine.
Two user types are acceptable: as the Administrator user or as a user who is a
member of the Administrators group.
The P2V Assistant machine is a physical or virtual machine where you install the
VMware P2V Assistant application. For more information on this machine, see
Requirements for the VMware P2V Assistant Machine on page 23.
3. Start the VMware P2V Assistant installer.
With the P2V Assistant installer software on the Application CD or downloaded
to a local location, do one of the following:
• From the Start menu, choose Run. Browse to the directory where you saved
the installer file. Double-click on the setup.exe file.
• Navigate through your file manager interface, such as Windows Explorer, to
the folder that contains the installer file. Double-click the setup.exe file.
4. Proceed through the installer, answering the prompts as indicated.
• Begin the installation. Click Next.
• Acknowledge the license agreement. Click Yes.
25
p2v_manual.book Page 26 Thursday, July 17, 2003 11:32 AM
VMware P2V Assistant User’s Manual
• Enter user identification and user access information. Click Next.
Type your name, your company’s name, and your product’s serial number in
the respective fields. The serial number can be found on your software
registration email or contact your Professional Services Organization
representative.
• Select the P2V Assistant installation location. Click Next.
Accept the default folder or select a folder by clicking Browse button. If the
selected directory does not exist, the installer creates it for you.
Note: You must install the P2V Assistant on a local drive, not a network drive.
• Select the P2V Assistant icon location. Click Next.
Various messages indicating the progress of the P2V Assistant installation are
displayed. The P2V Assistant checks the machine it is installed on for a
compatible Windows Script version.
5. Close the P2V Assistant installer. Click Finish.
You have completed P2V Assistant installation.
Uninstalling and Reinstalling the
VMware P2V Assistant
Uninstall or reinstall the VMware P2V Assistant through the Add/Remove Programs
utility in your Windows Control Panel.
1. Uninstall the previous version.
Run the installer. Select the Add/Remove program from your Windows Control
panel and select VMware P2V Assistant.
2. Reboot your machine.
3. Install the P2V Assistant. See Installing the VMware P2V Assistant.
26
www.vmware.com
p2v_manual.book Page 27 Thursday, July 17, 2003 11:32 AM
3
CHAPTER 3
Creating Clones
27
p2v_manual.book Page 28 Thursday, July 17, 2003 11:32 AM
VMware P2V Assistant User’s Manual
Creating Clones
This chapter describes how to use the VMware P2V Assistant to create a clone of a
source physical disk on a target machine as a target virtual disk.
This chapter includes:
•
Cloning and Configuring Considerations
•
ESX Server versus GSX Server and Workstation Compatible Clones
•
Cloning a Disk Using a Third Party Tool
•
Cloning a Disk Using the P2V Assistant
Cloning and Configuring Considerations
When configuring the virtual disks, match the number of virtual disks to the number
of physical disks on the source computer. Regardless of the type of the source disk,
the P2V migration process generally creates a SCSI virtual disk. The exception might
be if you use the advanced Direct to Disk option with GSX Server or Workstation and
setup an IDE disk as the target disk. ESX Server always limits the choices to a SCSI disk.
Note: If your source computer has multiple disks, you need to run the VMware P2V
Assistant separately for each physical disk.
During the disk cloning process, only the actual data is copied over. For example, if
you have a 18GB physical disk, but only have 4GB of actual data, the P2V Assistant
copies over 4GB of data during the migration process.
•
The size of each virtual disk must be large enough to hold the data from its
physical counterpart. In general, both the physical and virtual disks should be
the same size.
•
You can clone to a virtual disk that is larger than the source physical disk.
•
You can clone to a virtual disk that is smaller than the source physical disk.
•
You have the option, on your virtual disk, to resize and/or not include partitions
that exist on the source disk.
ESX Server versus GSX Server and
Workstation Compatible Clones
Depending upon the target disk you select, when you clone a physical disk, the P2V
Assistant either creates a .vmdk file or populates an existing .dsk disk. Refer to
Introducing VMware P2V Assistant for additional information.
28
www.vmware.com
p2v_manual.book Page 29 Thursday, July 17, 2003 11:32 AM
C H A P T E R 3 Creating Clones
Cloning a Disk Using a Third Party Tool
If you are not using the P2V Assistant to create the clone you can use a third party tool,
such as Symantec Ghost or Powerquest Image Center, running in a virtual machine to
create the clone.
When you create a clone using a third party tool there are specific requirements:
•
You must run the third party tool from within a helper virtual machine.
•
The helper virtual machine must have an attached virtual disk that is not the
virtual machine’s boot disk.
•
You direct the third party tool to populate the attached virtual disk.
•
If required by the third party tool, you may need to copy the third party tool’s
source file, (backup, .gho, .pqi), locally to a network share, the helper virtual
machine, or other device accessible by your third party tool.
Note: The P2V Assistant cloning feature supports a limited set of hardware
configurations, (a disk controller/NIC combination for the source computer). The P2V
Assistant Boot CD contains a file in Excel, (.xls), format that lists hardware configuration
that have been successfully tested with the Boot CD. If the cloning functionality fails,
using a third party tool is an alternative for creating a clone.
The following is a general description of the general process for creating a clone using
a third party tool.
1. Prepare the source machine as needed by the third party tool. For example:
Create a network boot disk with an appropriate NIC driver. Insert the network
boot disk, power the source machine on, and map a network drive.
2. Use the third party tool to create an image file.
With Ghost this is the .gho file. With PowerQuest this is the .pqi file. Create the
image onto a network share.
3. From your VMware virtualization platform add a target virtual disk to a virtual
machine that you create on your virtualization platform.
For information on supported virtualization platforms, refer to Installation
Requirements on page 22.
4. Create network boot disk with AMD PCInet driver (the VMware virtual NIC), if you
plan to run the image restore tool in DOS.
Note: The helper virtual machines’ guest operating system must be either
Windows XP or Windows 2000. The guest operating system cannot be set to
29
p2v_manual.book Page 30 Thursday, July 17, 2003 11:32 AM
VMware P2V Assistant User’s Manual
DOS, though per a third party requirement, the helper virtual machine can be
temporarily booted from a DOS floppy.
5. Install the third party tool in the helper virtual machine.
6. Copy the image file created by the third party tool to a network share, the helper
virtual machine, or other device accessible by your third party tool.
This step may or may not be required depending upon the specific third party
tool and version of the tool you are using. The tool may be able to use a network
accessible image file or it may require the image file is local. If needed, use the
network boot disk and map a network share.
7. Restore the image to the virtual disk.
Using a network restore and the third party imaging tool.
• Boot the virtual machine using the network boot disk.
• Map network shares as necessary to access the physical image previously
taken as well as the imaging tool
• Run the imaging tool.
Optionally, restore the image to the virtual disk, using either of the following:
• An ISO image to disk restore
• A disk to disk restore
Note: Typically, the third party tool requires that you run the restore in DOS
mode on a virtual machine.
8. If you wish to perform a system reconfiguration run the P2V Assistant from
within the helper virtual machine.
Prepare the restored clone using either method:
• Detach the disk and attach it to the helper virtual machine running the P2V
Assistant.
• Reboot the virtual machine, if the virtual machine you used also has P2V
Assistant installed.
Note: Use caution with the reboot method to ensure you do not overwrite
the helper virtual machine primary booting disk.
Refer to the chapter, Reconfiguring Clones, for additional information.
30
www.vmware.com
p2v_manual.book Page 31 Thursday, July 17, 2003 11:32 AM
C H A P T E R 3 Creating Clones
Cloning a Disk Using the P2V Assistant
The following describes how to create a virtual disk on a target machine from a
physical disk on a source machine using the P2V Assistant.
Preparing the Source Disk
1. Assemble the pieces.
• Consider, prior to cloning, disabling any services on the source machine that
may not be relevant on the new target virtual machine.
• Have the Administrator passwords for the source machine at ready reference.
• Obtain the P2V Assistant Boot CD from your VMware Professional Services
Organization (PSO) representative.
Note: The Excel, P2V_TEST.xls, provides a list of tested hardware. Please
review as needed.
• Shutdown the source machine gracefully.
2. Boot the source machine from the VMware P2V Assistant CD.
Insert the VMware P2V Assistant Boot CD in the CD-ROM drive, then power on
the source computer. If necessary, enter the BIOS setup screen and set the CDROM as the first boot device.
3. Accept the Boot CD wizard. Press Spacebar on Continue to accept on Continue
to accept to select OK.
Press Spacebar or F12 to continue.
31
p2v_manual.book Page 32 Thursday, July 17, 2003 11:32 AM
VMware P2V Assistant User’s Manual
4. Note the troubleshooting tip, as needed.
Please note the support file information including its location. In the event that
you need to make a support request regarding the P2V Assistant Boot CD you
will need to provide a copy of this support file.
Press Spacebar or F12 to continue.
5. Select a network interface to setup networking.
If the source computer has multiple ethernet cards the P2V Assistant Boot CD
detects all the disks and network cards it can and lists them. If the source
machine has a RAID controller, the disks detected are logical disks.
Press Tab to select the appropriate card, then press Spacebar or F12 to continue.
32
www.vmware.com
p2v_manual.book Page 33 Thursday, July 17, 2003 11:32 AM
C H A P T E R 3 Creating Clones
6. Verify all devices detected.
• No indicates all disks and network cards have already been detected correctly
in the previous screen. The P2V Assistant Boot CD continues to the next step.
• Yes indicates all devices might not have been detected correctly and you
want to try and load all the modules present on the Boot CD. When you select
Yes the P2V Assistant Boot CD loads all modules and then refreshes the
devices screen with any new devices it detects. A progress message displays
when this is selected, then you are returned to the Disk and Network Devices
Detected screen.
Press Tab to your selection, then press Spacebar or F12 to continue.
Note: Selecting Yes might crash the P2V Assistant Boot CD. If this happens
reboot and select No when the prompt is displayed again.
7. Define the network settings.
Press Spacebar to select DHCP or press Tab and type the appropriate
information to specify specific IP address information. Press Tab to highlight the
OK button. Press F12 to accept your settings.
33
p2v_manual.book Page 34 Thursday, July 17, 2003 11:32 AM
VMware P2V Assistant User’s Manual
8. Record the source computer IP address and port number.
After the source computer finishes booting the screen displays the computer’s
disks, IP address, and port number. You will need this information when you use
the VMware P2V Assistant.
Starting the P2V Assistant and the Cloning Process
1. Assemble the pieces.
• Install the P2V Assistant in the helper machine, if it is not installed already. This
can be a physical machine or a virtual machine.
• The helper machine must be able to reach the source machine through the
network. Have the source machine booted with the P2V Assistant Boot CD.
Refer to the previous section, Preparing the Source Disk.
• Identify and locate any Microsoft Windows Service Packs and/or Hotfixes you
have installed on your source machine. Do not rename the Service Pack
names.
• Identify and locate the target virtual disk.
This can be a disk attached to the helper virtual machine (if running the helper
as a virtual machine), or it can be an actual .vmdk virtual disk file accessible
by the helper machine. Preferably, the target file is local to the P2V Assistant
and not on the network.
2. Start the VMware P2V Assistant.
Double-click the VMware P2V Assistant icon or choose Start > VMware >
VMware P2V Assistant. Refer to Introducing VMware P2V Assistant for
information on P2V Assistant machine requirements.
34
www.vmware.com
p2v_manual.book Page 35 Thursday, July 17, 2003 11:32 AM
C H A P T E R 3 Creating Clones
3. If it is displayed, acknowledge or view the license information. Click Ok.
If you wish to view the license information, click the License Info button. Refer to
step 4.
4. Optionally, verify or update the license and serial number.
If your license is expiring, click the Version and License Info button from the
cloning task option screen or click the License Info button from the license
warning screen.
35
p2v_manual.book Page 36 Thursday, July 17, 2003 11:32 AM
VMware P2V Assistant User’s Manual
To enter a new serial number, click the Enter New Serial Number button.
Type the new serial number in the New Serial Number field. Click Submit to
accept the new number. Click Don’t Enter New Serial Number to cancel the
entry. Click Done to continue.
5. Select the P2V Assistant cloning option. Click Next.
36
www.vmware.com
p2v_manual.book Page 37 Thursday, July 17, 2003 11:32 AM
C H A P T E R 3 Creating Clones
The choices are:
• Clone a source computer’s physical disk to a virtual disk
This option creates a clone of a physical disk.
This selection obtains information about the source computer’s operating
system, applicable service pack(s), and disk(s), then performs the virtual
migration process. This process determines if the source disk contains a
supported operating system. If a supported operating system is found you are
given the choice to have the P2V Assistant continue with a system
reconfiguration after is has created the clone.
• Perform a System Reconfiguration on an existing disk that contains an
operating system
Select this option when you have an existing clone and your want to alter the
disk to serve as the primary boot disk in a new standalone virtual machine.
Refer to the chapter, Reconfiguring Clones.
Identifying the Source Disk
If you do not see the Source Computer Identification screen, you selected the system
reconfiguration option. Proceed to the chapter, Reconfiguring Clones.
1. Enter the source computer identification information, then click Next.
37
p2v_manual.book Page 38 Thursday, July 17, 2003 11:32 AM
VMware P2V Assistant User’s Manual
The fields indicate:
• IP address — Enter the IP address or the hostname of the source computer.
Refer to the information you recorded in Step 7.
• Port Number — Enter the port number that P2V Assistant uses to perform the
cloning operation. The port number is listed on the screen on the source
computer after you booted using the P2V Assistant Boot CD. The source
computer port number and the port number listed in this window must
match. For example, if you used port 5000 on the source computer you must
specify 5000 in this window.
P2V Assistant connects to the source computer.
2. Select the source disk for the P2V migration, then click Next.
If it is not already highlighted or there is more than one hard disk to choose from,
select the desired hard disk by clicking on your choice.
Note: You can only migrate one physical disk at a time.
This window lists the partitions on the disk to be cloned.
The P2V Assistant flashes progress messages.
38
www.vmware.com
p2v_manual.book Page 39 Thursday, July 17, 2003 11:32 AM
C H A P T E R 3 Creating Clones
3. Verify that the disk volume information is correct. Click Next.
Note: If the P2V Assistant finds a disk volume containing an unsupported file
system on the source disk, the P2V Assistant creates the target disk volume, but
the volume’s data is not copied into it. The target disk volume remains empty
and unformatted.
39
p2v_manual.book Page 40 Thursday, July 17, 2003 11:32 AM
VMware P2V Assistant User’s Manual
Choosing a System Reconfiguration Option
If the P2V Assistant does not find a supported operating system on the source disk
being cloned you do not see the System Reconfiguration screen. Skip to the next
section, Selecting Disk Cloning Options on page 40.
1. Select whether to perform a system reconfiguration of the operating system on
the cloned disk.
This screen is displayed if a supported operating system, which can be
reconfigured, is found.
• No — Copies over disk data without any modification to system files or
registry settings. Select this option to archive disk data.
• Yes — Copies over disk data and as applicable, reconfigures system files and
registry settings in the virtual disk. This option makes the virtual disk bootable.
Click the appropriate radio button, then click Next.
40
www.vmware.com
p2v_manual.book Page 41 Thursday, July 17, 2003 11:32 AM
C H A P T E R 3 Creating Clones
Selecting Disk Cloning Options
1. Select the disk cloning options, as needed, then click Next.
Options not applicable to the current cloning are not listed.
• Do not copy temporary system swap files such as pagefile.sys and
hiberfil.sys
Reduces disk cloning time since the guest operating system will automatically
re-create those files once it runs in the migrated virtual machine.
• Do not copy temporary internet files
Does not copy the contents of all user folders containing temporary internet
files. The contents of these directories typically include cached web page files,
pictures, and cookies.
On Windows 2000, those directories have the following path:
X:\Documents and Settings\<username>\Local Settings\Temporary
Internet Files\
On Windows NT, they are:
X:\Profiles\<username>\Local Settings\Temporary Internet Files\
41
p2v_manual.book Page 42 Thursday, July 17, 2003 11:32 AM
VMware P2V Assistant User’s Manual
Specifying the Target Disk
The Select a target disk screen displays two types of target disk options and a check
box for optionally adjusting the target disk partitions.
1. Create a virtual disk.
This is one option for target disk types. Choose this or the option in step 2.
• Select the radio button: Create a virtual disk (.vmdk) file.
Typically, you select this option to create a virtual disk for use with VMware
GSX Server or Workstation virtual machines.
Creates a .vmdk virtual disk file for use with VMware Workstation or GSX
Server. You may accept the default virtual disk size (the same as your source
disk) or specify a larger or smaller disk size. If you select a disk size that is
smaller than the source partitions, you are given the option to edit the size of
each partition to hopefully ensure each partition has sufficient space.
The .vmdk is created as a SCSI, not IDE type disk. Even if the source computer
uses IDE disks, the target virtual computer disks always use SCSI disks.
• Click Browse to specify the virtual disk path and file name, and manually type
in the disk size (capacity). Skip to step 3.
42
www.vmware.com
p2v_manual.book Page 43 Thursday, July 17, 2003 11:32 AM
C H A P T E R 3 Creating Clones
2. Use a direct disk device option.
This is one option for target disk types. Choose this or the option in step 1.
• Select the radio button: (Advanced) Use a direct disk device attached to this
computer.
Typically, you select this option to create a virtual disk for use with VMware
ESX Server virtual machines. Refer to Creating a New Virtual Machine with ESX
Server on page 65, for additional information.
You should be running the P2V Assistant in a virtual machine on an ESX Server.
This virtual machine must have at least two virtual disk drives. The direct disk is
attached as an additional drive to this virtual machine. If the direct disk
contains data, the data will be overwritten by the cloning process.
• Select the direct disk to use.
Select the appropriate direct disk radio button, then click OK. An updated
Select a target disk screen displays the disk capacity.
43
p2v_manual.book Page 44 Thursday, July 17, 2003 11:32 AM
VMware P2V Assistant User’s Manual
3. Select whether to adjust the partitions on the target disk.
Click the check box: Let me resize disk partitions and/or select which
partitions to copy.
This option allows you to adjust the size of each target partition and/or select
which partitions to copy from the source disk. The P2V Assistant provides a Disk
Partition Editor screen. See Setting the Partition Sizes for additional information.
4. Complete the Select a Target Disk screen.
• Select and answer any related prompts in the Select a target disk section of
the screen.
• Click or not the partition adjustment option, as needed.
• Click Next.
Setting the Partition Sizes
If you do not see either of the screens in this section, skip to the next section, Locating
Service Packs.
If you wish to resize your partitions or select which partitions are to be copied, click
Back on the current screen and repeat the steps in section, Specifying the Target Disk
on page 41. This time click the Let me resize disk partitions and/or select which
partitions to copy check box.
1. Select to edit the target partition size.
This screen is displayed if your target partitions are not large enough to receive
the data from the corresponding source partitions.
If you do not see this screen, skip to step 2.
Click Yes to edit the partition size.
Click No to not edit the partition size. Skip to the next section, Locating Service
Packs.
Note: If you select No, all the data from your source partitions will not be copied
to the target partitions.
44
www.vmware.com
p2v_manual.book Page 45 Thursday, July 17, 2003 11:32 AM
C H A P T E R 3 Creating Clones
Click Cancel to return to the previous screen. This allows you to select a different
target disk. Return to the previous section, Specifying the Target Disk.
2. Edit the partition size and/or select partitions to copy.
When the source disk is identified, the P2V Assistant analyzes the volumes (or
partitions) on the source disk to identify the partitions that are Windows
formatted. Volumes that are not Windows formatted are created as unformatted
volumes on the target disk.
When the target disk is identified, the P2V Assistant compares the space
available on the target disk with the data required per partition on the source
disk. If there is not enough space on the target disk to fit all the data in each
Windows formatted partition, the P2V Assistant displays this screen.
Available space per partition
Partition 1
Source
data
Target
before change
data
Target
after change
data
Partition 2
Partition 3
data
P2V automatic
proportional
adjustment.
Data truncated.
data
data
Partitions screen
manual
adjustment.
Source to Target Partition Data Allocation
Each row lists the data for a single partition. The Used MB identifies the amount
of space required for the data on that partition of the source disk. The total MB
indicates the total amount of space available to that partition of the source disk.
45
p2v_manual.book Page 46 Thursday, July 17, 2003 11:32 AM
VMware P2V Assistant User’s Manual
New Total MB indicates the space that will be allocated to that partition on the
target disk. The Copy column indicates whether the partition will be created on
the target disk. Red values indicate that the allocated space is insufficient for the
data to be copied. Red and blue values can be edited.
• Type directly into the fields to change the values.
If a value in a row is changed, the difference is added or removed from the row
directly below it. If the row directly below it does not have sufficient MBytes
available, the change is not allowed. ‘Borrowing’ (similar to a simple
subtraction carryover), is allowed only from the row immediately below. If you
want to distribute available MBytes, start from the bottom row and work your
way up the table.
• Type an N to not include the partition. Type a Y to include that partition.
• Click OK when finished.
46
www.vmware.com
p2v_manual.book Page 47 Thursday, July 17, 2003 11:32 AM
C H A P T E R 3 Creating Clones
Locating Service Packs
If you do not see the Service Pack screen, you did not choose to perform a system
reconfiguration, skip to the closing section, Completing the Cloning Process on
page 51.
1. Specify the location of the listed Service Pack.
The Microsoft Service Packs must be applied to your virtual disk as part of the
system reconfiguration to make the virtual disk bootable.
47
p2v_manual.book Page 48 Thursday, July 17, 2003 11:32 AM
VMware P2V Assistant User’s Manual
2. Download the Service Packs, if needed.
• Click the I don’t have the Service Pack archive button and the P2V Assistant
displays a browser with direct links to the appropriate Service Packs.
• Follow the links and listed directions as needed.
• When the Service Packs are downloaded, return to the Locate Service Pack
window.
3. Identify the Service Pack location to the P2V Assistant.
• Click the Browse button to specify the Service Pack location.
• When the Service Pack location is identified, click Next.
48
www.vmware.com
p2v_manual.book Page 49 Thursday, July 17, 2003 11:32 AM
C H A P T E R 3 Creating Clones
Locating Hot Fixes
If you do not see the Hot Fix screen, skip to the next section, Selecting System
Reconfiguration Options on page 49.
1. Download the required hotfix file(s).
If your source disk did not have hotfix patches applied, you do not see the
Required Hotfix screen.
For each listed hotfix, locate the hotfix file and accept it.
2. Download the required hot fix files. Click the Download button.
A browser opens to the Microsoft download page. Select the hotfix and save to
your location. Return to the P2V Assistant screen.
3. Locate the hotfix file locally. Click the Browse button and select the hotfix file.
The P2V Assistant adds the path to the hotfix file to the installer field.
4. Accept the hotfix file. Click Next.
49
p2v_manual.book Page 50 Thursday, July 17, 2003 11:32 AM
VMware P2V Assistant User’s Manual
Selecting System Reconfiguration Options
1. Select the system reconfiguration options.
Options not applicable to the current system reconfiguration are not listed.
Select the options, as needed. Click Next.
• Copy the VMware Tools package to the system volume without installing it
This option tells the P2V Assistant to only copy the VMware Tools installer to
the new virtual disk and to not execute the installer. After the cloning is
complete, to actually install the VMware Tools, run X:\VMware Tools
Installer\setup\setup.exe where X: is the system volume drive
letter of the guest operating system in the target virtual machine.
This option is useful when working with machines where the CD-ROM has
been disabled.
• Pre-install the VMware SVGA driver for smooth graphics and mouse
Copy and install the VMware SVGA driver. Pre-installing the SVGA driver
enables full color graphics and smooth mouse movements on the first boot.
On Windows 2000, this option also eliminates the prompt for a driver for the
VMware SVGA graphics card when the operating system detects the hardware
for the first time.
Note: If you do not do this now, you will need to manually install the SVGA
driver when you configure the new virtual machine.
50
www.vmware.com
p2v_manual.book Page 51 Thursday, July 17, 2003 11:32 AM
C H A P T E R 3 Creating Clones
• Attempt to preserve drive letter to volume mapping.
This option identifies the drive letters assigned to each volume on the source
disk and assigns the same drive letters to the volumes on the target disk. This
option does not display if the target disk type is direct disk device.
Completing the Cloning Process
When all the decisions have been made, the P2V Assistant proceeds and creates the
designated clone.
1. Confirm the execution of the selected task, clone and/or system reconfiguration.
Click OK.
A series of progress messages are displayed. The specific messages you see
depend upon the options you selected. Progress statistics include MBytes
copied, throughput, and estimated time of completion.
2. Close the P2V Assistant.
Click Finish. Progress screens are displayed.
51
p2v_manual.book Page 52 Thursday, July 17, 2003 11:32 AM
VMware P2V Assistant User’s Manual
3. Remove the P2V Assistant boot CD from the source computer and restart as
needed.
4. If you used the P2V Assistant direct disk device option, you must gracefully
shutdown the virtual machine running the P2V Assistant assistant.
This ensures that all the system reconfiguration changes are completely written
to disk. You have completed creating a virtual disk clone using VMware P2V
Assistant.
52
www.vmware.com
p2v_manual.book Page 53 Thursday, July 17, 2003 11:32 AM
4
CHAPTER 4
Reconfiguring Clones
53
p2v_manual.book Page 54 Thursday, July 17, 2003 11:32 AM
VMware P2V Assistant User’s Manual
Reconfiguring an Existing Clone
This chapter describes how to use the VMware P2V Assistant to reconfigure a clone so
it can be used as a boot disk in a virtual machine.
This chapter includes:
•
Starting the P2V Assistant
•
Identifying the Virtual Disk to Reconfigure
•
Locating Service Packs
•
Locating Hot Fixes
•
Selecting Reconfiguration Options
•
Completing the System Reconfiguration
Virtual disks, in order to function with virtual machines, require some reconfiguring.
The following describes how to reconfigure an existing virtual disk to boot in a virtual
machine using the P2V Assistant. Perform the steps in this section when you have an
existing virtual disk or image that you wish to use in a virtual machine.
Starting the P2V Assistant
1. Assemble the pieces.
• Install the P2V Assistant in the helper machine, if you have not done this
already. This can be a physical machine or a virtual machine.
• Identify and locate any Microsoft Windows Service Packs and/or Hotfixes you
have installed on your source machine. Do not rename the Service Pack
names.
• Identify and locate the clone virtual disk. This can be a disk attached to the
helper virtual machine or it can be a file in a network location accessible by
the helper machine.
2. Start the VMware P2V Assistant.
Double-click the VMware P2V Assistant icon or choose Start > VMware >
VMware P2V Assistant. Refer to Introducing VMware P2V Assistant for
information on P2V Assistant machine requirements.
54
www.vmware.com
p2v_manual.book Page 55 Thursday, July 17, 2003 11:32 AM
C H A P T E R 4 Reconfiguring Clones
3. Select the system reconfiguration task, then click Next.
The choices are:
• Clone a source computer’s physical disk to a virtual disk
If you wish to clone a source disk prior with or without a reconfiguration, refer
to the chapter, Creating Clones on page 27.
• Perform a System Reconfiguration on an existing disk that contains an
operating system
Select this option when you have an existing virtual disk and you want to alter
the disk to serve as the primary boot disk in a new standalone virtual machine.
The virtual disk could have been created by expanding a third party image
onto a virtual disk attached to a current virtual machine.
You might see an information message listing how many reconfiguration
licenses you have left. If you do not wish to see this message, click the
appropriate check box.
55
p2v_manual.book Page 56 Thursday, July 17, 2003 11:32 AM
VMware P2V Assistant User’s Manual
Identifying the Virtual Disk to
Reconfigure
The Select a target disk screen displays two types of target disk options.
1. Open an existing target disk.
This option is typically used for VMware GSX Server and Workstation virtual
machines.
• Select the radio button: Open an existing virtual disk (.vmdk) file.
Select this option to perform a system reconfiguration on a virtual disk for use
with a GSX Server or Workstation virtual machine. Click the Browse button,
locate the desired disk, click Next. Skip to step 3.
2. Use a direct disk device.
This option is typically used for VMware ESX Server virtual machines or when a
clone is being reconfigured within a helper virtual machine.
• Select the radio button: (Advanced) Use a direct disk device attached to this
computer, then click Select.
Typically, you select this option to reconfigure a virtual disk for use with
VMware ESX Server virtual machines. Refer to Creating a New Virtual Machine
with ESX Server on page 65, for additional information.
56
www.vmware.com
p2v_manual.book Page 57 Thursday, July 17, 2003 11:32 AM
C H A P T E R 4 Reconfiguring Clones
VMware GSX Server or Workstation: The virtual disk must be in .vmdk
format. VMware ESX Server: The virtual disk must be in .dsk format.
The virtual disk must be attached as a second disk to the virtual machine
running the P2V Assistant on your virtualization platform.
This virtual machine must have at least two virtual disk drives. The direct disk is
attached as an additional drive to this virtual machine. After the system
reconfiguration is performed the virtual machine with the attached .dsk must
be shutdown. Then the newly reconfigured .dsk can be attached to another
virtual machine and used as the boot disk.
• Select the direct disk. Click the radio button as needed, then click OK.
• Verify the new disk capacity, then click OK.
3. Verify that the disk volume information is correct. Click Next.
57
p2v_manual.book Page 58 Thursday, July 17, 2003 11:32 AM
VMware P2V Assistant User’s Manual
Locating Service Packs
1. Select the location of the service pack.
The Microsoft Service Packs must be applied to your virtual disk as part of the
system reconfiguration to make the virtual disk bootable.
2. Download the Service Packs, if needed.
• Click the I don’t have the Service Pack archive button and the P2V Assistant
displays a browser with direct links to the appropriate Service Packs.
• Follow the links and listed directions as needed.
• When the Service Packs are downloaded, return to the Locate Service Pack
window.
3. Identify the Service Pack location to the P2V Assistant.
• Click the Browse button to specify the Service Pack location.
• When the Service Pack location is identified, click Next.
58
www.vmware.com
p2v_manual.book Page 59 Thursday, July 17, 2003 11:32 AM
C H A P T E R 4 Reconfiguring Clones
Locating Hot Fixes
If you do not see the Hot Fix screen, skip to the next section, Selecting
Reconfiguration Options.
1. Download the required hotfix file(s).
If your source disk did not have hotfix patches applied, you do not see the
Required Hotfix screen.
The screen can display multiple hotfix files. For each listed hotfix, locate the
hotfix file and accept it.
2. Download the required hot fix files. Click the Download button.
A browser opens to the Microsoft download page. Select the hotfix and save to
your location. Return to the P2V Assistant screen.
3. Locate the hotfix file locally. Click the Browse button and select the hotfix file.
The P2V Assistant adds the path to the hotfix file to the installer field.
4. Accept the hotfix file. Click Next.
59
p2v_manual.book Page 60 Thursday, July 17, 2003 11:32 AM
VMware P2V Assistant User’s Manual
Selecting Reconfiguration Options
1. Select desired reconfiguration options.
Options not applicable to the current cloning are not listed. Click the buttons for
the options as needed, then click Next.
• Copy the VMware Tools package to the system volume without installing it
This option tells the P2V Assistant to only copy the VMware Tools installer to
the new virtual disk and to not execute the installer. After the cloning is
complete, to install the VMware Tools, run X:\VMware Tools\Installer\setup\
setup.exe where X: is the system volume drive letter of the guest operating
system in the target virtual machine. This option is sometimes useful when
working with machines where the CD-ROM has been disabled.
• Pre-install the VMware SVGA driver for smooth graphics and mouse
Copy and install the VMware SVGA driver. Pre-installing the SVGA driver
enables full color graphics and smooth mouse movements on the first boot.
On Windows 2000, this option also eliminates the prompt for a driver for the
VMware SVGA graphics card when the operating system detects the hardware
for the first time.
Note: If you do not do this now, you will need to manually install the SVGA
driver when you configure the new virtual machine.
60
www.vmware.com
p2v_manual.book Page 61 Thursday, July 17, 2003 11:32 AM
C H A P T E R 4 Reconfiguring Clones
Completing the System Reconfiguration
When all the decisions have been made, the P2V Assistant proceeds and reconfigures
the designated clone.
1. Confirm the execution of the selected task, clone and/or system reconfiguration.
Click OK. A series of progress messages are displayed. The specific messages you
see depend upon the options you selected. Progress statistics include MBytes
copied, throughput, and estimated time of completion.
2. Close the P2V Assistant.
Click Finish.
Progress screens are displayed.
3. If you used the P2V Assistant direct disk device option, you must gracefully
shutdown the virtual machine running the P2V Assistant assistant. This ensures
that all the system reconfiguration changes are completely written to disk.
You have completed performing a system reconfiguration on an existing virtual
disk clone using VMware P2V Assistant.
61
p2v_manual.book Page 62 Thursday, July 17, 2003 11:32 AM
VMware P2V Assistant User’s Manual
62
www.vmware.com
p2v_manual.book Page 63 Thursday, July 17, 2003 11:32 AM
5
CHAPTER 5
Creating a New Virtual
Machine
63
p2v_manual.book Page 64 Thursday, July 17, 2003 11:32 AM
VMware P2V Assistant User’s Manual
Creating a New Virtual Machine
Create a new virtual machine with the virtual disks you selected during the P2V
Assistant migration. See Supported Versions of VMware Products on page 24 for a list
of VMware products you can use to create the new virtual machine.
Refer to the product documentation or the in-product Help for the specific steps to
create a virtual machine using your VMware product. You can find the latest VMware
product documentation at www.vmware.com/support.
This chapter includes:
•
New Virtual Machine Considerations
•
New Virtual Machine Guidelines
•
Creating a New Virtual Machine with GSX Server
•
Creating a New Virtual Machine with ESX Server
•
Booting the New Virtual Machine
New Virtual Machine Considerations
Performing a system reconfiguration ensures that the new virtual disk can boot.
Supported adapters include: AMD PCNet Ethernet adapter, Buslogic SCSI adapter, CDROM and floppy drives.
Any software that is hardware dependant requires attention. Specifically, during a
migration and/or system reconfiguration the following identification items change:
•
MAC address
•
CPU model and serial number
•
Disk device model and manufacturer settings
The migrated virtual machine seems to be identical to the original physical machine
on the network. Use caution when powering up both the original physical machine
and the new migrated virtual machine simultaneously on the same network. Consider
using a private network for the new migrated virtual machine to avoid conflicts.
64
www.vmware.com
p2v_manual.book Page 65 Thursday, July 17, 2003 11:32 AM
C H A P T E R 5 Creating a New Virtual Machine
New Virtual Machine Guidelines
When creating a new virtual machine, follow these general guidelines. Refer to the
appropriate section below for any server-specific issues.
•
The guest operating system type should be the same as the source operating
system (Windows NT or Windows 2000) running on the source computer.
•
Reconfigure as many virtual AMD PCNet NICs as the number of physical NICs on
the source computer.
•
You may leave other configuration parameters (memory, floppy, and so forth) in
their default settings. You can customize these later.
Creating a New Virtual Machine with
GSX Server
When creating a new virtual machine in GSX Server, follow these additional
guidelines:
1. Use the New Virtual Machine Wizard to create the new virtual machine. Select
Custom for the configuration
2. You may want to choose host-only networking for your network connection
during initial testing of your new virtual machine. Later, you can switch your
network connection to bridged networking or network address translation
(NAT).
3. Select Use an existing virtual disk for the disk type and use the cloned disk
(containing the operating system) produced by the P2V Assistant. Add the other
virtual disk(s) as additional drives once you have created the virtual machine.
Creating a New Virtual Machine with ESX
Server
The P2V Assistant populates a virtual disk (.dsk) file, that was created by the ESX
Server, by selecting the direct disk option in the Specify Target Disk window. If you
selected this option, you can use the resultant .dsk file immediately with ESX Server.
If instead you selected to create a virtual disk (.vmdk) file, then you cannot use this
virtual disk with ESX Server, without first converting it to a .dsk file. You can do this
conversion by using the vmkfstools program or the file manager in the VMware
Management Interface.
65
p2v_manual.book Page 66 Thursday, July 17, 2003 11:32 AM
VMware P2V Assistant User’s Manual
Using vmkfstools to Import a Virtual Disk
As root, type the following:
vmkfstool -i <virtual_disk>.vmdk <vmfs_volume>:<virtual_disk>.dsk
where the -i option imports a virtual disk, <virtual_disk>.vmdk is the virtual
disk created by the P2V Assistant and <virtual_disk>.dsk is the virtual disk
used by ESX Server.
Using the VMware Management Interface to Import a Virtual
Disk
Follow these steps to use the VMware Management Interface file manager to import a
virtual disk to VMware ESX Server. Refer to the VMware ESX Server User’s Manual for
complete and up to date instructions.
1. Using a Web browser, log in to the ESX Server machine as root and click Manage
Files. Use the file manager in the VMware Management Interface to perform all
the file copy steps described below.
2. In the file manager, navigate to the location of the source disk files. Select the
main disk (.dsk) file for the virtual disk you are migrating, then click Copy.
3. Navigate to the vmfs folder and open the folder for the VMFS partition where
you want to store the virtual disk file. Click Paste.
A dialog box appears with the message “You are transferring one or more
console virtual disks to a VMFS partition. In order for virtual machines to access
these disks, they must be converted to the VMFS format. Although you can
convert console disks at any time, it is recommended that you do so now.”
The file you are copying is selected. Click OK.
The virtual disk is imported to the VMFS partition.
Note: If you do not see the message about transferring disks, there is a problem
with the import. Be sure you are pasting to the correct vmfs folder.
4. Select the newly imported .dsk file, then click Edit Properties.
5. Change the user and group names in the right-hand column so the file’s owner
and group match those of the user who will run the virtual machine.
If necessary, change the filename extension to .dsk. Click OK.
6. Log out, then log back in as the user who will run the new virtual machine.
66
www.vmware.com
p2v_manual.book Page 67 Thursday, July 17, 2003 11:32 AM
C H A P T E R 5 Creating a New Virtual Machine
7. Create a new virtual machine as described in the VMware ESX Server User’s
Manual. When you set the file name for the new virtual machine’s disk, be sure to
use the virtual disk file you just copied to the VMFS partition.
Booting the New Virtual Machine
Once you have created the new virtual machine, power it on. In some instances, you
may not have keyboard or mouse input at the Welcome to Windows screen. If this
happens, power off, then power on the virtual machine. You should have keyboard
and mouse input after rebooting.
67
p2v_manual.book Page 68 Thursday, July 17, 2003 11:32 AM
VMware P2V Assistant User’s Manual
68
www.vmware.com
p2v_manual.book Page 69 Thursday, July 17, 2003 11:32 AM
6
CHAPTER 6
Configuring the Guest OS and
Testing the New Virtual Machine
69
p2v_manual.book Page 70 Thursday, July 17, 2003 11:32 AM
VMware P2V Assistant User’s Manual
Configuring the Guest OS and Testing
the New Virtual Machine
The target computer can now boot from the updated disks on its own. Further
configuration, testing and tuning work is still needed before the virtual machine can
be deployed in production. Some of the specific steps depend on which operating
system is in the target computer.
This chapter includes.
•
Configuration Tasks for Both Windows NT and Windows 2000
•
Configuring Windows NT
•
Configuring Windows 2000
•
Testing and Tuning
Configuration Tasks for Both Windows
NT and Windows 2000
Some configuration tasks are standard, such as:
•
Attach installation media as CD-ROM or ISO. Remove stale devices.
•
Install VMware Tools. If you selected the option during the P2V Assistant
processes, it only copied the VMware Tools Installer to the system
root:\VMware Tools Installer\setup\setup.exe.
Network Interface Cards
Every NIC on the source computer may be replaced by an AMD PCnet or VMXnet NIC
(ESX Server) in the target computer. When the virtual machine is created the first time,
one virtual NIC is configured by default. Additional NICs can be added using the
Configuration Editor. If you have machines that have multiple adapters mapped to
different protocols, then you must manually set up the networking on the target
machine. Map each AMD PCnet or VMXnet NIC to the same protocol as on the source
computer.
Note: If you get a duplicate error when you attempt to assign an IP address on an
AMD NIC, on a Windows 2000 machine, go to the Add/Remove Hardware, then select
Uninstall a Device, check the Show Hidden Devices checkbox and remove the old NIC
that no longer exists in the virtual machine.
70
www.vmware.com
p2v_manual.book Page 71 Thursday, July 17, 2003 11:32 AM
C H A P T E R 6 Configuring the Guest OS and Testing the New Virtual Machine
Inside the Windows 2000 or NT virtual machine, each NIC can be configured with the
same IP address as the corresponding physical NIC on the source computer. If DHCP is
used, the DHCP server may need to be reconfigured to assign specific addresses to
the target computer’s NICs.
Enable the VMXnet NIC (if applicable) by installing the VMware Tools service in the
target computer.
VMware SVGA Graphics Card
The P2V Assistant allows you to install the VMware SVGA graphics card driver during
the reconfiguration. If you did not check this box, you need to install the SVGA driver
during the installation of VMware Tools.
Configuring Windows NT
Windows NT is not a plug-and-play operating system; therefore, any non-critical
devices that were present on the source computer but not in the target computer
cause driver startup errors, usually logged as warnings in the Event Viewer. To remove
or disable those drivers, remove (unregister) the hardware from the operating system.
Network Adapters
The most common devices that need to be removed are network adapters. To remove
stale network adapters, complete the following steps.
1. Boot the Windows NT operating system in the new virtual machine.
2. Log on locally to the virtual machine as the Administrator user or as a user who is
a member of the Windows Administrators group.
There is no active virtual network card and therefore you cannot be
authenticated against a domain.
3. Choose Start > Settings > Control Panel and double-click the Network icon.
Click the Adapters tab.
4. Remove all present adapters.
5. Using the same control panel, add an “AMD PCNet Family” adapter to register
the virtual machine’s NIC.
6. When prompted for the driver disk, insert the original Windows NT CD; it has the
appropriate drivers and system files.
7. Enter X:\i386 as the file path, where X: is the CD drive letter.
8. During the ensuing network configuration, reconfigure the IP address (static or
DHCP).
71
p2v_manual.book Page 72 Thursday, July 17, 2003 11:32 AM
VMware P2V Assistant User’s Manual
Other Drivers or Services
Other drivers or services which depend on hardware that no longer exists in the
target computer may still fail during system boot. If this occurs:
1. Use the Event Viewer to determine which drivers or services failed. Choose Start
> Programs > Administrative Tools (Common) > Event Viewer to open the
Event Viewer application.
2. Disable any services or devices that failed by changing the startup type to
“Manual” or “Disabled” in the respective Services or Devices control panel.
Choose Start > Settings > Control Panel and double-click the appropriate icon.
Configuring Windows 2000
As a plug-and-play operating system, Windows 2000 automatically disables drivers for
devices no longer present, and installs drivers for new devices that it recognizes, such
as the AMD PCnet NIC. Windows 2000 does not recognize a virtual machine’s SVGA
card. You must install drivers for these devices as part of a subsequent installation of
VMware Tools.
Complete the following steps to reconfigure Windows 2000 in your new virtual
machine.
1. Boot the Windows 2000 operating system in the new virtual machine.
2. If automatic logon is not enabled, wait until disk activity subsides before
attempting to log on the machine.
3. Log on locally to the virtual machine as the Administrator user or as a user who is
a member of the Windows Administrators group.
There is no active virtual network card and therefore you cannot be
authenticated against a domain.
Note: If the mouse or keyboard does not function properly, wait a few minutes
until disk activity stops. If you still have no mouse or keyboard response, then
power off and power on your virtual machine.
4. You may also see a message stating that “a duplicate name exists on the
network.” You see this message because the source and target computers have
the same identities (name, SID, and so on). You can resolve the duplicate ID
problem by renaming the target computer and using additional tools, such as
the Windows 2000 System Preparation Tool (Sysprep).
72
www.vmware.com
p2v_manual.book Page 73 Thursday, July 17, 2003 11:32 AM
C H A P T E R 6 Configuring the Guest OS and Testing the New Virtual Machine
5. Windows 2000 displays a series of messages detecting new hardware. If
Windows 2000 finds a hardware device for which it does not have a driver, it
displays messages, click Cancel or Skip to continue.
6. Windows 2000 asks to restart your computer. Click Yes.
Testing and Tuning
Applications installed in the target computer (in particular servers) should be tested.
This testing is critical and ensures that there are no issues after completing the P2V
process. We suggest you test the target computer for a few days to find subtle
problems or performance issues before it is deployed in a production environment.
Review the Windows event log for errors. Reconfigure services and devices as
indicated by the event log.
Note: After your new virtual machine is up and running, it is recommended that you
apply any patches, service packs, and/or hot fixes to the working virtual machine in
undoable mode.
73
p2v_manual.book Page 74 Thursday, July 17, 2003 11:32 AM
VMware P2V Assistant User’s Manual
74
www.vmware.com
p2v_manual.book Page 75 Thursday, July 17, 2003 11:32 AM
7
CHAPTER 7
Troubleshooting
75
p2v_manual.book Page 76 Thursday, July 17, 2003 11:32 AM
VMware P2V Assistant User’s Manual
Troubleshooting
If you are experiencing difficulties with any of the tasks and processes described in this
manual, first, read the latest VMware P2V Assistant release notes for a list of known
issues and work arounds. The release notes are installed with your VMware P2V
Assistant product. They can also be found on the VMware Website: http://
www.vmware.comThis chapter includes:
•
Troubleshooting Issues and Solutions
•
Technical Support Resources
If your questions are not answered please review the following troubleshooting tips
for additional information.
Troubleshooting Issues and Solutions
The following tables describe symptoms and possible solutions for various P2V
Assistant situations.
Issues with Installing P2V Assistant
Symptom
Context
Possible Solution
Installation hangs
Local helper machine, attempting
to install P2V Assistant
It is recommended that you install locally, not
remotely through Terminal Services.
No NTFS volume exists
Local helper machine, attempting
to install P2V Assistant
The host must have at least one local NTFS
volume for the VMware P2V Assistant. The
NTFS volume must be on a basic disk.
Issues with Pre-Installed Software in Clone
76
Symptom
Context
Possible Solution
Screen resolution
options are not
performing normally
PCAnywhere installed
in original physical
machine.
Uninstall PCAnywhere from virtual machine and re-install to
correct any video conflicts.
www.vmware.com
p2v_manual.book Page 77 Thursday, July 17, 2003 11:32 AM
C H A P T E R 7 Troubleshooting
Issues with Using a Third Party Tool to Create a Clone
Symptom
Context
Possible Solution
Network Map Disk
cannot connect
Machine running Ghost,
attempting to create a clone from
a Ghost image
If not using DHCP, may need to specify DNS
name in Imhosts file. Cannot use IP address in
network map net use.
Ghost crashes inside
virtual machine.
ESX Server virtual machine,
preparing to create a clone from a
Ghost image
Known issue in Ghost 6.5. Use 7.5 or 2003.
Cannot run Ghost.exe.
Machine running Ghost,
preparing to create a clone from a
Ghost image
GHO file was made with a newer version of
Ghost, or Ghost.exe is off the evaluation copy.
Cannot see GHO image
on disk.
Ghost image on ESX Server virtual
machine, attempting to create a
clone from a Ghost image
Make sure disk is FAT32 and BASIC, not
dynamic. Verify the current version of Ghost
identifying the local NTFS volume.
PowerQuest only sees
up to 8BG of the new
target virtual disk.
Machine running PowerQuest,
attempting to create a clone from
a PowerQuest image
Only image the system partition, then use
another method and/or tool to clone the data
partition(s) on the source disk.
Clone throughput is
consistently low
Machine running third party tool,
attempting to create a clone from
a third party image
Verify the network duplex settings and check
for a possible duplex mismatch.
Issues with Creating a Clone Using the P2V Assistant
Symptom
Context
Possible Solution
Warnings related to
improper dismounting
of disks appear
Source disk,
attempting to
create a clone
This are generally caused by programs like Anti-viruses
programs which are running on the same computer as the
P2V application. It is recommended to temporarily disable
such programs in case such warning do appear during P2V
imaging. If the program is not disabled, click OK to
acknowledge the warning and proceed, it does not affect the
P2V Assistant process.
Source data disk
unrecognizable.
Source disk,
attempting to
create a clone
Verify that the original source volume does not span across
two physical disks.
Verify that the source disk contains file systems in P2V
Assistant supported formats.
77
p2v_manual.book Page 78 Thursday, July 17, 2003 11:32 AM
VMware P2V Assistant User’s Manual
Issues with Performing a System Reconfiguration
Symptom
Context
Possible Solution
Cannot read the
source disk to
determine operating
system and service
pack level
Source disk,
attempting system
reconfiguration
Check to see if source disk mounted by P2V Assistant on the
P2V Assistant host appears in the Disk Management console
and is marked Active. Then check for the existence of a
boot.ini file on the active volume. Make sure the boot.ini file
contains a valid default operating system line. Make sure the
partition number is set correctly in boot.ini file.
Cannot access target Target disk,
virtual disk (.vmdk) file attempting system
reconfiguration
Look for .lck file.
Cannot utilize the
Service Pack file.
Service Pack,
attempting system
reconfiguration
Verify the Service Pack filename is what P2V Assistant
expects, that is the Microsoft default filename. Simply
pointing to the file does not work if the filename is incorrect.
Disk will not boot
even after system
reconfiguration
performed
Using Sysprep for
During a boot up, Sysprep can undo some of the P2V
Windows system
Assistant system reconfiguration. In the following reboot,
identification change. the machine might not boot.
If possible, place the target .vmdk file on a local disk instead
of a network share against P2V Assistant virtual machine,
rather than accessing .vmdk across network (to avoid
network latency issues).
If this occurs, perform a second system reconfiguration after
the second stage of Sysprep has completed. This ensures
that the virtual machine boots.
To summarize, when Sysprep has to be used with P2V
Assistant, the sequence of steps is:
1. Sysprep source machine (Sysprep stage 1).
2. Clone source machine.
3. Reconfigure this cloned machine.
4. Bootup. (Sysprep stage 2).
5. When Sysprep reboots the system, power it off
(conserving changes).
6. Perform system reconfiguration again.
7. Final bootup.
78
www.vmware.com
p2v_manual.book Page 79 Thursday, July 17, 2003 11:32 AM
C H A P T E R 7 Troubleshooting
Issues with Booting a Virtual Machine with a Clone
Symptom
Context
Possible Solution
Cannot boot up.
System reconfigured
clone, attempting to
boot virtual machine
Create a new clone disk, but without system
reconfiguration. Then try booting this new clone in a virtual
machine. If the virtual machine hangs, with a black screen or
an ‘operating system not found’ message, then the disk is
potentially corrupt.
Verify that the original clone was created from a bootable
disk. If it is not bootable, then verify that it mounts properly
in the P2V Assistant virtual machine. If it doesn’t have a
volume label, then the disk is potentially corrupt. Verify if the
clone was created from a healthy machine which was
shutdown properly. Verify the source partition was bootable
prior to the cloning effort.
Virtual machine blue
screens after system
reconfiguration.
System reconfigured
clone, attempting to
boot virtual machine
Look for offending .sys file listed in blue screen, and
manually remove from C:\WINNT\System32\Drivers. Use
extreme caution, the offending driver is not always listed in
the stack dump. Preferred action is to contact your VMware
support representative.
Booting up gives a
corrupt NTFS.
System reconfigured
clone, attempting to
boot virtual machine
Verify that the official Service Pack file from Microsoft was
used to perform the system reconfiguration.
Virtual machine blue
screens after reboot.
Clone created
through P2V
Assistant direct to
disk device option,
attempting to boot
virtual machine
Verify the P2V Assistant temporary virtual machine was
gracefully shut down. Delete NVRAM.
Clone used in virtual
machine as boot disk,
attempting to boot
virtual machine using
P2V Assistant clone
Ensure that the source disk contained a supported
operating system and that the P2V Assistant System
Reconfiguration was performed.
Clone is not bootable
When running the P2V Assistant within a temporary virtual
machine to create a direct to disk virtual machine disk,
always shutdown the temporary virtual machine after you
complete the system reconfiguration on the newly
populated disk.
79
p2v_manual.book Page 80 Thursday, July 17, 2003 11:32 AM
VMware P2V Assistant User’s Manual
Technical Support Resources
If you have problems while running the P2V Assistant, please submit a support
request. The guidelines listed below describe the information we need from you to
diagnose various types of problems. When requesting support:
•
If the P2V Assistant reaches the final Finish screen, it will display the path of the
support file. The file is created after the application terminates, so write down
the location of the file, then click OK to terminate the application, then locate
the support file.
•
If the P2V Assistant terminates normally before the Finish screen, for example, as
the result of pressing Cancel at any time during the disk cloning or
reconfiguration process, the application should attempt to generate the support
file but does not display its location. Look for the most recent file with a name of
the form:
P2V-Session-<Date>-<TimeOfDay>.sup in the
X:\<docs_settings>\<your_username>\Local Settings\Temp\
where X: is your system drive and <docs_settings> is default Documents
and Settings directory or your designated substitute.
80
www.vmware.com
p2v_manual.book Page 81 Thursday, July 17, 2003 11:32 AM
C H A P T E R 7 Troubleshooting
•
If you cannot find a support file, or the P2V Assistant terminates abnormally, look
for the most recent folder with a name of the form P2V-Session-<Date><TimeOfDay> in the same directory described above. If the directory exists,
package it up into a single ZIP file using a utility such as Winzip, then send the
ZIP file to VMware Support.
Be sure to register your serial number. You may then report your problems using the
support request form on the VMware Web site at www.vmware.com/
requestsupport.www.vmware.com/requestsupport.
81
p2v_manual.book Page 82 Thursday, July 17, 2003 11:32 AM
VMware P2V Assistant User’s Manual
82
www.vmware.com
p2v_manual.book Page 83 Thursday, July 17, 2003 11:32 AM
Index
Symbols
.dsk 15
from .vmdk 66
.dsk format 16, 65
.dsk formatted disk 12
.vmdk 15
to .dsk format 66
.vmdk format 16, 65
using P2V Assistant 31
with system reconfiguration 40
compatibility
application 18
converting
.vmdk to .dsk format 15
third party clone to ESX Server format 14
A
copying
internet files 41
swap files 41
AMD PCnet 70
CPU model 18
application compatibility 18
CPU model and serial number 64
applications
troubleshooting 76
creating target disk 42
B
D
Boot CD 31
direct disk
system reconfiguration 56
.vmdk target disk 42
boot CD 9
boot disk 9, 16
creating virtual machines 8
bootable disk 9
ESX Server virtual machine 14
direct to disk
selecting partition 42
target disk 42
bootable virtual disk 10
direct to disk device 12
booting
virtual machine troubleshooting 79
disk
system reconfiguration 56
booting new virtual machine 67
disk controllers 18
C
disk device
model and manufacturer settings 64
clone 9
direct to disk device 12
in virtual machine 16
system reconfiguration 10
third party imaging 11
cloning 8
completing 51
considerations 28
disk options 41
hot fixes 49
service packs 47
starting 34
system reconfiguration 54
system reconfiguration options 50
target disk selection 42
third party tool 29
troubleshooting 77
disk devices 18
disk partitions
setting size 44
disk space 23
disk volumes
selecting for cloning 37
disks
cloning options 41
selecting to clone 31
drivers
configuring 72
E
ESX Server
compatibility 28
compatibilty 24
83
p2v_manual.book Page 84 Thursday, July 17, 2003 11:32 AM
new virtual machine 65
NTFS volumes 23
existing clone 14
P
existing clones 10
G
P2V Assistant
machine requirements 23
graphics card 18
P2V Boot CD 9
GSX Server
compatibility 24, 28
new virtual machine 65
partitions 18
automatic adjustments 44
resizing 42
sizes 44
GSX Server virtual machines 9
guest operating system
configuring 70
new virtual machines 65
H
hardware compatibility 18
helper virtual machine 11, 14
third party tool cloning 29
hot fixes
cloning with system reconfiguration
49
system reconfiguration 59
populating disk device 12
port number 31, 37
R
reconfiguring
existing clone 54
requirements
P2V Assistant machine 23
source computer 22
restoring image 12
S
selecting 42
hotfixes 22
serial numbers 34
I
installing P2V Assistant 76
service packs 22
cloning with system reconfiguration
47
system reconfiguration 58
internet files 41
size virtual disk 28
introducing P2V Assistant 8
sizes
disk partitions 44
installing
P2V Assistant 25
IP address 31, 37
L
licensing 25
starting P2V Assistant 34
updating 34
M
MAC address 64
Management Interface 66
Microsoft Windows
P2V Assistant machine 23
source computer 22
84
network settings 31
ESX Server virtual machines 12
source computer 9
Boot CD 31
identification 31
requirements 22
settings 17
source disk 9
identifying for cloning 37
preparation for cloning 31
selecting partitions 37
support files 80
N
supported version
VMware products 24
network adapters 71
SVGA graphics card 71
network interface (NIC) 18
swap files 41
network interface cards (NIC) 65, 70
system reconfiguration 8, 9, 10, 54
www.vmware.com
p2v_manual.book Page 85 Thursday, July 17, 2003 11:32 AM
choosing 40
completing 61
completing with cloning 51
ESX Server bootable disk 14
hot fixes 59
options 50
service packs 58
starting 54
troubleshooting 78
system reconfigurations
options 60
T
target computer 17
target disk 9, 42
technical support resources 80
testing
new virtual machine 70
considerations 64
creating new 64
vmkfstools 66
VMware SGVA driver 50
VMware SVGA driver 60
VMware Tools 50, 60, 70
VMware Workstation compatibility 24
VMXnet 70
W
Windows 2000
configuring 72
configuring new virtual machine 70
Windows NT
configuring 71
configuring new virtual machine 70
testing applications 73
Workstation
compatibility 28
third party image 14
Workstation virtual machines 9
third party imaging 11
third party tool
cloning 29
troubleshooting 77
troubleshooting 76
tuning applications 73
U
understanding clones 9
uninstalling the P2V Assistant 26
V
virtual disk
identifying 56
importing with Management Interface 66
size 28
system reconfiguration 56
virtual disk files 9
virtual machine
booting 67
configuring guest OS 70
ESX Server 65
GSX Server 65
guidelines for new 65
testing 70
using new 17
virtual machines
85
p2v_manual.book Page 86 Thursday, July 17, 2003 11:32 AM
86
www.vmware.com