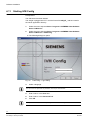
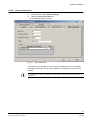
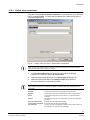
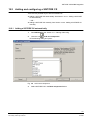
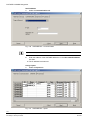
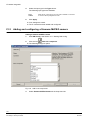
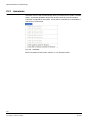
1
IVM Config
Configuration Software
Configuration Manual
IVM V3.6
Building Technologies
Fire Safety & Security Products
Liefermöglichkeiten und technische Änderungen vorbehalten.
Data and design subject to change without notice. / Supply subject to availability.
© 2009 Copyright by
Siemens Building Technologies
Wir behalten uns alle Rechte an diesem Dokument und an dem in ihm dargestellten Gegenstand vor. Der Empfänger erkennt diese Rechte
an und wird dieses Dokument nicht ohne unsere vorgängige schriftliche Ermächtigung ganz oder teilweise Dritten zugänglich machen oder
außerhalb des Zweckes verwenden, zu dem es ihm übergeben worden ist.
We reserve all rights in this document and in the subject thereof. By acceptance of the document the recipient acknowledges these rights
and undertakes not to publish the document nor the subject thereof in full or in part, nor to make them available to any third party without our
prior express written authorization, nor to use it for any purpose other than for which it was delivered to him.
About this document
This Configuration Manual contains information on the setup, installation and
configuration of IVM Config.
Additional information can be found in the Readme file in the directory D:\Cevis.
For information on operation please refer to the User Manual.
Trademarks
IVM is a trademark of Fire & Security Products GmbH & Co. oHG.
Microsoft is a registered trademark and Windows a trademark of Microsoft
Corporation. All other products or company names referred to explicitly in this
manual are mentioned only for purposes of identification or description and may be
trademarks or registered trademarks of their respective owners.
Contacting us
If you have questions or suggestions regarding the product or this documentation,
please contact our Customer Support Center.
Intranet:
Customer Support Center
Internet:
Worldwide contacts
E-Mail:
[email protected]
Tel.:
+49 89 9221 8000
Training courses
Siemens Fire & Security Products provides training courses for all products.
Contents
1
1.1
1.2
1.2.1
1.2.2
1.2.3
1.2.4
1.2.5
1.3
1.4
Safety .......................................................................................................9
Target readers...........................................................................................9
Work safety information ............................................................................9
Handling ....................................................................................................9
Transport...................................................................................................9
Setup.........................................................................................................9
Data loss after update.............................................................................10
Storage....................................................................................................10
Meaning of the warning notices ..............................................................10
Meaning of the hazard symbols ..............................................................10
2
2.1
2.2
2.3
2.4
Software description ............................................................................11
Program window IVM Config ..................................................................11
Toolbar ....................................................................................................12
Help.........................................................................................................12
Information on the version and system information ................................13
3
3.1
3.2
3.3
3.4
3.5
3.6
3.7
3.8
3.8.1
3.8.2
Operational setup..................................................................................16
Configuring the system environment ......................................................16
Video components ..................................................................................16
System configuration examples ..............................................................17
System requirements for the IVM Server................................................19
Setting the hardware acceleration for DirectX ........................................20
System requirements for the database ...................................................21
IVM system limits ....................................................................................22
TCP/UDP ports used ..............................................................................23
Standard ports for SISTORE CX, MX and AX ........................................23
Enabling access to IVM applications ......................................................24
4
4.1
4.2
4.3
4.4
4.5
4.6
4.7
4.8
4.9
4.10
4.11
4.12
4.13
4.13.1
4.13.2
4.13.3
4.13.4
4.13.5
4.13.6
Software installation.............................................................................27
Installation procedure..............................................................................27
WIBU dongle installation.........................................................................28
Setting up the ODBC data sources.........................................................28
Get time of client PC from an NTP server ..............................................33
Debugging with the log files ....................................................................35
Checking the network settings ................................................................35
Resolution of host names .......................................................................35
Directory structure on the hard disk ........................................................37
IVM Config update ..................................................................................38
Command line parameters......................................................................39
Starting IVM Config .................................................................................40
Starting IVM Config in demo mode .........................................................41
Initial configuration ..................................................................................41
Size of logbook / Logging........................................................................41
Entering system information ...................................................................42
Set operating mode.................................................................................43
Language settings...................................................................................44
Client connections...................................................................................45
Terminal connection................................................................................46
5
Siemens Building Technologies
Fire Safety & Security Products
03.2009
5
5.1
5.2
5.3
Group configuration .............................................................................47
New group ...............................................................................................47
Edit a group .............................................................................................47
Delete a group.........................................................................................48
6
6.1
6.1.1
6.1.2
6.1.3
6.1.4
6.1.5
6.2
6.3
Configuring components .....................................................................49
Add a new component ............................................................................49
Assigning a component to a group .........................................................51
Setting type of protocol and port .............................................................52
Configuring inputs ...................................................................................53
Configuring outputs .................................................................................55
On-screen display (OSD) ........................................................................56
Edit component properties ......................................................................61
Delete a component ................................................................................62
7
7.1
7.2
7.3
Server configuration .............................................................................63
Configuring ports.....................................................................................63
Add server to the list ...............................................................................65
Server log settings ..................................................................................66
8
8.1
8.2
8.3
8.4
8.5
8.6
8.7
User administration and administration of rights..............................67
Create a new user...................................................................................68
Edit user properties .................................................................................69
Assigning function rights .........................................................................70
Assigning SISTORE user rights ..............................................................71
Assigning user rights for cameras...........................................................72
Assigning user rights for output devices .................................................73
Edit user properties .................................................................................74
9
9.1
9.2
9.3
9.4
Workstations .........................................................................................75
Add a new workstation ............................................................................76
Assigning output devices ........................................................................77
Assigning user rights for workstations ....................................................78
Edit workstation properties......................................................................79
10
10.1
10.2
Alarm group configuration...................................................................80
Alarm group organization ........................................................................80
Alarm group cameras..............................................................................81
11
11.1
11.2
Alarm sequence configuration ............................................................82
Adding alarm sequences.........................................................................83
Adding cameras to alarm sequences......................................................84
12
12.1
12.2
12.2.1
12.2.2
12.2.3
12.2.4
12.2.5
12.2.6
12.2.7
12.2.8
12.2.9
12.2.10
12.2.11
12.2.12
12.2.13
Commands.............................................................................................86
Create a new command ..........................................................................86
Configure commands ..............................................................................87
Absolute alarm switching ........................................................................87
Set alarm status ......................................................................................88
Switch alarm component.........................................................................89
Record start.............................................................................................90
Record stop .............................................................................................91
User program ..........................................................................................92
Switching between EDS/ODR programs ................................................93
Control group ..........................................................................................94
Move camera to position .........................................................................94
Move camera to position name ...............................................................95
Close relay ..............................................................................................95
Open relay...............................................................................................96
Relay pulse..............................................................................................96
6
Siemens Building Technologies
Fire Safety & Security Products
03.2009
12.2.14
12.2.15
12.2.16
Control sequence ....................................................................................97
Control connect .......................................................................................98
Disconnect ..............................................................................................98
13
13.1
13.2
13.2.1
13.2.2
13.2.3
13.2.4
13.3
13.4
13.4.1
13.4.2
13.5
Alarms ....................................................................................................99
Add a new alarm .....................................................................................99
Alarm configuration ...............................................................................102
Selecting and configuring alarm types..................................................102
Alarm management configuration .........................................................105
Select users ..........................................................................................107
Assign commands.................................................................................108
Simulate alarm ......................................................................................112
Alarm management configuration .........................................................113
Basic functions for alarm configuration .................................................113
Alarm programs.....................................................................................115
Colour representation of alarms............................................................121
14
Priorities of camera control ...............................................................122
15
15.1
15.2
15.3
15.4
15.4.1
15.4.2
15.4.3
15.4.4
15.4.5
15.4.6
15.4.7
Plan configuration...............................................................................125
Configuration of system overview .........................................................125
Create a new plan .................................................................................127
Create new element..............................................................................129
Edit plan ................................................................................................131
New input icon.......................................................................................132
New contact/alarm ................................................................................133
New multifunction icon ..........................................................................134
New plan referral...................................................................................135
Store plan..............................................................................................136
Delete plan ............................................................................................136
Plan assignment to devices/groups ......................................................137
16
Configuration of the Software Monitor .............................................138
17
17.1
Scheduler.............................................................................................139
Configuring scheduler entries ...............................................................139
18
18.1
18.2
SIMATRIX integration .........................................................................143
Adding and configuring SIMATRIX .......................................................143
Configuration of SIMATRIX using VM_WIN8 .......................................151
19
19.1
19.2
19.2.1
19.2.2
19.2.3
19.3
19.3.1
19.3.2
19.4
19.4.1
19.4.2
19.4.3
SISTORE CX/AX/MX integration ........................................................155
Modes of operation ...............................................................................155
Adding and configuring a SISTORE CX ...............................................157
Adding a SISTORE CX automatically...................................................157
Adding a SISTORE CX manually..........................................................160
SISTORE CX configuration...................................................................163
SISTORE AX integration.......................................................................167
Adding a SISTORE AX .........................................................................167
SISTORE AX configuration...................................................................169
SISTORE MX integration ......................................................................173
Configuring SISTORE MX using SISTORE MX software.....................173
Adding a SISTORE MX.........................................................................175
Configuring SISTORE MX ....................................................................177
7
Siemens Building Technologies
Fire Safety & Security Products
03.2009
20
20.1
20.2
20.2.1
20.2.2
I/O server integration ..........................................................................181
Configuration of the I/O Server using the I/O-Server configuration
program .................................................................................................181
Adding and configuring an I/O Server...................................................182
Defining commands for I/O Server........................................................185
Defining SIMATIC alarms......................................................................186
21
21.1
21.1.1
21.1.2
21.1.3
21.2
IP camera integration..........................................................................188
Adding and configuring an IP MPEG-4 camera ....................................188
Adding an IP MPEG-4 camera automatically........................................188
Adding an IP MPEG-4 camera manually ..............................................191
Configuring an IP MPEG-4 camera ......................................................193
Adding and configuring a Siemens MJPEG camera.............................194
22
22.1
22.2
22.3
22.4
IVM Watchdog .....................................................................................198
Summary ...............................................................................................198
Conditions .............................................................................................198
Method of operation ..............................................................................198
Troubleshooting ....................................................................................198
23
23.1
23.2
Special functions of IVM Config ........................................................199
Printing the system configuration..........................................................199
Assistants ..............................................................................................200
24
Glossary ...............................................................................................201
25
Index .....................................................................................................203
8
Siemens Building Technologies
Fire Safety & Security Products
03.2009
Safety
1
Safety
1.1
Target readers
The instructions in this document are designed only for the following target
readers:
1.2
Target readers
Qualification
Activity
Condition of the
product
Operational startup
personnel
Technical training for
building or electrical
installations.
Puts the product into
operation for the first
time.
The product is not yet
installed and
configured.
Work safety information
z Read the general safety precautions before operating the software.
z Keep this document for reference.
z Always pass this document on together with the product.
z Please also read the safety precautions for the devices that are operated by the
software.
z Any national or local safety standards or laws that apply to the development,
design, installation, operation or disposal of a product must be adhered to in
addition to the instructions in the product documentation.
1.2.1
Handling
Damage due to improper handling
z Protect the CD from scratching.
z To clean the CD use a soft dry cloth.
1.2.2
Transport
Damage during transport
z Always transport the CD in the case it originally came in.
1.2.3
Setup
Dangerous situation due to false alarm
z Make sure to notify all relevant parties and authorities providing assistance
before testing the system.
z To avoid panic, always inform all those present before testing any alarm
devices.
9
Siemens Building Technologies
Fire Safety & Security Products
03.2009
Safety
1.2.4
Data loss after update
Data loss after software update
z Make sure to backup all data before updating the software.
1.2.5
Storage
Damage due to improper storage
z Always store the CD in its protective case.
z Keep the CD in an environment with a relative humidity of 10 – 90 %.
z Keep the CD between -5 and +55 °C.
z Do not store the CD in excessively dusty places.
z Do not keep the CD close to sources of magnetic radiation.
z Protect the CD from moisture.
z Protect the CD from direct sunlight.
1.3
Meaning of the warning notices
The severity of a hazard is indicated by the following written warning notices.
1.4
Signal word
Type of risk
CAUTION
There is a risk of minor injuries or damage to property
IMPORTANT
Malfunctioning may result
Meaning of the hazard symbols
The nature of the hazard is indicated by icons.
Caution - Dangerous area!
Caution: Dangerous electrical voltage!
10
Siemens Building Technologies
Fire Safety & Security Products
03.2009
Software description
2
Software description
IVM Config is a CCTV product.
The Interactive Video Management system (IVM) is suitable for universal operation
thanks to its software architecture and scalability. The systems comprises the
following applications:
z IVM Server
z IVM Config
z IVM CLIENT
The IVM Config configuration software is used to configure the system setup,
workstations, users, commands and alarm management. This allows the Video
Management System to be adjusted to meet a wide range of different requirements
and sizes of system.
This Instruction Manual contains information on the setup, installation and
configuration of IVM. The SISTORE units can be operated using the IVM Client or
IVM Client (VB) application software.
2.1
Program window IVM Config
Fig. 1
IVM Config main window
1
Menu bar
2
Toolbar. See Section 2.2: Toolbar.
3
Group display
4
Status bar
11
Siemens Building Technologies
Fire Safety & Security Products
03.2009
Software description
The menu bar consists of the menu items:
z Files
z General settings
z Server configuration
z System configuration
z Assistants
z Help
Online or offline operation
In the status bar, you can check if your PC is connected to the server.
No connection to server: offline operation
Connected to server:
online operation.
2.2
Toolbar
The Toolbar is designed for quick selection of functions. When the mouse pointer
is over a button a QuickInfo is displayed, giving information on the function of that
button. From here it is possible to add, edit and delete groups and components.
2.3
1
Add a new group. See Section 5.1: New group.
2
Add a new component. See Section 6.1: Add a new component.
3
Edit a group. See Section 5.2: Edit a group.
4
Edit a component. See Section 6.2: Edit component properties.
5
Delete a group. See Section 5.3: Delete a group.
6
Delete a component. See Section 6.3: Delete a component.
Help
The online help as a PDF file as well as general product and project information is
available under the Help menu.
Prerequisite:
The Adobe Acrobat Reader software is installed on your computer.
The Adobe Acrobat Reader Software is included on the accompanying CD.
12
Siemens Building Technologies
Fire Safety & Security Products
03.2009
Software description
1.
Select the menu sequence Help > Help.
Î
Adobe Acrobat Reader opens.
Î
The PDF file is opened.
The Acrobat bookmarks can be used to find the information you need quickly.
2.4
Information on the version and system information
1.
To display general information and information on the system, select the
menu sequence Help > About IVM…
Î
The information will be displayed under the General information and System
information tabs (see Fig. 2 and Fig. 3).
Fig. 2
General information
13
Siemens Building Technologies
Fire Safety & Security Products
03.2009
Software description
Fig. 3
2.
To obtain information on the current program and database versions, select
the menu sequence Help > About IVM Config.
Î
The information will be displayed in the IVM Config: Info window:
Fig. 4
3.
System information
IVM Config: Info
To display detailed system information, click System Info… in the IVM
Config: Info window.
14
Siemens Building Technologies
Fire Safety & Security Products
03.2009
Software description
Î
The following window opens:
Fig. 5
Detailed system information
15
Siemens Building Technologies
Fire Safety & Security Products
03.2009
Operational setup
3
Operational setup
3.1
Configuring the system environment
In principle it is possible to work through the individual program dialog boxes
independently of each other and in any order. If you are not familiar with the
configuration procedure, however, the following procedure is recommended:
The software is split up into two parts:
Basic configuration
1.
First of all configure all of the devices used (video matrix switchers, monitors,
cameras etc.). For more information, see Section 6.1: Add a new component.
2.
Set up the interfaces and connections to the devices. For more information,
see Section 7.1: Configuring ports.
Alarm configuration
3.
Once the hardware has been configured, it is possible to begin setting up user
accounts, alarms, alarm groups, alarm sequences etc.
It is important to follow a logical naming and database ID scheme!
Before the system is configured, a clear concept should be designed, based on the system setup,
which defines the assignment of IDs to the input, output, alarm, contact, video matrix etc.
3.2
Video components
IVM supports the following video components and devices:
Video component/Device
Version
SISTORE AX
SISTORE AX 2.4 or higher
SISTORE MX
SISTORE MX 2.50 or higher
SISTORE CX
SISTORE CX 3.5
SIMATRIX EPROM
min. VM10204.X05 for SIMATRIX 1.6.4.6
min. VM60204.X05 for SIMATRIX 6.4.8
min. VM80204.X05 or VM90204.X05 for SIMATRIX SYS
16
Siemens Building Technologies
Fire Safety & Security Products
03.2009
Operational setup
3.3
System configuration examples
System configurations supported by the IVM:
System configuration
Comment
IVM – SIMATRIX
Standard configuration
Cascade arrangement of max.
2 video matrix switchers
IVM with the TELSCAN WEB Server
Standard configuration
The web server is used in conjunction
with the IVM for video broadcast over
an IP network. The alarm processing
and the video matrix functionality are
controlled from the IVM server. The
live picture supplied by the TELSCAN
WEB server is displayed on the IVM
client. If the web server is used
behind the video matrix switcher, only
one input on the TELSCAN WEB
Server is supported. The number of
live images depends on the
performance of the client computer. If
two or more live pictures are to be
displayed simultaneously, the
TELSCAN Live Player is required.
This allows up to 4 images to be
displayed simultaneously on a 1 GHz
computer.
IVM with an encoder / decoder
Project configuration
Ordering and handling only via SSE!
In this configuration the IP network is
used to simulate a central video
matrix switcher.
17
Siemens Building Technologies
Fire Safety & Security Products
03.2009
Operational setup
System configuration
Comment
Complex system: IVM-OTN-TELSCAN WEB Server
Project configuration
Ordering and handling only via SSE!
Cascading of various types of
transmission media.
SISTORE CX with IVM and Cluster Server
Standard configuration
z Virtual matrix
z Web Client
z Alarm processing
The Cluster Server is required only if
the video system is controlled via the
WEB Client.
The Cluster Server permits
simultaneous access to several
SISTORE CX units. This allows live
images to be displayed from various
remote locations (max. 4 cameras) as
well as global archive retrieval and
backup via the WEB Client.
The Cluster Server & Web Server &
SISTORE Domain Server
applications are pre-installed on the
Video Cluster Server.
18
Siemens Building Technologies
Fire Safety & Security Products
03.2009
Operational setup
3.4
System requirements for the IVM Server
The following server system requirements are recommended for the IVM Server:
Processor
Dual-core processor
RAM
1 GB
Available hard drive capacity
40 GB
Operating system
Windows XP, Windows 2003 server or Windows 2008 server
Graphics card
With support for DirectX 8 (or later version)
Screen resolution
Min. 1024 x 768 pixels
Colour depth
16 bit or 32 bit (24 bit not supported)
Additional information can be found in the Readme file in the directory D:\Cevis.
19
Siemens Building Technologies
Fire Safety & Security Products
03.2009
Operational setup
3.5
Setting the hardware acceleration for DirectX
In the Windows Server 2003 operating system, the hardware acceleration is set to
"None" by default. In order that your SISTORE CX live images can be displayed
using DirectX, the hardware acceleration must be set to "Full“.
Prerequisite:
Use of a 128 MB AGP 8x graphics card.
1.
Right-click on your desktop.
2.
Select Properties.
Î
3.
The Display Properties window opens (see Fig. 6).
Select the Settings tab.
Fig. 6
4.
Click Advanced.
Î
5.
Windows – Display Properties
The Plug and Play Monitor ... window opens (see Fig. 7).
Select the Troubleshoot tab.
20
Siemens Building Technologies
Fire Safety & Security Products
03.2009
Operational setup
Fig. 7
3.6
Windows – Plug and Play Monitor ...
6.
Move the control slider to Full.
7.
Click OK.
Î
The hardware acceleration for DirectX is now set to maximum.
Î
The CX live images can be displayed using DirectX.
System requirements for the database
From IVM version 1.4 only the following databases are supported:
z MS Access
z MS SQL Server 2005 (only project-specific).
IVM is used with SQL Server for project configurations and is installed by the Engineering Department
PSG.
21
Siemens Building Technologies
Fire Safety & Security Products
03.2009
Operational setup
3.7
IVM system limits
Using the Access database provided, trouble-free operation is guaranteed up to
the following system size:
z 32 x IVM Client or 32 x Terminal Client (max. 32 in total)
z 5 x video matrix switcher (max. 255 inputs in total)
z 1 x TELEMAT basic system (max. 30 inputs)
z 50 x TELSCAN web server
z 5 x SISTORE AX or SISTORE MX Pro
z 500 x SISTORE CX4/CX8
z 500 alarms per day, 10 alarms per minute, 4 connections per second
(non-cascaded systems)
z Alarm acknowledgement approx. 10 alarms/second or 50 alarms within 4
seconds
(depending on the performance of the IVM server)
z Dependency between dwell time + number of sequences: approx. 10 sequences
if dwell time = 5 s
z Management of up to 256 cameras per plan
z Management of up to 20 plan referrals per plan
z Management of up to 120 multifunction icons or alarm icons per plan
Additional information can be found in the Readme file in the directory D:\Cevis.
We recommend using only one SISTORE type in CCTV systems. It is however possible to combine
SISTORE SX and SISTORE CX!
Larger system sizes can be implemented as customized project-specific solutions.
Not every possible configuration is explicitly described.
22
Siemens Building Technologies
Fire Safety & Security Products
03.2009
Operational setup
3.8
TCP/UDP ports used
3.8.1
Standard ports for SISTORE CX, MX and AX
It is recommended to release the ports only for individual devices (port forwarding).
SISTORE CX
Port
Protocol
Description
1900 – 1910
UDP
SISTORE SX/CX Config
8000 – 8032
UDP
RTP Multicast (Video Streaming)
21
TCP
Update
80
TCP
Home page
1200 – 65535 TCP
Unicast (Video Streaming)
SISTORE MX
Port
Protocol
80
TCP
Description
Home page
40
TCP
Server
1100 – 1121
TCP
Video Streaming
SISTORE AX
Port
Protocol
Description
8201
TCP
Call-back
8200
TCP
Administrator
8016
TCP
Monitoring
10019
TCP
Search
23
Siemens Building Technologies
Fire Safety & Security Products
03.2009
Operational setup
3.8.2
Enabling access to IVM applications
Access to Client applications
When the SISTORE client application has been installed, the following security
alert is displayed:
Fig. 8
1.
Windows Firewall – Security Alert
Click Unblock.
Î
The port for the SISTORE device is enabled automatically.
Port for IVM Client
The port for the IVM Client has to be added manually.
1.
Select Settings > Control Panel in the Windows start menu.
2.
Double-click on Windows Firewall.
3.
Click the Exceptions tab.
4.
Click Port…
24
Siemens Building Technologies
Fire Safety & Security Products
03.2009
Operational setup
Î
The following dialog box opens:
Fig. 9
Windows Firewall – Add a Port
5.
Enter "IVM Client“ in the Name text field.
6.
Enter "5688" in the Port number text field.
7.
Activate the option TCP.
8.
Click OK.
Î
The port for IVM Client has now been added.
25
Siemens Building Technologies
Fire Safety & Security Products
03.2009
Operational setup
Fig. 10
Windows Firewall – Exceptions
Access to Server applications
To ensure the correct functioning of the IVM applications the Windows firewall
settings must be configured accordingly.
z To allow a client PC access to IVM applications, the Windows firewall should be
configured such that access is granted to all IVM applications. Examples of
exceptions: See Fig. 10 Windows Firewall – Exceptions.
z These settings are described in the Windows user manuals.
26
Siemens Building Technologies
Fire Safety & Security Products
03.2009
Software installation
4
Software installation
4.1
Installation procedure
The installation procedure is described in the file readme.txt.
The following figure gives a summary of the installation procedure with IVM,
SIMATRIX and an Access database:
Fig. 11
SIEMENS Video Software installation
27
Siemens Building Technologies
Fire Safety & Security Products
03.2009
Software installation
4.2
WIBU dongle installation
The IVM Server, IVM Client und IVM API Software are protected by the WIBU
dongle. It is therefore necessary to install the WIBU-BOX Software. The WIBUBOX installation software is to be found on the IVM installation CD in the directory
<CD LW>:\Wibu\setup.exe. The installation procedure is automatic as part of the
FSP VSS Setup.
If the WIBU-BOX/P is not plugged in to the parallel port (LPT..) or the USB port, the programs will only
run in DEMO mode!
4.3
Setting up the ODBC data sources
The ODBC database source (IVM_NT, ARCHIVE, IVM_NT_Terminal etc.) are set
up using the VSS installation routine. If the data sources need to be changed follow
the steps below (here an example for the IVM_NT database):
1.
Select the menu sequence Start > Settings >
Control Panel > Administrative Tools > Data Source (ODBC).
Fig. 12
2.
Control Panel – Administrative Tools
Add the ODBC data sources (depending on the database used it may be
necessary to select the SQL driver or the MS Access driver).
If the IVM Client is installed on a separate PC, all ODBC connections must be linked to the database
on the server!
28
Siemens Building Technologies
Fire Safety & Security Products
03.2009
Software installation
Fig. 13
ODBC Data Source Administrator
3.
Configure the access driver in the following manner:
4.
Select Microsoft Access Driver (*.mbd).
Fig. 14
5.
Creating a new data source
Click on Finish.
29
Siemens Building Technologies
Fire Safety & Security Products
03.2009
Software installation
Î
The following dialog box opens:
Fig. 15
6.
ODBC Microsoft Access Setup
Click Select...
Î
The following dialog box opens:
Fig. 16
"Select System Database" dialog
7.
Select the DATA file.
8.
Select the database IVM_NT.mdb.
9.
Click OK.
30
Siemens Building Technologies
Fire Safety & Security Products
03.2009
Software installation
Î
The following dialog box opens:
Fig. 17
ODBC Microsoft Access Setup
10. Select the Database option.
11. Click System Database...
Î
The following dialog box opens:
Fig. 18
Selecting the system database
12. Select the DATA file.
13. Select the system database System.mdw.
14. Click OK.
31
Siemens Building Technologies
Fire Safety & Security Products
03.2009
Software installation
Î
The following dialog box opens:
Fig. 19
ODBC Microsoft Access Setup
15. Click OK.
32
Siemens Building Technologies
Fire Safety & Security Products
03.2009
Software installation
4.4
Get time of client PC from an NTP server
An NTP server always provides the current time. The time of your PC will be
updated continuously with the time from the NTP server. This is a periodic
synchronization mode, i.e. the time is updated at regular intervals. This may take
several hours.
Prerequisite:
In order to get the time from an NTP Server the IP address of the NTP Server must
be specified.
1.
Open the command prompt of your PC via the Windows Start menu.
Fig. 20
2.
Open command prompt from the Start menu
Enter the following command:
net time /setsntp:xxx.xx.xx.xxx
* Enter the IP address of the NTP Server for xxx.xx.xx.xxx.
Fig. 21
Command prompt
33
Siemens Building Technologies
Fire Safety & Security Products
03.2009
Software installation
3.
Restart your client PC or enter the following command in the command
prompt of your PC:
net stop w32time
net start w32time
4.
Open the "Windows Time" service from the Windows Start menu:
Start > Settings > Control Panel > Administrative Tools > Services >
Windows Time
Î
The following dialog box opens:
Fig. 22
5.
Windows Time Properties
Select Automatic for the startup type in the General tab.
Î
When your client PC is started, a connection to the NTP server will be
established automatically.
34
Siemens Building Technologies
Fire Safety & Security Products
03.2009
Software installation
4.5
Debugging with the log files
The IVM Server and the IVM Client create their own log files (filenames:
IVMNTLogfile.txt is located in Cevis/IVM_NT_Server and Client.log is located in
Cevis/IVM_NT_Client). It is possible to look for clues for problem solving in these
files.
4.6
Checking the network settings
Determining the IP address
The IP address can be determined using the command ipconfig or ipconfig/all in
the MS DOS box.
Testing the network connection
In the MS-DOS box the command ping IP address (e.g. ping 142.11.71.205) or
ping computer name (ping IVM_NT_Server1) can be used to check whether the
network connection to any given computer is present.
4.7
Resolution of host names
Devices that are connected in a TCP/IP network are addressed using their IP
addresses. The IP address is a 32-bit string which is usually represented in the
form xxx.xxx.xxx.xxx (e.g. 141.073.022.023). As names are always easier to
remember than numbers, a method has been developed which allows IP
addresses to be resolved into concrete names. This method has now been
integrated in the IVM system.
From IVM version 1.8, nearly all devices that are connected over a TCP/IP network
are addressed using the device name. The only exceptions are SISTORE CX and
SISTORE AX. To establish communication with these devices, the IP address has
to be entered.
When setting up devices that will interface with IVM, it is important to ensure that
the device name corresponds with the computer name of the sub-system.
The following table shows which devices support name resolution:
Unit
SISTORE AX
SISTORE MX
SISTORE CX
IVM Client / IVM Server communication
Name resolution supported
8
9
8
9
35
Siemens Building Technologies
Fire Safety & Security Products
03.2009
Software installation
If the devices are connected using routers, the name resolution will normally not work without a
specific router configuration. In that case it is recommended to include the IP address as well as the
associated device name in the lmhosts file.
The lmhosts file can be found in the directory
and be edited using a standard editor.
When using the Imhosts file make sure to delete the .sam suffix.
Fig. 23
Excerpt from the lmhosts file
36
Siemens Building Technologies
Fire Safety & Security Products
03.2009
Software installation
4.8
Directory structure on the hard disk
Depending on the components selected, the installation creates the following
directory tree:
Directory containing the current database
Directory containing pre-configured 16/4 standard database
Directory containing the icons for the graphical interface
Contains the I/O Server
IVM API libraries of own applications
Contains the IVM Client (as an application)
Contains the IVM ConfigTool
Contains IVM Server files
Contains the IVM Terminal ConfigTool
Contains the display format for the databases
Contains the IVM Client (via Internet Explorer)
Language files for the Client, Config, etc.
Directory for the background images “*.bmp” and “*.jpg”
Contains SIMATRIX configuration software
Contains SISTORE MX VIEWER
Contains SISTORE SX/CX Client software
Contains system files
Contains files for the WIBU-KEY dongle
Fig. 24
Directory structure
37
Siemens Building Technologies
Fire Safety & Security Products
03.2009
Software installation
4.9
IVM Config update
For systems with SISTORE devices, please note that in the event of an IVM update, a SISTORE
update is also necessary if
z the SISTORE CX version is lower than V1.5
z the SISTORE MX version is lower than V2.5
z the SISTORE AX version is lower than V2.4
From IVM Server version 1.3 the server performs the database update automatically. For all former
versions please call the hotline.
Fig. 25
IVM Update
38
Siemens Building Technologies
Fire Safety & Security Products
03.2009
Software installation
4.10
Command line parameters
IVM Server, and Terminal Service support the use of command line parameters,
which may be used to control additional functions of these components.
The following command line parameters are available:
/d The entry in the task manager is deleted for the respective component.
/i An entry is added to the task manager without any dependencies for the
respective component – default setting!
Example:
IVM_NT_Server /i
/I dependency comma list
Depending on the system environment, it may be necessary to start other services
(e.g. MSSQLSERVER) before starting the IVM service. These dependencies can
be defined using the parameter /i.
Example:
A dependency to the MSSQLSERVER service is entered:
IVM_NT_Server /iMSSQLSERVER
The mode of the service entry is “Automatic”, i.e. this service will be started
automatically when the machine is rebooted!
39
Siemens Building Technologies
Fire Safety & Security Products
03.2009
Software installation
4.11
Starting IVM Config
Prerequisites:
The IVM server has been started.
The dongle is plugged into LPT1 and the licence file IVM_NT_*.LIC is located in
the server application directory.
1.
Select the menu sequence Start > Programs > SIEMENS Video Software
Suite > IVM Server.
2.
Select the menu sequence Start > Programs > SIEMENS Video Software
Suite > IVM Server > IVM Config.
Î
The following dialog box opens:
Fig. 26
3.
IVM Config – Login dialog
Select a language.
The user name and password are predefined. The entry is case-sensitive.
4.
Enter "admin“ in the User field.
5.
Enter "admin“ in the Password field.
6.
Click OK.
The system must be restarted after any changes are made in the Config tool!
40
Siemens Building Technologies
Fire Safety & Security Products
03.2009
Software installation
4.12
Starting IVM Config in demo mode
In demo mode there is no communication with the IVM server.
Demo mode can be started with the command line switch demo, i.e.
<DRIVE LETTER>:\CEVIS\IVM_NT_Client\IVM_NT_Client.exe demo.
4.13
Initial configuration
4.13.1
Size of logbook / Logging
1.
Select the menu option General settings.
2.
Select the Logging tab.
Î
The following dialog box opens:
Fig. 27
General settings – Logging
Max. size of alarm, command
and event logbooks.
If the specified number of entries in the log is exceeded, the oldest
entries are overwritten.
Size when warning is issued
(alarm, command and event
logbook).
If the specified number of entries in the log is exceeded, a warning
is displayed in the IVM client to move the log, in order to prevent
loss of data. More information can be found in the IVM Client User
Manual.
3.
Enter the maximum size (number of lines) of the logbooks.
z The size at which a warning will be generated must not exceed ’10,000’.
z If the size is ’0’ no warning will be generated.
4.
Enter the size of the logbooks at which a warning is to be generated.
41
Siemens Building Technologies
Fire Safety & Security Products
03.2009
Software installation
4.13.2
Entering system information
1.
Select the menu option General settings.
2.
Select the System information tab.
Î
The following dialog box opens:
Fig. 28
3.
General settings – System information
Enter the following system information:
Customer
Name of the customer
Project name
Name of the project
Comment
Comment about the system
42
Siemens Building Technologies
Fire Safety & Security Products
03.2009
Software installation
4.13.3
Set operating mode
1.
Select the menu option General settings.
2.
Select the Operation mode tab.
Î
The following dialog box opens:
Fig. 29
General settings – Operation Mode
Warning: Camera is connected
to several monitors
If a camera is connected to several monitors, the message
"Camera x is already connected with user x“ is displayed in the
status bar and in the message list of the IVM Client.
Cancel connection on higher
priority
If all the video inputs between the matrix switchers are busy,
only a user with a higher priority than is required for the current
connections can select a camera.
Cancel connection on logout
If this checkbox is selected, the current user's connections are
cancelled when he logs off the system.
Use manual SISTORE inputs on
alarms
If this check box is selected, the SISTORE recording inputs are
assigned manually by the user. You can select the mode
“automatic/manual“ in the dialog box "Edit component properties“
in the "Inputs" tab. See Section 6.1.3: Configuring inputs.
Depending on the base component you have selected in the
Hardware tab, further settings have to be made. See Section
18: SIMATRIX integration and Section 19: SISTORE CX/AX/MX
integration.
43
Siemens Building Technologies
Fire Safety & Security Products
03.2009
Software installation
Server Mode
The Access database is selected by default in the standard configuration. In demo
mode the server simulates communication with the SIMATRIX or TELEMAT.
Fig. 30
4.13.4
Server Mode
Language settings
1.
Select the menu option General settings.
2.
Select the Language tab.
Î
The following dialog box opens:
Fig. 31
Language settings
The following filename extensions are used:
German
=*.ger
English
=*.eng
Spanish
=*.spa
Special
=*.xyz
Italian
=*.ita
Dutch
=*.hol
French
=*.fra
Catalan
=*.cat
Ruski
=*.rus
Polish
=*.pol
The language files are located in: D:\Cevis\Language
The selected languages are then available in the Client and Config.
44
Siemens Building Technologies
Fire Safety & Security Products
03.2009
Software installation
4.13.5
Client connections
1.
Select the menu option General settings.
2.
Select the Client connection tab.
Î
The following dialog box opens:
Fig. 32
Client connection
If the IVM Client is installed on the same PC as the IVM Server then the default
loop address 127.0.0.1 can be used, otherwise it is necessary to use the real IP
address.
If the IVM Client is installed on a separate PC, the IP address of the IM Server must be entered in the
AdminTool.
45
Siemens Building Technologies
Fire Safety & Security Products
03.2009
Software installation
4.13.6
Terminal connection
1.
Select the menu option General settings.
2.
Select the Terminal connection tab.
Î
The following dialog box opens:
Fig. 33
3.
Terminal connection
Make the desired settings.
46
Siemens Building Technologies
Fire Safety & Security Products
03.2009
Group configuration
5
Group configuration
Individual hardware components can be bundled into groups. The group can
subsequently be administered in plans See Section 15: Plan configuration.
"Group“ is the default group name. The designation "Group“ originates from the database. You can
change the name while editing the group. See Section 5.2: Edit a group.
5.1
New group
1.
Click the icon
Î
The following dialog box opens:
Fig. 34
2.
Add new group.
Add a new group
Enter the name of the group.
The addition of a comment or changing the Database ID is optional.
3.
Click OK.
Î
5.2
A new group of components is added to the system.
Edit a group
1.
Click on any cell in the desired group column.
2.
Click the icon
Î
3.
Edit group.
The Add a new group dialog box opens (see Fig. 34).
Edit the properties of the group. See Section 5.1: New group.
47
Siemens Building Technologies
Fire Safety & Security Products
03.2009
Group configuration
5.3
Delete a group
1.
Click on any cell in the desired group column.
2.
Click on the icon
Î
The following safety query appears:
Fig. 35
3.
Delete group.
Delete a group
Click Yes.
Î
The data for a group, and for all components belonging only to that group, can
be deleted completely using this button. Any components belonging to the
selected group and at least one other group remain intact.
48
Siemens Building Technologies
Fire Safety & Security Products
03.2009
Configuring components
6
Configuring components
6.1
Add a new component
The hardware settings are used to select CCTV components.
Depending on the type of component, various other configuration settings or forms
may be necessary.
It is recommended that the total size of system envisaged should be defined from the start with
respect to in and outputs, since previous in/out settings may be lost in a currently working system if
subsequent changes to the number of in and outputs are made.
1.
Click on Add new component.
Î
The following dialog box opens:
Fig. 36
2.
Add a new component
Enter the name of the component. The addition of a comment is optional.
To select a SISTORE AX or SISTORE MX component, select "SISTORE“.
3.
Select a new component in the Base component list box.
Î
The appearance of the screen depends on the selected base components:
49
Siemens Building Technologies
Fire Safety & Security Products
03.2009
Configuring components
Fig. 37
Î
Add a new component – Organization
If the selected component is a SISTORE device or a video matrix switcher,
you can decide whether or not signal loss is to be detected and reported .
4.
If signal loss is not to be reported, unmark the checkbox Detect signal loss.
5.
Configure the new component.
Component
Configuration of the component
I/O Server
See Section 20.2: Adding and configuring an I/O Server.
OTN Network
See Section 6.1: Add a new component and Section 6.1.5: On-screen
display (OSD).
VKS
See Section 18.1: Adding and configuring SIMATRIX.
SISTORE AX
See Section 19.3.2: SISTORE AX configuration.
SISTORE MX
See Section 19.4.3: Configuring SISTORE MX.
SISTORE CX
See Section 19.2.3: SISTORE CX configuration.
Visiowave Network
See Section 6.1: Add a new component.
50
Siemens Building Technologies
Fire Safety & Security Products
03.2009
Configuring components
6.1.1
Assigning a component to a group
The current component needs to be added to one or more existing groups. The
assignment of components to different groups is used to organize the system. This
is necessary for very large CCTV systems, for example in underground railway
systems, airports, etc. All video matrix switchers in an airport terminal can be
combined together, for example.
Prerequisite:
You have selected a base component.
You have created at least two groups. Information on how to add a group can be
found in Section 5.1: New group.
1.
Select the Groups tab.
Fig. 38
Î
Add a new component – Groups
The available groups are listed in the Available groups section.
2.
Select a group in the Available groups list.
3.
Assign the component to the selected group using the arrow button or by
double clicking on the group.
Î
4.
The component has been assigned to the group and will be displayed in the
Selected groups list.
Click Apply.
51
Siemens Building Technologies
Fire Safety & Security Products
03.2009
Configuring components
6.1.2
Setting type of protocol and port
Prerequisite:
You have selected a base component.
1.
Select the Communication tab.
Fig. 39
Add a new component – Communication
2.
Select the type of protocol: RS232, RS485 or TCP/IP in the Type of Protocol
drop-down list.
3.
Select the port in the Port drop-down list.
– OR –
Select "New port…“ in the Port drop-down list if you wish to create a new
port.
4.
To edit a port, click on Edit….
52
Siemens Building Technologies
Fire Safety & Security Products
03.2009
Configuring components
Î
The following dialog box opens:
Fig. 40
Edit port properties – Identification
For more information, see Section 7.1: Configuring ports.
6.1.3
Configuring inputs
Prerequisite:
A base component has been selected.
1.
Select the Inputs tab.
Fig. 41
Edit component properties - Inputs
53
Siemens Building Technologies
Fire Safety & Security Products
03.2009
Configuring components
Connection to outputs on the same device is not possible!
2.
Select the Type of the connection.
The following connection types are available:
Î
None
Select "None" if this input is not to be used to establish a connection.
Connection
Select "Connection" if the component is to be connected behind the video
matrix.
Split Camera
Select "Split Camera" if the component is to be connected before the video
matrix. The camera is connected to SIMATRIX and to SISTORE unit.
CCBx
K500
K505
For cameras that are directly connected to the SISTORE unit.
A standard name will be entered automatically.
Make sure to use a uniform naming scheme. This contributes to clear organization of the system.
3.
If you want to change a standard name, you can overwrite it in the Name
column.
4.
Other information can be added in the Comment text box.
This information is also evaluated in the SISTORE archive.
The ID is assigned automatically by the system.
Depending on the base component you have selected in the Hardware tab, further settings have to be
made. See Section 18: SIMATRIX integration and Section 19: SISTORE CX/AX/MX integration.
54
Siemens Building Technologies
Fire Safety & Security Products
03.2009
Configuring components
6.1.4
Configuring outputs
Fig. 42
Edit component properties – Outputs
Possible types of output are:
z none
z Connection
z Monitor
z VCR
z Video server
During configuration attention should be paid to a uniform naming scheme, since
this contributes to clear organization of the system.
Connection is also possible to the inputs of other devices: Select “connection” and
a dialog box will open automatically, allowing the device and the device input to be
selected.
Connection to inputs on the same device is not possible.
The icons for display on the workstation can be configured to control the individual
states of the devices connected to the outputs.
The outputs in the IVM Client are represented by the icons contained in the tables
Icon Standard, Icon Displayed, Icon Record, Icon Failure und Icon Alarm. If no
other icons are entered, the IVM Client will use the default icons.
To select an icon click on the
button in the corresponding row (see Fig. 42).
55
Siemens Building Technologies
Fire Safety & Security Products
03.2009
Configuring components
The following window opens:
Fig. 43
6.1.5
Input icon
On-screen display (OSD)
In the current version, the on-screen display (OSD) is only supported for the components VKS and
OTN Network.
Using the transport device it is possible to display text strings and functions in the
video image.
The following text strings can be configured:
z relatively static text such as camera name, location etc.
z text during alarm display, i.e. “Alarm”.
z function texts such as “left”, “right” (camera control).
z any other messages.
Edit OSD template
1.
Select OTN Network in the Hardware tab. See Section 6.1: Add a new
component.
2.
Activate the check box OSD.
3.
Select the On-Screen Display (OSD) tab.
56
Siemens Building Technologies
Fire Safety & Security Products
03.2009
Configuring components
Î
The following dialog box opens:
Fig. 44
OSD editor
New OSD templates can be created or deleted using the commands New, Delete
and Save.
OSD text display is reserved exclusively for staff from SIEMENS Karlsruhe.
4.
Select an available OSD template or create a new one.
Î
5.
The OSD template is opened:
Right-click on the desired text field.
57
Siemens Building Technologies
Fire Safety & Security Products
03.2009
Configuring components
Î
The following context menu opens:
Text properties
Select Properties in the context menu.
The following dialog box opens:
Fig. 45
Text properties
Here you can select the position of the text, its width, as well as the background
and foreground colours.
Deleting text
Select Delete current text in the context menu.
Adding text
Select the appropriate item in the context menu (Camera, Alarm, User, Function
or Location):
The text entered is only displayed if the text width is wide enough!
58
Siemens Building Technologies
Fire Safety & Security Products
03.2009
Configuring components
Positioning the text
If the text needs to be repositioned select the text at the top left-hand corner with
the left mouse button. Hold down the left mouse button to move the text. The x/y
coordinates of the current position of the text are displayed in the status bar.
Fig. 46
Positioning the text
The position of the various text strings is defined by the top-left corner and can be
positioned anywhere. The software does not check whether the text is completely
within the display area of the monitor or whether various text strings overlap.
59
Siemens Building Technologies
Fire Safety & Security Products
03.2009
Configuring components
Assigning an OSD template to a camera
Prerequisites:
At least 1 input must be selected in the Inputs list in the Hardware tab.
The cameras can now be assigned in the Inputs tab.
Fig. 47
Edit component properties - On Screen Display (OSD)
Here you can assign the OSD templates to the individual cameras.
Î
All predefined OSD templates are displayed in the list box (bottom right).
For a template to be assigned the camera must first be selected.
1.
You can select areas using the Shift and Ctrl keys.
2.
The template is assigned to, or removed from, the camera using the arrow
buttons.
Assign OSD template
Remove template
3.
Click OK.
Î
The settings will be saved.
60
Siemens Building Technologies
Fire Safety & Security Products
03.2009
Configuring components
6.2
Edit component properties
1.
Select the component you wish to edit.
2.
Click the button Edit component.
Î
The following dialog box opens:
The appearance of the screen and the tabs displayed (see Fig. 48) depends on the selected base
components.
Fig. 48
3.
Edit component properties
Configure the new component.
Component
Configuration of the component
I/O Server
See Section 20.2: Adding and configuring an I/O Server.
OTN Network
See Section 6.1: Add a new component and Section 6.1.5: On-screen
display (OSD).
VKS
See Section 18.1: Adding and configuring SIMATRIX.
SISTORE AX
See Section 19.3.2 SISTORE AX configuration.
SISTORE MX
See Section 19.4.3: Configuring SISTORE MX.
SISTORE CX
See Section 19.2.3: SISTORE CX configuration.
Visiowave Network
See Section 6.1: Add a new component.
61
Siemens Building Technologies
Fire Safety & Security Products
03.2009
Configuring components
6.3
Delete a component
The data for a component can be deleted completely using the button Delete
component. Deletion commences only after user confirmation.
Fig. 49
Delete a component
62
Siemens Building Technologies
Fire Safety & Security Products
03.2009
Server configuration
7
Server configuration
7.1
Configuring ports
Please make sure to assign the interfaces only once. For instance, an interface that is assigned to
IVM Terminal Config cannot be used for other applications within the IVM.
Select Ports in the Server configuration menu.
Î The following dialog box opens:
Fig. 50
Configuring ports
New RS232 serial ports can be added, edited or deleted in this dialog box.
Adding a new port
Fig. 51
Edit port properties – Identification
63
Siemens Building Technologies
Fire Safety & Security Products
03.2009
Server configuration
Fig. 52
Edit port properties – Data format
Fig. 53
Edit port properties – Baud rate
Fig. 54
Edit port properties – Flow control
64
Siemens Building Technologies
Fire Safety & Security Products
03.2009
Server configuration
The port properties can be defined in the various tabs. The default settings are the
SIMATRIX164 / 648 / SYS properties.
7.2
Add server to the list
The server list only needs to be maintained for redundant systems.
1.
Select the menu sequence Server configuration > Server list.
In the list of redundant servers a maximum of 2 servers can be added, which
will be available to provide redundancy. To do this, you must be assigned the
appropriate rights. For more information, see Section 8: User administration
and administration of rights.
2.
Click Add.
Î
A new row will be added.
Fig. 55
3.
List of redundant servers
Enter the name of the computer on which the IVM server is installed in the
Name column.
Î
The server has been added to the list.
65
Siemens Building Technologies
Fire Safety & Security Products
03.2009
Server configuration
7.3
Server log settings
IMPORTANT
1.
Select Server-Log settings in the Server configuration menu.
Î
The following dialog box opens:
Fig. 56
2.
Changes may only be made by trained service personnel.
Server-Log settings
Select the functions which are to be logged in the log file.
Depending on the malfunction, the corresponding log level, i.e. Debug, Info,
Warning, Error or Fatal, can be selected.
66
Siemens Building Technologies
Fire Safety & Security Products
03.2009
User administration and administration of rights
8
User administration and administration of rights
The users granted access to the system need to be configured. A number of
different areas can be configured: Login, Function rights, SISTORE rights,
Cameras and Output devices.
In a network of systems with SISTORE SX/CX, a user must be registered to the system with the same
password for all devices. Otherwise communication problems may result.
1.
Select Users… in the System configuration menu.
Î
The following dialog box opens:
Fig. 57
Edit types
Button
Description
New
Create a new user. See Section 8.1: Create a new user.
Edit
Edit user properties. See Section 8.2: Edit user properties.
Delete
Delete a user.
Close
Close dialog.
67
Siemens Building Technologies
Fire Safety & Security Products
03.2009
User administration and administration of rights
8.1
Create a new user
1.
Click New.
Î
The following dialog box opens:
Fig. 58
Edit user properties [admin] – Login
Login
See Section 8.2: Edit user properties.
Function rights
See Section 8.3: Assigning function rights.
SISTORE rights
See Section 8.4: Assigning SISTORE user rights.
Cameras
See Section 8.5: Assigning user rights for cameras.
Output devices
See Section 8.6: Assigning user rights for output devices.
68
Siemens Building Technologies
Fire Safety & Security Products
03.2009
User administration and administration of rights
8.2
Edit user properties
1.
Make the following entries in the dialog box (see Fig. 58):
User name
User name is the login name for the user.
Database ID
The user is identified by the Database ID.
Full name
Provides additional information on the user.
Password
The Password is required for user login.
Priorities
User priorities are divided into:
z Normal
z High
z Urgent
Sequence
The priorities affect the video connections between cascading video matrix
switchers.
The Priorities are evaluated when a selection is made by the user. To
avoid conflicts between different users, it is possible to set priorities for
various functions. In general this should only be done for large systems and
should be carried out by qualified personnel.
Camera motion
Camera control
Camera lock time
To avoid conflicts between different users, who may want to control the
same camera the priorities, the “Camera motion” and “Camera lock time”
priorities can be used.
When a user completes a control operation such as panning, the camera
remains locked for the specified lock time, hence cannot therefore be
controlled by another user.
A user with higher camera priority is able to interrupt the camera lock time.
Selection priorities
For cascading transport devices there are generally fewer communication inputs
than signal sources available. If the user wants to display another camera and
there are no more communication inputs available, then existing lower priority
displays are deleted.
The default setting is Normal priority for individual selections and Sequence for
sequences. In critical situations it is possible for a user to select the priority High or
Urgent to ensure that the selection is successful. More information can be found in
the IVM Client User Manual.
69
Siemens Building Technologies
Fire Safety & Security Products
03.2009
User administration and administration of rights
8.3
Assigning function rights
You can assign function rights to the IVM Client user.
Prerequisite:
You have opened the Add a new user or the Edit user properties dialog box.
See Section 8.1: Create a new user.
1.
Select the Function rights tab.
Fig. 59
2.
Edit user properties [admin] – Function rights
Select the function rights to be assigned to the user.
The individual meanings of the functions are:
Camera control
Camera pan/tilt
Zoom in / Zoom out
Focus far / Focus near
Pan camera to a predefined position
Camera settings
Electrical/Mechanical selection
Save camera position
Switch AGC on/off
Select between B/W and colour
Special configurations for K505 and CCBx
Enable internal alarms
Enable/disable internal alarms
Internal alarms are reported by components within the
IVM system.
Enable external alarms
Enable/disable external alarms
Activate/deactivate external alarms
External alarms are reported to the IVM system by
autonomous external systems (e.g. Topsys, WinCC) via
the IVM API interface.
Acknowledge alarm
Acknowledge alarms
Configure groups
Define/edit/delete a group
Configure sequences
Define/edit/delete a sequence
70
Siemens Building Technologies
Fire Safety & Security Products
03.2009
User administration and administration of rights
3.
8.4
Configure scheduler
Define/edit/delete a scheduler entries
Software Monitors
Define a software monitor. See Section 16: Configuration
of the Software Monitor.
Archive logbook
Save the logbook
Warning of possible logbook overflow
Configure graphics (camera
position...)
Right in the IVM Client
Edit external alarms or objects
Right in the IVM Client that allows the user to edit
external alarms or objects.
Start external applications
Start external programs either directly on the server or via
the server on any client
Send messages
Send messages to other users
SISTORE module
Reserved for future versions
Lock COM ports
Lock or open a serial port on the server (used for the
SIMATRIX configuration program)
Configure server
Use the IVM Config
Switch I/O relays
Right to switch the I/O relays.
Close IVM Client
Close the IVM Client.
Click OK.
Assigning SISTORE user rights
An IVM Client user can be assigned rights for SISTORE devices.
Prerequisite:
You have opened the Add a new user or the Edit user properties dialog box.
See Section 8.1: Create a new user.
1.
Select the SISTORE rights tab.
Fig. 60
2.
Edit user properties [admin] – SISTORE rights
Select the rights to be assigned to the user.
71
Siemens Building Technologies
Fire Safety & Security Products
03.2009
User administration and administration of rights
You can assign the following rights:
Rights
Description
Start record
The user is assigned the right to start recordings.
Stop record
The user is assigned the right to stop recordings.
Playback
The user is assigned the right to play back recordings.
Set archive comment text
The user is assigned the right to add comments to a
SISTORE archive entry.
3.
8.5
Click OK.
Assigning user rights for cameras
The user is granted access to the cameras on the system to which he is supposed
to have access.
Prerequisite:
You have opened the Add a new user or the Edit user properties dialog box.
See Section 8.1: Create a new user.
1.
Select the Cameras tab.
Fig. 61
Edit user properties [admin] – Cameras
2.
Select a camera in the Cameras list.
3.
Assign the selected camera to the user either using the arrow buttons or by
double-clicking on the camera.
Î
The cameras assigned to the user are listed in the Selected cameras list box.
Î
Following the planning configuration, the cameras appear on the station plans
in the IVM Client application.
72
Siemens Building Technologies
Fire Safety & Security Products
03.2009
User administration and administration of rights
8.6
Assigning user rights for output devices
The user is granted access to the output devices (i.e. monitors) on the system to
which he is supposed to have access.
Prerequisite:
You have opened the Add a new user or the Edit user properties dialog box.
See Section 8.1: Create a new user.
1.
Select the Output devices tab.
Fig. 62
Î
2.
Edit user properties [admin] – Output devices
The cameras assigned to the user are listed in the Selected output devices
list.
Assign the selected devices to the user either using the arrow buttons or by
double-clicking on the device.
Î
The output devices assigned to the user are listed in the Available output
devices list. The selected output devices are shown in the IVM Client.
73
Siemens Building Technologies
Fire Safety & Security Products
03.2009
User administration and administration of rights
8.7
Edit user properties
1.
Select the menu sequence System configuration > Users...
Î
The following dialog box opens:
Fig. 63
Edit types
2.
Select the user you wish to edit.
3.
Click Edit.
Î
The following dialog box opens:
Fig. 64
4.
Edit user properties [admin] – Login
Configure the following settings in this dialog box:
Login
See Section 8.2: Edit user properties.
Function rights
See Section 8.3: Assigning function rights.
SISTORE rights
See Section 8.4: Assigning SISTORE user rights.
Cameras
See Section 8.5: Assigning user rights for cameras.
Output devices
See Section 8.6: Assigning user rights for output devices.
74
Siemens Building Technologies
Fire Safety & Security Products
03.2009
Workstations
9
Workstations
For each new Client a workstation needs to be configured.
1.
Select the menu sequence System configuration > Workstations.
Î
The following dialog box opens:
Fig. 65
Edit types – Workstations
Additional workstations can be added, edited or deleted in this dialog box.
Button
Description
New
Create a new workstation. See Section 9.1: Add a new workstation.
Edit
Edit a workstation. See Section 9.4: Edit workstation properties.
Delete
Delete a workstation.
Close
Close dialog.
75
Siemens Building Technologies
Fire Safety & Security Products
03.2009
Workstations
9.1
Add a new workstation
1.
Click New.
Î
The following dialog box opens:
Fig. 66
2.
Add a new workstation (local) - Organization
Enter the Name of the workstation, a Comment, and the Host name.
Output devices
See Section 8.3: Assigning function rights.
User
See Section 8.4: Assigning SISTORE user rights.
76
Siemens Building Technologies
Fire Safety & Security Products
03.2009
Workstations
9.2
Assigning output devices
Here output devices are assigned to workstations. The selection of the output,
individual and group components, as well as the sequence, are critical for the
Alarm Management. See Section 7: Server configuration.
Prerequisite:
You have opened either the Add a new workstation or the Edit workstation
properties dialog. See Section 9.1: Add a new workstation.
1.
Select the Output devices tab.
Fig. 67
2.
Click Add.
Î
The following dialog box opens:
Fig. 68
3.
Edit workstation properties [local] – Output devices
Available output devices
Select the available output devices.
This assignment is required for the alarm management.
77
Siemens Building Technologies
Fire Safety & Security Products
03.2009
Workstations
Where the server displays individual outputs is defined using the check box (individual alarm intrusion,
alarm groups and alarm sequences), i.e. on which output the alarm intrusion can also be
acknowledged eventually.
9.3
Assigning user rights for workstations
For a user to be able to log in to the workstation that user needs to be assigned to that workstation.
Here workstations are assigned to the users who are intended to use/operate
them.
Prerequisite:
You have opened either the Add a new workstation or the Edit workstation
properties dialog. See Section 9.1: Add a new workstation.
1.
Select the Users tab.
Fig. 69
Edit workstation properties [local] – Users
2.
Select the user you wish to assign rights for the workstation from the
Available users list box.
3.
Assign the selected workstation to the user either using the arrow buttons or
by double-clicking on the workstation.
Î
The users assigned to the workstation are displayed in the Selected users
list box.
78
Siemens Building Technologies
Fire Safety & Security Products
03.2009
Workstations
9.4
Edit workstation properties
1.
Select the menu sequence System configuration > Workstations.
Î
The following dialog box opens:
Fig. 70
2.
To edit a workstation, click on Edit.
Î
The following dialog box opens:
Fig. 71
3.
Edit types – Workstations
Edit workstation properties [local] – Organization
Enter the following in this dialog box:
Organization
Output devices
User
4.
Here you can change the workstation data. See Section 9.1: Add a new
workstation.
Here you can assign output devices. See Section 9.2: Assigning output devices.
Here you can assign user rights for workstations. See Section 9.3: Assigning
user rights for workstations.
Click OK.
79
Siemens Building Technologies
Fire Safety & Security Products
03.2009
Alarm group configuration
10
Alarm group configuration
Multiple cameras, and one alarm, can be displayed simultaneously using the alarm
groups. The alarm groups created are subsequently integrated into the commands.
Select the menu sequence System configuration > Alarm groups.
Î
The following dialog box opens:
Fig. 72
Edit types – Alarm groups
Additional alarm groups can be added, edited or deleted in this dialog box.
10.1
Alarm group organization
Here the organizational entries for the name and a descriptive comment for alarm
groups can be entered.
The alarm is referenced using the Database ID.
Fig. 73
Edit alarm group properties
80
Siemens Building Technologies
Fire Safety & Security Products
03.2009
Alarm group configuration
10.2
Alarm group cameras
An alarm group can have one or several cameras assigned to it, which are to be
displayed in the event of activation.
Using the arrow keys (or by double clicking on a group), selected cameras can be
moved between the list boxes for “Available cameras” and “Selected cameras”.
The selected cameras are listed in the list box on the right.
Fig. 74
Edit alarm group properties [AGRP_1] - Cameras
81
Siemens Building Technologies
Fire Safety & Security Products
03.2009
Alarm sequence configuration
11
Alarm sequence configuration
Configuration of the alarm sequences is split into two sections:
z Organization. See Section 11.1: Adding alarm sequences.
z Sequence items. See Section 11.2: Adding cameras to alarm sequences.
1.
Select the menu sequence System configuration > Alarm sequences.
Î
The following dialog box opens:
Fig. 75
Edit types
New
Add a new alarm sequence.
Edit
Edit alarm sequences.
Delete
Delete alarm sequences.
You can define whether a sequence which is interrupted by another alarm should
be restarted. The alarm intrusion is made in addition to an alarm selection. It can
be deleted either by single display or by acknowledging the alarm.
82
Siemens Building Technologies
Fire Safety & Security Products
03.2009
Alarm sequence configuration
11.1
Adding alarm sequences
1.
Clicking on New... allows a new sequence to be defined.
Î
The following dialog box opens:
Fig. 76
Edit alarm sequence properties
2.
Enter the name of the sequence, a comment, and the database ID.
3.
Click OK.
83
Siemens Building Technologies
Fire Safety & Security Products
03.2009
Alarm sequence configuration
11.2
Adding cameras to alarm sequences
1.
Select the Sequence items tab.
Fig. 77
Add an alarm sequence
Add
Add new sequence items.
Delete
Delete a sequence item.
2.
Click Add.
Î
The following dialog box opens:
84
Siemens Building Technologies
Fire Safety & Security Products
03.2009
Alarm sequence configuration
Fig. 78
Select sequence item - Cameras
3.
Select the cameras to be added to the sequence.
4.
Click Select.
Î
5.
The cameras have been assigned to the sequence.
Select the Groups tab.
Fig. 79
Select sequence item – Groups
Here you can add groups to the sequence.
6.
Click on Close.
7.
Enter the dwell time in seconds for the camera/alarm group in the Period (s)
list box.
85
Siemens Building Technologies
Fire Safety & Security Products
03.2009
Commands
12
Commands
12.1
Create a new command
The commands configured can also be used in the IVM Client and Scheduler.
1.
Select the menu sequence System configuration > Commands.
Î
The following dialog box opens:
Fig. 80
Edit commands
2.
Click Add.
3.
Click on an arrow in the Commands column and select the appropriate
command from the drop-down list.
Fig. 81
Command selection
Î
A command ID is generated.
Î
The Design VAPI command dialog box opens. See Sections 12.2.1 to
12.2.16.
4.
Configure the appropriate command. See Section 12.2: Configure commands.
5.
Click OK.
Î
The command is now created.
Î
The command code, the parameters and the comment are generated
automatically.
86
Siemens Building Technologies
Fire Safety & Security Products
03.2009
Commands
12.2
Configure commands
1.
Select the menu sequence System configuration > Commands.
Î
2.
Click the symbol
Î
3.
12.2.1
The Edit commands dialog box opens (see Fig. 80).
corresponding to the command.
The Design VAPI command dialog box opens.
Configure the command. See Sections 12.2.1 to 12.2.16.
Absolute alarm switching
Using the command Absolute alarm switching the selected input is mapped on
the selected output, independent of the operator station configuration.
Fig. 82
Design VAPI command – Absolute alarm switching
1.
Select a component.
2.
Select an input in the Camera drop-down list.
3.
Select the output on which the selected input is to be activated.
87
Siemens Building Technologies
Fire Safety & Security Products
03.2009
Commands
12.2.2
Set alarm status
Using the command Set Alarm Status, individual alarms can be activated or
deactivated. This command can subsequently be administered via the scheduler.
Prerequisite:
The alarms have been defined.
Fig. 83
Design VAPI command – Set Alarm status
1.
Select the alarm for which the status is to be changed from the list.
2.
Select the appropriate state in the Change to state drop-down list.
You can choose from seven different states:
If the alarm type "ODR alarm" is selected, the states Enabled and Disabled have no function. This
means that the CX sensor is not enabled or disabled, but only the ODR alarm message in IVM is
suppressed.
Enabled
The associated alarm device is enabled and signals alarms.
Disabled
The associated alarm device is disabled and does not signal alarms.
Active
The associated alarm device is activated (e.g. for alarm simulation
purposes).
Inactive
The associated alarm device is deactivated (e.g. for alarm simulation
purposes).
Active &
Acknowledged
An active alarm has been acknowledged.
Inactive &
Acknowledged
An inactive alarm has been acknowledged.
Acknowledged
An alarm has been acknowledged; the alarm status is either "Active &
Acknowledged" or "Inactive & Acknowledged“.
88
Siemens Building Technologies
Fire Safety & Security Products
03.2009
Commands
12.2.3
Switch alarm component
Using the command Switch Alarm Component, components such as a TELEMAT
can be enabled/disabled, i.e. all the alarms defined for the particular device are
switched simultaneously.
Fig. 84
Design VAPI command – Switch Alarm Component
When the alarm type "external alarm" is selected, choose "No Component". Thus all the external
alarms that are defined in the system are switched.
1.
In the Select components drop-down list, select either the desired
component or select the option -No Component-.
2.
Select the appropriate alarm type in the Alarm types drop-down list.
3.
Select the appropriate state in the Change to state drop-down list.
You can choose from seven different states:
If the alarm type "ODR alarm" is selected, the states Enabled and Disabled have no function. This
means that the CX sensor is not enabled or disabled, but only the ODR alarm message in IVM is
suppressed.
Enabled
The associated alarm device is enabled and signals alarms.
Disabled
The associated alarm device is disabled and does not signal alarms.
Active
The associated alarm device is activated (e.g. for alarm simulation
purposes).
Inactive
The associated alarm device is deactivated (e.g. for alarm simulation
purposes).
Active & Acknowledged
An active alarm has been acknowledged.
Inactive & Acknowledged
An inactive alarm has been acknowledged.
Acknowledged
An alarm has been acknowledged; the alarm status is either "Active &
Acknowledged" or "Inactive & Acknowledged“.
89
Siemens Building Technologies
Fire Safety & Security Products
03.2009
Commands
12.2.4
Record start
Compatibility
SISTORE CX
SISTORE AX
SISTORE MX
9
9
9
Using this command, recording can be started on a SISTORE server.
Fig. 85
Design VAPI command – Record Start
Select the configured SISTORE server in the first drop-down box. The following
parameters for recording can be set:
Priority of
recording
Definition of the priority
Recording time
Recording time in seconds
Cameras
If fixed channel assignment is used, the SISTORE CX Server and the cameras
can be selected here. In case of <automatic> channel assignment an
unassigned camera will be connected automatically (configuration behind the
video matrix).
Please note Section 19.
90
Siemens Building Technologies
Fire Safety & Security Products
03.2009
Commands
12.2.5
Record stop
Compatibility
SISTORE CX
SISTORE AX
SISTORE MX
9
9
9
Using this command a recording can be stopped on a SISTORE server.
Fig. 86
Design VAPI command – Record Stop
91
Siemens Building Technologies
Fire Safety & Security Products
03.2009
Commands
12.2.6
User program
The command User program allows an external program to be executed. You can
select whether the user program is to be started on the IVM server or on an IVM
Client station
Fig. 87
1.
Design VAPI command – User program
To start the program on the server, tick the checkbox Execute on Server.
– OR –
To start the program on the client PC, untick the checkbox Execute on
Server.
2.
Click Browse....
3.
Select the desired program.
Fig. 88
"Open" dialog
92
Siemens Building Technologies
Fire Safety & Security Products
03.2009
Commands
If external commands are used, the situation may arise that an external program,
which is started using a command, is run in the background and is not shut down
correctly.
To rectify this, the option Data transfer between services and desktop needs to
be selected in the Windows Task Manager in order to prevent this phenomenon.
Make sure not to use any blanks when entering the path name.
Play sound file
We recommend using the Windows Media Player Classic for playing sound files.
The Media Player can be started using the following parameters:
mplayer2.exe /play /close <soundfile>
To play the sound file alarm.wav in the directory D:\sound enter the following:
mplayer2.exe /play /close D:\sound\alarm.wav
The sound file alarm.wav will be played. The Media Player application will be
closed.
12.2.7
Switching between EDS/ODR programs
The command EDS/ODR Program switching can be used to switch between
predefined alarm programs.
Prerequisite:
EDS alarm programs have been configured in SISTORE SX/CX Config. Further
information on this can be found in the SISTORE SX/CX Configuration Manual.
Fig. 89
Design API Command – EDS/ODR Program switching
1.
Select the appropriate component.
2.
Select a video input (1 to 8) in the Channel drop-down list.
3.
Select the program (1 to 4).
4.
Click OK.
93
Siemens Building Technologies
Fire Safety & Security Products
03.2009
Commands
12.2.8
Control group
The groups previously defined in the Alarm groups are available here. The entries
simply need to be selected. An associated priority can be defined.
Fig. 90
12.2.9
Design VAPI command – Control group
Move camera to position
This allows selection of the video matrix (SIMATRIX, SISTORE SX/CX) camera
which is to be moved to a previously saved position.
Fig. 91
Design VAPI command – Move camera to position
Cameras with position control have to be set up in the SIMATRIX configuration.
94
Siemens Building Technologies
Fire Safety & Security Products
03.2009
Commands
12.2.10 Move camera to position name
Prerequisite:
The position names configured in SISTORE CX and in IVM Config must be
identical. See Section 6: Configuring components.
This allows selection of the video matrix (SIMATRIX, SISTORE SX/CX) camera
which is to be moved to a previously saved position.
Fig. 92
Design VAPI command – Move camera to position name
12.2.11 Close relay
This command can be used to close the relays of transport devices.
Fig. 93
Design VAPI command – Close relay
95
Siemens Building Technologies
Fire Safety & Security Products
03.2009
Commands
12.2.12 Open relay
This command can be used to open the relays of transport devices.
Fig. 94
Design VAPI command – Open relay
12.2.13 Relay pulse
The command Relay pulse is only for use by the I/O server. This allows different
contacts to be triggered according to a set timing routine.
Fig. 95
Design VAPI command – Relay pulse
96
Siemens Building Technologies
Fire Safety & Security Products
03.2009
Commands
12.2.14 Control sequence
Sequences can be configured either in the Config Tool or in the Client.
The sequences defined previously are available here. The entries simply need to
be selected. An associated priority can be defined.
Fig. 96
Design VAPI command – Control sequence
97
Siemens Building Technologies
Fire Safety & Security Products
03.2009
Commands
12.2.15 Control connect
Using the Control connect command, a selection command can be configured.
Fig. 97
Design VAPI command – Control connect
The selection of a camera assigned to a component, or the camera itself, can be
defined. It can also be defined, which monitor it is displayed on, and with which
priority.
The output depends on the alarm management configuration. This allows the
output components to be adjusted. See Section 13.2.2: Alarm management
configuration.
12.2.16 Disconnect
Using the Disconnect command, a currently selected camera can be removed.
Fig. 98
Design VAPI command – Disconnect
This command may also be used as an acknowledge command, if the camera
image is to be removed after an alarm is acknowledged.
98
Siemens Building Technologies
Fire Safety & Security Products
03.2009
Alarms
13
Alarms
Alarms are used to display certain events graphically. They may be set off by such
events as contacts in the matrix switcher, motion sensors on the TELEMAT,
tamper switches etc. Each alarm can have different commands assigned to it, i.e.
SISTORE control, camera selection.
13.1
Add a new alarm
1.
Select the menu sequence System configuration > Alarms.
Î
The following dialog box opens:
Fig. 99
2.
Edit types – Alarms
Click New...
99
Siemens Building Technologies
Fire Safety & Security Products
03.2009
Alarms
Î
The following dialog box opens:
Fig. 100 Edit alarm properties – Organization
Î
3.
A name and a database ID are entered automatically.
If you want to change the name, you can overwrite it in the Name text field.
The alarm is referenced using the Database ID.
4.
If you want to change the database ID, you can overwrite it in the Database
ID text field.
5.
If you want to add further information, you can enter a comment in the
Comment field.
Î
The comment will be displayed within the IVM Client in the alarm list and in
the alarm logbook.
The Last change made by user box displays which user last changed the alarm configuration
(see Fig. 101).
100
Siemens Building Technologies
Fire Safety & Security Products
03.2009
Alarms
Fig. 101 Edit alarm properties – Organization
6.
If you want to save additional information to the archive, you can enter a
comment in the Archive comment field.
Î
If recording is started, the comment will be passed to the digital video recorder
and saved to its archive.
101
Siemens Building Technologies
Fire Safety & Security Products
03.2009
Alarms
13.2
Alarm configuration
13.2.1
Selecting and configuring alarm types
Prerequisite:
The alarms have been configured on the devices.
1.
Select the Type tab.
Î
The following dialog box opens:
Fig. 102 Edit alarm properties – Type
2.
Select the alarm type from the list box.
The following alarm types are available:
– Internal alarm
– External alarm
– Signal loss
– Tamper detection
– Motion detection (MD)
– Enhanced Motion Detection (EDS)
– Removed/left objects (ODR)
– Removed/left objects pre-alarm
102
Siemens Building Technologies
Fire Safety & Security Products
03.2009
Alarms
Î
3.
There are various configuration possibilities in the Properties of selected
alarm type area depending on the alarm type.
Select the component which will report the alarm in the Component list box.
The following components are available for the different alarm types:
Alarm type
Components
Internal alarm
Internal alarms are reported by components within the IVM
system:
SISTORE CX
SISTORE AX
SISTORE MX
VKS
I/O Server
OTN Network
TELEMAT
Visiowave Network
External alarm
External alarms are reported to the IVM system by
autonomous external systems (e.g. Topsys, WinCC) via the
IVM API interface.
Signal loss
SISTORE CX
SISTORE AX
SISTORE MX
VKS
OTN Network
TELEMAT
Visiowave Network
Tamper detection
SISTORE CX
OTN Network
TELEMAT
Visiowave Network
Motion detection (MD)
SISTORE CX
Enhanced Motion Detection (EDS)
SISTORE CX
Removed/left objects (ODR)
SISTORE CX
Removed/left objects pre-alarm
SISTORE CX
For more detailed information on alarms please refer to the SISTORE SX/CX Client User Manual.
4.
Select the number of I/O inputs of the component in the Contact/Channel list
box.
103
Siemens Building Technologies
Fire Safety & Security Products
03.2009
Alarms
Fig. 103 Internal alarm
5.
To assign the alarm a priority, select a value between 0 and 200 in the
Priority list box.
6.
The alarm has the lowest priority and will be executed last.
200
The alarm has the highest priority and will be executed first.
If a text is to be displayed during the alarm, you can enter this text in the
Processing text field.
Î
7.
The text will appear in the alarm list of the IVM Client.
If you wish to log the alarms of this alarm type, mark the checkbox Write
alarm to Logbook.
Î
8.
0
The alarms will be logged in the alarm logbook of the IVM Client.
To activate the alarm, tick the checkbox Enabled.
For some SISTORE devices, the alarm sources must be explicitly enabled. When the server is started,
all alarms that are enabled are therefore deactivated and then set to "enabled" for the appropriate
devices. This ensures that the alarms can be generated.
9.
Restart the server.
104
Siemens Building Technologies
Fire Safety & Security Products
03.2009
Alarms
13.2.2
Alarm management configuration
1.
Select the Management tab (see Fig. 104).
Fig. 104 Edit alarm properties - Management
2.
Make your configurations in the following five sections:
Alarm consideration
Latest alarm is on top of the
alarm stack (last in, first out)
The current alarm is displayed.
Alarms are processed in order
of occurring (first in, first out)
The alarms are displayed in the order in which the occur.
105
Siemens Building Technologies
Fire Safety & Security Products
03.2009
Alarms
Alarm Reset
Here you can mark several checkboxes.
manually by user
This setting cannot be changed. Alarms can always be
acknowledged manually.
by timer after ...
The alarm is acknowledged automatically after x seconds. The
value x is adjustable.
after SISTORE ends recording
The alarm is acknowledged automatically when SISTORE stops
recording.
when alarm contact resets
The alarm is acknowledged automatically when the alarm contact
resets (e.g. the person has left the zone where the alarm was
triggered).
Stop recording when alarm is
acknowledged
The recording is stopped automatically when the alarm has been
acknowledged.
Picture after reset
After reset, the picture
present before the alarm is
displayed
The image, which was displayed on the alarm monitor before the
alarm, is displayed again afterwards.
After reset, the alarm remains
displayed
The alarm image remains displayed after the alarm has been
reset.
Notifications
Display map of the alarm
location
In the event of an alarm, a map of the area including the alarm
camera is displayed in the IVM Client.
Show alarm list for details
In the event of an alarm, the alarm list is opened automatically on
the IVM Client.
Up to 20 plans may be opened simultaneously by alarms. If more than 20 plans are opened
simultaneously, the system can no longer be controlled. Should this be the case, a message will be
displayed in the "Message" line. More information can be found in the IVM Client User Manual (VB
Version).
Display
New alarm is displayed on
the right of the current alarm
New alarm images are displayed on the monitor to the right of the
current monitor, i.e. the first alarm image on the first monitor, the
second on the second monitor.
New alarm is displayed on
the same monitor as the
current alarm
With this setting only one image is displayed per alarm. The
image is displayed on only one monitor. Each alarm image
overwrites the previous one.
106
Siemens Building Technologies
Fire Safety & Security Products
03.2009
Alarms
13.2.3
Select users
Alarm processing/display is only possible, if the alarm has been assigned to at least one user. For the
display of the alarm, the user has to be logged on to the system.
1.
Select the Users tab.
2.
Select the user who shall be the receiver of the alarm in the Available users
list (see Fig. 105).
Fig. 105 Edit alarm properties – Users
3.
4.
Click the arrow button
.
Î
The user is displayed in the Selected users list.
Î
The user has now been selected and assigned to the alarm as the receiver.
To reverse your selection, click the arrow button
.
107
Siemens Building Technologies
Fire Safety & Security Products
03.2009
Alarms
13.2.4
Assign commands
Each alarm can be assigned one or several commands. When the alarm is
triggered, the commands run in the order in which they are listed.
Loss of recorded data due to unacknowledged alarms
IMPORTANT
Commands that are linked to an alarm are triggered when the alarm occurs for
the first time. If an alarm is not acknowledged, the command will not be
triggered the next time the alarm occurs.
z Acknowledge the alarm when it occurs for the first time.
Î The command will be triggered automatically the next time the alarm occurs.
Prerequisite:
The commands have been configured. See Section 12: Commands.
Select command type
1.
Select the Commands tab (see Fig. 106).
Fig. 106 Edit alarm properties – Commands
2.
In the Selected commands list box, you can choose between the following
command types:
Alarm commands
Commands which run in the event of an alarm.
108
Siemens Building Technologies
Fire Safety & Security Products
03.2009
Alarms
Quit commands
Commands which run when an alarm is acknowledged.
Trip wire commands
Commands which run when a predefined trip wire is crossed.
Area commands
Commands which run if objects are removed from or left in a defined area.
Assign alarm and acknowledge commands
1.
Click Add.
Î
The following dialog box opens:
Fig. 107 "Add commands" dialog
2.
3.
To add a new command, click on new command….
See Section 12: Commands.
Select the appropriate command group in the list box.
The following command groups are available:
Name
Control connect
Disconnect
Absolute alarm switching
Set alarm status
Switch alarm component
Open relay
Close relay
Relay pulse
Control group
∗
Control sequence
Move camera to position
Move camera to position name
Start user program
Record start
Record stop
Alarm
x
x
x
x
x
x
x
x
x
x
Reset/Acknowledge
x
x
x
x
x
x
x
x
x
x
x
x
x
x
x
x
x
∗
If the "Control sequence “ command is executed when an alarm is acknowledged, then the sequence will be started anyway irrespective of
the alarm, i.e. the camera pictures will be displayed on the monitors defined for the sequence.
109
Siemens Building Technologies
Fire Safety & Security Products
03.2009
Alarms
4.
5.
Select the appropriate command in the Available commands list.
.
Click the arrow button
The command is displayed in the Added commands list.
Î The command is now assigned.
Î
6.
7.
To reverse your selection, click the arrow button
.
Click OK.
Î The command has been assigned to the alarm and is saved to a database.
Assign trip wire commands and area commands
1.
Click Add in the Trip wire or Area section.
Î
A trip wire or an area is created (see Fig. 108).
Fig. 108 Edit alarm properties – Commands – New trip wire
A maximum of 32 trip wires can be configured.
The identifying number of the trip wire must be identical with the number defined in SISTORE SX/CX
Config.
2.
To change the identifying number of the trip wire or area, double-click on the
trip wire or area, respectively.
110
Siemens Building Technologies
Fire Safety & Security Products
03.2009
Alarms
Î
The following dialog box opens:
Fig. 109 Trip wire – New identifier
3.
Overwrite the number in the New identifier for selected trip wire text field.
4.
Click OK.
Î
The identifying number of the trip wire or area will be changed.
5.
To assign commands to a trip wire or an area, select the desired trip wire or
area.
6.
Click Add in the Added commands section.
Î
The following dialog box opens:
Fig. 110 "Add commands" dialog
7.
To add a new command, click on new command….
See Section 12: Commands.
8.
Select the appropriate command group in the Command list box.
The following command groups are available:
Name
Trip wire
Area
Control connect
x
x
Disconnect
x
x
Absolute alarm switching
x
x
Set alarm status
x
x
111
Siemens Building Technologies
Fire Safety & Security Products
03.2009
Alarms
Name
Trip wire
Area
Switch alarm component
x
x
Open relay
x
x
Close relay
x
x
Relay pulse
x
x
Control group
x
x
x
x
Control sequence
∗
Move camera to position
x
x
Move camera to position name
x
x
Start user program
x
x
Record start
x
x
Record stop
x
x
9.
Select the appropriate command in the Available commands list.
10. Click the arrow button
.
Î
The command is displayed in the Added commands list.
Î
The command is now assigned to the trip wire or area.
11. To reverse your selection, click the arrow button
.
12. Click OK.
Î
13.3
The command has been assigned to the trip wire or area and is saved to a
database.
Simulate alarm
Alarms and their effects can be simulated.
Prerequisites:
The alarm has been saved.
You require two client licences.
1.
Select the menu sequence System configuration > Alarms.
2.
Select the alarm you want to simulate.
3.
Click Edit....
4.
Click on Activate alarm.
Î
5.
The alarm will be simulated.
Click on Inactivate alarm.
Î
The alarm will be deactivated and acknowledged.
∗
If the "Control sequence “ command is executed when an alarm is acknowledged, then the sequence will be started anyway irrespective of
the alarm, i.e. the camera pictures will be displayed on the monitors defined for the sequence.
112
Siemens Building Technologies
Fire Safety & Security Products
03.2009
Alarms
13.4
Alarm management configuration
General information on alarm management
New alarm and display concepts are integrated into the IVM system. A key feature,
in contrast to conventional CCTV video and alarm systems, is that the alarm
administration is dynamic, not static. The alarm follows the user. This means that
the IVM system displays the alarms at the workstation where the specified user is
currently logged on. The user responsible for each alarm is saved for each alarm.
From IVM version 1.4 onwards it is also possible to configure absolute alarm
display. This enables cameras to be displayed on specific monitors, irrespective of
where a user is currently logged on.
13.4.1
Basic functions for alarm configuration
If video display is included in the configuration of an alarm, then the command will
be executed as soon as the alarm is detected. Depending on the alarm
configuration of the workstation, the alarm is displayed for each user that is logged
on.
There are 3 flags available per monitor for each workstation. These flags determine
where the video signal is displayed.
Fig. 111 Edit workstation properties
Further information on the output components can be found in Section
9.2: Assigning output devices.
113
Siemens Building Technologies
Fire Safety & Security Products
03.2009
Alarms
In this example, the monitors M1 and M2 are reserved for individual display and
the monitors M3 and M4 for sequences.
Single
M1
M2
x
x
M3
M4
Alarm groups
x
x
Alarm sequences
x
x
The alarm priority can influence the display behaviour in cases where there is a
conflict between the connections to sub-centres and centres. A LIFO alarm with
lower priority cannot, for example, be displayed over alarms with higher priority, i.e.
it cannot be acknowledged on the monitor. It has to be reset in the alarm list. To
avoid such behaviour, alarms on cascading matrix switchers should be configured
with the same priority as each other.
Fundamentally, the following applies to the alarm programs listed below:
If alarm images are displayed, no other sequences or any other types of display
are possible on this monitor.
On a monitor which has become available by resetting of an alarm, only the oldest
alarm image in the waiting list will be displayed if there are further alarms in the
waiting list (see Fig. 112).
(This ensures that each alarm has to be reset manually (stack alarm processing).
Fig. 112 Example of display of 5 alarm images (alarm program 2)
Cx: any camera
AI: alarm image
A1: AI1 A2: AI2
Stack with the following alarms
A3: AI3 (1.)
A4: AI4 (2.)
A5: AI5 (3.)
Acknowledging see example Fig. 112:
1
AI1 on M1is acknowledged --> AI35 is displayed on M1
2
AI2 on M2 is acknowledged --> AI35 is displayed on M1
3
AI4 on M2 is acknowledged --> AI3 is displayed on M2
Once the last alarm is acknowledged, either the image present before the alarm
was displayed is displayed again, or the alarm image remains displayed
(configurable).
With appropriate rights alarms can be enabled or disabled.
114
Siemens Building Technologies
Fire Safety & Security Products
03.2009
Alarms
If the SIMATRIX is working with the TELEMAT then it is possible to highlight the
zone where the alarm is reported (configurable). When an alarm is reset the
TELEMAT is also reset.
The alarm monitors are defined in IVM Config at the workstation.
Notes on alarm configuration!
z The combined operation of “LIFI/FIFO”, “Alarm image remains
displayed/previous image remains displayed” is not supported.
z An alarm is only displayed if a user has been configured for this alarm and is
logged on. If alarm display is intended to take place regardless of which users
are logged on, then it is necessary to configure absolute alarm display.
z In an alarm group the display takes place from left to right.
z If there are fewer group monitors than the number of cameras in the group, only
the first cameras in the group are displayed. Basically it is recommended that
the number of monitors in a group should be equal to, or a multiple of, the
number of cameras in the group.
z The number of cameras in the group should remain constant.
z No more than two SISTORE recordings can be defined for an alarm.
13.4.2
Alarm programs
The basic alarm programs supported by IVM are described in programs 1 to 6.
Alarm program 1 (individual display)
Alarms can be processed as follows:
z In the event of an alarm the alarm image is displayed on the configured monitor
(monitor 1 in this case).
z The alarm can be acknowledged (deleted) by clicking on the corresponding
“MON” icon (MON1 in this case). If there are no alarms in the stack then the
image previously displayed, or the alarm image, remains on the monitor,
depending on the configuration.
z If a second alarm arises before the first is acknowledged, then this is also
displayed in the alarm monitor (monitor 1 in this case). The waiting alarm image
(AI1 in this case) is added to the stack.
Fig. 113 Display of 5 alarm images (for example)
Cx: any camera
AI: alarm image
115
Siemens Building Technologies
Fire Safety & Security Products
03.2009
Alarms
Fig. 114 Display of 5 alarm images (for example)
Cx: any camera
AI: alarm image
Display of 5 alarm images (for example)
Stack with the following alarms
Acknowledge on Monitor1
A1: AI1
A2: AI2
A3: AI3
A4: AI4
A5: AI5
A5: AI5
A4: AI1
A3: AI2
A2: AI3
A1: AI4
(1.)
(2.)
(3.)
(4.)
(5.)
Alarms displayed on the alarm monitor can be acknowledged using the “MON”
icons (MON1 in this case).
On the monitor which has become available by acknowledging (MON1 in this
case), the oldest waiting alarm image is displayed, if there are several alarms
waiting.
IVM alarm configuration
For this alarm behaviour the options “Latest alarm is displayed on the same
monitor” and “Latest alarm is on top of the alarm stack (last in, first out)” need to be
marked in the IVM Config and for workstation\ output components, monitor1 has to
be marked as “Single”.
Alarm program 2 (individual display/series)
z In the event of an alarm the alarm image is displayed on the first available
monitor (monitor 1 in this case).
z The alarm can be acknowledged (deleted) by clicking on the corresponding
“MON” icon (MON1 in this case). The original image is displayed again on the
monitor if no other alarms are waiting in the stack.
z If a second alarm arises before the first is acknowledged, then this second alarm
is displayed on the next available monitor (monitor 2 in this case).
z If all alarm monitors are occupied, then the new alarm is added to the stack (see
Fig. 115).
Fig. 115 Display of 5 alarm images (for example)
Cx: any camera
AI: alarm image
116
Siemens Building Technologies
Fire Safety & Security Products
03.2009
Alarms
Stack with the following alarms
Acknowledge on MON1
Acknowledge on MON2
A1: AI1
A2: AI2
A3: AI3
A4: AI4
A5: AI5
AI1
AI3
AI2
AI4
AI5
(1.)
(2.)
(3.)
(4.)
(5.)
Display of 5 alarm images (for example)
Alarms displayed on the alarm monitors (1 or 2 in this case), can be acknowledged
using the corresponding monitor icons (‘MON1’ or ‘MON2’).
On a monitor which has become available by acknowledging (MON1 in this case),
the oldest waiting alarm image is displayed if there are several alarms waiting.
IVM alarm configuration
For this alarm behaviour the options “Latest alarm is displayed on the same
monitor” and “Latest alarm is on top of the alarm stack (last in, first out)” need to be
marked in the IVM Config and for workstation\ output components, monitor1 and
monitor 2 have to be marked as “Single”.
Alarm program 3 (individual display/series)
The same as alarm program 2 (points 1-3)
Each additional alarm image overwrites an existing one, however, so that the two
latest alarm images are always displayed on monitors 1 and 2, older alarm images
are added to the stack (see Fig. 116).
Fig. 116 Display of 5 alarm images (for example)
Cx: any camera
AI: alarm image
Fig. 117 Display of 5 alarm images (for example)
Cx: any camera
AI: alarm image
117
Siemens Building Technologies
Fire Safety & Security Products
03.2009
Alarms
Stack with the following alarms
Acknowledge on MON1
Acknowledge on MON2
A1: AI1
A2: AI2
A3: AI3
A4: AI4
A5: AI5
AI5
AI1
AI4
AI2
AI3
(1.)
(2.)
(3.)
(4.)
(5.)
Display of 5 alarm images
Alarms displayed on the alarm monitors (1 or 2 in this case), can be acknowledged
using the corresponding monitor icons (‘MON1’ or ‘MON2’).
The oldest waiting alarm image is displayed on the “acknowledged” monitor. When
the next alarm image is deleted the second oldest is displayed, etc.
IVM alarm configuration
For this alarm behaviour the options “New alarm is displayed on the right of the
current alarm” and “Latest alarm is on top of the alarm stack (last in, first out)” need
to be marked in the IVM Config under “alarms\alarm management” and for
workstation\ output components, monitor1 has to be marked as “Single”.
Alarm program 4 (alarm group display)
Alarms can be processed as follows:
z In the event of an alarm the alarm image is displayed on the first available
monitor (MON1 in this case), and the image of the neighbouring camera is
displayed on the neighbouring monitor (MON2 in this case) (alarm group
display).
z The alarm can only be acknowledged (deleted) by clicking on the corresponding
“MON” icon (MON1 in this case). The previous images are displayed again on
the monitors (the neighbouring monitor (MON2 in this case) also becomes
available), if there are no more alarms in the stack. (Clicking on MON2 has no
effect).
z If all alarm monitors are occupied, the new alarm is added to the stack.
Cx: any camera
AI: alarm image
AI- : alarm image group
Display of 1 alarm image
Cx: any camera
AI: alarm image
AI- : alarm image group
Display of 3 alarm images
118
Siemens Building Technologies
Fire Safety & Security Products
03.2009
Alarms
If there are more alarms waiting after alarm 1 is acknowledged, then the oldest
alarm image is displayed on the alarm monitor (monitor 1 in this case), and the
image from the neighbouring camera on the neighbouring monitor (monitor 2 in this
case), etc.
Alarm groups can contain more than 2 cameras. As many cameras are displayed, from left to right, as
there are alarm monitors available for the group. The alarm has to be acknowledged on the first
monitor. It is, however, possible to overwrite the other monitors separately by manual display
switching, without acknowledging the alarm.
IVM configuration:
For this alarm behaviour the options “New alarm is displayed on the right of the
current alarm” and “Alarms are processed in order of occurring (first in, first out)”
need to be marked in the IVM Config under “alarms\alarm management” and for
workstation\ output components, monitor 1 and monitor 2 have to be marked as
“Group”.
Alarm program 5 (alarm group display)
The same as alarm program 4 (points 1-2).
Each additional alarm image overwrites an existing one, however, so that the alarm
monitor and the neighbouring monitor always display the latest alarm group, older
alarm groups are added to the stack.
Cx: any camera
AI: alarm image
AI- : alarm image group
Display of 1 alarm image
Cx: any camera
AI: alarm image
AI- : alarm image group
Display of 3 alarm images
If there are more alarms waiting after alarm 1 is acknowledged, then the oldest
alarm image is displayed on the alarm monitor (monitor 1 in this case), and the
image from the neighbouring camera on the neighbouring monitor (monitor 2 in this
case), etc.
119
Siemens Building Technologies
Fire Safety & Security Products
03.2009
Alarms
IVM configuration:
For this alarm behaviour the options “New alarm is displayed on the right of the
current alarm” and “Latest alarm is on top of the alarm stack (last in, first out)” need
to be marked in the IVM Config under “alarms\alarm management” and for
workstation\ output components, monitors 1 and 2 have to be marked as “Group”.
Alarm program 6 (group display/series)
The same as alarm program 3, but with groups.
By clicking on the first alarm monitor icon in the group (‘MON1‘ and ‘MON3‘ in this case), the cameras
of the groups on the neighbouring monitors are automatically deleted.
Cx: any camera
AI: alarm image
AI- : alarm image group
Display of an alarm image group
Cx: any camera
AI: alarm image
AI- : alarm image group
Display of 3 alarm image groups
IVM configuration:
For this alarm behaviour the options “New alarm is displayed on the right of the
current alarm” and “Latest alarm is on top of the alarm stack (last in, first out)” need
to be marked in the IVM Config under “alarms\alarm management” and for
workstation\ output components, monitors 1, 2, 3 and 4 have to be marked as
“Group”.
120
Siemens Building Technologies
Fire Safety & Security Products
03.2009
Alarms
13.5
Colour representation of alarms
Select the menu sequence System configuration > Colour setting of the
alarms.
Î
The following dialog box opens:
Fig. 118 Alarm configuration
Different colours can be defined for the text and background for the various
statuses of an alarm.
121
Siemens Building Technologies
Fire Safety & Security Products
03.2009
Priorities of camera control
14
Priorities of camera control
1.
Select Allocation of group priorities in the System configuration menu.
Î
The following dialog box opens:
Fig. 119 Allocation of group priorities
You can use this function to assign priorities to individual groups.
2.
Click New.
Î
The following dialog box opens:
Fig. 120 Groups
3.
Enter a name for the camera group in the dialog box which opens and click
OK to confirm. The addition of a comment is optional.
Î
A new camera group is added to the system.
122
Siemens Building Technologies
Fire Safety & Security Products
03.2009
Priorities of camera control
A camera group can have one or several cameras assigned to it, which are to
be displayed in the event of activation.
4.
Using the arrow keys (or by double clicking on a group), selected cameras
can be moved between the list boxes for “Available cameras” and “Selected
cameras”.
Î
The selected cameras are listed in the list box on the right (see Fig. 121).
Fig. 121 Cameras
5.
Click the User tab
Î
The user is assigned priorities and control times here.
Fig. 122 User
6.
Click Add.
123
Siemens Building Technologies
Fire Safety & Security Products
03.2009
Priorities of camera control
Î
The following dialog box opens:
7.
Select User, Priority and Control lock time (in s).
8.
Click OK.
Î
The following dialog box opens:
Fig. 123 User
The admin user group with priority 10 (range: [0 ... 100]) has the highest
priority.
The VM-Matrix user group with priority 5 has the lowest priority.
124
Siemens Building Technologies
Fire Safety & Security Products
03.2009
Plan configuration
15
Plan configuration
The plan configuration is opened using the function System configuration/Plan
configuration.
15.1
Configuration of system overview
1.
Select Plan configuration in the System configuration menu and then
System overview in the submenu.
Î
The system overview is displayed:
This plan provides an overview of the status of the complete system (e.g.
signal loss, defective device). More Information can be found in IVM Client,
Section System overview.
2.
Right-click on the system overview.
Î
3.
The following context menu opens:
Select Plan properties from context menu.
Here you can select the background image for the system overview. For more
information, see Section 15.2: Create a new plan.
4.
Select New element in the context menu.
Î
5.
A new element is now created.
Right-click on the element.
Î
The following context menu opens:
125
Siemens Building Technologies
Fire Safety & Security Products
03.2009
Plan configuration
6.
Select Edit element in the context menu.
Î
The following dialog box opens:
Fig. 124 CCTV elements
7.
Make the following settings in the dialog box:
Element
Camera, VKS, Server,
SISTORE, Clients, TELEMAT
Selection of the component to be displayed using the collective
icon.
QuickInfo text
Explanatory text.
If this checkbox is selected, the status of the selected device will
be displayed in the collective icon in the system overview
(default: all checkboxes activated).
If this checkbox is not selected, the status of the selected device
will not be displayed in the collective icon in the system
overview.
Display
Active
Inactive
By clicking the Default icons button a grey frame is assigned to
"active“ and a red cross to inactive mode.
It is possible to assign user-defined icons using this button.
The icon can be deleted and its size changed here as in the system overview. For
more information, see Section 15.2: Create a new plan.
126
Siemens Building Technologies
Fire Safety & Security Products
03.2009
Plan configuration
15.2
Create a new plan
1.
Select the menu sequence System configuration > Plan configuration >
New plan.
Î
The following window opens:
Fig. 125 New plan
2.
Right-click on the plan.
Î
3.
The following context menu opens:
Select Plan properties from the context menu.
Î
The following dialog box opens:
127
Siemens Building Technologies
Fire Safety & Security Products
03.2009
Plan configuration
Fig. 126 Plan properties
4.
Specify the properties of the plan.
5.
Plan name (20 characters)
Here you must enter the name of the new plan
Background picture
Selection of the background image.
The background images are stored in the directory:
D:\Cevis\Pictures
Click on
Î
.
The following window opens:
Fig. 127 Selection file
The background image for the plan must be available in a standard picture format (GIF, JPG).
128
Siemens Building Technologies
Fire Safety & Security Products
03.2009
Plan configuration
Fig. 128 Plan properties - Assignment
The plan can be assigned to different matrix systems or devices, i.e. only the
cameras pertaining to the respective matrix or device are visualized in the plan.
15.3
Create new element
You can use the menu New element to create an new station icon.
Change size
1.
When you right-click on the new station icon, the following window is opened.
Î
2.
Select the menu item Change size.
Î
3.
The following context menu opens:
A frame is put around the icon.
You can now change the size of the element proportionally by keeping the left
mouse button pressed while dragging the arrows. This does not apply to the
Plan referral icon.
The size and shape of the Plan referral icon can be changed as required.
4.
You can use the left mouse button to shift the element to another position by
keeping the mouse button pressed in the centre of the frame.
Delete element
With the function Delete element the element can be deleted from the plan.
129
Siemens Building Technologies
Fire Safety & Security Products
03.2009
Plan configuration
Edit plan icon
Select Edit element in the context menu.
The following dialog box opens:
2
1
Fig. 129 Edit element
1
Selection of the graphics plan. Automatic plan selection:
the first plan of the selected group is opened.
2
QuickInfo
(appears when the mouse is moved across the icon!)
The plan icon can now be edited.
Symbols
The symbol can be assigned predefined shapes.
Fig. 130 Symbols
In addition, you can select the icon colour from the colour pallet below.
130
Siemens Building Technologies
Fire Safety & Security Products
03.2009
Plan configuration
Fig. 131 Colour selection
You can select the colours for the individual alarm statuses if you click the three
symbols Plan close, Plan open and Alarm on plan.
15.4
Edit plan
You can edit an existing plan by selecting the menu sequence System
configuration -> Plan configuration -> Edit plan.
The following dialog box opens:
Fig. 132 Edit plan
Open the plan you wish to edit by double-clicking on it.
131
Siemens Building Technologies
Fire Safety & Security Products
03.2009
Plan configuration
15.4.1
New input icon
You can use the right mouse button to insert a new input symbol in the plan.
Up to 128 input symbols can be arranged on a plan.
If you have created a new icon and click it with the right mouse button, the
following window appears:
The icon can be deleted and its size be changed here as in the plan overview and
the system overview. If you select the function "Edit element", the following window
is opened:
Fig. 133 Camera properties
Every time you click the
button, all cameras are rotated by 45°.
In this window, you can assign the camera to the input symbol. In addition, you can
configure the four status icons of the camera.
A camera will appear only if it was previously assigned to the user in IVM Config.
132
Siemens Building Technologies
Fire Safety & Security Products
03.2009
Plan configuration
Up to 256 cameras can be configured for each plan.
15.4.2
New contact/alarm
The contact/alarm icon visualizes the status of the alarm input. There are three
different statuses:
z Active
z Inactive
z Disabled
You can set a Contact/alarm icon by clicking the plan with the right mouse button.
Its shape, colour and the symbol can also be determined using the right mouse
button.
Fig. 134 Contact/alarm
Up to 256 alarm symbols can be configured for a plan.
133
Siemens Building Technologies
Fire Safety & Security Products
03.2009
Plan configuration
15.4.3
New multifunction icon
Up to 120 symbols can be configured for a plan.
Fig. 135 New multifunction icon
With the multifunction icons, it is possible to configure commands for these
symbols. Up to 32 commands can be assigned to each multifunction icon.
Fig. 136 Multifunction icon – Configuring commands
A large number of project-specific functions can be implemented using the
multifunctional icon, e.g. enabling/disabling of entire components, switching of
cameras, moving cameras to predefined positions, etc.
134
Siemens Building Technologies
Fire Safety & Security Products
03.2009
Plan configuration
Basically, every IVM API command can be assigned to the multifunctional icon.
The external alarms must be created in IVM Config before they can be assigned to
the icons on the plan.
The commands are configured in IVM Config, and are then assigned in the icon
configuration under the "External commands" tab.
In the input mode of the IVM Client, the menu is opened using the right mouse
button. The command is executed by clicking on the selected menu sub-item.
Fig. 137 All commands
By double-clicking the icon, all commands associated with it are executed.
15.4.4
New plan referral
Fig. 138 New plan referral
You can use this function to set a new layer icon on the plan. This layer icon can
be used to branch to another plan in operating mode.
Fig. 139 Referral qualities
The layer icon is visualized as a sensitive area or as an icon.
135
Siemens Building Technologies
Fire Safety & Security Products
03.2009
Plan configuration
Up to 20 layer icons can be set on a plan.
15.4.5
Store plan
Fig. 140 Store plan
Use this command to save the current plan with all objects.
15.4.6
Delete plan
Fig. 141 Delete plan
Use this command to delete the current plan.
136
Siemens Building Technologies
Fire Safety & Security Products
03.2009
Plan configuration
15.4.7
Plan assignment to devices/groups
1.
Select the menu sequence System configuration > Plan configuration >
New plan.
2.
Right-click on the plan.
3.
Select Plan properties from the context menu.
4.
Select the Assignment tab.
Fig. 142 Plan properties - Assignment
5.
Select the device or group to which you want to assign the plan:
– General group (select by double-clicking on the grey bar above the column
headers, e.g. Group 1, Group 2, etc.).
– Assignment to a group (select by double-clicking the desired column
header box (e.g. Group 1 or Group 2).
– Assignment to a device (select by double-clicking on a device in the group,
e.g. VKS).
6.
Click OK.
137
Siemens Building Technologies
Fire Safety & Security Products
03.2009
Configuration of the Software Monitor
16
Configuration of the Software Monitor
A software monitor is a component that is used to play digital live images on a VGA
monitor.
1.
Select Software monitors in the System configuration menu.
Î
The following dialog box opens:
Fig. 143 Software Monitors
2.
Click New to add a new entry or Edit if you want to edit an existing entry.
Î
The following dialog box opens:
3.
Enter the name of the software monitor, a comment and the database ID.
4.
Click OK.
138
Siemens Building Technologies
Fire Safety & Security Products
03.2009
Scheduler
17
Scheduler
With the scheduler function it is possible to execute specific commands at specific
times. The scheduler events can be configured from the operator terminals
according to the following criteria:
z at certain times (date/time)
z on certain days of the week
z on certain days of the month
The events may be carried out only once or recurrently at specific times/dates. The
number of events is limited by the type of command. Basically, the number of
commands configured per minute should not exceed 20.
The timer control commands are saved in the SQL or Access database.
17.1
Configuring scheduler entries
1.
Select Scheduler in the System configuration menu.
Î
The following dialog box opens:
Fig. 144 Scheduler
2.
Select New in the Entry menu
Î
This opens the window in which single execution or serial execution, the
command, the date, the time and specific functions of the scheduler can be
configured.
139
Siemens Building Technologies
Fire Safety & Security Products
03.2009
Scheduler
Fig. 145 Single execution Scheduler
If single execution is selected, the command will be executed only once. If the
command is to be executed recurrently on specific days, the "Serial execution"
option must be selected. The box "Activate execution" must be checked as
otherwise the command will not be executed. The function "Delete after execution"
can be used to delete the entry when it has been executed.
For a better clarity a comment should be assigned to each command.
Serial configuration permits a wide range of possible configurations, for instance:
z Daily
z Weekly
z Monthly
z Yearly
z User defined
140
Siemens Building Technologies
Fire Safety & Security Products
03.2009
Scheduler
Daily: With this command, an action can be performed daily at a certain time.
Fig. 146 Daily
Weekly: With this command, an action can be performed on a certain day of the
week.
Fig. 147 Weekly
Monthly: With this command, an action can be performed on a certain day of the
month.
Fig. 148 Monthly
Invalid entries, e.g. 31 February, are not executed by the IVM server and are not automatically deleted
either. The IVM server does not check the validity of a command!
The system administrator is responsible for the avoidance of such commands.
Yearly: With this command, an action can be performed on a certain day of the
year.
Fig. 149 Yearly
141
Siemens Building Technologies
Fire Safety & Security Products
03.2009
Scheduler
User defined: It is possible to generate a specific command. If wildcards "*" are
set instead of values, the command will be executed repeatedly. For example, if no
value is set for the day of the week, the IVM server will execute this command on
each day of the week. The fewer wildcards used, the more specific is the command
execution.
Fig. 150 User defined
It also applies here that invalid entries will not be executed by the IVM server. In general, no wildcards
should be used. The system administrator is responsible that meaningful commands are generated.
Click Add. When the time criteria have been configured, the command must be
selected from a list. The command type can be set for simpler selection.
Fig. 151 Scheduler commands
142
Siemens Building Technologies
Fire Safety & Security Products
03.2009
SIMATRIX integration
18
SIMATRIX integration
The SIMATRIX device family incorporates various system sizes of analog video
matrix switchers. These are controlled by IVM in terms of the system design
concept.
The SIMATRIX is connected to the IVM server via a COM port.
Fig. 152 SIMATRIX –IVM server connection options
The IVM server can only be connected to the SIMATRIX on COM2.
18.1
Adding and configuring SIMATRIX
Prerequisite:
The video matrix (SIMATRIX) needs to be configured in the database with the
COM port of the computer.
Cameras and monitors can be connected directly to a SIMATRIX or they can be
cascaded with other components.
Fig. 153 Example for the cascading of video matrix switchers
143
Siemens Building Technologies
Fire Safety & Security Products
03.2009
SIMATRIX integration
1.
Start IVM Config.
2.
Click the icon
Î
Add new component.
The following dialog box opens:
Fig. 154 Add a new component
3.
Select VKS in the list box Base component.
Fig. 155 Hardware – Video matrix
144
Siemens Building Technologies
Fire Safety & Security Products
03.2009
SIMATRIX integration
4.
Make the following settings in the dialog box:
Name
Enter the name of the video matrix in this field.
Comment
The addition of a comment is optional.
Base components
Select VKS.
Inputs
Select the number of inputs.
Outputs
Select the number of outputs.
OSD
The device supports OSD text overlay.
See Section 6.1.5: On-screen display (OSD).
Variable speed
The device supports variable-speed camera control
Assign the video matrix to a group
1.
Select the Groups tab.
Fig. 156 Groups
2.
Assign the component to the selected Group using the arrow button or by
double clicking on the group.
145
Siemens Building Technologies
Fire Safety & Security Products
03.2009
SIMATRIX integration
Set type of protocol and port
1.
Select the Communication tab.
Fig. 157 Communication
2.
Select the Type of Protocol: RS232, RS485 or TCP/IP.
3.
Select the appropriate Port.
4.
Select New port… if you wish to create a new port.
5.
To edit a port, click on Edit…. See Section 7.1: Configuring ports.
146
Siemens Building Technologies
Fire Safety & Security Products
03.2009
SIMATRIX integration
Î
The following dialog box opens:
Fig. 158 Edit port properties – Flow control
The standard settings for the port are 8 data bits, 2 stop bits, even parity,
19200 baud with software flow control.
6.
Enter the Bus ID.
7.
Select the Flow control tab.
Fig. 159 Port properties - Flow control
8.
Unmark the checkboxes Xon/Xoff flow control to transmit and Xon/Xoff
flow control to receive.
Configure inputs and outputs
1.
Select the Inputs tab.
147
Siemens Building Technologies
Fire Safety & Security Products
03.2009
SIMATRIX integration
Fig. 160 Inputs
2.
Make the following settings in the dialog box:
ID
Assigned by the system.
Name
Enter the name of the video matrix in this field. During configuration
attention should be paid to a uniform naming scheme, since this
contributes to clear organization of the system.
Comment
The addition of a comment is optional.
Type
Select the type:
Any connections to outputs and other devices can also be entered
here.
Select the type Connection.
Î In the dialog which opens you can select a device and an output.
Connection to outputs on the same device is not
possible!
PTZ control
3.
Tick the checkbox if the camera features PTZ control.
Select the Outputs tab.
148
Siemens Building Technologies
Fire Safety & Security Products
03.2009
SIMATRIX integration
Fig. 161 Outputs
4.
Make the following settings in the dialog box:
ID
Assigned by the system.
Name
Enter the name of the output in this field. During configuration attention should
be paid to a uniform naming scheme, since this contributes to clear organization
of the system.
Comment
The addition of a comment is optional.
Type
Select the type:
Any connections to outputs and other devices can also be entered here.
Select the type Connection.
Î In the dialog which opens you can select a device and an output.
Connection to outputs on the same device is not possible!
149
Siemens Building Technologies
Fire Safety & Security Products
03.2009
SIMATRIX integration
Icon
Standard
"Busy"
icon
Select an icon for the output.
1. Click the
button.
Î The following dialog box opens:
"Record"
icon
"Fail" icon
"Alarm"
icon
2. Select the desired icon.
5.
Click Apply.
Î
Your settings are saved.
For more information, see Section 6: Configuring components.
150
Siemens Building Technologies
Fire Safety & Security Products
03.2009
SIMATRIX integration
18.2
Configuration of SIMATRIX using VM_WIN8
The program VM_WIN8.exe which can be found in the Tools group in Setup is
used for SIMATRIX configuration.
Two configuration files ivm_nt.DAT and IVM_without_camera_text.DAT
(D:\Cevis\Simatrix\) are available, which can be adjusted according to the system
configuration. Use of COM2 on the SIMATRIX is the default setting. Proceed as
follows:
1.
Start the program VM_WIN8.exe
Î
The following dialog box opens:
Fig. 162 Video matrix
2.
Click the Load icon
.
151
Siemens Building Technologies
Fire Safety & Security Products
03.2009
SIMATRIX integration
Î
The following dialog box opens:
Fig. 163 Open config file
3.
Select IVM_NT.DAT.
Î
The program will be loaded.
It is especially important that all of the SIMATRIX ports used by the IVM are set to operate without
message repetition and that the port configuration, including the RS485 Bus ID corresponds to the
IVM configuration. These settings can be edited in VM_WIN8.exe on the “Protocol” tab.
4.
Click
Video matrix interfaces.
152
Siemens Building Technologies
Fire Safety & Security Products
03.2009
SIMATRIX integration
Î
The following dialog box opens:
Fig. 164 Ports
153
Siemens Building Technologies
Fire Safety & Security Products
03.2009
SIMATRIX integration
5.
Select the Controlling COM1…4 tab.
Fig. 165 Controlling COM1..4
6.
Click on
to set the Address of the bus ID.
The address corresponds with the Bus ID of the COM2 port in RS485 mode
(see Fig. 157).
On SIMATRIX 164 and 648 a signal loss is detected only if a sequence has been activated for one of
the outputs; on SIMATRIX SYS signal loss is detected automatically.
154
Siemens Building Technologies
Fire Safety & Security Products
03.2009
SISTORE CX/AX/MX integration
19
SISTORE CX/AX/MX integration
This chapter describes the integration of SISTORE AX/MX/CX into IVM. The
components of the SISTORE xX series are digital video recorders which can be
controlled via IVM.
The description below refers to the current product versions:
SISTORE MX
SISTORE AX
SISTORE CX
2.70
3.5
3.6
SISTORE is integrated into IVM as a component. SISTORE and the IVM server
communicate over the Winsocket TCP/IP interface. Using the IVM Client the
SISTORE video sequences can be played and recording started and stopped.
In the case of combined systems (IVM, SISTORE) make sure that the same user name and the same
password are used for all systems. Otherwise communication problems may result.
Switching several cameras with one event, it is proposed to assign only one SISTORE SX rule to each
camera.
19.1
Modes of operation
There are two possible ways of integrating SISTORE device:
z Integration of SISTORE behind a video matrix (not applicable to SISTORE
AX/MX)
z Integration of SISTORE before a video matrix
The possible ways of integration are shown in the following diagrams.
155
Siemens Building Technologies
Fire Safety & Security Products
03.2009
SISTORE CX/AX/MX integration
Fig. 166 Block diagram of IVM with SISTORE (behind the video matrix)
The operating mode "Behind the video matrix" is not supported for SISTORE AX and SISTORE MX!
Fig. 167 Block diagram of IVM with SISTORE (before the video matrix)
156
Siemens Building Technologies
Fire Safety & Security Products
03.2009
SISTORE CX/AX/MX integration
19.2
Adding and configuring a SISTORE CX
There are two possible ways to add a SISTORE CX:
z Adding a SISTORE CX automatically. See Section 19.2.1: Adding a SISTORE
CX automatically .
– OR –
z Adding a SISTORE CX manually. See Section 19.2.2: Adding a SISTORE CX
manually.
19.2.1
Adding a SISTORE CX automatically
1.
Start IVM Config. See Section 4.11: Starting IVM Config.
2.
Click the icon
Î
Add new component.
The following dialog box opens:
Fig. 168 Add a new component
3.
Select SISTORE CX in the Base component list box.
157
Siemens Building Technologies
Fire Safety & Security Products
03.2009
SISTORE CX/AX/MX integration
Î
You can now make further settings for the selected device:
Fig. 169 SISTORE CX – Hardware
4.
If signal loss is not to be reported for this SISTORE device, unmark the
checkbox Detect signal loss.
5.
If you wish to perform a ping check before the connection is set up, mark the
checkbox Check with ICMP echo request before connecting.
6.
Click on search device.
Î
The following dialog box opens:
Fig. 170 SISTORE CX – Selection wizard
158
Siemens Building Technologies
Fire Safety & Security Products
03.2009
SISTORE CX/AX/MX integration
7.
Select the SISTORE devices you wish to add from the list box.
– OR –
Enter the IP address of a SISTORE device in the text field.
8.
Click Add.
Î
The SISTORE devices are now selected.
9.
Click Next >.
Î
The data of the selected CX devices will be retrieved:
Fig. 171 SISTORE CX – Selection wizard - Connection options
10. Wait until the system has retrieved all information (100 %).
11. Click Apply.
Î
The SISTORE device has been added automatically.
159
Siemens Building Technologies
Fire Safety & Security Products
03.2009
SISTORE CX/AX/MX integration
19.2.2
Adding a SISTORE CX manually
1.
Start IVM Config. See Section 4.11: Starting IVM Config.
2.
Click the icon
Î
Add new component.
The following dialog box opens:
Fig. 172 Hardware
3.
Select SISTORE CX in the Base component list box.
160
Siemens Building Technologies
Fire Safety & Security Products
03.2009
SISTORE CX/AX/MX integration
Î
You can now make further settings for the selected device:
Fig. 173 SISTORE CX – Hardware
IMPORTANT
Malfunctioning in case of incorrect naming
If the devices are named differently malfunctioning will result.
z Always assign the device name you have defined in the network settings in
SISTORE Config.
4.
5.
Enter the name of the device in the Name field.
If you wish to add further information (e.g. the site where the device is in
operation), you can enter a comment in the Comment field.
It is important that the SISTORE CX hardware configuration is made correctly since standard rules are
automatically generated in the SISTORE CX depending on the hardware configuration, and these
rules are accessed for standard applications via the IVM system.
CX1
6.
Select the type of component from the list.
7.
Select the operating mode of the SISTORE device to be integrated from the
drop-down list:
CX4
CX8
The number of inputs and outputs is defined once with the configuration of the SISTORE. Once you
have clicked "Finish", it is not possible to change the hardware configuration. The Account data cannot
be changed either.
161
Siemens Building Technologies
Fire Safety & Security Products
03.2009
SISTORE CX/AX/MX integration
CX1
Operating mode
Video
input
Video
output
IP
cameras
4CIF
2CIF
CIF
QCIF
Enhanced-performance encoder
1
0
–
max. 25 ips
max. 25 ips
max. 25 ips
max. 25 ips
Standard-performance decoder
0
1
–
max. 25 ips
max. 25 ips
max. 25 ips
max. 25 ips
EDS enhanced-performance tracking and
encoder
1
0
–
max. 3.12 ips max. 6.25 ips max. 12.5 ips
max. 25 ips
EDS standard-performance tracking and
encoder
1
0
–
max. 6.25 ips max. 12.5 ips max. 25 ips
max. 25 ips
ODR and standard-performance encoder
1
0
–
max. 6.25 ips max. 12.5 ips max. 25 ips
max. 25 ips
Operating mode
Video
input
Video
output
IP
cameras
4CIF
CIF
QCIF
Standard-performance encoder
4
0
1
max. 12.5 ips max. 25 ips
max. 25 ips
max. 25 ips
Enhanced-performance encoder
2
0
1
max. 25 ips
max. 25 ips
max. 25 ips
max. 25 ips
CX4
2CIF
Enhanced-performance encoder/decoder
1
1
2
max. 25 ips
max. 25 ips
max. 25 ips
max. 25 ips
Standard-performance encoder/decoder
2
1
2
max. 12.5 ips max. 25 ips
max. 25 ips
max. 25 ips
max. 25 ips
max. 25 ips
(output also
max.
25 ips)
Standard-performance decoder
0
2
–
max. 25 ips
max. 25 ips
EDS enhanced-performance tracking and
encoder
2
0
2
max. 3.12 ips max. 6.25 ips max. 12.5 ips
max. 25 ips
EDS standard-performance tracking and
encoder
2
0
2
max. 6.25 ips max. 12.5 ips max. 25 ips
max. 25 ips
EDS standard-performance tracking and
encoder
4
0
2
max. 1 ips
max. 3.12 ips max. 6.25 ips
max. 25 ips
ODR and standard-performance encoder
4
0
2
max. 1 ips
max. 3.12 ips max. 6.25 ips
max. 25 ips
Operating mode
Video
input
Video
output
IP
4CIF
cameras
2CIF
CIF
QCIF
Enhanced-performance encoder
4
0
2
max. 25 ips
max. 25 ips
max. 25 ips
max. 25 ips
Enhanced-performance encoder/decoder
2
2
4
max. 25 ips
max. 25 ips
max. 25 ips
max. 25 ips
Enhanced-performance encoder/decoder
3
1
3
max. 25 ips
max. 25 ips
max. 25 ips
max. 25 ips
Standard-performance encoder
8
0
2
max. 12.5 ips
max. 25 ips
max. 25 ips
max. 25 ips
Standard-performance encoder/decoder
6
1
3
max. 12.5 ips
max. 25 ips
max. 25 ips
max. 25 ips
max. 25 ips
max. 25 ips
max. 25 ips
max. 25 ips
max. 25 ips
CX8
(output also
max. 25 ips)
Standard-performance encoder/decoder
4
2
4
max. 12.5 ips
(output also
max. 25 ips)
Standard-performance decoder
0
4
–
max. 25 ips
max. 25 ips
EDS enhanced-performance tracking and
encoder
4
0
4
max. 3.12 ips
max. 6.25 ips max. 12.5 ips
max. 25 ips
EDS standard-performance tracking and
encoder
4
0
4
max. 6.25 ips
max. 12.5 ips max. 25 ips
max. 25 ips
EDS standard-performance tracking and
encoder
8
0
4
max. 1 ips
max. 3.12 ips max. 6.25 ips
max. 25 ips
ODR and standard-performance encoder
8
0
4
max. 1 ips
max. 3.12 ips max. 6.25 ips
max. 25 ips
162
Siemens Building Technologies
Fire Safety & Security Products
03.2009
SISTORE CX/AX/MX integration
19.2.3
8.
If signal loss is not to be reported for this SISTORE device, unmark the
checkbox Detect signal loss.
9.
If you wish to perform a ping check before the connection is set up, mark the
checkbox Check with ICMP echo request before connecting.
SISTORE CX configuration
Prerequisite:
A SISTORE device has been added. See Section 19.2.1: Adding a SISTORE CX
automatically or Section 19.2.2: Adding a SISTORE CX manually.
Assign a SISTORE device to a group
1.
Now select the Groups tab.
Fig. 174 SISTORE CX – Groups
2.
Select the group which the SISTORE MX device is to be assigned to in the
Available groups list.
3.
Click the arrow button
.
Î
The group will be displayed in the Selected groups field.
Î
The SISTORE device is now assigned to the selected group.
163
Siemens Building Technologies
Fire Safety & Security Products
03.2009
SISTORE CX/AX/MX integration
Set IP address
1.
Select the Communication tab.
Fig. 175 SISTORE CX – Communication
The IP port and the Telemetry Server Port are entered automatically.
2.
Enter the address of the SISTORE device in the IP address text field.
Î
The IP address has been set.
Assign inputs
1.
Select the Inputs tab.
Fig. 176 SISTORE CX – Inputs
164
Siemens Building Technologies
Fire Safety & Security Products
03.2009
SISTORE CX/AX/MX integration
2.
Select the Type of the connection.
The following connection types are available:
Î
None
Select "None" if this input is not to be used to establish a connection.
Connection
Select "Connection" if the component is to be connected behind the video
matrix.
Split Camera
Select "Split Camera" if the component is to be connected before the video
matrix. The camera is connected to SIMATRIX and to SISTORE CX.
CCBx
K500
K505
For cameras that are directly connected to SISTORE.
A standard name will be entered automatically.
3.
If you want to change a standard name, you can overwrite it in the Name
column.
4.
Other information can be added in the Comment text box.
This information is also evaluated in the SISTORE CX archive.
The ID, the Signal ID and the Rule ID are assigned automatically by the system .
5.
Select the appropriate entries from the Management list box.
You can choose between the following:
– Automatic
The inputs are assigned automatically by IVM as part of the alarm
management, i.e. any available inputs are used for alarm recording.
For the inputs to be controlled manually, the checkbox "Use manual SISTORE channels on alarm“ in
the "General settings“ dialog must be ticked. See Section 4.13.3: Set operating mode.
165
Siemens Building Technologies
Fire Safety & Security Products
03.2009
SISTORE CX/AX/MX integration
– Manual
The user assigns the inputs manually, i.e. the inputs are used by the server
only on demand and can also be used by the IVM Client.
6.
If a current recording is not to be interrupted by a higher priority request,
select No in the Interruptible list box.
7.
If the camera is not a PTZ camera, untick the checkbox in the PTZ list box.
Selecting remote inputs (IP cameras)
When the operation mode Standard Performance Decoder is selected, the Remote input tab will
not appear. See Section 19.2.2: Adding a SISTORE CX manually.
1.
Select the Remote input tab.
Î
Depending on the mode of operation and the SISTORE device, 1 to 4 inputs
will be displayed. See Section 19.2.2: Adding a SISTORE CX manually.
Fig. 177 SISTORE CX – Remote input
2.
Select the type of IP camera in the Type column.
3.
The ID, the name and the database are entered automatically.
4.
In the URL column, enter the host name or the IP address and the port in the
following manner:
rtsp://[Host name or IP address]:[Port]
Terminating configuration
1.
Click Apply.
Î
Your settings are saved.
Î
The SISTORE device has been added and configured.
166
Siemens Building Technologies
Fire Safety & Security Products
03.2009
SISTORE CX/AX/MX integration
19.3
SISTORE AX integration
19.3.1
Adding a SISTORE AX
The password 12345678 is used to access SISTORE AX from the IVM. Make sure that the password
is configured correctly for all SISTORE AX devices.
1.
Start IVM Config. See Section 4.11: Starting IVM Config.
2.
Click the icon
Î
Add new component.
The following dialog box opens:
Fig. 178 Hardware
3.
Select SISTORE in the list box.
167
Siemens Building Technologies
Fire Safety & Security Products
03.2009
SISTORE CX/AX/MX integration
Î
You can now make further settings for the selected device:
Fig. 179 SISTORE AX – Hardware
Make sure that the name entered corresponds with the name of the SISTORE AX PC that is to be
integrated.
4.
5.
6.
Enter the name of the device in the Name field.
If you wish to add further information (e.g. the site where the device is in
operation), you can enter a comment in the Comment field.
Select an AX from the list.
It is important that the SISTORE AX hardware configuration is made correctly since standard
parameters are automatically generated in the SISTORE AX server.
7.
Select the device type from the list.
Fig. 180 Drop-down list SISTORE AX Hardware configuration
The number of inputs and outputs is defined once with the configuration of the SISTORE. Once you
have clicked Finish, it is not possible to change the hardware configuration. The "Account" data
cannot be changed either.
8.
If signal loss is not to be reported for this SISTORE device, unmark the
checkbox Detect signal loss.
168
Siemens Building Technologies
Fire Safety & Security Products
03.2009
SISTORE CX/AX/MX integration
19.3.2
SISTORE AX configuration
The following parameters have to be set:
z Network name
z IP address
z Connection video matrix/SISTORE AX
Prerequisite:
A SISTORE device has been added. See Section 19.3.1: Adding a SISTORE AX.
Assign SISTORE AX to a group
1.
Select the Groups tab.
Fig. 181 SISTORE AX – Groups
2.
Select the group which the SISTORE AX device is to be assigned to in the
Available groups list.
3.
Click the arrow button
.
Î
The group will be displayed in the Selected groups field.
Î
The SISTORE AX device is now assigned to the selected group.
169
Siemens Building Technologies
Fire Safety & Security Products
03.2009
SISTORE CX/AX/MX integration
Set IP address
1.
Select the Communication tab.
Fig. 182 SISTORE AX – Communication
IP port 17655 is set by default.
2.
Enter the address of the SISTORE AX device in the IP address text field.
Î
The IP address has been set.
170
Siemens Building Technologies
Fire Safety & Security Products
03.2009
SISTORE CX/AX/MX integration
Assign inputs
1.
Select the Inputs tab.
Fig. 183 SISTORE AX – Inputs
2.
Select the Type of the connection.
The following connection types are available:
Î
None
Select "None" if this input is not to be used to establish a connection.
Split Camera
Select "Split Camera" if the component is to be connected before the video
matrix. The camera is connected to SIMATRIX and to SISTORE AX.
CCBx
K500
K505
For cameras that are directly connected to SISTORE.
A standard name will be entered automatically.
171
Siemens Building Technologies
Fire Safety & Security Products
03.2009
SISTORE CX/AX/MX integration
3.
If you want to change a standard name, you can overwrite it in the Name
column.
Other information can be added in the Comment text box.
4.
This information is also evaluated in the SISTORE AX archive.
The ID, the Signal ID and the Rule ID are assigned automatically by the system.
5.
Select the appropriate entries from the Management list box.
You can choose between the following:
– Automatic
The inputs are assigned automatically by IVM as part of the alarm
management, i.e. any available inputs are used for alarm recording.
For the inputs to be controlled manually, the checkbox "Use manual SISTORE channels on alarm“
must be ticked. See Section 4.13.3: Set operating mode.
– Manual
The user assigns the inputs manually, i.e. the inputs are used by the server
only on demand and can also be used by the IVM Client.
6.
If a current recording is not to be interrupted by a higher priority request,
select No in the Interruptible list box.
7.
Click Apply.
Î
Your settings are saved.
Î
The SISTORE AX device has been added and configured.
172
Siemens Building Technologies
Fire Safety & Security Products
03.2009
SISTORE CX/AX/MX integration
19.4
SISTORE MX integration
19.4.1
Configuring SISTORE MX using SISTORE MX software
1.
Open the SISTORE MX Configuration dialog.
Fig. 184 SISTORE MX Configuration
2.
Activate the check box Enable software trigger in the System tab.
3.
Select the User management tab.
173
Siemens Building Technologies
Fire Safety & Security Products
03.2009
SISTORE CX/AX/MX integration
Fig. 185 User management
4.
Set up a new user with the user name IVM_SERVER.
5.
Make the appropriate settings is the dialog as shown in Fig. 185 above.
In SISTORE MX Pro, there are two users defined: the "Administrator“ with
the password "Administrator“, and the "Installer“ with the password "Installer“.
Information on user management can be found in the User Manual for the
Digital video recorder SISTORE MX Pro.
Make sure that the same user name and the same password are used for all systems. Otherwise
communication problems may result.
With the integration of SISTORE MX, only one IVM server has access to a SISTORE MX; otherwise
communication problems will occur.
174
Siemens Building Technologies
Fire Safety & Security Products
03.2009
SISTORE CX/AX/MX integration
19.4.2
Adding a SISTORE MX
When configuring SISTORE MX NVR types, select any SISTORE MX.
You can configure up to 16 IP cameras in the IP camera tab.
1.
Start IVM Config. See Section 4.11: Starting IVM Config.
2.
Click the icon
Î
Add new component.
The following dialog box opens:
Fig. 186 Hardware
3.
Select SISTORE in the Base component list.
175
Siemens Building Technologies
Fire Safety & Security Products
03.2009
SISTORE CX/AX/MX integration
Î
You can now make further settings for the selected device:
Fig. 187 SISTORE MX – Hardware
Make sure that the name entered corresponds with the name of the SISTORE MX server PC that is to
be integrated.
4.
Enter the name of the device in the Name field.
5.
If you wish to add further information (e.g. the site where the device is in
operation), you can enter a comment in the Comment field.
It is important that the SISTORE MX device type is selected correctly since standard parameters are
automatically generated in the SISTORE MX depending on the device type.
If your device is an MX24, select MX32 and configure only 24 inputs.
6.
Select the device type from the drop-down list.
Fig. 188 Selection of SISTORE MX device type
The number of inputs and outputs is defined once with the configuration of the SISTORE. Once you
have clicked Finish, it is not possible to change the hardware configuration. The "Account" data
cannot be changed either.
7.
If signal loss is not to be reported for this SISTORE device, unmark the
checkbox Detect signal loss.
176
Siemens Building Technologies
Fire Safety & Security Products
03.2009
SISTORE CX/AX/MX integration
19.4.3
Configuring SISTORE MX
The following parameters have to be set:
z Host name
z IP address
Prerequisite:
A SISTORE device has been added. See Section 19.4.2: Adding a SISTORE MX .
1.
Select the Groups tab.
Fig. 189 SISTORE MX – Groups
2.
Select the group which the SISTORE MX device is to be assigned to in the
Available groups list.
3.
Click the arrow button
.
Î
The group will be displayed in the Selected groups field.
Î
The SISTORE device is now assigned to the selected group.
177
Siemens Building Technologies
Fire Safety & Security Products
03.2009
SISTORE CX/AX/MX integration
Set IP address
1.
Select the Communication tab.
Fig. 190 SISTORE MX – Communication
IP port 8080 is set by default.
2.
Enter the address of the SISTORE MX device in the Host name/IP address
text field.
Î
The IP address has been set.
Assign inputs
1.
Select the Inputs tab.
Fig. 191 SISTORE MX – Inputs
178
Siemens Building Technologies
Fire Safety & Security Products
03.2009
SISTORE CX/AX/MX integration
2.
Select the Type of the connection.
The following input types are available:
Î
3.
4.
None
Select "None" if this input is not to be used to establish a connection.
Split Camera
Select "Split Camera" if the component is to be connected before the video
matrix. The camera is connected to SIMATRIX and to SISTORE MX.
CCBx
K500
K505
For cameras that are directly connected to SISTORE.
A standard name will be entered automatically.
If you want to change a standard name, you can overwrite it in the Name
column.
Other information can be added in the Comment text box.
This information is also evaluated in the SISTORE MX archive.
The ID is assigned automatically by the system.
5.
Select the appropriate entries from the Management list box.
You can choose between the following:
– Automatic
The inputs are assigned automatically by IVM as part of the alarm
management, i.e. any available inputs are used for alarm recording.
For the inputs to be controlled manually, the checkbox "Use manual SISTORE channels on alarm“ in
the "General settings“ dialog must be ticked. See Section 4.13.3: Set operating mode.
– Manual
6.
7.
The user assigns the inputs manually, i.e. the inputs are used by the server
only on demand and can also be used by the IVM Client.
If a current recording is not to be interrupted by a higher priority request,
select No in the Interruptible list box.
To enable PTZ control via the IVM Client, mark the checkbox in the column
PTZ.
179
Siemens Building Technologies
Fire Safety & Security Products
03.2009
SISTORE CX/AX/MX integration
Select IP cameras
1.
Select the IP camera tab.
Fig. 192 SISTORE MX – IP Cameras
2.
Select the input type in the Type column.
The following input types are available:
3.
None
Select "None" if this input is not to be used to establish a connection.
Camera
A camera will be connected to SISTORE MX.
Click Apply.
Î
Your settings are saved.
Î
The SISTORE MX device has been added and configured.
180
Siemens Building Technologies
Fire Safety & Security Products
03.2009
I/O server integration
20
I/O server integration
This chapter describes the integration of the I/O server into IVM.
The I/O server supports a communication interface to SIMATIC. SIMATIC S7-200
is supported as standard, and SIMATIC S7-300 can be supported as a projectspecific application.
20.1
Configuration of the I/O Server using the I/O-Server
configuration program
1.
Start the I/O Server configuration program via Start -> Programs ->
Siemens Video Software Suite -> I/O Server. Further information on this
can be found in the Configuration Manual for the I/O Server.
Î
2.
The following dialog box opens:
Select the S7 IO tab.
181
Siemens Building Technologies
Fire Safety & Security Products
03.2009
I/O server integration
The contact names of the I/O-Server in the Name column must consist of numbers from 1 to n.
More detailed information on the application, set-up and configuration of the I/O
server can be found in the I/O Server Configuration Manual.
20.2
Adding and configuring an I/O Server
1.
Start IVM Config. See Section 4.11: Starting IVM Config.
2.
Click the icon
Î
Add new component.
The following dialog box opens:
Fig. 193 Hardware
182
Siemens Building Technologies
Fire Safety & Security Products
03.2009
I/O server integration
3.
Select I/O Server in the Base component list:
Fig. 194 I/O Server – Hardware
4.
Enter the name of the I/O Server in the Name field.
5.
If you wish to add further information (e.g. the site where the device is in
operation), you can enter a comment in the Comment field.
Assign I/O Server to a group
1.
Select the Groups tab.
Fig. 195 I/O Server – Groups
183
Siemens Building Technologies
Fire Safety & Security Products
03.2009
I/O server integration
2.
Select a group in the Available groups list.
3.
Click the arrow button
.
Î
The group will be displayed in the Selected groups field.
Î
The I/O Server is now assigned to the selected group.
Set IP port and IP address
1.
Select the Communication tab.
Fig. 196 I/O Server – Communication
2.
Enter the socket address of the TCP/IP port in the IP port text field. Port 1234
is set by default and is therefore suggested automatically.
3.
Enter the IP address or the host name of the I/O server or of the computer on
which the I/O server runs in the Hostname/IP address text field.
4.
Click Apply.
Î
Your settings are saved.
Î
The I/O Server has been added and configured.
184
Siemens Building Technologies
Fire Safety & Security Products
03.2009
I/O server integration
20.2.1
Defining commands for I/O Server
In the next step, the commands for the I/O server, e.g. for opening a relay, are
defined:
1.
Start IVM Config. See Section 4.11: Starting IVM Config.
2.
Select Commands… in the System configuration menu.
Î
The following dialog box opens:
Fig. 197 IVM Configuration - Editing commands
3.
Click Add. You can now select the relevant command in the drop-down list.
Fig. 198 Command selection
The following commands are supported for the integration of the I/O server:
Close relay (225)
Command for closing a relay
Open relay (224)
Command for opening a relay
Relay pulse (266)
Command for a relay pulse
More information on the definition of commands can be found in Section 12 Commands.
185
Siemens Building Technologies
Fire Safety & Security Products
03.2009
I/O server integration
20.2.2
Defining SIMATIC alarms
A further step is the definition of alarms that were triggered by a SIMATIC system.
In this section, your attention is drawn to what is remarkable about the integration of the I/O server.
For more information on alarms please refer to Section 13: Alarms.
To do this, proceed as follows:
1.
Start IVM Config. See Section 4.11: Starting IVM Config.
2.
Select the menu sequence System configuration > Alarms....
Î
The following dialog box opens:
Fig. 199 Editing alarm types
3.
Click New...
Î
The following dialog box opens:
Fig. 200 Alarm types – Organization
186
Siemens Building Technologies
Fire Safety & Security Products
03.2009
I/O server integration
4.
Define a name for the alarm and select the Type tab. See Section 13: Alarms.
Î
The following dialog box opens:
Fig. 201 Alarm types – Type
Now select the alarm type in the drop-down list box on the left. The alarm type
properties may change depending on the alarm type.
For the I/O server integration only the alarm type Internal alarm is supported.
Information on alarm type properties:
Component
Select the desired I/O server in this field box.
Contact/Channel
The contacts defined in the I/O server are assigned in this field.
Track
Not relevant to the I/O server.
For the definitions to be made under the tabs Organization, Management, Users and Commands
proceed as described in Section 13: Alarms.
187
Siemens Building Technologies
Fire Safety & Security Products
03.2009
IP camera integration
21
IP camera integration
21.1
Adding and configuring an IP MPEG-4 camera
There are two possible ways to add an IP MPEG-4 camera:
z Adding an P MPEG-4 camera automatically. See Section 21.1.1: Adding an IP
MPEG-4 camera automatically.
– OR –
z Adding an P MPEG-4 camera manually. See Section 21.1.2: Adding an IP
MPEG-4 camera manually.
21.1.1
Adding an IP MPEG-4 camera automatically
1.
Start IVM Config. See Section 4.11. Starting IVM Config.
2.
Click the icon
Î
Add new component.
The following dialog box opens:
Fig. 202 Add a new component
3.
Select IP MPEG-4 Camera in the Base component drop-down list.
188
Siemens Building Technologies
Fire Safety & Security Products
03.2009
IP camera integration
Î
You can now make further settings for the selected device:
Fig. 203 IP MPEG-4 Camera – Hardware
4.
If you wish to perform a ping check before the connection is set up, mark the
checkbox Check with ICMP echo request before connecting.
5.
Click on search device.
Î
The following dialog box opens:
Fig. 204 IP MPEG-4 Camera – Camera Selection Wizard
189
Siemens Building Technologies
Fire Safety & Security Products
03.2009
IP camera integration
6.
Select the IP cameras you wish to add from the list box.
– OR –
Enter the IP address of an IP camera in the text field.
7.
Click Add.
Î
8.
The IP cameras are now selected.
Click Next >.
Î
The data of the selected IP cameras will be retrieved:
Fig. 205 IP MPEG-4 Camera – Camera Selection Wizard – Connection options
9.
Wait until the system has retrieved all information (100%).
10. Click Apply.
Î
The IP camera has been added automatically.
190
Siemens Building Technologies
Fire Safety & Security Products
03.2009
IP camera integration
21.1.2
Adding an IP MPEG-4 camera manually
1.
Start IVM Config. See Section 4.11. Starting IVM Config.
2.
Click the icon
Î
Add new component.
The following dialog box opens:
Fig. 206 Add a new component
3.
Select IP MPEG-4 Camera in the Base component drop-down list.
191
Siemens Building Technologies
Fire Safety & Security Products
03.2009
IP camera integration
Î
You can now make further settings for the selected device:
Fig. 207 IP MPEG-4 Camera – Hardware
4.
Enter the name of the camera in the Name field.
5.
If you wish to add further information (e.g. the site where the device is in
operation), you can enter a comment in the Comment field.
6.
If you wish to perform a ping check before the connection is set up, mark the
checkbox Check with ICMP echo request before connecting.
192
Siemens Building Technologies
Fire Safety & Security Products
03.2009
IP camera integration
21.1.3
Configuring an IP MPEG-4 camera
1.
Select the Communication tab.
Fig. 208 IP MPEG-4 Camera – Communication
2.
Enter the host name or the IP address in the Host name/IP address text
field.
3.
Select the Inputs tab.
Fig. 209 IP MPEG-4 Camera – Inputs
193
Siemens Building Technologies
Fire Safety & Security Products
03.2009
IP camera integration
4.
Select the input type in the Type column.
The following input types are available:
None
Select "None" if this input is not to be used to establish a connection.
Camera
A camera is directly integrated into IVM.
5.
21.2
Click Apply.
Î
Your settings are saved.
Î
The IP camera has been added and configured.
Adding and configuring a Siemens MJPEG camera
Adding a Siemens MJPEG camera
1.
Start IVM Config. See Section 4.11: Starting IVM Config.
2.
Click the icon
Î
Add new component.
The following dialog box opens:
Fig. 210 Add a new component
3.
Select Siemens MJEPG Camera in the drop-down list.
194
Siemens Building Technologies
Fire Safety & Security Products
03.2009
IP camera integration
Î
You can now make further settings for the selected device:
Fig. 211 IP camera – Hardware
4.
Enter the name of the camera in the Name field.
5.
If you wish to add further information (e.g. the site where the device is in
operation), you can enter a comment in the Comment field.
6.
If you wish to perform a ping check before the connection is set up, mark the
checkbox Check with ICMP echo request before connecting.
195
Siemens Building Technologies
Fire Safety & Security Products
03.2009
IP camera integration
Configuring a Siemens MJPEG camera
1.
Select the Groups tab.
Fig. 212 IP camera – Groups
2.
Select a group in the Available groups list.
3.
Assign the camera to the selected group using the arrow button or by double
clicking on the group.
Î
4.
The camera has been assigned to the group and will be displayed in the
Selected groups list.
Select the Communication tab.
Fig. 213 IP camera – Communication
IP port 8080 is set by default.
196
Siemens Building Technologies
Fire Safety & Security Products
03.2009
IP camera integration
5.
Enter the host name or the IP address in the Host name/IP address text
field.
6.
Select the Inputs tab.
Fig. 214 IP camera - Inputs
7.
Select the input type in the Type column.
The following input types are available:
None
Select "None" if this input is not to be used to establish a connection.
Camera
A camera is directly integrated into IVM.
8.
Click Apply.
Î
Your settings are saved.
Î
The IP camera has been added and configured.
197
Siemens Building Technologies
Fire Safety & Security Products
03.2009
IVM Watchdog
22
IVM Watchdog
22.1
Summary
A Quancom Hardware Watchdog can be used to increase the availability of the
IVM server. The internal threads of the IVM are monitored and the computer is
automatically restarted if the system hangs.
This depends on the IVM being correctly installed for this to work, i.e. as a system service which runs
automatically on start.
22.2
Conditions
The Watchdog is not activated by default and has to be activated by configuration
in the Windows registry. If the Watchdog is to be used then the following conditions
have to be met:
z The Watchdog card has to be installed.
z The QUANCOM device driver has to be installed.
z The Watchdog is activated in the IVM by entering the following Registry key:
Key
Type
Value
HKEY_LOCAL_MACHINE\Software\Siemens\IVM NT\IVM NT
Server\WatchdogType
String
QUANCOM
If this key is not present, or the key is entered incorrectly, then the Watchdog is not
used!
22.3
Method of operation
The IVM services are monitored by the Watchdog Service. All services being
monitored have to report to (trigger) the Watchdog Service at regular intervals. The
Watchdog Service, for its part, triggers a HW-Watchdog, only then, however, if all
triggers from the services being monitored have been received.
If a service fails to trigger repeatedly, or if the Watchdog Service itself hangs, then
the HW-Watchdog restarts the computer after a specified time.
22.4
Troubleshooting
If the Watchdog is configured, but not physically present or correctly installed
physically, an error message is displayed when the IVM starts reporting “Device
driver QLIBNDRV.SYS could not be loaded!”
If the error message is not cancelled, the IVM will not start correctly! If this
happens, then the Watchdog needs to be correctly installed or the registry key for
the IVM needs to be deactivated.
The error message originates from the QUANCOM QLIB32.dll and cannot be
deactivated!
198
Siemens Building Technologies
Fire Safety & Security Products
03.2009
Special functions of IVM Config
23
Special functions of IVM Config
23.1
Printing the system configuration
Using the Print function it is possible to print out the whole system configuration as
a table with the database IDs.
Select Print in the File menu.
Î The following dialog box opens:
Fig. 215 Print
Print options
It is possible to print the whole configuration in one go, or to print selected
configuration items, such as Users or Workstations.
199
Siemens Building Technologies
Fire Safety & Security Products
03.2009
Special functions of IVM Config
23.2
Assistants
Assistants can be used to automatically define commands and to enable or disable
alarms. Command generation should only be done once all inputs and outputs
have been configured for the system. For the alarm commands to be activated the
IVM server must be active.
Fig. 216 Assistants
More information can be found in Section 12.2.2: Set alarm status.
200
Siemens Building Technologies
Fire Safety & Security Products
03.2009
Glossary
24
Glossary
ASCII
American Standards Committee of Information Interchange
CCTV
Closed Circuit Television
Database ID
The automatic ID assignment by the program depends on the order of creation. It
is only possible for the user to change the ID immediately after it is assigned. If the
suggested Database ID is changed by the user please take note that:
because the Database ID is often intended to refer to an existing numbering
system in the real system, the operator should first devise a suitable scheme to
represent the system in the IVM and assign manual IDs according to this scheme.
I/O Server
The I/O Server is a Client/Server-based application for interfacing the SIMATIC
world.
IVM
Interactive Video Management system.
32-bit operating system version for Windows 2000/2003/XP/VISTA.
IVM Client
Interactive Management System client program for operation and monitoring.
IVM Config
IVM Server configuration program
IVM SERVER
Interactive Management System server program, can be used as a main or subserver depending on the configuration.
LAN
Local Area Network
ODBC
Open Database Connectivity
201
Siemens Building Technologies
Fire Safety & Security Products
03.2009
Glossary
Priority
By assigning priority values the control of camera image display can be defined
according to the user and monitors etc., i.e.: The output from a camera can be
displayed due to an alarm with higher priority, replacing a lower priority display. It is
not, however, possible to replace a high priority display with a new alarm with lower
priority.
SIMATRIX
Video matrix switcher made by SIEMENS.
SISTORE
Digital video recorder (CCTV device made by SIEMENS)
TCP/IP
Transmission Control Protocol / Internet Protocol
TELSCAN
Video/audio/data transmission system via analog telephone networks, ISDN or
digital data networks.
VKS
Video matrix switcher
VSS
Video Software Suite
202
Siemens Building Technologies
Fire Safety & Security Products
03.2009
Index
25
Index
A
Alarm configuration 113
Alarm programs 115
Basic functions 113
Program 1 (individual display) 115
Program 2 (individual display/series) 116
Program 3 (individual display/series) 117
Program 4 (alarm group display) 118
Program 5 (alarm group display) 119
Program 6 (group display/series) 120
Alarm groups 80
Cameras 81
Organization 80
Alarm sequences 82
Adding ~ 83
Adding cameras 84
Alarms 99
Alarm type configuration 102
Assign commands 108
Colour representation 121
Colour setting 121
Configuring alarm management 105, 113
New alarm 99
Select users 107
Simulate ~ 112
Allocation of group priorities 122
Assignment of devices 137
C
CEVIS directory 37
Command line parameters 39
Commands 86
Absolute alarm switching 87
Close relay 95
Control connect 98
Control group 94
Control sequence 97
Definition 86
Disconnect 98
Move camera to position 94
Move camera to position name 95
Open relay 96
Record start 90
Record stop 91
Relay pulse 96
Set alarm status 88
Start external program 92
Switch alarm component 89
Switching between EDS/ODR programs 93
Component
Deleting 62
Components 49
Adding ~ 49
Adding text 58
Assign ~ to a group 51
Assigning an OSD template to a camera 60
Configuring inputs 53
Configuring outputs 55
Delete ~ 62
Deleting text 58
Edit ~ 61
On-screen display (OSD) 56
Positioning the text 59
Set type of protocol and port 52
D
Directory structure 37
G
Groups 47
Delete ~ 48
Edit ~ 47
New group 47
H
Hazard symbols
Meaning 10
Help 12
I
I/O Server 181
~ configuration using I/O Server configuration
program 181
Adding ~ 182
Definition of alarms 186
Definition of commands 185
I/O Server integration 181
Icons
Toolbar 12
Information on the version 13
Installation 27
Checking network settings 35
Get time 33
Host name resolution 35
Log file 35
Name resolution 35
Procedure 27
Setting up the ODBC data source 28
WIBU dongle (BOX) 28
203
Siemens Building Technologies
Fire Safety & Security Products
03.2009
Index
IP camera 188
Adding IP MPEG-4 188
Adding MJPEG 194
Configuring IP MPEG-4 188
Configuring MJPEG 194
IVM Config
Printing the system configuration 199
Refresh ~ 38
Special functions 199
Start in demo mode 41
Starting ~ 40
IVM Watchdog 198
Conditions 198
Method of operation 198
Overview 198
Troubleshooting 198
L
Language files 44
M
Modes of operation 155
N
NTP Server
Get time from an NTP Server 33
O
ODBC database source 28
P
Plan configuration 125
Plans 125
Assignment of devices 137
Contact/alarm icon 133
Delete ~ 136
Edit ~ 131
External alarm or multifunction icon 134
Input icon 132
New plan 127
Plan referral 135
Save ~ 136
System overview 125
Print
Files 199
Print files 199
Print options 199
Priorities 122
Program window IVM Config 11
R
Rights 67
Assigning function rights 70
SISTORE user rights 71
User rights for cameras 72
User rights for output devices 73
User rights for workstations 78
S
Safety 9
Scheduler 139
Scheduler entries 139
Server 63
Add ~ to list 65
Configuring ports 63
Server log 66
Settings 41
Client connection 45
Language 44
Messages 41
Operating mode 43
Size of the logbook 41
Terminal connection 46
Setup 16
SIMATRIX 143
~ configuration using IVM Config 143
~ integration 143
Configuration using VM_WIN8 151
SISTORE AX 167
Adding ~ 167
Configuration 169
SISTORE CX 157
Adding ~ 160
Configuring ~ 163
SISTORE CX/AX/MX integration 155
SISTORE MX 173
Adding ~ 175
Configuring ~ 177
Configuring ~ using SISTORE MX 173
Software monitors 138
Starting the program 40
System configuration See system configurations
System configurations 17
System environment 16
Alarm configuration 16
Basic configuration 16
System information 13
System limits 22
System requirements for the database 21
System requirements for the PC 19
T
Target readers 9
Toolbar 12, See toolbar
204
Siemens Building Technologies
Fire Safety & Security Products
03.2009
Index
U
W
Update 38
User 67, 69
Create ~ 68
Edit ~ 74
Edit user properties 69
Warning notices 10
WIBU dongle 28
Work safety information 9
Workstations 75
Assigning output devices 77
Create ~ 76
Edit ~ 79
V
Video components 16
205
Siemens Building Technologies
Fire Safety & Security Products
03.2009
Issued by
Siemens Building Technologies
Fire & Security Products GmbH & Co. oHG
D-76181 Karlsruhe
www.buildingtechnologies.siemens.com/
Document no.
A24205-A336-B492
Edition
25.03.2009
© 2009 Copyright by
Siemens Building Technologies
Data and design subject to change without notice.
Supply subject to availability.
Printed in the Federal Republic of Germany
on environment-friendly chlorine-free paper.