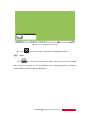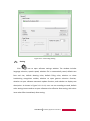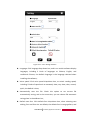
1
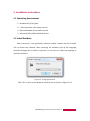
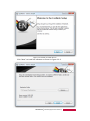
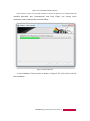
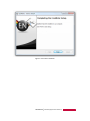
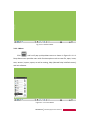
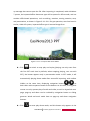
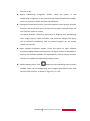
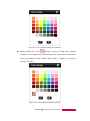
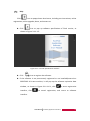
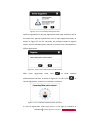
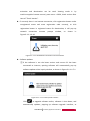
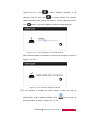
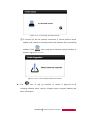
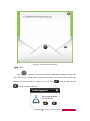
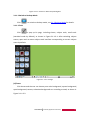
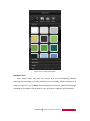
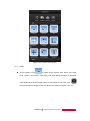
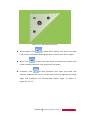
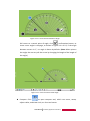
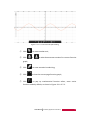
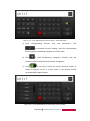
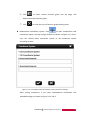
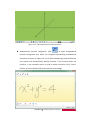
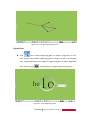
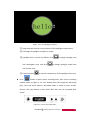
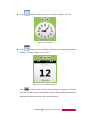
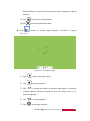
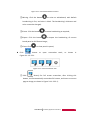
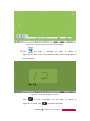
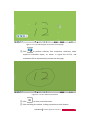
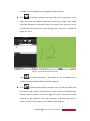
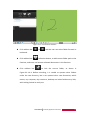
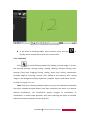
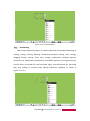
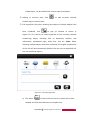
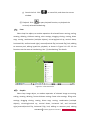
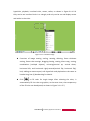
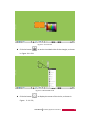
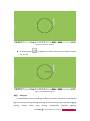
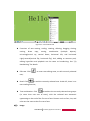
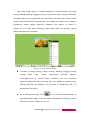
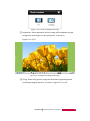
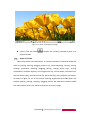
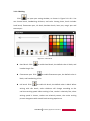
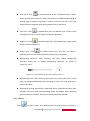
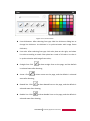
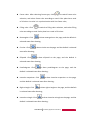
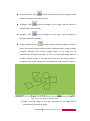
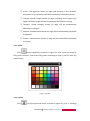
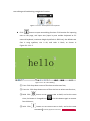
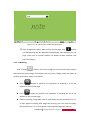
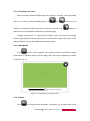
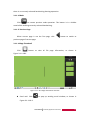
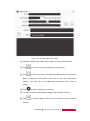
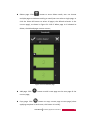
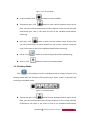
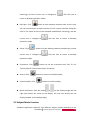
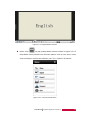
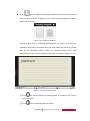
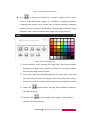
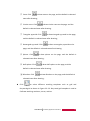
EasiNote Application Software User Manual Version 2.4.1 www.prestigio.com Contents 1. Software Introduction ...................................................................... 1 2. Installation Instructions .................................................................... 2 2.1 Operating Environment ............................................................................. 2 2.2 Install EasiNote ......................................................................................... 2 3. Use Introduction............................................................................... 6 3.1 Functions of Each Modes........................................................................... 7 3.1.1 Standard Mode ....................................................................................... 7 3.1.1.1 Menu ............................................................................................. 9 3.1.1.2 Switch to Desktop Mode ............................................................. 27 3.1.1.3 Tools ............................................................................................ 27 3.1.1.4 Resource Pool.............................................................................. 49 3.1.1.5 Selection...................................................................................... 52 3.1.1.6 Writing ........................................................................................ 69 3.1.1.7 Eraser .......................................................................................... 70 3.1.1.8 Lines ............................................................................................ 71 3.1.1.9 Rectangle..................................................................................... 74 3.1.1.10 Fill.............................................................................................. 77 3.1.1.11 Text ............................................................................................ 77 3.1.1.12 Roaming .................................................................................... 80 3.1.1.13 Cut/Copy and Paste................................................................... 81 3.1.1.14 Navigation ................................................................................. 81 3.1.1.15 Undo .......................................................................................... 81 3.1.1.16 Redo .......................................................................................... 82 3.1.1.17 Previous Page ............................................................................ 82 3.1.1.18 Page Thumbnail ........................................................................ 82 3.1.1.19 Add Page ................................................................................... 85 3.1.1.20 Next Page .................................................................................. 85 3.1.1.21 Shortcuts ................................................................................... 85 3.1.2 Concise Mode ....................................................................................... 85 3.1.3 Desktop Mode ....................................................................................... 86 3.2 Subject Mode Function ............................................................................ 87 3.2.1 English Mode......................................................................................... 88 3.2.2 Math Mode ........................................................................................... 91 3.2.3 Physics Mode ........................................................................................ 94 1. Software Introduction EasiNote is interactive whiteboard software which is based on interactive touch operation and solely developed by Guangzhou Shirui Electronics Technology Co., Ltd. The software is suitable for smart panel classroom teaching, which provides whiteboard functions such as writing, erasing, notation, drawing and roaming, and, at the same time, it fully integrates smart panel interactive multimedia functions, providing powerful interactive teaching and displaying experiences such as sub-subject teaching tools and multimedia demonstration. Friendly user interface, convenient operating experience, and various subjects scenes, are all outstanding parts of EasiNote software. ★ Convenient operation experience. Navigation map is convenient for user positioning page, toolbar mobile with gestures convenient for user demonstration operation. ★ Various subject scenes. Different subject is set with different subject scenarios, including Chinese, English, Math, Chemistry, Physics, and etc. Different subjects provide different teaching tools, and the user can apply different subject scenes for teaching according to the current subject. ★ Convenient and practical presentation tools. Functions such as screen cover, spotlight, screen zooming, and annotation at any time, integrate traditional blackboard presentation into computer intelligence, which enhances practicality and convenience of the software while inheriting traditional operation habit. ★ Actual simulation of soft pen. Soft pen function provides feeling of simulating soft pen, and during writing process, user can present handwriting effect of different degree of thickness according to user's writing speed, to provide users better writing experience. ★ Personalized custom settings. Users can customize settings for brush, eraser and canvas background according to need, fully meeting demonstration need from each detail. User Manual EasiNote (Application Software) 1 2. Installation Instructions 2.1 Operating Environment Windows XP/ 7/ 8 system . Net Framework 4.0 or above version Microsoft Media 10.0 or above version Microsoft Office 2007 and 2010 version 2.2 Install EasiNote Select setup.exe – the application software installer. Double click the installer icon to extract the software. After extracting the software, pop up the Language Selection dialogue box as shown in Figure2-2-1, the user can select the language to install the software. Figure.2-2-1 Language Selection Click “Ok” to enter to the Ready to Install Screen as shown in Figure 2-2-2. User Manual EasiNote (Application Software) 2 Figure 2-2-2 Ready to Install Screen Click “Next” to install the software as shown in Figure 2-2-3. User Manual EasiNote (Application Software) 3 Figure 2-2-3 Installation Path Selection Click “Install” to enter to the install interface, as shown in Figure 2-2-4. If you have not installed Microsoft .Net Framework4.0 and Flash Player, you should silent installation .Net Framework4.0 and Flash Player. Fig.2-2-4 Install software In the Installation Finish screen as shown in Figure 2-2-5, click Finish to finish the installation. User Manual EasiNote (Application Software) 4 Figure 2-2-5 Finish Installation User Manual EasiNote (Application Software) 5 3. Use Introduction After software installation is completed, double-click icon on the desktop or select EasiNote in drop-down list of "All programs" in the "Start" menu, to start EasiNote application software. Authorization Mechanism (1) The software needs to register permanently or be installed/external on PRESTIGIO all-in-one machine, and all functions are only available; (2) The software license registration on time, and all functions are available, but there is PRESTIGIO LOGO watermark on the top right corner of the page; (3) If the software is not permanently registered or not installed/external on PRESTIGIO all-in-one machine, there is PRESTIGIO LOGO watermark on the top right corner of the page and part of the functions cannot be used. The functions cannot use as following: ① Text tool in handwriting recognition; ② Touch gestures, including gestures erase, two-point select, three-point roam; ③ The simulation experiment can only be opened childhood discipline. Lack of functional modules under each system (1) All functions are available under Win 7 Chinese system (2) No Chinese scenes, system resources, English dictionary, English phonetic symbol, no displaying of toolbar textual description under Win 7 English system (3) Under Windows XP Chinese system, text, phonetic symbol and User Manual EasiNote (Application Software) 6 Chinese pinyin reading functions are hidden, without gestures selection (4) No Chinese scenes, system resources, English dictionary, English phonetic symbol, gestures selection, no displaying of toolbar textual description under Win 7 English system 3.1 Functions of Each Modes EasiNote application software includes standard mode, concise mode and desktop mode, open software to enter standard mode by default. In software interface, press long or right click mouse top of software interface, it can pop up auxiliary tool bar. Auxiliary tools, from left to right, are: screen brightness control, software name, date, as shown in Figure.3-1. Drag screen brightness scroll bar to adjust screen brightness. Figure.3-1 Auxiliary Tool Bar 3.1.1 Standard Mode In standard mode, the toolbar cannot be to dragged, with toolbar functions from left to right are: menu, switch to desktop mode, tools, repository, selection, writing, eraser, line, image, text, screen roaming (zooming in and out), cutting, copy, paste, roaming navigation, undo, redo, previous page, page thumbnail, adding page, User Manual EasiNote (Application Software) 7 next page, as shown in Figure.3-1-1-1. (Note: there are cutting and copy buttons only when objects are selected; there is paste button only after cutting and copy operation; there is undo button only when there is object operation; there is redo button only after undo operation; there are previous page and turning buttons only when there are more than one pages.) Figure.3-1-1-1 Standard Mode Interface Toolbar text tip. When opening the software, text message is displayed under toolbar icon by default, clicking blank area outside toolbar icon can hide the text messages, and click again can display icon text tips. Enabling/disabling of tooltip function can be modified in settings, and will take effect once after modified. Toolbar about switching. Click the left and right edges or button to switch the toolbar, as show in Figure 3-1-1-2 for toolbar after switch interface. User Manual EasiNote (Application Software) 8 Fig.3-1-1-2 Switch Toolbar 3.1.1.1 Menu Click and it will pop up drop-down menu as shown in Figure.3-1-1-1-1. Drop-down menu provides users with function options such as new file, open, insert, save, save as, import, export, as well as setting, help (selected help in default menu), and exit software. Figure.3-1-1-1-1 Start Menu User Manual EasiNote (Application Software) 9 (1) New Click icon to create a new blank file, each file can include many pages based on user’s needs. (2) Open Click icon to open .enb format file by software default. After file is opened, it will automatically jump to scene page when saving the file. (3) Insert Click icon to insert *.enb format, pdf documents, image, Flash, audio and video files, into current page. Among them, inserted pdf document is icon link form, double click icon to open pdf documents. If current audio and video format cannot be analyzed, it will prompt the user to install k-lite decoder, which is supplied with software, click “OK” on pop-up prompt window to install the decoder. (4) Save Click icon to save current document as software supported .enb format file by default. (5) Save as Click icon to save current document as *.enb, *.jpg, word, ppt, and pdf files. (6) Import Click icon to import word, ppt, excel and image into software page, with the import process having a progress bar prompt, among them, ppt, word, and excel files can only open one file at once. When opening the second file, it will pop User Manual EasiNote (Application Software) 10 up message that cannot open the file. After importing is completed, under Windows 7 system, the imported office document type will be opened in office mode, and can conduct office-based operations, such as editing, notation, erasing notation, save, and presentation, as shown in Figure.3-1-1-3-1-1 for ppt operation, word and excel is similar; Under XP system, imported office type is inserted image form. Figure.3-1-1-1-2-1 Import PPT Demo Mode Click to switch to stop play and replay (playing can only start from the first PPT each time by default; when stopping playing, user can edit PPT), the button appears only in presentation mode. In PPT mode, it will automatically playing demo mode after successful importing, with toolbar hidden at the same time, displaying navigation button on both sides and transparent button at the bottom. At this time, clicking with mouse can only operate play of audio and video, as well as hyperlinks on a page; page up and down can be realized by navigation button or sliding gestures. Word and excel mode have no page up and down navigation buttons. Click to enter play demo mode, and this button only appears in the User Manual EasiNote (Application Software) 11 mode of starting notation pen writing; Click to enable hard-pen notation, the default color is red, and handwriting is fine. User can adjust handwriting thickness according to need, but the handwriting coarse adjustment shall be in accordance with fluorescent pen; at the same time, it can choose different colors according to need, there are 7 kinds of color that can be selected; Click to enable fluorescence pen notation, the default color is red, and handwriting is fine. User can adjust handwriting thickness according to need, but the handwriting coarse adjustment shall be in accordance with hard pen; at the same time, it can choose different colors according to need, there are 7 kinds of color that can be selected; Click to select the eraser, default eraser is point wipe. Click for the first time to save edited and modified file, then click the button to save the document on the path that is saved for the first time; Click to switch into office file model, and narrow the file to EasiNote toolbar in the form of thumbnail. Click thumbnail icon , to pop up thumbnail that is opened. Click the document to return to office document mode interface, as shown in Figure.3-1-1-1-2-2; User Manual EasiNote (Application Software) 12 Figure.3-1-1-1-2-2 Office File Thumbnail Click to exit PPT mode, and go back to EasiNote interface. (7) Print Click icon to print the current document. System will pop up the dialog box as shown in Figure.3-1-1-1-3 (For different users operating systems or different printer models, interface might be different). User Manual EasiNote (Application Software) 13 Figure.3-1-1-1-3 Printing Setting (8) Setting Click icon to open software settings window. The window includes language selection, speech speed, whether file is automatically saved, default text font and size, default drawing color, default filling color, whether to show handwriting recognition toolbar, whether to open gesture selection function, whether to open software automatic update function, and whether to display text description. As shown in Figure.3-1-1-1-4-1, user can set according to need, default color settings items need to re-open software to be effective after setting, with other items take effect immediately after setting. User Manual EasiNote (Application Software) 14 Figure.3-1-1-1-4-1 Setting Interface Language. Click language drop-down box, and it can switch software display languages, including 3 kinds of languages as Chinese, English, and traditional Chinese, the default language is the language selected when installing the software; Voice speed. Click voice speed drop-down box, to switch reading speed, including 5 kinds of speed such as extremely slow, very slow, slow, normal, quick, the default is slow; Automatically save the file. Check this option to set current file automatically saving, and at the same time, you can choose file automatic saving place in the address bar; Default text font. Click default font drop-down box, when selecting text editing, font and font size are default, the default font is song typeface, and User Manual EasiNote (Application Software) 15 font size to 40; Display handwriting recognition toolbar. Check this option, in text handwriting recognition, it can synchronously display identification toolbar, which can manually choose text after identification; Open gesture selection function. Check this option to open gesture selection function, and at the same time, to close the two-point writing function. No such function under XP system. Two point selection. Choose by two points in diagonal form handwriting, lines, image, picture, audio and video, text and other objects, the object can be selected immediately, and the selected objects can be moved, scaled, and rotated; Open software automatic update. Check this option to open software automatic update. When currently there is a higher version of the software, opening the software updates will automatically pop-up prompt window, the user can update the software according to need; Default drawing color. Click button to pop up drawing color selection window, which can set handwriting, lines, image frame default color, with total 42 kinds of colors, as shown in Figure.3-1-1-1-4-2; User Manual EasiNote (Application Software) 16 Figure.3-1-1-1-4-2 Default Drawing Color Selection Default filling color. Click button to pop up filling color selection window, to set image frame default filling color, with total of 42 kinds of colors and default values, default filling color is default, as shown in Figure.3-1-1-1-4-3; Figure.3-1-1-1-4-3 Default Filling Color Selection User Manual EasiNote (Application Software) 17 (9) Help Click icon to popup lower-level menu, including use instructions, online registration, online upgrade, about, and contact us. Click icon to pop up software specification of Flash version, as shown in Figure.3-1-1-1-5. Figure.3-1-1-1-5 Flash Specification Interface Click icon to register the software. If the software is not permanently registered or not installed/external on PRESTIGIO all-in-one machine, it will pop up the software expiration date window, as shown in Figure.3-1-1-1-6-1, click interface, click to enter registration to cannel registration, and return to software interface. User Manual EasiNote (Application Software) 18 Figure.3-1-1-1-6-1 Trial Days Prompt Interface Confirm registration to pop up registration code input interface, and at the same time, pop up keyboard for user to input registration code, as shown in Figure.3-1-1-1-6-2. Normally, the software needs to register online, and see software query manual or contact us for information on offline registration. Figure.3-1-1-1-6-2 Enter Authorization Code Interface After enter registration code, click to enter network authentication interface, as shown in Figure.3-1-1-1-6-1; Click to cannel registration, and return to software interface. Figure.3-1-1-1-6-3 Network Authentication Interface In case of registration code input errors, it will pop up interface as User Manual EasiNote (Application Software) 19 shown in Figure.3-1-1-1-6-4. Figure.3-1-1-1-6-4 Registration Code Error In case of correct registration code input, it will pop up interface as shown in Figure.3-1-1-1-6-5. Figure.3-1-1-1-6-5 Registration Code Correct If the software has been registered before, it will pop up prompt to unregister as shown in Figure.3-1-1-1-6-6. Figure.3-1-1-1-6-6 Software Already Registered Prompt Window Click de-activation to enter network authentication interface to conduct network Figure.3-1-1-1-6-7; Click User Manual environment operation, as shown in to return to software interface. EasiNote (Application Software) 20 Figure.3-1-1-1-6-7 Network Authentication Interface After successful deactivation, software registration code will be extracted, as shown in Figure.3-1-1-1-6-8. User can save registration code as a txt document (default file name is serialnumber.txt), which can be reused for registration after reinstalling system or accidental error. Figure.3-1-1-1-6-8 Successful Deactivation Interface If the software is installed on all-in-one machine binding with MCU, it does not need to register activation and deactivation can be used, as shown in Figure.3-1-1-1-6-9. Figure.3-1-1-1-6-9 MCU Binding Interface If software is installed in external PC, but connected to PRESTIGIO whole machine with touch box version above 4330, it does not need to register User Manual EasiNote (Application Software) 21 activation and deactivation can be used. Viewing mode is: by machine-supplied remote control, press menu + 3939, check version after item of "Touch Version”. If currently there is no Internet connection, click registration button under unregistered status and enter registration code correctly, or click registration button in registered status for deactivation, it will pop up network connection timeout prompt window, as shown in Figure.3-1-1-1-6-10. Figure.3-1-1-1-6-10 Network Connection Timeout Interface Software updates ① If the software is not the latest version and current PC has been connected to Internet, opening software will automatically pop up software update online inquiry window, as shown in Figure.3-1-1-1-7-1. Figure.3-1-1-1-7-1 Check Update Interface Click to upgrade software online, software is shut down, and automatically updates, popping up software upgrade interface, as User Manual EasiNote (Application Software) 22 Figure.3-1-1-1-7-2. Click to cancel software updating. If file contents need to save, click to cancel update first, conduct update operation after saving file contents. During updating process, click button, to conceal updating interface into background. Figure.3-1-1-1-7-2 Check Whether File is Saved Window After software update is completed, it will pop up interface as shown in Figure.3-1-1-1-7-3. Figure.3-1-1-1-7-3 Software Update Completed ② If the software is already the latest version, it does not pop up automatically online updates window. Click icon to pop up prompt window, as shown in Figure.3-1-1-1-7-4. User Manual EasiNote (Application Software) 23 Figure.3-1-1-1-7-4 Already The Latest Version ③ If currently PC has no network connection, it cannot perform online update, and it needs to manually install new software after uninstalling software. Click icon to pop up no network prompt window, as shown in Figure.3-1-1-1-7-5. Figure.3-1-1-1-7-5 Currently No Network Connection Click icon, to pop up interface as shown in Figure.3-1-1-1-8, including software name, version, company name, company address and other information. User Manual EasiNote (Application Software) 24 Figure.3-1-1-1-8 About Information Click Click icon, to pop up interface as shown in Figure.3-1-1-1-9. to input text editing email content, click to send E-mail to contract software R&D personnel. User Manual EasiNote (Application Software) 25 Figure.3-1-1-1-9 Contract Us Interface (10) Exit Click icon to exit and close EasiNote application software. If there are files that are not saved when exiting the software, the system will remind user whether to save, as shown in Figure.3-1-1-1-10. Click to save the file and click to exit the software directly. User Manual EasiNote (Application Software) 26 Figure.3-1-1-1-10 Save or Not Prompt Dialog Box 3.1.1.2 Switch to Desktop Mode Click to switch to desktop mode, see 3.1.3 Desktop Mode for details. 3.1.1.3 Tools Click to pop up kit page, including theme, subject tools, small tools (standard mode by default), as shown in Figure.3-1-1-3-1. After switching subject scenes, open tools to enter subject tools interface corresponding to current subject scene by default. Figure.3-1-1-3-1 Kit Page (1)Theme Click theme and the user can choose pure color background, square background, spots background, texture, education background etc. according to need, as shown in Figure.3-1-1-3-2. User Manual EasiNote (Application Software) 27 Figure.3-1-1-3-2 Theme Interface (2)Subject Tools Click subject tools, and user can choose and use corresponding auxiliary teaching tool according to current teaching scene, including, Math and Physics, as shown in Figure.3-1-1-3-3. (Note: Some disciplinary tool can be saved with the page, including 30°set square, 45°set square, ruler, protractor, compass, and calculator.) User Manual EasiNote (Application Software) 28 Figure.3-1-1-3-3 Small Tool Interface (2.1) Math 45°set square. Click to open 45°set square tool, which can draw lines, stretch, and rotate. Click scale, and drag along increase or decrease scale direction to draw straight lines. In the middle of the ruler, icon will show segment length of the line drawn, as shown in Figure 3-1-1-3-4. User Manual EasiNote (Application Software) 29 Figure.3-1-1-3-4 Set Square Setting-out 30°set square. Click to open 30°set square tool, which can draw lines, stretch, and rotate. Drawing operation is the same to 45°set square. Ruler. Click to open ruler tool, which can draw lines, stretch, and rotate. Drawing operation is the same to 45°set square. Protractor. Click to open protractor tool, which can rotate, and measure angle with the cursor. Pull the two cursors to align with the angle edge, and protractor will automatically display angle, as shown in Figure.3-1-1-3-5-1. User Manual EasiNote (Application Software) 30 Figure.3-1-1-3-5-1 Protractor Measures Angle Pull cursor to a certain point of angle, click confirmation button, to insert cursor angle in the page, as shown in Figure.3-1-1-3-5-2, if the angle between cursors is 0 °, no angle is drawn by default. (Note: When picture the angle, the use can pull the cursor by changing the length of the length of the angle.) Figure.3-1-1-3-5-2 Protractor Draws Angle Compass. Click to open compass tool, which can move, rotate, adjust radius, and draw circle, arc lines and sector. User Manual EasiNote (Application Software) 31 ① Click the button ② Click the button and drag the compass to move the compass; and rotate the compass to rotating compass direction; ③ Drag the compass feet to adjust radius of circle, and at the same time display current radius length; ④ Click the button to switch compasses drawing effects, including arcs and sectors; ⑤ Drag the compass pen to draw circles, as shown in Figure.3-1-1-3-6; Figure.3-1-1-3-6 Compass Image Drawing ⑥ Click the button to close compass. Mathematical function graph drawing. Click to open mathematical function graph drawing tool, which can draw mathematical function graph, as shown in Figure.3-1-1-3-7-1. User Manual EasiNote (Application Software) 32 Figure.3-1-1-3-7-1 Function Graph Drawing ① Click ② Click to move number axis; or to make demonstrate notation for current function graph; ③ Click ④ Click ⑤ Click to erase notation handwriting; to clear the current page function graph; to pop up mathematical function editor, enter senior function mode by default, as shown in Figure.3-1-1-3-7-2. User Manual EasiNote (Application Software) 33 Figure.3-1-1-3-7-2 Mathematical Function Editor - Advanced Mode a) Input corresponding function keys and parameters, click to complete function editing, with the corresponding function graph automatically display on number axel; b) Click to insert handwriting recognition formula, with use method similar to mathematical formula recognition; c) Drag to the left to switch to primary function mode, as shown in Figure.3-1-1-3-7-3. In this mode, it can directly choose corresponding simple function. Figure.3-1-1-3-7-3 Mathematical Function Editor-Primary Mode User Manual EasiNote (Application Software) 34 ⑥ Click to insert current function graph into the page, and demonstrate the function graph; ⑦ Click to close the current function graph drawing tools. Mathematics coordinate system. Click to open mathematics tool coordinate system, pop-up settings window as shown in Figure.3-1-1-3-8-1. User can choose plane coordinate system or 3D coordinate system according to need. Figure.3-1-1-3-8-1 Mathematics Coordinate System Parameter Settings After setting completion, it can insert mathematical coordinates into whiteboard page, as shown in Figure.3-1-1-3-8-2. User Manual EasiNote (Application Software) 35 Figure.3-1-1-3-8-2 Mathematics Coordinate System Mathematical formula recognition. Click to open mathematical formula recognition tool, which can recognize handwriting mathematical formulae, as shown in Figure.3-1-1-3-9. After handwriting required formula, the system will automatically identify formula. If the formula does not conform, it can manually select in cycle to make correction. Click "Insert" button, to insert identified formula into the current page. User Manual EasiNote (Application Software) 36 Figure.3-1-1-3-9 Formulae Handwriting Recognition Calculator. Click to open the calculator small tool that can perform simple mathematical calculations, as 3-1-1-3-10. Fig.3-1-1-3-10 Calculator (2.2) Physics Click icon to enter physical force mode, which can directly draw lines to constitute physical component forces on white board. When two or more component forces are drawn, it will automatically generate resultant force, as shown in Figure.3-1-1-3-11. User Manual EasiNote (Application Software) 37 Figure.3-1-1-3-11 Physical Resultant Force (3)Small Tools Click icon to open magnifying glass, as shown in Figure.3-1-1-3-12. Click certain point within magnifying glass to drag to move it to enlarged area, drag amplification area edge of magnifying glass to adjust magnified area, click the right setting button to drag setting zooming ratio. Figure.3-1-1-3-12 Magnifying Glass User Manual EasiNote (Application Software) 38 Click icon to open veil tools, as shown in Figure.3-1-1-3-13. Veil tools can be used for covering page contents that are temporarily not displayed, and the user can adjust blocking position by dragging veil layer. When the curtain is moved or rectangle is specified, it will appear icon, and clicking this icon will reset curtain full screen; Click to customize curtain, and fill current inserted image. If the current page has no inserted image, it is default screen; Click to select local image as the curtain. Figure.3-1-1-3-13 Veil Interface Click icon to open spotlight, as shown in Figure.3-1-1-3-14. Spotlight can be used to shift focus of the audience to emphasized position. User Manual EasiNote (Application Software) 39 Figure. 3-1-1-3-14 Spotlight Interface ① Drag the black area can move position of the spotlights emphasized; ② Click edge of spotlights to adjust its scope; ③ Spotlight area is circular by default, click into rectangular area, and click to change spotlight area to change spotlight scope back into circular area. ④ Click the button Click to set the transparency of the spotlight cover part; button to open screen recording tools, with screen recording toolbar shown in Figure. 3-1-1-3-15. Buttons from left to right are start/stop, play, save and close buttons. Recorded video is saved as wmv format, directly click play button to play video files that are just recorded after saved. Figure.3-1-1-3-15 Screen Recorder User Manual EasiNote (Application Software) 40 Click button to open the clock, as shown in Figure.3-1-1-3-16. Figure.3-1-1-3-16 Clock Click button to open calendar. It displays current date and week by default, as shown in Figure.3-1-1-3-17-1. Figure.3-1-1-3-17-1 Default Calendar Click button to view calendar view as shown in Figure.3-1-1-3-18-1. Click left and right buttons to view date up and down. Click year and month position to quickly view other year, month and date. User Manual EasiNote (Application Software) 41 Figure.3-1-1-3-18-2 Calendar View Click button to open the timer, as shown in Figure.3-1-1-3-19. By default, the timer number starts from 00:00:00, and click countdown time. After setting up, click to set again to save and exit the setting. Figure.3-1-1-3-19 Timer Click button to open physical booth, which can realize display, lock screen, rotate 90°left and right, full screen, return to actual size, screenshot, scaling, movement, notation, return, and shut down operations, as shown in Figure.3-1-1-3-20. User Manual EasiNote (Application Software) 42 Figure.3-1-1-3-20 Physical Booth ① Click to lock up current displaying object of physical booth, and move physical objects. The displayed objects will be locked without any change, click again to unlock; ② Click to counterclockwise rotate the object 90°; ③ Click to clockwise rotate the object by 90°; ④ Click to display object in actual ratio; ⑤ Click to display object in full screen; ⑥ Click to shot current object into image and demonstrate in software interface. The picture after shooting will be automatically uploaded to software page. If you need to continue to use physical booth, it needs to re-open the small tools; ⑦ Click ⑧ Click to zoom current displayed objects; to select image operating mode, which can move current displayed objects; ⑨ Click to select notation mode, which can make comments on current User Manual EasiNote (Application Software) 43 displayed object, click to switch notation pen colors, including red, green, and blue; ⑩ Click to return to standard mode; ⑪ Click to close physical booth tools. Click button to conduct page playback, as shown in Figure. 3-1-1-3-21. Figure.3-1-1-3-21 Page Playback ① Click to play back page objects; ② Click to pause playback; ③ Click to change the speed of playback page object, the default playback speed is normal(×1 speed), the user can choose ×1/2, ×1, ×2 speed to playback; ④ Click for loop playback; ⑤ click to exit page playback; User Manual EasiNote (Application Software) 44 Click button to open panel-in-panel, default is hidden mode, as shown in Figure.3-1-1-3-22-1. Figure.3-1-1-3-22-1 Open Panel-In-Panel ① Extend whiteboard. Click white ring on top of page, dragging down white board. If the whiteboard is dragged half distance of page, the white board can fix to the current position; If the whiteboard is dragged to a distance of less than half page, whiteboard will retract automatically, but will not close, as shown in Figure.3-1-1-3-22-2; User Manual EasiNote (Application Software) 45 Figure.3-1-1-3-22-2 Extend Panel-in-Panel ② Writing. Click the button to write on whiteboard, with default handwriting is fine, and color is black. The handwriting’s thickness and color cannot be changed; ③ Eraser. Click the button to erase handwriting as required; ④ Export. Click the button to export the handwriting of current board panel as JPG format image; ⑤ Close. Click Click to close panel-in-panel; button to open screenshot tools, as shown in Figure.3-1-1-3-23-1. Figure.3-1-1-3-23-1 Screenshot Tool ① Click directly for full screen screenshot, after clicking this button, it will automatically screenshot full-screen, and insert to current page as image, as shown in Figure.3-1-1-3-23-2; User Manual EasiNote (Application Software) 46 Figure.3-1-1-3-23-2 Full Screen Screenshot Inserting Page ② Click and drag a rectangle on page, as shown in Figure.3-1-1-3-23-3, which can arbitrarily adjust position and shape of the rectangular. Figure.3-1-1-3-23-3 Rectangular Screenshot Click to inert screenshot into the page, as shown in Figure.3-1-1-3-23-4, click User Manual to cancel screenshot; EasiNote (Application Software) 47 Figure.3-1-1-3-23-4 Rectangular Screenshot Inserting Page ③ Click to perform arbitrary free screenshot. Arbitrarily select required screenshot object, as shown in Figure.3-1-1-3-23-5, and screenshot will be automatically inserted into the page; Figure.3-1-1-3-23-5 Arbitrary Screenshot ④ Click to close screenshot tools; ⑤ Click and drag this toolbar, to drag screenshot to tool location. User Manual EasiNote (Application Software) 48 (4)Shortcut Click the button shortcut to switch to the shortcut management interface, the user can add or delete shortcuts. Click the added shortcut, the user can quickly open the file. 3.1.1.4 Resource Pool Click to pop up resource pool as shown in Figure.3-1-1-4-1, "my computer" by default. In state of unlocking resource pool, during operation of dragging resources to page, resource pool will be automatically hidden. Figure.3-1-1-4-1 Resource Pool Interface Click to browse computer disk resources. User can browse each disk and position to target demonstration folder →select demonstration resources required (handwriting, image, Flash, audio and video, etc.) User Manual EasiNote (Application Software) 49 →double click or drag resources to page for demonstration. Click to browse resources that user adds to the repository on the page. If the user has added handwriting, written text, image, Flash, audio and video resources to particular folder of resource pool, the user can call put collected resources at any time through “My resources”, as shown in Figure.3-1-1-4-2. Figure.3-1-1-4-2 My Resources Interface Click to create new folder in "My resources", the new folder can be renamed, but the default folder cannot be renamed. Click to fast browse favorite resources. User can add the folder path that needs to be collected to the favorites, which include my desktop path, and the recent 15 records, as shown in Figure.3-1-1-4-3. This function is only effective to "My computer" and "My resources", and only when there is resource in the current path can it be added to the favorites. User Manual EasiNote (Application Software) 50 Figure.3-1-1-4-3 Favorites Interface Click address bar or , and the user can select folder forward or backward. Click address bar collection button, to add current folder path to the favorites, and users can browse collected documents in the favorites. Click address bar to lock the current folder, as shown in Figure.3-1-1-4-4. Before unlocking, it is unable to operate other folders under the root directory, but it can operate other root directories, which means, my computer, My resources, desktop are locked without any links, with locking limited to each part. User Manual EasiNote (Application Software) 51 Figure.3-1-1-4-4 Lock Resource Pool Interface In the state of unlocking folder, input resource name, and click to quickly search related resources of the current folder. 3.1.1.5 Selection Click to realize following options by drawing a closed image or click on the selected interface: moving, scaling, rotating, deleting, thickness setting, color settings, filling color, dragging cloning, cutting, direct copy, sorting, combination (multiple objects), mirroring, reversal, lock, adding to the resource pool, setting image as the background, editing hyperlinks, playback, export, read aloud, and etc., as shown in Figure.3-1-1-5-1. Note: Only when selecting multiple objects can carry out combination operation; only when selected multiple objects have been combined, and there is no objects without combination, can combination button changes to cancellation of combination, to realize undo operation; only when selecting one object or multiple objects have been combined, can edit hyperlink. User Manual EasiNote (Application Software) 52 Figure.3-1-1-5-1 Select Object (1) Handwriting Select loop handwriting object, to conduct operation of selected handwriting as moving, scaling, rotating, deleting, handwriting thickness setting, color settings, dragging cloning, cutting, direct copy, sorting, combination (multiple objects), cancellation of combination (combination of multiple objects), mirroring(vertical up, vertical down, horizontal left, and horizontal right), reversal(vertical flip, horizontal flip), lock, adding to resource pool, editing hyperlinks, playback, as shown in Figure.3-1-1-5-2. User Manual EasiNote (Application Software) 53 Figure.3-1-1-5-2 Select Handwriting Click and drag selected handwriting, to move current handwriting object to any position; Hold down icons of on the upper left, on the bottom left, and on the bottom right, to realize object uniform scaling zooming operations respectively; Hold down icon on each side to realize object zooming operation in single direction; Click In multi-touch mode, it can directly realize operations of currently selected to rotate the currently selected handwriting; handwriting as moving, zooming, rotation and etc. Click Click to adjust thickness of currently selected handwriting; Click to adjust color of currently selected handwriting; Click to delete currently selected handwriting; to enter dragging clone mode. After entering this mode, drag current selected handwriting, to directly clone the handwriting. Repeat dragging operation can clone the handwriting for many times, click the button once again to exit the dragging clone mode; Click button will pop up object editing menu, to conduct operations of for current selected handwriting as cutting, direct copying, sorting, combination (multiple objects), cancellation of combination (combination of multiple objects), imaging (vertical up, vertical down, vertical flip, horizontal left, and horizontal right, horizontal flip), adding to resource pool, playback and etc. User Manual EasiNote (Application Software) 54 ① Cutting. Click to cut currently selected handwriting; ② Direct copying. Click to copy currently selected handwriting, and paste it to lower right of the object; ③ Sorting. Click to pop up secondary menu, which can make settings for layer relationship of multiple objects (including handwriting, line, picture, image, audio and video, etc.) (handwriting has the same object level with others), including move one level up, move one level down, place on the top, and place on the bottom. In the case of multiple objects overlapping, when the object is selected and moves, it will float at the top; and when release the mouse or touch operation, the object automatically return to the original level; ④ Combination. Click to combine multiple objects (including handwriting, lines, picture, image, audio and video, etc.) together. After combination, choose any one of the objects to select all combined objects at once; ⑤ Cancellation of combination. Click to cancel the current combined objects (including handwriting, lines, picture, image, audio and video, etc.). Cancellation of combination only cancels combination of the last object, not including the object combination before, which means, for combination of A and B, and combination of AB and C, when cancelling combination ABC, it only cancels combination of AB with C, with combination of A and B maintained. Cancel combination of AB again will cancel combination of A and B; User Manual EasiNote (Application Software) 55 ⑥ Mirroring. Click to turn object of currently selected object vertical up, vertical down, horizontal left and horizontal right; a) Vertical up. Click to turn object of currently selected handwriting up; b) Vertical down. Click to turn object of currently selected handwriting down; c) Horizontal left. Click to turn object of currently selected handwriting left; d) Horizontal right. Click to turn object of currently selected handwriting right; ⑦ Flip. Click the button to turn object of currently selected object up and down or left and right; a) Vertical flip. Click to turn object of currently selected handwriting up and down; b) Horizontal flip. Click to turn object of currently selected handwriting around; ⑧ Lock. Click the button to lock the currently selected object; a) The locked object can only be clear operation to delete and roaming, other operations cannot operate the locked object; b) Select and click the locked button in the upper right corner of the User Manual EasiNote (Application Software) 56 locked object, can be released the current state of the object; ⑨ Adding to resource pool. Click to add currently selected handwriting to resource pool; ⑩ Edit hyperlinks. Only when selecting one object or multiple objects have been combined, click to pop up window as shown in Figure.3-1-1-5-3, which can create hyperlink for the currently selected handwriting object, including links to document, website, text information, whiteboard page, audio files, and etc. (Note: When selecting multiple objects have been combined, the original combination of the link will be automatically deleted, the user can set hyperlinks for the new combined object.) Figure.3-1-1-5-3 Edit Hyperlinks a) File. Select to link to the file, search to select links to files needed, and click the link button to complete link; User Manual EasiNote (Application Software) 57 b) Website. Select to link to website, input website, and click the link button to complete link; c) Text information. Select to link text information, input displaying text information when linking, and click the link button to complete; d) White board page. Select to link to white board, input white board page (input page number must be the page number of the white board), and click the link button to complete; e) Audio files. Select to link to the audio file, search to select links to audios needed, and click the link button to complete link; f) Link. Click to complete links, after links completion, select the object, display link button below the object, and click to open the linked content, as shown in Figure.3-1-1-5-4; Figure.3-1-1-5-4 Display Hyperlink Button User Manual EasiNote (Application Software) 58 g) Cancel the link. Click to cancel link, and close the current window. ⑪ Playback. Click to open playback function, to playback the currently selected handwriting. (2) Lines Select loop line object, to conduct operation of selected line as moving, scaling, rotating, deleting, thickness setting, color settings, dragging cloning, cutting, direct copy, sorting, combination (multiple objects), mirroring(vertical up, vertical down, horizontal left, and horizontal right), reversal(vertical flip, horizontal flip), lock, adding to resource pool, editing hyperlinks, playback, as shown in Figure.3-1-1-5-5. All the functions are the same as handwriting. See “(1) Handwriting” for details. Figure.3-1-1-5-5 Select Lines (3) Graphic Select loop image object, to conduct operation of selected image as moving, scaling, rotating, deleting, frame thickness setting, frame color settings, filling color settings, dragging cloning, cutting, direct copy, sorting, combination (multiple objects), mirroring(vertical up, vertical down, horizontal left, and horizontal right),reversal(vertical flip, horizontal flip), lock, adding to resource pool, editing User Manual EasiNote (Application Software) 59 hyperlinks, playback, inscribed circle, center, radius, as shown in Figure.3-1-1-5-6. Only can be set inscribed circle in a triangle, and only can be set and display center and radius in the circle. Figure.3-1-1-5-6 Select Image Functions of image moving, scaling, rotating, deleting, frame thickness setting, frame color settings, dragging cloning, cutting, direct copy, sorting, combination (multiple objects), mirroring(vertical up, vertical down, horizontal left, and horizontal right),reversal(vertical flip, horizontal flip), lock, adding to resource pool, edit hyperlinks and playback are the same as handwriting. See (1) Handwriting for details. Click to fill color for single image. After selecting the color, it automatically fill the color to graphics, at the same time, the transparency of the fill color can be adjusted, as shown in Figure 3-1-1-5-7; User Manual EasiNote (Application Software) 60 Fig.3-1-1-5-7 Fill Color Click the button to set the inscribed circle of the triangle, as shown in Figure 3-1-1-5-8. Fig.3-1-1-5-8 Inscribed Circle Click the button Figure to display the center of the circle, as shown in 3-1-1-5-9; User Manual EasiNote (Application Software) 61 Fig.3-1-1-5-9 Center of Circle Click the button to display the radius of the circle, as shown in Figure 3-1-1-5-10; Fig.3-1-1-5-10 Radius of Circle (4) 3D Figure In Math Mode, select loop 3D figure object, to conduct operation of selected 3D figure as moving, scaling, rotating, deleting, thickness setting, color settings, dragging cloning, cutting, direct copy, User Manual sorting, combination EasiNote (Application Software) (multiple objects), 62 mirroring(vertical up, vertical down, horizontal left, and horizontal right), reversal(vertical flip, horizontal flip), lock, adding to resource pool, editing hyperlinks, and playback, as shown in Figure.3-1-1-5-11. Figure.3-1-1-5-11 Select 3D Figure Functions of 3D figure moving, scaling, rotating, deleting, thickness setting, color settings, dragging cloning, cutting, direct copy, sorting, combination (multiple objects), mirroring(vertical up, vertical down, horizontal left, and horizontal right), reversal(vertical flip, horizontal flip), lock, adding to resource pool, edit hyperlinks and playback are the same as handwriting. See “(1)Handwriting” for details. 3D figure has no color filling function. (5) Text Select loop text object, to conduct operation of selected text as moving, scaling, rotating, deleting, dragging cloning, cutting, direct copy, sorting, combination (multiple objects), mirroring(vertical up, vertical down, horizontal left, and horizontal right),reversal(vertical flip, horizontal flip), lock, adding to resource pool, editing hyperlinks, editing text reading and playback, as shown in Figure.3-1-1-5-12. Only when selecting single text object can reading; only when selecting multiple text objects can combine texts. User Manual EasiNote (Application Software) 63 Figure.3-1-1-5-12 Select Text Functions of text moving, scaling, rotating, deleting, dragging cloning, cutting, direct copy, sorting, combination (multiple objects), mirroring(vertical up, vertical down, horizontal left, and horizontal right),reversal(vertical flip, horizontal flip), lock, adding to resource pool, editing hyperlinks and playback are the same as handwriting. See “(1) Handwriting” for details. Edit text. Click to enter text editing state, to edit currently selected text; Read. Click to read the currently selected text. Under XP, there is no text reading function; Text combination. Click to combine the currently selected two groups (or more than two sets of texts), with the selected text automatic typesetting to the end of the first set of text. Formats such as font, size, and color are the same as the first set of text. (6) Image User Manual EasiNote (Application Software) 64 Select loop image object, to conduct operation of selected image as moving, scaling, rotating, deleting, dragging cloning, cutting, direct copy, sorting, combination (multiple objects), mirroring(vertical up, vertical down, horizontal left, and horizontal right), reversal(vertical flip, horizontal flip), lock, adding to resource pool, setting as background image, editing hyperlinks, playback, and export, as shown in Figure.3-1-1-5-13. Only when selecting single image object can perform setting image as background, and export. Figure.3-1-1-5-13 Select 3D Image Functions of image moving, scaling, rotating, deleting, dragging cloning, cutting, direct copy, sorting, combination (multiple objects), mirroring(vertical up, vertical down, horizontal left, and horizontal right),reversal(vertical flip, horizontal flip), lock, adding to resource pool, editing hyperlinks and playback are the same as handwriting. See “(1) Handwriting” for details. Set as background image. Click to set currently selected image as page background image, with two modes of adaptation and filling can be selected, as shown in Figure.3-1-1-5-14. User Manual EasiNote (Application Software) 65 Figure.3-1-1-5-14 Set as Background Image ① Adaptation. Select adaptation and the image will be adapted to page background according to its own proportion, as shown in Figure.3-1-1-5-15. Fig.3-1-1-5-15 Adapted as Background Image ② Filling. Select filling and the image will be filled as page background according to page proportion, as shown in Figure.3-1-1-5-16. User Manual EasiNote (Application Software) 66 Fig.3-1-1-5-16 Fill as Background Image Export. Click the button to export the currently selected picture in its original format. (7) Audio and Video Select loop audio and video object, to conduct operation of selected audio and video as playing, pausing, dragging process bar, sound adjusting, moving, scaling, rotating, screenshot, deleting, dragging cloning, cutting, direct copy, sorting, combination (multiple objects), mirroring(vertical up, vertical down, horizontal left, and horizontal right), reversal(vertical flip, horizontal flip), lock, playback, and export, as shown in Figure.3-1-1-5-17. Only when selecting single audio and video object can perform playing, pausing, stopping, dragging process bar operations towards audio and video objects, and it can make screenshots of current image. User Manual EasiNote (Application Software) 67 Fig.3-1-1-5-17 Select Audio and Video Functions of audio and video moving, scaling, rotating, deleting, dragging cloning, cutting, direct copy, sorting, combination (multiple objects), mirroring(vertical up, vertical down, horizontal left, and horizontal right), reversal(vertical flip, horizontal flip), lock, and playback are the same as handwriting. See “(1) Handwriting” for details; function of export is the same as image exported, see “(6)Image”. Play. Click Pause. Click Stop. Click Drag progress bar. Drag audio and video playing progress bar, to customize to play audio and video; to pause playing of audio and video; to stop playing audio and video; playing position of audio and video; Voice control. Drag sound adjusting scroll bar, to adjust the volume; Screenshot. Click to insert screenshot image of current audio and video image into the page. User Manual EasiNote (Application Software) 68 3.1.1.6 Writing Click to open pen setting window, as shown in Figure.3-1-1-6-1. You can choose brush, handwriting thickness, and color. Among them, brush includes hard brush, fluorescent pen, ink brush, bamboo brush, laser pen, magic pen and texture pen. Figure.3-1-1-6-1 Brush Hard brush. Click to enable hard brush, the default color is black, and handwriting is fine. Fluorescent pen. Click to enable fluorescent pen, the default color is black, and handwriting is fine. Ink brush. Click to enable ink brush, the default color is black. When writing with this brush, stroke thickness will change according to the real-time writing speed. When writing is fast, stroke is relatively fine; when writing speed is slower, strokes are relatively coarse, the entire writing process integrates with smooth brush writing experience. User Manual EasiNote (Application Software) 69 Row brush. Click to enable bamboo brush, the default color is black. When writing with this brush, stroke thickness will be different according to writing angles. Bristles lying down is thicker, vertical cross pen is fine, the whole process integrates with writing experience of row brush. Laser pen. Click to enable laser pen, the default color is black. After writing with this pen, the writing will disappear gradually. Magic pen. Click to enable magic pen, the handwriting is pattern and there is 9 kinds of patterns; Texture pen. Click to enable texture pen, the user can select a different picture as the writing texture handwriting as required; Handwriting thickness. After selecting pen type, sliding handwriting thickness sliding bar to change handwriting thickness, as shown in Figure.3-1-1-6-2. Figure.3-1-1-6-2 Handwriting Thickness Adjusting Interface Handwriting color. After selecting pen type, click color plate color on the right, to change handwriting color according to need. The color plate has a total of 42 colors. Multi-point writing. According to operating points supported by touch box, software can write with corresponding points by default. When opening gesture selection function, two points writing cannot be realized. 3.1.1.7 Eraser Click to select eraser, with default eraser is point erasing, as shown in User Manual EasiNote (Application Software) 70 Figure.3-1-1-7. Eraser is divided into point erasing, cycle erasing, and sliding page erasing. Figure.3-1-1-7 Eraser Point erasing. Click to select point wiping eraser, which can erase ordinary brush handwriting, including hard brush, fluorescent pen, ink brush, and row brush. Ring erasing Click to select ring wiping eraser, select loop the handwriting requiring erase can erase selected handwriting, the eraser can erase ordinary brush (hard brush, fluorescent pen, ink brush, and row brush), lines, image, 3D figure and, text, image, audio and video handwritings. Page erasing. Slide button to the right, to remove contents of the current page. Gesture erasing. Use touch surface touch page of three fingers’ size, to start gesture erasing function. Under this function, it can erase all kinds of brush handwriting. 3.1.1.8 Lines Click to pop up line window, default selection is straight line, fine and black, as shown in Figure.3-1-1-8-1. Line type, thickness, and color can be selected, among which, line type includes 8 types as straight line, arrow, dotted line, double lines, curves, arc line, line segment, and rubber band. User Manual EasiNote (Application Software) 71 Figure.3-1-1-8-1 Line Tools Line thicknesses. After selecting line type, slide line thickness sliding bar to change line thickness. Its thickness is in synchronization with image frame thickness; Line color. After selecting line type, click color plate on the right, and select line color according to need. Color plate has a total of 42 colors. Its color is in synchronization with image frame color; Straight line. Click to draw straight lines on the page, and the default is selected state after drawing; Arrow. Click to draw arrows on the page, and the default is selected state after drawing; Dotted line. Click to draw dotted lines on the page, and the default is selected state after drawing; Double line. Click to draw double lines on the page, and the default is selected state after drawing; User Manual EasiNote (Application Software) 72 Curve: Click to draw curves on the page, and the default is selected state after drawing; Arc line. Click to draw arc lines on the page, and the default is selected state after drawing; Line segment. Click to draw line segments on the page, and the default is selected state after drawing; Rubber band. Click on the page to draw rubber band. ① Draw line segment. Click on the page, blue operation point will appear, drag blue operation point to draw line segments; ② Adjust line segment. Click blue operation point, operating point turns black, with black operating point can be used to adjust length and position; ③ Switch operation point. Click black operation point again, and the operating point can turn into blue operation point, each line segment has operating points on both ends, as shown in Figure.3-1-1-8-2. User Manual EasiNote (Application Software) 73 Figure.3-1-1-8-2 Rubber Band Tool ④ Complete drawing. Click to complete image drawing, with image drawn cannot be changed; ⑤ Automatic correction. When angle between line and coordinate axis is less than 3°, line segment will be automatically adjusted as horizontal or vertical. 3.1.1.9 Rectangle Click to pop up image window, rectangular is selected by default, frame is thin and black, with no filling color, as shown in Figure.3-1-1-9-1. Image type, frame thickness, frame color, and filling color can be selected. Among them, image type includes 11 kinds of operations as rectangular, circular, ellipsoid, parallelogram, isosceles trapezium, right triangle, isosceles triangle, five-pointed star, pentagon, hexagon, and handwriting recognition. Figure.3-1-1-9-1 Image Tools Frame thickness. After selecting image type, slide frame thickness sliding bar to change frame thickness. Its thickness is in synchronization with line frame thickness; User Manual EasiNote (Application Software) 74 Frame color. After selecting frame type, click to switch frame color selection, and select frame color according to need. Color plate has a total of 42 colors. Its color is in synchronization with line frame color; Filling color. Click to switch to filling color selection, and select filling color according to need. Color plate has a total of 42 colors. Rectangular. Click to draw rectangular on the page, and the default is selected state after drawing; Circular. Click to draw circular on the page, and the default is selected state after drawing; Ellipsoid. Click to draw ellipsoid on the page, and the default is selected state after drawing; Parallelogram. Click to draw parallelogram on the page, and the default is selected state after drawing; Isosceles trapezium. Click to draw isosceles trapezium on the page, and the default is selected state after drawing; Right triangle. Click to draw right triangle on the page, and the default is selected state after drawing; Isosceles triangle. Click to draw isosceles triangle on the page, and the default is selected state after drawing; User Manual EasiNote (Application Software) 75 Five-pointed star. Click to draw five-pointed star on the page, and the default is selected state after drawing; Pentagon. Click to draw pentagon on the page, and the default is selected state after drawing; Hexagon. Click to draw hexagon on the page, and the default is selected state after drawing; Image recognition. Click button to open image recognition function, which can identify angle (including acute and obtuse angle), arrow, triangle, tetragon, ellipsoid, and circular; Image drawn on the page will be automatically identified and Figure. 3-1-1-9 -2 is identified image; When it couldn't identify image, it will pop up prompt box for being unable to recognize, the prompt dialog box will automatically shut off after 1 second. Figure.3-1-1-9-2 Image Recognition Effect ① Angle. Two-side image of less than 90°drawn on the page will be automatically identified as angle; User Manual EasiNote (Application Software) 76 ② Arrow. Line segments drawn on page and retracing in any direction (completed in one operation) will be automatically identified as arrow; ③ Triangle. Closed triangle drawn on page (including acute angle, right angle and obtuse angle) will be automatically identified as triangle; ④ Tetragon. Closed tetragon drawn on page will be automatically identified as tetragon; ⑤ Ellipsoid. Closed ellipsoid drawn on page will be automatically identified as ellipsoid; ⑥ Circular. Closed circular drawn on page will be automatically identified as circular; 3.1.1.10 Fill Click to pop-up palette, as shown in Figure 3-1-1-10. Users can switch to filling color selection, and select filling color according to need. It can fill with any closed shape. Fig.3-1-1-10 Fill 3.1.1.11 Text Click to pop up text sub-menu, as shown in Figure.3-1-1-11-1, including User Manual EasiNote (Application Software) 77 text editing and handwriting recognition function. Figure.3-1-1-11-1 Text Input Function Options Click button to open text editing function. Click location for inputting text on the page, and input text (input by text toolbar keyboard or PC external keyboard, maximum height by default is 200 lines), the default text font is song typeface, size is 40, and color is black, as shown in Figure.3-1-1-11-2. Figure.3-1-1-11-2 Text Editing ① Font. Click drop-down menu of font box to select text font; ② Font size. Click drop-down menu of font size box to select text font size; ③ Bold. Click button to set current text to bold, and at the same time, the button is changed into , click this button again to restore font thickness; ④ Italic. Click button to set current text to italic, and at the same User Manual EasiNote (Application Software) 78 time, the button is changed into , click this button again to restore font; ⑤ Underline. Click button to set current text to underlined, and at the same time, the button is changed into , click this button again to remove underline of font; ⑥ Font color. Click button to pop up color plate, to set font color of current text; ⑦ Website link. Click to pop up hyperlink editing window, to edit current text hyperlinks to file, website, text information, whiteboard page, audio files, and etc. See “Editing hyperlinks” of "3.1.1.5 Selection" for detailed operation; ⑧ Keyboard input. Click ⑨ Delete. Click to call out keyboard for text input; to delete the current input text content, without closing text editor toolbar. Click button to open handwriting recognition function. Handwriting recognition can display handwriting recognition toolbars, or it can also be default automatic identification. This function can set in setup window, software default setting is not starting. ① Don't start recognition toolbar. After writing on the page, handwriting will be identified automatically and displayed on the page. The default displayed text is selected state, as Figure.3-1-1-11-3; User Manual EasiNote (Application Software) 79 Figure.3-1-1-11-3 No Toolbar Handwriting Recognition ② Start recognition toolbar. After writing on the page, click button and handwriting will be identified automatically and displayed on the page. Cross line on written toolbar can delete written contents, and make corrections; 3.1.1.12 Roaming After clicking button, click current page (or click the left mouse button) and move the current page; Click objects such as picture, image, audio and video, to perform multi-point zoom, and rotation. Click button to perform one operation of zooming in to all the objects on the current page. Click button to perform one operation of zooming out to all the objects on the current page. Gesture roaming. Long touch two or more points on the interface for 0.5 s, to start gesture roaming after page two jittering, user can roam the page; No action after 0.5 s, to close gesture roaming after page two jittering. User Manual EasiNote (Application Software) 80 3.1.1.13 Cut/Copy and Paste Select currently selected handwriting that needs to cut/copy, click drop-down menu of currently selected handwriting or cut /copy toolbar, to cut/copy handwriting that is currently selected, click button on the button to paste the currently selected handwriting to required page. Through shortcut Ctrl + V, copy external image or text, and paste to the page. Pasted image displays 300 px, pasted text is inserted from upper left corner of the page by default, and can be edited with text editor again. 3.1.1.14 Navigation Click button, and navigation can quickly position and browse region information of adjacent page of current page, with ratio can be adjusted, as shown in Figure.3-1-1-14. Figure.3-1-1-14 Navigation Image Interface 3.1.1.15 Undo Click to undo previous operation. This button is in a hidden state when User Manual EasiNote (Application Software) 81 there is no currently selected handwriting drawing operation. 3.1.1.16 Redo Click to restore previous undo operation. This button is in a hidden state before undoing currently selected handwriting. 3.1.1.17 Previous Page When current page is not the first page, click button to switch to previous page of current page. 3.1.1.18 Page Thumbnail Click button to view all file page information, as shown in Figure.3-1-1-18-1. Figure.3-1-1-18-1 Page Information Interface Send mail. Click to pop up sending email window, as shown in Figure.3-1-1-18-2. User Manual EasiNote (Application Software) 82 Figure.3-1-1-18-2 Sending Email Interface ① Manually configure the SMTP, port number, Account and password; ② Click to save the current configuration information; ③ Click to reset the current configuration information. If the user has saved configuration information, then reset to the user information stored; If the user has not configuration information, then reset to empty; ④ Click to hide configuration interface; ⑤ Fill in the recipient email address, subject and message content; ⑥ Click to send all pages of the current interface to user specified mailbox; User Manual EasiNote (Application Software) 83 Delete page. Click button to enter delete mode, user can choose multiple pages to delete according to need (user can select a single page, or click the Select All button to select all pages, the default selection is the current page), as shown in Figure.3-1-1-18-3. When page is all selected to delete, the deleted pages cannot recover; Figure.3-1-1-18-3 Delete page Add page. Click button to add a new page on the next page of the current page; Copy page. Click button to copy current page to next page (when applying template in each scene, this button is invalid); User Manual EasiNote (Application Software) 84 Move page. Click and drag the page, the user can drag the currently selected page to another location. 3.1.1.19 Add Page When the current page is the last page, click button to add a new page. 3.1.1.20 Next Page When the current page is not the last page, click button to switch to next page of the current page. 3.1.1.21 Shortcuts Call out screen keyboard or external keyboard, to realize functions of new, open, save, copy, paste, undo, redo, and delete by shortcuts. New: Ctrl+N Open: Ctrl+O Save: Ctrl+S Copy: Ctrl+C Paste: Ctrl+V Undo: Ctrl+Z Redo: Ctrl+Y Delete: Delete 3.1.2 Concise Mode Right click the mouse toolbar to switch to concise mode, as shown in Figure.3-1-2. Concise mode only has functions of fluorescent pen, brush, eraser, and returning to standard mode, and at the same time, press long any place on the page, and the toolbar can immediately track to this location. User Manual EasiNote (Application Software) 85 Figure.3-1-2 Concise Mode Stretch toolbar. Click button to stretch toolbar; Fluorescent pen. Click button to enter concise notation state. At this time, you can use fluorescent pen to make notation on the current interface. Fluorescent pen color is the same as that of the standard mode before switching; Hard pen. Click button to enter concise notation state. At this time, you can use hard pen to make notation on the current interface. Hard pen color is the same as that of the standard mode before switching; Eraser. Click button to erase writing and notation handwriting; Return. Click button to return to standard mode; 3.1.3 Desktop Mode Click on the toolbar to switch to desktop mode, as shown in Figure.3-1-3. Desktop mode only has functions of fluorescent pen, brush, eraser, screenshot and returning to standard mode. Figure.3-1-3 Desktop Mode Fluorescent pen. Click button to enter desktop notation state. At this time, you can use fluorescent pen to make notation on the current interface (Fluorescent pen color is the same as that of the standard mode before User Manual EasiNote (Application Software) 86 switching), and the current icon is changed to , click this icon to return to desktop operation mode; Hard pen. Click button to enter desktop notation state. At this time, you can use hard pen to make notation on the current interface (Hard pen color is the same as that of the standard mode before switching), and the current icon is changed to , click this icon to return to desktop operation mode; Eraser. Click button to erase desktop notation handwriting, and the current icon is changed to , click this icon to return to desktop operation mode; Screenshot. Click button to call out screenshot tool. See “3.1.1.3 Tools→(3)Small Tools→Screenshot” for details; Return. Click Stretch toolbar. Click Quick movement. Click the button button to return to standard mode; button to stretch toolbar; or on the desktop edge left and right (the button can move up and down), the user can quickly call the desktop toolbar to the desktop edge. 3.2 Subject Mode Function EasiNote application software sets different subject modes according to the User Manual EasiNote (Application Software) 87 different subjects, including English Mode, Math Mode, and Physics Mode. Different subjects provide different teaching tools, and the user can apply different subject teaching mode according to the current subject. In each mode, click buttons on the left side of the page, to pop up mode selection interface, as shown in Figure.3-2. Among them, each mode is of mutual independence and mutual coexistence, and page list of each subject mode only displays page list of current scene; besides standard mode, each mode can switch between each other. Figure.3-2 Mode Switch Interface 3.2.1 English Mode Click button to enter English mode, with toolbar functions from left to right: menu, switch to desktop mode, tools, resource pool, select, brush, eraser, fill, text, teaching templates, roaming, navigation, page number, add pages, as shown in Figure.3-2-1-1. User Manual EasiNote (Application Software) 88 Figure.3-2-1-1 English Mode Interface Menu. Click to pop up drop-down menu as shown in Figure.3-2-1-2. Drop-down menu provides user function options such as new, open, insert, save and import, and exit the software, see "3.1.1.1 Menu" for details. Figure.3-2-1-2 Chinese Mode Menu User Manual EasiNote (Application Software) 89 Click to select different teaching templates such as whiteboard and four-line grid, as shown in Figure.3-2-1-3. Four-line grid template is used to teach words writing. Figure.3-2-1-3 Teaching Template Four-wire grid used in teaching demonstration of letters, the user can handwrite the letters on the four-wire grid, and under the four-wire grid will pop up the candidate letters, select the required letters and it will identification to the four-wire grid automatically, as shown in Figure 3-2-1-4. Fig.3-2-1-4 Four-wire grid interface ① Click the icon to delete the output letters or words on the current four-wire grid; ② Click icon to read the letters or words; User Manual EasiNote (Application Software) 90 ③ Click icon to re-edit the letters, as shown in Figure 3-2-1-5; Fig.3-2-1-5 Re-edit Letters Other function buttons are the same with that in standard mode. 3.2.2 Math Mode Click button to enter Math mode, with toolbar functions from left to right: menu, switch to desktop mode, tools, resource pool, select, writing, eraser, lines, image, 3D image, fill, text, teaching templates, roaming, navigation, page number, add pages, as shown in Figure.3-2-2-1. User Manual EasiNote (Application Software) 91 Figure.3-2-2-1 Math Mode Interface Click to pop up line sub-menu as shown in Figure.3-2-2-2, with 9 kinds of three-dimensional images are available for drawing operation, including cube, cylinder, cone, circular cone, triangular pyramid, rectangular pyramid, sphere, half sphere, and dihedron. Among them, the default image selected is cube, and three-dimensional image has no filling function. Figure.3-2-2-2 3D Image Tools ① Frame thickness. After selecting 3D image type, slide frame thickness sliding bar to change frame thickness. Its thickness is in synchronization with line and image frame thickness; ② Frame color. After selecting 3D image type, click color plate on the right side, and select line color according to need. Color plate has a total of 42 colors. Its color is in synchronization with line and image frame color; ③ Cube. Click to draw cube on the page, and the default is selected state after drawing; ④ Cylinder. Click to draw cylinder on the page, and the default is selected state after drawing; User Manual EasiNote (Application Software) 92 ⑤ Cone. Click to draw cone on the page, and the default is selected state after drawing; ⑥ Circular cone. Click to draw circular cone on the page, and the default is selected state after drawing; ⑦ Triangular pyramid. Click to draw triangular pyramid on the page, and the default is selected state after drawing; ⑧ Rectangular pyramid. Click to draw rectangular pyramid on the page, and the default is selected state after drawing; ⑨ Sphere. Click to draw sphere on the page, and the default is selected state after drawing; ⑩ Half sphere. Click to draw half sphere on the page, and the default is selected state after drawing; ⑪ Dihedron. Click to draw dihedron on the page, and the default is selected state after drawing; Click to select different teaching templates such as grid and day-word grid as shown in Figure.3-2-2-3. Day-word grid template is used to facilitate teaching numbers, scores, and etc. User Manual EasiNote (Application Software) 93 Figure.3-2-2-3 Teaching Template Other function buttons are the same with that in standard mode. 3.2.3 Physics Mode Click button to enter Physics mode, with toolbar functions from left to right: menu, switch to desktop mode, tools, resource pool, select, brush, eraser, image, 3D image, physical force, fill, text, roaming, navigation, page number, add pages, as shown in Figure.3-2-4-1. Figure.3-2-3-1 Physics Mode Interface Image and 3D image is the same to Math mode, with other function buttons are the same with that in standard mode. Above are entire contents of instruction manual for EasiNote User Manual EasiNote (Application Software) 94 application software. Any updates of manual version are made without prior notice. Thanks again for choosing our products! User Manual EasiNote (Application Software) 95