1
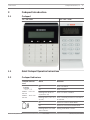
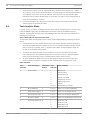
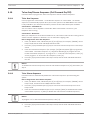
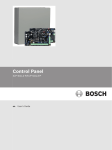
Control Panel
ICP-SOL2-P/ICP-SOL3-P
en
User's Guide
Control Panel
Table of Contents | en
3
Table of contents
1
Introduction
5
2
Specifications
6
3
Codepad Introduction
7
3.1
Codepad
7
3.2
Quick Codepad Operation Instructions
7
3.3
Codepad Indicators
7
3.4
Audible Indications
9
4
Operation with TEXT LCD Codepad
10
4.1
Text Menu
10
4.1.1
Command Menu
10
4.1.2
Access Menu
11
4.1.3
System Menu
11
4.1.4
Zone Menu
12
4.1.5
Area Menu
13
4.1.6
Output Menu
13
4.1.7
Communication Menu
13
4.1.8
Parameter Menu
14
5
Operation with ICON LCD Codepad
15
5.1
Arming the System
15
5.1.1
Forced Arming
15
5.1.2
Arming in AWAY Mode
15
5.1.3
Arming in STAY Mode 1
16
5.1.4
Arming in STAY Mode 2
16
5.1.5
Programming STAY Mode 2 Zones
17
5.2
Disarming the System
17
5.3
User Codes
17
5.3.1
Adding User/Radio Codes
17
5.3.2
Deleting User/Radio Codes
18
5.4
Codepad Alarms
18
5.4.1
Codepad Duress Alarm
18
5.4.2
Codepad Panic Alarm
18
5.4.3
Codepad Fire Alarm
19
5.4.4
Codepad Medical Alarm
19
5.4.5
Codepad PIN Error (Access Denied)
19
5.5
Isolating Zones
19
5.5.1
Standard Isolating
19
5.5.2
Code to Isolate
19
5.6
Fault Analysis Mode
20
5.6.1
Fault Descriptions
21
5.7
Date and Time
22
5.8
Turning Outputs On/Off
22
5.9
Reset Latching Outputs
22
5.10
Telco Arm/Disarm Sequence (Call Forward On/Off)
23
5.10.1
Telco Arm Sequence
23
5.10.2
Telco Disarm Sequence
23
5.11
Testing
24
5.11.1
Horn Speaker Test
24
Bosch Security Systems, Inc.
User's Guide
2014.06 | 01b | F01U298028
4
en | Table of Contents
Control Panel
5.11.2
Bell Test
24
5.11.3
Strobe Test
24
5.11.4
Walk Test Mode
24
5.11.5
Test Report
24
5.12
Event Memory
25
5.13
Day Alarm
25
5.14
Codepad ID / Buzzer Tone
25
5.15
Remote Arming by Telephone
25
5.16
Domestic Dialing
26
5.16.1
Acknowledging Domestic Calls
26
5.16.2
Programming Domestic Telephone Numbers
26
5.16.3
Disable Domestic Dialing
27
6
Glossary of Terms
28
2014.06 | 01b | F01U298028
User's Guide
Bosch Security Systems, Inc.
Control Panel
1
Introduction | en
5
Introduction
Congratulations on selecting the ICP-SOL2-P/ICP-SOL3-P Control Panel to protect you and
your property. To obtain the most from your unit, take time to read through this manual and
familiarize yourself with the numerous outstanding operating features of this system. In all
aspects of planning, engineering, styling, operation, convenience, and adaptability, we have
sought to anticipate your every possible requirement.
Programming simplicity and speed were some of the major considerations and we believe that
our objectives in this area were more than satisfied.
This manual explains all aspects of operating the control panel. All system parameters and
options are detailed; however, suitability is left up to the individual. Every system can be
tailored to meet all requirements quickly and easily.
Bosch Security Systems, Inc.
User's Guide
2014.06 | 01b | F01U298028
6
2
en | Specifications
Control Panel
Specifications
Temperature Range
0℃ to +50℃
Humidity
20% to 90%
Power Source
TF008 Plug Pack – 240 V/18 VAC @ 1.3A
Stand-By Current
65 mA
Current Draw in Alarm Condition
115 mA
Current Draw in Alarm Condition with
105 mA
Codepad
Back-Up Battery
7 Ah/12 VDC Rechargeable Sealed Lead Acid
Battery
Dimensions (Case, packed in carton)
306 mm x 262 mm x84 mm
Weight
2.5 kg
Supplier Code
N771
Table 2.1: Specifications
Notice!
Test the sirens, strobe, and zones at weekly intervals.
2014.06 | 01b | F01U298028
User's Guide
Bosch Security Systems, Inc.
Control Panel
Codepad Introduction | en
3
Codepad Introduction
3.1
Codepad
IUI – SOL -TEXT
IUI – SOL – ICON
3.2
Quick Codepad Operation Instructions
3.3
Codepad Indicators
Codepad indicator
7
Status
Definition
On
Zone is unsealed.
Off
Zone is sealed.
Flashing Fast (0.25 sec
Zone is in alarm condition.
icons
ZONE 1 – 8 for ICPSOL2-P
ZONE 1 – 16 for ICPSOL3-P
AWAY
on/0.25 sec off)
Flashing Slow (1 sec on/1 Zone is manually isolated or selected to
sec off)
be isolated.
On
System is armed in AWAY Mode.
Off
System is not armed in AWAY Mode.
Flashing twice a sec with
Setting STAY Mode 2 zones.
STAY indicator
Bosch Security Systems, Inc.
User's Guide
2014.06 | 01b | F01U298028
8
en | Codepad Introduction
Codepad indicator
Control Panel
Status
Definition
On
System is armed in STAY Mode 1 or
icons
STAY Mode 2.
Off
STAY
System is not armed in STAY Mode 1 or
STAY Mode 2.
Flashing twice a sec
Zone isolating mode
Flashing twice a sec with
Setting STAY Mode 2 zones.
AWAY indicator
MAINS
Flashing once every 3 sec
Day alarm status – day alarm turned on.
On
System is disarmed.
On
AC MAINS power normal.
Flashing
AC MAINS supply has failed.
On
There is a system fault that needs to be
rectified.
Off
The system is normal, there are no
faults.
FAULTS
Flashing
There is a system fault that needs to be
acknowledged.
Flashing
These two indicators flash when you
enter Installer’s Programming Mode or
use any Master Code function.
Programming Mode
The OFF indicator lights when the
system is disarmed and flashes when a
zone becomes unsealed when
disarmed. The indicator stops flashing
when all zones are sealed.
The ON indicator lights when the
system is armed and flashes when an
alarm occurs. The indicator is reset
after a valid User Code is entered.
2014.06 | 01b | F01U298028
User's Guide
Bosch Security Systems, Inc.
Control Panel
3.4
Codepad Introduction | en
9
Audible Indications
Below table defines the audible indicators given out by the codepad buzzer.
Audible Indicator
Definition
One short beep
A button/key was pressed on the codepad, or Exit Time ended
when armed in STAY Mode 1 or STAY Mode 2.
Two short beeps
The system accepted your code.
Three short beeps
The requested function was executed.
One long beep
Indicates the last 10 seconds of Exit Time when armed in AWAY
Mode, or the requested operation was denied or aborted.
Indicates codepad panic/fire/medical alarm operation.
One beep every sec
Walk Test Mode is currently active.
One short beep every min
There is a system fault waiting to be acknowledged.
One beep every 4 sec.
During Auto Arming Pre-Alert Time, the warning before
automatic arming takes place.
One beep every 2 sec.
During Exit Time when armed in AWAY Mode.
Table 3.1: Audible Indicators
Bosch Security Systems, Inc.
User's Guide
2014.06 | 01b | F01U298028
10
en | Operation with TEXT LCD Codepad
Control Panel
4
Operation with TEXT LCD Codepad
4.1
Text Menu
Main Menu
[ A U I ] 1 Command
[ U I ] 2 Access
[ U I ] 3 System
[ U I ] 4 Zone
[ I ] 5 Area
[ I ] 6 Output
[ I ] 7 Comm
[ I ] 8 Parameter
Table 4.1: Menu Structure
Text A or U or I in brackets [ ] instruct you the text menu that displays on the codepad for
different code holders:
[ A ] = All can access, no code required. To enter the text menu, simply press [ - ], only [1
Command] displays.
[ U ] = User code holder with authority levels can access. Enter the User Code, followed by
[ - ] to enter the menu.
[ I ] = Installer code holder can access. Enter the Installer Code, followed by [ # ] or [ - ] to
enter the menu, all menu items display.
4.1.1
Command Menu
[ A U I ] 1 Command [ U ] 11 Arm
[ U ] 111 AWAY Arm
[ U ] 112 STAY 1 Arm
[ U ] 113 STAY 2 Arm
[ U ] 114 AWAY Arm All
[ A U I ] 12 Inquire
[ A U I ] 121 Fault Analysis
[ U I ] 122 Event Recall
[ A U I ] 13 System
[ U ] 131 Set Date & Time
[ A U I ] 132 Day Alarm
[ U I ] 133 Arm/Disa Seq.
[ I ] 134 Report Monitor
[ A U I ] 135 ModemCall Init
[ U I ] 136 Domestic Phone
[ U I ] 137 VersionDisplay
[ I ] 138 FactoryDefault
[ U ] 139 System Reset
[ I ] 14 RF Diagnose
[ I ] 141 RF Zone
[ I ] 142 RF Keyfob
[ I ] 143 RF Repeater
2014.06 | 01b | F01U298028
User's Guide
Bosch Security Systems, Inc.
Control Panel
Operation with TEXT LCD Codepad | en
[A U I ] 15 Test
11
[ A U I ] 151 Horn Speaker
[ A U I ] 152 Bell Test
[ A U I ] 153 Strobe Test
[ U I ] 154 Walk Test
[ A U I ] 155 Test Report
[ U ] 16 Zone Bypass
[ U ] 17 Output On/Off
Table 4.2: Command Menu
4.1.2
Access Menu
[ U I ] 2 Access
[ I ] 21 Installer Code
[ U ] 22 User Code
[ I ] 23 Access Retry
[ U I ] 24 User Property [ U ] 241 User Name
[ I ] 242 User Allocate
[ I ] 243 User Authority
Table 4.3: Access Menu
4.1.3
System Menu
[ U I ] 3 System
[ I ] 31 Timer
[ I ] 311 Entry Time1
[ I ] 312 Entry Time2
[ I ] 313 Exit Time
[ I ] 314 Entry Guard Time For STAY Mode
[ I ] 315 Sensor Watch Time
[ I ] 316 Codepad Lockout Time
[ I ] 317 Auto Arm Pre-AlertTime
[ I ] 318 Auto Arm Time
[ I ] 319 Auto Disarm Time
[ I ] 32 Codepad
[ I ] 321 Silent Codepad Panic Alarm
[ I ] 322 Silent Codepad Fire Alarm
[ I ] 323 Silent Codepad Medical Alarm
[ I ] 324 Codepad Access Denied Silent
[ I ] 325 Codepad Fault Beep Enable
[ I ] 326 Codepad Display Off after 60s
[ I ] 33 Arm/Disarm
[ I ] 331 Auto Arm In STAY1
[ I ] 332 Single Btn Arm Enable
[ I ] 333 Single Btn Disarm Enable
[ I ] 334 Disarmed On Power Up
[ I ] 335 Arm/Disarm Track On Power Up
[ I ] 336 Phone Remote Arm
[ I ] 337 Answer Machine Bypass On Arm
Bosch Security Systems, Inc.
User's Guide
2014.06 | 01b | F01U298028
12
en | Operation with TEXT LCD Codepad
Control Panel
[ I ] 34 Fault
[ I ] 341 Ignore AC Fail
[ I ] 342 AC Fail Report Wait Time
[ I ] 343 Horn Speaker Fault Monitor
[ I ] 344 Phone Line Fault Indicator
[ I ] 345 Phone Line Fault Alarm on Armed
[ I ] 346 Phone Line Fault Alarm on Disarm
[ I ] 347 Lockout Phone Line Fail Alarm
[ U I ] 35 Wireless
[ I ] 351 RF Receiver
[ I ] 352 Zone RFID And Input Option
[ U I ] 353 Keyfob RFID
[ I ] 354 Repeater RFID
[ I ] 355 RF Supervision Time
[ I ] 356 RF Jam Sensitivity
[ I ] 357 RF RECE Jam/Tamper Siren Alarm
[ I ] 358 RFKF Btn4 Arm In STAY1
[ I ] 359 RF Arm/Disarm Strobe Indicate
[ U I ] 36 System
[ U I ] 361 Home Message
Option
[ I ] 362 Button Factory Default Enable
[ I ] 363 Alarm Memory Reset On Disarm
[ I ] 364 STAY Indicator For Day Alarm
[ I ] 365 Digit 3 For Codepad Duress Alarm
[ I ] 366 Siren & Strobe Output In STAY
[ I ] 367 Speaker Beep Volume
Table 4.4: System Menu
4.1.4
Zone Menu
[ U I ] 4 Zone
[ I ] 41 Zone Config
[ I ] 42 Zone Allocate
[ U I ] 43 Zone Name
[ I ] 44 Day Alarm Zone
[ U I ] 45 STAY2 Zone
[ I ] 46 EOL Resistor
[ I ] 47 Zone State Rpt
[ I ] 48 Swing Shutdown
[ I ] 481 Siren Swing Shutdown Count
[ I ] 482 Dialer Swing Shutdown Count
[ I ] 49 Zone Option
[ I ] 491 Silent Zone Tamper Alarm
[ I ] 492 Unseal Zone That Fail Monitor
[ I ] 493 Bosch Smart Lockout Enable
[ I ] 494 Zone Pulse Cnt Handover Enable
[ I ] 495 Handover Delay In Order
Table 4.5: Zone Menu
2014.06 | 01b | F01U298028
User's Guide
Bosch Security Systems, Inc.
Control Panel
4.1.5
Operation with TEXT LCD Codepad | en
13
Area Menu
[ I ] 5 Area
[ I ] 51 Codepad Area
[ I ] 52 Area Option
[ I ] 521 Arm/Disarm All Areas Once
[ I ] 522 Reset Siren From Any Area
Table 4.6: Area Menu
4.1.6
Output Menu
[ I ] 6 Output
[ I ] 61 Onboard Output
[ I ] 62 Codepad Output
[ I ] 63 Extend Output
[ I ] 64 Siren Config
[ I ] 641 Siren Run Time
[ I ] 642 Siren Run Rate
[ I ] 643 Siren Sound On RF Receiver Fail
Table 4.7: Output Menu
4.1.7
Communication Menu
[ I ] 7 Comm
[ I ] 71 Receiver
Config
[ I ] 72 Network
[ I ] 721 Network Module
Config
[ I ] 722 A-Link/RSC PSWD
[ I ] 723 IP Destination
[ I ] 724 CSVIP User Name And Password
[ I ] 73 Report
[ I ] 731 STAY Mode Arm/Disa Report Enable
Config
[ I ] 732 Arm/Disa Report Only If Alarmed
[ I ] 733 First Disarm/Last Arm Report
[ I ] 734 Arm/Disarm Report Option
[ I ] 735 Codepad Report Option
[ I ] 736 Test Report Time And Interval
[ I ] 737 Test Report Only When Armed
[ I ] 738 Test Report On Siren Reset
[ I ] 739 Test Report Dialer Option
Bosch Security Systems, Inc.
User's Guide
2014.06 | 01b | F01U298028
14
en | Operation with TEXT LCD Codepad
Control Panel
[ I ] 74 Comm
[ I ] 741 Ring Count
Option1
[ I ] 742 Dialer Report Function Enable
[ I ] 743 Exit A-Link Connection On Alarm
[ I ] 744 System Status Report Option
[ I ] 745 Use Bell-103 For FSK Format
[ I ] 746 DTMT Dial Pulse To 1 Digit/Sec
[ I ] 747 Receiver1/2 Dialing Format
[ I ] 748 Set Up Domestic Dialing Format
[ I ] 75 Comm
[ I ] 751 Telco Arming Sequence
Option2
[ I ] 752 Telco Disarming Sequence
[ I ] 753 Delay Alarm Report Time
[ I ] 754 Kiss-Off Wait Time
[ I ] 755 Delay Siren Until Transmit Over
[ I ] 756 Extend Wait For Handshake
[ I ] 757 Upload/Download Enable
[ I ] 758 Callback Phone Number Request
[ I ] 759 Callback Phone Number
Table 4.8: Comm Menu
4.1.8
Parameter Menu
[ I ] 8 Parameter
[ I ] 81 Addr Program
[ I ] 82 Addr Auto Step
[ I ] 83 Adapter
[ I ] 831 Test Adapter
[ I ] 832 Read Adapter
[ I ] 833 Write Adapter
Table 4.9: Parameter Menu
2014.06 | 01b | F01U298028
User's Guide
Bosch Security Systems, Inc.
Control Panel
Operation with ICON LCD Codepad | en
5
Operation with ICON LCD Codepad
5.1
Arming the System
15
There are several ways to arm the system depending on whether you are:
–
Leaving the premises and require all active zones to be in a ready state for an intruder.
–
Remaining in the premises and only require part of the system to be in a ready state for
and intruder.
If a zone is not sealed at the end of Exit Time, the zone is automatically isolated and
constantly displayed on the remote codepad. The zone becomes an active part of the system
when the zone is restored.
For example, if a window is left open after Exit Time expired, the window is not an active part
of the system until the window is closed. Opening the window after Exit Time expired causes
an alarm condition.
Below table defines the different methods for arming the system.
Mode
Arming Method
AWAY Mode
Arms the entire system. Refer to Arming in AWAY Mode, page 15.
STAY Mode 1
Arms all zones except those programmed to be automatically isolated
by the installer. Refer to Arming in STAY Mode 1, page 16.
STAY Mode 2
Arms all zones except those programmed to be automatically isolated
by the Master Code holder. Refer to Arming in STAY Mode 2, page
16.
Table 5.1: Arming Methods
5.1.1
Forced Arming
The feature of arming the system when a zone is not sealed is known as forced arming. If the
system does not arm and a long beep is heard, forced arming is not permitted. If this is the
case, you must ensure that all zones are sealed or manually isolated before you can arm the
system.
Refer to Isolating Zones, page 19.
5.1.2
Arming in AWAY Mode
When you leave your premises and require all zones to be in a ready state to detect intrusion,
arm the system in AWAY Mode.
There are two different methods for arming the system in AWAY Mode. Method one is
standard and always operates. Method two is optional and can be disabled by your installer if
you do not want to use single button arming.
Method One
Enter your user code followed by the [#] button (for example,
[2580#]).
Two beeps sound and the AWAY indicator displays. Exit Time
starts counting.
Method Two
Hold down the [#] button until two beeps sound.
The AWAY indicator displays and Exit Time starts counting.
Table 5.2: How to Arm the System in AWAY Mode
Bosch Security Systems, Inc.
User's Guide
2014.06 | 01b | F01U298028
16
en | Operation with ICON LCD Codepad
5.1.3
Control Panel
Arming in STAY Mode 1
STAY Mode 1 is only used when the perimeter and unused areas of the premises need to be
armed to detect an intruder from entering the premises. At the same time, you can move freely
within an area that is automatically isolated.
Only your security company can program zones automatically isolated in STAY Mode 1.
There are two different methods for arming the system in STAY Mode 1. Method one is
standard and always operates. Method two is optional and may be disabled by your installer if
you do not want to use single button arming.
Entry Guard Timer for STAY Mode 1
When arming the system in STAY Mode 1, an optional entry timer called Entry Guard Time for
STAY Mode is available. Use this entry timer to delay the sirens if a zone is not automatically
isolated and activated an alarm condition.
Entry Guard Time For STAY Mode is the delay time used for all zones except 24-hour zones
when the system is armed in STAY Mode 1 or STAY Mode 2.
If the Entry Guard Time for STAY Mode is programmed and a zone was not automatically
isolated is activated, the codepad beeps twice a sec until the entry timer expires or the
system is disarmed. If the alarm condition is not reset by entering your user code followed by
the [#] button (such as, [2580#]) before the entry time expires, the sirens activate into alarm.
Only your installer can program this feature.
Method One
Enter your user code followed by the [*] button (for example, [2580*]).
Two beeps sound and the STAY indicator displays. Exit Time starts
counting.
Any zones programmed to be automatically isolated in STAY Mode 1 flash
until Exit Time expires. At the end of Exit Time, all zones selected to be
automatically isolated turn off and the codepad gives one short beep.
Method Two
Hold down the [*] button until two beeps sound.
The STAY indicator displays and Exit Time starts counting.
Any zones programmed to be automatically isolated in STAY Mode 1 flash
until Exit Time expires. At the end of Exit Time, the zone indicators turn
off and the codepad gives one short beep.
Table 5.3: How to Arm the System in STAY Mode 1
5.1.4
Arming in STAY Mode 2
STAY Mode 2 is only used when the perimeter and unused areas of the premise need to be
armed to detect an intruder from entering the premise. At the same time, allowing you to
move freely within an area that is automatically isolated. Any Master Code or Installer Code
user can program zones to be automatically isolated in STAY Mode 2.
Enry Guard Timer for STAY Mode 2
When arming the system in STAY Mode 2, an optional entry timer called Entry Guard Time for
STAY Mode is available. Use this entry timer to delay the sirens if a zone is not automatically
isolated and activated into alarm condition.
How to Arm the System in STAY Mode 2
Hold down the [0] button until two beeps sound. The STAY indicator displays and Exit Time
starts counting.
Any zones programmed to be automatically isolated in STAY Mode 2 flash until Exit Time
expires. At the end of Exit Time, all zones selected to be automatically isolated extinguish and
the codepad emits one short beep.
2014.06 | 01b | F01U298028
User's Guide
Bosch Security Systems, Inc.
Control Panel
5.1.5
Operation with ICON LCD Codepad | en
17
Programming STAY Mode 2 Zones
Programming zones to be automatically isolated in STAY Mode 2 are only carried out if you
have a Master Code or Installer Code.
How to Program STAY Mode 2 Zones
1. Enter your Master Code or Installer Code, followed by [4] and the [#] button (for
example, followed [25804#]). Three beeps sound and the STAY indicator flashes.
2.
Enter the zone number to be automatically isolated, followed by the [*] button (for
example, [1*] = Zone 1, [2*] = Zone 2). The selected zone flashes. If you make a mistake,
enter the same zone number followed by the [#] button to clear the incorrect zone. To
select additional zones to be automatically isolated in STAY Mode 2, repeat Step 2 as
many times as required.
3.
Press the [#] button to exit this mode when you finish selecting all zones to be
automatically isolated in STAY Mode 2. Two beeps sound and the STAY and AWAY
indicators turn off.
5.2
Disarming the System
When you enter the premises after the system is armed in AWAY mode, or if you armed the
system in STAY Mode 1 or STAY Mode 2, you must disarm the system to disable detection
devices that activate an alarm.
If there was an alarm condition prior to disarming the system, a flashing zone indicator
displays, indicating a previous alarm on that zone.
How to Disarm the System
Enter your user code followed by the [#] button (for example, [2580#]). Two beeps sound.
5.3
User Codes
5.3.1
Adding User/Radio Codes
Only the Master Code holder can add or change other system user codes, including the Master
Code. Up to 32 user codes / radio user codes can be programmed to operate the system.
How to Add a User Code
1. Enter your Master Code, followed by [1] and the [#] button (for example, [25801#]).
Three beeps are heard and the STAY and AWAY indicators flash.
2.
Enter the User Code number (1 to 32), followed by the [#] button (for example, [2#] =
User 2, [8#] = User 8). Two beeps are heard and the selected user number displays on
the codepad indicators.
3.
Enter the digits required for the new code followed by the [#] button (for example, for
User Code 5768, enter [5768#]). Two beeps are heard and the STAY and AWAY indicators
turn off.
To add or change other User Codes, repeat this procedure as many times as required.
How to Add a WE800EV2 Keyfob
Set RF receiver as WE800EV2 Receiver.
1.
2.
Enter your Master Code, followed by [1] and the [#] button (for example, [25801#]).
Enter the WE800EV2 keyfob number (301 to 321) you want to add, followed by the [#]
button. Only current keyfob number (1 to 16 ) displays on the ICON codepad.
3.
Only use auto-learn mode to configure keyfob RFID. Press [#] button to switch into autolearn mode. When icon numbers (1 to 16) flash, press button 1 or 2 of the keyfob. The
panel learns the WE800EV2 Keyfob ID number and the last digit of RFID number displays
on the codepad. Press [#] button to confirm.
4.
Bosch Security Systems, Inc.
Enter [#] button to confirm the operation, or press [*] to cancel.
User's Guide
2014.06 | 01b | F01U298028
18
en | Operation with ICON LCD Codepad
Control Panel
How to Add a RADION Keyfob
Set RF receiver as RADION Receiver.
1.
Enter your Master Code, followed by [1] and the [#] button (for example, [25801#]).
2.
Enter the RADION keyfob number (301 to 332) you want to add, followed by the [#]
button. Only current keyfob number (1 to 16 ) displays on the ICON codepad.
3.
Use manual mode or auto-learn mode to configure RADION keyfob RFID.
–
In manual mode, enter the 9-digit RF device ID number, followed by the [#] button.
–
Or press [#] button to switch into auto-learn mode. When icon numbers (1 to 16)
flash, press button 1 or 2 of the keyfob. The panel learns the RADION Keyfob ID
number and the last digit of RFID number displays on the codepad. Press [#] button
to confirm.
4.
5.3.2
Enter [#] button to confirm the operation, or press [*] to cancel.
Deleting User/Radio Codes
Only the Master Code holder can delete other system user codes.
How to Delete a User Code
1. Enter your Master Code, followed by [1] and the [#] button (for example, [25801#]).
Three beeps sound and the STAY and AWAY indicators flash.
2.
Enter the user code number (1 to 32), followed by the [#] button (for example, [2#] =
User 2, [16#] = User 16). Two beeps sound and the selected user number displays on the
codepad indicators.
3.
Press the [*] button to delete the selected User Code. Two beeps are heard and the STAY
and AWAY indicators turn off.
To delete other User Codes, repeat this procedure as many times as required.
How to Delete a WE800EV2 Keyfob
1. Enter your Master Code, followed by [1] and the [#] button.
2.
Enter the WE800EV2 keyfob number (301 to 321) you want to delete, followed by the [#]
button.
3.
Press the [*] button to delete the WE800EV2 Keyfob.
How to Delete a RADION Keyfob
1. Enter your Master Code, followed by [1] and the [#] button.
2.
Enter the RADION keyfob number (301 to 332) you want to delete, followed by the [#]
button.
3.
5.4
5.4.1
Press the [*] button to delete the RADION Keyfob.
Codepad Alarms
Codepad Duress Alarm
A codepad duress alarm is used as a silent hold-up alarm. This only occurs when the number 9
is added to the end of any valid user code being used to disarm the system (for example,
[25809#]). A duress alarm is only useful if your system is reporting back to a monitoring
station. Domestic reporting (such as a mobile phone) cannot decipher which type of alarm
occurred.
5.4.2
Codepad Panic Alarm
An audible alarm activates when you press the [1] and [3] keys or the [*] and [#] keys
simultaneously.
Contact your installer to disable the codepad panic alarm function or to silence the codepad
panic alarm.
2014.06 | 01b | F01U298028
User's Guide
Bosch Security Systems, Inc.
Control Panel
5.4.3
Operation with ICON LCD Codepad | en
19
Codepad Fire Alarm
The horn speaker emits a distinct fire sound when you press the [4] and [6] keys
simultaneously.
Contact your installer to disable the codepad fire alarm function or to silence the codepad fire
alarm.
5.4.4
Codepad Medical Alarm
An audible codepad Medical Alarm activates when you press [7] and [9] simultaneously.
Contact your installer to disable the codepad medical alarm function or to silence the codepad
medical alarm.
5.4.5
Codepad PIN Error (Access Denied)
Codepad PIN error restricts the number of times an invalid user code can be used in an
attempt to operate the system. When the number of incorrect code attempts equals the
number programmed by your installer, the system activates an alarm condition. If reporting
back to a security monitoring station, the system sends an Access Denied report.
To shutdown and lockout a codepad for a period of time (0 sec to 150 sec), ask your installer
to program this function.
5.5
Isolating Zones
Use isolating zones to manually disable one or more zones before arming the system. Once a
zone is isolated, you can access that zone during the armed state without activating an alarm.
For example, you need to isolate a zone because before arming the system a PIR detector may
be false alarming, or you need to leave a pet inside a particular zone while away.
Isolating zones is performed by one of two methods. Method two is optional and only allows
those user codes programmed by your installer to have access to isolate zones.
5.5.1
Standard Isolating
Standard isolating allows all operators to isolate zones without knowing a valid user code.
How to Isolate a Zone
1. Press the [*] button twice to enter the Isolating Mode. Three beeps are heard and the
STAY indicator flashes.
2.
Enter the zone number (1 to 8), followed by the[*] button (for example, [1*] = Zone 1,
[2*] = Zone 2). Each zone to be isolated has a corresponding zone indicator that flashes.
If you selected an incorrect zone to be isolated, enter the incorrect zone number again
followed by the [*] button. Repeat Step 2 if more than one zone is to be isolated until all
zones to be isolated are selected.
3.
Press the [#] button after all selected zones are isolated. Two beeps are heard and the
system returns to the disarmed state.
5.5.2
Code to Isolate
This method restricts only those User Codes with the Code to Isolate priority level to isolate
zones.
If any User Code has this priority level, the method of standard isolating does not function.
How to Isolate a Zone
1. Press the [*] button followed by your User Code and the [*] button again to enter the
Isolating Mode (for example, [*2580*]). Three beeps sound and the STAY indicator
flashes.
Bosch Security Systems, Inc.
User's Guide
2014.06 | 01b | F01U298028
20
en | Operation with ICON LCD Codepad
2.
Control Panel
Enter the zone number (1 to 8), followed by the [*] button (for example, [1*] = Zone 1,
[2*]= Zone 2). Each zone to be isolated has a corresponding zone indicator that flashes. If
you selected an incorrect zone to be isolated, enter the incorrect zone number again
followed by the[*] button. Repeat Step 2 if more than one zone is to be isolated until all
zones to be isolated are selected.
3.
Press the [#] button after all selected zones are isolated. Two beeps sound and the
system returns to the disarmed state.
5.6
Fault Analysis Mode
If a fault occurs, the FAULT or MAINS indicators flash and the codepad beeps once every min.
If the AC MAINS supply fails, the MAINS indicator flashes until the AC MAINS supply is
restored. Pressing the [#] button once acknowledges the fault and stops the codepad from
beeping once every min.
How to Determine the Type of System Fault
To determine which system fault occurred, enter Fault Analysis Mode by following the steps
below:
1.
Hold down the [5] key until two beeps sound. The FAULT indicator remains steady and
the STAY and AWAY indicators flash in unison. A zone indicator displays the type of fault
that occurred (for example, Zone 1 = System Fault). Refer to Fault Indicators, page 20
for the list of possible system faults.
2.
To further determine the type of fault condition, press and hold down the key that
corresponds to the zone indicator displayed. For example, if Zone 1 displayed System
Fault, press and hold the [1] key to display which system fault occurred.
3.
To exit Fault Analysis Mode and return to the disarmed state, press the [#] key. The
FAULT indicator continues to display and the codepad stops sounding once a min.
Fault Indicators
Zone
Fault Description
Hold Down Zone
Indicator
1
System Fault
Fault Condition
Button
Indicator
1
1
Battery Fail
2
Date and Time
3
RF Receiver Fail
4
Output 1 to 3 Fail
5
Telephone Line Fail
7
Power Supply Fail
8
Tamper
9 to 16
RF Repeater 1 to 8 Fail
2
RF Low Battery
2
1 to 16
Zones 1 to 16 RF Low Battery
3
Zone Tamper Alarm
3
1 to 16
Zones 1 to 16 Tamper Alarm
4
Sensor Watch Fault
4
1 to 16
Zones 1 to 16 Sensor Watch Fail
5
RF Sensor Watch
5
1 to 16
Zones 1 to 16 RF Sensor Watch Fail
6
Communication Fail 6
1
Receiver 1 Fail
2
Receiver 2 Fail
3
IP Module 1 Fail
4
IP Module 2 Fail
2014.06 | 01b | F01U298028
User's Guide
Bosch Security Systems, Inc.
Control Panel
Operation with ICON LCD Codepad | en
Zone
Fault Description
Hold Down Zone
Indicator
7
Output and
8
Keyfob Low Battery
Fault Condition
Button
Indicator
7
2
Output Expander Fail
3 to 6
Codepad Fail
1 to 16
Keyfob 1 to 16 Low Battery
Codepad Fail
8
21
Table 5.4: Fault Indicators
5.6.1
Fault Descriptions
1 System Fault
A system fault only displays when any of the following faults occur. After entering Fault
Analysis Mode, press and hold the [1] key to determine which of the following faults occurred.
Low Battery Fault – A low battery fault registers when the system detects a low capacity
back-up battery. The system automatically performs a battery test every four hours and every
time you arm the system.
Date and Time – The date and time fault registers every time the system is powered down.
Refer to Date and Time, page 22 to program the date and time.
RF Receiver Fail – The RF receiver fault registers once the system detects that the wireless
receiver unit is disconnected, tampered or jammed.
Output 1 to 3 Fail – This fault registers when the system detects any output is disconnected.
This fault clears once any output is reconnected. Your installer must program the system for
this feature to operate.
Telephone Line Fail – A telephone line fault registers when the system detects that the
telephone line is disconnected from the control panel. Your installer must program the system
for this feature to operate.
Power Supply Fail – This fault occurs when AUX power supplies fails, +12V power fails, or
SDI2 Bus power fails. Contact your installer as soon as this fault displays.
Tamper – This fault occurs when the system detects the control panel is tampered.
RF Repeater Fail – The RF repeater 1 to 8 fault registers once the system detects that the
wireless repeater is disconnected, tampered or jammed.
2 RF Low Battery
This fault occurs when any of the RF wireless devices report a low battery condition to the
control panel. While in Fault Analysis Mode, press and hold the [2] key until two beeps sound.
This displays the zone reporting the RF Low Battery fault.
3 Zone Tamper Fail
This fault occurs when any zone with tamper becomes an open circuit. Press and hold the [3]
key until two beeps sound. This displays the zone reporting the tamper fail fault.
4 Sensor Watch Fault
A sensor watch fault registers because one or more detection devices failed to detect any
movement during the disarmed state for the time period programmed by your installer. The
fault clears once the zone in question detects movement and resets. Press and hold the [4]
key until two beeps sound. This displays the zone reporting the sensor watch fault.
5 RF Sensor Watch
An RF sensor watch fault registers because one or more RF detection devices fails to
communicate to the RF radio receiver for the time period programmed by your installer. The
fault clears once the RF device in question successfully transmits to the RF radio receiver.
Press and hold the [5] key until two beeps sound. This displays the RF detection device
reporting the RF sensor watch fault.
Bosch Security Systems, Inc.
User's Guide
2014.06 | 01b | F01U298028
22
en | Operation with ICON LCD Codepad
Control Panel
6 Communication Fail
A communication fail registers when the control panel fails to communicate with the receiving
party (such as a monitoring company, mobile phone). The communication fault clears once the
control panel successfully reports to the receiving party.
A communication fail also registers when network module is disconnected or tampered.
To determine which receiver or module failed to communicate, press and hold the [6] key.
7 Output and Codepad Fail
The output fault registers when the output expander B308 is disconnected or tampered.
The codepad fault registers when any codepad is tampered or disconnected from the control
panel.
To determine which fault occurred, press and hold the [7] key.
8 Keyfob Low Battery
This fault occurs when any of the RF keyfobs report a low battery condition to the control
panel. To determine which keyfob failed, press and hold the [8] key. Only keyfob 1 to 16 faults
display on the codepad through zone indicator 1 to 16.
5.7
Date and Time
Programming the date and time is only required when you need functions such as automatic
test reports, automatic arming, and history events to operate correctly.
How to Program the Date and Time
1. Enter your Master Code, followed by [6] and the [#] key (for example, [25806#]). Three
beeps sound, and the STAY and AWAY indicators flash.
2.
Enter the day, month, year, hour, and minute(DD, MM, YY, HH, MM format) (for example,
DD = day of the month, MM = month of the year, YY = current year, HH = hour of the day,
MM = minute of the day). To program the hour of the day, use the 24:00 hour format.
3.
Press the [#] button to exit and return to the disarmed state. Two beeps sound, and the
STAY and AWAY indicators turn off. If a long beep sounds, an error was made when
entering the date and time.
5.8
Turning Outputs On/Off
This feature is only applicable if your installer set up an output that can be turned on or off by
the codepad. The output programmed by your installer can control a pool pump or outside
lighting. Up to three separate outputs can be programmed.
How to Turn an Output On or Off
1. Enter your Master Code, followed by [5] and the [#] key (for example, [25805#]). Three
beeps sound and the STAY and AWAY indicators flash.
2.
Enter the output number (1 to 3).
3.
Press the [#] key to turn the output on, or press the [*] key to turn the output off. Three
beeps sound if the output is turned on, and two beeps sound if the output is turned off.
Repeat Step 2 and Step 3 if more than one output is required to be turned on or off.
4.
Press the [#] key to exit from this function. Two beeps sound and the STAY and AWAY
indicators turn off.
5.9
Reset Latching Outputs
This feature is only applicable if your installer programmed an output to latch (remain on) until
you acknowledge the event that occurred.
How to Reset Latching Outputs
Hold down the [7] key until two beeps sound. The output resets.
2014.06 | 01b | F01U298028
User's Guide
Bosch Security Systems, Inc.
Control Panel
5.10
Operation with ICON LCD Codepad | en
23
Telco Arm/Disarm Sequence (Call Forward On/Off)
Use this feature to program the Telco Arm Sequence and Telco Disarm Sequence.
5.10.1
Telco Arm Sequence
Use to program the Call Forward – Immediate On sequence or Call Forward – No Answer
sequence to automatically operate when you arm the system in the AWAY Mode. This feature
is only available if your telecommunications provider has the callforward option available.
Call Forward – Immediate On
You can redirect calls to anywhere in Australia. When Call Forward is turned on, your
telephone does not ring.
Call Forward – No Answer
When your telephone is not answered within 20 sec, this feature redirects all incoming calls to
another number anywhere in Australia. You can still make outgoing calls.
How to Program the Telco Arm Sequence
1. Enter your Master Code, followed by the [3] and [#] keys (for example, [25803#]). Three
beeps sound and the STAY and AWAY indicators flash.
2.
Press the [1] key followed by the [#] key to select the Telco Arm Sequence. Three beeps
sound.
3.
Enter the Call Forward Sequence (for example, [*61][Phone Number][#] to program the
Call Forward - No Answer Sequence or [*21][Phone Number][#] to program the Call
Forward Immediate Sequence). To program an “*” in the Telco Arm Sequence, enter [*1],
and to program a “#” in the Telco Arm Sequence, enter [*2].
4.
Press the [#] key when finished. Two beeps sound, and the STAY and AWAY indicators
turn off.
Notice!
To disable the Telco Arm Sequence, enter the Call Forward Sequence as [*5] (terminator) for
Step 3.
5.10.2
Telco Disarm Sequence
Use this function to automatically disable the call forward sequence upon disarming the
system.
How to Program the Telco Disarm Sequence
1. Enter your Master Code, followed by the [3] and [#] keys (for example, [25803#]). Three
beeps sound, and the STAY and AWAY indicators flash.
2.
Press the [2] key followed by the [#] key to select the Telco Disarm Sequence. Three
beeps sound.
3.
Enter the Call Forward Disable Sequence (for example, [#61#] to disable the No Answer
Call Forward sequence, or [#21#] to disable the Call Forward Immediate Sequence).
Notice!
To program a “#” in the Telco Disarm Sequence, enter [*2].
4.
Press the [#] key when finished. Two beeps sound, and the STAY and AWAY indicators
turn off.
Bosch Security Systems, Inc.
User's Guide
2014.06 | 01b | F01U298028
24
en | Operation with ICON LCD Codepad
Control Panel
Notice!
To disable the Telco Disarm Sequence, enter the Call Forward Sequence as [*5] (terminator)
for Step 3.
Digit Required
Number to Program
Digit Required
Number to Program
0
0
8
8
1
1
9
9
2
2
10
0
3
3
*
*1
4
4
#
*2
5
5
4-sec Pause
*3
6
6
7
7
Terminator
*5
Table 5.5: Dialing Digits
5.11
Testing
The following functions let you confirm that your system is operating correctly:
5.11.1
Horn Speaker Test
Hold the [1] key until two beeps sound.
The horn speaker sounds for 2 sec.
5.11.2
Bell Test
Hold the [2] key until two beeps sound.
The bell output operates for 2 sec.
5.11.3
5.11.4
Strobe Test
1.
Hold the [3] key until three beeps sound. The strobe flashes.
2.
Hold the [3] key until two beeps sound. The strobe stops flashing.
Walk Test Mode
Use Walk Test Mode to test detection devices to ensure that they are operating correctly.
Every time you test a zone, the codepad sounds one long beep, and the horn speaker sounds
one short beep to indicate that the zone is activated when testing.
1.
Enter your Master Code, followed by the [7] and [#] keys (for example, [25807#]). Three
beeps sound, and the STAY and AWAY indicators flash. The codepad beeps once every
sec while the system is in Walk Test Mode.
2.
Activate all zones requiring the test.
3.
When you finish testing all required zones, press the [#] key to exit from this mode. Two
beeps sound, and the STAY and AWAY indicators turn off. The system returns to the
disarmed state.
5.11.5
Test Report
This feature applies if your system reports using the telephone or network modules. By
holding down the [9] key until two beeps sound, the system sends a Test Report.
2014.06 | 01b | F01U298028
User's Guide
Bosch Security Systems, Inc.
Control Panel
5.12
Operation with ICON LCD Codepad | en
25
Event Memory
Use this function to replay the last 256 events that the system recorded. The event memory
history replays all system faults, all alarms and the arming/disarming of the system in AWAY
Mode, STAY Mode 1, and STAY Mode 2.
How to Enter Event Memory
Enter your Master Code, followed by[8] and the [#] button (for example, [25808#]). Three
beeps sound. The last 256 events display one at a time by the codepad indicators, starting
with the most recent event. A beep sounds as each event displays.
5.13
Day Alarm
Day alarm monitors a combination of zones during the disarmed state. It beeps the codepad
buzzer if activated. Only your installer can program zones 1 to 4 to operate for day alarm.
Example
A day alarm can be configured for the front door of a shop with a pressure mat or electronic
beam that customers activate as they enter the shop. When customers step on the pressure
mat or break the electronic beam, the codepad buzzer beeps.
How to Turn Day Alarm On
Hold down the [4] key until three beeps sound. Day alarm turns on. All zones programmed for
day alarm operation cause the codepad buzzer to beep during the disarmed state when
activated.
How to Turn Day Alarm Off
Hold down the [4] key until two beeps sound. Day alarm turns off.
5.14
Codepad ID / Buzzer Tone
1.
Hold down the [8] key until the desired buzzer tone is reached.
2.
Press the [#] key to exit.
There are 50 different tones, from1500 Hz to 5000 Hz. If multiple codepads are installed, each
codepad can have a different tone.
If the system is partitioned, the codepad display a number identifying which area the codepad
belongs.
5.15
Remote Arming by Telephone
Arm your system from any remote location using the telephone. For security reasons, the
system cannot be disarmed using this method. Your installer must program this feature to
operate.
How to Remotely Arm Your System by Telephone
1. Call the telephone number connected to your control panel.
2.
When the control panel answers the incoming call, a short jingle sounds. To arm the
system, press the [*] key on the touch-tone telephone for 1 sec to 3 sec. If you hear
modem tones when the control panel answers the incoming call, the system was
programmed for remote programming functions by your installer. Wait for a pause
between the tones before pressing the [*] key. After releasing the [*] key on the touchtone telephone, two beeps sound, indicating that the system is armed in AWAY Mode.
3.
Bosch Security Systems, Inc.
Hang up the telephone and the system remains armed.
User's Guide
2014.06 | 01b | F01U298028
26
en | Operation with ICON LCD Codepad
Control Panel
Notice!
If your installer programmed answering machine bypass, call the control panel twice to make
a connection with the system. For example, call the telephone number your control panel is
connected to and let the call ring no more than four times. Hang up the telephone. Wait a
minimum of 8 sec before you calling the control panel again.
5.16
Domestic Dialing
Use domestic dialing can be used to call your mobile phone or a relative/friend if your control
panel activates an alarm. Up to four different telephone numbers can be programmed for the
control panel to call when an alarm occurs. Only your installer can program the system to
report in the domestic format. The Master Code holder can change the telephone numbers at
any time.
5.16.1
Acknowledging Domestic Calls
When an alarm condition occurs, the system calls the first programmed telephone number.
When you answer an incoming call, the system repeatedly emits a siren tone followed by a
pause, continuously for 10 times (for example, siren tone, pause, siren tone, and pause).
If you do not acknowledge the call from the control panel during a pause between siren tones,
the control panel hangs up after 10 times and recall the same call number for 2 times. If the
system still can’t receive the acknowledge, the system calls the next telephone number.
Pressing the [*] key for 1 sec to 3 sec during the pause acknowledges the call. No further calls
are made for that event. If the call was successfully acknowledged, a tone of decreasing pitch
sounds.
Digit Required
Number to Program
Digit Required
Number to Program
0
0
8
8
1
1
9
9
2
2
10
0
3
3
*
*1
4
4
#
*2
5
5
4-sec Pause
*3
6
6
7
7
Terminator
*5
Table 5.6: Domestic Dialing Telephone Digits
5.16.2
Programming Domestic Telephone Numbers
If your system is set up for domestic dialing, any Master Code holder can program telephone
numbers that the control panel calls in the event of an alarm.
How to Program Telephone Numbers
1. Enter your Master Code, followed by the [2] and [#] keys (for example, [25802#]). Three
beeps sound and the STAY and AWAY indicators flash.
2.
Enter the any telephone number you need and press the [#] keys (for example, [1#]).
–
If there is telephone number already programmed, they display one digit at a time by
the codepad indicators and end with indicator [15].
2014.06 | 01b | F01U298028
User's Guide
Bosch Security Systems, Inc.
Control Panel
Operation with ICON LCD Codepad | en
–
27
If there are no telephone numbers programmed, indicator [15] displays and two
beeps sound.
3.
Enter all digits of the telephone number (for example, [96721717]). As each digit is
entered, the corresponding codepad indicators display.
4.
Press the [#] key to exit from this function.
If there is more than one telephone number to program, repeat step 1 to 4.
5.16.3
Disable Domestic Dialing
To cancel domestic dialing (for example, you are moving and do not want the system to
continue calling your mobile phone), enter the following sequence.
1.
Enter your Master Code, followed by the [2] and [#] keys (for example, [25802#]). Two
beeps sound and the STAY and AWAY indicators flash.
2.
Enter the telephone number you need to cancel and press the [#] keys (for example,
[1#]).
3.
Press the [*] key followed by the [5] and [#] keys(for example, [*5#]). The STAY and
AWAY indicators are disabled.
Bosch Security Systems, Inc.
User's Guide
2014.06 | 01b | F01U298028
28
6
en | Glossary of Terms
Control Panel
Glossary of Terms
Term
Description
24-hour zone
A monitored input where tamper switches and emergency switches can
be connected. If one of these switches is violated at any time (whether
the system is armed or disarmed), an alarm is reported.
alarm condition
The status when an alarm system is armed and one of the detection
devices is violated. A 24-Hour zone (for example, a smoke detector) can
activate when the system is armed or disarmed.
answering machine A condition that enables connection with the control panel for remote
bypass
arming or remote programming operations when there is an answering
machine or facsimile machine on the same telephone line.
Armed (System
A status in which the system is ready to accept alarms.
ON)
automatic arming
Programming that allows the system to disarm automatically at the
same time each day in AWAY Mode or STAY Mode 1.
AWAY Mode
The mode used to arm your system when you leave your premises.
codepad
A device that allows you to perform all functions such as arming,
disarming, and programming of your alarm system.
day alarm
Programming that allows a combination of zones to be monitored while
the system is disarmed.
detector
A unit installed as a satellite component in a security system designed
to detect an intruder within a protected area. Some common forms of
detection devices are passive infrared, smoke, photo electric beams,
reed switches, and vibration sensors.
disarmed
A system status that does not accept alarms, except for 24-Hour zones.
dynamic battery
A method used to monitor and test the condition of your backup
testing
battery.
entry delay
A programmed delay of the system alarm responses that allows a
person to enter a building through the entry door to turn the system off.
external
Any device connected to a security system, such as a detector,
equipment
codepad, or siren.
force arming
A method of overriding the safety feature that prevents arming with a
faulted zone on a control panel.
hand-over delay
If a system is armed and Zone 1 is violated, the entry delay starts timing.
If Zone 2 is violated, the entry delay time is handed over to the Zone 2
and so on, to Zones 3 and 4. This is known as sequential hand-over
delay.
hand-held radio
A device used to arm and disarm a security system or to cause a panic
remote control
alarm.
2014.06 | 01b | F01U298028
User's Guide
Bosch Security Systems, Inc.
Glossary of Terms | en
Control Panel
Term
Description
isolate
A method of manually disabling (isolating) one or more zones before
29
arming the system.
master code
A numeric code used for arming and disarming the system, and for
allowing access to all functions available through the codepad.
monitoring station
A secure location where a digital receiver monitors a number of alarm
systems and deciphers their alarm transmission reports so the operator
can advise the appropriate authorities to take immediate action.
panic
A condition or type of alarm in which the user requires either immediate
police or medical assistance.
sealed
Refers to a zone’s status. If a zone is sealed, the detection devices are
not violated and the zone indicator is not lit (that is, a reed switch is
closed or a detector is on standby waiting for an intrusion).
sensor watch
A feature that allows the control panel to recognize when detection
devices might have stopped working. Sensor watch monitors the
operation of a zone over a programmed time period.
silent alarm
An alarm that sounds only at a remote location, and gives no obvious
local indication that an alarm was sent out.
STAY Mode 1
A condition that automatically isolates certain zones when the security
system is armed in this mode. Only the installer can program these
zones.
STAY Mode 2
A condition that automatically isolates certain zones when the security
system is armed in this mode. The Master Code holder can program
these zones.
telco arming
A feature that automatically diverts a telephone number to another
sequence
telephone when a security system is armed in AWAY Mode, the same as
using call forwarding.
telco disarming
An automatic suspension of diverting of the telephone when the system
sequence
is disarmed.
unsealed
Refers to a zone’s status. If a zone is unsealed, the detection devices
are violated and the zone indicator is lit (that is, a reed switch is open
or a detector noted an intrusion).
user code
A numeric code used to arm and disarm the system.
zone
A monitored input used to activate an alarm. A zone might be set up to
activate an alarm only when the system is armed or to operate whether
the system is armed or disarmed.
Table 6.1: Glossary of Terms
Bosch Security Systems, Inc.
User's Guide
2014.06 | 01b | F01U298028
Bosch Security Systems, Inc.
130 Perinton Parkway
Fairport, NY 14450
USA
www.boschsecurity.com
© Bosch Security Systems, Inc., 2014