1
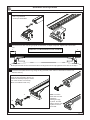
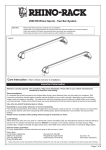
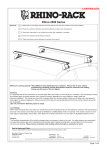
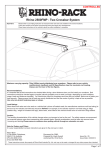
CONTROLLED Quick Mount Track Legs RLT600 Important: Please read these instructions carefully prior to and during installation. Check the contents of kit before commencing fitment and report any discrepancies. Clean roof prior to installation. Important Information Maximum carrying capacity: Up to 100kg. Evenly distributed over the crossbars. It is essential that all bolt connections be checked after driving a short distance when you first install your crossbars. Bolt connections should be checked again at regular intervals (probably once a week is enough, depending on road conditions, usage, loads and distances travelled). You should also check the crossbars each time they are re-fitted. Make sure to fasten your load securely. Ensure all loads are evenly distributed and centre of gravity is kept as low as possible. Use only non-stretch fastening ropes or straps. Caution: The handling characteristics of the vehicle changes when you transport a load on the roof. For safety reasons we recommend you exercise extreme care when transporting wind-resistant loads. Special consideration must be taken into account when cornering and braking. Please remove crossbars when putting vehicle through an automatic car wash. Load ratings: Maximum permissible load for system is up to 100kg per pair of crossbars. When crossbars are to be used in off-road conditions, please build a safety factor of 1.5 into this load limit. Although the crossbars are tested and approved to AS1235-2000, off-road conditions can be much more rigorous. However, increasing the number of crossbars does not increase the vehicles maximum permissible roof loading. Please refer to your vehicle manufacturers handbook for the maximum roof loading allowable for your make and model vehicle. Always use the lower of the two figures Note for Dealers and Fitters: It is your responsibility to ensure instructions are given to the end user or client. Rhino-Rack 3 Pike Street, Rydalmere, NSW 2116, Australia. (Ph) (02) 9638 4744 (Fax) (02) 9638 4822 Document No: R474 Prepared By: Kayle Everett Authorised By: Chris Murty Issue No: 06 Issue Date: 26/10/15 These instructions remain the property of Rhino-Rack Australia Pty. Ltd. and may not be used or changed for any other purpose than intended. Page 1 of 6 Quick Mount Track Legs RLT600 ! ! ! km/h 2 x Crossbars = 5kg When these roof racks are to be used on a vehicle that is driven off sealed roads, the manufacturer maximum roof load rating (to be found in the vehicles User Manual) should be divided by 1.5. Do not forget to subtract 5kg from your maximum carrying capacity due to the weight of the crossbars and legs. X 100kg load rating (Urban road) WARNING! Important Load Carrying Instructions With utility vehicles, the cabin and the canopy move independently. Roofracks and vehicle can be damaged if the item transported is rigidly fixed at points on both the cabin and canopy. Instead, rigidly fix to either the cabin roofracks or the canopy roofracks. X NO = ? kg 67 kg load rating (Off road - 50kg / 1.5) YES YES Page 2 of 6 Quick Mount Track Legs RLT600 Parts List Item Component Name Qty Part No. 1 2 3 4 5 6 7 8 9 10 M6 30x25x5 Nut Track Leg Body M6x16x1.6 Flat Washer M6 Spring Washer M6x20 Socket HD Track Leg Base Cover Track Leg Base 5mm Allen Key Track Leg Lockable Cover M6x16 Button Security Screw M6x12.5 Flat Washers M6 24x21x4 Nut Instructions 4 4 4 12 4 4 4 1 4 8 N035A M703 W031 W004 B054 M702 M701 H021 M704 B061 8 8 1 W003 N057 R474 11 12 13 Layout: 1. 8. 2. 9. 10. 4. 11. 12. Tools Required: Allen Key (provided) Metal Key (provided) 3. 4. 5. 6. 7. Instructions 1 2 Place M6 24x21 Hex Nut into the opening of each track at rear of vehicle. Slide along the track to position. Take note that the number of nuts used is vehicle and track specific. Place the mounting plate onto the track. Fix in place with security screws, spring and flat washers. Note that the amount of fixing hardware used is dependant on the previous step and vehicle requirements. For fixture to a curved section of the roof, use the two closest holes to the front of the vehicle. This will prevent the Track Leg Base from flexing too much. Front of vehicle Page 3 of 6 Quick Mount Track Legs RLT600 3 Prepare the Leg for installation as follows: 1 - Remove cover plate. 2 - Locate and Pinch locking levers together. 3 - With levers pinched together, push them backward into a locked position within the leg cavity. 1. 2. Note the locking studs extended. The Leg is now ‘locked’. retracted ‘unlocked’ 3. Keep locking levers in position. 4 Push levers back into leg cavity to locate into an ‘unlocked’ position. With the locking studs now in an ‘unlocked’ position, insert Front View the leg into the mounting bracket. 1. the locking studs are locked inward, this allows the leg to be placed in a mounting position. ‘CLICK!’ 2. Pull the locking levers foward to their original position.They will spring back pushing the locking studs back outward, fixing the leg into the mount. Ensure both studs are secure in bracket. Apply small amounts of downward pressure if studs do not engage. Page 4 of 6 Quick Mount Track Legs RLT600 5 Assemble the leg hardware as shown. Slide the leg into the bar and finger tighten. Repeat for all 4 legs. Note: Leg hardware comes pre-assembled. 6 Check the cross bar over hang is equal on both sides, re-adjust if required. Tighten with a 5mm allen. key. = = EQUAL OVERHANG DISTANCE At this point the bar can be removed and the mounting base can be fully tightened if not done so in step 2. 7 Insert the Face plate into the leg. Using the key provided, insert and turn clockwise to lock the unit. Remove the key. Insert the cover plate and then lock using the key provided in the kit. If it cannot be inserted properly it means one of the studs is not correctly fitted. Check fitment and re-try. 1. 2. H Note: The Face Plate will cover the hardware holding the legs in place. This will help to ensure your system is secure from theft. Page 5 of 6 Quick Mount Track Legs RLT600 8 Install the Vortex Rubber Strips. It may be easier to remove bar and complete assembly steps 8,9 and 10. 9 Insert the end cap. Using the key provided, lock the end cap. Remove the key. Note metal keys can be purchased so they match the RLT600 Leg. Removing the Bars 1 Remove the cover plate from the legs. Squeeze the locking levers together and push them backward into the leg cavity. Assistance may be required. 1. Remove the cover plate to access the locking levers. 2 3. 2. Note: Use two hands to push in the locking levers if tight. Do not used a screw driver as this may damage the levers. With assistance, carefully lift the bars out of the corresponding mounting plates. Attach Leg Base Cover when not in use. Page 6 of 6