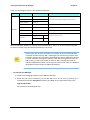
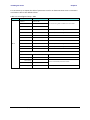
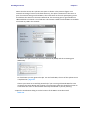
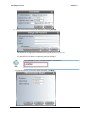
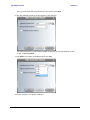
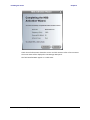
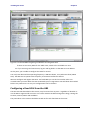
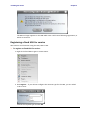
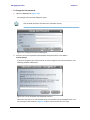
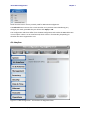
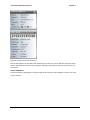
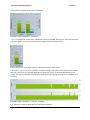
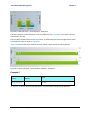
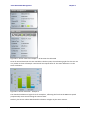
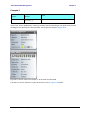
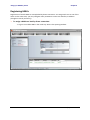
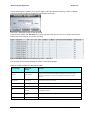
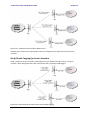
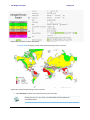
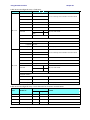
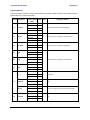
1
NetAstra Family Broadband Wireless Networking Solutions NetAstra AU (HBS) 5x200 / 5x50 / 5x25 / 5x10 / 5x05 NetAstra SU (HSU) 5x50 / 5x20 / 5x10 / 5x05 NetAstra HMU (Mobility Unit) 5x100 SYSTEM MANUAL Version 3.4.70 This document contains information that is proprietary to Netronics Technologies Inc. No part of this publication may be reproduced, modified, or distributed without prior written authorization of Netronics Technologies Inc. This document is provided as is, without warranty of any kind. Statement of Conditions The information contained in this document is subject to change without notice. Netronics shall not be liable for errors contained herein or for incidental or consequential damage in connection with the furnishing, performance, or use of this document or equipment supplied with it. Information to User Any changes or modifications of equipment not expressly approved by the manufacturer could void the user's authority to operate the equipment and the warranty for such equipment. Copyright © 2011 by Netronics. All rights reserved. 2 Netronics NetAstra Family System Manual Regulatory Compliance General Note This system has achieved Type Approval in various countries around the world. This means that the system has been tested against various local technical regulations and found to comply. The frequency bands in which the system operates may be “unlicensed” and in these bands, the system can be used provided it does not cause interference. FCC - Compliance This equipment has been tested and found to comply with the limits for a Class B digital device, pursuant to Part 15 of the FCC Rules. These limits are designed to provide reasonable protection against harmful interference in a residential installation. This equipment generate, uses and can radiate radio frequency energy and, if not installed and used in accordance with the instructions, may cause harmful interference to radio communications. However, there is no guarantee that interference will not occur in a particular installation. If this equipment does cause harmful interference to radio or television reception, which can be determined by turning the equipment off and on, the user is encouraged to try to correct the interference by one or more of the following measures: • Reorient or relocate the receiving antenna. • Increase the separation between the equipment and receiver. • Connect the equipment into an outlet on a circuit different from that to which the receiver is connected. Consult the dealer or an experienced radio/TV technician for help. Changes or modifications to this equipment not expressly approved by the party responsible for compliance could void the user's authority to operate the equipment. Warning Warning Caution It is the responsibility of the installer to ensure that when using the outdoor antenna kits in the United States (or where FCC rules apply), only those antennas certified with the product are used. The use of any antenna other than those certified with the product is expressly forbidden by FCC rules 47 CFR part 15.204. It is the responsibility of the installer to ensure that when configuring the radio in the United States (or where FCC rules apply), the Tx power is set according to the values for which the product is certified. The use of Tx power values other than those, for which the product is certified, is expressly forbidden by FCC rules 47 CFR part 15.204. Outdoor units and antennas should be installed ONLY by experienced installation professionals who are familiar with local building and safety codes and, wherever applicable, are licensed by the appropriate government regulatory authorities. Failure to do so may void the product warranty and may expose the end user or the service provider to legal and financial liabilities. Resellers or distributors of this equipment are not liable for injury, damage or violation of regulations associated with the installation of outdoor units or antennas. The installer should configure the output power level of antennas according to country regulations and antenna type. Netronics NetAstra Family System Manual 3 • Warning Where Outdoor units are configurable by software to Tx power values other than those for which the product is certified, it is the responsibility of the Professional Installer to restrict the Tx power to the certified limits. • This product was tested with special accessories - indoor unit (IDU or PoE), FTP CAT 5e shielded cable with sealing gasket, 12 AWG grounding cable - which must be used with the unit to insure compliance. Indoor Units comply with part 15 of the FCC rules. Operation is subject to the following two conditions: (1) These devices may not cause harmful interference. (2) These devices must accept any interference received, including interference that may cause undesired operation. Canadian Emission Requirements for Indoor Units This Class B digital apparatus complies with Canadian ICES-003. Cet appareil numẻrique de la classe B est conforme ả la norme NMB-003 du Canada. China MII Operation of the equipment is only allowed under China MII 5.8 GHz band regulation configuration with EIRP limited to 33 dBm (2 Watt). India WPC Operation of the equipment is only allowed under India WPC GSR-38 for 5.8GHz band regulation configuration. Unregulated In countries where the radio is not regulated the equipment can be operated in any regulation configuration, best results will be obtained using Universal regulation configuration. Safety Practices Applicable requirements of National Electrical Code (NEC), NFPA 70; and the National Electrical Safety Code, ANSI/IEEE C2, must be considered during installation. NOTES: 1. A Primary Protector is not required to protect the exposed wiring as long as the exposed wiring length is limited to less than or equal to 140 feet, and instructions are provided to avoid exposure of wiring to accidental contact with lightning and power conductors in accordance with NEC Sections 725-54 (c) and 800-30. In all other cases, an appropriate Listed Primary Protector must be provided. Refer to Articles 800 and 810 of the NEC for details. 2. For protection of ODU against direct lightning strikes, appropriate requirements of NFPA 780 should be considered in addition to NEC. 3. For Canada, appropriate requirements of the CEC 22.1 including Section 60 and additional requirements of CAN/CSA-B72 must be considered as applicable. 4 Netronics NetAstra Family System Manual Table of Contents Part 1: Basic Installation Chapter 1 Introduction Welcome to NetAstra!................................................................................................. What’s New in Release 3.4.70……………………………………………………….…………….………… Key Features of NetAstra PtMP……………………………………………………………….…………….. Components of NetAstra PtMP.………………………………………………………………………….…. Terminology……….………………………………………………………………………………………………….. Conventions Used in this Manual…………………………………………………………………………… 1-11 1-11 1-12 1-13 1-15 1-16 Planning the Sector Site................................................................................................ The Site Survey …………………………………….……………………………………….…………….………… Stage 1: Preliminary Survey…………………………………………………………………….…….……….. Stage 2: Physical Survey ……………………….…………………………………………………………….…. Stage 3: RF Survey …………………….………………………………………………………………….……….. RF Planning for Dense Installations and Collocated Sites ……….…………………….………… 2-18 2-18 2-19 2-20 2-21 2-21 Overview…………............................................................................................................ What’s in the box…….……………………….…………………….………………….…………….…….……… Tools required for installation…………………………………..………………………….………….…….. Safety Practices and Provisions…….……..…………………………………..………………………….…. Regulatory Considerations for HSUs…..………………………………………………………….……….. Hardware Installation Workflow for a NetAstra PtMP Sector….……………………..……….. 3-22 3-23 3-32 3-33 3-34 3-35 Chapter 2 Site Survey Chapter 3 Hardware Installation Part 2: Sector Installation Chapter 4 Getting Started with the Link Manager What we will do here.................................................................................................... Installing the Link Manager Application……………….……………………….…………….…..…….. Getting Started with the Link Manager….…………..……………………………….…….….……….. The Link Manager Log-on Concept……………………..…………………..……………..…….….…….. Log-on Errors and Cautions...……………………………………………………………….……....….……. Four Sector Display Views…….…………..……………………………….……………….….………..…….. Continuing with our Example Sector…………………………………………………………………..…… Exploring the Link Manager Main Window – HBS………………………………………………..….. Exploring the Link Manager Main Window – HSU………………………..……………………….... Logging on to a HBS…………………………………………………………………………………..……..…….. Setting Link Manager Preferences…..………………………………………………………………………. What Comes Next……………………………………………………………………………………………………. 4-56 4-56 4-57 4-60 4-62 4-63 4-69 4-72 4-82 4-82 4-85 4-89 Scope of this Chapter……………………………………….………..………………….…………….………… Concepts………………………………………………..………………...……………………………….………….. Working with Nomadic HSUs……..…………………………………….…………..…………………….…. Workflow…………………………….………………………………………………….………………….………….. Default NetAstra PtMP Settings………………………………………………………….……….…………. Configuring the Sector out of the Box – IP Addresses………………..……………….………….. Configuring a fixed HSU From the HBS……………………………………………………….…………… Configuring a nomadic HSU From the HBS………………………………………………….………….. Registering a fixed HSU for service…………………………………………………………….…………… Registering a nomadic HSU for service………………………………..…………….…………………… 5-90 5-90 5-91 5-91 5-92 5-95 5-106 5-111 5-113 5-117 Chapter 5 Installing the Sector Netronics NetAstra Family System Manual 5 Choosing Diversity Antenna Mode During Registration...........………………………….……. Deactivating the HBS.................................................................................................... Deregistering an HSU ................................................................................................... Where has my HSU gone?............................................................................................ Saving the HBS Settings for Reuse as a Template ........................................................ Creating Nomadic Entries for a Sector from a HBS Template ...................................... Part 3: Sector Management 5-120 5-120 5-121 5-121 5-121 5-122 Chapter 6 Managing the Sector Scope of this Chapter……………………………….………….…………………….….…………….………… Configuring a HBS…………………………………..…………..…………………………….…….…………….. HSU Connection Table………………..…………………………………………..……….…..…………….…. Configuring an HSU from the HBS Main Window…………………………….…………...……….. Replacing an HSU………………………………………………………………..………….……………………… Updating HSU Services………………………………………………………………………………………..... Suspending an HSU……………………………………………………………………………………………..… Changing the Sector Band………………………………………………………………………………….….. HBS Configuration with Telnet……………………………………………………………………….……… 6-126 6-126 6-148 6-149 6-161 6-163 6-163 6-164 6-168 Scope of this Chapter……………………………….………….…….………………….…………….………… Configuring an HSU………………………………………………..…………………………….……………….. 7-172 7-172 What is Smart Bandwidth Management.….………….………………….…………….…………….… Scope of this Chapter……..…..…………..…………………………….…………………………….……..…. Terminology and Concepts: Recapitulation.………………………………………………….………… How SBM Works……………………………………………………………………………………....……………. Traffic Generation Tools……………….…………………………………….……………......................... Traffic Generation Examples and Method…………………………………………….……….……….. About HBS Overhead……………………………………………………………………………………………… TCP/IP and other SLA Considerations….………………………………………………………….………. 8-180 8-181 8-181 8-183 8-183 8-184 8-198 8-200 Scope of this Chapter……………………………….………….………………….…………….…………….… Concepts……………………………..…………..…………………………….…………………………………..…. What You Need……………………………………………………………………………………………………… Getting Started………………………………………………………………………………………………………. Preparing the HBS……………………………………………………………….……………........................ Registering mobile HMUs…………….……………………………………………………….……………….. Saving the HBS Settings for Reuse as a Template…………………………………………………… Creating a Sector from a HBS Template…………………………………………………………………. Creating a Sector from a HBS Templateand an HBS List……..………….………………………. 9-201 9-201 9-202 9-202 9-203 9-206 9-210 9-211 9-212 Retrieving Link Information (Get Diagnostics)…….………………….…………….…………….…… Link Compatibility……………………………..…………..…………………….….………………..……………. Throughput Checking…………………………………………………………………………………...………… Recent Events………………………………………………………………………………………..………........... Performance Monitoring…………………………………………………..…………….……….…………….. Link Manager Traps……………………………………………………………………………………..…………. Active Alarms……………………………..…………………………………………………………….……………. Other Diagnostic Aids……………………………………………………………………………….………….... 10-213 10-216 10-217 10-219 10-221 10-226 10-227 10-228 Chapter 7 Direct HSU Configuration Chapter 8 Smart Bandwidth Management Chapter 9 Bringing Up a Mobility Sector Chapter 10 Monitoring and Diagnostics 6 Netronics NetAstra Family System Manual Part 4: Site Synchronization Chapter 11 Hub Site Synchronization What is Hub Site Synchronization?.…..…………..…………………….….……………………..………. Hardware Installation……………………………………………………………………………………………… ODU/HSS Unit Connection Pinout…………………………………………..…….…………….….………. Radio Frame Pattern (RFP)…………………………………………………..……………………..…........... Sector Configuration and HSS….………………………………………..……………………..…………….. 11-231 11-233 11-237 11-237 11-239 What is it for…….…………………………………………………….…….…………….………….………………. GSU Functionality.…..…………………………………….….…………………………………..………………… Typical GSU Scenarios………………………………………………………………………………..….………… GSU Redundancy…………………………………………..…….…………………………………..……………… GSU Kit Contents………………………………………………..…………….......................................... GSU Installation………………………………………………………………………………………..…………….. GSU Monitoring and Diagnostics….…………………………..…………………………….………………. GSU Telnet Support…………………………………………………………………………….………………….. Software Update for GSUs………………………………………………………………….………………….. 12-242 12-242 12-242 12-244 12-245 12-245 12-256 12-256 12-257 Chapter 12 Using the GSS-U Part 5: Advance Installation Topics Chapter 13 Software Upgrade What is the Software Upgrade Utility………………….…….…………….………………………………. 13-260 Upgrading an Installed Sector…………………………....…………………………………………………… 13-261 Chapter 14 VLAN Functionality with NetAstra PtMP VLAN Tagging-Overview….…………………………………….…….…………….……………………..……. Scope of this Chapter………………..…………………….….…………………………………………….…… Requirements…………………..………………………………………………………………………..….….…… VLAN Tagging………………………………………………..…….………………………………..……………..… VLAN Configuration Using the Link Manager….……..……………....................................... 14-265 14-265 14-265 14-265 14-269 Who needs it ….…………………………………………………….…….……………..……………………..……. DFS and False Radar Mitigation.……………..……….….……………………..………..………….……… Configuring False Radar Mitigation……….……………………………….………….…………………..… FCC/IC Considerations………..………………………..…….…………………….………………..…………… 15-273 15-273 15-274 15-275 Chapter 15 False Radar Mitigation Facilities Chapter 16 FCC/IC DFS Considerations FCC 5.4GHz Device Registration………….……………….…….……………..……………………….……. 16-276 Registering the Device………………………..…..……….….………………………..………………………… 16-276 TDWR Table………………………………………….……………………………….……………..……….………… 16-280 Chapter 17 Quality of Service Prerequisites……………………………………….……………….…….……………..………………..…………. 17-282 QoS – Overview…………..……………………..…..……….….……………………..…………..……………… 17-282 Setting up QoS..…………………………………….……………………………….………….…………………… 17-282 Part 6: Field Installation Topics Chapter 18 Link Budget Calculator Overview…………………………….………….…….…………………………………………………………......... Calculations.…………………….….………………………………………………………………..………………… About the Fresnel Zone…………………………………….………………………………..………….……….. Running the Link Budget Calculator…………………………….…..…….………………………………… Chapter 19 Spectrum View 18-288 18-289 18-290 18-292 What is Spectrum View…….………….…….……………………………………………………………......... 19-299 Who needs it………………….….………………………………………………………………………….………… 19-299 Netronics NetAstra Family System Manual 7 Scope of this Chapter……………………………………………………………..……………..……….……….. Two Ways to Run Spectrum View…..…………………..…….…………………………..………………… Where is the Spectrum View Data stored……………………………………………..…………………. Spectrum View Main Window: HBS………………………………………………………..……………….. Spectrum View Display Function Buttons…….………………………..……………………….……….. Running Spectrum View from the HBS………………..…….…………………………………..………… Running Spectrum View from a HSU……..……………………………………………………..…………. Zooming in and out………………………………………………………………………………………………….. 19-299 19-300 19-300 19-300 19-303 19-304 19-306 19-307 What is it for…….………….…….………………………………………………………............................... Who Need it……………….….…………………………………………………………………….……..…………. How it Works……………………………………………………………..………….………….………………..…. What is Provides…..…………………..…….…………………………………………………………………….. Prerequisites………………………………………………………………………………………….………………. Special Considerations Working with the WI………………………………………….………………. Scope of this Chapter…….………………………..………….…………………………………………………. Logging on………………..…….………………………………………………………………….…….……………. HBS Management………………………………..……………………………………………..………………….. HSU Management…………………………….…………………………………………..………………………… 20-309 20-309 20-310 20-312 20-312 20-313 20-313 20-314 20-314 20-320 Chapter 20 Using the Web Interface Part 7: Product Reference Appendix A Technical Specifications Scope of these Specifications…..…………………………………………………............................... ODU - HBS and HSU……...…………………………………………………………………………….…………. IDU-DT6 (Aggregation Unit)…………………..………….……………………………………………………. GbE PoE Device - Indoor, AC.…….…………………………………………….……………………………… PoE Device - Outdoor, DC….……………………………………………………………….…………………… GSU……………………………………………………………………………………………………………….………… Lightning Protector …….………………………..………….………………….…………………………………. Fast Ethernet CAT-5e cable repeater.……………………………………………….…….………………. Antenna Characteristics……………………………..……………………………………………….………….. A-327 A-327 A-334 A-335 A-336 A-337 A-338 A-339 A-340 ODU-PoE Cable (HBS and HSU)..………………………………………………………......................... HBS/HSS Unit Connection Pinout…...…………………..……………………………………….……….…. User Port Connectors.………………..……..………….………………………………….………………….…. DC Power Terminals …………..…….………………………………………………………………..…………… B-341 B-342 B-342 B-342 Appendix B Wiring Specifications Appendix C Setting Antenna Parameters Antenna Issues…..………………………………………………………………………………….................... C-344 About Single and Dual Antennas…...…………………………………………………………….…….……. C-344 Considerations for Changing Antenna Parameters……………..………….………………………… C-347 Appendix D Regional Notice: French Canadian Procédures de sécurité………………………………………………………………….………................... D-348 Installation sur pylône et mur.............……………………………………………….……………………. D-349 8 Netronics NetAstra Family System Manual Part 1 Basic Installation Netronics NetAstra Family System Manual 9 10 Netronics NetAstra Family System Manual Chapter 1 Introduction Welcome to NetAstra! NetAstra delivers up to 250 Mbps and is the ideal choice for last mile enterprise connectivity and high-end applications that demand assured performance with guaranteed bandwidth per subscriber. NetAstra sector access unit delivers up to 250 Mbps, providing the highest end user capacity in the market to best support data and high resolution video applications, today and tomorrow. By delivering high capacity over a single radio unit, Netronics solution saves valuable tower space, eases maintenance efforts and reduces the total cost of ownership per megabit. Offering a variety of powerful SUs, NetAstra enables service capacity of up to 100 Mbps for enterprise customers. NetAstra subscriber units may now be • Fixed - permanently installed at fixed locations • Nomadic - installed in a vehicle that may move from one base station to another. Service is provided when the vehicle is stationary • Mobile - installed in any kind of moving vehicle. Service is continuous and seamless from base stations in the network What’s new in Release 3.4.70 The main changes in LA release 3.4.70 since the last LA release 3.4.50 are: • • • • N SNMPv3 support HBS Throughput Mode may be changed from maximum (default) to a lower rate to minimize latency For each HSU, MIMO Mode may now be one of, Diversity (parallel identical streams), Spatial Multiplexing (split streams for maximum throughput) or Auto Selection. The mode is set at HSU registration or when using the HSU Update Service facility. Netronics NetAstra Family System Manual 11 Introduction Chapter 1 Key Features of NetAstra PtMP General • Ethernet connectivity • Advanced OFDM & MIMO 2x2 for nLOS performance • Enhanced interference mitigation capability • Inter & intra site sync to reduce self interference • Long range – up to 40 km/25 miles • Wide range of frequency bands - 2.3 - 2.7 GHz, 3.3-3.8 GHz, 4.9 -6.4 GHz • Dedicated Bandwidth ensuring SLA & latency • Low and constant latency – min < 3ms, typical 4 to 20 ms • Channel bandwidth – 5/10/20/40 MHz • Regulations supported - FCC/IC/ETSI/WPC/MII/Universal • Multiband HBSs and HSUs: 2.3-2.4 or 2.5-2.7 or 3.3-3.8 or 4.9-6.0 or 5.9-6.4 GHz in the same unit • Simple to deploy • Web Interface for sector management (both HBS and HSU) • SFP support when connecting to a IDU-DT6 in place of a PoE device Mobility Capabilities • Up to 100 Mbps per HBS sector and mobile unit • High speed - up to 200 Km/h • Long range coverage of up to 10 Km / 6 miles Base Station 12 • High capacity sector HBS • 250 Mbps aggregate throughput • Up to 32 Subscriber Units per HBS • Fully integrated with Netronics Legacy solutions: Coexist and HBS-collocatable with NetStream products Common Link Manager Common NMS • Smart Bandwidth Management (SBM) using dynamic bandwidth allocation to maximize service provider throughput and adhere to customer SLAs • Nomadic support (all HBSs) Netronics NetAstra Family System Manual Introduction • Chapter 1 Mobility support (Mobility HBSs only) Subscriber Units • High capacity: 5/10/25/50/100 Mbps aggregate throughput • Supports Customer SLAs by using SBM at the HBS • Fixed, nomadic, mobility types • Separate uplink and downlink configurable Maximum Information Rate (MIR) per HSU Components of NetAstra PtMP Sector Major Components A NetAstra Point to Multipoint Sector consists of an HBS equipped with a sector antenna, communicating with up to 32 HSUs located within the beam of its antenna. Figure 1-1: Sector Schematic: Main Components Both the HBS and the HSUs communicate respectively, with the service provider and users through PoE devices. The communication protocol for both the service provider and the users is Ethernet HBSs may be connected through IDU-DT6 aggregation units. Extended radial coverage can be achieved by setting up adjacent sectors using collocated HBSs. Netronics NetAstra Family System Manual 13 Introduction Chapter 1 Accessories To build a NetAstra PtMP sector you will require some of the following accessories: • PoE devices - Both Gigabit and 100 Mbps • HSS unit - Collocation unit for intra-site synchronization • IDU-DT6 Aggregation unit for a collocated hub site instead of multiple PoE devices • GSU for inter-site synchronization • Additional HSU types including AC powered units • Antennas - A wide variety of directional and sector antennas is available • ODU and antenna mounting kits • Lightning protector for use with all Ntronics outdoor products • Ethernet repeater - enables you to extend non-GbE PoE - ODU cables beyond the 100 m limit • CAT 5e cables of various lengths specifically for use with Netronics radios and PoE devices • Grounding cables Sector Management Tools Link Manager The Link Manager is an SNMP-based management application which manages a complete sector over a single IP address. It can also manage HSUs separately. The intuitive, easy-to-use Link Manager has a rich graphical user interface. The Web Interface enables you to carry out basic sector management functions using a Web browser. It is an easy way to rapidly configure and setup a link. It may be used to • Establish a sector on a minimal basis • Check link parameters and make basic changes • View the link Inventory • Inspect the Recent Events logs Full details are supplied in Chapter 20. Netronics Network Management System (NMS) The Netronics Network Management System enables Service Providers to manage all Netronics links in their network from a Network Operations Center (NOC). 1 Using NMS, Service Providers can configure and monitor up to 10,000 Netronics links . The intuitive easy-to-use NMS provides a full range of network surveillance, monitoring, configuration and fault management capabilities. It offers users complete visibility and control over their Netronics-based networks. 1. Depending on license type 14 Netronics NetAstra Family System Manual Introduction Chapter 1 Documentation supplied with NetAstra PtMP The technical documentation supplied with a NetAstra PtMP, is located on the product CD. It includes the following items: • A Quick Installation Guide for experienced installers (also hardcopy) • A full User Manual - the document which you are reading • A Help file accessible from the Link Manager • Link Budget Calculator Terminology • A Point to Multipoint network is typically abbreviated to PtMP. The PtMP networks described in this Manual are of course, radio links. • A PtMP link consists of at least one high Access Unit radio linked to several Subscriber Unit radios. The SUs are sometimes called Customer Premises Equipment (CPEs). The terminology comes from the field of telephony. • The NetAstra product suite supports considerably higher capacity than other current technologies (such as Wi-Max). We distinguish between generic AUs and SUs and NetAstra units, relabeling the latter, HBSs and HSUs (H = high capacity). • The radio links are effect by using a sector antenna with the HBS. The HSUs use directional antennas aligned to the HBS. • A Sector consists of a HBS and a group of HSUs within the angular sector covered by the HBS antenna. A Sector is typically 60° or 120° depending of course on the choice of antenna. • HBSs may be collocated to provide sectorial coverage up to 360°. • The RF characteristics of a Sector will be common to each radio: Frequency (regulation), band and channel bandwidth. Adjacent Sectors in a PtMP network will typically use different frequencies and non-overlapping bands to mitigate HBS self interference. • A HSU may be defined as fixed, nomadic or mobile. • A fixed HSU is just that - installed at a fixed location. • A nomadic HSU is attached to a vehicle that moves about within a sector and across sectors inside a well defined area. Service is provided when the vehicle is stationary. • A mobile HSU provides service while the vehicle to which it is attached is moving or stationary. The vehicle is typically a railway carriage or a ship. • Downlink traffic is data transfer from an HBS to an HSU. • Uplink traffic is data transfer from an HSU to an HBS. • Time slots are assigned to each HSU to prioritize them. 63 time slots are available in each of the uplink and downlink directions. Netronics NetAstra Family System Manual 15 Introduction • Chapter 1 For each fixed or nomadic HSU, Assured throughput is determined by the actual number of time slots allocated to it in either direction. Peak throughput (higher than Assured throughput) may be achieved by allocating unused downlink time slots or unallocated uplink time slots to very busy HSUs. This process is called Smart Bandwidth Management (SBM). SBM takes up one time slot in each direction. Conventions Used in this Manual Notifications Notifications consist of Notes, Cautions and Warnings. The purpose of a Note is to Note Caution Warning 16 • Draw your attention to something that may not be obvious or counterintuitive • Emphasize a special feature or peculiarity of the NetAstra • Offer an external reference for additional information • Add a caveat that would not qualify as a full Caution or Warning (see below) • Provide additional background to what follows • Offer a recommendation • Highlight an indication of something to watch out for • Advise you if an action has “side effects” i.e. it may disturb something else that would be best left undisturbed • Remind you of something that should be kept in mind A Caution is a notification of risk of damage to equipment or of service degradation A Warning is a notification of risk of danger to persons operating near the equipment Netronics NetAstra Family System Manual Introduction Chapter 1 Typographical conventions General Where a term is defined or introduced for the first time, it is shown in Boldface. You will have noticed this usage in the Terminology section above. Software The Link Manager is a Microsoft Windows application following the user interface conventions of familiar Microsoft Windows programs. Viewing and Printing This manual is optimized for viewing online as a PDF file. To this end it uses an 11 point Calibri typeface for main text. Tables for most part, use 7 or 8 point fonts. Here are a few pointers for hard-copy printing: • The text and table typefaces used are large enough to print the manual at two pages per sheet • For good legibility, use a commercial grade laser printer. A color printer is of course best, however a monochrome printer set to use gray-scale gives acceptable results Better quality ink jet printers also give good output • Netronics NetAstra Family System Manual 17 Chapter 2 Site Survey Planning the Sector Site Overview Sector site planning consists of a set of surveys, which must be carried out before any equipment is deployed. If for some reason, the outcome of any of these surveys is negative, HBS or HSU relocation will need to be considered. A Site Survey consists of three stages: • Preliminary survey - The proposed sector is analyzed in the office using a topographic map. You should use additional tools such as the Link Budget Calculator. • Physical survey - The locations of the indoor and outdoor equipment are determined on-site. • Radio Frequency (RF) survey - It is recommended that the installation area be scanned with a spectrum analyzer, to identify RF interference so as to determine a clear channel for radio installation (on-site). The Site Survey Introduction NetAstra PtMP wireless links must be planned before installation. The designated installation sites must be appraised to determine that the wireless system is able to operate efficiently and provide connectivity without signal degradation. NetAstra offers a wide operating frequency range. A free frequency channel must be determined within the operating range, for optimum performance. Recommended Equipment Stage 1: Preliminary Survey • Topological map of the area 18 • Urban map of the area • Compass • Link Budget Calculator Netronics NetAstra Family System Manual Site Survey Chapter 2 Stage 2: Physical Survey • 100 meter tape measure • Ohmmeter, to check ground connection • Binoculars • Map • Digital camera • Paper, pencil, and a clipboard • GPS device (optional) • Compass (optional) Stage 3: RF Survey • Spectrum Analyzer with Max Hold function and screen capture facility that can store multiple images, for documentation purposes • RF accessories (connectors and cables) • Communication devices (for example, cellular phones, or a set of walkie-talkies) Stage 1: Preliminary Survey A preliminary survey is necessary before visiting potential installation sites. As much detailed as possible should be obtained about the designated ODU installation sites and the area between them. To perform a preliminary survey: 1. Mark the designated installation sites on a topographic map of the area. 2. Measure the distance between the sites; check that it is within the specified range of the equipment. 3. On the urban map, check for developed areas situated between the installation sites. Pay attention to these areas when performing the physical site survey; there may be tall buildings, RF towers, or transmitters, which could cause interference to a sector. 4. Check the area between the two sites for obstructions such as: High ground - hills or mountains Lakes or large bodies of water. Water has a reflection effect on RF signals like a building. This type of reflection causes the received amplitude to be reduced. As a rule of thumb, the presence of a large body of water between sector sites may double the required antenna height. 5. Determine and record the compass bearings between HBS and HSU ODUs, relative to north. 6. If there are obstructions between the two sites, calculate the Fresnel Zone (see Chapter 18 for details). 7. If the sites chosen do not meet requirements, consider alternative sites. 8. Use the Link Budget Calculator (on the CD supplied with the equipment or using the Link Manager) to determine the expected performance. Netronics NetAstra Family System Manual 19 Site Survey Chapter 2 Stage 2: Physical Survey The physical site survey reviews the environment of the proposed installation location, to ensure that the sector sites are suitable for the wireless network. The results of the physical site survey should be recorded. Note It is advisable to go on a clear day, so you can more easily see any obstructions between the two sites. To perform a physical survey: 1. From the compass readings taken in the preliminary survey, find the azimuth (horizontal position) that each HSU ODU should face towards the HBS ODU. 2. Using binoculars, locate any obstructions such as tall trees, high buildings, hills or mountains. Look for other RF towers between the two sites. Mark the locations of the obstructions on the map. 3. Determine the location for the ODU (having regard for existing rooftop installations and tower space). It should be above any obstructions, considering the Fresnel zone (see Chapter 18). 4. If you need to install an ODU on a tower, make sure that the tower is far enough from overhead electric power lines. 5. Determine a location for the indoor equipment; it should be as close as possible to the ODU. At an existing site, there is probably an equipment room with cable-routing channels. Note Outdoor CAT-5e; Maximum cable length: 100 m for 10/100BaseT and 75 m for 1000BaseT (GbE PoEs) 6. Measure and record the path length of the cable from each ODU position to the indoor equipment room. 7. Determine the ground and lightning connection points of the installation. The ODU and PoE must both be grounded. 8. Using the Ohmmeter, measure and record the resistance of the required installation to the grounding point. The resistance must be less than 10 ohm. 9. Review the results of the physical site survey. Decide if the site is suitable for the wireless network installation. • If the site is suitable, continue with stage 3, the RF survey • If the site is not suitable, survey another site Additional Outdoor Site Requirements The ambient outdoor operating temperature should be -35 to 60°C (-31 to 140°F). 20 Netronics NetAstra Family System Manual Site Survey Chapter 2 Additional Indoor Site Requirements The ambient operating temperature should be 0 to 50°C (32 to 122 °F) at a humidity of up to 90%, non condensing. Stage 3: RF Survey The RF survey examines the wireless environment of the installation site, to determine whether there are available channels within the radio operating frequency band. An RF survey is performed using a spectrum analyzer. It is advisable to familiarize yourself with the spectrum analyzer before going out on site, specifically the Max Hold and Marker functions. You should perform the RF survey at each of the proposed sector sites. The survey should be carried out during a busy time of day, to best judge the worst-case radio interference. Allow 2-4 hours duration for a good RF survey. RF Planning for Dense Installations and Collocated Sites Interference may arise from • • Self-interference from collocated NetAstra radios Other collocated radio devices installed on the same site. To avoid or minimize interference, follow these recommendations: • For collocated NetAstra units, use an HSS unit to synchronize between them. Select different operating channels for each collocated NetAstra unit. • If one or more collocated units are not NetAstra units, ensure that there is a physical separation of at least three meters between a NetAstra unit and any other collocated radio on the site. • Use the largest possible frequency gap between these units • Choose the best frequency channel (as clear as possible from interference). You may be able to change the band used for the sector - depending on HBS model and regulations. • Decreasing the Tx Power of a sector will reduce collocation interference Note Use the Link Budget Calculator to determine the minimum Tx Power required to maintain sector stability. Netronics NetAstra Family System Manual 21 Chapter 3 Hardware Installation This chapter sets out the requirements and procedures for the hardware installation and alignment of a NetAstra link in accordance with the prior planning as set out in Chapter 2. It is intended to guide qualified field technicians. Outdoor units and antennas should be installed ONLY by experienced installation professionals who are familiar with local building and safety codes and, wherever applicable, are licensed by the appropriate government regulatory authorities. Failure to do so may expose the end user or the service provider to legal and financial liabilities. NetAstra and its resellers or distributors are not liable for injury, damage or violation of regulations associated with the installation of outdoor units or antennas. The material in this chapter is generic to all NetAstra radio link products unless stated otherwise. This chapter covers the following topics: • 22 Unpacking and checking supplied equipment: • Different ODU styles for HBSs and HSUs • PoE devices • IDU-DT6 aggregation unit • Antennas • Accessories • Tools required for installation • Safety practices • Mounting an ODU Netronics NetAstra Family System Manual Hardware Installation • Connecting an ODU • Grounding and lightning protection for an ODU • Network connection • Powering up • Establishing a radio link Chapter 3 What’s in the box Unpacking and Checking For each of the items below, do the following: 1. Remove the equipment from the box. 2. Check that everything listed on the included Bill of Materials or Pro-forma Invoice is present. 3. If any item is missing, contact Customer Service. You will be advised whether to return the package for replacement, or whether the missing item can be supplied separately. 4. Do not dispose of the packaging until the unit is installed and operational. Base Station Radios The NetAstra PtMP HBS package includes the following items: • One HBS - see the next figure for front and rear view Netronics NetAstra Family System Manual 23 Hardware Installation Chapter 3 Figure 3-1: Large HBS and HSU Form Factors • An HBS mounting kit • A CD containing • The Link Manager software • Quick Start Guide • User Manual - the document you are reading • Link Budget Calculator • A self-adhesive label showing the MAC address and the alternative Community string. You should keep this label in a safe place • Cable glands (to be used with the HBS-PoE cable) Subscriber Units The NetAstra PtMP HSU package includes the following items: • 24 One HSU - Large form factor as in Figure 3-1, small form factor as in Figure 3-2. Netronics NetAstra Family System Manual Hardware Installation Chapter 3 Figure 3-2: Small Form Factors HSU Further to Figure 3-2 above: • Integrated Antenna ODU This ODU has an integrated 370 mm (1.2 ft) flat panel antenna. The ODU contains both the radio and the antenna as a single unit housed in a weatherproof (IP67) case. • Connectorized ODU This ODU has 2xN-type connectors for connecting an external antenna • Small Form Factor HSU with AC power feeding This HSU has an integrated flat panel antenna. It has a direct AC power inlet, a LAN port and a PoE out port to connect to a powered device such as a video camera Figure 3-3: Small form factor HSU with AC power feeding • Embedded (Connectorized) ODU The Embedded ODU has two N-type connectors for an external antenna and a built-in low gain antenna. Netronics NetAstra Family System Manual 25 Hardware Installation Chapter 3 • A small form factor HSU mounting kit has a mounting kit adapter and two metal ties. • A CD containing • • • • • • The Link Manager software Quick Start Guide User Manual - the document you are reading Link Budget Calculator Label showing the MAC address and the alternative Community string. The label is selfadhesive. You should keep this label safe Cable glands (to be used with the HSU-PoE cable) Power Over Ethernet (PoE) Devices GbE PoE NetAstra’s Gigabit Power over Ethernet (GbE PoE) device provides data and power to NetAstra outdoor units. The PoE device is available with a variety of AC cables with different plug types. This is the recommended PoE device for use with HBSs and HSUs. The unit comes with a VAC cable. Both the cable length and plug are region dependent. Figure 3-4: GbE PoE device Outdoor (Ruggedized) DC PoE Device The Outdoor (Ruggedized) DC PoE Device may be used for both the HBS and the HSUs. It will not support Gigabit performance on the HBS. Two models are available using power input of 20 to 60 VDC or 10 to 30 VDC. The unit may be installed in a vehicle using respectively 24 VDC or 12 VDC power circuits. Figure 3-5: Ruggedized DC-PoE Device 26 Netronics NetAstra Family System Manual Hardware Installation Chapter 3 IDU-DT6 Aggregation Unit The IDU-DT6 provides aggregation for multiple Netronics ODUs and HBSs at a hub site. It supports all Netronics ODUs. It features • Six PoE ports (PoE legacy mode / Netronics PoE) • Up to 25 W per PoE port • 2 LAN Interfaces 10/100/1000 Mbps; auto-negotiation • SFP Interfaces: 2 x SFP ports of 1000 Mbps (standard MSA) It is 19” rack mounted, 1U and half width. Power feeding is 44 VDC – 56 VDC, Dual redundant inputs through standard IDU-NetStream RM type adapters. Figure 3-6: IDU-DT6 (formerly IDU-H) The IDU-DT6 package contains: • One IDU-DT6 • One short mounting ear • One long mounting ear • One dual connector to join two units mounted side by side • Two DC power plugs for power cables - see Figure 3-7 below Figure 3-7: DC three pin power plug The power connectors are 3 pin in line female, with polarities (left to right) minus, ground, plus. If required, an AC/DC power adapter should be ordered separately, depending on your region. The IDU-DT6 may be installed in single or double configurations: Netronics NetAstra Family System Manual 27 Hardware Installation Chapter 3 Figure 3-8: IDU-DT6 front view - single configuration Figure 3-9: IDU-DT6 front view - double configuration External Antennas HBS: Sector Antennas The HBS requires a dual pole sector antenna. Figure 3-10: External Antennas for HBS 60°, 90° or 120° flat panel HSU: Directional Antennas HSUs may use any suitable dual pole directional antenna. 28 Netronics NetAstra Family System Manual Hardware Installation Chapter 3 Figure 3-11: Flat Panel antenna - may be external or integrated Figure 3-12: Parabolic Dish external antenna Figure 3-13: Parabolic Grid external antenna Antenna Kits External antennas are available for the NetAstra PtMP radios, varying in operating frequencies, form factor, size and gain. Netronics NetAstra Family System Manual 29 Hardware Installation Chapter 3 See the Netronics products catalog for a more detailed offering of external antennas. External A typical antenna kit contains • An antenna • Two RF cables 1.2 m (4’) long • Mounting kit Accessories Hub Site Synchronization (HSS) Unit The HSS unit synchronizes collocated ODUs to prevent self interference. It is particularly useful at a multi-sector access unit employing several HBSs. A single HSS unit supports up to ten collocated ODUs. In addition to each unit being connected to its PoE device, the collocated unit has an additional cable that is connected to the HSS Unit. The HSS Unit is a compact, weatherproof (IP67) connector box that is installed on the same mast as the ODUs. All collocated units connect to this box using CAT-5e cable. Cables in prepared lengths are available for purchase. The HSS unit is supplied with ten protective covers; any port not in use must be closed with a protective cover. Figure 3-14: HSS Interconnection Unit See Chapter 11 for further details about the use of HSS. GSS-U The GPS-based synchronization unit (GSU) is designed to handle inter-site interferences under large-scale deployment scenarios. 30 Netronics NetAstra Family System Manual Hardware Installation Chapter 3 The GSS-U is an outdoor unit consisting of a standard NetStream 5x36 enclosure, a GPS antenna and a PoE device. The GSS-U is connected to the HSS Unit using a standard HSS cable. It synchronizes the transmission timing of multiple Hub-Sites to the same clock source thus eliminating self-interference (see Chapter 12). Figure 3-15: General GSU configuration Lightning Protection Devices The use of lightning protection is dependent on regulatory and end user requirements. The NetAstra PtMP ODU is designed with surge limiting circuits to minimize the risk of damage due to lightning strikes. It is designed for use with Netronics products. Figure 3-16: Netronics Lightning Protector The lightning protector incorporates high-power gas discharge tube and current transistor protection in a single protector unit. Technical specifications are shown in Appendix A. Ethernet cable Repeater The Netronics Ethernet repeater enables you to extend the PoE to ODU cable beyond the 100 m Netronics NetAstra Family System Manual 31 Hardware Installation Chapter 3 limit (but no more than 200 m). The unit looks physically like the lightning protection device in Figure 3-16. Its use is very simple as shown in the following schematic: Figure 3-17: Using an Ethernet repeater with lightning protectors The Ethernet repeater cannot be used with GbE IDU-ODU cables. Note Tools required for installation The following is a list of the equipment and materials required to install NetAstra PtMP hardware. Tools and Materials 32 • Crimping tool for RJ-45 (if the ODU-PoE cable is without connectors) • Spanner/wrench 13 mm (½”) • Drill (for wall mounting only) • Cable ties • Sealing material • Waterproofing tape such as Scotch 23 Tape ¾” wide, from 3M to ensure IP-67 compliant protection against water and dust Netronics NetAstra Family System Manual Hardware Installation Chapter 3 Cables and connectors • ODU grounding cable 10 AWG • ODU-PoE cable (outdoor class, CAT-5e, 4 twisted pairs, 24AWG): • Up to 100 m. for 100BaseT connection. • For a 1000BaseT connection (HBS only) use an ODU-PoE cable no longer than 75 m. For 1000BaseT, you should use Netronics supplied ODU-PoE cables, which guarantees 1 Gb performance. Netronics cannot guarantee 1 Gb performance if you use third party cables. • External CAT-5e cable diameter should be between 7-9 mm to ensure waterproof sealing. Safety Practices and Provisions Preventing Overexposure to RF Energy To protect against overexposure to RF energy, install the ODUs so as to provide and maintain minimal separation distances from all persons. When the system is operational, avoid standing directly in front of the antenna. Strong RF fields are present when the transmitter is on. The ODU must not be deployed in a location where it is possible for people to stand or walk inadvertently in front of the antenna. Grounding All Netronics products should be grounded during operation. In addition: • All ODUs should be earthed by a wire with diameter of at least 10 AWG. NetAstra PtMP ODUs must be properly grounded to protect against lightning. It is the user's responsibility to install the equipment in accordance with Section 810 of the National Electric Code, ANSI/NFPA No.70-1984 or Section 54 of the Canadian Electrical Code. These codes describe correct installation procedures for grounding outdoor units, masts, lead-in wiring and discharge units. It also lays down the size of grounding conductors and connection requirements for grounding electrodes. NetAstra PtMP ODUs must be grounded to a Protective Earth in accordance with the Local Electrical Regulations. • The earth lug on an IDU-DT6 should be connected to the protective earth at all times, by a wire with a diameter of 18 AWG or wider. Rack-mounted equipment should be mounted only in earthed racks and cabinets. Further, you should • Always make the ground connection first and disconnect it last • Never connect telecommunication cables to ungrounded equipment • Ensure that all other cables are disconnected before disconnecting the ground Netronics NetAstra Family System Manual 33 Hardware Installation Chapter 3 Protection Against Lightning The use of lightning protection is dependent on regulatory and end user requirements. All of Netronics outdoor units are designed with surge limiting circuits to minimize the risk of damage due to lightning strikes. Netronics recommends the use of additional surge arrestor devices to protect the equipment from nearby lightning strikes. General • It is recommended that installation of outdoor units be contracted to a professional installer • Before working on equipment connected to power lines or telecommunication lines, you should remove jewelry or any other metallic object that may come into contact with energized parts • Use extreme care when installing antennas near power lines • Use extreme care when working at heights • When using an AC power source for Netronics devices, always use the AC power adapter supplied by Netronics • Use the right tools! • Do not mount an ODU upside down or horizontally. Doing this may void you product warranty. Internal ESD Protection circuits Netronics equipment is designed to meet the ETSI/FCC/Aus/NZ/CSA EMC and Safety requirements. To fulfill these requirements, the system's Telecom lines at the ODU/PoE are Transformer-isolated and include internal ESD (Electro-Static-Discharge) Protection circuits. Regulatory Considerations for HSUs When installing an AC powered HSU: To maintain Overvoltage (Installation) Category II, install a suitable surge suppressor device in the branch circuit to limit expected transients to Overvoltage Category II values. The limits are based on IEC60664 and are also located in Table 2H of UL60950 (for mains ≤ 150 V, the transient rating is 1500 V; for 150 V < mains ≤ 300 V, the transient rating is 2500 V; and for 300 V < mains ≤ 600 V, the transient rating is 4000 V). 34 Netronics NetAstra Family System Manual Hardware Installation Chapter 3 For operation of the NetAstra SU 5xxx under FCC/IC Regulations: When operating the device with certain 29 dBi dish antennas, the Tx power may be no more than 23 dBm in the frequency channel 5845 MHz for 5 and 10 MHz channel bandwidth. Please check with Netronics Customer Service for antenna models subject to this requirement. All other frequencies may operate using maximum Tx power of 25 dBm. Hardware Installation Workflow for a NetAstra PtMP Sector Installing the Base Station Site Survey The Site Survey is carried out as described in Chapter 2. Recall that the Site Survey has three main steps: • Stage 1: Preliminary Survey • Stage 2: Physical Survey • Stage 3: RF Survey Site preparation Site Preparation includes • Obtaining any necessary legal and statutory permits for installation of radio equipment • Clearing physical obstructions as far as possible • Erecting a mast or tower if required. A mast-sited ODU typically uses a pole attached to the mast. • Installing a pole on a building wall if required • Constructing a weather-proof cabinet to house a PoE device if it is not to be housed indoors • Ensuring availability of power, typically standard local AC power • Ensuring that there is a LAN cable in place from the user’s switch to the PoE location Mounting the HBS Use a mounting kit to mount the HBS on a pole as shown in the following figures: Netronics NetAstra Family System Manual 35 Hardware Installation Chapter 3 Figure 3-18: Standard form factor Standard Mounting kit Figure 3-19: Large Clamp Figure 3-20: Small Clamp Figure 3-21: Arm Table 3-1: Bill of Materials: Standard mounting kit Item No. Description 1 Large Clamp (see Figure 3-19) 1 2 Small Clamp (see Figure 3-20) 1 3 Arm (see Figure 3-21) 1 4 Screw hex head M8x40 4 5 Screw hex head M8x70 2 6 Washer flat M8 4 7 Washer spring M8 3 8 M8 Nuts 2 36 Quantity Netronics NetAstra Family System Manual Hardware Installation Chapter 3 Figure 3-22: Attaching the mounting kit to the pole p Figure 3-23: Mounting kit in place on the pole • • • When mounting an HBS on a pole or wall, ensure that the unit is oriented so that the cable connectors are at the bottom. Do not mount an HBS horizontally Ensure that there are no direct obstructions in front of the HBS or interference from man-made obstacles. Netronics NetAstra Family System Manual 37 Hardware Installation Figure 3-24: Mounted connectorized HBS antenna Chapter 3 Figure 3-25: Mounted HBS: Integrated The purpose of the arm ( Figure 3-21), is to enable single-pole antennas (deprecated) to be rotated through 90° for correct vertical alignment or simply to distance the antenna or ODU from the pole. Mounting an HBS External Antenna The HBS requires a sector antenna. Typically, a flat panel antenna such as that show in Figure 3-10 is used. It has four bolts for a mounting kit adapter. Figure 3-26: Flat panel antenna mounting kit adapter It is mounted on a pole in exactly the same manner as the HBS itself using the adapter shown in Figure 3-26. The left hand view in shows the knurled surface adjacent to the mounting kit ear. The right hand view shows the recess for the mounting kit holding nut. 38 Netronics NetAstra Family System Manual Hardware Installation Chapter 3 Figure 3-27: Flat Panel antenna - rear with mounting kit adapter Figure 3-28: Flat Panel antenna - mounted Grounding an HBS external antenna External antennas should be individually grounded using a suitable Grounding Kit such as an Andrew Type 223158-2 ( http://www.commscope.com). Netronics NetAstra Family System Manual 39 Hardware Installation Chapter 3 Grounding the HBS There is a grounding lug on the rear of the HBS as shown in Figure 3-29. Connect it to ground using 10 AWG wire. Grounding is often carried out in conjunction with lightning protection. Figure 3-29: HBS: Grounding lug Installing a PoE device The PoE device (Figure 3-4) is a very simple piece of equipment. It has a recessed three pin AC power plug, a matching power cable, a LAN-In port (from a switch), a LAN-Out port (to the HBS) and a power LED, green under normal operation. It is typically strapped into a net-work equipment rack using plastic ties. It may also sit free on a tray or table-top. Connecting the HBS to the PoE device Connect the HBS to the LAN-Out port only. It will not work on the LAN-In port. Connecting the PoE Device to a Network Connect the PoE to network equipment such as a switch from the LAN-In port. Connecting network equipment to the LAN-Out port may damage it. Powering up the HBS from a Poe Device Connecting the HBS port labelled IDU to a powered up PoE is sufficient. If you have not already closed and weather-sealed the HBS IDU port, then inside it you can see an amber colored power LED which turn green when the HBS is activated. (See Chapter 4.) Mounting the Lightning Protection Units The use of lightning protection is dependent on regulatory and end user requirements. The NetAstra PtMP ODU is designed with surge limiting circuits to minimize the risk of damage due to lightning strikes. Netronics recommends the use of additional surge arrestor devices to protect the equipment from nearby lightning strikes. In what follows, ODU may be any type of Netronics outdoor radio unit and IDU may be any type of Netronics IDU used with such products (PoEs, IDU-DT6, etc). 40 Netronics NetAstra Family System Manual Hardware Installation Chapter 3 Figure 3-30: Netronics Lightning Protection Kit Table 3-2: LPU Kit contents Item Quantity LPU (shown wrapped) 1 U wall clamp 1 RJ-45 connectors (shown wrapped) 2 0.5m CAT-5e cable 1 View/Remarks Netronics NetAstra Family System Manual 41 Hardware Installation Chapter 3 Table 3-2: LPU Kit contents (Continued) Item Quantity Metal tie 1 Quick Installation Guide 1 View/Remarks Pamphlet For any type of IDU-ODU connection, lightning protection units (LPUs) are installed in pairs, as shown in the next figure: Figure 3-31: Basic use of lightning protectors 42 Netronics NetAstra Family System Manual Hardware Installation Chapter 3 To install a LPU on a pole adjacent to an ODU (HBS or HSU): 1. Mount one LPU on the ODU pole, as close as possible to the ODU. 2. Ground the LPU to the pole using the grounding lug. 3. Connect the 0.5 meter CAT-5e cable to the IDU port of the ODU. 4. Connect the other end of the cable to the top of the LPU. 5. Tighten the top cable LPU gland cap. 6. Connect the main ODUIDU cable from the IDU to the bottom end of the LPU. 7. Tighten the bottom cable LPU gland cap. 8. Run the main ODU-IDU cable towards the IDU location. 9. Insulate both LPU connections. See the next section, Additional Consideration for Waterproofing below. To install a LPU on a wall adjacent to an IDU (PoE or IDU-DT6): 1. Use the supplied wall clamp to mount the second LPU as close as possible to the indoor access point to the IDU. 2. Ground the LPU to an earth strip using the grounding lug. 3. Remove the top cable LPU gland cap together with the rubber sealing tube. 4. Thread the IDU cable from the upper LPU, through the removed cap from the previous step. 5. Plug it in to the top of the LPU. 6. Screw down and tighten the LPU cap. Netronics NetAstra Family System Manual 43 Hardware Installation Chapter 3 7. Connect the 0.5 m CAT-5e cable to the Bottom of the LPU. 8. Connect the other end (via the indoor access point) to the IDU. 9. Insulate both LPU connections. See the next section, Additional Consideration for Waterproofing below. Additional Consideration for Waterproofing Lightning Protectors and Ethernet Repeaters If these units are installed at locations heavily exposed to heavy dust, rain or corrosive moisture (for example, close to the sea), you should protect them further as in the following procedure. In the remainder of this section, “unit” refers to either a Lightning Protection Unit or a Repeater. To seal a unit against excessive dust and moisture: 1. Obtain a high quality sealing material such as Scotch 23 Tape ¾” wide, from 3M to ensure IP-67 compliant protection against water and dust. 2. Cut two pieces each 25 cm long, of Scotch 23 splicing tape. Remove the plastic cover to expose the tacky side of the sealing tape as shown in Figure 3-32. Figure 3-32: Exposing the tack side of the sealing tape 3. After connecting the short CAT-5 IDU/ODU cable (provided in the box) from the ODU to the unit, tighten the cable gland cap firmly and use the insulation tape scotch 23 to fully cover both of the cable glands. 4. Connect the tape with tacky side up on the cable gland cap and the CAT-5 cable. Start at Start Point at the bottom of the cable gland as shown in Figure 3-33. Finish at End Point of the CAT-5 cable, 2.5cm after the end of the shrink tubing. Stretch the tape and apply halfoverlapped to form gap-free joint. 44 Netronics NetAstra Family System Manual Hardware Installation Chapter 3 Figure 3-33: Start and End points for protective-taping the unit 5. Wrap two layers of any scotch vinyl plastic electrical type (e.g Scotch Super 88 Vinyl Plastic Tape from 3M) to protect the joints as shown in Figure 3-34. Ensure that the bottom of the cable gland and the end of the CAT-5 cable are covered with the sealing splicing tape and with vinyl plastic tape. Figure 3-34: Protecting the unit joints with vinyl tape Netronics NetAstra Family System Manual 45 Hardware Installation Chapter 3 6. Mount the unit on the pole using the mounting ring as shown in Figure 3-35. Ground the unit using the GND screw. For lightning protection, repeat the same procedure to install the second unit connected to the IDU. Figure 3-35: Mounted and strapped to the pole External Ports for CAT-5e Cables All external HBS ports should be water sealed. Use the same materials and method as for the LPU cable glands. The IDU-DT6: A Base Station Alternative to PoE Devices Using an IDU-DT6 instead of several PoE devices The IDU-DT6 is an aggregation switch with the functionality of six PoE devices. It is ideal for use at a base station having several collocated HSUs or NetAstra PtMP radios. Figure 3-36: IDU-DT6 46 Netronics NetAstra Family System Manual Hardware Installation Chapter 3 Installing an IDU-DT6 The IDU-DT6 can sit on a table top, but is best installed in a rack using the supplied ears as in Figure 3-8 and Figure 3-9. Connecting the HBS to an IDU-DT6 Connect the HBS IDU port to any of the six PoE ports of the IDU-DT6. Connecting the IDU-DT6 device to a network The IDU-DT6 has two LAN ports, either of which may be used for network connection. Grounding and Powering Up the IDU-DT6 The IDU-DT6 has redundant power connection circuits. An enlarged view of the power connectors is shown in below: Figure 3-37: IDU-DT6 power connectors, grounding lug and power plug. • For direct DC connection: The connectors are 3 pin in line female, with polarities (left to right) minus, ground, plus. • For AC connection: To avoid damage to the IDU-DT6, always use an AC/DC adapter and power plug supplied by Netronics. Ground the unit with a 10 AWG wire before applying power. IDU-DT6 - Functional Overview Figure 3-38: IDU-DT6 front panel Netronics NetAstra Family System Manual 47 Hardware Installation Chapter 3 The front panel is very straight forward: The SFP ports are standard. The LAN ports are Ethernet and support GbE. The six ODU WAN ports function identically to the LAN-Out port on a PoE device. The IDU-DT6 LEDs Table 3-3: IDU-DT6 LED Indicators Port Green Yellow WAN (2xRJ45 LEDs) Link / Activity Duplex or Port’s PoE status (configurable) LAN (2xRJ45 LEDs) Link / Activity Duplex SFP (2 panel mounted LEDs) Link / Activity Duplex Installing Fixed Subscriber Units Site survey The same considerations as for an HBS hold for the HSUs. Site preparation The same considerations as for an HBS hold for the HSUs. Mounting the HSU Standard form factor HSUs are mounted in exactly the same way as an HBS. Small form factor HSUs are different: A small form factor HSU mounting kit has a mounting kit adapter and two metal ties: Figure 3-39: Small form factor HSU - Rear, metal tie The mounting ties are threaded through the mounting slots provided and the unit mounted on a pole. Figure 3-40: Mounting adapter 48 Netronics NetAstra Family System Manual Hardware Installation Chapter 3 Table 3-4: Mounting adapter kit for small form factor HSUs Item Description Quantity No. 1 Metal ties 2 2 Mounting adapter 1 3 Screw M5x10, CSK, Phillips, stainless steel 2 The mounting adapter is used with the standard mounting kit shown in Figure 3-18. It is not included in the HSU package and must be ordered separately. To mount the small form factor HSU using a mounting kit: 1. Referring to Figure 3-41 below: Secure the adapter (3) to the rear of the HSU (2) using the two screws provided (4). Use a Phillips screwdriver set to a torque of 2.0 NM. Figure 3-41: Securing the mounting adapter 2. Referring to Figure 3-42 below: Attach the ODU mounting kit (1) to the mounting adapter ear (4) and proceed as above, for a standard ODU. Figure 3-42: Attaching a standard mounting kit Netronics NetAstra Family System Manual 49 Hardware Installation Chapter 3 • • • • When mounting an HSU on a pole or wall, ensure that the unit is oriented so that the cable connectors are at the bottom. Do not mount an HSU horizontally For an HSU with an integrated antenna: Do not tighten the HSUto its mounting bracket until the antenna alignment process is complete. Ensure that there are no direct obstructions in front of the HSU or interference from man-made obstacles. Mounting an HSU external antenna Many of the antennas of the types shown in Figure 3-11 to Figure 3-13 use the standard mounting kit of Figure 3-18. Some third party antennas use pole clamps, similar to those shown below: Figure 3-43: Pole clamps for external antennas Do not stand in front of a live antenna. Grounding an HSU external antenna External antennas should be individually grounded using a suitable Grounding Kit such as an Andrew Type 223158-2 ( http://www.commscope.com). The same considerations as for the HBS antennas apply here. Grounding the HSU All HSUs have a grounding lug as shown in Figure 3-44. Connect it to ground using 10 AWG wire. Grounding is often carried out in conjunction with lightning protection. 50 Netronics NetAstra Family System Manual Hardware Installation Chapter 3 Figure 3-44: HSU: Grounding lug standard and small form factor Using AC Powered HSUs The AC HSU has an integrated flat panel antenna. It has a direct AC power inlet, a LAN port and a PoE out port to connect to a powered device such as a video camera. Figure 3-45: Small form factor HSU with AC power feeding It is mounted and grounded like any other small form factor HSU. Installing a PoE device The same considerations as for an HBS hold for the HSUs. Connecting the HSU to the Network The same considerations as for an HBS hold for the HSUs. Powering up the HSU from a PoE device The same considerations as for an HBS hold for the HSUs. Netronics NetAstra Family System Manual 51 Hardware Installation Chapter 3 Establishing a Radio Link - Aligning HSUs to a HBS Use the HSUs buzzer to perform HSU antenna alignment to a HBS. To align an HSU to its HBS: 1. Ensure that the sector antenna of the HBS is aligned precisely to the sector it is intended to cover. Use a compass and topographical maps to do this. 2. For both the HBS and HSUs: Using a coax cable with N-Type connectors, connect the vertical polarization connector of the antenna to the ANT 1 connector of the ODU. Then, using a second coax cable with N-Type connectors, connect the horizontal polarization connector of the antenna to the ANT 2 connector of the ODU. There is no particular reason to use ANT 1 and ANT 2 in that order: They just have to be the same for each ODU in the sector. Further, adopting a convention like "ANT 1 is always vertical" avoids mistakes across a large sector. 3. Ensure that power is connected to the site PoEs across the sector. An unaligned HSU starts beeping 20 seconds after power up, and continues beeping until it is aligned to the HBS. The alignment details are described in the next two steps. “Antenna” refers both to an external antenna and an integrated antenna. The two steps should be carried out for each HSU in the sector. 4. Make a horizontal sweep of 180 degrees with the HSU antenna so that the strongest signal from the HBS can be detected. 5. Slowly turn the HSU antenna back towards the position of the HBS, listening to the tone until the best signal is reached. See the following figure for audible signal variations. Figure 3-46: Beep Sequence for antenna alignment • • • • • • 52 Three beeps and a pause is 'best signal so far' Two beeps and a pause is 'signal quality increased' One beep and pause is 'no change in signal' Long beep and short pause is 'signal quality decreased' One beep and a long pause is 'no air link' Any other signal does not relate to antenna alignment Netronics NetAstra Family System Manual Hardware Installation Chapter 3 6. Secure the HSU antenna to the pole/wall. Note The HSU beeping will stop completely when it is configured using the Link Manager. It may also be unconditionally switched off from the Manager. Connecting user equipment Typical user equipment includes switches and video cameras. Before connecting user equipment to the HSU through the LAN-In port of the PoE device, ensure that it powered down. If you are using an AC HSU, you may use the PoE Out port to connect and power a video camera. Follow your camera manufacturer’s instructions scrupulously to avoid damage to your equipment. Mounting lightning protection devices The same considerations as for an HBS hold for the HSUs. Additional consideration for waterproofing Lightning Protectors and Ethernet Repeaters The same considerations as for an HBS hold for the HSUs. External Ports for CAT-5e Cables The same considerations as for an HBS hold for the HSUs. HSU AC Power ports They should also we waterproofed in the same manner as the other ports. Netronics NetAstra Family System Manual 53 Part 2 Sector Installation 54 Netronics NetAstra Family System Manual Netronics NetAstra Family System Manual 55 Chapter 4 Getting started with the Link Manager What we will do here This chapter is a quick “hands-on” tour of a running sector. We show you how to install the Link Manager software on your managing PC, connect it to an operating access unit and then log on. We then explain the use of the various objects on the Link Manager main window. The background acquired here will enable you to understand the direction and purpose of the detailed procedures (described in later chapters), required to build a NetAstra sector from the ground up. Installing the Link Manager Application Minimum System Requirements The Link Manager application is distributed on a CD. Operating system specific PC resources required by the application are set out in Table 4-1 below: Table 4-1: PC Requirements for the Link Manager Application Windows Version Vista/7 XP Pro 32 bit Memory 512 Mb Processor P IV 1 Gb 64 bit 2 Gb P IV Dual Core Requirements common to all systems are: 56 • Hard disk: 1 GB free space • Network: 10/100BaseT NIC • Graphics: 1024x768 screen resolution with 16 bit color Netronics NetAstra Family System Manual Getting Started with Link Manager • Chapter 4 Any modern Web browser to view additional material, use the Web Interface or get help from the Netronics Web site. Installing the Software Any PC running the Link Manager application can be used to configure a NetAstra PtMP sector. To install the Link Manager application: 1. Insert the CD into the CD/DVD drive of your computer. 2. Choose Install Link Manager and follow the on-screen instructions of the installation wizard to complete the setup of the Link Manager application. If the installation program fails to start, browse to your CD/DVD drive, chose the setup.exe program and run it. Getting Started with the Link Manager We will look at a pre-configured fixed sector, setup as follows: Table 4-2: Preconfigured setup – HBS Location HBS.01 Attribute Value Remark IP Address 10.104.50.200 Net Mask 255.255.0.0 Default Gateway 10.104.10.21 Sector ID EBGX20560334 Inherited by all communicating fixed HSUs. Network ID EBX Inherited by all communicating nomadic HSUs. Protocol SNMPv1 Can be set to SNMPv3 or both v1 and v3 Contact Bach Optional Name [email protected] Location of Contact - optional Band 5.730 - 5.845 GHz FCC/IC Inherited by all communicating HSUs Channel Bandwidth 20MHz Inherited by all communicating HSUs Unit Serial Number PET540E0A000 All communicating HSUs and HBS in the same subnet Geographic location Latitude -37.8148 Longitude 144.9630 Azimuth (deg) 0 Beam width (deg) 90 Antenna height (m) 130 Netronics NetAstra Family System Manual Used for initial default placement of HSUs From RF plan, not used 57 Getting Started with Link Manager Chapter 4 Table 4-3: Preconfigured setup - fixed HSUs Location HFU.01.01 Attribute Value IP Address 10.104.50.1 Net Mask 255.255.0.0 Default Gateway 10.104.10.21 Protocol SNMPv1 Can be set to SNMPv3 or both v1 and v3 Contact Haydn Optional Name [email protected] Location of Contact - optional Time Slots Unit Serial Number Remark All communicating HSUs and HBS in the same subnet Downlink 8 Uplink 2 May vary with context PIN580I500A00004 Geographic location Latitude -37.8762 Longitude 145.0437 Antenna height (m) 10 HFU.01.02 From RF plan, not used IP Address 10.104.50.2 Net Mask 255.255.0.0 Default Gateway 10.104.10.21 Protocol SNMPv1 Can be set to SNMPv3 or both v1 and v3 Contact Mozart Optional Name [email protected] Location of Contact - optional Time Slots Unit Serial Number All communicating HSUs and HBS in the same subnet Downlink 8 Uplink 2 May vary with context PIN580I500A00005 Geographic location Latitude -37.4018 Longitude 145.0086 Antenna height (m) 60 From RF plan, not used Table 4-4: Preconfigured setup - Level allocation for maximum nomadic HSUs Level Time Sots Number of nomadic HSUs Downlink A 2 6 2 B 1 4 2 C 1 4 2 D 0 0 0 58 Remark Uplink Includes HNU.0.01 below Netronics NetAstra Family System Manual Getting Started with Link Manager Chapter 4 Table 4-5: Preconfigured setup - One actual nomadic HSU Location HNU.01.01 Attribute Value IP Address 10.104.50.3 Net Mask 255.255.0.0 Default Gateway 10.104.10.21 Protocol SNMPv1 Can be set to SNMPv3 or both v1 and v3 Contact Brahms Optional Name [email protected] Location of Contact - optional Level A Time Slots Unit Serial Number Remark All communicating HSUs and HBS in the same subnet Downlink 6 Uplink 2 Included in previous table PIN580I500A00003 We have add place-holders for a further three nomadic HSUs. That is, up to four vehicles equipped to work in this way, may operate simultaneously in the sector. Choose your unit locations carefully. For example, for three collocated HBSs each with 32 HSUs covering 360°, matters get out of hand very quickly if units are poorly named. They can always be identified by their IP addresses, but that is a poor substitute for effective naming. A URL-like naming pattern based on HBS_n.HSU_y is clear and familiar to Internet users. Keeping the names IP address independent enables you to copy the entire sector setup to a different geographic location without IP address duplication. To start the Link Manager: 1. Connect the managing computer to the HBS PoE LAN port. 2. Check that you have connectivity to the HBS ODU. You can do this by opening up a command line session (Start|Run and then type, cmd). At the command prompt, type ping 10.104.50.200 You should see something like this: Netronics NetAstra Family System Manual 59 Getting Started with Link Manager Chapter 4 Figure 4-1: Pinging the base station. Any other response from ping means that the HBS ODU is not responding. Check your Ethernet connection and that both the PoE and ODU are switched on and then try again. If you do not succeed, seek assistance from Netronics Customer Support. Pinging the HSUs should yield similar responses. 3. Dismiss the command line session. 4. Open the Link Manager from the desktop icon, or click Start|Programs|Link Manager|Link Manager. The Log-on dialog box appears. Figure 4-2: Log-on window The Link Manager Log-on Concept NetAstra PtMP supports SNMPv1 and SNMPv3 either separately or together. The log-on procedure differs slightly between operation under SNMPv1 and SNMPv3. In what follows below, we assume that SNMPv1 is in use. In Table 4-6 at end of the section, we show the difference between SNMPv1 and SNMPv3 at log-on time The Link Manager provides three levels of access in one of two entry modes. To see them, click Options at any time in the Log on window (Figure 4-2 above). You are offered an extended log-on window: 60 Netronics NetAstra Family System Manual Getting Started with Link Manager Chapter 4 Figure 4-3: Extended log-on window At the User Type field, click the list button: Figure 4-4: Log on window exposing the user types. There are three user types: • An Observer has read-only access to the sector. An Observer can monitor the sector, generate reports, but may not change any sector parameters. • An Operator can install and configure the sector. • An Installer can, in addition to functioning as an Operator, also change the operating frequency band (or regulation). The latter function has legal ramifications, requiring familiarity with local regulations. If you are using Trap Authentication, enter the User and Password. Leaving these fields blank or incorrect, will not prevent you from logging on. You will not be able to see trap messages directed to the trap message address associated with a defined user. The allocation and association of a trap Netronics NetAstra Family System Manual 61 Getting Started with Link Manager Chapter 4 address with a user is described in Chapter 6, Management. The following table summarizes these options: Table 4-6: User types, default passwords and function SNMPv1 User Type Default Password Function Observer adm in Operator Installer SNMPv3 Community Community String Password Default Value Monitoring Read-Only public Read-Only public adm in Installation, configuration Read-Write netman Read-Write netman w ireless Operator plus set-band Read-Write netman Read-Write netman The Network Manager should change the default passwords as soon as possible, particularly if SNMPv3 is to be used. Continuing the log-on procedure: 5. If your User Type is not Operator, then choose it now. 6. Enter the password. 7. If you are a user with Read-Write permission, click Options to enter the Community options if required. • Note • Leave the default Community passwords, netman for read-write, and public for read-only. If you are a user with read-only permission, then you may only log on as Observer. Log-on Errors and Cautions Unsupported Device Attempting to connect to an unsupported device on an otherwise valid IP address (for example, a LAN printer) will result in the following error message: Figure 4-5: Unsupported device message 62 Netronics NetAstra Family System Manual Getting Started with Link Manager Chapter 4 Incorrect IP Address If the IP address chosen is invalid or the sector is unreachable, the following error message will be displayed: Figure 4-6: Unreachable device message Incorrect Password If you type an incorrect password in the Login window, the follwing message will be displayed: Figure 4-7: Invalid user type or password Invalid Read/Write Community String This will result in the same message as shown in Figure 4-6. 8. Send an email request for to Netronics Customer Support for an alternative key. Your email must include the ODU serial number shown on the adhesive sticker on rear of one of your ODUs. Four Sector Display Views Table View The Link Manager offers three sector display views. The default view for a freshly installed sector is Table view and looks like this: Netronics NetAstra Family System Manual 63 Getting Started with Link Manager Chapter 4 Figure 4-8: Default Sector display - Table view What’s on the Cards - Table View The individual HSU display boxes are called cards. They are used with small variations in the Table and Map views. FIXED HSU NOMADIC HSU NOMADIC HSU PLACEHOLDER Figure 4-9: HSU Cards The card title bar holds as much of the HSU name as fits. • 64 The IP (address) and Loc(ation) are as defined by you during Configuration or Registration Netronics NetAstra Family System Manual Getting Started with Link Manager Chapter 4 • The RSS for the HSU and HBS are shown as bar graphs for convenience. They should be balanced. If for one HSU there is a consistent imbalance of even 1 dBM or intermittent imbalances of 2-3 dBm you should check its antenna connections and perhaps the unit itself. If several HSUs are out of balance, there may be a problem with the HBS. • The Level in the nomadic HSU: There are four allowed levels (A to D) allowing a measure of prioritization of nomadic HSUs. We will see how this is done on page 117. • Downlink and Uplink throughput: The green part of each bar shows the Assured throughput based on the number of time slots allocated to the HSU subject to the current sector traffic load. The light blue bar show the Peak throughput, again subject to traffic conditions. The peak throughput may exceed the assured throughput due to the operation of Smart Bandwidth Management (SBM), discussed in detail in Chapter 8. • The Rx and Tx rates at the bottom of the card are the Ethernet receive and transmit rates for the HSU • The little ball on the top left of each card is a status light, which will be explained in Table 4-11 below. Map View If you have an Internet connection, you may use Map view. The map view uses distinctive icons to distinguish between different types of HSUs and the HBS: HBS fixed HSU nomadic HSU HMU Figure 4-10: Map view icons The green "beacon" light on top of the icons changes color according to the unit's status. The below color codes are defined in Table 4-11. The default Link Manager main window looks like this: Netronics NetAstra Family System Manual 65 Getting Started with Link Manager Chapter 4 Figure 4-11: Sector display – Deafult Map view A new sector with default values for element map coordinates is shown centred on Greenwich (Figure 4-11). The sector is centered on the HBS azimuth (configurable). The HSUs distributed evenly within the sector beam width (configurable) without regard for geographic considerations. If you do not have an Internet connection, the display background will be solid gray. For this demonstration, we use a sector centered on Melbourne, Australia. The location of the HBS and two fixed HSUs is based on a Radio Plan shown in Table 4-7. The nomadic HSUs, having no predefined coordinates are “in the middle of nowhere”. Later we show you how to change the positions of the HSU icons on the map. List View The third sector display type is List view. It looks like this: 66 Netronics NetAstra Family System Manual Getting Started with Link Manager Chapter 4 Figure 4-12: Sector display - List view At the bottom of the HSU display panel, there is a thin horizontal scroll bar. Use it to see further details about the displayed HSUs. The Index and Name fields are protected so you always know to which HSUs the data belongs. The status indicator ball has the same meaning as it does for the HSU cards and map icons. For details, see Table 4-11 below. Utilization View The Utilization view shows how sector resources are allocated between HSUs. It is particularly important since the SBM mechanism can temporarily assign unused downlink time slots to a very busy HSU. It can also temporarily assign unallocated uplink time slots for the same purpose. Netronics NetAstra Family System Manual 67 Getting Started with Link Manager Chapter 4 Figure 4-13: Default Sector display - Utilization view The elements of the Utilization view are explained in detail in Chapter 8 where SBM is discussed. Switching Between Views To switch between displays: • Click the relevant tab. From left to right, the tabs are: Map view, Table view, List view and Utilization view. The active tab (Table view in the illustration) is shown enlarged. Display View Persistence The last display view used will be that opened at your next restart or log on to theLink Manager. 68 Netronics NetAstra Family System Manual Getting Started with Link Manager Chapter 4 Which Display View Should I Use? Your preferred view is clearly application dependent. For a geographically localized sector - say, video surveillance of a plant or a sports center with a small number of cameras, Table or List view might be adequate. Our own example is based on a backhaul situation for which the Maps view is very helpful. Continuing with our Example Sector Using the Map View To set up a new sector or to carry out substantial changes to an existing sector, you should have a Radio Plan from your Site Survey. The minimum requirement is a list of locations and their coordinates. Here is our plan extracted from Table 4-2: Table 4-7: Radio Plan for a small sector Unit Type Site Name Latitude Longitude Antenna height (m) fixed HSU [email protected] -37.4018 145.0086 60 fixed HSU [email protected] -37.8762 145.0437 10 nomadic HSU [email protected] n/a n/a n/a HBS [email protected] -37.8148 144.9630 130 A plan of this type may be prepared by hand, or by using a suitable Radio Planning tool. The method used here allowed us to specify antenna height as well so as to guarantee LOS. While it is not of direct use in what follows, antenna height is required to carry out physical installation as set out in Chapter 3. To relocate a HBS or HSU by setting latitude and longitude coordinates: 1. Right click the HBS ([email protected]) to open its Context menu and then Configure. 2. Click the Coordinates button to open the Coordinates window and enter the required latitude and longitude. Netronics NetAstra Family System Manual 69 Getting Started with Link Manager Chapter 4 You may enter the coordinates in decimal or degrees/minutes/seconds using the input template shown below: 3. HBS only: The Azimuth and Beam Width determine the sector center-line direction and angle. They are only used for initial default distribution of HSUs on the map. 4. Click OK. The unit is moved to the new location (possibly off-screen). 5. Repeat the previous four steps for each HSU in the sector. If at the end of the process, the HBS is off-screen, click the Center on Sector button to “fly” to the sector. Using the example in Table 4-7, here is the outcome: We have located the entire sector to Melbourne, Australia in accordance with our Radio Plan. The grey lines and icons are pre-registered place-holders for additional nomadic HSUs. 70 Netronics NetAstra Family System Manual Getting Started with Link Manager Chapter 4 You can make manual location adjustments using the GUI. To relocate a HBS or HSU using the GUI: 1. Select the unit to move by clicking it. It is surrounded by a brown box. 2. Mouse-over the top edge of the box to get a context button bar as shown in. Figure 4-14: Selected HBS or HSU with context button bar The functions of three buttons (from left to right) are as follows: Table 4-8: Unit Context Button bar functions • Button Tool tip Purpose Left Show/Hide details Show/Hide the status window Center Unlock / Lock Item Unlock to drag on map, lock to secure position Right Zoom in Show more background detail. Also displays the unit a status window if not already visible You can also zoom in/out using the mouse scroll wheel in the standard way The left details button opens a card, similar to those in Figure 4-9: HBS NOMADIC HSU Figure 4-15: Map Cards Netronics NetAstra Family System Manual FIXED FIXED 71 Getting Started with Link Manager Chapter 4 Unlike the Table View cards, the status indicator is on the icon itself. 3. Click the Unlock button. Drag the tower icon to its new location. You must confirm the change: The change is then carried out. Note The foregoing change confirmation is important: There is no “undo” function. If you inadvertently move the unit to a wrong place, you will have to restore its position by hand. Exploring the Link Manager Main Window - HBS The following sections describe the panels of main window shown in Figure 4-8. HBS Main Button Menu Figure 4-16: HBS main button menu Table 4-9: HBS main button bar functions Menu Item Purpose Reference Monitor - File location, interval and throughput units page 86 Events - Color coding for events log and events log file location page 87 Advanced - Enable/disable check for updates, monitoring interval and timeout page 88 Software Upgrade Perform software upgrade for a sector Chapter 13 Get Diagnostics Run and store diagnostics for all or some members of a sector Chapter 10 Log Off Return to log-on window Preferences Link Budget Calculator Help side arrow Chapter 18 Check Updates About Help Button 72 View this User Manual Netronics NetAstra Family System Manual Getting Started with Link Manager Chapter 4 Sector Status Panel The sector level information is shown here. There is nothing that can be changed for an active sector. The parameters are set before the access unit is activated and are duplicated for each HSU in the sector. Figure 4-17: Sector Status panel The last two items are of special interest: The Status (shown as Active) indicates whether the HBS has been activated or not. The Time Slots bars indicate how many out of 63 time slots in uplink and downlink directions, have been allocated to HSUs. Allocation of time slots between HSUs provides a basic form of prioritization between them. Normally you would not leave unallocated time slots unless you intended to add more HSUs. Every HSU requires at least one time slot. Time slot allocation is closely related to SBM performance detailed in Chapter 8. Base Station Panel The displayed items in the Access unit panel are straight forward. Figure 4-18: Access unit detail Panel The Tx Ratio shows the allocation of throughput between downlink and uplink traffic at the HBS. Here it is set to 70% downlink and 30% uplink. The Tx Ratio is not only sector-wide: If you use HSS (Chapter 11) to collocated several HBSs (to cover adjacent sectors), they must all use the same Tx Ratio. Netronics NetAstra Family System Manual 73 Getting Started with Link Manager Chapter 4 The Rx Rate and Tx Rate are the traffic receive and transmit rates through the HBS under load. The button bar provides the necessary functionality to configure and manage the HBS. Table 4-10: HBS Detail Panel button bar functions Menu Icon Purpose Reference HBS Configuration Chapter 6 Recent Events Log page 219 Performance Monitor page 221 Active Alarms page 227 Spectrum View Chapter 19 page 217 page 164 page 148 page 120 a. Installer only The foregoing description relates to an activated HBS. The Detail Panel title bar for an inactive HBS looks like this: Clicking the Activate button initiates an activation Wizard. The Activate button in the title bar is hidden, leaving it looking like this: The Activation process is covered in detail in Chapter 5. At any time, the current status of the HBS is shown in the Sector Status Panel, Figure 4-17. 74 Netronics NetAstra Family System Manual Getting Started with Link Manager Chapter 4 HBS Events Log The Events Log records system failures, loss of synchronization, loss of signal, compatibility problems and other fault conditions and events. Note The foregoing event types include events from all links for which this managing computer has been defined as the traps address. Only events from Netronics equipment will be shown. Alarms (traps) are displayed in the Events Log in the lower panel of the main window. The Events Log may be saved as a text file. The Events Log includes the following fields: • Sequential number (ID) Date • and time stamp Message • Trap source • IP address of the ODU that initiated alarm. For complete information about internal traps and alarms see Chapter 10. The events are displayed in the Events Log in the lower right-hand panel of the Link Manager main window: Figure 4-19: Events Log panel The events log provides a color coded event list. Blue items (like the one in Figure 4-19) are informational. You can set the color coding for critical, cautionary and informational messages from the Preferences button. The Events Log is horizontally scrollable if it is too wide for your computer display. Use the top left drop-down list to filter the messages: Figure 4-20: Events Log filter selection Netronics NetAstra Family System Manual 75 Getting Started with Link Manager Chapter 4 HBS Main Window - HSUs Panel Table View – Further details If you have a large number of HSUs in the sector, it may be helpful to filter the display. You have the following choices: The following case has colored fields indicating a problem requiring your attention: Figure 4-21: HSU card - indicating a problem If you mouse-over the colored RSS area, you will receive a tool tip telling you that RSS for Radio 1 is higher than for Radio 2, or something similar. We will provide further detail about these color codes below. Right click a HSU to get its context menu: Figure 4-22: HSU display - context menu (right click) 76 Netronics NetAstra Family System Manual Getting Started with Link Manager Chapter 4 Map View Here again is the Map view of the HBS Main Window: Figure 4-23: HBS Main Window - Map view HBS/HSU Status Lights HBS/HSU Status light appear on the tower graphic, 4-21). and the HSU detail (for example, Figure The meaning of the Status lights is as follows: Table 4-11: HBS/HSU Status light color codes Description Color HBS Figure 4-24: HBS/HSU Status lights HSU Green Active Registered, in sync Red Inactive Registered, no sync Purple N/A Authentication error Brown N/A Software Upgrade required Blue N/A Belongs to another sector Gray N/A Netronics NetAstra Family System Manual Static: Unregistered Mobile: Not synchronized 77 Getting Started with Link Manager Chapter 4 Navigation Tool bar The left hand display box shows the latitude and longitude of the point on the map under the tip of the mouse cursor. The right hand bar is the distance scale as defined by the numeric label - 25 km in the example. Figure 4-25: Navigation Tool bar Table 4-12: Navigation tool bar button functions Menu Icon Purpose Show/Hide the HBS/HSU Status lights ( Figure 4-24) Show/Hide the HBS/HSU Status boxes Center on the sector Shows different map views. Aerial View and Show Labels are set by default. Navigation buttons: Moves the sector about on the displayed map. Shows different levels of map detail 78 Netronics NetAstra Family System Manual Getting Started with Link Manager Chapter 4 The zoom item is a convenience function. The four side buttons show the detail level associated with the zoom slider position. Alternatively, you may click one of the side buttons to get directly to the indicated zoom level. The default level is “Region” corresponding roughly to an area sufficient to display the whole sector. Other Mouse Navigation Functions • Double clicking the mouse or rotating the scroll wheel forward causes the view to zoom in (become larger, more detailed) • Rotating the scroll wheel back causes the view to zoom out (become smaller, less detailed) • Moving the mouse over the map with the right button depressed drags the sector (centered on the HBS) in the direction of movement • Right clicking anywhere on the map opens up this close to the mouse location. Clicking this button copies the mouse cursor location as a coma separated text mode latitude-longitude pair to the clipboard. Here is a copy/ pasted example: -37.58896, 145.69000. The HSU Status box The following case has colored fields indicating a problem requiring your attention: Figure 4-26: HSU status boxes - detail, indicating problems If you mouse-over the colored RSS area, you will receive a tool tip telling you that RSS for Radio 1 is higher than for Radio 2, or something similar. The color codes have the following meanings: • Normal white/green together with a consistent RSS imbalance may be caused by different TX Power settings at each site. There is no warning indicator but it may be easily corrected using Configure| Tx & Antenna or by rerunning the Configuration wizard. • A yellow warning color will be displayed for an RSS difference of more than 8 dBm between the two polarizations on the same site (the RSS display is the combination of both polarizations on this site) • A red warning color indicates an RSS difference of more than 16 dBm between the two polarizations on the same site Netronics NetAstra Family System Manual 79 Getting Started with Link Manager Chapter 4 The latter two cases are usually the result of a physical problem at the indicated site. Probable causes are: • Interference • Antenna polarity problem • ODU malfunction This is a normal situation: Figure 4-27: HSU status cards: Left: fixed HSU Right: nomadic HSU The arrow on the top right hand corner can be used to minimize or restore full detail. Here is the HSU status box minimized: small display. Right click an HSU image This device is useful for a large sector with a to get its context menu: Figure 4-28: HSU display - context menu (right click). 80 Netronics NetAstra Family System Manual Getting Started with Link Manager Chapter 4 List View List view functionality is obtained by selecting a HSU and using the top button bar to configure it. Figure 4-29: HSU on HBS display - extract. Scroll right for more HSU fields If you have a large number of HSUs in the sector, it may be helpful to filter the display. You have the following choices: The button bar in Figure 4-29 follows the same pattern as the context menus in Figure 4-22. Table 4-13: HBS main window list display context menu and button bar functions Menu Item Menu Icon Purpose Reference Register Register a HSU to a sector page 113 Configure Site configuration for the HSU page 149 Recent Events Recent events log per HSU page 219 Performance Monitoring Performance Monitoring per HSU page 221 Active Alarms Display Active Alarms page 227 Estimate Throughput Estimate throughput per HSU page 217 Update Service Service evaluation and time slot allocation per HSU; also Spatial Multiplexing/Diversity selection page 163 Suspend ... Suspend Service page 163 Netronics NetAstra Family System Manual 81 Getting Started with Link Manager Chapter 4 Table 4-13: HBS main window list display context menu and button bar functions (continued) Menu Item Menu Icon Purpose Reference Replace Replace a HSU page 161 Locate on Map Fly to this HSU on the Map Display Reset Reset the HSU Deregister Deregister the HSU Copy HSUList Copies HSU List (showing serial no). to clipboard page 120 Exploring the Link Manager Main Window - HSU You may log on to a HSU over the air from a HBS or by directly connecting a Managing Computer to the HSU whether through a switch or directly to its PoE. You can log on over the air to any registered HSU. The HSU main window is different from the HBS main window, however it uses the same GUI and the same labels for common entry fields. Logging on to a HSU You can log on to a HSU of an established sector. The log on procedure is the same as for a HBS. Suppose we log on to HSU with IP address 10.104.50.1: We initially receive the following caution: Figure 4-30: Logging on to a HSU Upon clicking OK to dismiss the caution, we get a variation of the previous main window: 82 Netronics NetAstra Family System Manual Getting Started with Link Manager Chapter 4 Figure 4-31: Opening Link Manager window - HSU The direct log on window differs only in the bottom status bar where the Connection Mode will show Network instead of over-the-air. There are several functional differences between the log on modes, which we will explain in the following chapters. HSU Main Button Menu The HSU main button menu is similar to the HBS main button menu. The only new item is in the Configure button. Figure 4-32: HSU main button menu Netronics NetAstra Family System Manual 83 Getting Started with Link Manager Chapter 4 Table 4-14: HSU main button bar functions Menu Item Purpose The Configure button opens HSU site configuration. The additional functions in the detail menu work in the same way as the corresponding functions for the HBS. Configure Monitor - File location, interval and throughput units Preferences Events - Color coding for events log and events log file location Advanced - Enable/disable check for updates, monitoring interval and timeout Get Diagnostics Run and store diagnostics for all or some members of a sector Log Off Return to log-on window Link Budget Calculator Help Check for updates About Help Button View this User Manual HSU Link Status 84 Netronics NetAstra Family System Manual Getting Started with Link Manager Chapter 4 HSU Events Log The HSU events display is functionally identical to that of the HBS. HSU Link Performance The HSU Link Performance panel shows the same fields as in Figure 4-27. For convenience we also display the corresponding parameters for the HBS. The throughput bar graphs and labels have the same meaning as the corresponding items on the HSU cards. Setting Link Manager Preferences The Preferences tabs appearing on both the HBS and HSU relate entirely to the way the Manager displays certain items for the connected unit. They are completely local to the managing computer. They are also functionally identical for both the HBS and HSUs. Note Each technician servicing a sector will need to set up his managing computer (typically a laptop) with his own preferences. Netronics NetAstra Family System Manual 85 Getting Started with Link Manager Chapter 4 Monitor Figure 4-33: Monitor Preferences - HBS Figure 4-34: Monitor Preferences - HSU 86 Netronics NetAstra Family System Manual Getting Started with Link Manager Chapter 4 The Monitor file contains a vast amount of information and can become inordinately large very quickly. You should therefore choose a longer sampling interval if you intend to store this information for a lengthy duration. For the HBS, it will show details for the HBS itself and all registered HSUs. For a HSU, it will record the information just for that HSU. You should use distinctive file names for HBS and HSU Monitor files. The content of the Monitor file will be discussed in more detail in Chapter 10. The Utilization file shows the data at the requested interval appearing at the bottom of Figure 8-4. It also can become very large very quickly. Events Here you may choose your own color coding for the Recent Event display (see Chapter 10). You may also choose a location and file name for the events log for storage. These settings are again, per HBS or HSU. To avoid over-writing, you should use file names reflecting their source ODU. The SNMPv3 User and Password are relevant if you are using SNMPv3. In this, case trap messages are keyed to the user name and password and not visible to anyone else. The preferences entered here, relate to trap messages sent to the specified user if specified or to all trap messages, otherwise. For associating a user with a trap address, see Chapter 6, Management. Netronics NetAstra Family System Manual 87 Getting Started with Link Manager Chapter 4 Advanced Figure 4-35: Advanced Preferences - HBS Figure 4-36: Advanced Preferences - HSU 88 Netronics NetAstra Family System Manual Getting Started with Link Manager Chapter 4 Change Password You may change your log-on password here from the default, admin. Restore Alerts Many alert messages in the Link Manager have an option of the form “Do not show this message again”. These alert messages can be reverted to their default state (shown) by clicking the Restore Alerts button. You will be asked to confirm: Setting the Map View Background Mode You have a choice of two map providers, a default or a self-chosen background. If you log on without an Internet connection, you will get a default gray background or, if you have caching enabled, your last used map. What Comes Next? The purpose of this chapter was to offer an overview of a running NetAstra PtMP a sector. The next three chapters will cover respectively, detailed sector setup considerations, sector management and monitoring and diagnostics. The foregoing background should provide sufficient “signposts” to ensure that you do not become lost in the plethora of details required to commission and manage a fully operational sector. Netronics NetAstra Family System Manual 89 Chapter 5 Installing the Sector Scope of this Chapter Chapter 4, offered an overview of a running Sector as motivation for the technical installation details set out below. Assuming that the Sector equipment is in place as described in earlier chapters, sector installation has two phases: • Configuring and activating the HBS • Bringing up the HSUs - configuration and registration The same Link Manager program is used for both the HBS and the HSUs. Much of the process is common to both types of ODU. We will cover the HBS in detail; for the HSUs we will concentrate on those items which are different. In any event, where setup procedures are common we will point them out. This chapter covers fixed and nomadic HSU configurations. Mobile HSUs are covered in Chapter 9. Concepts A HBS out of the box, must be configured with • Basic RF parameters such as frequency band, channel bandwidths and Sector ID • Networking parameters such as IP address, subnet mask and default gateway At this point, the HBS ODU is in an inactive state, powered up, configurable but not transmitting anything. Upon activation, the HBS will commence transmitting and receiving packets related to sector management only - that is no service. Activation and Deactivation are effected quite simply by clicking a toggle button. Assuming that the Sector HSUs are mounted aligned and powered up, the HSUs will discover the HBS establishing links for management only. At this point the HSUs may be managed over the air. As soon as the HSUs are configured to your satisfaction, you must register them on the HBS. Registration of an HSU enables service traffic between the HSU and the HBS. 90 Netronics NetAstra Family System Manual Installing the Sector Chapter 5 During the registration process, you assign time slots to each HSU. A total of 64 time slots are available to each HBS to be distributed among the HSUs in the sector. The relative number of time slots determines the relative amount of service each HSU will receive. Each HSU receives at least two time slots. To disable an HSU you must deregister it. (A suspend mechanism is also available, to suspend service on an HSU for a limited period.) For each registered HSU, you can set separately, the uplink and downlink Maximum Information Rate (MIR) in Mbps or leave it at Best Effort. You may also manage an HSU Connection table to enable and disable connectivity between HSUs in a sector. HSUs may be fixed or nomadic. The latter may move around within and across sectors. Mobile HSUs (HMUs) may also move around within and across sectors. They are covered in Chapter 9. Working with Nomadic HSUs Each nomadic HSU is allocated to one of four HBS levels labelled A, B, C and D. Some operating parameters for each level (such as VLAN, MIR, QoS, time slots, fixed rate, MIMO/Diversity antenna mode) can be different for each level allowing for broad prioritization of service between different types of nomadic units. This requires that each nomadic HSU be assigned a level to join a sector. A nomadic HSU may only send and receive service traffic while stationary. A nomadic HSU detects that it is time to seek another HBS upon sync loss. Upon entering and stopping in a new sector, it may take several seconds to establish sync with the sector HBS. Changing any of VLAN, MIR, QoS, fixed rate, MIMO/Diversity antenna mode for one configured HSU at a given level, changes all other HSUs at that level. If you add a new HSU to a sector (by direct connection) at a given level, at sync time, it will acquire the existing parameters for that level. Workflow In this chapter, we assume that you are familiar with the graphical user interface described in Chapter 4, including Geographic location. We will concentrate here on sector radio setup workflow. To this end, the installation will be carried out against a blank white background. At the end of the process we will complete the sector by opening the map to reflect our Geographic positioning data. Prior to commencing, you should have a written sector plan along the lines of Table 5-2. Netronics NetAstra Family System Manual 91 Installing the Sector Chapter 5 Default NetAstra Settings The default settings of the NetAstra configuration parameters are listed in Table 5-1 below. Table 5-1: Default settings Unit HBS Parameter Default Value IP Address 10.0.0.120 Net Mask 255.0.0.0 Default Gateway 0.0.0.0 Location Location Contact Person Name Contact Factory default band Product dependent Channel Bandwidth 20MHz Link Manager log-on passwords Observer admin Operator admin Installer wireless Link Password wireless-p2mp Geographic location Latitude 51.47885 Longitude 0.01060 Antenna height (m) 130 HSU IP Address 10.0.0.120 Net Mask 255.0.0.0 Default Gateway 0.0.0.0 Location Location Contact Person Name Name Link Manager log-on passwords Link Password 92 Observer admin Operator admin Installer wireless wireless-p2mp Netronics NetAstra Family System Manual Installing the Sector Chapter 5 For convenience, we repeat the table of parameters used in our demonstration sector. Parameters not listed are left at their default values: Table 5-2: Preconfigured setup – HBS Location HBS.01 Attribute Value Remark IP Address 10.104.50.200 Net Mask 255.255.0.0 Default Gateway 10.104.10.21 Sector ID EBGX20560334 Inherited by all communicating fixed HSUs. Network ID EBX Inherited by all communicating nomadic HSUs. Protocol SNMPv1 Can be set to SNMPv3 or both v1 and v3 Contact Bach Optional Name [email protected] Location of Contact - optional Band 5.730 - 5.845 GHz FCC/IC Inherited by all communicating HSUs Channel Bandwidth 20MHz Inherited by all communicating HSUs Unit Serial Number PET540E000A00000 All communicating HSUs and HBS in the same subnet Geographic location Latitude -37.8148 Longitude 144.9630 Azimuth (deg) 0 Beam width (deg) 90 Antenna height (m) 130 Netronics NetAstra Family System Manual Used for initial default placement of HSUs From RF plan, not used 93 Installing the Sector Chapter 5 Table 5-3: Preconfigured setup - fixed HSUs Location HFU.01.01 Attribute Value IP Address 10.104.50.1 Net Mask 255.255.0.0 Default Gateway 10.104.10.21 Protocol SNMPv1 Can be set to SNMPv3 or both v1 and v3 Contact Haydn Optional Name [email protected] Location of Contact - optional Time Slots Unit Serial Number Remark All communicating HSUs and HBS in the same subnet Downlink 8 Uplink 2 May vary with context PIN580I500A00004 Geographic location Latitude -37.8762 Longitude 145.0437 Antenna height (m) 10 HFU.01.02 From RF plan, not used IP Address 10.104.50.2 Net Mask 255.255.0.0 Default Gateway 10.104.10.21 Protocol SNMPv1 Can be set to SNMPv3 or both v1 and v3 Contact Mozart Optional Name [email protected] Location of Contact - optional Time Slots Unit Serial Number All communicating HSUs and HBS in the same subnet Downlink 8 Uplink 2 May vary with context PIN580I500A00005 Geographic location Latitude -37.4018 Longitude 145.0086 Antenna height (m) 60 94 From RF plan, not used Netronics NetAstra Family System Manual Installing the Sector Chapter 5 Table 5-4: Preconfigured setup - Level allocation for maximum nomadic HSUs Level Time Sots Number of nomadic HSUs Downlink Remark Uplink A 2 6 2 B 1 4 2 C 1 4 2 D 0 0 0 Includes HNU.0.01 below Table 5-5: Preconfigured setup - One actual nomadic HSU Location HNU.01.01 Attribute Value IP Address 10.104.50.3 Net Mask 255.255.0.0 Default Gateway 10.104.10.21 Protocol SNMPv1 Can be set to SNMPv3 or both v1 and v3 Contact Brahms Optional Name [email protected] Location of Contact - optional Level A Time Slots Unit Serial Number Remark All communicating HSUs and HBS in the same subnet Downlink 6 Uplink 2 Included in previous table PIN580I500A00003 We have also add place-holders for four nomadic HSUs. That is, up to four vehicles equipped to work in this way, may simultaneously enter the sector. Choose your unit locations carefully. For example, for three collocated HBSs each with 32 HSUs covering 360°, matters get out of hand very quickly if units are poorly named. They can always be identified by their IP addresses, but that is a poor substitute for effective naming. A URL-like naming pattern based on HBS_n.HSU_y is clear and familiar to all Internet users. Keeping the names IP address independent enables you to copy the entire sector setup to a different geographic location without IP address duplication. Configuring the Sector out of the Box - IP Addresses The default log-on IP address for all ODUs in the sector is the same: 10.0.0.120, subnet mask 255.0.0.0 and default gateway 0.0.0.0. To get the process started, set up the IP address on the network card on the managing computer to something like 10.0.0.100, subnet mask 255.255.255.0 and Default Gateway 0.0.0.0. Ensure that you have a direct LAN connection to the HBS, run the Link Manager and log-on to it. Netronics NetAstra Family System Manual 95 Installing the Sector Chapter 5 Figure 5-1: Logging on with factory default IP address Alternatively, you can log on using Local Connection without need to change your Network Interface Card address: Figure 5-2: Logging on with Local Connection • The Local Connection method uses broadcast packets to “discover” the attached ODU • If you log on using Local Connection, but your physical connection is not local (i.e. anything other than a direct connection between the managing computer and the PoE device), then any configuration you carry out may affect other links in the network. Do not do this! • Do not carry out this procedure using a multi homed managing computer also connected to a network. It will flood the network with broadcast packets. Further, it will throw any other links on the network into Installation or Inactive mode. • • 96 In any event, as a precaution, default log-on over Local Connection is readonly mode. Check the Read/Write enable box to carry out installation procedures. Network log on (IP address to the ODU) is recommended. Netronics NetAstra Family System Manual Installing the Sector Chapter 5 Here is the initial main display using Local Connection: Figure 5-3: Main window for un-configured HBS ODU Notice the red icon on the top left corner of the window. It will change to green as soon as the HBS is configured and activated. Here is the work-flow: 1. Activate the HBS which includes setting its IP address. It will then “see” the deployed HSUs regardless of their IP address. 2. Configure the HSUs 3. Register the HSUs to the HBS for traffic 4. Complete HSU configuration including HSU Connection Table and any other required fine tuning. To activate a HBS: 1. Click the Activate button. The Activation Wizard opens. Netronics NetAstra Family System Manual 97 Installing the Sector Chapter 5 2. Click Next: Enter the Sector ID, Name and Location. All fields are mandatory. Here are entries in accordance with Table 5-2: About the Sector ID: Any unregistered HSU will establish a link with the first HBS it detects and inherit the Sector ID from the HBS. As soon as the HSU is registered for service with the HBS, the HSU’s inherited Sector ID can no longer be changed while linked: It is “locked” into the HBS. This mechanism prevents an HSU close to a sector boundary from “drifting” between HBSs for adjacent sectors. 98 Netronics NetAstra Family System Manual Installing the Sector Chapter 5 Notice that the Sector ID is split into two parts as shown in the previous figure. For a network consisting of sectors with fixed HSUs only, the split is immaterial. If the sector is part of a network having non-fixed HSUs, then each Sector ID for each participating sector should have the same four character Network ID. The remaining part is ignored when an HBS establishes a link with a non-fixed HSU. This feature enables non-fixed HSUs to establish a link with any HBS in the network. The Sector ID is split into a four character Network ID (EBGX) and the remaining part (20561334). For fixed HSUs you may ignore the split. For non-fixed HSUs, the use of the split Sector ID is explained on page 175. Choose your Sector ID it carefully particularly if you are using collocated HBSs for extra coverage. The Sector Name and Location are convenience items but should be chosen to ensure that the sector is documented and easily identifiable in your RF planning. 3. Open the Coordinates dialog to set the location of the HBS in accordance with Table 5-2: Netronics NetAstra Family System Manual 99 Installing the Sector Chapter 5 4. The Link Password may also be changed by clicking Change: Full details for changing the Link Password may be found on page 137. It is best left as is if there is no pressing need to change it. If you skipped an entry, it will be framed in red like this: 5. From the previous Activation Wizard window, click Next. 100 Netronics NetAstra Family System Manual Installing the Sector Chapter 5 Here you may enter the IP details if didn’t do it earlier. Click Next. 6. The next window is used to set the frequency and channels. The default frequency is the lowest available (5.735 GHz) in the operating band, here, 5.730 - 5.845 GHz FCC/IC. 7. Click Other to see other available bands for this HBS. 8. For our purposes, we choose 5.820 GHz: Netronics NetAstra Family System Manual 101 Installing the Sector Chapter 5 Observe that the right hand spin-wheel is no longer displayed. Had you left Other enabled, you could have chosen a frequency by working through those available in 5 MHz increments. 9. Choose the required Channel Bandwidth: If your hardware supports 200 Mbps net aggregate capacity, you should choose 40 MHz Channel Bandwidth to enable it 102 Netronics NetAstra Family System Manual Installing the Sector Chapter 5 10. To use ACS, check the Automatic Channel Selection box: You can perform a customized channel selection or click Select All to check all the channel boxes as shown: Automatic channel selection at the HBS makes little sense beyond configuration time. You may leave all or several of the channels selected for now. In practice, after having fully configured the sector you would disable all but the actual operating channel. Netronics NetAstra Family System Manual 103 Installing the Sector Chapter 5 11. Click Next. The Antenna type and Tx Power window is presented: The choice of Tx Power, antenna gain and cable loss (between the radio and the antenna) determines the EIRP and is affected by such considerations as radio limitations and regulatory restrictions. Before completing antenna installation, you might like to consider the background information about setting antenna parameters, in Appendix C: Choose your Antenna Type, Required Tx Power, Antenna Gain and Cable Loss. We will set Required Tx Power to 5 dBm for our example. Click Next. When setting Required Tx Power, it is your responsibility to chose a value in compliance with your local regulations. 12. The Summary window of the Wizard is displayed. 104 Netronics NetAstra Family System Manual Installing the Sector Chapter 5 Check that all information showed is correct and click Activate. After a few moments the sector HSUs will be displayed in the Manager HSU panel. The field-installed HSUs appear in a Table view: Netronics NetAstra Family System Manual 105 Installing the Sector Chapter 5 Figure 5-4: Activated HBS recognizing installed but unconfigured HSUs If there are too many HSUs for the Table view, switch to the scrollable List view. 13. If you are using Local Connection, log out and log back in to the HBS on its IP address. At this point, you are able to configure the HSUs for service. You may have observed that operating frequency 5.790 GHz shown, is not what we chose (5.820 GHz). The HBS tries to optimize the frequency to minimize interference effects. We next configure and register the HSUs. For fixed HSUs you can do this in either order. For nomadic HSUs you must define the HSU as Nomadic prior to registration. We will show the method below. Our preference is to carry out configuration first for all HSUs. Configuring a fixed HSU from the HBS The HSU activities described in this section, may be carried out any time - regardless of whether or not the HSU is registered for service or not. These activities include among other things, setting the Location, Contact, Name and IP address. The procedures in this section should be carried out for each fixed HSU in the sector. 106 Netronics NetAstra Family System Manual Installing the Sector Chapter 5 To configure an fixed HSU from the HBS: 1. Right click an HSU to get its context menu: Figure 5-5: HSU Context menu 2. Click Configure. The Configuration dialog is displayed. If you have not already, enter a Name Contact and Location: Location is a site name - typically a building or tower name. Contact is the contact person Netronics NetAstra Family System Manual 107 Installing the Sector Chapter 5 at that Location and Name is the Contact location. It might be just a telephone number. Here are our entries: 3. Set the Coordinates (latitude and longitude) for the HSU as shown in the Sector Plan: 4. Set the HSU Tx Power (possibly as required by regulations). Click Tx & Antenna. The following dialog is displayed: 108 Netronics NetAstra Family System Manual Installing the Sector Chapter 5 Set the Antenna Connection Type, Antenna Type, Required Tx Power, Antenna Gain and Cable Loss as required. For our example, we use external antennas and we set Tx Power to 5 dBm. If you click apply, you receive the following confirmation request: There are several variations of this message window, depending on what you change: Netronics NetAstra Family System Manual 109 Installing the Sector Chapter 5 5. In any event, clicking Yes results in a further message appearing: 6. Click OK. The HSU display area refreshes with the newly configured HSU in its new location in the sector. 7. Reopen the Configuration dialog for the HSU and then open the Management tab. 110 Netronics NetAstra Family System Manual Installing the Sector Chapter 5 Change the default HSU IP Address, Subnet mask and Default Gateway as shown: 8. For now, we will leave the remaining fields. Click OK to exit the Configuration window. You will be offered a cautionary message: Click Yes. The newly entered parameters for the HSU will be displayed following the next sync loss/restore to the HSU. You can achieve the same thing by issuing a rest to the HSU from its context menu. 9. Repeat steps 1 to 8 for one more HSU. Configuring a nomadic HSU from the HBS To configure an nomadic HSU from the HBS: 1. Carry out steps 1 to 7 as in the previous section for a fixed HSU. 2. Open the Nomadic tab: Netronics NetAstra Family System Manual 111 Installing the Sector Chapter 5 3. From the Type list, choose Nomadic. The right hand Level list is enabled: 4. The four levels enable you to split nomadic HSUs into up to four service groups with (for example) different QoS parameters. Choose level A and then OK. The number of time slots allocated to the HSU will be updated during the registration process. You are offered the following confirmation message: 112 Netronics NetAstra Family System Manual Installing the Sector Chapter 5 The HSU no longer appears on the HBS Table view. It will return following registration, to which we now turn. Registering a fixed HSU for service We continue our illustration using the HSU, HFU.10.101. To register an fixed HSU for service: 1. Right click a fixed HSU to get its context menu: 2. Click Register... If you did not configure the antenna type for the HSU, you are asked to do so now: Choose the required type and click OK. Netronics NetAstra Family System Manual 113 Installing the Sector Chapter 5 The Registration window opens: 3. You may edit or add the site Name, Location and Coordinates. 4. If you are using Dual Antennas, you may check the MIMO or Diversity antenna mode. The choice is HSU specific. For further details about MIMO/Diversity antenna mode, see Appendix C. 5. Click the Evaluate button. Service evaluation takes a few seconds during which the window is darkened and inactive. Upon completion you may assign time slots to the HSU: 114 Netronics NetAstra Family System Manual Installing the Sector Chapter 5 Figure 5-6: HSU Registration dialog Notice that the Evaluating activity icon continues to rotate after completion of the evaluation. The Manager maintains dynamic monitoring of the sector for injection into the sector of HSUs elsewhere and accordingly reduces the available time slots. 6. Use the slider to choose the number of time slots to be allocated to the HSU. Netronics NetAstra Family System Manual 115 Installing the Sector Chapter 5 The time slot allocations may be changed later. 7. Use the sliders to set uplink and downlink MIR. You may defer this and carry it out using the HSU Configure option. The MIR acts as a “throttle”. 8. Click Register it to complete the process. Here is the result for our example: Observe that the registered HSU icon LED is now green and that the Time Slots bar on the left reflects the proportion of time slots allocated. 9. Repeat steps 1 to 8 for other fixed HSUs. 116 Netronics NetAstra Family System Manual Installing the Sector Chapter 5 Registering a nomadic HSU for service Although we only have one nomadic HSU in our demonstration sector, in practice we would make provision for a larger number to enable movement between sectors. By way of example, we will pre-register three HSU slots to levels A, B and C and time slots to each level as shown: To configure nomadic HSUs from the HBS: 1. Open the HBS Configuration window and then its Nomadic Tab: Figure 5-7: HBS Nomadic Configuration 2. In the Add Devices window, click the Add spin wheel buttons and the Time slots spinwheels as shown. The Register button is enabled. Netronics NetAstra Family System Manual 117 Installing the Sector Chapter 5 3. Click the Register button to register the HSUs. Note that you may use the bottom dialog to save or upload a saved HBS configuration. We will demonstrate uploading a saved configuration at the end of this chapter. 4. Exit the Configuration dialog. The Final Outcome Here is the outcome for our example: p Figure 5-8: Fully functional mixed fixed and nomadic sector - Table view If you have too many HSUs to fit the table view, you can get a reduced table view by using the right hand HSU button: 118 Figure 5-8 looks like this: Netronics NetAstra Family System Manual Installing the Sector Chapter 5 Here is a Map view of the sector: Figure 5-9: Fully functional sector, two fixed one nomadic HSU - Map view You may now carry out any other adjustments to the HSUs from the HBS or by direct connection. Notice that we adjusted the Tx Power for all elements in the sector to keep the RSS at a reasonable level. As a partial alternative method, you may enter the HSU Name and Location fields during Registration. Note If you do not see the changes as shown, a hard reset of the HSUs will cause them to appear. Netronics NetAstra Family System Manual 119 Installing the Sector Chapter 5 Choosing Diversity Antenna Mode during Registration Suppose that in Figure 5-8 for HFU.10.101 we had chosen Diversity mode, the outcome would look like this: The assured throughput in both directions on this HSU has dropped to about half of its previous value. (The Rx and Tx rates drop slightly. The reason that there is no significant change to the Rx and Tx rates is that the SBM mechanism is allocating additional time slots in both directions. See Chapter 8 for details about the operation of SBM.) The other HSUs are left unchanged. This underlines the flexibility of the NetAstra PtMP system which enables HSUs to be independently configured depending on their particular location. Deactivating the HBS From the HBS button bar, click the right hand button followed by Deactivate. You are offered a cautionary message: 120 Netronics NetAstra Family System Manual Installing the Sector Chapter 5 If you proceed, the HBS display will change to reflect the deactivated state: Notice that the HSUs remain registered, and will return to full service after the HBS is re-activated. Deregistering an HSU A HSU may be deregistered by using the Deregister entry in an HSU context menu or using the button from an HSU button bar. Where has my HSU gone? Suppose that you installed two collocated HBSs with contiguous sectors. It is possible that an HSU located close to the common sector boundary may “discover” the wrong HBS. A HSU can be “forced” across to another HBS by changing its Sector ID to that of the required HBS. The method for doing this is covered in Chapter 7. Saving the HBS Settings for Reuse as a Template Refer to Figure 5-7 of which the following is an excerpt: Netronics NetAstra Family System Manual 121 Installing the Sector Chapter 5 Following any further fine tuning, open up the HBS Nomadic tab, and click Save. You are offered the standard Save File dialog. Save the HBS Nomadic settings file (MobilitySettings.mob) to a convenient location. For our example we changed the file name to Nomadic-Settings.mob. Creating Nomadic Entries for a Sector from a HBS Template The saved settings file may be used as a template for further sectors. To create a sector from a HBS Nomadic settings file: 1. Starting with a new HBS and HSUs, log on to the HBS. 2. Activate the HBS in the usual way. 3. Open the Nomadic tab in the Configuration window. In the Save / Upload Settings window, click Upload. Figure 5-10: Preparing to upload the Nomadic file 4. In our case we have one HBS, so it is sufficient to enter the Nomadic file as shown and then click Start. After a few moments, the Status field indicates Done. The result is as expected: 122 Netronics NetAstra Family System Manual Installing the Sector Chapter 5 Notice that our one “real” nomadic HSU has come up configured and registered. The fixed HSUs must be registered by hand. To create a sector from a HBS IP list and a Nomadic settings file: 1. In the window of Figure 5-10, enter a HBS list file. The format of the file is lines of <IP address> <Read-Write community> For example, 10.104.50.200 netman All of the HBSs need to activated and accessible (via a switch) to the managing com-puter. They need not be on the same sub-net. Alternatively, enter them one by one using the Plus button. Any un-activated HBSs will be shown as unavailable: 2. Make any further changes to the displayed list using the Plus/Minus buttons. 3. Click Start to commence the process. 4. The list window will indicate the success or otherwise of the upload for each HBS. Netronics NetAstra Family System Manual 123 Part 3 Sector Management 124 Netronics NetAstra Family System Manual Netronics NetAstra Family System Manual 125 Chapter 6 Managing the Sector Scope of this Chapter This chapter deals with managing the sector from the HBS. It covers HBS Configuration and HSU Configuration from the HBS. HSU direct or over-the-air configuration is a little different and is covered in Chapter 7. A Configuration window is available for both the HBS and the HSUs to change setting without necessarily dropping service. Nevertheless care must be exercised when changing them. By way of example, changing antenna parameters for a HSU results in a HSU reset. It is necessary however to have this function in the Configuration window since it is required to initially set up the unit. The HBS itself may be configured over-the-air: A scenario for this is where the sector is backhauled by on of the HSUs. There are no significant differences between the two methods, however some care is required. If for example, you deactivate the HBS over-the-air, you will lock yourself out of the sector. Running Spectrum View from the HBS manager over-the-air, will lock you out for the duration of the Spectrum View timeout period. Configuring a HBS Configuration Menu Buttons Open the Configuration window. The Backup and Restore buttons provide for backup and restore of the HBS software. A backup (full or configuration) may be restored to another HBS provided that the product IDs and revision levels of the source and target HBSs are identical. They are shown in the HBS Inventory window. 126 Netronics NetAstra Family System Manual Managing the Sector Chapter 6 The Refresh button restores the current window to its previous state abandoning any changes you made, provided that you did not click Apply or OK. We will work through each of the Configuration tabs in turn with emphasis on tabs or features not encountered in the previous chapters. System These items are convenience fields. Name and Location are typically entered during HBS activation. You may like to change Contact here, not set during activation. The Coordinates button opens the same window as used during activation. Netronics NetAstra Family System Manual 127 Managing the Sector Chapter 6 Air Interface This panel has the same functionality as the corresponding window in the Activation Wizard (see Chapter 5). Changing the Sector ID will “percolate” to all registered HSUs. It’ll of course, “picked up” by newly installed and registered HSUs. • The only way to change the Operating Channel is by deactivation and reactivation. • Channel Bandwidth and Channel Selection changes will all be sector-wide. • Use of Automatic Channel Selection only makes sense at configuration time. Choose a single channel based on what ACS shows. Use the Spectrum View tool (Chapter 19) to help you make your choice. The Advanced bar (shown open) enables you to choose Throughput Mode that deter-mines how the Adaptive Modulation mechanism works. Maximum Throughput (default) should be chosen if throughput is more important than higher delay. Conversely, Reduced Latency minimizes delay at the expense of lower throughput. 128 Netronics NetAstra Family System Manual Managing the Sector Chapter 6 Tx and Antenna This tab is available for both the HBS and HSUs. It has the same meaning in both cases. For the HBS, changes made here may affect link quality and in the case of antenna type, cause a sector re-sync. Changing the antenna type for an HSU will cause a re-sync to that site only. Netronics NetAstra Family System Manual 129 Managing the Sector Chapter 6 Hub Site Sync [HSS] The External Pulses which might be detect, may come from a collocated HBS, a NetAstra ODU or a GSU configured as Hub Sync Master. To enable HSS, check the Enabled check box. Ensure that the correct Operational state is selected - in our example, Hub Site Client - Continue Tx. Click Apply or OK to enable HSS. See Chapter 11 for further detail about HSS. 130 Netronics NetAstra Family System Manual Managing the Sector Chapter 6 Management If you set the IP and related addresses correctly, there should be little to change here. The three sub-windows, Trap Destinations, VLAN Management and Protocol dialogs are generic to the HBS and the HSUs (direct or over-the-air) and are discussed below. Netronics NetAstra Family System Manual 131 Managing the Sector Chapter 6 Trap Destinations Enter the Trap Destinations. They could include the IP address of the managing computer. The events log will be stored at the addresses chosen. To change a trap IP address: 1. Open an entry with its edit button: The following entry window is displayed: 2. Enter the Trap Destination IP Address and Port. It could be the IP address of the managing computer. The events log will be stored at the addresses chosen. 132 Netronics NetAstra Family System Manual Managing the Sector Chapter 6 3. For Security model you may choose between SNMPv1 or SNMPv3. The choice is site dependent. If you choose SNMPv1, you may only enter an IP address and port number. For SNMPv3, you should supply a user name and password: 4. Click OK to save your choice. Note that for each active trap destination, the Clear Trap Destination button is enabled: VLAN for Management Management VLAN Configuration Figure 6-1: VLAN for Management Caution VLAN IDs are used by NetAstra products in three separate contexts: Management VLAN, Traffic VLAN and Ethernet Ring. It is recommended that you use different VLAN IDs for each context. VLAN Management enables separation of user traffic from management traffic whenever such separation is required. It is recommended that each member of a sector be configured with different VLAN IDs for management traffic. (This reduces your chances of accidentally locking yourself out of the sector.) Netronics NetAstra Family System Manual 133 Managing the Sector Chapter 6 To enable VLAN for management: 1. In the window of Figure 6-1, check the Enabled box. 2. Enter a VLAN ID. Its value should be between 2 and 4094. After entering the VLAN ID, only packets with the specified VLAN ID are processed for management purposes by the HBS/HSU ODU. This includes all the protocols supported by the ODU (ICMP, SNMP, Telnet and NTP). The VLAN priority is used for the traffic sent from the ODU to the managing computer. Using VLAN for management traffic affects all types of management connections (local, network and over the air). 3. Enter a Priority number between 0 and 7. 4. Change the VLAN ID and Priority of the managing computer NIC to be the same as those of steps 2 and 3 respectively. 5. Click Apply or OK. Lost or forgotten VLAN ID If the VLAN ID is forgotten or there is no VLAN traffic connected to the ODU, then reset the relevant ODU. During the first two minutes of connection, the ODU uses management packets both with and without VLAN. You may use this period to reconfigure the VLAN ID and priority. Supported Protocols Supported protocols are shown in Figure 6-2: Figure 6-2: Supported protocols • For further details about Telnet access see page 170. • For further details about the Web Interface, see Chapter 20. SNMP support is permanently enabled. You may choose between SNMPv1, SNMPv3 or both. If you choose SNMPv3, you will be offered the following cautionary message: 134 Netronics NetAstra Family System Manual Managing the Sector Chapter 6 For a sector managed as part of a network, direct access to a HBS/HSU using Telnet is considered to be a security breach. Telnet access may be enabled or disabled by clicking the Protocol tab and enabling/disabling Telnet access using the Telnet check-box. Similar considerations apply to access via the Web Interface. • For further details about Telnet access see page 170. • For further details about the Web Interface, see Chapter 20. Telnet and Web Interface access modes when available, are site specific. If for example, you want Telnet access from specific sector members, you should enable it for these sites and disable it elsewhere. Conversely, If Telnet or Web Interface access mode poses a general security risk, you must disable them for each sector member separately. Netronics NetAstra Family System Manual 135 Managing the Sector Chapter 6 Inventory You might like to capture or copy the information here: The Inventory information will be required by Customer Support should you require assistance. 136 Netronics NetAstra Family System Manual Managing the Sector Chapter 6 Security This section applies to both the HBS and HSUs unless stated otherwise. Figure 6-3: Sector Security settings The Security dialog enables you to change the Link Password and the SNMP Community strings. Changing the Link Password This item is available as follows: • Always at the HBS (No Active HSUs) • At an isolated HSU • Never for an active HSU Here are the details: The default password is wireless-p2mp. Optionally, you can change the link password as explained here. Netronics NetAstra Family System Manual 137 Managing the Sector Chapter 6 To change the link password: 1. Open the Security tab (Figure 6-3). The Change Link Password dialog box opens. Use the Hide characters check box for maximum security Note Figure 6-4: Change Link Password dialog box 2. Enter the current link password (The default link password for a new ODU is wireless-p2mp). If you have forgotten the Link Password, click the Forgotten Link Password button. The following window is displayed: Figure 6-5: Lost or forgotten Link Password recovery Follow the instructions to use the Alternative Link Password, and click OK to finish. You are returned to the window in Figure 6-4 above. Continue with the next step. 138 Netronics NetAstra Family System Manual Managing the Sector Chapter 6 3. Enter a new password. 4. Retype the new password in the Confirm field. 5. Click OK. 6. Click Yes when asked if you want to change the link password. 7. Click OK at the Password changed success message. • • A link password must contain at least eight but no more than 16 characters excluding SPACE, TAB, and any of “>#@|*?;.” Restoring Factory Defaults returns the Link Password to wireless- p2mp. Link Manager Community Strings In this section, “ODU” may be either a HBS or HSU. The ODU communicates with the Link Manager using SNMPv1 protocol. The protocol defines three types of communities: • Read-Only for retrieving information from the ODU • Read-Write to configure and control the ODU • Trap used by the ODU to issue traps. The Community string must be entered at log on. You must know the password and the correct Community string to gain access to the system. You may have read-only privileges. It is not possible to manage the ODU if the read-write or the read Community values are forgotten. A new Community value may be obtained from Netronics Customer Support for the purpose of setting new Community. You must also have available the serial number or the MAC address of the ODU. The read-write Community strings and read-only Community strings have a minimum of five alphanumeric characters. (bru1 and bru4097 are not permitted). Changing the trap Community is optional and is done by clicking the check box. Editing SNMPv1Community Strings When editing these strings, both read-write and read-only communities must be defined. Upon logging on for the first time, use the following as the current Community: • For Read-Write Community, use netman. • For Read-Only Community, use public. • For Trap Community, use public Netronics NetAstra Family System Manual 139 Managing the Sector Chapter 6 To change a Community string: 1. Type the current read-write Community (default is netman). 2. Choose the communities to be changed by clicking the check box. 3. Type the new Community string and re-type to confirm. A community string must contain at least five and no more than 32 characters excluding SPACE, TAB, and any of “>#@|*?;." 4. Click OK to save. Editing SNMPv3 Passwords To commence the process, you must enter the current Read-Write Community password as shown in the first field of Figure 6-6 below. Change the Read-Write an d Read-Only pass words as indicated. A password must be between 8 and 31 characters long. The same character restrictions for the SNMPv1 community strings also apply here. Figure 6-6: Changing the Community String Forgotten Community string If the read-write Community string is unknown, an alternative Community key can be used. The alternative Community key is unique per ODU and can be used only to change the Community strings. The alternative Community key is supplied with the product, and should be kept in a safe place. If both the read-write Community and the alternative Community key are unavailable, then an alternative Community key can be obtained from Netroncis Customer Support using the ODU serial number or MAC address. The serial number is located on the product label. The serial number and the MAC address are displayed in the Site Configuration inventory tab. 140 Netronics NetAstra Family System Manual Managing the Sector Chapter 6 When you have the alternative Community key, click the Forgot Community button and enter the Alternative Community key (Figure 6-6). Then change the read-write Community string. Figure 6-7: Alternative Community Dialog box Date and Time Setting the Date and Time The ODU maintains a date and time. The date and time should be synchronized with any Network Time Protocol (NTP) version 3 compatible server. During power-up the ODU attempts to configure the initial date and time using an NTP Server. If the server IP address is not configured or is not reachable, a default time is set. When configuring the NTP Server IP address, you should also configure the offset from the Universal Coordinated Time (UTC). If there is no server available, you can either set the date and time, or you can set it to use the date and time from the managing computer. Note that manual setting is not recommended since it will be overridden by a reset, power up, or synchronization with an NTP Server. The NTP uses UDP port 123. If a fire wall is configured between the ODU and the NTP Server this port must be opened. Note It can take up to 8 minutes for the NTP to synchronize the ODU date and time. To set the date and time: 1. Determine the IP address of the NTP server to be used. 2. Test it for connectivity using the command (Windows XP), for example: w32tm /stripchart /computer:216.218.192.202 Netronics NetAstra Family System Manual 141 Managing the Sector Chapter 6 Figure 6-8: Date and Time Configuration 3. If entering an IP address for the NTP Server, click Clear, and then enter the new address. 1 4. Set your site Offset value in minutes ahead or behind GMT . 5. To manually set the date and time, click Change and edit the new values. Figure 6-9: Change Date and Time 1. Greenwich Mean Time 142 Netronics NetAstra Family System Manual Managing the Sector Chapter 6 6. Click OK to return to the Configuration dialog. Ethernet Service Configuration Figure 6-10: Setting Ethernet services HBS Aging Time The HBS works in Bridge Mode. In Bridge mode the ODU performs both learning and aging, forwarding only relevant packets over the sector. The aging time of the ODU is by default, 300 seconds. Ethernet Ports Configuration The ODU Ethernet port mode is configurable for line speed (10/100/1000BaseT) and duplex mode (half or full duplex). Line speed 1000BaseT is only available if the HBS is connected to a GbE PoE device. Netronics NetAstra Family System Manual 143 Managing the Sector Chapter 6 An Auto Detect feature is provided, whereby the line speed and duplex mode are detected automatically using auto-negotiation. Use manual configuration when attached external equipment does not support auto-negotiation. The default setting is Auto Detect. The icon next to the CRC error count may be clicked to reset the counter to zero. Caution You should not reconfigure the port that is used for the managing computer connection, since a wrong configuration can cause a management disconnection or Ethernet services interruption. To configure the Ethernet Mode: • In the Ethernet Ports Configuration pane, use the drop-down menu to choose the required mode. Transmission Ratio (Tx Ratio, Asymmetric Allocation) The Transmission Ratio shows the allocation of throughput between downlink and uplink traffic at the HBS. The Transmission Ratio is not only sector-wide: If you use HSS (Chapter 11) to collocated several HBSs (to cover adjacent sectors), they must all use the same Transmission Ratio. Figure 6-11: HBS Collocated client or independent unit If it is an HSS master, you will see something like this: 144 Netronics NetAstra Family System Manual Managing the Sector Chapter 6 Figure 6-12: HBS Collocated master Moving the slider to the right in stages, yields the following: The effective available range for Asymmetric allocation is determined by channel bandwidth as shown as well as link distance. In this context, “link” is a collocated HBS or NetAstra ODU. QoS Configuration To install and use the Ethernet QoS feature, see Chapter 17. Advanced: Broadcast/Multicast Flooding Protection Broadcast/Multicast Flooding Protection provides a measure of protection by limiting multicast and broadcast packets to mo more than 12.5% of available capacity. You may wish to uncheck this item if your application is based on multicast/broadcast packets - for example, video surveillance using multicast downlink, or video conferencing using multicast uplink. Netronics NetAstra Family System Manual 145 Managing the Sector Chapter 6 Nomadic See page 113. 146 Netronics NetAstra Family System Manual Managing the Sector Chapter 6 Operations This section applies to both HBSs and HSUs. Reverting to Factory Settings Figure 6-13: Restore Factory Settings and License Activation Clicking the Restore Defaults button opens the following self explanatory dialog: Netronics NetAstra Family System Manual 147 Managing the Sector Chapter 6 License Activation You may add additional bands using the license Activation facility. Additional bands (if available) are obtained using the Change Band function. For a single band, just enter the supplied license Key and click Activate. If you have a list of them (a text file) you will need to use the License File option. Advanced: False Radar Mitigation for HBS This tab is only visible if • You are using a Regulation requiring Radar Channel Avoidance and • You are logged on as Installer For this release, this feature at the HBS, is only relevant to the 5.3 GHz ETSI band. Configuration of False Radar Mitigation is covered in Chapter 15. HSU Connection Table From the HBS button bar, click the right hand button followed by HSU Connection Table. The following table is displayed: 148 Netronics NetAstra Family System Manual Managing the Sector Chapter 6 Figure 6-14: HSU Intercommunication - Connection Table The green shaded squares show intercommunicating elements within the sector. MNG refers to management traffic which should always be open between HSUs and the HBS. LAN refers to service traffic between the HBS and the HSUs. As shown, the two HSUs may not communicate between themselves. Clicking the top white square would enable communication (via the HBS) between them. You may in fact disable all traffic between the HBS and the HSUs and restore it using this device. Configuring an HSU from the HBS Main Window Right click an HSU for its context menu and click Configure to open the HSU Configuration window. Configuration Menu Buttons The Backup and Restore buttons have the same functionality as the corresponding buttons for the HBS. They provide for backup and restore of the HSU software. A backup (full or configuration) may be restored top another HSU provided that the product IDs and revision levels of the source and target HSUs are identical. The Buzzer button may set or mute the buzzer. Netronics NetAstra Family System Manual 149 Managing the Sector Chapter 6 The Auto position means that the Buzzer will give the beeps set out on Figure 3-46 during installation or upon sync loss. The Advanced Auto position means that in addition, the buzzer will beep continuously at different rates upon sync loss, antenna misalignment and other events for up to two minutes following restoration of sync. Recall that the main use of the buzzer tone is for HSU antenna alignment. The Refresh button restores the current window to its previous state abandoning any changes you made, provided that you did not click Apply or OK. We will work through each of the Configuration tabs in turn: System Figure 6-15: HSU Configuration window (HBS) These items are convenience fields. They are typically entered during registration. 150 Netronics NetAstra Family System Manual Managing the Sector Chapter 6 Tx & Antenna Figure 6-16: HSU Configuration - Setting antenna type and parameters The remarks about changing the HBS parameters also apply here. Changing the antenna type will cause a re-sync between the HSU and the HBS. Netronics NetAstra Family System Manual 151 Managing the Sector Chapter 6 Management Figure 6-17: HSU Configuration - IP addresses The functionality is identical as that for the HBS. 152 Netronics NetAstra Family System Manual Managing the Sector Chapter 6 Inventory You should note the details for each HSU Netronics NetAstra Family System Manual 153 Managing the Sector Chapter 6 Security You may change the SNMP community strings only for the HSU from here. You cannot change the Link password from an HSU. 154 Netronics NetAstra Family System Manual Managing the Sector Chapter 6 Date & Time The functionality is identical as that for the HBS. Netronics NetAstra Family System Manual 155 Managing the Sector Chapter 6 Ethernet Ethernet configuration for an HSU follows the same general pattern as the corresponding tab for the HBS but with important differences. Ethernet Ports Configuration This item is same for all PoE powered HSUs and the HBS. See page 143. For the SU2-ACs (AC powered HSUs) Ethernet Ports Configuration panel is different: The ODU entry is disabled; only the LAN and PoE (out) ports are available for configuration. 156 Netronics NetAstra Family System Manual Managing the Sector Chapter 6 The LAN port has these options: The PoE port offers the following options: Typically, a video camera is attached to the PoE port. The last two option provide basic camera management functions. The information: button next to the POE label offers basic PoE perfor-mance Maximum Information Rate The Maximum Information Rate (MIR) was initially set during HSU Registration. You may change it here. VLAN Configuration For Traffic VLAN configuration, see Chapter 14. QoS Configuration QoS configuration is described in Chapter 17. Netronics NetAstra Family System Manual 157 Managing the Sector Chapter 6 Nomadic You cannot change a fixed HSU to a nomadic HSU here without prior deregistration. For a nomadic HSU, you may change its operating level or even revert it to a fixed HSU. 158 Netronics NetAstra Family System Manual Managing the Sector Netronics NetAstra Family System Manual Chapter 6 159 Managing the Sector Chapter 6 Operations This functionality is identical to that for the HBS. Advanced: False Radar Mitigation This tab is only visible if • You are using a Regulation requiring Radar Channel Avoidance and • You are logged on as Installer For this release, this feature for HSUs, is relevant to the 5.3 GHz ETSI and the 5.4 GHz FCC/ IC bands. Configuration of False Radar Mitigation is covered in Chapter 15. 160 Netronics NetAstra Family System Manual Managing the Sector Chapter 6 Replacing an HSU A defective HSU may be replaced by another HSU belonging to the sector provided that the replacement is not registered. Here is a typical scenario: Figure 6-18: Unit 10.105.50.1 is down; unit 10.104.50.2 is available and 10.104.50.3 is not registered Since the replacement procedure is a rather delicate process, we will step through it with a detailed example based on the scenario in Figure 6-18. To replace a defective HSU: 1. Right click the defective unit for its context menu: It has a new item: Replace. 2. Click Replace. You’re offered a list of HSUs available as replacements. In our example there is one: 10.104.50.3. Netronics NetAstra Family System Manual 161 Managing the Sector Chapter 6 3. Select the required unit by clicking on it. 4. Click OK. You are asked to confirm before proceeding: 5. Click OK again. You receive further confirmation: 162 Netronics NetAstra Family System Manual Managing the Sector Chapter 6 Here is the final outcome: Notice that 10.104.50.3 has replaced 10.104.50.1 inheriting most of its settings. It may not inherit the Tx and Antenna settings, which you should check. Note The IP address of the replacement unit is not changed. To ensure that all 10.104.50.1 traffic actually gets to the new unit, you should also change its IP address to that of the original unit, 10.104.50.1. Updating HSU Services Choosing Update Services from an HSU context menu or clicking from the HSU button bar opens the Registration window. You may use this to switch the HSU between MIMO and Diversity mode and change the HSU time slot allocation. Suspending an HSU You may break the link (cause a sync loss) to an un-registered HSU for a fixed amount of time. Here is the scenario: HSU 10.104.50.1 is not registered. Netronics NetAstra Family System Manual 163 Managing the Sector Chapter 6 To suspend an un-registered HSU: 1. Click Suspend in its context menu. You are requested to enter a suspend duration. 2. Choose a suspend time and click OK. During the suspend duration, the HSU will be deleted from the HBS Main Window HSU panel. The HSU returns to the main display with resumption of sync. Changing the Sector Band Changing the Band in use is always carried out at the sector level (not per installed ODU). To the Sector Band you must be logged on to the HBS as Installer. In Installer mode, the right hand button, on the Access unit button bar has an extra function, Change Band. To change the Sector Band: 1. Click Change Band. A list of available Bands is displayed: 164 Netronics NetAstra Family System Manual Managing the Sector Chapter 6 Figure 6-19: Change Bands 2. Select the required Band and click OK. For our purposes, we choose 5.740-5.950 GHz Universal. The band is highlighted and right button is enabled. Netronics NetAstra Family System Manual 165 Managing the Sector Chapter 6 Figure 6-20: Add/Change Band dialog 3. Click the right button. The following window opens: 166 Netronics NetAstra Family System Manual Managing the Sector Chapter 6 4. Here you may chose the working channel bandwidth and channel selection as in the activation process. Click OK to accept your choice. You are returned to the display in Figure 6-20. 5. Click OK again. The following cautionary message is displayed: 6. Click Yes to continue. After a short delay, you are offered a final confirmation: Netronics NetAstra Family System Manual 167 Managing the Sector Chapter 6 7. Click OK. A sector re-sync follows. Here is the final result: Having set the channel bandwidth and operating channels earlier, there is no need for deactivation and reactivation. HBS Configuration with Telnet Telnet Access to the HBS A Telnet terminal can be used to configure and monitor the NetAstra. To start a Telnet session on the HBS, use telnet <ODU_IP>. For example, if you run Telnet as follows, telnet 10.104.50.200 you will be ask for a user name and password. The Telnet log on user name is the password that you used to enter the Link Manager (for example, the default: admin). The Telnet password is the corresponding Community string (default: netman). 168 Netronics NetAstra Family System Manual Managing the Sector Chapter 6 Figure 6-21: Telnet session log on to the HBS A Read-Only Community string allows you to use display commands only whereas a Read-Write Community string allows you to use display commands and execute set commands. Supported HBS Telnet commands are shown in Table 6-1 to Table 6-3. Table 6-1: HBS Telnet - Display Commands Command Explanation display inventory Displays ODU product name, Name, Location, hardware and software revisions, uptime, MAC address. display management Displays IP, subnet, Gateway, Traps table display link <param:all,reg,unreg> Displays all static details about the sector or HSU display ethernet Displays Port table (State, Status and action) display ethernet_errors Displays Cable statistics display ntp Displays Time, Server and Offset display PM <interface:AIR,LAN1> <interval:current,day,month> Shows the performance monitor tables for each interface according to user defined monitoring intervals display bands Displays available bands Table 6-2: HBS Telnet - Set Immediate Commands Command Explanation set ip <ipaddr> <subnetMask> <gateway> Set the ODU IP address, subnet mask and gateway. The user must reset the ODU after the command completion set trap <index:1-10> <ipaddr> <port:065535> Set a specific trap from the traps table (e.g. set trap 3 192.168..101 162) set readpw <oldpasswd> <passwd> Set the read access password (Read Community) set writepw <oldpasswd> <passwd> Set the read-write access password (Read-Write Community) Netronics NetAstra Family System Manual 169 Managing the Sector Chapter 6 Table 6-2: HBS Telnet - Set Immediate Commands (Continued) Command Explanation set trappw <oldpasswd> <passwd> Set the trap Community string set tpc<power:Value between minimal Tx power, and maximal Tx power> Set the ODU Tx Power. If a wrong value is entered, both min and max values shall be displayed in the error reply set name <new name> Set the name of the link set location <new location> Set the name of the location set contact <new contact> Set the name of the site manager set ethernet <port:LAN1> <mode:AUTO,10H,10F,100H,100F,DISABLE> Set the mode and speed of the Ethernet port reboot Resets the ODU. The user is warned that the command will reset the ODU. A new Telnet session to the ODU may be opened after the reset is complete. help Displays the available commands Table 6-3: HBS Telnet - Set Commands requiring Reset Command Explanation set secId <SectorID> Set new sector ID - Reset required. Telnet Access to the HSU The procedure is the same as for the HBS. Figure 6-22: Telnet Management window - HSU Supported HSU Telnet commands are shown in Table 6-4 to Table 6-6. 170 Netronics NetAstra Family System Manual Managing the Sector Chapter 6 Table 6-4: HSU Telnet - Display Commands Command Explanation display inventory Displays ODU product name, Name, Location, hardware and software revisions, uptime, MAC address. display management Displays IP, subnet, Gateway, Traps table display link Displays all static details about the HSU display ethernet Displays Port table (State, Status and action) display ethernet_errors Displays Cable statistics display ntp Displays Time, Server and Offset display PM <interface:AIR,LAN1> <interval:current,day,month> Shows the performance monitor tables for each interface according to user defined monitoring intervals display bands Displays available bands Table 6-5: HSU Telnet - Set Immediate Commands Command Explanation set ip <ipaddr> <subnetMask> <gateway> Set the ODU IP address, subnet mask and gateway. The user must reset the ODU after the command completion set trap <index:1-10> <ipaddr> <port:065535> Set a specific trap from the traps table (e.g. set trap 3 192.168..101 162) set readpw <oldpasswd> <passwd> Set the read access password (Read Community) set writepw <oldpasswd> <passwd> Set the read-write access password (Read-Write Community) set trappw <oldpasswd> <passwd> Set the trap Community string set buzzer <mode:0=OFF,1=AUTO,2=ON> Set the buzzer mode set tpc<power:Value between minimal Tx power, and maximal Tx power> Set the ODU Tx Power. If a wrong value is entered, both min and max values shall be displayed in the error reply set name <new name> Set the name of the link set location <new location> Set the name of the location set contact <new contact> Set the name of the site manager set ethernet <port:LAN1> <mode:AUTO,10H,10F,100H,100F,DISABLE> Set the mode and speed of the Ethernet port reboot Resets the ODU. The user is warned that the command will reset the ODU. A new Telnet session to the ODU may be opened after the reset is complete. help Displays the available commands Table 6-6: HSU Telnet - Set Commands requiring Reset Command Explanation set secId <SectorID> Set new sector ID - Reset required. Netronics NetAstra Family System Manual 171 Chapter 7 Direct HSU Configuration Scope of this Chapter Direct management of an HSU may be carried out by a direct LAN connection to a managing computer (on-site) or over-the-air (from the HBS site). There are several differences in the configuration functionality for a directly managed HSU compared to the method of Chapter 6 depending on whether the HSU is registered to a HBS, unregistered or not a member of any sector. Where configuration function is identical under direct connection and through the HBS, we will not repeat the details, which may be seen in Chapter 6. Configuring an HSU Log on to the HSU either directly or over-the-air as shown in Chapter 4. For a registered HSU, you will see a display like this: 172 Netronics NetAstra Family System Manual Direct HSU Configuration Chapter 7 Figure 7-1: Direct or over the air connection to a registered HSU For an unregistered HSU, the throughput (T-put) fields and the Sector ID field would be empty. If the HBS is deactivated, or the HSU is stand-alone you will see a display like this: Netronics NetAstra Family System Manual 173 Direct HSU Configuration Chapter 7 Figure 7-2: Direct connection to a stand-alone HSU out of the box In what follows, we configure a registered HSU unless specifically specified otherwise. Configuration Menu Buttons The Backup and Restore buttons have the same functionality as the corresponding buttons for the HBS. They provide for backup and restore of the HSU software. A backup (full or configuration) may be restored to another HSU provided that the product IDs, revision levels and capacity of the source and target HSUs are identical. They are shown in the HSU Inventory window. The Buzzer button may set or mute the buzzer. 174 Netronics NetAstra Family System Manual Direct HSU Configuration Chapter 7 Recall that the buzzer tone is primarily used for HSU antenna alignment. The Refresh button restores the current window to its previous state abandoning any changes you made, provided that you did not click Apply or OK. The configuration tabs here differ from the HSU configuration tabs under the HBS Table view in one respect: There is an Air Interface tab, which varies in functionality, depending on whether the HSU is registered or not. Air Interface Figure 7-3: HSU Configuration - Air Interface for Registered HSU Netronics NetAstra Family System Manual 175 Direct HSU Configuration Chapter 7 For a registered HSU this window is for information only. For an unregistered or unsynchronized HSU, the Sector ID field will be blank and editable and the Channel Bandwidth field will be set to default and active: Figure 7-4: HSU Configuration - Air Interface for stand-alone HSU For a nomadic HSU or a HMU, the Air Interface display is different. First, the Sector ID is replaced by the Network ID. For a registered HSU, neither the Network ID or CBW can be touched: Figure 7-5: HSU Config. - Air Interface, registered nomadic HSU or HMU For an unregistered or unsynchronized HSU, you may edit both of these fields: Figure 7-6: HSU Config. - Air Interface, stand-alone nomadic HSU or HMU Use this feature to switch a nomadic HSU or HMU to a different network. 176 Netronics NetAstra Family System Manual Direct HSU Configuration Chapter 7 Where has my HSU gone? Suppose that you installed two collocated HBSs with contiguous sectors. It is possible that an HSU located close to the common sector boundary may “discover” the wrong HBS. A HSU can be “forced” across to another HBS by changing its Sector ID to that of the required HBS. To switch an HSU to another HBS, make sure that it is unregistered. You will need to log on to it directly and get to the Air Interface window: Figure 7-7: HSU Configuration - Air Interface Unregistered HSU Enter the Sector ID of the required HBS and click OK. The HSU should then “discover” the required HBS. Netronics NetAstra Family System Manual 177 Direct HSU Configuration Chapter 7 Security You may only change the SNMP community strings over a direct or over-the-air connection. You can change the Link Password for an un-synchronized HSU. Otherwise the functionality is the same as in page 154. Advanced Advanced: False Radar Mitigation 178 Netronics NetAstra Family System Manual Direct HSU Configuration Chapter 7 This tab is only visible if • You are using a Regulation requiring Radar Channel Avoidance and • You are logged on as Installer For this release, this feature for HSUs, is relevant to the 5.3 GHz ETSI and the 5.4 GHz FCC/ IC bands. Configuration of False Radar Mitigation is covered in Chapter 15. Netronics NetAstra Family System Manual 179 Chapter 8 Smart Bandwidth Management What is Smart Bandwidth Management Smart Bandwidth Management (SBM) enables busy links to utilize unused time slot resources from relatively idle links. It applies to fixed and nomadic HSUs. It offers • Peak rates of over100% of assured static allocation for busy links • Enhanced overall sector utilization • Dynamic bandwidth allocation to maximize service provider throughput and adhere to customer SLAs To achieve best sector performance, each HSU is allocated separate uplink and downlink time slots. Downlink traffic is fully under HBS control, so that it can allocate any unused downlink time slots whether allocated or not to a busy link. The busy link may operate at an extremely high peak rates, 1000% utilization not being uncommon. Uplink traffic is unpredictable. Again, in the case of a busy link with other links relatively idle, the HBS will allocate extra uplink time slots to the busy link from free pool only. If all of the uplink time slots are allocated, then SBM will not operate in the uplink direction. The allocation of uplink and downlink time slots becomes a network policy issue. For example, if all the HSUs provide regular internet service, it might be advisable to give each one minimum time slots in both directions (subject to the 63 time slot maximum in each direction) and allow traffic to dynamically determine time slot utilization. Alternatively, if the HSUs are used for backhaul, the minimum number of time slots in either direction should be allocated to meet defined service requirements (such as a SLAs). The Link Manager provides facilities to configure separate uplink and downlink time slots. It further monitors performance, providing tabular and graphic utilization statistics. 180 Netronics NetAstra Family System Manual Smart Bandwidth Management Chapter 8 Scope of this Chapter Use of Smart Bandwidth Management (SBM) as a tool to enhance resource utilization involves network management issues beyond the scope of a User Manual. What we will do here, is show how SBM is configured and demonstrate several basic scenarios. Our intent is to “get you started” with SBM by assisting you to develop your own intuition and networking skills setting up highly resource efficient sectors. The first point to keep in mind is that the SBM mechanism is always active in the HBS. It’s not something you can switch on or switch off. The issue here is how to get the best out of it. Terminology and Concepts: Recapitulation It is important both in following the discussion below, and viewing the Link Manager Utilization windows to remember: • • Downlink traffic is data transfer from an HBS to an HSU • The HBS allocates time slots to sector HSUs in round-robin fashion to effect timesharing. There are separate sets of 64 time slots for each of the uplink and downlink directions. One time slot in each direction is reserved for SBM management leaving 63 in each direction to be allocated to sector HSUs. The uplink and downlink allocations are independent and therefore separately assignable. • For each fixed or nomadic HSU, Assured throughput is determined by the actual number of time slots allocated to it in either direction. Peak throughput (higher than Assured throughput) may be achieved by allocating unused downlink time slots or unallocated uplink time slots to very busy HSUs. • Time slot allocation is the only mechanism available for utilization management. • Manual time slot allocation for a fixed HSU is carried out during registration or Service update: Uplink traffic is data transfer from an HSU to an HBS Netronics NetAstra Family System Manual 181 Smart Bandwidth Management Chapter 8 Figure 8-1: Service (Time slots) update for a fixed HSU » 182 Manual time slot allocation for nomadic HSUs is carried out from the HBS Configuration window: Netronics NetAstra Family System Manual Smart Bandwidth Management Chapter 8 Figure 8-2: Service (Time slots) update for a nomadic HSUs How SBM Works Downlink traffic is fully under HBS control, so that it can allocate any unused downlink time slots to a very busy link, whether allocated or in free pool. The busy link may operate at an extremely high throughput, 1000% utilization not being uncommon as will be seen in an example below. Uplink traffic is completely unpredictable. Again, in the case of a very busy link with other links relatively idle, the HBS will allocate extra uplink time slots to the busy link from free pool only. If all of the uplink time slots are allocated, then SBM will not operate in the uplink direction. The Link Manager provides facilities to configure separate uplink and downlink time slots as shown in Figure 8-1 and Figure 8-2 above. It further monitors performance, providing tabular and graphic utilization statistics demonstrated below. Traffic Generation Tools For our examples in this chapter, we used the Iperf traffic generator with its GUI front end, Jperf. These are free open source software packages found here: Iperf: http://sourceforge.net/projects/iperf/ Jperf: http://sourceforge.net/projects/jperf/ Netronics NetAstra Family System Manual 183 Smart Bandwidth Management Chapter 8 Jperf includes the Iperf executable. The results below are indicative rather than accurate. Accurate traffic generation and measurement require hardware tools. See for example, http://www.ixiacom.com/. Traffic Generation Examples and method Each case demonstrated below is based on a single HBS with three fixed HSUs. Two of them will be idle and one will be heavily loaded (“the busy HSU”) to demonstrate the following cases: Table 8-1: Traffic generation examples - Time slot (TS) Allocation Example Downlink TS allocation Uplink TS allocation Purpose 1 All HSUs 2 TS All HSUs 2 TS Required downlink BW taken from unused time slots 2 Busy HSU 2 TS, others take all remaining TS All HSUs 2 TS Required downlink BW taken from allocated but unused time slots 3 All HSUs 2 TS Busy HSU 1 TS, others take all remaining TS Busy HSU “starved” in uplink direction 4 All HSUs 2 TS Busy HSU 1 TS, others take half remaining TS Busy HSU takes unallocated uplink time slots We will look at Example 1 in great detail, to ensure that you understand each item appearing in the SBM Utilization window. Subsequent examples will be explained more briefly, concentrating on utilization issues rather than graphic features. Traffic generation was accomplished by using two parallel Jperf sessions. One sent traffic at 100 Mbps from the HBS to the HSU. The second sent traffic at 50 Mbps from the HSU to the HBS. Both units were driven at maximum capacity. Example 1 Downlink Uplink allocation allocation All HSUs 2 TS All HSUs 2 TS Purpose Required downlink BW taken from unallocated time slots In Figure 8-3 below, observe that the sector is grossly under-allocated. This situation might be appropriate if all the client HSU were supplying Internet service only. 184 Netronics NetAstra Family System Manual Smart Bandwidth Management Chapter 8 Figure 8-3: Sector status for Example 1 The Rx and Tx Rates for the HBS in themselves do not mean very much. But the changes to them will be noticeable in the next three examples, offering a comparative basis for various time slot allocations. Sector Utilization Sector utilization is displayed by using the right most tab on the main window as seen in the next screen capture: Netronics NetAstra Family System Manual 185 Smart Bandwidth Management Chapter 8 Figure 8-4: Sector Utilization Pane from the main window for Example 1 The current numerical values for each measured field for the selected HSU may be seen by moving the horizontal slider just below the bottom segment. The graphs provide a time-line. Table 8-2 explains the purpose of each measurement. Table 8-2: Traffic statistics for each HSU Field name Unit Explanation Traffic UL Mbps Traffic load sent to the HBS Traffic DL Mbps Traffic load received from the HBS Sector Relative UL Percentage Percentage of sector UL time slots utilized for transmission to the HBS. May be over HSU’s allocation if there are unallocated UL time slots available. Sector Relative DL Percentage Percentage of sector DL time slots utilized for reception from the HBS. May be over HSU’s allocation if there are available UL time slots available, allocated or not HSU Based Relative UL Percentage Percentage of HSU UL time slots utilized for transmission to the HBS. May be over 100% if there are unallocated UL time slots available. HSU Based Relative DL Percentage Percentage of HSU DL time slots utilized for reception from the HBS. May be over 100% if there are available UL time slots available, allocated or not To get a better idea of what is happening, we will enlarge each section of Figure 8-4 in turn. 186 Netronics NetAstra Family System Manual Smart Bandwidth Management Chapter 8 The top left hand graph shows sector utilization: Figure 8-5: Sector Utilization - Example 1 Figure 8-5 shows the overall sector utilization as seen by the HBS. At any point, you can mouse-over any of the graphs to see the current value in a larger more convenient format. This is useful if you are using a laptop or other device with a small screen. The values in Figure 8-5 are as expected: The HBS is using a little over half its capacity in the uplink direction. The excess is overhead required to monitor the sector. In the downlink direction, the excess over 50% is incidental as will be seen from the top right graph showing sector utilization as a time line: Figure 8-6: Sector Utilization - time line - Example 1 The “glitches” are due to Jperf and host computer limitations. Netronics NetAstra Family System Manual 187 Smart Bandwidth Management Chapter 8 The lower pair of graphs show utilization of a selected HSU either sector relative or self-relative. Use the selector in the HSU utilization title bar to make a choice. We first look at the HSU based utilization. (In our view, the Sector relative measurements will make more sense if we first understand what is happening at the HSU level.) Figure 8-7 shows the HSU relative utilization for the selected HSU. The green percentage bars are easy to understand. They are both well over 100% since the whole sector is grossly under-allocated. Both values are over 1000%! More specifically, if the HSU could only use its two allocated time slots in both directions, it is fairly easy to demonstrate that it would not be able to operate at maximum capacity. Since it is able to “borrow” the unused uplink and downlink time slots, it reaches maximum throughput and operates at over ten times the assured rate define by two time slots in both directions. The blue uplink and downlink bars reflect the amount of traffic being handled by this HSU. The HSU itself is a 50 Mbps (aggregate) unit, so it is operating at a maximum capacity of about 25 Mbps in both directions. The black figures above each bar show the actual throughput in Mbps and are updated about once per second. Figure 8-7: HSU Utilization - HSU Relative - Example 1 Here is the time-line for the same HSU: Figure 8-8: HSU Utilization - HSU Relative time line - Example 1 Next, we examine the behavior of this HSU relative to the sector. 188 Netronics NetAstra Family System Manual Smart Bandwidth Management Chapter 8 Figure 8-9: HSU Utilization - Sector Relative - Example 1 The HSU utilization across the sector is not very different from Figure 8-5, since have one busy HSU and the rest idle. The busy HSU receives all the resources it needs, as reflected by the blue throughput bars which are almost the same as those in Figure 8-6. Figure 8-10 shows the sector relative time line, which is quite steady as to be expected. Figure 8-10: HSU Utilization - Sector Relative time line - Example 1 Example 2 Downlink Uplink allocation allocation Busy HSU 2 TS, others take all remaining TS All HSUs 2 TS Purpose Required downlink BW taken from allocated but unused time slots In Figure 8-11 below, observe that the sector is fully allocated in the downlink direction. Netronics NetAstra Family System Manual 189 Smart Bandwidth Management Chapter 8 Figure 8-11: Sector status for Example 2 - All DL time slots allocated Since all unused downlink slots are available to the busy HSU, the utilization graphs for this case are very similar to those of Example 1 and we will not repeat them all. The main difference is in the sector utilization: Figure 8-12: Sector Utilization - Example 2 The downlink utilization is higher than for Example 1, reflecting the fact that the HBS must spend proportionally more time checking the inactive HSUs. Similarly, the Sector relative HSU downlink utilization is higher by the same amount. 190 Netronics NetAstra Family System Manual Smart Bandwidth Management Chapter 8 Example 3 Downlink allocation Uplink allocation Purpose All HSUs 2 TS Busy HSU 1 TS, others take all remaining TS Busy HSU “starved” in uplink direction In this case, we are deliberately “starving” the busy HSU, by allocating it one uplink time slot and dividing the rest between the inactive HSUs. The situation is shown in Figure 8-13. Figure 8-13: Sector status for Example 3 - All UL time slots allocated The effect on sector utilization is quite dramatic as seen in Figure 8-14 below. Netronics NetAstra Family System Manual 191 Smart Bandwidth Management Chapter 8 Figure 8-14: Sector Utilization Pane from the main window for Example 3 Uplink utilization is 100% despite almost no traffic getting through from the busy HSU to the HBS as seen in Figure 8-15 and the enlarged left hand bar chart in Figure 8-16 below: Figure 8-15: HSU Utilization - Sector Relative time line - Example 3 Figure 8-16: HSU Utilization - Sector Relative - Example 3 192 Netronics NetAstra Family System Manual Smart Bandwidth Management Chapter 8 In all of this, downlink utilization is unaffected and remains as for the first example. The importance of leaving a “pool “of unallocated uplink time slots (if possible) is illustrated in Example 4, which prevents HSU “starvation”. Example 4 Downlink Uplink allocation allocation All HSUs 2 TS Busy HSU 1 TS, others take half remaining TS Purpose Busy HSU takes unallocated uplink time slots This example, as seen in Figure 8-17 leaves a pool of unallocated UL time slots to avoid busy HSU starvation. Figure 8-17: Sector status for Example 4 - Half UL time slots allocated Netronics NetAstra Family System Manual 193 Smart Bandwidth Management Chapter 8 Figure 8-18: Sector Utilization Pane from the main window for Example 4 Figure 8-19: HSU Utilization - Sector Relative time line - Example 4 The left hand bar graphs for each section are instructive. Here first, is Sector Utilization: 194 Netronics NetAstra Family System Manual Smart Bandwidth Management Chapter 8 Figure 8-20: Sector Utilization - Example 4 The downlink results reflect both the actual traffic and HBS monitoring of all the HSUs. The uplink figures reflect the same thing. Despite there being more than adequate free uplink time slots, the HBS overhead of taking care of inactive HSUs is noticeable. Here is HSU self-relative utilization: Figure 8-21: HSU Utilization - HSU Relative - Example 4 The percentage utilization here is very high - significantly more so than Example 1. The actual traffic throughputs to the busy HSU are slightly lower - for the same overhead reasons. Similar considerations are reflected in the HSUs sector relative utilization: Figure 8-22: HSU Utilization - Sector Relative - Example 4 Netronics NetAstra Family System Manual 195 Smart Bandwidth Management Chapter 8 Example Summary For readability reasons, we will use the left hand bar graphs rather than the time lines to summarize the scenarios. In each case, we have chosen the bar graphs to be as representative as possible. 196 Netronics NetAstra Family System Manual Smart Bandwidth Management Table 8-3: Unitization Summary for our four examples 1 2 3 4 UL All HSUs 2 TS All HSUs 2 TS Busy HSU 1 TS, others all remaining TS Busy HSU 1 TS, others half remaining TS DL All HSUs 2 TS Busy HSU 2 TS, others, remaining TS All HSUs 2 TS All HSUs 2 TS HSU sector HSU self Sector Utilization Ex. Chapter 8 Netronics NetAstra Family System Manual 197 Smart Bandwidth Management Chapter 8 About HBS Overhead There is always some overhead on the HBS. Recall that one time slot in each of the uplink and downlink directions is reserved by the HBS for sector management. In our four examples we noted that the occurrence of HBS overhead increases when allocating time slots even to “idle” HSUs. As we saw, the percentage point sector load increases as you allocate further downlink time slots, or maintain any unused but allocated uplink time slots. It is straightforward to demonstrate that overhead is also channel-bandwidth dependent. If you repeat the four examples under 10 and 5 MHz channel bandwidth, the load overhead percentage increases as channel bandwidth decreases. Conversely, if you are able to operate at 40 MHz, the overhead percentage drops. To illustrate the effect of different channel bandwidths, we show in order, Example 3 at 10, 20 and 40 MHz: Figure 8-23: Example 3: Half the uplink time slots reserved at 10 MHz CBW Notice that at 10 MHz channel bandwidth, the sector utilization is 100% in both directions! 198 Netronics NetAstra Family System Manual Smart Bandwidth Management Chapter 8 Figure 8-24: Example 3: Half the uplink time slots reserved at 20 MHz CBW At 20 MHz channel bandwidth, the sector utilization is around 80% in the uplink direction and about 63% in the uplink direction. Figure 8-25: Example 3: Half the uplink time slots reserved at 40 MHz CBW At 40 MHz channel bandwidth, the sector utilization is around 70% in the uplink direction and about 26% in the uplink direction. The percentage sector utilization has dropped dramatically for the same traffic load. Netronics NetAstra Family System Manual 199 Smart Bandwidth Management Chapter 8 TCP/IP and other SLA Considerations The foregoing example were all based on UDP traffic. If the sector traffic has a heavy TCP/IP content (including dependent protocols such as HTTP/HTTPS) you must allow sufficient time slots particularly in the uplink direction to ensure the that TCP/IP ACK messages are transmitted without delay. Some theoretical calculations are possible, but ultimately you will need to use a hardware traffic generator to assist your time slot allocation. This is particularly critical if you are operating a sector with SLA. The same holds true if you are offering a backhaul service with SLA regardless of the traffic packet composition. 200 Netronics NetAstra Family System Manual Chapter 9 Bringing Up a Mobility Sector Scope of this Chapter Mobility solutions offers powerful, easy to deploy base stations that guarantee high capacity connectivity to ruggedized mobile units mounted on vehicles, trains and ships. NetAstra PtMP Mobility enables: • Perimeter security - two way video transmission between patrol vehicles • On-board video surveillance and Internet access for public transportation • Oil rig to ship - video and data connectivity • Unmanned vehicle operation – remote control of heavy machinery for mines and ports NetAstra PtMP is designed to ensure that HMUs attain continuous service within a sector and seamless service when crossing into a new sector. Mobility applications are typically large scale projects. A railway application for example, requires a chain of overlapped sectors along hundreds or thousands of kilometers of railway track. The detailed use of NetAstra PtMP elements in a Mobility application is beyond the scope of this manual. The purpose of this chapter is to demonstrate the use of Link Manager in bringing up and managing a physically installed Mobility sector. In practice, one sector would be built by hand (as we will do below). The complete sector configuration can be saved and uploaded to further sectors. For Mobility project management questions, please consult Netronics Customer Service. Concepts Each HMU is allocated to one of four HBS levels labelled A, B, C and D. The operating parameters for each level (such as VLAN, MIR, QoS, time slots, fixed rate, Spatial Multiplexing/ Diversity antenna mode) can be different for each level allowing for broad prioritization of service between different types of mobile units. This requires that each HMU be assigned a level to join a sector. The actual joining process is quite dynamic since the HSU will typically move from sector to sector at high speed. Netronics NetAstra Family System Manual 201 Bring Up a Mobility Sector Chapter 9 Changing any of VLAN, MIR, QoS, fixed rate, Spatial Multiplexing/Diversity antenna mode for one configured HSU at a given level, changes all other HSUs at that level. If you add a new HSU to a sector (by direct connection) at a given level, at sync time, it will acquire the existing parameters for that level. A HMU must be able to send and receive service traffic while moving. To avoid service “glitches” while switching between successive HBSs, the HBS hand-over time must be very small. For NetAstra PtMP HBSs it is typically less than 500 ms, depending on selection of Mobility channels. A HMU detects that it is time to seek the next HBS when its rate drops below a predefined minimum capacity threshold based on a minimum supported rate. The HBS chosen will be the first found offering an RSS level above a minimum threshold (by default -60 dBm), which you can configure for each HMU. If no HBS can be found satisfying the latter criterion, then the HSU will sync with the HBS that has the highest RSS level (even though it is below the RSS Threshold). It is up to the Mobility Project RF planners to ensure that HBSs are spaced with coverage overlap so that on the one hand the HSU RSS level does not fall so low that it loses synchronization between HBSs and on the other hand, successive HBSs do not interfere with one another. In a Mobility project, it is fairly typical to use a fixed channel at each HBS and to have the HSUs configured to use the group of channels used by the HBSs so as to minimize hand-over time. What You Need The NetAstra Mobility products are different from the fixed/nomadic products. They have different part numbers. Ensure that your HBS and HSUs as delivered are the Mobility models. Each sector comes with a pre-installed operating band. You can change it in the usual way. If you do ensure than each of the HSUs is changed. Alternatively (better), bring up the sector as is and change the band sector-wide. Getting Started We will create a sector with three HMUs. There is no difference in the log-on procedure to the HBS. To avoid needless repetition and issues not really relevant to this chapter, we will start out with the HBS and the HMUs set to there factory defaults except for the IP addresses. We will maintain the IP addresses used in the previous chapters. In practice, the IP addresses of sector element may well be configured using Direct or Local Connection prior to reproduction of sector parameters from a “template” sector (such as we are creating) and most likely before deployment in the field. Further we will not make any use of the Map view in this chapter. Once again, in practice, a Mobile system would be managed from a NOC using an enterprise standard NMS. The Table view after logging on to the HBS looks like this: 202 Netronics NetAstra Family System Manual Bring Up a Mobility Sector Chapter 9 Figure 9-1: Mobile HBS after initial log-on You activate the HBS in the usual way. Be aware that use of fixed versus automatic channel selection is part of your RF planning. We will maintain the naming scheme used in earlier chapters, but our HSUs will have names like HMU.01.01 and so on (instead of HFU and HNU for fixes and nomadic types). The activation wizard pages are identical to those used for a fixed sector. The first difference between a new activated mobile and fixed sector is that the HSUs do not appear in the Table view. Preparing the HBS Open the Configuration window and then the Mobility tab: Netronics NetAstra Family System Manual 203 Bring Up a Mobility Sector Chapter 9 Figure 9-2: HBS Mobility Configuration The maximum distance is in fact a nominal common distance assumed by the HBS for all mobile HSUs in its sector. It is taken as the maximum distance any HSU can be from a HBS. (It effectively guarantees an identical propagation delay for all HSUs in the sector to compensate for rapid HSU movement.) If the distance is set too small, there is a risk of sync loss for distant HSUs; if it is set too large it will reduce performance across the sector. The choice is part of RF planning for Mobility projects and is beyond the scope of this manual. We will pre-register three HSU slots to levels A, B and C and time slots to each level as shown: 204 Netronics NetAstra Family System Manual Bring Up a Mobility Sector Chapter 9 The time slots as shown mean 8 per unit X 3 units at level A, 6 per unit X 3 units at level B and so on up to 64 time slots. Click Register, leave the maximum distance as is and click OK to leave the configuration window. Here is the result: We have “place holders” for the maximum allowable mobile HMUs in the sector. Netronics NetAstra Family System Manual 205 Bring Up a Mobility Sector Chapter 9 Registering HMUs Registration of actual HMUs is accomplished by direct connection. You assign each one to one of the levels. At the same time, you may configure other parameters such as Air Interface, IP address (though not strictly necessary). To assign a HMU to a level by direct connection: 1. Log on to a mobile HMU in the usual way. Here is the opening window: 206 Netronics NetAstra Family System Manual Bring Up a Mobility Sector Chapter 9 2. Open the Configuration window. Update the system parameters. Netronics NetAstra Family System Manual 207 Bring Up a Mobility Sector Chapter 9 3. Open the Air Interface tab. 4. Enter the sector ID (EBGX20561334 in our example) and if necessary, change the Channel Bandwidth. 5. Open the Tx & Antenna tab and ensure that the antenna type is correct. You may change any other antenna parameters as well. We set Tx Power for our example to 5 dBm. 6. (Optional) Open the Management tab and set the HSU IP address. 7. Open the Mobility tab. Click the required level. We leave this HSU on A. We will place our other two HSUs in level B. 208 Netronics NetAstra Family System Manual Bring Up a Mobility Sector Chapter 9 8. Set the RSS threshold parameter. 9. Chose the required Available Channels from the list. 10. Click OK to accept your changes and close the window. 11. Repeat steps 1 to 9 for each HMU. Netronics NetAstra Family System Manual 209 Bring Up a Mobility Sector Chapter 9 For our example, we assign one HSU each to levels A, B and C. Here then, is the final result: From this point, you may use the configuration and reporting facilities in the usual way. Saving the HBS Settings for Reuse as a Template Refer to Figure 9-2 of which the following is an excerpt: Following any further fine tuning, open up the HBS Mobility tab, and click Save. You are offered the standard Save File dialog. Save the HBS Mobility settings file (MobilitySettings.mob) to a convenient location. 210 Netronics NetAstra Family System Manual Bring Up a Mobility Sector Chapter 9 Creating a Sector from a HBS Template The saved settings file may be used as a template for further sectors. To create a sector from a HBS Mobility settings file: 1. Starting with a new HBS and HSUs, log on to the HBS. 2. Activate the HBS in the usual way. 3. Open the Mobility tab in the Configuration window. In the Save / Upload Settings window, click Upload. Figure 9-3: Preparing to upload the Mobility file 4. In our case we have one HBS, so it is sufficient to enter the Mobility file as shown and then click Start. After a few moments, the Status field indicates Done. The result is as expected: Netronics NetAstra Family System Manual 211 Bring Up a Mobility Sector Chapter 9 You will of course need to separately configure the participating HSUs. If we connect our three configured mobile HSUs, we revert to our original sector. To create a sector from a HBS IP list and a Mobility settings file: 1. In the window of Figure 9-3, enter a HBS list file. The format of the file is lines of <IP address> <Read-Write community> For example, 10.104.50.200 netman All of the HBSs need to activated and accessible (via a switch) to the managing computer. They need not be on the same subnet. Alternatively, enter them one by one using the Plus button. Any unactivated HBSs will be shown as unavailable: 2. Make any further changes to the displayed list using the Plus/Minus buttons. 3. Click Start to commence the process. 4. The list window will indicate the success or otherwise of the upload for each HBS. 212 Netronics NetAstra Family System Manual Chapter 10 Monitoring and Diagnostics The Link Manager application enables you to monitor the sector, as well as perform basic diagnostic operations such as throughput testing. This chapter covers: • Retrieving link information • Throughput checking • Recent events • Performance monitoring • Active Alarms • Link Budget Calculator • Online Help • Obtaining support Retrieving Link Information (Get Diagnostics) The Get Diagnostics feature collects and writes link and Manager information from selected sites into a text file. The file information can be used for diagnostics and should be sent to Netroncis Customer Support to expedite assistance. The following table lists link and system information that can be monitored. Table 10-1: Get Diagnostics Data and Description Data Description System Data General information about the system • Events Log • List of system events including those from other sites if this site is defined as the trap Destination Last 256 events from all sites Sector Information Information about the HBS and HSU settings Site Configuration Data about the site parameters Netronics NetAstra Family System Manual 213 Monitoring and Diagnostics Chapter 10 Table 10-1: Get Diagnostics Data and Description (Continued) Data Description Monitor Detailed event data record Restriction Table This is the Connection Table from Figure 6-11 Active Alarms Active Alarms are raised for any event affecting availability or quality of service Performance Monitor Network performance data over defined time periods - - every 15 minutes for 30 days Spectrum Analysis For HBS, selected HSUs and general inter fence statistics for the sector To get diagnostics: 1. Click the Get Diagnostics button: Figure 10-1: Get Diagnostics Dialog Box - HBS 214 Netronics NetAstra Family System Manual Monitoring and Diagnostics Chapter 10 Figure 10-2: Get Diagnostics Dialog Box - HSU 2. Select or deselect the data options. If the file is to be sent to Netronics Customer Support leave all options checked. 3. HBS only: Choose HSUs to be included. 4. Click File Path to specify the file name and older in which you want to save the file and then click Run to save the information. On completion, the status of the checked items is confirmed: The content of the Diagnostics report is an aggregate of all the more specific reports discussed below. It is primarily intended for use by Netroncis Customer support. Netronics NetAstra Family System Manual 215 Monitoring and Diagnostics Chapter 10 The Spectrum Analysis output is available directly from the Spectrum View utility as a CSV file (see Chapter 19). The format in the Diagnostics report is intended for use by Netronics Customer support. The Spectrum Analysis section of the Diagnostics report is based on the last available spectrum analysis (if any). If you are submitting a support request involving interference issues, or if you are specifically asked by Customer support to submit a Diagnostics report containing a recent spectrum analysis, you should carry out the analysis in accordance with the instructions in Chapter 19 prior to using the Get Diagnostics facility. Link Compatibility Compatibility between the HBS and an HSU is primarily determined by the software level of each element. Advisory messages are typically displayed as follows: Figure 10-3: Typical incompatibly messages for HSUs on HBS display On the HBS window, these messages can only be seen in HSU list mode, and in the HBS Active Alarms log. 216 Netronics NetAstra Family System Manual Monitoring and Diagnostics Chapter 10 Figure 10-4: This HSU requires a software upgrade On the HSU window, these messages appear as shown in Figure 10-4. The messages are as follows: Software Upgrade available This is an advisory message. If the upgrade is not carried out, then corrections in the upgrade will not be available. This message may appear for an active HBS or any HSU in the sector, registered or not. Software Upgrade recommended This is also an advisory message. It typically occurs with a new HBS or new HSUs added to a sector. If the upgrade is not carried out, then the HBS or HSU (s) will ope rate with limited or degraded functionality. This message may appear for an active HBS or any HSU in the sector, registered or not. Software Upgrade required This message will be displayed if a product band ID mismatch is detected. Thus for a HBS, it cannot occur unless one or more HSUs are registered. Affected HSUs will always show it as depicted above in Figure 10-4 above. For such HSUs, traffic is disabled and the only services available are Change Band and Software Upgrade. Throughput Checking In this mode, NetAstra estimates Ethernet throughput by filling frames over the air to maximum for 30 seconds. This mode should not influence service. The test may be carried out for the HBS or an HSU. Netronics NetAstra Family System Manual 217 Monitoring and Diagnostics Chapter 10 To use Throughput Checking: 1. HBS: Chose Estimated Throughput as shown: HSU from HBS: Chose Estimated Throughput as shown: HSU direct or over the air: Unavailable. 2. In either case, you are asked to enter the testing period: 3. Enter the required time and click OK to continue. The Ethernet services area changes appearance and the estimated throughput is displayed: 218 Netronics NetAstra Family System Manual Monitoring and Diagnostics Chapter 10 At the end of 30 seconds, the display reverts to normal. Recent Events The Recent Events log records system failures, loss of synchronization, loss of signal, compatibility problems and other fault conditions and events. Note The foregoing event types include events from all links for which this managing computer has been defined as the traps address. Only events from NetAstra equipment will be shown. Alarms (traps) are displayed in the Events Log in the lower panel of the main window. The Events Log may be saved as a text file. The Events Log includes the following fields: » » » » Sequential number (ID) Date and time stamp Message Trap source IP address of the ODU that initiated alarm. You may filter the events shown by choosing All or Internal. Netronics NetAstra Family System Manual 219 Monitoring and Diagnostics Chapter 10 A full report may be seen by clicking Recent Events: Figure 10-5: Recent Events: Left to right: HBS, HSU from HBS, HSU direct In each case the report has the same format: Here is a more readable enlargement of the table area: The left button may be used to save the report to a file. 220 Netronics NetAstra Family System Manual Monitoring and Diagnostics Chapter 10 Performance Monitoring NetAstra Performance Monitoring constantly monitors traffic over the radio link and collects statistics data for the air interface and Ethernet ports. It does so continuously, even when the Link Manager is not connected. Figure 10-6: Performance Monitoring: Left to right: HBS, HSU from HBS, HSU The on-screen and generated reports have the same general formats, but there are differences in what is reported. HBS The HBS Performance Monitoring window offers the following button menu: Choose the data period required with the 15 Minutes button. • • • Current gives you the latest entry. 15 Minutes provides data in a scroll down list in 15 minute intervals Daily (24 hours) shows results for the last 30 days at midnight. Netronics NetAstra Family System Manual 221 Monitoring and Diagnostics Chapter 10 The Threshold button enables you to set the upper traffic threshold for reporting. Traffic conditions above the threshold indicate congestion and probably lost frames. Figure 10-7: Setting the upper traffic threshold To get data for display, click Get Data. The process may take a few seconds. Here is an extract Performance Monitoring report based on 15 minutes recording: Figure 10-8: HBS - Performance Monitoring report - Valid data The meaning of the column headings is shown in the following table: Table 10-2: HBS Performance Monitoring Fields Abbreviation Meaning Description Integrity Valid data flag Green tick for current and valid; Red cross for invalidated data (See example below). Note that the Performance Monitoring data is not valid if not all the values were stored (e.g., due to clock changes within the interval or power up reset) Date & Time Time stamp Data are recorded every 15 minutes; the last 30 days of recordings are maintained. Roll-over is at midnight. UAS Unavailable Seconds Seconds in which the interface was out of service. ES Errored seconds The number of seconds in which there was at least one error block. SES Severe Errored Seconds The number of seconds in which the service quality was low as determined by the BBER threshold. BBE Background Block Error The number of errored blocks in an interval. Rx MBytes Received Mbytes The number of Megabytes received at the specified port within the interval Column Heading 222 Netronics NetAstra Family System Manual Monitoring and Diagnostics Chapter 10 Table 10-2: HBS Performance Monitoring Fields (Continued) Column Heading Abbreviation Meaning Description Tx MBytes Transmitted Mbytes The number of Megabytes transmitted at the specified port within the interval. Above Traffic Thresh Threshold set in Figure 10-7 Seconds count when actual traffic exceeded the threshold Active Seconds The number of seconds that the configured Ethernet service is active Data becomes invalidated following a reset. In the example below, the HBS was reset shortly after 11:00. All data prior to that time becomes invalidated. The only valid item is the first recording after re-sync. Figure 10-9: HBS - Performance Monitoring report - Showing invalid data Use the Save button to store the current data to file and the Clear button to delete currently stored performance data. HSU The Performance Monitoring window for the HSU is slightly different depending on whether you access it from the HBS or directly: From the HBS You may choose between an uplink or downlink report. The remaining buttons have the same functionality as they do for the HBS. (There is no significance in monitoring period button label, Daily. The options are as for the HBS.) Netronics NetAstra Family System Manual 223 Monitoring and Diagnostics Chapter 10 Direct or Over the Air Here, only a downlink report is available. Otherwise the buttons have the same functionality as they do for the HBS. Here is an extract from a 15 minute report. We have broken it into three pieces so that it is legible: Figure 10-10: HSU - Performance Monitoring report - Both valid and invalid data (1 of 3) Figure 10-11: HSU - Performance Monitoring report - Both valid and invalid data (2 of 3) 224 Netronics NetAstra Family System Manual Monitoring and Diagnostics Chapter 10 Figure 10-12: HSU - Performance Monitoring report - Both valid and invalid data (3 of 3) The HSU report contains many more fields than the HBS. Here is their meaning: Table 10-3: HSU Performance Monitoring Fields Abbreviation Meaning Description Integrity Valid data flag Green tick for current and valid; Red cross for invalidated data (See example below). Note that the Performance Monitoring data is not valid if not all the values were stored (e.g., due to clock changes within the interval or power up reset) Date & Time Time stamp Data are recorded every 15 minutes; the last 30 days of recordings are maintained. Roll-over is at midnight UAS Unavailable Seconds Seconds in which the interface was out of service ES Errored seconds The number of seconds in which there was at least one error block. SES Severe Errored Seconds The number of seconds in which the service quality was low as determined by the BBER threshold BBE Background Block Error The number of errored blocks in an interval Column Heading Min RSL (dBm) The minimum of the receive signal level (measured in dBm) Max RSL (dBm) The maximum of the receive signal level (measured in dBm) RSL Thresh 1 (-88dBm) The number of seconds in which the Receive Signal Level (RSL) was below the specified threshold. RSL Thresh 2 (-88dBm) The number of seconds in which the RSL was below the specified threshold. Min TSL (dBm) The minimum of the transmit signal level (measured in dBm) Max TSL (dBm) The maximum of the transmit signal level (measured in dBm) TSL Thresh (25 dBm) The number of seconds in which the Transmit Signal Level (TSL) was above the specified threshold BBER Thresh (1.0%) The number of seconds in which the Background Block Error Ratio (BBER) exceeded the specified threshold Rx MBytes Received Mbytes The number of Megabytes received at the specified port within the interval Tx MBytes Transmitted Mbytes The number of Megabytes transmitted at the specified port within the interval. Netronics NetAstra Family System Manual 225 Monitoring and Diagnostics Chapter 10 Table 10-3: HSU Performance Monitoring Fields (Continued) Column Heading Abbreviation Meaning Description Below Capacity Thresh (0.0 Mbps) Seconds count when throughput fell below the threshold set in Figure 10-7 Above Traffic Thresh Threshold set in Figure 10-7 Seconds count when actual traffic exceeded the threshold As for the HBS, use the Save button to store the current data to file and the Clear button to delete currently stored performance data. More on the Thresholds RSL Thresholds Two RSL Thresholds can be defined. They are used as an indicator of problems in the radio channel. You can check the RSS from the Link Budget Calculator results during installation. Values of -5 dB and -8 dB from the current RSS are typical. TSL Threshold A counter is maintained, of the number of second intervals during which Tx power exceeds this threshold. BBER Threshold The Background Block Error Ratio is measured as a percentage. The threshold can be set from 0.1% up to 50%. An 8% threshold is recommended. If there are no problems during the interval, then for that threshold, the recommended BBER value should be 0. Since the system provides a lossless Ethernet service, there is throughput degradation in case of interference. The degradation is proportional to the BBER. Ethernet Thresholds - Capacity This is used as a basis for checking adherence to a Service Level Agreement. It is the number of seconds count that the link capacity falls bellow the threshold. Ethernet Thresholds - Traffic The number of seconds count that received traffic exceeded this threshold. It can be used to measure traffic peaks. Link Manager Traps The Link Manager application issues traps to indicate various events, displayed in the Events Log. Table 10-4: Link Manager Trap Messages Trap Message Severity Remarks Cannot bind to trap service port. Port 162 already in use by ProcessName (pid: ProcessId) Warning Link Manager will not catch any traps from the ODU, some other application has grabbed this port. Device unreachable! Error Check connectivity to ODU 226 Netronics NetAstra Family System Manual Monitoring and Diagnostics Chapter 10 Table 10-4: Link Manager Trap Messages (Continued) Trap Message Severity Remarks Connected to <site_name> Information <site_name> Site will be reset. Information Restore Factory Default Settings in process on Site <site_name> Information Factory Settings: The process was not finished due to connection issues. Warning Factory setting failed due to connectivity problem to ODU Reset: The process was not finished due to connection issues. Warning Factory setting failed due to connectivity problem to target - ODU will not be reset Cannot Write to Monitor file. There is not enough space on the disk. Warning Free some space on disk on the managing computer and retry Windows Error: <error_ID>. Cannot Write to Monitor file. Warning Operating System error on the managing computer Identical IP addresses at <local_site_name> and <remote_site_name> Warning Set up a different IP to each site The Product is not identified at the <local_site_name> site. Warning Link Manager is incompatible with the ODU software version The Product is not identified at the <remote_site_name> site. Warning The Product is not identified at both sites. Warning Product Not Identified! Warning The Manager identified a newer ODU release at the <remote_site_name> site. Warning The Manager identified a newer ODU release at the <local_site_name> site. Warning Newer Version identified at the <local_site_name> site. Warning ODU release is newer than Link Manager release. Wizards are not available. Link Manager will be used just for monitoring. Upgrade the Link Manager. (You will get this message as a pop up) ODU release is newer than Link Manager release. Wizards are not available. Link Manager will be used just for monitoring. Upgrade the Link Manager. Newer Version identified at the <remote_site_name> site. Warning Newer Version Identified! Warning Active Alarms Active Alarms are raised for any event affecting availability or quality of service. The Active Alarms button, is available for the HBS and the HSUs.Her is an example: Netronics NetAstra Family System Manual 227 Monitoring and Diagnostics Chapter 10 Here is the table part in more detail: Current Active Alarms may be saved to a file. The list displayed will not be updated unless you click Refresh. Other Diagnostic Aids Link Budget Calculator The Link Budget Calculator is part of the Link Manager software and is found in the Help menu. This useful utility enables you to calculate the expected performance of the wireless link and the possible configurations for a specific link range including antenna size, cable loss and climate conditions. For full details, see Chapter 18. To run the Link Budget Calculator from the Windows Start Menu: • Go to Start | Programs | Link Manager | Link Budget Calculator Online Help Online help can be accessed from the Help menu on the main window of the Link Manager. Using most common Web browsers, it may also be run going to Start | Programs | Link Manager | User Manual Customer Support Customer support for this product can be obtained from the local VAR, Integrator or distributor from whom it was purchased. 228 Netronics NetAstra Family System Manual Part 4 Site Synchronization Netronics NetAstra Family System Manual 229 230 Netronics NetAstra Family System Manual Chapter 11 Hub Site Synchronization What is Hub Site Synchronization? When several units are collocated at a common hub site, interference may occur from one unit to another. NetAstra ODU units support the collocation of more than two units at a central site. Like any other RF deployment, the wireless operation is highly dependent on factors such as available frequencies, the physical spacing between radios, other interfering radios, and whether NetStream, NetAstra units are installed. • • HSS does not eliminate the need for careful RF planning to ensure the design will work as planned. See Chapter 2 for information on installation site survey. HSS support for NetAstra PtMP HBSs is model dependent The Netronics Hub Site Synchronization (HSS) method uses a cable connected from the master ODU to all collocated ODUs; this cable carries pulses sent to each ODU, which synchronize their transmission with each other. The pulse synchronization ensures that transmission occurs at the same time for all collocated units. This also results in all of the hub site units receiving data at the same time, eliminating the possibility of interference that could result if some units transmit while other units at the same location receive. Figure 11-1 illustrates interference caused by non-synchronized collocated units. Netronics NetAstra Family System Manual 231 Hub Site Synchronization Chapter 11 Figure 11-1: Interference caused by collocated units Adding HSS removes interference as shown in the next two figures: Figure 11-2: Collocated units using Hub Site Synchronization (1) Figure 11-3: Collocated units using Hub Site Synchronization (2) The units are connected to each other with HSS cables and HSS Distribution Units. One of the radios in the site is defined as HSS Master and generates synchronization pulses. The other collocated radios in the site - the HSS Clients, are connected to the HSS Master and synchronize their transmission to the pulses. An HSS Client can be configured to work in one of two modes: 232 Netronics NetAstra Family System Manual Hub Site Synchronization • • Chapter 11 HSS Client-Continue Transmission (HSC-CT): If the unit loses synchronization with the HSS Master, the link remains active. However, without synchronization pulses, it is possible that this unit will cause interference. HSS Client-Disable Transmission (HSC-DT): If the unit loses synchronization with the HSS Master, the link is dropped until the synchronization pulses resume. This setting prevents the unit from causing interference. The remote ODUs that are not located at the hub site, are called Independent Units. Hardware Installation Connecting an HSS Unit A single HSS unit supports up to ten collocated ODUs. In addition to each unit being connected to its PoE device, the collocated unit has an additional cable that is connected to the HSS Unit. The HSS Unit is a compact, weatherproof (IP67) connector box that is installed on the same mast as the ODUs. All collocated units connect to this box using CAT-5e cable. Cables in prepared lengths are available for purchase. The HSS unit is supplied with ten protective covers; any port not in use must be closed with a protective cover. Figure 11-4: HSS Interconnection Unit • • For a single HSS unit, ensure that the collocated units are connected in sequence from SYNC 1. If an ODU is removed from the hub site, then all remaining ODUs must be reconnected to maintain the connectivity. You may cascade (daisy-chain) two or more HSS Units with an HSS cable. The method is described in detail below. Netronics NetAstra Family System Manual 233 Hub Site Synchronization Chapter 11 To connect an ODU to an HSS unit: 1. Unscrew the protective cover from the port marked SYNC 1. 2. Connect the RJ-45 connector from one end of the prepared CAT-5e cable to SYNC 1. 3. Connect the other end of the CAT-5e cable to the ODU connector labeled SYNC. 4. Tighten the protective seal that is on the prepared cable over the RJ-45 connector. 5. Repeat for all ODUs that are to be collocated at the hub site. The next ODU to be connected is inserted in SYNC 1, SYNC 2, followed by SYNC 3 and so on. Using a Single HSS Unit Figure 11-5: HSS Wiring schematic The wiring, as shown in Figure 11-5 is self explanatory. The Sync signal path is less self-evident. If we set ODU 1 (on SYNC 1) to HSS Master, then the Sync signal path is as shown in Figure 11-6. The signal travels from ODU 1 to SYNC 1, from SYNC 1 to SYNC 2, from SYNC 2 to ODU 2 and back again. The back and forth paths repeat for the second to fourth ODU, from left to right. The signal exits the HSS unit at SYNC 5 and terminates in ODU 5. The choice of the ODU on SYNC 1 as HSS master is not mandatory, but is good practice. If for example we were to use ODU 3 as HSS master, the Sync signal path would be ODU 3 to SYNC 3, then left and right to SYNC 2 and SYNC 4. It would then propagate to ODUs 2 and 4, terminating at both ODUs 1 and 5. 234 Netronics NetAstra Family System Manual Hub Site Synchronization Chapter 11 Figure 11-6: HSS sync signal path with ODU 1 as HSS Master Using More than One HSS Unit In a large collocation site, several HSS units may be cascaded (daisy-chained) subject to the following conditions: Condition 1: Cabling Sequence 1. Up to nine ODUs may be connected to the first HSS unit using HSS ports SYNC 1, SYNC 2, SYNC 3,... up to SYNC 9 in order without leaving empty ports. 2. The next available SYNC port of the first HSS unit should be connected to SYNC 10 of the second HSS unit as shown in Figure 11-7. In the illustration, the next available port on the first HSS unit is SYNC 6. 3. The second HSS unit may be filled out with up to nine more ODUs in reverse order. That is, connect SYNC 9, SYNC 8, SYNC 7... as shown in Figure 11-7. Figure 11-7: Cascading two HSS units Netronics NetAstra Family System Manual 235 Hub Site Synchronization Chapter 11 • To add a further HSS unit: Connect the next available SYNC port from the second HSS unit in descending order (SYNC 5 in Figure 11-7) to SYNC 1 of the third HSS unit. • ODUs are connected to the third HSS unit from SYNC 2 as shown in Figure 11-8, in ascending order: Figure 11-8: Cascading three HSS units • If further ODUs are required, observe the convention that additional even numbered units are populated in descending order from SYNC 9 and odd numbered HSS units are populated in ascending order from SYNC 2. If an ODU is disconnected from an HSS unit, then all remaining ODUs must be moved up or down to maintain the connectivity. Condition 2: Total HSS Cable Length The total path of the HSS sync pulse must not exceed 300m. This applies no matter how many HSS units are used. To illustrate the method for calculating the sync pulse path length we show three examples. For our purpose, let: Lmn denote the length of the ODU-HSS unit cable at SYNC n on HSS unit m Hm be the length of the cable joining HSS unit m to HSS unit m+1 One HSS unit with five collocated ODUs PathLength = L11 + 2 x L12 + 2 x L13 + 2 x L14 + L15 Two cascaded HSS units as shown in Figure 11-7 PathLength = L11 + 2 x L12 + 2 x L13 + 2 x L14 + 2 x L15 + H1 + 2 x L29 + 2 x L28 + 2 x L27 + L26 236 Netronics NetAstra Family System Manual Hub Site Synchronization Chapter 11 Three cascaded HSS units as shown in Figure 11-8 PathLength = L11 + 2 x L12 + 2 x L13 + 2 x L14 + 2 x L15 + H1 + 2 x L29 + 2 x L28 + 2 x L27 + 2 x L26 + H2 + 2 x L32 + 2 x L33 + 2 x L34 + L35 ODU/HSS Unit Connection Pinout Table 11-1: ODU/HSS Unit Connection Pinout Color ODU RJ-45 HSS UNIT RJ-45 White/Green 1 1 Green White/Orange Not connected Orange 6 6 Blue 4 4 White/Blue 5 5 White/Brown 7 7 Brown 8 8 Radio Frame Pattern (RFP) A Radio Frame Pattern (RFP) is the cycle duration of transmit and receive of the air-frame. Without HSS When selecting Ethernet services, the system automatically and transparently chooses the optimal RFP. RFP and HSS When HSS is used, the RFP for the collocated radios must be selected manually. NetAstra radios use the Time Division Duplex (TDD) mechanism. Under HSS, TDD enables synchronization of transmission for the collocated units as shown in Figure 11-9: Netronics NetAstra Family System Manual 237 Hub Site Synchronization Chapter 11 Figure 11-9: Radio Frame Pattern Five RFP types (A to E) are available. Under HSS the RFP must be configured by the user depending on the type of the radio products, services and channel bandwidth in accordance with the Table 11-2 and Table 11-3. The tables describe the efficiency of the air interface according to the RFP type, radio products mix, services and channel bandwidth. The tables may also be viewed in the Link Manager and in the Link Budget Calculator. The efficiency of the air interface will vary according to the product used. Table 11-2: Radio Frame Pattern Table - NetAstra AU RFP 5/10/20/40 MHz E TDM N/A Ethernet Best fit Table 11-3: Radio Frame Pattern Table - NetStream RFP 40 MHz 20 MHz 10 MHz 5 MHz TDM Ethernet TDM Ethernet TDM Ethernet TDM Ethernet B Available Available Available Available Available Available Best fit Best fit E Best fit Best fit Best fit Best fit Best fit Best fit Available Available Table 11-4: Legend for Radio Frame Pattern Tables Item Description Best fit Optimal RFP choice for TDM and Ethernet services Available Available RFP for TDM and Ethernet services, but not optima N/A Service unavailable Select the RFP that gives you the Best Fit or Available for required system services and select the channel bandwidth accordingly. The RFP must be the same for each link within the collocated system. 238 Netronics NetAstra Family System Manual Hub Site Synchronization Chapter 11 RFP: General Radio Frame Pattern When setting the RPF, the following considerations should be borne in mind: 1. When synchronizing NetAstra AU units you must use RFP E 2. When synchronizing NetAstra AU with NetStream units you must use RFP E 3. RFP influences capacity and latency. 4. Using the Link Budget Calculator, you can see the effect of the RFP on the Ethernet throughput. Sector Configuration and HSS The Hub Site Synchronization Settings dialog box appears in both the HBS Site Configuration window. Figure 11-10: HSS Settings window Netronics NetAstra Family System Manual 239 Hub Site Synchronization Chapter 11 If you click the Enabled box, the central display (with Operational state opened) will look like this: Figure 11-11: Setting HBS as HSM or HSC Continue Tx means that the HBS as a client to continue to work if there is no HSM pulse. If you select Hub Sync Master and click Apply, the display changes again: Figure 11-12: HBS as HSM The possible External Pulses conditions are shown in the following table: 240 Netronics NetAstra Family System Manual Hub Site Synchronization Chapter 11 Table 11-5: External Pulse Status HSS Sync Status Meaning Generating ODU is HSM and generates the sync pulse Detected ODU is HSC and detects the sync pulse Not detected ODU is independent Generating and detected HSM, but other HSM present Generating and Improperly Detected NetAstra AU is HSM, but detects a NetStream 5x36/5x06 or Orange NetStream HSM signal that is not RFP E Not detected HSC but no HSM present Improperly detected HSC but HSM pulse doesn’t fit the HSC as configured. Occurs only for NetAstra AU, which stops transmitting. Netronics NetAstra Family System Manual Color code Green Red 241 Chapter 12 Using the GSU What is it for The GPS-based synchronization unit (GSS-U) is designed to handle intersite interferences under large-scale deployment scenarios. The GSS-U (or just GSU for short) is an outdoor unit consisting of a standard NetStream 5x36 enclosure, a GPS antenna and a PoE device. The GSU is connected to the HSS Unit using a standard HSS cable. It synchronizes the transmission timing of multiple Hub-Sites to the same clock source thus eliminating mutual interference. GSU Functionality The GSU receives a synchronization signal from the GPS once per second. It distributes a NetAstra proprietary synchronization signal to all other ODU units using the RS422 protocol and the standard HSS mechanism, where the GSU acts as an HSM unit. When the GSU doesn’t receive a synchronization signal from the GPS for 30 seconds, it moves automatically to Self-Generation mode and acts as a regular HSM unit, until the GPS recovers. Typical GSU Scenarios Independent Distributed Sites In the scenario of Figure 12-1, we have multiple independent collocated sites, which may interfere with each other. To meet this situation, we coordinate all of them using the GSU as shown. The GSU functions like “wide area HSS unit”, ensuring that all participating radios at the loca-tions marked GSU each transmit and receive at the same time. 242 Netronics NetAstra Family System Manual Using the GSU Chapter 12 Figure 12-1: GSU Scenario - Independent distributed sites Multiple Distributed Sites with Communication What happens if, in Figure 12-1, the GSU towers themselves have radios communicating as shown in Figure 12-2? Consider GSU 1 and GSU 2: Both collocated towers transmit and receive simultaneously. However, the radios communicating at GSU 1 and GSU 2 must transmit and receive in turn according to the scheme in marked “Normal Phase” in Figure 12-3. This is an impossible situation, if all the links must send and receive together. It is further complicated by adding a third and further sites as shown. Figure 12-2: GSU Scenario - Communicating distributed sites Netronics NetAstra Family System Manual 243 Using the GSU Chapter 12 Cascaded Sites using Shifted Phase Transmission The solution offered here is not a “universal cure”. The following conditions are necessary, but in any specific case may not be sufficient: • The GSU sites (marked 1, and 3 above) are sufficiently far apart as to ensure that there is no mutual interference between communicating sites (1-2 and 2-3 above) • There should be no interference between non-communicating sites (1 and 3 above). The see how it works, we use Figure 12-2. The GSU towers are numbered and marked for be cascading, 1-2 and 2-3. There should not a link between 1 and 3. The GSU can synchronize the TDD timing of several sites enabling the cascading of consecutive links without mutual interference. To use cascading, the TDD timing of the even-ordered links (GSU 2 above) must be “shifted” (Shifted Phase) and odd-ordered links (GSU 1 and GSU 3 above) must be “unshifted” (Normal Phase). The phase shift is half of the Radio Frame Duration (RFD) from the chosen RFP. The scheme is shown in Figure 12-3. Since the GSU is always HSS master (HSM), at each GSU location, the GSU can “force” the synchronization of its collocated radios. By half RFD shifting, alternate collocated sites can talk to each other. Figure 12-3: Phase shifted transmission - phase shift is 1/2 the RFD Choice of normal or shifted phase is configurable per GSU using the Link Manager. GSU Redundancy The GSU is designed to support redundancy, improving the robustness of a GSU based topology. In redundancy mode, two GSUs are installed at the same HSS site. One of them self-configures to generate HSS sync signals. We will call it the Primary unit. The other one, the Secondary unit remains dormant merely polling the first GSU. If the Primary GSU fails, then the Secondary GSU becomes active immediately. If the Primary unit becomes active again, it remains dormant, reversing the original roles. The choice of the Primary GSU is random and of no significance. If the Primary GSU fails, and then the Secondary GSU also fails to receive sync signals from its GPS, then it moves to self-generation HSM mode like an ordinary HSM ODU until its GPS recovers. 244 Netronics NetAstra Family System Manual Using the GSU Chapter 12 Figure 12-4: Make the GSUs the first two collocated units Redundancy switching is completely transparent to the GSU-managed links. GSS-U Kit Contents The GSS-U package includes: • 1 x GSU • 1 x Mounting Kit • 1 x GPS Antenna • 1 x GPS Antenna Mounting Kit • 1 x RF Cable, 1.5 m • CD GSS-U Installation Overview The GSU uses the same container and cabling as a NetStream unit. Netronics NetAstra Family System Manual 245 Using the GSU Chapter 12 Figure 12-5: General GSU configuration In that respect, all of the considerations of Chapter 3 of the use Manual apply to the GSU. It may be configured using the regular Link Manager or Telnet. Preparing the GSU for Use Log on to the unit using Local Connection or IP address 10.0.0.120 to change its IP address from the default (10.0.0.120). In the example screen captures below, we use 10.104.20.1 with Subnet Mask 255.255.0.0 and Gateway 10.104.10.21. Mounting the GSU Mount the GSU and antenna. Ensure that its ODU port connected to its PoE device and the HSS cable is connected to the HSS unit as shown. The external LAN port of the PoE device is connected to the managing computer. If you are accessing the GSU through a network it is essential that you use the IP pre-loading method. The default IP address may be inaccessible and you may not use the Local Connection method over a network. Configuring the GSU Getting Started To configure the GSU, you log on to it, exactly as in Chapter 4. 246 Netronics NetAstra Family System Manual Using the GSU Chapter 12 The GSU Main Window Here is the main window for GSU configuration: Figure 12-6: GSU Main widow at startup The top five items in the GSU Monitor panel are taken from a satellite. The transmission Phase may be Normal as shown or Shifted. It purpose, together with the Tx Ratio bar, will be explained below. The Status Box Under normal operating conditions, it will be green as shown, indicating that it is synchronized with a satellite. If satellite synchronization is lost, then the GSU will function as an independent HSM and the status box will change color: The Main Menu The main menu is a subset of the main menu applicable to the NetStream 5x36. Notice that there are no Installation or Configuration wizards. Such configuration as is necessary is carried out using a modified version of Site Configuration for NetStream 5x36. Similarly, the Tool bar is a subset of that applicable to the NetStream 5x36. Netronics NetAstra Family System Manual 247 Using the GSU Chapter 12 Using Site Configuration for the GSU Site Configuration: System Here is the opening window for Site Configuration: Figure 12-7: Site Configuration: System It is similar to that of the NetStream 5x36. 248 Netronics NetAstra Family System Manual Using the GSU Chapter 12 Site Configuration: GPS Sync Unit This window is the main GSU configuration tool: Figure 12-8: Site Configuration: GPS Sync Unit The WBB-R label refers to NetStream 5x36 and 5x06 and WBB-B refer to all other NetStream radios. The actual annotation seen may vary, but the intention should be clear. 1. Setting the RFP for HSS The GSU is automatically configured as HSS Master (HSM). Ensure that no other collocated ODU is configured as HSM. Note If the hub site consists only of NetStream 5x36 and 5x06 units, then any suitable RFP may be chosen. If there are one or more NetStream 5x200/5x50/5x25/5x10/5x05 units, you must use RFP B or E. Netronics NetAstra Family System Manual 249 Using the GSU Chapter 12 The permitted RFPs are also dependent on channel bandwidth and are color coded as follows: You May use RFP/Channel Bandwidth combinations with this color For these collocated radios NetStream 5x36 and 5x06 only NetStream 5x200, 5x50, 5x25, 5x10 and 5x05 only All NetStream, NetAstra AU with anything None - unavailable There is a further restriction: If there are two distributed sites transmitting to each other, they must both use the same RFP. This requirement, together with use of shifted transmission phase (item 3 below), ensures that communicating distributed sites to not interfere with each other by transmitting simultaneously. Two GSU managed sites transmitting with shifted transmission phase and using the same RFP, transmit one half a RFD apart (see Figure 12-3 above). 2. Setting the Tx Transmission Ratio Since the GSU is always HSM, it must be able to cater for hub site NetStream 5x200 based links. (See the NetStream User Manual). If you use asymmetric allocation, shifted transmission phase becomes unavailable and you cannot “cascade” links as described in step 1. 3. Choosing the Transmission Phase Choose the Transmission Phase in accordance with considerations in step 1 above. If you choose Shifted Phase then the Asymmetric Ratio selector is disabled. 250 Netronics NetAstra Family System Manual Using the GSU Chapter 12 Site Configuration: Management Figure 12-9: Site Configuration: Management Here you set the GSU IP address, subnetsubnet mask mask and gateway. You also set trap addresses here. It is identical to the corresponding panel for NetStream 5x36 and 5x06. Netronics NetAstra Family System Manual 251 Using the GSU Chapter 12 Site Configuration: Inventory Figure 12-10: Site Configuration: Inventory 252 Netronics NetAstra Family System Manual Using the GSU Chapter 12 Site Configuration: Security You can only change the SNMP Community stings: Figure 12-11: Site Configuration: Security Netronics NetAstra Family System Manual 253 Using the GSU Chapter 12 Site Configuration: Date and Time ODU Recent events, alarms and traps are time-stamped from the time method chosen here (NTP, managing computer, ODU default). Figure 12-12: Setting the date and time for trap reporting 254 Netronics NetAstra Family System Manual Using the GSU Chapter 12 Site Configuration: Operations The only available action here is Restore System Defaults: Figure 12-13: Site Configuration: Operations Netronics NetAstra Family System Manual 255 Using the GSU Chapter 12 GSU Preferences The Preferences window adds a new tab for the GSU: Figure 12-14: Site Configuration: Operations You may choose the units for latitude/longitude coordinates. GSU Monitoring and Diagnostics The monitoring and diagnostic reports are similar to those of NetStream 5x36 and 5x06. GSU Telnet Support To configure the GSU with Telnet, start a Telnet session, using telnet <GSU_ipaddr>. For example, if you run Telnet as follows, telnet 10.107.2.20 you will be asked for a user name and password. You must log on with administrator privilege under user name, admin and password netman. The available commands are the same as for NetStream 5x36 and 5x06 with the addition of four additional display commands and three additional set commands. 256 Netronics NetAstra Family System Manual Using the GSU Chapter 12 The additional display commands are display rfp display ratio display tx_phase display gpsinfo The last one display gpsinfo, is the most interesting: [email protected]> display gpsinfo Current GPS time 102941.000 Current GPS latitude 51.500000 Current GPS N\S Indicator N Current GPS longitude 0.000000 Current GPS E\W Indicator E Current GPS number of satellites 09 Current GPS altitude 84.0 Command "display gpsinfo" finished OK. The three additional set commands are set rfp <index> (2-6) [Must be 6 for RFP E] set ratio <ratio> [Leave as is] set tx_phase <mode:1=normal,2=shifted> [See above] Software Update for GSUs All GSUs in a distributed site can be updated simultaneously. Use an IP list as described in Chapter 12. Netronics NetAstra Family System Manual 257 Part 5 Advanced Installation Topics 258 Netronics NetAstra Family System Manual Netronics NetAstra Family System Manual 259 Chapter 13 Software Upgrade What is the Software Upgrade Utility? The Link Manager provides a Software Upgrade Utility (SWU) to upgrade the software (firmware) of installed ODUs in a network. The update files may be located anywhere accessible by the operator. The SWU provides for: • Prior backup of the current files prior to upgrade • Upgrade from a list • Delayed upgrade • Various ODU reset options The default location of the software files is in the installation area, and can be used to restore factory defaults. 260 Netronics NetAstra Family System Manual Software Upgrade Chapter 13 Upgrading an Installed Sector To upgrade software for a link: 1. In the Link Manager, click the Software Upgrade button.The following detached window appears: Figure 13-1: Software Upgrade Utility - Main window The default sites shown in the Software Upgrade list panel belong to the currently installed sector. The list may be empty if you are running the Link Manager “offline”. 2. Click Add Site to add additional sites for upgrade. Figure 13-2: Add/Remove site buttons The left button opens up a Windows file dialog to locate a list of locations to update. The list has the following format: <IP address>,<Read-Only community>,<Read-Write community> The list should include HBSs and HSUs able to accept the same upgrade. This is unlikely to be a problem unless you are using equipment prior to the 3.3.00 release of Wireless Mux PtMP. Non-upgradable items will result in an error message. Contact Customer Support about upgrading them. The center button allows you to add a single site: Netronics NetAstra Family System Manual 261 Software Upgrade Chapter 13 Figure 13-3: Adding a single site for upgrade Enter the IP address of the site, the Read-Write Community (Default: netman) and then click OK. The site will appear in the Software Upgrade list box. Items from the list can be cleared by selecting them and then using the right button: 3. Having created an update list, click Upgrade Package to choose the relevant files. The default files are located in the SWU subdirectory in the Link Manager installation area. You may see one or more of the following SWU files: Table 13-1: SWU Files by product File name Product SWU_1k.swu NetStream 5x36 and 5x06 SWU_2k.swu NetStream SWU_5k.swu NetAstra PtMP SWU_gs.swu Netronics GSU For NetAstra PtMP, always choose SWU_5k.swu. 4. To back up your existing system, check Backup device software check-box. Then button for a standard file dialog. The default location is the My Documents click the directory on the managing computer or the last backup directory you used. The backup here is the same as that on page 174, and serves the same purpose. It provides a fallback if the upgrade proves problematic. 5. In addition to the previous step, you may opt to perform a delayed upgrade. Check the Delayed Upgrade box, and enter the date and time for the delayed upgrade. A Calendar dialog box opens 262 Netronics NetAstra Family System Manual Software Upgrade Chapter 13 • The radio buttons on the right determines how your HSUs should be reset. Bear in mind that on the one hand, a reset involves a service interruption, but on the other hand, the software upgrade will not become effective until after the reset is carried out. Here is a typical delayed upgrade scenario: • Click Start Upgrade to commence the process. For an immediate upgrade you will be able to observe the upgrade progress from the green progress bars: Netronics NetAstra Family System Manual 263 Software Upgrade Chapter 13 Figure 13-4: Software upgrade in progress - Note the stop button Figure 13-5: Software upgrade completed successfully 8. Use the title bar exit button to dismiss the Software upgrade window. If one or both sites fail to update, a warning notice will be displayed. If one or more sites of a sector update fails, you should correct the problem and update the failed sites as soon as possible. If you do not, following the next reset of the updated sites, you could experience a link software mismatch which may affect service. 264 Netronics NetAstra Family System Manual Chapter 14 VLAN Functionality with NetAstra PtMP VLAN Tagging - Overview VLAN Terminology Both the technical literature and the Link Manager use the terms VLAN ID and VID interchangeably to denote a VLAN identification number. VLAN Background Information on the WEB The standards defining VLAN Tagging are IEEE_802.1Q and extensions. For general background about VLAN see http://en.wikipedia.org/wiki/Virtual_LAN. Background information about Double Tagging also known as QinQ may be found here: http://en.wikipedia.org/wiki/802.1QinQ. Scope of this Chapter This chapter describes how the components of a NetAstra sector deal with tagging and untagging. Requirements It is assumed that you are familiar with VLAN usage and terminology. VLAN Tagging VLAN tagging enables multiple bridged networks to transparently share the same physical network link without leakage of information between networks: Netronics NetAstra Family System Manual 265 VLAN Functionality with NetAstra PtMP Chapter 14 Figure 14-1: VLAN scenarios handle by NetAstra AU IEEE 802.1Q is used as the encapsulation protocol to implement this mechanism over Ethernet networks. QinQ (Double Tagging) for Service Providers QinQ is useful for Service Providers, allowing them to use VLANs internally in their “transport network” while mixing Ethernet traffic from clients that are already VLAN-tagged. Figure 14-2: Separating client data streams using double tagging 266 Netronics NetAstra Family System Manual VLAN Functionality with NetAstra PtMP Chapter 14 The outer tag (representing the Provider VLAN) comes first, followed by the inner tag. In QinQ the EtherType = 0x9100. VLAN tags may be stacked three or more deep. When using this type of “Provider Tagging” you should keep the following in mind: • Under Provider Tagging, the system double-tags egress frames towards the Provider’s network. The system adds a tag with a VLAN ID and EtherType = 0x9100 to all frames, as configured by the service provider (Provider VLAN ID). • The system always adds to each frame, tags with VLAN ID and EtherType = 0x9100. Therefore, 1. For a frame without a tag – the system will add a tag with VLAN ID and EtherType = 0x9100 so the frame will have one tag 2. For a frame with a VLAN tag – the system will add a tag with VLAN ID and EtherType = 0x9100 so the frame will be double-tagged For a frame with a VLAN tag and a provider tag – the system will add a tag with VLAN ID and EtherType = 0x9100 so the frame will be triple-tagged and so on. VLAN Untagging VLAN Untagging means the removal of a VLAN or a Provider tag. Port Functionality VLAN functionality is supported at the MNG port of the HSU. The HSU MNG port can be configured to handle Ethernet frames at ingress direction (where frames enter the HSU) and at egress direction (where frame exit the HSU). Netronics NetAstra Family System Manual 267 VLAN Functionality with NetAstra PtMP Chapter 14 Ingress Direction Table 14-1: Port settings - Ingress direction Transparent The port ‘does nothing’ with regard to VLANs - inbound frames are left untouched. a Frames entering the HSU port without VLAN or QinQ tagging are tagged with VLAN ID and Priority , which are pre-configured by the user. Frames which are already tagged at ingress are not modified and pass through. Tag Frames entering the HSU port are tagged with provider’s VLAN ID and Priority which are pre-configured by the user. Frames which are already tagged with Provider tagging at the ingress are not modified and pass through Provider tag . a. Priority Code Point (PCP) which refers to the IEEE 802.1p priority. It indicates the frame priority level from 0 (lowest) to 7 (highest), which can be used to prioritize different classes of traffic (voice, video, data, etc). 268 Netronics NetAstra Family System Manual VLAN Functionality with NetAstra PtMP Chapter 14 Egress Direction Table 14-2: Port settings - Egress direction Transparent The port ‘does nothing’ with regard to VLANs - outbound frames are left untouched. Port configured to untag user VLAD tags for all frames. Untag all Frames are tagged QinQ with a VLAN ID, which is configured by the service provider (Provider VLAN ID). The QinQ (provider) tags are removed. User tags are passed through. Untag double tagged Filter VLAN Configuration Using the Link Manager Disclaimer If you are not a VLAN expert, please be aware that incorrect VLAN configuration may cause havoc on your network. The facilities described below are offered as a service to enable you to get best value from your NetAstra links and are provided “as is”. Under no circumstances does Netronics accept responsibility for network system or financial damages arising from incorrect use of these VLAN facilities. Netronics NetAstra Family System Manual 269 VLAN Functionality with NetAstra PtMP Chapter 14 Management Traffic and Ethernet Service Separation Managing the HBS over the Air from an HSU If traffic VLAN tagging is in force for the HSU ingress direction and management VLAN is in use at the HBS, then the VLAN ID at the HSU ingress direction must be the same as the VLAN ID for management at the HBS. Configuration of VLAN Tagging for Ethernet Service VLAN configuration is carried out per HSU. It is up to you to ensure consistency between the HSUs. HSU VLAN tagging can only be configured from the HBS. You can not log on to an HSU directly and do it from the HSU main window. The reason is that the HSU maintains the HSU tagging information in its internal per HSU configuration record. To set up an HSU for VLAN tagging: 1. Right click an HSU on the HBS window, and then click Configure | Ethernet | VLAN Configuration. The VLAN Configuration window is displayed: In Disabled mode, Ethernet frames pass transparently over the radio links. 2. For Provider tagging, click the Provider Radio button: 270 Netronics NetAstra Family System Manual VLAN Functionality with NetAstra PtMP Chapter 14 In Provider mode, Ethernet frames are tagged with the provider’s VLAN ID before they enter into the provider’s network/backbone. 3. Enter a Provider VLAN ID and Priority. The VLAN ID must be in the range 2 to 4094. The VLAN Priority must be in the range 0 to 7. Click OK to accept. 4. For user VLAN tagging, click the Tag Radio button: In Tag mode Ethernet frames are tagged or untagged to distinguish between different networks. 5. For completely transparent passage of tagged frames, there is nothing further to do. The following table shows the possible settings for each combination of Ingress and Egress modes: Netronics NetAstra Family System Manual 271 VLAN Functionality with NetAstra PtMP Chapter 14 Table 14-3: VLAN Configuration Options - Tag Mode Ingress Egress Transparent Untag All Filter Transparent Nothing further required Nothing further required Allow up to 4 VIDs to be passed through Tag: Enter a VLAN ID and Priority Nothing further required Nothing further required Allow up to 4 VIDs to be passed through 6. Click OK. 272 Netronics NetAstra Family System Manual Chapter 15 Who needs it? False Radar Mitigation Facilities If you are using DFS frequency bands 5.3/5.4 GHz FCC and 5.4/5.8 GHz ETSI you should use this facility. DFS and False Radar Mitigation About DFS Under DFS frequency bands, it must be ensured that radio links do not interfere with certain radar systems in the 5 GHz band. If radar is detected, the radio link should move automatically to a frequency that does not interfere with the detected radar. What is False Radar Mitigation False Radar Mitigation capability is an advanced method to reduce or eliminate false radar detection and DFS triggering (“False positives”). False radar detection can be caused by other radios transmissions or external interference that can be interpreted as true radar. This option is active only in DFS frequency bands, 5.3/5.4 GHz FCC (HBS only) and 5.4/ 5.8 GHz ETSI (HBS & HSU). In what follows false radar means any source of radar-like signals which are not real radar. False Radar Mitigation has two components: 1. Reduction of false positive radar detection by reduction of the probability of detecting any kind of false radars, while allowing the system to detect real radar signals. 2. Elimination of detection of specific false radar types by blocking detection of false radars of a specific type. There are three types of radars: • • Fixed: False radars with fixed pulse width having fixed repetition frequency Variable: False radars with variable pulse width having variable repetition frequency Netronics NetAstra Family System Manual 273 False Radar Mitigation Facilities • Chapter 15 Staggered: False radars with variable repetition frequency within a burst period (Applies to 5.4 GHz ETSI only) Configuring False Radar Mitigation The configuration method for the HBS (ETSI and FCC/IC) is the same as for the HSUs (ETSI only). We will demonstrate the HBS for a sector using the 5.3 GHz FCC/IC band: To configure False Radar Mitigation: 1. Log on to the HBS as Installer. 2. Enter the Configuration window and open the Advanced tab. Figure 15-1: False Radar Mitigation 3. The DFS Frequency Status Table at the bottom of Figure 15-1 shows the time, type and frequency of the last radars detected. This table should be used to select the best option(s) to reduce or eliminate false radar detection without completely blocking out real radar detection. 4. Check the mitigation features to be used. 274 Netronics NetAstra Family System Manual False Radar Mitigation Facilities Chapter 15 5. When you are satisfied with your configuration parameters, click OK to save them and dismiss the Configuration window. FCC/IC Considerations The FCC requires that devices installed within 35 km of any Terminal Doppler Weather Radars (TDWR) location should be registered in the voluntary WISPA sponsored database.For convenience, we supply guidelines about the way this is done in Chapter 16. Netronics NetAstra Family System Manual 275 Chapter 16 FCC/IC DFS Considerations FCC 5.4 GHz Device Registration The FCC requires that devices installed within 35 km of any TDWR location should be registered in the voluntary WISPA sponsored database. The FCC has published a TDWR Location Information table that lists the exact location of all TDWR towers (see Table 16-1 at the end of the chapter). 1. When installing a 5.4 GHz device define your exact location (latitude and longitude) 2. Use the TDWR Location Information table to determine if the distance between the device and any TDWR tower is less than 35 km. 3. If the distance is less than 35 km then register the device in the voluntary WISPA sponsored database (following section) 4. Disable the frequencies between 5570 – 5680 MHz from the available channels list. 5. The frequency range between 5.600 to 5.650 GHz is not included in the available channels list. Registering the Device To register a device: 1. Enter the website http://www.spectrumbridge.com/udia/home.aspx and follow the instructions. At your first entry into the site, you will be required to register as a user: 276 Netronics NetAstra Family System Manual FCC/IC DFS Considerations Chapter 16 2. Click the User Registration button to enter the registration page. Netronics NetAstra Family System Manual 277 FCC/IC DFS Considerations Chapter 16 3. Fill in the registration page and click Register. 4. To complete device registration enter the Register Device tab as shown: 278 Netronics NetAstra Family System Manual FCC/IC DFS Considerations Chapter 16 You are offered this: 5. Fill in the required information in the preceding web page and click the Register Device button. Netronics NetAstra Family System Manual 279 FCC/IC DFS Considerations Chapter 16 TDWR Table The following table contains the latitude and longitude locations of Terminal Doppler Weather Radars (TDWR). Use this table to determine if the Master or Client device installed is within 35 km radius of a TDWR location. If one of the installed devices is within 35 km radius of any TDWR location then disable all frequencies between 5570 – 5680 MHz from the available channels list. Table 16-1: Latitude and longitude locations of TDWRs 280 STATE CITY LONGITUDE LATITUDE FREQUENCY TERRAIN ELEVATION (MSL) [ft] ANTENNA HEIGHT ABOVE TERRAIN [ft] AZ PHOENIX W 112 09 46 N 33 25 14 5610 MHz 1024 64 CO DENVER W 104 31 35 N 39 43 39 5615 MHz 5643 64 FL FT LAUDERDALE W 080 20 39 N 26 08 36 5645 MHz 7 113 FL MIAMI W 080 29 28 N 25 45 27 5605 MHz 10 113 FL ORLANDO W 081 19 33 N 28 20 37 5640 MHz 72 97 FL TAMPA W 082 31 04 N 27 51 35 5620 MHz 14 80 FL WEST PALM BEACH W 080 16 23 N 26 41 17 5615 MHz 20 113 GA ATLANTA W 084 15 44 N 33 38 48 5615 MHz 962 113 IL MCCOOK W 087 51 31 N 41 47 50 5615 MHz 646 97 IL CRESTWOOD W 087 43 47 N 41 39 05 5645 MHz 663 113 IN INDIANAPOLIS W 086 26 08 N 39 38 14 5605 MHz 751 97 KS WICHITA W 097 26 13 N 37 30 26 5603 MHz 1270 80 KY COVINGTON CINCINNATI W 084 34 48 N 38 53 53 5610 MHz 942 97 KY LOUISVILLE W 085 36 38 N 38 02 45 5646 MHz 617 113 LA NEW ORLEANS W 090 24 11 N 30 01 18 5645 MHz 2 97 MA BOSTON W 070 56 01 N 42 09 30 5610 MHz 151 113 MD BRANDYWINE W 076 50 42 N 38 41 43 5635 MHz 233 113 MD BENFIELD W 076 37 48 N 39 05 23 5645 MHz 184 113 MD CLINTON W 076 57 43 N 38 45 32 5615 MHz 249 97 MI DETROIT W 083 30 54 N 42 06 40 5615 MHz 656 113 MN MINNEAPOLIS W 092 55 58 N 44 52 17 5610 MHz 1040 80 MO KANSAS CITY W 094 44 31 N 39 29 55 5605 MHz 1040 64 MO SAINT LOUIS W 090 29 21 N 38 48 20 5610 MHz 551 97 MS DESOTO COUNTY W 089 59 33 N 34 53 45 5610 MHz 371 113 NC CHARLOTTE W 080 53 06 N 35 20 14 5608 MHz 757 113 NC RALEIGH DURHAM W 078 41 50 N 36 00 07 5647 MHz 400 113 NJ WOODBRIDGE W 074 16 13 N 40 35 37 5620 MHz 19 113 Netronics NetAstra Family System Manual FCC/IC DFS Considerations Chapter 16 Table 16-1: Latitude and longitude locations of TDWRs (Continued) STATE CITY LONGITUDE LATITUDE FREQUENCY TERRAIN ELEVATION (MSL) [ft] ANTENNA HEIGHT ABOVE TERRAIN [ft] NJ PENNSAUKEN W 075 04 12 N 39 56 57 5610 MHz 39 113 NV LAS VEGAS W 115 00 26 N 36 08 37 5645 MHz 1995 64 NY FLOYD BENNETT FIELD W 073 52 49 N 40 35 20 5647 MHz 8 97 OH DAYTON W 084 07 23 N 40 01 19 5640 MHz 922 97 OH CLEVELAND W 082 00 28 N 41 17 23 5645 MHz 817 113 OH COLUMBUS W 082 42 55 N 40 00 20 5605 MHz 1037 113 OK AERO. CTR TDWR #1 W 097 37 31 N 35 24 19 5610 MHz 1285 80 OK AERO. CTR TDWR #2 W 097 37 43 N 35 23 34 5620 MHz 1293 97 OK TULSA W 095 49 34 N 36 04 14 5605 MHz 712 113 OK OKLAHOMA CITY W 097 30 36 N 35 16 34 5603 MHz 1195 64 PA HANOVER W 080 29 10 N 40 30 05 5615 MHz 1266 113 PR SAN JUAN W 066 10 46 N 18 28 26 5610 MHz 59 113 TN NASHVILLE W 086 39 42 N 35 58 47 5605 MHz 722 97 TX HOUSTON INTERCONTL W 095 34 01 N 30 03 54 5605 MHz 154 97 TX PEARLAND W 095 14 30 N 29 30 59 5645 MHz 36 80 TX DALLAS LOVE FIELD W 096 58 06 N 32 55 33 5608 MHz 541 80 TX LEWISVILLE DFW W 096 55 05 N 33 03 53 5640 MHz 554 31 UT SALT LAKE CITY W 111 55 47 N 40 58 02 5610 MHz 4219 80 VA LEESBURG W 077 31 46 N 39 05 02 5605 MHz 361 113 WI MILWAUKEE W 088 02 47 N 42 49 10 5603 MHz 820 113 Netronics NetAstra Family System Manual 281 Chapter 17 Quality of Service Prerequisites To use the facility you must be familiar with the use of VLAN (802.1p) or Diffserv. QoS - Overview QoS is a technique for prioritization of network traffic packets during congestion. NetAstra PtMP sectors support two classification criteria, VLAN based or Diffserv based. You may choose which of them to use. Table 17-1: Default priorities an d allocation by VLAN ID and Diffserv Priority Quality queue Diffserv VLAN Real time 48-63 6-7 Near real time (responsive applications) 32-47 4-5 Controlled load 16-31 2-3 Best effort 0-15 0-1 Based upon the classification criterion chosen, received packets will be mapped into one of four quality groups: Real time, Near real time, Controlled load and Best effort. You may partition the total link capacity across the four Quality queues. The default weights as percentages are shown in Table 17-1. Setting up QoS QoS for NetAstra is set up in two phases: 1. The required queues for the sector and their respective priority mappings must be chosen. 2. For each HSU you must configure the required queues, queue weights and queue Maximum Information Rate (MIR). The latter must be done for both the Uplink and Downlink directions. 282 Netronics NetAstra Family System Manual Quality of Service Chapter 17 Setting up the HBS for QoS From the HBS manager, enter Configuration, open the Ethernet tab and then QoS configuration. QoS is disabled by default. You may choose between the VLAN (802.1p) and Diffserv methods. The default settings for Diffserv and VLAN are as shown in the next two figures: Netronics NetAstra Family System Manual 283 Quality of Service Chapter 17 If you uncheck a queue, it will be disabled for the sector. It will not prevent the HSU from configuring it as “live”. The purpose behind this is to avoid the necessity of reconfiguring QoS for each HSU, should the queue be reinstated. Setting up an HSU for QoS QoS setup for an HSU is carried out from the HBS. To configure an HSU for QoS: 1. Right click an HSU in the HBS manager HSU window, and choose Configuration. 2. Open the Ethernet tab and click QoS Configuration. The following window is displayed: 3. Ensure that the Mode field is Enabled. If you already configured the HBS (sector) for Diffserv or VLAN, then it will be enabled by default. If you need to change the mode, then you 284 Netronics NetAstra Family System Manual Quality of Service Chapter 17 probably did not set the sector wide QoS type - but you can go back and do it later. 4. For each queue, both downlink and uplink (from the HSU) enter the required weight and MIR. The latter may be left unlimited. In which case the system will use a “best effort” method. If you exceed 100% total weight, you will receive an error message. You will be required to correct this before leaving the window other than by cancellation. If you are under-booked, for example by setting a queue to zero, the unused weight will be distributed to the remaining queues. The effect of doing this will only become apparent under congestion. In particular, a queue set to zero weight will become nearly blocked under congestion with packets passing through on a best effort basis. 5. When you complete your entries, click OK to save them and continue Netronics NetAstra Family System Manual 285 Part 6 Field Installation Topics 286 Netronics NetAstra Family System Manual Netronics NetAstra Family System Manual 287 Chapter 18 Link Budget Calculator Overview The Link Budget Calculator is a utility for calculating the expected performance of the NetAstra PtMP wireless link within a sector and the possible configurations for a specific link range. The utility allows you to calculate the expected RSS of the link, and find the type of services and their effective throughput as a function of the link range and deployment conditions. User Input You are required to enter or choose the following parameters. Depending on the product, some of the parameters have a default value that cannot be changed. • Band, which determines frequency and regulation • HSU series used • Channel Bandwidth (currently 10 and 20 MHz) • Tx Power (maximum Tx power per modulation is validated) • Antenna Type (currently dual; cannot be changed for ODU with integrated antenna) • Antenna Gain per site (cannot be changed for integrated antenna) • Cable Loss per site (cannot be changed for integrated antenna) • Fade Margin (currently 6 dB) • Rate • Required Range and climate type Link Budget Calculator Internal Data For each product (or Regulation and Band) the calculator stores the following data required for link budget calculations: 288 • Maximum Transmit power (per modulation) • Receiver Sensitivity (per modulation) for Ethernet service • Maximum linear input power (used to calculate minimum distance) • Antenna gain and cable loss for ODU with integrated antenna Netronics NetAstra Family System Manual Link Budget Calculator • Chapter 18 Available Channel Bandwidths Calculations EIRP EIRP = TxPower + AntennaGainSiteA – CableLossSiteA Expected RSS and Fade Margin ExpectedRSS = EIRP – PathLoss + AntennaGainSiteB – CableLossSiteB where: Site A is the transmitting site Site B is the receiving site PathLoss is calculated according to the free space model, PathLoss = 32.45 + 20 log10 frequencyMHz + 20 log10 RequiredRangeKm ExpectedFadeMargin = ExpectedRSS – Sensitivity where Sensitivity is dependent on air-rate. Min and Max Range MinRange is the shortest range for which ExpectedRSS ≤ MaxInputPower per air-rate. MaxRange (with Adaptive checked) is the largest range for which Expected RSS ≥ Sensitivity, at the highest air-rate for which this relationship is true. In a link with adaptive rate this will be the actual behavior. MaxRange (for a given air-rate) is the largest range for which Expected RSS ≥ Sensitivity + RequiredFadeMargin. Service The Ethernet and configured TDM trunks throughput is calculated according to internal product algorithms. Availability The Service Availability calculation is based on the Vigants Barnett method which predicts the downtime probability based on a climate factor (C factor). Netronics NetAstra Family System Manual 289 Link Budget Calculator Chapter 18 Availability Antenna Height The recommended antenna height required for line of sight is calculated as the sum the Fresnel zone height and the boresight height. See About the Fresnel Zone below. Using the notation of Figure 18-1 below, splitting ExpectedRange into d1 + d2, the Fresnel zone height at distance d1 from the left hand antenna, is given by For the most conservative setting, we take the mid-point between the antennas, setting which gives simplifying to The boresight clearance height is calculated as: where RMean = 6367.4425Km. About the Fresnel Zone The Fresnel zone (pronounced "frA-nel", with a silent “s”) is an elliptically shaped conical zone of electromagnetic energy that propagates from the transmitting antenna to the receiving antenna. It is always widest in the middle of the path between the two antennas. 290 Netronics NetAstra Family System Manual Link Budget Calculator Chapter 18 Figure 18-1: Fresnel zone Fresnel loss is the path loss occurring from multi-path reflections from reflective surfaces such as water, and intervening obstacles such as buildings or mountain peaks within the Fresnel zone. Radio links should be designed to accommodate obstructions and atmospheric conditions, weather conditions, large bodies of water, and other reflectors and absorbers of electromagnetic energy. The Fresnel zone provides us with a way to calculate the amount of clearance that a wireless wave needs from an obstacle to ensure that the obstacle does not attenuate the signal. There are infinitely many Fresnel zones located coaxially around the center of the direct wave. The outer boundary of the first Fresnel zone is defined as the combined path length of all paths, which are half wavelength (1/2 λ) of the frequency transmitted longer than the direct path. If the total path distance is one wavelength (1 λ) longer than the direct path, then the outer boundary is said to be two Fresnel zones. Odd number Fresnel zones reinforce the direct wave path signal; even number Fresnel zones cancel the direct wave path signal. The amount of the Fresnel zone clearance is determined by the wavelength of the signal, the path length, and the distance to the obstacle. For reliability, point-to-point links are designed to have at least 60% of the first Fresnel zone clear to avoid significant attenuation. The concept of the Fresnel zone is shown in Figure 18-1 does above. The top of the obstruction not extend far into the Fresnel zone, leaving 60% of the signal the Fresnel zone clear; therefore, is not significantly attenuated. For more about Fresnel zone, see http://en.wikipedia.org/wiki/Fresnel_zone. Netronics NetAstra Family System Manual 291 Link Budget Calculator Chapter 18 Running the Link Budget Calculator The Link Budget Calculator is supplied on the Link Manager CD. It may be run stand-alone from the CD or from the Link Manager application. To run the Link Budget Calculator from the CD: 1. Insert the Link Manager CD into the drive on the managing computer. In the window which opens, click the Link Budget Calculator option. 2. If the CD autorun application does not start by itself, then point your browser to Z:\WBB\Setup\DATA\Link Budget Calculator.htm where Z should be replaced with your own CD drive name. To run the Link Budget Calculator from the Link Manager: • Choose Help | Link Budget Calculator from the main menu of the Link Manager: Figure 18-2: Accessing the Link Budget Calculator To run the Link Budget Calculator from the Windows Start Menu: • Go to Start | Programs | Link Manager | Link Budget Calculator However invoked, your browser displays the following page: Figure 18-3: Link Budget window - startup 292 Netronics NetAstra Family System Manual Link Budget Calculator Chapter 18 • Microsoft Internet Explorer users may see a warning message like this: Note Click the yellow bar and follow the instructions to allow blocked content. To use the Link Budget Calculator for NetAstra PtMP: 1. Click the NetAstra PtMP tab. Figure 18-4: NetAstra LBC main window 2. Netronics NetAstra Family System Manual 293 Link Budget Calculator Chapter 18 2. Choose the required NetAstra PtMP band. Figure 18-5: Band selector For the purposes of our example, we will use 5.730-5.845 GHz FCC/IC Connectorized. Note • This release supports 5/10/20/40 MHz Channel Bandwidths • Collocated HBSs use RFP E so there is no HSS entry 3. Enter the radio details. The Fade margin is the minimum required for line-of-sight (LOS) conditions. For degraded link conditions, a larger Fade margin should be used. The EIRP is given in dBm and Watts. 4. nThe Rate item may be used for calculating the Link Budget under best and worst scenarios. In practice, HBSs are configured for Adaptive rate which may not be disabled. 5. If the required range between the two link sites is known, you may enter it directly. Alternatively, you may enter the latitude and longitude of each site in the link, in which case the distance between them will be calculated and displayed. 294 Netronics NetAstra Family System Manual Link Budget Calculator Chapter 18 Figure 18-6: Calculation of distance from site coordinates If for example, we enter: Site A: 41.1°N lat 75.2°W Long Site B: 40.8°N lat 75.0°W Long and press Set, the range will be calculated and displayed: Netronics NetAstra Family System Manual 295 Link Budget Calculator Chapter 18 6. Located to the right of the green Coordinates button is a drop-down list of Climactic C Factor values. It is only available if you choose a non-adaptive rate. Figure 18-7: Climactic C Factors For help about what these mean, click the ? button to the right of the list in Figure 18-7. 296 Netronics NetAstra Family System Manual Link Budget Calculator Chapter 18 Figure 18-8: Climactic C Factor description In Figure 18-9 we display a map of the world showing C Factor contours: Figure 18-9: World map showing C Factor contours 7. Click Calculate to obtain the required performance estimate. Note Placing the cursor in any other calculated field will also update the calculated results. Netronics NetAstra Family System Manual 297 Link Budget Calculator Chapter 18 Figure 18-10: LBC - Results section The Expected Performance parameters are calculated and displayed: • Expected RSS - the expected RSS that the Link Manager shows when the NetAstra ODUs are optimally aligned Services Type - Ethernet only • Ethernet Rate - maximum throughput available for the chosen parameter combination • Antenna height for LOS – the minimum antenna height required for line-of-sight operation. It is the sum of the height required for boresight clearance due to the earth’s curvature plus the height required to clear the Fresnel zone • If the expected performance is not suitable for your application, try different parameters and repeat the calculation. 298 Netronics NetAstra Family System Manual Chapter 19 Spectrum View What is Spectrum View The Link Manager Spectrum View utility is an RF survey tool designed to support the sector installation prior to full sector service activation. The tool provides comprehensive and clear spectral measurement information enabling easier, faster and better quality installations. You can view real-time spectrum information, save the spectral information and view retrieved spectral information from historic spectrum scans. Separate information is generated for the HBS and HSUs - all by selection. A general sector level Highest Interference view is also provided. NetAstra’s spectrum measurement and estimation algorithms are designed to show accurate information accommodating variations in frequency, temperature and interference power and at the same time overcoming anomalies that tend to occur in high interference environments. Who needs it As indicated in the previous paragraph, Spectrum View is primarily a professional tool for the technician. The Spectrum View reports may be generated as images, CSV files or text files as part of the Get Diagnostics feature. All of these are intended for use by to Netronics Customer Services to assist with diagnosing interference related problems. Scope of this Chapter In view of the nature of the intended audience, we assume that the reader knows about RF Spectrum Analysis. This chapter therefore, is not a tutorial on RF Spectrum Analysis and is restricted to showing how to use the Spectrum View tool without any further theoretical explanations. Netronics NetAstra Family System Manual 299 Spectrum View Chapter 19 Two Ways to Run Spectrum View Spectrum View may be run from the HBS in which case you have a choice of analyzing all sites in the sector in one run, or making a selection. Spectrum View may also be run on a managing computer directly connected to an HSU. Remember that in such a case the results will be quite different if the HSU is part of a sector (registered or not) or if it is completely stand-alone, for example using a different spectral range and operating Band from the HBS. In the former case, expect a “noise hump” around the channels used by the sector, due to the duty signals from the HBS. Where is the Spectrum View Data stored Spectrum View data is always stored in the ODU originating the analysis. The HBS maintains the last Spectrum View analysis data for all members of the sector. If you run Spectrum View from a directly connected HSU, it stores its own data, which may be quite different from the analysis obtained for the same HSU from the HBS. Spectrum View Main Window: HBS In this section we review the main window management controls. Click the Spectrum View button 300 . The Spectrum View main window opens in full screen mode: Netronics NetAstra Family System Manual Spectrum View Chapter 19 Use the top left panel to set the Spectrum View configuration parameters and choose an analysis type - Entire Sector or Specific HSU. The settings are “sticky” for the HBS and will be reused. The analysis range is limited from 4900 to 6050 MHz with a maximum difference of 500 MHz. Erroneous entries will be shown with a red border like this: The timeout is the maximum analysis time per site. Use the bottom button bar to start an analysis, to stop a running analysis or run a Highest Interference profile for the sector: If you choose to run the analysis for specific HSUs, The left hand HSU panel will change: Check the required HSUs and then Start. Since a large sector will clutter up the right hand display area, you may selectively Show, minimize or remove a sector member. Another way of freeing up more space for analysis displays is to hide the left hand panel using the circled arrow: Netronics NetAstra Family System Manual 301 Spectrum View Chapter 19 If for example you click Show on the HBS, the following view will open in the right panel: Figure 19-1: Spectrum View data panel for the HBS, ready for data The standard X button closes the window completely (but does not loose data). The - button collapses the view to look like this: The two side arrows (circled) are used to reorder a stack of such view on the display area: 302 Netronics NetAstra Family System Manual Spectrum View Chapter 19 The remaining controls on the Spectrum View main window relate to Spectrum View data manipulation. We will cover them in the next section using a live analysis. Spectrum View Display Function Buttons Spectrum View data manipulation functions are provide on the top button bar: Each button function applies to all of the sector members at once. Note Table 19-1: Spectrum View Analysis Display Buttons functionality Button Purpose Show/Hide Antenna A Show/Hide Antenna B Show/Hide average Show/Hide current channel (HSUs only) Show/Hide maximum Netronics NetAstra Family System Manual 303 Spectrum View Chapter 19 Table 19-1: Spectrum View Analysis Display Buttons functionality (Continued) Button Purpose Show/Hide DFS information Show/Hide point values Save the analysis to a CSV file Clear all sector member analyses from the display (They can be shown again) Running Spectrum View from the HBS Choose Entire sector and click Start. You are offered the following cautionary message: If it is acceptable to drop the service click Yes. The processing may appear to have stopped - but it is not complete until all of the Show buttons for selected HSUs are enabled. Here is the result for the HBS: 304 Netronics NetAstra Family System Manual Spectrum View Chapter 19 The keys to the color coding is permanently displayed at the bottom of the main window: Figure 19-2: Spectrum View Analysis color codes The green band reflects the current HBS operating frequency. Notice also the small fly-over diskette icon (circled) to the upper left of either graph. Clicking it opens a Windows File-Save dialog allowing you to save the graph to disk as a jpg file. Here is the analysis for one of the HSUs. It is a bit different: The light green rectangle in the background of both antenna displays reflects actual channel (20 MHz wide here) being used by the HSU. The title bar also contains the HSUs IP address. There is a further display of interest: Highest Interference for all HSUs in the sector: Netronics NetAstra Family System Manual 305 Spectrum View Chapter 19 See Figure 19-2 for the color coding. Running Spectrum View from a HSU There is no difference in principle between running a Spectrum View analysis for a HSU and running it for a HBS. There is a major difference between running Spectrum View on an active HSU (registered or not) or in total isolation from the sector. Here is what happens in total isolation: Figure 19-3: HSU spectrum analysis in complete isolation from the sector 306 Netronics NetAstra Family System Manual Spectrum View Chapter 19 Now we return the HSU to the sector: Figure 19-4: HSU spectrum analysis within the sector The hump in Figure 19-4 reflects the duty cycle signal from the HBS centered on the current channel (circled). Zooming in and out You may zoom in on a range of interest and enlarge it. Use the mouse to swipe the range from left to right or reverse and then click.The swiped range is zoomed in. You may repeat this several times. The zoom applies to all charts for all elements in the analysis. An indicator is provided at the top right of each chart: Netronics NetAstra Family System Manual 307 Spectrum View Chapter 19 Zoom Out returns you to the previous zoom state; Show all revert you to the original display. In a zoomed state, a horizontal scroll bar enables you to view other areas of the displayed frequency range. 308 Netronics NetAstra Family System Manual Chapter 20 Using the Web Interface What is it For The Web Interface (WI) enables you to carry out basic sector management functions using a Web browser. It may be used to • Monitor a sector on a minimal basis • Check sector parameters and make limited changes • View the link Inventory • Inspect the Recent Events logs Who Need it The WI is a tool for technicians to “quick-install” a HSU in a link with minimum effort. It may also be employed by a user for a quick look at current operating parameters and the Recent Events logs. Netronics NetAstra Family System Manual 309 Using the Web Interface Chapter 20 How it Works Assume the sector setup, which we used in Chapter 5 and later. We repeat it here for convenience: Table 20-1: Preconfigured setup – fixed HBS Location HBS.01 Attribute Value Remark IP Address 10.104.50.200 Net Mask 255.255.0.0 Default Gateway 10.104.10.21 Sector ID EBGX20560334 Inherited by all communicating fixed HSUs. Network ID EBX Inherited by all communicating nomadic HSUs. Protocol SNMPv1 Can be set to SNMPv3 or both v1 and v3 Contact Bach Optional Name [email protected] Location of Contact - optional Band 5.730 - 5.845 GHz FCC/IC Inherited by all communicating HSUs Channel Bandwidth 20MHz Inherited by all communicating HSUs Unit Serial Number PET540E000A00000 All communicating HSUs and HBS in the same subnet Geographic location Latitude -37.8148 Longitude 144.9630 Azimuth (deg) 0 Beam width (deg) 90 Antenna height (m) 130 310 Used for initial default placement of HSUs From RF plan, not used Netronics NetAstra Family System Manual Using the Web Interface Chapter 20 Table 20-2: Preconfigured setup – fixed HSUs Location HFU.01.01 Attribute Value IP Address 10.104.50.1 Net Mask 255.255.0.0 Default Gateway 10.104.10.21 Protocol SNMPv1 Can be set to SNMPv3 or both v1 and v3 Contact Haydn Optional Name [email protected] Location of Contact - optional Time Slots Unit Serial Number Remark All communicating HSUs and HBS in the same subnet Downlink 8 Uplink 2 May vary with context PIN580I500A00004 Geographic location Latitude -37.8762 Longitude 145.0437 Antenna height (m) 10 HFU.01.02 From RF plan, not used IP Address 10.104.50.2 Net Mask 255.255.0.0 Default Gateway 10.104.10.21 Protocol SNMPv1 Can be set to SNMPv3 or both v1 and v3 Contact Mozart Optional Name [email protected] Location of Contact - optional Time Slots Unit Serial Number All communicating HSUs and HBS in the same subnet Downlink 8 Uplink 2 May vary with context PIN580I500A00005 Geographic location Latitude -37.4018 Longitude 145.0086 Antenna height (m) 60 From RF plan, not used Table 20-3: Preconfigured setup - Level allocation for maximum nomadic HSUs Level Time Sots Number of nomadic HSUs Downlink A 2 6 2 B 1 4 2 C 1 4 2 D 0 0 0 Netronics NetAstra Family System Manual Remark Uplink Includes HNU.0.01 below 311 Using the Web Interface Chapter 20 Table 20-4: Preconfigured setup - One actual nomadic HSU Location HNU.01.01 Attribute Value IP Address 10.104.50.3 Net Mask 255.255.0.0 Default Gateway 10.104.10.21 Protocol SNMPv1 Can be set to SNMPv3 or both v1 and v3 Contact Brahms Optional Name [email protected] Location of Contact - optional Level A Time Slots Unit Serial Number Remark All communicating HSUs and HBS in the same subnet Downlink 6 Uplink 2 Included in previous table PIN580I500A00003 On the managing computer, point your browser to 192.168.10.200 and log on as shown below. You can also log on over the air to registered HSUs in the same way. For stand-alone or unregistered HSUs, you must connect a managing computer directly to the HSU and again log on as shown below. What it Provides The WI is a developing technology. It is possible that the current distributed release may have additional or slightly different features from those shown here. The description below, should nevertheless give you a good idea of how to use the WI. Prerequisites Hardware You need a regular LAN connection between a managing computer and one of the sector ODUs. The WI can be used directly opposite the HBS any of its HSUs. It can also be used over the air from the HBS to any registered HSU. The WI is available for NetStream 5x200 at release level 2.6.00 or later along with NetAstra PtMP ODUs, this release and later. Software Your computer should have at least version 6 of MS Internet Explorer. The Web interface also works with other browsers such as Mozilla Firefox version 3 and later. 312 Netronics NetAstra Family System Manual Using the Web Interface Chapter 20 Technical Background You should be familiar with the concepts underlying the Link Manager and preferably with the Manager itself. Special Considerations Working with the WI Advanced Configurations For setup configurations using features such as HSS, VLAN and QoS, you will need to use the Link Manager. Operational Effects Several WI functions cause temporary sync loss. Typically, changing the number of antennas falls into this category. These cases will be pointed out in Warning messages. Some Working Tips You can: • Log on to a ODU on the default IP address of 10.0.0.120/8, set the Link ID and IP address instead of using the Link Manager as in Chapter 4. Unlike the Local Connection method, you need to reset the ODU to see the change in the Web Interface. • Change the operating Band of an HSU instead of using the Link Manager as in Chapter 5. You can revert it the same way or by a direct connection, logged on as Installer. You cannot change the operating Band of the HBS in this way. • Look at Recent Events for either site You cannot: • • • • Change default Tx power Configure MIMO/Diversity Manage other features such as GSU (when supported), VLAN, QoS Perform Software upgrade Be very careful: • Using this tool if your link is providing customer service which may not be interrupted with sync-losses Scope of this Chapter The remainder of this chapter is divided into three sections: Logging on, HBS Configuration and HSU Configuration. Netronics NetAstra Family System Manual 313 Using the Web Interface Chapter 20 Logging on To use the Web interface, simply point your browser to the IP address of the site to which you are connected. Figure 20-1: Web interface - Log on The User Name and Password are respectively, admin and netman as used for Telnet access. You must click the Log In button to effect entry to the WI. The foregoing applies to both the HBS and the HSUs. HBS Management The Main Window 314 Netronics NetAstra Family System Manual Using the Web Interface Chapter 20 Figure 20-2: Web interface - Main window, HBS The Sector ID (EBGX20561334) appears all or in part as the heading. The HBS Info panel is self explanatory. The green Active indicator will vary according to the status of the HSU shown by the Link Manager. Figure 20-3: Sector Status panel (it will typically be Active, Inactive, Probing etc.) The bottom panel shows all member HSUs. The green LED icons will change color to reflect the status of HSUs. For example, deregistering an HSU will change it to black as in the Link Manager. Figure 20-4: HSU Haydn deregistered Netronics NetAstra Family System Manual 315 Using the Web Interface Chapter 20 Now, click anywhere on the HBS Info panel: Configure The Configure button opens the following display: System The Name, Contact and Location field may be changed. Clicking Save commits them. Clicking Refresh revert the fields to their last Saved values. Air Interface There is nothing that can be changed on this panel. Clicking the Antenna & Tx Power button opens up the following window: 316 Netronics NetAstra Family System Manual Using the Web Interface Chapter 20 The only item that can be changed is the Antenna Type: Changing Antenna Type will call a sector-wide sync loss. Caution Inventory The Inventory display is for information only. Netronics NetAstra Family System Manual 317 Using the Web Interface Chapter 20 Management The Management fields are all fully editable: If you change any of these fields, you will causes a HBS reset: 318 Netronics NetAstra Family System Manual Using the Web Interface Chapter 20 Other You may change the HBS LAN port configuration: You will receive the following notification: This action of course, has no bearing on the sector. Netronics NetAstra Family System Manual 319 Using the Web Interface Chapter 20 Events The Recent Event List is displayed: Reset Use this button to reset the HBS. HSU Management HSU management follows the same pattern as that for the HBS. To avoid tedious repetition, we will only point out significant differences. The Main Window HSU configuration is accomplished by clicking the required HSU in the bottom panel of Chapter 20. For the purposes of this section, we have deregistered Haydn so the panel looks like this: Click Mozrart. Here is what you see: 320 Netronics NetAstra Family System Manual Using the Web Interface Chapter 20 Clicking Configure, opens up a new tab in you browser, pointing to Mozart: Here is the HSU main window: Netronics NetAstra Family System Manual 321 Using the Web Interface Chapter 20 The only item here requiring comment is the Configure button. Install is disabled and the remaining three buttons are the same as for the HBS. Here is the Configure display: The only function here, which differs from the corresponding HBS function, is the Air Interface tab. 322 Netronics NetAstra Family System Manual Using the Web Interface Chapter 20 In addition to the Antenna & Tx Power button, you may also change operating Band: Netronics NetAstra Family System Manual 323 Using the Web Interface Chapter 20 There are two strict caveats to using this function: Warning 324 • It is intended as a tool for the field technician, replacing an HSU in the field. • If you change the operating Band of a registered HSU, you will “loose” it from the sector. The only remedy is to log on to the HSU with a direct connection and either reverse the above process, or log on as Installer and using the regular Change Band. Netronics NetAstra Family System Manual Part 7 Product Reference Netronics NetAstra Family System Manual 325 326 Netronics NetAstra Family System Manual Appendix A Technical Specifications Scope of these Specifications This appendix contains technical specifications for the major link components appearing in this User Manual. They are correct at the date of publication, but are intended for general background only. The latest authoritative and most up to date technical specifications are available as Data Sheets obtainable from Netronics Customer Service. In any event, Netroncis reserves the right to change these specifications without notice. ODU - HBS and HSU Capacity HBS: Up to 200Mbps aggregate net throughput depending on regulation HSU: Up to 50 Mbps aggregate net throughput depending on model Range Up to 40 km / 25 miles Radio Modulation 2x2 MIMO-OFDM (BPSK/QPSK/16QAM/64QAM) Adaptive Modulation & Coding Supported Automatic Channel Selection Supported DFS Supported Diversity Supported Spectrum View Supported Duplex Technology TDD Error Correction FEC k = 1/2, 2/3, 3/4, 5/6 Rate – Dual Antenna [Mbps] at 20 MHz CBW 13 26 39 52 78 104 117 130 Rate – Single Antenna [Mbps] at 10 MHz CBW 6.5 13 19.5 26 39 52 58.5 65 Modulation FEC [k=] BPSK 1/2 Max Tx Power [dBm] for 4.8 – 6 GHz Sensitivity (dBm) @BER <10e-11 at 20 MHz CBW For 10 MHz CBW, deduct 3 dBm Encryption QPSK 1/2 16QAM 3/4 25 -88 -86 -83 64QAM 1/2 3/4 2/3 24 21 19 -81 -77 -72 3/4 5/6 18 -70 -67 AES 128 Netronics NetAstra Family System Manual 327 Technical Specifications Appendix A Supported Bands The bands shown below are supported by Netronics products. Both the bands and related Channel Bandwidths are product dependent. Band (GHz) 2.3 2.4 2.5 3.4 3.5 3.6 Regulation Universal FCC/IC FCC BRS ETSI ETSI ETSI IC 3.5 Universal FCC/IC 4.4 328 Universal Occupied Frequency Range (GHz) CBW (MHz) 2.3045-2.4745 5 2.302-2.477 10 2.297-2.482 20 2.287-2.492 40 2.4095-2.4645 5 2.407-2.467 10 2.402-2.472 20 2.392-2.482 40 2.4965-2.6925 5 2.494-2.695 10 2.489-2.700 20 3.4105-3.4825 5 3.408-3.485 10 3.403-3.490 20 3.4775-3.6025 5 3.475-3.605 10 3.470-3.610 20 3.5975-3.7025 5 3.595-3.705 10 3.590-3.710 20 3.4755-3.6495 5 3.473-3.652 10 3.468-3.657 20 3.2975-3.8025 5 3.295-3.805 10 3.290-3.810 20 3.6505-3.6745 5 3.650-3.675 10 3.650-3.675 20 4.3975-5.0025 5 4.395-5.005 10 4.390-5.010 20 DFS? Compliance (Notes) No N/A (Supported CBW product dependent) No FCC 47CFR, Part 15, Subpart C and IC RSS-210 No FCC 47CFR, Part 27, Subpart M (BRS/EBS) No ETSI EN 302 326-2 (Nominally, 3.5 GHz ETSI) No IC RSS-192 No N/A No FCC Part 90 Subpart Z and IC RSS-197 (Restricted) No N/A Netronics NetAstra Family System Manual Technical Specifications Band (GHz) 4.8 Regulation Universal FCC/IC 4.9 Universal 5.0 Universal ETSI 5.1 Universal 5.2 FCC/IC ETSI FCC/IC 5.4 Universal Appendix A Occupied Frequency Range (GHz) (MHz) 4.8075-4.9025 5 4.805-4.905 10 4.800-4.910 20 4.790-4.920 40 4.9425-4.9875 5 4.940-4.990 10 4.940-4.990 20 4.8975-5.0025 5 4.895-5.005 10 4.890-5.010 20 4.880-5.020 40 4.9975-5.1525 5 4.995-5.155 10 4.990-5.160 20 4.980-5.170 40 5.150 – 5.350 10 5.150 – 5.350 20 5.1475-5.3375 5 5.145-5.340 10 5.140-5.345 20 5.130-5.355 40 5.2525-5.3475 5 5.255-5.345 10 5.255-5.345 20 5.255-5.345 40 5.475 – 5.720 10 5.475 – 5.720 20 5.475 – 5.720 40 5.4775-5.7175 5 5.480-5.715 10 5.480-5.715 20 5.480-5.715 40 5.4725-5.7225 5 5.470-5.725 10 5.465-5.730 20 5.455-5.740 40 CBW Netronics NetAstra Family System Manual DFS? Compliance (Notes) No N/A No FCC 47CFR, Part 90, Subpart Y and IC RSS-111 No N/A No N/A Yes ETSI EN 301 893 No N/A Yes FCC 47CFR, Part 15, Subpart E and IC RSS-210 Yes ETSI EN 301 893 Yes FCC 47CFR, Part 15, Subpart E and IC RSS-210 No N/A 329 Technical Specifications Band 5.4 Occupied Frequency Range (GHz) (MHz) 5.4775-5.7175 5 5.480-5.715 10 5.480-5.715 20 5.480-5.715 40 5.725 – 5.875 10 5.725 – 5.875 20 5.7275-5.8475 5 5.725-5.850 10 5.725-5.850 20 5.725-5.850 40 5.7375-5.8375 5 5.735-5.840 10 5.730-5.845 20 5.720-5.855 40 5.8325-5.8675 5 5.830-5.870 10 5.825-5.875 20 5.815-5.885 40 5.7275-5.9525 5 5.725-5.955 10 5.720-5.960 20 5.710-5.970 40 5.6975-6.0525 5 5.695-6.055 10 5.690-6.060 20 5.680-6.070 40 5.895-6.4050 10 5.890-6.410 20 Regulation (GHz) IC ETSI FCC/IC 5.8 MII China WPC India 5.9 6.0 6.4 Appendix A Universal Universal Universal CBW DFS? Compliance (Notes) Yes IC RSS-210 Yes ETSI EN 302 502 No FCC 47CFR, Part 15, Subpart C and IC RSS-210 No MII China (Supported CBW product dependent) No GSR-38 (Supported CBW product dependent) No N/A No N/A No N/A (No products in WinPro) The following Max Tx Power limitations apply to all products supporting the 3.5 GHz ETSI band: Occupied Sub-Band GHz Center Frequency GHz 3.403-3.490 3.413-3.480 3.470-3.610 3.480-3.600 3.590-3.710 3.600-3.700 330 Mode Channel Bandwidth MHz Max Tx Power dBm Frequency Step KHz 17 Inactive 5, 10, 20 23(†) 250 25(‡) Netronics NetAstra Family System Manual Technical Specifications Appendix A (†) The 3.480 GHz frequency is overlapped, occurring in two different bands as shown. If you wish to use the 3.480 GHz frequency, you should set Max TX Power to 17 dBm. Note (‡) The 3.600 GHz frequency is overlapped, occurring in two different bands as shown. If you wish to use the 3.600 GHz frequency, you should set Max TX Power to 23 dBm. Management Management Application (per sector) Link Manager Protocol SNMP and Telnet NMS WBB NMS - RNMS Environmental Operating Temperatures HBS/HSU: -35°C to +60°C / -31°F to +140°F Humidity HBS/HSU: Up to 100% non-condensing, IP67 Storage -40° to 85°C / -40°F to 185°F Mechanical HBS with Integrated Antenna 37.1/14.84(W) x 37.1/14.84(H) x 9.00/3.6(D) cm/in; 3.5 kg / 7 lbs HBS/HSU Connectorized 19.5/7.7(W) x 27.0/10.8(H) x 5.5/2.2(D) cm/in; 1.8 kg / 3.6 lbs HSU SFF with Embedded antenna) 19.5/7.7(W) x 27.0/10.8(H) x 7/2.8(D) cm/in; 1.8 kg / 3.6 lbs NetAstra SU 5M Connectorized 19.5/7.7(W) x 27.0/10.8(H) x 5.5/2.2(D) cm/in; 1.1 kg / 2.4 lbs NetAstra SU 5M with Integrated Antenna, also HSU AC 24.1/9.4(W) x 19.7/7.7(H) x 7.7/3(D) cm/in; 1.3 kg / 2.8 lbs Power Power Feeding Power provided over ODU-IDU cable using PoE Power Consumption - alone HBS: <25W, HSU: <20W, HSU-505/510/525<10W Safety TUV UL 60950-1, UL 60950-22, CAN/CSA C22.2 60950-1, CAN/CSA C22.2 60950-22 ETSI/IEC EN/IEC 60950-1, EN/IEC 60950-22 EMC FCC 47CFR Class B, Part15, Subpart B ETSI EN 300 386, EN 301 489-1, EN 301 489-4 CAN/CSA-CEI/IEC CISPR 22 Class B AS/NZS CISPR 22 Class B Netronics NetAstra Family System Manual 331 Technical Specifications Architecture Appendix A ODU: Outdoor Unit with Integrated Antenna, Connectorized for External Antenna or Embedded PoE device for Ethernet only HBS: • Outdoor CAT-5e cable. maximum cable length: 100m for 10/ 100BaseT. ODU to PoE Interface • Outdoor CAT-5e cable. maximum cable length: 75m for 1000BaseT. HSU: Outdoor CAT-5e cable; maximum cable length: 100 m (10/100BaseT) Management Application (per sector) Link Manager Protocol SNMP and Telnet NMS Netroncis NMS Operating Temperatures HBS/HSU: -35°C to +60°C / -31°F to +140°F Humidity HBS/HSU: Up to 100% non-condensing, IP67 Storage -40° to 85°C / -40°F to 185°F FCC/IC (cTUVus) UL 60950-1, UL ?-22, CAN/CSA C22.2 60950-1, CAN/CSA C22.2 60950-22 ETSI/IEC EN/IEC 60950-1, EN/IEC 60950-22 FCC 47 CFR Class B, Part15, Subpart B ETSI EN 300 386, EN 301 489-1, EN 301 489-4 CAN/CSA CISPR 22-04 Class B AS/NZS CISPR 22:2004 Class B HSU AC - HSU with AC Power Feeding Configuration Architecture ODU: Outdoor Unit with Integrated Antenna ODU to LAN and PoE Interface Outdoor CAT-5e cable. Maximum cable length: 100m for 10/100BaseT. Radio Capacity 10 Mbps net aggregate throughput Range Up to 40 km / 25 miles Channel Bandwidth Configurable: 5,10,20 and 40 MHz Modulation 2x2 MIMO-OFDM (BPSK/QPSK/16QAM/64QAM) Bandwidth Allocation Symmetric and Asymmetric DFS Supported 332 Netronics NetAstra Family System Manual Technical Specifications Appendix A Radio Adaptive Modulation & Coding Supported Automatic Channel Selection Supported Diversity Supported Spectrum Viewer Supported Max Tx Power 25 dBm Duplex Technology TDD Error Correction FEC k = 1/2, 2/3, 3/4, 5/6 Encryption AES 128 Ethernet Interface 10/100BaseT PoE port 10/100BaseT, IEEE 802.3af Layer 2 Hub Mode QoS Packet classification to 4 queues according to 802.1p and Diffserv, Dynamic scheduling according to air interface changes VLAN Supported 802.1Q, 8021.P, QinQ Mechanical Dimensions 24.1(w) x 19.7(h) x 7.7(d) cm Weight 1.3 kg / 2.8 lbs Integrated Antenna 19.7/7.7(W) x 24.1/9.5(H) x 9.0/3.6(D) cm/in; 1.3 kg / 2.8 lbs Power Power Feeding Direct AC power feeding 85-265VAC Power Consumption - alone <10W Environmental Operating Temperatures -35°C to +60°C / -31°F to +140°F Humidity 100% condensing, IP67 (totally protected against dust and against immersion up to 1m) Safety TUV UL 60950-1, UL 60950-22, CAN/CSA C22.2 60950-1, CAN/CSA C22.2 60950-22 ETSI/IEC EN/IEC 60950-1, EN/IEC 60950-22 Environmental FCC 47CFR Part15, Subpart B, Class B ETSI EN 300 386, EN 301 489-1, EN 301 489-4 CAN/CSA CISPR 22 Class B AS/NZS CISPR 22 Class B Netronics NetAstra Family System Manual 333 Technical Specifications Appendix A IDU-DT6 (Aggregation Unit) Ethernet Interface PoE Interfaces 6 x legacy mode PoE ports(10/100/1000Mbps), up to 25W per port Ethernet Ports 2 x RJ-45 PHY ports of 10/100/1000 Mbps Based-T Ethernet LAN Interface Framing/Coding IEEE 802.3/U LAN Interface Line Impedance 100 Ohm LAN Interface Ethernet Mode Auto-negotiation 10/100/1000 SFP Interfaces 2 x SFP ports of 1000 Mbps (standard MSA) MAC Address Entries Up to 1K MAC Address entries (same as IDU-NetStream RM) Maximal Frame Size 2048 bytes Ethernet Latency 3 ms Mechanical Dimensions 1U 19” Rack mounted, half width Weight 0.8 Kg Power Internal Power Consumption < 15W @ Maximal Power feeding Power Feeding 44VDC - 56VDC, Dual redundant inputs. 3 pin female DC connector Grounding Front panel grounding lug, as for IDU-NetStream RM Protection - DC input Line & Reverse Polarity protection - PoE Ports over/under Current & over/under Voltage protections Environmental Operating Temperatures -40°C - 60°C / -40°F - 140°F Humidity 90% non-condensing Storage -40° to 70°C / -40°F to 158°F Humidity 95% Safety TUV UL60950-1, CAN/CSA-C22.2 No. 60950-1 ETSI/IEC EN/IEC 60950-1 FCC 47CFR Part 15, Subpart B, Class B ETSI EN 300 386; 301 489-4; 301 489-1 CAN/CSA-AS/NZS CISPR 22 Class B 334 Netronics NetAstra Family System Manual Technical Specifications Appendix A GbE PoE Device - Indoor, AC Electrical AC Input Voltage 100 - 240 VAC nominal, 90 - 264 VAC max range Input Frequency 47 - 63 Hz Input Current 2.0 A (rms) 115 VAC at Max. load 1.2 A (rms) 230 VAC at Max. load Max. In-rush Current 30A for 115VAC at Max. load 60A for 230VAC at Max. load Standby Power 0.5W (Max) at 240Vac DC Output Voltage 56 VDC Protection Indication • • • Short circuit protection Auto recovery Over voltage protection Green led for normal operation Interfaces PoE output RJ-45 connector PoE to ODU Interface Outdoor CAT 5e; Maximum cable length: 75m for 1000BaseT or 100m for 10/ 100BaseT. Ethernet input RJ-45 connector AC input on device Standard socket IEC320 C14 type AC cable Variety of AC plugs available (see below) Ethernet / ODU WBB RJ-45 connector Ethernet LAN interface type RJ-45, 10/100/1000BaseT Interface (Line Impedance -100 ) Mechanical Case Plastic Dimensions 16cm(W) x 6.3cm(D) x 3.33cm(H) Weight 250g Environmental Operating Temperatures 0°C to 40°C/32°F to 104°F Humidity 90% non-condensing Safety ULCSA 60950-1, C22.2 No. 60950-1 ETSI/IEC IEC/EN 60950-1 Netronics NetAstra Family System Manual 335 Technical Specifications Appendix A EMC ESD 61000-4-2 RS 61000-4-3 EFT 61000-4-4 Surge 61000-4-5 CS 61000-4-6 DIPS 61000-4-11 EMI FCC part 15 class B, CISPR Pub 22 class B, AS/NZS CISPR 22 class B PoE Device - Outdoor, DC Electrical Input voltage range -20 to -60 VDC (single input) Output voltage 48VDC / 0.6A Power Consumption 0.5W (not including radio) Protections Differential - 15KW Common – 3KW Interfaces Ethernet LAN interface type RJ-45, 10/100BaseT Interface (Line Impedance -100 ) DC input 2 pins connector ODU (PoE Port) RJ-45 Mechanical Enclosure All weather cases Dimensions 24.5cm(H) x 13.5cm(W) x 4.0cm(D) Weight 1.0kg/2.2lbs Environmental Operating Temperatures -35° C to 60° C / -31° F to 140° F Humidity Up to 100% non-condensing Standards IEC 60721-3-4 Class 4M5 IP67 Safety FCC/IEC/ CAN/CSA 336 Designed to meet 60950-1, 60950-22 Netronics NetAstra Family System Manual Technical Specifications Appendix A EMC ETSI Designed to meet EN 300 386; EN 301 489-1 FCC Designed to meet 47CFR Part 15, Subpart B, Class B CAN/CSA Designed to meet ICES-003 Class B AS/NZS Designed to meet CISPR 22 class B GSU Configuration Architecture Outdoor Synchronization Unit; Including External GPS Antenna, HSS cable and PoE device GSU to PoE Interface Outdoor CAT 5e cable; Maximum cable length: 100 m Mechanical Dimensions 24.5cm(H) x 13.5cm(W) x 4.0cm(D) Weight 1.0kg/2.2lbs Power Power Feeding Power provided by PoE device Max Power Dissipation 10Watt Environmental Operating Temperature Range -35°C to 60°C / -13°F to 140°F Humidity Up to 100% non-condensing Safety EN/IEC Designed to meet EN/IEC 60950-1, 60950-22 EMC FCC Designed to meet 47CFR Class B, Part 15, Subpart B ETSI Designed to meet EN 300 386; EN 301 489-4; EN 301 489-1 CAN/CSA-CEI/IEC Designed to meet CISPR 22-02 AS/NZS Designed to meet CISPR22 Class B Netronics NetAstra Family System Manual 337 Technical Specifications Appendix A Lightning Protector Electrical Compatible Interfaces 10/100/1000BaseT Data Rates Up to 1000Mbps Nominal Operational Voltage 48 VDC Maximum Operational Voltage 60 VDC - 650 mA Maximum Continuous current 1A Impedance 90 to 110 Ohm Connection type RJ45 CAT 5e STP (shielded) Pin-out 8 wires + shielding Pins Protected All pins protected Response time <5 microseconds (with ODU) Nominal discharge currents Line to Line 500 A @ 8/20μs Line to Ground 2000 A @ 8/20μs Impulse Discharge Current 20000 A, 8/20 μs 1 operation minimum 10000 A, 8/20 μs > 10 operations 2000 A, 10/350 μs 1 operation 200 A, 10/1000 μs > 300 operations 200 A, 10/700 μs > 500 operations Impulse Spark-over DC Spark-over ±20 % @ 100 V/s 150 V 100 V/μs 350 V 1000 V/μs 500 V Capacitance < 2 pF DC Holdover Voltage 80V Mechanical Enclosure Metal Connection to bonding Network Screw Dimensions 150mm Weight 220 gram (0.22 Kg) 338 Netronics NetAstra Family System Manual Technical Specifications Appendix A Environmental Operating temperature -40°C to 60°C Storage temperature -50°C to 70°C Enclosure rating IP67 Humidity 100% non condensing Fast Ethernet CAT-5e cable repeater Electrical Compatible Interfaces 100BaseT Data Rates Up to 1000Mbps Nominal Operational Voltage 48 VDC Maximum Operational Voltage 60 VDC - 650 mA Current consumption 0.5 A Impedance 90 to 110 Ohm Connection type RJ45 CAT 5e STP (shielded) Pin-out 8 wires + shielding Mechanical Enclosure Metal Connection to bonding Network Screw Dimensions 150mm Weight 220 gram (0.22Kg) Environmental Operating temperature -40°C to 60°C Storage temperature -50°C to 70°C Enclosure rating IP67 Humidity 100% non condensing Safety TUV UL 60950-1, UL 60950-22, CAN/CSA C22.2 60950-1, CAN/CSA C22.2 60950-22 ETSI/IEC EN/IEC 60950-1, EN/IEC 60950-22 EMC FCC CFR47 Class B, Part 15, Subpart B ETSI EN 300 386, EN 301 489-4, EN 301 489-1 CAN/CSA-AS/NZS CISPR 22 Class B Netronics NetAstra Family System Manual 339 Technical Specifications Appendix A Antenna Characteristics An antenna is the radiating and receiving element from which the radio signal, in the form of RF power, is radiated to its surroundings and vice versa. The transmission range is a function of the antenna gain and transmitting power. These factors are limited by country regulations. The NetAstra PtMP may be operated with an integrated antenna attached to the ODU unit, or with an external antenna wired to the ODU via N-type connectors. All cables and con nections must be connected correctly to reduce losses. The required antenna impedance is 50 Ω. 340 Netronics NetAstra Family System Manual Appendix B Wiring Specifications ODU-PoE Cable (HBS and HSU) The ODU-PoE cable is shielded/outdoor class CAT-5e, 4 twisted-pair 24 AWG terminated with RJ-45 connectors on both ends. A cable gland on the ODU side provides hermetic sealing. The following table shows the connector pinout: Table B-1: ODU-PoE RJ-45 Connector Pinout Function Color PoE ODU Ethernet (RxN) White/Green 1 1 Ethernet (RxT) Green 2 2 Ethernet (TxT) White/Orange 3 3 Ethernet (TxN) Orange 6 6 Power (+) Blue 4 4 Power (+) White/Blue 5 5 Power (-) White/Brown 7 7 Power (-) Brown 8 8 Table B-2: LAN-GbE PoE RJ-45 Connector Pinout Function Color PoE LAN TxRx A White/Green 1 1 TxRx A Green 2 2 TxRx B White/Orange 3 3 TxRx B Orange 6 6 TxRx C & Power(+) Blue 4 4 TxRx C & Power(+) White/Blue 5 5 TxRx D & Power(-) White/Brown 7 7 TxRx D & Power(-) Brown 8 8 Netronics NetAstra Family System Manual 341 Wiring Specifications Appendix B HBS/HSS Unit Connection Pinout Table B-3: HBS/HSS Unit Connection Pinout Color ODU RJ-45 HSS UNIT RJ-45 White/Green 1 1 Green White/Orange Not connected Orange 6 6 Blue 4 4 White/Blue 5 5 White/Brown 7 7 Brown 8 8 User Port Connectors LAN Port The LAN 10/100BaseT interface terminates in an 8-pin RJ-45 connector, wired in accordance to Table B-4. Table B-4: Fast Ethernet Connector Pinout Function Signal Pin Transmit Data (positive) TD (+) 1 Transmit Data (negative) TD (–) 2 Receive Data (positive) RD (+) 3 Receive Data (negative) RD (–) 6 DC Power Terminals DC PoE Table B-5: Terminal Block 2-pin -48 VDC Function Pin + Right – Left 342 Netronics NetAstra Family System Manual Wiring Specifications Appendix B SU2-AC Power Terminal The SU2-AC power port is a four pin male socket with pin assignments as follows: Table B-6: SU2-AC power pin assignments Pin Wire Color Function 1 Red Line 2 Not used 3 Black Neutral 4 Green or Green-Yellow Ground Netronics NetAstra Family System Manual 343 Appendix C Setting Antenna Parameters Antenna Issues The choice of Tx Power, antenna gain and cable loss (between the radio and the antenna) determines the EIRP and is affected by such considerations as radio limitations and regulatory restrictions. Before proceeding to antenna installation details, the following background information should be considered: About Single and Dual Antennas Each NetAstra PtMP ODU is made of two radio transceivers (radios). The radios make use of algorithms that utilize both MIMO and Diversity resulting in enhanced capacity, range and link availability. The number of antennas (i.e. radios) used is determined by user configuration and by automatic system decisions, explained below. Dual Antennas at the HBS and an HSU When using dual antennas at both sites (single bipolar antenna or two mo-unipolar antennas) you can choose between MIMO Mode and Diversity Mode. MIMO Mode With MIMO the system doubles the link capacity. At the same time, it keeps the same rate and modulation per radio as was used with single antenna, thus increasing capacity, range and availability. For example with a dual antenna NetAstra can transmit at modulation of 64QAM and FEC of 5/6 and get an air rate of 130 Mbps, compared to 65 Mbps with single antenna. To work in this mode, each antenna port must be connected to an antenna, the RSS level in both receivers should be balanced and a minimal separation between the antennas must be maintained. (For example, by using dual polarization antennas a cross polarization separation is attained). 344 Netronics NetAstra Family System Manual Setting Antenna Parameters Appendix C Upon selecting Antenna Type as Dual, NetAstra PtMP automatically selects MIMO mode and doubles the air rates. Link Manager indicates a case of unbalanced RSS between the two antennas in the HBS panels. Diversity Mode Diversity Mode uses two antennas to improve the quality and reliability of the link. Often, there is not a clear line-of-sight (LOS) between transmitter and receiver. Instead the signal is reflected along multiple paths before if-ally being received. Each such “bounce” can introduce phase shifts, time delays, attenuations, and even distortions that can destructively interfere with one another at the aperture of the receiving antenna. Antenna diversity is especially effective at mitigating these multi-path situations. This is because multiple antennas afford a receiver several recordings of the same signal. Each antenna will be exposed to a different interference envy-remnant. Thus, if one antenna is undergoing a deep fade, it is likely that another has a sufficient signal. Collectively such a system can provide a robust link. Antenna diversity requires antenna separation which is possible by using a dual-polarization antenna or by two spatially separated antennas. Use Diversity instead of MIMO in the following situations: • When the system cannot operate in MIMO Mode • When one of the receivers has high interference compared to the second receiver (i.e. the system is “unbalanced”) • When you achieve higher capacity in Diversity Mode than in MIMO Mode • When high robustness is of importance and the capacity of Diversity Mode is sufficient (up to 25 Mbps full duplex) Single Antennas at Both Sites By selecting a single antenna at the HBS and HSU, the ODUs operate with a single radio that is connected to the ANT 1 connector. The second radio is automatically shut down. Single at One Site, Dual Antennas at the Other In this mode one of the sites uses the ODU with a single antenna while the other site uses the ODU with a dual antenna. The advantages in this mode in comparison to using a single antenna in both sites are doubled total Tx Power and additional polarization and/or space diversity (depending on the polarization of installed antennas). The air rates used in this mode are same as when using single antennas in both sites. Netronics NetAstra Family System Manual 345 Setting Antenna Parameters Appendix C Table C-1 summarizes the situation: Table C-1: MIMO - Diversity settings Number of Antennas Mode Max Full Duplex Capacity Site A Site B 2 2 2 1 25 Mbps 1 2 25 Mbps 1 1 25 Mbps MIMO 50 Mbps Diversity 25 Mbps Site A and B may be HBS or HSU. The rates used by NetAstra are shown in Table C-2 below: Table C-2: NetAstra PtMP Air rates Antenna Modulation FEC Air-Rate [Mbps] Single BPSK 1/2 6.5 Single QPSK 1/2 13 Single QPSK 3/4 19.5 Single 16QAM 1/2 26 Single 16QAM 3/4 39 Single 64QAM 2/3 52 Single 64QAM 3/4 58.5 Single 64QAM 5/6 65 Dual BPSK 1/2 13 Dual QPSK 1/2 26 Dual QPSK 3/4 39 Dual 16QAM 1/2 52 Dual 16QAM 3/4 78 Dual 64QAM 2/3 104 Dual 64QAM 3/4 117 Dual 64QAM 5/6 130 346 Netronics NetAstra Family System Manual Setting Antenna Parameters Appendix C Considerations for Changing Antenna Parameters Let: max Available Tx Power denote the maximum Tx Power practically available from an ODU. (It appears as Tx Power per Radio.) maxRegEIRP denote the maximum EIRP available by regulation. It will be determined by three factors: • per band/regulation • per channel bandwidth • antenna gain maxRegTxPower denote the maximum regulatory Tx Power for the equipment, also having regard the above three points. Then, the following relationship must be satisfied: maxAvailableTxPower ≤ min (maxRegEIRP – AntennaGain + CableLoss, maxRegTxPower) ... (*) The Tx Power (per radio) indicates the power of each radio inside the ODU and is used for Link Budget Calculations. The Tx Power (System) shows the total transmission power of the ODU and is used to calculate the EIRP according to regulations. • To see the relationship between Tx Power (radio) and Tx Power (system), note that dBm = 10 x log10milliWatt so that if you double the power in milliWatts (for two radios) then dBm will • Notes • • • increase by 10 x log102 ≈ 3 . The Max EIRP level will be automatically set according to the selected band and regulation. The EIRP level is the sum of the System Tx Power and the Antenna Gain minus the Cable Loss. The Max EIRP level will be automatically set according to the selected band and regulation. The EIRP level is the sum of the System Tx Power and the Antenna Gain minus the Cable Loss. The inequality (*) above is always satisfied by the system in accordance with the relevant regulation. The precise relationship between the items in inequality (*) is as follows: • • Required Tx Power (per radio) will be adjusted down to the lesser of the value entered and maxAvailableTxPower Tx Power (system) is maxAvailableTxPower + 3 (for 2 radios) • Max EIRP is maxRegEIRP. • EIRP is maxAvailableTx Power + Antenna Gain - Cable Loss Netronics NetAstra Family System Manual 347 Appendix D Regional Notice: France Canadian Procédures de sécurité Généralités Avant de manipuler du matériel connecté à des lignes électriques ou de télécommunications, il est conseillé de se défaire de bijoux ou de tout autre objet métallique qui pourrait entrer en contact avec les éléments sous tension. Mise à la terre Tous les produits NetAstra doivent être mis à la terre pendant l'usage courant. La mise à la terre est assurée en reliant la fiche d'alimentation à une prise de courant avec une protection de terre. En outre: • La cosse de masse sur l'IDU-NetStream RM doit être constamment connectée à la protection de terre, par un câble de diamètre de 18 AWG ou plus. Le matériel monté sur rack doit être installé seulement sur des racks ou armoires reliés à la terre • Une ODU doit mise à la terre par un câble de diamètre de 10 AWG ou plus • Il ne doit pas y avoir de fusibles ou d'interrupteurs sur la connection à la terre De plus: • Il faut toujours connecter la terre en premier et la déconnecter en dernier • Il ne faut jamais connecter les câbles de télécommunication à du matériel non à la terre • Il faut s'assurer que tous les autres câbles sont déconnectés avant de déconnecter la terre Protection contre la foudre L'utilisation de dispositifs de protection contre la foudre dépend des exigences réglementaires et de l'utilisateur final. Toutes les unités extérieures NetAstra sont conçues avec des circuits de limitation de surtension afin de minimiser les risques de dommages dus à la foudre. NetAstra con seille l'utilisation d'un dispositif de parafoudre supplémentaire afin de protéger le matériel de coups de foudre proches. 348 Netronics NetAstra Family System Manual Regional Notice: France Canadian Appendix D Matériel supplémentaire requis L'équipement requis pour l'installation du matériel est le suivant: • Pince à sertir RJ-45 (si un câble pré-assemblé ODU/IDU n'est pas utilisé) • Perceuse (pour le montage sur mur seulement) • Câbles de terre IDU et ODU • Clef 13 mm (½) • Câble ODU - IDU si non commandé (type extérieur, CAT-5e, 4 paires torsadées, 24 AWG) • Colliers de serrage • Ordinateur portable avec Windows 2000 ou Windows XP. Précautions de sécurité pendant le montage de ODU Avant de connecter un câble à l'ODU, la borne protectrice de masse (visse) de l'ODU doit être connectée à un conducteur externe protecteur ou à un pylône relié à la terre. Il ne doit pas y avoir de fusibles ou d'interrupteurs sur la connection à la terre. Seulement un personnel qualifié utilisant l'équipement de sécurité approprié doit pouvoir monter sur le pylône d'antenne. De même, l'installation ou le démontage de ODU ou de pylônes doit être effectuée seulement par des professionnels ayant suivi une formation. Pour monter l'ODU: a. Vérifier que les supports de fixation de l'ODU sont correctement mis à la terre. b. Monter l'unité ODU sur le pylône ou sur le mur; se référer à la Installation sur pylône et mur au dessous. c. Connecter la câble de terre au point de châssis sur l'ODU. d. Relier le câble ODU-IDU au connecteur ODU RJ-45. e. Visser les presses-étoupe de câbles pour assurer le scellement hermétique des unités ODU. f. Attacher le câble au pylône ou aux supports en utilisant des colliers classés UV. g. Répéter la procédure sur le site distant. Ne pas se placer en face d'une ODU sous tension. Prudence Connecter la terre à IDU-NetStream RM Connecter un câble de terre de 18 AWG à la borne de masse de l'appareil. L'appareil doit être constamment connecté à la terre. Installation sur pylône et mur L' ODU ou l'O-PoE peuvent être montés sur un pylône ou un mur. Netronics NetAstra Family System Manual 349 Regional Notice: France Canadian Prudence Appendix D • Les appareils sont prévus pour être installés par un personnel de service. • Les appareils doivent être connectés à une prise de courant avec une protection de terre. • Le courant CC du IDU-NetStream RM doit être fourni par l'intermédiaire d'un disjoncteur bipolaire et le diamètre du câble doit être de 14 mm avec un conduit de 16 mm. Contenu du kit de montage ODU Le kit de montage ODU comprend les pièces suivantes: 8. une grande clame (voir Figure D-1) 9. une petite clame (voir Figure D-2) 10. un bras (voir Figure D-3) 11. quatre visses hex tête M8x40 12. deux visses hex tête M8x70 13. quatre rondelles plates M8 14. trois rondelles élastiques M8 15. deux écrous M8. Figure D-1: grande clame Figure D-2: petite clame Figure D-3: bras Montage sur un pylône 350 Netronics NetAstra Family System Manual Regional Notice: France Canadian Appendix D Figure D-4: Montage sur un pylône Netronics NetAstra Family System Manual 351 Regional Notice: France Canadian Appendix D Montage sur un mur Figure D-5: Montage sur un mur 352 Netronics NetAstra Family System Manual Regional Notice: France Canadian Appendix D Montage d'une antenne externe L'antenne externe optionnelle peut être montée sur un pylône. Contenu du kit de montage d'une antenne externe Le kit de montage d'une antenne externe comprend les pièces suivantes a. Douze rondelles plates b. Huit rondelles élastiques c. Huit écrous hex d. Quatre boulons e. Un support en U f. Un support à pivotement g. Deux courroies de fixation en métal Pour installer une antenne externe sur un pylône: i. Attacher le support en U à l'arrière de l'antenne en utilisant quatre rondelles plates, quatre rondelles élastiques et quatre écrous hex. ii. Attacher le support à pivotement au support en U en utilisant huit rondelles plates, quatre rondelles élastiques, quatre écrous hex et quatre boulons. iii. Passer les deux courroies de fixation par les fentes verticales dans le support à pivotement. iv. Attacher l'antenne au pylône en utilisant les deux courroies de fixation. Ajuster l'inclinaison nécessaire en utilisant l'échelle angulaire et serrer tous les boulons et écrous à la position requise. Netronics NetAstra Family System Manual 353