1
Program Block Editor and Compiler (PBEC)
For Hercules
User Manual Version 1.7.5
© 2007 Dearborn Group Inc.
27007 Hills Tech Court
Farmington Hills, MI 48331
Phone (248) 488-2080 • Fax (248) 488-2082
http://www.dgtech.com
This document is copyrighted by Dearborn Group Inc. Permission is granted to copy any or all
portions of this manual, provided that such copies are for use with the product provided by the
Dearborn Group, and that the name “Dearborn Group Inc.” remain on all copies as on the
original.
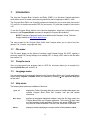
IMPORTANT NOTICE
When using this manual, please remember the following:
•
This manual may be changed, in whole or in part, without notice.
•
Dearborn Group Inc. assumes no responsibility for damage resulting from any accident –
or for any other reason – which occurs while the Hercules Software is in use.
•
No license is granted – by implication or otherwise – for any patents or other rights of
Dearborn Group Inc., or of any third party.
GRYPHON® is a registered trademark of Dearborn Group Inc.
2
TABLE OF CONTENTS
1.
INTRODUCTION ................................................................................................... 4
1.1
File menu .........................................................................................................................................................4
1.2
Compile menu .................................................................................................................................................4
1.3
Language menu...............................................................................................................................................4
1.4
Help menu .......................................................................................................................................................4
2.
PROGRAM BLOCKS............................................................................................ 5
2.1
Starting the Program Block Editor and Compiler ......................................................................................6
2.1.1 Starting up the application............................................................................................................................6
2.2
Creating and editing code ..............................................................................................................................7
2.2.1 Creating global References...........................................................................................................................7
2.2.2 Creating global Functions ............................................................................................................................8
2.2.2.1
Function Code display ............................................................................................................................9
2.2.2.2
Library functions ..................................................................................................................................10
2.2.3 Events: viewing event handler functions....................................................................................................16
2.2.3.1
OnError(uchar channel, uchar error_type .............................................................................................16
2.2.3.2
OnFrame(DataFrame *frame, uchar channel) .......................................................................................16
2.2.3.3
OnKey(char character)..........................................................................................................................16
2.2.3.4
OnStart(long time) ................................................................................................................................17
2.2.3.5
OnStop(long time) ...............................................................................................................................17
2.2.3.6
OnTimer(uint timerid) ..........................................................................................................................17
2.2.3.7
OnTrigger(long time)............................................................................................................................18
2.2.3.8
OnSerial(const void * data, unsigned short datacount).........................................................................18
2.3
Creating and Managing PSF files ...............................................................................................................19
2.4
Compiling PSF Files .....................................................................................................................................20
3
1.
Introduction
The Hercules Program Bock Compiler and Editor (PBEC) is a Windows-based application
which allows a user to create a Hercules program block that is composed of ANSI C code.
The Program Block Editor and Compiler provides an interface for you to enter code (see section
2.2), save it in a compiler-accessible PSF file (see section 2.3), and then compile it (see section
2.4).
To use the Program Blocks feature in the Hercules Application, select the Configuration menu,
followed by the Program Blocks command to display the Program Blocks dialog.
NOTE: Examples of program blocks are available at the Dearborn Group Technical
Support website at http://www.dgtech.com.
The main screen for the Program Block Editor and Compiler allows you to select from four
options: File, Compile, Language and Help.
1.1
File menu
The File menu allows you the options of creating a new Program Source File (PSF), opening a
previously saved PSF, saving changes to an existing PSF, or saving a PSF under a new file name
(see section 2.3).
1.2
Compile menu
Once you have saved your program code in a PSF file, this menu allows you to compile it by
selecting Build Exe (see section 2.4).
1.3
Language menu
You may select one of two language formats for the Program Block Editor and Compiler applications
screen display: English or German. Make your selection by selecting (9) the appropriate language
on this menu.
1.4
Help menu
The following three options are available on this menu:
Open F1
displays the Table of Contents dialog for a series of available help pages: also
contains Program Block Editor and Compiler user tips and special
instructions.
Hot Keys
displays an information dialog that contains a list of the Hot Keys used in the
Program Block Editor and Compiler application. The function (F) keys listed
are valid anywhere in the application. However, the control (CTRL) keys are
only active in Global References, Function Code, and Event Code boxes.
About
displays a window identifying the version number of the software installed.
4
2.
Program Blocks
With the PBEC you can develop and compile custom event handler applications that can be
uploaded to the hardware. Once uploaded, these applications can be accessed by the Hercules
communication interface, via the Program Blocks option on the Hercules software’s Configuration
menu (see section 4.8 of the Hercules User Manual).
A Hercules program block is composed of ANSI C code and is executed in response to the
specific events shown below (described in section 2.2.3).
OnError (uchar channel, uchar error_type)
OnFrame (DataFrame *frame, uchar channel)
OnKey (char character)
OnStart (long time)
OnStop (long time)
OnTimer (uint timerid)
OnTrigger (long time)
OnSerial (const void * data, unsigned short datacount)
Hercules/Program Block channel mismatch
Hercules and program blocks do not recognize the channels the same way resulting in the possibility
that frames expected to be transmitted are not when a program block is loaded. Program blocks
recognize the channel order literally the way they appear in Gryphon. Hercules Hardware & Protocol
Configuration sequentially lists channels for each recognizable card in the Gryphon. Hercules does
not recognize every card.
A mismatch occurs if there is an unrecognizable card in a previous slot in the Gryphon, and the user
writes a program block to transmit frames on a channel listed in Hercules. Hercules does not display
an error message and Information view displays that the program block is successful even though
nothing is transmitted.
Note that the Gryphon channels, not the Hercules channels, must be used in order to have a
successful transmission.
5
Gryphon channels are viewable by opening a Telnet session to the Gryphon IP address [For
example: telnet 192.168.1.1], logging in with the name: root and a password: dggryphon
then typing in the command: gryphrx -.
2.1
Starting the Program Block Editor and Compiler
To install and start up the Program Block Editor and Compiler application, follow the instructions
provided in the following sections.
2.1.1 Starting up the application
Select Start | Programs; select the Hercules Software | Hercules Compiler from the Programs
menu or double click the icon that appears on the desktop. This is also selectable from the
Configuration menu using the Program Blocks command.
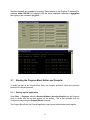
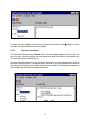
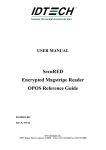
The Program Block Editor and Compiler application’s main screen (shown below) should appear.
6
Accessible from this screen are all of the menus and viewers that support the following features:
2.2
•
Code editing (access by reference, function, or event) – see section 2.2.
•
File management (of PSF file) – see section 2.3.
•
Compiling functions (via DJGPP Public Access Cross-Compiler freeware by DJ Delorie:
http://www.delorie.com) – see section 2.4.
Creating and editing code
The Code Viewer is used for the display and editing of instructions (code) to be performed whenever
specific events occur on the hardware interface. (The event handlers utilized are listed and described
in section 2.2.3.) The code viewer organizes this program source file (PSF) code in three main
areas (References, Functions, and Events) described in the sections that follow.
2.2.1 Creating global References
To create global references accessible by various functions, click on the References node name in
the Code Viewer window. You may then enter your ANSI C references, along with your Include
headers, in the Global References box to the right of the Code Viewer. Controls for editing code are:
CTRL-X (cut), CTRL-C (copy), and CTRL-V (paste).
References defined here will be global to the entire program source file (PSF).
7
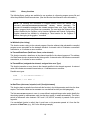
2.2.2 Creating global Functions
To create global functions, click on the Functions node name in the Code Viewer window; a function
tool bar with a blue “+” button and a red “X” button should appear above Code Viewer.
To add a function, click the “add function” (blue ⊕) button, and enter the function name (but NOT its
prototype or arguments) in the dialog that appears.
Click OK. The function name should now be listed in the Code Viewer box:
8
To delete a function, select it from the Code Viewer menu and click the red ⊗ (delete) icon, then
click Yes. The deleted function cannot be undeleted.
2.2.2.1
Function Code display
The code of the function currently selected in the Code Viewer display appears in the Function Code
box to its right. A default prototype and body appear here when that function is first added to the
Functions list (see screen display above).
You may modify this prototype, but you should not change the name of the function here. Doing so
will result in compiling errors. To change the name of a function, you should delete that function from
the Functions list and add a new function with the name you desire. The following is an example of
code modified from the default prototype shown above.
9
2.2.2.2
Library functions
The following library routines are available for use anywhere in a Hercules program source file and
utilize the predefined DataFrame structure. (See the Hercules User Manual for more information.)
NOTE: The following two commands in Program Blocks involve the channel. The
command TransmitDataFrame(DataFrame *frame, uchar channel). The
command TransmitError(unsigned char channel, unsigned char error Type). When you
create a program block using these two commands, you must enter the channel as the
number identified by the Gryphon, not by Hercules Hardware and Protocol Configuration.
Gryphon channels are viewable by completing a Telnet session for the Gryphon IP
address, then typing in the gryphrx – command.
int WriteInfo (char *string)
This function sends a string to the external program (Hercules software) that activated the compiled
program source executable on the hardware interface. A returned value of 0 indicates a successful
transmission; a –1 indicates an error condition.
int TransmitDataFrame (DataFrame *frame, uchar channel)
This function transmits a data frame to the channel specified in the channel argument. The address
of a DataFrame structure is passed as the first argument. A returned value of 0 indicates a successful
transmission; a –1 indicates an error condition.
int TransmitError (unsigned char channel, unsigned char error Type)
This function transmits an error frame to the channel specified in the channel argument. A returned
value of 0 indicates a successful transmission; a –1 indicates an error condition.
Possible error types:
GCAN
/* for CAN ErrorFrame */
GFORDUBP /* for NACK */
int StartTimer (uint name, int period, void (*funct)(uint name))
This function starts a periodic timer that calls the function in the third parameter each time the timer
expires. The function called can be OnTimer or a user-defined function (see third paragraph).
The first StartTimer argument, name, is a user-defined, unsigned integer value used to identify the
timer being started by StartTimer; each time the timer expires, it restarts automatically. The timer's
period (a millisecond value between 0.001 and 2,147,483.647 seconds) is passed via the period
argument.
If a user-defined function is called, then it must have a uint parameter passed to it from the first
parameter in StartTimer, (e.g., 0x01 in the following example):
10
Example:
Definition of this [user-defined] function:
void MyFunction(uint timerid)
{
//insert function code here
}
Call to StartTimer:
int StartTimer(0x01,50,MyFunction);
Inside StartTimer, 0x01 will be the only parameter passed into MyFunction, like this:
MyFunction(0x01);
A returned value of 0 indicates a successful transmission; a return value of –1 indicates an error
condition.
int StopTimer (uint name)
This function stops the running periodic timer identified in the name parameter. A returned value of 0
indicates a successful transmission; a –1 indicates an error condition.
int SendSerial(const void * data, unsigned short datacount)
This function sends the data supplied in the data parameter to the PC’s serial port. The serial port
must first be configured in the Hercules software’s Serial Port Configuration window (see
Configuration menu).
int SendTrigger (void)
This function, when called from a program block, causes the Hercules tool to log to the buffer
according to the pre- and post-trigger values selected (see section 4.3 of the Hercules User Manual).
The Hercules software buffer configuration must be set to Triggered mode. This function has the
same effect as the pressing of CTRL-T (also see section 4.3 as indicated above). Once the buffer is
filled, the Hercules tool will go into OFFLINE mode.
long DecodeData(unsigned char* m_data, unsigned int m_dataLen, PARAM_INFO
m_paramInfo, double* m_value)
This function decodes the data bytes in m_data and returns the resulting value in m_value. The data
bits used for decoding and the resolution and offset values applied are supplied in the m_paramInfo
structure outlined in the box below.
11
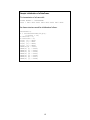
PARAM_INFO Structure
typedef struct
{
unsigned int m_startByte;
unsigned int m_startBit;
unsigned long m_paramLength;
double m_resolution;
double m_offset;
unsigned int m_signedUnsignedFlag;
unsigned int m_applyScaling;
//valid values 0 - 7
//valid values 0 - 7
//length in bits
//scaling parameter
//scaling parameter
//0 = unsigned, 1= signed
//0 = do not apply scaling, 1 =
//apply scaling
} PARAM_INFO;
long EncodeData(unsigned char* m_data, unsigned int m_dataLen, PARAM_INFO
m_paramInfo, double m_value)
This function encodes the m_value parameter value and puts it into the m_data data bytes field. The
m_paramInfo structure (described in the box above) determines the storage location for the value
within the data bytes. The resolution and offset values supplied in m_paramInfo are used in this
calculation.
DataFrame * CreateDataFrame (unsigned short maxIdlen, unsigned short maxDatalen,
unsigned short maxExtralen)
This function is called to allocate memory for a DataFrame (see section 2.2.2.3: DataFrame
structure, below). The values of maxIdlen (maximum ID length, in bits), maxDatalen (maximum
data length, in bytes), and maxExtralen (maximum extra data length, in bytes) specify the amount
of memory to allocate for the pointers to Id, data, and extraData, respectively, in the DataFrame
structure. If the DataFrame is created successfully, then a valid pointer to a DataFrame is returned. If
not, a value of NULL is returned.
NOTE: You should make sure to call the FreeDataFrame function (see int FreeDataFrame
section that follows) to free up allocated memory once you are finished with using the frame
specified here. If a value of zero is specified for any of these arguments, then the
corresponding pointer in the structure will be NULL.
12
Example:
dataFrame * x;
x = CreateDataFrame(29,8,0); /* creates a frame with a header of
29 bits(4 bytes), 8 data bytes, and 0 extra data bytes */
if(x=NULL)
return;
else
{
/* we want a frame representing a CAN header of 0x00234523 and
data of 0x66 0x77 */
x->Idlen = 29; //length in bits, actually 4 bytes
x->datalen = 2;
ID(x)[0] = 0x00;
ID(x) [1] = 0x23;
ID(x) [2] = 0x45;
ID(x) [3] = 0x23;
DATA(x)[0] = 0x66;
DATA(x) [1] = 0x77;
}
int FreeDataFrame( DataFrame * frame)
This function is used to de-allocate memory that was allocated by the function CreateDataFrame
(see above). A return value of 0 indicates success; a value of –1 indicates a failure.
Example:
DataFrame * x;
x = CreateDataFrame(11,4,0);
if(x!=NULL)
{
if(FreeDataFrame(x)==0)
WriteString(“Your memory has been given freedom!”);
}
Error constants are now free to be passed to the software from the hardware tool. These constants
are defined in files found on the hardware itself, in the /include/hw/ folder. The files in question are
included with respect to the modules installed (connected); they are named as dev_xxx.h, where xxx
is the type of channel (e.g., dev_can.h or dev_scp.h).
13
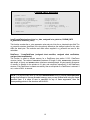
2.2.2.3
Data Frame Structure
All messages received or transmitted by the Hercules tool are stored in accordance with the following
structure. Structure members are accessible from any point within your program source file.
DataFrame structure:
typedef struct {
unsigned long time;
range is 0 to 0xFFFFFFFF
represents time in 10E-5 seconds
The address of the header
The address of the data
The address of the extra data
*/
*/
*/
*/
*/
Idlen;
/* represents header size in bits
datalen;
extralen;
mode;
priority;
stat;
context;
buffer[1];
/* do not modify or use!!! */
*/
void *Id;
void *data;
void *extraData;
unsigned
unsigned
unsigned
unsigned
unsigned
unsigned
unsigned
unsigned
} DataFrame;
short
short
short
char
char
char
char
char
void OnFrame( DataFrame *
{
/*
/*
/*
/*
/*
frame, uchar channel)
if (frame != NULL)
{
if (frame->mode&MODE_RX)
{
/*
message was received from a node from the outside world */
/* put your code here */
}
else
if(frame->mode&MODE_TX)
{
/* message originated from hardware or Gryphon® */
/* put your code here */
}
}
}
14
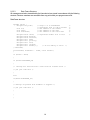
Sample initialization of a DataFrame
For transmission of a frame with
Frame Header = 0x3FFFFFFF
Data = 0x01 0x02 0x03 0x04 0x05 0x06 0x07 0x08
the frame structure would be initialized as follows:
DataFrame x;
x = CreateDataFrame(29,8,0);
x->Idlen = 29;
x->datalen = 5;
x->extralen = 0;
ID(x) [0] = 0x3F;
ID(x) [1] = 0xFF
ID(x) [2] = 0xFF;
ID(x) [3] = 0xFF;
DATA(x)[0] = 0x01;
DATA(x) [1] = 0x02;
DATA(x) [2] = 0x03;
DATA(x) [3] = 0x04;
DATA(x) [4] = 0x05;
DATA(x) [5] = 0x06;
DATA(x) [6] = 0x07;
DATA(x) [7] = 0x08;
15
2.2.3 Events: viewing event handler functions
The Code Viewer is used for the display and editing of instructions to be performed whenever
specific events occur on the hardware interface. The event handlers utilized are listed and described
below.
2.2.3.1
OnError(uchar channel, uchar error_type
This event handler is called in response to a fatal error or CAN controller error.
Sample function code:
void OnError(uchar channel, uchar error_type)
{
WriteInfo("On Error!");
}
2.2.3.2
OnFrame(DataFrame *frame, uchar channel)
This event handler is called whenever the hardware receives a frame. The contents of the received
frame—including the header, data count, data, time stamp and CAN channel—may be accessed via
the user's code.
Sample function code:
void OnFrame(DataFrame *frame)
{
PrintCANFrame(frame);
}
2.2.3.3
OnKey(char character)
This event handler is called whenever the user presses any letter key (except for C or T) along with
the CTRL key. The value (identity) of the letter key pressed may be accessed via the user's code. The
character argument value is the ASCII value of the letter key. (In the case of CTRL-A being pressed,
for example, the value 0x41 would be supplied when the OnKey function was called.)
NOTE: The two following key combinations have been reserved and are not processed by the
OnKey event handler: Ctrl-B (“clear buffer”) and Ctrl-T (“trigger on”).
16
2.2.3.4
OnStart(long time)
This event handler is called when measurement starts. The [absolute] time the measurement started
shall be available in a parameter accessible via the user's source code.
Sample function code:
void OnStart(long time)
{
char temp[50];
sprintf(temp,"OnStart time was %d",time);
WriteInfo(temp);
}
2.2.3.5
OnStop(long time)
This event handler is called when measurement is stopped. The [absolute] time the
measurement stopped is accessible via the user's source code
Sample function code:
void OnStop(long time)
{
char temp[50];
sprintf(temp,"OnStop time was %d",time);
WriteInfo(temp);
}
2.2.3.6
OnTimer(uint timerid)
This event handler is called periodically following a call to the library function StartTimer. The
[absolute] time the event occurred and the name of the timer are available in a parameter accessible
via the user's source code.
Sample function code:
void OnTimer(uint p_timerid)
{
char temp[50];
sprintf(temp,"OnTimer Id
WriteInfo(temp);
was %d",p_timerid);
}
17
2.2.3.7
OnTrigger(long time)
This event handler is called in response to a trigger. In order for this event handler to be called, the
Buffer Configuration of the Hercules tool must be set to Triggered. The time of the trigger is
available in a parameter accessible via the user's source code
Sample function code:
void OnTrigger(long time)
{
char temp[50];
sprintf(temp,"Trigger time was %d",time);
WriteInfo(temp);
}
2.2.3.8
OnSerial(const void * data, unsigned short datacount)
This event is called when data is received over the PC’s serial port. Through the Code Viewer, the
user can enter function code identifying actions to be taken when data is received by the serial port.
The serial port must first be configured in the Serial Port Configuration window of the Hercules
software (see Configuration menu).
18
2.3
Creating and Managing PSF files
Before you attempt to compile program code to be uploaded to the Hercules tool, you must save it to
a program source (.psf) file. The File menu allows you the following options for creating a new PSF,
opening a previously saved PSF, saving changes to an existing PSF, or saving a PSF under a new
file name, respectively:
New Program Source File
Open Program Source File
Save Program Source File
Save Program Source File As
Exit
The file name of the active file, once saved, will appear in the left-hand panel of the status bar. (There
will be a “successful save” comment in the right panel.)
Once you have saved the program as a PSF file, you may compile it by following the instructions
provided in section 2.4.
19
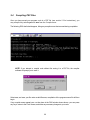
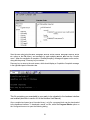
2.4
Compiling PSF Files
Once you have saved your program code in a PSF file (see section 2.3 for instructions), you
may compile it by selecting Build Exe from the Compile menu.
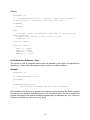
The following DOS shell should appear, listing any compiler errors that occurred during compilation.
NOTE: If you attempt to compile code without first saving it to a PSF file, the compiler
software will prompt you to save it.
Select Yes, and save your file under a valid filename; compilation of the program source file will then
begin.
If any compiler errors appear here—as they have in the DOS window shown above—you can press
any key to return to the Code Viewer, and make any necessary changes to your code.
20
Save the new code (using the Save Program Source File or Save Program Source File
As option on the File menu), and recompile by again selecting Build Exe from the Compile
menu. When the compilation is complete, a “finished compiling” message will appear on the screen,
along with the prompt, “Press any key to continue . . .”
Press any key to return to the main screen, which should display a Compilation Complete! message
in the right-hand panel of the status bar.
This file containing your executable is now ready to be uploaded to the hardware interface
and enabled (also refer to section 4.8 of the Hercules User Manual).
Once compiled and saved as a Hercules binary (.out) file, a program block can be downloaded
to the hardware interface. To download a saved .out file, select the Program Blocks option on
the Configuration menu to open the following dialog.
21
Click Select to display the Open dialog. Locate and select the .out program file you wish to
download, and click Open. Click Download in the Program Blocks window.
The progress bar will fill as the file is downloaded. When the download is finished, click OK.
Enable the program block by selecting (;) the Enable Programming Block check box in the
bottom of this window. You can also make this selection later in the Global Options dialog
accessed from the Configuration menu, (see Global Options below). Click OK.
Open an Information View (from the Display menu) so that you will be able to view the status
of your program block. Messages will show based on keys or events chosen in the dialog from
“Select”.
Once you have initiated an ONLINE monitoring session (i.e., selected Start from the Monitoring
menu or the main toolbar), the Information View should indicate the successful execution of
your program block.
Global Options lets you enable or disable the filtering, frame responder, UCS, and program
block features for a monitoring session. The default setting for menu options is disabled (box
cleared: ). To enable a feature from this list, select (;) its box. A feature is only available for
selection if it has been configured for the current monitoring session.
22