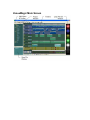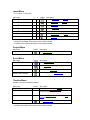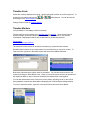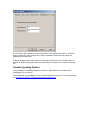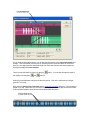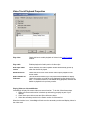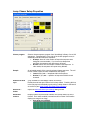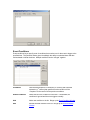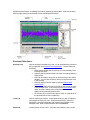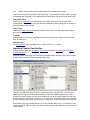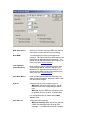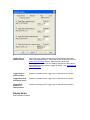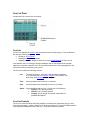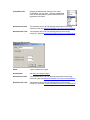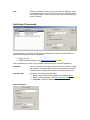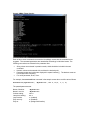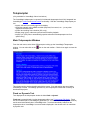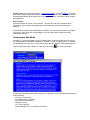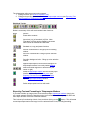
1
VenueMagic Show Control Software 2.5 Table of Contents Introduction to VenueMagic Help ................................................................................................. 7 VenueMagic End User License Agreement .................................................................................. 7 VenueMagic Main Screen.......................................................................................................... 10 VenueMagic Main Menu ........................................................................................................ 12 File Menu ........................................................................................................................... 12 Edit Menu ........................................................................................................................... 12 View Menu ......................................................................................................................... 12 Insert Menu ........................................................................................................................ 14 Project Menu ...................................................................................................................... 14 Event Menu ........................................................................................................................ 14 Timeline Menu.................................................................................................................... 14 Playlist Menu ...................................................................................................................... 15 Clips Menu ......................................................................................................................... 15 Devices Menu .................................................................................................................... 15 Tools Menu ........................................................................................................................ 15 Help Menu.......................................................................................................................... 16 Fixtures ..................................................................................................................................... 16 Add Fixtures .......................................................................................................................... 16 Cut, Copy and Pasting Fixtures .......................................................................................... 18 Remapping Fixtures ........................................................................................................... 18 Mapping Fixtures to Capture Polar 3D Visualizer ................................................................ 20 Edit Fixture Settings ........................................................................................................... 24 Setting Fixture Channel Names .......................................................................................... 25 Fixture Channel Types ........................................................................................................... 26 Fixture Channel Merge Modes ............................................................................................... 27 Select Channels..................................................................................................................... 29 Group Builder ........................................................................................................................ 30 Check Special Groups ........................................................................................................ 31 Channel Duplication Detected ............................................................................................ 31 Important Uses for Channel Groups.................................................................................... 32 Calibrate Lamps..................................................................................................................... 33 Channel Routing ....................................................................................................................... 35 Add Channel Route ............................................................................................................... 35 General Channel Routing External Control ............................................................................. 37 Channel Routing Groups........................................................................................................ 38 Projects..................................................................................................................................... 39 Project Options ...................................................................................................................... 39 Project Editor Settings ........................................................................................................ 40 Project Lamp Settings ........................................................................................................ 41 Project Quality Settings ...................................................................................................... 41 Project VMNet Settings ...................................................................................................... 42 Project Telnet Settings ....................................................................................................... 45 Project Visualizer Settings .................................................................................................. 48 Project Window...................................................................................................................... 50 Open Files List ................................................................................................................... 51 Copy Project Settings ............................................................................................................ 51 Importing VenueMagic 2.1 Timelines and Playlists from another Project................................. 52 Importing VenueMagic 2.0 Timelines and Playlists from another Project................................. 56 Audio File Properties.............................................................................................................. 57 Video File Properties.............................................................................................................. 57 Timelines .................................................................................................................................. 58 Clip Time Display ................................................................................................................... 59 Play Range Bar ..................................................................................................................... 59 Timeline Scale ....................................................................................................................... 60 Timeline Markers ................................................................................................................... 60 Linking Markers to Timeline Clips ....................................................................................... 61 Time Cursor ........................................................................................................................... 61 Time Cursor Position Display ................................................................................................. 61 Timeline Audio Level Display ................................................................................................. 61 Timeline Toolbar .................................................................................................................... 61 Playback Controls .................................................................................................................. 62 Timeline Options .................................................................................................................... 63 Timeline Playback Options ..................................................................................................... 64 Timeline Audio Options .......................................................................................................... 65 Timeline Lamp Options .......................................................................................................... 66 Timeline External Control Options .......................................................................................... 66 Timeline Security Options ...................................................................................................... 67 Timeline Synching Options .................................................................................................... 68 Timeline Notes....................................................................................................................... 70 Audio Tracks.......................................................................................................................... 70 Master Sync Audio Track.................................................................................................... 71 Audio Track Panel .............................................................................................................. 71 Audio Track General Properties .......................................................................................... 72 Audio Track Audio Properties ............................................................................................. 73 Audio Track Envelope Properties........................................................................................ 74 Audio Track External Control Properties ............................................................................. 75 Audio Track Notes .............................................................................................................. 75 Audio Clip Properties .......................................................................................................... 76 Exporting Audio Clip Profiles .............................................................................................. 81 Video Tracks.......................................................................................................................... 81 Video Track Panel .............................................................................................................. 82 Video Clip Properties .......................................................................................................... 87 Video Playback Window ..................................................................................................... 90 Lamp Tracks.......................................................................................................................... 91 Lamp Track Panel .............................................................................................................. 91 Lamp Track General Properties .......................................................................................... 92 Lamp Track Channel Properties ......................................................................................... 92 Lamp Track Envelope Properties ........................................................................................ 97 Lamp Track External Control Properties ............................................................................. 98 Lamp Track Notes .............................................................................................................. 98 Level Control ...................................................................................................................... 99 Lamp Chaser.................................................................................................................... 105 Built-in Lamp Effects......................................................................................................... 118 Event Tracks........................................................................................................................ 121 Event Track Panel ............................................................................................................ 121 Event Track General Properties ........................................................................................ 122 Event Track Event Properties ........................................................................................... 123 Event Track Notes ............................................................................................................ 123 Cue List Command Event ................................................................................................. 124 Event Table Event ............................................................................................................ 127 MIDI Out Event................................................................................................................. 129 Multi-Event Event ............................................................................................................. 132 Play Audio Event .............................................................................................................. 134 Run Timeline Event .......................................................................................................... 137 Set Tapper BPM Event ..................................................................................................... 140 Serial Port Output Event ................................................................................................... 143 Show HTML Event ........................................................................................................... 145 Set Variable Event............................................................................................................ 148 Set Routing Group Event .................................................................................................. 151 Reset Event Group Event ................................................................................................. 153 VM Telnet Event ............................................................................................................... 156 Event Conditions .............................................................................................................. 158 Real-time Recording of Events ......................................................................................... 160 Envelopes............................................................................................................................ 160 Envelope Editing from the Timeline................................................................................... 161 Envelope Editor ................................................................................................................... 161 Envelope Tree Organization ............................................................................................. 165 Envelope Plot Area........................................................................................................... 166 Envelope Editor Multi-Channel Handle Mode .................................................................... 168 Envelope Editor Settings .................................................................................................. 169 Envelope Editor External Control Properties ..................................................................... 170 Copying Envelopes & Envelope Handles .......................................................................... 170 Editing Recorded Data ..................................................................................................... 171 Channel Data Profiles .......................................................................................................... 179 Exporting Channel Data Profiles ....................................................................................... 179 Importing Channel Data Profiles ....................................................................................... 180 Auto-populating a Timeline from a Profile ......................................................................... 181 Recording DMX Input/Output Data to a Profile .................................................................. 182 Importing Profiles from ASCII Text Files ........................................................................... 184 Synching VenueMagic Timelines to an External Clock Source ............................................. 185 Synching to Beat Tapper .................................................................................................. 186 Synching to External Input ................................................................................................ 187 Synching to MIDI Clock .................................................................................................... 188 Synching to MIDI LTC ...................................................................................................... 191 Synching to SMPTE over Serial ........................................................................................ 192 VMNet Synch ................................................................................................................... 195 Playlists................................................................................................................................... 196 Playback List ....................................................................................................................... 196 Playback Controls ................................................................................................................ 197 Playlist Toolbar .................................................................................................................... 197 Playback Position Control .................................................................................................... 197 Playlist Playback Time Display ............................................................................................. 198 Playlist Audio Level Display ................................................................................................. 198 Playlist Display Format Options............................................................................................ 198 Playlist Playback Options ..................................................................................................... 199 Playlist Audio Options .......................................................................................................... 200 Playlist Lamp Options .......................................................................................................... 201 Playlist Default Clip Properties ............................................................................................. 202 Playlist External Control Options .......................................................................................... 202 Playlist Notes ....................................................................................................................... 203 Playlist Clips ........................................................................................................................ 204 Playlist Clip General Properties ........................................................................................ 204 Playlist Clip Playback Properties....................................................................................... 205 Playlist Clip Level Properties ............................................................................................ 206 Playlist Clip Level Properties ............................................................................................ 206 Playlist Silence Block........................................................................................................ 207 Playlist Wait Block ............................................................................................................ 207 Exporting Playlists ............................................................................................................... 208 Cue Control Window ............................................................................................................... 208 Programmable Cue Button Pane.......................................................................................... 209 Cue Button General Properties ......................................................................................... 211 Cue Button Level Properties ............................................................................................. 213 Cue Button External Control Properties ............................................................................ 213 Cue Button Notes ............................................................................................................. 214 Cue Button Groups .............................................................................................................. 215 Cue Button Group Properties............................................................................................ 216 Preloading Cues .................................................................................................................. 217 Cue List Pane ...................................................................................................................... 219 Cue List ............................................................................................................................ 219 Cue List Controls.............................................................................................................. 219 Global Mute/Lamp-out Controls ........................................................................................ 220 Cue List External Control .................................................................................................. 221 Beat Tapper Control............................................................................................................. 221 Beat Tapper Settings Window .......................................................................................... 222 Lamp Preview Window ............................................................................................................ 223 Select Lamp Preview ........................................................................................................... 223 Multi-Channel Lamp Previews .............................................................................................. 224 Lamp Preview Attributes ...................................................................................................... 225 Virtual Control Surface (VCS) .................................................................................................. 226 VCS Slider Properties .......................................................................................................... 227 VCS Slider Groups .............................................................................................................. 228 VCS Slider Group Properties ............................................................................................ 228 VCS Master Level Sliders .................................................................................................... 230 Device Setup........................................................................................................................... 230 Audio Device Setup ............................................................................................................. 230 DMX Device Setup .............................................................................................................. 230 MIDI Device Setup ............................................................................................................... 233 Supported Devices Setup .................................................................................................... 233 Selecting External Input Devices ............................................................................................. 234 Input Channel Data Processing ........................................................................................ 235 Input Channel Settings Window ........................................................................................ 235 Understanding Threshold Values ...................................................................................... 238 Customizing VenueMagic’s Appearance .................................................................................. 239 Customizing Color ............................................................................................................... 239 Customizing Fonts ............................................................................................................... 240 Project Notes .......................................................................................................................... 240 User Fixture Library ................................................................................................................. 241 Manufacturers List ............................................................................................................ 242 Fixtures List ...................................................................................................................... 243 Fixture Channels List ........................................................................................................ 245 Channel Selection/Subchannel Settings ........................................................................... 248 Exporting Fixtures ............................................................................................................ 255 Importing Fixtures............................................................................................................. 256 Event Scheduler ...................................................................................................................... 257 Event List ......................................................................................................................... 258 Event List Display Options ................................................................................................ 260 Triggering Options ............................................................................................................ 262 Real-time Recording and Editing of Channels .......................................................................... 262 Serial/UDP Port Input/Output ................................................................................................... 262 Serial Port List Window ........................................................................................................ 262 Setup Serial Port.................................................................................................................. 263 Setup UDP Port ................................................................................................................... 264 Serial Input Commands........................................................................................................ 265 Serial Output Commands ..................................................................................................... 266 Event Table ............................................................................................................................. 266 Select Event Window ........................................................................................................... 267 Event Trigger Settings ......................................................................................................... 268 Variable Table ......................................................................................................................... 269 Variable Properties Window ................................................................................................. 269 Virtual Fixtures ........................................................................................................................ 270 Setup Virtual Fixtures Window ............................................................................................. 270 Select Fixture List ............................................................................................................. 271 Redirecting Virtual Fixture Channels to MIDI..................................................................... 271 VMNet ..................................................................................................................................... 272 VMNet Server ...................................................................................................................... 272 VMNet Clients...................................................................................................................... 273 VMNet Time Code Source ................................................................................................... 273 VMNet Pass Codes ............................................................................................................. 273 VMNet Telnet Server ........................................................................................................... 273 VMNet Telnet Clients ........................................................................................................... 275 Teleprompter........................................................................................................................... 276 Main Teleprompter Window ................................................................................................. 276 Fixed vs. Dynamic Text .................................................................................................... 276 Teleprompter Edit Mode ................................................................................................... 277 Teleprompter Settings Window ......................................................................................... 279 Timeline Teleprompter Markers............................................................................................ 281 Teleprompter Marker Settings .......................................................................................... 283 Linking Teleprompt Markers to Clips ................................................................................. 283 Importing Lyric (LRC) Files................................................................................................... 283 Importing Lyric Teleprompter Formatting .......................................................................... 284 Debugging Tools ..................................................................................................................... 285 MIDI Monitor ........................................................................................................................ 285 DMX Output Monitor ............................................................................................................ 285 DMX Input Monitor ............................................................................................................... 286 Serial Input Monitor.............................................................................................................. 287 Event Status ........................................................................................................................ 287 Watch Inputs........................................................................................................................ 289 Set Variable Value............................................................................................................ 290 Weigl WEMC1 Operation......................................................................................................... 290 Setting-up VenueMagic for the WEMC1 ............................................................................... 291 Exporting VenueMagic Playlists to the Weigl WEMC1 .......................................................... 292 WEMC1 Playlist Export Settings ....................................................................................... 293 WEMC1 Playlist Playback Settings ................................................................................... 294 Important Limitations on Exporting VenueMagic Audio...................................................... 296 Using VenueMagic with X-Keys ............................................................................................... 296 Setup X-Keys Devices Window ............................................................................................ 296 Introduction to VenueMagic Help Welcome to the VenueMagic help library. This library is intended to be a quick reference to the features and functions of the VenueMagic show control software. This manual covers the Express, Classic, DMV+AV and SC+ editions of VenueMagic, and notations will be included to identify which features and functions are available for which editions. If no notation is included for a given topic, then assume that the feature is available for all versions. For a more detailed and comprehensive explanations of how to use VenueMagic, please consult the User Manual and tutorials included with your VenueMagic installation. VenueMagic End User License Agreement IMPORTANT—READ CAREFULLY: This EULA is a legal agreement between you (either an individual or a single entity) and Entertainment Sciences Group, Inc., herein referred to as “ESG, Inc.” for the use of software. The term “Software” refers to VenueMagic DJ Edition, and any updates to the software, any supplemental code provided to you by ESG, Inc., the user manual, any associated software components, any related media and printed materials, any “online” or electronic documentation, and any associated converting hardware (USB to DMX). YOU AGREE TO BE BOUND BY THE TERMS OF THIS EULA BY INSTALLING, COPYING, OR OTHERWISE USING THE SOFTWARE. IF YOU DO NOT AGREE, DO NOT INSTALL, COPY, OR USE THE SOFTWARE. IT IS ILLEGAL AND STRICTLY PROHIBITED TO DISTRIBUTE, PUBLISH, OFFER FOR SALE, LICENSE OR SUBLICENSE, GIVE OR DISCLOSE TO ANY OTHER PARTY, THIS SOFTWARE IN HARD COPY, DIGITAL FORM OR ANY OTHER MEDIUM WHETHER EXISTING OR NOT YET EXISTING, EXCEPT AS SPECIFICALLY PERMITTED BELOW. The use of this Software is governed by the terms and conditions set forth herein. This EULA is applicable to the Software, whether in its indivisible whole or any divisible part thereof, and any documents or supplemental materials included with the Software. You are deemed to have read, understood and accepted the terms of this EULA when you install or use the Software. 1. LIMITED LICENSE: You are granted a limited, non-exclusive license to install the Software on an individual personal computer or other device for your own use provided that such computer does not render the Software accessible to other users through local or Internet networks or other methods. Only the individual that purchased and installed the Software, will have license to use the Software. Use by any other person, company, affiliate, corporation, Limited Liability Company, trust, or other separate legal entity will require a separate license. This includes companies that may be affiliated to you by ownership or otherwise. The license granted herein shall remain in effect perpetually, but shall terminate upon your use of the Software beyond the scope licensed herein or upon your violation of any term or condition hereof. All protections with which ESG, Inc. is provided under this EULA shall survive the termination of your license to use the Software. 2. COPYRIGHT: The Software and supporting documentation is copyright protected 2009 by ESG, Inc. ESG, Inc. retains all title, ownership, and intellectual property rights in the Software, including but not limited to all supporting documentation, files, marketing material, images, multimedia and applets. The Software is protected by copyright and other intellectual property laws and by international treaties. The Software may include security measures designed to control access and prevent unauthorized copying and use. You agree not to interfere with any such security components. ESG, Inc. permits you to download, install, use, or otherwise benefit from the functionality or intellectual property of the Software only in accordance with the terms of this EULA. Use of any third party material included in the Software may be subject to the terms and conditions typically found in the party's own license agreement. 3. COPYRIGHT - MUSIC LIBRARY: All music included with the Software audio library is copyrighted by ESG, Inc. It is included in the purchase price and is intended solely for use with the Software and for no other purposes. Unauthorized reproduction of music content is strictly prohibited. 4. SOUND EFFECTS LIBRARY: The sound effects library contains both copyrighted and non-copyrighted material. It is provided, as-is, solely for convenience and is not included in the purchase price of the product. ESG, Inc. also provides for downloading the sound effects library as a separate component free of charge. 5. THIRD PARTY COPYRIGHT: This Software may be used to reproduce materials. It is licensed to you only for reproduction on non-copyrighted materials, materials in which you own the copyright, or materials you are authorized or legally permitted to reproduce. If you are uncertain about your right to copy, edit, replay or use any material you should first contact your legal advisor. 6. CONFIDENTIALITY: The Software contains trade secrets and proprietary know-how that belong to ESG, Inc. and it is being made available to you in strict confidence. You shall not disclose to any third party any proprietary information concerning trade secrets, methods, processes or procedures or any other confidential or business information relating to the development or operation of the Software during the course of performance and use under this EULA. ANY USE OR DISCLOSURE OF THE SOFTWARE, OR OF ITS ALGORITHMS, PROTOCOLS OR INTERFACES, OTHER THAN IN STRICT ACCORDANCE WITH THIS EULA, MAY BE ACTIONABLE AS A VIOLATION OF ESG, INC.’S PROPRIETARY RIGHTS. 7. EVALUATION VERSION: You may use the evaluation version of the Software 15 days for evaluation purposes without any charge. You must pay the license fee and register your copy to continue to use the Software after the evaluation period is over. Otherwise, you must delete (uninstall) the Software from your computer. For information on paying the license fee and registering your copy of the Software, please visit http://www.venuemagic.com. The evaluation software may be distributed freely as long as you don’t modify, change, or alter the Software from its original form. 8. REGISTERED VERSION: You may install and use one copy of the registered Software on one personal computer or other device. You also may install an additional copy of the Software on a second, portable device for the exclusive use of the primary user of the first copy of the Software. Beyond this, you may not copy the registered Software in whole or in part. You may permanently transfer all of your rights to the registered copy of the Software under this license provided you transfer all copies of the Software and the recipient agrees to the terms of this license. All rights not expressly granted under this license are reserved by ESG, Inc. 9. RESTRICTIONS: You may not: (i) modify, reverse engineer, decompile or disassemble the Software in any way, including changing or removing any message or windows; (ii) alter the Software in whole or in part in any way; (ii) modify or create any derivative works of the Software or documentation, including any customization, modifications, enhancements, or translations without ESG, Inc.'s express written consent; (iii) rent or lease the Software without express written permission from ESG, Inc.; (iv) reverse engineer, decompile, disassemble, make or otherwise attempt to derive the source code of the Software, or the underlying ideas or algorithms of the Software; (v) attempt to gain unauthorized access to and documents, ESG, Inc. servers or any other service, account, computer system or network associated with the Software or with ESG, Inc., it's affiliates, agents, partners and customers; (vi) remove or alter any trademark, logo, copyright or other proprietary notices or symbols in the Software; (vii) block, disable, or otherwise affect any advertising, banner window, tab, link to websites and services, or other features that are part of the Software; (viii) incorporate, integrate or otherwise include the Software or any portion thereof into any software, program or product; (ix) provide false information when registering the Software; (x) digitally transmit or make available the Software or its content through local networks, intranets, extranets, FTP, online discussion boards, forums, list-serve, peer-to-peer networks or technologies, newsgroups, bulletin boards, or any other mode of shared communication system, or place the Software onto a server so that it is accessible via a pubic network such as the Internet; (xi) use the Software in any way that violates this EULA or any law; or (xii) authorize or assist any third party to do any of the things described in this section. 10. WAIVER & SEVERABILITY: ESG, Inc.'s waiver of any breach of this EULA shall not constitute an amendment to this EULA or ESG, Inc.'s waiver of subsequent breaches. If any part of this EULA is found void and unenforceable, it will not affect the validity of the balance of this EULA, which will remain valid and enforceable according to its terms. 11. AMENDMENTS: ESG, Inc. reserves and keeps full rights to change any part of the Software whether now or any time in the future. ESG, Inc. also reserves the right to unilaterally amend all offers, pricing terms or other matters pertaining to the Software, ESG, Inc.’s website or this EULA. No course of dealing or trade usage shall be deemed to amend the terms of this EULA. 12. GOVERNING LAW: This EULA shall be governed by and construed under the laws of the State of California. You consent and agree that all legal proceedings relating to the subject matter of this EULA shall be maintained in courts sitting within the State of California, and that jurisdiction and venue for such proceedings shall lie exclusively with such courts. 13. LIMITATION OF LIABILITY: EXCEPT AS REQUIRED BY LAW, ESG, INC. AND ITS EMPLOYEES, DIRECTORS, LICENSORS, CONTRIBUTORS AND AGENTS WILL NOT BE LIABLE FOR ANY DIRECT, INDIRECT, SPECIAL, INCIDENTAL, CONSEQUENTIAL OR EXEMPLARY DAMAGES ARISING OUT OF OR IN ANY WAY RELATING TO THIS EULA OR THE USE OF OR INABILITY TO USE THE SOFTWARE, INCLUDING WITHOUT LIMITATION DAMAGES FOR LOSS OF GOODWILL, WORK STOPPAGE, LOST PROFITS, LOSS OF DATA, AND COMPUTER FAILURE OR MALFUNCTION, EVEN IF ADVISED OF THE POSSIBILITY OF SUCH DAMAGES AND REGARDLESS OF THE THEORY (CONTRACT, TORT OR OTHERWISE) UPON WHICH SUCH CLAIM IS BASED. IT IS UNDERSTOOD THAT YOU SHALL FOLLOW ALL APPLICABLE SAFETY STANDARDS AND RULES IN THE OPERATION OF THE SOFTWARE TO CONTROL ANY DEVICE, WHETHER SUCH USE WOULD HAVE FORESEEABLY LED TO LIABILITY OR NOT. IN NO CASE SHALL YOU USE THE SOFTWARE TO CONTROL ANY DEVICE WHERE A MALFUNCTION COULD RESULT IN DEATH, INJURY, OR DAMAGE TO EQUIPMENT, INCLUDING BUT NOT LIMITED TO THE USB TO DMX PROTOCOL CONVERTOR. ESG, INC.'S LIABILITY UNDER THIS EULA IS LIMITED TO REPLACEMENT OF A CD-ROM CONTAINING THE SOFTWARE AND WILL NOT EXCEED FIVE DOLLARS (US$5.00). 14. DISCLAIMER OF WARRANTY: THIS SOFTWARE IS PROVIDED "AS IS" WITHOUT WARRANTY OF ANY KIND, EITHER EXPRESS OR IMPLIED, INCLUDING, BUT NOT LIMITED TO WARRANTIES OF MERCHANTABILITY OR FITNESS FOR A PARTICULAR PURPOSE. IN NO EVENT SHALL ESG, INC. BE LIABLE FOR ANY DAMAGES, INCLUDING INCIDENTAL OR CONSEQUENTIAL DAMAGES, ARISING OUT OF THE USE OF THIS SOFTWARE, WHETHER OR NOT ADVISED OF THE POSSIBILITY OF SUCH DAMAGES. YOU ACKNOWLEDGE THAT YOU HAVE READ THIS LICENSE, UNDERSTAND IT AND AGREE TO BE BOUND BY ITS TERMS. 15. VIOLATIONS OF THIS EULA: ESG, Inc. reserves all rights not specifically granted to you above. ESG, Inc. will have the right to proceed against you in the event that you infringe against ESG, Inc.’s rights. Any use not within the precise scope of this EULA set forth herein will be considered an infringement. You acknowledge and agree that ESG, Inc.’s damages in the event of your violation of this EULA will be substantial and that ESG, Inc. will suffer irreparable harm in such event. As such, ESG, Inc. shall have the right to obtain equitable remedies, including but not limited to recovery of damages, obtaining injunctions, recovering statutory damages, recovering attorney fees, and any other available legal remedy. 16. TERMINATION: This EULA automatically terminates if you fail to comply with any of the terms and conditions herein, and you shall promptly destroy all copies of the Software and associated documentation you possess. Furthermore, ESG, Inc. shall have the sole and exclusive right to immediately terminate this EULA and revoke your license to use the Software should you fail to perform any obligation required under this EULA or engage in activity that ESG, Inc. deems harmful to its well-being. This EULA takes effect upon your installation of the Software and remains effective until terminated. The termination of this license does not limit other rights ESG, Inc. may have by law. 17. COMPLETE AGREEMENT: This is the entire EULA between ESG, Inc. and you relating to the Software and it supersedes any prior representations, discussions, undertakings, warranties, communications or advertising relating to the Software. VenueMagic Main Screen The above figures show the elements of the VenueMagic main screen. These elements fall into two categories: toolbars and documents. Toolbars can be added or removed from the screen as desired by selecting them in the View menu. By grabbing the gripper bar, they can be moved and docked to any part of the main screen. Arrange the toolbars how you like them and VenueMagic will remember their position. The toolbars are: Project Window: Lamp Preview Window: Cue Control Window: Virtual Control Surface: Contains all the project folders. Also includes the Open File Window. Real-time display of lamps and other channel information. Contains the cue list and the programmable cue buttons. Programmable sliders for controlling a variety of VenueMagic functions. VenueMagic also supports two documents types: Timelines: Playlists: Layout the performance of combined music, sound effects, lamp control, events, etc… Organizes audio files and timelines for sequential playback. VenueMagic Main Menu The main menu changes depending on which type of document (i.e.: timeline or playlist) is currently shown. The following tables briefly describe the function of each menu option in the main menu. If there is an associated button in the toolbar, that will also be noted. File Menu Menu item New Timeline Description Create a new timeline. New Playlist Create a new playlist. New Project Open Close Create a new project. Save Save As… Save Project Save Project As… toolbar Open a timeline, playlist or project. — Save currently displayed timeline or playlist. — — — Save All Reports Recent Projects Exit Close currently displayed timeline or playlist. — — — Save currently displayed timeline or playlist under a different name. Save currently open project. Save currently open project under a different name. Save currently open project and all open timelines and playlists. Select from a list of available reports to create. Select from a list recently opened projects. Exit VenueMagic. Edit Menu Menu item toolbar Undo — Redo Cut Copy Paste Delete — Description Undo the last change made to a timeline or playlist. Redo the last change undone change. Delete an item and place it into clipboard. Copy an item into the clipboard. Paste an item from the clipboard. — Delete selected item. View Menu Menu item toolbar Status Bar — Project Window Cue Control Window Beat Tapper Description Show/Hide status bar at the bottom of the screen. Show/Hide project window. Show/Hide cue control window. Show/Hide beat tapper control. Available on when cue control window is shown. Lamp Preview Window Show/Hide virtual control surface (VCS) window. Show/Hide lamp preview window. Video Playback Window Show/Hide video playback window. Virtual Control Surface Redock all Lamp Preview Properties… Properties… — — Select this option to restore all floating window to their docked state. Set lamp preview properties. Set properties for currently selected item. Refers only to clips in timelines and playlists. Insert Menu (‘T’=Timeline, ‘P’=Play list) Menu item T P toolbar Audio Track * Video Track * Lamp Track * Event Track Lamp Tracks from Profile Silence Wait — * ** ** Description Add an audio track into a timeline. Add a video track into a timeline. Add a lamp track into a timeline. Add an event track into a timeline. Import profile and auto-populate timeline. Add a silence block into a playlist. Add a wait block into a playlist. * Located in the toolbar at the bottom of the timeline window. ** Located in the toolbar at the bottom of the playlist window. Project Menu Menu item toolbar Description Set project options. toolbar Event Scheduler… Description Open event scheduler. Event Table… Open event table. Enable Event Table Enable/disable event table operation Reset Event Groups Resets triggers for all event groups Project Options Event Menu Menu item Timeline Menu (Shown only when a timeline is shown) Menu item Play Enable External Sync toolbar — — Inserts a timeline marker at the current time cursor position. Insert Marker Timeline Options… Description Play/stop currently shown timeline. Enable/disable external synching of the timeline playback. * Set timeline options. * Located in the toolbar at the bottom of the timeline window. Playlist Menu (Shown only when a playlist is shown) Menu item Play Playlist Options… toolbar — ** Description Play/stop currently shown playlist. Set playlist options. ** Located in the toolbar at the bottom of the playlist window. Clips Menu (Shown only when a timeline is shown. For toolbar buttons, see Timeline Toolbar.) Menu item Lock Clip(s) Unlock Clip(s) Link Clip(s) Unlink Clip(s) Split Clips at Cursor Edit Envelopes… Record Channels Clip Properties… Description Lock all currently selected clips in the timeline. Unlock currently selected clips in the timeline. Link all currently selected clips in the timeline. Link currently selected clips in the timeline. Splits selected clips at the time cursor position. Open the envelope editor for the selected clip. Enables/Disables channel recording. Set properties for selected clip. Devices Menu Menu item Fixtures… Description Show Add Fixtures window. Groups… Show Group Builder window. Virtual Fixtures… Variable Table… Setup Channel Routing… Open Setup Virtual Fixtures window. Open Variable Table window. Setup channel routing. Enable Channel Routing Enable/disable channel routing. Turn Off Lamps Turn off all lamps. Only affects dimmable lamps. Resets DMX interfaces in case of a malfunction. Select audio, DMX and MIDI devices. (see Device Setup). Enable input from external input devices (MIDI, VCS, etc…) Enable communications with DMX devices, etc… Reset DMX Control toolbar — Setup Devices… Enable External Inputs Enable Device Communication Tools Menu Menu item Appearance Settings… toolbar Description Show Appearance Settings window. Calibrate Lamps… Chaser Library User Fixture Library… Monitor MIDI Input… Monitor DMX Input… Monitor DMX Output… Record DMX… Monitor Serial Input… Watch Inputs… Events Status… Show Calibrate Lamps window. — — — — — — — — Show Chaser Library window. Show User Fixture Library window. Show the Monitor MIDI Input window. Show the DMX Input Monitor window. Show the DMX Output Monitor window. Show the Record DMX window. Show the Monitor Serial Input window. Show the Watch Inputs window. Show the Events Status window. Help Menu Menu item Tip of the Day Contents Search Index VenueMagic on the Web Check for Updates toolbar — — — — — — Register VenueMagic About VenueMagic — Description Show the Tip of the Day window. Show help table of contents tab. Show help search tab. Show help index tab. Opens a browser to www.venuemagic.com. Goes online to check for updates to your VenueMagic software. If updates are available you are given the option to download and install them. If you have not yet registered your copy of VenueMagic, this option will start the VenueMagic Registration wizard. Show About VenueMagic window. Fixtures VenueMagic includes a library of a numerous DMX fixtures from a variety of manufacturers. These fixtures are added and organized in the Add Fixture window. Each fixture is composed of one or more channels which correspond to a DMX channel. Some channels may be further broken to sub channels. In this case, the sub channels correspond to DMX channels. Add Fixtures Select fixtures from the Fixture Library and drag them into Fixture Placement window. The numbered cells correspond to DMX addresses. To change the address range of a fixture, select the fixture in the window and drag it to the desired address. Filter by manufacturer Check this to filter the fixture library by manufacturer* in the adjacent selector box. Uncheck to show all fixtures for all manufacturers. Filter by fixture type Check this to filter the fixture library by fixture type in the adjacent selector box. Uncheck to show all fixtures types. Main/User Library Use these selectors to choose which library is currently displayed in the Fixture Library list. Select Main library to display the fixture library that came with the VenueMagic installation. Select User library to show fixtures that have been entered into the user fixture library. (See User Fixture Library). Fixtures that were dragged over from the user library are shown displayed as a lighter shade of blue in the Fixture Placement Window. Fixture info: Displays information about the fixture currently under the mouse cursor. Name=user selected name. Fixture=manufacturer name for fixture. Type=type of fixture. Address switch settings: Graphical display of the address switch settings for the fixture currently under the mouse cursor. Remove (button) Remove selected fixtures from window. Edit (button) Edit fixture settings (see Edit Fixture Settings). Show universe: Select which DMX universe is currently displayed in the Fixture Placement Window. The number of universes available depends on which version of VenueMagic you have installed. Fixtures: Shows how many fixtures are in the window. Channels: Shows how many fixture channels are in the window. Cut, Copy and Pasting Fixtures Common clipboard functions are available from a pop-up menu. To cut or copy, select the desired fixtures, right-click on one of the selected fixtures and select Cut or Copy. To paste copied fixtures, right-click on a channel and select Paste. Remapping Fixtures (Available in DMX+AV and above) A powerful and unique feature available to VenueMagic fixtures is the ability to substitute one fixture for another. This is particularly useful in situations such as when a moving head breaksdown at the last minute just before a show and the replacement head is a completely different brand with a completely different channel mapping. Procedure: 1. In the Add Fixtures window select a replacement fixture from the Fixture Library and drag onto any empty channel range in the Fixture Placement Window. 2. Right-click on the fixture you wish to replace and select Remap… 3. Follow the instructions on the Select Item Replacements wizard. Upon completion of the remapping procedure, VenueMagic will have mapped all references to the original fixture—including lamp tracks, lamp effects, channel routing, channel groups, etc… to the replacement fixture. You are now free to delete the original replaced fixture and move the new replacement fixture to take its place in the DMX map. Is desired. Select Item Replacement Wizard This Select Item Replacement Wizard steps you through the process of replacing a fixture in the Add Fixtures window. List #1 on the left shows the fixture selected for replacement. List #2 on the right shows all of the fixtures currently included in the Add Fixtures window. In List #2, check the fixture you would like to replace the fixture in List #1 and click Next. In most instances, VenueMagic will be able to remap the individual fixture channels automatically. If you are replacing a fixture with an identical fixture this task is easy. However, if the two fixtures are quite different, VenueMagic may need some additional help. In List #1, you will see a summary of all of the fixture replacements that were assigned in the previous screen. Select one of them, and List #2 will be populated with VenueMagic’s best guest as to how the individual channels should be replaced. In most cases, VenueMagic will do a pretty good job. However, if changes need to be made, you can click and drag channels on the right side of this list to line them up with different channels on the left. This is, of course, subject to certain rules. For more details on how to modify channel replacements, see Selecting Track Channel Replacements, which functions similarly. After you have verified (and perhaps corrected) channel replacements for channel, click Finish. Mapping Fixtures to Capture Polar 3D Visualizer (Available in Classic and above) VenueMagic supports interfacing to the Capture Polar 3D Visualizer versions 2.8.11 and above. Before doing this, you must setup this feature in the Project Visualizer Settings window. If this feature is enabled in the Edition of VenueMagic you are using, an additional Visualizer button appears at the bottom of the Add Fixtures window: Click on this button to open the Map Fixture to Visualizer window. Map Fixture to Visualizer Window This window lets you set up fixture mapping between VenueMagic and the current default instance of Capture Polar (see Project Visualizer Settings). This window has two lists. The list on the top, lists all of the fixtures included in the VenueMagic project. Fixture data includes: Fixture Name The name of the fixture as specified in the VenueMagic project. Type The fixture type or model. Manufacturer The fixture manufacturer. Univ Which DMX universe the fixture is associated with. Chn The current DMX base address. Chns How many DMX channels are in the fixture. Mapping Specifies whether or not the fixture is currently mapped to a fixture in the Capture project (Yes/No). The buttons beneath the list (Auto-Map, Unmap, Unmap All, Add to Visualizer) will be discussed later. The list on the bottom shows all of the fixtures in the currently loaded Capture project. Fixture data includes: ID A unique numeric identifier for the fixture. This value corresponds to the Capture Channel value of the fixture. Name The fixture type or model. Manufacturer The fixture manufacturer. Univ Which DMX universe the fixture is associated with. Chn The current DMX base address. Chns How many DMX channels are in the fixture. Mapping Fixtures You can map the fixtures from one list to the other by following these steps: 1. Select a VenueMagic fixture in the top list. 2. Select a Capture fixture to map to in the bottom list. You’re done. Repeat those steps to map other fixtures. The Capture fixture (bottom) list is color-coded to help keep track of how things are mapped. A dark-green highlight shows Capture fixtures that are currently mapped to other VenueMagic fixtures. Light-green shows which Capture fixture is mapped to the currently selected VenueMagic fixture. Fixture mapping is one-two-one. If you select a Capture fixture that is already mapped to a different VenueMagic fixture, the highlight will turn yellow and the mapping will not take place. Click Re-map to force a re-mapping of the selected Capture fixture to the currently selected VenueMagic fixture. Fixture already mapped to a different VenueMagic fixture Click to force remapping Click Refresh List to request an update of available fixtures from Capture. Additional Mapping Function The row of buttons beneath the VenueMagic fixture list provides additional mapping functionality. Auto-map Click this button to automatically map fixtures based on DMX addresses. VenueMagic fixtures are mapped to Capture fixtures with the same DMX address. VenueMagic fixtures with no matching Capture fixture are left unmapped. Unmap Click to un-map selected VenueMagic fixtures. Unmap All Click to un-map all VenueMagic fixtures. Add to Visualizer Click this button if you would like the currently selected VenueMagic fixture to be added to Capture Polar’s Console Patch window. Brings-up the Add Fixture to Visualizer window. Auto-Update Selection Check this box to enable the Auto-update selection feature. With this feature enabled, any fixture selected Select visualizer fixture to map to list (a.k.a. the “bottom” list), will automatically be selected in the view windows in Capture Polar. Likewise, any fixture selected in a Capture Polar view window willow also be selected in the Select visualizer fixture to map to list. This feature can greatly simplify the fixture mapping process. DMX Address Patch Matching The Setup Dmx address patch matching group sets up patch matching action that occurs when OK is clicked. Select Match VenueMagic to Visualizer and all of the VenueMagic fixture DMX channels will be changed to matched those of the Capture fixtures they are mapped to. Again, this matching occurs when the window is closed by clicking the OK button. It will not continue to match automatically. If you do not want DMX address matching, select Don’t change patching. Add Fixture to Visualizer What VenueMagic calls the fixture What Capture calls the fixture This window lets you assist Capture in adding a fixture to Capture’s Console Patch window based on a VenueMagic fixture. In the Visualizer equivalent section, enter the Capture equivalent of the VenueMagic fixture name and manufacturer displayed in the top section of the window. This must be entered exactly as it appears in the Capture fixture library. VenueMagic will remember the substitution so that the next time you wish add this fixture to the Console Patch window, it will be automatically loaded with the previously entered fixture name and manufacturer equivalent for that fixture. Click OK and the fixture is added to Capture’s Console Patch window, from where it can be dragged into the view. Strategies for Mapping VenueMagic Fixtures to Capture Polar VenueMagic provides a number of tools and features designed to help simplify the process of using Capture Polar to visually display VenueMagic playback. The most time consuming part of this is, of course, mapping fixtures in the VenueMagic project to the fixtures in the Capture Polar project, and vice versa. Below are some examples of how the Map Fixtures to Visualizer window can be used to accomplish this in different situations. Example #1: Adding VenueMagic fixtures to map to existing Capture fixtures. If you already have a completed Capture Polar project that you want to control with VenueMagic, follow these steps: 1. Print out a list of all the fixtures in the Capture project (see Capture Polar manual for more information on how to do this. 2. Locate the fixtures in the VenueMagic database and add them to the VenueMagic project (see Add Fixtures). Note: some of the fixtures you need may not be available in the VenueMagic library. You may add them yourself using the User Fixture Library, or request a fixture from [email protected]. 3. Use the Map Fixtures to Visualizer window to map VenueMagic fixtures to capture fixtures. Example #2: Adding Capture fixtures to map to existing VenueMagic fixtures. If you wish to add fixtures to a Capture project to map to an existing VenueMagic, there are a couple of approaches: Approach #1 – Best for large numbers of fixtures. 1. Print out a list of all VenueMagic project fixtures (FilesReportsDMX Fixtures). 2. Locate matching fixtures in Capture library and add them to the view. The Capture fixture library is extensive but there are a number of VenueMagic fixtures that Capture does not support. Contact Capture Sweden concerning updates to you Capture Polar library (http://www.capturesweden.com). 3. Use the Map Fixtures to Visualizer window to map VenueMagic fixtures to capture fixtures. Approach #2 – Good for small numbers of fixtures. 1. Right-click on a fixture in the Add Fixtures window and select Map to Visualizer. This will open the Map Fixtures to Visualizer window with the fixture selected. 2. Click Add to Visualizer and add a new fixture to the Capture Console Path window using the Add Fixture to Visualizer window. Example #3: Mapping fixtures automatically through DMX addressing. Whether you use Example #1 or #2 above, you can really speed-up the mapping process by making sure to give VenueMagic fixtures and their Capture counterparts the same DMX addresses. Then you can map them automatically using the Auto-map tool in the Map Fixtures to Visualizer window. Edit Fixture Settings Customize settings for fixture channels. Name: Enter the desired name for the fixture channel or leave it as the default. This name can contain only letters, numbers or the underscore (‘_’). The name must also be unique within the project. Fixture: Manufacturer’s name for the fixture (not editable). Type: Fixture type (not editable). Fixture channel list Channel Name Click on a channel in the list to select it. Then click again in the Channel Name column to change the name. When you have finished entering the name, press the Enter key. (See: Setting Fixture Channel Names). Type Displays the channel type. Not editable. (See: Fixture Channel Types). Merge Mode Click on a channel in the list to select it. Then click again in the Merge Mode column to activate the merge mode selector. Select the desired mode and press Enter. (See: Fixture Channel Merge Modes). Dragging this slider will output the DMX level for the selected channel. Use this to make sure the fixture hardware is addressed properly. Test Setting Fixture Channel Names Fixture channel names are generally displayed as dot notation in the form: fixture.channel.subchannel The subchannel is optionally used when the library has grouped several channels into one composite channel for convenience (see Fixture Channel Types). You can change the name of channel in the fixture channel list of the Edit Fixture Settings dialog window. This list omits the fixture portion of the channel name, displaying it as: channel.subchannel Again, subchannel is optional depending on what the library has defined. The following rules apply as you change channel names in the list that include the subchannel (note: these rules do not apply for channel names that do not include a subchannel): 1. You may enter subchannel name without retyping the channel name. The channel name is automatically added when you press Enter. 2. You may change the channel name by entering new_channel.subchannel. When you press enter, all of the channel names for that channel in the list will be changed to the new name. Example: Changing RGB1.Red to RGB_1.Red: Channel Name RGB1.Red RGB1.Green RGB1.Blue RGB2.Red RGB2.Green RGB2.Blue Channel Name RGB_1.Red RGB_1.Green RGB_1.Blue RGB2.Red RGB2.Green RGB2.Blue Fixture Channel Types The VenueMagic fixture library defines several channel types. These channel types help VenueMagic know how to deal with a particular channel or group of channels. Channel types mainly affect the operation of the Envelope Editor, the Lamp Preview Window and all Lamp Effects. The are pre-defined and not user-settable. The channel types are: Bitfield (Available in SC+ and above) Splits DMX channel into 8 separate VenueMagic subchannels, each channel representing a single bit in the DMX output value. Individual bit channels are selectable as On or Off. Color Wheel A special case of the Selector type designed to deal with color wheel selection. Dimmer Defines a dimmer channel. Dimmer16 Defines a high precision dimmer channel that take two DMX channels. Gobo Wheel A special case of the Selector type designed to deal with gobo selection. Motion Any channel that deals with a single channel of motion. Motion XY Composite of two motion channels in a scan (xy) head that can work in coordination with each other (to make circles, for example). Further divided into subchannels X and Y. Motion PT Similar to Motion XY type, but deals with pan-tilt heads. Further divided into subchannels Pan and Tilt. Motion XY-16 Same as Motion XY, but takes two DMX channels for higher precision. Motion PT-16 Same as Motion PT, but takes two DMX channels for higher precision. Motion PT Similar to Motion XY type, but deals with pan-tilt heads. Further divided into subchannels Pan and Tilt. Motion-16 Same as Motion but takes two DMX channels for higher precision. Reserved For channels that have no purpose but have been reserved by the manufacturer for one reason or another. RGB Defines an RGB (Red-Green-Blue) composite channel. RGB channels are further divided into three the subchannels: Red, Green and Blue. Selector Any channel that uses a range of values to select a lamp function. Speed For channels that set the speed of a lamp function. Time Duration For channels that set a time duration for a lamp function. Time Interval For channels that set a time interval for a lamp function. Fixture Channel Merge Modes You may wish to control a single fixture channel from several sources at once. For example, you can add the same channel to multiple lamp tracks in a timeline (or in different timelines) and simultaneously run multiple lamp effects on the same channel. VenueMagic will merge (or mix) all of the sources into the channel according to preset merge mode. The merge mode for each channel maybe set in the Edit Fixture Setting window to one of the following: Add All sources are added together before output to the channel. Average All sources are added together and the resulting value is divided by the number of sources before output to the channel. HTP (highest takes precedence) The highest value among all the sources is output to the channel. In addition, the Channel Router offers the following merge modes that pertain only to level commands it sends: Default Behaves a defined in the Edit Fixture Setting window. HTP (highest takes precedence) The highest value among all the sources is output to the channel. Add Adds in the Channel Router level regardless of the merge mode set in the Edit Fixture Setting window. Scale Scales the final result of all other sources going into the channel. Acts somewhat like a “master level control” for the channel. Override Takes complete control of channel(s). No other source will affect it. If more than one route is set to Override for the same channel, the results will be unpredictable. The Lamp Track Channel Settings window offers these merge modes that pertain only to the level commands for a channel sent by the associated track: Default Behaves a defined in the Edit Fixture Setting window. HTP (highest takes precedence) The highest value among all the sources is output to the channel. Add Adds in the channel level regardless of the merge mode set in the Edit Fixture Setting window. Scale Scales the final result of all other sources going into the channel. Acts somewhat like a “master level control” for the channel. Select Channels This window is used by VenueMagic functions that need the user to select one or more fixtures, channels or groups. These functions include: Adding channels to Lamp Tracks. Selecting channels to be displayed in the Lamp Preview window. Selecting output channels for the Channel Router. The behavior of the Select Channels window adapts to the needs of the function that uses it. In general, it has two top level folders: Fixtures which contain all fixtures/channels and Groups which contains all user-defined groups. The following apply: Icon meanings: Lamp fixture Lamp fixture channel or subchannel Fixture channel with multiple subchannels. Fixture channel group Items with the icon cannot be selected. This is to prevent duplication of channels within a single track (applies to Lamp Tracks only). Checkbox rules for different functions: Lamp Tracks Checking the checkbox for any item in the tree will select that item and all child items associated with it. Lamp Preview Any item can be selected individually without Window affected the selection of other items Channel Router Only one item at a time can be selected. Other items are automatically deselected. The Uncheck All and Show Selected buttons behave accordingly for all functions. Group Builder (Only Available for VenueMagic Classic and above) The Group Builder lets you combine multiple fixtures, channels and even other groups into a singles group. VenueMagic offers a variety of group functions that simplify lamp control for large numbers of channels with similar functions. Group List Select from existing groups which group you would like to add members to. The Chns column shows how many channels are currently in the group. To rename a group, click on the group to select it, then click the Group column to change the name. Control group channels Defines how a group will behave. Select from: As separate channels: Fixtures and channels in group are individually controlled. The group type is used mainly to make it easier to organize fixtures and channels together. In unison: Fixtures and channels are treated as if they were a single channel. Each channel will receive the same channel level. New Group button Add a new group. Remove button Remove the selected group from the list Group Notes Enter notes for group. Select Groups in Group Check the checkbox next to the groups you would like to add to the currently selected group. Groups with the icon cannot be checked because doing so would cause channel duplication within the selected group. Check All button Check all groups in the list that do not have the icon. Uncheck All button Uncheck all checked groups. Select Fixtures/Channels in Group Check the checkbox next to the fixture or individual channels you would like to add to the currently selected group. Groups with the icon cannot be checked because doing so would cause channel duplication within the selected group. Checking a fixture implies that all channels within the fixture are also included in the group, even though they are not checked. Checking a channel will uncheck its fixture. Check All button Check all fixtures/channels in the list that do not have the icon. Uncheck All button Uncheck all checked fixtures/channels. Special… button Opens the Check Special Groups dialog window. Show Selected button Expands the tree to show all selected fixtures/channels. You may a single channel to as many groups as you like. Check Special Groups Channel Duplication Detected When the Group Builder window is closed, VenueMagic will run a check on all project timelines to make sure that the changes you made did not cause any single track to have duplicate channels. This can happen when a lamp track within a timeline contains a fixture, say, Fixture A, and a group, Group 1, that does not contain Fixture A. If Fixture A is then added to Group 1 while in the Group Builder window, a duplicate track channel is detected and the following dialog window appears. The following solutions are offered: Modify groups: The Group Builder is reopened and you can make changes to correct the problem. Remove track groups that duplicate channels: Offending groups are removed from the affected tracks. Remove duplicate track channels: Offending channels (rather than groups) are removed from the affected tracks. Important Uses for Channel Groups Channel groups are very powerful though it may not always be clear what they can be used for. Here are just a few examples of how Channel Groups can be used: Zoned light balancing: After setting up all of your timelines with desired lighting effects, you may wish to independently control zones of lights to balance them without messing with the timelines. You can do this by assigning all of the lamp channels in each zone to a unison group. Then add it to the Channel Router (with merge mode set to Scale). You will be able to control the master level of each zone without having to make any changes to timelines. Stage light color balancing: The zoned light balancing application described above could be modified to allow individual control of different colored lights on a stage. This will allow you to do on-the-fly stage lighting color adjustments without interfering with timelines—even during playback. Overlapping channel effects: You can have multiple channel effects working simultaneously on multiple groups that have overlapping channels. A good example of this would be an array of lamps (say 5x5) that you want to use to create a chaser pattern of vertical and horizontal lines (see figure). Simply create a unison group for each row and each column (total 5 groups of each) and put the appropriate lamp channels in each. Now create a timeline with two lamp tracks. Put all the rows in one and all the columns in another, then put a chaser in each track and run it. Presto—a chaser pattern of vertical and horizontal lines. Custom fixtures: If the fixture you have is not in the library, let us know and we’ll stick it in. In the meantime, add multiple fixtures from the “Generic” fixtures in the library and “glue” them together in a group. Calibrate Lamps (Only Available for VenueMagic Classic and above with some features available only in SC+ and above) Calibrating Lamp Settings When setting-up and programming lamps for a show, there are a few things that should be kept in mind: It is not wise to frequently turn lamps on and off because it wears out the filament much faster, reducing the life of the bulb. The best thing to do is to select an “off” level that is still on, but at a very low level. It is unnecessary to run a lamp at 100% when a lower level is sufficient. This also improves bulb life. Bulbs are usually non-linear, meaning that setting a level of 50% does not appear to turn the light on half brightness. Use the Low, Med and High to compensate for each of the above issues. Use the Low and High sliders to setup a “virtual” range of lamp levels to be used during timeline playback. If desired, enable the Mid slider to make the lamp control more “linear.” Once set, you can test your settings using the Test slider. A simple procedure for setting-up lamps is as follows: 1. Select the lamp channel you wish to calibrate. 2. Drag the Low slider and pick a lamp level that is barely visible. (The lamp level will change to reflect the level of the slider the moment you start sliding it). 3. Drag the High slider to set the lamp level to the maximum brightness level you believe you will need. 4. If desired, check the Mid checkbox to enable the Mid slider, and then drag the slider until the lamp level appears to be at roughly half brightness. 5. Drag the Test slider up and down to test your settings. It should appear to go up and down smoothly. If not, adjust the Mid slider until you are happy with the results. 6. Repeat steps 2-6 for each channel you wish to calibrate. Important note: If the Mid slider is enabled, the calibration method uses a parabolic function to help compensate for lamp linearity problems. If you notice strange “dips” or “rises” in the lamp intensity as you move the Test slider, then you may have positioned the Mid slider too close to one of the other two. Positioning the Mid slider a little closer to the center of the range should eliminate this problem. Setting Range of Motion for Moving Heads You can use the lamp calibration window to set the range of motions for moving heads: 1. 2. 3. 4. Select a channel that controls motion. Make sure that the Mid slider is disabled (uncheck the Mid box) Adjust the Low and High sliders to encompass the desired range of motion. Verify the range using the Test slider. Channel Rest Setting (SC+ and above only) The Turn Lamps Off function in the Devices menu of the VenueMagic main menu as well as the Turn off lamps after playback settings in the Timeline Lamp Options, Playlist Lamp Options and the Envelope Editor Settings windows are all functions that set channel output values to zero for the described condition. In many cases, a channel value other than zero may be desired. For instance, turning a lamp “off” in the case of certain lamps requires setting a gobo or color channel to a “black out” setting, which may not necessarily be at zero. Animatronics and other position control devices my also need defined a “rest” or “home” position that is not at zero. Use this slider to define a rest position that is used instead of zero for the conditions described above. Ease-in/out Setting (SC+ and above only) This feature is primarily a safety feature for control of motion axes in animatronics and other devices. Adjust this slider to adjust the maximum acceleration that can occur on this channel. Any level commands sent to the channel will first pass through this acceleration limiter to prevent any fast, jerk movements that may damage*. The higher the slider value, the lower the acceleration. Try experiment with different setting, testing them with the Test slider, until you find one that best suits your situation. This should not be confused with the ease-in/out functions associated with the Timeline Lamp Options and the Project Options, which are independent and not related to the Calibration window ease-in/out function. *Note: Please review the VenueMagic End User License Agreement which limits Entertainment Sciences Group, Inc’s liability with respect to damage to equipment arising out of the use of VenueMagic products. Copy and Paste Settings You can copy the settings of a selected channel into another channel by doing the following: 1. Select the channel you wish to copy settings from. 2. Click the Copy button. 3. Select the channels you wish to paste settings to (hold down the Ctrl key to select multiple channels). 4. Click the Paste button. Additional Functions Revert Restore calibrations settings for a selected channel to the values it had before being selected. Reset Restores calibration settings to their default values of Low=0%, Mid=50% and High=100%. Filter by Select the channel type to filter the channel list by, or select All to chow all channels. Zero All Levels (Not available in SC+) Sends a zero level command to all channels. Does not affect calibration settings. Invert level Tells VenueMagic to invert any level command sent to the selected level so that a value of zero corresponds to full on and 100 corresponds to full off. Inversion takes place before scaling, so that the set min and max levels are not affected. Channel Routing (Only Available for VenueMagic Classic and above) Control channels or group of channels from an external source. External sources include MIDI input and the Virtual Control Surface (VCS). To add a channel route, click on the Add button to bring up the Add Channel Route dialog window. Likewise you can remove selected channel(s) by clicking on Remove. The Edit button brings up the Edit Channel Route window, which is identical to the Add Channel Route window. Beside each route entry is a checkbox that can be used to enable (checked) or disable (unchecked) the route entry. Uncheck the Enable routing checkbox to disable general channel routing. The Enable override checkbox will let you enable/disable all routes with the merge mode set to override. Click the Ext. Ctrl button to setup external control of enabling/disabling general routing and routing override (see General Channel Routing External Control). To show routes only for a single routing group, check Filter by routing group and select the group you would like to see. To add, remove or edit routing groups, click on Edit Routing Group List to bring-up the Channel Routing Groups window. Add Channel Route Sets up a new channel route in the Channel Routing window. Input channel The input channel that will be routed to the output channel. Click the adjacent Select button to bring up the Select External Control window. Output channel The output fixture, channel or group. Click the adjacent Select button to open the Select Channels window. Routing group Select the routing group to assign this route to, or leave it “<Unassigned>”. This route is enabled only when the its routing group is active. Routes that have not been assigned to a routing group are enabled regardless of which routing group is currently active. Merge mode Select how the input channel will affect the output channel. See Fixture Channel Merge Modes. Enable/disable Route with external control: Check this box if you would like enable/disable the route with an external control. Input sources and thresholds for enabling and disabling the route can be set independently. The Select Enable Source and Select Disable Source buttons will each bring-up the Select External Control window for selecting the enable source and the disable source, respectively. This is the equivalent of checking/un-checking the route enable box in the channel routing list in the Channel Routing window. Set variable when preset changes Check this box to have the current value of the routes input assigned to a variable in the Variable Table. Since variables can be redirected to MIDI controller outputs, this features becomes very useful if for controlling motorized slider consoles being used in conjunction with channel routing. If a fixture is selected as an output channel, all channels in the fixture will be simultaneously affected by input channel. The same will happen if a group or a channel with sub channels is selected. (See: Fixtures, Group Builder). General Channel Routing External Control You can control general routing and override routing using external controls. This is the equivalent of checking/un-checking the Enable routing and Enable override boxes in the Channel Routing window. Enable/disable Routing with external control Check this box if you would like enable/disable general routing with an external control. Input sources and thresholds for enabling and disabling the route can be set independently. The Select Enable Source and Select Disable Source buttons will each bring-up the Select External Control window for selecting the enable source and the disable source, respectively. Enable/disable Override with external control Check this box if you would like enable/disable all override routing with an external control. Selecting external control is identical to selecting for general routing (above). Navigate routing groups with external control Check this box if you would like to enable routing group navigation. Then setup external control for source each of the following functions: Next Group – causes the activation of the next routing group in the list (relative to the currently active group). Previous Group – causes the selection of the previous routing group in the list. Last Group – causes the activation the routing group that was active just before the currently active group was selected. For instance, if group “A” is selected, followed by group “C”, the Last Group function will restore “A” as the active group. Channel Routing Groups (Only Available for VenueMagic DMX+AV and above) Channel routing groups enable you to enable/disable multiple channels routes at a time. This has many applications, the most obvious of which is setting up slider banks where a limited set of sliders can control an unlimited number of channels simply by changing the slider bank. The Channel Routing Groups window manages the routing groups available in a project. It is accessed by clicking on the Edit Routing Group List button in either the Channel Routing or Add/Edit Channel Route windows. Routing Group list Lists routing groups and associated external control channel (if any). If no external control channel is selected, “<Disabled>” is displayed. Add Click this button to add routing group to the list with a default name. The Routing Group column for the new group is enabled for editing so you can enter name for the group. Change the name for an already added routing group by selecting the group, and then clicking in the Routing Group column. Remove Click to remove selected routing groups from the list. Enable external control Check this box to enable external control of the for group currently selected routing group. Next, click Select to bring-up the Select External Control window, select an external input, then fill in the appropriate threshold value (see Understanding Threshold Values). When the selected external input is received with the proper threshold value, this group will be selected by the Channel Router. Real-time Selection of Routing Group Only one routing group can be active at a time. There are three ways to select the currently active routing group: 1. Manually select a routing group using the routing group selector in the applications main title bar. 2. External control: a. Activate a specific routing group (Enable external control for group checkbox above) b. Navigate through presets sequentially (see General Channel Routing External Control). 3. Using the Set Routing Group event. Unassigned Routes If a channel route is not assigned to a routing groups it will display “<Unassigned>” in the Channel Routing list. Unassigned routes are active at all times, regardless of the currently selected routing group. Projects VenueMagic organizes all of your fixtures, groups, audio files, timelines, playlists, cue button settings, lamp preview settings, VCS settings, channel routing settings and a number of other settings, into projects. Think of a project as being basis for your “show” with each different show being stored in a different project. When VenueMagic runs for the first time, it automatically creates a project for you and gives it the name “Projectn” where n is the next available project number. From then on, VenueMagic will always load the project you were working on when you last exited the program. Project Options These options apply specifically to the currently loaded project. Project Editor Settings Save on exit Specifies how VenueMagic will deal with unsaved modified files when the application is shut down. By default, the Prompt before save option is selected, which will prompt the user to save unsaved files before shutting down. Select Save automatically, and changes will be saved on exit with no user interaction. With Abandon changes selected, any unsaved changes will be abandoned when the application shuts down. Auto-save every… Check this box to activate the auto-save feature, then select between 1, 5, 10, 30 and 60 minutes. Auto save only occurs at the designated interval if no timelines are running. Export profile file when saving timelines Check this box to automatically generate a profile file each time a timeline is saved. The exported file will have the same path and name as the original, but with a .vcp extension. Project Lamp Settings Ease-in Settings The project ease-in setting sets how many seconds it will take to execute a Lamp-off function (Main Menu, DevicesTurn Lamps Off). Rather than sending all channels immediately to zero (or rest position – see Calibrate Lamps), you can check the Ease-in “lamp off” commands box and set the Ease-in time (secs) value, which will cause channels “ease” to the zero position over the number of seconds provided. Project Quality Settings (Only Available for VenueMagic DMX+AV and above) Lamp control quality This setting gives you some control over the VenueMagic update cycles based on the needs of your application. High update rates are more precise, but limit the number of channels and the level of timeline complexity that can be controlled accurately at that rate. Low settings will handle more channels and greater complexity, but at the expense of lower accuracy. The Medium setting is a compromise between the two. The best way to determine a proper setting is to pick the one you desire, and then observe the Cycle Load gauge at the bottom right of the application window. If it starts to drift into the red zone while you’re timelines are running, then you should probably select a lower quality. Lamp preview quality Similar to the Lamp control quality, this lets you set the accuracy of the Lamp Previews. If too many lamps in the preview screens are updating at a fast rate, it could impact the overall performance of VenueMagic. Project VMNet Settings (Only Available for VenueMagic SC+ and above. Some features available in DMX+AV) Enable VMNet server Check this box to enable the VMNet Server. Click Setup to open the VMNet Server Settings window. VMNet Clients This is a list of VMNet clients that have been created for the project. To create a new VM Client, click the Add button. Add Click this button to add a new VMNet Client. This will open the VMNet Client Settings window. Edit Opens the VMNet Client Settings window for the currently selected client. Remove Click to remove selected clients from the VMNet Clients list. For more information on VMNet servers and clients, see VMNet. VMNet Server Settings This window sets up the VMNet server. Accept events Check this box to enable the VMNet Server to process remote event execution messages sent by VMNet clients. Accept sync Check this box to enable the VMNet Server to process time code messages sent by a VMNet Time Code Source. Enable plugin-services Check this box so the VMNet server will process messages from a VenueMagic plug-in running on another application. Pass code Enter in a VMNet Pass code. Can be a number from 0 to 2147483648. (See VMNet Pass Codes). Port IP port address of the server. This is an advanced setting and, in nearly every case, should be left at its default value. The only time is should be changed is if there is a conflict with another application using the same port, which is unlikely. Consult your network administrator if this is a problem. VMNet Client Settings Setup VMNet Client. Client name Name used by VenueMagic features to identify client. Server name The name or IP address of a VMNet server. Click the button to bring-up the Available VMNet Servers window. Pass code Enter the pass code of the selected server. Port Enter the IP port address used by the selected server (see Port field description in VMNet Server Settings window. Available VMNet Servers Shows a list of all VMNet servers currently detected on the network. Select the desired server and click OK. Click Find Servers to refresh the list. In some cases, it may be necessary to click Find Servers a couple of times to get a complete list. After OK is clicked, the Select Server Reference window appears. Select whether to use the VMNet server name or IP address to reference the server. If you select Name, then the computer name of the server will be used. The advantage to this is that you can let VenueMagic figure out which IP address is associated with the server. The disadvantage is that it is slower and a lot of VMNet activity with that server will impact the performance of VenueMagic. Selecting IP Address will result in faster, more efficient communications with the server (hence little or no performance hit). However, if your network router chooses to reassign your VMNet server’s IP address, you will have to manually select the new IP address. Project Telnet Settings (Only Available for VenueMagic SC+ and above.) Configures Telnet server and client settings for project. Enable Telnet server Check this box to enable the VM Telnet server. Click Setup to open the Telnet Server Setup window. Telnet Clients This is a list of Telnet clients that have been created for the project, the server name or IP address and the connection status. Check/uncheck the box next to client Name to open/close the clients connection to the server. The Status field can be one of the following: Closed – connection is closed Waiting – waiting for the server to respond and negotiate the connection. Connected – a successful telnet connection has been established. Cnx Error – Results when an internet error occurs. Can also result when client does not understand server’s responses (see Expected server responses section of the Telnet Client Setup window). Invalid login – Server reported that login and or password were invalid. Uncertain – Client could not determine if login was a success based on the response of the server (see Expected server responses section of the Telnet Client Setup window). No server – A telnet server was not found at the specified address. To create a new client, click the Add button. Add Click this button to add a new Telnet client. This will open the Telnet Client Settings window. Edit Opens the Telnet Client Settings window for the currently selected client. Remove Click to remove selected clients from the VMNet Clients list. Name used by VenueMagic features to identify client. Enable Telnet Telnet Server Setup Sets up the VMNet Telnet server. Require login Check this box if the server should require a login. Then enter the user name and password the server will require. Quite mode Check this box to prevent the server from sending back any characters to the client. Echo characters When checked, the server echoes back every character it receives from the Telnet client. Prompt text Prompt text Telnet server shows after a successful login to indicate it is waiting for a command from the client. Error prefix The text that will precede any error messages returned by the Telnet server. EOL string Appended to the end of every line of text sent by the server. Telnet Client Setup Sets up a Telnet client. Client name An arbitrary name identifying the telnet client. Server address The computer name or IP address of the telnet server client will connect to. Use login By default this box is checked. Uncheck it if the telnet server this client will connect to does not require any type of login. User name Password Enter the user name and password the telnet server requires. The Expected server responses section is where you tell the VenueMagic telnet client how to recognize prompts received from the telnet server. The default settings are sufficient in most cases, but should be modified as required. User name prompt text This is the text the client should expect from the server to indicate that the server is requesting a user name be entered. Exact text is expected (case is ignored). Password prompt text Text expected from the server to indicate a password request. Exact text is expected (case is ignored). Login success text All or part of the prompt indicating that login was successful. Login failed text Text indicating that login failed. Exact text is expected (case is ignored). Project Visualizer Settings (Only Available for VenueMagic Classic and above.) Configures interface to Capture PolarTM Visualizer. VenueMagic supports interfacing to the Capture Polar 3D Visualizer versions 2.8.11 and above. The Capture Polar visualizer is not included with VenueMagic and must be purchased separately (http://www.capturesweden.com). Check Enable Capture visualizer interface to enable this feature. The interface is Ethernet-based, so you can run Capture Polar on the same computer or on another computer. Since both Capture and VenueMagic require a lot of processor power, it is recommended that you run them on separate computers unless you have a lot of memory and processing power. Computers running separately need to be connected to the same local area network. The Select active visualizer: list shows all of the instances of Capture Polar you have registered with your VenueMagic Project and their current status. The list columns are: Name The name of the registered instance of Capture. Status The current status of instance. Can be one of the following: Closed – This instance of capture is currently not running. Opening – VenueMagic has connected with Capture and is sharing information. Opened – Connection has been established and Capture is ready for use. Error – A communications error has occurred. Close down Capture and VenueMagic and try again. If no instances have been registered, this list will be empty. To register an instance, click Add to bring-up the Connect to Visualizer window. This list shows every instance of Capture Polar currently running on the network or on the same computer, along with the Type and State information reported back by capture. Select the instances you wish to register and click OK. Once an instance of Capture has been registered, it will remain on the Select active visualizer list even when it is not running. Registering Capture instances in this fashion is necessary to enable VenueMagic to keep track of Capture project information within the VenueMagic project file. Although you can have multiple registered instances, VenueMagic will control only one at a time. In the Select active visualizer list, check the instance you would like VenueMagic to control. Click Remove in the Visualizer Settings window to remove an instance from the list. For information on mapping VenueMagic fixtures to Capture fixtures, see in the Add Fixtures section. Project Window Project Folders Audio Contains all audio files that have been imported into the project. To import audio files, right-click on the folder and select Import Audio File to import one or more individual files in a single directory, or Import Audio Library to search an entire folder and its subfolders for audio files and import them. Import Audio Library also retains the folder structure the files are found in. Only wave (.wav) files, MP3 and Window Media (.wma) files are supported. Video Contains all video files that have been imported into the project. To import video files, right-click on the folder and select Import Video File to import one or more individual files in a single directory. Most video formats are accepted. Lamp Effects Provides easy access to all of VenueMagic’s built-in lamp effects (see: Lamp Effects). Events Provides easy access to all of VenueMagic’s built-in events (see: Event Tracks). Timelines Contains all timelines that have been added to the project. A new timeline is automatically added to this folder when it is saved for the first time. (See: Timelines, Importing Timelines and Playlists from another Project ). Playlists Contains all playlists that have been added to the project. Functions similarly to Timelines folder. (See: Playlists). Fixtures Contains all of the fixtures that have been added to the project. To add fixtures to the project, double-click on this folder to bring up the Add Fixtures window. You may also double click on a fixture or channel within the folder to edit its settings. (See: Fixtures). Channel Groups Contains all of the channel groups that have been added to the project. To add groups to the project, double-click on this folder to bring up the Group Builder window. You may also double click on a group within the folder to edit its settings. Adding, Deleting & Renaming Subfolders To improve the organization of you project, you can add your own subfolders to the Audio, Timelines and Playlists folders. Simply right-click on the desire folder or subfolder and select Add Folder. Similarly, you may rename a subfolder or delete it (along with all of its subfolders). Items and subfolders in the above mentioned folders may also be dragged into other subfolders. Open Files List This pane lists all currently opened project files. Right-click on a file to bring-up a menu with the following selections: Show File Brings the file to the front. Close File Closes the file. Reload File Timelines and playlists may make reference to other timelines. If changes are made to timeline currently referenced by a currently open timeline or playlist, it may be necessary to reload that timeline or playlist. Add to Project If the timeline or playlist is not part of the current project, select this to add it. This is another way of importing files into the project. Copy Project Settings When a new project is created, you are given the option of copying over certain settings of last opened project to the new project. Fixtures & Groups Copy all fixtures and groups into the new project. Channel routing Copy all programmed channel routes. Only permitted if Fixtures & Groups is checked. Lamp preview Copy all lamp preview settings. Only permitted if Fixtures & Groups is checked. VCS Mixer Copy all settings for the Virtual Control Surface. Audio Library Select how audio library should be copied over. Load default: Copy library from original installation into new project. Copy current: Copy library from current project into new project. Leave empty: Do not copy any library into the new project. Note: Only links to audio files a copied. The files themselves are not copied. Importing VenueMagic 2.1 Timelines and Playlists from another Project Opening a timeline created from a project other than the one currently loaded can pose certain complications. The timeline may contain fixtures not included in the project or, even it the project does contain those fixtures (or perhaps similar ones), how should substitutions be made? Fortunately, VenueMagic has a solution for this, though it does require a little interaction from the user. Start by opening a “foreign” timeline into your project by selecting FileOpen from the main menu, and then selecting the timeline in the file list. VenueMagic will first check to see if all of the fixtures referenced in the timeline are included in main fixture library or the user fixture library. If some are not, VenueMagic will add them to the appropriate library and alert the user with the following window: Click OK to continue. Next, VenueMagic will show you a list of all of the fixtures referenced by the foreign timeline that are not included of the current project: At this point, if all you want to do is add those fixtures to your project, simply click on Finish and you’re done. Suppose, however, that you don’t own some or all of the fixtures in this list and you need to replace them with similar fixtures that you do own. If this is the case, then click Next, and you will see the following: List #1 on the left shows all of the new fixtures in the foreign timeline. At this point, nothing has been added to the project yet. List #2 on the right shows all of the fixtures currently included in your project. These fixtures will have been previously added by the user using the Add Fixtures window. Select the first fixture in List #1, then, in List #2, check the fixture you would like to replace the selected fixture. Then select the next fixture and check its replacement, and so on. Any fixtures in List #1 that have not been assigned a replacement in List #2 will be added to your project. When you have finished selecting replacements, click Next. In addition to selecting which fixture will replace another, you must also make sure that the individual channels in the fixture are replaced properly. If you are replace a fixture with an identical fixture this task is easy. However, if the two fixtures are not the same, VenueMagic may need some additional help. In List #1, you will see a summary of all of the fixture replacements that were assigned in the previous screen. Select one of them, and List #2 will be populated with VenueMagic’s best guest as to how the individual channels should be replaced. In most cases, VenueMagic will do a pretty good job. However, if changes need to be made, you can click and drag channels on the right side of this list to line them up with different channels on the left. This is, of course, subject to certain rules. For more details on how to modify channel replacements, see Selecting Track Channel Replacements, which functions similarly. After you have verified (and perhaps corrected) channel replacements for channel, click Finish. VenueMagic will then request that save the foreign timeline under a different name so that the timeline under the old name will belong to its original project. If you do not wish to change the name, just save it with the same name in Save As file window. Now, if you look at the Add Fixtures window, you will notice that the new added fixtures have been assigned addresses and are displayed in a different color. They will remain in this color until they are move to a different address. Now, let’s review what VenueMagic did while importing the foreign timeline into your project: 1. Fixtures used by the timeline were added to your fixture libraries if they didn’t already exist. 2. You selected fixtures in the current project to replace fixture references in the foreign timeline. 3. VenueMagic suggest channel replacements for each fixture replacement which you verified or modified. 4. VenueMagic modified foreign timeline with the fixture and channel replacements. 5. Fixtures that were not assigned a replacement were added to the project. Importing VenueMagic 2.0 Timelines and Playlists from another Project Timelines created in VenueMagic 2.0 cannot be imported with fixture references because they do not include the necessary information in them. When loading a VenueMagic 2.0 timeline from another project, the following warning is shown: VenueMagic will load the timelines, but all lamp track fixtures will be removed. It is then the responsibility of the user to add fixtures to the timeline lamp tracks. It is important to change the name of the timeline (File: Save Project as) otherwise you will get the same message when the previous owner attempts to load the timeline. As fixtures are manually re-added to the tracks, VenueMagic will do the best it can to intelligently reassign fixture channels settings for any lamp effects the track may contain. It may be a good idea to review all of the lamp effect settings after a fixture has been added to a lamp track just to make sure all the settings were reassigned properly. Audio File Properties This dialog window is displayed when you double-click on an audio file in the Audio Folder of the Project Window. Name Enter into this field what should be displayed for the audio file in the Audio Folder of the Project Window. This will not change the name of the file itself. The other fields are non-editable and are self-explanatory. Click the button to play the file. Video File Properties (Only Available for VenueMagic DMX+AV and above) This dialog window is displayed when you double-click on a video file in the Video Folder of the Project Window. Name Enter into this field what should be displayed for the video file in the Video Folder of the Project Window. This will not change the name of the file itself. The other fields are non-editable and are self-explanatory. Click the a special Video Playback window with controls for previewing the video. button to bring-up Timelines Timelines are at the heart of VenueMagic operation. It is here that you produce your “show” by placing audio clips, lamp effect clips and event clips and organizing them into synchronized playback. Anyone who has had experience with timeline-based video or audio editing software will find VenueMagic timelines simple and intuitive to use. In addition, your VenueMagic installation includes a number of tutorial videos to help you come up to speed quickly. Clip Time Display Shows the length of a selected clip. If multiple clips are selected then it shows the time range covered by all selected clips. While dragging a clip or clips, the display changes color and shows the start time of clip or clips. Change the time format in Timeline Options. Play Range Bar The play range bar defines the start and end playtimes for the timeline. If auto adjust play range is turned on, the bar will automatically resize itself to include all clips in the timeline. Click and drag the sliders arrows to set it manually. Click and drag the inner bar area to move both end points together. Any manual movement of the play range bar will turn off auto adjust play range. Timeline Scale Shows the currently displayed time range. Use the horizontal scroll bar to scroll through time. To change the time range scale use the or scale range in the Timeline Options window. toolbar buttons. You can also set the Change the time format in Timeline Options. Timeline Markers (Only Available for VenueMagic Classic and above) Timeline markers can be placed on the timeline scale of a timeline. There are two types of timeline markers, general and teleprompter. Teleprompter markers are for use with the VenueMagic Teleprompter window, and are discussed in the following sections: Teleprompter Timeline Teleprompter Markers The remainder of this section will be devoted exclusively to general timeline markers. General timeline markers let you mark location in the timeline that you can return to later. To insert a marker, right-click in the timeline scale and select Insert MarkerGeneral. Now insert a label and some option notes for the marker. You can also select a color for the marker by clicking on Select Marker Color. When you move the mouse cursor over the marker, it will display the label for about a second, followed by the label and the notes together. You can also add markers at the current time cursor position by hitting Ctrl-M. If this is done during playback, markers are added without displaying the Timeline Marker Settings window. To move to a timeline marker, right-click in the timeline scale and select Goto Marker Linking Markers to Timeline Clips Both general and teleprompter timeline markers can be linked to an audio, video, lamp control or event clip on the timeline. When linked, the markers will always follow the clip when moved. Follow these steps: 1. Select all markers you would like to link to a timeline clip. 2. Right-click on the timeline click to link to and select Link to Selected Markers. Similarly you first select a clip, then right-click on a marker and select Link to Selected Clip. Unlink a single marker linked to a clip by right-clicking on the marker and selecting Unlink from Clip. Unlink all markers linked to a clip by right-clicking on the clip and selecting Unlink from All Markers. Time Cursor Marks the current playback position. Click the cursor handle to drag the cursor across the timeline. There are several options for how the time cursor will behave during and after playback. They are set in the Timeline Options window. Time Cursor Position Display Displays the current position of the time cursor. Change the time format in Timeline Options. Timeline Audio Level Display Graphically shows the audio levels of the timeline during playback. Timeline Toolbar Increase/decrease the track sizes. This results in changing the number of tracks displayed. This can also be done by holding the Ctrl-key down and moving the mouse wheel. Zoom in/out the timeline time scale. Expands from the timeline origin. Zoom in/out the timeline time scale. Expands around the current time cursor position. You can also hold the Shift-key down and turn the mouse wheel to zoom in/out around the mouse cursor. Adjust timeline zoom to include all clips and the play range. Adjust timeline zoom to encompass the selected clips. Loop playback (on/off). Shift timeline to include the time cursor. Split selected clips at the current time cursor position. Clip must be both selected and intersected by the time cursor. Works for Audio, Video and Lamp Effect clips. Enable/disable snap to grid feature. Grid spacing is set in the Timeline Options window. Enable/disable snap to clip edge feature. With this feature enabled, clips being dragged will gently snap to the start and end times of other clips on the timeline. This makes it much easier to line clips up precisely. Enable/disable auto adjust play range function for Play Range Bar. Show Timeline Options window. Show properties window for selected clip. Show the Envelope Editor for selected clip. Lock/unlock selected clip(s). This will prevent them from being moved on the timeline. Link/unlink selected clips. Linked clips move together when dragged. Add audio track. Add lamp track. Add event track. Snapshot channels at time cursor. (see Snapshot Channels). Enables recording for all selected Level Control effects for which recording has been set up. Locks record mode so that recording does not disable when playback stops. Enables external synching if it has been setup for this timeline. (See Timeline Synching Options) Playback Controls Play timeline starting at time cursor position. Hot key: SPACEBAR (while not in playback). Stop playback. Hot key: SPACEBAR (during playback). During playback: Fast reverse slewing. Not in playback: Move to start of play range. Hot key: HOME (while not in playback only). During playback: Fast forward slewing. Not in playback: Move to end of play range. Hot key: END (while not in playback only). During playback, neither clips nor tracks can be moved or edited. Also, some of the toolbar buttons will be disabled. (See also: Timeline External Control Options). Timeline Options Timeline display format Select the time format for the timeline scale, time cursor position display and the clip time display. Select from the following: Secs: Show time in seconds and 1/100th seconds. Mins:Secs: Show time in minutes:seconds format. Hrs:Mins:Secs: Show time in hours:minutes:seconds format. SMPTE: Show time in standard SMPTE format. Select an fps mode of 24, 25, or 30 frames per second. Measures:Beats:Ticks: Show time as measure:beat:ticks. You can also select a base BPM and time signature. Time range Enter the number of seconds to be displayed in the timeline. Tracks per page Enter the number of tracks to display on a page. Max envelopes shown per track Sets the maximum number of envelopes that can be displayed in a single track. If a track contains many channels (> 50) the screen refresh begins to slow down notably This setting is to reduce clutter on the screen and to speed up screen refresh. This number will affect the number of envelopes that can be checked in the Lamp Track Envelope Properties dialog window. Auto-adjust play range bar Enable/disable auto adjust play range function for Play Range Bar Snap to clip edge With this feature enabled, clips being dragged will gently snap to the start and end times of other clips on the timeline. This makes it much easier to line clips up precisely. Snap to grid Enable/disable snap to grid feature. Grid spacing Enter the desire grid spacing. If the time display format is SMPTE, this field shows frames. Otherwise it shows seconds. Timeline Playback Options Play in a loop Play timeline in a loop. Name in Cue list This is what will be displayed in the Cue column when the timeline is run in the Cue List. Play Tracks Check which track types you wish to be active during playback. Normally these should all be enabled, but it is occasionally desired to disable all tracks of a particular type at once. Scrub Tracks Check which track types for which timeline scrubbing is enabled. Scrub a timeline by moving the timeline cursor while holding the SHIFT key down. Playback scrolling Select how the timeline will scroll during playback: Scroll timeline after playback. Timeline remains fixed and time cursor moves left to right during playback. When playback stops, timeline is shifted to include where the time cursor stopped. Do not scroll timeline. Timeline remains fixed and time cursor moves left to right during playback. When playback stops, timeline does not shift. Post-playback cursor action Select time cursor behavior following playback: Return to last start position: Time cursor returns to the position it was at when playback was last started. Return to playrange start: Returns the cursor to the beginning of the play range. Remain at stop position: Time cursor remains at stopping point after playback. Timeline Audio Options Volume level scaling Move the slider to set the main volume level for the timeline (0% 100%). Show audio level graph When checked, the audio level bar graph at the bottom of the timeline is shown. Uncheck to hide it. Hiding it can improve timeline execution speed and performance. Timeline Lamp Options Lamp level scaling Set the lamp brightness level scaling for the timeline (0% - 100%). Turn off lamps after playback When checked, all timeline lamps are set to level zero at the end of playback. Unchecked, lamps remain at last level when playback ends. Note: only Dimmer and RGB channels are affected by this feature. All other channel types will remain unchanged (see Fixture Channel Types). Ease-in on playback/stop Check this option to force an “ease-in” period when a playlist is run or stopped. Rather than causing channels levels to jump immediately to the start level of the timeline, it will gradually blend from its current levels to the start levels over a specified period. (Available in VenueMagic SC+ and above only) Ease-in time (secs) Specify the ease-in period in seconds. (Available in VenueMagic SC+ and above only) Timeline External Control Options This dialog window lets you configure a timeline’s playback controls to be controlled externally (i.e. MIDI device or VCS). Trigger Play on external source Check this box to enable external control of the timeline’s Play button. Click on the adjacent Select… button and choose an input source in the Select External Control window. Since external controls input percentage values, enter into the Threshold field the level the external input will have to send in order to trigger the button. See Understanding Threshold Values. Trigger Stop on external source Identical in operation to the Trigger Play on external source feature. Trigger Rewind on external source Identical in operation to the Trigger Play on external source feature. Rewind will only trigger when the timeline is not in playback mode, and will move the time cursor to the beginning of the timeline. Trigger Rewind on external source Identical in operation to the Trigger Play on external source feature. Rewind will only trigger when the timeline is not in playback mode, and will move the time cursor to the beginning of the timeline. Timeline Security Options (Only Available for VenueMagic Classic and above) You can require that a password if someone desires to alter and then save this file. Check the Require password to save changes box to require a password, then enter and re-enter the password in the fields below. If anyone attempts to save this timeline, or to select the Security tab in the Timeline Options, a window will appear requiring the user to enter a password to save the file or enable the Security tab. Timeline Synching Options (Only Available for VenueMagic DMX+AV and above. Specified features available only in VenueMagic SC+ and above) This window sets up VenueMagic to sync to various external sync sources. For more information see Synching VenueMagic Timelines to an External Clock Source. Sync Source Select the source of VenueMagic synching. Main clock/Master sync track: Select this option to instruct VenueMagic to sync to its main clock or to the master sync track if one is selected. (see Master Sync Audio Track ). Other: Select from the list of available sync source types and click Setup… to open the setup window for the selected type (see Synching VenueMagic Timelines to an External Clock Source). Stop and end of play range Check this box if you would like the timeline to stop at the end of the play range. If left unchecked, timeline will wait for sync source to return the time to within the play range and run the timeline starting at that time. Drop-out action Select how VenueMagic should handle timeline playback If I sync source were to drop out while the timeline is playing: Continue on main clock: Timeline continues to playback in real-time based on the main timeline clock. Continue at last speed: Timeline will continue to play back, but at the last speed before the dropout. Hold: Playback holds and waits for the source time to continue or to jump to another time. Broadcast VMNet sync Check this box and this timeline will broadcast VMNet time code over the channel designated in the Channel field. Any running timeline setup to use VMNet sync on this channel will be controlled by this timeline. The Port field should contain the IP port number used by the VMNet server on the computer running the timeline to be synched (see VMNet Server and VMNet Server Settings). Timeline Notes This window let’s you add notes about your timeline. Audio Tracks Audio tracks contain audio clips that have been dragged over from the Project Window. An audio track can either be a normal audio tracks and master sync audio track. VenueMagic Classic and DMX+AV will allow as many audio tracks as you like. VenueMagic Express limits you to one audio track. Normal Audio Track: Master Sync Audio Track Master Sync Audio Track A master sync audio track is identical in every way to a normal audio track with one exception: During playback, the main timeline clock will synchronize itself to any audio file that may be playing on the track. This will ensure all lamp effects, events, etc… will remain in synched the audio on the master sync track. Only one at a track can be a master sync track. Enable this function for any audio track in the Audio Track General Properties window. A master sync track is identified by a different background color and the phrase “Master Sync Track” located in the track panel under the track name. Audio Track Panel The Audio Track panel affects playback and editing of the audio track. Pin track to page Click this icon to pin this track to its current location on the page. As you scroll the tracks up and down, this track will remain fixed. Disable audio playback Click this icon to mute the audio played by this track. Solo play When enabled, only this audio track will be active during playback. No other audio track will play. Lock track Lock track to changes. Track main volume Adjust the volume of audio played on this track. Double-click on the window. icon or the audio track name to bring-up the Audio Track Properties Audio Track General Properties Track name Enter the track name to be displayed in the track panel. Master sync track Check this box to make the audio track a master sync audio track. Lock track Check this box to lock out any changes to track Audio Track Audio Properties Select audio output Mute track Enable track clip sound fx’s Available in DMX+AV and above only. Select an audio output device from a list of those currently installed on your computer. All audio clips playing in this track will output it sound to the selected device. This setting default to the audio output device selected in the Audio tab of the Setup Devices window. Mutes track during playback. Functions identically to the mute button on the track panel. . Enables sound effects for clips on track. The list below allow the enabling/disabling of individual sound effects for the track. By default, all of these are checked. Audio Track Envelope Properties Select which envelopes in the track are to be shown in the track. It the number selected exceeds the maximum specified in the Timeline Options window, other envelopes will be deselected, starting with the least recently selected envelope. Click the Set Color button to set the color that the envelope will be displayed in the timeline and the Envelope Editor window. Audio Track External Control Properties Control slider level with external device Enables the track panel’s main volume slider to be controlled by an external source. Click the Select… button and choose an input source in the Select External Control window. Allow mouse control of slider When the main volume slider is being controlled by an external source, it my not make sense to allow the mouse to control it at the same time. Uncheck this box to lock-out the mouse from controlling the slider. Audio Track Notes This window lets you enter notes about the audio track. Audio Clip Properties Audio Clip General Properties Clip name Enter the name that will appear on the clip in the timeline window. By default, this is the name of the audio file associated with the clip. Path Shows the complete path of the audio file (not editable). Enable playback Check this box to enable playback of the clip. Uncheck it to mute the clip during playback. It is checked by default. Lock clip Check this box to lock the clip onto the timeline. Locked clips cannot be moved or resized. Audio Clip Audio Properties Volume Gain Adjusts the overall volume level of the clip during playback. Use this to scale the effect of the volume envelope. Pan Center Shifts the stereo pan center of the clip during playback. Enable sound fx Check this box to enable sound effects processing for the clip. Then click the Setup Sound FX button to configure effects. (see Audio Clip Sound Effects). Enable crossfadeback Check this box to enable cross fade-back for the clip. Then click the Setup CFB button to configure cross fade-back. (see Cross Fade-back). Audio Clip Sound Effects VenueMagic provides five DirectX audio effects. Each audio effect has parameters that can be configured by effect sliders or by using envelopes during playback. The Sound Effects Settings dialog is divided into two panes: Sound FX and Settings. In the Sound FX pane Enable column, check the corresponding box for the desire sound effects to turn them on. In the Select column, select the effects you would like to adjust. The settings for that effect will appear in the Settings pane. Checking Use Envelope for any setting will enable envelope control of the setting. In the Settings pane, drag the slider of the desired effect parameter to change it. Each parameter is a percentage value (0-100). The best way to learn these parameters is to experiment. Click to play the sound file once, or to play it in a continuous loop. During playback you can vary parameters but you cannot enable/disable effects. Cross Fade-back (Only Available for VenueMagic Classic and above) Cross Fade-back Overview Use Cross-Fade-back to extend the length of certain sound clips. For example: Suppose your show needed 10 minutes of background night noises (crickets, etc…). Unfortunately, your favorite night noise sound clip is only 20 seconds long. A couple solutions to your problem come to mind: 1. Make 30 copies of the sound clip and line them up on your track like this: … Unfortunately, your crickets will “hiccup” every 10 seconds, which is very distracting. 2. You could stagger the clips across two tracks and cross-fade between the clips using envelopes like this: … Clearly this method takes a lot of time and is cumbersome. Cross fade-back offers a far better solution. With cross fade-back, the sound clip actually crossfades back onto itself, providing smooth transitions. It can also be setup in seconds. Cross Fade-back Setup Double click on your clip on the timeline to bring up the audio clip properties dialog box and select the Audio tab. Check the Enable cross fade-back box, then click on Setup CFB. This will bring-up the Setup Cross Fade-back dialog box. Notice that two clips are displayed: one on the top, one on the bottom. These actually represent the beginning and end of the same clip. The two timescales show time relative to their respective clips. Click on and slide one of the clips towards the other. Notice how they both move together. This is how we overlap the clips. Next, click and slide the Fade-out start time adjust arrow. You will see the number Fade-out start time field change. This tells cross fade-back function where to start fading-out before the end of the clip. Likewise, you can adjust Fade-in end time adjust arrow to setup where the fadein to the clips beginning will end. As you slide the time adjust arrows, you will also see the number in the Cross fade length field change. This is the actual period of time (in seconds) that the cross fade-back will occur over. Once you are happy with the cross fade length, you move the start and end times together by clicking and sliding the Cross fade bar. Test the cross fade-back by clicking on the play the display area using the and button. You can also change the scale of buttons. Setting up cross fade-back may seem a little tricky at first. Play with it a little and you will get good at it in no time. Now close the Setup Cross Fade-back and the audio clip properties dialog box. Then resize the length of you clip. Notice how you can make it any length now. You will also see that cross fade lines have been added to show where cross fade-back will take place. Audio Clip Notes Enter notes about the audio clip. Exporting Audio Clip Profiles (VenueMagic SC+ and above only) VenueMagic will let you extract a rough audio envelope to a profile file that can later be loaded into a Level Control lamp effect. The overall effect is similar to the Audio Link lamp effect, but you have the added flexibility of being able to edit the audio profile in the Envelope Editor (see also Exporting Channel Data Profiles). To export a profile, right-click on an audio clip in an audio track and select Export Audio Profile. This will bring-up a file browser in which you can enter an filename for the exported profile. Video Tracks (Only Available for VenueMagic DMX+SA and above) Video tracks contain video clips that have been dragged over from the Project Window. VenueMagic provides a single video track that can contain as many video clips as desired. A video track can either be a normal video tracks and master sync video track. Normal Video Track: Master Sync Video Track Video Track Panel (Only Available for VenueMagic Classic and above) The Audio Track panel affects playback and editing of the audio track. Pin track to page Click this icon to pin this track to its current location on the page. As you scroll the tracks up and down, this track will remain fixed. Disable video and audio playback Click this icon to disable playback of audio and video playback on this track. Solo play When enabled, only this video track will be active during playback. No other audio or video track will play. Lock track Lock track to changes. Track main volume Adjust the volume of videos played on this track. Double-click on the window. icon or the video track name to bring-up the Video Track Properties Video Track General Properties Track name Enter the track name to be displayed in the track panel. Master sync track Check this box to make the video track a master sync video track (see Master Sync Audio Track). Lock track Check this box to lock out any changes to track Video Track Playback Properties Play video Check this box to enable playback of videos in the Video Playback window. Play audio Enables playback of audio portion of video clips. Auto-open video screen When checked, the Video Playback window automatically opens up when the timeline is played. Show fullscreen Check this box to force video all track video clips to playback in fullscreen mode. This list shows all monitors you computer makes available for display. Check the monitor you wish the to be displayed by clips playing in this track. If a selected monitor is unavailable during playback, the video will default to playback in the primary monitor. Select monitor for fullscreen Playing Video on a Second Monitor VenueMagic will play full screen video on a second monitor. To do this, follow these steps: 1. Make sure the second monitor is hooked-up and working properly as part of your desktop. 2. Check Auto-open video screen and Show fullscreen above. 3. Select the secondary monitor in the Select monitor for fullscreen list. When the timeline is run, VenueMagic will take over the secondary monitor and display videos in the video track. Video Track Envelope Properties Select which envelopes are to be shown in the track. It the number selected exceeds the maximum specified in the Timeline Options window, other envelopes will be deselected, starting with the least recently selected envelope. Click the Set Color button to set the color that the envelope will be displayed in the timeline and the Envelope Editor window. Video Track External Control Properties Control slider level with external device Enables the track panel’s main volume slider to be controlled by an external source. Click the Select… button and choose an input source in the Select External Control window. Allow mouse control of slider When the main volume slider is being controlled by an external source, it my not make sense to allow the mouse to control it at the same time. Uncheck this box to lock-out the mouse from controlling the slider. Video Track Notes This window lets you enter notes about the video track. Video Clip Properties Video Clip General Properties Clip name Enter the name that will appear on the clip in the timeline window. By default, this is the name of the video file associated with the clip. Path Shows the complete path of the video file (not editable). Enable playback Check this box to enable playback of the clip. Uncheck it to disable video and audio playback of the clip. It is checked by default. Lock clip Check this box to lock the clip onto the timeline. Locked clips cannot be moved or resized. Video Clip Video Properties Play video Check this box to enable playback of the clip in the Video Playback window. Play audio Enables playback of audio portion of video clip. Scale video to fit screen If checked, the video clip will fill the entire Video Playback window, event if it has to be stretched in the horizontal or vertical direction. When unchecked, the video image maintains the proper aspect ration. In this mode, it is possible for the video to play in a “letterbox” format, with black bars on the top and bottom of the window. Video Clip Audio Properties Volume Gain Adjusts the overall volume level of the clip during playback. Use this to scale the effect of the volume envelope. Pan Center Shifts the stereo pan center of the clip during playback. Video Clip Notes Properties Enter notes for the video clip. Video Playback Window The Video Playback window facilitates the playback of videos. Show the window by selecting ViewVideo Playback Window in the main menu. Size the window by clicking and dragging the windows edges. Make if full screen in the current monitor by right-clicking in the video area and selecting Full screen. Do the same to restore it to normal size. This window can also be opened and made full screen automatically through settings in the Video Track Playback Properties window. Lamp Tracks Lamp tracks contain lamp effects dragged over from the Lamp Effects folder of the Project Window. Lamp Track Panel The figure below shows the function of each item in the lamp track panel. Pin track to page Click this icon to pin this track to its current location on the page. As you scroll the tracks up and down, this track will remain fixed. Disable lamp playback Click this icon to disable playback of lamp effects on this track. Solo play When enabled, only this lamp track will be active during playback. No other lamp track will play. Lock track Lock track to changes. Track main lamp level slider Adjust the overall level of lamp effects on this track. If a lamp track has no fixtures linked to it, the lamp icon will appear grayed, like this: soon as a fixture is added to the track, it will assume its yellow color: Double-click on the . icon to bring-up the Lamp Track Properties window. . As Lamp Track General Properties Track Name Enter the track name to be displayed in the track panel. Lock track Check box to lock-out track to changes. Lamp Track Channel Properties The channel tree shows which channels are currently linked to the lamp track. It has includes three folders: Channels: Contains channels that were added to the track independent of their fixtures. Also referred to as “orphaned” channels. Fixtures: Contains fixtures linked to the lamp track. Groups: Contains groups linked to the lamp track. A single channel, fixture or group can be added to as many tracks as you like. However it can be added to a specific track only once. Furthermore groups in the Group folder cannot contain fixtures also found in the Fixture folder, nor can the Fixture folder contain channels already in the Channels folder. Put simply: There can be no duplicate channels within the same track. Fortunately, VenueMagic keeps track of all that for you so you don’t have to worry about it. VenueMagic prevents you from breaking the rules. To select/remove channels, fixtures and groups to be included in the track, click on the Select Channels… button to bring up the Select Channels window. Click the Settings… button to show the Lamp Track Channel Settings window. You can also add channels, fixtures and groups to a lamp track by dragging them over from the Fixtures and Channel Groups folders in the Project Window. Lamp Track Channel Settings Starting level source Specifies the initial level of a channel in the track when the timeline starts playback from the beginning. Fixed value: Channel starts with the level specified in the Start level (%) field. Current level at timeline start: Whatever level the lamp is currently at when the timeline begins playback is where it will start. This is useful when you want one timeline to continue where another left off. Start level of first lamp effect: Allows you to set the initial lamp level for the channel in the track using a Level Control lamp effect. Start level (%) Set the starting level for the channel within the track. Available only when Fixed value option is selected. Merge mode The merge mode setting lets you select how the channel will be affected by this track only (see Fixture Channel Merge Modes). For instance, if Scale is selected, then lamp level commands for this channel coming from this track will be merged as Scale, rather than the channel default. When set to Default, the default channel merge mode is used. (see Edit Fixture Settings). Replacing Lamp Track Channels & Fixtures (Only Available for VenueMagic Classic and above) VenueMagic will let you replace a channel or fixture that has been added track with a fixture or channel that is not part of the track. Select the fixture or channel that you would like to replace and click the Replace button. This will bring-up the Select Item Replacement wizard. Replacing Track Channels If a channel was selected to be replaced, then the Select Item Replacement wizard will appear as above. In the list on the left is the channel you selected to replace. On the right is a list of all of the channels that are not currently part of the track. Simply check the channel in the list on the right that will replace the selected channel and click Finish. You will immediately see the message: Click Yes to close the Lamp Track Channel Properties window and activate the replacement. Or click No to activate the changes later when you close the window. The important thing to remember is that the changes will not be reflected in the Lamp Track Channel Properties window until after it has been closed. It is always recommend that you click Yes to this message. Replacing Track Fixtures If a track fixture was selected to be replaced, then the Select Item Replacement wizard appears as above with the selected fixture on the left, and a list of available fixtures (not currently attached to this track) on the right. Check the fixture in the list on the right that you wish to replace your selected fixture with and click Next. VenueMagic will also allow you to select multiple fixtures to replace a single fixture, effecting splitting the fixture up. After clicking next, the Selecting Channel Replacements window comes up. Selecting Track Channel Replacements The Select Channel Replacements window shows two lists. List 1 (on the top) shows the selected fixture on the left side and the fixture chosen to replace that fixture (in the Select Item Replacement window) on the right. If multiple fixtures had been chosen as replacements, then there would be a list item for every replacement. Click on the replacement item in List 1, and you will notice that List 2 (on the bottom) is filled with suggested channel replacements across the two fixtures. If you don’t like VenueMagic’s suggestions, you can select and drag items on the right side to lined them up with the desired replacements on the right. Unused channels on the right are placed below the assigned channels in the section labeled Unassigned channels. VenueMagic color codes the items in the list as follows: Green Yellow Red Mapping is across identical channel types. For example, a channel of type dimmer is mapped to another channel of type dimmer. The mapping is across different, but technically compatible channels. An example of this would be mapping a dimmer channel to a gobo wheel channel. Mapping is illegal. This occurs when you attempt to map a compound channel (such as RGB) to a channel that is not same type (such as position). When you have finished arranging channel replacements to you liking, click Finish. You will see the message: Click Yes to close the Lamp Track Channel Properties window and activate the replacement. Or click No to activate the changes later when you close the window. The important thing to remember is that the changes will not be reflected in the Lamp Track Channel Properties window until after it has been closed. It is always recommend that you click Yes to this message. Lamp Track Envelope Properties Select which envelopes in the track are to be shown in the track. It the number selected exceeds the maximum specified in the Timeline Options window, other envelopes will be deselected, starting with the least recently selected envelope. If you don’t want lamp level lines to be drawn between clips, uncheck the Draw lamp levels between clips box. Click the Set Color button to set the color that the envelope will be displayed in the timeline and the Envelope Editor window. Lamp Track External Control Properties Control slider level with external device Enables the track panel’s main lamp level control slider to be controlled by an external source. Click the Select… button and choose an input source in the Select External Control window. Allow mouse control of slider When the main lamp level slider is being controlled by an external source, it my not make sense to allow the mouse to control it at the same time. Uncheck this box to lock-out the mouse from controlling the slider. Lamp Track Notes Enter notes about the lamp track. Level Control A Level Control lamp effect gives you full control of channel levels in a track by utilizing the Envelope Editor to edit channel level profiles. Level Control General Properties Name Enter the name that will appear on the clip in the timeline window. By default, this will always be “Level Control”. Enable playback Check this box to enable playback of the clip. Uncheck it to disable lamp control by this clip during timeline playback. It is checked by default. Lock clip Check this box to lock the clip onto the timeline. Locked clips cannot be moved or resized. Scale envelopes on resize Check this box and envelope handles will be scaled horizontally when the Level Control clip is resized. Level Control Setup Recording Properties (Only Available for VenueMagic DMX+AV and above) This window allows you to setup channels for real-time recording of DMX, MIDI and Joystick control. By default, all of the channels associated with a Level Control lamp effect are controlled by envelopes that are designed by the user in the timeline or in the Envelope Editor. Setting –up selected channels to be “recordable” will enable you perform real-time recording of those levels during timeline playback. Selecting Channels to Record The Select recordable channels list shows all of the output channels available to this Level Control effect. Check the box on those that you wish to record. Checked items will appear in the Select channels to record list. In this list, check those channels you wish to record during timeline playback. Unchecked channels will not be recorded, but will playback their pre-recorded data (if any) when the timeline is run. Selecting Inputs to Control Recorded Channels Perhaps a little clarification is needed at this point. The channels you have selected for recording are actually output channels, not input channels. In the end, what we really need to record are the input channels that are controlling the output channels. In order to do this, we must specify which external input channel is controlling a “recordable” output channel while it is being recorded. Select an output channel in the Select channels to record list and click on the Select Input button. This brings up the Select External Control window from which you can select an input channel to control selected output channel. While the timeline is recording, this will function similarly to the Channel Router in that the each output channel will be controlled directly by the associated input channel. Copying Inputs from Channel Routing If you have already setup the Channel Router and would like to use the same inputs for recording, click on Match Inputs From Channel Routing. This will reassign all of the recording channels to match the inputs currently setup in the channel router. If a record channel is not referenced in the Channel Router, it is left alone. Note: in Channel Routing, multiple inputs can affect a single output channel. Recording does not allow this. If multiple inputs are found for the record channel, you will be prompted to select the desired one from a list. Importing Profiles into Level Control Channels Import previously exported profiles into channels by selecting the channels to be imported to in the Select channels to record list, and then clicking Import Profile. Select the profile file and click OK to bring-up the Load Profile Channels window which will have populated the record channel list with the channels selected in the Select channels to record list. Recording Channels Check the Enable recording box to enable recording for this clip. When you close the Level Control Properties window, you will find that the Level Control clip title bar has changed colors (to red) and the clip title now includes “(Record ENABLED)”. You can also enable recording by right clicking on the clip and selecting Record Channels. Or you can click on the button in the timeline toolbar. This will enable recording for all selected Level Control Clips, as long as recording has been setup for each of them. When you run the timeline, the title text changes to include “(Record WAITING)”. As soon as recording is triggered (see Level Control Record Triggering Properties), the clip’s appearance changes to: Now run the timeline. Recording of the selected channels will begin when the timeline time cursor reaches the clip. When timeline playback stops, the new recorded data appears in the clip. Record Lock When the timeline stops after a recording, the clip is automatically taken out of record mode. This is done to prevent accidentally recording over data. If you want clips to remain in record mode after the timeline stops, can click on the record lock button in the timeline toolbar. For more information on real-time recording, see Real-time Recording and Editing of Channels. Level Control Record Triggering Properties Selecting a Record Trigger Various options are available for triggering the start and stop of recording during playback. Start Recording Triggers Timeline playback Recording begins immediately when the timeline is run. Manual (Ctrl-R) Recording is toggled on/off (while timeline is running) using the Ctrl-R key combination. This functional is actually available in all modes. First data change (auto punch-in) Recording begins when the first input data is received. In other words, if you are controlling channels with several sliders, moving one of the sliders will start recording for the whole clip. Timeline marker Recording begins at the selected timeline marker. If you start playback after the specified marker, recording starts immediately. (see Timeline Marker) External Ctrl Select and external control to trigger start of record. (see Selecting External Input Devices). Stop Recording Triggers Manual (Ctrl-R) Recording is toggled on/off (while timeline is running) using the Ctrl-R key combination. This functional is actually available in all modes. Timeline marker Recording stops at the selected timeline marker. (see Timeline Marker) External Ctrl Select and external control to trigger record stop. (see Selecting External Input Devices). Level Control Notes Properties Enter notes about the level control effect. Snapshot Channels (Only Available for VenueMagic Classic and above) You can “snapshot” the current output level of all channels controlled by a Level Control lamp effect by right-clicking on the Level Control effect and selecting Snapshot channels. Or you can click on the icon in the timeline toolbar. This function is available in both the timeline editor and the envelope editor. This function is especially useful when you wish to set all of the lamp levels, head positions, etc… manually (you must setup channel routing to do this) and then capture the position for use in a timeline. The Snapshot Channel Levels box will list all of the channels controlled by the Level Control. Check those channels you wish to snapshot. Check the Copy to FIRST handle box if you wish to copy the captured channel values to the first handle in the Level Control’s envelope that corresponds to each channel. This option is available only to the first Level Control effect on the track. In addition to this, only channels with the starting source level set to Start level of first lamp effect will be copied. Uncheck this box if you do not want to copy any channel values to the first handles. Check the Copy to LAST handle box if you wish to copy the captured channel values to the first handle in the Level Control’s envelope that corresponds to each channel. This option is always available and will copy all channels controlled by the Level Control effect. Check the Copy at time cursor box if you wish to insert new handles with the captured channel values at the current time cursor position. This option only available if the timeline time cursor is inside the Level Control effect. The Curve type box lets you select the curve type that will be associated with the captured points. Select from Step, Linear, and Spline (see Envelope Editor). Lamp Chaser Lamp chasers are very powerful and exciting feature of VenueMagic. VenueMagic lets you select from a library of over 100 chaser sequences, or you can create your own with VenueMagic’s easy-to-learn (can you spare 1-2 minutes?) chaser sequence development language in the Lamp Chaser Library. Lamp Chaser General Properties Name Enter the name that will appear on the clip in the timeline window. By default, this will always be “Lamp Chaser”. Enable playback Check this box to enable playback of the chaser. Uncheck it to disable lamp control by this chaser during timeline playback. It is checked by default. Lock clip Check this box to lock the clip onto the timeline. Locked clips cannot be moved or resized. Lamp Chaser Setup Properties Chaser program Select a chaser sequence program from VenueMagic’s library of over 100 sequences. Parenthetically, to the right of the chaser program name, is additional information about the sequence: N lamps: where N is the number of lamps the sequence was designed to accommodate. If you have more lamps than specified, the sequence will repeat every N lamps. N beats: where N is the number of beats in this sequence. In other words, the sequence will repeat every N beats. Sample An animated sample of the currently selected chaser sequence. The cell names consist of letter-number combinations that specify: Letter A, B, C, etc…: lamp/beat within the sequence. Number 1, 2, 3, etc…: repetition of sequence within the track channels. Enable auto-beat sync (Only Available for VenueMagic Classic and above) Enable the auto-beat sync feature for this lamp chaser. Checking this box is the first step to automatically synchronizing a lamp chaser to the beat of an audio file (see Lamp Chaser Auto Beat Synchronization). Advanced… button Opens the Advanced Auto-Sync Settings dialog window. Show beat markers Displays chaser sequence beat markers on the lamp chaser clip in the timeline. Even when enabled, beat markers will not show if the timeline display time range is too large. Auto-beat sync enabled: Speed Move the slider to set the chaser speed in beats per minute. You can also enter a BPM value manually in the adjacent field. Active only when Autobeat sync is not checked. Brightness: Auto-beat sync disabled: Tap: Check this box and the chaser will follow the beat tapped-into the Beat Tapper. All other speed settings are ignored. Env.: Checking this box will enable envelope control of the chaser speed. The envelope value (0-100%) will vary the chaser speed between 0 BPM and the value set in the speed field. Ext.: Check to enable external control of the speed. Behaves similarly to envelope control. Once enabled, external control must be setup in the Lamp Chaser External Control Properties window. Functions similarly to the Speed setting, except brightness control is active regardless of whether Auto-beat sync is checked or not. Lamp Chaser Channel Order Properties If your chaser lamps are flashing out of order, you can reorder them by dragging them around the Chaser Channel list. For explanation of the codes in the Sequence (Seq) column, see Lamp Chaser Setup Properties. If you don’t want a channel included in the chaser sequence, drag it into the Excluded Channels list. When a lamp chaser is first added to a lamp track (or when more channels are added to the track) the chaser will automatically exclude all channels except dimmer and RGB type channels (see Fixture Channel Types). If you actually wish to include these channel types, you will need to drag back into the Chaser Channel list yourself. Click the Reorder by DMX Address button to reorder the channels in the lamp chaser by DMX address. This is useful if you have rearranged fixtures in the Add Fixtures window and would like to quickly rearrange the chaser’s channel order. It is also useful if you need a quick way to reset channel ordering to the default. Lamp Chaser External Control Properties Chaser Speed external source: External control of lamp chaser Speed function. Click Select… button to open Select External Control dialog window. External control will scale the chaser speed between 0 bpm and the speed set in the Lamp Chaser Setup Properties window. External control of the speed must be also enabled in the same window. Chaser Level external source: Selects external control of chaser lamp level. Functions similarly to Chaser Speed external source above. Lamp Chaser Notes Enter notes about the lamp chaser. Lamp Chaser Auto Beat Synchronization (Only Available for VenueMagic DMX+AV and above) A powerful feature of lamp chasers is the ability to automatically synchronize to the beat of music in an audio file. This can be done by following these steps: 1. Select an audio file from the Audio folder in the Project Window and drag it into an audio track on the timeline. It is important the music you select has a clearly distinguishable beat. 2. Drag the Lamp Chaser from the Lamp Effects folder in the Project Window into a lamp track. 3. Double-click on the lamp chaser clip on the timeline to bring-up the Lamp Chaser Properties window and select the Setup tab. 4. Select a desired chaser program and then check the Enable auto-beat sync box. Now click OK. The chaser clip should now look something like this: Note the word “Unsynched” in the chaser clip title bar. This tells you that auto-beat sync is enabled, but the chaser hasn’t been synched yet. 5. In the timeline, identify the start of the beat in the audio file and line-up the beginning of the chaser clip to that beat as shown below: This tells the beat detector which beat you want to sync to. (Note: you may need to expand the timeline to get a closer view using the buttons in the timeline toolbar.) 6. Now, select both the chaser clip and the audio clip (click on one to select it, then click on the other while holding down the CTRL key to select both). 7. Right-click on the chaser clip and select Sync Chaser BMP. This will bring up the Sync Chaser Beat dialog window. For now, just click OK. After a few seconds, you should see a message that looks like this: Click OK. Your chaser clip should now low something like this: You are now synched-up and ready to go! Auto Synching Problems VenueMagic will do the best it can to detect the beat of the selected music and sync to it. If the music does not have a clearly distinguishable beat or if the beat is erratic or changing, VenueMagic may not get it exactly right. It may not be able to find the beat at all, in which case you will see the message: If VenueMagic has trouble finding the beat, you may try some or all of the following: 1. Try breaking the music into sections by inserting a different chaser clip for each section. This is especially useful for songs that change tempo a lot. The beat detection function searches for the most prominent beat across the length of the music corresponding to the chaser clip and applies it to the whole chaser clip. It will not detect and sync to tempo changes along the same chaser clip. 2. Change the Minimum BPM in the Advanced Auto-Sync Settings dialog window. This value tells VenueMagic where to look for the most prominent beat. This value defaults to 45 bpm. Many songs will apply a strong beat at the beginning of a rhythmic pattern which could confuse beat detection and give you a very low BMP (10-20 or even lower) if this limit is set too low. However, in some cases, the may be the only beat VenueMagic is able to lock on to. Try lowering the number in degrees and testing the results. You can then speed up the tempo by setting the Multiply by scaling value in the Sync Chaser Beat window. 3. In very rare occasions VenueMagic may be able to extract a beat from rhythmic patterns that occur above the actual beat of the song. Change the Maximum BPM in the Advanced Auto-Sync Settings to a higher value and see what happens. You can then slow down the beat by setting the Divide by scaling value in the Sync Chaser Beat window. 4. Sometimes VenueMagic is able to identify the tempo (BPM) of the song, but can’t quite lock on to the precise beat. Try varying the Beat lock margin value in the Advanced Auto-Sync Settings window by small amounts ad see if it helps. The beat detection functions works in two steps: First, it identifies a tempo based on the most prominent beat. Then it tries to lock-on to the strongest audio “pulse” in the vicinity of where it predicts the actual beat should be. This helps adjust for minor (usually imperceptible) tempo variations within the music. The Beat lock margin tells VenueMagic how far to stray from the predicted beat position to find the actual beat. 5. Some songs may confuse the beat lock function even though the BPM calculation is fairly accurate. You can disable this feature by un-checking the Auto-beat lock box in the Advanced Auto-Sync Settings window. Keep in mind that this may cause the chaser beat to drift out of sync with the music over time. Use multiple chaser clips to periodically “resync” the chaser beat by manual adjustment of each chaser clip position. 6. When all else fails, you may need to sync to the beat the old fashioned way. Uncheck the Enable auto-beat sync box in the Lamp Chaser Setup Properties window. Then, through trial and error, adjust the chaser speed manually until you have a close match. Again, it may be necessary to use multiple chaser clips so that you can re-sync periodically. With auto-beat sync disabled, your chaser clip will look something like this: Sync Chaser Beat This dialog comes up when the Sync Chaser BMP… pop menu option is selected from the timeline (see Lamp Chaser Auto Beat Synchronization). After setting the desire parameter(s), click OK to begin beat detection. Audio file: Shows the path of the audio file chaser will be synched to. Start time: The start time of the lamp chaser clip with respect to the beginning of the audio clip. This field is not editable. Length: The length of the chaser clip. This field is not editable. Scaling After the tempo of the audio file is detected, it can be scaled to make the chaser beat faster of slower. Select from the following: No scaling: Do not perform any scaling of the detected tempo. Multiply by: Multiply detected tempo by the specified amount to make the beat faster. Divide by: Divide detected tempo by the specified amount to make the beat slower. Note: Scaling the chaser beat will have no effect on the actual tempo of the music. Advanced Auto-Sync Settings This dialog window is opened by the Advanced… button in the Lamp Chaser Setup Properties window. For more explanation of the settings in this window, see Auto-Synching Problems. Minimum BPM: Specifies the lowest tempo in beats per minute that VenueMagic will consider while attempting to detect the tempo and beat of a music file. Maximum BPM: Specifies the highest tempo in beats per minute that VenueMagic will consider while attempting to detect the tempo and beat of a music file. Auto-beat lock Checked by default. Uncheck this box to disable the auto beat-lock feature of the VenueMagic beat sync function. Beat-lock margin: How far the beat-lock function will stray from the predicted beat position to attempt to locate the actual beat. Value is a percentage of the calculated beat length. Lamp Chaser Library (Only Available for VenueMagic Classic and above) The Lamp Chaser Library provides a quick and easy way to create custom chaser programs. VenueMagic provides a simple, text-based chaser sequence design code that is both powerful and easy to learn. The following steps summarize the process of creating a chaser program: 1. Click the New button under the Chaser program list to add a new chaser program to the list called “Lamp Chaser”. You will note that the new program is selected and in “edit mode” so that you can type in your own name for the chaser. If you wish to change the name at a later time, select the program in the list by clicking on it, then click on it again to re-enter edit mode. 2. Click in the Chaser Program Editor and enter code for the chaser program. 3. Click on the Compile button to compile and plot the chaser program. If there are no errors, the Program Compile Results window will show “Success, followed by the number of characters in the code, how many channels are in the sequence, and how many periods (beats) are in the sequence. The Chaser Preview Window shows an example of what the chaser will look like. Writing Chaser Program Code Writing chaser code is simple. First, the letters of the alphabet (A, B, C, to Z) represent lamps. This will allow your programs to include up to 26 lamps. Letters cannot be skipped. In other words, if you wish to program a sequence using 4 lamps, you must use A, B, C & D. Cycles and Periods A chaser program represents a repeating sequence called a cycle. A cycle is divided segments called periods, which are represented by the dash (“-“) character. A chaser program is simply a collection of different lamp patterns for each period in a cycle. So, a basic chaser that flashes four lamps in sequence, one after another, will look like this: A-B-C-D Suppose you wanted the lamps A and B to be on simultaneously, followed by C and B turned on simultaneously. Here’s the code that would accomplish this: AB-CD Pretty simple? Try to figure out this program: A-AB-ABC-ABCD-BCD-CD-DQuarter Periods The forward slash (“/”) represents ¼ of a period. What do you thing the program below will do? Try it. (note that spaces and carriage returns are ignored): A/B/C/D/ A//B//C//D// A///B///C///D/// A-B-C-D Chaser Pulse Width You will notice the even though we are using quarter periods, the lamps stay on for a whole period, making a confusing mess. The time a lamp remains on is called the pulse width. You can change the pulse width using the command: [Wn] (pulse width) where n is a number between 0-100 specifying the pulse width as a percentage of a period. Let’s try our last program a little differently. [W25] A/B/C/D/ [W50] A//B//C//D// [W75] A///B///C///D/// [W100] A-B-C-D Rise Time & Fall Time Make the lamps dissolve on and off by changing the rise and fall time using the commands: [Rn] [Fn] (rise time) (fall time) where n is a number (0 – 100) specifying the rise/fall time as a percentage of the pulse width. Example: [W50][R25][F25] A-B-C-D Lamp Level Scale the lamp level using the command: [Ln] (lamp level) where n is a number (0 – 100) specifying the lamp level. Example: [W50][R25][F25] [L100]A-[L50]B-[L100]C-[L50]D Built-in Lamp Effects In addition to Level Control and Lamp Chaser effects, VenueMagic provides an assortment of specialized built-in lamp effects designed to display specific effect patterns. Internally, these lamp effects are actually based on mathematical equations and are intended to simulate lighting “phenomena” such as lightning, candlelight, sunrise/sunset, explosions and a lot more. There are also effects designed to control moving light fixtures to draw circles, figure-8’s random patterns, etc… VenueMagic’s Built-in Lamp Effects library is always growing, and you can download new libraries as they come from the VenueMagic website. Built-in Lamp Effect General Properties The appearance of the built-in lamp effect’s General Properties dialog window will appear different for each different lamp effect. However, the setting fields remain constant. This window is for the Candelabra Effect, but the descriptions below apply to all lamp effects. Name Enter the name that will appear on the clip in the timeline window. Enable playback Check this box to enable playback of the clip. Uncheck it to disable lamp control by this clip during timeline playback. It is checked by default. Lock clip Check this box to lock the clip onto the timeline. Locked clips cannot be moved or resized. Built-in Lamp Effect Settings Properties The appearance of the Lamp Effect Settings Properties dialog window will appear different for each different lamp effect. This window is for the Candelabra Effect, but the descriptions below apply to all lamp effects. Channel: This list contains all of the channels currently linked to the track in which the Lamp Effect clip resides. They are listed in alphabetical order. Select the channel for which you would like to modify lamp effect settings. Selecting [Global Settings] at the top of the list will allow you to modify settings that will affect all of the channels together. Select type: Choose a lamp effect variation type for the selected channel. Each VenueMagic lamp effect offers one or more variations of the effect that can be applied to a specific channel. For example, for effects that depend on lamp color (such as in the Sunrise RGB and Sunset RGB effects), a type will be provided for each colored lamp. Another example is when effects that require coordination between two motion axes (such as the in the Circle effect). There is one variation type for the Pan axis and one for the Tilt axis (or X & Y axes for scanning lamp heads). When a lamp effect is first added to a track, or when additional channels are added to the track thereafter, VenueMagic will do its best to automatically select the right type for the right channel based on the channel’s type (see Fixture Channel Types). Afterwards, you can go through the list and make any changes you feel are necessary. If you want a channel to be unaffected by the lamp effect, select None. Select parameter to set: This list show all of the parameters associated with the selected variation type. Select the one you wish to modify. Parameter value: Change the value of the selected parameter by moving the slider, or by entering the value directly into the field. Set parameter with envelope: Most of the lamp effects will allow you control certain parameters using envelopes. Check this box to enable envelope control of the selected parameter. Ext. ctrl. Lamp effect parameters can be also be controlled in real-time by an external input. To enable this, check this box then click Select to bring-up the Select External Control window. Checking this box also disables setting the parameter with an envelope. Ending lamp value: Some lamp effects use a random value generator to create its effect. This means that the final channel level at the end of the clip is unpredictable. Set this value (0-100) to force the final channel level to the desire value. Lamp Effect Help… Click this button to bring-up a help window specific to this lamp effect. Built-in Lamp Effect Channel Order Properties Some lamp effects use the channel sequence number to vary the effect (such as in the Pan Wave and Tilt Wave effects). This makes channel order important. Rearrange the channel order by dragging them in around in this window. Note: the sequence number column (Seq) represents the sequence within the lamp effect. As you reorder channels, this column will not change. Click the Reorder by DMX Address button to reorder the channels in the lamp effect by DMX address. This is useful if you have rearranged fixtures in the Add Fixtures window and would like to quickly rearrange the chaser’s channel order. It is also useful if you need a quick way to reset channel ordering to the default. Built-in Lamp Effect Notes Enter notes about the lamp effect. Event Tracks (Only Available for VenueMagic Classic and above) Event tracks contain events that have been dragged over form the Events folder of the Project Window. Event Track Panel The figure below shows the function of each item in the event track panel. Pin track to page Click this icon to pin this track to its current location on the page. As you scroll the tracks up and down, this track will remain fixed. Disable events Click this icon to disable playback of events on this track. Solo play When enabled, only this event track will be active during playback. No other event track will play. Lock track Lock track to changes. Enable real-time event recording Enables real-time recording of events for this track. (See Realtime Recording of Events). Event Track General Properties Track name Enter the track name to be displayed in the track panel. Lock track Check this box to lock out any changes to track Event Track Event Properties Disable events Check to disable events on this track. Preload “Run Timeline” events Check this box if you would like VenueMagic to pre-load the timelines specified by all of the track’s “Run Timeline” events at the beginning of playback. This will ensure greater accuracy for the triggering of these timelines at their designated times. The trade-off is that if there are many “Run Timeline” events there may be a delay between running the parent timeline and the actually start of playback. If accuracy is not important, leave this box unchecked. Event Track Notes Enter notes about the event track. Cue List Command Event The Cue List Command event executes one of several commands that effect execution of a single item or all items of the Cue List. Cue List Command Event General Properties Event type: Describes the event type. In this case it is a Cue List Command event. Event name: The name of the event as it will appear in the status bar and in tool tips when the mouse cursor passes over the event. Marker shape: Select a desired shape for the event marker. Event markers are not resizable (as are audio clips and lamp effect clips) because they are executed at a specific instance in time rather than over a range of time. Set Marker Color… Choose a color for the marker. When event markers are first dragged button into an event track they appear in a dark gray color. This indicates that the event has not yet been setup. After it has been setup, is assumes its proper color. Trigger on postevent start time. When this is checked, the event will trigger immediately if playback is started after the event. If unchecked, the event will only trigger at the event. Playback must start before or on the event. Enable playback Uncheck this box to prevent the event from triggering during playback. Lock clip Check this box to lock the clip onto the timeline. Locked clips cannot be moved or resized. Cue List Command Event Properties Select a Cue List command from the Cue list command selector box. Some of the commands are directed to all of the cue items currently running in the Cue List. Other commands affect a specific item in the list, so a name is required in the Cue list item name field. This name is the name that appears in the Cue column of the Cue List when a cue is running, and is set in the Name in Cuelist field in the Timeline Playback Options window for timelines, or the Playlist Playback Options for playlists. For audio files, it will be the name of the file, with extension (for example, “MySong.wav”). The Play Audio Event and the Run Timeline Event allow you to change the name for audio files and timelines triggered by those events. Cue Buttons also allow this. The following list shows the available commands and their descriptions: Stop item Stop playback of specified item and remove it from the cue list. Pause item Pause playback of specified item in the cue list Resume item Resume playback of a specified item that is currently paused. End loop If a specified item is playing in a loop, this event will prevent the item from looping after the current playback. Stop all Stop playback of all items and remove them from the cue list. Pause all Pause playback of all items in the cue list. Resume all Resume playback of all paused items in the cue list. End all loops Any items in the cue list that are playing in a loop will stop at the end of the current playback. Mute all Mute all sound. Unmute all Unmute all sound. Disable lamps Disable all lamp control. Enable lamps Enable all lamp control. Cue List Command Event VMNet Properties With Send to VMNet remote checked the Cue List Command event is routed to a VMNet server on the network by way of the selected client (see VMNet, Project VMNet Settings). Cue List Command Event Conditions Setup event trigger conditions (see Event Conditions). Cue List Command Event Notes Enter notes about event. Event Table Event The Event Table event executes an event in the Event Table. This allows you to reuse events that you have already created and added to the event table. Event Table Event General Properties Event type: Describes the event type. In this case it is a Event Table event. Event name: The name of the event as it will appear in the status bar and in tool tips when the mouse cursor passes over the event. Marker shape: Select a desired shape for the event marker. Event markers are not resizable (as are audio clips and lamp effect clips) because they are executed at a specific instance in time rather than over a range of time. Set Marker Color… button Choose a color for the marker. When event markers are first dragged into an event track they appear in a dark gray color. This indicates that the event has not yet been setup. After it has been setup, is assumes its proper color. Trigger on postevent start time. When this is checked, the event will trigger immediately if playback is started after the event. If unchecked, the event will only trigger at the event. Playback must start before or on the event. Enable playback Uncheck this box to prevent the event from triggering during playback. Lock clip Check this box to lock the clip onto the timeline. Locked clips cannot be moved or resized. Event Table Event Properties The Select event drop-down lists all of the events currently defined in the Event Table. Select the event that you would like the Event Table Event to execute. Check the Ignore event condition box if you would like the conditions associated with the event in the event table to be ignored. Checking this box does not affect the conditions defined for the Event Table Event. Event Table Event Conditions Setup event trigger conditions (see Event Conditions). Event Table Event Notes Enter notes about event. MIDI Out Event A MIDI Out event will send a stream of MIDI commands out the default MIDI out port (see MIDI Device Setup). MIDI Out Event General Properties Event type: Describes the event type. In this case it is a Midi Out event. Event name: The name of the event as it will appear in the status bar and in tool tips when the mouse cursor passes over the event. Marker shape: Select a desired shape for the event marker. Event markers are not resizable (as are audio clips and lamp effect clips) because they are executed at a specific instance in time rather than over a range of time. Set Marker Color… button Choose a color for the marker. When event markers are first dragged into an event track they appear in a dark gray color. This indicates that the event has not yet been setup. After it has been setup, is assumes its proper color. Trigger on postevent start time. When this is checked, the event will trigger immediately if playback is started after the event. If unchecked, the event will only trigger at the event. Playback must start before or on the event. Enable playback Uncheck this box to prevent the event from triggering during playback. Lock clip Check this box to lock the clip onto the timeline. Locked clips cannot be moved or resized. MIDI Out Event Properties MIDI Messages A list of MIDI messages that will be sent out, in order, when the event is triggered. Add… Add a message to the list. Brings up the Select MIDI Message dialog window. Edit… Brings up the Select MIDI Message dialog to modify the selected midi message. Remove Remove selected message(s) from the list. Move up Move selected message up in the list. Move down Move selected message down in the list. Route to MIDI input Sends the command to VenueMagic’s MIDI input processor in addition to the MIDI output. This is useful if you are controlling a MIDI output with a VCS slider and you need the slider to know if an event has sent a message to the same MIDI control. MIDI Out Event Select Midi Message Select a MIDI message type in the Message type box. The rest of the dialog will modify itself adding or removing fields to allow for appropriate data entry for the selected type. Click Capture MIDI Message to bring up the Capture MIDI Message window. Capture MIDI Message This window provides a real-time display of the most recent MIDI messags received over the default MIDI input device (see MIDI Device Setup). Click OK to capture the currently displayed message and send it back to the Select MIDI Message window. Click the Monitor Midi… button to bring up the MIDI Monitor window. MIDI Out Event Conditions Setup event trigger conditions (see Event Conditions). MIDI Out Event Notes Enter notes about event. Multi-Event Event The Multi-Event event executes multiple events at once. Multi-Event Event General Properties Event type: Describes the event type. In this case it is a Multi-Event event. Event name: The name of the event as it will appear in the status bar and in tool tips when the mouse cursor passes over the event. Marker shape: Select a desired shape for the event marker. Event markers are not resizable (as are audio clips and lamp effect clips) because they are executed at a specific instance in time rather than over a range of time. Set Marker Color… button Choose a color for the marker. When event markers are first dragged into an event track they appear in a dark gray color. This indicates that the event has not yet been setup. After it has been setup, is assumes its proper color. Trigger on postevent start time. When this is checked, the event will trigger immediately if playback is started after the event. If unchecked, the event will only trigger at the event. Playback must start before or on the event. Enable playback Uncheck this box to prevent the event from triggering during playback. Lock clip Check this box to lock the clip onto the timeline. Locked clips cannot be moved or resized. Multi-Event Event Properties Adding, Removeing and Editing Events in the List Insert events into the event list by clicking Add, to bring-up the Select Event window. Select the desired event, click OK, then setup the event. Events are added to the list show the name of the event in the Event Name column and a brief description of the event settings in the Type column. You can change the name of an event by first selecting the event in the list, and then clicking the text in the Event Name column for the selected event. Now type in a new name for the event and press the Enter key. Remove one or more events from the list by first selecting them and then clicking on Remove. Modify the settings of the selected event by clicking on Edit. Re-ordering Events in the List The listed events are executed in the order they appear in the list. To change the position of an event in the list, select the event, then use the and down in the list. buttons to move the selected event up Important note: Events in the list should not have conditions that depend on other events in the list because the results will be unpredictable. For example, if the condition settings of Run Timeline event in the list depends on a variable being set by another event in the list, it may not function as expected. This is because the conditions for all events in the list are evaluated before any events in the list are executed. Multi-Events in the Event Status Window Normally, multi-events take up a single line in the Event Status window. If you would like all of the events in a multi-event to appear in the window, check the Show sub-events in Event Status window box. Multi-Event Event Conditions Setup event trigger conditions (see Event Conditions). Multi-Event Event Notes Enter notes about event. Play Audio Event The Play Audio event will play a selected Wave (.wav), MP3 (.mp3), Windows Media (.wma) or MIDI (.mid) file by sending it to the Cue List. The selected file does not have to be included in the Audio folder of the Project Window. Play Audio Event General Properties Event type: Describes the event type. In this case it is a Play Audio event. Event name: The name of the event as it will appear in the status bar and in tool tips when the mouse cursor passes over the event. Marker shape: Select a desired shape for the event marker. Event markers are not resizable (as are audio clips and lamp effect clips) because they are executed at a specific instance in time rather than over a range of time. Set Marker Color… button Choose a color for the marker. When event markers are first dragged into an event track they appear in a dark gray color. This indicates that the event has not yet been setup. After it has been setup, is assumes its proper color. Trigger on postevent start time. When this is checked, the event will trigger immediately if playback is started after the event. If unchecked, the event will only trigger at the event. Playback must start before or on the event. Enable playback Uncheck this box to prevent the event from triggering during playback. Lock clip Check this box to lock the clip onto the timeline. Locked clips cannot be moved or resized. Play Audio Event Properties Audio file: The path of the file that will be played when the event is triggered. Click Browse… to bring up a file list. You can select any selected Wave (.wav), MP3 (.mp3), Windows Media (.wma) or MIDI (.mid) file. The selected file does not have to be included in the Audio folder of the Project Window. Master volume: Enter a value (0-100%) for the master volume applied to the file during playback. Name in Cuelist: Enter the name that will appear in the Cue column of the Cue List while the audio file is being played. Play looped: Check this box to play audio file in a loop. Play one only: If this box is checked, the event will not play the audio file if the same file is already playing in the Cue List. Play Audio Event Conditions Setup event trigger conditions (see Event Conditions). Play Audio Event Notes Enter notes about the event. Run Timeline Event The Run Timeline event will execute any timeline that is part of the current project by placing it into the Cue List. Run Timeline Event General Properties Event type: Describes the event type. In this case it is a Run Timeline event. Event name: The name of the event as it will appear in the status bar and in tool tips when the mouse cursor passes over the event. Marker shape: Select a desired shape for the event marker. Event markers are not resizable (as are audio clips and lamp effect clips) because they are executed at a specific instance in time rather than over a range of time. Set Marker Color… Choose a color for the marker. When event markers are first dragged button into an event track they appear in a dark gray color. This indicates that the event has not yet been setup. After it has been setup, is assumes its proper color. Trigger on postevent start time. When this is checked, the event will trigger immediately if playback is started after the event. If unchecked, the event will only trigger at the event. Playback must start before or on the event. Enable playback Uncheck this box to prevent the event from triggering during playback. Lock clip Check this box to lock the clip onto the timeline. Locked clips cannot be moved or resized. Run Timeline Event Properties Select timeline: Select a timeline to run when the event triggers. This box will only offer timelines that are found in the Timeline folder of the Project Window. If this event is setup as a VMNet remote event, a selection will not be offered. Rather, the user will have to enter in the name of the remote timeline manually. Master volume: Enter a value (0-100%) for the master volume applied to the timeline during playback. Master lamp level: Enter a value (0-100%) for the master lamp level applied to the timeline during playback. Name in Cuelist: Enter the name that will appear in the Cue column of the Cue List while the timeline is being played. Play looped: Check this box to play the timeline in a loop. Play one only: If this box is checked, the event will not play the timeline if the same timeline is already playing in the Cue List. Play as: (see Cue Button General Properties) Run Timeline Event VMNet Properties Setup VMNet remote event. With Send to VMNet remote checked the Run Timeline event is routed to a VMNet server on the network by way of the selected client (see VMNet, Project VMNet Settings), and will not be executed on the local computer. Run Timeline Event Conditions Setup event trigger conditions (see Event Conditions). Run Timeline Event Notes Enter notes about event. Set Tapper BPM Event The Set Tapper BPM event will change the current beats-per-minute of the VenueMagic beat tapper. Beat Tapper Event General Properties Event type: Describes the event type. In this case it is a Set Tapper BPM event. Event name: The name of the event as it will appear in the status bar and in tool tips when the mouse cursor passes over the event. Marker shape: Select a desired shape for the event marker. Event markers are not resizable (as are audio clips and lamp effect clips) because they are executed at a specific instance in time rather than over a range of time. Set Marker Color… button Choose a color for the marker. When event markers are first dragged into an event track they appear in a dark gray color. This indicates that the event has not yet been setup. After it has been setup, is assumes its proper color. Trigger on postevent start time. When this is checked, the event will trigger immediately if playback is started after the event. If unchecked, the event will only trigger at the event. Playback must start before or on the event. Enable playback Uncheck this box to prevent the event from triggering during playback. Lock clip Check this box to lock the clip onto the timeline. Locked clips cannot be moved or resized. Beat Tapper Event Properties New Beat Tapper BPM Enter a new beats-per-minute value for the beat tapper. When the event is triggered, the BPM output of the tapper will be set to this value. It will remain at this until the user manually taps the beat tapper or another Beat Tapper Event is triggered with a different value. (See Beat Tapper Control.) Beat Tapper Event VMNet Properties Set VMNet remote event. With Send to VMNet remote checked the Beat Tapper event is routed to a VMNet server on the network by way of the selected client (see VMNet, Project VMNet Settings), and will not be executed on the local computer. Beat Tapper Event Conditions Setup event trigger conditions (see Event Conditions). Beat Tapper Event Notes Enter notes about event. Serial Port Output Event (Only available for DMX+AV and above) The Serial Out event is used to send commands over a serial port to an external hardware devices such as a video controller/switcher, etc… Serial Event General Properties Event type: Describes the event type. In this case it is a Serial event. Event name: The name of the event as it will appear in the status bar and in tool tips when the mouse cursor passes over the event. Marker shape: Select a desired shape for the event marker. Event markers are not resizable (as are audio clips and lamp effect clips) because they are executed at a specific instance in time rather than over a range of time. Set Marker Color… button Choose a color for the marker. When event markers are first dragged into an event track they appear in a dark gray color. This indicates that the event has not yet been setup. After it has been setup, is assumes its proper color. Trigger on postevent start time. When this is checked, the event will trigger immediately if playback is started after the event. If unchecked, the event will only trigger at the event. Playback must start before or on the event. Enable playback Uncheck this box to prevent the event from triggering during playback. Lock clip Check this box to lock the clip onto the timeline. Locked clips cannot be moved or resized. Serial Event Properties Select port Select a serial port from the list of ports in the Serial Port List Window. Serial output string Enter a string that is to be output through the selected serial port when the event is triggered. Special control characters can be enclosed in square brackets (i.e: “[]”) either as numerical values, hexadecimal values preceded by the ‘$’ character, or as ASCII mnemonics (see table below). Examples: PLAYSTART [13] [$0d] [CR] : string output : special control character 13 (CR). : special hex character 0d (also CR) : ASCII mnemonic. ASCII Mnemonics: Dec Hex Mnem 0 00 NUL 1 01 SOH 2 02 STX 3 03 ETX 4 04 EOT 5 05 ENQ 6 06 ACK 7 07 BEL 8 08 BS 9 09 TAB 10 0a LF 11 0b VT 12 0c FF 13 0d CR 14 0e SO 15 0f SI Dec 16 17 18 19 20 21 22 23 24 24 26 27 28 29 30 31 Hex 10 11 12 13 14 15 16 17 18 19 1a 1b 1c 1d 1e 1f Mnem DLE DC1 DC2 DC3 DC3 NAK SYN ETB CAN EM SUB ESC FS GS RS US Serial Event Conditions Setup event trigger conditions (see Event Conditions). Serial Event Notes Enter notes about event. Show HTML Event The Show HTML Event will open/close a window for displaying HTML from a URL, and HTML file or HTML text. Only one HTML window can be shown at a time. Show HTML Event General Properties Event type: Describes the event type. In this case it is a Show HTML event. Event name: The name of the event as it will appear in the status bar and in tool tips when the mouse cursor passes over the event. Marker shape: Select a desired shape for the event marker. Event markers are not resizable (as are audio clips and lamp effect clips) because they are executed at a specific instance in time rather than over a range of time. Set Marker Color… button Choose a color for the marker. When event markers are first dragged into an event track they appear in a dark gray color. This indicates that the event has not yet been setup. After it has been setup, is assumes its proper color. Trigger on postevent start time. When this is checked, the event will trigger immediately if playback is started after the event. If unchecked, the event will only trigger at the event. Playback must start before or on the event. Enable playback Uncheck this box to prevent the event from triggering during playback. Lock clip Check this box to lock the clip onto the timeline. Locked clips cannot be moved or resized. Show HTML Event Properties URL Html Html File The name and purpose of this field changes based on what you have selected in the Command options: Show Url: Enter in URL Show Html: Enter in actual HTML code. Show Html File: Click Browse button and select HTML file. Close window: Field is disabled. Browse button Open file window to select HTML file (visible only when Show Html File is selected). Preview Open the HTML window to preview the contents. Command: Select the command that will be executed. The options are: Show Url: Display HTML from a URL Show Html: Display HTML entered into the HTML field. Show Html File: Show and HTML file. Close window: Close the HTML window. Positioning the HTML Window Click preview to open the HTML and display a preview of its contents. Once opened, you can move and resize the window as desired. The Window size and Window position fields will update as you move the window. You can also manually enter the pixel position and size. To force the window to center itself on the screen when it is shown, check the Center box. If you wish an event to change the size and position for the window that was opened earlier by another Show HTML event, you must check the Reset box for size and position, respectively. If these boxes are left unchecked, the size and position of the window will only change when it is closed, then opened again. Show HTML Event VMNet Properties Setup VMNet remote event. With Send to VMNet remote checked the Show HTML event is routed to a VMNet server on the network by way of the selected client (see VMNet, Project VMNet Settings), and will not be executed on the local computer. Show HTML Event Conditions Setup event trigger conditions (see Event Conditions). Show HTML Event Notes Enter notes about event. Set Variable Event The Set Variable Event changes a value of a variable in the Variable Table. Set Variable Event General Properties Event type: Describes the event type. In this case it is a Set Variable event. Event name: The name of the event as it will appear in the status bar and in tool tips when the mouse cursor passes over the event. Marker shape: Select a desired shape for the event marker. Event markers are not resizable (as are audio clips and lamp effect clips) because they are executed at a specific instance in time rather than over a range of time. Set Marker Color… Choose a color for the marker. When event markers are first dragged button into an event track they appear in a dark gray color. This indicates that the event has not yet been setup. After it has been setup, is assumes its proper color. Trigger on postevent start time. When this is checked, the event will trigger immediately if playback is started after the event. If unchecked, the event will only trigger at the event. Playback must start before or on the event. Enable playback Uncheck this box to prevent the event from triggering during playback. Lock clip Check this box to lock the clip onto the timeline. Locked clips cannot be moved or resized. Set Variable Event Properties Select variable: Select a variable from the Variable Table. If this event is setup as a VMNet remote event, a selection will not be offered. Rather, the user will have to enter in the name of the remote variable manually. Select operation Select an operation to perform on the variable. The operand field below this one changes based on the selection. Choose from the following: Set var to value – sets the variable equal to the operand: Add value to var – adds the operand value to the variable. Subtract value to var – subtracts the operand value from the variable. Set var to random value – assigns a random value to the variable between Range min and Range max. Set Variable Event VMNet Properties Setup VMNet remote event. With Send to VMNet remote checked the Set Variable event is routed to a VMNet server on the network by way of the selected client (see VMNet, Project VMNet Settings), and will not be executed on the local computer. Set Variable Event Conditions Setup event trigger conditions (see Event Conditions). Set Variable Event Notes Enter notes about event. Set Routing Group Event Changes the current Channel Routing Group. Set Routing Group Event General Properties Event type: Describes the event type. In this case it is a Set Routing Group event. Event name: The name of the event as it will appear in the status bar and in tool tips when the mouse cursor passes over the event. Marker shape: Select a desired shape for the event marker. Event markers are not resizable (as are audio clips and lamp effect clips) because they are executed at a specific instance in time rather than over a range of time. Set Marker Color… button Choose a color for the marker. When event markers are first dragged into an event track they appear in a dark gray color. This indicates that the event has not yet been setup. After it has been setup, is assumes its proper color. Trigger on postevent start time. When this is checked, the event will trigger immediately if playback is started after the event. If unchecked, the event will only trigger at the event. Playback must start before or on the event. Enable playback Uncheck this box to prevent the event from triggering during playback. Lock clip Check this box to lock the clip onto the timeline. Locked clips cannot be moved or resized. Set Routing Group Event Properties Select the routing group to be selected when this event is triggered. If this event is setup as a VMNet remote event, a selection will not be offered. Rather, the user will have to enter in the name of the remote variable manually. Set Routing Group Event VMNet Properties Setup VMNet remote event. With Send to VMNet remote checked the Set Routing Group event is routed to a VMNet server on the network by way of the selected client (see VMNet, Project VMNet Settings), and will not be executed on the local computer. Set Routing Group Event Conditions Setup event trigger conditions (see Event Conditions). Set Routing Group Event Notes Enter notes about event. Reset Event Group Event Resets all manual-mode event triggers of the specified group. (See Event Trigger Settings). Reset Event Group Event General Properties Event type: Describes the event type. In this case it is a Reset Event Group event. Event name: The name of the event as it will appear in the status bar and in tool tips when the mouse cursor passes over the event. Marker shape: Select a desired shape for the event marker. Event markers are not resizable (as are audio clips and lamp effect clips) because they are executed at a specific instance in time rather than over a range of time. Set Marker Color… button Choose a color for the marker. When event markers are first dragged into an event track they appear in a dark gray color. This indicates that the event has not yet been setup. After it has been setup, is assumes its proper color. Trigger on postevent start time. When this is checked, the event will trigger immediately if playback is started after the event. If unchecked, the event will only trigger at the event. Playback must start before or on the event. Enable playback Uncheck this box to prevent the event from triggering during playback. Lock clip Check this box to lock the clip onto the timeline. Locked clips cannot be moved or resized. Reset Event Group Event Properties Select the event group to reset, or reset all groups by checking the Reset all groups box.. Reset Event Group Event VMNet Properties Setup VMNet remote event. With Send to VMNet remote checked the Set Router Preset event is routed to a VMNet server on the network by way of the selected client (see VMNet, Project VMNet Settings), and will not be executed on the local computer. Reset Event Group Event Conditions Setup event trigger conditions (see Event Conditions). Reset Event Group Event Notes Enter notes about event. VM Telnet Event Sends telnet messages through selected telnet client. (See VMNet Telnet Clients). VM Telnet Event General Properties Event type: Describes the event type. In this case it is a VMTelnet event. Event name: The name of the event as it will appear in the status bar and in tool tips when the mouse cursor passes over the event. Marker shape: Select a desired shape for the event marker. Event markers are not resizable (as are audio clips and lamp effect clips) because they are executed at a specific instance in time rather than over a range of time. Set Marker Color… button Choose a color for the marker. When event markers are first dragged into an event track they appear in a dark gray color. This indicates that the event has not yet been setup. After it has been setup, is assumes its proper color. Trigger on postevent start time. When this is checked, the event will trigger immediately if playback is started after the event. If unchecked, the event will only trigger at the event. Playback must start before or on the event. Enable playback Uncheck this box to prevent the event from triggering during playback. Lock clip Check this box to lock the clip onto the timeline. Locked clips cannot be moved or resized. VM Telnet Event Properties Select the telnet client from the list of clients created in the Project Telnet Settings window. Then enter a command line that will be sent to the telnet server associated with the selected client. VM Telnet Event Conditions Setup event trigger conditions (see Event Conditions). VM Telnet Event Notes Enter notes about event. Event Conditions Event conditions let you specify a set of conditions that must be true for the event to trigger at the specified time. This powerful feature gives VenueMagic the ability to make decisions and take actions based on those decisions. Multiple conditions can be “stringed” together. Conditions Lists textual descriptions of conditions (2nd column) and a Boolean expression (1st column) that specifies how the condition will be “compared” to the result of all the previous conditions. Enable conditions Check this box if the condition is to be used. If unchecked, the conditions is ignored and the event triggers normally. Add Add a new condition to the list. Brings-up the Event Condition Window. Edit Edit the selected condition in the list. Brings-up the Event Condition Window. Remove Deletes selected conditions from the list. Move up/down The position of a condition in the list is important, as the conditions are evaluated first to last, with each condition evaluated against the result of all prior conditions. Clicking these buttons will move the selected event up/or down in the list. Event Condition Window A condition is simply a comparison between two numeric values. These values can either be a variable and a number, or two variables. A variable is defined here as any input available in the Select External Control window. In the sample window above, a condition is setup that is only true after the Variable Table variable AttractCnt1 is greater than or equal to 3. AttractCnt1 was previously setup to be incremented by a Set Variable Event to count the number of times a specific timeline (perhaps a looped one) was run. This condition is true only after the timeline has run (or looped) 3 or more times. Comparison type Select whether the condition comparison is between a variable and a constant or between two variables. Boolean operation Once this condition has been evaluated, it will be applied to the other conditions in the list. The selections are: AND – Result of true only if this condition is true and the result of all previous conditions in the list is true. OR – Result is true if this condition is true or the result of all previous conditions in the list is true, or both. XOR – Exclusive OR. Same result as OR operation except in the case where both this condition and the result of all previous conditions is true. In this case the result is false. NOP – No operation. Selecting this operation is a good way of removing a condition from the list without actually deleting it. Value #1 source Click select to bring-up the Select External Control window and select a variable to be compared. Compare operation Select how the Value #1 is to be compared with Value #2. The choices are: = <> < > <= >= Value #2 – Value #1 is exactly equal to Value #2. – Value #1 is not equal to Value #2. – Value #1 is less than Value #2. – Value #1 is greater than Value #2. – Value #1 is less than or equal to Value #2. – Value #1 is greater than or equal to Value #2. If Variable with constant is selected as the comparison type, enter a number in this field for Value #2. If Variable with variable is selected, another select button will be available for selection of a Value #2 source using the Select External Control window. Real-time Recording of Events VenueMagic will let you record cue button event triggers during playback. First, setup a cue button to trigger a VenueMagic event and check the Recordable box (see Cue Button General Properties). Next, enable recording for the desired event track by clicking on the Enable real-time event recording button. During playback, press the cue button and the event will trigger, but it will also be automatically dropped onto event track at the current time cursor position. Envelopes This section contains an overview of what envelopes are and how to use them. Details about specific envelopes are contained in other sections. Envelopes allow you to adjust audio clip and lamp clip settings during playback. Envelopes can adjust: Volume/pan Sound effects settings Lamp level Lamp Effect settings Envelopes are shown by default, unless the number of envelopes exceeds the maximum allowed for the track (see Timeline Options). Select which envelopes you would like to show in the Audio Track Envelope Properties and Lamp Track Envelope Properties windows. Envelope Editing from the Timeline An envelope is edited by adding and dragging envelope handles. To add a handle, position the mouse cursor above where you would like to add the handle, then click the right mouse button to bring-up the timeline clip menu. Select Add Envelope Handle, and then select the envelope you would like to add a handle to. All envelopes turned on and shown for the clip will be listed in the menu. To move the handle, simply place the mouse cursor over the desired handle, left click and drag. To delete a handle, right click on the desired handle and click Delete Envelope Handle. Envelope Editor Editing envelopes on the timeline is quick and easy for a limited number of handles. However it’s cumbersome if you want to precisely place multiple handles in multiple envelopes. For more sophisticated envelopes, VenueMagic provides a graphical envelope editor. Open the envelope editor by right-clicking on the desired clip and selecting Edit Envelope. Envelope Editor Items: Envelope Tree Lists all envelopes available to the clip. For an understanding of how the tree is organized, see Envelope Tree Organization. The tree functions as follows: Check the box beside the envelope(s) you wish to display in the Envelope Plot Area. Checking the box beside a folder will check everything inside the folder as well. Select an envelope to bring it to the front so that you can edit its handles. You can also do this by clicking on the envelope curve in the plot area. Select an RGB or Position folder to activate Multi-Channel Handle Mode. Select an envelope and click Set Envelope Color to set the color of an envelope curve. If the current clip is a Level Control lamp effect, then the envelope color will also be the color of the channel level line shown between clips. Click Check All or Uncheck All button to check or uncheck all off the envelopes in the tree, respectively. Track List Lists all tracks in the timeline. Check those tracks you wish to display in the background of the plot area. Select the track that you wish to be highlighted. Checked tracked are also played during playback in the envelope editor, while unchecked tracks are muted/disabled. Plot Scale Current position of time cursor. Can show time relative to clip or entire timeline (see Envelope Editor Settings). Time Cursor Marks current playback position. Move prior to playback to the position where playback should start. Time Cursor Position Displays current position of the Time Cursor relative to the clip or entire the timeline (see Envelope Editor Settings). Playback Control Controls playback of the clip in the Envelope Editor. While not in playback: While in playback: You can also play/stop by pressing the space bar. Envelope Plot Area See Envelope Plot Area. Color Bar The Color Bar shows a color gradient representation of the currently selected envelope, the base color being that of the selected envelope itself. If an RGB folder is selected, the Color Bar will show the color blend of the Red, Green and Blue channels. In Multi-Channel Handle Mode, the Color Bar also contains all of the multi-channel handles for the selected RGB or Position folder. Envelope Editor Toolbar Zoom in envelope plot area around time cursor. Zoom out envelope plot area around time cursor. Zoom out envelope plot area to include all of the clip Show Envelope Editor Settings window. Lock plot area so that handles cannot be dragged along the time axis. Lock plot area so that handles cannot be dragged along the level value axis. Update lamps while editing. If the clip is a Level Control clip, then each envelope will be directly associated with a lamp channel. With this box check. Changing the value of the selected handle will, in real-time, set the output level of the associated channel. Turn off all lamps. Snapshot the current channel levels (see Snapshot Channels). Undo last action. These are for editing recorded data and will be discussed later (see: Editing Recorded Data). Envelope Editor Fields: Curve type: Time: Select the default curve type. Also sets the curve type for any selected handles. The following curve types are supported: Step: Stair-steps from one handle to the next. Linear: Connects each handle with a straight line. Spline: Connects each handle with a smooth curve. Shows time of currently selected handle, referenced to the plot scale. Changes as handle is dragged. For precise time settings, enter a time value into the field and hit Enter. Enter the value in one of the following formats seconds mins:secs hours:mins:secs hours:mins:secs:frames (SMPTE) The value will automatically be converted the current time display format as set in the Envelope Editor Settings window. Value: Value of currently selected handle. You can also enter a value into the field and hit Enter. Select: For envelopes associated with channels that select between multiple settings (see Fixture Channel Types) shows the current selection based on the handle value. You can select a setting in this box, which will cause the handle to move to the center of the selection range. Mouse pos: Current [time], [value] position of the mouse within the plot area. Envelope Tree Organization The Envelope Tree of the Envelope Editor is organized according to the following rules (see figures below for an example): 1. If the associated clip as Level Control lamp effect clip, then envelopes are organized by: Fixture… Channel… Sub channel 2. If the clip is built-in lamp effect, and some of the parameters have been configured to be set by envelope (see Built-in Lamp Effect Settings Properties), then the envelopes are organized by: Fixture… Channel… Sub channel… Variation Type… Parameter 3. For Lamp Chaser clips, all envelopes are inside a folder called Chaser. 4. For audio clips, the Pan and Volume envelopes are at the top level, and any configured sound effect envelopes are organized by: Effect… Effect Channel Example Figures: Envelope Plot Area The Envelope Plot Area shows the following: Desired envelopes and handles when checked in the Envelope Tree. Elements of other tracks (audio graph, envelopes) for tracks checked in the Track List. Showing other tracks helps you synch the handles in this clip to what’s going on in other tracks. The Envelope Plot Area allows you to do the following: Click and drag an envelope handle to move it with the plot area. Double-click on an envelope curve to add a point to it. Right-click on an envelope and select Delete Handle(s) to delete it. Click anywhere in the plot area (except on a handle) and drag a selector box to select multiple handles. Then you can drag them all together. If the Update lamps while editing function is enabled sliding a handle up and down will affect the associated channel in real-time. (Functions only if clip is a Level Control lamp effect). Additional rules and considerations: A handle cannot be moved beyond the handles before and after it. This will be enforced even if multiple handles are selected. The first and last handles of a clip cannot be moved horizontally (along the time axis). The first handle of a Level Control envelope cannot be moved at all. This is because it’s level is set by the last level of the previous clip, or, if there is no previous clip, by the level set in the Lamp Track Channel Settings window. Note: If the desired envelope does not appear in the plot area, make sure that it has been checked in the envelope tree. Envelope Editor Multi-Channel Handle Mode The Envelope Editor enters Multi-Channel Handle Mode whenever an RGB or Position folder is checked and selected in the Envelope Tree. In this mode, you may add a multi-channel handle by right-clicking in the color bar and selecting Add Color Handle, if an RGB folder is currently selected, or Add Position Handle if a Position folder is selected. In the following case, an RGB folder was selected and a Color Handle was added to the color bar. As seen in the figure above, adding a single handle to the Color Bar also added three additional color sub-handles to the Red Green and Blue envelopes in the plot area. Notice that these handles are triangular shaped rather then the square used by the normal envelope handles. Click and slide the color handle left to right and the three sub-handles move with it. Now click and slide a sub-handle in the plot area. Note that you can only change its value by moving it up and down. You cannot change its time. These three sub-handles are locked together in the timeline and can only be moved with the sub-handle. You can also select a specific color to be associated with the color handle. Right click on the color handle in the Color Bar and select Edit Color Handle. Then select the desired color. The value of each sub-handle will be changed in order to create the selected color. The function of the handles and sub-handles is similar if a Position folder is selected, but only two sub-handles are created—one for Pan (or X) and one for Tilt (or Y). You will also notice that the Color Bar is black when a Position folder is selected. Envelope Editor Settings Time display format Select the format that time will be displayed throughout the envelope editor. Time relative to start of clip Check this box to display envelope editor time relative the beginning of the clip. If unchecked, time will be shown relative to the entire timeline. Show grid Uncheck to remove grid from plot area. Show timeline markers Check to display timeline markers in envelope editor. Just as in the timeline, you may place the mouse cursor over the marker to display it’s name, but you may not move, edit or delete them here. To move the time cursor to a marker, right click in the plot scale area and select Goto Marker, and then the desire marker. Control lamps while editing If the clip is a Level Control clip, then each envelope will be directly associated with a lamp channel. With this box check. Changing the value of the selected handle will, in real-time, set the output level of the associated channel. Turn off lamps after playback Check this box to have then Envelope Editor turn off all lamps after playback. If left unchecked, lamp levels remain as they are when playback stops. Allow envelope line selection When this box is checked, an envelope may be selected by clicking on an envelope line in the envelope plot to. When unchecked, envelopes may be selected only from the envelope tree, or by clicking on an envelope handle in the envelope plot. Un-checking this box will help avoid inadvertently selecting the wrong envelope while adding handles. Envelope Editor External Control Properties The VenueMagic Envelope Editor will allow you to set the value for an envelope point or color handle using external control. Enable external control Check to enable external control of selected envelope handle(s). Channel #1 Click Select to bring up the Select External Control window, and select an external input to control Envelope Editor Channel #1. This will affect the currently selected envelope handle. If a handle is selected in the Color Bar, Channel #1 will affect the Red channel (for RGB channel types), or the X/Pan channel (for Motion XY / Motion PT channel types). (See: Fixture Channel Types). Channel #2 Click Select to bring up the Select External Control window, and select an external input to control Envelope Editor Channel #2. This will only affect the Green channel (for RGB channel type) or the Y/Tilt channel (Motion XY or Motion PT channel types) of the selected Color Bar handle. Channel #3 Click Select to bring up the Select External Control window, and select an external input to control Envelope Editor Channel #3. This will only affect the Blue channel (for RGB channel type). Copying Envelopes & Envelope Handles The Envelope Editor offers a variety of ways that you can copy and paste envelopes and envelope handles. You can: Copy selected handles in an envelope to another location in the envelope or into a different envelope. Copy Color Bar handles to another location on the Color Bar or on the Color Bar of another envelope group. Copy an envelope group (RGB or Position) to another compatible envelope group in the same fixture or a different one. Copy all envelopes from one fixture to another identical fixture. To copy individual envelope handles: 1. Select the envelope you wish to copy handles from. 2. Select the handles you wish to copy. 3. Right-click on one of the selected handles and select Copy Handles. 4. Right-click on the envelope you wish to copy to at the location in time where you wish them copied at and select Paste Handle at Cursor. 5. OR right click on an envelope in the envelope tree and select Paste Handles to copy the handles to the same time as the new channels Copying Color Bar handles functions similarly. To copy an entire envelope or envelope group: 1. Right-click in the envelope tree on the envelope or envelope group (RGB or Position) you wish to copy select Copy [name] Envelopes, where name is the name of the envelope or envelope group you are copying. 2. Right click on the envelope or compatible envelope group you wish to copy to and select Paste Envelopes from [name]. To copy all of the envelopes in a fixture: 1. Right-click in the envelope tree on the fixture you wish to copy select Copy [name] Handles, where name is the name the fixture copying. 2. Right click on fixture you wish to copy to and select Paste Envelopes from [name]. Intelligent Copy Buffering Fixtures envelopes can only be pasted to a matching fixture. For example, if you copy all the envelopes in a DJ Scan 250 EX, you can only paste those envelopes to another DJ Scan 250 EX. The Envelope Editor will enforce this. However, the Envelope Editor also supports intelligent copy buffering. This means you can copy multiple fixture types into the copy buffer, one after another, and the copy buffer will keep track of all of them. When you attempt to paste to a fixture, the copy buffer is searched and if a matching fixture is found, you are given the option of pasting it. Envelope groups functions similarly, allowing you to paste RGB and Position envelope groups only other RGB and Position envelope groups, respectively. Editing Recorded Data (Only Available for VenueMagic DMX+AV and above) Then Envelope Editor can also be used to edit recorded channel data (see Real-time Recording and Editing of Channels). When recorded data is selected in the Envelope Tree, the appearance and behavior of the Envelope Editor changes somewhat. The first thing you will notice is that the curve editing tools, which are normally grayed-out, are now enabled. In order to edit the recorded data, you must select a range of data to edit. Do this by clicking and the left mouse button somewhere in the plot area and then holding the button down as you drag the mouse cursor to select a range. When you have selected the desired range, release the mouse button. After selecting the range, you can easily resize the range by clicking on and dragging either edge of the range. Click anywhere in the plot area outside of the range to deselect it. Curve Editing Tools The curve editing tools for recorded data are quite powerful. Below is a brief description of each tool, but the best way to understand them is to use them. Move Level: Click and drag the selected range up and down. Stretch Level: Stretch the selected range. Stretching is relative to where you the mouse cursor is initially placed when the left button is clicked. The closer a point on the curve is to this initial point, the faster it will stretch when the mouse is moved. Stretching is also affected by the proximity of the initial point to the baseline of the selected curve. The baseline is defined as the line that connects the endpoints of the curve at the edges of the selected range. Drag Level: This tool drags curve points proportionally to the distance between the initial click point and a point on the curve, scaled within the range of a bounding circle. This tool does not require a selected range because the bounding circle selects which points in a curve will move. You can adjust the radius of the bounding circle by moving the mouse wheel or by entering a value into the Drag radius box just below the cursor time display. The Drag radius box is only visible when the Drag Level tool is selected. The Drag Level tool is ideal for stretching part of a curve without affecting the rest of the curve. Move in Time: Moves the selected range in time. Stretch in Time: Stretch the selected range in time. The center of stretching is the initial point where the mouse was clicked to begin dragging. Flatten Curve: Flattens the curve along the baseline of the selected curve. (See Stretch Level toll above for and explanation of the baseline). Set Curve To Constant: Sets all points in range to a specified constant. Smooth Curve: Smooth out the curve in the selected range. Clicking this button multiple times increases the smoothing. Editing Individual Data Points Expand the envelope plot range to maximum by clicking on the button until it grays-out. You will now see that the individual data points are visible in the plot. The curve editing tools equally apply to this view except that you can select and move data points individually. Adjust Envelope Window (Available in SC+ and above only.) Right-click on a recorded envelope in the Envelope Editor and select Adjust Envelope… to bringup the Adjust Envelope window. From this window you can adjust the current envelope or the selected section of it with more precision than the standard curve editing tools. Any change of settings is shown immediately in the Envelope Editor. All functions of the Envelope Editor are disabled while the Adjust Envelope window is open with the exception of the time cursor and the playback controls. This allows you to playback the envelope while changing settings on-the-fly. The Adjust Envelope window will also import previously exported profiles as well as extract a profile from and audio .wav file (this is often referred to as a “Yak” function when it is used to extract an audio envelope from a file with dialog which is used to control mouth movements in an animatronics character). Adjustments are made by either moving the associated slider, or by entering a number directly into the text entry field. Settings can be save in a list of presets that can be re-used. On the right side of selected sliders is a set slider range button you set the desired range of the slider. that will open a window to let Sliders without a button have fixed ranges that cannot be changed. Adjust Envelope Window Items Descriptions Adjust Level Check this box to enable level adjustment sliders: Gain (%) – Adjust the amplitude of the envelope by a percentage. Offset (%) – Adjust the horizontal position of the envelope by a level percentage. Thresh (%) – Adjust zero threshold. Any data below this value is zeroed out. Level Clipping Check this box to enable level clipping then adjust the High (%) and Low (%) values to cut-off the top and bottom of the envelope, respectively. Adjust Time Check to enable time adjustments: Shift (f/s) – Shifts envelope in time by the specified frames (f) or seconds (s). Select how time is displayed with the Show time in frames checkbox (discussed below). Scale (%) – Scale the time range by the specified percentage. Filtering Check to enable filtering: Smooth – Applies smoothing to envelope. Ranges from zero (no smoothing) to 10 (a lot of smoothing). Quantize (f/s) – Quantizes envelope by sampling the envelope at specified increments of frames/seconds and filling the space between samples with either a line or a step. Select Quantize to steps to fill in the space with steps, or Quantize to lines to fill it with lines. A value of zero disables quantizing. Digital Thresholds Check this box to convert envelope into a “digital” representation of the curve. Upper (%) – Selects the upper threshold level for digitizing. Where the original curve is above this point the output curve goes to 100%. Lower (%) – Selects the upper threshold level for digitizing. Going left to right, once the original curve reaches the specified Upper threshold and its output goes to 100%, the curve must drop below the Lower threshold level before it goes back to 0%. This effectively introduces a hysteresis effect. To eliminate the hysteresis effect, always set Upper and Lower to the same value. Invert Level Check this box to vertically invert the selected envelope. Reverse Time Check to invert the envelope left-to-right along the time axis. Differentiate Performs a differentiation function to produce the derivative of the original curve. If the original curve plots position vs. time, the new plot will show velocity vs. time. Bypass Check to bypass all settings. The original un-modified curve is shown in the Envelope Editor. Importing Profiles Import profiles into the currently selected channel of the Envelope Editor by click on Import Audio Profile. (See Importing Channel Data Profiles). Importing Audio Profiles Import envelope of .wav audio file directly into the Envelope Editor without first having to create a profile from an audio clip. Click on Import Audio File, and then select the .wav file you would like to import. If the .wav file contains stereo audio, the Import Audio File window will appear. Select how you want the profile to be imported: Left: Right: Both: Mix: import just the left channel import just the right channel import both left and right channels as separate channels in the profile import the sum of the left and right channels into a single profile channel Click Ok and the profile is imported to the envelope within the selected range. Saving and Reusing Setting Presets Once settings have been adjusted as desired for a particular envelope, they can be save under a Settings Preset and applied later onto other envelopes. Click the New button to create a new Settings Preset and add it to the Presets list, then type in a name for the preset. Adjust the settings as desired, and then click Save to bring up the Save to Preset window. Select the preset you wish to save to and click OK. To apply an existing preset to the current envelope, select the desired preset in the Preset list and the new settings are applied immediately. Delete presets by selecting them in the Preset list and clicking Delete. Important note: Be sure to save any changes to the current preset before selecting another preset, otherwise your changes will be lost. Channel Data Profiles (Available in SC+ and above only.) VenueMagic gives you the ability to export and import channel data profiles. A channel data profile (also referred to simply as a “profile”) is a file that contains a list of channels, by name, and a stream of data for each channel. These profiles can be imported for later use (described below). Exporting Channel Data Profiles Profiles can be exported from the following sources: Audio Clips Right-click on an audio-clip in a VenueMagic timeline and select Export Audio Profile. Enter a filename in the file dialog and click OK. If the audio clip is stereo, the Export Audio Clip window will appear. Select how you want the profile to be exported: Left: export just the left channel Right: export just the right channel Both: export both left and right channels as separate channels in the profile Mix: exports the sum of the left and right channels into a single profile channel Click Ok and the profile is exported to the selected file. If the audio clip is mono, export will begin immediately after the export file is selected and the Export Audio Clip window is not shown at all. Lamp Effect Clips Right-click on a lamp effect and select Export Clip Profile, then select a file to receive the exported data. This will export all of the channels controlled by that clip along with an “image” of the output data for each channel. Lamp Tracks Right-click on lamp track panel and select Export Track Profile. This will export output data for the entire track into a profile. Timelines Export a profile file for the currently loaded timeline by selecting FilesExport Timeline Profile from the main menu. DMX Recorder The DMX recorder can record DMX input or output and save it to a profile. Importing Channel Data Profiles Profiles can be inputted into lamp tracks, level control effects and envelopes (see also Adjust Envelope Window). All profile imports will bring up the Load Profile Channels window, which is used to tell the import function which channels to import and where they will go. The list on the left shows all of the profile channels included in the profile file. The list on the right shows all of the record channels available to receive the imported channel data. Drag channels you wish to import from the profile channel list over to the record channel list, and drop it on the channel you would like to import it to. To remove an imported channel from the recorded channel list, simply drag it back over to the profile channel list. Click OK to perform the importing. Notice that as you drag a profile channel over to the recorded channel list, it is removed from the profile channel list. This is because you cannot import a single profile channel into more than one record channel. The Load Profile Channels window is used with the following import functions: Importing to Level Control Effects Profiles can be loaded into selected channels in a level control effect (see Level Control Setup Recording Properties). Importing to Envelope Editor The Adjust Envelope Window can import profiles directly into envelopes in the Envelope Editor. Importing to a Timeline Profiles can be used to auto-populate a timeline with profile data with one or multiple channels per track. (see Auto-populating a Timeline from a Profile Not all of the settings in this window are available to all import functions. The table below lists each button/setting, a description of its functions, and when it is available. Moves all profile channels to record channel list, in order from top to bottom, filling in the unused record channels. Move all profile channels back into the profile channel list. Moves selected profile channels to record channel list, in order from top to bottom, filling in the unused record channels starting with the first selected record channel, if any. Move selected profile channels back into the profile channel list. (Also accomplished by dragging). Moves a single selected profile channel up/down in the record channel list. (Also accomplished by dragging). Move all or selected profile channels to record channels, automatically selecting the best match for each based on the channel namesd. Create This setting is used only by the auto-populate timeline function. The options are: Single track – imports all channels into a single lamp track. Multi tracks – imports each channel into its own lamp track. Replace channel names Check this box if you wish each fixture channel name to be changed to match the name of the profile channel being imported into it. Available only with auto-populate timeline function. Set Envelope Color Click this button to select the envelope color of all imported profiles. Available only with auto-populate timeline function. Auto-populating a Timeline from a Profile (Available in SC+ and above only.) You can use a channel data profile to automatically populate a timeline with tracks and level control effects. From the main menu, select InsertLamp Tracks from Profile. After selecting a file to import, and setting up the channel mapping in the Load Profile Channels window, VenueMagic will automatically perform the following functions: 1. Required lamp tracks are added to the timeline, either one for each channel or one for all channels, depending on what was specified in the Load Profile Channels window. 2. Required fixture channel(s) are added to new lamp track(s). 3. A level control effect is added to each new lamp track. 4. Profile data is loaded into level control effects as specified in the Load Profile Channels window. Recording DMX Input/Output Data to a Profile (Available in SC+ and above only.) VenueMagic will let you record DMX input from and DMX input device or the DMX output from a timeline playback, and put it into a profile file. In the Main Menu, select ToolsRecord DMX to bring up the Record DMX window. Recording DMX Input Under Select source, select the Default DMX input option to setup recording from the default DMX input into a profile. This option is only available if a DMX input has been configured in the DMX Device Setup window. Next, select the DMX channels you would like to record by checking the corresponding box in the Select record channels list. If you wish to route DMX input to its corresponding DMX output channels, check the Output to universe box, then select the universe you would like to output to. Output will be sent to the device setup for that universe in the DMX Device Setup window. The Description field can be filled with any text up to 255 characters. This text is what is displayed in the Description field at the top of the Load Profile Channels window. Recording DMX Output Select VenueMagic DMX output as the source if you would like to record DMX output generated by VenueMagic. The Select record channels list will list all of the DMX fixture channels assigned to the current project, by name, preceded by the associated DMX channel in square brackets (i.e.: “[001]”). Check the box next to the channels you wish to record. Check the Synch to editor box if you’re primarily interested in synching to the playback of a timeline. In this mode, starting recording will also start playback of the timeline currently being edited at the current position of the time cursor. The recorder will also record time information directly from the timeline rather than use its own clock. Stopping or pausing recording will also have the same affect on timeline playback. Record Controls Actual recording of DMX is managed by the record controls Record, Pause and Stop. The Record time window shows the current record time in hours:minutes:seconds.hundreths format. Starting Record Recording starts immediately when the Record button is clicked. The Record button then turns into the Pause button. If Synch to editor is checked, the timeline currently in the editor begins playing, starting at the last time cursor position. When recording starts, the Record time is reset to zero, turns green and begins running forward to report the current time as it is being recorded in the profile. If Synch to editor is selected, Record time will not reset to zero, but will instead show the current playback time of the timeline currently being edited. Pausing Record To pause recording, click on the Pause button (formerly the Record button). This will stop the Record time which starts flashing between gray and green until recording is resumed or stopped. The Pause button also turns back into the Record button, which can be clicked to resume the recording. Stop Record Click the Stop button to stop recording. This will bring-up a file browser so that you can tell VenueMagic where to store the recorded profile. Importing Profiles from ASCII Text Files VenueMagic can import profiles from and ASCII text file that conforms to a specific format. This makes it possible to input show data created by other software. This is done by selecting “Text File” as the file type in the file browser when you are selecting a file to import. The text file must adhere to the sample format below: * Sample VenueMagic ASCII-based Profile File * An asterisk as the first character in the line denotes a comment ********************************************************* * *** The following two lines must be included. * *** FILE_VERSION must be 1.0. * *** DESCRIPTION can be anything up to 254 characters ********************************************************* FILE_VERSION(1.0) DESCRIPTION("Export of Lamp Effect: [Level Control]") ******************************************************************************* * This section associates channel numbers with channel names. * Channel names can be arbitrary strings, channel numbers should be sequential ******************************************************************************* CHANNEL(0, CHANNEL(1, CHANNEL(2, CHANNEL(3, CHANNEL(4, CHANNEL(5, CHANNEL(6, "BOC.Power") "BOC.Dimmer_Strobe") "BOC2.RGB.Blue") "BOC2.RGB.Green") "BOC2.RGB.Red") "BOC2.ServoC.Motion") "BOC2.ServoA.Motion") ******************************************************************************* * This sections contains all of the channel data. * TIME(s) specifies time in seconds and applies to all channel "events" that follow * Channel events are of the format (channel, level %). * List must start with “PROFILE_START and end with "PROFILE_END" ******************************************************************************* PROFILE_START TIME(0) (0,0) (1,0) (2,0) (3,0) (4,0) (5,0) (6,100) TIME(0.0333333) (0,0) (1,0) (2,0) (3,0.0820137) (4,0) (5,0.0527208) (6,99.8963) TIME(0.0666667) (0,0) (1,0) (2,0) (3,0.323193) (4,0) (5,0.208095) (6,99.5909) TIME(0.1) (0,0) (1,0) (2,0) (3,0.716246) (4,0) (5,0.46194) (6,99.0921) PROFILE_END Synching VenueMagic Timelines to an External Clock Source (Available in DMX+AV and above only. Some features available only in SC+) VenueMagic can sync a timeline to an external clock source. The following items are synched in a frame-accurate manner: All lamp tracks. All event track triggers. All audio start and stop times. All video start and stop times. VenueMagic will not scale the playback speed of audio or video files. Only their stop and start times are affected. When an audio or video clip is triggered, it will run at real-time based on the VenueMagic main clock regardless of what the sync source is doing with the exception of the following: 1. If the Hold option is selected in the Timeline Synching Options window, audio and video playback for the timeline will hold when the external clock source stops or drops out. 2. Random jumps of the sync clock of more than +/- 1-2 seconds will restart audio and video at the new time. Lamp chasers that are set to sync to the beat tapper or external control will not be affected by external sync clock. Synching is setup for individual timelines in the Timeline Synching Options window. Once setup, you can enable synching from the main menu by selecting TimelineEnable External Sync, or by clicking on the icon on the toolbar at the bottom of the timeline. When synching is enabled, the timeline control panel will change to show additional information specific to the type of sync chosen, as shown below. To start synching, click the timeline play button. You can also assign a synched timeline to a cue button. Synching starts when the cue button is triggered. There are no sync settings on the project level. External synching of Playlists is not currently supported. VenueMagic timelines are can be synched to the following external sync clock sources: Beat Tapper Sets the speed of timeline playback using the Beat Tapper based on a specified BPM. External Input Setup an external input (slider, etc…) to control the speed of playback. MIDI Clock Sync to another midi device or application using a MIDI Clock signal. MIDI LTC Sync to another midi device or application using the MIDI Linear Time Code signal. SMPTE Over Serial Sync to ASCII-based SMPTE received over a serial port. VMNet Sync Sync to another VenueMagic timeline running as a VMNet Time Code Source on the network. Synching to Beat Tapper This allows synching to the VenueMagic beat tapper. This is for adjusting the speed of playback only. It will not attempt to match the actual position of beats as in Lamp Chasers. Base BPM The base beats per minute from which playback speed is determined. For example, if this value were set to 120 BPM, when the beat tapper shows 240 BPM, the timeline would be running at twice normal speed. Beat scaling (%) This is an addition scaling factor that can be applied to timeline playback speed after the beat tapper/base BPM calculation. By default, this is 100%, which has no effect. A value of 50% cuts playback speed—based on the beat tapper and base BPM setting—by on-half. When sync is enabled, the timeline control panel adds additional synching information: Sync BPM (X%) Current value of the beat tapper. X is the value in the Beat scaling (%) field above. Base BPM The base beats per minute from which playback speed is determined. For example, if this value were set to 120 BPM, when the beat tapper shows 240 BPM, the timeline would be running at twice normal speed. Synching to External Input An external input such as a slider control may be used as a playback speed control for a timeline. External input source Click the Select… button and chose an external input device to control the timeline playback speed. Range min (%) Range max (%) Since external inputs normally return values ranging from 0-100%, it is necessary to “rescale” that range if we desire to adjust the timeline speed to a value greater than 100%. Use the Range min (%) and Range max (%) settings to do this. Example: if Range min were set to 50% and Range max to 100%, then the 0% setting on and external input (i.e.: if a slider is set to zero position) would correspond to 50% playback speed, and 100% on the external control would correspond to 200% playback speed. When sync is enabled, the timeline control panel adds additional synching information: Speed Factor Percentage of real-time speed timeline is currently running at. 100% = normal time. Synching to MIDI Clock You can sync a VenueMagic timeline to an MIDI device or application that can send MIDI Clock messages. MIDI input device Select from currently connected MIDI input devices from which to receive the MIDI Clock message. Base BPM The base beats per minute for the MIDI Clock message. This should match the BPM setting in the MIDI device or application sending the clock. You should also set the Base BPM for the timeline to the same value (see Timeline Options). Time signature (top and bottom) Enter the time signature associated with the clock. These settings should match the settings in the MIDI device or application sending the clock. You should also set these values for the timeline to the same value (see Timeline Options). Start beat (M:B:T) Enter the start beat in measures, beats and ticks. When synching has begun, the timeline will not start until this neat is reached. Sync to: Select the type of clock message to sync to: MIDI Clock: Midi clock signal which is sent by MIDI device at a rate of 24 pulses-per-quarter note. MIDI Tick: Syncs to MIDI time tick which is sent by the MIDI device at a rate of 10 milliseconds. For most applications, the default setting MIDI Clock is used. Start sync on: Select what starts synching: MIDI Start message: Most sequencers generate a MIDI Start message before sending Clock messages. This allows slave devices to prepare for synching. With this option selected, VenueMagic will wait for a Start message before it begins synching. First MIDI Clock message: Some software does not send a MIDI Start first, but goes right into sending Clock messages. Select this option and VenueMagic will start synching on the first Clock message after the timeline is started. The best way to determine the best option for the sync source you’re using, use the MIDI Monitor to watch what the sync source is doing. When sync is enabled, the timeline control panel adds additional synching information: Sync Source (MBT) Current sync time based on MIDI clock counts. When the timeline play button is pressed, this field will flash green until MIDI clock signals are received, at which time it will remain solid green. Start Offset (MBT) The start offset entered into the Start offset (M:B:T) field above. When the MIDI clock signals are being received, this field will flash green until the Sync Source has reached this value, at which time it will remain solid green. How MIDI Clock Synching Works There are essentially five MIDI messages sent by your MIDI device or application that the VenueMagic timeline will respond to. Song Position Commands a start position for playback within the song. VenueMagic will respond by moving the time cursor to the designated time. MIDI Start Indicates that synching is to begin at time=0. Immediately followed by a MIDI Clock message MIDI Stop Indicates that synching is to stop. No clock messages are received afterwards until a MIDI Start or MIDI Continue is received. MIDI Continue Sent to start synching after a Song Position message is sent. Acts the same as MIDI Start, except playback is not rest to time=0. Followed immediately by a MIDI Clock message. MIDI Clock Sent by controlling device at a rate of 24 pulses per quarter note. VenueMagic uses the BPM and time signature settings to calculate beats, measures and ticks. As soon as the timeline play button is pressed, the time cursor is set to zero, and VenueMagic waits for either a Song Position or MIDI Start message, at which time it will take the appropriate action as described above. Synching to MIDI LTC You can sync a VenueMagic timeline to an MIDI device or application that can send MIDI Linear Time code messages. MIDI input device Select from currently connected MIDI input devices from which to receive the MIDI LTC messages. Start offset Enter the start offset in hours:minutes:seconds:frames. When synching has begun, the timeline will not start until this value has been reached. When sync is enabled, the timeline control panel adds additional synching information: Sync Source Current sync time received from MIDI device. When the timeline play button is pressed, this field will flash green until MIDI timecode signals are received, at which time it will remain solid green. Start Offset The start offset entered into the Start offset field above. When MIDI LTC messages are being received, this field will flash green until Sync Source has reached this value, at which time it will remain solid green. How MIDI LTC Synching Works When the timeline play button is pressed, start waiting for MIDI LTC quarter frame or full frame messages, at which time it begins synching to the time code messages. If the time code suddenly jumps more than 1 second in either direction, the timeline will move to the new time and resume playing. Synching to SMPTE over Serial (VenueMagic SC+ and above only) VenueMagic timelines can sync to SMPTE time code received in ASCII format over a serial port from a SMPTE reader. VenueMagic does not decode audio SMPTE stripes. Serial port Select the list of currently available serial communications ports (see . Serial Port Input/Output. Format string Defines the ASCII format that VenueMagic expects to receive. Once you have determined the output format of your SMPTE reader, see Setting Up SMPTE Format Strings to determine what should go in this field. To reset format string and termination string to factory defaults, click Reset. Termination string The character(s) VenueMagic should look for to indicate a termination. This information is available in the manual of your SMPTE reader. For information on how to enter control character, see Serial Event Properties . Frames/sec Select the frame rate mode: 24, 25, 30 and 30-drop. VenueMagic does not automatically detect SMPTE frame rates. You should set the SMPTE fps mode in the Timeline Options window to the same value Start offset Enter the start offset in hours:minutes:seconds:frames. When synching has begun, the timeline will not start until this value has been reached. Start Test Click this button to test SMPTE input. If the SMPTE device is properly connected and sending SMPTE strings, and if the Format string and Termination string have been properly set, the adjacent time display will display SMPTE code as it is received. If VenueMagic encounters a problem decoding the SMPTE string, “ERROR” will appear in this box. This usually means that the format or termination string is incorrect. It could also mean that the serial connection is not clean. Use the Serial Input Monitor to verify that the SMPTE code is being delivered properly. When sync is enabled, the timeline control panel adds additional synching information: Sync Source Current sync time received from SMPTE reader. When the timeline play button is pressed, this field will flash green until time code is received, at which time it will remain solid green. Start Offset The start offset entered into the Start offset field above. When SMPTE time code is being received, this field will flash green until Sync Source has reached this value, at which time it will remain solid green. How Synching over Serial SMPTE Works Since VenueMagic does not decode audio SMPTE stripes, this must be done by an external device (such as an ESE SMPTE time code reader). The decoded data is output via an RS232 port and received by VenueMagic. Synching starts when the timeline play button is pressed. If the time code suddenly jumps more than 1 second in either direction, the timeline will move to the new time and resume playing. Setting Up SMPTE Format Strings VenueMagic uses a simple syntax to define how SMPTE time code should be interpreted. Here is a summary: 1. Characters inside curly braces (i.e.: {}) are interpreted as data using the following codes: H Indicates a “hours” digit. The string “{HH}” would tell VenueMagic to expect a two-digit decimal value that represents SMPTE hours. M Indicates a “minutes” digit. The string “{MM}” would tell VenueMagic to expect a two-digit decimal value that represents SMPTE minutes. S Indicates a “seconds” digit. The string “{SS}” would tell VenueMagic to expect a two-digit decimal value that represents SMPTE seconds. F Indicates a “frame” digit. The string “{FF}” would tell VenueMagic to expect a two-digit decimal value that represents SMPTE frames. ? Identifies a character that can be anything. The string “{?????}” specify that these five characters in the string can be anything, and should be ignored. 2. Characters inside parenthesis (i.e.: ()) indicate that this character can be one of several different characters that should be treated the same. Example: “(:;.)” that VenueMagic should expect either a colon (:), semi-colon (;) or period (.). 3. All other characters specify what VenueMagic should expect at that position in the string. 4. Terminate the format string with the percent (%) character. Example: The string below would tell VenueMagic to expect two hours digits, followed by a colon, then two minutes digits, a colon, and then two seconds digits followed by either a colon, semi-colon, or period. This is followed by two frame digits. {hh}:{mm}:{ss}(:;.){ff}% VMNet Synch A VenueMagic timeline can sync to another VenueMagic timeline running on a different computer connected to the internet. This feature provides unlimited possibilities as one might guess. The timeline to be synched to must first be designated a VMNet Time Code Source by checking the Broadcast VMNet sync box in the Timeline Synching Options window. Then setup the timeline to be synched in the VMNet Sync Setup window below. VMNet Sync Channel Must be set to the same channel as the source timeline. Start Offset The start offset entered into the Start offset field above. Playlists Playlists let you create lists of timelines and audio files for sequential playback. Playback List Drag timelines and audio files from their respective folders in the Project Window into the Playback List. Drag Playlist items within the list to change their playback order. Items may be reorganized during Playback if their status column reads “Waiting” (see Status below). The Playback List includes the following columns: Start time The starting time for the playback of this item, relative to the start of the Playlist. This values is automatically set to provide sequential playback of all items in the list. It is calculated based on the length of the clips and any overlap you may specify (see Playlist Clip Playback Properties). Clip title The name of the clip. By default this is the name of the timeline or audio file. You may change the displayed name in the Playlist Clip General Properties window. Length Length of the clip. This value is takes into consideration the actual length of the song and any time removed from the beginning and/or ending of it (see Playlist Clip Playback Properties). Note: If the clip item is a timeline that is has been edited since this Playlist was last loaded, then, after saving the timeline file, reload the Playlist by right-clicking on the Playlist in the Open Files List and select Reload file. Time Current playback time relative to the start of the clip. Time remaining Current time remaining in the playback of this clip. Status The current playback status of the clip. Can be one of the following: Waiting: Item is waiting to be played. Fading in...: Item is fading in. Fading out...: Item is fading out. Playing: Item playing. Paused: Item has been paused. Next up: Item is next in line to be played. Done: Item has completed playing. Playback Controls Play/pause timeline from current playback position. Hot key: SPACEBAR / Stop playback and reset playback position to the beginning of the playlist. Move to the beginning of the currently playing item. If playback is less than 2 seconds into the song, moves to the beginning of the previous item. Move to the beginning of the next item. Playlist Toolbar Show Playlist Options dialog window. Show Clip Properties dialog window. Insert a Silence Block into the Playback list Insert a Wait Block into the Playback list. Playback Position Control Drag this slider to position playback of currently playing clip. Playlist Playback Time Display Displays the current playback position of the Playlist. Playlist Audio Level Display Graphically shows the audio levels of the playlist during playback. Playlist Display Format Options Select the time display format for each column in the playlist. The Time display format box selects the display format for the Playlist Playback Time Display. Playlist Playback Options Play in a loop Play entire playlist in a loop. Clip end warning Check this box to make a clip flash yellow as it approaches the end of its playback time. Time before end: Enter how many seconds before the end of playback the clip should start flashing yellow. Name in Cuelist: Enter the name that will appear in the Cue column of the Cue List while the Playlist is being played. Playlist Audio Options Volume level scaling Move the slider to set the main volume level for the playlist (0% - 100%). Enable active time synchronization When enabled (default) VenueMagic will actively adjust the playback speed of currently playing audio clips to make sure that the audio stays in sync with master playlist clock. This can, in rare situation, cause an undesirable “warbling” effect in the audio output. If this is the case for a given timeline, then uncheck this box. However, by doing so, you run the risk of lamp effects getting slightly out of sync with the audio (usually less that a second). If lamp synchronization is not an important issues then disable this feature. Playlist Lamp Options Lamp level scaling Set the lamp brightness level scaling for the playlist (0% - 100%). Turn off lamps after playback When checked, all playlist lamps are set to level zero at the end of playback. Unchecked, lamps remain at last level when playback ends. Note: only Dimmer and RGB channels are affected by this feature. All other channel types will remain unchanged (see Fixture Channel Types). Playlist Default Clip Properties This window sets up the defaults for the properties that come up in a new clip in the Playlist Clip Playback Properties window (see Playlist Clip Playback Properties for an explanation of field items). Click Reset to restore these settings to their original values. Playlist External Control Options This dialog window lets you configure a Playlist’s playback controls to be controlled externally (i.e. MIDI device or VCS). Trigger Play on external source Check this box to enable external control of the Playlist’s Play button. Click on the adjacent Select… button and choose an input source in the Select External Control window. Since external controls input percentage values, enter into the Threshold field the level the external input will have to send in order to trigger the button. See Understanding Threshold Values. Trigger Stop on external source Identical in operation to the Trigger Play on external source function. Trigger Move Next on external source Identical in operation to the Trigger Play on external source function. Trigger Move Previous on external source Identical in operation to the Trigger Play on external source function. Playlist Notes Enter notes about Playlist. Playlist Clips Double-click on a clip item in the Playback List to bring-up the Clip Properties window. Playlist Clip General Properties Title: The title of the clip as it appears in the Playback List. Changing this does not change the name of the file. File: The directory path and filename of the actual clip file. Playlist Clip Playback Properties Remove from start: Check this box to remove a section from the beginning of the clip, and enter how many seconds to remove. Remove from end: Check this box to remove a section from the end of the clip, and enter how many seconds to remove. Overlap last clips: Check this box to start playback of this clip while the previous clip is still playing. Enter the desired number of seconds of overlap. If this is the first clip, or if the previous item was a Silence Block or a Wait Block, then this box will be disabled. Fade in: Check to fade in the clip when playback starts. Then enter how many seconds of fade in into the Length field. Overlap this with a fade out of the previous clip to create a dissolve effect between clips. Fade out: Check to fade out the clip at the end of playback. Then fill in the fields: Start offset from end: How many seconds from the end of the clip will fade out begin. Length: The length of the fade out in seconds. Note: It is possible to enter values in these fields that will contradict each other. An example of this is when the Start offset from end value is less than the fade out Length value. If contradicting values are entered, VenueMagic will detect it and alert you with the message: It is the user’s responsibility to correct the values and re-enable the disabled setting(s). Playlist Clip Level Properties Master volume: Sets the master volume of the clip’s audio. Use this to normalize the volume across the clips in the playlist. Master lamp level: Sets the master lamp level of the clip. Playlist Clip Level Properties Insert notes about Playlist Clip. Playlist Silence Block A Silence Block adds a period of silence in a playlist. Add a Silence Block by clicking on the toolbar button. Playlist Silence Block Settings Silence time (secs): Enter how many seconds of silence is desired. Playlist Wait Block A Wait Block pauses playback and waits for the Wait Block by clicking on the toolbar button. button to be clicked to resume. Add a Exporting Playlists (VenueMagic SC+ and above only) You can export VenueMagic Playlists to supported formats by selecting FilesExport Playlist... The Select Export Type window lets you select from available export types. Select the type you desire and click next to activate the export wizard specific to the selected type. Cue Control Window The Cue Control Window has two main purposes. First, it provides a customizable list of cue buttons for cueing timelines, playlists and audio files. Second, it displays the current status of the cue list and gives you control of it. Programmable Cue Button Pane Cue buttons can be programmed to execute a timeline, playlist or audio file by adding it to the Cue List. Once a button has been programmed, just click on it to run the specified file. Right-click anywhere in the Cue Button Area to bring-up a menu of options: Cut Delete selected button and place a copy of it into the copy buffer. Copy Place a copy of the button into the copy buffer. Paste Paste the button in the copy buffer, inserting it before the selected button. Delete Button Delete selected button without first copying it into the copy buffer. New Button… Add a new cue button to the current cue button group. New Group… Add a new cue button group. Note: VenueMagic Express only allows one group. Button Properties… Bring-up the Cue Button Properties window. You may also click and drag a button to move it’s position within a group. Cue Button General Properties Caption: Enter the caption displayed on button. Place ampersand (‘&’) character in front of any character in the caption to make the corresponding key on the keyboard trigger the cue. For instance, enter “&EnvTest1” for the caption, and you will be able to trigger the cue by pressing the letter ‘E’ on your keyboard. Case is ignored. Button Color… Sets the color of the button face. Font… Sets the font style and color for the caption. Play when pressed: Select the type and file that is run in the cue list when the button is pressed. Select from the following: Timeline: Select a timeline to run. Selections are limited to the timelines in the Timeline folder in the Project Window. Playlist: Select a playlist to run. Selections are limited to the timelines in the Playlist folder in the Project Window. Audio File: Selecting this option will provide a Browse button that will bring up a file window. You may select any Wave (.wav), MP3 (.mp3), Windows Media (.wma) or MIDI (.mid) audio file. The selected file need not be included in the Audio folder of the Project Window. Event: Select an event from the list and click Setup Event.... Listed are the same events that you can add to a timeline event track (see Event Tracks). Check Recordable if you would like this event to be recordable on selected event track during playback. (see Real-time Recording of Events). Cueing mode: Select the type of cueing preload you would like: Run immediately: Cue runs immediately. Manual preload: Enables manual preloading of cues. Auto-preload: Cue is automatically preloaded (currently unavailable). (see Preloading Cues) Show status lamp Check this box to show the preload cue status lamp beside the cue button. This should usually be enabled only when Manual preload is selected as the cueing mode. It can also be enabled when Run immediately is selected for consistency in button appearance if desired. However, in this mode, the button really serves no purpose (except for looks) and will remain dark. (see Preloading Cues) Play looped Check this box to make the selected file play in a loop. Play one only With this box checked, only one instance of this cue can run in the cue list. If this cue is already running in the cue list, attempts to cue another instance will be ignored. Auto play Check this box to make the selected file Automatically start playing when the project is loaded. Play as: Select how you wish this cue to be played. Your choices are essentially background or foreground. A background cue plays uninterrupted until it ends or is stopped by the user or an event. You can simultaneously play as many background cues as you like. A foreground cue plays until another foreground cue with the same number interrupts it and takes its place. There are ten foreground cues available, numbered 1 through 10. A foreground cue will only interrupt another foreground cue with the same number. An additional foreground cue called Foreground All will interrupt any foreground cue, regardless of its number. Foreground All cues can also be interrupted by any other foreground cue. Name in Cue list Background cues do not affect foreground cues and vice versa. This is what will be displayed in the Cue column when the file is run in the Cue List. This will override the Name in Cue list settings in the Timeline Playback Options and Playlist Playback Options windows. Cue Button Level Properties Master volume: Sets the master volume of the cue’s audio. Master lamp level: Sets the master lamp level of the cue. Cue Button External Control Properties Cue Buttons can be activated and controlled externally by MIDI or by VCS. Preload cue on Check this box if you would like the cue associated with this button to be external source: preloaded from an external source, and then click on Select… to bringup the Select External Control window. Available only when cueing mode is set to Manual preload in the Cue Button General Properties window. (See also: Preloading Cues) Since external controls input percentage values, enter into the Threshold field the level the external input will have to send in order to trigger the button. See Understanding Threshold Values. Trigger cue on external source: Check this box if you would like this cue button to be activated from an external source, then click on Select… to bring-up the Select External Control window. Since external controls input percentage values, enter into the Threshold field the level the external input will have to send in order to trigger the button. See Understanding Threshold Values. External volume control VenueMagic can snapshot any input value and use it to set the master volume for the cue. Select from: None: Do not control master volume externally. Trigger level: If the trigger source is a MIDI Note on message, the volume level will be taken from the note velocity data. Otherwise, it will be taken from the value that caused the trigger. Other input: Click the Select button to bring up the Select External Control window and select a source to be snapshot at the moment the trigger is received. External lamp level control Identical in function to the External volume control, but affects the master lamp level of the cue. Cue Button Notes Enter notes about Cue Button. Cue Button Groups (Only Available for VenueMagic Classic and above) You can setup an unlimited number of Cue Button Groups, each with up to 16 buttons. Cue Button Groups appear as tabs above the Cue Button Area. Select the tab to show the group. Right-click on a group tab to bring up a menu of options: Paste Button If you have copied a button into the Copy buffer, this option will add that button to the selected group. New Group Add a new cue button group. Delete Group Delete the selected cue button group. Group Properties…: Bring up the Group Properties dialog window for the selected group. Cue Button Group Properties Group name: Enter the group name that will appear in the Cue Button Group tab. Set tab color… Sets the color of the Cue Button Group tab. Also sets the color of the cue button area background. Set tab text color… Sets the color of the Cue Button Group tab text. Size buttons to fit Check this box to make the cue buttons scale themselves to fill the entire length of the cue button area. Examples: Checked: Allow multiple columns: Unchecked: Check this box to allow for multiple cue button columns. Example: Max button rows: Specified the maximum number of button rows permitted in the cue button area before the rows are split into columns. Distribute columns evenly Check this box to make sure that buttons get distributed evenly. This may require the last button to be wider than the others. Examples: Checked: Notes: Unchecked: Insert notes about the group. Preloading Cues By default, when a cue is triggered (either by clicking the cue button or by an external control message), VenueMagic follows this order of operation: 1. Load cue 2. Initialize cue 3. Execute cue For audio and small timelines/playlists, this whole process usually happens so fast that a delay is barely noticeable. However, for larger timelines and playlists, the process of loading and initialization can sometimes take several seconds. To totally eliminate this delay, VenueMagic will allow you to “preload” a cue so that it runs immediately when the cue button is clicked (or an external control message is received). To setup a cue for pre-loading, select the Manual preload option for the cueing mode in the Cue Button General Properties window. When in Manual preload mode, an indicator lamp appears beside the cue button. If the lamp is red, the cue has not yet been preloaded. If it is green, then the cue is preloaded and will begin immediately the next time the cue is triggered. Preloading & Execution When the lamp is read, you can initiate preloading by clicking on the cue button. As soon as it turns green, it is ready to be executed. Click the button again to execute the preloaded cue. In summary, VenueMagic follows this order of events when the cue button is clicked while in Manual preload mode: If lamp is red: 1. Load cue 2. Initialize cue 3. Turn lamp green. If lamp is green: 1. Execute cue 2. Turn lamp back to red. Cue List Pane Includes the Cue List and Cue List controls. Cue List The Cue List displays all timeline, playlist and audio cues currently playing. Cues are added to the list in the following ways: Clicking on a Cue Button. Sending an event from a timeline. Dragging a timeline, playlist or audio file from the Project Window into the Cue List. Cues added to the Cue List begin playing immediately and are removed from the list when playback is complete, unless the cue is in loop mode in which case it will repeat playback until removed from the cue manually (or by event). The Cue List contains the following columns: Cue The name of the cue. This is the name specified in the Name in Cue list setting found in timeline, playlist, event (timeline, and audio files), and cue button settings windows. Time Current playback time for the cue, in seconds. Rem Current playback time remaining for the cue, in seconds. Status Current playback status for cue. Can be one of the following: Playing: Cue is playing normally. Paused: Cue is currently paused. Looping: Cue is playing in a and will restart when its playback has finished. Cue List Controls The Cue List Controls buttons affect the playback of selected cues (upper/blue group) or all at once (lower/red group). Select a single cue in the list by clicking on it, or select multiple timelines by clicking while holding down the CTRL key. The buttons function as follows: Resume playback (must be paused). Pause playback. Stop playback and remove cue(s) from the list. Take looped cues out of looping mode so that they will stop and be removed from the list when they have finished current playback. Global Mute/Lamp-out Controls Even though these buttons appear on the Cue List Pane, their affect is global. Mute audio in all currently playing timelines, playlists and audio files. Disable all lamps. Cue List External Control Provides for external control of Cue List Controls. Trigger Pause on external source Check this box to enable external control of the cue list’s Pause (all) button. Click on the adjacent Select… button and choose an input source in the Select External Control window. Since external controls input percentage values, enter into the Threshold field the level the external input will have to send in order to trigger the button. See Understanding Threshold Values. Trigger Resume on external source Identical in operation to the Trigger Pause on external source function. Trigger Stop on external source Identical in operation to the Trigger Pause on external source function. Beat Tapper Control The Cue Control Window is also home to the Beat Tapper control. As the name of this control implies, it is used to establish a “beat” which is used to control the speed of Lamp Chaser effects that have been setup to follow it (see Lamp Chaser Setup Properties). To show the Beat Tapper control, go to the main menu and select ViewBeat Tapper. The Beat Tapper control will appear between the cue button are and the cue list. There are three ways to tap-in a beat: 1. Tap in the beat by clicking (with the left mouse button) in the flashing BEAT TAP lamp on the Cue Control Window. 2. Tap on the letter “T” key on your keyboard. 3. Tap on an external midi controller key (see Beat Tapper Settings). Beat Tapper Settings Window Right-click on the Beat Tapper control and select Beat Tapper Settings… to bring-up the Beat Tapper Settings window. Scaling You can scale the beat before it gets to the Lamp Chaser effects. This affects the chasers only while the flashing of the Beat Tapper control is unaffected. No scaling: Do not perform any scaling of the tapped-in beat. Multiply by: Multiply tapped-in beat by the specified amount to make the beat faster. Divide by: Divide tapped-in beat the specified amount to make the beat slower. Note: Scaling the chaser beat will have no effect on the actual tempo of the music. Show BMP Check this box to show the current, un-scaled BPM in the beat tapper control. Align to tap With this box checked, lamp chasers will align their beats to be in sync with the tapped-in beat. If unchecked, the speed the chaser will match the tapped-in beat, but their synching will not be lined-up. Minimum BPM Enter the minimum BPM that would normally be tapped in. Beats tapped-in entered in slower than this will be ignored. Use external tap source Check this box to allow tapping to be done from an external MIDI source. Click on Select… to bring-up the Select External Control window. Enter into the Threshold field the level the external input will have to send in order to trigger the button. See Understanding Threshold Values. Lamp Preview Window The Lamp Preview Window helps you get an idea of how your show may look during playback by displaying a graphical representation of selected fixtures in your project. Activate the Lamp Preview Window by selecting View: in the VenueMagic main menu. Select Lamp Preview Right-click anywhere in the Lamp Preview Window and select the Select Lamps… option to bring up the Select Channels window. You can also add previews by dragging fixtures and/or groups over from the Fixtures and Channel Groups folders in the Project Window. Click and drag lamps to rearrange them within the window. To set the properties for a specific lamp, right-click on the lamp and select the Lamp Properties… option. This will bring-up the Lamp Preview Attributes window. Multi-Channel Lamp Previews Some fixtures contain more than just lamp level channels. The may include gobo, speed, pan, tilt and other channels (see Fixture Channel Types) that do not lend themselves to be displayed as simple lamps. The Lamp Preview Window only shows lamp intensity and color as graphical representation. Other channels are represented as text, as shown below. Multi-channel lamp previews are identified by a gold ring: Single-channel lamp previews are identified by a silver ring: Below is a table of channel types and how they affect a lamp preview: Color Wheel Preview lamp shows current color for Color Wheel setting. Dimmer Controls lamp intensity. Gobo Wheel Current gobo shown as text. Motion Current position shown as text. Motion PT Current Pan and Tilt positions shown as text. Motion XY Current X and Y positions shown as text. Reserved Not shown RGB Lamp preview color and intensity derived from combining Red, Green and Blue channels. Selector Current selector is shown as text. Speed Current value of Speed channel is shown as text. Time Duration Current value of Time Duration channel is shown as text. Time Interval Current value of Time Interval channel is shown as text. If a fixture has multiple lamps, then adding to the Lamp Preview Window will produce multiple lamp previews. The simple nature of the display approach allows for faster real-time updating, giving you a more accurate picture as far as timing is concerned. Lamp Preview Attributes Preview Channels Select which channels in the selected lamp will affect the lamp display. Use alternate label: By default the displayed lamp label is the name of the fixture or channel. If you want to give it a different label, check this box and enter the new label text into the adjacent box. Set Label Color… Set the label color. Set Lamp Color… Set the color of the lamp. Only available to lamps that do not have an RGB or Color Wheel channel. Show lens reflections: Check this box if you would like the lamp display to show lens reflections. Lens reflections look nice, but they do tend to slow down the Lamp Preview Window update time. Virtual Control Surface (VCS) The Virtual Control Surface is a collection of sliders that you can use to control anything that gives you the option of external control. Activate the VCS from the VenueMagic main menu by selecting View: Virtual Control Surface. Right-clicking anywhere in the VCS Slider Area to bring up the VCS pup-up menu: Cut Delete selected slider and place a copy of it into the copy buffer. Copy Place a copy of the selected slider into the copy buffer. Paste Paste the slider in the copy buffer, inserting it before the selected slider. Delete Delete selected slider without first copying it into the copy buffer. New Slider… Add a new slider to the current VCS slider group. New Group… Add a new VCS slider group. Note: VenueMagic Express only allows one slider group. Slider Properties… Bring-up the VCS Slider Properties window. You can also click in a slider’s label area and drag the slider around to reorganize the window. VCS Slider Properties Channel name: Enter text that will be displayed in the slider label. Name Color: Click this button to set color of the name text. Level Color: Click this button to set color of level display text. Slider Color: Click this button to set the color of the slider background. The slider text color will be selected automatically. Select channel: Select a VCS channel that will be controlled by this slider. There are a total of 128 slider channels available. External control source: Check this box to control the slider from an external source, and then click Select… to bring up the Select External Control window. Since the slider itself is available as an external source, the external source entered here will also control whatever the slider itself is controlling. External control stepwise Check this box to enable stepwise slider adjustments. In this mode, sliders are adjusted incrementally when specified external input conditions are met. Step % What percent of change occurs when stepwise control is triggered. Select step-up source Click to bring-up the Select External Control window to select the external control for stepwise increasing the slider level. Then set the Threshold value (see Understanding Threshold Values). Select step-down source Click to bring-up the Select External Control window to select the external control for stepwise decreasing the slider level. Then set the Threshold value appropriately Notes: Enter notes with respect to slider. VCS Slider Groups (Only Available for VenueMagic Classic and above) You can setup any number of VCS Slider Groups, each with as many sliders as you like. VCS Slider Groups appear as tabs in the VCS Group Tabs area. Select the tab to show the group. Right-click on a group tab to bring up a menu of options: Paste Slider If you have copied a slider into the Copy buffer, this option will add that slider to the selected group. New Group Add a new VCS slider group. Delete Group Delete the selected VCS slider group. Group Properties…: Bring up the VCS Slider Group Properties dialog window for the selected group. VCS Slider Group Properties Group name: Enter the group name that will appear in the VCS Slider Group tab. Set tab color… Sets the color of the VCS Slider Group tab. Also sets the color of the VCS Slider Area background. Set tab text color… Sets the color of the VCS Slider Group tab text. Notes Enter notes about group. VCS Master Level Sliders The VCS Master Level Sliders globally control the volume and lamp levels for all timelines, playlists and audio files currently playing. They do not belong to any group and are always shown when the VCS is active. Right click on either slider and select Slider Properties… to bring up the VCS Slider Properties window. You will note that Slider name and Select channel boxes are grayed-out. However you may select an external control source is you wish. Device Setup Audio Device Setup Select the audio device VenueMagic will use. Only one may be selected, which will apply to all projects. In VenueMagic DMX+AV Edition, this is the device a newly added audio track will default to (see Audio Track Audio Properties). DMX Device Setup This window displays all available universes (depending on the VenueMagic version) and allows you to select from a list of assigned devices to be used for each universe. It also lets you select a source for DMX Input. DMX Output Universes You can assign any supported and installed device to any available universe (depending in which version of VenueMagic you own). Only a single device can be assigned to a specific universe and vice versa. To un-assign a universe, select the desired universe and click the Un-assign button. To assign a universe to a DMX device, select the universe you wish to assign, the click the Assign button to bring-up the Assign DMX Universe window. This window lists all currently connected DMX devices and the number of universes it supports. Select the desired device and click OK. DMX Input Devices (Only Available for VenueMagic Classic and above) VenueMagic will allow you to select a single installed device that can be used for DMX input. Devices that are capable of DMX input are shown in the DMX input devices list. Some devices (such as the Enttec USB Pro) can either do DMX input or output, but not both. If you have already assigned such a device to a universe in the DMX output universes list, it will not be appear in the DMX input devices list unless you first unassigned it. Likewise, any such device selected in the input list will not be available for assignment to an output. Devices capable of doing input and output simultaneously (such as ArtNet) are available in both lists. Only one DMX device may be selected for input. DMX input is available in the Selecting External Control window. MIDI Device Setup Select the MIDI input and output devices to be used by VenueMagic. Only one of each may be selected, which will apply across all projects. MIDI output is not available in VenueMagic Express. Supported Devices Setup VenueMagic supports several models of DMX interfaces. Each device has its own set of drivers and control functions. Check the device(s) you are currently using with VenueMagic. If you are not using a device, leave it unchecked. As support for other devices is added to future versions of VenueMagic (DMX or non-DMX) it will appear in this list. If a device requires some setup, select the device, then click the Properties button. For information about serial communications, see Serial Port Output. For more information about the DMX interfaces VenueMagic supports, please see our website at www.venuemagic.com/dmxsupport. Selecting External Input Devices The Select External Control window is used by all VenueMagic features that require the selection of an external device. Select input device: Select a source device for external input. This version of VenueMagic supports : DMX Input (see DMX Device Setup) (VenueMagic DMX+AV only) MIDI Input (see MIDI Device Setup) Virtual Sliders Virtual Control Surface (VCS). Joystick (up to 15) (VenueMagic Classic and DMX+AV only) Keyboard (key-down=100%, key-up=0%) (VenueMagic Classic and DMX+AV only) Other input sources will be included as they become available. Device input group: Input channels on some devices are divided into groups. Select the group that applies. Process Data Check this box is you would like to perform additional processing on this input. Then click the Setup button to open the Data Processing window. This functions differently from Input Channel Settings window in that the settings here are associated with the item using the input rather than the input itself. For example if this setting is used for a channel route, only that route would be affected by settings. Other channel routes that may use the same input are not affected. Select input channel: Here is listed all available input “channels” for the selected input device. The list column headers adapt themselves to the selected device. Pick a channel from the list and click OK. Capture enabled: Monitors the selected input device for input messages and selects the associated “channel” in the list. When, the proper channel is selected, click OK. Input Settings Brings-up the Input Channel Settings window. Reset Settings Resets any scaling setup in Input Channel Settings window. Select input channel list Scaling column If scaling has been setup for this channel, the current settings are displayed here. The format is “(Low/Mid/High)”, where Low, Mid and High are the settings in the Input Channel Settings. If the Invert level setting is enabled, the above text will be preceded by the minus sign: “(Low/Mid/High)”. If no scaling has been setup, then column will show the word “None”. Input Channel Data Processing Set channel processing for an input channel for a particular item (such as a channel route, slider control, etc...). The scaling and offset values will modify the input channels value as follows: final value = (input value) x scaling + offset Input Channel Settings Window (VenueMagic DMX+AV only) The Input Channel Scaling window allows you to setup scaling and other processing for any input. Input Channel Name Enter the desired name for this input. Level Scaling The settings are similar to those found in the Calibrate Lamps window. Low Sets the low value for the channel range. In other words, if the input is set to zero, Low will be the scaled value. Mid Sets the mid value for the channel range. When the input is at 50% full scale, this will be the scaled value. This allows for non-linear scaling. Check the Mid checkbox to enable this feature. High Sets the high value for the channel range. If the input is set to its highest level, High will be the scaled value. Additional Processing In this group you can set additional parameters to process the input channel. The top section allows for added scaling: Pre-scale gain (%) Multiply input channel by a gain factor before it goes through level scaling. A value of 100% would leave the input unchanged. 50% would cut it in half, 200% would double it. The valid range is from 0-100%. Pre-scale offset (%) Offset the input by a desired percentage. This offset is added to the input signal before the Pre- scale gain. A value of 0% leaves the input unchanged. 50% would add 50 to the input level before it is multiplied by the gain. -50% subtracts 50. The valid range is -100% to +100%. Invert Level Check this box to invert the channel such that 0% scales to 100% and 100% to 0%. Inverting is applied after gain and offset, but before scaling. Control as Speed In some cases, it would be convenient for the input channel to control the speed of something rather than a level. For instance, suppose you were controlling a moving head with a joystick that snapped-back to a zero (rest) position when you le go of it. It would be much more effective if you could use the joystick to control the speed of the head in the desired direction rather than use it to command the position directly. You can enable this feature for the input channel by checking the Control as speed box. With this enabled for X and Y joystick channels, you could route them to the Pan and Tilt channels of a moving head (see Channel Routing). Now, push the joystick forward and watch the Tilt axis of the head start moving. Release the joystick and the head stops. Push forward harder on the stick and the head moves faster. Pull back on the stick and the Tilt axis moves the other direction. Similar action occurs on the Pan axis as you move the joystick left and right. Try this out with the Control as speed box unchecked and see what happens. The following parameters are available to fine tune the Control as speed feature: Sensitivity (%) Adjusts how sensitive the output speed is to movement in the joystick. 100% is for high speeds, 1% for very slow. External ctrl: If you would like control the Sensitivity parameter using another external input, check this box. Then click the Select button and select an input and set a threshold value. (See Selecting External Input Devices, Understanding Threshold Values). Rest position Most joysticks send values that range from 0100% with a rest position (when you let go of the joystick) that is technically at 50%. Here is were you tell VenueMagic what level is should be interpreted as the rest position. The default of 50% should be fine in nearly all cases. Threshold (%) While is rest position, many (usually cheaper) joysticks tend to chatter. This means that they move back and forth between levels even though you are not touching it. The Threshold value specifies how far the joystick has to move away from rest position before it is no longer considered at rest. The default of 0.5% usually works fine. Note: Do not confuse this with the threshold value used for triggering as described in Understanding Threshold Values. Understanding Threshold Values Some VenueMagic External Control settings require a Threshold value, which usually defaults to 50%. The reason that this value is necessary is that some MIDI controller buttons will send a midi message twice, first when pressed, again when released. Only the data field of these two messages will differ. VenueMagic will look at the data field and compare it to the threshold value to make sure that only the “pressed” message will be used. Most MIDI data values range between 0 and 127, which VenueMagic scales to a range of 0 to 100%. Buttons that send two messages usually sent 127 in the data field when pressed, and 0 in the field when released. Setting the threshold to 50% (a MIDI value of roughly 63) usually works in most cases. If the selected MIDI button sends only one message when pressed (and no message when released) it is not always certain what value of the data field will contain. In this case, it is best to set the threshold value to 0%, which is a special case that will trigger on the message regardless of its associated value. If you’re not sure what your MIDI button is doing, use the MIDI Monitor. If you want a trigger to occur when the associated value is less than the specified threshold, put a negative sign in front of it. In summary: Threshold value 50% Description Trigger occurs with value is greater than 50% (63 for MIDI controllers). Use this for MIDI control buttons that send two messages, where the first messaged (pushed) is greater than the second (released). -50% Trigger occurs with value is less than 50% (63 for MIDI controllers). Use this for MIDI control buttons that send two messages, where the first messaged (pushed) is greater than the second (released). 0% Trigger occurs when messages is received, regardless of associated value. This is the best setting for note keys and MIDI controller buttons that send only one message. Note: VenueMagic converts all MIDI NOTE OFF messages to NOTE ON messages with a velocity of zero. Customizing VenueMagic’s Appearance Clicking on the button in the main toolbar will bring-up the Appearance Settings dialog window, which will allow you to change colors and fonts for various items of the VenueMagic windows. Customizing Color Screen: Select a VenueMagic window. The Item list will be filled items that can be modified. Item: Select an item to change. Change Color: Choose a new color for the selected item. Global use gradients Check this box and VenueMagic will use color gradients to show certain items. It looks nice, but could slow down drawing time for very complicated timelines. Customizing Fonts Screen: Select a VenueMagic window. The Item list will be filled items that can be modified. Item: Select an item to change. Edit Font: Modify the current font for the selected item as desired. Project Notes Various items in VenueMagic include a tab or field to insert notes. Enter anything you like into these fields as they are there to help you keep track of you thoughts as you put shows together. User Fixture Library (VenueMagic Classic and above only) VenueMagic’s fixture library includes hundreds of fixture profiles from various manufacturers and it is constantly being added to. However you may, from time to time, desire to use a fixture that is not currently part of the installed library. VenueMagic’s User Fixture Library allows you to enter your own fixture profiles and use them in your projects as easily as you would fixtures from the installed library. Profile information for specific fixtures should be available from the fixtures manufacturer, and will be required for entering fixtures into the library. In the main menu, select ToolsUser Fixture Library… to bring up the User Fixture Library window: The User Fixture Library window is divided into four sections: Manufacturer List List of fixture manufacturers. Fixture List List of all fixtures associated with the selected manufacturer. Fixture Channels All channels in the selected fixture. Channel Selections/ Sub channel Settings For channels that are divided into range values (such as gobos and color wheels) this list shows hardware range values associated with functions for the selected fixture channel. It also shows sub channel information for compound channels. The Save button lets you save changes without closing the window. The Save & Close button saves your changes and then closes the window. Note: Changes made to the fixtures in the User Fixture Library will in no way affect fixtures stored in the main fixture library. Manufacturers List VenueMagic lets you keep track of your user fixtures by manufacturer. Initially, this list is taken from the main fixture database when you run the program, but you may add and remove manufacturers as you like. To add a manufacturer, click on the Add button and enter then name of the new manufacturer. To change the name of a manufacturer, select the desired manufacturer, then click in the Manufacturer Name column and key in a new name. To remove a manufacturer and all of the fixtures in the User Fixture Library that are associated with it, click the Remove button. The #Fixs. Column show the number of fixtures the library contains for that manufacturer. Total fixtures: shows the total number of fixtures in the User Fixture Library. Fixtures List The fixtures list lets you add, remove, edit or copy fixtures associated with the manufacturer currently selected in the manufacturers list. If no manufacturer is selected, this list will be blank. The list displays the fixture model, type and the number of channels the fixtures contains. Show fixtures for device selects the device the fixture is associated with. The available options are: DMX – Fixture is a DMX fixture. Virtual – Fixture is a virtual fixture (see Virtual Fixtures). Adding a Fixture Click the Add button to bring up the Add New Fixture window. Enter a name for the new fixture (usually the name given by the fixture’s manufacturer) and then select a fixture type. If you’re not certain of the fixtures type, leave it at the default, “Lamp”. This field is mainly for your benefit and has no effect on how VenueMagic will interpret the fixture. Click OK when you’re done and the new fixture is added to the list. Editing a Fixture To edit the name or type of a fixture already in the list, click the Edit button. A similar window will appear. Fixture names must be unique to the associated manufacturer. Removing a Fixture Click the Remove button to remove selected fixtures from the list. You may remove a single fixture or multiple fixtures by selecting them in the list. Removing a fixture also deletes all associated channels associated with that fixture. Copying a Fixture You can copy a fixture, along with all of its channels and channel range settings by clicking Copy to bring up the Copy fixture window. First select the manufacturer you would like to copy the fixture to. By default, the current manufacturer is selected. This feature is convenient, because several manufacturers may carry the same fixtures under a different name. Next, select how man copies of the fixture you would like to make. Fixture Channels List This list shows all of channels associated with the selected fixture. From here you can add, remove, edit and copy channels within the fixture. You can also adjust the DMX channel ordering. The list includes the following columns: Adding Channels Click on the Add button to bring up the Add Fixture Channel window. First select a channel type from the Fixture channel type list. This is not an arbitrary selection like the fixture type. VenueMagic uses this very important setting do decide how the channel should behave in different lamp effects. For a detailed explanation of fixture channel types, see Fixture Channel Types. Next, select how many channels of this type you would like to add and enter a base name for the channel. If you request more than one of this channel type to be added, the base name will be appended by a number (ex: Lamp1, Lamp2, etc…) to prevent duplicate channel names within a fixture. Adding Channels with Selections The channel types Color Wheel, Gobo Wheel, and Selector use DMX level ranges to select colors, gobos or additional features. When one of these channel types is selected, the Add Fixture Channel window will offer additional settings. In the case of the Color Wheel channel type, you can enter in the number of color settings available, and then set the base name for each setting. You will later be able to edit the name, DMX level range and other attributes (such as the actual color) in the Channel Selection/Sub channel Settings list later on. Adding Composite Channels The channel types RGB, Motion PT, Motion PT Fine, Motion XY and Motion XY Fine are called composite channels (see Fixture Channel Types). This means that they are further broken down into sub channels (RGB.Red, RGB.Green, RGB.Blue, MotionPT.Pan, etc…). This allows VenueMagic lamp effects to operate on these channels together to produce more sophisticated lighting effects. Sub channels of composite channels are displayed in the Channel Selection/Sub channel Settings list for the selected channel. Mode Channels A Mode channel type is used to define a specific operating mode for the fixture. Quite often, changing the mode in the fixture will also change the channel configuration of the fixture, including the number of channels and their purpose. The way that VenueMagic deals with multi-mode fixtures is by requiring that a separate fixture be added for each mode. After adding the mode channel, you can edit it to set the mode value. Editing Channels To edit a fixture’s settings, select the fixture and click the Edit button to bring up the Edit Fixture Channel window. Enter a new name for the channel. For most of the channel types you will be able to select a trace color by clicking the Trace Color button. The trace refers to the lines that are drawn to represent the channel level in a timeline or in the Envelope Editor. Trace colors for composite channels are set in the Channel Selection/Sub channel Settings list. Channel Clusters You can also set the channel’s associated channel cluster. This value is use used to help determine how a channel should be represented in the Lamp Preview Window. When a fixture is dragged into the Lamp Preview Window, each cluster will have its own separate lamp. This is useful for fixtures such as dimmer packs which control multiple lamps. In addition, some RGB Lamp fixtures may provide control for several RGB channels, each of which will need its own lamp in the preview window. If an RGB fixture includes a master level control that controls all of the red, green and blue levels together, this channel should have the same cluster number as the RGB channel. VenueMagic will automatically try to assign the cluster number for you as you add new fixtures. In most cases, the default assignment will work just fine. However, you have the option to change it here if it does not. Hardware Min/Max Values Most DMX fixture channels have a hardware range of 0 to 255, representing 0 to 100% in VenueMagic world. In addition, VenueMagic combines LSB and MSB of 16-bit controllers into one channel with a range of 0 to 65535. These values are set by default and will not need to be changed. However, there are some fixtures that require odd values that are not within the normal range. These fields are also good for making sure that VenueMagic never sends values outside of the range for this fixture channel. Editing Mode Channels Mode channels have their own edit window that only permits you to set the DMX mode code. Removing Channels You can remove one or more selected channels by clicking on the Remove button. This will delete the channel and any associated ranges or subchannels. Copying Channels To copy a selected channel, click on the Copy button to bring up the Create Copies window. Enter the number of copies you would like to make of the selected channel and click OK. VenueMagic will copy the selected channel any associated range or sub channel information. Each copy will have a sequential number appended to the channel name to prevent duplication. Setting Channel Order After you have entered all of the channels in a fixture, you will need to make sure that all of the channels are in the right order as indicated by the fixtures documentation. Click on the Ordering button to bring up the Channel Ordering window. The Channel Ordering window shows all of the physical channels you have include in the fixture and their assigned channel within the fixture. The term base in the Chn # column represents the base DMX channel setting for the fixture. Notice how the composite channel Position has been broken down into its sub channels, Position.Pan and Position.Tilt. Select a channel, then use the buttons to change the position of the channel in the fixture’s channel number ordering. Click OK when you have finished. Channel Selection/Subchannel Settings This list will show different information base on the channel type of the channel currently selected in the Fixture Channel list. Motion PT and Motion XY Channels It the selected fixture channel is Motion PT or Motion XY, then the Channel Selection/Subchannel Settings window will display the associated subchannels like this: Position subchannels cannot be added or removed, but you can change their trace color by selecting a channel and clicking on Edit. Motion PT Fine and Motion XY Fine Channels Motion PT Fine and Motion XY Fine channel types are for channels that control motion using two DMX channels per axis for greater precision. As you can see, the Channel Selection/Subchannel Settings window will show will show all four channels. You can set the trace color for the coarse position channels (X, Y) but not for the fine channels (XFine, YFine). The reason for this is that VenueMagic handles the splitting of position values across the coarse and fine channels automatically. After you have set them up User Fixture Library window, you will not see them anywhere else. RGB Channels When and RGB type channel is selected, the Channel Selection/Subchannel Settings shows the Red, Green and Blue subchannels. You cannot change the trace color of these subchannels because it is assumed (perhaps erroneously, but oh well…) that you will want them to be red, green and blue, respectively. This assignment is made for you automatically. Color Wheel, Gobo Wheel and Selector Channels For these channel types, the function and appearance of the Channel Selection/Subchannel Settings window is changed. Rather than showing subchannels, it now shows DMX level ranges and their associated settings. Adding Level Ranges The best way to add selection ranges to a channel is to do it all at once using the bottom half of the Add Fixture Channel window. If done this way, the Channel Selection/Subchannel Settings window is pre-loaded for that channel with HW ranges that are event divided. Later you can go back and edit the names and ranges. However, if you find yourself needing to add another level range, then click on the Add button to bring-up the Add Range Settings window. This window is slightly different for each channel type. Add Color Wheel Range Name Type in a name for the color. Dimmer/fader When checked, this range acts like a dimmer. In other words, a lamp effect can vary the level within the range. When unchecked, only the center point of the range is used by fixture. For example, if, for this fixture, the range 200-255 on this channel corresponds to a rainbow color (non-stop rotating of the color wheel) and the level adjusts the speed of the rotating wheel, then check this box so that VenueMagic knows that the whole range controls something. Colorwheel color Select a pre-defined color from the list or select CUSTOM for your own color. Selecting a predefined color will also automatically set the Name field to the appropriate color name. Hardware min value The hardware value (0 to 255) specifying the bottom of the range, inclusively. Hard coded to 255, which puts any added ranges at the very end. Hardware max value The hardware value (0 to 255) specifying the top of the range, inclusively. Hard coded to 255. Add Gobo Wheel Range Name Type in a name for the gobo. Dimmer/fader See Add Color Wheel Ranges. Hardware min value The hardware value (0 to 255) specifying the bottom of the range, inclusively. Hard coded to 255, which puts any added ranges at the very end. Hardware max value The hardware value (0 to 255) specifying the top of the range, inclusively. Hard coded to 255. Add Selector Range Name Type in a name for selection. Dimmer/fader See Add Color Wheel Ranges. Hardware min value The hardware value (0 to 255) specifying the bottom of the range, inclusively. Hard coded to 255, which puts any added ranges at the very end. Hardware max value The hardware value (0 to 255) specifying the top of the range, inclusively. Hard coded to 255. Editing Level Ranges To edit a selected range, click the Edit button to bring up the Edit Range Settings window. This window is slightly different for each channel type. Edit Color Wheel Range Name Type in a name for the color. Dimmer/fader Check this box if the range is to behave like a dimmer/fader. See Adding Color Wheel Ranges for a more detailed explanation of this setting. Colorwheel color Select a pre-defined color from the list or select CUSTOM for your own color. Selecting a predefined color will also automatically set the Name field to the appropriate color name. Hardware min value The hardware value (0 to 255) specifying the bottom of the range, inclusively. (See also Hardware Min/Max Value Auto-accommodation) Hardware max value The hardware value (0 to 255) specifying the top of the range, inclusively. (See also Hardware Min/Max Value Auto-accommodation) Edit Gobo Wheel Range Name Type in a name for the gobo. Dimmer/fader See Add Color Wheel Ranges. Hardware min value The hardware value (0 to 255) specifying the bottom of the range, inclusively. (See also Hardware Min/Max Value Auto-accommodation) Hardware max value The hardware value (0 to 255) specifying the top of the range, inclusively. (See also Hardware Min/Max Value Auto-accommodation) Edit Selector Range Name Type in a name for the gobo. Dimmer/fader See Add Color Wheel Ranges. Hardware min value The hardware value (0 to 255) specifying the bottom of the range, inclusively. (See also Hardware Min/Max Value Auto-accommodation) Hardware max value The hardware value (0 to 255) specifying the top of the range, inclusively. (See also Hardware Min/Max Value Auto-accommodation Edit Bitfield Bit Name Enter a name for the bitfield bit. Hardware Min/Max Value Auto-accommodation If you change the hardware min and/or max values for a channel range, VenueMagic will automatically adjust other ranges to accommodate the ranges you entered to prevent overlap and gaps in the ranges. This can often lead to unpredictable results if you enter range values very different from the original assigned ranges. Before radically changing hardware values for a range, it is best to first move the channel range close to where you want it using the above the Channel Selection/Subchannel Settings list and then editing it. Exporting Fixtures VenueMagic will allow you to export selected user fixtures to a file that can be imported by others. Click on the Export Fixtures… button to bring up the Export Fixtures window. This tree shows a list of fixtures, listed by manufacturer, that are currently included in the user fixture library. Place a check on the fixtures you wish to export. You may also select all fixtures for a manufacturer by checking the box next to the manufacturers name. To export all fixtures, click on Select All. When you have checked all fixtures you wish to export, click OK, then select a path and enter a filename for the exported fixtures. If the operation was successful, VenueMagic shows the message: Importing Fixtures VenueMagic will allow you to import fixtures from a previously exported file, or from the main fixture library that came with your installation of VenueMagic. Start by clicking on the Import Fixtures… button. The Select Fixture Import Source lets you choose where you will import from. Select the first option to import from a previously exported fixture file. Select the second option to import from the main fixture library. Then click OK. Selecting the first option first brings a file selection window from which you may select the file you wish to import fixtures from. Once the file has been selected and loaded, The Import Fixtures window you will be allowed to choose which fixtures to import. Selecting the second option brings-up the Import Fixtures window without first asking you to select a file. The Import Fixtures window functions similarly to the Export Fixtures window. If you attempt to import a fixture that is already in your user fixture library, it will be ignored. If you want the imported fixture to replace the old one, check the Replace older fixtures option. Event Scheduler (VenueMagic DMX+AV and above only) The Event Scheduler lets you schedule the execution of a VenueMagic event for a specific date and time. From the main menu, select ViewEvent Scheduler top open the Event Scheduler window. This Event Scheduler window is divided into three sections: 1. The event list, shows lists the entered events according to display options and lets you add, edit, delete, copy, etc… events. 2. Display options specify the range of dates for which events are displayed. 3. Triggering options specify event triggering behavior. Event List The event list shows information about all events in the range specified in the display options. Shown for each is event is: Date/Time: The date and time that the event will be triggered. Event: A brief description of the event. Status: The current status of the event. Can be one of the following: o Waiting: Event is waiting for its trigger time. o Triggered: Event has been triggered. If Auto-delete triggered events is enabled, this status will never bee seen. o Disabled: Usually means that the event has not been completely setup. Color Coding For convenience, events in the list are color coded according to their status: Adding Events To add an event when no existing event is currently selected, click on the Add… button to bring up the Scheduled Event window for a new event. Select event Select the event you would like to trigger. Listed here are the same events that you can add to a timeline event track (see Event Tracks). Settings… Click this button to bring up the events settings window for the selected event. For more information about these settings, go to the event setup window for the specified event in the Event Tracks section. Trigger date Time: Click on the button to bring up the date picker and select a date for the event to trigger. Enter the time of day that you would like the event to trigger. Added events are place in the list sorted by date/time. When you add an event, the trigger date and time in the Scheduled Event window will default to the date and time of the last event currently displayed in the list. If no events are currently displayed, it will default to the current time, on the date specified in the display options section. Inserting Events If an event is currently selected, the Add… button will be changed to display Insert… This functions similarly to the Add button, except that the default date and time will be the same as the currently selected event. Again, if you change the date/time, the event will be repositioned in the list so that the proper display order (by date/time) is maintained. Editing Events Select the event you wish to edit and click Edit… Modify any of the event settings in the Scheduled Event window. Deleting Events Deleting one or more events by selecting them in the event list, and clicking Delete. Repeating Events You can tell events to repeat regularly at daily or weekly intervals. Select the events you wish to repeat and click on Repeat… to bring up the Repeat Selected Events window. Repeat every You can tell the selected events to repeat every Day or every Week. If Day is selected, you can choose which days of the week it will be triggered. Repeat count Enter the number of time you would like the selected events to repeat. Repeating events really just copies them at the specified interval for the specified number of times. Once they have been set to repeat, you cannot go back and change the repeat parameters. Cut, Copy and Paste You can also cut, copy and paste selected events using the buttons. When you paste copied events, the event time remains the same, however, the date will be adjusted relative to the date currently selected in the display options section. For example, suppose you were to copy two events that occurred on the 15th and 16th day of the month respectively. I you were to set the display options to show events for the 20th day of the month and click Paste, the two events will be pasted to the 20th and 21st days of the month, respectively. Note: you cannot paste events prior to the current date and time. Event List Display Options The event list display options lets you select which day or range of days are displayed in the event list. Date Select Calendar In the date select calendar, click on the day you would like to display in the list. You can also select several days by clicking and dragging the mouse pointer across multiple days. As you make your selection, the event list is updated with all events scheduled to trigger within the range. Use the keys to select the displayed month. Dates that contain events are marked in bold Showing Events Over Ranges You can a range of dates with the Show events for selector Select Day for a single day in the currently displayed month or Month to show events for the entire month. If you select Custom Range, you can enter an arbitrary range of dates in the From and To fields below. To show events scheduled for today, click on the Show Today button. Triggering Options Enable event triggering Check this box to enable triggering of scheduled events. Uncheck it to prevent events from triggering. Auto-delete triggered events With this box checked, events will be cleared from the list as soon as they are triggered. If unchecked, triggered events remain listed with their status set to Triggered. Triggered events can be copied to a future time, but cannot be reset to trigger again. Real-time Recording and Editing of Channels (Only available for VenueMagic DMX+AV and above) VenueMagic allows you to perform real-time recording of DMX, MIDI and Joystick inputs. You can setup Level Control effects to record input channel levels as they control specific output channels, and then play them back later. For more information on setting up the record feature, see Level Control Setup Recording Properties. After you have recorded data, you can go back and edit it using the envelope editor. The Envelope Editor includes tools for, moving, stretching, dragging, smoothing, time shifting, and more. For more information on editing recorded data, see Editing Recorded Data. Serial/UDP Port Input/Output (Only available for VenueMagic DMX+AV and above) VenueMagic lets you send customized synchronized messages over any serial communications or over UDP port on a local area network (LAN). It will also let you specify special input commands to allow external serial or UDP devices to command VenueMagic to send events or act as external control devices. From the Supported Devices tab in the Setup Devices window, check and select Serial Communications devices list, and click the Properties button. This will bring-up the Serial Port List window. Serial Port List Window Use this window to add or edit serial or UDP ports that can be used by VenueMagic Serial Out Events. This list does not show all of the serial ports available on you computer. Rather it shows only those ports that you have told VenueMagic you want to use. To add a serial port to the list, click the Add Serial to bring-up the Setup Serial Port window. To add a UDP port, click on Add UDP to brin-up the Setup UDP Port window. To edit the settings an already added serial port, select the port from the list and click Edit… To delete a port from the list, select it then click Remove. You can enable/disable the port by checking/un-checking the box to the left of the Port name. Setup Serial Port This window lets you setup a serial communications port for use by VenueMagic. This information is dependent on the hardware you will be communicating with. Consult the manual that came with your hardware for the proper serial communications settings. Port name Type in any unique name for the port. By default it will be the name of the port selected in the Connect using field. Connect using Shows a list of all available serial ports on you computer. Select the one you would like to use. Baudrate Select an appropriate baud rate from the list. Data bits Select the number of data bits required (4-8). Most hardware will require this to be set to 7 or 8. Parity Select the option for parity check. If you’re unsure, leave it at none. Stop bits Select the stop bits (1, 1.5 or 2). A value of 1 is most common. Flow control Select the flow control (handshaking) mode for communications. “None” is the most common selection. Enable input Check this box to enable serial input from the selected port. Setup Input Commands Click this button to bring up the Serial Input Commands window. Test Click the Test button to make sure you can open your serial port. Note: A successful test only tells you the serial port on your computer is setup and working properly. It does not tell you if you are communicating with your hardware. Setup UDP Port This window lets you setup a UDP communications port for use by VenueMagic. Port name Type in any unique name for the port. By default it will be the name of the port selected in the Connect using field. Host address Enter the computer name or IP address that this port will be communicating with. Host port Enter the port number the UDP port will open for sending and receiving. Enable input Check this box to enable serial input from the selected port. Setup Input Commands Click this button to bring up the Serial Input Commands window. Test Click the Test button to make sure you can open your UDP port. Note: A successful test only tells you the UDP port on your computer is setup and working properly. It does not tell you if you are communicating with another computer. Serial Input Commands VenueMagic lets you setup serial/UDP input commands that will enable an external device to perform the following functions on VenueMagic: 1. Trigger an event 2. Provide level data available in the Select External Control window. Click the Add button to create a new command, and then setup the command parameters: Command This is the command string that the external device must send to trigger this command. Command strings sent by the external device must be terminated with a carriage return character (hex=0x0d, decimal=13). Command type Select from the following command types: Event: Receiving the command triggers a VenueMagic Event. Level: Command appears in the Select External Control window. Timecode: Currently unsupported. Event Commands Choose a VenueMagic event in the Select event list. Click on Setup Event… to bring up the properties window for the selected event. Level Control Commands Level control commands must be sent by the external device in the form: command = level<CR> Where command is the specified command string and level is a number between Min value and Max value. The terminating character, <CR> (hex=0x0d, decimal=13) must always be added to the end of the string. VenueMagic will scale the full range of Min value to Max value and convert it into the 0%-100% values that VenueMagic expects. Serial Output Commands All serial output is handled by the Serial Port Output Event. Event Table (Only available for VenueMagic SC+ and above) Open the Event Table window by selecting EventsEvent Table in the main menu. Events in the event table function identically to events in an event track. The big difference is that while event track events conditionally trigger at a specific time in a timeline, events in the event table will trigger the moment a condition is true. You can also setup events in the table to trigger periodically at a specified time interval. To add an event to the list, click the Add button. This will bring-up the Select Event window. Select the event you would like to add and click OK and the Event Properties window will appear for the selected event. Setup the event just as you would an event on a timeline. You will notice an additional tab in the Event Properties window that does not appear for events in timelines. The Trigger tab is specific to events in the event table and offers for control over how, and hoe often, an event will trigger (see Event Trigger Settings below). The Edit button will bring-up the Event Properties window for the selected event. The Remove button will remove selected events from the event table. Check the Disable events when window is closed box to prevent the events table from activating as soon as the window is closed. This will prevent events from triggering unexpectedly. The event table can be enabled manually by selecting EventsEnable Event Table in the main menu. When enabled, the table will constantly scan through the events, triggering them when the specified conditions are valid. Select Event Window Select the type of event to add to the event table. Click OK and the properties window for the selected event will come-up. Event Trigger Settings Event table events offer additional flexibility when it comes to how the event is triggered. Trigger mode The trigger mode is actually more concerned with how an event resets itself after it has been triggered. An event is triggered when the specified condition (set in the Conditions tab) becomes true. A triggered event must be reset before it is able to trigger again. The following options are available: Edge – Once an edge trigger has been triggered, it can only be reset when whatever condition caused the trigger becomes false. For example, if an event condition cases the event to trigger when a Virtual Slider goes above 50%, the trigger will automatically reset when the slider drops back down to 50%. Level – A level triggered event will execute when the specified condition is true and will execute repeatedly until the condition becomes false. This mode is usually used with an Update interval value greater than zero; otherwise the event will be repeatedly triggered at the full VenueMagic cycle rate. Manual – In this mode, the triggered event must be manually reset before it can trigger again. There are two ways to reset a manual event: 1. Select EventsReset Event Groups in the main menu. This will reset all event groups. 2. Reset it using a Reset Event Group event. This will reset a specific event group or all of them. Trigger group To more easily facilitate the manual resetting of large numbers of Manual-mode events, each event is assigned to an event group. In this field, select the group number an event will belong to. When Reset Event Group event is executed, all events assigned to a specified group number are reset together. Variable Table (Only available for VenueMagic SC+ and above) The VenueMagic variable table is a list of general purpose variables that store numeric values that can be used as external input sources (see Selecting External Input Devices). The value of variable tables variables are set primarily by the Set Variable Event, however they can also be modified by a special function of Channel Routing Groups to take advantage of a variable’s redirect feature. Access to a variable’s value is available only as an external input source. From the main menu, select DevicesVariable Table to open the Variable Table window. To add a variable to the table, click Add to create a new variable and bring-up the Variable Properties window. Variable Properties Window Variable name Enter a name top uniquely identify the variable. Description An optional description of the variable. Startup value Enter the value that will be automatically to the variable when VenueMagic first starts-up. The variable will retain this value until it is changed by a Set Variable Event or by a Channel Routing Groups changed if the routing group is setup to do so. Redirect to Check this box and any value assigned to the variable will be redirected to a MIDI channel. Click Select to bring-up the Select MIDI Message window. This feature is mainly intended to function with the Channel Routing Groups feature. As such, the number assigned to the variable is expected to be in the range 0-100, and will be re-scaled to a value between 0 and 127 before being sent as a MIDI message. Virtual Fixtures (Only available for VenueMagic SC+ and above) Virtual fixtures functions as both fixture outputs and external inputs. Virtual fixtures appear in the Fixture folder of the Project window, from where they can be added into lamp tracks. However, they are also available as external inputs in the Select External Input Device window. This allows you to use lamp effects to control volume levels, lamp levels or anything else that can be controlled with an external input. Unlike regular DMX fixtures, which are associated with an actual piece of DMX hardware, virtual fixtures represent “imaginary” hardware and, by default, do not control anything outside the software (unless redirected to MIDI outputs—see Redirecting Virtual Fixture Channels to MIDI). They exist solely for the purpose of routing level control from a lamp track into an available external input source. Virtual fixtures are created in two steps: 1. Create a virtual fixture in the User Fixture Library. Be sure to select Virtual as the Show fixture for device option. 2. Add the fixture to the virtual fixture list from the Setup Virtual Fixtures window. Setup Virtual Fixtures Window Open the Setup Virtual Fixtures Window by selecting DevicesVirtual Fixtures from the main menu. This list shows virtual fixtures that have been setup for the project. Add Click Add to bring-up the Select Fixture List, which shows a list of all virtual fixtures that have been created in the User Fixture Library. Edit Click Edit to bring-up the Edit Fixture Settings window for the selected fixture. From here you can rename the fixture and channels as they appear in the Virtual Fixtures list. Remove Removes selected fixtures from the list. Redirect… The redirect features lets you assign virtual fixture channels to actual MIDI messages. Select a fixtures with channels you would like to redirect to MIDI, then click Redirect to bring up the Redirect Virtual Fixture Channels window. Edit Fixture Library… A shortcut to open the User Fixture Library for creation of new virtual fixtures. Select Fixture List Lists the virtual fixtures that have been created in the User Fixture Library. Select the fixtures you would like to add to the Setup Virtual Fixtures window and then select how many copies of each fixture you would like to add. Then click OK. Redirecting Virtual Fixture Channels to MIDI Virtual fixtures are meant primarily to function as a link between lamp track level control and external inputs (see Selecting External Input Devices). However they do offer an additional feature that allows them to be redirected to MIDI messages, giving VenueMagic the ability seamlessly control MIDI-based fixtures as easily as it controls DMX-based fixtures. Bring-up the Redirect Fixture Channels window by selecting a virtual fixture in the Setup Virtual Fixtures window and clicking Redirect. Shown here is a list of all of the channels contained in the selected fixture. Select a channel and click Select to bring-up the Select MIDI Message window. (Note that this is the same selection window used by the MIDI Out event.) After you have assigned all of the desired channels to MIDI messages, click OK to return to the Setup Virtual Fixtures window where you will see that the Redirected column of the fixture no reads “Yes”. This indicates that at least one channel in the fixture has been redirected to a MIDI message. To un-assign the redirection of a channel, select the desired channel, and then click Clear. VMNet (Only available for VenueMagic SC+ and above. Some features available in DMX+AV and Classic) VMNet expands the power of VenueMagic to local area networks, providing the following capabilities: Remote running and synching of timelines Remote execution of VenueMagic events Telnet services Interfacing for VM plug-ins running on other applications (Virtual DJ, etc…) There are two components to VMNet: Server, Client and Time code Source. Any currently running VenueMagic on the network can function simultaneously as a server and a client. VMNet Server The VMNet Server function provides the following services: Remote synching The VMNet server can receive time code messages from a VMNet time code source and relay it to any timelines running locally that are setup to receive them. Remote event execution VMNet servers receive event commands from clients and execute them on the local machine. Only certain VenueMagic events can be send over VMNet. Consult the documentation on a specific event to see if it has VMNet remote execution available. Telnet service Plug-in services (available in Classic and above) VMNet offers a simple Telnet server capability for the purpose of receiving VenueMagic event execution commands from other applications. VenueMagic plug-ins running in other applications (such as Atomix’s Virtual DJ) communicate with VenueMagic through the VMNet server. A number of special functions are exposed to the plug-in to provide a very tight, clean and complete integration between the plug-in and VenueMagic, whether VenueMagic is running on the local computer, or on another computer connected to the network. More information on how to setup the VMNet server can be found in the Project VMNet Settings section. VMNet Clients A VenueMagic project can has as many Clients as required, each one setup to communicate with a single VMNet server running locally or on another computer connected to the network. VMNet clients enable VenueMagic events to be sent to VMNet servers to be executed remotely on other VenueMagic installations running on the network. This feature is available only to selected VenueMagic events which include an additional VMNet tab in their setup windows. More information on how to setup VMNet clients can be found in the Project VMNet Settings section. VMNet Time Code Source A VenueMagic timeline can be setup to be a VMNet time code source in the Timeline Synching Options window. There are multiple channels of VMNet time code available, so it is possible to run several so timelines simultaneously as VMNet time code sources as long as they are all on different channels. VMNet Pass Codes A VMNet server can be setup with a special pass code that prevents un-authorized users to control it from another VenueMagic on the network. A pass code can be any number from 0 to 2147483647and needs to be set for the server and all clients that use the server. More information on how to setup VMNet pass codes can be found in the Project VMNet Settings section. VMNet Telnet Server Telnet is one of the service offered by the VMNet server. It is a simple implementation that gives other applications the ability to remotely execute certain VenueMagic events. More information on how to setup VMNet Telnet server can be found in the Project VMNet Settings section. Once a Telnet client has successful connected to a VMNet Telnet server, a list of available event commands can be displayed using the help command. Typing help followed by one of the listed commands provides a simple description of the functions parameter list. Terminate the session by typing exit. Sample VMNet Telnet Session Each of above event commands executes the VenueMagic events that the command name suggests. The command parameters are named after the settings in individual events. The following conventions are followed in the parameter lists: String values are enclosed in quotation marks, which should be included in the sent command. Numeric values can be entered with or without the decimal point. Parameter ranges and options are displayed in square brackets [ ]. The brackets must not be included in the command. For on/off parameter, 0=off, 1=on. For example, the RunTimeline command in the sample screen above could be set as follows: RunTimeline(“MyTimeline”, “MyTimeline”, 100.0, 50,0, 1, 0, 0) The passed parameters are: Name of timeline: Name in cue list: Volume scaling: Lamp level scaling: Loop timeline: Play one only: Play as: “MyTimeline” “MyTimeline” 100.0 50.0 1 (enabled) 0 (disabled) 0 (background timeline) VMNet Telnet Clients Telnet clients enable VenueMagic to send telnet messages to standard telnet servers over a network. Multiple clients can be setup in the Project Telnet Settings window. Once clients have been setup, messages are sent using the VMTelnet Event. Teleprompter (Only available for VenueMagic Classic and above) The VenueMagic teleprompter is a powerful, full-featured teleprompter that is fully integrated into VenueMagic’s timeline and external control functionality. With the VenueMagic teleprompter you can: Import, edit and format multi-page text for display. Scroll text manually using a MIDI controller (keyboard, foot control, etc…) or any other supported external control. Control text scrolling from a timeline (SC+ only). Display song lyrics or other text synchronized to timeline playback. Import Lyric (LRC) files to automatically populate a timeline with teleprompter text for a specific song. Main Teleprompter Window From the main menu, select ViewTeleprompter to bring-up the VenueMagic Teleprompter window. You can also click on the window. icon on the main toolbar. Click the icon again to close the This window can be sized and positioned with the mouse. Size and position are saved when VenueMagic is exited. VenueMagic provides only one teleprompter window that is used by all timelines and projects. Fixed vs. Dynamic Text Text displayed in the teleprompter window is either fixed or dynamic. Fixed text is entered directly into the teleprompter editor (see Teleprompter Edit Mode). Fixed text is included as part of VenueMagic’s global data (i.e.: not associated with a project or timeline) and is saved automatically when VenueMagic exits. It is also automatically loaded into the teleprompter when VenueMagic is run and remains displayed in the window until it is overwritten by dynamic text. Dynamic text is sent to the teleprompt by a teleprompt marker in a running timeline. A timeline may contain multiple teleprompt markers. As the time cursor passes over a marker, the text and formatting associated with the marker are sent to the teleprompter, overwriting what is currently being displayed. Which to Use? Fixed text is easier to use but not very flexible. Dynamic text is far more flexible because timelines can control what is being displayed in the teleprompter at all times during show playback. It should also be noted that the teleprompter is limited to the number of characters it can display. If the text you have cannot be accommodated, you may have to split it up across multiple teleprompter markers. Teleprompter Edit Mode At startup (i.e.: when VenueMagic is run), the teleprompter is put into display mode, where text can be displayed (and scrolled if needed) but not edited. In order to edit fixed text, you must put the teleprompter into edit mode. This is done by right-clicking anywhere in the teleprompter text area and selecting Switch to Editor. You can also click on the icon in the main toolbar. In edit mode, the teleprompter window functions as a typical text editor with standard settings and features such as: Text font, size and color. Horizontal/vertical justification Horizontal/vertical margins Background color Cut, copy, paste text Import standard (.txt) or formatted (.rtf) text files. The teleprompter editor serves two main purposes: 1. Editing fixed text (see Fixed vs. Dynamic Text) 2. Editing and exporting dynamic text to timeline teleprompter markers (see Exporting Text and Formatting to Teleprompter Markers). Edit Mode Toolbar Below is a summary of the edit mode toolbar button functions: Button Function Erase editor contents. Import text (.txt) or formatted (.rtf) files. Note: Formatted (.rtf) files can be created by document editors such as WordPad and MS Word. Standard cut, copy and paste functions. Set font of selected text. Brings up text font setting window. Set color of selected text. Brings up color selection window. Set editor background color. Brings up color selection window. Applies teleprompter’s current format settings to all teleprompter markers in currently loaded timeline. Select horizontal alignment of selected text (left, center or right). Inserts a teleprompter marker into the currently open timeline at the location of the time cursor (see Exporting Text and Formatting to Teleprompter Markers). Opens Teleprompter Settings window. Switch teleprompter back into edit mode. Exporting Text and Formatting to Teleprompter Markers If you wish to divide up a larger piece of text across multiple teleprompter markers (song lyrics are a great example of this) the best thing to do is to first load it into the teleprompter editor and then export sections of the text to different markers. This is done by first selecting a block of text, and then clicking on the button. This will create a new teleprompter marker and copy into it the selected block of text, including formatting. Teleprompter Settings Window The Teleprompter Settings window lets you setup the display mode behavior of the teleprompter window. Teleprompter General Settings Vertical Alignment Select the vertical alignment of all text in the teleprompter. This will only take effect during display mode. Select from top, bottom, and center. Bottom and center alignment works best if the teleprompter contains only a single page of text. Left/right margin Adjust the left and right margins of the teleprompter. Top/bottom margin Adjust the top and bottom margins of the teleprompter. Show vertical scrollbars Check this box if you wish the vertical scrollbars to be available during display mode. If scrolling is controlled exclusively from external controls then scrollbars are probably not needed. Enable timeline control Uncheck this box if you do not want the teleprompter to be affected by timeline markers. Teleprompter External Control Settings Here you can set how teleprompter page scrolling will respond to external controls. Check the Enable external control box if you wish use external inputs (MIDI, etc…) to control teleprompter page scrolling. Then select the desired Scroll control option, either Incremental or Level. Incremental scroll control lets you control page-up, page-down and goto-top from external controls such as buttons on MIDI or PC joystick controllers. Click on the corresponding button (Select page-up source, Select page-down source, Select goto-top source) and select the desired external control in the Select External Control window. Then set the threshold value for each as appropriate (see Understanding Threshold Values). Incremental control is best for scrolling with foot switches or other MIDI devices. Level scroll control lets you set the absolute scroll position using a MIDI slider or other external level control. An input value of 0% scrolls the teleprompter to the top of the first page of text, while 100% scrolls it to the last page of text. Timeline Teleprompter Markers Timeline teleprompter markers let you specify formatted text to be displayed in the teleprompter window when timeline playback reaches the marker. To add a teleprompter marker, right-click on the timeline time scale where you would like the timeline to be placed and select Insert MarkerTeleprompter. This will insert a green, diamond-shaped teleprompter marker and bring up the Edit Teleprompter Marker window. This resizable editor functions similarly to the teleprompter window opened in edit mode. During timeline playback, as the time cursor passes over a marker, the text and formatting associated with the marker are sent to the teleprompter, overwriting what is currently being displayed. The format settings of a new marker are always the settings of the last marker that was edited. This makes it easier to maintain consistency in appearance when multiple markers are added consecutively. You can also apply the format of the currently opened marker to all teleprompter markers in the timeline by clicking on the button (see below). Below is a summary of the teleprompter marker editor button functions: Button Function Erase editor contents. Import text (.txt) or formatted (.rtf) files. Note: Formatted (.rtf) files can be created by document editors such as WordPad and MS Word. Standard cut, copy and paste functions. Set font of selected text. Brings up text font setting window. Set color of selected text. Brings up color selection window. Set editor background color. Brings up color selection window. Applies this marker’s current format settings to all teleprompter markers in the timeline. Select horizontal alignment of selected text (left, center or right). Opens Teleprompter Marker Settings window. Teleprompter Marker Settings Vertical Alignment Select the vertical alignment of all text in the marker. This will only take effect when sent to the teleprompter during timeline playback. Select from top, bottom, and center. Bottom and center alignment works best if the teleprompter displays only a single page of text. Left/right margin Adjust the left and right margins of the teleprompter. Top/bottom margin Adjust the top and bottom margins of the teleprompter. Open teleprompter if closed Check this box and the teleprompter window will be automatically opened (if not opened already) when this marker is reached. If unchecked, the teleprompter will remain closed, if already closed, and the marker text will not be displayed. Close teleprompter Check this box if you which this marker to close the teleprompter window. Linking Teleprompt Markers to Clips (see Linking Markers to Timeline Clips) Importing Lyric (LRC) Files The teleprompter window is particularly useful for displaying lyrics to a song during playback. Teleprompter markers can be placed at specific locations on the timeline to make sure the correct lyrics are shown as the song plays. An alternative to manually adding teleprompter markers for each line of the lyrics, VenueMagic will allow you import standard Lyric (LRC) files. Lyric files are available from a variety of sources (including the internet) and include not only the lyrics for a particular song but also timestamps that specify where in the song different lines of lyrics should go. If you have a lyric file for a particular song (for which you have an audio file), VenueMagic can import the lyrics using the following steps: 1. 2. 3. 4. Add the audio clip for your song to a timeline audio track (see Audio Tracks). Right-click on the audio clip and select Import Lyrics. This will open a file browser. Locate and select the lyric file using the file browser and click Open. In the Teleprompter Formatting window, setup the default formatting you would like for the lyrics, then click OK. Timeline markers are automatically added to the timeline that contain lyrics for the song, placed at the proper times relative to the beginning of the audio clip. The markers are also linked to the audio clip so that as you drag the clip around, the markers will move with it. Importing Lyric Teleprompter Formatting Setup the default formatting for all teleprompter markers created from importing a lyric file. The Preview window gives you a sample of how the text will look. Select Font Click to bring-up the font selector and setup the desire text font. Select Text Color Click to bring-up the color selector and select the desire text color. Select BG Color Click to bring-up the color selector and select the desired color for the teleprompter background. Left/right margin Adjust the left and right margins of the teleprompter. Top/bottom margin Adjust the top and bottom margins of the teleprompter. Horizontal Alignment Select the horizontal alignment of all text in the marker. Select from left, right, and center. Vertical Alignment Select the vertical alignment of all text in the marker. Select from top, bottom, and center. Bottom and center alignment works best if the teleprompter displays only a single page of text. Debugging Tools MIDI Monitor Real time monitoring and displaying of MIDI data from the default MIDI input device (see MIDI Device Setup). This window is activated by selecting Tools: Monitor MIDI in the main menu bar. Pause Pauses adding of MIDI messages to the list. Clear list Clear all MIDI message from the list. DMX Output Monitor This window provides real time monitoring of DMX levels being sent out to the default DMX interface. Only currently assigned channels are shown. Show level as Select Percent (%) to show lever as a value from 0% to 100%. Select DMX byte to show as a DMX value from 0 to 255. DMX Input Monitor (VenueMagic DMX+AV only) This window provides real time monitoring of DMX input levels received from the device selected in the DMX Device Setup window. Show level as Select Percent (%) to show lever as a value from 0% to 100%. Select DMX byte to show as a DMX value from 0 to 255. Serial Input Monitor (VenueMagic DMX+AV and above only) This window displays serial data received from to the selected port and also lets you send commands directly out the same port. The activity monitor shows data received in blue, and commands sent from this window in red. To send a command out the serial port, click in the command entry field to show the cursor, and then enter the command. To send the command, hit the Enter key or click on the Send button. Select port: Select the serial port to receive data from. Pause Pause the display Clear list Erases the contents of the display. Show raw data If unchecked, single serial command strings (see Serial Input Commands) terminated by a carriage return <CR> are displayed on their own line as they are received. String is not displayed until <CR> is received. If checked, all data is displayed as received. Control characters are shown by their ASCII mnemonic inside square brackets (“[ ]”). (See Serial Event Properties for a list of ASCII mnemonics). Send Transmit to the selected serial port the command entered into the command entry field. After a command is sent, the command entry field is cleared. Event Status (VenueMagic SC+ and above only) VenueMagic events can be triggered from several places, namely: Timelines Event Tracks Event Table Event Scheduler Cue Buttons Serial Control Keeping track of all of these events—their sources, condition state and trigger state—can be a monumental task while developing and debugging a show. The Event Status window simplifies this by providing real-time updated event status information for all events in the event table, active timelines and the event scheduler. This color-coded list provides useful information about the status of events, their conditions and triggers, in a manner that is clear and (with a little experience) easy to understand. For convenience, the Event Status window can remain open while you are doing other things with your project. Event Status List The event status list contains five columns with information as described below. Each column can be sorted by clicking on the column header. Click on the header multiple times to sort by that column in ascending or descending order. Columns Event A description of the event. Source Where the event resides: Timeline, Event Table or Event Scheduler. If it resides on a timeline, the name of the timeline is included. Time to trig For timeline and event scheduler events this column displays the number of seconds before the event is executed on a flashing green background. For event table events, it shows the update interval for the event (see Event Trigger Settings). The current state of the trigger condition (see Event Conditions) : Cond. state TRUE (light green b.g) – trigger condition is true. FALSE (light green b.g.) – trigger condition is false. Disabled (dark gray b.g.) – event has been disabled for playback. A TRUE value indicates that the all of the condition set in the Event Conditions are true. In this state, the event has either already triggered, or it is waiting for its time to come-up. This value is not affected by the state of the actual trigger. Trig. state The current state of the events trigger: Waiting (dark yellow background) – event is reset and waiting for the next. Triggered (light green b.g.) – event has triggered and is waiting to be reset. Disabled (dark gray b.g.) – event has been disabled for playback. (see also, Event Trigger Settings). Reset Events Click this button to reset all of the selected events with manual-mode triggers (see Event Trigger Settings). Refresh List Updates the list with the currently active events—specifically the timeline events. Which Events Are Shown Event table and event scheduler events are automatically added to the Event Status list when the window is opened. Events that are added to the event table and event scheduler while the Event Status window is opened are automatically added to the list when they are created. Timeline events appear in the window when a timeline is activated (i.e.: when playback begins) and will remain in the list even after the timeline has become inactive (playback stops). Events for inactive (non-playing) timelines can be removed from the list by either clicking the Refresh List button, or by closing the timeline. The Show events from checkboxes filter which event sources are represented. Watch Inputs (VenueMagic DMX+AV and above only) Select ToolsWatch Inputs from the main menu to open the Watch Inputs window. This handy little debugging tool lets you monitor selected external inputs in real-time. Its operation is really quite simple. Click the Add button to bring-up the Select External Control window and select an external input. The selected input is added to the watch list. Click Remove to remove selected items from the list. The Edit button brings-up the Select External Control window for the selected watch item so that you may change other functions available in that window. Changing Variable Table Values If the selected watch item is a Variable Table variable, you can click the Set Var button to open the Set Variable Value window. From here you can enter a new value to be assigned to the variable. For convenience, the Event Status window can remain open while you are doing other things with your project. Set Variable Value Enter a new value for the selected variable and click OK. Weigl WEMC1 Operation (VenueMagic SC+ only) VenueMagic SC+ supports the Weigl WEMC1 show control device. Communications with the device is over Ethernet only, and can be setup in the Supported Devices Setup window as described in Setting-up VenueMagic for the WEMC1. VenueMagic SC+ supports the following functions of the WEMC1: DMX output Analog/digital/servo/PWM output Digital input Exporting playlists for standalone operation DMX output When installed, a WEMC1 looks like a regular DMX output in the DMX Device Setup screen. Only a single universe is supported. Analog/Digital/Servo/PWM Output When is WEMC1 is selected for use, VenueMagic automatically creates a WEMC1 fixture for the device and adds it to the Fixtures folder in the Project Window. This fixture gives you access to all analog, digital, servo and PWM channels. You can add them to tracks, groups, channel routing, etc… just as you would any other fixture. A digital output is considered OFF if its level is below 50%, and ON if its level is 50% or higher. Digital Input An installed WEMC1 device will appear in the Select External Control window, providing access to 16 digital input channels. When the input is OFF, the value for that input is 0%. When the input is ON, its value is 100%. Exporting Playlists for Standalone Operation VenueMagic can export a playlist to the WEMC1 for standalone operation. See Exporting VenueMagic Playlists to the Weigl WEMC1. Setting-up VenueMagic for the WEMC1 To setup VenueMagic to use the WEMC1, you must first check the Weigl WEMC1 box in the Supported Devices Setup window. Then click on Properties… to bring-up the Setup WEMC1 window. This window lists all WEMC1 devices that have been detected on the Ethernet connection. Check the WEMC1 you wish to install for use. You can also select a WEMC1 on the list and click Info… Please consult the WEMC1 manual for the meaning of this information. Creating a WEMC1 Fixture After you have selected a WEMC1 device, close the Setup Devices window by clicking OK. If there does not yet exist a fixture for that WEMC1, VenueMagic will show the message: Click Yes, and a Fixture will be created for the WEMC1 device that was installed in the Setup WEMC1 screen. This fixture will then be added to the Fixture folder of the Project Window. Uninstalling a WEMC1 You can uninstall a WEMC1 by un-checking it in the Setup WEMC1 window. When the Setup Devices window is closed, you will see the following message: Click Yes to remove the fixture. Clicking No or Cancel will return you to the Setup WEMC1 window. Exporting VenueMagic Playlists to the Weigl WEMC1 (VenueMagic SC+ only) VenueMagic SC+ will let you export VenueMagic Playlist’s to show files that can be uploaded to the Weigl WEMC1 show control device for standalone operation. The Playlist and all associated timelines and audio files are converted into WEMC1-compatible files. All files are put into a single folder that can be copied or uploaded to the WEMC1. For more information about WEMC1 show files and standalone operation, please consult the WEMC1 manual. WEMC1 Playlist Export Settings (VenueMagic SC+ only) Sets where and what will be exported. Export to path Click Browse and select the folder that all files will be exported to. All additional folders will be automatically inside the selected folder. Export Select which items are to be exported: Master sync audio track: Check this box to export audio from all timelines in playlist. Only audio on the master sync audio track will be exported. Audio files added directly to the Playlist are always exported. (see Important Limitations on Exporting VenueMagic Audio) Convert audio files: Audio files must be converted into the OGG format to run on the WEMC1. This takes time to do and it doesn’t make sense to convert them every time you export if the audio files haven’t changed. You can uncheck this box to suppress re-conversion only if there have been no audio changes in the Playlist or any of the Playlists timelines. Lamp control: Check this box to export all lamp control tracks in all timelines in the Playlist. Events: Check this box to export all timeline Event tracks. Only Run Timeline and WEMC1 Control events are exported. All others are ignored. Time resolution (fps) Enter the desired time resolution in frames-per-second. Will accept any value between 0.1 and 100. The default of 30 fps is sufficient for nearly all applications. Click Next to bring-up the WEMC1 Playlist Playback Settings window. WEMC1 Playlist Playback Settings (VenueMagic SC+ only) Playback Mode There are two ways that the WEMC1 can run the exported playlist: Start on trigger mode: WEMC1 waits for the specified trigger to start playing the playlist. A default timeline can be setup to play continuously in a loop until the trigger is activated. Continuous loop on power-up mode: On power-up WEMC1-1 begins runs playlist continuously in a loop at a specified time interval. Start on Trigger Mode The following settings apply when Start on trigger mode is selected: Start trigger Select the condition that will trigger execution of the playlist. Available are the 16 WEMC1 input bits (input01-input16, either opened or close), and the remote control number keys (0-0). Default timeline Select the timeline that will run continuously in a loop until the start trigger is activated. When the playlist has finished execution, the default timeline will restart. Any timeline in the current project can be selected. If a default timeline is not desired, select None. Delay start Specify how many seconds after power-up the WEMC1 should wait before starting the default timeline (if specified). This can be specified in seconds or minutes:seconds (note ‘:’ used to separate minutes from seconds). Hold resume trigger Select the trigger that will resume playback of a playlist that has encountered a Wait block. E-Stop timeline Select the timeline that should run in an “emergency stop” condition or None of not required. For example, this is timeline could turn on the house lights and stop the audio playback. E-Stop trigger Select the condition that will trigger and E-Stop (see Start trigger for available trigger selections). Continuous Loop Mode If Continuous loop on power-up mode is selected, the available settings change: Restart trigger Select the condition that will restart execution of a playlist following and EStop. See Start trigger above for available settings. Delay start Specify how many seconds after power-up the WEMC1 should wait before starting playback of the playlist. This can be specified in seconds or minutes:seconds (note ‘:’ used to separate minutes from seconds). Loop interval Specify the interval at which the playlist is repeated. If this value is less than the length of the playlist, then playlist will restart immediately after playback. Specify time in seconds, minutes:seconds or hours:minites:seconds (note ‘:’ used to separate values). Hold resume trigger Select the trigger that will resume playback of a playlist that has encountered a Wait block. E-Stop timeline Select the timeline that should run in an “emergency stop” condition or None of not required. For example, this is timeline could turn on the house lights and stop the audio playback. E-Stop trigger Select the condition that will trigger and E-Stop (see Start trigger for available trigger selections). Starting Export Click on Finish and exporting will begin immediately. A window will pop up to report of the progress of the export function. Important Note: Several Windows command windows may appear if you have selected the Convert audio files option to in the WEMC1 Export Settings window. This is normal. Important Limitations on Exporting VenueMagic Audio Exporting audio from VenueMagic timeline tracks has the following limitations: 1. Only audio clips on the master sync track will be exported. 2. Clips can be trimmed at the end but not the beginning. Any trimming at the beginning of the clip will be ignored, resulting in improper playback on the WEMC1. 3. Any audio effects (echo, etc…), envelopes and level settings will be ignored. 4. Audio clips with cross-fadeback applied should not be used. Using VenueMagic with X-Keys (VenueMagic Classic and above only) VenueMagic supports the following P.I. Engineering X-Keys USB input devices: XK-16 XK-24 XK-80/60 XK-3 Foot Pedal When properly installed and configured, X-Keys devices are available in the Select External Control window. To use and X-Keys device, follow these steps: 1. Plug-in one or more X-Keys USB devices. 2. In the Supported Devices tab of the Setup Devices window, select and check the X-Keys Interface device, then click on the Properties button to bring-up Setup X-Keys Devices window. 3. Set each installed device’s Unit ID number to a different value. 4. Use the X-Keys devices just as you would use any external control. Setup X-Keys Devices Window This window detects all currently installed X-Keys devices and lets you set their Unit ID’s. By default, all X-Keys devices are shipped with a Unit ID of 0. To program a new Unit ID, select the desire X-keys device and click on the Set Unit ID button to bring up the Set X-Keys Unit ID window. Enter a new Unit ID and click OK. If you plug-in additional X-Keys devices while the Setup X-Keys Devices window is opened, you must click on Refresh List to display the new devices.