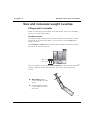
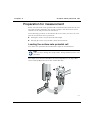
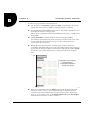
1
! Zetasizer www.malvern.com Malvern Instruments Limited Enigma Business Park Grovewood Road, Malvern Worcs, WR14 1XZ, U.K. nano series Printed in England MRK1378-01 Q & SelAccessories Guide Tel: +44 (0) 1684 892456 Fax: +44 (0) 1684 892789 Malvern Zetasizer Nano accessories guide MAN0487 Issue 1.1 April 2013 Copyright © 2007 - 2013 Malvern Instruments Ltd. Malvern Instruments pursues a policy of continual improvement due to technical development. We therefore reserve the right to deviate from information, descriptions, and specifications in this publication without notice. Malvern Instruments shall not be liable for errors contained herein or for incidental or consequential damages in connection with the furnishing, performance or use of this material. No reproduction or transmission of any part of this publication is allowed without the express written permission of Malvern Instruments Ltd. Head office: Malvern Instruments Ltd. Enigma Business Park, Grovewood Road, Malvern, Worcestershire WR14 1XZ United Kingdom. Tel + [44] (0)1684-892456 Fax + [44] (0)1684-892789 Zetasizer, Malvern and the 'hills' logo are registered trademarks in the UK and/or other countries, and are owned by Malvern Instruments Ltd. NIBS and M3-PALS are trademarks of Malvern Instruments. M3 is granted Euro Pat No: 1 154 266 DE FR. Windows is a registered trademark of Microsoft Corporation. Tygon is a registered trademark of Saint-Gobain Corporation. Hellmanex is a registered trademark of Hellma GmbH & Co. KG. Table of contents Introduction and accessory range Introduction . . . . . . . . . . . . . . . . . . . . . . . . . . . . . . . . . . . . . . . . . 1-1 Accessory range. . . . . . . . . . . . . . . . . . . . . . . . . . . . . . . . . . . . . . 1-1 General cells and cuvettes Introduction . . . . . . . . . . . . . . . . . . . . . . . . . . . . . . . . . . . . . . . . . 2-1 Cuvette holder . . . . . . . . . . . . . . . . . . . . . . . . . . . . . . . . . . . . . . . 2-2 Cell and cuvettes . . . . . . . . . . . . . . . . . . . . . . . . . . . . . . . . . . . . . 2-3 Size and molecular weight cuvettes . . . . . . . . . . . . . . . . . . . . . . . . 2-8 Folded capillary cell . . . . . . . . . . . . . . . . . . . . . . . . . . . . . . . . . . 2-12 Dip cell . . . . . . . . . . . . . . . . . . . . . . . . . . . . . . . . . . . . . . . . . . . 2-20 High concentration cell . . . . . . . . . . . . . . . . . . . . . . . . . . . . . . . . 2-25 Surface zeta potential cell . . . . . . . . . . . . . . . . . . . . . . . . . . . . . . 2-29 Surface zeta potential cell Introduction . . . . . . . . . . . . . . . . . . . . . . . . . . . . . . . . . . . . . . . . . 3-1 Measurement technique . . . . . . . . . . . . . . . . . . . . . . . . . . . . . . . . 3-3 Preparation for measurement . . . . . . . . . . . . . . . . . . . . . . . . . . . . 3-4 Controlling an SZP measurement via an SOP . . . . . . . . . . . . . . . . 3-10 Performing the measurement. . . . . . . . . . . . . . . . . . . . . . . . . . . . 3-16 Maintenance - cleaning the SZP cell . . . . . . . . . . . . . . . . . . . . . . 3-19 Chemical compatibility - SZP cell. . . . . . . . . . . . . . . . . . . . . . . . . 3-20 Flow-mode option Introduction . . . . . . . . . . . . . . . . . . . . . . . . . . . . . . . . . . . . . . . . . 4-1 Flow-mode . . . . . . . . . . . . . . . . . . . . . . . . . . . . . . . . . . . . . . . . . 4-1 Applications . . . . . . . . . . . . . . . . . . . . . . . . . . . . . . . . . . . . . . . . . 4-2 Connectivity . . . . . . . . . . . . . . . . . . . . . . . . . . . . . . . . . . . . . . . . . 4-3 Exporting the flow-mode data . . . . . . . . . . . . . . . . . . . . . . . . . . . . 4-4 Editing and inspecting a flow-mode result . . . . . . . . . . . . . . . . . . . 4-5 Controlling the flow-mode measurement via an SOP . . . . . . . . . . . . 4-9 Zetasizer Nano accessories guide Page i Table of Contents Zetasizer Nano accessories guide The Flow-mode measurement display . . . . . . . . . . . . . . . . . . . . . 4-14 Displaying the flow-mode report . . . . . . . . . . . . . . . . . . . . . . . . . 4-15 Microrheology Introduction . . . . . . . . . . . . . . . . . . . . . . . . . . . . . . . . . . . . . . . . . 5-1 DLS Microrheology . . . . . . . . . . . . . . . . . . . . . . . . . . . . . . . . . . . . 5-1 Microrheology utilities . . . . . . . . . . . . . . . . . . . . . . . . . . . . . . . . . . 5-3 Exporting the microrheology data . . . . . . . . . . . . . . . . . . . . . . . . . 5-4 Controlling the microrheology measurement via an SOP . . . . . . . . . 5-6 Microrheology measurement process . . . . . . . . . . . . . . . . . . . . . . . 5-9 Displaying the microrheology measurement report . . . . . . . . . . . . 5-17 Advanced protein features Introduction . . . . . . . . . . . . . . . . . . . . . . . . . . . . . . . . . . . . . . . . . 6-1 Controlling a protein mobility measurement via an SOP . . . . . . . . . . 6-4 Performing the measurement. . . . . . . . . . . . . . . . . . . . . . . . . . . . . 6-7 Interpreting the results . . . . . . . . . . . . . . . . . . . . . . . . . . . . . . . . . 6-8 Calculators tool . . . . . . . . . . . . . . . . . . . . . . . . . . . . . . . . . . . . . 6-10 Page ii MAN 0487 1 Introduction and accessory range Introduction This manual give an overview the accessories that are available for use with the Zetasizer Nano series of instruments. This manual is a supplement to the following manuals: Zetasizer Nano user manual Zetasizer Nano basic guide Warning! The accessories or the samples to be measured may be hazardous if misused. Users must read the health and safety information in the basic guide before operating the system. This manual focuses on specific issues of the Zetasizer Nano accessories that are not covered by the above manuals. Accessory range The accessories available for use with the Zetasizer Nano are indicted in the following section. Full descriptions on usage and application are contained in the subsequent chapters. The accessories that can be used will be dependent upon the instrument configuration and measurement type that will be performed. Some accessories can be used for differing types of measurements, these are duplicated. Zetasizer Nano accessories guide Page 1-1 1 Chapter 1 Introduction and accessory range Cells and Cuvettes Zeta potential measurements DTS1070 Folded capillary cell Maintenance-free capillary cell primarily designed for zeta potential measurements. (This cell is a direct replacement for DTS1060/61). ZEN1002 Dip cell Cell used to provide repeatable measurements of aqueous, and non-aqueous samples. It is particularly suitable for measurements of valuable aqueous samples where minimal sample quantity is important. Use with DTS0012 and PCS1115 cuvette - described below. ZEN1010 High concentration cell Cell intended primarily for the measurement of zeta potential on a concentrated aqueous sample. The cell is suitable for a broad range of conductivities. It is particularly suitable for measurements of valuable aqueous samples where minimal sample quantity is important. ZEN1020 Surface zeta potential cell Cell intended for the measurement of the zeta-potential at the surface of a flat material in an aqueous environment. Use with DTS0012 and PCS1115 cuvette - described below. Size and molecular weight measurements DTS1070 Folded capillary cell - This cell can be used for size measurements, in the Zetasizer Nano S, Nano ZS and Nano ZSP only. (This cell is a direct replacement for DTS1060/61). DTS0012 Square polystyrene cuvettes - for size and molecular weight measurements. ZEN0118 Disposable polystyrene low volume cuvette - for size and molecular weight (90° instruments only). ZEN0040 Disposable plastic, micro cuvette, for size measurement at a 173° scattering angle. PCS8501 Square glass cell with cap (round aperture) - for size and molecular weight. Also for use with the Dip cell. PCS1115 Square glass cell with cap (square aperture) - for size and molecular weight. Also for use with the Dip cell. ZEN2112 Low-volume quartz batch cuvette - for size and molecular weight. ZEN0023 Quartz flow cell - for size, intensity measurements and molecular weight. Note: All cuvettes have an outside dimension (o.d.) of 12mm Page 1-2 MAN 0487 Introduction and accessory range Chapter 1 Cell to Zetasizer Nano instrument compatibility table The table below indicates which cells and cuvettes are compatible with which instruments of the Zetasizer Nano range. Cell Zeta Size MW S Z ZS DTS1070 • • • • • ZEN1002 • ZEN1010 • ZEN1020 • ZS90 ZSP • • • • • • • • • • • • • • • S90 • • • • • • • • DTS0012 • ZEN0118 • ZEN0040 • • • PCS8501 • • • • • • • PCS1115 • • • • • • • ZEN2112 • • • • • • • ZEN0023 • • • • • • • • (SEC systems) The following chapters describe each cell or cuvette in more detail. The aspects covered are: Identification of each cell of the dispersion units with guidance on selection. How to fill each cell with sample and then insert into the Zetasizer Nano instrument. Some accessories require configuration of the software and SOP parameters. Where required the software controls are identified with explanation on how to use the cells to make measurements on the system. Maintenance procedures for inspecting and cleaning each cell and its respective components, including identification of the chemical compatibility of the cell components that may come into contact with the sample. Zetasizer Nano accessories guide Page 1-3 Chapter 1 Introduction and accessory range Additional accessories and options A range of accessories and options are also available for more advance measurement strategies. MPT-2 Titrator and Vacuum degasser The MPT-2 Titrator is used to perform pH, additive and dilution titrations. The degasser is used to remove any dissolved gases from the titrants before dispensing by the Titrator. This prevents any gaseous escape during the titration increasing the accuracy and reproducibility. Usage and operation is described in the MPT-2 Titrator and Vacuum degasser user manual. For use with all Zetasizer Nano instruments. Flow-mode option ZEN1006 Flow-mode option for Zetasizer Nano S and Zetasizer Nano ZS. Instruments fitted with the flow-mode option can be connected to a size exclusion chromatography (SEC) system and be used as a light scattering detector. The following kit is available for use with the Zetasizer Nano when connected to a SEC system. It includes the flowcell ZEN0023. ZEN0116 Quartz flow cell kit for connection of the Zetasizer Nano to an SEC system. Connection, use and operation of a flow-mode optioned Zetasizer Nano is described in the Flow-mode chapter later in this manual. For use with all Zetasizer Nano instruments except the Nano Z. If fitted, an option part number label will be attached to the front of the cuvette holder. The flow mode option is included as a standard fitment on the Zetasizer Nano ZSP. High Temperature These instruments have an increased temperature range of 0 to 120. If fitted the Zetasizer Nano instrument label will include an ‘HT’ identification and an option part number label will be attached to the front of the cuvette holder. ZEN9063 Page 1-4 Extends the upper temperature range of the Zetasizer Nano series from 90 to 120 For use with all Zetasizer Nano instruments except the Nano ZSP. MAN 0487 Introduction and accessory range Chapter 1 Narrow band filter ZEN9051 Narrow band filter for ‘Green’ badged Zetasizer Nano S instruments ZEN9052 Narrow band filter for ‘Green’ badged Zetasizer Nano ZS instruments ZEN9061 Narrow band filter for ‘Red’ badged Zetasizer Nano S, Z and S90 instruments ZEN9062 Narrow band filter for ‘Red’ badged Zetasizer Nano ZS, ZS90 and Nano ZSP instruments This filter improves the signal for samples that fluoresce at the wavelength of the laser fitted. If a filter is fitted, an option part number label will be attached to the front of the cuvette holder. For use with all Zetasizer Nano instruments. Microrheology Microrheology is a new measurement type available to users of the Zetasizer Nano ZS and ZSP. It allows the measurement of the viscoelastic modulus of samples within the linear viscoelastic region. Microrheology measurements require a software key to access the software features and functionality. For use with the Zetasizer Nano ZS and ZSP. Protein mobility Protein mobility is a new measurement type, supplied with the Zetasizer Nano ZSP as standard, and available to purchase separately for the Nano ZS. The Zetasizer Nano ZSP has increased capability for the measurement of small and weakly scattering molecules and particles. This increased sensitivity improves the measurement of zeta potential, with it’s primary purpose being the ability to measure the zeta potential, or more appropriately the electrophoretic mobility of protein samples. The Zetasizer Nano ZS is only capable of making these measurements at higher protein concentrations (>10-15 mg/ml). A dedicated measurement type is included for protein mobility and also a suite of new calculators for proteins. Protein mobility measurements are available after installing the Advanced protein features software key. For use with the Zetasizer Nano ZSP and ZS. Zetasizer Nano accessories guide Page 1-5 Chapter 1 Page 1-6 Introduction and accessory range MAN 0487 2 General cells and cuvettes Introduction Malvern offers a range of cells and cuvettes for performing measurements with the Zetasizer system. The choice of cell or cuvette is dependent upon the type of measurement being performed and the sample that will be measured. The cells or cuvettes available for each measurement type are fully documented in this chapter with some discussion on their use and application. The aspects covered are: Identification of each cell of the dispersion units with guidance on selection. How to fill each cell with sample and then insert into the Zetasizer Nano instrument. Some accessories require configuration of the software and SOP parameters. Where required the software controls are identified with explanation on how to use the cells to make measurements on the system. Maintenance procedures for inspecting and cleaning each cell and its respective components, including identification of the chemical compatibility of the cell components that may come into contact with the sample. Zetasizer Nano accessories guide Page 2-1 2 Chapter 2 General cells and cuvettes Cuvette holder The cuvette holder is for storing the cells before and after use. The cuvette holder swings out from under the instrument and up to 12 cuvettes can be stored. ill 8503 Caution! Ensure the thermal cap is lowered and all cuvettes have been removed before swinging the holder back under the instrument base. The two trays that hold the cuvettes can be removed for cleaning. The cuvette holder provides a place to store the thermal cap during changeover of cells. The cap is released by raising the cap and lifting off the cap post. Similarly, storage is also provided for the two “thermal contact plates” used with the folded capillary cell. When not being used, place these in the holder to the left of the tray. The cuvette holder includes a serial number, model number and option labels. These identify the instrument and should be quoted in any correspondence with Malvern Instruments. Page 2-2 MAN 0487 General cells and cuvettes Chapter 2 Cell and cuvettes Which cell Caution! Due to the risk of melting, polystyrene cuvettes must not be used for measurements above 70°C. The choices for each measurement type are outlined below with some discussion on their use. Generally, for “easy to perform” measurements, such as with samples that scatter a reasonable amount of light (latex with 0.01% mass or higher, high scattering intensity, etc.) the disposable polystyrene cuvettes can be used. Disposable polystyrene cuvettes are easily scratched and should never be used more than once. Disposable cuvettes are not resistant to organic solvents, thus non-water based samples should generally be measured in glass or quartz type cuvettes. The optical quality of the cells is vitally important when performing molecular weight and low concentration protein measurements (derived count rate <100kcps), therefore glass or quartz type cuvettes should be used to ensure the optimum signal is achieved. Briefly the following cells can be used with the Zetasizer Nano instrument. Cell Application Disposable “polystyrene” cuvettes – Standard and small volume Size and zeta potential (with Dip cell) Quartz glass cuvettes – Square, standard, low and ultralow volume, flow Size, molecular weight and zeta potential (with Dip cell) Folded capillary cell Size and zeta potential High concentration cell Size and zeta potential Dip cell Zeta potential Surface zeta potential (SZP) cell Zeta potential All the cells mentioned are available from Malvern and should be used with the supplied cell caps. Using the caps will ensure greater thermal stability of the sample, as well as preventing dust introduction and possible spillage. Zetasizer Nano accessories guide Page 2-3 Chapter 2 General cells and cuvettes Cell and cuvette options The cells and cuvettes described in this section can be used for all measurements. Folded capillary cell (DTS1070 / DTS1060/61) Disposable polystyrene (DTS0012) Application Size, zeta potential Size Typical solvent Water, water/alcohol Water, water/ethanol Optical quality Good to very good Good to very good Minimum Sample volume 0.75ml 1ml Advantages Low cost Low cost Single use disposable (no cleaning) Single use disposable (no cleaning) Use with MPT-2 Titrator No sample crosscontamination No sample crosscontamination Fast sample change over (This cell is described later in this chapter) Disadvantages Material Page 2-4 Not resistant to organic solvents Not resistant to organic solvents Unsuitable for use at high temperatures (above 70°C) Unsuitable for use at high temperatures (above 70°C) Polycarbonate Polystyrene MAN 0487 General cells and cuvettes Chapter 2 Disposable low volume polystyrene (ZEN0118) Disposable low volume polystyrene (ZEN0040) Application Size Size Typical solvent Water, water/alcohol Water, water/alcohol Optical quality Good to very good Good to very good Minimum Sample volume 50μl 40μl Advantages Low cost Low cost Low volume Low volume Single use disposable (no cleaning) Single use disposable (no cleaning) Requires careful filling to avoid bubbles Requires careful filling to avoid bubbles Not resistant to organic solvents Not resistant to organic solvents Unsuitable for use at high temperatures. (above 70°C) Unsuitable for use at high temperatures. (above 70°C) Only 90°C systems (Zetasizer Nano S90, ZS90, Zetasizer μV) Only applicable to systems with NIBS optics (Zetasizer Nano S/ZS/ZSP) Polystyrene Polystyrene Glass - square aperture (PCS1115) Glass - round aperture (PCS8501) Application Size, molecular weight Size, molecular weight Typical solvent Water, most organic and inorganic solvents Water, most organic and inorganic solvents Optical quality Excellent Excellent Minimum Sample volume 1ml 1ml Advantages Highest optical quality Highest optical quality Can use nearly any dispersant Can use nearly any dispersant Disadvantages Material Reusable Disadvantages Requires cleaning after measurement Requires cleaning after measurement Material Glass Glass Zetasizer Nano accessories guide Page 2-5 Chapter 2 General cells and cuvettes Low volume Glass flow cell (ZEN0023) Low volume quartz (ZEN2112) Application Size Size Typical solvent Water, most organic and inorganic solvents Water, most organic and inorganic solvents Optical quality Excellent Excellent Minimum Sample volume 75μl plus tubing 12μl Advantages Highest optical quality Highest optical quality Can use nearly any solvent (tubing dependent) Can use nearly any dispersant Use with MPT-2 Titrator Low sample volume Requires cleaning after measurement Requires cleaning after measurement With manual use requires careful filling to avoid bubbles Requires careful filling to avoid bubbles Glass Quartz Disadvantages Material Low volume Glass flow cell pack (ZEN0116) Application Size as part of a Flow-mode (SEC) system Refer to ZEN0023 for description of cell Includes: - ZEN0023 flow cell - Connections for cell - 1.5m PEEK tubing (1/16th inch outside diameter / 0.1mm inside diameter) Refer to the Flow-mode chapter later in this manual for connection, use and operation. Page 2-6 MAN 0487 General cells and cuvettes Chapter 2 Use, cleanliness and filling advice Note Before filling and using a cell or cuvette, consult the cleaning section for each cell or cuvette, and perform any cleaning and maintenance procedures described. When filling the cell there are several actions to consider; some that apply to all cells and others that are only applicable to the measurement type and the cell chosen. The cleanliness of the cells used in each measurement is a paramount importance. As well as the information below, refer to the respective cleaning cells/cuvettes section for each cell, where more specific advice will be given. Size cells and cuvettes All size cells should be rinsed/cleaned with filtered dispersant before use. Molecular weight cells and cuvettes All molecular weight cells should be rinsed/cleaned with the filtered standard (e.g. Toluene) or solvent, then dried in a dust free environment such as a laminar flow cabinet, before use. Zeta potential cells All zeta potential cells should be rinsed/cleaned with filtered dispersant before use. Additionally The cell should be filled slowly to avoid air bubbles from being created. Ultrasonication can be used to remove air bubbles - but only if the sample is suitable for use with ultrasonics. If using syringe filters for the dispersant, never use the first few drops from the syringe, in case there are any residual dust particles in the filter that may contaminate the dispersant. Zetasizer Nano accessories guide Page 2-7 Chapter 2 General cells and cuvettes Size and molecular weight cuvettes Filling a cell or cuvette Fill the cell with the prepared sample as described below. Also refer to the filling advice given earlier in this chapter. Standard cuvettes A minimum sample volume must be provided. However, this minimum volume depends on the actual cell type and it is easier to ensure a certain depth of the sample in the cell. This minimum is 10mm from the bottom of the cell (the measurement is made 8mm from the bottom of the cell). Max. 15mm Min. 10mm ill 8506 Do not overfill the cell, use about 15mm maximum, as this can produce thermal gradients within the sample that will reduce the accuracy of the temperature control. When filling, tilt the cuvette and allow it to fill slowly. To stop bubbles forming let the sample flow down the inside. ill 7935 Page 2-8 MAN 0487 General cells and cuvettes Chapter 2 Note When filled place a lid securely on the cuvette. Low volume cuvettes These cells are designed to use the minimum volume of sample possible for a size or molecular weight measurement. The sample must be pipetted carefully into the bottom of the cuvette, so it is filled from the bottom up. The minimum volume that can be used is 12 microlitres for the Zetasizer Nano S, ZS and ZSP, 2 microlitres for the Zetasizer μV and 20 microlitres for the Zetasizer Nano S90 and ZS90. This will only partly fill the visible cell volume. After filling, carefully inspect the cell for trapped bubbles. Note The lower sensitivity of the S90 and ZS90 means that they are unlikely to be suitable for the majority of molecular weight measurements. Flowcells Flowcells will be filled during the measurement procedure. Refer to the MPT-2 Titrator and Vacuum degasser user manual. Inserting a cell or cuvette For these measurements, perform the following: Standard low volume cuvettes Open the cell area lid by pushing the button in front of the lid . Push the cell into the cell holder until it stops . Some cells have opaque surfaces as well as polished optical surfaces. A polished optical surface must be facing the front of the instrument (towards the button). Most cells have a small triangle at the top to indicate the side that faces the front. This is especially critical for molecular weight measurements. Place the thermal cap over the cell (this is not used if using a flowcell). Close the cell area lid . Zetasizer Nano accessories guide Page 2-9 Chapter 2 General cells and cuvettes 3 4 2 1 Small triangle towards button To Autotitrator Flowcell connections ill 8510 Flowcells - using the MPT-2 Titrator Follow these instructions for connecting a flowcell when using the MPT-2 Titrator. Always minimise the tubing within the cell area before inserting into the pinch valve channel. Follow the instructions in the previous section on how to insert the cell. Do not fit the thermal cap. Sample in Sample out Tubing join within cell area ill 8419 Page 2-10 MAN 0487 General cells and cuvettes Chapter 2 The tubing is attached to the flowcell using threaded inserts; push the sample tubes into the inserts and screw into the top of the flowcell. The tubing is then inserted into the pinch valve channel; push both tubes down into the pinch valve on the side of the cell area. Ensure the join between the PTFE and silicone tubing is within the cell area. Cleaning cuvettes Two main types of cuvette are available: Disposable polystyrene Do not clean and re-use disposable cuvettes. It gives inaccurate results. Reusable glass or quartz The cleaning procedure depends on the sample measured so specific instructions cannot be given. Follow these guidelines: Rinse the cuvette with the dispersant that was used for the measurement. Try submerging the cuvette in an ultrasonic bath of clean solvent. Once clean, wipe the cuvette with a lint free tissue (photographers’ lens cleaning tissues are recommended). The smaller and more dilute the sample, the more important cleanliness is. Zetasizer Nano accessories guide Page 2-11 Chapter 2 General cells and cuvettes Folded capillary cell (DTS1070 / DTS1060/61) Description These are maintenance-free capillary cells primarily designed for zeta potential measurements, but can also be used for size measurements. They have been designed to be used for a single measurement or series of measurements, then discarded rather than cleaned. This removes the chances of crosscontamination. The cells are inserted with either the Malvern logo (DTS1070) or the weld line (DTS1060/61) facing the front of the instrument - refer to the Inserting the cell section later in this chapter. The cells provide a low-cost alternative to previous reusable quartz capillary cells. The stoppers can be replaced with ‘Luer’ connectors to provide leak-free connection to the optional MPT-2 Titrator. (DTS1070 cell shown above) ill 8794 Size measurements can also be performed without having to remove and reposition the cell. Sample details can be written on the textured area on the side of the cell with a permanent pen. Application The cells are used for measurements of aqueous based samples Typical solvent Water, water/alcohol Optical quality Good to very good Material Body : Polycarbonate Electrodes : Gold plated beryllium/copper Minimum Sample volume 0.75ml Advantages Low cost Single use disposable (no cleaning) Use with MPT-2 Titrator No sample cross-contamination Fast sample change over Disadvantages Not resistant to organic solvents Unsuitable for use at high temperatures (above 70°C) Page 2-12 MAN 0487 General cells and cuvettes Chapter 2 Filling a folded capillary cell The folded capillary cells should be filled with the prepared sample as described below. Both cells should be rinsed/cleaned with filtered dispersant before use; refer to Cleaning the folded capillary cell later in this section Note Filling a cell for a protein mobility measurement involves a different technique. Refer to the Advanced protein features chapter. DTS1070 cell The cell name - DTS1070 - will be identified on the central section of the cell body. Prepare the sample in a syringe of at least 1ml capacity. Place the sample syringe into one of the sample ports. Invert the cell . Slowly inject the sample from its syringe into the cell, filling the U tube to just over half way . Check no air bubbles form in the cell. Tap the cell gently to dislodge any that do form. 1 2 ill 7938 Zetasizer Nano accessories guide Page 2-13 Chapter 2 General cells and cuvettes Turn the cell upright and continue to inject slowly until the sample is reaches the fill area as shown . Fill between shoulder of cell and the FILL MAX line. Check again for bubbles in the cell. Tap the cell gently to dislodge these. Check that the electrodes are completely immersed. 3 Remove the syringe and insert a cell stopper in each port. Remove any liquid spilt on the electrodes contacts. ill 8796 / 8797 Note The stoppers must be fitted before a measurement is performed. Ensure that one stopper is fitted firmly, and the other one loosely, to avoid pressurisation of the cell. DTS1060/61 cell The cell name - DTS1060 - will be identified on the central section of the cell body. Page 2-14 Prepare the sample in a syringe of at least 1ml capacity. Place the sample syringe into one of the sample ports. Invert the cell . Slowly inject the sample from its syringe into the cell, filling the U tube to just over half way . MAN 0487 General cells and cuvettes Chapter 2 Check no air bubbles form in the cell. Tap the cell gently to dislodge any that do form. Turn the cell upright and continue to inject slowly until the sample is at the top of the electrodes . Check again for bubbles in the cell. Tap the cell gently to dislodge these. 1 2 Check that the electrodes are completely immersed. Remove the syringe and insert a cell stopper in each port. Remove any liquid spilt on the electrode contacts. ill 7938 3 Zetasizer Nano accessories guide Page 2-15 Chapter 2 General cells and cuvettes Note The stoppers must be fitted before a measurement is performed. Ensure that one stopper is fitted firmly, and the other one loosely, to avoid pressurisation of the cell. Inserting the folded capillary cell 4 2 3 1 ill 8507 Place a thermal contact plate into the recess on either side of the folded capillary cell . The plates provide increased temperature stability. Flat side of plate against flat side of cell Raised side of plate against sunken side of cell Plates MUST be positioned correctly Page 2-16 Open the cell area lid by pushing the button in front of the lid. MAN 0487 General cells and cuvettes Chapter 2 1. Hold the cell near the top, away from the lower measurement area, and push into the cell holder until it stops . 2. The cells will fit in the cell either way round but do have a correct orientation. Please refer to the section below. 3. Close the cell area lid . Note Different versions of the capillary cells have unique thermal plates. If required, please contact your Malvern representative for the correct plates for your cell. Folded capillary cell - orientation and insertion The clear folded capillary zeta potential cells can show significant differences in sample count rate depending on the orientation of the cell in the cell holder. In most cases the difference does not affect the quality of the result, only the attenuator selection. However, in extreme cases, where the sample being measured is a poor scatterer, the measurement may not be possible in one of the orientations. The diagram below shows the cell with the preferred orientation in the cell holder. DTS1070 DTS1060/61 ill 8798 / 7945 DTS1070 cell When inserting the cell, ensure that the Malvern logo faces towards the front of the instrument. Press down until the cell clicks into place. Zetasizer Nano accessories guide Page 2-17 Chapter 2 General cells and cuvettes DTS1060/61 cell The cell is oriented such that the weld line is towards the front of the instrument. Press down until the cell clicks into place. The cell is made of two different parts (front and back part), welded together. Tests indicate that inserting the cell with the front part towards the laser gives better count rates, and hence this is the preferred cell orientation. Using the MPT-2 Titrator Follow the guidelines above on inserting the cell, then follow the instructions below for connecting the cell for the Titrator. Always minimise the tubing within the cell area before inserting into the pinch valve channel. The tubing is attached to the folded capillary cell using 'Luer lock' connectors. With a half-turn these secure to the Luer fittings on the top of the cell - do not overtighten. The tubing is then inserted into the pinch valve channel; push both tubes down into the pinch valve on the side of the cell area. ill 8420 Note The pinch valve manufacturer recommends that a vegetable-based oil (e.g. Castor oil) is used to lubricate the section of tube that is inserted into the pinch valve. This is done to help minimise friction, though testing by Malvern Instruments has not shown this to be essential. Page 2-18 MAN 0487 General cells and cuvettes Chapter 2 Cleaning the folded capillary cell This cell is intended to be used once then discarded. We recommend that, before a cell is used for the first time, it is flushed through with ethanol or methanol to facilitate wetting. A syringe or a wash bottle can be used. Use only sufficient fluid to wet the surface of the cell and electrodes. The cell should then be flushed through with water as described below. To clean the cell: Fill one syringe with de-ionised water or the dispersant. Place the full syringe in one of the sample ports on the cell and the empty syringe in the other. Flush the contents of the full syringe through the capillary cell into the empty syringe. Repeat the flushing process five more times, flushing the liquid backwards and forwards between the syringes. The cell is then ready for use. Never attempt to clean the outside of the folded capillary cell. It causes small surface scratches that give inaccurate results. Zetasizer Nano accessories guide Page 2-19 Chapter 2 General cells and cuvettes Dip cell (ZEN1002) Description The Dip cell is used to provide a method to measure the zeta potential of both aqueous and non-aqueous samples. A number of samples can be prepared and the Dip cell inserted to measure each one in turn. For aqueous samples the Dip cell can be used in conjunction with the disposable polystyrene (DTS0012). For non-aqueous samples use the reusable Glass - square aperture (PCS1115). These cells are described above. Refer to maintenance and chemical compatibility section later in this chapter. ill 8504 Application The Dip cell can be used for measurements of aqueous and non-aqueous based samples. Note If the Dip cell is used for non-aqueous measurements, it is not recommended that it is subsequently used for aqueous measurements, as cleaning well enough afterwards to ensure the zeta potential standard is within specification cannot be guaranteed. It is recommended that two Dip cells are used: one Dip cell used for aqueous dispersants, and another for non-aqueous dispersants. Filling the cuvettes used with the Dip cell Fill the cell with the prepared sample as described below. Also refer to the filling advice given earlier in this chapter. The Dip cell uses square cuvettes to hold the sample. With the insertion of the Dip cell the sample will be displaced upwards within the cuvette. If too much sample is placed into the cuvette prior to insertion of the Dip cell there is a risk that the cuvette will overflow. Max. 10mm Min. 7mm ill 8505 Page 2-20 MAN 0487 General cells and cuvettes Chapter 2 To ensure a minimum sample volume is provided for the sample to be measured but protect against overfilling, we recommend the cuvette is filled to a depth of between 7mm and 10mm (before the Dip cell is inserted). The minimum level relates to approximately 0.7ml of sample. Do not overfill the cuvette; as well as overflowing the cuvette once the Dip cell is inserted, this can also produce thermal gradients within the sample that will reduce the accuracy of the temperature control. When filling, tilt the cuvette and allow it to fill slowly. To stop bubbles forming let the sample flow down the inside. ill 7935 Once the Dip cell is inserted, It may be necessary tap the cell lightly to dislodge any bubbles that may be caught between the electrodes. Inserting the Dip cell Insertion of the Dip cell follows the same procedure as above, but first the Dip cell must be placed into the sample cuvette. This must be done at an angle to avoid any bubbles being caught between the sample electrodes. The cuvette must not be filled more than the recommended maximum depth of 10mm . Tilt the cuvette to a maximum angle of 45° . Slowly insert the cell into the cuvette until the metal electrodes are covered . As the cell is inserted it displaces the sample so any bubbles will be pushed out from the top of the electrode gap. Once the electrodes are covered bring the cuvette up to the vertical . Inspect the combined cell and cuvette and check for any bubbles . If bubbles are present gently tap the bottom of the cuvette to dislodge these. If not dislodged repeat the above sequence. The cell can only be inserted one way round. Hold the base of the Dip cell cap and the top of the cuvette simultaneously . Ensure the coloured band on the label (and cuvette triangle) is facing the front of the instrument and push the cell into the cell holder until it stops - a ‘stop’ on the Dip cell must rest on the top of the cell holder. Check that the cell sits flat on the cell holder. Zetasizer Nano accessories guide Page 2-21 Chapter 2 General cells and cuvettes 2 1 3 10mm max 4 max 45° Front 5 6 Stop Coloured band Stop Front Triangle Front ill 8508 Note With the procedure complete, the measurement face of the cuvette (some have a small triangle at the top of the cell) and the coloured band on the Dip cell label must face in the same direction. This is to ensure the orientation is correct when inserted into the cell holder. Removing the Dip cell With care, by simultaneously holding the base of the Dip cell cap and the top of the cuvette, both the Dip cell and cuvette can be removed together. If adequate purchase cannot be obtained on both parts, then the following procedure is recommended. Lift the Dip cell up out of the cuvette, but before completely removing, gently tap the bottom of the Dip cell on the top of the cuvette . This will dislodge any remaining drops of sample from the cell into the cuvette. If the Dip cell is simply lifted out of the cuvette there is a risk of drops of sample falling from the bottom of the Dip cell onto the instrument and surrounding area. This is especially important when using solvent based samples. Page 2-22 MAN 0487 General cells and cuvettes Chapter 2 1 2 Tap 3 Place the Dip cell immediately into an empty cuvette for storage. ill 8509 This will prevent any potential damage occuring either to the cell electrodes or the workspace. Remove the sample cuvette afterwards and place in the cuvette holder . Note Storage is also provided in the Dip cell case if the cell is not to be used for a while. Cleaning the Dip cell Clean the cell thoroughly between measurements, especially between different types of sample. Cross-contamination between samples can seriously affect the results. Caution! Do not immerse the complete cell. Only the sample electrodes must dip in to the dispersant, as shown below. Clean the Dip cell electrodes regularly. They are made of solid palladium and can be cleaned physically and chemically. Follow the instructions below: Immerse the electrodes in a gentle ultrasound bath (30 Watts) for five to 15 minutes before use. Use the dispersant used for the previous sample as the cleaning fluid. If this dispersant contains additives such as surfactants, follow this by ultrasonicating for two minutes in the pure solvent. Zetasizer Nano accessories guide Page 2-23 Chapter 2 General cells and cuvettes ill 6763 Warning! Take care: ultrasonication can produce a fine aerosol of the bath liquid. Remove the electrodes from the bath and rinse them with pure solvent. A pipe cleaner can be used for gentle cleaning of electrodes. To protect the Dip cell after cleaning, we recommend placing it in an empty cuvette for storage. Before making a measurement, rinse the electrodes and cuvette with the sample to be measured. When changing the sample, thoroughly rinse the electrodes with pure dispersant. Note The electrode holder is made from Natural PEEK (Polyetheretherketone) which is resistant to a wide range of chemical products. However, seek advice from Malvern and the sample manufacturer before using strong acid or base. Chemical compatibility - Dip cell With proper use, only the central electrode section of the Dip cell will ever come in contact with sample. The outer components of the Dip cell will only come into contact if spillage or overfilling occurs. Component Materials Central section Electrode casing Electrodes Natural PEEK (Polyetheretherketone) Palladium Outer components Top and side casing Contacts Page 2-24 Natural PEEK (Polyetheretherketone) Phosphor Bronze with Nickel plating MAN 0487 General cells and cuvettes Chapter 2 High concentration cell (ZEN1010) Description The High concentration cell is intended primarily for the measurement of zeta potential of concentrated aqueous samples. The cell can be used in conjunction with the MPT-2 for automated titrations. The cell consists of a high precision optical measurement block held within electrode chambers. This is all contained in an outer cuvette sized casing assembly that allows excellent thermal contact with the instrument cell holder. Refer to maintenance and chemical compatibility section later in this chapter. ill 8450 Application The High concentration cell is used for measurements of high concentration aqueous samples. The cell is supplied with the following components to prepare the sample and connect the cell: 1/32" internal bore silicon tubing with appropriate Luer fittings Luer plugs for manual filling Additional fittings for connection to the MPT-2 Titrator Interdental brushes for cleaning of the electrode chamber, internal flow paths and optical block are also included Filling the High concentration cell Fill the cell with the prepared sample as described below. Also refer to the filling advice given earlier in this chapter. Filling the High concentration cell uses a similar principle to the Folded capillary cell. Inject the sample slowly until the liquid reaches the bottom of the ‘luer’ outlet . Check no air bubbles form in the cell. Tap the cell gently to dislodge any that do form. Remove the syringe and insert a cell stopper in each port. Remove any liquid spilt on the electrodes. Zetasizer Nano accessories guide Page 2-25 Chapter 2 General cells and cuvettes 1 ill 8448 Inserting the High concentration celI The High concentration cell is inserted into the instrument and connected to the Titrator in the same manner as the Folded capillary cell. ill 8449 The metal face of the cell must face the front of the instrument; this is to ensure good thermal contact between cell and instrument. Cleaning the High concentration cell General cleaning Rinsing of the cell prior to a measurement should be carried out by flushing through with copious amounts of de-ionised water. Page 2-26 MAN 0487 General cells and cuvettes Chapter 2 External surfaces of the assembled cell can be wiped clean with a weak soap solution. Intensive cleaning The cell first has to be disassembled before cleaning can be performed. 1 2 3 5 4 6 ill 8447 Remove the screw cap . Separate the two halves of the cell by pulling the rear casing vertically away from the metal front. Note how the electrode chambers and quartz measurement cell block are assembled . Remove the chambers and cell block from the metal front casing . Detach the pipework and remove the top port . Protect the cell block from damage . Once the cell has been disassembled, cleaning can be performed as described in the following table. Zetasizer Nano accessories guide Page 2-27 Chapter 2 General cells and cuvettes Component Cleaning method Screw cap Wipe clean with a mild soap solution Outer casing Black part of casing (Rear - Delrin): Wipe clean with a mild soap solution. Metal part of casing (Front - Stainless steel): Immerse the casing in Hellmanex and place in a gentle ultrasound bath (30 Watts) for five to 15 minutes. Rinse with water once cleaned. Electrode chambers and port Electrode Chamber: Scrub gently with interdental brush and Hellmanex, then scrub with copious amounts of de-ionised water. Smaller internal bore: Scrub gently with interdental brush and Hellmanex, then scrub with copious amounts of de-ionised water. Quartz measurement cell block Scrub both internally and externally with interdental brush. Afterwards brush with copious amounts of water. Note: Once inserted back into assembly, a cotton bud with ethanol can be used for light cleaning of the outside of the cell block. This is only to remove any errant marks that may have occurred when assembling the cell. Once cleaned, leave all parts to dry before re-assembling. Re-assembly is the reverse of dis-assembly. Take care not to damage the sprung electrodes located in the rear casing. Chemical compatibility With proper use, only the central electrode and measurement section of the High concentration cell will ever come in contact with sample. The outer components of the cell will only come into contact if spillage or overfilling occurs. Component Materials Central section Electrode chambers / O-rings Electrodes Electrode contacts Precision measurement block Tubing Natural PEEK / Nitrile rubber Palladium Brass Quartz Silicone rubber Outer components Casing Cap Contacts Page 2-28 Delrin / Stainless steel 316 Delrin / Phosphor Bronze Gold plated beryllium / Copper MAN 0487 General cells and cuvettes Chapter 2 Surface zeta potential cell (ZEN1020) Description The surface zeta potential cell is intended for the measurement of the zeta potential at the surface of a flat material in an aqueous environment. The cell is a dip cell type device an be used with 1ml cell DTS0012 and PCS1115. It is incompatible with the MPT-2 Titrator. ill 8687 Application The surface zeta potential cell is used for measurements of aqueous samples. For details for this cell, refer to the separate Surface zeta potential chapter in this manual. Zetasizer Nano accessories guide Page 2-29 Chapter 2 General cells and cuvettes Page 2-30 MAN 0487 3 Surface zeta potential cell Introduction This chapter gives an overview of the Zetasizer Nano cell for measuring surface zeta potential. It describes how to use, insert and clean the cell to ensure reliable and consistent measurements. The Surface zeta potential (SZP) cell is intended for the measurement of the zeta potential at the surface of a flat material in an aqueous environment. The cell is a dip cell type device and can be used with 1ml cell DTS0012 and PCS1115. It is incompatible with the MPT-2 Titrator. 1 2 Surface zeta potential cell (ZEN1020) Cell cap and adjustment screw White alignment mark Cuvette Electrical contacts 3 Sample barrel 4 Sample holder and screw 5 6 7 Electrodes ill 8688 The cell consists of a height adjustable sample barrel , in which the sample is glued onto a sample holder and held between two palladium electrodes . A series of zeta potential measurements are then performed in a conventional cuvette , with the measurement position within the cell controlled by rotating the cell cap which adjusts the height of the sample barrel. Zetasizer Nano accessories guide Page 3-1 3 Chapter 3 Surface zeta potential cell The cell is supplied with the following components to prepare, load and set the sample: Surface zeta potential cell with palladium electrodes Page 3-2 A 12-well plate for storing the samples 10 PEEK sample holders A screwdriver for cell tightening Forceps for sample handling A cell height alignment tool and a sample holder for gluing the sample to MAN 0487 Surface zeta potential cell Chapter 3 Measurement technique A surface zeta potential measurement consists of attaching a sample to a mount or holder that is then held in place between two electrodes. The sample is then immersed in an appropriate aqueous solution, containing tracer particles. The apparent tracer mobility is now measured at a number of different distances from the sample surface. The electro-osmotic flow at the sample surface will tend to fall off with increasing distance hence; close to the surface the tracer mobility will be dominated by the electro-osmotic surface flow, while at distances further from the surface it will be dominated by the electrophoretic motion of the tracer itself. The graph below shows a typical plot of reported zeta displacement from the surface. The zeta potential at the surface is then calculated by extrapolating the graph to zero displacement and applying the following formula; Surface zeta potential = ill 8694 – intercept + tracer zeta potential where the tracer zeta potential is recorded far from the wall, where the electroosmotic flow can be taken as zero. In the displacement graph above, the blue circles represent the reported zeta potential of the tracer particles, while the red squares represent the zeta potential of the tracer particles measured far from the sample surface and also independent from any electro-osmotic effects. Zetasizer Nano accessories guide Page 3-3 Chapter 3 Surface zeta potential cell Preparation for measurement Before a measurement can be performed the cell must first be loaded onto the sample holder and then attached to the cell. The complete cell is then inserted into a standard cuvette and placed into the instrument. These following operations are described in the next sections; once these are complete the measurement can be performed: Loading the surface zeta potential cell with sample. Inserting the surface zeta potential cell into the instrument. Loading the surface zeta potential cell The surface zeta potential cell is loaded with a sample as described below: Note Take care not to damage the sample surface during attachment to the sample holder. The sample to be measured should be cut into rectangular pieces no larger than 7mm x 4mm (LxW) and no more than 1.5mm thick (H). W L H ill 8689 Page 3-4 MAN 0487 Surface zeta potential cell Chapter 3 The sample is then attached to the sample holder using an appropriate adhesive such as AralditeTM (refer to note overleaf for guidelines on glue selection). A sample gluing tool is provided to hold the sample holder during the gluing process. Ensure the sample is placed squarely onto the sample holder and not at an angle. The sample should be perpendicular to the electrodes, once inserted into the barrel. There should be no large gaps between the electrodes and sample (≤200μm). Wait until the sample has set in place, then load onto the cell using the supplied forceps and screw the holder into place. Note The glue used should be selected beforehand and be compatible with the experimental design. It should be capable of attaching to both the sample and the holder, and it should not be soluble in the selected medium, so that the sample is securely held in place for the duration of the experiment. Inserting the surface zeta potential cell The insertion of the surface zeta potential cell into the Zetasizer Nano is done in three stages. First a coarse alignment is performed where the cell has to be aligned to a zero position with respect to the instrument laser - this is initially done using a height alignment tool supplied with the cell. Secondly the cell is inserted into the cuvette, which is then added into the instrument. Thirdly a fine alignment is performed using the count rate meter in the application software. Once these stages are complete a measurement can be performed. Zeroing the cell height position - coarse alignment Once the sample holder is in place, the surface of the sample must be aligned to a zero height position with respect to the instrument laser, using the height alignment tool. The surface is aligned to a zeroing target etched on the windows of the tool. There are two zeroing targets, one on the front plate, and one on the back. Hold the alignment tool so that the centre of the two targets coincide, to avoid a parallax error. Zetasizer Nano accessories guide Page 3-5 Chapter 3 Surface zeta potential cell ill 8690 Insert the cell assembly into the tool, so that the white mark on the cell is facing the front of the tool, indicated by the white spot, and tilting forward. Adjust the cell cap to alter the sample barrel position until the surface of the sample is aligned with the zeroing target on the tool window. ill 8691 Page 3-6 MAN 0487 Surface zeta potential cell Chapter 3 The sample barrel position should be adjusted so that the sample surface and the centres of the two zeroing targets all line-up exactly. With the sample height set, the cell cap also needs to be zeroed. Loosen the cap screw, then rotate the cell cap until the white mark on the cap is in line with the white mark on the cell body. Secure the screw afterwards. B A C ill 8692 Filling the cuvette and inserting the cell into the instrument The surface zeta potential cell can use either disposable plastic and glass or quartz square cuvettes to hold the sample. With this insertion of the cell, the dispersant will be displaced upwards within the cuvette. Prepare an appropriate aqueous suspension, containing the tracer particles. Sufficient suspension should be added to the cell so that the sample, electrodes and screw are all completely submerged; This is approximately 1.2 ml. Fill the cuvette the prepared aqueous suspension. When filling, tilt the cuvette and allow it to fill slowly. To stop bubbles forming, let the sample flow down the inside. With cell filled, the cell can be inserted; this must be done at an angle to avoid any bubbles being caught between the sample electrodes, and to ensure that the sample plate is entirely submerged. The level of the dispersant must be significantly above the top of the electrodes and the nylon screw that holds the sample in place. The procedure follows below. Note With the procedure complete, the measurement face of the cuvette (some have a small triangle at the top of the cell) and the white mark on the cell body must face in the same direction. This is to ensure the orientation is correct when inserted into the cell holder. Zetasizer Nano accessories guide Page 3-7 Chapter 3 Surface zeta potential cell The cuvette must not be filled more than the recommended maximum depth of 20mm before insertion of the cell . Tilt the cuvette to a maximum angle of 45° . This is to avoid spilling the dispersant. Slowly insert the cell into the cuvette until the sample holder, barrel and electrodes are covered . As the cell is inserted it displaces the sample so any bubbles will be pushed out from the top of the electrode gap. Once the electrodes are covered bring the cuvette up to the vertical . Inspect the combined cell and cuvette and check for any bubbles . If bubbles are present around the electrode or nylon screw, gently tap the bottom of the cuvette to dislodge these. If not dislodged repeat the above sequence. 20mm max 3 2 1 4 max 45° 5 6 Stop A A Stop B ill 8799 Page 3-8 MAN 0487 Surface zeta potential cell Chapter 3 Hold the base of the SZP cell cap and the top of the cuvette simultaneously . Ensure the white marks on the cap and cell body, and the cuvette triangle , are facing the front of the instrument and push the cell into the cell holder until it stops - a 'stop' on the surface potential cell must rest on the top of the cell holder. Check that the cell is sitting flat, and that the cuvette is also fully inserted and rests on the base of the cell holder. Fine alignment using the Count rate meter A final fine adjustment of the zero-position can be made once the cell has been placed into the instrument; this is done using the Count rate meter in the Zetasizer software. From the main menu select Tools-Count rate meter to open the count rate meter, and set the count rate meter as specified: Select the Forward scatter radio button. Under Cell type, select ZEN1020 plate cell (Surface zeta potential cell) from the drop down list. Set the Attenuator to 11. To identify if your sample is aligned correctly open the instrument lid and rotate the cell cap clockwise in increments of approximately 1/8 to 1/4 of a turn. Close the lid and observe the count rate measured in between each increment. Once you lower the sample far enough that the count rate observed is zero, open the lid and rotate the cell cap counter-clockwise by approximately 1/8 to 1/4 of a turn. Close the lid and observe that the count rate has risen a reasonable extent. This position is the starting point for your measurement. For ease of reference, it is now possible to loosen the thumb screw on the micrometer and rotate it to the front of the cell then retighten it to proceed with measurement. Note After the fine alignment step, whenever the cell height is adjusted during the experiment, it is imperative that the physical position of the cell is not moved within the cell holder. Any movement of the cell will result in a different zero height and this must be constant throughout a given measurement. Any alteration of the height during an experiment will reduce the quality of the data. Zetasizer Nano accessories guide Page 3-9 Chapter 3 Surface zeta potential cell Controlling an SZP measurement via an SOP Once the cell has been inserted into the Zetasizer and zeroed, a measurement can be made. This is done using an SOP, or a manual measurement in the usual manner. An SOP can be configured to control all settings for the accessories automatically. A surface zeta potential (SZP) measurement follows the same SOP format as performed when doing a normal zeta potential measurement, with a few exceptions. When a SZP measurement is chosen two extra dialogues - SZP measurement and Tracer measurement - will be included in the SOP selections. The SOP Editor and setup is described in full in the Zetasizer Nano user manual. Most of the SOP sections are common to Measurement types, and these are described in the above manual. The other SOP sections are specific to the SZP cell being used; these are described below. Also note that some of the other dialogue pages will alter slightly to accommodate extra parameters necessary to perform the SZP measurement. Creating or editing an SOP - Measurement Type selection To create a new SOP, select File-New SOP. This will open up the SOP Editor. The SOP Editor consists of several dialogues that can be stepped through by using the Next arrow button. (To edit an existing SOP, choose Open-SOP instead.) Complete the SOP Editor as described in the Zetasizer Nano user manual. Once the SOP has been created, press Finish and save the new SOP. The various SOP dialogues are described below. Measurement type options Select a surface zeta potential measurement type then complete the SOP creation as required. Tracer Material Please refer to the Sample - Material description in the zeta potential SOPs section of the main user manual. Page 3-10 MAN 0487 Surface zeta potential cell Chapter 3 Cell Please refer to the Sample - Cell description in the size SOPs section of the main user manual. As the surface zeta potential cell was selected as the measurement type, this cell will be the only cell choice available. The Zetasizer software will configure all settings and parameters to match this cell. The default selection is the Surface zeta potential cell. SZP measurement The SZP measurement SOP window is similar to the standard zeta potential Measurement window. Where appropriate please refer to the measurement description in the zeta potential SOPs section of the main user manual for more details on each of the measurement options. Zetasizer Nano accessories guide Page 3-11 Chapter 3 Surface zeta potential cell Settings Description SZP measurement duration The SZP (Surface zeta potential) measurement duration options are the same as standard measurement duration options available during normal zeta potential measurements. SZP measurements The SZP measurements options define the number of repeat measurements made at each displacement away from the surface and the length of any delay between repeat measurements. SZP displacement The SZP displacement options define the distances to be used during a surface zeta potential measurement. The Number of positions defines the number of points away from the surface where tracer mobility is to be measured. The Size of steps defines the additional distance away from the surface that each measurement is made. Note that 500 microns can only be chosen if the tracer measurement displacement (in the tracer measurement SOP window) is set to 1500 microns or greater. This is to ensure that a minimum of three displacement points will be measured. SZP measurement - Advanced Refer to the Measurement - Material description in the zeta potential SOPs section of the main user manual. Page 3-12 MAN 0487 Surface zeta potential cell Chapter 3 Tracer measurement The Tracer measurement SOP window is similar to the standard zeta potential Measurement window. Where appropriate please refer to the Measurement description in the zeta potential SOPs section of the main user manual for more details on each of the measurement options. Settings Description Tracer measurement duration The Tracer measurement duration options are the same as standard measurement duration options available during normal zeta potential measurements. Tracer measurements The tracer measurements options define the number of repeat measurements that can be made at each measurement distance from the sample surface, and the length of any delay between these repeat measurements. SZP displacement The final stage in a surface zeta potential measurement is a fast field reversal (FFR) only measurement. The purpose of this is to make a measurement only of the tracer mobility, which will not include any electro-osmotic component, and this will be used in the surface zeta potential equation. Zetasizer Nano accessories guide Page 3-13 Chapter 3 Surface zeta potential cell Settings Description SZP displacement (continued) The Tracer measurement displacement defines the distance from the sample at which this FFR only measurement takes place. The displacement is altered in 125micron increments. Tracer measurement - Advanced Refer to the Measurement - Material description in the zeta potential SOPs section of the main user manual. Data processing This window allows the advanced analysis parameters to be set. It is generally best to leave these set to default. Size ranges and measurement thresholds can be applied to the analysis to filter spurious peaks prior to the analysis being performed. These can be setup using the Configure button. Page 3-14 MAN 0487 Surface zeta potential cell Chapter 3 Settings Description Configure button Pressing the Configure button will display the Plate analysis parameters window, which enables various attributes of the analysis model to be altered. These include the measured zeta Display range, and the measurement thresholds. If it is known that all particles within the sample will fall within a certain zeta potential range, then the zeta Display range can be set to improve the repeatability of the measurement result; similarly a lower threshold sets the noise rejection baseline in the zeta potential distribution. Refer to the Help file for more information. Zetasizer Nano accessories guide Page 3-15 Chapter 3 Surface zeta potential cell Performing the measurement With the cell loaded into the instrument, and the SOP configured, a measurement can be performed. When the measurement is started, a user instruction is given to turn the cap on the top of the cell by a given amount - this will set the distance to the first required displacement position. This is a manual operation and the user must open the cell area lid, turn the head of the cell the specified amount, then close the lid again before continuing. Each 1/4 turn of the cap counter-clockwise corresponds to a movement or displacement of 125 microns; a second 1/4 turn will correspond to a total displacement of 250 microns, and so on. The amount to move the cap will be indicated in the SOP and in the measurement instructions. Page 3-16 MAN 0487 Surface zeta potential cell Chapter 3 Once all of the specified measurements have been performed at that displacement, an instruction is given to set the cell to the next measurement position. This process will continue until all measurements have been made at all the positions specified in the SOP, and the surface zeta potential measurement is then complete. The data is stored as a ‘parent’ surface zeta potential record, with ‘child’ records relating to the individual zeta potential measurements made at each displacement. Zetasizer Nano accessories guide Page 3-17 Chapter 3 Surface zeta potential cell A surface zeta potential report is available to view the results. Select ViewWorkspaces-Surface zeta potential to view the appropriate workspace. Editing the results Surface zeta potential results can be edited by right-clicking on the record in the records view and selecting Edit result; or select Edit-Edit result from the main menu. With the Edit result window open, the Debye length model, tracer material and dispersant properties can then all be changed. The surface zeta potential edit result option allows points to be removed from the displacement plot by left-clicking on them on the displacement graph. When OK is clicked, a new surface zeta potential record is created containing only the child zeta potential measurements that were included in the analysis. Removing the cell from the instrument Follow the procedure for removing the Dip cell from the instrument; the operation is the same. Page 3-18 MAN 0487 Surface zeta potential cell Chapter 3 Maintenance - cleaning the SZP cell Caution! During cleaning and use it is vital not to let any fluid enter the top and cap area of the cell assembly. Any cross contamination of material from one measurement to the next could affect the result, so it is extremely important to ensure the cell is completely clean before use. Cuvettes used with the surface zeta potential cell If a quartz cuvette was used for the measurement, it is recommended to clean the cuvette with Hellmanex, and then rinse with copious amounts of de-ionised water, prior to reusing it. If a plastic disposable cell was used for the measurement, it is recommended that this is disposed of and a new one used for all subsequent measurements. General cleaning As a complete assembly the cell can be cleaned using de-ionised water or with a Hellmanex solution. If Hellmanex is used, the cell must be rinsed with copious amounts of de-ionised water, prior to reusing it. More efficient cleaning can be obtained by immersing the electrode area and sample holder in a gentle ultrasound bath (30 Watts) for 5 to 15 minutes. Use the dispersant used for the previous sample as the cleaning fluid. If this dispersant contains additives such as surfactants, follow this by ultrasonicating for two minutes in the pure solvent. ill 6763 Over time, it is likely that the electrodes will become discoloured or tarnished. This is expected, and although it cannot be cleaned, this will not affect the quality of the data obtained. Zetasizer Nano accessories guide Page 3-19 Chapter 3 Surface zeta potential cell Intensive cleaning Cleaning can be performed as described in the following table. The material and chemical compatibility of each component is detailed in the next section. Component Cleaning method Cell cap Wipe clean with a mild soap solution. Rinse with water once cleaned. Outer casing Sample barrel Sample holder Wipe clean with a mild soap solution. Electrodes Scrub gently with a pipecleaner and Hellmanex, then scrub with copious amounts of de-ionised water. Rinse with water once cleaned. Once cleaned, leave all parts to be fully dry before re-using; especially the electrode and sample holder area. Chemical compatibility - SZP cell Components of the Zetasizer Nano that may come into contact with the sample are manufactured from materials that are considered to give the widest protection from chemical attack. However, it is important to check that any sample or titrant used is chemically compatible with the materials mentioned. Warning! It is advisable that the chemical compatibility is checked against the materials identified below before inserting a sample. It is also recommended that a test is performed on the material with the sample before more permanent usage is undertaken. With proper use, only the central measurement section (see table for components) of the surface zeta potential cell will ever come into contact with sample. The outer components of the cell will only come into contact if spillage or overfilling occurs. Page 3-20 Component Materials Casing Natural PEEK / Stainless steel 316 Sample barrel Natural PEEK Sample holder Natural PEEK Sample holder screw Nylon Electrodes Palladium Contacts Beryllium / copper MAN 0487 4 Flow-mode option Introduction This chapter gives an overview of the Flow-mode option. Instruments fitted with this option can be connected to a size exclusion chromatography (SEC) system and be used as a light scattering detector. ZEN1006 Flow-mode option for Zetasizer Nano S and Zetasizer Nano ZS. It describes how to connect, control and operate the flow-mode arrangement to ensure reliable and consistent measurements. The following cell is available for use with the Zetasizer Nano when connected to a SEC system. ZEN0116 Quartz flow cell kit for connection of the Zetasizer Nano to an SEC system. The option is for use with all Zetasizer Nano instruments except the Nano Z. If fitted, an option part number label will be attached to the front of the cuvette holder. The flow mode option is included as a standard fitment on the Zetasizer Nano ZSP. Flow-mode The Flow-mode option allows the Zetasizer Nano to be connected, using a flowcell, to a flowing sample stream, such as the output of a chromatographic column or a field flow fractionation system, and measurements made without interrupting the flow. The output from external detectors, such as refractive index and ultra-violet absorption detectors, can be input back into the Zetasizer to allow integration of the data, using optional hardware. Zetasizer Nano accessories guide Page 4-1 4 Chapter 4 Flow-mode option In a flow-mode measurement, both the scattered light intensity and hydrodynamic diameter are plotted as a trend, and the addition of optional analogue inputs enables the simultaneous display of data from up to two other detector outputs. Liquid Connections Degasser Eluent Pump Auto Injector SEC/GPC Column Trigger Electrical Connections Data Waste ill 7908 By connecting the output from the external device to the external input socket on the rear of the Zetasizer Nano, a real-time parameter reading from the device can be directly inputted back into the Zetasizer Nano software. This parameter reading can be plotted as a trend, thus enabling additional sample characteristics to be monitored. Applications Applications for this feature include use as a chromatography detector and a process monitor. Separations detector The Zetasizer Nano can be connected to a size-exclusion chromatography (SEC) system or a field-flow fractionation (FFF) system. When connected to one of these systems, the Zetasizer Nano acts as a sensitive light scattering detector, simultaneously plotting trends of the total intensity of light scattered and the size as the hydrodynamic diameter. Light scattering is an almost universal detector, as most materials, such as proteins for example, will have a different refractive index to the buffer they are in, and hence will produce a light scattering signal. Page 4-2 MAN 0487 Flow-mode option Chapter 4 Other detectors can be connected to the Zetasizer Nano optics unit and their signals plotted on the same axes as the light scattering signal. The timing of these signals can then be adjusted to compensate for the output delay due to the detectors being connected serially in the flow path. These detectors will usually be refractive index or UV and used to measure the concentration of the eluting sample. These values can then be used to calculate the molecular weight of each component separated. 500 30 Monomer 65 kDA 400 350 CR (kCnts/s) RI (mV) UV (mAU) Radius (nm) Dimer 130 kDa 300 250 25 20 15 Trimer 195 kDa 200 10 150 Low MW impurities Aggregates 100 Hydrodynamic Radius Residual Intensity, RI, & UV 450 5 50 0 0 6 7 8 9 10 11 12 13 14 15 16 17 18 19 20 Elution Volume (mL) + Offset ill 7906 Process monitor The Zetasizer Nano can be connected to a flowing sample extracted from a process stream or reaction vessel. The high concentration capability of the Nano S and ZS means that many processes can be monitored without further sample preparation, simplifying the measurement. Note The method of sampling the process and transferring this to the Zetasizer is not provided. Connectivity To obtain the data from the external detector use the 4-way ‘Lemo’ socket on the rear panel. A lead is supplied - the end terminated with a ‘Lemo’ plug connects to the rear panel; whilst the other end, terminated in 4 bare wires, will be connected to the external device. External devices can be connected to the external input 1 and earth, and external input 2 and earth. An additional input may be used as a trigger for remotely starting the Zetasizer Nano. Zetasizer Nano accessories guide Page 4-3 Chapter 4 Flow-mode option Connections from External Device Screen/Earth Lemo Connector External Input 1 External Input 2 External Input 3 Connect to Nano Rear Panel (additional) ill 7907 The lead supplied by Malvern can be connected directly to the rear of the external device, or to an output from the device, whichever is appropriate. Consult the external device documentation to obtain the output connections for connecting the Malvern lead. Connector input voltage specification The input voltage is -5v to +5v (analogue). Exporting the flow-mode data Once received, the external device data obtained during the flow-mode measurement can be exported from the Zetasizer Nano software, saved as a text file, and inserted into a spreadsheet software package (such as Microsoft Excel) for analysis. This is done using the Export flow result macro option in the Tools menu. If this macro is not visible in the menu, select Tools-Options... to enable it. Exporting the flow-mode data: Page 4-4 Select a flow measurement record. The export will not work if this is not done. Select Tools-Macros-Export flow result. A window is displayed requesting the export destination. On selecting Save, the data will be exported and saved as a text (.txt) file. The file can then be imported into the target program. MAN 0487 Flow-mode option Chapter 4 Editing and inspecting a flow-mode result A flow-mode result can be edited by right-clicking on the measurement record and selecting Edit-Result. This will display the window below. 1 A B C The window shows the following: E 2 3 4 D ill 8822 Chromatogram This shows the flow-mode plot. By default the Intensity trace is displayed on the left y-axis, and the Z-average mean parameter displayed on the right y-axis. Rightclicking on the y-axis text allows other available traces to be displayed. The available traces are displayed in the Selected trace area of the Traces tab. Zetasizer Nano accessories guide Page 4-5 Chapter 4 Flow-mode option Traces The traces on the plot display the measured parameters with respect to the volume passed through the flow-mode system arrangement. Use the cursor to select each trace; the trace selected will be displayed in the plot legend and the displayed Trace tab. The traces shown can be chosen by right-clicking on the yaxes or by using the Trace tab. Generally the Z-average mean values are shown as dots on the plot, whilst the Intensity is shown as a continuous line. Peaks The peaks detected by the analysis are indicated by the blue vertical bars on the plot. The peaks displayed are determined by inspecting the Z-average mean data points. When a peak is selected, by either clicking on the bar or selecting the peak check box, the Peak tab will be displayed. This shows the peak details (see below). Note that the selected peak will be highlighted deep blue. By clicking and dragging, it is possible to select a region of the chromatogram, which is highlighted in purple. By right clicking the mouse, it is then possible to perform a DLS analysis of this region. This calculates and intensity-weighted average Z-average that is calculated in the box in the bottom right of the display. Note that when the user clicks OK, although the data is saved, it is not displayed in the reports and must be accessed by returning to the Edit results dialogue. Viewing tools These enable different plot views to be shown. The tools can be selected and used in two ways: • Select directly from the drop-down menu and perform the action. • With the drop-down menu showing the Peak/trace highlighter, hold the appropriate control key down to perform the action. The actions available are: Peak / Trace highlighter (cursor) When the cursor is moved over the traces, peaks and axes of the plot, this will change to a hand, allowing the feature to be selected. When a trace or peak is selected the respective tab will be displayed. Zoom (Alt) Use to place a “marquee” around a specific part of the plot and enlarge. The axes will automatically adjust to match the enlarged plot. Page 4-6 MAN 0487 Flow-mode option Viewing tools (continued) Chapter 4 Scale (Control) Use to dynamically zoom in or out of the plot. This will be centred on the cursor position. The axes will automatically adjust to match the new scale. Pan (Shift) Allows the plot to be moved left, right, up and down. The axes will automatically adjust to match the new position. Resets the view back to the initial view. All zoom, scale and pan actions will be removed. Baseline pointer The Baseline pointer is used to set the datum level for the plot. When the measurement is originally performed the software will attribute an appropriate baseline level and use this as a filter to remove unwanted and erroneous data. All measurement data below this level will be removed from the measurement, plus any data above it that the software considers to be uncharacteristic of the measurement, in effect an “outlier”. This filter of outliers can be disabled in the Data Processing section of the SOP and Edit results dialogue. Choose Configure and then disable the option to Filter flow mode data to do this. With reference to the originally attributed baseline level, the software will display any peaks that may have occurred during the measurement. To observe the effect on the peaks when the baseline is adjusted, change a y-axis to Intensity, select the baseline pointer with the cursor and drag to a different position along the right y-axis. The peaks will be displayed in the Peaks tab (see below) - this will automatically be displayed when the baseline pointer is moved. Note that when the baseline level is moved the software will remove any data that is below the new level. This may significantly alter any peaks shown. The baseline pointer is only visible when an Intensity trace is displayed. Trace data Sections of the chromatogram can be removed from the flowmode plot. To remove a part of the chromatogram, highlight a section by dragging the mouse over the graph; then right-click on the highlighted section and select Trace data. Options will be given to either remove the highlighted section (Delete data in this section only), or to remove all data outside the highlighted section (Keep data in this section only). Zetasizer Nano accessories guide Page 4-7 Chapter 4 Flow-mode option Measurement tab This Measurement tab displays the measurement details. These are the same details as entered when the measurement was first performed. Refer to the appropriate SOP windows - Sample and Flow settings - for more details. The Edit settings button will display the standard Edit result window where the measurement details and parameters can be inspected and edited. Traces tab The Traces tab displays the traces available for viewing on the plot. The traces available will be determined by the flow-mode system arrangement and the measurement signals analysed. The available traces could be the Z-average mean, Intensity, RI (Refractive Index) and UV. When RI is selected using the drop-down menu, the Delay Volume, Offset and Gain values will be displayed; These are the values entered in the External Inputs SOP window when the SOP was originally performed. Refer to the Flow-mode SOPs section. Note that the default External Inputs values are defined in the Options window, explained later in this chapter. Peaks tab The Peaks tab displays all the details about the calculated peaks shown in the flowmode plot. To display a peak's details either select a blue peak bar in the plot, or select one of the peaks identified at the top of the peak tab; the details in the tab will reflect the data appropriate to that peak. The selected peak will be highlighted on the plot. (The details displayed are the same as shown on the Chromatogram summary report). The features of the Peaks tab are: Peaks identified box This shows all the peaks identified in the measurement and plot. Selecting a peak will display its details in the accompanying boxes. To show or hide a peak in the plot, select or de-select the check box alongside the peak. Page 4-8 Hide all Press this button to hide all identified peaks. Peaks can be displayed again by selecting the peak check box. Remove This will remove the highlighted peak in the Peaks identified box. When pressed, a message is displayed to warn that the peak will be removed permanently. Start vol. / End vol. This shows, in mL, the start and end volume points for the peak. Peak analysis details Displays the results from the measurement: Molecular weight, Z-average, Width and Intensity area. MAN 0487 Flow-mode option Chapter 4 Controlling the flow-mode measurement via an SOP Once the Flow-mode option has been connected to the required size exclusion chromatography (SEC) system, a measurement can be made. This is done using an SOP, or a manual measurement in the usual manner. The Flow-mode SOP enables measurements to be performed on a flowing sample stream. The scattered light intensity and hydrodynamic diameter can be plotted as a trend, and, with the addition of optional external input windows, information from external measuring sources, such as a refractive index detector, can be monitored and displayed. An SOP can be configured to control all settings for the accessories automatically. A Flow-mode measurement follows the same SOP format as performed when doing a normal size measurement, with a few exceptions. When a size measurement is chosen some extra dialogues - External Input 1/2 and Flow settings - will be included in the SOP selections. The SOP Editor and setup is described in full in the Zetasizer Nano user manual. Most of the SOP sections are common to Measurement types, and these are described in the above manual. The other SOP sections are specific to the flow measurement being performed; these are described below. Also note that some of the other dialogue pages will alter slightly to accommodate extra parameters necessary to perform the flow measurement. Creating or editing an SOP - Measurement type selection To create a new SOP, select File-New SOP. To edit an existing SOP, choose Open-SOP. This will open up the SOP editor. The SOP editor consists of several dialogues that can be stepped through by using the Next arrow button. Complete the SOP editor as described in the Zetasizer Nano user manual. Once the SOP has been created, press Finish and save the new SOP. Note To improve the stability of temperature control when using the system as a Gel Permeation Chromatography (GPC) detector, the measurement temperature should be set to be 5°C or greater, above or below the ambient temperature. Zetasizer Nano accessories guide Page 4-9 Chapter 4 Flow-mode option Measurement type options Select a Flow measurement type then complete the SOP creation as required. External input 1 and 2 Measurement parameters can be set for each external input used. The same parameter options are available for each input. Settings Description With the Enable input check box selected, the input conditions required for the external signal can be setup. Page 4-10 Input name Use Input name to name the type of input. Use a name that represents the signal or reading being inputted. A name is mandatory once the check box has been selected, otherwise another SOP window cannot be selected. Input type / Path length Input type (the kind of detector the instrument is connected to) and Path length (mm) are options that only require selection when using the Research features. MAN 0487 Flow-mode option Chapter 4 Settings Description Offset / Gain The Offset and Gain are mathematical parameters (values) that are needed to convert the incoming signal (in volts from the external measurement device) to the measurement parameter required. Reading converted to voltage Signal input to Zetasizer Incoming Voltage Signal Convert voltage to reading External Device Parameter reading Zetasizer Nano DTS Software Parameter reading pe Slo 0 Offset and gain values used for conversion ain =G Offset = Voltage when measured parameter is 0 0 Measured parameter ill 7696 Consult the external detector documentation to ascertain the Offset and Gain values required and input these into their respective entry boxes. Delay volume The Delay volume is the volume of liquid contained in the cells and connecting tubing between the external detector and the Zetasizer Nano. This parameter ensures that data recorded by the Zetasizer can be over-plotted from the same elution point. This value will be obtained from the external detecting device (i.e. chromatographic column) that is used in the flowmode measurement. The default settings, for name, delay volume, offset and gain, can be adjusted using the Tools-Options-External Inputs window. Zetasizer Nano accessories guide Page 4-11 Chapter 4 Flow-mode option Measurement Settings Description Measurement duration The measurement duration setting may affect the accuracy and repeatability of the results. In Measurement duration, input the total measurement time or volume amount required, and adjust the units to suit: Time or Volume. The Run duration value determines the length of each individual measurement within the experiment. Page 4-12 MAN 0487 Flow-mode option Chapter 4 Flow settings Settings Description Flow rate Input the flow rate of the sample through the instrument and connecting tubing. This value is taken from the external detecting device (i.e. chromatographic column) that is used in the flow-mode measurement. For all other SOP windows, refer to the size SOP section. Zetasizer Nano accessories guide Page 4-13 Chapter 4 Flow-mode option The Flow-mode measurement display The Flow-mode measurement displays are virtually identical to those shown when performing a standard size measurement. The only difference being the inclusion of different view options on the Result tab, i.e. Flow trace vs Volume as shown below. The standard tabs are explained in the Zetasizer Nano manual. Result tab (1st tab) The result tab will show the result obtained as the measurement progresses. The result view will be updated after every run of the measurement. The Result tab is named after the result view chosen, the result view shown above is Flow trace vs Time. Different views can be selected by right-clicking on the graph and selecting from the list displayed. The views available are: Count Rate, Correlation Function, Flow trace vs Volume and Flow trace vs Time and Monitor. Monitor enables the count rate signals to viewed before a measurement is run. Note that the monitor only displays information before the measurement has actually been started. When the measurement is started, the flow trace views should be used. Page 4-14 MAN 0487 Flow-mode option Chapter 4 Displaying the flow-mode report To display a titration report, select a 'Flow' type measurement record and then select the appropriate report tab. The report will show all appropriate measurement information for that record. Standard report - flow-mode measurements The standard Flow-mode report, Chromatogram Summary (M), gives the same information as seen in a standard size report, plus additional information relating to the flow duration and rate used. Zetasizer Nano accessories guide Page 4-15 Chapter 4 Flow-mode option The three main peaks in the measurement will also be shown, displaying the sample intensity, width, molecular weight and start and end flow volumes. Additionally a the flow trace result graph will be displayed. This can be viewed either in Time or Volume. Page 4-16 MAN 0487 5 Microrheology Introduction This chapter gives an overview of the microrheology option in the Zetasizer software. It can be used with either a Zetasizer Nano ZS or ZSP. The microrheology option allows the measurement of the viscoelastic modulus of samples within the linear viscoelastic region. ZEN5600 Zetasizer Nano ZSP instrument ZEN3600 Zetasizer Nano ZS instrument It describes how to connect, control and operate the microrheology optioned instrument to ensure reliable and consistent measurements. DLS Microrheology The new measurement protocol for the Zetasizer Nano ZS and ZSP has been called DLS Microrheology, as it is a cross over between DLS and rheology, and allows rheological measurements of low viscosity and weakly structured samples to be made. Advantages of DLS Microrheology are: Rheological characterization of low viscosity, weakly-structured samples. Via access to very high frequency (short time) dynamics which is highly relevant for dilute samples or weak structures. Very small sample volumes can be used (approx. 12μL). This is particularly suitable for precious protein samples. Provides rheological parameters - G', G'', η*. Data can be verified using the same sample measured on a rotational rheometer where measurement ranges overlap. Data can be exported and used in the Malvern rSpace software. Zetasizer Nano accessories guide Page 5-1 5 Chapter 5 Microrheology Extends viscoelastic measurements into ranges inaccessible by mechanical rheometry techniques. Fast measurements are possible, with all frequencies effectively sampled simultaneously. Applications for viscosity of protein solutions and onset of protein aggregation. DLS Microrheology - basic theory DLS Microrheology uses tracer probe particles to measure the relationship between stress and deformation. Both DLS and ELS measurements are done to ensure robust measurement methodology. A measurement consists of the 3 main measurement steps. Ensure suitable tracer particle surface chemistry Zeta potential measurement step to show no significant interaction between the tracer particles and measurement sample. The tracer is initially measured in the sample buffer/dispersant (or solvent) alone with no sample added. sample is then added and a second measurement performed. The two zeta potential results are then compared - a small relative change in zeta potential in the presence of the sample indicates minimal interaction between the sample and tracer particles. Ensure suitable concentration and dispersion of tracer particles Size measurement step for evaluation of appropriate scattering signal and PSD to meet this condition. A size measurement is run to see that tracer scattering dominates signal, and has a narrow monomodal Intensity PSD peak, i.e. tracers are dispersed properly. Measure Correlation function of tracer particles Perform a microrheology measurement and extract microrheology data from Mean Square Displacement (MSD) plot. Page 5-2 MAN 0487 Microrheology Chapter 5 Microrheology utilities The Zetasizer software has a utilities section for the Microrheology suite, which can be accessed via either the Tools menu (Tools-Utilities-Microrheology utilities) or from right clicking on a microrheology record. The following tab selections are available: Mean square displacement Viscoelastic Moduli Complex viscosity Each tab page contains controls that allow different models to be fitted to the microrheology data graph. It is important to note however that not all models will be applicable to all the datasets. Due to the measurement inconsistencies at very short timescales, there will be areas of the data that will not be appropriate to use with the models. In order to change the area used, and displayed in the Fit results area, left-click and drag the range pointers (the red triangles on the x axis) to an appropriate point on the chart. To export the microrheology data, refer to the next section. Zetasizer Nano accessories guide Page 5-3 Chapter 5 Microrheology Exporting the Microrheology data On completion of the measurement the rheology data can be exported from the Zetasizer Nano software, saved as an .xml or a .csv file. Note The .csv file should be used if the results are to be imported into the Malvern rSpace software. Exporting the microrheology data (.csv) - using the File option To export the measurement data as a .csv file. Select a microrheology measurement record. The export will not work if this is not done. Select File-Export. A window is displayed requesting the export destination. Enter the destination and alter the parameters and settings as required. To export the data as a .csv file select the Browse button and alter the file extension. (Note: if Ok is pressed the data will be exported and saved as a text (.txt) file.) Note Refer also to the Exporting results section in the main user manual. Exporting the microrheology data (.xml/.csv) - using the Microrheology utilities To export the measurement data as either a .xml file or a .csv file. Page 5-4 Select a microrheology measurement record. The export will not work if this is not done. Select Tools-Utilities- Microrheology utilities. The Microrheology data processing window will be displayed. Select Save and input the export destination. Alter the file extension to .xml file or .csv as required. MAN 0487 Microrheology Chapter 5 On selecting OK, the data will be exported. The parameters that are exported are: Sample Name Date File Name Lag times (μs) Times (μs) Angular Frequency (rad/s) Creep Compliance: Plot against Times Mean Square Displacement: Plot against Times Channel Values: The Correlogram, plot against Lag times Complex Viscosity (cP or mPas): Plot against angular frequency G Prime Prime (Pa): Viscous component, plot against angular frequency G Prime (Pa): Elastic component, plot against angular frequency These can be imported into rSpace software using an appropriate sequence. Note It is important to note that for the first release of microrheology, the time is exported from the Zetasizer software in μs, and will be imported into the rSpace software in s. Zetasizer Nano accessories guide Page 5-5 Chapter 5 Microrheology Controlling the Microrheology measurement via an SOP A microrheology measurement follows the same SOP format as performed when doing a normal size measurement, with a few exceptions. When a microrheology measurement is chosen some extra dialogues Optimization and tracer - will be included in the SOP selections. The SOP Editor and setup is described in full in the Zetasizer Nano user manual. Most of the SOP sections are common to Measurement types, and these are described in the above manual. The other SOP sections are specific to the microrheology measurement being performed; these are described below. Also note that some of the other dialogue pages will alter slightly to accommodate extra parameters necessary to perform the microrheology measurement. Creating or editing an SOP - Measurement type selection To create a new SOP, select File-New SOP. This will open up the SOP Editor. The SOP Editor consists of several dialogues that can be stepped through by using the Next arrow button. (To edit an existing SOP, choose Open-SOP instead.) Complete the SOP Editor as described in the Zetasizer Nano user manual. Once the SOP has been created, press Finish and save the new SOP. The various SOP dialogues are described below. Measurement type options Select a microrheology measurement type then complete the SOP creation as required. Optimization The optimization SOP window is required for preparation (optimization) of the sample and measurements before the microrheology measurement proper. Optimization is the process of performing zeta potential and size measurements on the tracer particle and then subsequently on the measurement sample to ensure all requirements are met prior to performing the microrheology measurement. The zeta potential and size optimization measurements are configured by clicking on the Edit buttons - this will open the standard zeta potential and size SOP windows as described in the main user manual. This stage is not always necessary; Page 5-6 MAN 0487 Microrheology Chapter 5 depending upon the measurement setup and data available, both the zeta potential and size optimization measurements can be ignored, with the user going directly to the microrheology stage. Settings Description Zeta potential SOP / Size SOP Select or deselect the zeta potential and size tick boxes as required. Refer to the schematic description below. Load Load a saved SOP file. The SOP loaded will be shown in the above entry box. Edit Edit a new zeta potential or size SOP. Schematic The schematic shows the optimization process that will be conducted. If either or both of the zeta potential or size SOP tick boxes are deselected, the schematic will grey out that part of the schematic and that part of the measurement stage will be ignored. Zetasizer Nano accessories guide Page 5-7 Chapter 5 Microrheology Tracer The Tracer SOP window shows details about the tracer used in the measurement. Press Select to open the tracer manager window where the tracer to be used can be selected. Settings Description Select Highlight the tracer required and press OK. The Tracer SOP will now be populated with the selected tracer. Edit Enables the editing of the nominal tracer size. Notes Add any additional information. Measurement - Advanced This window is the same as the standard size Measurement - Advanced, except for the addition of the Acceptable zeta ratio (%) setting. Page 5-8 Settings Description Acceptable zeta ratio (%) This is the acceptable ratio between the zeta potential measured for the tracer particles in dispersant alone, and of that measured in dispersant and sample. MAN 0487 Microrheology Chapter 5 For a description of the other measurement parameters, refer to the Measurement - Advanced description in the size SOPs section of the main user manual. For all other microrheology SOP windows, refer to the size SOP section in the main user manual. Microrheology measurement process With the cell loaded into the instrument, and the SOP configured, a measurement can be performed. Overall to make a microrheology measurement, only one measurement is technically needed - this is a size measurement that the software uses to calculate the relaxation times, and therefore the viscosity and moduli values. However, in order to get to this point, and in order to make reliable measurements, the full microrheology measurement process consists of several basic steps, these are described in the following paragraphs below. As the measurement progresses through the measurement steps, the software will prompt instructions for the user to perform where relevant. Each instruction will involve a manual operation and the user must open the cell area lid, perform the specified action, then close the lid again before continuing. The process a microrheology measurement performs is shown in the optimization stage of the SOP. Zetasizer Nano accessories guide Page 5-9 Chapter 5 Microrheology Sample preparation advice The correct preparation of the tracer and sample elements for the measurement is important to ensure that reliable and repeatable results are achieved. The concentration of tracer samples used will depend to a great extent on the concentration of your sample in the dispersant. Following are some important considerations for the preparation. Zeta potential measurements For the initial tests of the zeta potential the following starting concentrations are suggested. Tracer in dispersant/buffer (or solvent) only 0.5μl tracer particles to 10ml sample (0.05μl/ml). Tracer in dispersant/buffer (or solvent) including sample Add 10-100μl of the tracer in dispersant to 1ml of the sample in dispersant. Start at the low end and increase the concentration if required. Size measurements - to hide sample scattering Size measurements are performed to check that the tracer particle's scattering completely hides the sample scattering; therefore the size of the tracer particle should be larger than the sample. Page 5-10 MAN 0487 Microrheology Chapter 5 The following starting concentrations are suggested. Tracer particles in measurement sample Start with a few μl (up to about 5μl) of neat tracer to 1ml of sample. If more tracer is required to hide the sample scattering, add 1μl at a time. Alternatively; dilute 100μl in 1ml of buffer, filter using an appropriately sized filter and add 5μl at a time if more probes are required to hide the sample scattering. Filtering It is suggested that to get the most reproducible result, the tracers are filtered with appropriately sized (i.e. filter size larger than the tracers) filter. Size sample measurement - to check sample scattering visibility During the measurement the software makes a measurement of the sample size, then asks for tracer particles to be added. The size is re-measured and checked against the original sample size measurement. If the sample scattering is still visible. The software will encourage the user to add more tracer. If there is too much tracer in the sample, it will become turbid and measurement will be difficult. It is therefore important to use just enough tracer to mask the sample but not put in so much that the sample becomes turbid. Note The measured size of the tracer may not be correct. This is because of the viscosity of the sample and does not matter. The important point is that the scattering from the tracer should hide the scattering from the sample. Zeta potential - acceptable zeta ratio Testing the difference in the zeta potential between the tracer and measurement sample is important because large changes would indicate that the tracer particle and the sample are interacting. With proteins, that could mean that the proteins are adhering to the tracer's surface and therefore not only changing the tracer's zeta potential but also the size of the tracer. The tracer then becomes part of the system and directly influences the rheology. Therefore to avoid this interaction the amount of sample added with respect to the tracer must be controlled. This is done by measuring the sample zeta potential measurement against the tracer zeta potential. The resultant measurement and comparison must show that the sample measurement is within a set percentage of the tracer measurement. This comparison is termed the acceptable zeta ratio. Zetasizer Nano accessories guide Page 5-11 Chapter 5 Microrheology For the microrheology measurement to measure reliably the acceptable zeta ratio is 25% or less. Note It is important to note that stable dispersion of the tracer particles in the sample may take some time. It has been noticed that with certain systems, gentle mixing (for example using a sample roller) will help to disperse the tracer particles, but that surface interactions can take several hours to manifest themselves. During the measurement this ratio is checked. If the ratio is acceptable the measurement will continue; if not and the zeta potential ratio is more than 25% different the software will advise. There are two possible causes for the zeta potential shows significant differences between the tracer and the sample / tracer systems. The tracer concentration is not high enough in the sample If the tracer concentration is too low, the zeta potential result will be dominated by the sample, not the tracer, adding more tracer particles and re-testing can show if the difference is due to concentration rather than interaction. The tracer and sample are interacting If the tracer and sample are interacting, adding more tracer won't improve the difference in zeta potential (unless so much is added that it completely dominates the zeta potential measurement). Measurement process A full microrheology measurement consists of several steps. As the measurement progresses through the measurement steps, the software will display instructions examples are shown in the following text. On pressing the Start button a dialogue will appear indicating the first step to perform. Pressing Next in the measurement dialogues will then move the measurement onto the next step. Page 5-12 MAN 0487 Microrheology Chapter 5 Zeta potential measurement to study sample/tracer interaction Measure tracer zeta potential in dispersant/buffer (or solvent) alone This is termed the tracer measurement. Use a zeta potential cell. A zeta potential cell is filled with the dispersant/buffer, that is to be used in the later microrheology measurement, and a diluted suspension of the tracer particles is added. An initial measurement of the zeta potential and size of the tracer is then performed. Zetasizer Nano accessories guide Page 5-13 Chapter 5 Microrheology The tracer size measurement is used later in the microrheology measurement step. The tracer size needs to be measured to ensure the microrheology result is as accurate as possible. When finished a dialogue will appear indicating the next step to perform. Measure tracer zeta potential in dispersant/buffer (or solvent) including sample This is termed the sample measurement. Use a zeta potential cell. Prepare the sample to be used for the measurement, then add small amount of tracer particles - do this at a concentration similar to that used in the previous step. Ensure the tracer and measurement sample are mixed. A measurement of the zeta potential of the tracer in the measurement sample is then performed. Once this measurement is complete the software compares the two measured zeta potential results and tests to see if sample measurement is within a set percentage of the tracer measurement - this is the acceptable zeta ratio. If the ratio is less than 25% the measurement process will continue to the next step otherwise with a dialogue appearing indicating the next step to perform. If the ratio is more than 25% the software will give sample preparation advice and advise on repeating steps 1 and 2. Refer to the zeta potential - acceptable zeta ratio section. Page 5-14 MAN 0487 Microrheology Chapter 5 Size measurement to monitor tracer and sample scattering Measure size of measurement sample Use a folded capillary cell or disposable sizing cell Prepare a fresh measurement sample and perform a size measurement. When finished a dialogue will appear indicating the next step to perform. Measure size of measurement sample and tracer particles Use a folded capillary cell or disposable sizing cell Add a quantity of tracer particles to the measurement sample. Once done perform a size measurement. Zetasizer Nano accessories guide Page 5-15 Chapter 5 Microrheology With the measurement is complete, an intensity plot should also be displayed showing one peak. The software compares the two measured size results and tests for the following: The size of the tracer particle should be larger than the sample particles The tracer particle's scattering should completely hide that of the sample scattering. If the sample scattering is still visible the software will prompt for more tracer to be added to the sample. The tracer scattering must obscure the sample scattering by more than 90%, but not so much that the sample becomes turbid, therefore making any subsequent measurement difficult. When the software is satisfied with the comparison between the two size measurements, the microrheology measurement can be started. A dialogue will appear indicating the next step (the microrheology measurement) can be performed. Press next to start the microrheology measurement automatically. Microrheology measurement This measurement is a single size measurement from which the MSD and rheological parameters are calculated. The microrheology measurement display The microrheology measurement displays are virtually identical to those shown when performing a standard zeta potential or size measurement. These standard tabs are explained in the main Zetasizer Nano user manual. Page 5-16 MAN 0487 Microrheology Chapter 5 Running only the microrheology test The microrheology test can be run on it's own as long as the user is confident that the other steps have been fulfilled to their satisfaction. For example, if a range of concentrations of the same sample are being tested, the zeta potential testing can be run once, on just a single concentration. If the same tracer is being used, the tracer size can be measured once and the same value can be set in the SOP by checking the edit box next to the nominal tracer size and changing the nominal tracer size to the size that has been measured. Displaying the microrheology measurement report To display a microrheology report, select a Microrheology group type measurement record and then select the appropriate report tab. The report will show all appropriate measurement information for that record. Standard report - microrheology measurements Once a microrheology measurement is completed there are a number of standard reports available for reviewing the measurement results. Zetasizer Nano accessories guide Page 5-17 Chapter 5 Microrheology These are: Microrheology: Correlogram and MSD (mean squared displacement). Rheological properties: Eta (Complex viscosity), G (Moduli), Creep compliance. Microrheology MSD (mean squared displacement) The mean squared displacement is a representation of the movement of the tracer particles within the sample. A purely viscous (Newtonian) sample will show a straight line. Correlogram The correlogram shows the base data from which the microrheology result is calculated. The correlation function displayed is a measurement of the amount of movement the probe particles make within the test sample over a range of timescales. Rheological properties Eta (Complex viscosity) This report shows the relationship of the complex viscosity to the shear viscosity using the Cox-Merz rule. This rule is generally only fully applicable for simple systems, and that the differences between complex viscosity and shear viscosity increases as the sample structure becomes more complex. G (Moduli) The Moduli tab shows the viscoelasticity of the sample, it shows two sets of data on the chart - G', the elastic (storage) component and G", the viscous (loss) component. In a microrheology measurement it is expected that the viscous component will be dominant for at least most of the measured frequency range. This is because the technique relies on the tracer particles being able to move and therefore produce a correlogram. For example; a gel system where the elastic component (G') is dominant for all of the frequency range, will hold the tracer particles still within the gel matrix, which means that the correlogram will be close to a flat line, and the MSD will be effectively 0. Creep compliance Creep compliance is another way of viewing the viscoelasticity of a sample. Page 5-18 MAN 0487 Microrheology Chapter 5 A standard report (MSD) The standard microrheology report, MSD (mean squared displacement) (M), gives similar information as seen in a standard size and zeta potential report, plus additional information relating to the microrheology measurement itself. Zetasizer Nano accessories guide Page 5-19 Chapter 5 Microrheology Page 5-20 MAN 0487 6 Advanced protein features Introduction This chapter gives an overview of the Advanced protein features option in the Zetasizer software. With the Zetasizer Nano ZSP it is now possible to achieve the best possible measurement of protein mobilities. This is achieved with the combination of the following features: A system with sufficient sensitivity to measure the low count rates and low electrophoretic mobilities associated with protein samples. A measurement technique that minimises the risk of protein aggregation and minimise the amount of material required. This is the Diffusion barrier measurement technique; a description of this follows. A measurement process that reduces the risk of aggregation but also capable of identifying any aggregates that are formed and assesses the quality of the measurement. Measurement process The protein mobility measurement combines size and zeta potential measurements to check that no protein aggregates are forming during the measurement. The mobility measurements will be performed in groups of sub-runs. This is to allow for periods of cooling to be applied at stages within the measurement and so reduce any chances of aggregation happening through over-heating of the sample. To further reduce any risk of aggregation, an automated measurement optimization will check and reduce the voltage required. This is done by monitoring the sample conductivity. Zetasizer Nano accessories guide Page 6-1 6 Chapter 6 Advanced protein features The basic steps involved in a measurement are: The first step is the thermal equilibration delay, performed in order for the sample and cell to properly equilibrate with the Zetasizer cell holder. An optional pre-mobility size measurement is completed so that the user can check that the sample is not aggregated. This result is recorded into the protein mobility parent record as a child record of type size. A zeta potential measurement follows for measuring the mobility. A normal zeta potential measurement consists of a number of sub-runs, at the end of which the final result (the average over all recorded sub runs) is reported into the record view. During the measurement proper, running a large number of sub-runs sequentially will significantly increase the risk of Joule heating of the sample. to prevent this the protein mobility measurement is split into the smaller groups of sub-runs with a delay added between each group to allow the sample to relax. t=0 Thermal Delay Pre-Size } Aggregate, joule heating and polarization concentration detection during each group Delay Delay Post-Size ill ill8801 Page 6-2 Once the measurement starts the Expert system will check and warn if the sample has will be subject to levels of Joule heating or Polarisation/field estimation issues that might affect the measurement accuracy. Appropriate advice is given, for such cases, on the Expert advice tab on the live display and after the measurement on the record view. MAN 0487 Advanced protein features Chapter 6 Once all of the groups have been recorded the post-mobility size measurement is performed in order to determine the state of the sample after the electrophoresis measurement. This completes the measurement process. Diffusion barrier measurement technique Protein mobility measurements should be used in combination with the diffusion barrier measurement technique to further protect the sample. It has been found that most of the damage that happens to protein samples, during mobility measurements, happens at the electrodes. The diffusion barrier technique protects the protein from damage by introducing a physical distance between the sample and the electrodes. This is done by holding a plug of measurement sample within a larger volume of the same buffer that contains no protein. This separates the protein from the electrodes and prevents any protein-electrode interaction and sample damage. . Standard measurement volume Measurement sample covers electrodes . Diffusion barrier measurement volume Sample plug shown with buffer between plug and electrodes A B ill ill8802 The sample sits at the bottom of the cell if the cell is handled carefully. Advantages of this technique are that: Many more measurements can therefore be made before aggregates start to appear. Only small volumes (20-50 μl) are required. Zetasizer Nano accessories guide Page 6-3 Chapter 6 Advanced protein features Controlling a protein mobility measurement via an SOP A protein mobility measurement is divided into two separate measurement parts - zeta potential and size. The protein mobility measurement follows the same SOP format as performed when doing a normal zeta potential or size measurement, with a few exceptions. The SOP editor and setup is described in full in the Zetasizer Nano user manual. Most of the SOP sections are common to Measurement types, and these are described in the above manual. The other SOP sections are specific to the protein mobility measurement being performed; these are described below. Also note that some of the other dialogue pages will alter slightly to accommodate extra parameters necessary to perform the microrheology measurement. Creating or editing an SOP - Measurement type selection To create a new SOP, select File-New SOP. This will open up the SOP editor. The SOP editor consists of several dialogues that can be stepped through by using the Next arrow button. (To edit an existing SOP, choose Open-SOP instead.) Complete the SOP editor as described in the Zetasizer Nano user manual. Once the SOP has been created, press Finish and save the new SOP. The various SOP dialogues are described below. Measurement type options Select a protein mobility measurement type then complete the SOP creation as required. Page 6-4 MAN 0487 Advanced protein features Chapter 6 Measurement Settings Description Sub-runs per group With Automatic selected, the software will automatically determine the numbert of sub-runs required per measurement. This will be suitable for the majority of samples and can simply be left as the default. With manual selected the measurement will use the user defined Number of runs: setting. The time may be reduced for the measurement of a latex standard, or increased to improve the repeatability of the measurement of particularly polydisperse samples. All the individual runs are accumulated and then averaged to give a final zeta potential result. Therefore the more runs performed the better the repeatability. Naturally the more runs selected the longer the duration of the complete measurement. Groups per measurement Zetasizer Nano accessories guide Measurements of protein mobility are run as groups of a limited number of sub-runs. The results from the groups are combined in the final result. This option defines the total number of groups that are combined to make up the result. Add a delay between the measurements of each group in the Delay between groups entry box if required. A typical delay between groups would be 180s. Page 6-5 Chapter 6 Advanced protein features Running a large number of sub-runs sequentially significantly increases the risk of Joule heating of the sample, so the protein mobility measurement is split into the smaller groups of sub-runs with a delay between groups to allow the sample to relax. Size measurement Full details of the size measurement window will be found in the main Zetasizer Nano user manual. A brief overview follows. Page 6-6 Settings Description Perform a size measurement... With the Perform a size measurement before and after the Protein mobility measurement check box selected a size measurement will also be performed as well as the standard zeta potential measurement. Angle of detection The measurement angle is fixed to 13 degree forward scatter. This is to ensure that the size is measured at the same angle as the zeta potential. Measurement duration The Measurement duration setting can affect the accuracy and repeatability of the size results. Measurements This option allows a sample to be measured more than once; to investigate the effect on particle size over time, or to prove repeatability. MAN 0487 Advanced protein features Chapter 6 Settings Description Partial results If it is likely that a measurement will not produce a correlation function that can be analysed, then the data collected can still be saved by selecting the Allow results to be saved containing correlation data only check box. For all other protein mobility SOP windows, refer to the size SOP section in the main user manual. Performing the measurement The protein mobility measurement follows the same basic measurement sequence as a standard zeta potential measurement. The measurement will be performed in groups, as defined in the SOP. These are groups of a few sub-runs with a delay between each group to allow the sample to relax. The protein mobility measurement displays are identical to those shown when performing a standard zeta potential measurement. The measurement and a a description of the measurement tabs is explained in the Zetasizer Nano user manual. During the measurement the data is stored as a ‘parent’ protein mobility zeta potential record, with ‘child’ records relating to the individual zeta potential and size measurements made during each measurement group. Zetasizer Nano accessories guide Page 6-7 Chapter 6 Advanced protein features Interpreting the results The record view As part of each group measurement, the count rate is measured and a rolling average taken as the measurement proceeds. Aggregates are, generally, characterised by a much larger particle size than the native protein and if any aggregates are present then large changes in the measured count rate in each group will be observed. This will happen even if there are only tiny fractions of aggregates present with respect to the fraction of protein. Therefore once all of the measurement groups have been recorded, any groups that have a significantly higher count rate than the average will be removed from the averaging procedure. The mobility over the remaining groups is then calculated and reported into the record view as a zeta potential child record of the protein mobility parent record. Note The Expert system will warn the user if less than ten groups are left once aggregated groups have been removed. The average over un-aggregated groups will yield the mobility of only the protein itself and not its aggregates, but the number of groups included in the measurement will aid the user in assessing whether the measurement of further aliquots is required. The pre-mobility size records tell the user whether the sample is aggregated prior to the mobility measurement. If it is then the aggregates will, typically, scatter far more light than the native protein and the aggregate mobility will dominate the result. The zeta potential record is the measurement of the mobility of the protein with the aggregated groups removed prior to calculating the final result and the Expert system will give advice on the quality of this measurement with regards to field effects such as Joule heating. Finally the post-mobility size measurement characterises the sample after the mobility measurement. This is especially important when the Diffusion Barrier is used, where the sample may not have reached the electrodes; subsequently no electrode aggregation should have occurred and the sample can be retrieved for further analysis. Page 6-8 MAN 0487 Advanced protein features Chapter 6 Displaying the protein mobility measurement report To display a protein mobility report, select a Protein mobility group type measurement record and then select the appropriate report tab. The report will show all appropriate measurement information for that record. Standard report - protein mobility measurements Once a protein mobility measurement is completed there are a number of standard reports available for reviewing the measurement results. The main reports are Protein mobility and Protein analysis. An example of the Protein mobility report is shown above. The report gives similar information as seen in a standard size and zeta potential report, plus additional information relating to the protein mobility measurement itself. Zetasizer Nano accessories guide Page 6-9 Chapter 6 Advanced protein features Calculators tool One of the three basic functions of the Zetasizer Nano series of instruments is its ability to perform accurate measurement of a sample’s molecular weight. By measuring the sample scattering intensity over a range of concentrations and entering the necessary sample parameters, the molecular weight can be determined. If the hydrodynamic diameter is also measured from one of these concentrations, the molecule shape or conformation can also be estimated. The Calculators tool enables the calculation of the molecular weight and also provides other calculation tools. To access the protein utilities select Tools-Calculators. The following tab selections are available: Page 6-10 SLS Debye plot The protein utilities function enables a static light scattering Debye plot to be constructed from freely available information, or from a record generated from actual data. Molecular weight (MW) and shape estimates A ‘what if’ calculation can be performed. If any two parameters from the molecular weight, hydrodynamic size and conformation (shape) are known, then the third - either a Shape, Hydrodynamic diameter or molecular weight parameter - can be estimated. Concentration utilities This window contains features to establish the concentration and scattering levels that are expected to give the input parameters. Scattering functions A plot can be generated by entering the measurement data. Protein charge & ƒ(Ka) A tool to calculate ƒ(Ka) from the Henry equation using known size and ionic strength. This tool uses the Ohshima equation for monovalent salts. The MAN 0487 Advanced protein features Chapter 6 second calculation calculates protein charge from the electrophoretic mobility and Stokes radius. Virial Diameter A tool to calculate the virial diameter, also called the thermodynamic diameter, from the measured molecular weight and 2nd virial coefficient (A2). DLS Debye plot A 'dynamic Debye plot' of measured hydrodynamic size as a function of sample concentration to calculate the true hydrodynamic radius and the dynamic virial coefficient. Interparticle distance A tool to calculate the distance between the particles based on their concentration and molecular weight. Also estimates the thickness of the electrostatic layer based on protein charge and ionic strength. Mixture Viscosity A simple tool that calculates the overall viscosity of a mixture of solutions based on a volume weighted mean viscosity. Oligomer ratios A tool that estimates the ratio between monomer and dimer in a peak that contains both where the size of each is known. This is based on work published by Malvern Instruments entitled "Dynamic light scattering as a relative tool for assessing the molecular integrity and stability of monoclonal antibodies" by Nobbmann U et al. The reference is published in Biotechnology and Genetic engineering Reviews, 2007, Vol 24 pp117-128. In each case the effect of changing any of the input parameters can be seen instantly in all of the derived parameters. Zetasizer Nano accessories guide Page 6-11 Chapter 6 Advanced protein features SLS Debye plot As mentioned in the introduction, the Calculators tool includes the ability to generate a Debye plot, using inputted rather than measured data. This feature can be useful for various reasons, for example: By combining individual measurements, one single Debye plot can be generated. A Debye plot can be created by entering the concentration points from an existing measurement, then adding additional concentration points. Any of the parameters in the window box can be changed; the other parameters will be instantly recalculated. This can be used to investigate the sensitivity of the result to changes in any parameter. For example, by first entering the concentration points from an existing measurement, a sample parameter - e.g. sample temperature - can be altered and the effect immediately observed on the Debye plot. This saves time in performing the original measurement again at the different temperature. The format of the plot can be altered by changing the drop-down menu in the top right hand corner of the window to Chart properties. The individual properties can then be altered in the table below. Page 6-12 MAN 0487 Advanced protein features Chapter 6 Note The Debye plot uses the reduced Rayleigh scattering equation. Adding & editing sample parameters & table data To generate an SLS Debye plot, the sample parameters and table concentrations have to be entered. To access the Debye plot select Tools-Calculators and then the SLS Debye plot tab. Select the Table tab to begin entering data into the table. To define a new concentration, press the Add... button. The table Input values window will be displayed. Specify the Concentration and Sample intensity values - either new values or ones taken from an existing measurement. To modify a concentration, select it from the list and press the Modify... button. The Input values window is displayed, allowing the parameters to be changed. A concentration can be deleted by selecting the concentration from the list and pressing the Delete... button. Select the Graph tab to see the resultant Debye plot. Zetasizer Nano accessories guide Page 6-13 Chapter 6 Advanced protein features The table values and graph plot can be subsequently altered by changing the Sample, Data and System parameters in the measurement parameters table on the right of the window. These parameters are described in the following section. Measurement parameters table Once all the concentration values have been added into the table, the measurement parameters table can be used to alter the result and Debye plot. To view and alter each parameter setting, click on the plus sign next to each parameter group to open the list (Click on the minus symbol to close the list). Default parameters are in “normal” type, altered parameters will be made bold. Page 6-14 MAN 0487 Advanced protein features Chapter 6 The parameters are described below. Data This indicates the data entries that have been entered into the Debye plot table, see below. Sample Sample dn/dc (ml/g) This is the specific refractive index increment; the change in refractive index as a function of the change in concentration. Experiment notes Used to record specific details about the experiment or calculation performed. Hydrodynamic radius (nm) The radius as measured using dynamic light scattering. Solvent Ref. Index (Refractive index) The refractive index of the solvent used. Solvent count rate (kcounts) The count rate used to calculate the Rayleigh ratio (R) is the ‘residual’ count rate, which is derived by subtracting the solvent count rate from the sample count rate. Shape Model The shape model that is used to estimate the radius of gyration from the hydrodynamic radius, and therefore calculate the angle dependent effects on KC/RoP for particles of sizes outside the Rayleigh region (Diameter > ~50nm). System Wavelength (nm) The wavelength of the laser used in the Zetasizer Nano instruments, or for the measurement. Either 632.8nm ‘red’ or 532nm ‘green’ laser wavelengths are available. Scattering angle (degrees) The scattering angle of the optics unit - either 173°, or 90° for the ‘classical’ optics arrangement. Toluene count rate (kcounts) The scattering count rate of the toluene reference. Saving the Debye plot The parameters and data inputted to produce the plot can be saved by pressing the Save button, and then reviewed at a later stage by pressing the Load button. Zetasizer Nano accessories guide Page 6-15 Chapter 6 Advanced protein features Copying the Debye plot The graph can be pasted into another application (such as Microsoft Word or Excel) by selecting the Copy button. Results area With both the table data and sample parameters entered the results will be automatically calculated and shown alongside the graph. The results displayed are: MW (kDa) - molecular weight Shows the measured weight of a molecule within the sample expressed in atomic mass units; indicated in kiloDaltons. It is calculated from the intercept of the KC/RoP vs concentration Debye plot. +/The expected error in the molecular weight, derived from the scatter in the data about the least squares best fit line. % Error in MW The error in the calculated molecular weight arising from the use of only a single angle. For isotropic scattering particles (diameter < ~50nm), this error should be negligible. A2 (ml mol/g2) - second virial coefficient A property describing the interaction strength between the molecule and the solvent. This is calculated from the slope of the plot. K (Mol cm2/g) The instrument optical constant. Molecular weight (MW) and shape estimates The hydrodynamic size measured by Dynamic Light Scattering (DLS) is defined as “the size of a hypothetical hard sphere that diffuses in the same fashion as that of the particle being measured”. In practice though, macromolecules in solution are non-spherical, dynamic (tumbling), and solvated. Because of this, the diameter calculated from the diffusional properties of the particle will be indicative of the apparent size of the dynamic hydrated/solvated particle. Hence the terminology, ‘Hydrodynamic’ diameter. If the molecular weight (or mass) and the partial specific volume (inverse density) for the particle being measured are known, then a mass equivalent spherical size can be calculated. The closer the particle is to being spherical, the closer the mass equivalent spherical diameter will be to the DLS measured hydrodynamic diameter. In fact, it is the difference in these two values, coupled with Perrin theory (below), that allows particle shape information to be extracted from DLS measurements. Page 6-16 MAN 0487 Advanced protein features Chapter 6 Once the molecular weight - either measured or estimated - and the specific volume are known, the particle shape information can be estimated by using the Protein utilities tool. The Shape estimate calculator takes the entered data and then applies two equations - the Stokes-Einstein and the Perrin factor. Stokes-Einstein equation The measured data in a DLS experiment is the correlation curve. Embodied within this curve is all of the information regarding the diffusion of particles within the sample that has been measured. By fitting the correlation curve to an exponential function, the diffusion coefficient (D) can be calculated (D is proportional to the lifetime of the exponential decay). With the diffusion coefficient (D) now known, the Hydrodynamic diameter can be calculated by using a variation of the Stokes-Einstein equation. The Stokes-Einstein equation for the Hydrodynamic diameter is : kT kT D H = ------ = --------------f 3D DH : Hydrodynamic diameter. k : Boltzmann constant. f : Particle frictional coefficient. : Solvent viscosity. T : Absolute temperature. D : Diffusion coefficient. The Stokes-Einstein equation was developed using the assumption of hypothetical hard spheres. Perrin factor For non-spherical particles, the Perrin or shape factor (F) can be used to estimate particle shape. The Perrin factor is used to calculate the prolate and oblate axial ratios for ellipsoids with the same Perrin factor value. The Perrin factor is defined as the ratio of the frictional coefficient for a sphere with the same volume as the particle being measured, to the frictional coefficient for a sphere with the same mass as the particle being measured. The Perrin factor (F) is : Zetasizer Nano accessories guide f Vol 6D Vol D Vol DH - = ------------------------ = ------------- = ------------F = ---------f Mass 6D Mass D Mass D Mass Page 6-17 Chapter 6 Advanced protein features DH : Hydrodynamic diameter. The diameter as measured via DLS. DMass : The diameter by mass. This is calculated from the known molecular weight and the specific volume of the particle. f : Particle frictional coefficient. : Solvent viscosity. T : Absolute temperature. Shape estimate calculation Enter the Molecular weight result, Specific volume and Hydrodynamic diameter (measured using dynamic light scattering) into the appropriate text boxes. The Perrin (shape) factor (F), plus the Prolate and Oblate axial ratio will be automatically calculated and displayed in the results area. If required, a solvent layer can be subtracted from the hydrodynamic radius when calculating the Perrin factor. To do this select the Subtract solvent layer check box. Molecular weight estimate Whilst the preferred method of measuring absolute molecular weight is by performing concentration dependent light scattering measurements, this can be very time consuming, from the point of view of the sample preparation. Providing that only an estimate of the molecular weight is required then it can be derived by utilising a relationship between the Hydrodynamic diameter and the molecule conformation. Page 6-18 MAN 0487 Advanced protein features Chapter 6 To find the molecular weight estimate, enter the measured Hydrodynamic diameter value into the text box and the estimated molecular weight will automatically be calculated. The molecular weight is displayed in four ways: Globular Proteins Linear polysaccharides Branched polysaccharides Starburst polymers Hydrodynamic diameter estimate This works in the same way as above, except the molecular weight (in kDaltons) is entered to find the Hydrodynamic diameter instead. Concentration utilities Zetasizer Nano accessories guide Page 6-19 Chapter 6 Advanced protein features Select the Concentration utilities tab to view concentration and scattering parameters. Concentration and Scattering This area of the window contains features to establish the concentration and scattering levels that may be observed from the sample. Enter the values from the measurement into the table. On entering each value, press the return key afterwards and the results table will be updated. Minimum Concentration Calculator By entering only the molecular weight the Sample concentration (mg/ml) values required for performing a measurement can be calculated: Sizing sample concentration on a Zetasizer Nano S instrument. Sizing sample concentration on a Zetasizer Nano S90 instrument. Zeta potential sample concentration on a Zetasizer Nano Z instrument. Scattering functions A scattering function plot can be generated by inputting the measurement data in the list on the right, in this window: Page 6-20 MAN 0487 Advanced protein features Chapter 6 Enter the values from the measurement into the table and press Plot - the graph will update to show the values entered. To see the result of changing a value, change the required value and press Add plot - a new plot line will be added to the graph. Protein charge & ƒ(Ka) This tool is used to calculate ƒ(Ka) for the Henry equation using known size and ionic strength. This tool uses the Ohshima equation for monovalent salts. The second calculation calculates protein charge from the electrophoretic mobility and Stokes radius. Henry equation The basic zeta potential measurement performed by the Zetasizer Nano measured the electrophoretic mobility of the particle or molecule under investigation. The mobility is related to the zeta potential using the Henry equation where: where: Zetasizer Nano accessories guide Page 6-21 Chapter 6 Advanced protein features UE= electrophoretic mobility Z = zeta potential ε = dielectric constant Ƞ = viscosity F(κa) = Henry's function. Henry's function (f(κa)) is defined as : where: εr = dielectric constant εo = permittivity of free space (8.8542*10^-12 C/Vm) a = hydrodynamic radies κ = inverse Debye length (1/nm) NA = Avogadros' number (6.022*10^23 /mole) K = Boltzmann's constant (1.38065*10^-23 m2kg/s2K) T = temperature (K) I = ionic strength (moles/L) This calculator allows a more specific value other than the Smoluchowski or Huckel estimates to be calculated and used for zeta potential measurements. Protein charge The protein charge calculation calculates protein charge from the measured electrophoretic mobility and the hydrodynamic size. The charge is calculated from the following equation: where: Z = calculated protein charge ζ = the zeta potential Page 6-22 MAN 0487 Advanced protein features Chapter 6 and the other values can be taken from the above. Virial Diameter A tool to calculate the 'virial diameter' from the measured molecular weight and 2nd virial coefficient (A2). Dynamic (DLS) Debye plot A dynamic Debye plot can be created by inputting sample parameters and data rather than using measured data. This feature can be useful for various reasons, for example: A dynamic Debye plot can be created by inputting the concentration points from an existing measurement, then additional concentration points can be added. Any of the parameters in the dialogue box can be changed, and the other parameters are instantly recalculated. This can be used to investigate the sensitivity of the result to changes in any parameter. For example, by first entering the concentration points from an existing measurement, a sample parameter - e.g. sample temperature - can be altered, with the effect immediately observed on the Debye plot. This saves time in performing the original measurement again at the different temperature. Zetasizer Nano accessories guide Page 6-23 Chapter 6 Advanced protein features The format of the plot can be altered by choosing Chart properties from the drop-down menu in the top right hand corner of the graph. Adding and editing sample parameters and table data To access the Debye plot select Tools-Calculators and then the Debye plot tab. Select the Table tab to begin entering data into the table. To define a new concentration, press the Add... button. The table Input values window will be displayed Specify the Concentration and Measured diffusion coefficient values either new values or ones taken from an existing measurement. Page 6-24 To modify a concentration, select it from the list and press the Modify... button. The Input values window is displayed, allowing the parameters to be changed. A concentration can be deleted by selecting the concentration from the list and pressing the Delete... button. Select the Graph tab to see the resultant Debye plot. The table values and graph plot can be subsequently altered by changing the Sample, Data and System parameters in the measurement parameters table on the right of the window. These parameters are described in the following section. MAN 0487 Advanced protein features Chapter 6 Measurement parameters table When all the concentration values have been added into the table, use the measurement parameters table on the right hand side to alter the result and dynamic Debye plot. The parameters are: Molecular weight The molecular weight of the sample (optional). Partial specific volume The partial specific volume of the sample (optional). Second virial coefficient The second virial coefficient of the sample (optional). Solution Viscosity The viscosity of the solution. Temperature The measurement temperature. This is displayed in both Celsius and Kelvin. If either is completed, the other will be updated. Saving the dynamic Debye plot Click Save to save the parameters and other inputted data. To reviewed the saved parameters at a later stage, click the Load button. Copying the dynamic Debye plot To paste the graph into another application (such as Microsoft Word or Excel) select the Copy button. Results area When both the table data and sample parameters have been entered the results are automatically calculated and shown alongside the graph. The results displayed are: Diffusion coefficient The calculated diffusion coefficient at zero concentration. Stokes radius The calculated radius at zero concentration. DLS interaction parameter The DLS interaction parameter (kD) is also known as the dynamic virial coefficient and is related to the slope of the line on this plot. Frictional coefficient The frictional coefficient. Zetasizer Nano accessories guide Page 6-25 Chapter 6 Advanced protein features Interparticle distance This tool is used to calculate the distance between the particles based on their concentration and molecular weight. It also estimates the thickness of the electrostatic layer based on protein charge and ionic strength. The values are calculated according to the following formulae: Dielectric constant of the media εr is: Hydrodynamic radius estimated from molecular weight based on a globular protein model: The Debye length is: Separation distance is: where: εo = permittivity of free space (8.8542*10^-12 C/Vm) κ = inverse Debye length (1/nm) NA = Avogadros' number (6.022*10^23 /mole) K = Boltzmann's constant (1.38065*10^-23 m2kg/s2K) T = temperature (K) I = ionic strength (moles/L) This assumes that the available solvent volume is equally distributed between all particles, and that the particle is located in the centre of a cube that would represent this solvent volume 'occupied' per particle. The interparticle distance, on average, is then given by the edge length of the cube, representing the distance from the centre of one cube to the centre of the neighbouring cube. Mixture Viscosity A simple tool that calculates the overall viscosity of a mixture of solutions based on a volume weighted mean viscosity. Page 6-26 MAN 0487 Read this first ! Zetasizer www.malvern.com Malvern Instruments Limited Enigma Business Park Grovewood Road, Malvern Worcs, WR14 1XZ, U.K. nano series Printed in England ill 8806 Quick start & Self installation guide Tel: +44 (0) 1684 892456 Fax: +44 (0) 1684 892789 Malvern