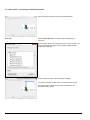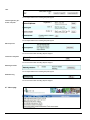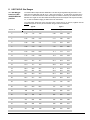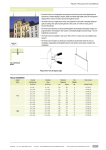
1
LISST-HOLO User’s Guide Version 3.0 December 2014 Sequoia Scientific, Inc. 2700 Richards Road, Suite 107 Bellevue, WA 98005 USA Tel: (+1) 425-641-0944 Fax: (+1) 425-643-0595 [email protected] www.SequoiaSci.com Technical assistance To obtain technical assistance related to your LISST-HOLO, please contact your local distributor (a list of our international distributors can be found on www.SequoiaSci.com) or Sequoia Scientific, Inc. directly. Please be sure to include the instrument serial number with any correspondence. Sequoia Scientific, Inc. Contact Information: Telephone: +1(425) 641-0944 Email: [email protected] Waste Electrical and Electronic Equipment Smaltimento di apparecchiature elettriche ed elettroniche da rottamare Table of Contents 1 Introduction ................................................................................................................................ 9 2 Contents and Technical Specifications ................................................................................. 11 2.1 General Features ....................................................................................................................... 11 2.2 Parameters Measured and Derived ........................................................................................... 11 2.3 Particle Size and Concentration ................................................................................................ 11 2.4 Technology ................................................................................................................................ 11 2.5 Mechanical and Electrical .......................................................................................................... 11 Drawings ............................................................................................................................................. 12 Bulkhead connector Pin-outs .............................................................................................................. 13 3 Getting Started ......................................................................................................................... 15 3.1 3.2 3.3 4 Introduction ................................................................................................................................ 15 Connect cables and power up ................................................................................................... 15 Take a hologram ........................................................................................................................ 17 Hologram Processing with HOLO_Batch and HOLO_Detail ............................................... 21 4.1 Intro ............................................................................................................................................ 21 4.2 Install the hologram processing software .................................................................................. 21 4.3 Process holograms using HOLO_Batch and HOLO_Detail ...................................................... 22 4.4 HOLO_Batch – automated batch processing of multiple holograms ......................................... 23 .TIFF files output by HOLO_Batch ..................................................................................................... 32 .CSV files output by HOLO_Batch ...................................................................................................... 32 .MAT file output by HOLO_Batch ....................................................................................................... 33 .Tiff files of individual slices ................................................................................................................ 34 Summary of files created by HOLO_Batch......................................................................................... 35 4.5 HOLO_Detail – processing of individual holograms .................................................................. 36 Select Button ...................................................................................................................................... 36 Advanced Settings .............................................................................................................................. 36 Set ROI, Regen Kernel and Reconstruct Buttons .............................................................................. 37 Clean Stack Slider .............................................................................................................................. 37 Improfile Button................................................................................................................................... 39 Zoom and Reset Buttons .................................................................................................................... 39 Grid Button .......................................................................................................................................... 39 Save Image Button ............................................................................................................................. 40 Measure Button .................................................................................................................................. 40 4.6 LISST-HOLO User’s Community ............................................................................................... 40 5 LISST-Holo Field Deployment ................................................................................................ 41 5.1 Introduction ................................................................................................................................ 41 5.2 Programming ............................................................................................................................. 41 Selecting the start/stop program using the PC ................................................................................... 43 5.3 Preparing for Deployment .......................................................................................................... 43 with the EMM installed ........................................................................................................................ 43 without the EMM installed ................................................................................................................... 43 5.4 Wake up / power up LISST-HOLO ............................................................................................ 44 5.5 Start Data Collection .................................................................................................................. 44 5.6 Stop Data Collection .................................................................................................................. 44 5.7 Downloading Raw Holograms ................................................................................................... 44 Downloading from EMM ..................................................................................................................... 44 Downloading and deleting from LISST-HOLO internal drive (EMM not installed) ............................. 44 5.8 Viewing raw holograms in OpenSeeIt ........................................................................................ 47 5.9 Next Deployment or Powering Down ......................................................................................... 48 6 Reviewing Instrument Info and Other Settings .................................................................... 49 6.1 6.2 Intro to Other Settings ................................................................................................................ 49 Home page ................................................................................................................................ 49 System Status .................................................................................................................................... 49 Select program ................................................................................................................................... 49 Programming Information ................................................................................................................... 49 6.3 Images page .............................................................................................................................. 49 6.4 Log page .................................................................................................................................... 50 6.5 Configure page .......................................................................................................................... 51 6.6 Tools page ................................................................................................................................. 51 Current conditions .............................................................................................................................. 51 Take test image .................................................................................................................................. 51 Image file name .................................................................................................................................. 51 Sampling control ................................................................................................................................. 51 Storage maintenance ......................................................................................................................... 52 Sleep or reboot ................................................................................................................................... 52 Power profile ....................................................................................................................................... 52 Set time .............................................................................................................................................. 52 Set time zone ...................................................................................................................................... 52 Set time manually ............................................................................................................................... 52 Change external trigger polarity ......................................................................................................... 52 Restore default values ........................................................................................................................ 52 Submit log for analysis ....................................................................................................................... 53 Generate log file ................................................................................................................................. 53 Check for updates .............................................................................................................................. 53 Network parameters ........................................................................................................................... 53 Delete all images ................................................................................................................................ 53 Laser ................................................................................................................................................... 54 Camera brightness, gain, shutter, and power .................................................................................... 54 Manual exposure ................................................................................................................................ 54 Command to subsystem ..................................................................................................................... 54 Watchdog shutdown ........................................................................................................................... 54 Motherboard log ................................................................................................................................. 54 6.7 About page ................................................................................................................................ 54 7 Handling, Cleaning, Maintenance and Storage .................................................................... 56 7.1 7.2 7.3 7.4 8 Handling ..................................................................................................................................... 56 Cleaning ..................................................................................................................................... 56 Maintenance .............................................................................................................................. 56 Storage ...................................................................................................................................... 56 Ethernet Communications ...................................................................................................... 58 8.1 Router Use ................................................................................................................................. 58 Connecting to the router via your network.......................................................................................... 58 Connecting to the router wirelessly .................................................................................................... 58 Updating LISST-HOLO software via the Internet ............................................................................... 58 8.2 Changing the IP address of the Linksys E1000 router .............................................................. 58 8.3 Changing the LISST-HOLO IP address ..................................................................................... 59 9 FAQs ......................................................................................................................................... 61 10 Endcap LED Status Light Indicators ..................................................................................... 63 11 LISST-HOLO Size Ranges ....................................................................................................... 65 11.1 11.2 Size Ranges based on LISST-100X SPHERICAL particles. ..................................................... 65 Size Ranges based on LISST-100X RANDOMLY shaped particles ......................................... 67 12 Hologram .PGM File Format Structure .................................................................................. 69 13 Warranty ................................................................................................................................... 71 14 Index.......................................................................................................................................... 73 1 Introduction Thank you for purchasing the LISST-HOLO Submersible Digital Holographic Camera! The intent with this introduction is to get you started using the LISST-HOLO as quickly as possible. Sequoia’s goal with the LISST-HOLO is to make the user interface so friendly that no manual would be required for normal operation, except as a firsttime introduction to the instrument The LISST-HOLO was shipped to you in a Pelican case with custom foam padding. Included in the shipping box are the LISSTHOLO, clamps, stands, External Memory Module with USB cable, Ethernet cable, Wireless Router, Serial Cable with Power Supply, and a spare 5-pin cable for connecting the LISST-HOLO to alternate power source such as a CTD. Sequoia Scientific, Inc. is pleased that you have chosen one of our products. Thank you! We strive to make our instruments rugged, reliable, and simple to operate. If you should have any difficulties or questions regarding this product, please feel free to contact us at [email protected]. LISST-HOLO User’s Guide 9 10 LISST-HOLO User’s Guide 2 Contents and Technical Specifications 1) 2) 3) 4) 5) 6) LISST-HOLO with External Memory Module (EMM) installed Instrument stands Clear box with power supplies and communication cables Clamps Chamber for testing Box with Manual, CD with software, wireless router 2.1 General Features In-situ digital in-line holographic technology Self-contained with internal data logger Ethernet connection to PC for programmable data collection—no software is needed for programming or offloading data Power via external battery pack (Optional, not included) or 12 - 15V external power source (cable provided) Programmable data collection Optical path length: 50 mm standard Sample volume: 1.86 cm3 Data processing yields in-focus particle images and volume distribution Automated firmware updates possible when instrument is connected to the Internet 2.2 Parameters Measured and Derived Particle images for observation and classification Particle volume distribution Temperature Depth 2.3 Particle Size and Concentration Size range: 25-2500µm equivalent spherical diameter Concentration range: Beam attenuation coefficient of 0-4 m-1; see also FAQ in section 9. Resolution: 50 log spaced size classes, 18% bin widths. 2.4 Technology Solid state diode laser @ 658 nm 4.4 µm pixel size digital camera; 1600 1200 pixels 2.5 Mechanical and Electrical Dimensions: 13.3 cm (5.25”) 77 cm (30.2”) L Weight: 9.5/3.6 kg (21/8 lbs) in air/water 300 m depth rating 32 GB internal solid state drive 32 GB External Memory Module (included) Battery life (for the Optional External Battery Pack): 10,000 holograms for standard 15V, 42Ah battery LISST-HOLO User’s Guide 11 External power input: 15VDC nominal @ 1 A. (12 to 16V) Sampling frequency up to 0.2 Hz (one hologram every 5 seconds). Current consumption, sleeping: 0.020 A max at 12 VDC input. Current consumption, idling (not sampling, laser off, camera off): 0.500 A max at 12 VDC input. Current consumption, laser on: 0.6 00 A max at 12VDC input. Current consumption, laser and camera on: 0.880 A max at 12 VDC input. NOTE: Upon power up the current draw may briefly reach 1.200 A when all systems are turning on. This maximum draw will be lower than 1.200 A if the operating temperature is warmer than 0°C. Drawings LISST-HOLO dimensions in inches [mm] LISST-HOLO External Battery Case (OPTIONAL ACCESSORY). Dimensions in inches. 12 LISST-HOLO User’s Guide Bulkhead connector Pin-outs Five-pin connector (Teledyne Impulse part # MCBH(WB)-5-MP SS) Pin # Function 1 Power Ground 2 12 to 15 V, 1 A power supply or battery 3 Communications Ground 4 RS232 EIA level out, 19.2K, 8 bit, no parity 5 RS232 EIA level in Six-pin Auxiliary Connector (Teledyne Impulse part # MCBH(WB)-6-MP SS) Pin # Function 1 Ground 2 Digital Output 1 3 Digital Output 2 4 Digital Output 3 5 Digital Input 1 6 Digital Input 2 Eight-pin Communications Connector (Teledyne Impulse part # MCBH(WB)-8-MP SS) Pin # Function 1 Ethernet ATX+ 2 Ethernet ATX - 3 Ethernet ARX+ 4 Ethernet ARX- 5 USB Vcc 6 USB Data- 7 USB Data+ 8 USB Ground LISST-HOLO User’s Guide 13 14 LISST-HOLO User’s Guide 3 Getting Started 3.1 Introduction This section is designed to enable the first-time user to unpack the LISST-HOLO and capture a hologram within a few minutes after opening the case for the first time. The experienced user may find this section useful for a quick review of the various procedures. It is not necessary to install any software to go through this section and become familiar with the instrument and its operation. Section 4 describes how to install and use the software for processing the raw holograms. Section 5 discusses how to configure and deploy the instrument in the field. 3.2 Connect cables and power up In order to program and offload data from the LISST-HOLO you need a PC with a web browser and access to a power source. Take out the instrument stands and place the LISST-HOLO on the stands. Take out the clear plastic box and open it up. Inside you will find a number of cables and power supplies, described below. The yellow cable is an Ethernet cable used for communication with the LISST-HOLO. This is not a waterproof cable. The black cable is a 5-pin cable used to power the LISST-HOLO when working in the laboratory. The 5-pin cable is being used to provide power to the LISST-HOLO using the included 110/220VAC power supply; it is NOT being used for communication: The yellow Ethernet cable must be used for communication. NOTE: If you have an external LISST-HOLO battery pack, you should use the 5-pin cable that shipped with the external battery pack if you wish to power the LISST-HOLO from the external battery pack. LISST-HOLO User’s Guide 15 Look at the LISST-HOLO connector endcap. Disconnect the External Memory Module if it is connected. Undo the dummies and connect the 5-pin cable to the 5-pin bulkhead connector #1 (just below the serial number) and the yellow Ethernet cable to 8-pin bulkhead connector #2 (just above the serial number). Note that the External Memory Module and the Ethernet cable share the 8-pin bulkhead connector. The cables are now correctly connected to the LISST-HOLO. It is necessary to have BOTH cables connected in order to power and communicate with the LISST-HOLO. No power is supplied through the yellow Ethernet cable, only communication. Connect the yellow Ethernet cable to the wireless router. DO NOT use the port to the far left. Connect the router power cable to the router Plug the router power supply into a 110-220VAC power source. When the router completes its booting procedure it can be located as LISST-Holo on a wireless network. The password for connecting to the router is manyholograms (this information is also located on the bottom of the router). Establish a Wi-Fi connection between the router and your PC before you proceed. If you do not have a Wi-Fi enabled PC, use the black Ethernet cable for connecting the router to the Ethernet port on your PC. 16 LISST-HOLO User’s Guide When you are connected to the router, plug in the power to the DB-9 connector. It is not necessary to have the DB-9 connector attached to the PC. IMPORTANT: MAKE SURE THAT THE POWER CABLE IS FIRMLY SEATED IN THE CONNECTOR. EVEN MORE IMPORTANT: NEVER UNPLUG THE POWER TO THE LISST-HOLO WHILE IT IS RUNNING. ALWAYS PUT THE INSTRUMENT TO SLEEP BEFORE UNPLUGGING POWER. Make sure that the magnetic switch on the connector endcap is in ‘0’ position (off). The magnetic switch does not need to be in the ‘1’ position to communicate with the LISSTHOLO. Plug in the LISST-HOLO power supply in order to apply power to the LISST-HOLO. The LISST-HOLO will boot up. The endcap LED will flash yellow for approximately 30 seconds. When it is ready, the LED will blink green every 5 seconds. See section 10 for more information about the LED colors and status light indicators. NOTE: The LISST-HOLO has no internal power. Whenever power is applied to the instrument, the internal processor is powered on and initiates its boot-up procedure. The LISST-HOLO cannot boot up any faster than 30 seconds. 3.3 Take a hologram If you have followed the instructions in section 3.2 the LISST-HOLO is now powered up and connected to your PC. It is time to take a hologram! Open up a web-browser on your computer, e.g. Firefox, Google Chrome or Internet Explorer. To connect to the LISST-HOLO, use URL http://192.168.0.150/ Note: The IP address of the instrument can be changed, and in most cases it must be LISST-HOLO User’s Guide 17 changed – see your local system administrator for more information on how to get a static IP address. See the FAQ in section 9 for more information on how to change the IP address of the LISST-HOLO. The LISST-HOLO home page will then show. To take a hologram, click the Tools option. On the tools page, click the Take Images button to take a hologram. Note that the laser turns on, then off. It takes a few seconds to capture a hologram in this manner, because the laser has to warm up first. The actual hologram is taken a few milliseconds before the laser turns off. Then click the Images menu item to go to the Images page, where all holograms on board the memory card are listed. Click the hologram you wish to view. You will be asked if you want to save it to disk or to view it. Select the Save option, so that you can process the hologram. If you want to process a hologram, you always need to save it to a folder on your PC. Holograms are stored in .pgm format, which is a lossless compression format. .pgm format In order to see the holograms on your PC, you may need to download and install OpenSeeIt (http://openseeit.sourceforge.net/), which is a FREE viewer for pgm files. See the FAQ on the About page of the web interface for more information about OpenSeeIt. You can of course also use OpenSeeIt to view holograms you have already downloaded and stored on your computer. See section 12 for more information about the hologram .pgm file structure. 18 LISST-HOLO User’s Guide The About page shows the FAQ where you can find more information about how to download, install, and use OpenSeeIt to view the unprocessed holograms. If you took a hologram without anything in the laser beam, your hologram will typically look something like this. Try taking another hologram, but hold a hair or thin piece of string into the laser beam. You should then see something like the image to the left. Take another 1-2 holograms with other types of material in the laser beam, e.g. a screw, or blow some dust through the laser beam when the hologram is captured. The LISST-HOLO comes with a test chamber that can be installed between the windows and be filled with water for testing. To install the chamber remove the Ushaped spacer and press the sliding part into the chamber leaving a small gap. Center the openings of the chamber on the windows and insert the U-shaped spacer so that the O-rings seal on the area around the window. To put the LISST-HOLO to sleep, click the Home button, then click the Sleep button. If the Sleep button is not present at the Home page, go to the Tools page and put the instrument to sleep using the Sleep button on the Tools page (see section 6.6). You can now safely disconnect the power to the LISST-HOLO. To continue Getting Started with the LISST-HOLO please read Section 4, Hologram Processing with Holo Batch and Holo Detail, or skip to Section 5, LISST-HOLO Field Deployment. LISST-HOLO User’s Guide 19 20 LISST-HOLO User’s Guide 4 Hologram Processing with HOLO_Batch and HOLO_Detail 4.1 Intro The holograms are processed using two MATLAB-based programs called HOLO_Detail and HOLO_Batch. You do not need to be connected to the LISST-HOLO in this chapter. 4.2 Install the hologram processing software To install the software, plug in the disk that was shipped with your instrument and locate the LISST-HOLO software folder. Or visit www.sequoiasci.com and download the software package from the LISST-Holo page. Our software supports 32-bit Windows, 64-bit Windows, and Mac OS X operating systems (NOTE: the Mac OS X version is only available from Sequoia’s website). You must select the software that matches your machine. Inside the software folder you will see two folders and one application. The folders contain the Holo Batch and Holo Detail applications. However, before these programs can be run, Matlab Compiler Runtime (MCR) must be installed. The installer for the MCR is included in the software package and has a name such as ‘MCR_R2014a_win64_installer.exe’. Double click the MCR installer. It will start by extracting files, which may take several minutes. (Note that the installation may appear slightly different on Mac OS X) Once files are done extracting, the installer will open, click next to proceed. Accept the License Agreement and click next. The installer will chose a default location to install the MCR. Either accept the default location or enter the location where you would like the program to be installed. LISST-HOLO User’s Guide 21 An overview of installation will be displayed, click next to start the installation. The installation may take a significant amount of time depending on your machine. A new window will appear once the installation is complete. Select the finish button to complete the installation process. The Holo Batch and Holo Detail applications do not need to be installed on your computer. The .exe file contained in each folder can be run as a stand alone application. You can move the Holo Batch and Holo Detail folders to a location of your choosing (for example into the Programs folder). It may also be helpful to create a shortcut of the batch and detail applications and place them on the desktop. Should you like to add the program to the taskbar or start menu, you can right click on the program icon and select ‘Pin to Taskbar’ or ‘Pin to Start Menu.’ 4.3 Process holograms using HOLO_Batch and HOLO_Detail Two different programs are supplied for processing holograms; HOLO_Batch and HOLO_Detail. HOLO_Batch will do batch processing of a selection of holograms, and automatically output the size distribution as well as composite images showing the in-focus particles. HOLO_Detail only processes one hologram at the time, but allows the user to zoom and analyze a hologram in great detail, in case more detailed image analysis is needed than what is provided with HOLO_Batch. In the following sections the use of these two programs will be explained. 22 LISST-HOLO User’s Guide 4.4 HOLO_Batch – automated batch processing of multiple holograms This section describes how to use the automated batch processing program, HOLO_Batch. Open the program by clicking the HOLO_Batch executable. There are 5 main procedures to be performed before processing can begin: Select Reconstruction Parameters Select Output Options Select Particle Bin Size Select Paths (Folders) Select Files. The HOLO_Batch is shipped with factory default settings for the Reconstruction Parameters, and these should normally not be changed. However, if necessary they can be changed by selecting Unlock Reconstruction Parameters in the Options Menu. The Change ROIs and Advanced buttons then become active. Also the three input boxes for selection of the minimum and maximum focal length, as well as the step size become active. LISST-HOLO User’s Guide 23 The Change ROIs button opens up a window for selecting the ROI (Region Of Interest) to be processed. The ROI is the part(s) of the hologram that will be reconstructed. Particle counts will only be computed from the reconstructed part of a hologram. ROI’s must be defined as a square region to allow for correct hologram reconstruction. Therefore, the rectangular image (1600 x 1200) cannot be treated as a single ROI. Once selected, the ROI will be the same for all holograms. In this example, 2 overlapping ROI’s with a size of 10241024 pixels are chosen. Particle counts will then be obtained from both ROIs, and adjusted so that particles in the overlapping parts are only counted once. If you click the Add button, a 3rd ROI will be added, which you can then drag to the desired location. If you click the Delete button, the last added ROI will be deleted. The Image Size parameter should not be adjusted unless the images have been cropped from their original size. Reconstruction of holograms is memory demanding, so on PC’s with smaller memory (<4GB), or slower processors (<2GHz), the 512512 pixels ROI should be selected. Note that you can delete and add ROI’s using the Delete and Add buttons. In this example to the left, one of the 10241024 pixel ROI’s have been deleted. Subsequently the Delete button has been grayed out. 24 LISST-HOLO User’s Guide In this example, another 10241024 ROI has been added. Note that the ROIs do not have to be aligned with each other. Click the OK button when the ROI size and location is satisfying. Note that the processing time doubles every time you add a new ROI. The advanced button opens up the settings menu for the advanced parameters. The values listed in the window to the left are the factory default settings. With the exception of Minimum Threshold, Scale Length, Clean Stack, and possibly the Index of Refraction, none of these values should ever be changed unless instructed by Sequoia support personnel to do so. The Offset is the distance in mm from the receive window to the CCD array. The reconstruction software needs this distance in order to properly reconstruct the holograms. For the LISST-HOLO this value is 28 mm. DO NOT CHANGE THIS VALUE. The Pixel Size is the size of each pixel in micro-meters (µm). For the LISST-HOLO the pixel size is 4.4 µm. DO NOT CHANGE THIS VALUE. The wavelength is the wavelength of the laser in nm. For the LISSTHOLO the wavelength is 658 nm. The reconstruction software needs this value in order to properly reconstruct the holograms. DO NOT CHANGE THIS VALUE. The Index of Refraction is for the medium in which the LISST-HOLO is being used. An average value for water is 1.333. If the LISST-HOLO is used in air, e.g. for measuring pollen or snowflakes, the refractive index should be changed to that for air; 1.0003. The Minimum Threshold is used for creating a composite image of all the particles in the hologram. Decreasing this value will cause more pixels to be identified as being a particle; increasing it will cause less pixels to be identified as a particle. Clean Stack is used to remove pixels that are less than a certain percentage of the maximum gray scale value. Enter the percentage you would like to be remove here (usually between 0% and 5%). This can be useful for removing background noise. The Scale Length is the length of the scale bar (in µm) being added to the composite images created during processing. The Minimum Particle Area is a measure used to exclude ‘particles’ that could appear simply due to noise in the image. The default minimum area is 9, meaning that unless a particle has a minimum area of at least 9 coherent pixels (Equivalent Spherical Diameter of ~15µm), it is being excluded from further consideration when computing size distribution etc. Click OK when you are satisfied with your selections. LISST-HOLO User’s Guide 25 If you wish, you can change the Reconstruction Parameters. Min Depth indicates where to start reconstructing images. A value of 0 mm will start reconstruction at the receiving window of the LISST-HOLO. Max Depth indicates where to stop reconstruction. A value of 50mm will stop the reconstruction at the opposite window (transmit window) of the LISST-HOLO. Step Size determines how many millimeters apart the reconstructed images will be. In the example to the left, the entire sampling volume will be reconstructed (0-50mm), at an interval of 0.5mm. This will result in 101 reconstructed images. Note that the processing time increases linearly with the number of Steps. Upon processing, all particles in all intervals (slices) will be combined into one focused image. The next step is to select output options. A csv file containing the size distribution for each hologram is written by default, even if none of the check boxes or the right are selected. During hologram reconstruction, an image containing both in focus and out of focus particles is created at every step. Check ‘Save reconstructed slices’ if all slices are to be saved. ‘Save Dep/Mon Images’ saves depth and montage images of particles. These are composite images that show all the detected particles in one 2D plane. Examples are show on page 32. The ‘Save particle statistics (MAT)’ option creates a particle statistics file in MATLAB .mat format for every image processed. It will contain information about each particle detected in the image. See page 33 for details. The ‘Save particle statistics (CSV)’ option creates a particle statistics file in Comma-separated values (ASCII) format for every image processed. It will contain the bulk properties of the image. See page 32 for details. The ‘Save generated background’ option saves the background image used for processing if background files are selected (background removal is discussed later in this section). ‘Show data visualization’ will show continually updated plots of total volume concentration, number of particles per hologram, temperature, and depth. This option is the fastest way to visualize data after it has been collected. 26 LISST-HOLO User’s Guide The next step is to select the bin sizes for your particle size distributions. The size bins for the LISST-HOLO are based on the LISST-100X so that data from the two instruments can be easily merged. While the LISST100X has an upper size bin of 250µm (type B) or 500µm (type C), the LISST-HOLO simply expands the upper limit of the size bins to 8000 µm (see section 11 for details). Select the LISST-100X equivalent size bins desired for your output size distributions. Next, select Performance Options. The default selection is for ‘-Speed,Memory’. The ‘+Speed,+Memory’ option should not be used unless you are running a computer with at least 6 GB of RAM and are using a reconstruction step size of 0.5 mm or more. If this option is selected a warning message will remind you of the requirements of running the higher memory setting. NOTE: The ‘+Speed,+Memory’ is only available in the 64 bit version of Holo Batch. LISST-HOLO User’s Guide 27 Now click the Raw Holograms button in order to select the path from where HOLO_Batch will read your raw holograms. Select the folder where your raw holograms are stored and click OK. Now click to select the folder where you want the reconstructed images to be stored. This is where reconstructed and Dep/Mon images will be stored. If these options are not selected in the output options, nothing will be written to the folder you select. As above, a browser window will open up prompting you to select a folder. 28 LISST-HOLO User’s Guide Finally, click the Size Distributions button to select the folder where you want the particle size distributions to be stored. If you have selected to output .CSV or .MAT files, this is where they will be stored. If you would like to process a subset of holograms in the directory, you can press ‘Select Holograms to Process.’ The directory you have selected for ‘Raw Holograms’ will open in a browser window, you can now select which holograms you would like to processs. If you would like to process all of the holograms in the directory, you can ignore this button. LISST-HOLO User’s Guide 29 If you have a hologram obtained in clean water or air, that you would like to subtract from the holograms, select it here. Selecting a background hologram can reduce the noise in the composite output image. You can select multiple background files, which will be averaged into one background file before subtracting. It is not necessary to supply a background hologram in order to process your holograms; if you do not select a background none will be subtracted. All selections are now complete! Click the Process button to process the selected holograms. One of the two screens on the left will appear, depending on if you chose to show data visualization or not. Press the ‘Go’ Button to start the processing. 30 LISST-HOLO User’s Guide Processing updates will be printed to the text box in the processing window. Processing times per hologram vary greatly. The time depends on: the size and number of ROIs, the reconstruction step size, selected outputs, performance option selection, number of particles, and computer hardware. Processing is complete when ‘End’ is displayed in the text box and the ‘Cancel’ button changes to an ‘Exit’ button. Processing can be aborted at any time by pressing the ‘Cancel’ button. It may take a minute or so for the processing to exit. If the data visualization option is selected, the plots shown at the left will be updated after each hologram is processed. A status bar will be also be displayed at the bottom of the screen showing the progress of the batch processing. After processing 100 holograms the plots will begin to scroll with the data, this avoids using an excess amount of memory for visualization (i.e. the plots only show the last 100 holograms worth of data). Go to the folder(s) you specified as output paths for your processed data. You will notice that a number of files have been created for each hologram. The exact number of files created depends on what you have selected for output options. In the following sections these files are briefly described. LISST-HOLO User’s Guide 31 .TIFF files output by HOLO_Batch If you selected to output dep/mon images, two .TIFF files will be created for every hologram process. They will be placed in the reconstructed images folder The –mon suffix image is a montage of all the in focus particles that were found in all the planes within an ROI. The scale bar length can be adjusted prior to processing in the Advanced section of HOLO_Batch. Note that only the part of the hologram covered by the ROI is displayed on the –mon image. The rest of the hologram was not analyzed and therefore cannot be displayed. The –dep suffix image is a color coded image, where the particles within the ROI have been colored according to their depth of focus. As with the –mon image, only the part of the hologram covered by the ROI is displayed on the –dep image. The scale bar is all blue and displayed in the bottom left corner. The color bar in the bottom right corner shows the location of the particles relative to the transmit window. Red particles are very close to the transmit window, blue particles very close to the receive window. Using a pair of 3-D glasses will display the particles in a 3-D effect, where the red particles will appear closer to the viewer than the blue particles. .CSV files output by HOLO_Batch A composite file with the name firsthologram_lasthologram_All.csv, where firsthologram and lasthologram are the filenames of the first and last holograms that were selected for processing. This file is always generated for each run of Holo Batch. This composite file has all the information about sample date and time, water depth, temperature, and the size distribution (given as the volume concentration in (µl / l) per size bin). Finally, the composite file has in its first row the lower limit of the size bin for the size distributions in columns 26:75. In the 2 nd row is the mid-point of the size bin for the size distributions in columns 26:75 and in the 3 rd row is the upper limit of the size bin for the size distributions. The table below shows the parameters in columns 1-75 of the .CSV file. 32 Column # Value Unit 1 Year (YYYY) N/A 2 Month (MM) N/A 3 Day (DD) N/A 4 Hour (HH) N/A 5 Minute (MM) N/A 6 Second (SS) N/A 7 1/100s of a second (hhh) NOTE: Currently not available. NaN (Not a Number) displayed instead. 8 Depth m LISST-HOLO User’s Guide 9 Temperature °C 10 Input Voltage V 11 Exposure N/A 12 Laser Power N/A 13 Laser Photo Diode N/A 14 Brightness N/A 15 Shutter N/A 16 Gain N/A 17 Deployment ID N/A 18 Image Number N/A 19 Number of Particles N/A 20-24 Reserved for Future Use N/A 25 Total Volume Concentration Size Distribution µl / l 26-75 µl / l .MAT file output by HOLO_Batch If the ‘Save particle statistics (MAT)’ checkbox was selected, a MATLAB .MAT file will be created. The .MAT file can only be opened up in MATLAB. It contains a structure called PartStats. It has dimensions N17, where N is the number of particles detected in the ROI. The 10 columns have the following information about each particle: Column # 1 Particle Property Unit 1 Particle Area based on pixel count μm2 2 Particle Equivalent Diameter based on pixel count μm 3 Major Axis Length μm 4 Minor Axis Length μm 5 Solidity Dimensionless 6 Eccentricity Dimensionless 7 Filled Area μm2 8 Convex Area1 μm2 9 Equivalent Convex Area Diameter μm 10 Particle Volume μm3 11 Centroid (X,Y) (from top left of hologram)2 Pixels The Convex Area is the area, based on pixel count, of all pixels within the convex hull of the particle. The convex hull is the smallest polygon that can contain the particle. LISST-HOLO User’s Guide 33 12 Focus Depth (from emit window) mm 13 Bounding Box Pixels 14 Orientation Degrees 15 Euler Number Dimensionless 16 Extent Dimensionless 17 Perimeter μm .TIFF files of individual slices If the check box ‘Save Individual Slices’ was checked, HOLO_Batch will save a .TIFF image for each reconstructed slice, showing the in focus and out of focus particles that appear on that particular slice. The distance from the transmit window of each slice is given in the image filename. For example the image on the left is 016-0270-z22.500.TIFF, meaning it was reconstructed from hologram 016-0270.pgm at a distance of 22.5 mm from the transmit window. 2 The Centroid X, Y locations specify where the particle is located. Together with the Focus Depth, these 3 numbers locate the particle in the 3-D space of the laser beam. 34 LISST-HOLO User’s Guide Summary of files created by HOLO_Batch Check Box Checked? Filename and type Content filename-dep.jpg Color-coded DEPth image, showing the location of the particles in the depth dimension. filename-mon.jpg Black and White MONtage image, showing the particles in B&W. Useful for more detailed information about the shape and structure of the particles. firstfilename_lastfile name_All.csv Comma-separated ASCII file with size distribution and other output as described in the section above filename-znnn.jpg Reconstructed slices of the hologram. nnn indicates the slice number. filename-pstat.mat MATLAB .MAT file with N x 17 structure with particle statistics as described in the section above. N is the number of particles in the hologram. Rows 1-3 of the pstat file contain the size bins. filename-pstat.csv Comma-separated ASCII file with N x 17 matrix with particle statistics as described in the section above. N is the number of particles in the hologram. Rows 1-3 of the pstat file contain the size bins. background.pgm Saves the selected background hologram (or the average of multiple selected background holograms). Always Created Save Dep/Mon Images Save Slices Save Stats (MAT) Save Stats (CSV) Save Background LISST-HOLO User’s Guide 35 4.5 HOLO_Detail – processing of individual holograms Open the program by clicking the HOLO_Detail executable. Select Path Click the Select Path button to select a folder for browsing your holograms. Select the folder where your holograms are stored, then click OK. If you are just getting stated, navigate to the ‘Example Holograms’ folder located on the ship disk. From the drop-down menu, select a hologram to display. The selected hologram will then show in the left part of the window. Only one hologram at the time can be selected, displayed, and processed in HOLO_Detail. 36 LISST-HOLO User’s Guide Advanced Settings Additional reconstruction options are available under Options -> Advanced Settings. The only parameter that should be adjusted is the index of refraction. An average value of 1.333 for water is set as the default. This should be changed if the hologram was taken in air or in any other substance with a different index of refraction. The Offset, Pixel Size, and Wavelength should not be adjusted. Set ROI and Reconstruct Buttons Select the size of the ROI using the radio buttons in the lower left corner. After selecting the ROI size press the ‘Set ROI’ button. The ROI box will appear as a blue square overlaid on the hologram. The ROI can be moved to another location by moving the mouse over the ROI, selecting it, and then moving it around to the desired location within the hologram. LISST-HOLO User’s Guide 37 When the ROI is in the desired location, DOUBLE-CLICK it so that the ROI turns red. Note that the Reconstruct button then becomes active. Now set the minimum and maximum depth for the hologram reconstruction, as well as the step size (in mm). Click the Reconstruct button to initiate the reconstruction process. Upon reconstruction, the individual slices can be viewed on the right by clicking on the left and right arrows. The X, Y, and Z axes of the reconstructed image are in calibrated units (µm). The Z axis (the focus depth) is displayed above the reconstructed image. Clean Stack Slider The Clean Stack slider is used to reduce noise in the image. The slider can be moved from left to right to help remove background noise in the images. 38 LISST-HOLO User’s Guide Improfile Button The Image Profile button can be used to get an idea of the intensity variation along a line transect. To use, click the Image Profile button and a + will appear. Move it to the location on the slice you want to examine in more detail and click once. Now drag the cursor to draw a line. Click once to set a point, doubleclick to mark the end of the transect. In the image to the left, a transect composed of 3 lines at right angles to each other has been selected. When you double-click to mark the end of the transect a figure similar to the one on the left will pop up, showing the pixel intensities along the selected transect. Zoom and Reset Buttons Clicking the zoom button enables you to zoom in on a part of the slice. Click and drag the cursor to draw a rectangle on the slice and release to zoom to the rectangle. Note that if you use the arrows to move back and forth between the slices after you have zoomed, the zoom area is retained on the other slices. Click the Reset button to zoom out again. Grid Button The grid button draws a grid onto the slice. This makes it easier to determine the size of the particles in the slice. Click the grid button again to turn off the grid. LISST-HOLO User’s Guide 39 Save Image Button The Save Image button enables you to save the current view of your slice as an image on your computer. The image is saved with a .PNG (Portable Network Graphics) extension. Measure Button The measure button will allow you to measure objects in the reconstructed slices. After selected the measure button, a + will appear when you mouse over the image. Click and hold to drag a line across an object in the image. When you release the mouse button, the length of the line will be displayed in microns. 4.6 LISST-HOLO User’s Community Dr. Alex Nimmo Smith of University of Plymouth hosts a user’s community website for holographic image processing; holoproc: http://holoproc.marinephysics.org/ On the holoproc website you will find additional MATLAB files that can be used for processing LISST-HOLO data, developed by other LISSTHOLO users and shared via the holoproc user community. SEQUOIA SCIENTIFIC, INC. DOES NOT PROVIDE ANY SUPPORT OR ASSISTANCE RELATED TO HOLOGRAM PROCESSING WITH FILES DOWNLOADED FROM THE HOLOPROC WEBSITE QUESTIONS SHOULD BE ADDRESSED DIRECTLY TO THE USER WHO CREATED THE FILE. 40 LISST-HOLO User’s Guide 5 LISST-Holo Field Deployment 5.1 Introduction The LISST-HOLO has many features that make it easy to deploy in the field. Start and Stop conditions can be programmed into the instrument in advance. Once the instrument is turned on it will wait for the Start Condition to occur before capturing holograms. It will continue to capture holograms at the programmed rate until the stop condition is reached. The holograms are stored either on an External Memory Module (EMM) if it is installed on the 8-pin connector on the endcap. If the EMM is not installed, holograms will be stored on the internal drive (32 GB) of the LISST-HOLO. The EMM is pressure rated to the same depth as the LISST-HOLO (300m). Up to four different set of Start, Stop, and Sampling conditions can be preprogrammed into the LISST-HOLO. The sections below describe in detail how to configure, start, and stop the data collection as well as how to offload hologram from the EMM and the internal drive. 5.2 Programming To configure the Start and Stop conditions you must connect to the instrument using the Ethernet connection as described in Sections 3.2 and 3.3. Clicking on the Home tab will show a summary of the four sets of sampling conditions. Each of the four sets can be configured differently. To set up a sampling program click on the Program # hyperlink. The Start Condition, Sampling mode and rate, and the Stop Condition will need to be set. To set the Start condition choose between a Date/Time start, delayed start, depth start, External Signal 1, External Signal 2, or the Magnetic Switch. To set the sample mode, choose between Fixed rate and burst sampling. Date/Time start will wait until the selected GMT time is reached before sampling is started and the magnetic switch is in the 1 position. If it is past the specified time the sampling will start immediately if the magnetic switch is in the 1 position. Be sure to check the homepage to make sure your LISST-HOLO has the correct GMT time. LISST-HOLO User’s Guide 41 NOTE: It is possible to set the LISST-HOLO time to local time if a Time Offset is entered on the Tools page. See section 6.6 for details. The Delay Start will start after the specified delay. The delay must be an integer number and can be specified as Minutes or Hours. In this example the LISSTHOLO will start sampling 1 minute after the magnetic switch has been turned to ‘1’ (On) position. The Depth Start will wait until the depth is greater than the specified value before starting. In this example the LISST-HOLO will start sampling once the depth exceeds 100 m and the magnetic switch is in the 1 position. The External 1 and External 2 will wait for the voltage on the selected External input located in the Auxiliary 6-pin connector to be greater than 2.4V and the magnetic switch is in the 1 position. The Magnetic switch option will start sampling when the switch is in turned to the 1 position. NOTE: ALL PROGRAMS MUST BE STARTED BY TURNING THE MAGNETIC SWITCH TO THE 1 POSITION. The sampling rates and modes also need to be selected. There are two modes: Fixed Rate Mode and Burst Mode. The Fixed rate mode will take one hologram at the specified interval. Holograms can be taken at a frequency of up to 0.2 Hz (5 second interval). The Burst Mode can be used to take a burst of holograms at a fixed time interval between the start of each burst. The maximum sample rate is 0.2 Hz (5 second interval). If more than 20 holograms are captured within a burst, there will be a slight gap in the data every for every 20 holograms, as the file system cannot write the holograms to the memory as fast as they are taken. The Burst Interval will automatically be recomputed to take this delay into account if more than 20 holograms are captured within a burst. The Stop Conditions also have multiple options: Date/Time, Fixed Duration, Greater than or less than Depth, External Signal 1 or 2, Magnetic switch, or fixed number of Samples. The Date/Time Stop is used to stop collection at a particular time and date. The date and time can be GMT or a local time if a time offset has been entered on the Tools page (see section 6.6). The Stop after setting will stop the sampling after the specified amount of time from the start of data collection. The > Depth value will stop when the depth is deeper than the specified depth. The < Depth value will stop when the depth is shallower than the specified depth. The External 1 signal and External 2 signal setting will stop collection when the selected signal is less than 0.8 volts. The Magnetic Switch option will cause sampling to stop when the switch is in the 0 position 42 LISST-HOLO User’s Guide The ‘Samples’ setting will stop data collection when the specified number of samples has been collected. After making changes to the settings press on the Apply button to save the settings and refresh the page. All four sets of start and stop conditions can be programmed. Selecting the start/stop program using the PC When the four start and stop conditions have been programmed, you can select which program you want to use by selecting the appropriate radio button and clicking apply. 5.3 Preparing for Deployment Now that the sampling parameters are configured we can prepare the instrument for deployment and start the sampling. The procedure is slightly different, depending on whether the LISST-HOLO is deployed with or without the External Memory Module (EMM). These two scenarios are described below. with the EMM installed The first step is to put the instrument into low power sleep mode so that we can disconnect the Ethernet cable and install the EMM. ! In order for the EMM to be recognized it must be in place before power is applied OR while the instrument is in sleep mode. Navigate to the Tools page and click the Sleep button at the Sleep or reboot line. This will shut down the primary data logger and the green LED on the endcap should be blinking every 30 seconds instead of every few seconds. Disconnect the Ethernet cable and plug in the External Memory Module using the special threaded locking part to hold it in place. Proceed with section 5.4. without the EMM installed It is NOT necessary to install the EMM in order to sample with the LISSTHOLO. In this case the holograms will be stored to the internal drive of the LISST-HOLO. If the EMM is not used, the 8-pin dummy MUST be installed onto the 8-pin connector. Failure to do so may short circuit the instrument and damages the electronics. Unplug the yellow Ethernet cable and install the 8-pin connector. Proceed with section 5.4. LISST-HOLO User’s Guide 43 5.4 Wake up / power up LISST-HOLO If the system is still powered up but asleep, move the switch to the 1 position and then quickly back to the 0 position. This will wake up the instrument. If the system is disconnected from power, make sure the switch is at the 0 position, then power it back on. The LISST-HOLO will boot up and be ready in approximately 30 seconds. When the green LED is flashing every few seconds the instrument is awake and ready to start sampling. 5.5 Start Data Collection To start the data collection program, move the Switch to the 1 position. The LED on the endcap will change from green to red indicating that sampling has begun. It will blink slowly until the start condition is reached and it will be on continuously during the acquisition of a hologram. It will return to green when the stop condition has been reached. 5.6 Stop Data Collection Data collection will continue until the selected Stop Condition is reached. To Stop the data collection at any time, move the switch to the 0 position. Within a few seconds the LED on the endcap should change from Red to Green. If the data collection has already stopped the LED will be blinking green regardless of the switch position. However, the switch should be always be placed in the 0 position when sampling is complete. 5.7 Downloading Raw Holograms The raw holograms are saved to the External Memory Module if it is installed. Otherwise the holograms are stored on the internal drive of the LISST-HOLO. The offload procedure is different for those two scenarios and will be described in the following. Downloading from EMM Raw holograms stored on the EMM can be downloaded using the provided USB cable. Remove the EMM from the instrument. Leave the locking ring attached to the connector on the instrument. Plug the mating underwater connector of the USB cable onto the EMM and then plug the USB end into your PC. The USB flash drive inside the EMM should now appear on your PC. You can now transfer files as you would from any USB flash drive and subsequently delete the holograms you no longer wish to keep on the EMM. See section 5.8 for instructions on how to view the raw (unprocessed) holograms using OpenSeeIt. See section 4 for instructions on how to process the holograms. Downloading and deleting from LISST-HOLO internal drive (EMM not installed) To download holograms from the internal drive you will need an FTP utility like Filezilla (http://filezilla-project.org). When you have started the FTP application, you will need to specify a host, username and password. The host is the IP address of the LISST-HOLO, typically 192.168.0.150 unless you have changed it to another IP address (see section 8.3). Leave the username blank The password is anonymous 44 LISST-HOLO User’s Guide Click the Quickconnect button to start the FTP transfer. Filezilla will connect to the LISST-HOLO and display the images folder in the bottom right window. To the left is the destination folder selection. Navigate to the desired destination folder. In this example, we will offload to a folder on the C drive called HOLO-Offload. Note that the destination directory window is empty Focus on the directory listing in the bottom right window. LISST-HOLO User’s Guide 45 Double-click the folder called images. The holograms on the internal drive are now displayed. Select the holograms you wish to offload or delete. Use the SHIFT key to select a range of holograms. Use the CTRL key to select several individual holograms. Here 5 holograms have been selected. Now drag the selected holograms straight across to the destination folder window on the left side of the screen. The selected holograms will then transfer to the destination folder To DELETE the holograms, right click on the selected holograms on the images drive on the LISST-HOLO and select Delete. You will be asked to confirm the deletion. The holograms are then deleted from the internal drive on the LISST-HOLO. WHEN THE HOLOGRAMS HAVE BEEN DELETED THEY CANNOT BE RECOVERED! 46 LISST-HOLO User’s Guide 5.8 Viewing raw holograms in OpenSeeIt To quickly view the raw holograms, use the Browser mode of the OpenSeeIt software. If you have set OpenSeeIt to be used for all PGM files you can simply double click on one of the holograms in order to see it in OpenSeeit. If you press <Enter> within OpenSeeIt when a hologram is displaying the View mode changes to Browser mode. Otherwise follow the instructions below. Open up OpenSeeIt and select Browser Mode from the View Menu. Navigate to the folder where your holograms are stored. They will all be displayed in the bottom left of the OpenSeeIt window. Use up/down arrow keys to scroll through the holograms. You can use this functionality to quickly determine which holograms will be suitable for processing and which will not. The hologram on the left will not process well, because there are no visible interference patterns (concentric rings). This is due to the particle concentration being too high. LISST-HOLO User’s Guide 47 This hologram will process well, because the interference patterns are clearly visible and distinct. Next Deployment or Powering Down 5.9 The External Memory Module can now be re-installed on the LISST-Holo and sampling can be started again by moving the switch to the 1 position. If you do not wish to re-install the External Memory Module you should install the 8-pin dummy on the connector. There is no need to connect the Ethernet cable and establish communication with the instrument unless the setting for the Start and Stop conditions needs to be changed. If the instrument is not going to be redeployed it can be powered down. If the instrument is not sampling or writing files the power can simply be disconnected. However, power should only be disconnected when the instrument is in its low power sleep mode. The instrument will automatically go into lower power sleep mode after 10 minutes of no activity if the power profile is checked on the Tools page. The green LED will blink every 30 seconds when in sleep mode. When the instrument is awake but idle the LED will blink every 5 seconds. 48 LISST-HOLO User’s Guide 6 Reviewing Instrument Info and Other Settings 6.1 Intro to Other Settings In addition to the Start and Stop Conditions there are other parameters that can be changed using the Ethernet connection. This section will discuss some of the additional parameters that can be accessed from the home page. 6.2 Home page The Home page shows the System Status, Selected Program and Programming Information. In addition it also shows Start and Stop conditions for the four different sampling programs. System Status The System Status shows the available memory on the internal flash drive, input voltage, current temperature and depth, endcap switch position, and the state of the two digital inputs. Select program The Select Program buttons lets the user select which program should control the LISST-HOLO sampling. Up to 4 programs can be loaded in the LISST-HOLO. In the example to the left, Program 1 is selected. If another program is to be selected, click the appropriate radio button and then click the Apply button. Programming Information The details on the start/stop conditions for the four different programs are reviewed in section 5.2 and will not be repeated here. 6.3 Images page In addition to the External Memory Module the LISST-Holo has an internal flash drive. When the External Memory Module is not attached the holograms will be stored on the internal drive. The Images page shows a listing of the holograms saved on the internal drive. LISST-HOLO User’s Guide 49 The hologram file name is a hyperlink to the file on the internal drive of the LISST-HOLO. Click on the file name to download the file to a temporary folder and open the file in OpenSeeIt. To copy the file to a specific folder, right click on the file name and choose “Save Target as” or “Save Link as” and then enter a folder to store the file to. To see specific information about the hologram such as date and time, depth, and temperature click on the Details button. The Details Button then opens up a 2nd window showing the details. Click the Delete button to delete a hologram. You can only delete one hologram at the time using the Delete button. To download or delete multiple holograms from the internal drive you will need to use an FTP utility like Filezilla (http://filezilla-project.org) as described in section 5.7. 6.4 Log page 50 The LISST-Holo writes information to a file as it is operating. This file contains information that can be helpful in troubleshooting problems and it can be sent to Sequoia for evaluation. The Log option of the main menu allows the user view the contents of the log file. LISST-HOLO User’s Guide 6.5 Configure page Selecting Configure on the home page main menu will bring up a window listing many parameters and allows their values to be changed. Values on this page should not be changed without detailed knowledge of the parameter’s use or without detailed instructions. By default this page has restricted access and the user should NOT change any of these values w/o being asked to do so by Sequoia. 6.6 Tools page Selecting Tools on the main menu brings up a window that allows the user to take a test image and to change additional parameters such as IP address, send Log file for analysis, check for firmware updates, synchronize time with standard time, and other settings. These options are described in detail in the following. Current conditions The current voltage, temperature and depth are displayed. Also displayed are the digital counts. Click the Refresh button to update. Take test image In order to take a manual hologram, click the Take images button. You can take up to 20 holograms by selecting the number using the drop down menu. If you enter a comment, it will display when reviewing the image details (see section 6.3). The duration and power settings control the output power of the laser and the duration that it is on. Changing these may cause the hologram to become completely white or black. If this happens, go to the FAQ page on the About page (section 6.7). If you change the laser power and duration here, it ONLY affects the laser power and duration for the test holograms. Laser power and duration during regular sampling initiated by one of the four programs (section 5) is NOT affected. Image file name You can force the LISST-HOLO to start at a certain deployment number or image (hologram) number. You can also enter a comment that can be used later to identify the holograms, e.g. the location. Remember to click the Apply button. Sampling control Use the Start sampling button to simulate the magnetic switch. This can be useful for example in a laboratory environment where the LISST-HOLO may be in a tank or similar and you want to control the start and stop of the sampling manually. LISST-HOLO User’s Guide 51 Storage maintenance Periodically it is necessary to perform storage maintenance on the internal drive of the LISSTHOLO. The LISST-HOLO will notify you about this need by displaying a warning message saying ‘xxx’ on the Home page. When you see this message, click the Schedule Maintenance button and then the Reboot button immediately below. Sleep or reboot Click the Sleep button to put the LISST-HOLO to sleep. Click the Reboot button to reboot the LISST-HOLO. If you reboot you must re-enter the LISSTHOLO IP address in your browser window to re-establish communication. Power profile If the Power profile check box is checked as in the example above, the instrument will not go to sleep between samples. Use this setting if the instrument is connected to shore power, or to the external power supply. You should UNCHECK this checkbox if the LISST-HOLO is powered with an external battery. This preserves battery life. The Sleep button on the Home page will disappear if the checkbox is checked. Set time Set time zone Set time manually Click the Set time to synchronize the LISST-HOLO to a time server. If you want your local time to be displayed on the home page, enter the Time zone and click Apply. If you do not have internet access, you can set the time manually. Change external trigger polarity Restore default values Clicking the Set Defaults button will restore the brightness, gain, and shutter to factory defaults. 52 LISST-HOLO User’s Guide Submit log for analysis Clicking the Send Log button will send the deployment log to Sequoia for troubleshooting. The LISST-HOLO must be connected to the internet and it must be rebooted after the Send Log button has been clicked for the log to transfer. Generate log file The Generate Log file button creates a text file of the instrument log in the images folder of the LISST-HOLO, which can be offloaded using FTP. It is useful for troubleshooting. Check for updates Clicking the Update button will prompt the LISST-HOLO to check for software updates and automatically install them. It is necessary for the LISST-HOLO to be connected to the internet and the unit must be rebooted before the changes will take effect. Network parameters Use Network parameters to change the IP address of the LISST-HOLO. Click Apply when you have changed it, but make sure that it is correct. The changes will take effect immediately, so you will need to enter the new IP address in your browser to continue working with the LISST-HOLO. Delete all images Click the Delete button to delete all files on the internal hard drive of the LISST-HOLO. You will be asked to confirm. When you have confirmed the Tools page will refresh, and another 5 seconds after this the LISST-HOLO will begin to delete the holograms. During the time the LISST-HOLO is deleting holograms it WILL NOT RESPOND. Clicking any of the links will result in a time out and a blank browser page. Deleting 1000’s of holograms can take 5-10 minutes. Upon completion, the LISST-HOLO will become responsive again. There will be no indication from the LISST-HOLO that it is responsive, but clicking on the Images page will show that no images are available. The parameters described below should NOT be changed without first consulting Sequoia. They are to be used for troubleshooting and problem resolution only. LISST-HOLO User’s Guide 53 Laser Do not adjust without first consulting Sequoia support. Camera brightness, gain, shutter, and power Do not adjust without first consulting Sequoia support. Manual exposure Do not use without first consulting Sequoia support. Command to subsystem Do not use without first consulting Sequoia support. Watchdog shutdown Do not adjust without first consulting Sequoia support. Motherboard log Do not use without first consulting Sequoia support. 6.7 About page 54 LISST-HOLO User’s Guide The top of the About page contains information about the hardware and firmware loaded in the instrument, as well as the serial number of the instrument. Below this section are a few FAQ’s, as well as links to the free OpenSeeIt and Filezilla software. LISST-HOLO User’s Guide 55 7 Handling, Cleaning, Maintenance and Storage 7.1 Handling When handling the instrument, at all times please remember that the LISST-HOLO is a highprecision optical instrument. Avoid mechanical shocks and impact to the housing, as this may cause misalignment of the optical parts. The instrument pressure housing should not be opened. 7.2 Cleaning The glass windows of the instrument can be scratched. Do not use abrasive cleaners on glass or anodized surfaces. When cleaning windows be careful not to drag and hard particles such as sand across the windows. Use glass cleaner or liquid dish soap to clean windows. 7.3 Maintenance Make sure that the windows are as clean as possible. The windows can be cleaned with Windex, but often a mild, lukewarm, soap solution is the best for cleaning optical windows. Dip a finger in the soapy solution and gently rub the windows. Rinse several times with clean, particle-free water. The connectors and cables should be lubricated with 3M Silicone Spray or equivalent on a frequent basis. DO NOT use grease on the connectors. Grease may prevent the dummies or cables from mating with the connectors and allow water to penetrate and cause corrosion or short circuit the connector. To preserve the file structure integrity on the internal drive, regular maintenance of the file system is needed. Use the button ‘Schedule Maintenance’ on the Tools page to perform maintenance. You should always perform this maintenance before deploying the instrument for a longer duration. 7.4 Storage The LISST-HOLO should be thoroughly cleaned with fresh water and dried out before storage. Store in a clean dry place or inside the provided ship case. Make sure the dummy plugs for the connectors are in place before storage. The instrument should be disconnected from power when not in use. 56 LISST-HOLO User’s Guide LISST-HOLO User’s Guide 57 8 Ethernet Communications 8.1 Router Use A static IP address is required for access to the LISST-HOLO via a network. If you are able to simply plug in your LISST-HOLO to your local network, all you have to do is enter the IP address of the LISSTHOLO (http://192.168.0.150/). However, the LISST-HOLO may conflict with the user’s or user’s administrator security settings, thereby preventing direct connection to the LISST-HOLO via the local network. In that case, a router is required to communicate with the LISST-HOLO. Connecting to the router via your network The LISST-HOLO comes with a Linksys E1000 router that has been programmed to communicate with the LISST-HOLO. Plug your computer’s Ethernet port and the LISST-HOLO into any of the numbered ports on the E1000 router. Turn on the router, then power up the LISST-HOLO and open up a web browser. Then initiate communication with the LISST-HOLO as described in section.3.2. Connecting to the router wirelessly You may also use a wireless connection to communicate with the router. You must still connect the LISST-HOLO to the router. Then turn the router on and have your computer search for the SSID, which is LISST-Holo. When you have connected to the router you need to enter the WAP PSK (password), which is manyholograms. Then power up the LISSTHOLO and initiate communication as described in section 3.2. Updating LISST-HOLO software via the Internet The Internet port on the E1000 router can be connected to your network to give the LISSTHOLO access to the Internet for software updates. To log on, leave user name blank and enter admin for the password. 8.2 Changing the IP address of the Linksys E1000 router It may be necessary for you to change the IP address of the E1000 router. You do NOT have to change the IP address of the router if you are only changing the last element of the LISST-HOLO’s IP address (150). If you are changing any of the first 3 elements of the LISST-HOLO’s IP address (192.168.0) you *MUST* change the IP address of the router to match: 1. 2. 3. 4. 58 LISST-HOLO User’s Guide Apply power to the Linksys E1000 router. Connect the Ethernet jack in a computer to Ethernet port 1 of the router. Light #1 should come on. Open Internet Explorer and navigate to 192.168.0.1. Leave the user name blank. Enter admin as password. This will open up the setup page below. 5. 6. Change the Local IP Address from 192.168.0.1 to your new desired IP address. Make a note in this manual of the new local IP address in case you need to change it in the future: New router IP address: Date: New router IP address: Date: New router IP address: Date: New router IP address: Date: 7. Now click the Windows Start Button on your PC 8. Type cmd in the search/command line and press <Enter> . You should see the black DOS prompt window. Type ipconfig/release and press <Enter>. 10. Type ipconfig/renew and press <Enter>. 11. The IP address has now been updated from 192.168.0.1 to the IP address you selected. 9. 8.3 Changing the LISST-HOLO IP address To change the IP address of the LISST-HOLO use the web interface. Connect as described in section 3.2 and go to the Tools page of the LISST-HOLO web interface. Scroll down until you get to Network Parameters. Change the IP address to the desired address and click the Apply button. The changes will take effect LISST-HOLO User’s Guide 59 immediately, so you will need to enter the new IP address in your browser to continue working with the LISST-HOLO New LISST-HOLO IP address: Date: New LISST-HOLO IP address: Date: New LISST-HOLO IP address: Date: New LISST-HOLO IP address: Date: 60 LISST-HOLO User’s Guide 9 FAQs What is a hologram? Fundamentally, holograms are 3-D images that have first been projected, and then stored on a 2-D surface. In the type of holograms captured by the LISST-HOLO (so-called in-line holograms), a laser beam is emitted and a small part of it is being scattered by the particles in the water. The part of the laser beam that is not being scattered by particles interferes with the scattered light. This creates an interference pattern - a hologram. The interference pattern is captured by a small digital camera. Upon processing of the captured interference pattern (i.e. the hologram), it is possible to recover the original image that created the hologram. Thus, the LISST-HOLO does NOT capture and store an image of the suspended particles. It is the hologram of the particles that is stored. During data processing, the image of the suspended particles is reconstructed from the hologram. Subsequently standard image processing methods can then be applied to get information about particle shape, size, area, etc. Why can't the LISSTHOLO be used when the flow speed is more than 0.5 m/s? It takes a few micro-seconds to capture the hologram using the digital camera. The image captured by any digital camera is made up by a large number of pixels. If the particles in the water move more than half a pixel during the time it takes to capture and store the hologram, it is impossible to process the hologram and get reliable results. For the pixel size used in the LISST-HOLO, a flow speed of more than 0.5 m/s will begin to blur the hologram. Consequently, if the LISST-HOLO is used on a profiling platform, e.g. a CTD, the profiling speed must be 0.5 m/s or less. Likewise, if the LISSTHOLO is deployed on a mooring or tripod, the current velocity around the instrument must be less than 0.5 m/s. Why should I connect the LISST-HOLO to the Internet? Connecting the LISST-HOLO to a local area network that is connected to the Internet has benefits. The first benefit is that the instrument is accessible from different locations across the network. Connecting the instrument to the Internet has other advantages such as checking for firmware updates, syncing the time with international standards, and transmitting log files to Sequoia. It is not necessary to have the instrument connected to a network or the Internet but it can be useful when needed. How do I connect the LISST-HOLO to the Internet? The LISST-HOLO comes configured with a pre-selected IP address, netmask, gateway, DNS 1, and DNS 2. These settings will work with the provided wireless router but they will probably not work with your existing local area network. Because the LISST-HOLO requires a static IP address an IP address must be selected so as not to interfere with other computers on your network. It is highly recommended that users work with their network administrators to determine the proper settings for their network. The new value can be entered on the Tools page (see section 8.3). Be sure to double check the values before pressing the Apply button on the Tools page. Once the Apply button is clicked the IP address will change immediately and you will need to log into the new IP address before LISST-HOLO communication can be re-established. If incorrect values are entered it is possible to change them manually through serial port communication. Contact Sequoia for details of this procedure. Why does it take 2 minutes to process one hologram? Processing (or reconstruction) of a hologram is a mathematically intensive task. Therefore a LISSTHOLO hologram is split up into ROIs (Regions Of Interest), which are each processed separately. This is in order to avoid memory problems during processing. Once the ROIs have been processed they are merged into one image with particles and processed for size, area, shape, etc. The 2 minute processing time per hologram is the maximum expected time on a standard 2.2GHz windows PC with 4GB of memory. However, since the processing is fully automated, it is possible to process holograms overnight or during weekends. Is it possible to get data in real-time from the LISST-HOLO? No. It typically takes 2 minutes to reconstruct a hologram into an image that can be analyzed for particle size, shape, area, etc. Does the LISST-HOLO support DHCP? No. The LISST-HOLO does not support DHCP (Dynamic Host Configuration Protocol). What is the maximum sample rate for the LISST-HOLO? The maximum sample rate for the LISST-HOLO is 0.2 Hz (one hologram every 5 seconds). Can I connect the LISST-HOLO directly to the Ethernet port on No. You must always connect via the supplied router or a local network. With the router, you can connect wirelessly to your PC. If your PC does not have wireless capability you can plug the router into your PC. However, in both circumstances the LISST-HOLO must be plugged into the router and LISST-HOLO User’s Guide 61 my PC? NOT the PC. What is the maximum concentration that the LISST-HOLO can be used with? The concentration limits for a LISST-HOLO are roughly as tabulated in the table below. See also this article on Sequoia’s website: http://www.sequoiasci.com/article/what-are-the-concentration-limits-forthe-lisst-holo/ for a more thorough explanation. Mean Particle Diameter Wentworth Grades Maximum Concentration [µm] [phi] [mg/l] 1.95 9.00 Clay 8 3.9 8.00 Very Fine Silt 15 7.8 7.00 Fine Silt 31 15.6 6.00 Medium Silt 62 31.25 5.00 Coarse Silt 123 62.5 4.00 Very Fine Sand 247 125 3.00 Fine Sand 494 250 2.00 Medium Sand 987 How do I tell if the suspended sediment concentration is too high? If you cannot see any interference patterns in the hologram (lots of concentric rings), the concentration is too high and you most likely won’t get any sensible data out of the hologram when processing it. Why can I choose between spherical and random size ranges in HOLO_Batch? For Sequoia’s LISST-100X and LISST-STX instruments, the user has the option to process the data assuming two different types of particle types: Spherical particles and Randomly shaped particles (sediment grains). The size ranges differs between these two processing options. In order to make it easier for LISST-HOLO users to merge their data with LISST-100X data, this option has been transferred to the HOLO_Batch processing software as well. It has no influence on the processing of the holograms; only on the size bins used for the final size distributions. Why are my holograms completely black? Adjust the laser power and exposure fields either on the tools page (if capturing images from the tool menu) or in the sampling program page (if running a sampling program). 62 LISST-HOLO User’s Guide 10 Endcap LED Status Light Indicators This table describes the LED signals visible from the end cap. LED sequence What the LISST-Holo is doing. 0.5 second green flash once every 30 seconds LISST-Holo is sleeping. Flashes are initiated by the motherboard when the power is removed from the Linux system. Yellow flashing twice a second for 40 to 60 seconds. Linux system is booting. External trigger caused motherboard to wake up Linux system. If this continues beyond approximately 60 seconds, the internal flash drive has failed. Motherboard initiates this display when it applies power to the Linux system. If it does not occur, the motherboard has not been booted. If this display lasts more 40 seconds, the Linux system is not responding or the internal flash drive has been corrupted. This display ends when the Linux system sends the first command to the motherboard. Could also be that the Linux system could not initiate the serial communications between the Linux system and motherboard. x red flashes, 2 second pause, repeat Fatal error. Record number of red flashes and contact Sequoia for troubleshooting and/or possible repair of the instrument. 0.5 second green flash once every five seconds. Indicates Linux system is operational and idling. It may be sampling or waiting for input. No external flash drive detected. Linux system commands the motherboard to show this display. If it does not occur, the Linux system has not booted. 0.5 second yellow flash every 2 seconds. Camera is being set up. If this condition persists more than a few seconds, there is a camera or Firewire board problem. The laser will come on during this time for warm up. 0.5 Hz green flashing. Sampling enabled but the sampling conditions have not been met. Either the magnetic switch is in the 1 position of the sampling was enabled on the Tools page. 1 Hz green flashing. Start condition met, sampling. Steady yellow. Taking sample. 2 green flashes, 2 second pause File maintenance taking place. If the internal flash drive is error free, this will take about 5 minutes. If errors are found, this can anywhere from 15 to 60 minutes depending on the severity of the problem. LISST-HOLO User’s Guide 63 64 LISST-HOLO User’s Guide 11 LISST-HOLO Size Ranges 11.1 Size Ranges based on LISST100X SPHERICAL particles. The LISST-HOLO outputs the size distribution in 50 size ranges logarithmically placed from 1.25 4923 microns in diameter (type B), or 2.5 – 9847 microns (type C). In both cases, the upper size in each bin is 1.180 times the lower. These size ranges are chosen so that they are similar to the two different size ranges for the LISST-100X submersible particle size analyzer from Sequoia Scientific, Inc., in order to facilitate merging of data from the two instruments. The table below shows the lower and upper limit of each size bin in microns, together with the median size (also in microns) for each size bin for type B and C instruments. Type B Type C Size bin # Lower Upper Median Lower Upper Median 1 1.25 1.48 1.36 2.50 2.95 2.72 2 1.48 1.74 1.60 2.95 3.48 3.20 3 1.74 2.05 1.89 3.48 4.11 3.78 4 2.05 2.42 2.23 4.11 4.85 4.46 5 2.42 2.86 2.63 4.85 5.72 5.27 6 2.86 3.38 3.11 5.72 6.75 6.21 7 3.38 3.98 3.67 6.75 7.97 7.33 8 3.98 4.70 4.33 7.97 9.40 8.65 9 4.70 5.55 5.11 9.40 11.1 10.2 10 5.55 6.55 6.03 11.1 13.1 12.1 11 6.55 7.72 7.11 13.1 15.4 14.2 12 7.72 9.12 8.39 15.4 18.2 16.8 13 9.12 10.8 9.90 18.2 21.5 19.8 14 10.8 12.7 11.7 21.5 25.4 23.4 15 12.7 15.0 13.8 25.4 30.0 27.6 16 15.0 17.7 16.3 30.0 35.4 32.5 17 17.7 20.9 19.2 35.4 41.7 38.4 18 20.9 24.6 22.7 41.7 49.2 45.3 19 24.6 29.1 26.7 49.2 58.1 53.5 20 29.1 34.3 31.6 58.1 68.6 63.1 21 34.3 40.5 37.2 68.6 80.9 74.5 22 40.5 47.7 43.9 80.9 95.5 87.9 23 47.7 56.3 51.9 95.5 113 104 24 56.3 66.5 61.2 113 133 122 25 66.5 78.4 72.2 133 157 144 26 78.4 92.6 85.2 157 185 170 27 92.6 109 101 185 218 201 28 109 129 119 218 258 237 29 129 152 140 258 304 280 30 152 180 165 304 359 331 31 180 212 195 359 424 390 32 212 250 230 424 500 460 33 250 295 272 500 590 543 34 295 348 320 590 696 641 35 348 411 378 696 822 756 36 411 485 446 822 970 893 37 485 572 527 970 1144 1053 LISST-HOLO User’s Guide 65 66 38 572 675 621 1144 1350 1243 39 675 797 733 1350 1593 1467 40 797 940 865 1593 1880 1731 41 940 1109 1021 1880 2219 2043 42 1109 1309 1205 2219 2618 2410 43 1309 1545 1422 2618 3090 2844 44 1545 1823 1678 3090 3646 3357 45 1823 2151 1980 3646 4303 3961 46 2151 2539 2337 4303 5078 4674 47 2539 2996 2757 5078 5992 5516 48 2996 3536 3255 5992 7071 6509 49 3536 4172 3841 7071 8344 7681 50 4172 4923 4533 8344 9847 9065 LISST-HOLO User’s Guide 11.2 Size Ranges based on LISST100X RANDOMLY shaped particles The LISST-HOLO outputs the size distribution in 50 size ranges logarithmically placed from 1.00 3939 microns in diameter (type B), or 1.90 – 7495 microns (type C). In both cases, the upper size in each bin is 1.180 times the lower. These size ranges are chosen so that they are similar to the two different size ranges for the LISST-100X submersible particle size analyzer from Sequoia Scientific, Inc., in order to facilitate merging of data from the two instruments. The table below shows the lower and upper limit of each size bin in microns, together with the median size (also in microns) for each size bin for type B and C instruments. Type B Type C Size bin # Lower Upper Median Lower Upper Median 1 1.00 1.18 1.09 1.90 2.25 2.07 2 1.18 1.39 1.28 2.25 2.65 2.44 3 1.39 1.64 1.51 2.65 3.13 2.88 4 1.64 1.94 1.79 3.13 3.69 3.40 5 1.94 2.29 2.11 3.69 4.35 4.01 6 2.29 2.70 2.49 4.35 5.14 4.73 7 2.70 3.19 2.93 5.14 6.06 5.58 8 3.19 3.76 3.46 6.06 7.15 6.59 9 3.76 4.44 4.09 7.15 8.44 7.77 10 4.44 5.24 4.82 8.44 9.96 9.17 11 5.24 6.18 5.69 9.96 11.8 10.8 12 6.18 7.29 6.71 11.8 13.9 12.8 13 7.29 8.61 7.92 13.9 16.4 15.1 14 8.61 10.2 9.35 16.4 19.3 17.8 15 10.2 12.0 11.0 19.3 22.8 21.0 16 12.0 14.1 13.0 22.8 26.9 24.8 17 14.1 16.7 15.4 26.9 31.8 29.2 18 16.7 19.7 18.1 31.8 37.5 34.5 19 19.7 23.2 21.4 37.5 44.2 40.7 20 23.2 27.4 25.2 44.2 52.2 48.0 21 27.4 32.4 29.8 52.2 61.6 56.7 22 32.4 38.2 35.2 61.6 72.7 66.9 23 38.2 45.1 41.5 72.7 85.7 78.9 24 45.1 53.2 49.0 85.7 101 93.1 25 53.2 62.8 57.8 101 119 110 26 62.8 74.1 68.2 119 141 130 27 74.1 87.4 80.5 141 166 153 28 87.4 103 94.9 166 196 181 29 103 122 112 196 232 213 30 122 144 132 232 273 252 31 144 169 156 273 322 297 32 169 200 184 322 381 350 33 200 236 217 381 449 413 34 236 279 256 449 530 488 35 279 329 303 530 625 576 36 329 388 357 625 738 679 37 388 458 421 738 871 802 38 458 541 497 871 1028 946 LISST-HOLO User’s Guide 67 68 39 541 637 587 1028 1213 1116 40 637 752 692 1213 1431 1317 41 752 888 817 1431 1689 1555 42 888 1047 964 1689 1993 1835 43 1047 1236 1138 1993 2352 2165 44 1236 1458 1343 2352 2775 2555 45 1458 1721 1584 2775 3275 3014 46 1721 2031 1870 3275 3865 3558 47 2031 2397 2206 3865 4561 4198 48 2397 2828 2604 4561 5382 4954 49 2828 3338 3073 5382 6351 5846 50 3338 3939 3626 6351 7495 6899 LISST-HOLO User’s Guide 12 Hologram .PGM File Format Structure The holograms stored on the flash drive are saved in .PGM format and are composed of two parts. The first block of bytes in a hologram is the standard PGM format, as follows: “P5<lf>1600 1200 255<lf> plus 1600 ×1200 bytes containing the hologram data. The second block of has a size of 1024 bytes and follows immediately after the hologram data. This block holds binary data as follows: Bytes Description 0-7 Seconds since epoch. Time stamp indicating when image was obtained. Unsigned long integer. 8-15 Pressure in counts. Unsigned long integer. 16-17 Temperature in counts. 18-19 Battery/power supply voltage in counts 20-21 Exposure time in 600ns increments. 22-23 Laser power in counts. 24-25 Laser photo diode reading, in counts. 26-27 Camera brightness. 28-29 Camera brightness, minimum value. 30-31 Camera brightness, maximum value. 32-33 Camera shutter. 34-35 Camera shutter, minimum value. 36-37 Camera shutter, maximum value. 38-39 Camera gain. 40-41 Camera gain, minimum value. 42-43 Camera gain, maximum value. 44-115 Not used 116-119 Depth coefficient, DepthA. Floating point number. 120-123 Depth coefficient, DepthB. Floating point number. 124-127 Depth coefficient, DepthC. Floating point number. 128-131 Temperature coefficient, TemperatureA. Floating point number. 132-135 Temperature coefficient, TemperatureB. Floating point number. 136-139 Temperature coefficient, TemperatureC. Floating point number. 140-143 Temperature coefficient, TemperatureSlope. Floating point number. 144-147 Temperature coefficient, TemperatureOffset. Floating point number. 148-151 Auxiliary input A/D channel 2. 8 bits, 0 to 255. 152-155 Auxiliary input A/D channel 3. 8 bits, 0 to 255. 156-159 Auxiliary input A/D channel 4. 8 bits, 0 to 255. 160-163 Auxiliary input A/D channel 5. 12 bits, 0 to 4095. 164-167 Auxiliary input A/D channel 6. 12 bits, 0 to 4095. 168-171 Not used 172-173 Inter-frame delay in milliseconds. 174-181 Millisecond time stamp. Use to determine time between previous or following hologram. 182-1023 Unassigned, set to 0 LISST-HOLO User’s Guide 69 70 LISST-HOLO User’s Guide 13 Warranty STATEMENT OF LIMITED WARRANTY AND LIABILITY This Statement of Limited Warranty applies to all Sequoia Scientific, Inc. (“SEQUOIA”) products ("Products"). Any additional or different terms, including any terms in any purchase order, will be of no effect unless agreed to in writing by an authorized representative of SEQUOIA as reflected in a written SEQUOIA quotation. 1. Limited Warranty SEQUOIA warrants that upon delivery by SEQUOIA (a) the Products will be free from defects in materials and workmanship, (b) the Products will perform substantially in accordance with SEQUOIA's applicable specifications, and (c) any Products (or components or parts thereof) that are manufactured by SEQUOIA do not infringe any U.S. patent or copyright. 2. Correction of Non-Compliance If, during the twelve months after delivery (the “Warranty Period”), any Product does not comply with the warranties set forth in 1(a) and 1(b) above, SEQUOIA will, at its option, either (a) repair the Product, (b) replace the Product, or (c) refund the purchase price paid by Customer to SEQUOIA for the Product; provided that Customer gives SEQUOIA written notice of the noncompliance within the Warranty Period and ships the Product to SEQUOIA within one month after the end of the Warranty Period. As to any Product repaired or replaced by SEQUOIA, the Warranty Period will end upon the later of the end of the original Warranty Period or 90 days after SEQUOIA's delivery of the repaired or replacement Product to Customer. Any Product, component, part or other item replaced by SEQUOIA becomes the property of SEQUOIA. SEQUOIA may use refurbished components in the repair of Products supplied hereunder. SEQUOIA's warranties shall be void and not apply if the Product has been subjected to misuse or alteration or repaired by a party not approved by SEQUOIA or the serial number on a product (if applicable) has been altered or defaced. SEQUOIA shall not be liable for normal wear and tear (such as replacement of consumables), nor for defects or failure caused by maintenance, misuse, negligence or failure resulting from non-compliance with SEQUOIA’s specifications, operating or maintenance manuals. 3. Infringement Indemnification If any Product does not comply with the warranty set forth in 1(c) above, SEQUOIA will defend and indemnify Customer against any third-party claim asserted in any proceeding against Customer based on this noncompliance; provided that Customer gives SEQUOIA prompt written notice of the claim, SEQUOIA has exclusive control over the defense and settlement of the claim, Customer provides such assistance as SEQUOIA may request in connection with the defense and settlement of the claim (in which event SEQUOIA will reimburse the reasonable out-of-pocket costs incurred by Customer to provide such assistance), Customer does not settle the claim without the prior written consent of SEQUOIA and, upon SEQUOIA's request, Customer returns the Non-Complying Product to SEQUOIA for modification, replacement or a refund of the purchase price paid by Customer to SEQUOIA for the Non-Complying Product, less a reasonable allowance for Customer's use prior to return. 4. Exclusive Warranties THE WARRANTIES SET FORTH IN PARAGRAPH 1 ABOVE ARE EXCLUSIVE AND IN LIEU OF ALL OTHER WARRANTIES, EXPRESS OR IMPLIED. SEQUOIA DISCLAIMS ANY AND ALL WARRANTIES, EXPRESS OR IMPLIED (INCLUDING, BUT NOT LIMITED TO, ANY IMPLIED WARRANTY OF MERCHANTABILITY OR FITNESS FOR A PARTICULAR PURPOSE, AND ANY IMPLIED WARRANTY ARISING FROM COURSE OF PERFORMANCE, COURSE OF DEALING, OR USAGE OF TRADE) OTHER THAN THOSE SPECIFICALLY SET FORTH IN PARAGRAPH 1. 5. Exclusive Remedies CUSTOMER'S RIGHTS AND REMEDIES SET FORTH IN PARAGRAPHS 2 AND 3 ABOVE ARE EXCLUSIVE AND IN LIEU OF ANY AND ALL OTHER RIGHTS AND REMEDIES FOR ANY BREACH OF OR OTHER FAILURE TO COMPLY WITH ANY WARRANTY WITH REGARD TO ANY PRODUCT. 6. No Consequential Damages SEQUOIA will not be liable for any indirect, incidental, special or consequential damages, any cover, or any loss of revenue, profit, data or use. 7. Limitations of Liability SEQUOIA's liability (whether in contract, tort, or otherwise; and notwithstanding any fault, negligence, strict liability or product liability) with regard to any Product (including, but not limited to, any breach of or default by SEQUOIA) will in no event exceed the purchase price paid by Customer to SEQUOIA for such Product. Further, SEQUOIA will not be liable for, or be in breach of or default on account of, any delay or failure to perform as a result of any cause, condition or circumstance beyond SEQUOIA's reasonable control. 8. Indemnification by Customer Customer acknowledges that the Products are designed and manufactured for use in non-critical, monitoring situations. If Customer chooses to purchase a Product or Products for use in applications that could result in damages in excess of the price of the Product if the Product does not operate properly or otherwise fails, Customer acknowledges and agrees that it is Customer’s responsibility to provide for redundancy and/or other safety or back-up measures sufficient to assure that failure of a Product(s) LISST-HOLO User’s Guide 71 will not cause such damages. Customer agrees that it will defend and hold SEQUOIA harmless from any and all claims and costs (including but not limited to attorney’s fees and other costs of defense against such claims) in excess of the price of the Products arising directly or indirectly from such Customer’s use of the Products. Such indemnification is a critical part of the consideration being provided by Customer (over and above the price paid for the Product(s)) for the right to use the Products for such purposes and Customer shall not use a Product or Products for such purposes if it is unwilling or unable to provide such indemnification. 9. Statute of Limitations Customer will not commence any action based on breach of warranty with respect to any Product more than 18 months after SEQUOIA's delivery of such Product. 10. Software The Products may include or be delivered with certain computer programs, databases or other software that is proprietary to SEQUOIA. SEQUOIA hereby grants Customer a nonexclusive license to use such software solely for the purpose of operating Products. Customer will not: use any such software for any other purpose; modify, adapt, translate, or create derivative works based on any such software; or disassemble, decompile or reverse engineer any such software. No title to or ownership of any software or intellectual property rights are transferred to Customer. 11. U.S. Government Restricted Rights Notice All software, data, technical information, and written materials provided by SEQUOIA are provided with restricted rights. Use, duplication, or disclosure by the government is subject to restrictions as set forth in subparagraph (c)(1)(ii) of the Rights in Technical Data and Computer Software clause at 48 C.F.R. § 252.227-7013 or in subparagraph (c)(2) of the Commercial Computer Software-Restricted Rights clause at 48 C.F.R. § 52.227-19, as applicable. Portions of these items may be unpublished. SEQUOIA reserves all rights under applicable copyright laws. 12. Controlling Document In the event of any conflict or inconsistency between any provision of this Statement of Limited Warranty and any other provision of the Order, the provision of this Statement of Limited Warranty will control. 13. Controlling Law This Statement of Limited Warranty will be governed by the laws of the State of Washington without reference to its rules relating to choice of law for the purpose of applying another jurisdiction’s law. The U.N. Convention on Contracts for the International Sale of Goods will not apply. 72 LISST-HOLO User’s Guide 14 Index About page .................................................19, 54 Battery case ...........................................................12 life ..............................................................11 Cables connecting ..................................................16 ethernet ......................................................15 power .........................................................15 Camera settings ...............................................54 Cleaning ...........................................................56 Concentration ...................................................62 range ..........................................................11 too high ................................................47, 62 Configure page .................................................51 Connectors maintenance ..............................................56 pin-outs ......................................................13 Current consumption...............................................12 Delete holograms .......................................46, 53 Dimensions .......................................................11 Downloading .....................................................44 External Battery Case ......................................12 External Memory Module .................................11 installation ..................................................43 FAQ ..................................................................61 Features ...........................................................11 Files created by HOLO_Batch ............................35 created by HOLO_Detail ............................40 download from EMM ..................................44 download via FTP ......................................44 format ...................................................35, 69 PGM file structure ......................................69 Filezilla........................................................44, 55 FTP ...................................................................44 host address ..............................................44 password ....................................................44 Getting started ..................................................15 Handling ...........................................................56 HOLO_Batch ....................................................23 advanced parameters ................................25 background hologram ................................30 bin sizes .....................................................27 factory default settings ...............................23 output options ............................................26 performance options ..................................27 reconstruction parameters .........................23 ROI (Region Of Interest) ............................24 HOLO_Detail ....................................................36 Hologram ..........................................................61 details .........................................................50 download from EMM ..................................44 download from internal drive ................44, 50 enter comment ...........................................51 file name ....................................................51 PGM file structure ...................................... 69 processing ................................................. 22 processing time ......................................... 61 view in OpenSeeIt ..................................... 47 Holoproc ........................................................... 40 Home page ................................................ 18, 49 Images page .............................................. 18, 49 IP address change LISST-HOLO ................................ 59 change router ............................................ 58 Log ................................................................... 50 Magnetic switch emulator..................................................... 51 Maintenance .................................................... 56 Manual sampling .............................................. 51 OpenSeeIt .................................................. 47, 55 Password changing router IP ..................................... 58 connecting to router ................................... 16 connecting via FTP .................................... 44 PNG images ..................................................... 40 Power ............................................................... 12 disconnect ................................................. 19 supply ........................................................ 11 Power profile .................................................... 48 Process holograms using HOLO_Batch ................................... 23 using HOLO_Detail ................................... 36 Programming start conditions .......................................... 41 stop conditions........................................... 42 Router .............................................................. 58 connecting ................................................. 16 Select program ................................................. 49 using the PC .............................................. 43 Set time automatically.............................................. 52 manually .................................................... 52 Size ranges ................................................ 65, 67 Sleep ................................................................ 52 Software installation.................................................. 21 Specifications ................................................... 11 Start data collection ......................................... 44 Stop data collection .......................................... 44 Storage............................................................. 56 System Status .................................................. 49 Test chamber installation.................................................. 19 Time zones ...................................................... 52 Tools page ................................................. 18, 51 URL .................................................................. 17 User community ............................................... 40 Warranty........................................................... 71 Weight .............................................................. 11 LISST-HOLO User’s Guide 73