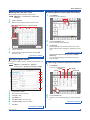
1
User’s Manual Models GX10/GX20/GP10/GP20 Paperless Recorder First Step Guide Contents Introduction.................................................................................. 1 Handling Precautions of the GX/GP............................................. 4 SD Memory Card Handling Precautions....................................... 4 Checking the Package Contents.................................................. 5 Standard Accessories.................................................................. 6 Conventions Used in This Manual................................................ 6 Protection of Environment............................................................ 7 Functional Overview.........................................................8 Overview..................................................................................... 8 A Variety of Source Signals.......................................................... 8 Expandable Module Construction................................................. 8 Data Storage............................................................................... 8 A Variety of Display Functions...................................................... 8 Touch Screen.............................................................................. 8 Freehand Messages.................................................................... 9 Versatile Network Functions and Software................................... 9 Other Functions........................................................................... 9 System Configuration.................................................................10 Component Names......................................................... 11 GX20/GX10................................................................................11 GP20/GP10................................................................................12 GX90XA/GX90XD/GX90YD......................................................12 Operating Procedure.......................................................14 Installation and Wiring.....................................................16 Installation Location.....................................................................16 Installation Procedure..................................................................16 External Dimensions and Panel Cut Dimensions.........................17 Installing and Removing I/O Modules...........................................18 Wiring.........................................................................................19 Basic Operation...............................................................23 Turning the Power On and Off.................................................... 23 Setting and Removing SD Memory Cards.................................. 23 Viewing the Operation Screen (Trend)........................................ 24 Displaying the Menu Screen....................................................... 24 Setting the Date and Time.......................................................... 25 Configuring the Inputs................................................................ 25 Starting Measurement and Recording........................................ 25 Switching between Operation Screens....................................... 25 Advanced Operation (Various settings and operation).26 Setting Measurement and Recording Conditions........................ 26 Setting Alarms........................................................................... 26 Using the Scaling Function (Measuring a flow meter).................. 27 Registering and Deleting Favorite Screens................................. 27 Reconfiguring the GX/GP (Module identification)..........28 Reconfiguring the GX/GP........................................................... 28 Initializing the GX/GP (Initializing all settings)............................................................ 28 Saving and Loading Setting Parameters........................29 Saving Setting Parameters........................................................ 29 Loading Setup Parameters........................................................ 29 Web Application..............................................................30 Starting the Web Application...................................................... 30 Closing the Web Application....................................................... 30 Application Software.......................................................31 PC System Requirements...........................................................31 Installation...................................................................................31 Starting and Closing Universal Viewer........................................ 32 Starting and Closing Hardware Configurator............................... 32 Setup Menu Map..............................................................33 IM 04L51B01-02EN 1st Edition User Registration Thank you for purchasing YOKOGAWA products. We invite you to register your products in order to receive the most up to date product information. To register, visit the following URL. http://www.yokogawa.com/ns/reg/ PRS 108-02E Trademarks Introduction Thank you for purchasing the SMARTDAC+ GX/GP Series Paperless Recorder (hereafter referred to as the GX/GP). This manual explains the basic operation, installation, and wiring of the GX/GP. To ensure correct use, please read this manual and the following manuals thoroughly before beginning operation. Paper Manuals Manual Title Models GX10/GX20/GP10/GP20 Paperless Recorder First Step Guide Quick, Easy Steps Manual No. IM 04L51B01-02EN (This manual) IM 04L51B01-04Z1 Electronic Manuals You can download these manuals from the following web page: www.smartdacplus.com/manual/en/ Manual Title Models GX10/GX20/GP10/GP20 Paperless Recorder First Step Guide Models GX10/GX20/GP10/GP20 Paperless Recorder User’s Manual Models GX10/GX20/GP10/GP20 Communication Command User’s Manual SMARTDAC+ STANDARD Universal Viewer User’s Manual SMARTDAC+ STANDARD Hardware Configurator User’s Manual Notes Manual No. IM 04L51B01-02EN IM 04L51B01-01EN IM 04L51B01-17EN IM 04L61B01-01EN IM 04L61B01-02EN • The contents of this manual are subject to change without prior notice as a result of continuing improvements to the instrument’s performance and functions. • Every effort has been made in the preparation of this manual to ensure the accuracy of its contents. However, should you have any questions or find any errors, please contact your nearest Yokogawa dealer. • Copying or reproducing all or any part of the contents of this manual without the permission of Yokogawa is strictly prohibited. Revisions December 2012 1st Edition • vigilantplant and SMARTDAC+ are registered trademarks of Yokogawa Electric Corporation. • Microsoft and Windows are registered trademarks or trademarks of Microsoft Corporation in the United States and/or other countries. • Pentium is a trademark of Intel Corporation in the United States and/or other countries. • Adobe and Acrobat are registered trademarks or trademarks of Adobe Systems Incorporated. • Kerberos is a trademark of Massachusetts Institute of Technology (MIT). • The SD logo is a registered trademark of the SD association. • Company and product names that appear in this manual are registered trademarks or trademarks of their respective holders. • The company and product names used in this manual are not accompanied by the registered trademark or trademark symbols (® and ™). Safety Precautions • This instrument conforms to IEC safety class I (provided with terminal for protective grounding), Installation Category II, and EN61326-1 (EMC standard), Measurement Category II (CAT II).* * Measurement Category II (CAT II)* is for the analog input modules. Measurement category II (CAT II) applies to measuring circuits connected to low voltage installation, and electrical instruments supplied with power from fixed equipment such as electric switchboards. • This instrument is an EN61326-1 (EMC standard) class A instrument (for use in commercial, industrial, or business environments). • The general safety precautions described here must be observed during all phases of operation. If the SMARTDAC+ is used in a manner not described in this manual, the SMARTDAC+ safety features may be impaired. Yokogawa Electric Corporation assumes no liability for the customer’s failure to comply with these requirements. • The SMARTDAC+ is designed for indoor use. ■ About This Manual • Please pass this manual to the end user. We also ask you to store this manual in a safe place. • This guide is intended for the following personnel: Engineers responsible for installation, wiring, and maintenance of the equipment. Personnel responsible for normal daily operation of the equipment. • Read this manual thoroughly and have a clear understanding of the product before operation. • This manual explains the functions of the product. It does not guarantee that the product will suit a particular purpose of the user. IM 04L51B01-02EN 1 ■ Precautions Related to the Protection, Safety, and Alteration of the Product The following safety symbols are used on the product and in this manual. “Handle with care.” To avoid injury and damage to the instrument, the operator must refer to the explanation in the manual. Protective ground terminal Functional ground terminal (do not use this terminal as a protective ground terminal.) Alternating current Direct current ON (power) OFF (power) • For the protection and safe use of the product and the system in which this product is incorporated, be sure to follow the instructions and precautions on safety that are stated in this manual whenever you handle the product. Take special note that if you handle the product in a manner that violates these instructions, the protection functionality of the product may be damaged or impaired. In such cases, Yokogawa does not guarantee the quality, performance, function, and safety of product. • When installing protection and/or safety circuits such as lightning protection devices and equipment for the product and control system or designing or installing separate protection and/or safety circuits for fool-proof design and fail-safe design of the processes and lines that use the product and the control system, the user should implement these using additional devices and equipment. • If you are replacing parts or consumable items of the product, make sure to use parts specified by Yokogawa. • This product is not designed or manufactured to be used in critical applications that directly affect or threaten human lives. Such applications include nuclear power equipment, devices using radioactivity, railway facilities, aviation equipment, air navigation facilities, aviation facilities, and medical equipment. If so used, it is the user’s responsibility to include in the system additional equipment and devices that ensure personnel safety. • Do not modify this product. • Use the Correct Power Supply Ensure that the source voltage matches the voltage of the power supply before turning ON the power. In the case of a portable type, ensure that it is within the maximum rated voltage range of the provided power cord before connecting the power cord. 2 ● Use the Correct Power Cord and Plug (Portable Type) To prevent electric shock or fire, be sure to use the power cord supplied by Yokogawa. The main power plug must be plugged into an outlet with a protective earth terminal. Do not disable this protection by using an extension cord without protective earth grounding. The power cord is designed for use with this instrument. Do not use the power cord with other instruments. ● Connect the Protective Grounding Terminal Make sure to connect the protective grounding to prevent electric shock before turning ON the power. The power cord that comes with the portable type is a three prong type power cord. Connect the power cord to a properly grounded three-prong outlet. ● Do Not Impair the Protective Grounding Never cut off the internal or external protective grounding wire or disconnect the wiring of the protective grounding terminal. Doing so invalidates the protective functions of the instrument and poses a potential shock hazard. ● Do Not Operate with Defective Protective Grounding Do not operate the instrument if the protective grounding might be defective. Also, make sure to check them before operation. ● Do Not Operate in an Explosive Atmosphere Do not operate the instrument in the presence of flammable gas or vapors. Operation in such an environment constitutes a safety hazard. Prolonged use in a highly dense corrosive gas (H2S, SOx, etc.) will cause a malfunction. ● Do Not Remove Covers The cover should be removed by Yokogawa’s qualified personnel only. Opening the cover is dangerous, because some areas inside the instrument have high voltages. ● Ground the Instrument before Making External Connections Connect the protective grounding before connecting to the item under measurement or control unit. ● Damage to the Protection Operating the instrument in a manner not described in this manual may damage the instrument’s protection. ● Wiring To prevent shock, attach the included terminal cover after wiring. Make sure to use appropriate wires and crimp-on lugs. IM 04L51B01-02EN This instrument is a Class A product. Operation of this instrument in a residential area may cause radio interference, in which case the user is required to take appropriate measures to correct the interference. ■ Exemption from Responsibility • Yokogawa makes no warranties regarding the product except those stated in the WARRANTY that is provided separately. • Yokogawa assumes no liability to any party for any loss or damage, direct or indirect, caused by the user or any unpredictable defect of the product. ■ Software Handling Precautions • Yokogawa makes no warranties, either expressed or implied, with respect to the software’s merchantability or suitability for any particular purpose, except as specified in the terms of the separately provided warranty. • All reverse-engineering operations, such as reverse compilation or the reverse assembly of the product are strictly prohibited. • No part of the product’s software may be transferred, converted, or sublet for use by any third party, without prior written consent from Yokogawa. About the Usage of Open Source Software 关于开放源代码软件的使用 Expat The report template function of the following products uses Expat source code for report creation. In accordance with the Expat license agreement, the copyright notice, redistribution conditions, and license are listed below. 以下产品的报表模版功能中的创建报表部分使用Expat 的源代码。 根据Expat 的授权,用原文(英文)记述了 版权、发布条件及授权。 GX10, GX20, GP10, GP20 Paperless Recorder Copyright (c) 1998, 1999, 2000 Thai Open Source Software Center Ltd Permission is hereby granted, free of charge, to any person obtaining a copy of this software and associated documentation files (the “Software”), to deal in the Software without restriction, including without limitation the rights to use, copy, modify, merge, publish, distribute, sublicense, and/or sell copies of the Software, and to permit persons to whom the Software is furnished to do so, subject to the following conditions: The above copyright notice and this permission notice shall be included in all copies or substantial portions of the Software. IM 04L51B01-02EN THE SOFTWARE IS PROVIDED “AS IS”, WITHOUT WARRANTY OF ANY KIND, EXPRESS OR IMPLIED, INCLUDING BUT NOT LIMITED TO THE WARRANTIES OF MERCHANTABILITY, FITNESS FOR A PARTICULAR PURPOSE AND NONINFRINGEMENT. IN NO EVENT SHALL THE AUTHORS OR COPYRIGHT HOLDERS BE LIABLE FOR ANY CLAIM, DAMAGES OR OTHER LIABILITY, WHETHER IN AN ACTION OF CONTRACT, TORT OR OTHERWISE, ARISING FROM, OUT OF OR IN CONNECTION WITH THE SOFTWARE OR THE USE OR OTHER DEALINGS IN THE SOFTWARE. Heimdal The password-management function of the following products uses Heimdal source code for AES authentication key generation. In accordance with the Heimdal license agreement, the copyright notice, redistribution conditions, and license are listed below. 以下产品的密码管理功能中的AES认证键生成部分使用 Heimdal的源代码。 根据Heimdal的授权,用原文(英文) 记述了版权、发布条件及授权。 SMARTDAC+ STANDARD Universal Viewer Copyright (c) 2006 Kungliga Tekniska Högskolan (Royal Institute of Technology, Stockholm, Sweden). All rights reserved. Redistribution and use in source and binary forms, with or without modification, are permitted provided that the following conditions are met: 1. Redistributions of source code must retain the above copyright notice, this list of conditions and the following disclaimer. 2. Redistributions in binary form must reproduce the above copyright notice, this list of conditions and the following disclaimer in the documentation and/or other materials provided with the distribution. 3. Neither the name of the Institute nor the names of its contributors may be used to endorse or promote products derived from this software without specific prior written permission. THIS SOFTWARE IS PROVIDED BY THE INSTITUTE AND CONTRIBUTORS “AS IS’’ AND ANY EXPRESS OR IMPLIED WARRANTIES, INCLUDING, BUT NOT LIMITED TO, THE IMPLIED WARRANTIES OF MERCHANTABILITY AND FITNESS FOR A PARTICULAR PURPOSE ARE DISCLAIMED. IN NO EVENT SHALL THE INSTITUTE OR CONTRIBUTORS BE LIABLE FOR ANY DIRECT, INDIRECT, INCIDENTAL, SPECIAL, EXEMPLARY, OR CONSEQUENTIAL DAMAGES (INCLUDING, BUT NOT LIMITED TO, PROCUREMENT OF SUBSTITUTE GOODS OR SERVICES; LOSS OF USE, DATA, OR PROFITS; OR BUSINESS INTERRUPTION) HOWEVER CAUSED AND ON ANY THEORY OF LIABILITY, WHETHER IN CONTRACT, STRICT LIABILITY, OR TORT (INCLUDING NEGLIGENCE OR OTHERWISE) ARISING IN ANY WAY OUT OF THE USE OF THIS SOFTWARE, EVEN IF ADVISED OF THE POSSIBILITY OF SUCH DAMAGE. 3 TCP/IP Software GX10, GX20, GP10, GP20 Paperless Recorder The TCP/IP software of GX/GP and the document concerning the TCP/IP software have been developed/ created by Yokogawa based on the BSD Networking Software, Release 1 that has been licensed from University of California. eFont The monitoring function of the following products uses eFont data for the character representation. In accordance with the eFont license agreement, the copyright notice, redistribution conditions, and license are listed below. GX10, GX20, GP10, GP20 Paperless Recorder (c) Copyright 2000-2001 /efont/ The Electronic Font Open Laboratory. All rights reserved. Redistribution and use in source and binary forms, with or without modification, are permitted provided that the following conditions are met: 1. Redistributions of source code must retain the above copyright notice, this list of conditions and the following disclaimer. 2. Redistributions in binary form must reproduce the above copyright notice, this list of conditions and the following disclaimer in the documentation and/or other materials provided with the distribution. 3. Neither the name of the team nor the names of its contributors may be used to endorse or promote products derived from this font without specific prior written permission. THIS FONT IS PROVIDED BY THE TEAM AND CONTRIBUTORS “AS IS” AND ANY EXPRESS OR IMPLIED WARRANTIES, INCLUDING, BUT NOT LIMITED TO, THE IMPLIED WARRANTIES OF MERCHANTABILITY AND FITNESS FOR A PARTICULAR PURPOSE ARE DISCLAIMED. IN NO EVENT SHALL THE TEAM OR CONTRIBUTORS BE LIABLE FOR ANY DIRECT, INDIRECT, INCIDENTAL, SPECIAL, EXEMPLARY, OR CONSEQUENTIAL DAMAGES (INCLUDING, BUT NOT LIMITED TO, PROCUREMENT OF SUBSTITUTE GOODS OR SERVICES; LOSS OF USE, DATA, OR PROFITS; OR BUSINESS INTERRUPTION) HOWEVER CAUSED AND ON ANY THEORY OF LIABILITY, WHETHER IN CONTRACT, STRICT LIABILITY, OR TORT (INCLUDING NEGLIGENCE OR OTHERWISE) ARISING IN ANY WAY OUT OF THE USE OF THIS FONT, EVEN IF ADVISED OF THE POSSIBILITY OF SUCH DAMAGE Handling Precautions of the GX/GP • Use care when cleaning this instrument, especially its plastic parts. Use a soft dry cloth. Do not use organic solvents, such as benzene or thinner, or other cleansers. They may cause discoloring and deformation. • Keep electrically charged objects away from the signal terminals. Doing so may damage the GX/GP. • Do not apply volatile chemicals to the display, panel keys, etc. Do not allow rubber and vinyl products to remain in contact with the GX/GP for long periods of time. Doing so may damage the GX/GP. • When not in use, make sure to turn off the power switch. 4 • If there are any symptoms of trouble such as strange odors or smoke coming from the GX/GP, immediately turn off the power switch and the power supply source. Then, contact your nearest Yokogawa dealer. SD Memory Card Handling Precautions • SD memory cards are delicate and should be handled with caution. • Yokogawa provides no warranty for damage to, or loss of data recorded on the SD memory card, regardless of the cause of such damage or loss. Please always make backup copies of your data. • Do not store or use the SD memory card in places with static electricity, near electrically charged objects, or where electrical noise is present. Doing so can result in electric shock or damage. • Do not disassemble or modify the SD memory card. Doing so can result in damage. • Do not physically shock, bend, or pinch the SD memory card. Doing so can lead to malfunction. • During reading/writing of data, do not turn OFF the power, apply vibration or shock, or pull out the card. Data can become corrupt or permanently lost. • Only use Yokogawa SD memory cards. Operation cannot be guaranteed with other brands of card. • When inserting the SD memory card into the instrument, make sure you orient the card correctly (face up or down) and that you insert it securely. If not inserted correctly, the card will not be recognized by the instrument. • Never touch the SD memory card with wet hands. Doing so can lead to electric shock or malfunction. • Never use the SD memory card if it is dusty or dirty. Doing so can lead to electric shock or malfunction. • The SD memory card comes formatted. SD cards must be formatted according to the standard established by the SD Association (https://www.sdcard. org/home). If you want format the SD memory card, use the instrument’s Format function. If using a PC to perform the formatting, use the SD card formatter software available from the above SD Association. • You can use SD/SDHC cards (up to 32 GB) on the GX/ GP. SD Memory Card Specifications and Characteristics Electrical specifications Operating voltage: 2.7 V to 3.6 V (memory operation) Supports SD 1, 4-bit mode, SPI mode * Compliant with SD PHYSICAL LAYER SPECIFICATION Ver. 3.00. External dimensions/ weight H: 32, W: 24, D: 2.1 (mm), weight: approx. 2 g * Compliant with Standard Size SD Card Mechanical Specification Ver. 1.00. Reliability and durability * Compliant with SD PHYSICAL LAYER SPECIFICATION Ver. 3.00 and Standard Size SD Card Mechanical Specification Ver. 1.00. Operating conditions –25 to 85°C, temp. 25°C, RH=95%, no condensation Storage conditions –40 to 85°C, temp. 40°C, RH=93%/500 h, no condensation Unit: mm 24 ± 0.1 Writable WP SD 32 ± 0.1 Write-protected IM 04L51B01-02EN Checking the Package Contents After receiving the product and opening the package, check the items described below. If the wrong items have been delivered, if items are missing, or if there is a problem with the appearance of the items, contact your nearest Yokogawa dealer. Check that the product that you received is what you ordered by referring to the model name and suffix code given on the name plate on the GX/GP. Models in Which I/O Modules Are Preinstalled Model Suffix Code GX10 -1E/[ ][ ] GX20 GP10 -1E1[ ]/[ ][ ] GP20 Options (analog Input)3 NO. (Instrument Number) When contacting the dealer from which you purchased the instrument, please give them the instrument number. MODEL and SUFFIX Codes Options (digital I/O)3 GX10/GX20 Model Suffix Code GX10 GX20 Type -1 Language Options E Optional Description Code Paperless recorder (Panel mount type, Small display) Paperless recorder (Panel mount type, Large display) Standard English, degF, DST (summer/winter time) /C2 RS-2321 /C3 RS-422/4851 /D5 VGA output2 /FL Fail output, 1 point /MT Mathematical function (with report function) /MC Communication channel function /P1 24 VDC/AC power supply4 /UH USB Interface (host 2 ports) /UC[ ]0 Analog (universal) input module preinstalled (clamp terminal)3 /US[ ]0 Analog (universal) input module preinstalled (M3 screw terminal)3 /CR[ ][ ] Digital output module, digital input module preinstalled4 1 2 3 4 5 6 7 Model GP10 GP20 Type -1 Language E Power supply Power cord Options IM 04L51B01-02EN 1 D F R Q H N Optional Description Code Paperless recorder (Portable type, Small display) Paperless recorder (Portable type, Large display) Standard English, degF, DST (summer/winter time) 100 VAC, 240 VAC Power cord UL/CSA standard Power cord VDE standard Power cord AS standard Power cord BS standard Power cord GB standard Power cord NBR standard /C2 RS-2321 /C3 RS-422/4851 /D5 VGA output2 /FL Fail output, 1 point /MT Mathematical function (with report function) /MC Communication channel function /P1 24 V DC/AC power supply /UH USB interface (host 2 ports) /UC[ ]0 Analog (universal) input module preinstalled (clamp terminal)3 /US[ ]0 Analog (universal) input module preinstalled (M3 screw terminal)3 /CR[ ][ ] Digital output module, digital input module preinstalled4 /UC10 /UC20 /UC30 /UC40 /UC50 /US10 /US20 /US30 /US40 /US50 /CR01 /CR10 /CR11 /CR20 /CR21 /CR40 /CR41 With analog input module, 10ch (Clamp terminal) With analog input module, 20ch (Clamp terminal)6 With analog input module, 30ch (Clamp terminal)7 With analog input module, 40ch (Clamp terminal)4 With analog input module, 50ch (Clamp terminal)4 With 10ch analog input module (M3 screw terminal) With 20ch analog input module (M3 screw terminal)6 With 30ch analog input module (M3 screw terminal)7 With 40ch analog input module (M3 screw terminal)4 With 50ch analog input module (M3 screw terminal)4 With digital I/O module (output: 0, input: 16)7 With digital I/O module (output: 6, input: 0)7 With digital I/O module (output: 6, input: 16)6, 7 With digital I/O module (output: 12, input: 0)5 With digital I/O module (output: 12, input: 16)5 With digital I/O module (output: 24, input: 0)5 With digital I/O module (output: 24, input: 16)5 I/O Modules GX90XA Model GX90XA Channels Suffix Code -10 Type Terminal type Suffix Code Paperless recorder (portable type) /C2 and /C3 cannot be specified together. /D5 can be specified only for the GX20/GP20. Only one option can be specified. /UC40, /UC50, /US40, and /US50 cannot be specified for the GX10/GP10. /CR20, /CR21, /CR40, and /CR41 cannot be specified for the GX10/GP10. If /UC20 or /US20 is specified for the GX10/GP10, /CR11 cannot be specified. If /UC30 or /US30 is specified for the GX10/GP10, /CR01, /CR10, and /CR11 cannot be specified. - GP10/GP20 Optional Description Code Paperless recorder (panel mount type) Area Description Analog Input Module for GX/GP series 10 channels Universal, Scanner type (3-wire RTD -U2 b-terminal common) N Always N -3 Screw terminal (M3) -C Clamp terminal N General GX90XD Model GX90XD Channels Suffix Code -16 Type Terminal type Area Description Digital Input Module for GX/GP series 16 channels Open collector/Non-voltage, contact -11 (shared common), Rated 5 VDC N Always N -3 Screw terminal (M3) -C Clamp terminal N General GX90YD Model GX90YD Channels -06 Type Terminal type Area Suffix Code Description Digital Output Module for GX/GP series 6 channels -11 Relay, SPDT(NO-C-NC) N Always N -3 Screw terminal (M3) N General 5 Standard Accessories The instrument is shipped with the following accessories. Make sure that all accessories are present and undamaged. 1 6 2 3 4 5 7 8 No. Name 1 Mounting bracket 2 SD memory card 3 Dummy cover 4 Tag plate 5 Sheet 6 7 Stylus Power cord 8 Manual Part Number/Model B8740DY Qty. 2 Notes GX10/GX20 only 773001 1 1GB B8740CZ B8740FE B8741FE B8740FF B8741FF B8740BZ A1074WD 1 1 1 1 1 1 A1009WD 1 A1024WD A1054WD A1064WD A1088WD 1 1 1 1 IM 04L51B01-02EN IM 04L51B01-04Z1 1 1 For empty slots GX20/GP20 GX10/GP10 GX20/GP20 GX10/GP10 D: Power cord UL, CSA st’d F: Power cord VDE st’d R: Power cord AS st’d J: Power cord BS st’d H: Power cord GB st’d N: Power cord NBR st'd First Step Guide Quick, Easy Steps Optional Accessories (Sold separately) Name Part Number/ Model Mounting bracket B8740DY SD memory card 773001 Stylus B8740BZ Shunt resistor X010-250-3 (for M3 screw terminal) X010-100-3 X010-010-3 Shunt resistor 438920 (for clamp terminal) 438921 438922 Minimum. Q’ty 2 1 1 1 1 1 1 1 1 Notes GX10/GX20 only 1GB 250 Ω ± 0.1% 100 Ω ± 0.1% 10 Ω ± 0.1% 250 Ω ± 0.1% 100 Ω ± 0.1% 10 Ω ± 0.1% GX/GP Style Number, Release Number, and Firmware Version Number Style number: The GX/GP hardware ID number. This number is written on the name plate. Release number: The GX/GP firmware ID number. This number is written on the name plate. This number matches with the integer part of the firmware version number. Example: If the firmware version number is 1.01, the release number is 1. Firmware version number: This number appears on the system information screen of the GX/GP. To view the number, see section 2.3, “Displaying Various Types of Information” in the User’s Manual, IM 04L51B01-01EN. Conventions Used in This Manual • This manual covers information regarding GX/GPs whose display language is English. • For details on the language setting, see the Paperless Recorder User’s Manual, IM04L51B01-01EN. Unit K: Denotes 1024. Example: 768K (file size) k: Denotes 1000. The notes and cautions in this manual are indicated using the following symbols. Improper handling or use can lead to injury to the user or damage to the instrument. This symbol appears on the instrument to indicate that the user must refer to the user’s manual for special instructions. The same symbol appears in the corresponding place in the user’s manual to identify those instructions. In the manual, the symbol is used in conjunction with the word “WARNING” or “CAUTION.” WARNING Calls attention to actions or conditions that could cause serious or fatal injury to the user, and precautions that can be taken to prevent such occurrences. CAUTION Calls attentions to actions or conditions that could cause light injury to the user or damage to the instrument or user’s data, and precautions that can be taken to prevent such occurrences. Note Calls attention to information that is important for proper operation of the instrument. 6 IM 04L51B01-02EN Protection of Environment Control of Pollution Caused by the Product This is an explanation for the product based on “Control of pollution caused by Electronic Information Products” in the People’s Republic of China. 产品中有毒有害物质或元素的名称及含量 部件名称 印刷电路 内部接线材料 外壳/ 机箱 I/O 模块外壳 电源 正面边框 标准附件/ 可选附件 有毒有害物质或元素 六价铬 (Cr6+) N/A N/A N/A N/A N/A N/A N/A N/A N/A N/A N/A N/A N/A N/A 多溴联苯 (PBB) 多溴二苯醚 (PBDB) N/A N/A N/A N/A N/A N/A N/A N/A N/A N/A N/A 铅(Pb) 汞(Hg) 镉(Cd) 塑料 金属 塑料 N/A N/A N/A N/A N/A N/A N/A N/A N/A N/A N/A N/A N/A N/A 显示器 (LCD) N/A N/A N/A 安装支架 电源线(GP10/GP20) N/A N/A N/A N/A SD 存储卡 N/A 分流电阻 N/A :表示该部件的所有均质材料中的有毒有害物质或元素的含量均低于SJ/TXXX-2006 标准所规定的限量要求。 N/A:表示该部件中至少有一种均质材料中的有毒有害物质或元素的含量超过SJ/TXXX-2006 标准所规定的限量要求。 该标识适用于2006 年2 月28 日颁布的《电子信息产品污染控制管理办法》以及S J / T11364–2006 《电子信息产品污染控制标识要求》中所述,在中华人民共和国(除台湾、香港和澳门外)销售的电子信 息产品的环保使用期限。 只要您遵守该产品相关的安全及使用注意事项,在自制造日起算的年限内,则不会因产品中有害物质泄漏 或突发变异,而造成对环境的污染或对人体及财产产生恶劣影响 Waste Electrical and Electronic Equipment (WEEE), Directive 2002/96/EC This is an explanation of how to dispose of this product based on Waste Electrical and Electronic Equipment (WEEE), Directive 2002/96/EC. This directive is only valid in the EU. • Marking This product complies with the WEEE Directive (2002/96/EC) marking requirement. This marking indicates that you must not discard this electrical/electronic product in domestic household waste. • Product Category With reference to the equipment types in the WEEE directive Annex 1, this product is classified as a “Monitoring and Control instrumentation” product. Do not dispose in domestic household waste. When disposing products in the EU, contact your local Yokogawa Europe B.V. office. How to Dispose the Batteries This is an explanation about the new EU Battery Directive (DIRECTIVE 2006/66/EC). This directive is only valid in the EU. Batteries are included in this product. Batteries incorporated into this product cannot be removed by yourself. Dispose them together with this product. When you dispose this product in the EU, contact your local Yokogawa Europe B.V.office. Do not dispose them as domestic household waste. Battery type: Lithium battery Notice: The symbol (see above) means they shall be sorted out and collected as ordained in ANNEX II in DIRECTIVE 2006/66/EC. IM 04L51B01-02EN 7 Functional Overview Data Storage Overview The GX/GP is a paperless recorder that can display measured data in real time on its touch screen and save the data in an SD memory card. GX/GP configuration and real-time monitoring on a Web browser Displaying data on Universal Viewer There are two ways to store data. One way is to record measured data at all times (display data and event data). The other way is to record only when events, such as alarms, occur (event data). Measured data is saved to the internal memory at the specified interval. Data in the internal memory can be saved to the SD memory card automatically or manually. Measured data can be transferred automatically to an FTP server over an Ethernet connection. Auto data transfer to FTP server GX/GP Ethernet GX/GP A variety of signal inputs Ethernet FTP server Internal memory Redundant measured data on internal memory and external media SD memory card A Variety of Source Signals The GX/GP can connect to DC voltage, TC, RTD, and ON/OFF inputs and measure temperature, flow rate, and other parameters. The GX/GP acquires data by sampling input signals at the set scan interval. The shortest scan interval is 100 ms. Up to four alarm conditions can be specified on each measurement channel. Expandable Module Construction The I/O section is modular, so you can configure your system according to the input types and number of measurement points. Modules Model Name Channels GX90XA Analog input module 10 GX90XD Digital input module 16 GX90YD Digital output module 6 • Up to 10 modules can be installed in the GX20/GP20. • Up to 3 modules can be installed in the GX10/GP10. • Different modules can coexist. SD Memory card Signal input A Variety of Display Functions Measured data can be displayed in groups as trend waveforms, values, and bar graphs. There is also an overview display that you can monitor all channels on a single screen. Trend Overview Digital Bar graph Multi panel Touch Screen The GX/GP touch screen enables intuitive operation. You can tap the icons of setup and operation items as well as scroll and zoom in on and out of waveforms by directly touching the screen. In addition, when you are working on-site, you can operate the GX/GP with your gloves on. Detachable module terminal block Maintenance is easy! 8 IM 04L51B01-02EN Functional Overview Touch Operations Freehand Messages You can use the touch pen or your finger to write text and draw marks freely in the waveform area. The messages that you write can easily be displayed from information displays such as the message summary and memory summary. Tap Touch the screen with a pen or finger. Versatile Network Functions and Software Drag Drag Touch the screen with a pen or finger and move. The Ethernet interface enables you to monitor the GX/ GP from a Web browser. E-mails can be sent through this interface when alarms and other events occur. In addition, you can use the Modbus protocol to read data from other devices on the network and display it. As for the software, Universal Viewer can be used to view measured data and convert the data into other data formats. Flick Draga pen or finger across Wipe the screen. Internet Explorer 6/8 Seamless remote monitoring on a Web browser Ethernet Other Functions Pinch apart/together Touch the screen with two fingers and move them apart or together. IM 04L51B01-02EN Math function (/MT option) Expressions can be assigned to math channels to perform various computations. FAIL output This function transmits alarms when (/FL option) the GX/GP fails. Security function You can allow only registered users to use the GX/GP. In addition, certain operations can be prohibited. Remote control This function executes specified operations by combining input modules and the event action function. 9 Functional Overview System Configuration You can configure a GX/GP system as shown below. Web site • Download PC software • Download user’s manuals PC Ethernet PC Temperature Controller Recorder Network printer Serial communication* GX20 RS-232, RS-422/485 Signal input SD memory card RTD TC/DCV DI USB memory USB port* Remote input GX10 Mouse keyboard Alarm output GP20 Bar code reader FAIL/status output* Monitor* GP10 * Option (GX20/GP20 only) 10 IM 04L51B01-02EN Component Names GX20/GX10 GX20 front panel GX10 front panel LCD Shows the trend display and other displays and the setup screen START/STOP key Starts and stops recording MENU key Press this once to show a menu for accessing various screens. GX10 rear panel Stylus pen (touch pen) USB port (/UH option) USB2.0 compliant. Connect a USB memory device, mouse, keyboard, etc. Power switch SD memory card slot SD memory card (up to 32 GB) Format: FAT32 or FAT16 A 1 GB card is included. Front door MENU key Front door lock mechanism GX20 rear panel Use an off-the-shelf door lock key. I/O module slot GX10, GP10: 3 slots (0 to 2) GX20, GP20: 10 slots (0 to 9) I/O module Connect I/O signals. Power inlet (GP10/GP20) Serial port (/C2 option) RS-232 terminal Power supply terminal and protective ground terminal (GX10/GX20) Serial port (/C3 option) RS-422/485 terminal USB port (/UH option) USB 2.0 compliant. Connect a USB memory device, mouse, keyboard, etc. Ethernet port 10BASE-T/100BASE-TX port FAIL output terminal (/FL option) IM 04L51B01-02EN VGA output connector (/D5 option) Connects to an external monitor 11 Component Names GP20/GP10 GX90XA/GX90XD/GX90YD GX20 front GX20 rear GX90XA Analog Input Module M3 screw terminal Clamp terminal Handle Power inlet Feet GX10 front Handle GX10 rear Terminal block release levers GX90XD Digital Input Module M3 screw terminal Clamp terminal Terminal block attachment screws GX90YD Digital Output Module M3 screw terminal Terminal block attachment screws 12 IM 04L51B01-02EN Component Names To prevent electric shock when you attach or remove terminal covers or terminal blocks, be sure that the power supply is turned off. For modules other than the GX90XA, you can use the attachment screw to remove and attach them. Terminal block attachment screws Removing and Attaching a Terminal Cover Removing the Terminal Cover Loosen the screw at the bottom section of the terminal cover, and remove the cover. Attaching the Terminal Cover 1. Insert the two hooks at the top section on the inside of the terminal cover into A, and push the bottom section of the terminal cover. 2. Fasten the screw at the bottom section of the terminal cover to fix the cover in place. Recommended tightening torque: 0.6 N•m Recommended torque for tightening the terminal block attachment screws: 0.1 N•m A The shape of the cover varies depending on the module, but the procedure is the same. Removing and Attaching a Terminal Block Removing the GX90XA Terminal Block Push down on the lever at the bottom section of the module, and pull the terminal block out. Attaching the GX90XA Terminal Block Insert the terminal block into the module, and push the lever firmly against the module (at the position indicated by the arrow in the figure). Side view of module Terminal block release lever IM 04L51B01-02EN 13 When you are using the GX/GP for the first time, following the procedure below to quickly start measuring and recording. Operating Procedure Product user’s manuals can be downloaded or viewed at the following URL; URL: www.smartdacplus.com/manual/en/ Manuals for reference GX10/GP10: Up to 3 modules can be installed. GX20/GP20: Up to 10 modules can be installed. Install modules. First Step Guide (IM 04L51B01-02EN) “Installation and Wiring” Not required if preinstalled Modules (five types) Connect I/O signals and power. First Step Guide (IM 04L51B01-02EN) “Installation and Wiring” Power inlet on the GP10/GP20 First Step Guide (IM 04L51B01-02EN) “Basic Operations” Turn on the power. First Step Guide (IM 04L51B01-02EN) “Reconfiguring the GX/GP” Make the GX/GP recognize the modules (GX/GP reconfiguration). First Step Guide (IM 04L51B01-02EN) “Basic Operations” Set the date and time. First Step Guide (IM 04L51B01-02EN) “Basic Operations” Configure signal inputs. Paperless Recorder User’ s Manual (IM 04L51B01-01EN) Power switch Configure functions as necessary. MENU key IM 04L51B01-01EN First Step Guide (IM 04L51B01-02EN) “Basic Operations” 14 If preinstalled, modules are preconfigured. If you rearrange the modules, reconfigure. Start measuring/recording. IM 04L51B01-02EN Operating Procedure 1 Modules not installed 2 Insert until a click is heard and fasten with screws.* 3 Modules installed (10 modules) Dummy covers are attached to empty slots (with screws). * Recommended tightening torque: 0.6 N•m GX90XA Analog input module M3 screw terminal GX90XD Digital input module Clamp terminal M3 screw terminal Clamp terminal Set the date and time. GX90YD Digital output module M3 screw terminal To prevent electric shock when wiring, make sure that the power supply is turned off. Configure input and functions. Common menu tab Browse tab Start measuring/recording. Recording stopped Recording in progress Alternates or Lit in blue Running (No alarm) Lit in red Alarm activated Off: Power off To open, push the front door down and pull it toward you. IM 04L51B01-02EN 15 Installation and Wiring Installation Location Install the GX/GP indoors in an environment that meets the following conditions: • Instrumentation panel The GX10/GX20 excluding the portable type (GP10/ GP20) is designed to be installed in an instrumentation panel. • Well-ventilated location To prevent overheating, install the GX/GP in a wellventilated location. For the panel cut dimensions when arranging multiple GXs, see the next page. When other instruments are installed next to the GX, follow the panel cut dimensions to provide adequate space around the GX. In the case of the portable type, we recommend that you provide at least 50 mm of space from the left, right, and top panels. • Minimal mechanical vibrations Install the GX/GP in a location that has minimal mechanical vibrations. Installing the GX/GP in a location that is subject to large levels of mechanical vibration will not only put added stress on its components, it may also impede ordinary measurement. • Level Location Install the GX/GP in a level location so that it is not slanted to the left or the right (however, the GX/GP can be inclined up to 30 degrees backward for panel mounting). Note Installation Procedure Installation Procedure for the GX10/GX20 Use a steel panel that is 2 mm to 26 mm thick. 1 2 Insert the GX through the front of the panel. Mount the GX to the panel using the included mounting brackets as described below. • Use two mounting brackets to support the top and bottom or the left and right sides of the case (remove the stickers that are covering the holes before you attach the brackets). • The recommended tightening torque for the mounting screws is 0.7 to 0.9 N•m. • Follow the procedure below to mount the GX to the panel. • First, attach the two mounting brackets and temporarily tighten the mounting screws. • Next, fix the GX in place by tightening the mounting screws with the appropriate torque. When the GX is approximately perpendicular to the panel, press the mounting brackets so that they are in contact with the case, and fully tighten the mounting screws. • Using more than the appropriate torque to tighten the screws can deform the case or damage the brackets. • Be sure not to insert foreign objects or tools into the case through the mounting bracket holes. • When you attach the rubber packing, be sure that no portion of it gets wedged between the GX and the panel. If the rubber packing is not attached properly, you will not be able to achieve sufficient dust proofing or waterproofing. Condensation may form when moving the GX/GP from a low temperature or humidity environment to a high temperature or humidity environment, or when there is a sudden change in temperature. Temperature or humidity changes may also result in thermocouple measurement errors. In these kinds of circumstances, wait for at least an hour before using the GX/GP, to acclimate it to the surrounding environment. Do Not Install the Instrument in the Following Places • Outdoors • In direct sunlight or near heat sources Install the GX/GP in a place that is near room temperature (23°C) and that is not subject to large temperature fluctuations. Placing the GX/GP in direct sunlight or near heat sources can cause adverse effects on the internal circuitry. • Where an excessive amount of soot, steam, moisture, dust, or corrosive gases are present Soot, steam, moisture, dust, and corrosive gases will adversely affect the GX/GP. Avoid installing the GX/GP in such locations. • Near strong magnetic field sources Do not bring magnets or instruments that produce electromagnetic fields close to the GX/GP. Operating the GX/GP near strong magnetic fields can cause measurement errors. 16 • Where the display Is difficult to see The GX/GP uses an LCD screen, so it is difficult to view the display from an extreme angle. Install the GX/ GP so that the user can view the display directly from the front. Note To achieve sufficient dust proofing and waterproofing, mount the GX in the middle of the panel cut out. IM 04L51B01-02EN Installation and Wiring GX10 External Dimensions +0.4 136.5 0 (5.37) GX20 External Dimensions Unit: mm (approx. inch) Unless otherwise specified, tolerance is ±3% (however, tolerance is ±0.3 mm when below 10 mm). (Dimensions before attaching the mounting bracket) Max 224.4 (8.83) (*1) 32.3 (1.27) Panel cut dimensions 360 min. (14.17) 247.4 (9.74) (Dimensions after attaching the mounting bracket) *1: With modules *2: Without modules 2 to 26 151.5 (5.96) 144 (5.67) 9.4 (0.37) 157.7 (6.21) Panel thickness 103.3 (4.07) 26.6 (1.05) (Dimensions after attaching the mounting bracket) *1: With modules *2: Without modules Panel cut dimensions Single-unit mounting Side-by-side mounting (horizontally) +2 137 0 (5.39) 175 min. (6.89) +2 137 0 (5.39) +2 137 0 (5.39) +2 281 0 (11.06) 22.8 (0.90) 103.3 (4.07) 40.9 (1.61) 9.4 (0.37) 280.2 (11.03) (Allowable panel thickness) 288 (11.34) 295.2 (11.62) 148 (5.83) 28.2 (1.11) 7.5 (0.30) 295.2 (11.62) 288 (11.34) 144 (5.67) 219.2 max. (8.63) (*1) 168.8 (6.65) (*2) 152.6 (6.01) 2 to 26 173.1 (6.81) (*2) 151.5 (5.96) 144 (5.67) 40.9 (1.61) (Dimensions before attaching the mounting bracket) 136.5 +0.4 (5.37) 0 280.2 (11.03) Unit: mm (approx. inch) Unless otherwise specified, tolerance is ±3% (however, tolerance is ±0.3 mm when below 10 mm). 7.5 (0.30) External Dimensions and Panel Cut Dimensions L+20 361 min. (14.21) Side-by side mounting (vertically; max. 3 units) +2 281 0 (11.06) +2 137 0 (5.39) L+20 175 min. (6.89) IM 04L51B01-02EN Units 2 3 4 5 6 7 8 9 10 n +2 L0 282 (11.10) 426 (16.77) 570 (22.44) 714 (28.11) 858 (33.78) 1002 (39.45) 1146 (45.12) 1290 (50.79) 1434 (56.46) (144×n)-6 17 Installation and Wiring GP20 External Dimensions Installing and Removing I/O Modules 288 (11.34) Installing a Module 288 (11.34) MAX 247.2 (9.73) (*1) 196.8 (7.75) (*2) ( 8 ) (0.31) ( 8 ) (0.31) Unit: mm (approx. inch) Unless otherwise specified, tolerance is ±3% (however, tolerance is ±0.3 mm when below 10 mm). 1. As shown below, insert the module into the GX/GP slot. 2. Push the module in until you hear a click. Then, fasten the screw at the bottom section of the module.* Latch Module * Recommended torque for tightening the screws: 0.6 N•m 288 (11.34) 287 (11.30) Removing a Module 1. Loosen the screw at the bottom section of the module. 2. While pressing down on the latch at the top of the module, pull the module out. Channel Names Channel name 23 (0.91) 22 (0.87) A channel name consists of a unit number, slot number, and channel number. 0 (Fixed) *1: With modules *2: Without modules Unit number GP10 External Dimensions Slot number 143.6 (5.65) Channel number I/O modules Unit: mm (approx. inch) Unless otherwise specified, tolerance is ±3% (however, tolerance is ±0.3 mm when below 10 mm). 9 8 7 6 5 4 3 2 1 0 144.9 (5.70) 144 (5.67) (8 ) (0.31) (*1) Max 247.2 (9.73) 196.8 (7.75) (*2) 15 (0.59) Rear *1: With modules *2: Without modules 2 18 GX20/GP20 1 0 GX10/GP10 IM 04L51B01-02EN Installation and Wiring Wiring • To prevent electric shock while wiring, make sure that the power supply is turned off. • If a voltage of more than 30 VAC or 60 VDC is to be applied to the output terminals, use ring-tongue crimp-on lugs with insulation sleeves on all terminals to prevent the signal cables from slipping out when the screws become loose. Furthermore, use doubleinsulated cables (dielectric strength of 2300 VAC or more) for the signal cables on which a voltage of 30 VAC or 60 VDC or more is to be applied. For all other signal cables, use basic insulated cables (dielectric strength of 1390 VAC). To prevent electric shock, attach the terminal cover after wiring and make sure not to touch the terminals. • Applying a strong tension to the input and output signal cables connected to the GX/GP may damage the cables or the GX/GP terminals. To avoid applying tension directly to the terminals, fix all cables to the rear of the mounting panel. • To prevent fire, use signal cables with a temperature rating of 70°C or more. • Do not apply voltages that exceed the following values to the input terminals. Doing so may damage the GX/ GP. GX90XA • Maximum input voltage: ±60 VDC • Maximum common mode voltage: ±60 VDC (under measurement category II conditions) GX90XD • Maximum input voltage: +10 VDC • Maximum common mode voltage: ±50 VDC The GX/GP is an installation category II product. Precautions to Be Taken While Wiring Take the following precautions when wiring the input signal cables. • With a screw terminal, we recommend that you use a crimp-on lug with an insulation sleeve (M4 for power supply wiring, M3 for signal wiring). Crimp-on lug with an insulation sleeve Recommended signal wiring crimp-on lug N1.25-MS3 (JST Mfg. Co., Ltd.) • With a clamp terminal, we recommend the following wire. GX90XA Cross-sectional area Stripped wire length 0.05 mm2 to 1.5 mm2 (AWG30 to 16) 5 to 6 mm GX90XD Cross-sectional area Stripped wire length 0.2 mm2 to 1.5 mm2 (AWG24 to 16) 9 to 10 mm IM 04L51B01-02EN • Take measures to prevent noise from entering the measurement circuit. • Move the measurement circuit away from the power cable (power circuit) and ground circuit. • Ideally, the object being measured should not generate noise. However, if this is unavoidable, isolate the measurement circuit from the object. Also, ground the object being measured. • Shielded wires should be used to minimize the noise caused by electrostatic induction. Connect the shield to the ground terminal of the GX/GP as necessary (make sure you are not grounding at two points). • To minimize noise caused by electromagnetic induction, twist the measurement circuit wires at short, equal intervals. • Make sure to earth ground the protective ground terminal through minimum resistance (less than 100 Ω). • When using internal reference junction compensation on the thermocouple input, take measures to stabilize the temperature at the input terminal. • Always use the terminal cover. • Do not use thick wires which may cause large heat dissipation (we recommend a cross sectional area of 0.5 mm2 or less). • Make sure that the ambient temperature remains reasonably stable. Large temperature fluctuations can occur if a nearby fan turns on or off. • Connecting the input wires in parallel with other devices can cause signal degradation, affecting all connected devices. If you need to make a parallel connection, then • Turn the burnout detection function off. • Ground the instruments to the same point. • Do not turn ON or OFF another instrument during operation. This can have adverse effects on the other instruments. • RTDs cannot be wired in parallel. Wiring Procedure A terminal cover is screwed in place on the I/O terminal block. A label indicating the terminal arrangement is affixed to the cover. 1. Turn off the GX/GP, and remove the terminal cover. 2. Connect the signal cables to the terminals. Recommended Screw terminal 0.5 to 0.6 N•m torque for (M3) tightening the Clamp terminal GX90XA: 0.4 N•m GX90XD: 0.5 N•m screws 3. Attach the terminal cover and fasten it with screws. The appropriate tightening torque for the screws is 0.6 N•m. Note With a clamp terminal, if you use a single wire whose diameter is 0.3 mm or less, you may not be able to clamp the wire securely to the terminal. Take measures to securely clamp the wire such as by folding the conductor section that will be connected to the clamp terminal in half. 19 Installation and Wiring Wiring to a GX90XA Analog Input Module Wiring to a GX90XD Digital Input Module Terminal Diagram M3 screw terminal Clamp terminal CH1 301/201/101 CH10 310/210/110 201 202 CH2 203 CH3 CH6 CH5 CH8 CH7 213 214 CH10 215 DC voltage input, DI input b B Term. No. 201 CH2 202 203 204 CH4 205 206 207 CH6 208 209 210 CH8 211 212 213 CH10 214 215 Term. No. 21 22 23 24 25 26 27 28 29 30 DC current input (with an external shunt resistor) Symbol Term. No. b 201 b 202 b 203 b 204 b 205 b 206 b 207 b 208 b 209 b 210 Symbol Term. No. -/B 101 -/B 102 -/B 103 -/B 104 -/B 105 -/B 106 -/B 107 -/B 108 -/B 109 -/B 110 Symbol +/A -/B b +/A -/B b +/A -/B b +/A -/B b +/A -/B b Symbol DI9 DI10 DI11 DI12 DI13 DI14 DI15 DI16 COM - Term. No. 11 12 13 14 15 16 17 18 19 20 Symbol DI1 DI2 DI3 DI4 DI5 DI6 DI7 DI8 COM - Terminal Diagram M3 screw terminal +/A +/A +/A +/A +/A +/A +/A +/A +/A +/A 21 22 23 24 25 26 27 28 29 Symbol Wiring direction Wiring to a GX90YD Digital Input Module Clamp terminal CH No. DI8 COM DI16 DI8 COM COM Wiring direction + Terminal Arrangement M3 screw terminal Term. No. 301 302 303 304 305 306 307 308 309 310 DI1 DI9 Terminal Arrangement A+ B− b TC input − CH No. CH1 CH2 CH3 CH4 CH5 CH6 CH7 CH8 CH9 CH10 DI1 DI16 COM 113 CH9 114 115 + Clamp terminal DI9 103 A RTD input M3 screw terminal Wiring direction − + 101 CH1 102 CH4 Wiring direction − Terminal Diagram CH No. CH1 CH3 CH5 CH7 CH9 Term. No. 101 102 103 104 105 106 107 108 109 110 111 112 113 114 115 Symbol +/A -/B b +/A -/B b +/A -/B b +/A -/B b +/A -/B b DO4 DO5 DO6 N.C. COM N.O. N.C. COM N.O. N.C. COM N.O. N.C. COM N.O. N.C. COM N.O. N.C. COM N.O. DO1 DO2 DO3 11 12 13 14 15 16 17 18 19 Wiring direction Terminal Arrangement DO No. Term. No. 21 DO4 22 23 24 DO5 25 26 27 DO6 28 29 30 Symbol N.C. COM N.O. N.C. COM N.O. N.C. COM N.O. - DO No. Term. No. 11 DO1 12 13 14 DO2 15 16 17 DO3 18 19 20 Symbol N.C. COM N.O. N.C. COM N.O. N.C. COM N.O. - The RTD b terminal is connected internally. 20 IM 04L51B01-02EN Installation and Wiring Connecting to the FAIL Output/Status Output (/ FL option) FAIL output Status output NO C NC NO C NC During normal operation NO C NC When a failure occurs NO C NC When power is turned off NO C NC NO C NC NO C NC During normal When the specified When power is operation status occurs turned off Connecting to the Serial Communication Interface (/C2 option) 2 3 5 7 8 5 4 3 2 1 6 7 8 9 DSUB 9-pin male • Only connect the GX/GP to a monitor after turning both the GX/GP and the monitor off. • Do not short the VIDEO OUT connector or apply external voltage to it. Doing so may damage the GX/GP. RD (Received Data) SD (Send Data) SG (Signal Ground) RS (Request to Send) CS (Clear to Send) Connecting to a Monitor 1. Turn off the GX/GP and the monitor. 2. Connect the GX/GP and the monitor using an RGB cable. 3. Turn on the GX/GP and the monitor. The GX/GP screen appears on the monitor. Note Pins 1, 4, 6, and 9 are not used. Connecting to the RS-422/485 Connector (/C3 option) Four-wire system Two-wire system FG SG SDB+ SDA– RDB+ RDA– • When the GX/GP is turned on, the VIDEO OUT connector constantly transmits VGA signals. • The monitor display may flicker if you place the GX/ GP or some other device close to it. • Depending on the type of monitor, parts of the GX/GP display may be cut off. Connecting to the USB Port (/UH option) A USB2.0 compliant port (see “Component Names”) FG SG SDB+ SDA– RDB+ RDA– Connecting to the Ethernet Port FG SDB+ RDB+ SG SDA− RDA− Electric potential of the shield Shield FG (Frame Ground) SG (Signal Ground) SDB+ (Send Data B+) SDA− (Send Data A−) RDB+ (Received Data B+) RDA− (Received Data A−) FG SDB+ SG SDA− Electric potential of the shield Shield Case ground of the GX/GP Signal ground Send data B (+) Send data A (–) Receive data B (+) Receive data A (–) Connecting to the VGA Connector (/D5 option) 5 1 10 6 15 Pin No. 1 2 3 4 5 6 7 8 9 10 11 12 13 14 15 11 Signal Name Red Green Blue ― ― GND GND GND ― GND ― ― Horizontal sync signal Vertical sync signal IM 04L51B01-02EN Checking the Connection and Communication Status You can use the indicators that are located above the Ethernet port to check the connection status of the Ethernet interface. Indicators Yellow green Orange Indicator Connection Status of the Ethernet Interface Lit (yellow-green) The Ethernet interface is electrically connected. Off (yellow-green) The Ethernet interface is not electrically connected. Blinking (yellow-green) Receiving data Lit (orange) Connected at 100 Mbps Off (orange) Connected at 10 Mbps Specifications 0.7 Vp-p 0.7 Vp-p 0.7 Vp-p Approx. 39.1 kHz, TTL negative logic Approx. 60 Hz, TTL negative logic 21 Installation and Wiring Wiring the Power Supply Use a power supply that meets the following conditions: Item Rated supply voltage Allowable power supply voltage range Rated power supply frequency Permitted power supply frequency range Maximum power consumption 100 VAC (/P1: 24 VDC) Maximum power consumption 240 VAC (/P1: 24 VAC) Note Condition (Not /P1) 100 to 240 VAC 90 to 132 VAC, 180 to 264 VAC 50/60 Hz Condition (/P1) 24 VDC/AC 21.6 V to 26.4 VDC/AC 50/60 Hz (for AC) 50/60 Hz ± 2% 50/60 Hz ± 2% (for AC) GX10/GP10: 48 VA GX10/GP10: 24 VA GX20/GP20: 90 VA GX20/GP20: 48 VA GX10/GP10: 60 VA GX10/GP10: 42 VA GX20/GP20: 110 VA GX20/GP20: 76 VA Do not use a supply voltage of 132 to 180 VAC, as this may have adverse effects on the measurement accuracy. Precautions to Be Taken When Wiring the Power Supply (GX10/GX20) Make sure to follow the warnings below when wiring the power supply. Failure to do so may cause electric shock or damage to the instrument. • To prevent electric shock, ensure that the power supply is turned off. • To prevent fire, use 600 V PVC insulated wires (AWG20 to AWG16; JISC3307) or wires or cables with equivalent or better performance. • Make sure to earth ground the protective earth terminal through a grounding resistance of 100 Ω or less before you turn on the power. • Use crimp-on lugs (designed for 4 mm screws) with insulation sleeves to connect both the power cord and the protective ground. • To prevent electric shock, be sure to close the transparent cover for the power supply wires. • Provide a power switch (double-pole type) on the power supply line to separate the GX/GP from the main power supply. Use labels to indicate that this switch is for cutting off the power supply to the GX/GP and to indicate ON and OFF. Switch specifications Steady-state 1 A or higher (Not /P1), current rating 3 A or higher (/P1) Inrush 60 A or higher (Not /P1), current rating 70 A or higher (/P1) Must comply with IEC60947-1 and IEC60947-3. • Do not add a switch or fuse to the ground line. 22 Wiring Procedure (GX10/GX20) 1. Turn off the GX power supply, and then remove the transparent power supply terminal cover. 2. Connect the power cord and the protective ground cord to the power supply terminal. Use ring-tongue crimpon lugs (for M4 screws) with insulation sleeves. The appropriate tightening torque for the screws is 1.4 to 1.5 N•m. L N Protective ground 3. Attach the transparent power supply terminal cover, and fasten it with screws. Precautions to Be Taken When Connecting the Power Supply (GP10/GP20) Make sure to follow the warnings below when connecting the power supply. Failure to do so may cause electric shock or damage to the instrument. • Before connecting the power cord, ensure that the source voltage matches the rated supply voltage of the instrument and that it is within the maximum rated voltage range of the provided power cord. • Connect the power cord after checking that the power switch of the instrument is turned OFF. • To prevent electric shock and fire, be sure to use a power cord purchased from Yokogawa Electric Corporation. • Make sure to connect protective earth grounding to prevent electric shock. Insert the power cord into a grounded three-prong outlet. • Do not use an extension cord without protective earth ground. If you do, the instrument will not be grounded. Connection Procedure 1. Check that the GP’s power switch is off. 2. Connect the supplied power cord plug to the power inlet on the rear panel of the GP. 3. Ensure that the source voltage is within the maximum rated voltage range of the provided power cord. Then, connect the other end of the cord to the outlet. Use a grounded three-prong outlet. IM 04L51B01-02EN This section explains the details indicated as “Basic Operation” in the operating procedure on pages 14 and 15. Basic Operation Turning the Power On and Off Turning the Power Off Turning the Power On Check the following points before turning on the power switch. • The power cord or wires are connected properly to the GX/GP. • The GX/GP is connected to the correct power supply. If the input wiring is connected in parallel with another instrument, do not turn on or off the GX/GP or other instrument during operation. If you do, measured values may be affected. 1 2 Open the front door. Turn on the power switch. A self-test takes place for a few seconds, and then the operation screen appears. Check the following points before turning off the power switch. • The external storage medium is not being accessed (the yellow-green LED is not blinking). 1 2 3 Open the front door. Turn off the power switch. Close the front door. Setting and Removing SD Memory Cards Setting a SD Memory Card 1 2 Open the front door. Insert an SD memory card into the card slot. Removing the SD Memory Card 1 2 Tap the media eject icon. Power switch 3 Press MENU. Close the front cover. • If nothing appears on the display even when you turn on the power switch, turn off the power switch, and check the wiring and supply voltage. If, after checking these items, the GX/GP still fails to start when you turn on the power switch, it may be malfunctioning. Contact your nearest Yokogawa dealer for repairs. • If an error message appears on the screen, take measures according to the information in chapter 5, “Troubleshooting” in the GX/GP User’s Manual. • After you turn on the power switch, allow the GX/GP to warm up for at least 30 minutes before starting a measurement. IM 04L51B01-02EN 3 4 On the screen for selecting the type of media, tap SD. Remove the SD memory card. Operation complete 23 Basic Operation Viewing the Operation Screen (Trend) Status display section Shows the display name, date/time, data recording, alarm icons, etc. SD memory card icon Remaining memory space 50% or more Remaining memory space 50% or less Numeric display section Remaining memory space 10% or less External medium error Math icon (/MT option) Gray icon: Computation started Yellow icon: Computation data dropout occurred Status icon The condition assigned to instrument information output is occurring. Operation lock is enabled. E-mail transmission is enabled. Waveform display Alarm icon Displayed when any alarm is activated. Scale Data display section Shows measured data and function setup screens Lit in red Alarm activated. Blinking in red Status Display Section Blinking in gray Alarm indication set to hold. All alarms have been cleared after alarms have occurred, but some alarms have not been acknowledged. Date and time Recording status icon Recording in progress Recording stopped Data type DISP: Display data EVENT: Event data Alarm indication set to hold. Alarms are currently activated, and some alarms have not been acknowledged. Displaying the Menu Screen To change the display between various setup screens and operation screens, display the menu screen. 1 Press MENU. The menu screen appears. Recording progress Displays the progress using a green bar graph. The frame indicates the saving interval (display data) or data length (event data). MENU key Internal memory error Tabs Display name or group name Recording icon Icons When using the batch function When using the login function When using the login and batch functions 24 IM 04L51B01-02EN Basic Operation Setting the Date and Time Starting Measurement and Recording 1 Set the date using the calendar and the time. Path MENU key > Universal tab > Date/Time settings 1 2 Tap the Date tab. Set the month and day with the switch icons. Date tab Switches the year Switches the month Time tab 2 3 3 4 Press MENU. The menu screen appears. Tap the Time tab. Enter the time using the keyboard, and tap OK. The time is set. Tap the Recording icon. The record start screen appears. Tap Record. Recording starts. The recording status icon in the status display section changes to recording in progress. Operation complete You can also start recording with the START/ STOP key. You can stop recording in the same way that you start recording. Operation complete Configuring the Inputs For channel 1 (0001) of slot 0, set thermocouple type T, 0 to 200°C. Path MENU key > Browse tab > Setting > Setting menu > AI channel settings > Range Switching between Operation Screens 1 1 2 Press MENU. The menu screen appears. Digital Trend Bar graph Overview 3 4 5 6 7 1 2 3 4 5 6 7 Tap First-CH > 0001. Check that Last-CH is 0001. 2 3 Tap Type > TC. Tap Range > T. Tap Span Lower, and enter 0.0. Tap Span Upper, and enter 200.0. Tap the Browse tab. Tap the icon of the display that you want to change to. Operation complete Tap Save. Operation complete IM 04L51B01-02EN 25 This section explains how to change various settings. Before you change settings, stop recording and computation. Advanced Operation (Various settings and operation) Setting Measurement and Recording Conditions Setting the Trend Interval Path Configuring the type of data to record to display data, the scan interval to 2 s, and the trend interval to 1 min. MENU key > Browse tab > Setting > Setting menu > Display settings > Trend interval Setting the Type of Data to Record Path MENU key > Browse tab > Setting > Setting menu > Recording Settings > Recording mode > Basic settings 1 1 2 2 1 2 1 2 Tap Trend interval [/div] > 1 min. Tap Save. Operation complete Setting Alarms Tap File type > Display. Tap Save. You can set the file type to record only the data that suits your purpose. For example, you can record detailed data or record data only when alarms occur. For details, see the User’s Manual (IM 04L51B0101EN). On channel 1 of slot 0, set the high limit alarm at the alarm value of 150°C. Path MENU key > Browse tab > Setting > Setting menu > AI channel settings > Alarm 1 2 Setting the Scan Interval Path MENU key > Browse tab > Setting > Setting menu > Display settings > Scan interval 3 4 5 1 6 2 1 2 Tap Scan interval > 2s. 1 2 3 4 5 6 Tap First-CH > 0001. Check that Last-CH is 0001. Tap Level1 > On. Tap Type > H. Tap Value, and enter 150.0. Tap Save. Operation complete Tap Save. Operation complete 26 IM 04L51B01-02EN Advanced Operation (Various settings and operation) Using the Scaling Function (Measuring a flow meter) Registering and Deleting Favorite Screens On channel 1 of slot 1 (0101), measure the input signal ranging from 1 to 5 VDC as 0.0 to 100.0 m3/h. Path MENU key > Browse tab > Setting > Setting menu > AI channel settings > Range 1 2 You can register displays that you use frequently as favorite screens and display them with easy operation. You can register up to 20 displays. Registering a Favorite Screen 1 2 Show the display that you want to register as a favorite screen. Press MENU. The menu screen appears. Close button 3 4 5 6 Add a favorite screen 7 8 9 10 11 1 2 3 4 5 6 Favorite screen list 3 4 5 6 Tap First-CH > 0101. Scroll Tap Add favorite. A confirmation screen appears. Tap Favorite name, and enter the name. Tap OK. The display is registered. Tap the Close icon. The screen closes. Operation complete Check that Last-CH is 0101. Tap Type > GS. Deleting a Favorite Screen Tap Range > 1-5V. Tap Calculation > Linear scaling. Drag the screen up. Show the setting parameters off the screen at the bottom. 7 Tap Decimal place > 1. 8 Tap Scale Lower, and enter 0.0. 9 Tap Scale Upper, and enter 100.0. 10 Tap Unit, and enter m3/h. 11 Tap Save. 1 2 3 4 Press MENU. Tap Universal tab > Remove favorite. Select the screen to delete, and tap OK. Tap the Close icon. The screen closes. Operation complete Operation complete IM 04L51B01-02EN 27 This section explains what you need to do when you change the module configuration (by installing or removing modules). Reconfiguring the GX/GP (Module identification) Initializing the GX/GP (Initializing all settings) Reconfiguring the GX/GP When you reconfigure the GX/GP, the installed I/O modules are detected, and the settings are changed accordingly. Reconfiguration is necessary in the following situations. • If you specify modules separately • If you change the modules (change to different modules) • If you add or remove modules If you purchased a model with preinstalled modules (/U[] []0 or /CR[][] option), you can start using the GX/GP right away without any reconfiguration. However, if you change modules, add modules, or delete modules, you will need to reconfigure. 1 2 3 4 5 Press MENU. Initialize the GX/GP after reconfiguring the GX/GP when channels are not assigned to display groups. Channels are automatically assigned during initialization. For details, see the User’s Manual (IM 04L51B01-01EN). Note 1 2 3 4 Tap the Browse tab. Tap Initialize Calibration. Tap Reconfiguration. Tap Execute. The system information appears. • This procedure is not necessary if you purchased an I/O module preinstalled model and do not need to change the configuration. • If you initialize, setting parameters are reset to their factory defaults. We recommend that you back up setting parameters before initialization. Press MENU. Tap the Browse tab. Tap Initialize Calibration. Tap Initialize all > On. 4 5 XX-XX-XX-XX-XX-XX RX.XX.XX 6 6 7 XXXXXXXXX Tap Reconfigure. Operation complete 28 5 6 Tap OK. Note Tap Execute. A confirmation screen is displayed. Tap OK. The settings are initialized. Operation complete Do not carry out the following operations while the GX/ GP is reconfiguring. • Turn the power off and on • Insert or remove modules IM 04L51B01-02EN This section explains how to back up setting parameters. Before you change the module configuration or settings, we recommend that you back up the setting parameters. Saving and Loading Setting Parameters Saving Setting Parameters Save setting parameters to the SD memory card with the file name “SF1.” Path Loading Setup Parameters Load the setup parameter file “SF1.GNL” from the SD memory card. MENU key > Browse tab > Save load > Menu Save settings > Setting parameters Path MENU key > Browse tab > Save load > Menu Load settings > Setting parameters 1 2 1 2 3 4 1 2 3 4 Tap Media kind > SD. Tap File name, and enter SF1. Tap Execute. Tap Exit. Operation complete IM 04L51B01-02EN 3 4 1 2 3 4 Tap Media kind > SD. Tap File name > SF1.GNL. Tap Execute. Tap Exit. Operation complete 29 Web Application You can open the Web application simply by starting a Web browser (IE6 or IE8), and specifying the GX/GP IP address. You do not have to install any software. You can do the following on the Web application. • Operate the GX/GP • Monitor data • Changing setting parameters For details on configuring the environment settings to connect the GX/GP to an Ethernet network and how to use the software, see the User’s Manual (IM 04L51B01-01EN). Starting the Web Application 1 2 Start the Web browser. In the Address box, enter “http://” followed by the GX/GP IP address. If DNS is available, you can specify the host name in place of the IP address. Example: When the IP address is “192.168.1.1,” enter http://192.168.1.1 in the Address box. The Web application starts, and the screen appears. Operation complete Closing the Web Application When close the Web browser, the Web application also closes. 30 IM 04L51B01-02EN Application Software The following software applications are available for the GX/GP. • SMARTDAC+ STANDARD Universal Viewer • SMARTDAC+ STANDARD Hardware Configurator You can use SMARTDAC+ STANDARD Universal Viewer to display on screen and print the following types of data that is generated by recorders. • Display data files • Event data files • Report data files (including hourly, daily, monthly, batch, and daily-custom, and free reports) • Manual sampled data files You can attach also convert measured data to ASCII or Excel formats. You can use SMARTDAC+ STANDARD Hardware Configurator to create and edit setup data for the GX/GP recorder. You can download the latest software and labels from the following URL. URL: www.smartdacplus.com/software/en/ You can the labels on the front door of the GX/GP. Enter or print tag names on them for use. You can use Microsoft Office Excel 2003 or later to edit the labels. You can download the product user’s manuals from the following URL. URL: www.smartdacplus.com/manual/en/ PC System Requirements OS OS Windows XP Type Home Edition SP3 (excluding 64-bit editions) Professional SP3 (excluding 64-bit editions) Windows Vista Home Premium SP2 (excluding 64-bit editions) Business Edition SP2 (excluding 64-bit editions) Windows 7 Home Premium SP1 (32- or 64-bit edition) Professional SP1 (32- or 64-bit edition) Hard disk Free space of at least 100 MB (depending on the amount of data, you may need more memory). Display A video card that is recommended for the OS and a display that is supported by the OS, has a resolution of 1024×768 or higher, and that can show 65,536 colors (16bit, high color) or more. Other Operating Conditions To view the user’s manuals, you need to use Adobe Reader 7 or later by Adobe Systems (the latest version recommended). Installation To install Universal Viewer or Hardware Configurator, download the installer from the Yokogawa website. 1 2 Turn on the PC, and start Windows. Log onto Windows as an administrator. Double click the installer (**.exe). The installer starts. Follow the instructions on the screen to install the software. Note • Close all other software applications before installing this software. • To reinstall the software, uninstall the current software first. Hardware Configurator • The “Countries/regions except Japan” selection dialog box appears during installation. Select the country that you will use the software in. • The HTTP port for using the Web browser is set to 34443. If this port is already in use by another application, you will not be able to start Hardware Configurator even if you install it. In such a case, perform the corrective action on section 1.4 in SMARTDAC+ STANDARD Hardware Configurator User’s Manual (IM 04L61B01-02EN). CPU and main memory OS Windows XP Windows Vista Windows 7 CPU and main memory Intel Pentium 4, 3 GHz or faster x64 or x86 processor. At least 2 GB of memory. 32-bit edition: Intel Pentium 4, 3 GHz or faster x64 or x86 processor. At least 2 GB of memory. 64-bit edition: Intel Pentium 4, 3 GHz or faster x64 processor. At least 2 GB of memory. Web Browser Compatible Browser Version Windows Internet Explorer Internet Explorer 6 or Internet Java Runtime Environment Explorer 8 1.6 (Version 6) IM 04L51B01-02EN 31 Using the Application Software About the User’s Manuals The user’s manual is installed with the software. To view the manual, on the Help menu, click Instruction Manual. You can also access it from Start > All Programs. Use Adobe Reader 7.0 or later to view the manual. The software and manual are installed for the following languages. Universal Viewer Language Japanese English Chinese French German Russian Korean Software Japanese English Chinese French German Russian Korean Hardware Configurator Country Selected at Software Installation Japanese Display language selectable: Japanese/English Regions except Japan Japanese English Note From the Start menu, click All Programs SMARTDAC+ STANDARD - Viewer. Universal Viewer starts. On the File menu, click Exit. Or, click the × button. Specifying a File Name and Opening the Data File 2 From the Start menu, select All Programs - SMARTDAC+ STANDARD - Hardware Configurator. The first time Hardware Configurator starts after installation, the Windows Security Alert dialog box appears. Click Unblock. Hardware Configurator starts, and the following window appears. User’s manual Closing Universal Viewer 1 1 Japanese English Chinese English Starting Universal Viewer 1 Starting Hardware Configurator User’s manual Starting and Closing Universal Viewer 1 Starting and Closing Hardware Configurator On the File menu, click Open. Or, click Open on the toolbar. The Open dialog box appears. • Hardware Configurator will not start if Internet Explorer is not installed. • The default settings are the system configuration of the GX20. Closing Hardware Configurator Close Internet Explorer. 1 Click the Close button; or on the File menu, click Exit. Note If you change the setup data, the changes are stored and will appear the next time you start the software. Select the data file you want to open, and click Open. Or, double-click the file. The data appears in the window. 32 IM 04L51B01-02EN Setup Menu Map Depending on setting parameter values, some items may be hidden. For details, see the User’s Manual (IM 04L51B01-01EN). AI channel settings Range Alarm First-CH Last-CH Range Type Range Span Lower Span Upper Calculation Reference channel Scale Decimal place Scale Lower Scale Upper Unit Low-cut On/Off Low-cut value Low-cut output Moving average On/Off Count RJC Mode Temperature Burnout set Mode Bias Value Display settings Position Division Bar graph Base position Division Partial On/Off Expand Boundary Color scale band Band area Color Display position Lower Display position Upper Alarm point mark Indicate on Scale Mark kind Alarm 1 color Alarm 2 color Alarm 3 color Alarm 4 color Display characters of each value 0 1 First-CH Last-CH Level 1 On/Off Type Value Hysteresis Logging Output type Output No. Level 2 On/Off Level 3 On/Off Level 4 On/Off Alarm delay Hour Minute Second IM 04L51B01-02EN First-CH Last-CH Tag Characters No. Color Color Zone Lower Upper Scale Calibration correction First-CH Last-CH Mode Mode Number of set points 1 Linearizer input Linearizer output : 12 33 Setup Menu Map DI channel settings DO channel settings Range Alarm 34 Display settings First-CH Last-CH Level 1 On/Off Type Value Hysteresis Logging Output type Output No. Level 2 On/Off Level 3 On/Off Level 4 On/Off Alarm delay Hour Minute Second Display settings Range First-CH Last-CH Range Type Span Lower Span Upper Calculation Reference channel Scale Decimal place Scale Lower Scale Upper Unit First-CH Last-CH Tag Characters No. Color Color Zone Lower Upper Scale Position Bar graph Base position Alarm point mark Indicate on Scale Mark kind Alarm 1 color Alarm 2 color Alarm 3 color Alarm 4 color Display characters of each value 0 1 First-CH Last-CH Range Type Span Lower Span Upper Unit Action Energize/De-energize Action Hold Relay Action on ACK Relay deactivated interval First-CH Last-CH Tag Characters No. Color Color Zone Lower Upper Scale Position Bar graph Base position Display characters of each value 0 1 Math channel settings Calculation expression First-CH Last-CH Math range On/Off Calculation expression Decimal place Span Lower Span Upper Unit TLOG Timer type Timer No. Sum scale Reset Rolling average On/Off Interval Number of samples Continued on the next page IM 04L51B01-02EN Setup Menu Map Alarm Display settings Constant Math action settings IM 04L51B01-02EN Display settings First-CH Last-CH Level 1 On/Off Type Value Hysteresis Logging Output type Output No. Level 2 On/Off Level 3 On/Off Level 4 On/Off Alarm delay Hour Minute Second First-CH Last-CH Tag Characters No. Color Color Zone Lower Upper Scale Position Division Bar graph Base position Division Partial On/Off Expand Boundary Color scale band Band area Color Display position Lower Display position Upper Alarm point mark Indicate on Scale Mark kind Alarm 1 color Alarm 2 color Alarm 3 color Alarm 4 color Number of constant Constant K001 : Value on Error START/STOP key action Value on Overflow SUM, AVE MAX, MIN, P-P Trend interval Group settings Message settings Trend settings Screen display settings Trend interval [/div] Trend rate switching Second interval [/div] Group number Group settings On/Off Group name Channel set Scale image On/Off Trip line 1 On/Off Position Color Line width Trip line 2 On/Off Trip line 3 On/Off Trip line 4 On/Off Message number Message Message 1 : Direction Trend clear Trend line Grid Scale Digit Value indicator Digit of mark Partial On/Off Message Write group Power-fail message Change message Bar graph Direction LCD Brightness Backlight saver Mode Saver time Restore Monitor Display background Scroll time Jump default display Calendar display 1st weekday Changing each value from monitoring On/Off 35 Setup Menu Map Measurement settings Scan interval Scan interval Over-range Value on over-range Module settings Select module Recording settings Report settings Basic settings Module 0 - 9 Operation mode Operation mode A/D integrate A/D integrate Basic settings Recording channel settings Data save settings Batch settings Recording mode File type Display data, Trend waveform Saving interval Event data Recording interval Recording mode Data length Pre-trigger Trigger source operation Display data, Trend waveform Event data Manual sample Save directory Directory name File header Characters Data file name Structure Identified strings Media save Auto save Media FIFO File format Display / Event data Report channel settings Timer settings Timer Timer 1 Type Type Creation time Day Day of week Hour Minute Save interval File creation interval Data type Report 1 Report 2 Report 3 Report 4 Report 5 File type File type Report template output Excel file PDF file Printer Report channel number Report channel Channel type Channel no Sum scale Type Type Interval Day Hour Minute Interval Action on Math Start Reset Reference time Hour Minute Timer 2 Timer 3 Batch function On/Off Lot-No. digit Auto increment Batch text Batch text Timer 4 Match time timer Match time timer 1 Text field number Text field Title of field Characters Type Type Timer match condition Month Day Day of week Hour Minute Timer action Timer action Match time timer 2 Match time timer 3 Match time timer 4 36 IM 04L51B01-02EN Setup Menu Map Event action Display settings Event action number Event action On/Off Event Type Number Alarm level Operation mode Action Type Number Detail Group number Communication channel settings On/Off, Span Alarm IM 04L51B01-02EN First-CH Last-CH On/Off, Span On/Off Decimal place Span Lower Span Upper Unit At power on Value at power on Preset value Preset value Watchdog timer On/Off Timer Value at timer-expired First-CH Last-CH Tag Characters No. Color Color Zone Lower Upper Scale Position Division Bar graph Base position Division Partial On/Off Expand Boundary Color scale band Band area Color Display position Lower Display position Upper Alarm point mark Indicate on Scale Mark kind Alarm 1 color Alarm 2 color Alarm 3 color Alarm 4 color First-CH Last-CH Level 1 On/Off Type Value Hysteresis Logging Output type Output No. Level 2 On/Off Level 3 On/Off Level 4 On/Off Alarm delay Hour Minute Second 37 Setup Menu Map Communication (Ethernet) settings Basic settings Automatic IP settings Obtain IP address automatically IP Address IP Address Subnet mask Default gateway Automatically DNS settings Obtain DNS address automatically DNS settings Primary DNS server Secondary DNS server Domain suffix Primary domain suffix Secondary domain suffix Host settings Host name Domain name Host name registration Host name registration FTP client settings FTP client function On/Off Transfer file Display & Event data Report Manual sampled data Alarm summary Snap shot Transfer wait time Display & Event data Report FTP connection Primary FTP server name Port number User name Password Directory PASV mode FTP connection Secondary FTP server name Port number User name Password Directory PASV mode SMTP client settings SMTP client function On/Off Authentication Authentication SMTP server SMTP server name Port number User name Password POP3 server POP3 server name Port number User name Password E-mail settings Mail header Recipient 1 Recipient 2 Sender Subject E-mail contents Header Include source URL Alarm settings Alarm notification Channel set Attach instantaneous data Send alarm action Include tag/ch in Subject Report settings Report notification Scheduled settings Scheduled notification Attach instantaneous data Interval (Recipient 1) Ref. time hour (Recipient 1) Ref. time minute (Recipient 1) Interval (Recipient 2) Ref. time hour (Recipient 2) Ref. time minute (Recipient 2) System settings Media alarm notification Power failure notification System error notification SNTP client settings SNTP client function On/Off SNTP server SNTP server name Port number Query action Ref. time (Hour) Ref. time (Minute) Interval Timeout Time adjust on Start action Modbus client settings Basic settings Modbus client function On/Off Communication Interval Recovery action Wait time Connection Keep connection Connection timeout Modbus server settings Server number Modbus server settings Server name Port number Continued on the next page 38 IM 04L51B01-02EN Setup Menu Map Command settings Client command number Command settings Type Server Unit No. Data type Register Channel type First-CH Last-CH Server settings Sever function Keep alive function On/Off Timeout function On/Off Timeout (minute) FTP server Output Directory Format Modbus server Modbus delay response Allowed Modbus clients Modbus client connect limits function On/Off 1 On/Off IP Address : Server list IM 04L51B01-02EN FTP On/Off Port number HTTP On/Off Port number SNTP On/Off Port number MODBUS On/Off Port number GENE On/Off Port number Communication(Serial) settings Basic settings Receiver Function Address Data transfer Baud rate Parity bit Stop bit Data length Handshake Modbus master Basic setting Master function On/Off Communication Interval Communication timeout Gap between messages Recovery action Retransmission Wait time Command settings Master command number Command settings Type Slave Data type Register Channel type First-CH Last-CH 39 Setup Menu Map Instruments tag System settings Environment (Language) settings Alarm basic settings Time basic settings Internal switch settings Status relay Printer settings Sound, LED 40 Language Temperature Decimal Point Type Date format Date format Delimiter Month indicator Rate of change Decrease Increase Indicator Hold/Nonhold Time zone Hour Minute Gradually adjusting the time Time deviation limit Time adjustment beyond limit Daylight Saving Time Use/Not Start time Month Day order Day of the week Hour of the day End time Month Day order Day of the week Hour of the day First number Last number Internal switch Type And/Or Fail relay Memory/Media status Measurement error Communication error Record stop Alarm IP Address Paper size Page orientation Resolution (dpi) Number of copies Snapshot Setting file USB input device Instruments tag Instrument tag No. Setting file comment USB input device Security settings Basic settings User settings Authority of user Operation Lock Security function Touch operation Communication Logout Auto logout Operation without Login User number User settings User level Mode User name Initialize password Authority number Authority of user Record Math Data save Message Batch Alarm ACK Communication Touch operation Time set Setting operation External media Operation Lock function Password Limitations Record Math Data save Message Batch Alarm ACK Communication Touch operation Time set Setting operation External media Sound Touch Warning LED MENU key LED IM 04L51B01-02EN YOKOGAWA ELECTRIC CORPORATION Headquarters 2-9-32, Nakacho, Musashino-shi, Tokyo, 180-8750 JAPAN Branch Sales Offices Nagoya, Osaka, Hiroshima, Fukuoka, Sendai, Ichihara, Toyota, Kanazawa, and Kitakyusyu. YOKOGAWA CORPORATION OF AMERICA 2 Dart Road, Newnan, Georgia 30265-1094, U.S.A. Phone : 1-800-888-6400 Fax : 1-770-254-0928 YOKOGAWA EUROPE B. V. Euroweg 2, 3825 HD Amersfoort, THE NETHERLANDS Phone:31-88-4641000 Fax:31-88-4641111 Branch Sales Offices / Wien (Austria), Zaventem (Belgium), Ratingen (Germany), Madrid (Spain), Runcorn (United Kingdom), Milano (Italy), Velizy-Villacoublay (France), Budapest (Hungary), Stockholm (Sweden), Sola (Norway), Warszawa (Poland), Vila Nova de Gaia (Portugal), Bucharest (Romania), Dublin (Ireland) YOKOGAWA AMERICA DO SUL LTDA. Praca Acapulco, 31 - Santo Amaro. Sao Paulo/SP - BRAZIL Phone : 55-11-5681-2400 Fax : 55-11-5681-4434 YOKOGAWA ENGINEERING ASIA PTE. LTD. 5 Bedok South Road, 469270 SINGAPORE Phone : 65-6241-9933 Fax : 65-6241-2606 YOKOGAWA ELECTRIC KOREA CO., LTD. 14-1, Yangpyongdong-4Ga, Youngdeungpo-Gu, Seoul, 150-866 KOREA Phone : 82-2-2628-6000 Fax : 82-2-2628-6400 YOKOGAWA AUSTRALIA PTY. LTD. Tower A, 112-118 Talavera Road, Macquarie Park, N.S.W.2113, AUSTRALIA Phone : 61-2-8870-1100 Fax : 61-2-8870-1111 YOKOGAWA INDIA LTD. Plot No.96 Electronic City Complex, Hosur Road, Bangalore 560100, INDIA Phone : 91-80-4158-6000 Fax : 91-80-2852-1442 YOKOGAWA CHINA CO., LTD. 3F TowerD Cartelo Crocodile Building No.568 West Tianshan Road, Shanghai 200335, CHINA Phone : 86-21-62396262 Fax : 86-21-62387866 June '10 Printed in China