1
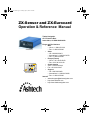
microz1.book Page i Tuesday, July 23, 2002 2:53 PM ZX-Sensor and ZX-Eurocard Operation & Reference Manual Thales Navigation 471 El Camino Real Santa Clara, CA USA 95050-4300 ZX-Sensor ZX-Eurocard Phone and Fax Numbers • Main • Voice: +1 408-615-5100 • Fax: +1 408-615-5200 • Sales • US: 1-800-922-2401 • International: +1 408-615-3970 • Fax: +1 408-615-5200 • Europe (France) • Voice: +33 2 28 09 38 00 • Fax: +33 2 28 09 39 39 • South America • Voice: +56 2 234 56 43 • Fax: +56 2 234 56 47 • Support • US: 1 800-229-2400 • International: +1 408-615-3980 • Fax: +1 408-615-5200 Internet • [email protected] • http://www.ashtech.com • http://www.thalesnavigation.com microz1.book Page ii Tuesday, July 23, 2002 2:53 PM Copyright Notice Copyright © 2002 Thales Navigation. All rights reserved. No part of this publication or the computer programs described in it may be reproduced, translated, stored in a retrieval system, or transmitted in any form or by any means, electronic, mechanical photocopying, recording, or otherwise, without prior written permission of Magellan. Your rights with regard to this publication and the computer programs are subject to the restrictions and limitations imposed by the copyright laws of the United States of America (“U.S.A.”) and/or the jurisdiction in which you are located. Printed in the United States of America. Part Number: 630872 Revision A July 2002 Trademarks ZX-Sensor, ZX-Eurocard, Evaluate, SSRadio, and the Ashtech logo are trademarks of Thales Navigation. Ashtech® is a registered trademark of Thales Navigation. All other products and brand names are trademarks or registered trademarks of their respective holders. ii ZX-Sensor and ZX-Eurocard Operation and Reference Manual microz1.book Page iii Tuesday, July 23, 2002 2:53 PM DISCLAIMER OF WARRANTIES AND LIMITATION OF LIABILITY LICENSOR AND ITS THIRD-PARTY SUPPLIERS MAKE NO WARRANTIES OR REPRESENTATIONS, EXPRESS OR IMPLIED, REGARDING THE PROGRAM, MEDIA, DOCUMENTATION, RESULTS OR ACCURACY OF DATA AND HEREBY EXPRESSLY DISCLAIM ANY WARRANTIES OF MERCHANTIBILITY AND FITNESS FOR A PARTICULAR PURPOSE AND NONFRINGEMENT. LICENSOR AND ITS THIRD PARTY SUPPLIERS DO NOT WARRANT THE PROGRAM WILL MEET YOU REQUIREMENTS OR THAT ITS OPERATION WILL BE UNINTERRUPTED OR ERROR-FREE. LICENSOR, its third-party suppliers, or anyone involved in the creation or delivery of the Program or Documentation to you shall have no liability to you or any third-party for special, incidental, indirect or consequential damages (including, but not limited to, loss of profits or savings, downtime, damage to or replacement of equipment or property, or recovery or replacement of programs or data) arising from claims based in warranty, contract, tort (including negligence), strict liability, or otherwise even if LICENSOR and its third-party have been advised of the possibility of such claim or damages. The liability of LICENSOR and its third-party suppliers for direct damages shall not exceed the actual amount paid for the program license. Some States do not allow the exclusion of limitation of implied warranties or liability for incidental or consequential damages, so the above limitations or exclusions may not apply to you. MANUAL DISCLAIMER THIS MANUAL IS PROVIDED “AS IS”; THALES NAVIGATION MAKES NO WARRANTIES TO ANY PERSON OR ENTITY WITH RESPECT TO THE SUBJECT MATTER OR USE OF INFORMATION CONTAINED HEREIN OR ANY DERIVATIVES THEREOF OR ANY SERVICES OR LICENSES. THALES NAVIGATION DISCLAIMS ALL IMPLIED WARRANTIES, INCLUDING, WITHOUT LIMITATION, WARRANTIES OF MERCHANTABILITY AND FITNESS FOR A PARTICULAR PURPOSE AND NONINFRINGEMENT. FURTHER, THALES NAVIGATION DOES NOT WARRANT, GUARANTEE, OR MAKE ANY REPRESENTATIONS REGARDING THE USE, OR THE RESULTS OF THE USE, OF THIS MANUAL IN TERMS OF CORRECTNESS, ACCURACY, RELIABILITY, OR OTHERWISE. THIS PUBLICATION AND FEATURES DESCRIBED HEREIN ARE SUBJECT TO CHANGE WITHOUT NOTICE. U.S. GOVERNMENT RESTRICTED RIGHTS The Program and Documentation are provided with RESTRICTIVE RIGHTS. Use, duplication, or disclosure by the Government is subject to restrictions as set forth in subdivision (c)(1)(ii) of the Rights in Technical Data and Computer Software clause at DFARS 252.227-7013 or subdivision 9(c)(1) and (2) of the Commercial Computer Software Restricted Rights 48 CFR 52.227.19, as applicable. Should you have any questions concerning the License Agreement or the Limited Warranties and Limitation of Liability, please contact Thales Navigation in writing at the following address: 471 El Camino Real, Santa Clara, CA 95050-4300 iii microz1.book Page iv Tuesday, July 23, 2002 2:53 PM iv ZX-Sensor and ZX-Eurocard Operation and Reference Manual microz1.book Page v Tuesday, July 23, 2002 2:53 PM Contents Chapter 1. Introduction . . . . . . . . . . . . . . . . . . . . . . . . . . . . . . . . . . . . . . . . . . 1 Overview . . . . . . . . . . . . . . . . . . . . . . . . . . . . . . . . . . . . . . . . . . . . . . . . . . . . 1 Functional Description . . . . . . . . . . . . . . . . . . . . . . . . . . . . . . . . . . . . . . 2 Technical Specifications . . . . . . . . . . . . . . . . . . . . . . . . . . . . . . . . . . . . . . . . . 3 Performance Specifications . . . . . . . . . . . . . . . . . . . . . . . . . . . . . . . . . . . . . . 4 Receiver Options . . . . . . . . . . . . . . . . . . . . . . . . . . . . . . . . . . . . . . . . . . . . . . 4 [B] RTCM Base. . . . . . . . . . . . . . . . . . . . . . . . . . . . . . . . . . . . . . . . . . . . 5 [U] RTCM Remote . . . . . . . . . . . . . . . . . . . . . . . . . . . . . . . . . . . . . . . . . 5 [E] Event Marker. . . . . . . . . . . . . . . . . . . . . . . . . . . . . . . . . . . . . . . . . . . 5 [M] Remote Monitoring . . . . . . . . . . . . . . . . . . . . . . . . . . . . . . . . . . . . . . 6 [F] Fast Data Output . . . . . . . . . . . . . . . . . . . . . . . . . . . . . . . . . . . . . . . . 6 [T] Point Positioning . . . . . . . . . . . . . . . . . . . . . . . . . . . . . . . . . . . . . . . . 6 [3] Observables—1, 2, 3. . . . . . . . . . . . . . . . . . . . . . . . . . . . . . . . . . . . . 6 [J] RTK Rover . . . . . . . . . . . . . . . . . . . . . . . . . . . . . . . . . . . . . . . . . . . . . 6 [K] RTK Base . . . . . . . . . . . . . . . . . . . . . . . . . . . . . . . . . . . . . . . . . . . . . 6 [I] Instant RTK. . . . . . . . . . . . . . . . . . . . . . . . . . . . . . . . . . . . . . . . . . . . . 7 [G] Reserved for Future Options . . . . . . . . . . . . . . . . . . . . . . . . . . . . . . 7 [H] 5 Hz Synchronized RTK . . . . . . . . . . . . . . . . . . . . . . . . . . . . . . . . . . 7 [N] Reserved for Future Options. . . . . . . . . . . . . . . . . . . . . . . . . . . . . . . 7 Chapter 2. Equipment. . . . . . . . . . . . . . . . . . . . . . . . . . . . . . . . . . . . . . . . . . . . 9 Hardware Description . . . . . . . . . . . . . . . . . . . . . . . . . . . . . . . . . . . . . . . . . . . 9 ZX-Eurocard . . . . . . . . . . . . . . . . . . . . . . . . . . . . . . . . . . . . . . . . . . . . . . 9 RF Connector . . . . . . . . . . . . . . . . . . . . . . . . . . . . . . . . . . . . . . . . . 13 Antenna . . . . . . . . . . . . . . . . . . . . . . . . . . . . . . . . . . . . . . . . . . . . . . 14 Power Requirements . . . . . . . . . . . . . . . . . . . . . . . . . . . . . . . . . . . . 14 Environmental Specifications . . . . . . . . . . . . . . . . . . . . . . . . . . . . . 14 Mounting Requirements . . . . . . . . . . . . . . . . . . . . . . . . . . . . . . . . . 14 Heat Sink Requirements . . . . . . . . . . . . . . . . . . . . . . . . . . . . . . . . . 15 Modem Support . . . . . . . . . . . . . . . . . . . . . . . . . . . . . . . . . . . . . . . . 15 ZX-Sensor . . . . . . . . . . . . . . . . . . . . . . . . . . . . . . . . . . . . . . . . . . . . . . 16 Mounting Dimensions . . . . . . . . . . . . . . . . . . . . . . . . . . . . . . . . . . . 18 Power/Input/Output Connector . . . . . . . . . . . . . . . . . . . . . . . . . . . . 19 Power Requirements . . . . . . . . . . . . . . . . . . . . . . . . . . . . . . . . . . . . 20 Environmental Specifications . . . . . . . . . . . . . . . . . . . . . . . . . . . . . 20 RF Connector . . . . . . . . . . . . . . . . . . . . . . . . . . . . . . . . . . . . . . . . . 20 Serial/Power Cable . . . . . . . . . . . . . . . . . . . . . . . . . . . . . . . . . . . . . 21 v microz1.book Page vi Tuesday, July 23, 2002 2:53 PM Antenna . . . . . . . . . . . . . . . . . . . . . . . . . . . . . . . . . . . . . . . . . . . . . .21 On-Board Battery . . . . . . . . . . . . . . . . . . . . . . . . . . . . . . . . . . . . . . . . . 21 Radio Interference . . . . . . . . . . . . . . . . . . . . . . . . . . . . . . . . . . . . . . . . 22 Development Kits . . . . . . . . . . . . . . . . . . . . . . . . . . . . . . . . . . . . . . . . . . . . .22 Chapter 3. Getting Started . . . . . . . . . . . . . . . . . . . . . . . . . . . . . . . . . . . . . . . 27 Hardware Setup . . . . . . . . . . . . . . . . . . . . . . . . . . . . . . . . . . . . . . . . . . . . . .27 Applying Power. . . . . . . . . . . . . . . . . . . . . . . . . . . . . . . . . . . . . . . . . . . 27 Receiver Initialization . . . . . . . . . . . . . . . . . . . . . . . . . . . . . . . . . . . . . . . . . .27 Receiver Communication . . . . . . . . . . . . . . . . . . . . . . . . . . . . . . . . . . . . . . .27 Monitoring . . . . . . . . . . . . . . . . . . . . . . . . . . . . . . . . . . . . . . . . . . . . . . . . . . .28 Satellite Tracking . . . . . . . . . . . . . . . . . . . . . . . . . . . . . . . . . . . . . . . . . 28 Position . . . . . . . . . . . . . . . . . . . . . . . . . . . . . . . . . . . . . . . . . . . . . . . . . 28 Setting Receiver Parameters . . . . . . . . . . . . . . . . . . . . . . . . . . . . . . . . 29 Saving Parameter Settings . . . . . . . . . . . . . . . . . . . . . . . . . . . . . . . . . . 29 Data Recording . . . . . . . . . . . . . . . . . . . . . . . . . . . . . . . . . . . . . . . . . . . . . .29 Default Parameters . . . . . . . . . . . . . . . . . . . . . . . . . . . . . . . . . . . . . . . . . . .29 Appendix A. Global Product Support . . . . . . . . . . . . . . . . . . . . . . . . . . . . . . . 35 Solutions for Common Problems . . . . . . . . . . . . . . . . . . . . . . . . . . . . . . . . .36 Corporate Web Page . . . . . . . . . . . . . . . . . . . . . . . . . . . . . . . . . . . . . . . . . .36 Repair Centers . . . . . . . . . . . . . . . . . . . . . . . . . . . . . . . . . . . . . . . . . . . . . . .36 vi ZX-Sensor and ZX-Eurocard Operation and Reference Manual microz1.book Page vii Tuesday, July 23, 2002 2:53 PM List of Figures Figure 2.1. Figure 2.2. Figure 2.3. Figure 2.4. Figure 2.5. Figure 2.6. Figure 2.7. Figure 2.8. Figure 2.9. Figure 2.10. Figure 2.11. Figure 2.12. Figure 2.13. ZX-Eurocard Dimensions ........................................................... 9 ZX-Eurocard Interface Connector............................................. 10 64-Pin Straight Header Option ................................................. 10 Interface Connector Pinout ....................................................... 11 ZX-Eurocard Mounted with Heat-Sink ...................................... 15 ZX-Sensor ................................................................................ 17 ZX-Sensor Mounting Dimensions ............................................. 18 DB25 Connector ....................................................................... 19 ZX-Sensor Serial/Power Cable................................................. 21 ZX-Sensor Development Kit (A) ............................................... 22 ZX-Sensor Development Kit (B) ............................................... 23 ZX-Eurocard Development Kit (A) ............................................ 24 ZX-Eurocard Development Kit (B) ............................................ 25 vii microz1.book Page viii Tuesday, July 23, 2002 2:53 PM viii ZX-Sensor and ZX-Eurocard Operation and Reference Manual microz1.book Page ix Tuesday, July 23, 2002 2:53 PM List of Tables Table 1.1: Table 1.2: Table 2.1: Table 2.2: Table 2.3: Table 2.4: Table 3.1: Accuracy as Function of Mode ................................................... 4 Receiver Options ........................................................................ 5 ZX-Eurocard Interface Connector............................................. 12 SSRadio Connector Pinout....................................................... 13 ZX-Sensor Front Panel Description .......................................... 17 ZX-Sensor DB25 Connector Pinout.......................................... 19 Default Values .......................................................................... 30 ix microz1.book Page x Tuesday, July 23, 2002 2:53 PM x ZX-Sensor and ZX-Eurocard Operation and Reference Manual microz1.book Page 1 Tuesday, July 23, 2002 2:53 PM The Z-Family of receivers includes the Z-Eurocard, Z-Sensor, ZX-Eurocard, ZXSensor Z-Surveyor and Z-FX. This manual covers the ZX-Eurocard and ZXSensor. These two receivers have been built specifically with real-time industrial applications in mind, such as machine control in construction, mining, and precision agriculture; as well as precision navigation applications like docking, and dredging. The ZX-Eurocard and ZX-Sensor are built to withstand severe vibration requirements in their target applications. They also provide positions at the high update rates and low latencies required in control applications. The ZX-Eurocard is mechanically and electrically compatible with the Ashtech GG24 GPS+GLONASS Eurocard, and the GG-RTK Eurocard. Thus once you have integrated one of these, you have essentially integrated them all. The same is true of the ZX-Sensor, GG24 Sensor, and GG-RTK Sensor. Throughout this manual, the terms “ZX-Eurocard” and “OEM board” are used interchangeably. Because this manual describes both the ZX-Sensor and the ZX-Eurocard, the term “ZXreceiver” refers to both products. Overview The ZX-receiver processes signals from the GPS satellite constellation. The ZXreceiver provides real-time position, velocity, and time measurements using 36 dedicated separate and parallel channels, 12 each for Coarse/Acquisition (C/A) code-phase, and carrier-phase measurement on the L1 (1575 MHz), and Precise (P) code phase and carrier phase measurement on L1 and L2 (1227 MHz) bands. The ZX-receiver receives satellite signals via an L-band antenna and low-noise amplifier (LNA). The ZX-receiver operates stand-alone, and as a base (reference) station or remote (rover) station providing real-time differential GPS operation for code and real-time kinematic (RTK) operation for carrier phase. The unit implements the RTCM SC 104 V2.3 standard for differential and RTK operation, including the newly defined message types 18, 19, 20, and 21. These features allow the ZX-receiver to achieve centimeter accuracy while being compatible for Introduction 1 Reliance Fundamentals The ZX-Eurocard and ZX-Sensor are two form-factors for the newest generation of the Ashtech Z-12 receiver. The Z-12 receiver tracks all the available signals from GPS satellites, both C/A and P code, both L1 and L2 frequencies, whether AS (Anti-Spoofing) is on or off. The benefit of dual-frequency is that it is excellent for RTK (Real Time Kinematic) applications, especially on longer baselines. RTK is typically used where centimeter accuracy is required in real time. Introduction Introduction 1 microz1.book Page 2 Tuesday, July 23, 2002 2:53 PM differential and RTK operation with any other receiver that implements the RTCM standard. Functional Description The receiver is activated when power is applied to the power connector, and (in the case of the ZX-Sensor) the power switch is ON. After self test, the receiver initializes its 12x3 channels and begins searching for all space vehicles (SV) within the field of view of the antenna. The receiver can track all Block I and Block II GPS SVs. All 32 PRN numbers as specified in Navstar GPS Space Segment/Navigation User Interfaces, ICD-GPS-200, Revision B are coded inside the product. As the receiver acquires (locks onto) each SV, it notes the time and then collects the ephemeris data about the orbit of that SV, and almanac data about the orbits of all the SVs in the constellation. The receiver features 12-parallel channel/12-SV all-in-view operation; each of up to 12 visible SVs can be assigned to a channel and then continuously tracked. Each SV broadcasts almanac and ephemeris information every 30 seconds, and the unit automatically records this information in its non-volatile memory. The unit has an L1/L2-band radio frequency (RF) port and four RS-232 serial input/output (I/O) ports. Ports A, B, and C are capable of two-way communication with external equipment. On the ZX-Sensor, port D can only be used with the optional internal radio. On the ZX-Eurocard, port D may be used with an on-board radio or externally via the DIN64 connector. The RF circuitry receives satellite data from a GPS antenna and LNA via a coaxial cable, and can supply +5V to the antenna/LNA by means of that cable. No separate antenna power cable is required. Typical power consumption is approximately 5.0 watts even when powering an LNA. The receiver incorporates a red/green LED which lights red to indicate power status and flashes green to indicate the number of satellites locked. The receiver collects Coarse Acquisition (C/A) code-phase (pseudo-range) and full wavelength carrier phase measurement on L1 frequency (1575 MHz), Precise (P) code phase (pseudo-range) and full wavelength carrier phase on L1 and L2 frequency (1227 MHz). The receiver permits uninterrupted use even when anti-spoofing (AS) is turned on. When AS is on, the receiver automatically activates Ashtech’s patented Z-tracking mode that mitigates the effects of AS. The performance when AS is on is the same as when AS is off. 2 ZX-Sensor and ZX-Eurocard Operation and Reference Manual microz1.book Page 3 Tuesday, July 23, 2002 2:53 PM Technical Specifications Introduction Table 1.1 lists the technical specifications of the receiver. Table 1.1. Technical Specifications Specifications Characteristic ZX-Sensor Tracking ZX-Eurocard 12 channels L1 CA/PL1 and PL2 Size 2.30”H x 6.75”W x 10.31”L Weight 0.6”H x 3.9”W x 6.8”L 3.75 lb 0.5 lb -- add 1 oz for heat sink plate + thermal pad* Operating temperature -30° to +55°C -30° to +70°C* Storage temperature -40° to +85°C -40° to +85°C Humidity 100% 95% non-condensing Environment Resistant to wind-driven rain and dust per MIL-STD-810E N/A Power consumption 4.0 W with power saving mode ON 5.0 W with power saving mode OFF Power input 10—28V 5V ±5% Interface • Three RS-232 ports via a DB25 connector (one internal RS-232 port) • One antenna connector • Event marker and 1PPS via DB-25 connector • Optional radio antenna connector • • • • • Four RS-232 ports One antenna connector Event marker 1PPS Optional radio interface connector MEASUREMENT PRECISION C/A (>10° elevation) • Pseudo-range (raw/smooth) • Carrier Phase P-Code AS off (>10° elevation) • L1 Pseudo-range (raw/ smooth) • L1 carrier phase • L2 Pseudo-range (raw/ smooth) • L2 carrier phase •25cm/3.6cm •0.9mm •15cm/0.9cm •0.9mm •21cm/1.3cm •0.9mm * Refer to “Heat-Sink Requirements” on page 15 for heat sinking information. Introduction 3 microz1.book Page 4 Tuesday, July 23, 2002 2:53 PM Performance Specifications One of the most important functions of the receiver is providing real-time position solutions with accuracy ranging from centimeter level to 100 meters. Table 1.1 summarizes the positioning modes and expected accuracy. Table 1.1: Accuracy as Function of Mode Positioning Mode Typical Horizontal Accuracy (2drms), 5 SVs, PDOP<4 Maximum Update Rate 5 Hz (10 Hz optional) Maximum Operating Range Autonomous 100 meters with SA on Anywhere RTCM code differential 1.0 meters + 10 ppm 5 Hz (10 Hz optional) Several hundred kilometers (depending upon datalink) Static (post-processed) 5mm + 1ppm 5 Hz (10 Hz optional) Several hundred kilometers (depending upon satellite geometry) Real-time carrier phase 1.6cm +2ppm differential in RTCMRTK format or DBEN format 5 Hz (10 Hz optional) <15 kilometers (depending upon datalink) All accuracies were computed from multiple trials of live satellite data collected in the San Francisco Bay area with receivers and survey grade antennas under average multipath conditions. Receiver Options Table 1.2 lists the available options. Each option is represented by a letter or number presented in a certain order. You can verify the installed options by issuing the following command to the receiver using an external handheld controller or PC, as described in the Z-Family Technical Reference Manual: $PASHQ,RID The command will display the options on an external handheld controller or PC. For example: $PASHR,RID,UZ,30,ZC00,BUEXMFT3JKIGHN,0A16*0B 4 ZX-Sensor and ZX-Eurocard Operation and Reference Manual microz1.book Page 5 Tuesday, July 23, 2002 2:53 PM Introduction If the letter or number is displayed in the response message, the option is installed. If the letter/number is not displayed, the option is not installed. Table 1.2 lists the available options. Table 1.2: Receiver Options Option Description B RTCM differential base U RTCM differential remote E Event marker M Remote monitor option F Fast data output T Point positioning 1,2,3 Observables J RTK rover K RTK base station I Instant RTK G Reserved H 5 Hz synchronized RTK N Reserved [B] RTCM Base The receiver can be set as an RTCM differential base station and can output real-time differential corrections when this option is enabled. The output will be in RTCM-104, Version 2.3 format message types 1, 3, 6, 16, and 22 as well as RTCM Carrier Differential 18, 19, 20, and 21. For messages 18, 19, 20, and 21, the J option is also required. [U] RTCM Remote The real-time differential corrections are available when this option is enabled. The receiver will decode the RTCM-104, Version 2.3 format message types 1, 3, 6, 9, 16, and 22 as well as types 18, 19, 20, and 21. For messages 18, 19, 20, and 21, the J option is also required. [E] Event Marker The [E] option enables the storage of event times created from a trigger signal. The receiver measures and records event times with high accuracy (down to one microsecond). The receiver stores an event time at the rising Introduction 5 microz1.book Page 6 Tuesday, July 23, 2002 2:53 PM edge of the trigger signal (or the falling edge on command) and the time is recorded in the receiver’s PC memory card and/or output through the TTT NMEA message. [M] Remote Monitoring The remote monitoring option allows you to use the REMOTE.EXE to access and control the receiver via a modem from a remote location. It also allows you to use the session programming feature. [F] Fast Data Output This option enables the receiver to be programmed to output both raw position data and NMEA messages at user-selectable frequencies up to 10Hz. Without this option, only frequencies up to 5Hz are available. [T] Point Positioning The [T] option allows you to put the receiver into point positioning mode using the $PASHS,PPO command. Point positioning mode improves the accuracy of an autonomous position of a static point. [3] Observables—1, 2, 3 This option determines the observables available in the receiver, where: 1—CA code and P-code on L1/L2 (No carrier) 2—CA code and carrier, P-code on L1/L2 (No carrier) 3—CA code and carrier, P-code on L1/L2 and carrier [J] RTK Rover The [J] option allows the receiver to act as a rover station that utilizes the carrier phase differential (both DBEN and RTCM message 18, 19, 20, and 21) data transmitted from the base to compute differentially corrected positions. This option requires the observables option to be 3. For RTCM messages type 18, 19, 20, and 21, the U option is required in addition to the J option. [K] RTK Base The [K] option allows the receiver to act as an RTK base station which outputs carrier phase differential data. This option requires the observables option to be 3. For RTCM 18/19 or 21/22, the B option is also required. 6 ZX-Sensor and ZX-Eurocard Operation and Reference Manual microz1.book Page 7 Tuesday, July 23, 2002 2:53 PM [I] Instant RTK Introduction The [I] option, an extension of the J option, allows the receiver to use the new RTK system - Instant RTKTM which uses a new data processing strategy for integer ambiguity initialization. The initialization time using Instant RTK typically requires a single epoch of data if there are 6 or more satellites available with reasonable open sky and low multipath. The baseline length should be 7 km or less. [G] Reserved for Future Options [H] 5 Hz Synchronized RTK The [H] option enables the receiver to output synchronized or matched time tag RTK positions at a rate up to 5 Hz (5 positions per second); 5 Hz synchronized RTK lets you attain the better accuracy of matched time tag RTK with nearly the same productivity as Fast CPD. This feature is available only when using DBEN or CMR format data. [N] Reserved for Future Options Introduction 7 microz1.book Page 8 Tuesday, July 23, 2002 2:53 PM 8 ZX-Sensor and ZX-Eurocard Operation and Reference Manual microz1.book Page 9 Tuesday, July 23, 2002 2:53 PM 2 Equipment Hardware Description ZX-Eurocard Equipment The ZX-Eurocard has four RS-232 serial ports embedded in a 64-pin connector. The RF circuitry receives satellite data from a GPS antenna and LNA via coaxial cable, and can supply power to the antenna/LNA by means of that cable. No separate antenna power is required. The LNA power consumption is approximately 150 milliwatts (depends on model and manufacturer). The board includes a two-color LED; the LED lights red to indicate the power status, and flashes green to indicate the number of satellites locked. For example, red indicates power on, and four green flashes indicate four satellites locked. An external two-color LED can be connected to the board by connecting the common cathode to ground, and the anodes to the LED-GRN and LED-RED pins. Connect current-limiting 100-ohm resistors in series with the output pins. Figure 2.1. ZX-Eurocard Dimensions Equipment 9 microz1.book Page 10 Tuesday, July 23, 2002 2:53 PM Figure 2.2 shows the 64-pin DIN male power/input/output interface connector (this board is also available with a 64-pin straight header). Figure 2.2. ZX-Eurocard Interface Connector Figure 2.3. 64-Pin Straight Header Option 10 ZX-Sensor and ZX-Eurocard Operation and Reference Manual microz1.book Page 11 Tuesday, July 23, 2002 2:53 PM Figure 2.4 shows the pinout of the interface connector. B1 A1 GND B2 A2 +5V INPUT SSR +12V B3 A3 --- LNA POWER B4 A4 LNA GND LED RED B5 A5 --- LED GREEN B6 A6 --- SERIAL A CD B7 A7 SERIAL GND SERIAL A DSR B8 A8 --- SERIAL A CTS B9 A9 SERIAL A TXD SERIAL A RTS B10 A10 SERIAL A RXD SERIAL C CTS B11 A11 SERIAL C TXD SERIAL C RTS B12 A12 SERIAL C RXD SERIAL D CTS B13 A13 SERIAL D TXD SERIAL D RTS B14 A14 SERIAL D RXD --- B15 A15 SERIAL GND --- B16 A16 --- SERIAL B CTS B17 A17 SERIAL B TXD SERIAL B RTS B18 A18 SERIAL B RXD RADIO LED RED B19 A19 --- RADIO LED GREEN B20 A20 --- --- B21 A21 GND 1 PPS OUTPUT B22 A22 GND --- B23 A23 GND PHOTO INPUT B24 A24 GND --- B25 A25 GND --- B26 A26 GND --- B27 A27 GND MANUAL RESET INPUT B28 A28 GND --- B29 A29 GND --- B30 A30 GND --- B31 A31 GND --- B32 A32 GND Equipment GND +5V INPUT Figure 2.4. Interface Connector Pinout Table 2.1 defines the pinout and signal designations of the 64-pin connector. Equipment 11 microz1.book Page 12 Tuesday, July 23, 2002 2:53 PM Table 2.1: ZX-Eurocard Interface Connector Pin 12 Code Pin B1 Code A1 GND GND A2 +5 Vdc input B2 +5 Vdc input A3 —* B3 SSR +12 V** A4 LNA GND B4 LNA power† A5 — B5 LED red A6 — B6 LED green A7 Serial GND B7 Serial A carrier detect (CD) A8 — B8 Serial A data set ready (DSR) A9 Serial A TXD B9 Serial A CTS A10 Serial A RXD B10 Serial A RTS A11 Serial C TXD B11 Serial C CTS A12 Serial C RXD B12 Serial C RTS A13 Serial D TXD B13 Serial D CTS A14 Serial D RXD B14 Serial D RTS A15 Serial GND B15 — A16 — B16 — A17 Serial B TXD B17 Serial B CTS A18 Serial B RXD B18 Serial B RTS A19 — B19 Radio LED - red A20 — B20 Radio LED - green A21 GND B21 — A22 GND B22 1 PPS output A23 GND B23 — A24 GND B24 Photo input A25 GND B25 — A26 GND B26 — A27 GND B27 — A28 GND B28 Manual reset input‡ A29 GND B29 — A30 GND B30 — A31 GND B31 — A32 GND B32 — ZX-Sensor and ZX-Eurocard Operation and Reference Manual microz1.book Page 13 Tuesday, July 23, 2002 2:53 PM Table 2.1: ZX-Eurocard Interface Connector (continued) Pin Code Pin Code * “—” means no connection. ** Required only if SSRadio is installed. † Required only if LNA requires greater than 5Vdc. ‡Short to ground with a switch closure or open-collector transistor. Port A can be connected to a modem. Refer to “Modem Support” on page 15 for more details. Equipment Table 2.2 shows the pinout for the optional spread spectrum radio. This connector mates only with a flex circuit that is provided if the SSRadio is used. Connector specifications and flex circuit dimension requirements can be provided if you need to construct your own flex circuit. Table 2.2: SSRadio Connector Pinout Signal Name Number DIR Description PRTD_IN 1 I Should be grounded by the radio to indicate that it is plugged in. CLK20C 2 O 20 MHz square wave output GND 3 P Ground/power return GND 4 P Ground/power return 1PPSOUT 5 O GPS 1 pulse per second TXD3 6 O Transmit data port D (RS232) RXD3 7 I Receive data port D (RS232) +12V_INT 8 P 12 V radio power from 64-pin connector RTS3 9 O Request-to-send port D (RS232) CTS3 10 I Clear-to-send port D (RS232) +5 V 11 P Not connected on ZX-Eurocard LED_EXT 12 I Not connected on ZX-Eurocard The 16-pin connector J101 on the ZX-Eurocard is for factory use only. RF Connector The RF connector is a standard 50-ohm SMB female wired for connection via coaxial cabling to a GPS antenna with integral LNA. The SMB connector shell is connected to the Z-Eurocard common ground. The SMB center pin provides +5Vdc to power the LNA (maximum 150 mA draw) and accepts 1227 and 1575 MHz RF input from the antenna; the RF and DC signals share the same path. Equipment 13 microz1.book Page 14 Tuesday, July 23, 2002 2:53 PM For installations compatible with the GG24-Eurocard, an SMB-to-SMA adapter is available (part number 730188). Antenna The ZX-Eurocard provides DC power on the center conductor for an LNA on the antenna cable. No external source is required to power a 5 Vdc LNA. An LNA requiring greater than 5 Vdc may be used by connecting an external power supply to LNA POWER and LNA GND on the 64-pin connector. No jumpering is required as long as the voltage is higher than 5 Vdc. The maximum external LNA voltage should not exceed 15Vdc. The gain of the LNA less the loss of the cable and connectors should be between 20 and 45 dB. Connect the antenna cable directly to the antenna connector on the ZX-Eurocard. Antenna cables exceeding 15 dB of loss require a line amplifier. A line amp (part number 700389) compensates for 20 dB of cable loss. The line amplifier has N-type connectors to connect to the antenna cable. Power Requirements The ZX-Eurocard requires 5 Vdc regulated ±5% at the board connector, and consumes 5.0 watts. Environmental Specifications The operating temperature range of the ZX-Eurocard is -30°C to +70°C; storage temperature is -40°C to +85°C. The operating humidity range is 0 to 95%, non-condensing. The ZX-Eurocard is designed to operate while being subjected to random vibration per MIL-STD-810E Method 514.4, as well as a machine control vibration test of 5g for 20 hours in each orthogonal axis. Mounting Requirements The ZX-Eurocard should be mounted using, as a minimum, the four 0.110” holes in the corners of the board, on standoffs as described under the heatsink requirements (refer to “Heat Sink Requirements” on page 15). In highvibration applications, the two center 0.110” holes should also be used. The maximum diameter for the center standoffs is 3/16”. This board can also be provided in a true Eurocard format with a 96-pin 3-row connector. The center row of pins is not loaded, for electrical compatibility, and the side edges are milled to 0.062” to allow insertion into a card rack. The length of the true Eurocard board is 6.300”; all other dimensions are the same as the standard ZX-Eurocard. 14 ZX-Sensor and ZX-Eurocard Operation and Reference Manual microz1.book Page 15 Tuesday, July 23, 2002 2:53 PM Heat Sink Requirements The ZX-Eurocard has one large quad-flat-pack IC on the bottom side that requires a heat sink to keep it within its safe operating temperature range. If you wish to mount the board inside a metal case, use 0.200” standoffs with the adhesive thermal pads provided with the board filling the gap between the two ICs and the metal case. Equipment If this arrangement is not possible, an aluminum heat-sink plate is available (part number 200541) so you can attach the board on the bottom side (again using the thermal pads) filling the gap between the ICs and the heat-sink). Attach the plate using the four plated-through holes as shown. Figure 2.5. ZX-Eurocard Mounted with Heat-Sink Applications requiring 70°C operation should provide either a substantial heat sink or forced-air cooling to limit the temperature rise on the board to less than 10°C above ambient. Modem Support The ZX-Eurocard can be interfaced to a modem through Port A. Refer to Table 2.1 and the modem user manual before making connections. After making connections, you can follow the steps below to configure and initialize Equipment 15 microz1.book Page 16 Tuesday, July 23, 2002 2:53 PM the modem using ZX receiver commands. If using a modem other than US Robotics, refer to modem command (MDM) in the user manual for more detailed information. 1. Select an appropriate baud rate for Port A and modem; the baud rate should be identical for Port A and the modem. You may have to refer to the user manual if selecting a baud rate other than the default. 2. Set Port A for modem use with the command $PASHS,MDM,ON,A,O,[baud rate]. The baud rate field in the command is optional, as indicated by the brackets. The above command can be sent through serial ports B, C, or D. The receiver acknowledges with the response message $PASHR,ACK. 3. Use the query command $PASHQ,MDM to verify the setting in step 2. 4. Send command $PASHS,MDM,INI to initialize the modem. The receiver should respond with the message $PASHR,MDM,INI,OK 5. The modem connected to Port A of the receiver is now initialized and ready for communication. 6. To establish a communication link, the modem on the other end has to dial the modem connected to the receiver. ZX-Sensor The sensor version of the receiver, Figure 2.6, has three RS-232 input/output (I/O) ports embedded in a DB25 connector (ports A,B, and C are available to the user, while port D can be used for an internal radio), an L1/L2-band RF 16 ZX-Sensor and ZX-Eurocard Operation and Reference Manual microz1.book Page 17 Tuesday, July 23, 2002 2:53 PM port, and an optional radio RF port. The ZX-Sensor also supports an optional PCMCIA card (internal) for data recording purposes. Equipment Figure 2.6. ZX-Sensor Table 2.3 describes the front panel components of the ZX-Sensor. Table 2.3: ZX-Sensor Front Panel Description Component Equipment Function RADIO connector Allows RF connection of the embedded Spread Spectrum Radio Receiver Board to the Spread Spectrum Antenna; TNC reverse polarity. GPS ANT connector The GPS ANT connector is a standard TNC female receptacle wired for connection via 50-ohm coax to a GPS antenna with an integral LNA. The connector shell is connected to the ZX-Sensor common ground. The TNC center pin provides +5Vdc to power the LNA, and accepts 1227 and 1575 MHz RF input from the antenna; RF and DC signals share the same path. ON/OFF switch Turns the unit on and off. PWR/SATS LED Flashing red indicates power is applied to the receiver. Number of green flashes indicates number of satellites the receiver is locked to. SERIAL PORTS A, B, C, PWR STROBES The multi-function 25-pin connector serves as the three RS-232 serial input/output ports (A, B, and C), the power input, event marker input, the 1PPS output, and LED connectors. 17 microz1.book Page 18 Tuesday, July 23, 2002 2:53 PM Mounting Dimensions Figure 2.7 shows the mounting dimensions for the ZX-Sensor. Figure 2.7. ZX-Sensor Mounting Dimensions 18 ZX-Sensor and ZX-Eurocard Operation and Reference Manual microz1.book Page 19 Tuesday, July 23, 2002 2:53 PM Power/Input/Output Connector Figure 2.8 shows the pin arrangement for the DB25 power/input/output connector. Equipment Figure 2.8. DB25 Connector Table 2.4 lists the signal designations for the DB25 connector. Table 2.4: ZX-Sensor DB25 Connector Pinout Pin Equipment Code Pin 14 Code 1 LED RED LED GND 2 LED GREEN 15 1PPS OUT 3 GND 16 CTSC-clear to send, port C 4 RTSC-ready to send, port C 17 RXDC-receive data, port C 5 TXDC-transmit data, port C 18 RXDB-receive data, port B 6 TXDB-transmit data, port B 19 EVENT IN 19 microz1.book Page 20 Tuesday, July 23, 2002 2:53 PM Table 2.4: ZX-Sensor DB25 Connector Pinout (continued) Pin Code Pin Code 7 GND 20 CTSB-clear to send, port B 8 RTSB-ready to send, port B 21 RXDA-receive data, port A 9 TXDA-transmit data, port A 22 No connection 10 GND 23 CTSA-clear to send 11 RTSA-ready to send, port A 24 EXT PWR 1 12 GND 25 EXT PWR 2 13 GND Power Requirements The ZX-Sensor requires 10-28 Vdc and consumes 7.5 watts. Environmental Specifications The operating temperature range of the Z-Sensor is -30°C to +55°C; storage temperature range is -40°C to +85°C. The ZX-Sensor will work at 100% humidity and is rated to MIL-STD-810E for wind driven rain and dust. RF Connector The RF connector is a standard 50-ohm female TNC wired for connection via coaxial cabling to a GPS antenna with integral LNA. The TNC connector shell is connected to the Z-Sensor common ground. The TNC center pin provides +5 Vdc to power the LNA (maximum 150 mA draw) and accepts 1227 and 1575 MHz RF input from the antenna; the RF and DC signals share the same path. 20 ZX-Sensor and ZX-Eurocard Operation and Reference Manual microz1.book Page 21 Tuesday, July 23, 2002 2:53 PM Serial/Power Cable The serial/power cable, Figure 2.9, connects the ZX-Sensor to the power source, the PC or handheld unit, and any peripherals. Equipment Figure 2.9. ZX-Sensor Serial/Power Cable Antenna The ZX-Sensor provides DC power on the center conductor for an LNA on the antenna cable. The gain of the LNA minus the loss of the cable and connectors should be between 20 and 45 dB. Connect the antenna cable directly to the antenna connector on the ZX-Sensor. Antenna cables exceeding 15 dB of loss require a line amplifier. A line amplifier (part number 700389) compensates for 20 dB of cable loss. The line amplifier has N-type connectors to connect to the antenna cable. On-Board Battery Both the ZX-Sensor and ZX-Eurocard contain a 3.6V lithium backup battery to maintain power to the non-volatile memory and real-time clock when the main power source is not available. This battery should last a minimum of 5 years. The firmware monitors the battery voltage, and detects a failure when it reaches 2.25 volts. You can obtain this information via any serial port with the $PASHQ,WARN command (refer to the Z-Family Technical Reference Manual for detailed information about this command). Equipment 21 microz1.book Page 22 Tuesday, July 23, 2002 2:53 PM Radio Interference Some radio transmitters and receivers, such as FM radios, can interfere with the operation of GPS receivers. Before setting up your project, we recommend you verify that nearby handheld or mobile communications devices do not interfere with the ZX-receivers . Development Kits Figure 2.10 through Figure 2.13 list inventories for all items you should have received with your purchase of either the ZX-Eurocard or the ZX-Sensor. Figure 2.10. ZX-Sensor Development Kit (A) 22 ZX-Sensor and ZX-Eurocard Operation and Reference Manual microz1.book Page 23 Tuesday, July 23, 2002 2:53 PM Equipment Figure 2.11. ZX-Sensor Development Kit (B) Equipment 23 microz1.book Page 24 Tuesday, July 23, 2002 2:53 PM Figure 2.12. ZX-Eurocard Development Kit (A) 24 ZX-Sensor and ZX-Eurocard Operation and Reference Manual microz1.book Page 25 Tuesday, July 23, 2002 2:53 PM Equipment Figure 2.13. ZX-Eurocard Development Kit (B) Equipment 25 microz1.book Page 26 Tuesday, July 23, 2002 2:53 PM 26 ZX-Sensor and ZX-Eurocard Operation and Reference Manual microz1.book Page 27 Tuesday, July 23, 2002 2:53 PM Getting Started 3 This chapter describes receiver operations. Hardware Setup Perform the following steps before turning on the receiver: 1. Connect the antenna cable from the GPS antenna to the antenna connector on the receiver. 2. Connect supplied power cable to the power connector on the receiver. Getting Started 3. Connect serial port connectors of serial/power cable to appropriate connectors on external equipment. Applying Power Apply power after your equipment has been properly cabled. Receiver Initialization It is good practice to reset your receiver prior to operating it for the first time or when a system malfunction occurs. A reset of the internal memory clears the memory and restores the factory defaults. Send the following command: • $PASHS,INI,5,5,5,5,1,0 Receiver Communication After you have the receiver powered and running, you must send it commands in order to receive data. The following procedure describes how to send commands to and receive information from the receiver using an IBM-compatible PC. Many communicaiton software packages, such as the Ashtech Evaluate or Receiver Communications Software, allow you to interface with the receiver. Evaluate includes a communications package that automatically establishes communication with the receiver and allows you to send commands from a predefined menu, as well as tools for logging and playback of data, graphical display of position and velocity, and data analysis. Getting Started 27 microz1.book Page 28 Tuesday, July 23, 2002 2:53 PM The default communciations parameters of the reciver are: • • • • 9600 baud 8 data bits no parity one stop bit When first establishing communication, your interface must use this protocol. Having established communication, you may send commands. All the default data output commands are set to NO. The receiver will not output any data until you send a message commanding it to do so. If you have typed in and sent the command correctly, you should receive a response. To become familiar with receiver messages, send a few common commands and observe the responses. Monitoring The receiver provides the capability of monitoring receiver activity while data collection is occuring. The following is a step-by-step instruction of how to access important receiver status information such as: • • • Satellite Tracking Position Remaining Memory Satellite Tracking If you wish to monitor the satellites the receiver is tracking and using for position solutions, perform the following steps: 1. Send the NMEA command $PASHS,NME,SAT,x,ON x—port designation ON—turns port on 2. SAT messages will be output every second through the designated port. 3. The response message contains the number of tracked satellites as well as whether individual satellites are used in the position solution. Position To view the current position of the Z-receiver, perform the following steps: 28 ZX-Sensor and ZX-Eurocard Operation and Reference Manual microz1.book Page 29 Tuesday, July 23, 2002 2:53 PM 1. Send the NMEA command $PASHS,NME,POS,x,ON. x—port designation ON—turns port on 2. POS messages are output every second through the designated port. 3. The response message contains information about the current position of the receiver. Setting Receiver Parameters If you do not wish to use the factory default settings, you must change each setting individually. Refer to the Command/Response chapter of the Z-family reference manual. Saving Parameter Settings Getting Started Ordinarily, Z-receiver parameters that have been changed will return to their default status after a power cycle. The Z-receiver allows you to save changed settings so they will be saved through a power cycle. Perform the following steps to save receiver settings: 1. Send the command $PASHS,SAV,c. This command enables or disables user parameters in memory, where c is Y (yes) or N (no). User parameters that were changed prior to issuing the SAV command are are saved until commands INI or RST are issued, or until SAV is set to No and a power cycle occurs. Data Recording Recording data directly onto your PC can be done with DATLOGR, using the DATALOGR.EXE program. DATALOGR will collect B- and E-files in real time onto your computer. Refer to your DATALOGR User’s Guide. Alternatively, you can use the internal PCMCIA card (optional) in the ZX-Sensor for recording data. Refer to the Data Recording section of the user manual. Default Parameters During the normal course of receiver operation, you will often change one or more receiver parameters such as recording interval, port baud rate, or elevation mask. To save new settings, you must save the current setting to memory or else all parameters (with a few exceptions) will be reset to the default values during a power cycle. The exceptions are session Getting Started 29 microz1.book Page 30 Tuesday, July 23, 2002 2:53 PM programming parameters, modem setting parameters, MET (meteorological) and TLT (tilt) parameters, and the POW (power) parameters. Saving parameters can be done by issuing a $PASHS,SAV,Y command to a serial port. When parameters are saved to the memory, they are maintained until a memory reset or a receiver initialization is performed which resets all parameters to their default. Figure 3.1 lists the default values of all user parameters. Table 3.1: Default Values Parameter Default SVS SV tracking selection Y for all PMD Position mode selection 0 Altitude Hold Fix Mode Selection 0 Position elevation mask 10 Zenith position elevation mask 90 FUM Use of UTM coordinates N FZN UTM zone selection 01 FIX PEM ZEN_PEM PDP Position Dilution of Precision mask 40 HPD Horizontal Dilution of Precision mask 04 VDP Vertical Dilution of Precision mask 04 UNH Use of unhealthy SV’s N ION Enable ionosphere model N PPO Enable point positioning mode N SAV Save parameters in battery backup memory N ANR Antenna noise reduction CPD LAT Antenna latitude 00N LON Antenna longitude 00W ALT Antenna altitude +00000.000 DTM Datum selection W84 UDD Datum user-defined parameters Semi major axis = 6378137 Inverse flattening = 298.257224 Remaining parameters = 0 PHE Photogrammetry edge selection R PPS Pulse per second default parameters Period= 1 second Offset = 000.0000 Edge = R Power capacity of external battery All 0’S POW parameters 30 Description ZX-Sensor and ZX-Eurocard Operation and Reference Manual microz1.book Page 31 Tuesday, July 23, 2002 2:53 PM Table 3.1: Default Values (continued) Parameter Description Default Session Programming Default Parameters INUSE flag = N REF day = 000 OFFSET = 00:00 For all Sessions: Session Flag = N Start Time = 00:00:00 End Time = 00:00:00 RCI = 20 MSV = 3 ELM = 10 RNG = 0 MDM Modem Parameters MODE=OFF TYPE = 0 (US Robotics) PORT = B BAUD RATE = 38400 BEEP Warning beep Off CTS Clear to send port setting On LPS Loop parameter setting 01, 2, 3 MET meteorological parameter setting All ports off INIT-STR:No TRIG-CMD:*0100P9 INTVL:5 TLT Tilt Meter parameter setting All ports OFF INIT-STR:No TRIG-CMD:*0100XY INTVL:1 NMEA messages NMEA Message Output Status OFF in all ports TAG NMEA nessage format ASH PER NMEA Messages Output Rate 001.0 RCI Raw Data Output Rate 020.0 DOI Data output interval 20 DRI Data recording interval 20 MSV Minimum Number of SV’s for Raw Data Output 03 ELM Elevation Mask for Raw Data Output 10 ZEN_ELM Zenith elevation mask 90 REC Record Data Flag (N/A) E MST Minimum Number of SV’s for Kinematic Operation 0 ANH Antenna Height (before session) 00.0000 Getting Started Getting Started Session Programming 31 microz1.book Page 32 Tuesday, July 23, 2002 2:53 PM Table 3.1: Default Values (continued) Parameter Description ANA Antenna Height (after session) 00.0000 SIT Site ID Name ???? EPG Kinematic Epoch Counter 000 RNG Ranger Mode Selection (N/A) 0 RAW data Raw Data Output Status OFF in all ports Raw data format Raw Data Output Format ASCII in all ports Serial Port Baud Rate Serial Ports Baud Rate Selection 9600 in all ports RTCM MODE RTCM Differential Mode Selection OFF RTCM PORT RTCM Differential Mode Port Selection A AUT Automatic differential/autonomous switching when rtcm differential mode enabled N RTCM SPD RTCM differential bps speed setting 0300 STI RTCM base or remote station id setting 0000 STH RTCM base station health setting 0 MAX Maximum age for old RTCM corrections to be used 0060 QAF RTCM communication quality setting 100 SEQ Use sequence number of RTCM correction in remote station N TYPE RTCM differential messages enabled and output frequency of the enabled messages 1 = 99, 6 = ON, remaining messages 00 RTCM EOT End of character selection for rtcm corrections CRLF MSG Text for RTCM type 16 message empty IOD IODE update rate 30 CPD MODE CPD mode selection Disabled PED DBEN output transmission period 001.0 DBEN PORT Output port for dben messages in the base B CPD EOT End of character selection for cpd corrections CRLF AFP Setting of ambiguity fixing confidence level 099.0 MAX AGE Maximum age of corrections for CPD 30 DYN CPD rover mode dynamic operation WALKING POS Output MTP 32 Default CPD Level of multipath selection MEDIUM ZX-Sensor and ZX-Eurocard Operation and Reference Manual microz1.book Page 33 Tuesday, July 23, 2002 2:53 PM Table 3.1: Default Values (continued) Parameter Description Default Reference position of the other receiver RECEIVED FST Fast CPD Mode Selection ON CPD PER CPD Update Interval 01 CKR Reserved ON IAF Reserved ON ANT radius Radius of the Antenna 0.0000 ANT offset Distance from Antenna Phase Center to Antenna Edge 00.0000 ANT horizontal azimuth Azimuth measured from Reference Point to Antenna Phase Center 00000.00 ANT horizontal distance Distance from Reference Point to Antenna Phase 00.0000 Center Getting Started Getting Started CPD POS 33 microz1.book Page 34 Tuesday, July 23, 2002 2:53 PM 34 ZX-Sensor and ZX-Eurocard Operation and Reference Manual microz1.book Page 35 Tuesday, July 23, 2002 2:53 PM Global Product Support If you have any problems or require further assistance, you can contactTechnical Support by telephone, email, or Internet. Please refer to the documentation before contacting Technical Support. Many common problems are identified within the documentation and suggestions are offered for solving them. Ashtech Products Technical Support, Santa Clara CA USA 800 Numberr 800-229-2400 Direct Dial: (408) 615-2400 Switchboard: (408) 615-5100 FAX Line: (408) 615-5200 e-mail: [email protected] Internet: http://www.ashtech.com Nantes, France: Direct Dial: 33 2 2809 3934 Switchboard: 33 2 2809 3800 e-mail: [email protected] Ashtech South America: Tel: +56 2 234 56 43 FAX: +56 2 234 56 47 When contacting Technical Support, please have the following information: Receiver serial number Software version number Software key serial number, if applicable Firmware version number A clear, concise description of the problem. Global Product Support 35 microz1.book Page 36 Tuesday, July 23, 2002 2:53 PM Solutions for Common Problems • • • • • Check cables and power supplies. Many hardware problems are related to these simple problems. If the problem seems to be with your computer, re-boot it to clear RAM. If you are experiencing receiver problems, reset the receiver as documented in the set commands section of this manual. Reset clears receiver memory and resets operating parameters to factory defaults. Verify that the batteries are charged. Verify that the antenna view of the sky is unobstructed by trees, buildings, or other canopy. Corporate Web Page You can obtain data sheets, GPS information, application notes, and a variety of useful information from Ashtech's Internet web page at: http://www.ashtech.com Repair Centers In addition to repair centers in California and England, authorized distributors in 27 countries can assist you with your service needs. Thales Navigation 471 El Camino Real Santa Clara, California 95050-4300 USA Voice: (408) 615-3980 or (800) 229-2400 FAX: (408) 615-5200 e-mail: [email protected] Ashtech Europe Ltd. First Base, Beacontree Plaza Gillete Way Reading RG2 OBP United Kingdom Tel: 44 118 931 9600 FAX: 44 118 932 9601 36 ZX-Sensor and ZX-Eurocard Operation and Reference Manual microz1.book Page 37 Tuesday, July 23, 2002 2:53 PM Index Symbols $PASHR,RID, ........................................... 4 $PASHS,INI, ........................................... 27 $PASHS,MDM, ....................................... 16 $PASHS,MDM,INI, ................................. 16 $PASHS,NME,POS, ............................... 29 $PASHS,NME,SAT, ............................... 28 $PASHS,PPO, .......................................... 6 Numerics 1227 MHz, ................................................ 1 1575 MHz, ................................................ 1 25-pin connector, .................................... 17 700389, .................................................. 14 730188, .................................................. 14 A B backup battery, ....................................... 21 baseline length, ........................................ 7 B-File, ..................................................... 29 Block I, ..................................................... 2 II, .................................................... 2 C C/A, .......................................................... 3 CA, ........................................................... 6 CA. See Coarse Acquisition cable loss, .............................................. 14 carrier differential, ..................................... 5 carrier phase, ...................................3, 4, 6 D data analysis, .........................................27 data collection, .......................................28 DB25, .......................................... 3, 16, 19 DBEN, ..................................................4, 6 default data output commands, ..............28 default parameters, ..........................28, 29 differential, ................................................5 DIN, ........................................................10 E edge selection, .......................................30 E-File, .....................................................29 ephemeris data, ........................................2 event marker, .......................................3, 5 event times, ..............................................5 expected accuracy, ..................................4 external communication, ..........................2 Index accuracy, .................................................. 4 almanac data, ........................................... 2 antenna connector, ................................... 3 Anti-Spoofing, ........................................... 2 AS, ............................................................ 2 AS. See Anti-Spoofing autonomous, ............................................. 4 autonomous position, ............................... 6 carrier phase differential, ..........................6 Coarse/Acquisition, ..................................1 code-phase, ..............................................1 communication protocol, ........................28 communication with receiver, .................27 constellation, ............................................2 current position, ......................................28 F falling edge, ..............................................6 fast data output option, .............................5 firmware, .................................................21 forced-air cooling, ...................................15 G gain, ........................................................14 GG24, .......................................................1 I ICD-GPS-200, ..........................................2 improving accuracy, .................................6 INI, ....................................................27, 29 37 microz1.book Page 38 Tuesday, July 23, 2002 2:53 PM initialization time, ......................................7 installed options, .......................................4 L L1, ................................................ 1, 2, 3, 6 L1/L2, ......................................................16 L1/L2-band, ..............................................2 L2, ................................................ 1, 2, 3, 6 L-band antenna, .......................................1 LNA, ...............................1, 2, 9, 14, 20, 21 low-noise amplifier, ...................................1 R M machine control, .......................................1 MDM, ......................................................16 message types 18, 19, 20 & 21, .............................. 1 MIL-STD-810E, ............................ 3, 14, 20 modem, .....................................................6 monitoring receiver activity, ....................28 multipath, ..................................................7 N NAVSTAR, ................................................2 NMEA, ......................................................6 non-volatile memory, ................................2 number of satellites locked, ......................2 O observables, .............................................6 observables option, ..................................5 operating temperature range, .................15 options, .................................................4, 5 P PCMCIA card, .........................................17 P-Code, ........................................... 1, 3, 6 performance conditions, ....................................... 4 metrics, ........................................... 4 point positioning mode, .............................6 point positioning option, ............................5 38 POS, ...................................................... 29 position, .................................................. 27 power, ...................................................... 3 power consumption, ................................. 2 power status, ............................................ 2 PPO, ........................................................ 6 precision navigation docking, ...........................................1 dredging, .........................................1 PRN, ........................................................ 2 pseudo-range, ...................................... 2, 3 raw position data, ..................................... 6 real-time differential, ............................ 1, 5 real-time kinematic, .................................. 1 real-time position, ..................................... 4 receiver status, ....................................... 28 remote location, ....................................... 6 remote monitor option, ............................. 5 remote.exe, .............................................. 6 RID, .......................................................... 4 rising edge, .............................................. 5 RS-232, ................................................ 2, 3 RST, ....................................................... 29 RTCM, .................................................. 4, 6 SC 104 V2.3, ...................................1 RTCM differential option, ......................... 5 RTCM-104, Version 2.3, .......................... 5 RTK, ......................................................... 1 RTK base station option, .......................... 5 RTK rover option, ..................................... 5 S SAT, ....................................................... 28 satellites being tracked, ......................... 28 SAV, ....................................................... 29 save changed settings, .......................... 29 SMB, ...................................................... 13 SMB-to-SMA adapter, ............................ 14 spread spectrum radio, .......................... 13 SV, ........................................................... 2 ZX-Sensor and ZX-Eurocard Operation and Reference Manual microz1.book Page 39 Tuesday, July 23, 2002 2:53 PM T technical specifications, ............................ 3 TNC, .................................................17, 20 trigger signal, ............................................ 5 TTT, .......................................................... 6 U user-selectable frequencies, .................... 6 V velocity, .................................................. 27 Z Index Z-12 receiver, ........................................... 1 Z-Family Z-Eurocard, .................................... 1 Z-FX, .............................................. 1 Z-Sensor, ........................................ 1 Z-Surveyor, ..................................... 1 Z-receiver, ................................................ 1 Z-tracking, ................................................ 2 39 microz1.book Page 40 Tuesday, July 23, 2002 2:53 PM 40 ZX-Sensor and ZX-Eurocard Operation and Reference Manual