1
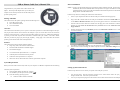
USB to Printer Cable User’s Manual V2.4
Driver Installation
_
Notice: : The driver of USB-Printer Bridge only supported for Win98/ Win98SE/ Win ME. About the driver for
Win2000/XP, Microsoft has followed IEEE 1284 Specification to support a standard driver bundled
in Win2000. When you plug in the cable, Win2000/XP will automatically detect the USB-Printer
Bridge cable & install the bundled driver.
Congratulations on your purchase of the USB to Printer Cable
adapter. This unique cable adapter allows you to attach your
computer to most Printer printer device thru the USB port and
Follow the steps below on installing the USB to Printer cable software:
get faster printing results.
Package Checklist
The USB to Printer Cable product package includes the following items:
♦ The USB to Printer Cable
♦ Driver Installation Diskette
♦ This User's Manual
Overview
1.
Power on your computer and make sure that the USB port is enabled and working properly.
2.
Plug in the USB to Printer cable into the USB port and Windows will detect the IEEE-1284 device and
run the Add New Hardware Wizard to assist you in setting up the new device. Click Next to continue.
3.
Insert the USB to Printer cable driver diskette into the floppy drive and click Next to continue. For
Windows 98, click Search for the best driver for your device and click to search driver from the
floppy disk drive.
4.
Windows will detect the driver (U2PAR.INF) and shows the IEEE-1284 Controller device. Click Next
to continue installation.
5.
6.
Click Next to continue and let Windows copy the needed files to your hard disk.
When Windows finished installing the software required for the new USB-Printer Bridge device, click
Finish.
The USB to Printer cable allows your PC to print to most Printer printer device connected through the USB port.
Just plug the USB connector of the cable into the USB port of your PC and the other end into the Centronics
connector of the Printer printer. USB (Universal Serial Bus) interface provides up to 12Mbps data throughput,
so printing is much faster compared when connected to standard Printer port (150kbs). The USB to Printer
cable also provides true plug-n-play and hot-plug capability - simply plug in the cable under the Windows
operating system and the cable will be instantly detected.
Features
The USB to Printer cable provides the following features:
♦ Single chip (ASIC) USB to Printer communication
♦
Windows 98/Me and Windows 2000/XP Support
♦
Mac OS8/OS9 Support
♦
Universal Serial Bus Specification Rev. 1.1 compliant
♦
USB full speed communication and bus powered
♦
USB Printer Class Specification 1.0 compliant
♦
IEEE-1284 1994 (bi-directional Printer interface) specification compliant
System Requirements
Before you use the USB to Printer cable, make sure your computer is an IBM PC-compatible with the following
Setting Up the Printer Device
minimum system requirements:
♦ Intel-compatible 486DX-66 MHz CPU or higher
♦ One standard 4-pin USB port (with the symbol
♦ Either the following operating systems:
Windows 98/Me or Windows 2000/XP
Follow the steps below on how to connect your printer to the USB port of your PC:
)
1.
2.
USB to Printer Cable User's Manual
1
Turn off your printer. Plug the Centronics connector of the “USB to Printer cable” into your printer
through a Printer cable. Turn on the printer afterwards.
Turn on your computer and plug in the USB connector of the USB to Printer cable into the USB port.
USB to Printer Cable User's Manual
2
3.
4.
If you have already installed a printer device before, click Start, Settings, Printers. Right-click the
default-installed printer and click on Properties. The Properties dialog box of the installed printer will
appear on your screen.
Click the Details folder tab and change the printer port to LPT2: (USB to Printer Port).
Disclaimer
Information in this document is subject to change without notice. The manufacturer does not make any
representations or warranties (implied or otherwise) regarding the accuracy and completeness of this document
and shall in no event be liable for any loss of profit or any other commercial damage, including but not limited to
special, incidental, consequential, or other damages.
No part of this document may be reproduced or transmitted in any form by any means, electronic or mechanical,
including photocopying, recording or information recording and retrieval systems without the express written
permission of the manufacturer.
All brand names and product names used in this document are trademarks, or registered trademarks of their
respective holders.
FCC Statement
This device generates and uses radio frequency and may cause interference to radio and television reception if
not installed and used properly. This has been tested and found to comply with the limits of a Class B
computing device in accordance with the specifications in Part 15 of FCC Rules. These specifications are
designed to provide reasonable protection against such interference in a residential installation. However, there
is no guarantee that interference will not occur in a particular installation. If this device does cause harmful
interference to radio or television reception, which can be determined by plugging the device in and out, the user
can to try to correct the interference by one or more of the following measures:
5.
If you do not have a printer installed yet, click on Start, Settings, Printers, Add Printer. The Add
Printer Wizard will start and assist you in installing a new printer device. Select the printer
manufacturer and model name from the list provided by the wizard or use the printer driver diskette
supplied with your printer.
6.
When prompted which port the printer will use, click on LPT2: USB to Printer Port.
7.
Follow the succeeding instructions to complete the installation and also run Print Test Page to see if it
can print without problems.
Reorient or relocate the receiving antenna.
Increase the separation between the device and receiver.
Connect the computer into an outlet on a circuit different from that to which the receiver is
connected.
Consult the dealer or an experienced radio/TV technician for help.
Copyright ©2005 All rights reserved.
Uninstalling the Driver Program
If in any case you want to remove the USB to Printer cable driver program, you can uninstall it by following the
steps below:
1. Unplug the USB to Printer cable from your PC.
2. Run the UNINST.EXE program from the USB to Printer cable driver diskette and reboot the PC.
More Information
If you need more information please visit website:
http://www.prolific.com.tw
USB to Printer Cable User's Manual
3
USB to Printer Cable User's Manual
4