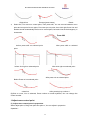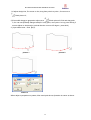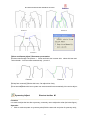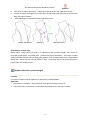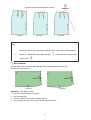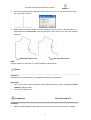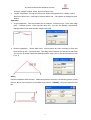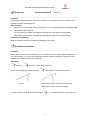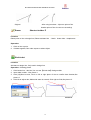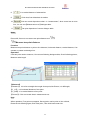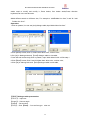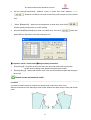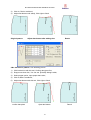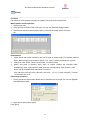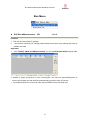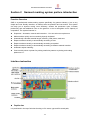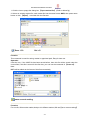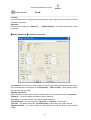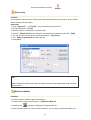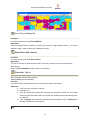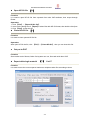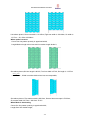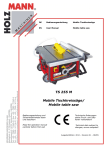
1
Richpeace Garment CAD System
Richpeace Group Co., Limited
www.richpeace.com
Content Summary
This manual is matched book with Richpeace Garment cad, It introduce software
function and operation, This book comprehensive, With words and picture, from
simple to deep, Have strong study and reference value.
It is available for students in fashion school, or pattern design person and who is
interested in garment cad.
Catalogue
Chapter One RichpeaceGarment Cad Function Summarize
Section 1 Function summarize .................................................................................... 1
Section 2 Computer cofiguration and software installation ....................................... 6
Section 3 Plotter and digitizer installation.................................................................. 9
Section 4 Professional term of this maunal ............................................................. 10
Chapter Two Richpeace Design And Grading System
Section 1 Shortcut key and mouse wheel Introduction .................................... 11
Section 2 Richpeace Design &Grading System .............................................. 14
Section 3 Quick accidence .............................................................................. 16
Section 4 Short Cut Toolbar............................................................................. 28
Section 5 Design toolbar ................................................................................. 58
Section 6 Pattern toolbar ............................................................................... 100
Section 7 Grading toolbar .............................................................................. 133
Section 8 Hide toolbar ...................................................................................... 143
Section 9 Menu bar .......................................................................................... 162
Chapter 3 Garment Marking System
Section 1 keyboard shortcut button instruction .............................................. 196
Section 2 Garment marking system preface introduction .............................. 198
Section 3 Quick accidence ............................................................................ 201
Section 4 File Toolbar .................................................................................... 207
Section 5 Marker toolbar 1 ............................................................................ 236
Section 6 Marker toolbar 2 ............................................................................ 243
Section 7 Matrial toolbar ................................................................................ 251
Section 8 Hiden toolbar ................................................................................. 251
Section 9 Toolbar menu ................................................................................. 259
RICHPEACE GARMENT CAD FUNCTION SUMMARIZE
Chapter One
Richpeace Garment Cad Function Summarize
Section 1
Function summarize
Chapter One - It covers the content of each chapter and partial special terms and basic
configuration of system as well as the installation of software and hardware.
Chapter Two - It roundly introduces the function and operation in Richpeace DGS (CAD)
system.
Chapter Three - It roundly involves the operation and functions in Richpeace GMS system.
Richpeace Garment CAD is used in fashion、underwear、cap、bag、Sofa、tent industry, Epeical
Make pattern 、Grading and marker making. This function is very powerful, Easy for operating
and study . Can improve work efficiency and product quality, It is necessary tool in fashion
company.
Richpeace Garmet cad, Can make pattern 、Grading on computer, Also can input by camera or
digitizer, Then modify pattern, Grading and make marker、Plot, Also can input patter already
nest.
How to Read the User’s Manual
In every system of interface part, it briefly shows you the operational environment, so that you
are familiar with this system.
In the section of 【Quick Accidence】, it introduces the operational flow of whole system. Going
through this section, you can complete the simple operation. In the sections of Shortcut
Toolbar and the other Toolbars, it shows you the function and usage of every tool in detail. It
becomes your dictionary and teaches you how to utilize this system. In this chapter, you can
figure out all of the features and operations for each tool which helps you master this system
easily.After reading, You can know the system comprehensively.
Following introduce pattern design 、Grading、 Modify pattern and marker making
and plot function.
1
RICHPEACE GARMENT CAD FUNCTION SUMMARIZE
Pattern desing(
(Pattern creation)
)There are three type:
:
Auto design
There are many pattern lib in software,It is easy for modifying part size and order size,
Grading automatically, Offer accurate data for calculating material, Also can establish
Pattern lib by yourself.
Free design
1.
Intelligent pe more function
One pen include twenty function, Can finish without tool change;
2.
Can input measurement without dialogue table appear
When make design line, Can input data size directly,Improve efficiency;
3.
Set situation near side
No need to cut apart line, You can set size. See following picture;
4.
Match divided point on line automatically
Can get divided point automatically when set situation;
5.
Mouse wheel and space
Zoom out or zoom in or move pattern;
6.
1:1 appear
Design line or pattern ca appear 1:1 proportion;
7.
Curve line and straight line connect smoothly
If there are part curve and part straight on one line, Can smooth in connection place, do not
have corner;
8.
Show subtense height when adjust
9.
Move and rotate adjust
Can combine more group design line and pattern line then adjust;
10. Symmetry adjust
Whe adjust one side,Adjust side will adjust together;
11.
Measure
Can refresh measured data automatically;
12. Transfer dart
Can transfer dart in one circle, also can transfer in different circle, Transfer eaqually, One
dart transfer to more dart, Also can transfer whole in proportion, Dart tip can move also can
keep it;
2
RICHPEACE GARMENT CAD FUNCTION SUMMARIZE
13. Add pleat
There are knife pleat、Box pleat、Front or back pleat, Also can whole pleat and half pleat,
Can add straight line pleat and curve line pleat ,Also can insert one or more dart;
14. Cut apart
Can longer or shorten appointed line, Insert dart or pleat in appointed place;
15. Flouncing
Can make start and end equal width flouncing, Also can make start and end non equal
width flouncing;
16. Arc corner
Can make equal distance corner also can use non equal distance corner;
17. Forfex pattern
It offer colour filled pattern, Select line to creat pattern, Make square to form pattern and
hollow pattern function, And can creat seamallownce automatically;
18. Seam
Seam and pattern border is associated, When adjust border, Seam will refresh
automatically. Equal seam or same corner place can set or modify together, Special
Seamallowance also associate;
19. Notch place fixed and modify
Can add equal distance notch on one or more line、More kind of notch type, Can match
notch oncetime o sleeve and front and back;
20. Create interlining
Create interlining on pattern automatically;
21. Pic lib
Software offer hundreds of sewing sign. Also can modify size, Move and rotate to
Available part; .
22. Sew line、Quilted line
System offer more kinds of straight line and curve line type, You can group freely,
Quilted line can select between single and cross line, Angel can set freely;
23. Shrink 、Part shrink
Can shrink all the material same pattern, Also can shrink for part pattern;
24. Safe restore
System auto save each file, Did not save when met Something urgent, System will
Help u find data;
25. Encrypt file
System can encrypt file, File can not be copied and thieved;
26. ASTM、TIIP
Can import ASTM、TIIP file and output ASTM, Share with our CAD;
27. Custom toolbar
Tool can group freely on interface, Right click button can set freely;
3
RICHPEACE GARMENT CAD FUNCTION SUMMARIZE
Pattern made by hand import
You can input pattern to computer by camera or digitizer,Can input one size, Also can
Input more size.
Grading
1.
Auto confirm “+” or “-”
When use point grading, System can recognize grading value“+” or “-”automatically;
2.
Grading together for part which grading value is same
Can make square more point and grading together;
3.
Equal grading between pattern border and assistant line
4.
Assistant line can grade together with border ,Also can grade separately;
5.
Fixed measurement grade
Can grade according to curve or straight line length ;
6.
Size group
Can grade in one group ,Also can grade in different group;
7.
Text grading
Different size can have same text,also can have different size, text place can grade tool;
8.
Button hole、Drill
Can add equal drill、button hole , Also can add same distance drill 、button hole, When
grading, Different size button hole or drill quantity can same, Also can not same;
9.
Grading value copy
Can copy one and paste one, Also can copy one and paste more.
Pattern modify
1.
Shadow
When modify pattern, Shadow can appear, You can compare before pattern and modified
pattern. If modify more time, Can go back original shape;
2.
Move all or only move line
When adjust more part same,Can adjust together;
3.
Adjust other size except basic size(point or line)
When adjust pattern, Can adjust one single size or all the size ,Also can adjust in
proportion and adjust parallel;
4.
Show line length
Can show line length automatically;
5.
Ajust pleat and dart merged
On basic size or graded dart and pleat, Can combine dart and pleat and make it smooth;
6.
Compare path work
With on pattern walk on anoter pattern, Combine and adjust line smooth.
4
RICHPEACE GARMENT CAD FUNCTION SUMMARIZE
Nest
1.
Super nest
Efficiency is higher than manual nest in short time, Also have color avoid、Bind and fixed
pattern function;
2.
Calculate(Estimate) material
Can calculate each marker material consumption (Include length and weight), Also Can
apart automatically (or manually), Cut down fatory cost;
3.
System can apart material automaticallyaccording to different material;
4.
Easy operate when make marker by hand
Can finish flip、Overlap、Slope with mouse or shortcut button;
5.
Strip
Can strip according to before pattern, Also can strip according to appointed place、Strip by
hand or automatically;
6.
Check overlap
Can check overlap between pattern;
7.
Double marker
Can make marker on main or aided marker;
8.
Reference marker
Can make marker refer to before finished marker;
9.
Duplicate 、Reverse marker
Can duplicate or Rever marker on part finished marker;
10. Cap nest
Aim at cap nest mode, Can set reverse、interleaving、@ reverse、@interleaving;
11. Associate
After make marker, Marker can change automatically when pattern change;
12. Group nest
Aim to cutter can group nest.
Plot
1.
Output Mode
Can plot、Whole cut、 Half knife cut;
2.
Plot line type
Inside border、Outside border、Assistant line type can set separately;
3.
Plot selected page
Plot appointed marker;
4.
Marker title
Can plot detail instruction at end or at start;
5.
Check ploting
If there are missed pattern or same side pattern or different material pattern, System can
check automatically.
5
RICHPEACE GARMENT CAD FUNCTION SUMMARIZE
Section 2 Computer cofiguration and software installation
Computer configuration
Pentium 2.0G or above CPU
512 MB RAM
40GB disk space more than 40 GB
Independent display card(128 bit,128MB)
17 size or above display
Service platform:Windows 98/2000/xp
Software installation process:
:
1.
2.
3.
Close all the run program;
Put Richpeace disk to CD-ROM
Open disk, Run setup, You can see following dialogue table;
4.
Click Next,You can see following dialogue table;
6
RICHPEACE GARMENT CAD FUNCTION SUMMARIZE
5.
Select corresponding version ,If select “Enterprise” (If your company is lan version, Please
select lan version,Click Next button, You can see following dialogue table;
6.
Click Next(You can click Browse define path again),You can see following dialogue;
7.
Select need program, Then click Next, You can see following dialogue table;
8.
Select plotter type,Thenclick next,You can see following dialogue table;
7
RICHPEACE GARMENT CAD FUNCTION SUMMARIZE
9.
Click finish button, Insert key on computer can run, If can not open software, Need to install
driver by hand;
10. Open installation disk from “My computer”,For example disk c ,Richpeace cad V8---
--
,Double click and install instWiz3;
11. If yours is lan version,You need to install
and
--
---
--
--
(lmsetup only be installed on server
computer;
If supernest key(safenet)You need to install driverSentinel Protection Installer(Please do not
insert key when install this driver).
8
RICHPEACE GARMENT CAD FUNCTION SUMMARIZE
Section 3
Plotter and digitizer installation
Plotter installation process:
:
1.
Close computer and plotter power;
2.
Connect plotter and computer with serial cable or parallel cable or USB cable;
3.
Open computer;
4.
According to plotter maual, Open plotter and set operation.
Note:
:
1.
Not allowed to pull off serial cable/ parallel cable/USB Cable when plotter or computer
open;
2.
3.
Keep plotter closed before switching on the power
The socket should be connected properly.
Digitizer installation Process:
:
1. Close computer and digitizer power;
2. Connect digitizer serial cable and computer;
3. Open computer;
4. According to digitizer manual, Open digitizer and set corresponding operation.
Note:
:
1. Not allowed pull off serial cable when computer and digitizer when power on;
2. Keep digitizer close before switching the power;
3. .The socket should be connected properly.
9
RICHPEACE GARMENT CAD FUNCTION SUMMARIZE
Section 4
Professional term of this maunal
【Click 】 Press the left button and release the mouse instantly.
【Click (Single click the right key) Press right button of mouse and release mouse instantly,
Also means to current command finish.
【Double click right key】 Click right key two times quickly on same position.
【Drag with left button】 Put left buton on point or line, press left and do not loosen.Then
move button.
【Drag with right
button】 Put right buton on point or line, press right and do not
loosen.Then move button.
【Left button marqueen select】 Before move mouse to point or line, Press left and do not
loosen, Then move mouse and make a marqueen to select object . If distance is too short and
turn to 【Drag with left button】,You can press ctrl before press left button.
【Right button marqueen select】 Before move mouse to point or line, Press right and do
not loosen, Then move mouse and make a marqueen to select object . If distance is too short
and turn to 【Drag with right button】,You can press ctrl before press right button.
【Click(
(Press)
)】 Put cursor on object, Then release mouse instantly.
【Click】 Right button is no special inllustration , It is means left button.
【Mrqueen】 Right button is no special inllustration , It is means left button.
【Ctrl+Z】
F1-F12:
:
Press ctrl at the same time press z on keyboard.
Twelve button on the top of keyboard.
Ctrl + F12: Press and hold Ctrl, Then press F12.
E sc:
: Press Esc on the left top corner.
Delete:
:Delete button on keyboard.
Arrow: It is refer to up, down, left, right four directio
10
RICHPEACE DESIGN AND GRADING SYSTEM
Chapter Two
Richpeace Design And Grading System
Section 1 Shortcut key and mouse wheel Introduction
A –Modify B-Intersect And Equal Distance Line C-Compasses D–Divider E-Eraser
F-Intelligent Pen G -Move K–Mirror M–Symmetry Adjust N -Combine Adjust
Q-Equal Distance Line
R –Compare Length S- Rectangle T -One –Way Extend
V –Corner W - Forfex
Z –Snip Curve
F2 -Change Shadow And Border Line
F4 Show Basic Or Show All
F5 Change Sewing Line and seam allowance
F7 Show /Hide Seam Allowance
F9 Match Whole Line Or Part Line
F10 Show Or Hide Ploting Paper Line
F12 Renew All Pieces
Ctrl+F11
Ctrl+F12 All Pieces Enter Working Area
Ctrl+N
New
Ctrl+O
Open
Ctrl+S
Save
Ctrl+A
save as
Ctrl+C
Copy Pattern
Ctrl+V
Paste Pattern
Ctrl+D
Delete Pieces
Ctrl+G
Clear Pattern Grading
Ctrl+E
Edit Size And Measurement
Ctrl +F
Show /hide grading point
Ctrl +K
Show/Hide Non Grading Point
Ctrl+J
Fill Color/Do Not Fill Pattern
Ctrl+H Show /Hide chord height when adjust
Ctrl+R
Create new grainline
Ctrl+B
Ctrl+U
Show temp assist curve or hidden assist curve
Shift+U
Hide temp assist curve or assist curve
Shift+S
Curve adjust
SHIFT
1:1 Show
Rotate
Ctrl+F7 show or hide seamallowance value.
Ctrl+Shift+Alt+G Delete all G-line
When draw curve,Press Shift Draw Turn Line
ESC
ESC Current operation
Enter Line changing operation when edit words/change parameter of current point/ show
dialogue table of cursor point
11
RICHPEACE DESIGN AND GRADING SYSTEM
X button
Using together with siz align button,Align grading value in x direction
Y button
Using together with siz align button,Align grading value in Y direction
U button
press U ,at the same time click pattern, Pattern can go back to pattern list
Note:
:
Press shift+u, When cursor turn to
, Click or make a square to select hidden assist curve.
F11: When grainline move or extend, Match one/all size; With T move T text, Match one/
All size.
Mouse Wheel:
:
When use any tool,Move wheel front direction, All the work arerea pattern or design line mov
etowards down direction.When use any tool,Move wheel back direction, All
work arerea
pattern or design line move towards up direction.
Press Shift:
:
Move wheel front direction, All work arerea pattern or design line move towards right direction.
Move wheel back direction, All work arerea pattern or design line move towards left Direction.
Keyboard Direction :
Press up button, All work arerea pattern or design line move towards down direction.
Press down button, All work arerea pattern or design line move towards up direction.
Press left button , All work arerea pattern or design line move towards right direction.
Press right button ,All work arerea pattern or design line move towards left direction.
Small keyboard + “+”on keyboard, press once time, All work arerea pattern or design line show according to
proportion
“-”on keyboard, press once time, All work arerea pattern or design line show according to
proportion
Space Function :
1. Select any tool, Put cursor on pattern, Press”space”.
2. Using any tool, Press space , curson change to zoom in , Move wheel front direction,
Workarea content will zoom in basing cursor center, Move wheel back direction, Workarea
content will zoom out basing cursor center,Click right is full screen.
No value in dialogue table :
1. Input one group value: Input value, press enter.
For example, Input 30cm horizontal line with intelligent pen, Click left , change to
horizontal ,input 30, Press enter.
2. Input two group value: Click first group value, Press enter, Press second group value, Press
enter.For example, Draw an rectangle 24x60, Click to make first point, Input 20, Press enter,
Input 60, Input 60, press enter.
Click right on table dialogue table:
12
RICHPEACE DESIGN AND GRADING SYSTEM
Click right on table dialogue table, You can see menu, Select value on menu, For example,
Input 1.3/8, Operationn: Input 1, click right, Select 3/8.
13
RICHPEACE DESIGN AND GRADING SYSTEM
Section 2
Richpeace Design &Grading System
Interface Introduction
Interface is user work house, If you familiar interface,You familiar work eviroment, Improve
work efficiency.
File Path
Show current opened file path.
Menu Bar
It is putting menu command place, And there are various command under each menu. Click
menu, You can see a menu list, Cick select one command. Also pressand hold Alt and press
letter behind menu, You Can select Menu,Press direction button to select object.
Shortcut Toolbar
Some commands in common use are put here in manner of icon.
Patternlist Box
It is a pictorial list of pieces within a design file. The Pattern Listbox shows a small picture of
each piece in a design file .You can display the Pattern Listbox location from 【Option】-【System Setup】--【UI Setup】--【Piece Listbox Arrange】.By dragging a pattern and move ,
you can adjust its arrangement order of pattern in the Pattern Listbox. Also you can select
pattern with menu ,copy or paste pattern.
14
RICHPEACE DESIGN AND GRADING SYSTEM
Ruler Bar
Show used unit.
Design Toolar
Line drawing or modify design line tool is put here.
Pattern Toolar
After using the tool of scissor
to create a pattern, the tools in this toolbar can be used to
adjust the created patterns. Such as adding darts, notches, drills, etc.
Grading Toolbar
Some tools for grading are put here.
Work Area
It is seems a paper, You can draw design line, Also you can grading、Plot or show paper border.
Status Bar
The Status Bar is on the bottom of the interface. The status bar displays information of the
current tool and the prompts for its operation.
15
RICHPEACE DESIGN AND GRADING SYSTEM
Section 3
Quick accidence
Establish Database
Double click my computer
,Then doubclick to open disk D,Disk E or Disk F,Or you click
right on blank location to establish new folder. You can renew file name for example spring and
summer Fashion folder, Autumn and winter fashion folder, Then save it to a disk.
Design Pattern For a Lady’S Long Sleeve Shirt
Note: Detailed tool operation will be introduced on later chapter and section.
1.
Click 【size】 menu-【Edit size and measurement】, Input size in measurement size
(this optioncan have also can no this process);
2. Select intelligent pen
, drag length(64CM) and back bust(Bust98/4=24.5CM);
16
RICHPEACE DESIGN AND GRADING SYSTEM
3. Draw back collar width 8cm, Back collar deep 2cm with rectangle tool
intelligent pen
, Select
draw back collar curve,And adjust collar curve with symmetry adjust
tool;
4. Select Intelligent pen
, Put curson on back center point, When appear red icon, Press
Enter on keyboard, You will see dialoge table, Input offset value, And connect with collar width
point;
5. Use intelligent pen
, Put on horizontal line and drag, Input 24 on key board to fix bust
line, Same operation to get waist line;
17
RICHPEACE DESIGN AND GRADING SYSTEM
6. Draw back breadth with Intelligent Pen
7. Draw back armhole with intelligent pen
(Can use calculator bust/6+2.5=18.8);
, Get equal point on back breadth, If it is not
2 ,You can input 2 in shortcut toolar bar
, Make curve smooth with modify tool
18
;
RICHPEACE DESIGN AND GRADING SYSTEM
8. Draw side seam curve and bottom line, Make curve smooth with modify tool
9. Make front by coping design line of back with move tool
bust line with intelligent pen
;
,Draw 2.5CM line from
;
10. Draw front collar deep 9cm ,and front collar width 8cmwith rectangle
, Draw front
shoulder down line 4.2 cm,Draw front bust width 17.8cm,At the same time draw front collar
with intelligent pen
,Adjust with symmetry adjust
tool until satisfy;
11. Measure and record small shoulder length with compare length tool
shouler with compasses
, Draw front armhole with Intelligent pen
19
, Make Front
;
RICHPEACE DESIGN AND GRADING SYSTEM
12. Copy back seam line with move tool
, At the sametime move side point to up bust
2.5 cm line;
13. Draw closing and bottom line with aptitude pen
, Adjust front and back armhole, Front
and back collar, Front and back bottom with move and rotate adjust tool
these line smooth.
20
,Make sure
RICHPEACE DESIGN AND GRADING SYSTEM
14. Make under armhole center line and fastigiate center line with intelligent pen
Measurefront and back armhole length and record with compare length tool
15. Draw sleeve width with intelligent pen
,
;
,Draw front and back sleeve slope with
Compasses tool;
16. Draw sleeve curve with aptitude pen, Adjust it make sleeve line smooth.See above picture;
17. Compare Armhole and sleeve value margin with compare length tool
wanted value,Adjust with curve adjust tool
.;
18. Draw sleeve center line and cuff and sleeve side seam ;
21
,If it is not your
RICHPEACE DESIGN AND GRADING SYSTEM
19. Measure front and back collar length with compare length tool
Intelligent pen
;
20. Get pattern border line with Forfex tool
,Also pattern dart center line;
21. Adjust Grainline direction with Grain line tool
tool
, Draw collar with
, Add side seam dart in front with v dart
, Add waist dart with Fastigiate dart tool
,Add seam with add seam tool
;
22
, Add button on front with drill tool
RICHPEACE DESIGN AND GRADING SYSTEM
22. Make notch with Notch tool on waist, Make notch on armhole, sleeve curve with “sleeve
Crown and armhole notch”tool;
23. Symmetry back and collar with pattern symmetry tool
;
24. Click [pattern]-[style info],You can see [ style information] dialogue table,
Setname ,customer,order,Material color, Set the same way for grainline;
23
RICHPEACE DESIGN AND GRADING SYSTEM
25. Double click on pattern on pattern list, you can see【Pattern info】dialogue table, Input
pattern name, Material and copies;
26. Save file, Make new file each time, Clcik save button
, There are 【save as】dialogue
table appear, Select path, save it, If you open again, and modify file , need to save, only
need to press save icon
;
27. Grading:Eedit size and measurement. Clcik 【size】-【Edit size and measurement】, Input
size needed and Set size color;
24
RICHPEACE DESIGN AND GRADING SYSTEM
28. Make display/hide design line icon up
,Make view pattern incon
down, Press F7
hide seam allowance, Put front pattern to workare, Make location well, Click Grade table
incon
, You can see Grade table dialogue table, make Auto confirm sign icon down
29. Select grading value same point with “select pattern control point “tool
, For example,
Front side Seam grading table, Input 1cm in any size except basic size, Click equal x;
30. Finish Front and back pattern shoulder and collar grading with same operation;
25
;
RICHPEACE DESIGN AND GRADING SYSTEM
31. Select bottom of front and back, If some size dispersion is not same, You can click equal Y
first, Input value in different size, Then input Y non equal grading
32. Auto confirm sign icon
.
,Make it up. Grading for front and back waist length, Armhole
deep, Front collar, Grading for dart with
V dart and fastigiate dart
;
33. Grade for sleeve and collar with point grading, And check dispersion Between armhole and
sleeve curve with compare length tool
;
34. Plot: Put all the pattern need to plot to work area, Check grainline info show or
not(Option-systme setup-Grainline setup/plot parameter);
26
RICHPEACE DESIGN AND GRADING SYSTEM
35. Click[edit] Menu-[Auto arrange patterns].
36. Click plot
, Select available option, You can plot pattern.
27
RICHPEACE DESIGN AND GRADING SYSTEM
Section 4
New(
( N)
Short cut toolbar
Ctrl+N
Function
It is used to establish a new file.
Operation:
:
1. Click new icon
or Ctrl+N to establish a new file;
2. .If there are unsaved file in workare, It will appear 【save current file or not】dialogue
table to ask save or not.
3.
Clcik【yes】will appear【save as】dialogue table, select path and input file name, click
【save】.If you ever save before, Will save to original place.
Open
Ctrl+O
Function
Open a file already saved.
Operation
Click this icon or press “ctrl+O”,You will see 【open】dialogue table, Select file according to path,
Click[【open】(double click file name),You can open a saved pattern file.
【OPEN】
】:dialogue table parameter introduce:
28
RICHPEACE DESIGN AND GRADING SYSTEM
【Preview】
】:Select
preview, Will appear the last time saved content of this file;
:
appear“style info”-【comment】 ,For example “shirt”;
【Search file】
】Click search file button, You can see【search file dialogue table】;
【Search file】
】parameter introduce
【Browse file】
】
Select file according to path, All the file show on browse dialogue table,No style, Appear with
sign“×”;
【Search】
】
29
RICHPEACE DESIGN AND GRADING SYSTEM
Check above item according to above cue, Click dialouge table, Input words, Press disk under
[search], Click [start], When file name appear under [search file],Click[open].
Save As(
(S)
)
Ctrl+S
Function:
:
It is used to save an existing file.
Operation:
:
1.
Click
icon or press ctrl+s, Will appear【save as】 dialogue table, Find a path, Input file
name in 【file name】,Click 【save】.;
2.
Click save file again, Click this icon again, File will be save to original path and Original
name.
Presentation:
:
If file did not change, Icon is grey, It is unactive status.
30
RICHPEACE DESIGN AND GRADING SYSTEM
Input pattern
Function:
:
Input manual made pattern and overlap pattern to computer with digitizer and digitizer mouse.
Operation:
:Read basic size
1. Paste pattern on digitizer;
2. Click input pattern Icon
,You can see【input pattern】 dialogue table, Put digitizer cursor
on inputing point(Refer 16 key mouse Button setup function),Input order point in clockwise,
Click .2 to finish;
3. Opened assist line
is selected automatically(If you want to input close line, Click
icon, If It is hollow pattern, Click
,Press corresponding button according to point
parameter,every time fish one assistant line or hollow place or closed line ,Press 2 to finish;
4.
According to attached table ,Input other inner sign;
5.
Click 【New pattern】on dialogue table, before pattern appear on pattern list, [Input pattern]
dialogue table blank, now you can read another pattern.
6.
When finish all pattern, Click 【End】
Note: Drill、
、button hole、
、Grainline、
、dart/Pleat can be input after inputing border line.
Example,Number in circle is digitizer mouse, is not in circle is order of inputing. Following is
important place presentation.
1.
After reading point 4 with digitizer mouse btton 1, Select corresponding pleat on
menu,Then read this pleat;
2.
Point 11, If it is 【curve point】,Press 4 then press 3 on digitizer mouse,Press 3 directly on
digitizer mouse on point 22 and;
3.
After reading point 17,read dart border point with digitizer mouse 1, Then read dart;
4.
Point 31,Press 1,Then press 2 on digitizer mouse;
5.
When read fastigiate dart, select fastigiate dart on menu with digitizer mouse button1,
Beacause it is symmetry, So we only read half part;
6.
After reading opened assistant line, each time finish one opened assistant line, press 2 to
finish;
31
RICHPEACE DESIGN AND GRADING SYSTEM
1 2
31
39 F 1
4 30
40
1 2 2
35
4
36
34
5
37 4
19
4 28
3
4
1
6 5
7
5
5
5
14
24
4
4
23
4
22
3
1
3
38
27 26 25
4
33 D
32 D
5
29
4
1
1
21
4
13 12 11
15
7 4
4
20 18 17
4
16
5
5 4 1
4
3
4
5
8
5
5
10 9
4
1
Read grading pattern: There are two way to read grading pattern, Cick input pattern icon, First
select all size,Second selct one size by one under
. Here we introduce the
first way.
1.
Click[size]-[Edit size and measurement], Insert or Add size, Then confirm basic size, Click
ok.
2.
Arrange pattern from small to big size, Align with one side, Then fixed on digitizer.
3.
Click input pattern icon
, You can see 【input pattern】dialogue table, Input basic size
grading point with button1,Then Press E from small size to big size( leap over big size),
Input corresponding grading point of this grading point.
4.
Refer to this method, Input other grading point, Input basic size only when met non grading
table.
5.
Press button 2 to finish.
EXAMPLE:
1.
Input four size in 【size】-【edit size and measurement】, For example S、M、L、XL, Set
size s as basic size.
2.
Arrange pattern from small to big size, Align with one side, Then fixed on digitizer.
32
RICHPEACE DESIGN AND GRADING SYSTEM
3.
From point A, Read pattern clockwise, Press on basic size withdigitizer mouse 1,
ClickA1,A2, A3 with digitizer mouse E.
4.
Click on point B with digitizer mouse 1(B non grading), Press 4 read basic size collar curve.
5.
Click on point C with digitizer mouse buton 1, Then Click on point C with digitizer mouse
button E,Then click two times on point C2 with digitizer mouse E.(Collar with is two size
one dispersion)
6.
Process of inputing poin D is same as point A, Then read armhole with button 4, Other
grading point and non grading point read process same as before.
Note:
Standard digitizing can be read in with present function in 16-key mouse through the attribute of
different points. If it is a 4-key mouse in which don’t contain the preset function, you can click
the options of Key 1 in the dialog box Read Patterns, and then press the Yellow button (Key 1)
to read in the points. The usages for these keys are introduced in the annexed table below.
(Shown as the following pic)
The attributes for each key in 16-key mouse are described as below (the relevant key of
4- key cursor is attached after the function):
1:Grading point on one line
2:Close/Finish
3:Notch
4:Non grading point on a curve
5:Dart/Pleat
6:Drill
7:Grading point on a curve
A:Non-grading point on one lin
9:Button hole
B:Read new pattern
0:Circle
C:Undo
D:Grainline
E:Graded
F:Assistant button(Switch
selected status)
33
RICHPEACE DESIGN AND GRADING SYSTEM
Attachement:
Type
Operation
Picture
After reading border line, Opened assistant line tool
Opened
Assistant
line
is selected automatically, Input one side, Middle point with
digitizer mouse button 1,( As point property, If beeline,
input 1,If curve line, input 4), Input another side with button
1, Press 2 to finish.
Closed
Assistant
Line
After reading border line,Click
, Input according to
point property, input 2 to finish.
Inner
border
line
After reading border line, Click
,Input according to
point parameter, Press 2 to finish
When read v dart ,Select v dart on menu with digitizer
mouse 1( Default is v dart, If you did not ever read other
dart, No need to select). Rress 5 on dart first poit, Press 4
V dart
on middle line, Press 5 on dart tip point, Press 5 on end
point. Beacause dart is symmetry, So only press 5 on end
point ,No need to press 4 on another side curve.
When read fastigiate dart, Select fastigitat dart on menu
Fastigiate
with button 1, Then press 5 read dart first point, dart waist
Dart
pioint, Dart tip point ,dart end point, If there are curve,
Press 4, Beacause dart is symmetry, So only press 5 on
end point ,No need to press 4 on another side curve.
InnerV
dart
Inner
fastigiate
dart
When finish border line, Select v dart on menu with button
1, Operation is same as v dart.
When finish border line, Select fastigiate dart on menu
with button 1, Operation is same as fastigiate dart.
34
RICHPEACE DESIGN AND GRADING SYSTEM
After reading border line, Select Rhombus dart on menu
with button 1, Read dart point,dart waist point, dart tip
Rhombus
point, Press 2 to finish. f there are curve, Press 4,
dart
Beacause dart is symmetry, So only press 5 on end
point ,No need to press 4 on another side curve.
Same operaation for reading box pleat(show、H ide)、
knife pleat, When read border and reach pleat, Press 1 on
Pleat
menu select pleat type and direction, Then press 5 read
pleat first point and pleat deep. Order is 1、2、3、4.
type of point property from 1、4、7、A, Then press 3.If
Notch
selectCurve grading point, press 7 ,then press 3.
Before or after finishing border line, Press D to read
Grainline
Grain line two side point , If you did not input grain line,
System wil creat a grainline automatically.
Button
Before or after finishing border line, press 9 to input button
hole
hole two side point.
Drill
Before or after finishing border line,Press 6 on drill center
Circle
Before or after finishing border li ne,Press 0 on drill center
Read pattern presentation:
1.When read border and inner closed line, Read in clockwise;
1. Dart pleat
When read dart or pleat, Read one border line at least.
When read v dart, did not read other dart or pleat,No need to select on menu.
When read same type dart and pleat, Only select one time.
35
RICHPEACE DESIGN AND GRADING SYSTEM
【Input pattern dialogue table】parameter presentation
,There are many notch type after
[noctch], You can click arrow and select. Selected notch is appeared notch when read pattern,
there are many point type , You can select by clicking arrow.
Like picture, When you read curve grading point, You can only use 3 button of digitizer mouse.
If read basic size ,You can select all size or any size by clicking arrow, If
read grading pattern When select all size, Can read overlap size with E button, When select
other size,Can read one size by one.
When menu is moved or read pattern first time, You need to set up menu.
Operation, Put menu on effective area, Click [setup menu], Then click “yes”.Click menu left up
corner, Left bottom corner,Right bottom corner.
After finish one pattern, Click this command, before read pattern go back to
packing list,You can start reading next pattern.
More erro process when reading pattern, Using this command
When pattern go back to packing list, Click this button can read continuously,
For exampleNotch、Assistant line etc. Operation, Select this pattern, Click continue command,
Selected pattern will appear in dialogue table, Then read continuously.
It is used for closing dialogue table.
Camera input pattern
Function
Open picture made with camera or scanned picture. Efficiency is higher than digitizer.
Picture requirement
1. Pattern area: Back ground must be white colour, Point (circle use for fixing situation) must
be black. U can set length and width as you want, for example in my picture length is
1120cm, width is 760cm. We divide it two 28 and 19 equal parts. Circle parameter can not
be too small, Also cannot be too big. In my picture, circle parameter is 10mm;
Note: We can do following picture in Coreldraw software, Then 1:1 print.
36
RICHPEACE DESIGN AND GRADING SYSTEM
2. After Printing the area, Paste this paper on a big white area; It is better a white board with
magnetism.
3. 500 mega-pixel camer, Picture size must be more than 2000*1500.
4. Picture must be clear, Other area color need be same as back ground colour except fixed
black circle point and pattern.
5. Fixed black circle point and pattern can not be mistiness (affect precision)
6. Pattern must be placed within fixed point, Distance between black circle and pattern border
about 1-2 cm, Also distance between magnet which is used for fixed pattern and pattern
border is about 1-2 cm.
7. Pattern must be placed flatly, Pattern border can not be winkle, Do not have shadow (affect
precision) Like following picture.
8. Following picture is not correct
Lost fixed circle point
Excrescent celling
Camera input toolbar
After system recognize automatically, U are not satisfy, U can modify with above tool.
Zoom in: Press space, make a square to select area need to zoom in; Press space, Then rotate
wheel of mouse, Can zoom in or zoom out picture.
37
RICHPEACE DESIGN AND GRADING SYSTEM
Press space then right click, U can make picture full screen.
Rotate mouse directly, Ca move picture up and down, Press shift and rotate wheel, Can move
picture
Left and right.
Open image file
Function
Open picture from camera or scanned. If can not recognized automatically, Can recognize by
hand.
Save
Function
Used for scanned picture and picture type is design image .
Operation
Click this tool, System save recognized picture information to picture original path, Suffix is opr.
Setup
Function
Before opening picture, Must set up for camera input pattern function .
When us camera, Need to input locate postion and divided quantity.
When use scanner, Need to input resolution .
Auto recognition
Function:
When select scanner, U can select auto recognition or manual draw. After recognition, Color
is 4th
Mark color in color setup- workview.
38
RICHPEACE DESIGN AND GRADING SYSTEM
Modify
Function
Modify design line, pattern and assistant line.
Operation:
1. Adjust place of control point: Select line, Then click point and move to destination place;
2. Add point: Select line first, Click at no point place, can add control point;
3. Delete point: Select the line, Move cursor to control point, right click or click delete;
4. Change point property: Convert between coner point and curver point, Select line , Press
and
Hold shift then right click.
5. Divide selected line equally with numberkey: Select line, Press number on keyboard
(available
For design line and assistant line)
6. Delete line: Select line, Move cursor to non point place, Press delete.
Draw border
Function:
It is used for drawing pattern border, Also can modify point property.
Operation:
1. Draw line
a) Default point is curvepoint, Press shift point is corner point, right click to finish.
b) Press delete , delete the last point when operation
2. Change point property
a) Convert grading point and non grading point:: Right click on changed point.
b) Convert corner point and curve point, Press shift and right click on changed point.
Draw design line and assistant line
Function:
Draw line on scanned design line, Draw assistant line on pattern, Change point property on
design line and assistant line.
Operation:
Operation:
3. Draw line
39
RICHPEACE DESIGN AND GRADING SYSTEM
c) Default point is curvepoint, Press shift point is corner point, right click to finish.
d) Press delete , delete the last point when operation
4. Change point property
c) Convert grading point and non grading point:: Right click on changed point.
d) Convert corner point and curve point, Press shift and right click on changed point.
Grainline
Function:
Draw or delete grainline.
Operation:
1. Draw grain line: Click two point on pattern.
2. Delete grainine, Move this tool to grainline place, When grainline turn right, right click or
Press delete.
Notch
Function:
Draw notch、Modify notch direction、Delete notch.
Operation:
1. Draw notch: Click on place which need to add notch
2. Modify notch direction: Move this tool on notch, When notch turn light, Drag to destination
direction then click
3. Delete notch: Move cursor on notch which need to delte, When notch turn light, right click or
press
Delete
Point
Function
Add or modify or delete point on design line or pattern.
Operation
1. Add point: Click on no point place;
2. Move point: Select this tool, Move cursor to assistant piont, Click and move to destination
place
3. Delete point: Select this tool, Move cursor to assistant piont, Right click or press delete
Snap or join curve
Function
Snap or join design line, assistant ine .
Operation:
1. Snap: Snap line which need to snap, Then click destination place
2. Jion: Click two joined line, note: Two point can not be too far.
Undo
40
RICHPEACE DESIGN AND GRADING SYSTEM
Function:
It is used for cancelling operation dictate, Press one time , Can cancelling one step.
Operation:
Click icon one step by one, How many times u press, Mean how many step cancelled.
Function:
It is used for come back cancelled operatin, Press one time , Can come back one step
Operation:
Click this icon.
Function:
After recognizing automatically or manually, Click ok can create pattern.
Plot
Function
It is used for plot he pieces in real size (1:1).
Operation:
:
1. Put all pieces that need to be plotted to the right working areaand arrange them according
to【 plot 】border,Then click plot,You an see following dialogue table;
2. Select Actual or Plot scale, Click on size which do not plot , No need plot size will no color.
3. Click【setup】,You can see【plot】dialogue table, Select current plotter, Set paper size,
Preserve Border, work data path etc, Click 【0k】, It will turn back 【plot】 dialogue table.
41
RICHPEACE DESIGN AND GRADING SYSTEM
4. Click [ok],You can plot.
Note
1. Select port which is used for connecting plotter in plotcenter.
2. If you want to change setup of inside and outside line output type, Notch,Grainline, Please
click【option】-【system setup】-【plot parameter】
【Plot】
】dialogue table parameter presentation
【Actual】is used to plot pieces in real size(1:1)
【Plot scale】Select this option, dialogue table will turn light, You can input proportion of plot
and real size.
【Overlap】is used to print Grading pieces as overlapped mode.
【Seperate】Is used for print grading pieces in separate mode, Right dialogue table is size
selection,It is used for outputing size,Blue color is outputing size, White is not outputing
size,Default is selecting all.
42
RICHPEACE DESIGN AND GRADING SYSTEM
【Setup】Set parameter of ploting
【Plot】
】Parameter presentation
【Current plotter】It is used for selecting Model of plotter, Click the small triangle to pull down
the plotter names and select .
【Paper size】It is used for selecting paper size, Click the small triangle to pop up a pull-down
list and select paper size , Also you can define Paper size by yourself on user-defined, Input
value in dialogue table, Clcik ok.
Left margin of plotter paper
Right Margin of plotter paper
Space between two ploting;
Set space between the contraposition sign
【Portrait】【landscape】It is used for seting ploting direction
【Export to file】Select, You can save pattern to plt file, open plt file in plotcenter directly,You
can Plot even no software.
Operation:
1.
In 【plot】 dialogue table, Select【output to file】.
2.
Click
You can see【Out file name】 dialogue table, Input file name, Click【save】,
You can see【plot】 dialogue table, Click 【ok】、【ok】
43
RICHPEACE DESIGN AND GRADING SYSTEM
【Work Data Path】It refer to path of current plotter,It is data path of plotcenter which is used for
connecting plotter.For example, There are two computerA,B.Computer B connect with plotter,
Computer A need to be connected with web. Select Computer B-plotcenter-Data path, Select
plot folder. (Also you can establish folder yourself). Plot on computer B, select plot directly.
【Error】It is used for adjust size after ploting is actual size or not;
Operation:
:
1.
Click[Erro],You can see [password] dialogue table, Input password, Click [0k],If you
need password, Please ask for Richpeace.
2.
You can see【correct plotting erro】dialogue table.
Here you can input real measurement plotted for 1m in width
Here you can input real measurement plotted for 1m in length.
3.
Plot a 1mx1m rectangle, For example, Actual size is 998mmx998.2mm,You need to input
998 on width, 998.8 on length,Click[ok].
Notify:
:
Please do not change the setup freely.
Undo
Ctrl+Z
Function
Cancle before command in order, Press onetime ,You can cancel one step.
Operation:
:
Click this icon,Or press ctrl+z,Or click right, Then click【Undo】
Note
When the icon of【Undo】is gray,It means there is no operation can be undone.
44
RICHPEACE DESIGN AND GRADING SYSTEM
Redo Ctrl+Y
Function
Redo operaion which have been undone, Press onetime ,You can come back one step.
Operation:
:
Click this icon, or Press ctrl+Y.
Display/Hide remark
Funcion
Show or hide remark.
Operation:
:
1. Size which measured by compare length tool
point measurment tool
2. Click this tool
, and record size which measured by two
;
,Select is show, No select is hide.
Show/Hide design line
Function:
:
Select this icon, It show design line, Otherwise it is hide line.
Operation:
:
Click this icon,When down, design line will show, Clcik again, When up,Design
Line will hide.
View Pattern
Function:
:
Select this icon, It shows pattern, Otherwise it is hide pattern.
Operation
Click this icon,When down, Pattern will show, Clcik again, When up,pattern
will hide.
45
RICHPEACE DESIGN AND GRADING SYSTEM
Only display one piece
Function:
:
1.
Select this icon, Only one pieces appear on workarea in full screen,Means pieces is
Locked, If did not select this icon, More pieces can be shown on workarea.
2.
When pattern is locked, Only can operation this pattern, Can avoide other pattern
diaturbing,Also can avoide wrong operation to other pattern.
Operation:
:
a.
aSelect this pattern, Click this icon,When icon down, Pattern is locked.
b.
Click other pattern, Can lock new pattern.
c.
Click this icon,When icon up, Can cancel locking.
Hang up select pattern
Function:
:
Moving pattern from work area to pattern list.
Operation:
:
1. Select”select pattern control point”tool
.
2. Click this icon,Pattern go back to patternlist.
View same material pattern
Function:
:
Put patternlist pattern to workarea by material name.
Operation:
:
1.
2.
Clcik this icoin,You can see【Show pattern Base material】dialogue table.
material name.
46
RICHPEACE DESIGN AND GRADING SYSTEM
Grade table
Function:
:
Grade for one or more point.
Operation.:
:
1. Click this icon
,You can see Grade table.
2. Click or make a square to select more Grade table with “select pattern control point”
,
dx and dy is active.
3. Input Grade value in other size except base size.
4. Click
(Equal x)、
(Equal Y)or X equal Y
etc to finish grading.
skill:
:
Afterselecting one or more grading point with“select pattern control point”tool
, Click
onBlank place or press”ESC” can cancel selected point.
【Grade table】
】 Parameter presentation:
:
Under size is size name, □ is for basic size, ○is other size.If “√”appeared before size name,
It means showing this size,If no“√”Means hiding the size.If it is singal group, only input in basic
size,If there are group, Can input in basic size of non basic size group.
Copy Grading
Function:
:
It is used for coping grade value of grading point ,You can copy grading value from one point or
one group point.
Operation:
:
1.
Select grading point with“Select pattern control point”tool
,Click or make a square to
select point alreading graded, Grading value show on Grade table.
47
RICHPEACE DESIGN AND GRADING SYSTEM
2.
Click copy grading
icon, All grading value is saved , Will be used for paste.
Paste grading
Function:
It is used for pasting x and y direction value to appointed grade point.
Operation:
:
1.
After finishing[copy grading] command, Click or make a square to select graded point;
2.
Click paste grading
icon, you can paste grading value.
Paste X
Function:
It is used to paste the Dx value from the copied grading point to the selected points.
Operation:
:
1. After you copied the grading value, click the point need to be graded.
2.
Click
to paste the DX value to the selected point.
Paste Y
Function:
It is used to paste the DY value from the copied grading point to the selected points.
Operation:
:
1. After you copied the grading value, click the point that needs to be graded.
2.
Click
to paste the DY value to the selected point.
Neg X
It is used to reverse the grading values for a graded point in the X direction. That is to say, if the
X value for a grading point is +X, you can click this tool to change it to –X or from –X to +X.
Operation:
:
Click to select a grading point and then click this icon.
Neg Y
Function:
:
It is used to reverse the grading values for a graded point in the Y direction. That is to say, if the
Y value for a grading point is +Y, you can click this tool to change it to –Y or from –Y to +Y.
Operation:
:
Click to select a grading point and then click this icon.
48
RICHPEACE DESIGN AND GRADING SYSTEM
Neg XY
Function:
It is used to reverse the grading values for a graded point in the X and Y direction. That is to say,
if the X and Y value for a grading point is +X and +Y, you can click this tool to change it to –X
and –Y or from –X and -Y to +X and +Y.
Operation:
:
Click to select a grading point and then click this icon.
Display relative grading or absoluted grading
Function:
:
It is used for controling grading value show status,You can select by yourself.
Operation:
:
1.
is selected, Grading is absolute grading value, disperse is margin between othersize
and basic size.If there are group,it is Other group size and basic group size margin, Other
size with basic size disperse in same group.
2.
is unselected status, Grading is relative grading value, disperse is margin between
othersize and front size.If there are group,it is Other group size with frontgroup size margin,
Other size with front size disperse in same group.
All Group
Function:
:
It is used for group.When grading value is same,If did notSelect this value,It is effective to this
group only.If select this icon, Input grading value in any group, Then grade, It is grading to all
size group,Improve efficience.
Only group basic size
Function:
:
It is used for group.When select this icon, Click this icon, Only appear basic group size, do not
select, All the size appear.
Angel
Function:
:
In grading,Coordinate can be defined freely, So you need this icon to control”Angel”.Arrow
direction is coordinate positive direction,Short arrow is x direction,long arrow is Y direction,
Following is tangent direction.
49
RICHPEACE DESIGN AND GRADING SYSTEM
Operation:
:
1.
Click 【Grade tale】,Select
,Select Angel
2.
Click
button.
button,You can see some menu, Select one, set coordinate.
Parameter Presentation:
:
【Last Point Direction】:The X direction is defined by connecting the current grading point with
the last grading point.
The X direction is defined by connecting the current grading point
【Next Point Direction】
:The
with the next grading point.
【Right Rotate 90 Degree】:It
It is used to rotate the XY axis in the direction of right 90 degree.
【Left Rotate 90 Degree】:It
It is used to rotate the XY axis in the direction of left 90 degree.
Previous Grading Point
Function:
:
It is used to select the previous grading point.
Note:
:
The points in the piece contour are ordered by clockwise direction.
Operation:
:
1.
elect a grading point with “select a pattern point”tool
Click to select
50
RICHPEACE DESIGN AND GRADING SYSTEM
2.
Click
to select the previous point of the current point.
Next Grading Point
Operation:
1.
Use
2.
Click
to click a point to select it.
to select the next point of the current point.
Equal X
Function:
This command can make selected grading point grade equally in x direction.
Operation:
:
1.
Select grading point, [Grade table] is active;
2.
Input disperse in dialogue table;
3.
Click this icon.
Equal Y
Function:
:
This command can make selected grading point grade equally in Ydirection.Operation is same
as equal x.
X Equal Y
Function:
:
This command can make selected grading point grade equally in X and Ydirection. Operation is
same as above
X non equal grading
Function:
This command can make selected grading point grade non equal in X direction.
Operation:
:
Click to select a grading point, the textbox of 【Grade Table】will be bright to show that you can
input grading value to the selected point.
1. Input different value according to different size in dx,Click this icon.
51
RICHPEACE DESIGN AND GRADING SYSTEM
Y non equal grading
Function:
:
This command can make selected grading point grade non equal in Ydirection.Operation is
same as x non equal grading.
X、
、Y non equal
Function:
:
This command can grade for both equal or non equal value input in grade table.
Operation:
:
1. Click grading point,Input available grading value in textbox of [Grade table];
Note:
:Input value according to dialogue table number, Except grading value is 0.
2. Click this icon
X Equal to 0
Function:
:
It is used to change all the X grading values for a graded point to Zero. That is to say that no
grading is ready for a grading point in X direction.
Operation:
:
Click to select a grading point and then click this icon.
Y Equal to 0
Function:
:
It is used to change all the Y grading values for a graded point to Zero. That is to say that no
grading is ready for a grading point in Y direction.。Operation is same as x equal to 0.
Auto confirm sign
Function:
:
Select this icon, What ever you input positive or negative, When use grade table function,
computer can indetify + or -.
Keep shape grade
No use keep shape grade in collar
Use keep shape grade in collar
52
RICHPEACE DESIGN AND GRADING SYSTEM
Function
Use this tool can keep other size curve shape is same as basic size shape.
Operation:
:
1. With”Select pattern point tool”
,Drag from one point to another point to select curve
which need to deal with.
2. Click Keep shape grade icon.
Equa height grade
No use equal height grade
Use equal height grade
Function:
:
It is used to make their height equal for the curves between two grading points after graded.
Operation:
:
1.
With”Select pattern point tool”
,Drag from one point to another point to select curve
which need to deal with.
2.
Click equal height grade icon.
Color Setup
Function:
:
It is used to set the color for Pattern list box, working area and sizes.
Operation:
:
1.
Click the icon to get the dialog box of【Setup Color】. There are three options in the dialog
box.
2.
Click to select one option and then select one item, and then click to select a color, click
【Apply】 to change the color for the selected item. After set new colors for all the
necessary items in the three options, click 【OK】to confirm.
53
RICHPEACE DESIGN AND GRADING SYSTEM
【Setup List box】Parameter:
:
【Pattern List box】
】items
Pattern backgroug:It is refer to pattern list background color.
Pattern contour:It is refer to pattern list pattern contour color
Pattern serial No. It is refer to pattern serial No.color in pattern list.
【Work view】
】items
Window background:It is used to set the color for the working background.
The 1st operation color: It is used to set the prompt color for the first operation.
The 2nd operation color: It is used to set the prompt color for the second operation by right
click. The 3rd operation color: It is used to set the prompt color for the third operation by
right click.
It is used to set the prompt color the fourth operation by right click. It is used to set the color
for all remarks.
Measure prompt color:When draw line, line length color
Remark color: It is used to set the color for all remarks.
Unselected Pattern color: It is used to set the color for the unselected pattern that is picked
54
RICHPEACE DESIGN AND GRADING SYSTEM
up pattern by the tool of
.
Selected Pattern color: It is used to set the color for the selected pattern.
Fill pattern color 1:When do “compare path work”,Fixed pattern color.
Fill pattern color 2:When do “compare path work”,Walking pattern color.
Scan Image color: It is used to set the color for the scanned image.
Grid color: It is used to set the color for the Grid added to the working area.
【Size】items
It is used to set the color for sizes. Select size ,then click color.
Colour setup
Function:
:
It is used for seting or changing design line color.
Operation:
:
a.Click the pull down list to select one color, and then you can draw design line by the selected
color.
b.Change line color: you can click the small triangle of the tool of
list and then select a color. And then click to select
square to select line.
55
to get its pull down
to click right mouse on line or make a
RICHPEACE DESIGN AND GRADING SYSTEM
Line type
Function:
:
It is used for seting or changing line type.
Operation:
:
Click the pull-down list to select one line type, and then you can draw design line by the
selected line type.
If you need to change the line type for designed lines or assistant line , you can click the small
triangle of the tool of
select
to get its pull down list and then select a line type. And then
to click the line to change its type.
Note:
:If u select dash line, U can want to change the dash line segment length and distance
freely, U can select this line type
,With this tool
, Press and hole on line, Input
value in L, Then press enter, Then input value in D.
Parameter Edit
Function:
:
It is used for equal divide line.
Operation:
How much in that dialogue table, Line will be divided to corresponding number.
Set curve shape
Function:
:
It is used for changing line type.
Operation:
:
Select【Set curve color and type】
tool, Click 【Set curve shape】
tool by click
arrow,You can set line width and height,First width, then height, After input width,Then press
enter,Input height,Click left on changed line.
Set assist curve output type
Function:
:
56
RICHPEACE DESIGN AND GRADING SYSTEM
It is used for seting assist curve output type.
Operation:
:
Select【Set curve color and type】
tool, Click 【Set assist curve output type】
tool.
by click arrow. Click left on changed line, If you set whole knife cut, One side of assist line will
appear whole knife sign. If set half knife, One side of assist line will appear half knife sign.
Play demo
Function:
:
It is used for playing video
Operation:
:
Select this icon, Then click any tool, Will play this tool operation.
57
RICHPEACE DESIGN AND GRADING SYSTEM
Section 5
Modify
Design toolbar
Shortcut toolbar A
Function:
:
It is used for adjusting curve shape, Modify control point number, Convert curver point and turn
point, Change property of drill, button hole, pleat, dart by click right.
Operation:
:
1.Adjust single control point
1)
Click on curve with adjust single control point tool: Line is selected, Click control point
and drag to suitable place, Then click. When chord height line appear, Press number
button of small key board can change equal number, Move control point can adjust to
chord height,
Cursor data is curve line length and chord height . [Ctrl+H Show /Hide chord height ]
Adjust control point on curve
2)
Press keyboard number and adjust control point place
Adjust control point by value: After selectng line, put cursor on control point, Then
press enter.
After Click Enter
3)
After click ok
Add control point, Delete control point on curve line or turn line:Click curve line or
turn line, Make it selected status,Add point in no point place by clicking left, (or press
insert) , Put cursor on control point, click right to delete(or press Delete button)
58
RICHPEACE DESIGN AND GRADING SYSTEM
Original line
4)
Process (press insert)
Result
Select line, Put cursor on control point, Then press shif, You can convert between curve
point and turn point.On turn point, Put cursor pn turn point, then click right,Curve line and
beeline smooth automatically.Press ctrl on control poin,Can make Line smooth tangency in
intersection
before press shift on selected point
After press shift on selected
point
before click right on selected point
After click right on selected point
After press ctrl on selected point
Before Press ctrl on selected point
select line
After pressing key number 4
(5)Click on curve, Line is selected, Press number on small keyboard, You can change line
control number
2.Adjust more control point
(1) Adjust more control point in proportion.
When adjust point c, Drag from point A to point c ,You can adjust in proportion.
Operation:
59
RICHPEACE DESIGN AND GRADING SYSTEM
1) If adjust design line, Put cursor on line, drag from point A to point c, Cursor turn to
,Check picture 2;
2) Press shift change to proportion adjust cursor
,Check picture 3,Click and drag point
C,You can see【offset】dialogue table(if it is key point, move point c to key point directly, if
want to Adjust on horizontal or vertical direction or move 45 degree , press shift)
3 ) Input offset value,Click【ok】.
picture 1
picture 2
Picture 3
When adjust in proportion on pattern, Mae cotrol point show, Operation is samve as above.
60
RICHPEACE DESIGN AND GRADING SYSTEM
Press shift adjust in horizontal, vertical or 45 degree adjust
(2)Adjust more control point in parallel:
Operation:
Drag adjusted point, when cursor turn to
,Select one point and move, You can see
[offset] dialogue table, Input value.
(3) Adjust all control point in square
Operation:Make a square on object line, Press [enter] You can see [offset] dialogue table,Input
value in dialogue table.
61
RICHPEACE DESIGN AND GRADING SYSTEM
(4) Only adjust line
Operation:Make a square on line by right click, Input value, click ok.
After marqueen line with right mouse
Offset result
3. Modify drill(button hole or pleat) property and number
Click right on drill (button hole or pleat), You can see drill property dialogue table, Modify
Parameter.
Move and Rotate Adjust
Shortcut toolbar N
Function:
:
Adjust line after moving and rotating, Usually used in adjusting front and back armhole,bottom,
dart, front and back collar and should compare, Can be used both in pattern
And design line.
Operation:
:
1. Check picture 1,Click or make a square to select linea、b、c、d,Click right to finish.
2. Click line 1,2,3,4,Click right to finish, You can see dialogue table.
3. .Check picture 2,Armhole is combined together, Click right to adjust control point, If it is
public point, Move in vertical direction.Lick picture 3.
4. When line smooth, Click right to finish.
62
RICHPEACE DESIGN AND GRADING SYSTEM
Picture 1
Picture 2
Picture 3
【Move and Rotate Adjust】Parameter presentation
【Select rotat Group】Like picture 1,if front and back rise in same side,select this item and
select border,line can rotate automatically,picture 2;
Picture 1
Picture 2
【Keep form manually】Select this item, Can adjust line freely.
【Auto smooth】Select this item,system can creat smooth line automatically,No need to adjust。
Symmetry Adjust
Shortcut toolbar M
Function:
:
It is used to adjust the line after symmetry, commonly use to adjust the collar (As below figure) .
Operation
1.
Click or make a square on symmetry axis(Click the start and end point of symmetry axis);
63
RICHPEACE DESIGN AND GRADING SYSTEM
2.
Then click or make a square on lines that’s required to flip, then right click mouse:
3.
Use the tool click the flipped lines , after they are light then click the point on the line, and
drag it to proper position;
4.
After adjusting the required lines then right click to end.
Before adjustment
Adjusting
After adjustment
Presentation of third step
When adjust,drag mouse on point ,it is adjustment (for example pointB),Put cursor on
point,then press delete, it is delete point(public point can not be delete),Put cursor on point
(Like point B and c)Press shift,Change point property,Click on blank place of line;When adjust
design line,Press shift can convert adjust or copy。Press shift and do not loosen,Press A on
joined place,Can modify as line.
Adjust with dart or pleat merged
Funcion
It is used to combine dart and pleat, then adjust,Only suitable pattern
Operation
1. Like picture 1,Click dart 1 and dart 2,then click right to finish,like picture 2;
2. Click center line, Click picture 2, Adust waist line with this tool, click right to finish.
64
RICHPEACE DESIGN AND GRADING SYSTEM
Picture 1
Picture2
Picture 3
Tip:
:
1.
If dart and pleat made on design line and you want to use this tool, You need to
select“Dart /Pleat ”tool, drag dart or pleat two point make it dart or pleat element.
2.
Default is “Adjust with dart or pleat merged”
combine tool
,Press shift can change to dart
。
Dart combine:
Functio: Delete dart or change dart width,Also can change appointed border line,
See picture 1 and picture 2.
Picture1
Picture2
Operation:
:(See above picture)
1. First click fixed point(see hip pointA);
2. Then click point B;
3. If delete, Please click another dart width point C;
4. If only change dart size, Move cursor to blank place and click,
65
RICHPEACE DESIGN AND GRADING SYSTEM
5. Input new dart width,Click ok.
Fix length
Function:
:
Keep curve Length same and do not change, adjust shape, Can be suitable for design and
Pattern.
Operation:
:
1. Click this curve, Curve is selected;
2. Move control point to satisfied place.
Curve adjust
Funcion:
:
When cursor is
, Check or adjust curve length and straight line of two point, Also can
offset side point, When cursor is
, Can adjust one side point of line to destination place.
can be used for both design line and pattern.
Operation:
:
Switch
and
with shift, Cursor
shortcut key is shift+s
1. Select this tool, click or make a square to select one line, You can see curve adjust
dialogue table;
66
RICHPEACE DESIGN AND GRADING SYSTEM
2. Select adjust item,Input proper value, Click ok.
3. Press Shift, Click or make a square to select line, One side of line can move freely.
Original picture
process
Result
Point move presentation:
:
Near click or make square place is modified point, If adjust two line, drag end point of two line,
the first select is modify point.
【Curve adjust】
】Parameter presentation:
:
Select【
【 Curve adjust】
】 ,left is length increase or decrease value, You can input new
dispersion, Select【
【dispersion】
】
* Point move horizontally
* Point move vertically
* point move as two point joined line
Side point do not move,curve length change
67
RICHPEACE DESIGN AND GRADING SYSTEM
Select【Straightness】
,L
Left Show length increase or decrease value,ou can input new
straightness dispersion, Select【
【dispersion】
】
Point move horizontally
* Point move vertically
* point move as two point joined line
Two point move as two point joined line
Select 【End point offset】
Input value in DX, Then click this icon, All x direction data equal;
Input value in DY, Then click this icon, All Y direction data equal;
Input data in near size,Click this icon,All the size appear data equally;
Click can copy current value;
When copy different size value, Can select another line and
paste. Can copy one line length or dispersion to another lien.
Intelligent Pen
Shortcut toolbar F
Function:
:
Draw line、Make rectangle、Adjust、Adjust line length、corner、Dart line、Delete、One way extend 、
two way extend 、move(copy)poin line、Transfer dart、snip(connect)line、shrink dart、
Not cross isometry line、cross isometry line 、compassses、set aquare、offset point(line)、
horizontal and vertical line etc.
Operation:
:
1.Click left mouse
(1)Click left and become【
【Draw line 】tool
1) Click on blank place or key point or intersection or line,Go to draw line operation;
2) Put cursor on key point or intersection,Press enter to make offset,Go to draw line
operation;
3) After confirming first point,Click right to change T tool(Draw horizontal/vertical/45
degree beeline)、Any direction beeline。Press shift to convert between curve and
beeline;
Horizontal/vertical/45 degree line
Any direction beeline and curve
Turn
line
(2)Press left mouse and draw rectangle. Click shift, click
68
left mouse on
RICHPEACE DESIGN AND GRADING SYSTEM
keypoint and drag can make
rectangle from point.
2.Click right mouse
1.
Click right on line and become【Modify】
2.
Press Shift,Click right on line and become【Ajust curve】。Click right on middle of line,
it is two side did not change,Ajust curve length。Click on one side point,Ajust from one
side Point.
Click right in the middle
Click right from one side point
3. Left button marqueen select
1.
Press left and make a square on two line, Click right is [corner connection];
2.
Press left and make a square to select four ine, Click right is [Dart line]
Presentation: Click right in which side, Dart direction is that side;
Clike four line
3.
Click one dart left side
Click on dart right side
Make a square to select one or more line, Then press Delete can delete all selected
line;
4.
Make a square to select on or more line, Click on another line, Go to 【one way or two
way extend】function,Click right on reserve line, It is 【one way extend】;Click on another
two line ,It is【two way extend】;
No use one way extend
After use one way extend
69
RICHPEACE DESIGN AND GRADING SYSTEM
No use two way extend
After use two way extend
5.
Click on blank place and make a square, Go to 【Rectangle】tool;
6.
Press shift, Make a square to one or more line,Click right is【move(copy)】function,
Convert move or copy with shift ,Press ctrl ,It is move or copy in any direction;
7.
Press shift, Make a square to select one or more line, Click left ,Go to 【transfer dart]】
function.
4 . 【Right button marqueen select】
1.
1,Make a square with right mouse on line, Go to【snip(connect) line】function;
2.
Press shift, ,Make a square with left mouse on line, Go to 【Shrink dart】function.
5. 【Drag with left button】
1.
2.
Press left button and drag on blank place, Go to 【rectangle】function;
Drag line with left button ,Go to 【Non Cross isometry line】;
3.
Press on key point and drag until meet line, Go to 【Singal compasses】;
4.
on key point and drag to another point, Go to [Double compasses];
5.
Press shift, Press left and drag, Go to [cross isometry line],Then click two cross side
line;
Drag waist
6.
Click two cross side line
Press shift, Drag and select two point, Go to 【set square】,Click another point and
drag mouse ,Make parallel or vertical line.
Original
Move parrallel direction
Move vertical direction
6. 【Drag with right button】
1.
On key point, Drag with right mouse, Go to 【Horizontal or vertical line】(Click right
change direction)
70
RICHPEACE DESIGN AND GRADING SYSTEM
2.
Press shift, Click on key point ,Click right Go to 【Offset point/ offset line】(click right
change reserve point/line or not)
7.Press Enter, Get【Offset point】
Rectangle
Shortcut toolbar S
Function
It is used for making rectangle design line, Rectangle assistant in pattern.
Operation:
:
1.
Click on blank place or key point with rectangle , When cursor appear X,Y, Iput length and
width( press enter input length and width, Press enter to finish);
2.
Or drag mouse, click left again, You can see【Rectangle】
】dialogue table, Input proper
value,Click【ok】;
3.
Make rectangle on pattern, It is assistant line of pattern.
Note
1.
If rectangle start point and end point cross, There are two situation, The start and end is
key point, No dialogue table, On line, You can see point position dialogue table,
Input data, Click[ok];
2.
Start point and end point is on key point, Press Enter to offset.
Arc corner
71
RICHPEACE DESIGN AND GRADING SYSTEM
Function :
Make equal distance or non equal distance Arc corner on non parallel line.Can make bottom of
uniform,Pocket etc, Can be used in design line and pattern.
Operation
1.
Select Arc Corner, Click right can convert from
and
,
is reserve corner,
is delete corner;
2.
Click two line which will make Arc corner, like following picture line 1 and line 2;
3.
Move cursor one design line, You can see dialogue table;
4.
Input proper value, click ok.
3P ARC
Function
Draw Arc or circle through 3 point, Can draw design line, assistant line of pattern.
Operation:
:
1.
Press shift can convert between three point circle
and three point ARC
2.
After changing to
cursor, Click three point can make three point circle;
3.
After changing to
cursor, Click three point can make ARC.
CR ARC
Function:
:
Draw Arc or Circle, Can draw design line, assistant line of pattern.
Operation
72
;
RICHPEACE DESIGN AND GRADING SYSTEM
1. Press shift can convert between three point circle
2. After changing to
and three point ARC
;
cursor, Click any point to set center point of circle, Then you can
see【Arc length】 Dialogue table;
3. Input proper Arc length, Click【OK】.
Note:
:
CR ARC Operation is same as CR circle operation.
Angel line
Function:
:
Can make any angel line, Make vertical line ,tangent (parallel line )through point out of line, Can
be used in design line and pattern.
Operation:
:
A. Make corner line on beeline or curve line
1.
Like picture, C is one point on line A and B, Click AB first,Then click c, Two vertical
reference line appear, Press shift,two vertical line convert between in picture 1 and picture
Picture 1
2.
Picture 2
Above situation ,Press right to covert Angel start line. Following is convert picture of picture
1;
3.
Click left, You can see following dialogue table;
73
RICHPEACE DESIGN AND GRADING SYSTEM
4.
Input length and Angel, Click ok.
B. Make vertical line through point out of line or on line.
1.
.Please check following picture, Click line first, Then click point A, Two vertical reference
line appear, Press shift,two vertical line convert between reference line and selected line.
Picture 3
Picture 4
Picture 5
2.
Picture 6
Move cursor, make it near to selected vertical line, Cursor will adhere to reference line, You
can see dialogue table;
3.
Input vertical line length, click ok.
C.Do tangent through point on line or do parrallel out of line
1.
Check following picture, Click line , Then click point A, Two vertical reference line appear,
Press shift,two vertical line convert between reference line and selected line.
Picture 7
2.
Picture 8
Move cursor, make it near to selected vertical line, Cursor will adhere to referenceline,Click,
You can see following dialogue table;
74
RICHPEACE DESIGN AND GRADING SYSTEM
3.
.Input parallel length or tangent line length, Then click ok.
Draw line with Angel
【Length】Line length ;
Line angel;
【Opposite direction】Select
,360 degree disperse compared with original degree.
Tagent line of ARC
Function:
:
Make tagent line from point to circle or two circle, Can operate on design line and pattern.
Operation:
:
1. Click point or circle.
2. Click another circle
Divider
Shortcut toolbar D
Function
Add equal point on line, Add equal distance point in opposite direction on line, Can operate on
design line and pattern.
Operation:
:
1.
Press shift to convert between Add equal point on line
opposite direction on line
and equal distance point in
(Click right to convert have equal line on point or not)
75
RICHPEACE DESIGN AND GRADING SYSTEM
2.
Add equal distance point in opposite direction,Click key point on line, Move mouse along
line, Input value, Click ok.
3.
Equal divided line:Input number on shortcut toolbar, Click left on line. If add equal point or
equal equal line on part of line, Click one side point, Then click on line, Then click another
side point.
Add equal point on line
Add equal line on line.
Skill:
:
If equal number no more than 10, Input keyboard number directly.
Point
Function :
Add point on line or blank place, Can operate on design line and pattern.
Operation:
:
1.
Click on line which need to add point, Near side point will turn light ,add appear【Point
position】dialogue table.
2.
.Input value, Then click ok.
Compasses
Shortcut toolbar C
Function:
:
1.
Single compasses:Make fixed length lineFrom key point to line,Usually used in drawing
76
RICHPEACE DESIGN AND GRADING SYSTEM
shoulder, straight armhole, Waist, bias line of sleeve Arc.
2.
.Double compasses: Through two fixed point, Make two appointed line, Usually used in
bias line of sleeve arc、peak lape of custom fashion etc, Can operate on design line and
pattern.
Operation:
:
1. Single compasses:Take should bias line as example,Select this tool,Click collar width
point ,Release mouse,Click shoulder down line,You can see【single compasses】
dialogue table, Input small shoulder length,click【ok】
2. Double compasses:
(sleeve width fixed,confirm sleeve arc point according to front and
back sleeve arc line),Click point A,B,Then drag mouse towards one side of line then Click
You can see 【double compasses】dialogue table, Input value on first and second line,click
【 ok 】
SKILL:
:
Double compasses offset function,Make back pocket of trousers. Like following picture, select
Point A、B,Put cursor on point c,Press Enter,Input value in 【offset
offset】
offset ,Click ok to make AC’and
BC’
77
RICHPEACE DESIGN AND GRADING SYSTEM
Snip curve
Shortcut toolbar Z
SHIFT+C
Function:
:
Snip line from appointed place, It will turn to two line. Or connect more line to one line, Can
operate on pattern and design line.
Snip function:
:
1.
Click on line, Line turn red, Click on line agin, You can see 【point position】 dialogue table;
2.
Input proper value, Click ok.
If it is key point you select (for example equal point or cross point or point already
exist),Click on these place, No dialouge table appear, Snip from the point directly.
Connect line operation:
:
Make a square to select line or click line seperately, Click right.
Relevant or irrelevant
Function:
:
When adjust cross line with modify tool, If you use relevant, Line can be adjusted together, If
you use irrelevant , Line can not be adjusted together, Can be used both in design line and
assistant line, Default cross point is relevant.
Operation:
:
Relevant ,
irrelevant,Press Shift to convert
a.Click or make square to select two line
Original
, Can relevant cross point of two line.
After using revelant,Ajust one point of line
Another point of line move accordingly
b. Click or make square to select two line with
,Can irrrelevant cross point of two line。
78
RICHPEACE DESIGN AND GRADING SYSTEM
Original
After using irrevelant,Ajust one point of line
Another point of line do not move accordingl
Eraser
Shortcut toolbar E
Function:
:
Delete point or line or design line, Delete assistant line 、Notch、button hole、dartpleat etc.
Operation:
:
1. Click on line or point;
2. If delete together, Can make square to select object.
Shrink dart
Function:
:
Add dart on design line, Only used in design line.
Operation:
:following picture
1. Click border line、dart line,You can see【shirnk dart】dialogue table
2. Input width in table,Like picture 1;
3. Click [ok],Move mouse, Click on left or right place of dart to confirm dart direction,like
picture 2
4. Click left to adjust dart ,Make side seam is smooth, Click right to finish,like picture 3.
Picture 1
Picture 2
79
RICHPEACE DESIGN AND GRADING SYSTEM
Picture 3
Dart line
Function: Add dart line to dart, Can be used in design line
Operation:
:
1.
Select this tool, Click curve or fold line which is close to one side( As below figure, First
click line 1, Then click line 2);
2.
Select this tool, Click curve or fold line which is close to another side As below figure, First
click line 3, Then click line 4);If dart direction towards middle, You can click 4、3、2、1,d、
c、b、a.
Insert dart
Function:
:
Insert dart on pleat on selected line, Can be used in design line and pattern, Usually used in
making Hubble-Hubble sleeve or three dimensional pocket
Have spread line:
:
1. Click or Make a square on selected line ,then click right
2. Make a square or click dart line ,Click right, You can see【spread dart】dialogue table.
3. Input value in dart or pleat dialogue table.,Click ok.
80
RICHPEACE DESIGN AND GRADING SYSTEM
Original picture
After spreading
No spread line:
1. Make a square on line which will insert dart, Click right two times,Youcan see【Gathing
dialogue】table;(If only one dart line, Can click left,Then click right, Youcan see【Gathing
dialogue】table);
2. Input Input value in dart or pleat dialogue table.,Click ok.
Transfer dart
Function:
:
It is used to transfer dart of pattern, Can Transfer in same circle center, Also not in same circle
center, Can tranfer part, Also Can transfer all, Also can transfer equally, New dart point can in
original place, also can not in original place, Be suitable for design line.
Operation:
:
1.
Make square to all transfer dart
2.
Click new dart line(If more new dart line, Can make a square means marqueen select)
3.
Clcik one line to confirm start side of combining or Clcik key point as circle point of
transfering dart.
4.
a.Transfer whole dart, Click another line of combining(click left to click another line, Dart
81
RICHPEACE DESIGN AND GRADING SYSTEM
length equal after transfering, if click right mouse on another side, New dart point place do
not change)
b.Transfer part dart: Press ctrl,Click another side of combing(Click another side with left
mouse, Dart length equal, If click right on another side, New dart point do not change)
C. Equal divider dart:Input number is eqaul divided dart, Then click another side of
combining dart(Click another side with left mouse, Dart length equal, If click right on
another side, New dart point do not change)
Transfer whole dart
Transfer part dart
circle Center point is not same
Equal divider dart
One dart Transfer to more place
Please check following whole process :
82
RICHPEACE DESIGN AND GRADING SYSTEM
1(Marqueen operation line, 2(Click new dart line,
Line turn red)
3(Click start line of combining
Dart line turn blue,Click right)
4(Click end line of combining)
Line turn green)
Result
Pleat
Function:
:
It is used to spread pattern,and add pleat mark and pleat adjust amount,Can only used in
design line
Operation :Check following picture
1. Select whole operation line, Click right;
2. Click up fold line(If more line, Marqueen select then click right);
3. Click down fold line(If more line, Marqueen select then click right);
4. Click or marqueen spread line, Click right to finish.Right click mouse place is fixed
place,You can see【Pleat expand】dialogue table(If no spread line, click rihgt directly, Right
click mouse place is fixed place.);
5. Input pleat and total value,select pleat mode.
83
RICHPEACE DESIGN AND GRADING SYSTEM
【Box pleat/knife pleat】Dialogue table presentation
Up fold line:After selecting all the line, First selection is up fold line;
Down fold line:After selecting all the line, Secnd selection is down fold line.
Cut Apart
Function:
:
It is used to amend, divide pattern or deduct surplue. Can used in design line and pattern, Can
make big bottom shirt, Heye border.
Operation:
:Used in design line
1. Make a square (or click) all operation line, click right;
2. Click no spread line(If more line, Make a square, then click right)
3. Click spread line(If more line, Make a square, then click right)
4. If there are divide line, Click or make a square on divide line, click right to confirm fixed
side,You can See 【cut apart】dialogue table.(If no divide line ,click right to confirm fixed
side)
5. Input proper data, select suitable item, click ok.
Spread according to appointed line
84
RICHPEACE DESIGN AND GRADING SYSTEM
Equal spread
Equal spread
Operation: Used on pattern
1. Click nob spread line
2. Click spread line, Then right click.
【Cut apart】
】Dialogue table presentation:
:
1. In total expansion, + is spread,- is deduct surpluse
2. Mode,
a) Select “divide”, Input total expansion and lines, Spread line apart but did not connect.
b)Select “smooth”, elect “divide”,Input total expansion and lines, Spread line apart but
connect Automatically.
c)Select “keep form” Inputnput total expansion and lines, line connect from spread place.
Flouncing
85
RICHPEACE DESIGN AND GRADING SYSTEM
Function:
:
Make helical flouncing. Only available for design line.
Operation: Two type
1. Click on blank place, You can see 【Flouncing】dialogue table(Can input new data),Click
【ok】.
2.
Crossing select operation line, Then click right, You can see 【Flouncing】dialogue
table,There are three type, Select one type. The click ok.
Compare length
Shortcut toolbar R
Function:
:
It is used to measure line length, more length plus value,Disperse after more line
comparing,Also can measure notch to point length.
Operation:
:
You can click left or line, Marqueen select line, Drag from one point to another.
A. Measure on or more line
1.
Select this tool, You can see【Compare length】dialogue table;
86
RICHPEACE DESIGN AND GRADING SYSTEM
2.
3.
Select needed option In length, X ,Y;
Select need to measured line, Length can appear in table.
B Compare more line
Compare sleeve ARC and armhole:
1. Select this tool, You can see【Compare length】Dialogue table;
2. Select【length】option;
3. Click or make a square to select sleeve curve, click right to finish, then click or make a
square to select armhole, 【L】is disperse.
【Compare length】
】Parameter Presentation:
:
1. L is dispersion of 【sum+】and【sum-】
2. DL (absolute dispersion) dispersion of other size with basic size
3. DDL(Relative dispersion):dispersion between near size.
4. 【sum+】:Length summation before click right mouse
5. 【sum-】
:Length summation after click right mouse
6.
7.
If select curve,It is curve length,If select straight line, It is straight line length
It is horizontal distance of selected line
87
RICHPEACE DESIGN AND GRADING SYSTEM
8.
It is vertical distance of selected line
9.
Click clear,Can delete data in textbox.
10.
Click can record dispersion under L in “measurement”, when record two or more
line, You can see【Measurement var】dialogue table.
11.
Can print dispersion of current dialogue table
Note:
:
Press shift, Can turn to measure two point distance tool
.
Measure two point distance
Function:
:
Measure two point distance or point to line distance, Horizontal distance, vertical distance, Can
operate on pattern and design line.
Operation:
:
Click two point need to measure, You can see following dialogue table, Check following picture,
Measure waist length.
【Measure】
:
【Distance】
:It is refer to straight line length of two point,like Picture, It is AB length;
【H_DIS】:It is horizontal distance of two point
【V_DIS】:It is vertical distance of two point
【Record】:Click can record data in measurement var
Note
When operation, First point must appear, Second point can be point or line or blank,
Please check following figure,Click waist point, Then click back center line.
88
RICHPEACE DESIGN AND GRADING SYSTEM
Protractor
Function:
:
1. Can operate on pattern and design line
a. Measure one line horizontal and vertical degree;
b. Measure two line degree;
c. Measure three point dgree;
d. Measure two point horizontal or vertical degree
A.Operation:
:
Click or make square on measured line, Click right, You can see【 measure angel】 dialogue
table.Check following fingure, Measure shoulder bias degree AB.
B. Operation:
:
Click or make square to select measured two line, Click right to finish, You can see 【measure
angle 】dialogue table, Check following figure, Measure degree of shoulder bias line and
armhole.
89
RICHPEACE DESIGN AND GRADING SYSTEM
C. Operation:
:
Check following figure, Measure degree of point A,B,C, Click point A, Then click point B and c,
you can see measure angel dialogue table.
D.Operation:
:
Press shift, Click two point need to measure, You can see X and y angel in measure angle table
Rotate
Function:
:
It is used for rotating or copy on group point or line, It is suitable for design line and assistant
line.
Operation:
:
1. Click or make a square to select point ,line ,click right to finish;
2. Click one point, This point is axis point, Click any point as reference point, Drag to object
position.
90
RICHPEACE DESIGN AND GRADING SYSTEM
Presentation:
:
Default is rotate and copy, cursor is
Mirro
,Press shift to convert to
Shortcut toolbar K
Function:
:
It is used to Mirro (copy or move)design line or pattern according to symmetry axes.
Operation:
:
1. Click two point on line or click two point on blank place As symmetry axes.
2. Make a square or click point,line or pattern,Click right to finish.
Presentation:
:
1.
Default is copy, Copy icon is
, Press shift to convert to
;
2.
Default is drawing horizontal or vertical line or 45 degree line, click right can Convert to any
direction.
Move
Short cut toolbar G
Function:
:
It is used for coping or moving one group point or line.
Operation:
:
1. Click or make a square to select copy or move line ,Click right;
2. Click reference point, Drag to object position then click;
3. After selecting reference point, Click right,Selected line mirro on horizontal or vertical
direction. Check following figure.
91
RICHPEACE DESIGN AND GRADING SYSTEM
Presentation:
:
1.
Default is copy, Copy icon is
, Press shift to convert to
;
2.
Press ctrl, can move in horizontal or vertical direction;
3.
When copy or move, Press enter, You can see[offset] dialogue table.
Move and rotate
Funcion:
:
It is used to move and rotate on group line to another group line, For example, Move
Back to front, Check following fingure.
Operation 1:
:
1.
Like picture 2,Click shoulder biasline near back collar width point.
2.
Click shoulder biasline near Front collar width point
3.
Make a square or click need to move and rotate, Click right to finish.
Picture 1
Picture 2
Picture 3
Operation 2:
:
1. Like picture 3, Click piont 1,2,3,4;
2. Make a square or click need to move and rotate, Click right to finish.
Presentation:
:
1.Default is copy, Copy icon is
Forfex
, Press shift to convert to
Shortcut toolbar W
Function:
:
It is used for picking up pattern from design line or assistant line.
92
;
RICHPEACE DESIGN AND GRADING SYSTEM
Operation:
:
Method 1:Click or make a square on line formed pattern ,Click right, System will creat pattern
as big area.
Method 2:Press shift, Click the area formed pattern, Have color filled, Can click more
areaContinuously, Click right to finish,Like picture2;
Method 3:Click one pioint, Click border line in clockwise until close, If line turn green when pick
up,Click right can select later line, finish picking up,Like picture3.
Click line, Make a square on line, Press shift and click color area, First operation
Is selection, Second is cancel selecting.
Above three operation is click right to finish pattern, Tool turn to picking up assistant
line tool.
Picture 1
Picture 2
Picture 3
Note:
Select forfex,Click right can turn to pick up assistant line tool
pick up assistant line tool
Function:
:
Picking up assistant line from design line.
OPeration:
:
1.
Select forfex tool,Click right cursor turn to
2.
Click pattern, Design line turn blue color.
3.
Click or make square on needed line, click right.
4.
If scissor border line to assistant line, Click two point ,If curve line, click 3 point.
Note:
With this tool, Press shift,Click right can appear “pattern ino” dialogue table.
93
RICHPEACE DESIGN AND GRADING SYSTEM
Inside border
Function:
:
Make hollow graph in pattern, Also can pick up on design line, Can hollow assistant line fromed
area in pattern.
Pick inside border on design line
1.
Click to select work area pattern, Pattern original line fill color. Like Picture 1;
2.
Click or make a square on inside border line;
3.
Click right to finish, Picture 2。
Picture 1
Picture 2
Pick inside border on assistant line fromed area
1. Click or marke square on assistant line in pattern
2. Click right to finish
After click right
After making square before click right
Set curve colour and type
Function:
:
It is used to modify design line color,Line type、Assistant line type and ouput type.
Presentation:
:
Set solid line thick or thin ,set solid or dashed line
Set inside line is plot or cut or half blade cut
94
Set various line type
RICHPEACE DESIGN AND GRADING SYSTEM
Operation:
:
1.
Select this tool,There are colour,Line type, cut dialogue table on the right of shortcut
toolbar;
2.
Select color, line type etc;
3.
Se;t line type, cut status,Click or make square on line;
4.
Select colour, click or make square on line by clicking right mouse.
If change solide line to dashed Great wall line, select this tool, select line type on
,select
,Click or make a square on modified line. If change original
Solid line to dashed ,Click left or make square on modified line.
Line size setup
1. Effect to Wave line、Turn line、Great wall line;
2. Select one type line, Cursor appear length and width, input length and width value on
keyboard, First input is line length,Press enter, Input line width,Then press enter;
3. Click or make square on modified line.
Cue:
Select pattern,Press shift,Click on pattern assistant line on pattern, Assistant line turn to
temporary line, And can not plot.
Pic lib
Function:
:
1. To make the craft picture cooperated with the order 【Save to picture lib】under the menu
【File】
;
2. open and adjust the craft picture.
3. Copy bitmap picture to office
Operation:
:
1.Insert (save)craft picture:
1) ( Select the tool; Separately click or marquee select the figure (The figure is drawn by
tradition tool or special tool); Click right, You can see craft picture is surrouded by a dashed
frame.
2)
3)
Click the【
【File】——【Save to picture lib】
Popup dialog box【Save to picture lib】, then choose the path, input the picture name in the
file name bar, click【Save】to add a craft picture.
95
RICHPEACE DESIGN AND GRADING SYSTEM
2.Open and adjust the craft picture:
There are two situation
A.Open
in blank place
A.
1.
Click on blank place,You can see 【Part lib】dialogue table;
2.
Double click on picture, You can open ;
3.
Click on blank place,Click Left is confirm,Click right you can see【scale】 dialouge
table.
Adjustment of craft picture dashed frame:
When you put the mouse cursor in the dashed frame, the
Move
cursor change the shape as the picture shown then click
and drag the mouse to proper position and click again.
When the cursor is put on the right/left side frame, it will turn
Horizontal
the shape as the picture shown, then click and drag the
mouse to proper position and click again.
Stretch
Vertical
The operation is same as above.
Stretch
When the cursor is put on the four corners of dashed frame,
Rotate
it will turn the shape as the picture shown, then click and
drag the mouse to proper position and click again.
When cursor is put four side corner of dashed frame,Press
Proportion
stretch
ctrl,Cursor turn to shape as picture shown,Drag mouse to
suitable place, Click left.
96
RICHPEACE DESIGN AND GRADING SYSTEM
Adjustment of Craft picture proportion
1. Select this tool, Marqeen select design line, click right two times,You can see【scale】
dialogue table,Check following picture;
2. In dialogue table, Input value,click ok.
B.Open on pattern:
:
1. Select this tool on pattern,You can see picture lib dialogue table
2. Double click on needed picture, You can open.
3. Before clicking ok,Press shift convert on group ware and assistant line.
Presentation:
:
Groupware is a whole part,Adjust, move or rotate with modify tool
,Operation is same as
adjust craft picture.
3.Copy bitmap pciture
Select design line, Click right,Copy bitmap command is active, Click and copy to word,excel file.
Text
Function:
:
It is used for add text,Move text, modify or delete text on design line or pattern,
And text on each size can different.
Operation:
:
1.Add text
a.Click on design line or pattern with this tool,You can see 【text】dialogue table;
b.Input text,Click 【ok】
2.Move text
Click on text, text is selected, Move mouse to suitable place then click again.
3.Modify or delete text,There are two kinds of operation
1.Put cursor on modified text, text turn light,Then click right,You can see 【text】dialogue table,
After modifing or deleting ,Click ok.
2.Put this tool on text,Text turn light,Press Enter,You can see 【text】dialogue table,Select
97
RICHPEACE DESIGN AND GRADING SYSTEM
words need to modify and moidfy it ,Press delete, Can delete words,Press direction
keyboard,Can nove text direction
4.Add different words on different size, For example s “addRubber line 6cm”,L and XL “add
Rubber line 8 cm”.
Operation:
:
1.Click on pattern,You can see [text] dialogue table,Input“Add rubber line 6cm”
a.Click【Size】button,Click l,xl, Make them white color, no blue color;
b.Clci [ok] in dialouge tale and 【text】dialogue table in size table,
C.Use this tool continuously,Click on pattern, Input “Add rubber line 8 cm”like step 1.
d.Click【Size】button,Click S and M, Make them white color, no blue color;
e.Click [ok] in dialouge tale and 【text】dialogue table in size table,
【TEXT】dialogue table presentation
【TEXT】:Input text
【Angel】:Set text angle
【Hight】:Set text size
【Font】:Click【Font】,Can set font type、color etc
98
RICHPEACE DESIGN AND GRADING SYSTEM
【size】:Add text on different size, Selected is add text on left,Did not selected size, did not add
text.
Special presentation:
:
Text place grading operation,Select “select pattern control point”
words,Grade withGrading table.
99
tool to select
RICHPEACE DESIGN AND GRADING SYSTEM
Section 6
Pattern toolbar
Select pattern control point
Function:
:
It is used to select pattern, Select border point of pattern, Select assistant line point,Modify point
parameter
Operation:
:
1.
Select pattern:Click pattern, If you want to select more pattern,Marqueen grading point of
each pattern.
2.
Select point of border:
:
Select one grading point,Click on grading point or marqueen select grading point.
Select more grading point,Marqueen select grading point or press ctrl, click grading
point one by one
Select non grading point,Click on point;
Select more non grading point,Press ctrl and click on non grading point one by one.
Press ctrl,First click on point is selected, Second click is cancel selecting
Cancel selected point one time,Press ESC or click on blank place;
Select two point, Press A then drag to point B,Picture 2 is selected status.
Picture 1
3.
Picture 2
Assistant line and border line overlap:
Click on overlap point, Selected is border point;
Marqueen selected overlap point,Both border point and assistant line grading point are
selected together;
Press shift,Click on marqueen overlap point,Selected is grading point;
4. Modify point property:
: Double click on modified point,You can see 【Control point attr】
dialogue table, Check following picture,
100
RICHPEACE DESIGN AND GRADING SYSTEM
After modifing,Click apply,if select if more point, Press enter can see following dialogue
table.
Skill:
:
If convert only in grading point and curve point,Click right.
Sew line
Function:
:
Add and modify sew line on pattern border.
Operation:
:
1. Add fixed length sew line;
Click border line on pattern,You can see【sew line】dialogue table, Select needed sew line,
Input sew line length and distance,Click ok, If modify sew line exist on pattern, Value will
appear on currect dialogue table,Modify directly;
2. Add sew line on one or more line,
Click or marqueen more line ,then click right,Select needed curve type, Input value of line
distance,Click ok.
3. Add not equal width sew line:Select one line in clockwise, Press and hold mouse on first
point ,Then drag and move to second point,You can see 【Sew line】dialogue table,Select
needed line,Input distance,Click ok.If there are sew line in two point,It will appear current
data in dialogue table.
4. Delete sew line:Click with eraser, Can select blank line type in line type or curve type.
101
RICHPEACE DESIGN AND GRADING SYSTEM
【Sew line】 Parameter presentation:
A. is distance of first line with border line,If A>0,Sew line is inside pattern, A<0,sew line is out
of pattern;
B.It is distance of first line and second line,Get absolute value;
C.is distance of third line and second line distance, Get absolute value.
Increase sew line of two point
【Sew line】Parameter presentation:
【A1】【A2】:A1>0 it is sew line inside pattern, Sew line <0,It is sew line outside pattern, A1、
A2 is distance of first line with border line
【B1】【B2】
:It is distance of first line and second line,Get absolute value;
【C1】【C2】
:It is distance of second line and third line,Get absolute value;
The third line is inside border or outside border, When add sew line between two point,Can
make not equal sew line of start point and end point,And curve height is same, Can not stretch.
Custom dash: U can set segment length and distance between two segment.
Quilted stitching
Function:
:
Add or modify quilted stitching line
Add quilted stitching line operation
102
RICHPEACE DESIGN AND GRADING SYSTEM
1. Click this pattern with this tool,Pattern turn grey,Picture 1:
Picture 1
2.
Picture 2
start point and end point of reference line(it can be border line, also can be assistant
line),You can see【quilt】 dialogue table.
3. Select proper line type,Input value,Click OK.
Modify stitching line operation:
:
Click right on pattern which have stitching line,You can see quilt dialogue table, Modify and click
ok.
Delete stitching line operation:
:
Can use eraser,Also can click right on pattern which have stitching line, Select blank type in
straight or curve type.
【Quilt】Parameter presentation
Type:
:Select Cross,Input Angel in Angel of cross;Select single, Quilted stitching line is parallel.
103
RICHPEACE DESIGN AND GRADING SYSTEM
Straight line type: Select three line,A is distance of second line with first line;B is distance of the
third line with second line, Select two line; B is uneffective; Signal line,Both A and B is
uneffective; C is distance of two group.
Curve line type:
:
Curve width,
Curve height
Select this option can extend line to seam allowance, Do not select,
This option can not extend line to seam allowance.
Add seam
Function:
:
It is used for add seam or modify seam and cut corner.
Operation:
:
1.
Add (Modify)same seam allowance to all side of pattern: Click on any border point,You
can see 【Seam of pattern】dialogue table, Select proper option, Click ok.
2.
Add (Modify)same seam allowance to more side of pattern:
Marqueen select same seam allowance line,Click right,You can see 【Add seam
Dialogue table;Input seam value, Select proper cut corner type, Click ok.
3.
Add seamallowance first,Then click border line modify seamallowce: Select tool,Input
number,then press enter,Then click border line,Seam value is changed.
Before clicking
After clicking
104
RICHPEACE DESIGN AND GRADING SYSTEM
4.
Click border line:Click border line with add seam tool,Input value in 【Add seam】dialogue
table,click ok.
5.
Drag border point add (modify)seam line: Press on point 1,then drag to point 3 and
loosen mouse,You can see 【Add seam】dialogue table, input value, Click ok.
6.
Modify seam cut corner :Click right on modifing point,You can see 【Seam type of corner】
diaogue table, Select proper cut corner,Then click ok.
7.
Modify two side length equal cut corner:
: Select this tool and press shift,When cursor
turn
,ClickTwo side border line near cut corner
105
RICHPEACE DESIGN AND GRADING SYSTEM
Parameter Instruction on 【Add
Add Seam】
Seam】
Hereunder, we will explain the corner types in the dialog box 【Add Seam】
】. We define the order
in the clockwise direction. The icon
the seam.
or
indicate the corners that have not been added
Border 1, 2 intersect
The seams at the corner of the piece extend and intersect naturally.
Symmetry on 2
It is often used in the operation of hemline. Tuck up the seam according to border 2, and then
modify the seam corner according to the
t seam1, 3.
2 vertical length
Extend border 2 to border 1 and make them inersect, Through cross point make vertical line
and make it intersect with border 2, It is often used in the armhole of princess line.
Cut Angle Bisector
It is used to make colloar point, Cut tine corner along bisector vertical direction,
106
RICHPEACE DESIGN AND GRADING SYSTEM
Input red line length in length table.
Cut on bias
It is used to make sleeve placket,shirt placket corner seam, Input line length out of red line in
length dialogue table,Means corner width.
2 length fix
Extend the sewing line of border 1 to extending line of border 2. You can input the length of
segment 2 in the dialog box and make the vertical line of border 2.
2 length fix 1 vertical
Like Picture, Make side 1 and 2 vertical line OB、OA through point,Through O make side 2 fixed
Length line OC 3.5cm(extend lline),Connect BC,It is more used in priness line and two pieces
sleeve armhole.
Note: BE and BC is not in same line.
【Symmetry on 1】
】Referring to the operation of 【Symmetry on 2】
】
【1 vertical length】
】Referring to the operation of 【2 vertical length】
】
【1 length fix】
】Referring to the operation of 【2 length fix】
】
【1 length fix 2 vertical】
】Referring to the operation of【2
2 length fix 1 vertical】
】
【Vertical to 1, 2 sewing lines】
】
Make vertical line from 1,2 Corner to seam,Cut corner along intersect point connection line
direction
【Extending the sewing line】
】
12 extend line cross on seam,Cut corner along intersect point connection direction.
107
RICHPEACE DESIGN AND GRADING SYSTEM
Make Interlining
Function:
:
It is used to make interlining
Operation:
:
1. Add equal value interlining on more pattern: Make a square on border line ,then click
right,Input proper value in 【Interlining 】dialogue table.
Add equal value interlining on more pattern:
Add interlining on more border
slope line is interlining
2. Add interlining on whole pattern:
: Select this tool and click pattern, Pattern border turn
grey,You can see interlining dialogue table, Input value.
108
RICHPEACE DESIGN AND GRADING SYSTEM
【Interlining】Parameter presentation
【Distance】:Input “+’,it is inside distance ofinterlining from selected line,If input “-” it is outside
distance of interlining from selected line
【Decrease of seam】:Input“+”,New pattern seam decrease,Input”-”,New pattern seam increase.
【keep seam】:Select,All new pattern have seam,otherwise, new pattern is no seam
【slope line】:Select,Slope line appear on original pattern, Otherwise no slope line appear on
original pattern.
【Pattern name】: If input interlining on dialogue table, Original pattern name is front, New
pattern name is Front interling, and add “interling” text in original pattern.
【 Grainline direction 】: Select“ no change”,New pattern grain line is same as original
pattern.Select “Rotate 90 degree”,New pattern grain line rotate 90 degree basing on original
grainline.
Notch
Function:
:
Add notch, turn corner notch on pattern, Adjust notch direction,Grad to notch,Modify
Notch position size and property.
Operation:
:
Add notch on control point.
Click on control point.
Add notch on line:
:
Click or marqueen line,You can see【Edit notch】dialogue table,Select proper option,Input
value,Click【ok】
Add equal distance notch on more line:
Make a square one need to add notch line, Click right, You can see【Edit notch】dialogue table,
Input proper option and value, Click【OK】
109
RICHPEACE DESIGN AND GRADING SYSTEM
Add equal notch between two point:
Drag mouse from one point to another point,You can see 【Proportion notch、Divider notch】
dialogue table, Select divider, Input quantity, Input ok.
turn corner notch :
a.Press Shift , Cursor turn to
,Click turn point, Input seaming value, Click ok, All the turn
corner is added notch.
b.Make square on turn corner, Can add notch on turn corner, Can add turn corner notch on
more corner at same time.
c.Marqueen select or click middle of line, Two side is added notch automatically, If marqueen or
click one side of line, Add notch on one side of line.
Marqueen select middle of line
110
Result
RICHPEACE DESIGN AND GRADING SYSTEM
Marqueen select on one side of line
Result
Adjust notch degree:
:
Click on notch, You can see a green line, Drag to proper degree.
Grade for notch, Change notch position and property
Click right on notch,You can see【Edit notch】dialogue table, Input value, Select Notch attri,Click
【Apply】
【Edit Notch】
】dialogue table presentation:
1.
【locate type】When select distance, Add notch base on distance, Value is notch to
reference point length (* point)When select proportion, Add Notch base on proportion,
Proportion is notch to * point length and selected length.
2.
【locate type】Can be grading point,also can be non grading point.
3.
【Multi notch】Add more notch one time, It is whole
4.
【Multi notches】Can be two or three, gap is two near notch distance.
5.
Select【Dispersion】
,whatever cursor in which size, click
from notch to reference point is same as basic size.
111
,All the distance
RICHPEACE DESIGN AND GRADING SYSTEM
6.
Did not select【Dispersion 】, whatever cursor in which size under distance, Click
,Distance from Other size notch to reference point is same as cursor loacted
size.
7.
Select【Dispersion】, What ever input dispersion in which size, Click All EQ
,
All size grading equally base on cursor locating .
8.
Did not select【Dispersion】,Input value out of basic size, Then click
,Other size
grade base on dispersion of this size with basic size.
【Proportion notch、
、Divide notch】
】Dilogue table presentation
1. 【Locate type】:Proporion is two point (more line two point) add notch in proportion;
Divide notch is adding notch between two point (like divider)
2. 【Change Ref_p】:When select divide notch, Click this icon,Reference point will change to
other point.
Sleeve crown and armhole notch
Function:
:
It is used for adding notch on armhole and sleevecrown at the same time, Front
Arhomle and sleeve crown add single notch, Back armhole and back sleeve crown add double
notch.
112
RICHPEACE DESIGN AND GRADING SYSTEM
Operation:
:Click front armhole, front sleevecrown, back armhole and back sleevecrown)
1.
Near point A、C,Click or marqueen select front armhole AB、CD,Click right to finish;
2.
Near Point A1、C1,Click or marqueen front Sleeve crown A1B1、C1D1,Click right to finish;
3.
Near PointE、G,Click or marqueen back armhole EF、GH,Click right to finish.
4.
Near Point A1、F1,Click or marqueen front Sleeve crown A1E1、F1D1,Click right to finish;You
Can see【Add notch together】dialogue table.
5.
Input proper value, Click【ok】
【Sleeve crown and armhole notch】Dialogue parameter presentation
【Size】:Select size, This size appear, notch will appear,Data will change freely in dialogue
table.
【A.H.L】:It is total line length of first step and third step.
【S.C.L】:It is total line length of second step and fourth step.
【S.G:It is dispersion of total sleevecrown length and total armhole length.
【F.A.H.D】
:It is refer to length from front notch to under armhole or shoulder point.
【F.S.C.G】:It is refer to dispersion of front sleeevecrown notch distance and front armhole
notch distance;
【B.A.H.D】:It is refer to length from back notch to under armhole or shoulder point.
【B.S.C.G】: It is refer to dispersion of back sleeevecrown notch distance and back armhole
notch
【Start from another endpoint】:If select line from under armhole, Select this option, Notch
distance will calculate from shoulder point.
113
RICHPEACE DESIGN AND GRADING SYSTEM
【All EQ】【D.EQ】【Dispersion】Refer to [pleat]dialogue table.
Button hole
Function:
:
Add button hole on pattern, Modify button hole. On grade pattern, Different size button hole can
equal ,also can not equal.
Operation:
:
1.According to button hole number and distance, system will draw button hole
automatically, Add button hole in this way, will grade one size by one.
1) Like picture, Click front collar depth, You can see【Add button hole】dialogue table;
2) Input offset value, Number and distance, Click[ok].
【Add button hole】
】dialogue table parameter presentation
【Offset of start】
:It is refer to distance of first buton and reference point
【Quantity】:It is refer to button number
It is refer to horizontal distance of adjacent button hole,If button hole on the right of
reference point, InPUT “+”, f button hole on the left of reference point,input”-”.
It is refer to horizontal distance of adjacent button hole,If button hole on the top of
reference point, InPUT “+”, f button hole on the bottom of reference point,input”-”.
【Angel】
】Angel degree, Can set button hole according to requirement.
114
RICHPEACE DESIGN AND GRADING SYSTEM
【Type】
】It is refer to button different fingure,Select different button fingure under pull down
menu.
2.
.Add button hole on line, System can distribute button hole according to button number,
Only grade for assistant line start and end point.Refer to add drill.
3. Add did not equal number button on different size. Refer to add drill.
4. Modify button hole
Operation:Click right on button hole, You can see 【Button hole】dialogue table.
Drill
Function:
:
Add drill(button) on pattern, Modify drill(button) attribute and number.On gradePattern, Different
size drill number can equal also can not equal.
Operation:
:
1.According to drill/button number and distance, System can draw drill/button place
automatically. Add button hole in this way, will grade one size by one.
1) Like picture,Click front collar depth with this tool,You can see【Drill】Dialogue table
2) Input offset value, Number and distance, Click[ok].
【Drill】dialogue table parameter presentation
【start offset】:It is refer to distance of first drill and
reference point
【Quantity】:It is refer to drill number
It is refer to horizontal distance of adjacent drill
It is refer to vertical distance of adjacent drill
2.Add drill(button) on line, System will add button on line eqaully, Only grade for
assistant line start and end point.
1)
Click on line,You can see [Add drill at curve] dialogue table;
2)
Input drill quantity and 1st and 2nd distance,Click ok.
115
RICHPEACE DESIGN AND GRADING SYSTEM
Select pattern assistanct line,
,
* point is first point.
After add button
Note:
:
After adding drill or button on line, If adjust shape with modify tool, drill or button distance is still
equal, And 1st and 2st point distance did not change.
3.Add different quantity drill(button)on different size
There are two different situation: add on line or did not add on line, take add different quantity
button as example, Add three button on small three size,Add four on the biggest button.
1)
Select drill button,Click on line,You can see【Add drill at curve】dialogue table;
2)
Input button number 3,Click 【size】,you can see【select size】dialogue table;
3)
Select last size XL,Make it no color(this size do not add 3 button);
4)
Click ok in【size】,Will go back last dialogue table;
5)
Click ok;
6)
Same operation,Click on line
7)
Input button number 4,Click 【size】,you can see【select size】dialogue table; Make other
size do not have color, Click ok go back to last dialogue.
8)
Click ok to confirm.
Add three button on size S、
、M、
、L
116
RICHPEACE DESIGN AND GRADING SYSTEM
Add four button on size xl
4.Modify
4.
drill(button) property and number
Operation:Click right on button,You can see【Drill attribute】dialogue table.
【Drill attribute】dialogue table presentation
【Operation】
Select as drill,When connect cutting plotter;This drill is cut
Select only draw, When connect with cutting plotter or plotter, Only draw drill.
Select DrillM43 or Drill M44 or Drill M45, When connect with cutter, Hole size.
【Radius】
:drill circle radius.
【Strip info】:Set strip number,Select this option,When make marker ,will strip automatically
【Modify all drills of style】
:Select, All the drill operation , radius is same.
【Size】
】dialogue table presentation
Only add different quantity drill in different size, will use this function, select is added drill, Did
not select is not added notch.
Pleat
Function:
:
Add or moify box or knife pleat on pattern border, Also can change pleat on design line to pleat
element.When make whole pleat, add pleat on original pattern, Pattern size will change, If add
half pleat, only add pleat sign, did not change pattern size.
117
RICHPEACE DESIGN AND GRADING SYSTEM
Operation:
:
1.Have pleat line on pattern,Check following picture:
1.
Click or make square on pleat line, click right, You can see 【Pleat】dialogue table;
2.
Input up and bottom pleat width, Select pleat type;
3.
Click [ok],Pleat combine;
4.
Adjust pleat until satisfy,Click right mouse.
2.Add Even pleat
1)
Select this tool, Click line which will add pleat, Like following picture lin AB,CD.Then click
right.(MoreLine marqueen ,then click right)
2)
If made half pleat, Click right,You can seePleat dialogue table;
118
RICHPEACE DESIGN AND GRADING SYSTEM
3)
if made complete pleat, Select boarder line, Like process one, Click right you will see
following dialogue table;
4)
Input pleat width and quantity.
5)
Adjust under of pleat,until to satisfy.
Note:
:
Right click position decide pleat direction,
At the same time decide up and under,(right click position is fixed position,right click
position is up.)
3.Modify box pleat or knife pleat
Select this tool,Move cursor on box or knife pleat,When pleat line turn red, Click right mouse,
You can see【Pleat】dialogue table.
4.Assistant line convert to pleat element
Like following picutre, Put this tool on point A drag to point B, Then put on point C then drag to
point D,You can see【Pleat】dialogue table, After confirming original assistant line change to
pleat element, Pleat element have notch automatically.
119
RICHPEACE DESIGN AND GRADING SYSTEM
Note:
After adding pleat, If need modify pleat value or type and notch,bias attribute,Can click right on
pleat, You can see Peat dialogue table.
【Pleat】
】dialogue table parameter presentation
【Width 1】:When each size pleat equal, Click 【Width 1】table,This line table is selected, Can
input pleat value one time, 【Width2】【pleat length】is same as【Width 1】;
【Notch Attr】:Set notch type, width,depth etc;
【Bias Attr】:Set pleat sign bias and distance;
【All size EQ】:Effect to actual value, Current table value is benchmark,Other group size turn to
equal;
【AVE.size】
:Set adjacent size dispersion equal;
【Dispersion】Select will appear in actual dispersion, Otherwise will appear in actual value;
Make pleat type, First show pleat start from middle, Second and third is from one side
to another side.
V dart
Function:
:
Add or modify V dart on pattern border, Also can change dart on design line to dart element.
Operation:
:
1. There are dart line on pattern, see following picture
1)
Click on dart with this tool, You can see【V dart】dialogue table;
2)
Input proper option, Input proper value;
120
RICHPEACE DESIGN AND GRADING SYSTEM
3)
Click ok, Dart is combined;
4)
Adjust dart bottom until satisfy, Click right to finish.
Original pattern
Adjust dart bottom after adding dart
Result
2.No dart line on pattern,
,See following picture
1)
Click border line with this tool, Confirm dart place first;
2)
Drag mouse then click, You can see【V dart】dialogue table;
3)
Select proper option, Input proper dart value.;
4)
Click ok,Dart is combined;
5)
Adjust dart bottom with this tool, Click right to finish.
confirm dart place
Ajust dart bottom
121
Result
RICHPEACE DESIGN AND GRADING SYSTEM
3.Modify V dart
Select this tool, Move cursor to v Dart, When line turn red ,Click right, You can see【V dart】
dialogue table.
4.Convert assistant line to element:
Check following picture, Click dart bottom A and B, then click dart tip c,You can see【V dart】
dialogue table,After click ok, assistant line turen to element automatically, Element is added
notch and drill automatically.
assistant line dart
convert process
Result
Note
After adding dart, If need modify dart value and notch and drill property, Can click right on dart
with modify tool, You can see dart dialogue table:
【V dart】
】Dialogue table parameter presentation:
【All EQ】
【D.EQ】
【Dispersion】Refer to【Pleat】 Dialogue table parameter presentation:
【Drill Mode】Refer to【drill】 Dialogue table parameter presentation:
【Notch Attr】Refer to【notch】 Dialogue table parameter presentation:
122
RICHPEACE DESIGN AND GRADING SYSTEM
Fastigiate dart
Function:
:
Add fastigiate or rhombus dart.
Operation
1. See following picture, Click point A,B,C, You can see 【Fastigiate dart】dialogue table;
2. Input dart value,Click【ok】;
图1
图2
【Fastigiate dart】
】dialogue table parameter presentation
W1、W2、D1、D2:dart bottom width、dart waist width、length from dart waist width to dart bottom
width、total length;
【All EQ】
【D.EQ】
【Dispersion】Refer to【Pleat】 Dialogue table parameter presentation:
【Drill Mode】Refer to【drill】 Dialogue table parameter presentation:
【Notch Attr】Refer to【notch】 Dialogue table parameter presentation:
Note:
:
If do not add fastigiate dart or rhombus dart on appointed line, D1、D2 is active,Input value.
Compare path work
Function:
:
One pattern border line walk on another pattern border line, Can adjust inner line is smooth or
not, also can add notch.
123
RICHPEACE DESIGN AND GRADING SYSTEM
Operation
1.
See following picture, Click point B、point A, Pattern 2 is combined on pattern1;
2.
Click pattern border again, pattern 2 will walk on pattern one, You can add notch, Also can
adjust assistant line;
3.
Click right to finish.
Before using this tool
comparing
presentation:
:
1. If compared and walked two line is in same side ,Like line a and b, Pattern is overlap, Press
ctrl before operation;
2. Amony comparing,Press shift, Click control point or notch can compare from starting point.
【Compare path work】
】Dialogue table parameter presentation:
1. 【Fixed pattern、Stepped pattern】It is refer to add equal length notch from start point
2. Offset behind【Fixed pattern、Stepped pattern】It is refer to casing when add notch;
124
RICHPEACE DESIGN AND GRADING SYSTEM
3. 【Flip pattern】When select flip pattern, Stepped pattern flip once time, Did not select,
Stepped pattern flip one more time
4. 【Skip casing val,dimension】Select, behind dialogue table is active, when match two notch,
Two notch can match automatically within dimension
5. 【Go back when finish】Select, after comparing, stepped pattern go back to before place ,
Other wise, willStopped finished place.
Grainline
Function:
:
It is used for adjust Grainline Direction,located, length and info on weaveline.
Operation:
1. Select this tool, Click two point on pattern by clicking, Grainline will parallel with appointed
point;
2. Click right on pattern, Grain line rotate 45 degree;
3. Click on pattern (not grainline),Then click right, Can rotate grainline in any degree;
4. .Click on middle of grain line then drag, You can move grain line;
5. .Select this tool, Put cursor on grainline side point, You can adjust grainline length
6. Press shift, Cursor will turn to “T”,Click right, Info on grainline will rotate 90 degree;
7. .Select this tool, Cursor will turn to T, Click any point, Info on grainline will rotate in
appointed direction
Note
When grainline rotate, pattern did not rotate
Pattern rotate
Function:
:
It is used for rotating one or more pattern
Operation:
:
1.
If grainline is horizontal or vertical, Click right on pattern, Pattern will rotate 90 degree. If
grainline is not horizontal or vertical, Click right on pattern, Pattern rotate to grainline
horizontal or vertical direction;
2.
.Click selected point, move mouse, Pattern rotat horizontal or vertical in selected point;
3.
Press ctrl, Click two point on pattern and move mouse, Can rotate pattern in freely;
4.
Press ctrl,Click right on pattern, Pattern rotate in appointed degree;
5.
More pattern rotate 90 degree. Make a square to select rotate pattern, (If u select wrong, U
can just click to cancel the selection) Right click to rotate90 degree.
Note:
:
When rotate pattern, Grainline and pattern rotate at the same time.
125
RICHPEACE DESIGN AND GRADING SYSTEM
Pattern flip
It is used for flip pattern
Operation:
:
1. Switch horizontal flip
and vertical flip
with shift;
2. Click on pattern directly;
3. If pattern have left and right,There are a cue “do u flip the pattern”?
4. If you want to flip, click yes.
5. More pattern flip vertically or horizontally. Make a square to select rotate pattern, (If u select
wrong, U can just click to cancel the selection) Right click to flip vertically and horizontally.
Horz/vertical adjust
Function:
:
Adjust line to horizontal or vertical status, Adjust line AB to picture 2, usually used for adjusting
inputing pattern.
Picture 1
picture 2
Operation:
:
1. Press shift switch cursor to horizontal adjust
(vertical adjust
);
2. Click or make a square line AB,You can see click or marke square on line AB,Then click
right, You can see【Horz_vert adjust】dialogue table;
3. Select proper option,Click ok.
126
RICHPEACE DESIGN AND GRADING SYSTEM
Note
It is adjusting pattern, Is not horizonal or vertical pattern,Pattern size will change, It is used for
adjusting A little.
Resmooth curve
Function:
:
It is used for adjusting curve and key point is reserved at original place.
Operation:
:
1.
Click curve need to adjust, There are a new curve appear on original place(if there are no
grading point, New curve is straight line, If there are grading point, New curve through
grading point as default);
2.
Click control point on original line, New curve will adhere to this point(Click this point again,
will separate from new curve);
3.
When satisfy,Click right on blank place.
Original picture
process
Result
Change border segment
Function:
:
1.
Can Interchange between design line and pattern border;
2.
Also can change assistant line to border line
Function-Operation
1.
Click or make square on one side of line,Line is selected(If select more line,The first must
marqueen select, Then click right);
2.
Click right can flip on horizontal or vertical direction;
3.
Move cursor on object,Click right to finish;
One pattern border line replace another pattern border line
Before changing
Among changing
127
RICHPEACE DESIGN AND GRADING SYSTEM
After changing
Note:
:On pattern, You can drag to point.Check following picture:
Change picture one to picture 2,Select this tool and select line c,Drag from point A to point B;
Change picture one to picture 3,Select line c, Drag from point B to point A.
Picture 1
Picture 2
Picture 3
Operation 2:
:
Click or marqueen select assistant line, Cursor will turn to
shape, Click right.Check
following picture.
Before assistant line turn to border line
Among assistant line turn to border line
After
assistant line to border line
Change border to assistant curve
Function:
:
Change pattern to to another pattern closed assistant line.
Operation:
:
Change A pattern to B pattern closed assistant line.
Click on key point of pattern A ,Then click on key point of pattern B (or press enter offset)
128
RICHPEACE DESIGN AND GRADING SYSTEM
Two separate pattern
Packet changed to assistant line of front pieces
Divide pattern
Function:
:
Cut pattern along assistant line.
Operation:
:
1. Select divide pattern tool;
2. Click assistant line on pattern
Before dividing
After click dividing and click yes
After click dividing and click NO
Pattern jion
Function:
:
Jion two pattern to one pattern,Two jioned way: A Combine with two point connection line, B
Combine with curve.
Operation
Press shift switch between
(method A) and
129
(Method B). When click on first
RICHPEACE DESIGN AND GRADING SYSTEM
pattern, Then press shift will change between reserve combined line
reserve combined line
(
(
)and not
)
There are four operation way after selecting cursor
a. Click blank place of two pattern directly;
b. Clike two corresponding point seperately;
c. Click border line of two pattern seperately;
d. Drag two point of one pattern,Then drag two point of another pattern, can combine;
Before joining
After combining with
After combining with
After combining with
After combining with
Pattern symmetry
Function:
:
There are relevant
and irrelevant
two function, After use relevant, When adjust half
of pattern, another part also change, Select irrelevant, Adjust half of pattern, another
Pattern did no change.
130
RICHPEACE DESIGN AND GRADING SYSTEM
Operation:
:
1.Relevant symmetry pattern
1.
Press shift,Cursor turn to
2.
Check picture 1, Click symmetry axis(front center) or Click point A and point B seperately;
3.
;
When appear picture 2, If want to go back to picture 1,select this tool and press
Symmetry axis do not loose, Press delete.
Picture 1
Picture 2
2、
、Irrelevant symmetry pattern
1. Press shift, Cursor turn to
;
2. Click symmetry axis(front center) or Click point A and point B seperately, Check picture 2.
Picture 1
Picture 2
Note:
:
If pattern two side is not symmetry, When select symmetry axis, Reserve big area side.
Check following picture.
Before relevant symmetry
After relevant symmetry
131
After irrelevant symmetry
RICHPEACE DESIGN AND GRADING SYSTEM
Shrink
Function:
:
Can shrink to whole pattern according to material, Can part shrink selected line .
Whole pattern shrink operation
1. Select shrink tool;
2. Click on blank or pattern,Then click right, You can see【shrink】dialogue table;
3. Select shrink material, select proper option, input weft and warp shrink, then click
Ok.
Presentation:
:
1.
Whole shrink can record old shrink, Also can change or delete shrink. For example, Add 5%
shrink, After changing new material, shrink is 7%, Input 7 directly, delete shrink, input 0;
2.
Change or clear shrink, Table color will filled, it is alert function;
3.
Shrink and scale is relevant, Input value on shrink, System will calculate scale
automatically, Also, Input value on scale, there are corresponding value in shrink. Take
size is 100 as example,When add shrink, Formula is:
100+100*10%+100*10%*10%+100*10%*10%*10%.....≈111.11,If add 10%scale, Formula
is 100+100*10%=110.
Part shrink operation:
:
1. Click or marqueen select shrink border line or assistant line, click right,You can see【Partial
shrink】dialogue table;
2. Input shrink, input proper option;
Click【ok】
132
RICHPEACE DESIGN AND GRADING SYSTEM
Section 7 Grading toolbar
Intersection of two parallel
Function:
:
It is used for grading for pattern border,After using this tool,parallel with intersection side,
Usually used in grading for collar of custom fashion.
Operation:
:
From picture one to picture 2, Click point A directly.
Picture 1
Picture 2
Assist curve parallel grading
Function:
:
Grading for inner line of pattern, After using this tool, inner line size will parallel and intersect
with border line.
Operation:
:
Check picture 1, Click point A,point b, line c,It means that click graded side, did not graded side
and border line.
133
RICHPEACE DESIGN AND GRADING SYSTEM
Picture 1
Picture 2
Grading of assistant curve
Function:
:
Assist line side point which intersect on pattern will grade according to border line appointed
point length. (like AB curve length)
Operation:
:
1.
Double click on assistant line point A,You can see【Grading of assistant curve】dialogue
table;
2.
Input proper value, Select proper option;
3.
Click【Apply】.
【Grading of assistant curve】Dialogue table parameter presentation
1.
【length】
:It is refer to length from selected point to reference point;
2.
Locte:There are two locte.Angle ref poi,Click this button, Cursor change to
,Can click
objective point
3.
【Dispersion】: It is refer to dispersion of two adjacent size, Did not select,Value is
distance from appointed point to reference line.
4.
5.
Input value in any size, Then click this icon,All size grade by this size value
Select 【 Dispersion 】 ,Whatever input grading value in which size,Then click
,Each size grade by cursor locating size.
6.
Did not select【Dispersion】Input value out of basic size, Then click
size grade equally by dispersion of this size and basic size.
134
, All
RICHPEACE DESIGN AND GRADING SYSTEM
Grading by parallel and distance
Function:
:
Make different size shoulder parallel.
Operation:
:
Shoulder did not grading,Grade according to actual value.
1. Click two point of back center with this tool;
2. Click shoulder point,You can see【Distance point】dialogue table, Input proper value,
Select proper option,Then click ok.
Shoulder did not grade
After grading shoulder
Shoulder Grade operation: Check following picture
1.
Click grainline(can click two point of back center);
2.
Click shoulder,You can see 【 Distance point 】 dialogue table, Check following first
option,Click ok.
135
RICHPEACE DESIGN AND GRADING SYSTEM
【Distance point】
】parameter presentation:
:
1. 【Dis】It is refer to shoulder to reference line distance;
2. 【Parallel with prev grade point】
:It is refer to grading point before selected point;
3. 【Parrallel with Next Grade point】:It is refer to grading point after selected point;
4. 【Dispersion】
:It is refer to dispersion of two adjacent size,Did not select,It is refer to
distance of appointed point to reference line;
5. Select 【 Dispersion 】 ,Whatever input grading value in which size,Then click
,Each size grade by cursor locating size.
6. Did not select【Dispersion】Input value out of basic size, Then click
size grade equally by dispersion of this size and basic size.
Size Align
Function:
:
Align grading value by point or line or restore original alin.
Operation:
:
1.
Click one point on pattern, Grading value horizontal or vertiacl aline with this point;
2.
Select part of line, Graing value aline with connection line of this line two point,
3.
Press X before click point, It is horizontal aline;
4.
Press Y before click point, It is Vertical aline;
5.
Click right on pattern, Will restore original aline.
Arc Grading
Function:
:
Can grade to angel、radius、Arc length.
Operation:
:
1.
Click arc with this tool,You can see following picture,Circle center point will appear,
You can see【Arc graing】dialogue table;
136
, All
RICHPEACE DESIGN AND GRADING SYSTEM
2.
Input proper value,Click 【Apply】【Close】
【Arc Grading】
】Dialogue table parameter presentation
【All size EQU】
:Select,All size equal at click place with mouse
【Dispersion】:Select,Other size will appear with dispersion except basic size, Otherwise will
appear with actual data;
【Change p】
:Click one time,* Point change to another side of arc, *point is unmoved point;
Copy grading value
Function:
:
Copy same grading value
Operation:
:
Situation one,Copy sigle grading point: Picture one to picture 2
Click or marqueen select grading point with grade value,The click or marqueen select did not
grade point;
Picture 1
Picture 2
Situation 2,
,More grading point copy:Picture 3 to picture 4
Marqueen select or drag on grade pattern,(Like picture 3,A tob),Then marqueen or drag on ungrade pattern (like picture 3, From point c to point D)
137
RICHPEACE DESIGN AND GRADING SYSTEM
Picture 3
Picture 4
Situation 3,
,Copy same grading value,Paste to more graing point continuously:
Press Ctrl,Marqueen select or drag or graded pattern, Then select or drage on un-graded
pattern;
Situation 4,
,Copy one direction or opposite direction,Select in dialogue table.
Two point proportion grade
Function:
:
Grade another two point proportion according to two point proportion or grade from one point to
one line according to one point to one line grading.
Operation:
:Check following picture,EF according to Length proportion of AB.
1.
Select this tool,Press shift switch cursor to
status;
2.
Click point A and point B, Then click point E and point F;
See following picture,Grade point C to line AB according to Point D to line AB;
1.
Select this tool, Press shift switch cursor to
2.
Click point D,Then click line AB;
3.
Click point C, Then click line AB;
138
status;
RICHPEACE DESIGN AND GRADING SYSTEM
Enable or disable assistant curve auto grading with border
Function:
1. Assistant curve auto grading with border
2. Assistant curve do not auto grading with border
Operation:
Assistant curve auto grading with border
1. Press shift, Change cursor to
, Assistant curve auto grading with border.
2. Select or click middle of line, Assistant two side will grading with border.
3. Select one side of assistant line, Only one side grading with border
Note:
After use this operation, If u modify border grading value or grade border point, Assitant line will
grading automatically.
Assistant curve do not auto grading with border
1. Press shift change cursor to
, Assistant curve do not auto grading with border
2. Select or click middle of line, If u modify border grading value or grade border point, Assistant
line do not grade with border line.
3. Select one side of assistant line, If u modify border grading value or grade border point ,Only
one side donot grading with border
Special presentation:
If u want to grade whole pattern, U can click pattern-assistant cuve auto grading with outline or
disjoin border and assistant curve.
Parrallel grading
Function
Grade for border line, pattern assistant line, Usually used for lingerie grading.
139
RICHPEACE DESIGN AND GRADING SYSTEM
Operation:
1. Select or make a square to select line need to parallel grading, right click. U can see parallel
Grade dialogue.
2. Input distance of each parallel line, Click ok.
[Parallel grading] dialogue parameter presentation
1. Parallel grading is refer o cuver (border line and assistant line) similar as base size shape,
And u can set value.
2. [D.EQ] is refer to distance is same between diffent size.
3. [All columns same] After select this option, Each column value is same.
4. [Relatively] and [Absolute], Because base size do not move, So distance is 0, Each size have
Offse distance, U can think it is dispersion. Relative is dispersion of neared size, Abosultely is
Dispersion compared with base size.
5. Distance have positive and negative , U can see the arrow on pattern, >0 means offset
according to arrow direction, Other wise offset another direction.
6. If input 0 means this size shape is same as base size
7. For non selected line, Extend current shape.
Line grade
Function
Grade whole pattern
Operation
1. Click line grading table, u will see line grade table dialogue.
2 .Select vertical line tool
, Click on place which need to input line out of pattern, Drag to
another side of pattern vertically , Right click to finish.
3. Select horizontal line tool
, Drag to another side of pattern horizontally, Right click to
finish.
4. Also u can input any direction line with any direction line tool
5. Also u can input middle point
, Right click to finish.
by click on line and base point
by click blank place
and outside border control point.
6. Select “Select line” tool, Click or make a square on line, Input value in any table of q1 or q2 or
q3.
7. Click apply, grade. Pattern will grade according to the value inputing in dialogue. .
140
RICHPEACE DESIGN AND GRADING SYSTEM
[Line grade table] dialogue table parameter presentation
1.
Copy select line grading value,If line is not selected, U can not use it.
2.
Past selected grading value to table.
3.
q1,q2,q3 all equal:If press this icon and make the icon down,Mean q1,q2,q3 equal;,
if u input one value in any table of q1 or q2 or q3, All the value is same.
4.
All line in work view: If press this button, Click “ Apply”, Value in table will be put to all
Grading line, Otherwise only be put selected grading line.
5.
Average interval: If press this button, Value in table will be put other size according to
average regular,Otherwise do not put to other size.
6.
All patterns in workviewer, If select this icon, All the patterns and all group size will be
grading.
7.
All pattern in work view: If press this icon, Select”Grade”, All the patternwill be grading,
Otherwise only selected pattern is graded.
8.
Show or hide grade line, If select, u can see grade line, Otherwise u can not see.
9.
Delete grade line:Click this icon , u can see “delete all grade line in workview?” dialogue
Table, U can delete all grade line after clicking ok.
10.
Settings:Click this icon, U cansee a dialogue, u can select element to deal with.
141
RICHPEACE DESIGN AND GRADING SYSTEM
11.
:If u select relative, Length is distance between near size, If u
Select absolute,Distance is other size compared with base size.
12.
: Save value in table to grade line, If select”all line in workview”,
Value will be saved to all the line in work area.
13.
:Press this icon, If press”all pattern in workview”,All the pattern
Will be grading, Otherwise only selected pattern is grading.
142
RICHPEACE DESIGN AND GRADING SYSTEM
Section 8 Hide toolbar
Parallel modify
Function:
:
Parallel modify one or more line
Operation:
:
1. Click or drag more point, Click blank place, You can see 【Parallel】modify dialogue
table,Input Adjust value ,Click ok.
2. When drag,If move to key point, No dialogue table;
3. When drag,Press shift can adjust in horizontal ,vertical ,45 degree direction.
Proportion adjust
Function:
:Drag one or more line in proportion,Press shift,Cursor will change between
Operation:
:
Original line
Adjust with
Adjust with
143
and
RICHPEACE DESIGN AND GRADING SYSTEM
1.
Selet this tool, Switch to proper cursor,Click one point on curve and drag(or drag one group
of control point,Click key point and drag),Click on blank place,You can see【Offset】dialogue
table,Input adjust value,Click ok;
2.
When drag, if move to key point, do not appear dialogue table;
3.
When drag,Press shift can adjust in horizontal ,vertical ,45 degree direction
Curve
Function:
:
Draw curve or straight line freely.
Operation:
:
Draw straight line:Click two point,Click right,You can see 【 Length and angel 】 dialogue
table ,Input length and angel.
Two pint connection line: Click right on two point,Then click right.
Draw curve line:Click at least three point,Then click right.
Corner
Shortcut toolbar V
Function:
:
Extend line until cross and delete unselected part.See following picture.
Operation:
:
1. Select this tool,Click two line seperately;
2. Cursor colour will change, changed line is reserved line;
3. Click left or right
Horz or vert line
Function:
:
Formed a right-angel line on two point(include cross point or oneside point)
Operation:
:
Click one point, Then click right to switch horizontal or vertical line location, Then click another
144
RICHPEACE DESIGN AND GRADING SYSTEM
point.
Equidistance curve
Short cut toolbar Q
Function:
:
It is used for drawing a equal distance line
Operation:
:
1.
Click on line with this tool,Then drag cursor and click,You can see【Parallel】dialogue table;
2.
Input value,Then click【ok】
Equidistance curve intersect with two curve
Short cut toolbar B
Function:It is used for drawing equidistance curve intersect with two curve,Can draw more line
onetime.
Operation:
:
1. Click line which will make equal line,line color change;
2. Click intersect side which intersect with selecting line;
3. Move mouse to proper situation,You can see 【Parallel】dialogue table
4. Input value,Then click【ok】
Curve aline
Shortcut toolbarT
Function:
:
There are one way-extend and two way extend. One way extend, extend more line to one line,
Two way extend, Extend more line to two line.
Operation:
:
One way extend, Click or marqueen select line abc,Then click right, Then click line d, Move
cursor to proper place, Click right;
Before one way extend
After one way extend
Two way extend, Click or marqueen select line abc,Then click right, Then click line d,e.
Before Two way extend
After two way extend
145
RICHPEACE DESIGN AND GRADING SYSTEM
Zoom in
Shortcuttoolbar space
Function:
:
It is used for zooming in or full screen appear workarea object.
Operation:
:
Click outside need to zoom in,Drag mouse to form a rectangle, make zoom in part within
rectangle, Click can zoom in.
Full screen:Click right on workarea.
Skill:
:
When use any tool,Press and hold space,Can convert to zoom in tool, scroll mouse wheel in
front direction ,it is zoom in acorrding to cursor center location, scroll mouse wheel in back
direction ,it is zoom out acorrding to cursor center location
Move pattern
Shortcut toolbar
space
Function:
:
Move pattern from one place to another place,Or two pattern overlap with on point.
Operation:
:
1. Move pattern:Click on pattern with this tool and move to suitable,Then click.
2. two pattern overlap with on point:Click this tool, Click on pattern, Drag mouse to another
pattern, When this point is selected, Then cick ok.
Skill:
:
When select any tool,Move cursor on pattern, Press space, Cursor turn to move pattern , Drag
to proper place then click
Set square
Function:
:
It is used for making any direction vertical or parallel line(extend line)
Operation:
:
1. Click two side of line with this tool;
2. Click another point, drag mouse, Make selected line parallel line or vertical line
Original picture
Move in parallel direction
146
Move in vertical direction
RICHPEACE DESIGN AND GRADING SYSTEM
Equal notch
Function:
:
Add notch at two group line, Also can add easing.
Operation:
:
1.
Click or marqueen select line AB near point A with this tool,Click right;
2.
.Click or marqueen select line AB near point c,Click right,You can see【Equal notch
dialogue】table;
3.
Input proper value,Click【OK】
【Equal notch】Dialogue table parameter presentation
【length 1】
:Select line length before clicking right
【length 2】
:Select line length after clicking right
【DL】
:Dispersion of two group line
【Notch 1】:For example, Value 10 is AE1 Length in notch 1,CE1 length is sum of notch and
easing,total is 12
【Notch 2】
:Check above picture, Noth two value is 25,AE2 length;CE2 length is sum of notch
2 value and easing ,total is 25;
【Notch 3】:Check above picture,In notch 3, Value 50 is length of AE3,CE3 is sum of notch and
147
RICHPEACE DESIGN AND GRADING SYSTEM
casing.
【ALL EQ.】
【】【D.EQ.】
:Refer pleat dialogue table
【Qty】:When select 1,Only open one group notch,When select 2,Can open two group
notch,When select 3,Can open three group notch;
【Ref End point】
:Before click Notch 1、Notch2、Notch 3,Set place with selected line starting
point, Select,Set place with selected line end point;
【Count and gap】:Set different notch number and gap.
Fold out pattern
Function
It is used for copy part of pattern
Operation:
See following picture, Copy placket
Picture 1
Picture 2
1. See picture 1, Select center line a ,Or click two point on line a;
2.Click need to symmetry line, Like above line b;
3. Picture 2 is symmetry result.
Connect/Adjust X/Y
Function:
U can ask assistant line basic size near to border along with assistant line , Also U can ask
assistant line side point grading value no change in X or Y direction, And grading in Y(X)
direction.
Operation :
See following picture, Two assistant line near border in x direction, And grading
Value no change in Y direction.
148
RICHPEACE DESIGN AND GRADING SYSTEM
Picture 1
Picture 2
1. Select connect /adjust x/y tool, Press shift switch to
;
2. Click or make a square to select line which need to near assistant line, Then
Right click;
3. Click pattern border, See picture 2.
Note: Press shift switch between
and
.
Parallel Move
Function:
:
See following picture, Adjust pattern paralleled .
Operation :
1. Click or make a square on need parallel adjust line ,Then right click;
2.Then drag and click ,U can see 【Distance】dialogue table;
3. Input proper value (+ is length, - is shorten), Then click [ok].
Add/replace unparallel curve
Function:
Add one unparallel line or adjust unparallel border line or assistant line, See following picture:
Picture 1
Picture 2
Operation:
:
149
RICHPEACE DESIGN AND GRADING SYSTEM
1. See above picture, Click or make square on side line, U can see 【Unparallel curve】
Dialogue tabe;
1. Select add or replace;
2.Click key point on pattern Input adjust value, Then click [apply], Check above picture 2,
Bust increase 1 cm, Waist increase 0.8cm, bottom increase 1.2 cm.
Note: Input “+” increase pattern, Input “-”
”
ARC spread
Function:
:
Can make ARC on draft line or pattern.
Operation
Draft line
1. Click or make a square on draft line, Then right click;
2. Click not change line near fixed point, If more line,Make a squre, Then right click;
3. Click change line, U can see [Arc Spread] in dialogue;
4. Input proper value, Click ok.
150
RICHPEACE DESIGN AND GRADING SYSTEM
On pattern
1. Click not change line near fixed point, If more line, Make a square, Then right click;
2. Clcik change line, U can see [Arc spread] dialogue table;
3.Input proper value, Click ok.
In blank place
Click on blank plce, U can see [Arc Spread] dialogue table, Input needed value,
Click ok.
ARC cutline
Function
Make curve radius and tangent curve of two unparallel line.
Operation
1.Click or make a squre on two line, U can see [ARC cut line] dialogue;
2.Input proper value, Click ok,See following picture 2.
151
RICHPEACE DESIGN AND GRADING SYSTEM
Picture one
Picture two
Correspondinglength /adjustxy
Function :
Sum more line grading value and grading fro single point,Check following picture,
We grade wasit according to waiste line.
Option:
:
1. Select this tool, Switch x
or y direction
grading with shift button;
2. Click or make a square on line which need to grade, * Point is grading point,
Then right click, See picture 1;
3. Click or make a squre on reference line, See following picture 2;
4. Picture 3 is result.
Picture 1
Picture 2
Picture 3
Increase/Decrease pattern
Function:
:
Increase/decrease whole pattern
Operation:
:
1. Click or make a squre on pattern, Then right click, Drage mouse then clik, u
Can see [Increase/decrease]dialogue;
152
RICHPEACE DESIGN AND GRADING SYSTEM
2.Input proper value, Click ok.
Scale
Function:
:
Draft line /pattern zoom in/out appointed size in proportion.
On draft line operation:
1. Select one line or two point on draft line, U can see [scale]dialogue table;
2.Input new length or proper proportion in scale, Click ok.
Operation on pattern:
1. Select or border line or assistant line on pattern with this tool, Or select two
control point, U can see 【Scale】dilogue table;
2.Input new length or proportion ,Select object, Click ok.
【Scale 】dialogue parameter presentation:
1. Operating pattern, Scale for selected curve or control point pattern.
2. Select workarea pattern: Scale for all pattern in workarea;
3. Select all pattern, Scale all pattern in this style.
153
RICHPEACE DESIGN AND GRADING SYSTEM
Note: When scale draft line, Do not affect pattern size, Also scale pattern, Do not affect draft line
Size.
Modify notch type
Function:
:
Modify one or more notch type.
Operation:
:
Modify part notch type on pattern
1.Select this tool, Click notch need to modify, Then right click, U can see【Modify notch type】
dialogue table;
2. Select notch you need, Input proper value, click ok.
Modify notch type on select pattern
1.Select this tool, Click on pattern need to modify notch, Then right click , U can see【Modify
notch type】dialogue table;
2. Select notch type need to modify in “old notch type”, Input new notch type and notch depth
and width, Click ok.
154
RICHPEACE DESIGN AND GRADING SYSTEM
Modify workarea or whole file notch type
1. Put pattern on workarea;
2. Click on black place, U can see 【Modify notch type】dialogue table;
3. Select proper option, Click OK.
Presentation:
:
1. When select notch, System allow modifying notch type, depth, height. Not allow to modify
notch command type (cut, draw), Also donot change notch angle;
2. When select pattern, System can modify appointed notch type, Allow to select T、V、U、I、
Box to modify. If do not select, It means do not select notch type. Do not slect command
type(cut, draw), Also do not modify notch angle;
Keep angle apex grading
Function:
:
Adjust corner grading and keep different size angle apex grading equally. Usually use for
adjusting back rise and collar corner.
Operation:
:
Click on corner, U can see the degree change.
155
RICHPEACE DESIGN AND GRADING SYSTEM
Keep angle edge xy grading(
(Adjust XY)
)
Function:
:
Adjust corner one side grading point and make each size angle equally. Like following picture,
Adjust X and Y direction grading value, Make corner A different size corner degree same.
Before operation
After opertation
Operation:
:
1. Select this tool, Press shift switch adjust x
or Y
direction.
2. Click point B, Then click point A, Then click another side grading.
Keep angle edge ext grading
Function:
:
Extend corner one side line, Make different size angle same.
See above picture, Extend point B on line AB,Make corner A different size degree same.
Operation:
:
1.Click point B、Point A、Point C, U can see Distance dialogue table;
2. Input proper value, Click ok.
Grade data label
Function:
:
156
RICHPEACE DESIGN AND GRADING SYSTEM
Add dispersion lable for graded pattern.
Operation:
:
1. Click view-Grade data label;
2. Click blank place on workarea, U can see create grade data label dialogue table;
3. Select proper option, Click ok.
Add grade data label to part grading table
Click or make a square on grade point which will add grading table
Delete grade data label
Press shift, Click on blank place with this tool, Input proper option.
Delete part grading point grade label:
1. Press shift,Click or make a square on grade point which need to delete;
2. Move cursor on grade lable, When grade label turn light, Press delete.
Change grade label position
Click and move to destination position.
Laser template
Function:
:
It is used for seting hollow line width. Usually used for making laser template.
Operation:
:
Clcik pattern border line with this tool (assistant line) or click two control point, U can see【laser
template】dialogue table;
1. Input proper data, Click ok.
Modify parameter:
:
Right click template line, u cansee laser template dialogue table.
157
RICHPEACE DESIGN AND GRADING SYSTEM
Hiden part assistant line
Function:
There are many assistant line on pattern, In order to easy to check grading situation, Can hide
part assistant line.
Operation:
:
Press Shift+ U, When cursor change to
, Click or make a square on assistant line
can hide.
Show/Hide assistant line
Function :
Show or hide assistant line
Operation:
Press Ctrl+U
Rotate dart
Function:
Make a dart at the same time keep the original length do not change
Operation:
1. Click line A, Then press point B and C, U will see rotate dart dialogue.
2. Input value in w, Click ok to finish.
Rotate dart dialogue table parameter presentation
W: width of dart D: length of dart Mode: Select one mode for dart.
Overlap: Dart direction.
Drill Attr.: Click , U can select one drill attribute , Also can select distance.
Notch Attr: Click, U can choose notch type, Modify width and depth, Also command.
158
RICHPEACE DESIGN AND GRADING SYSTEM
Parallel quad rangle
Function: Usually used for making bag, toy etc .
Operation:
1. Just click on blank place, Then move and click, U can see parallel quadrangle dialogue table.
2. Input value, Click ok to finish.
Trapezia
Function: Usually used for making bag, toy etc .
Operation:
1. Just click on blank place, Then move and click, U can see Trapezia dialogue table.
2. Input value, Click ok to finish.
Flank pieces
Function: Used for making side face of bag.
Operation:
1. Select first pattern, Click point A,B; 2.Select another pattern, Click point A’,B’
2. Input value in parameter, U can see side face appear.
159
RICHPEACE DESIGN AND GRADING SYSTEM
Zipper window
Function: Used for add zipper for bag or glove or other style. Avaiable for design line and
Pattern.
Operation:
1. Click on line or point, U can see zipper window
2. Input value, Then click ok.
Note: Blade on pattern means cutting.
Assistant curve notch
Function: Add notch on seamallowance according to assistant line prolong direction.
Operation:
1. Click on one side of line, Add one notch, Click on center of line, Both side add notch.
2. Modify notch: Click assistant curve notch, Then press enter. U can select notch type,
Depth,width etc.
3. Delete notch: Put cursor on notch, When notch turn red color, Press delete.Or delete
With eraser.
Insert or Edit Image
Function:
:Put picture like logo, designed line on pattern.
Operation:
1. Drage a square on pattern, Click browse to load a picture.
2. Input length and width, vertex , Angle etc.
3. Click ok, U can see picture is put on pattern.
160
RICHPEACE DESIGN AND GRADING SYSTEM
4. Modify picture
1) Click on picture,Ucan see different sign.
- move picture,
- change size of picture
-rotate pattern
5. Delete pattern
Select eraser, Delete on pattern.
Forfex(With replace pattern dialogue)
Function: It is used for getting a new pattern or getting a new patern also replace original
pattern.
Operation:
1. Select this tool, Click line one by one, then right click, U will see a dialogue.
2. Select“create a new pattern”, After edit patern info, System will create a new pattern, Select
“create a new pattern and replace old one”, Input the index,System will replace the original
pattern.
3. Click “ok”to finish.
161
RICHPEACE DESIGN AND GRADING SYSTEM
Section 9
Menu bar
File menu
Save as (A)
)
Ctrl+A
Function:
:
It is used for back up current file.
Operation:
:
Click【File】
【Save
as】,You can see【Save as】dialogue table, Input new file name and change
path ,You can save current file, For details,Please refer
Save to lib
Function:
:
Use together with
with[pic lib]tool.
Operation:
:
162
【Save】explanation
RICHPEACE DESIGN AND GRADING SYSTEM
1.
1Marqueen select objective line with tool
,Then click right,See following picture;
2.
Design line is surrouded by a virtual square;
3.
Click 【File menu】-【save to lib】,You can see【save to lib】dialogue table, Select saved
path and input name,Click【save】
Safety restore
Function:
:
Did not have time to save file beacause of power cut,You can find the file with this command.
Operation:
:
1.
Open software;
2.
Click【File menu】,You can see 【safety restore 】dialogue table;
3.
Select acorrding file,Click【ok】.
Note:
:
If want to safety restore effect,Must click【Option】Menu-【system setup】,Select【Use Auto
design】option
Unit file
163
RICHPEACE DESIGN AND GRADING SYSTEM
Function:
:
Combine name different file together.
Operation:
:
1.
Open a file 001;
2.
Click【File】-【unit file】,You can see【Open】dialogue table,Double click on combined file.
Condition:
:
Combined file size is same as basic size
Auto Design
Function:
:
Can import file which is made in formula design,Also can modify in edit size and measurement.
Operation:
:
1. Click 【File】-【Auto Design】dialogue table,
2. Double click needed style,You can see【Auto Design】dialogue table(up left is style picture,
up right is structure picture, Right bottom is size table),Size data Size value canmodify
according to actual situation(Also can click
button beside【size table】,Measure
people value with three-dimensional tool
3. Click【OK】,Pattern and design line go to system automatically
164
RICHPEACE DESIGN AND GRADING SYSTEM
Open AAMA/ASTM Format file
Function:
:
Can open AAMA/ASTM format file, It is International format.
Operation:
:
1.
Click【File】Menu—【Open AAMA/ASTM format file】,Appear 【Open】diaogue table
2.
Select save path, double click on file name.
Open TIIP format file
Function:
:
It is used for open Japan .dxf pattern file,TIIP is Japan format file.
Operation:
:
1.
Click【File】--【Open TIIP format file】,Click【Open】dialogue table;
2.
Select save path,Double click on file name.
Export ASTM file
Function:
:
Convert this software file to ASTM file.
Operation:
:
1. Click file need to output,Then click “open”;
2. Click【File】--【Out put ASTM file】,You can see【Save as】dialogue table;
3. Select save path,Input file name,Click save.
Print measure table---print
Function:
:
Print measure table with this command.
Operation:
:
Click【file】menu-【Print measure table】--【print】
Print measure table---Preview
165
RICHPEACE DESIGN AND GRADING SYSTEM
Function:
:
It is used for preview size table.
Print pattern info
Function:
:
It is used for print pattern detailed data, For example pattern mame, Comment、material、
Quantity etc.
Operation:
:
Click【file】menu--【Print pattern info】,You can see【print pattern information】dialogue
table,Select proper option,Click【print】
【print pattern information】parameter presentation
【All pattern of style】This command is dialogue table default value,Press【Print】,Can
Print all the pattern and pattern ino one by one.
【All pattern of style】This option only print workarea pattern.First Put all the pattern need print
to workareea, Then select this option, Click【Print】,Can print work area pattern and pattern info.
【Preview】Click can appear preview interface.
Note:
:
If print words choas,Please click“option”-“system setup”-“interface setup”-“language”.Can select
needed language.
Print style info
Function:
:
It is used for printing all the pattern style info.
166
RICHPEACE DESIGN AND GRADING SYSTEM
【Print global data】parameter presentation
【All size】:Default is print all size pattern value,Donot select,Can select needed size in
pulldown table, One time only print one size all pattern.
【All Mater】
:Different material pattern,Default is printing all the pattern info,do not select,Can
select print which type material pattern.
【Preview】:Can see selected pattern data list.
【Export Excel】:Click, All the pattern info like area, Perimeter will export to excel.
Operation:
:
Click【file】-【prinstyle】,You can see print global data dialogue table, select accordingly setup.
Note:
:
If print words choas,Please click“option”-“system setup”-“interface setup”-“language”.Can select
needed language.
Printer setup
Function:
:
It is used for seting up printer name and paper direction
Operation:
:
1.
Click【file】menu-【printer setup】,You can see【printer setup】dialogue table;
2.
Select printer name and print direction and paper size etc.
Digitizer setup(
(E)
)
167
RICHPEACE DESIGN AND GRADING SYSTEM
【Digitizer Setup】Parameter presentation
Digitizer Model:Click arrow behind mode, You can select model;
Digitizer size:It is used for seting up digitizer size;
Port:It is used for seting up port name;
Button setup:It is used for seting different function of 16 key mouse;
Select default button setup:Select ,button mouse will use this default setup;
Digitizer menu ara:It is used for seting digitizer Row and Col;
Precision:It is used for adjusting digitizer precison. Method:Draw a 50cmx50cm rectangel,
Input to computer, Input actual length measured to dialogue table.
Print menu:After seting menu row and col,Click this button,System will print【digitizer menu】
automatically.
Edit menu:
:Click edit menu,You can see more free mune of digitizer, Setup pattern name,Input
pattern name directly,One edit area one name.
Presentation:Digitizer menu is a pattern inputing menu,Paste it to one corner of
digitizer,It is easy for inputing pattern info on digitizer directly,Please refer to input
pattern.
Latest used 5file
Function:
:
Can open 5 latest used file quickly.
Operation:
:
Click【file】,Click file name,Can open this file.
EXIT
Function:
:
It is used for closing this system run.
168
RICHPEACE DESIGN AND GRADING SYSTEM
Operation:
:
Click【file】-【exit】,Also can click
on title toolbar,If opened file did not save, a cue will
appear,ask if save or not.If click【No】,close system directly,Press【yes】,If we did not save
file ,Will appear【save as】dialogue table, Select path,Then click【save】,Will close system,If ever
saved, Only few step did not save,Press【yes】,File will save according to original path and close
system.
Edit menu
Cut pattern
Ctrl+X
Function:
:
This command is used together with Paste pattern function, Selected pattern is cut to cutboard.
Operation:
:
1. Select cut patern with “select ctrl point” tool;
2. Click【Edit】--【Cut pattern】
Copy pattern
Ctrl+C
Function:
:
It is used together with paste pattern,Copy selected pattern to cut pad.
Operation:
:
1Select pattern need to copy;
3. Then click【Edit】-【Copy pattern】
Paste pattern
Ctrl+V
Function:
:
169
RICHPEACE DESIGN AND GRADING SYSTEM
This command is used together with paste pattern,Make pattern pasted on cut pad to opened
file.
Operation:
:
1. Open file need to paste
2. Click【Edit】-【Paste pattern】
Assist Curve control point to grading(
(G)
)
Function:
:
Switch assistant point to grading point.
Operation:
:
1. Click selected pattern;
2. Click【Edit】Menu-【Assistant point to grading point】,You can see【All assistant point
on line to grading point】,Select needed ,All the assistant line point turn to grading point.
Assistant curve grading point to non grading(
(N)
)
Function:
All the assistant line point convert to non grading point.Operation is same as assistant curve
grading point to grading
Autoarrange pattern
Function:
:
Arrange workarea pattern simply,Saved manual arrange trouble.
Operation:
:
1. Arrange pattern to work area;
2. Click 【Edit】manual--【Auto arrange pattern】,You can see 【Auto arrange】dialogue table;
3. Set internal,Click did not arrange size,Make it white color, Like size s,Click ok;
4. Work area pattern will arrange according to paper width.
170
RICHPEACE DESIGN AND GRADING SYSTEM
Save patterns position
Function:
:
When pattern finish in workarea,Click【save patterns position】,System will record pattern
position in workarea.
Operation:
:
1.
Pattern have been arranged well in workarea;
2. Click【Edit】menu-【Record pattern position in workarea】,You can see【Save position】
dialogue table;
3. Click position,Click ok.
Load pattern position
Function:
:
If file which have implemented 【Save patterns position】,Then open the file,Can renew
pattern last position.
Operation:
:
1. Open file which have implemented【Save pattern position】command;
2. Click【Edit】manual- 【Load pattern position】,You can see【Restore position】dialogue
table;
3. Click proper restore position,Click ok.
171
RICHPEACE DESIGN AND GRADING SYSTEM
Copy bitmap
Function:
:
This command is used together with
,Copy selected design line in picture to cut pad.
Operation:
:
1.
With Pic lib tool
,Marqueen select design line,Then click right,Check following picture;
2.
Design line is selected by a virtual square;
3.
Click【Edit】-【copy bitmap】,Now design line is selected;
4.
Open office software,Like excel or word, Adopt paste command, Bitmap will paste to this
software,.
Point clean up
Function: Delete superfluous point automatically.
Operation:
1. Click [edit]-[point clean up]
172
RICHPEACE DESIGN AND GRADING SYSTEM
Pattern menu
Style info(
(S)
)
Function:
:
It is used for importing all the style info of all the pattern in same file. Info can appea on grainline,
Can export to marker system together with pattern.
Operation:
:
Click【Pattern】-【Style info】,You can see【Style information】dialogue table,Input related
information, Click set,Then click ok.
【Style information】parameter presentation:
:
Edit dictionary:
:
Click matched dictionary
,Input data which is used usually,Clcik beside arrow,Input needed
173
RICHPEACE DESIGN AND GRADING SYSTEM
words in pull down table.
【Style name】Open file style name;
【Comment】Simple presentation,Info can not appear on pattern;
【Customer】Mark which customer file;
【Order】Input original order name of opening file;
【Picture】Appeared picture saved path;
Click this icon,Find style picture,After opening file,Select style image under view menu,
Style picture will appear.
Material:
:If input all material name in one file,When input material in pattern info ,You can
select;
Color:
:Click table under color,Can set showing material color in pattern list;
【Set】:Click【Set】,You can see【material】dialogue table,Set all the pattern material
together.Check following picture,all the pattern material is ”A”.If one pattern is different
material,Can set in “pattern info”.
Pattern info(
(P )
Function:
:
Can edit detailed information in current selected pattern, Shortcut way:Double click on pattern.
Operation:
:
1. Select pattern,Click【pattern】【
- Pattern info】,You can see【Pattern information】dialogue
table,Input info,Click【Apply】
2. If need to edit info to other pattern,Can do not close dialogue table,Press 【Apply】,
Then select other pattern and edit.
174
RICHPEACE DESIGN AND GRADING SYSTEM
【Pattern information】
】presentation:
:
1. 【Name】
:It is refer to select pattern name;
2. 【Comment】:Special presentation to selected pattern, Can input here;
3. Material name input:If input material name in style info,Can select in pattern information.
4. 【Copies】Select current pattern is left under orientation,Click【left】,Then select 【Left
right】Fold,Another pattern is right,Otherwise two pieces is left;
5.
It is used for spread or shrink under part.
Globe data
Function:
:
It is used for checking different material and sigle pattern area and perimeter
Operation:
:
Click【Pattern】--【Globe data】,You can see【Globe data】dialogue table, Check needed data.
Presentation:
:
When select Different area and perimeter is caculated by one pattern,Did not select,Will
calculate with actual quantity.
175
RICHPEACE DESIGN AND GRADING SYSTEM
Delete selected Pattern(
(D)
)
Ctrl+D
Function:
:
Delete selected pattern on pattern list in workarea.
Operation:
:
1. Select need to delete pattern;
2. Click【Pattern】-【Delete selected pattern】,Or use shortcut toolbar ctrl+d,You can see
dialogue table;
3.
Click【Yes】,Selected pattern delete from file,Click【No】,Cancel this command,Pattern is
not deleted
Delete all pattern in working area
Function:
:
Delete all pattern in workarea from pattern list table.
Operation:
:
1. Delete all pattern in work area;
2. Click[Pattern] Menu-【Delete all pattern in working area】,You can see a dialogue table
3. Click【Yes】,All the pattern in workarea will delete,Click【NO】,Cancel this command,
Pattern did not delete.
Clear select pattern(
(M)
)
Function:
:
Clear current pattern modification operation and put pattern go back to pattern list,It is used for
going back status before modifing after modifying more times.
Operation:
:
1.
Click【Pattern】--【Clear select pattern】;
2.
Select pattern is cleared and go back to pattern list,If you still want to operation to pattern,
Click on pattern list.
Note
Clear pattern, Only put current selected pattern to pattern list from work area, Even pattern is
modified,It is same as before operation which put back to pattern list, Uneffective to workarea,
different from deleting pattern.
Clear pattern grading(
(C)
)
Ctrl+G
Function:
:
It is used for clearing current pattern grading.
176
RICHPEACE DESIGN AND GRADING SYSTEM
Operation:
:
1.
Select grading value which will clear grading value;
2.
Click【Pattern】
【
- Clear pattern grading】,You can see 【Clear pattern grading】dialogue
table;
3.
Select first option,Click 【OK】.
Presentation:
If use this function to all pattern of work area or all pattern of still,Click directly;
Clear assist curve grading(
(F)
)
Function:
:
It is used for deleting assist curve grading
Operation:
:
1. Select pattern which need to deleting assist curve grading;
2. Click【Pattern】-【Clear assist curve grading】,You can see 【Clear assist curve
grading】grading table;
3. Select first option,Click【OK】.
Presentation:
:
If use this function to all pattern of work area or all pattern of still,Click directly.
Clear corner notch
Function:
:
It is used for clearing corner notch
177
RICHPEACE DESIGN AND GRADING SYSTEM
Operation:
:
1. Select pattern which need to cler corner notch;
2. Select【Pattern】--【Clear corner notch】,You can see 【Clear corner notch】dialogue
table;
3. Select first option,Click 【OK】.
Presentation:
:
1.
If use this function to all pattern of work area or all pattern of still,Click directly.
2.
All the noth will be deleted is made with corner notch tool.
Clear text of pattern(
(T)
)
Function:
Clear text with is writed with tool T(Note:Do not include pattern info on grainline)
Operation:
:
1. Select patern which have “T”text;
2. Select【Pattern】--【Clear text of pattern】,You can see 【Clear text of pattern Clear
corner notch】dialogue table;
3.Select first option,Click 【OK】.
Presentation:
:
1.If use this function to all pattern of work area or all pattern of still,Click directly.
Clear all assist curve in pattern(
(Q)
)
Function:
:
It is used for deleting assist curve of pattern.
178
RICHPEACE DESIGN AND GRADING SYSTEM
Operation:
:
1. Select pattern which will deletng assist curve;
2. Select【Pattern】--【Delete all assist curve】,You can see 【Delete all assist curve 】
dialogue table;
3. Select first option,Click 【OK】.
Presentation:
If use this function to all pattern of work area or all pattern of still,Click directly;
All pattern hang up(
(U)
)
F12
Function:
:
Remove all pattern in workarea.
Operation:
:
Click【Pattern】-【All pattern hang up】,Or use shortcuttoolbarF12;
All pattern down(
(Q)
)
Ctrl+F12
Function:
:
Put all pattern in pattern list to workarea.
Operation:
:
1.
Click【Pattern】-【All pattern down】,Or use shortcuttoolbar ctrl+F12
2.
Click all pattern in pattern list, All pattern will go to work area.
Redef grainline(
(B)
)
Function:
:
Grainline go back to original status.
Operation:
:
179
RICHPEACE DESIGN AND GRADING SYSTEM
1. Select pattern which need to redef grainline;
2. Click【Pattern】--【Redefine grainline】,You can see 【Redefine grainline】dialogue table;
3. Select first option ,click ok.
Presentation:
:
If used the command to all pattern of work area or all pattern of style,Click directly;
Assist curve auto grading with curve line
Function:
:
Grading for assistant line connected with border line
Operation:
:
1. Select pattern which will grading along with border line;
2. Click【Pattern】--【Assist curve auto grading with curve line】,You can see 【Assist
curve auto grading with curve line 】dialogue table;
3. Select first option ,click ok.
Presentation:
:
If used the command to all pattern of work area or all pattern of style,Click directly;
Disjoin border and assist curve
Function:
:
Border line ans assistant line do not have relation,When use the function,grading for assistant
line,Border assistant line grading value do not change.
Operation:
:
1. Select pattern which deal with border line and assistant line seperated;
2.
Click【Pattern】--【Disjion border and assist curve】,You can see 【Disjion border and
assist curve Assist curve auto grading with curve line 】dialogue table;
3. Select first option ,click ok.
Presentation:
:
If used the command to all pattern of work area or all pattern of style,Click directly;
Make pattern
Function:
:
Make circle or rectangle pattern.
180
RICHPEACE DESIGN AND GRADING SYSTEM
Operation:
:
1.
Click【pattern】--【Make pattern】,You can see【Make pattern】dialogue table;
2.
Select needed option,Input proper value,Click【ok】,New pattern appear.
Creat shadow
Ctrl+Q
Function:
:
Make all point and line creat shadow,It is easy for looking shadow before modifing pattern.
Operation:
:
1. Select pattern which will creat shadow;
2. Click【Pattern】-【Creat shadow】;
Delete shadow
Function:
:
Delete shadow on pattern
Operation:
:
1. Select pattern which will Delete shadow;
2. Click【Pattern】-【Delete shadow】;
Show or hide shadow
Function:
:
It is used for showing or hiding shadow.
Operation:
:
Click【Pattern】menu—【Show or hide shadow】
Move pattern to design pos
Function:
:
Move pattern which moved before to design line position.
Operation:
:
1. Select pattern need to operate;
2. Select 【Pattern】--【Move pattern to design pos】,You can see 【Move pattern to design
pos】dialogue table;
3. Click first option,Click【OK】.
181
RICHPEACE DESIGN AND GRADING SYSTEM
Presentation:
:
If used the command to all pattern of work area or all pattern of style,Click directly;
Creat design line to pattern
Function:
:
Click pattern will creat new design line.
Operation:
:
1. Select pattern which will creat design curve;
2. Click【Pattern】--【Creat design line to pattern】,You can see【Creat design line to pattern】
dialogue table;
3. Click first option,Click【OK】.
Presentation:
:
If used the command to all pattern of work area or all pattern of style,Click directly.
Guide line parrallel
Function: Make a guide line according to two points to confirm a place.
Operation:
1. Select”select pattrn control point” tool, Drage from point A to point B.
2. Click 【pattern】- 【Guide line parallel】,U will see a dashline appear on pattern.
3. Select “modify”tool, Press and hold ctrl, Then click , U will see a dialogue
4. Input distance,U can copy a guide line.
182
RICHPEACE DESIGN AND GRADING SYSTEM
Size Menu
Edit Size &Measurement (E)
)
Ctrl+E
Function:
:
1. Edit size and color,Easy for grading;
2.
input fashion size,Easy for making pattern,Adopt value when auto grading and back up
detailed size data.
Operation:
:
1.
Click 【SIZE】--【Edit size &Measurement】,You can see【Edit size table】dialogue table;
2. Default is single group,Click on size name,System can add line automatically(Click on
second line,System can add third line automatically),Input part name in first line;
3. Input different part size under size name,Can set different size color after size;
183
RICHPEACE DESIGN AND GRADING SYSTEM
【Edit size table】parameter presentation:
【Open】It is used for opening saved size table before
【Save】It is used for saving mading well size table
Dictionary is used for saving size name,Can save size name by sort;
This dictionary can saving part name,Can save size name by sort;
【Group】Default appear Group,Select this command can appear single group;
【Import】It is used for importing size summaries file(*.SML);
【Disp in g】When in sigle group,Select basic size ,Input dispersion before this command.Then
click
this
icon,System
will
calculate
different
size
value,When
under
group,Onlyeffect to Disp in g.
【Disp.g】Under group,Select group basic size, Input dispersion before this command,Then
click this icon, System can calculate basic size value automatically.
Measurement var
Function:
:
It is used for saving record measurement var.
Operation:
:
Click【size】—【Measurement var】,You can see【Measurement var】dialogue table,可
Can check different size data,Can modify measurement sign,Way:Click Measurement
var,When It is light,Click arrow beside text dilogue table, Select measurement var sign,Can
input measurement name directly ,Also can modify measurement name,Click 【ok】.
184
RICHPEACE DESIGN AND GRADING SYSTEM
View menu
【Status bar】
、
【style image】
、
【Ruler bar】
】、
【patternlist box】
、
【Toolbar】
、
【Design toolbar】
、
【Pattern toolar】
、
【Grading toolbar】
【Pattern assist curve】
【Pattern temp assist curve】
Select appear the content,Otherwise ,do not appear.
Operation Menu
185
RICHPEACE DESIGN AND GRADING SYSTEM
System setup(
(S)
)
Function:
:
There are more option card, Can setup different option
Operation:
:
Click【Option】menu-【System set up】,You can see 【system set up】dialogue table,There
are eight option card, Set one of parameter, Need to click apply button .
【Length unit】Option parameter presentation
It is used for confirming unit,Select one in cm,mm, inch,Select needed to reach precision in
【Precision】.When select inch,Can select fraction format or decimal direction.
【Inch fraction format】Select,Use inch fraction format,Do not select,Use decimal format.
【No Denmination,Default is precision
If precision is 1/16,When select this option,10.3 and 103/16 is same.
【View exact values a compare length dialogue when use inch fracion format】
Select this option,There are two format appear in comparing length table.Do not select,
Only appear fraction format.
186
RICHPEACE DESIGN AND GRADING SYSTEM
【Default parameter】Option presentation
【Notch】:
Set default notch type,Size,Angle,Command.Default depth is 5mm, Width is 3.5mm. Default
value can change according to requirment.
Command:When select cut,If connect with cutting plotter, Outside border notch will cut;When
select draw, Will appear in drawing if connect with plotter or cutter.M68,It is notch type when
connect with cutter.
2notch type:It is refer to ajacent notch distance when made more notch.
Digitizer notch type:It is default point of 【Read pattern】
【Seam val】:
It is refer to add pattern,Appear seam value,Select seam,seam will appear on pattern.
【Add seam val auto】
Default seam is 10mm,You can modify according to your requirment.Select, will add seam
automatically,When creat pattern,system will creat 10mm seam for each pattern automatically.
【Point size】
It is used for controling point size on design line or pattern
When make distance,It is reference point size.
【Drill distance of dart】
It is used for seting distance from drill on top to dart top;
It is used for seting distance from drill on waist to dart waist;
187
定
RICHPEACE DESIGN AND GRADING SYSTEM
It is used for seting distance from drill on bottom to dart bottom.
Operation:
:
It is used for seting drill distance of dart,Double click text dialogue table which will modify,Input
value,Click 【Apply】
【Drill】
Select drill,It is refer to drill is cut when connect with cutting plotter;Select draw only,It is refer to
draw when connect with plotter or cutting plotter;Select drill m43 or drill M44 or drill M5,It is refer
to drill size when connect with cutter.
It is used for seting drill size.
【Pattern qty and capture】:
Capture:It is used for seting capture,Capture make circle center in capture point, make cirle
wih radius, PIX is more, Dimension is big, Will set between 5-15.
Pattern qty,It is used for seting pattern quantity when digitizer pattern.
【Plot parameter】option presentation
【Line width】It is used for set line width of inkjet plotter
【Point size】It is used for seting point size of inkjet plotter
It is used for seting distance of dashed line
188
RICHPEACE DESIGN AND GRADING SYSTEM
It is used for seting distance between point and line
It is used for seting distance of dashdotted
【Fixed length】Keep pattern relevant with paper when cut, Set length here;
【Cut length】It is used for seting cuting length one time;
Cut shape please refer to following picture when cut pattern border
【Outside border】【Inside border】【Assistant line】
It is used for seting different line type when plot
【Draw sew border】Select,Will draw sew border;
【Draw sew border notch】Select,Will draw sew border notch;
【Cut outside border】Select,when use cut and plotter,Cut border line, Now fixed length and
cut length is active;
【Draw grainline】Select,When plot or print,Draw grainline.
【Notch type of outside border】
Select outside border notch use the same type, Can use same notch when select
Plotter or cutter;
【UI Setup】
】Option presentation:
【Pattern listbox】
Click any button in 【Up、
、down、
、left、
、right】,Pattern list will put to corresponding place.
【Screen size】 Input according to actual size,can 1:1 shown
【Language】
Select corresponding language, “Plot pattern info” and “Plot style info” text will match under file
189
RICHPEACE DESIGN AND GRADING SYSTEM
menu.
【Line thickness】
It is refer to thickness of design line ,border line, assistant line, Left will turn more thick, right will
turn more thickness.Select use smooth curve line, Line is smooth showing,If do not select, It is
sawtooth showing.
【UI SETUP】
】 Parameter presentation:
:
【Pattern list box】
Click one button from【up、down、left、right】
,Pattern list box can get to corresponding position。
【Screen size】
Input according to actual screen size,Can show 1:1.
【language】
Select corresponding language, Font can match with “print pattern info”“Print global info”in file
menu.
【Line thickness】
It is refer to designline、borderLine、assistant line thickness, Move left side, Line turns more thin,
Move right side,Line turns thick, Select “use smooth curve”,Line will smooth.
【Theme】
Saved theme can be selected
In order to give convenience, Customer can show tool on interface according to
requirement, Click can set button and right tool.
190
RICHPEACE DESIGN AND GRADING SYSTEM
Note:
:
In workarea ,Click right can appear.
Set toolbar can be saved, Can saved more theme;
Select do not need theme, Click del theme;
Same as colorsetup tool
in shortcut toolbar
【Auto save】Option parameter
【Use Auto save】Select will use Auto save;
【Save interval】It is used for seting up interval of saving time;
【Save each step】It is refer to save each operation step,Each file have corresponding file
191
RICHPEACE DESIGN AND GRADING SYSTEM
name,Suffix is bak,Saved by people will save in same path,If make more process,And did not
save one time, Please use safety restore.
【Fixed path】
( allow saving file to the path)
Select 【Fixed path】,All file is saved to appointed path.Avoid to can not find file. Select this
option,Pattern can not save to other path, System will remind u must saving to this path, Select
appointed file, Can save.
【Switch setup】Option parameter presentation:
【View non grading point】
Ctrl+K
Select will show non grading point, Otherwise do not appear
【View grading point】
Ctrl+F
Select will show grading point,Otherwise do not show
【View seam line】
F7
Select will show seamline,Otherwise do not show.
【Fill pattern】
Ctrl+J
Select will have color filled,Otherwise do not show.
【Grain line setup】Option presentation:
192
RICHPEACE DESIGN AND GRADING SYSTEM
【Grainline fault Direction】
】
Grainline direction is selected direction here;
Click arrow on the right,You can select needed option in pull down menu,Sign will
appear on dialogue table,Click【Apply】、
【ok】.Then select【Show pattern info at grain line】,You
can see 【Pattern info】【Style info】appear on grainline.
【ASTM/TIIP】option presentation:
193
RICHPEACE DESIGN AND GRADING SYSTEM
【Read comment text】:Select,When open AAMA/ASTMor TIIP in 【File】,Text can be
read,Otherwise onlyPattern can be read.
Default parameter
Function:
:Use default set up.
Option:
:
Click【Option】menu-【Default parameter】
Note:
:
When use default setup,Corresponding setup will change,Suggestion, When set is
in normal,Please do not select.
Open length dialog
Function:
:
There are √ before this command,When draw appointed length line or orientation adjust , Have
Dialogue appear,Otherwise, do not have.
Operation:
:
Click 【Option】menu--【Open length dialog】,If do not have √ before use this operation, After
option √ will appear. If there are √appear,After option,No √ appear.
Font(
(F)
)
Function:
:
It is used for seting tool info cue、T text、Font on grainline、text shape and size of measurement
var,Also go back to default font which have set before.
Operation:
:
1.
Click【Font】under option,You can see 【fonts】
】dialogue table;
2.
Select need to set content,Click【Set】,You can see dialogue table, Select proper font,size,
Click【Ok】,Result will appear in 【Font】dialogue table;
3.
If you want to go back default font,Only need to press on 【Default】;
4.
Click OK,Corresponding font will change.
194
RICHPEACE DESIGN AND GRADING SYSTEM
Help menu
About Richpeace DGS
Function:
:
It is used for view program version, VID、Copy right etc
Operation:
:
Click【Help】Menu--【About richpeaceDGS】,You can see【About richpeace Design】dialogue
table,after viewing,Click【ok】。
195
RICHPEACE MARKING SYSTEM
Chapter 3
Garment Marking System
Section 1
keyboard shortcut button instruction
Ctrl + A Save as
Ctrl + C Put pattern on workarea to size list table
Ctrl + I Piece info
Ctrl + M Define marker
Ctrl + N New
Ctrl + O Open
Ctrl + S Save
Ctrl + Z Undo
Ctrl + X Redo
Alt + 1
File toolbar
Alt + 2
Marker toolbar1
Alt + 3
Marker toolbar 2
Alt + 4
Piece window
Alt + 5
Sizelist box
Alt + 0
Status bar
Space
Tool switch(Under “Move selected pieces”tool, Space button switch between
zoom in and “Move selected pieces”, If select other tool, It switch between “zoom in”
and other tool
F3
Arrange Aided marker pattern according to size set
F4
Rotate 180 degree for selected pattern
F5
Refresh
Delete
Delete selected pattern
Double click Double click ,Select pattern go back to piece list, Dould click on size list
box,Can put pattern on marker.
8246
Click move pattern up【
【8】
】、Bottom
【2】
】、Left【
【4】
】、Right
【6】
】
、
、
、
Direction until touch other pattern
5 7 9
Can rotate selected pattern 90 degree 【5】
】、Vertical flip 【7】
】,Horizontal flip 【9】
】
Can rotate selected pattern clockwise 【1】
】,Can rotate pattern anti-clockwise 【3】
】
196
RICHPEACE MARKING SYSTEM
Note: Nine number match key board letter, Have same function, See following picture
1
2
3
4
5
6
7
8
9
Z
X
C
A
S
D
Q
W
E
【8】
】&【
【W】
】、【2】
【X】
】
、【4】
【A】
】、【6】
【D】
】 have relation ship with button【
【NUM
【 】&【
【 】&【
【 】&【
LOCK】
】, When use【NUM LOCK】
】button, This button move is one step by one,Donot use
【NUM LOCK】
】,Press this key, Will move to marker left, right, top and bottom
Can move selected pattern up direction【
【 】,Bottom direction【】
【】、Left
、
direction 【
】、Right
direction【
【
、
】,No matter touch other pattern or not.
197
RICHPEACE MARKING SYSTEM
Section 2
Garment marking system preface introduction
Function Overview
GMS is a professional marker-making system specifically for garment industry. t has a very
simple and user friendly interface, all marker tools are powerful and convenient. This system
can help you to improve cutting room efficiency, shorten the production cycle, increase
productivity and add additional value to the garment. so as to strengthen user’s capacity of
competition. The system features in:
Supernest、Automatic, manual and interactive,You can select as requirement
Make markers quickly and conveniently through keyboard.
Automatically calculate material length, efficiency, total pieces, total sets.
Depart markers manually or automatically according to size.
Depart markers manually or automatically according to material.
Depart markers manually or automatically according to different material number.
Automatic stripes matching.
Connect with printer or plotter for printing small size patterns or plotting and cutting
patterns at 1:1.
Interface instruction
Caption bar
It is positioned in the top of window showing the file name, type and file saved path;
198
RICHPEACE MARKING SYSTEM
Menu bar
GMS Menu is designed as per the standard windows based software. It contains nine menus
which can be selected by clicking on respective menu or by pressing the short key ALT + the
underlinged letter in each menu
File tool bar
This tool bar has all the usual commands neccessary for defining the marker parameters,
defining the constraint's to be applied, change the work units, file open and file save, etc.
Hide toolbar
Piece window:
In Piece window, it shows all the pieces for a marker file. Each piece is put into the individual
box. The size of piece box can be adjusted by dragging its right or left border. By clicking the
right button one can rearrange the pieces by their area, height, width, material and or original
order in the dialog box.
Size list :
Each small piece box has its size list where all sizes and the piece numbers of each size are
shown.
Ruler
It is used for showing the unit of current marker
Marker toolbar 1
Main marker workarea
In the main marker work area, you can set the pieces in a manner so as to achieve a highly
efficient marker
Scroll bar
It includes horizontal or vertical scroll bar, Drag can browser main and aided marker whole w
workarea,Pattern in piece list, pattern different size.
Aided marker workarea:
:
You can put Pieces in the aided marker according to the size, and then drag pieces into the
work area to operate as per request.
Status bar:
:
The Status bar is at the bottom of the interface. It shows important information. it contains 8
parts from left to right.
199
RICHPEACE MARKING SYSTEM
1.
2.
3.
4.
5.
6.
7.
8.
Show the coordinate position in work area or the operation prompts of current selected tool.
Show the total quantity of each size.
Show the total quantity of pieces on marker.
Show the efficiency of cloth of current marker.
Show the total length and the used length of current marker.
Show the overall width of current marker.
Show the total quantity of plies in current marker.
Show the current unit of Length, such as mm or cm. You can change the unit in Length of
Work units in Marker menu.
Interface window control button
n
Can maximum or minimize interface control window.
Material bar
Marker toolbar 2
200
RICHPEACE MARKING SYSTEM
Section 3
Quick accidence
Nesting
1.Click
and the dialog box 【Marker definitions】will come out.. You can setup parameters
in the dialog box and the marker border. The marker width in the dialog box can be defined as
per the real width of cloth; Length is suggested longer slightly.
2.Click 【Ok】to get the dialog box.
3.Click 【Load】to get the dialog box, and then select the format of the pattern file. File Format
is DGS、PTN、PDS、PDF.
201
RICHPEACE MARKING SYSTEM
4. Click filename, then click 【Open】to get the dialog box 【Order for Marker Making】. Then
you can alter or add more parameter inside the table. All information about pieces in this dialog
box have been defined in DGS system when you design your pattern; and you can click the
textbox to renew or revise these contents as you require.
5.Input the size quantity for each set: come to the 【Sets】column and enter the sets quantities
requested in each box.
6.Click 【Ok】to return to the previous dialog box.
7.Click 【Ok】again, and you will see that the pieces with their sizes list have been
displayed in piece window and size list bar.
202
RICHPEACE MARKING SYSTEM
8.Then you should set the parameter for the pattern display and print. Click 【Options】——
【Pieces on marker】, click to cancel 【Colors of set】, click the arrow slider by 【Above
weave line】to tick 【Size】, 【Pattern name】and what are needed to be displayed in piece
to define the description.
9.Nest with auto nest, Manual nest or super nest until get better efficiency. Also you can adjust
overlap with direction button or rotate with button 1 and 3(If no colour means overlap)
10. you can view the marker-related information in status bar, 【Length】will show the real used
material.
203
RICHPEACE MARKING SYSTEM
11.Click 【File】——【Save as】to flip the dialog box 【Save as】, and click
for a new folder.
Stripe adjust
Before making stripe, First need to make notch or drill mark on pattern where matching is
required , For example shirt, Waist need
Vertical match, Pocket and front need to match.
1.Click
,you can setup a new marker, and then load files from DGS into marker. If you don’t
know how to do it, please refer to operation at the beginning of this chapter.
2.Click【option】,Select【Adjust stripe】
3.Click【option】,Select【Show stripe】;
4.Click【Marker】--【Define stripe】
,You can see following dialogue table;
204
RICHPEACE MARKING SYSTEM
5. Click 【Define Material】, to get the dialog box of【Stripe Definitions】, then set stripes and
grids according to the real material. After defining setting, click 【OK】to return the previous
dialog box.
6. Select the piece in the Piece Window, then click 【Define Marks】in the 【Stripe】dialog
box, it will open another box 【Define Stripe Marks】.
7.Click 【Add】 to get the dialog box 【Add Mark】, Name the mark freely referring to the
205
RICHPEACE MARKING SYSTEM
following, then click【OK】to return to the previous dialog box; if you need more marks, continue
to click 【Add】, otherwise click 【Close】.
8.Refer to 【Internals】in the 【Stripe】dialog box .Click 【Prev】or 【Next】
】until select
Marked notch or drill, Iike front select notch 6.Select 【strip adjust】in 【strip dialogue】
】 table,
Then select marked sign a, Then click[ apply]. Click【Prev】or 【Next】
】,Select sign 3, Select
Marked sign b, Then click [Apply].
9.Select back ,Select notch 2,Then click sign a,Click[Apply].Select pocket,Select drill
1,Click[Apply].
10.click and drag pattern from pieces window to workarea,Then loosen mouse, Then put other
patern to workarea, Pattern match according to the first pattern which put in workarea.
206
RICHPEACE MARKING SYSTEM
Section 4
File toolbar
Open a pattern file(
(D)
)
Function:
It is used to acquire the commands of file menu to complete the operation of New, Open, Save
and Print, and Set up, Alter and Check the piece information, etc.
1.【Load】is to select the nest files such as DGS,PDS or .PTN
2.【View】is to check all the content of 【Order for marker making】.
3.【Delete】is to remove the selected file.
4.【Add pieces】is to add other files with the same sizes and load to the marker.
5.【Information】It is used for checking file information
File name: Shows where DGS File is saved and file name
Load time: Shows dgs loading time
modify time: Shows dgs saved time before loading
File length: File Bits
File ID:DGS modification and number after assciation
If Dgs modified and ever associate in gms,File ID will modify.
Operation:
Load
1. Click 【Load】; pop up a dialog box of 【Order for marker making】;
2. Do the setting according to the content and click 【OK】
】.
207
RICHPEACE MARKING SYSTEM
View
1. Select the file name and then click 【View】.
2. Popup a dialog box of 【Order for marker making】, and alter the content, then click 【OK】.
3. Turn back to the first dialog box, and click 【OK】.
Delete
Click the file name and select 【Delete】.
Add pieces
1.Select file after loading, Click【Add pieces】button,You can see,You can see[select file]
dialogue table;
2.Select DGS、PTN、PDS file, Double click file name,You can see【Add pieces】dialogue table
3.Select pieces you want to add and click 【OK】.(Can add more pattern one time)
It is used to add another piece from the same file or from another pattern file to the current marker
Tips:
:
Double click the filenames; you can alter the options in the dialog box 【Order for marker
making】.
【Order for marker making】Parameter Instruction
【File】
It lists the path and filename of the current pattern.
【Order, Pattern, Customer and material】
If the three have been defined in Global Info, you needn’t rename them.
208
RICHPEACE MARKING SYSTEM
【Piece Name】
It is used to define the name of the piece. If you renew it, the original name will be replaced.
【Description】
It contains the pieces attributes or all notes of the selected piece.
【Quantity】
It is used to define the cut quantity of the piece on marker. This number will be displayed in size
list in the form of counter and it will reduce during marker making until all pieces are completed
or placed in the marker. If the number in 【Quantity】is 0, its piece will not be read for marker
making.
【Material】
It is used to define the material of the selected piece. If you want to replace it with different
material, you can define the material in this column.
【Side】
You can define a single piece, right or left attribute for the selected piece in this column. If you
need only one piece, the system will default it as single piece, if it is even number such as 2,
you can select right or left piece.
【Both】
It is used to define if the piece is symmetric. If piece number is 2 and the symmetry attribute is
【Yes】, you will have two symmetric pieces for right and left; and If piece number is 2 and the
symmetry attribute is 【NO】, you will have two same pieces for right and left.
Tips:
If piece number is even number and the pieces will be symmetrical, you can tick the option of
【Set Both-Attribute if pieces count is even】to define the 【Both】automatically
【Horz Shrinkage】, 【Horz Scaling】, 【Vert Shrinkage】, 【Vert Scaling】
When you input the percentage, piece will shrink relatively before they are placed on the
marker.
【Code】
It is used to define the code of the piece. You can define a series of number or a code of the
piece type
【Size name】
It displays the size name for all sizes.
【Set】
You can input the set number for all sizes in this column. For example, if the quantity of size L is
half of the size M, then size M is 2 sets when size L is one set.
【Reverse sets】
It is used to for nesting using the concept one size one direction .It shows the quantity for
reversed pieces.
Note:
If you want to display the contents in this dialog box, you must click 【Options】——【Pieces
on marker】to popup the dialog box 【show Pieces on marker】, then click the black triangle
by 【Top】or 【Bottom】under 【Description】, and select the input items in the popped
floating menu.
【Print preview】
209
RICHPEACE MARKING SYSTEM
It used for previewing 【order for marker making】 before printing;
【Print】
It is used for printing 【order for marker making】
【Print setup】
This is used for set contents in【order for marker making】
Blue colour is selected contents.
New Ctr +N
Function:
It is used to create a new marker file.
Operation::
:
1.Click the icon to popup the dialog box 【Marker definition】where you can set the marker.
2.Click 【Ok】to popup the dialog box 【Save changes to “untitled.mkr”?】, if you click 【Ok】,
it will display the dialog box 【Save as】, click 【Save】after you input the path and filename,
then popup 【Select pattern files】.
3.Click 【Load】, popup 【Select file】to select PDS or PTN, click 【OK】, then popup 【Order
for Marker Making】again.
4.Do the setting according the dialog box, then click 【Ok】.
5.Return to the first dialog box, click 【OK】to build a new marker.
【Marker definition】
210
RICHPEACE MARKING SYSTEM
【Comment】
Input simple instruction,This content can show before and ender marker
【Selected marker】
】
When this item is selected it allows to select the last defined marker length and width from the list.
Size is default marker size of next marker,You can input marker size which used usually.
【Width】
This window is used to define the marker width.
【Length】
This window is used to define the marker length. The value is only a reference value of the
longest length of the cutter, and you can change it during the marker making process as you
need.
【zoom】
】
It is used for adding shrinkage or scaling to a marker which has been already made.
【Plies】
It means the total plies of material on marker.
【Layout mode】
】
It means the mode for the material placed on the marker, such as single or face.
【Total pieces】
It is used to display the total area of pieces on marker.
【Marker border】
If the material has damaged borders, you need define them to assure the pieces will not enter
the damaged
【Left】is used to define the left margin of the marker borders.
【Right】is used to define the right margin of the marker borders.
【Top】is used to define the top margin of the marker borders.
【Bottom】is used to define the bottom margin of the marker borders.
Open(
(0)
)
Ctrl+O
Function:
:
Open a marker which has been finished
Operation:
211
RICHPEACE MARKING SYSTEM
1. Click the icon to popup the dialog box 【Open marker file】. (Refer to below fig)
2. Select an existing marker file, each marker file has the same format .MKR, then press return
button or click 【Open】, or double click the filename.
Save(
(S)
)
Ctrl + S
Function:
This command is used for saving marker in appointed path, Easy for later use.
Operation
Click the icon; if the .MKR file has been saved before, then this file will be saved under the
current files; if this file is saved for the first time, you can use the command of 【Save as】.
Note:
MKR will be added as the format of this file automatically
save current nesting
Function:
:
For one file, When make marker,And put it in different marker,Will use【save current nesting】
212
RICHPEACE MARKING SYSTEM
command. When save this marker,Give a similar name like original marker,Difference
Is that the last letter is changed to (-)and number,Like file name is 2035.mkr,Other is
2035-1.mkr etc.
Operation:
:
1. Click the icon to popup the dialog box 【Save current Solution】, refer to below fig.
2. You can input a file name in the dialog box, or you can click 【Browse】to select filename.
3. Click 【Ok】.
【Save Current Solution】Parameter instruction:
【Browse】
You can save the current marker with a specified filename and save others with the same name
with an additional serial number.
【Save current nesting only】
After you tick the option, it will save the nesting on current marker, and the un-nested pieces will
not be saved.
If you don’t tick the option, the whole parts (including aligned and non-aligned pieces will be
saved).
【All Markers】
If you tick the option, it will save all markers.
If you don’t tick this option, it just saves the current marker.
Print marker
Function:
It is used to export small scale marker by a printer.
Operation:
Click the icon to popup the dialog box 【Print marker】, and select print option, then click 【Ok】.
213
RICHPEACE MARKING SYSTEM
Note
Click 【property】Click [print paper],Select print direction.
Plot
Function:
It is used to plot the pattern in real size (1:1). Only the computer with the plotter connected with
the Serial Port and the LPT in computer or the computer with plotter in network can plot the
pattern.
Operation:
:
1.Click
icon,You can see【plot】dialogue table;
2.Click 【Setup】, popup another 【Plot】dialog box, do the setting for the 【Current plotter】,
【Paper Size】, 【Edge】, and 【Port】, then click 【OK】.
【Plot】parameter instruction:
【Scale】is to plot pieces at 1:1 proportion.
【Plot Scale】is to plot piece by the percentage between the scale size and real size.
【Cut pieces】is to cut piece automatically when computer connect with the Cutting Plotter.
【Cut frame】is to cut the frame of the marker when computer connect with the Cutting Plotter.
【Plot selected pages】is to set the plotting length and page.
214
RICHPEACE MARKING SYSTEM
【Setup】is to setup some parameter in the plotter, click this option, and popup a dialog box
shown as below fig.
【Plotter】
】Parameter instruction:
:
【Current Plotter】: It is used to select the plotter model. You can click the small triangle to
popup the pull-down list, and select the current plotter in it.
【Paper Size】: It is used to select the paper type. You can click the small triangle to pull down
the page sizes, and then you can select the page type or self-define it by clicking Custom to
input the size in the dialog box.
is used to set the left margin for the plot paper.
is used to set the right margin for the plot paper.
is used to set the space between two plotting.
is used to set the space between the contra-position signs.
【Portrait】, 【landscape】orientation is used to select the plotting direction.
【Export to File】 It is used to consolidate the plotting files and save them in a special folder,
Operation :
1. Click to select the 【Output to File】in the dialog box 【Plot】.
2. Click the 【Browse】to popup the dialog box 【Output Filename】, you can select a path to
establish a new folder for printing and input the filename, and then click 【Save】to return to the
215
RICHPEACE MARKING SYSTEM
dialog box 【Plot】.
【Working directory】It refers to work path of current plotter,Plotter and plotcenter connection
working directory.
For example,There are computer AB, Computer B connect with plotter, Computer A want to
Plot through web,Select computer B-plottercenter-data path,Select plotfolder(You can creat a
folder in Richpeace cad).Computer A working directory is plot folder in computer B.
【Correct error】It is used for revising size after ploting , Not actual size.
Operation:
:
1.Click【Correct error】,Input password, After inputing, Click[ok],
2.You can see [plot plot error] dialogue table;
Actual plotting size of 1m in width direction;
Actual ploting size of 1m in length direction;
3.Make a 1mx1m rectangle, For example, It is 998mmX998.2mm,You input 998mm in width
direction,Input 998.8 in length direction,Click【ok】
Note:
:
Please do not modify easily, If you ever modify is dgs, No need to modify in gms.
Print preview
Function:
It is used to preview the marker will be printed.
Operation:
Click the icon to popup the interface 【Print preview】, if you are satisfied with it, click 【Print
marker】.
Undo
Ctrl+Z
Function:
216
RICHPEACE MARKING SYSTEM
It is used to return to the previous operation for more times.
Operation:
Click this icon; you can return to the previous operation.
Redo
Ctrl+X
Function:
It is used to resume the previous operation for more times.
Operation:
Click this icon, and you can resume the previous operation.
Add piece
Function;
It is used to add or decrease the quantity for certain pieces. It can increase or decrease the
quantities for one size only, and also can increase or decrease quantities for all sizes.
Operation:
1.Select the piece size in Size box.
2.Click the tool, popup a dialog box, and type the amount in 【Quantity】,“+”is increase,
“-”is decrease.
3.Select all size,Can add quantity for all size;
4.Click【 ok】
Working units
Function:
This tool can be used to set the work unit for the marker.
Operation:
:
1. Click the icon or click 【Marker】——【Work units】, or use the shortcut key Alt+M+W to
popup the dialog box.
2. Click the required unit in the dialog box, and click 【Ok】.
217
RICHPEACE MARKING SYSTEM
Setup parameters
Function:
It can be used to set some defaults of this system. Including 【Parameters of nesting】,
【Parameters of pieces】, 【Show parameters】and 【Plot or print】, 【File Directory】.
Operation:
:
1.Click the icon or click 【Options】——【Parameters】, or you can press the shortcut key
Alt+O+P to popup the dialog box 【Parameters】.
2.After you complete the revision, press 【Apply】. Revise other options in the same way then
click 【Ok】.
218
RICHPEACE MARKING SYSTEM
【Parameters of nesting】parameter instruction
【Show overlap status by virtual border】
Select this option, Pattern add virtual border then overlap, If virtual border overlap, pattern color
will change, No color fill pattern.
【right limit as base line】
When select this option,When it is end of making marker manually,Marker right border will
Align.
【Stripe only in a set】
If there are several sets for one size, Select this option, Each size can stripe
separately,Improve efficiency.
【Self-adjusting of overlapped pieces】
Ticking this option then the overlapped pieces will be flicked automatically when you make your
marker manually.
【Fixed Moving】
It means that you can move pieces a step length for each click of the ←↑↓→ in the keyboard.
【Fixed Deg】
It is used to control the angle of rotation for each press through key 1or key 3 in keyboard.
219
RICHPEACE MARKING SYSTEM
【Single Click Piece list to Nest Piece】
Tick this option, you can click the piece into marker by single click in the Size box, otherwise
you need to double click. It is optional individually.
【Not duplication when insufficiency】
Tick this option is used that if the quantity is not sufficient, you can not duplicate the marker, and
duplicate reverse.
【Rotate Piece by hot key according weaveline limit】
When “rotate limited” no select,Do not select“Rotate Piece by hot key according ”woveline
limitPress keyboard 5 or right click, Pattern rotate 90 degree; Select“Rotate Piece by hot key
according woveline limit”,Press 5 or right click, Pattern rotate 180 degree.
【Not need press mouse when move piece】
Tick this option is used that you don’t need to move the piece by pressing mouse.
【Not place piece when overlapped】
You can set up this option only after you tick 【Not need press mouse when move piece】. It
means you are not able to overlap piece when aligning the marker.
【Parameters of Pieces】Option introduction:
The option contains the defaults just like length, width of notches, radius of buttons and the
default set when pattern upload into the marker as well as auto adjust wove line. You can edit
them here by inputting new value in textbox to create new defaults
220
RICHPEACE MARKING SYSTEM
【Show parameters】option introduction:
:
【Default】
Click 【Show Parameters】then select a new font in the item 【Default】
【Window Size】
It contains 【Piece window width】, 【Piece window height】and 【Size list box height】.
You can input new values by double clicking the box following each item, or click the fine
adjusted slider to revise the default.
【piece window】
【Show zero pieces】
Select the option to display the piece whose quantity is 0 in piece window. If you don’t tick this
option, pieces can not be shown in the Piece window and Size box.
【Show size at head】
Tick this option means size number comes before the quantity of piece in the Size box.
【Show Piece’s Description】
Tick this option, description can be shown on the piece.
【Marker】
【Marker Text above pieces】
Use tool
【Marker text to mark the text on the marker】, if tick this option, texts will not
be covered by pieces. This option can be selected as required.
【Show folded border of piece】
Tick this option; the folded line in the piece can be displayed.
221
RICHPEACE MARKING SYSTEM
Non-selected
Selected
【Only change current piece’s status】
This option can be selected as required. If you select it, when nesting, the later placed piece
overlap the forma placed piece, then this piece will be shown hollow with outline blue, but the
forma piece is still in filled status. If you don’t select it, when nesting, the later placed piece
overlap the forma placed piece, then this piece will be shown hollow with outline blue, but the
former piece is shown hollow with outline red as well.
Non-selected
Selected
【Show Marker text According to proportion】
Tick this option, marker text and piece text will be displayed according to the proportion. Non
tick, it can be shown by the real size.
【Show bottom limit】
Tick this option to display bottom limit.
【Set number using letter】
Tick it, the name of Set is shown by letter, otherwise by number
【Show last right limit】
Tick it, after nesting, save the marker, then adjust the pieces to nest by the second time, then
222
RICHPEACE MARKING SYSTEM
you can view the limit line at the end and the marker turns green and stop in the original position.
In this case, you can compare with the maker length between the first time and the second time
to see which one is better.
【Show pleat and dart with line】
Tick this option, dart or pleat is displayed with line; non tick, the dart or pleat line can not be
shown.
【Show auxiliary line as】
In this option, assistant line inside the piece can be changed to show as Solid, Dashed, Dotted,
Dashed-Dotted and Original.
【Status main】
Click the little triangle button next to the textbox, it popup many options. You can select some as
required and make it shown on the Status Bar.
【Plot and print】
】option introduction
【Combine notch and border line
(All the notch turn to V type) 】
Select,Marker connect with auto cutter,Border line is not V type, will appear with V type,
223
RICHPEACE MARKING SYSTEM
Otherwise cut with original notch type.
【All the notch same height,Width】
Select,Can set same notch height and width;
【Color Printing】
Select this option to print marker in color printing.
【Plot Marker Border】
Select the option to plot the marker with its border.
【Description at head】
Select the option to plot the marker description prior to plot the marker.
【Draw pieces Border when Cutting】
Select the option to draw the piece border when cutting, if not, it will not draw piece border when
cutting.
【Cut pieces in One page】
Select the option to be used in some special situation where there is a piece placed between
the first page and the second page. When cutting, this page will be selected by system to cut in
the second page, instead of cutting the part in first page.
【Plot stripe in border only】
Select the option to plot the stripe line on the marker.
【Draw all pieces then cut】
Select the option to draw the piece line then cut.
【Use software broken line】
Select the option to plot the dashed line under the circumstance if the plotter does not have the
function to plot the broken line, you should use this option to set up in advance.
【Plot auxiliary line as】
You can change the auxiliary line as Solid, Dashed, Dotted, Dashed-Dotted and Original if
necessary.
【Plot covered piece’s border as】
You can plot covered piece’s border as Solid, Dashed, Dotted, Dashed-Dotted and None as
required.
【Check before plotting or printing】
【UnNested Pieces】, 【pieces in aided marker】, 【Fit symmetry】, 【Different Material】.
In above four options, you can select one or some as needed, and then the system will send a
reminder to check if you want to plot before plotting.
【Des】
It means length between dashed line and interval.
It means length between dot line and interval
It means length between dashed line, dot line and interval
【No Cutting Seg.】
It is used to cut pieces in the terms of above line shape. By inputting value to define the length
224
RICHPEACE MARKING SYSTEM
that how long can be cut, and how long can be remained.
【Cutting Seg.】
It is used to define the cutting length per cutting.
【Description】
Click the arrow button to popup the list, the items selected will be shown on the border of the
marker. Here you can do the operation such as edit, delete, change the line and type the font
directly, which can be viewed in below preview column.
【File Directory】Option introduction
【Specify Directory】
Select, Can save all the file to appointed directory.Can find file because of wrong operation,
Pattern do not save to other directory,System will remind you save to appointed
Directory,Can save in appointed directory.
【Back up when save】
Select ,When save manually, Can back up in appointed directory. Only backup the last time
saved, Replace of before file when backup each time.
Select colors
Function:
It can be used to specify different colors for the system interface, all sizes and all sets.
Operation:
1.Click the icon, or click 【Options】——【Colors】, or press the shortcut key Alt+O+C to popup
the dialog box 【Select colors】.
225
RICHPEACE MARKING SYSTEM
【Select colors】
】parameter instructions::
:
①. Select color for General objects.
②. Drag the slipper bar under Name box, and select a object.
③. Select color for the object in the color box..
④. Click Ok.
2. Select color for size.:
⑤. Click 【sizes】;
⑥. Drag the slipper bar and select a size name, then the selected size name can be
shown in the Name box.
⑦. Select color for the size;
⑧. Click 【Ok】;
3. Define the names and colors of several sets.:
⑨. Click 【Sizes】;
⑩. Input or select size name;
⑪. Click 【Sets】;
⑫. Input the name of the first set in the 【Name】box
⑬. Click 【Add】;
⑭. Input the name of the second set in the 【Name】box and select a color for it.
⑮. Add several sets in the same way
⑯. Click 【OK】。
4.Define the color of Style color:
⑰. Click Style color;
⑱. Click 【Add】;
⑲. Select a color for it;
⑳. Click 【OK】;
TIP:
:
Double click any of the color block, popup a color dialog box. You can define more colors
226
RICHPEACE MARKING SYSTEM
Define Marker
Ctrl+M
Function:
It can be used to edit or change the parameters about current marker such as marker size, plies
and marker border etc.
Operation:
Click the icon to popup the 【Marker】——【Define Marker】, or click the shortcut key Ctrl+M
to popup it.
【Marker Definitions 】Parameter instruction:
:
【Comment】:It is used to fill in the marker description. After typing the information and tick the
in the comment box in description from【Parameter】--【Plot or Print】, when plotting or print,
this comment can be output.
【Marker selection】
:
Select the option to pick up the reference marker which you used before under the Comment.
【Width】: it is used to define the width of marker (material)
【Length】: It is used to define the length of marker (material)
【Layout mode】: You can select the 【Single】or 【Faced】. If the mode is
【Faced】, you need to select the 【Folded mode】by three way, top, bottom and left.
【Marker border】: It is used to define a marker border to avoid the defect on the material
border.
227
RICHPEACE MARKING SYSTEM
Select fonts
Function
This command can be used to select fonts of the interface shown on the marker, and to decide
the fonts when print and output.
Operation:
:
1. Click 【Options】——【Fonts】, or press the shortcut key Alt+O+F.
2. Popup a dialog box 【Font】.
3. Select the items in the left box to setup the font.
4. Click the 【Select Font】in the right side, and choose the needed font then click 【Ok】.
5. You can limit the font size by set up the parameter in 【Text Size】.
6. Tick 【Size of Ignored text】to input the size.
7. Click【Ok】.
Tip:
:
Plotter font:It refers to grainline up and down font when use plotter.
Maker description plotter font:It refers to marker head and end length,width ,sets font when
plotter marker.
Reference Marker
Function:
:
It is used to open a finished marker for reference.
1. Click this tool to popup a dialog box of 【Reference Marker】.
2. Click this icon
to popup a dialog box of Open marker file.
3. Open a marker which you need to make reference. You can align a new maker based on it.
228
RICHPEACE MARKING SYSTEM
Close Pieces Display Bar
Function:
:
It is used to open and close Piece Window.
Operation:
:
could use toggle button instead of concave and convex. Toggle button when in , the piece
window is open , when out the piece window is closed
Open/Close Size List box
Function:
:
It is used to open and close Size List Box.
Operation:
:
The tool is concave to open the size list box. The tool is convex to close the size list box.
Special note:
Only if the Piece Window is open, this tool is activated.
Piece Info Ctrl + I
This command contains three options:
【Piece info】(see fig as below)
Function:
It is used to place the information for the current size of the current piece.
Operation:
a. Click one size of a piece in size list.
b. Click the icon.
c. Click the option that contains the contents to be defined in DGS, you can check
these info and alter each value as needed, the nesting will start according to the
revised info.
d. Click 【Apply】, the contents in this option will be confirmed, click 【Close】after
the three options are all confirmed.
Tip:
:
229
RICHPEACE MARKING SYSTEM
You can select the next piece or size to be revised without closing the dialog box.
The contents in the option are valid for the selected size of the selected piece.
【Piece Info】
】Parameter instruction:
:
【Order】, 【Pattern】, 【Size】and 【Material】
These four items have been set in the style information and piece information of PDS or GGS.
You can’t change them here, but you can change them in the dialog box 【Order for marker
making】during loading the file.
【Piece name】,【Code】,【Description】
The three items have been set in the style information and piece information of PDS or GGS.
You can input or revise them in 【Order for marker making】during loading pattern files.
【Area】
It shows you the piece area.
【Perimeter】
It shows you the piece perimeter.
【Virtual Border】
It is used to set up the virtual interval for piece when cutting.
【Quantity】
It shows the quantity of the selected piece for the selected size. You can check and edit the
number again and the new quantity will be displayed in the size list after you click 【Apply】.
【Plies】
It shows you the plies of the spreading. You can check or edit it again by clicking the icon
【Remainder】
It shows you the quantities of the pieces that have not been put on marker.
【Attribute】
230
.
RICHPEACE MARKING SYSTEM
It can be used to define the piece attribute such as single piece, left piece, right piece, and
pairing or folded mode.
a. If the quantity of the same piece is 2, which is also defined in pairing, then you will get two
pieces for right and left,after that choosing left will define the current piece is left, the other
one is right.
b. If the quantity of the same piece is 2, but the pairing is invalid (no ticking), you will have the
two same pieces.
【Folded mode】
The option 【Top】 or 【Bottom】can be used to specify the piece can be folded up and down;
while you align for the tubular material, some pieces will be folded along its left border or right
border. And the option 【Left】or 【Right】means the piece can be folded for the left and right.
【Limit Marking】
During making marker, you can rotate the piece and optimize the piece layout on marker for
higher efficiency of the material. You can select 【Any】to rotate the piece randomly. Generally,
it is not selected because you have to consider the yarn direction. Besides, you can tick the
option 【Flip allowed】, which means that you can flip this piece during marker making.
In some cases, such as one-way material or the arrangement is strictly limited by the
requirement of stripes and grids and you don’t hope to rotate pieces, then you can specify
【One-way】to limit the direction of the piece. In the same way, you can rotate the piece by
180°when you specify 【Two-way】and rotate it by 90°when you specify 【Four-way】.
【Auto Nesting】
【Normal】
It means that the system will put all pieces on marker according to the priority that has been set
in 【Nesting】—【Start Autonesting】during auto marker making.
231
RICHPEACE MARKING SYSTEM
All Size Info:
This option can be used to set the size attribute of all the selected pieces simultaneously. Most
contents in it are the same as what in 【Piece info】, please refer to the instruction of 【Piece
info】.
Note:
:
The contents in this option are valid for all sizes of the selected piece.
Total Piece Info:
232
RICHPEACE MARKING SYSTEM
In order to alter all piece data simultaneously, you can input data in 【Total piece info】to take
effect on each size of each piece.
Most functions in 【Total piece info】are similar to the previous two options. The following
instruction is mainly for a few different options.
【Current size only】
】
Tick this option, then select one size from size list and return to the option for editing, the editing
result is only valid for the selected size after you click the button【Apply】. This only takes effect
for the selected size of the selected piece.
For example, firstly tick the option 【Current size only】, then select any one size in size list,
after that, you can input the value 2 in 【piece quantity】of the option 【Total piece info】. Then
you can find that all piece quantities of the current size will be changed to 2.
【Weight per square centimeter】
】
It is used to define the weight of the cloth. You can use it to calculate the total weight of the cloth
for all pieces of all sizes. Input the real weight for per square centimeter and click 【Recalculate】
then you can get the total weight of all pieces.
【close】:
】: Press close button when finish all the setup
Rotate Piece
It can be used to rotate the selected piece at any angle or duplicate piece after rotating and add
it to the piece window.
If the selected piece is not on marker, you can rotate the piece through this command or
duplicate after rotating and add it to the piece window.
If the selected piece has been placed on marker, then you only need to rotate it to create a new
piece, and add it to the piece window
Operation
1. Click the piece to be rotated in piece window.
2. Click 【Piece】——【Rotate】to get the dialog box 【Rotate piece】.
3. If you want to rotate and duplicate the piece, you can select 【Duplicate piece】.
4. Input the angle to be rotated.
5. Select 【clockwise】or 【counter-clockwise】under rotate direction.
6. If you want to rotate all size pieces, you can tick 【All sizes】. Otherwise only rotate one size
piece.
7. Click 【Ok】.
233
RICHPEACE MARKING SYSTEM
Flip Piece
Function:
This order is used to flip the piece.
If the selected piece is not on marker, you can flip the piece through this command without
duplicating the piece; you can also flip to produce a new piece, and then add it to the piece
window.
If the selected piece has been placed on marker, then you can only flip to create a new piece,
and add it to the piece window.
Operation: (see fig as below)
1. Click the piece to be flipped in piece window.
2. Click 【Piece】——【Flip】to get the dialog box 【Flip Piece】.
3. If you want to duplicate the piece, you can click 【Duplicate】.
4. Select the direction from the two options: 【Up /down】and 【left /Right】.
5. If you want to flip all size pieces, you need to click the option 【All Sizes】.
6. Click 【Ok】.
Cut Piece
Function:
You can cut the selected piece vertically or horizontally through this command. In order to save
the material during marker making, you can cut the piece and place them on markers
separately.
Operation: (see fig as below)
1. Select the piece to be cut in the piece window.
2. Use the command to popup the dialog box 【Cut a piece】.
3. Not tick the 【Half-Cut】, you can cut the piece at any position.
4. Move the red cursor “+” in the right preview window and place it at the right position.
Meanwhile you can view the position in X and Y from the【Cutting line】. You also can input the
value in X and Y to define the cutting position.
234
RICHPEACE MARKING SYSTEM
5. Select 【Horizontal cut】or 【Vertical cut】.
6. Input the seam value in the textbox 【Seam width】.
7. If you want to half-cut the piece, you can select 【Half-cut】.
8. Click 【Ok】.
Delete Pieces
Function:
This order is used to delete the selected pieces of one size or all sizes in piece window or
marker.
Operation: (see fig. as below)
Click the piece that you want to delete in the Piece window.
Click the icon to get a dialog box, ask if you want to delete the same piece of other sizes or
not.
If you want to delete all sizes, click 【OK】; if you want to delete one size only, click 【NO】,
or you can click 【Cancel】not to delete any size.
235
RICHPEACE MARKING SYSTEM
Section 5
Marker toolbar 1
Functions:
You can do the following operations for the pieces in marker: select, move, rotate, flip, zoom in,
zoom out, measure and input text etc.
Select piece
Function:
This tool can be used to select and move pieces.
Operation:
It can be used in the following five ways:
1. Select a piece: Click the icon and then click one piece;
2. Select more pieces: Click the icon, then click and drag in the blank place in the marker to
drag rectangle marquee in order to select several pieces, after that loose the mouse; or press
and hold Ctrl button, and then click the pieces that you want to select one by one.
3. Rectangle marquee more pieces:Rectangle marquee more piece in the Size list bar. You
can select a certain sizes for certain pieces at one time, and right-click the mouse, then all the
pieces selected in rectangle align into the marker automatically.
4. Move: click the icon, then click one piece, and then drag the piece to the best position, then
loose it.
5. Return the piece in working area to piece window: Click this tool, double click piece, then
this piece will be put back into the Piece window instantly. You also can return more pieces by
rectangular selection.
Tips:
1.If you want to place one piece on the marker to other blank place (the blank area will roomy
enough to place the piece), you can click the right button on the piece and then drag the
mouse to this blank place, then loose the mouse. The piece will be placed in the blank area
close to the other pieces automatically.
2.When you want auto nest by this tool, Press CTRL, double click the certain size in the size
list bar, then pieces with all size for one pattern will be placed into the working area; Pressing
SHIFT and double click the certain size, you can put all pieces with this size for this pattern
into the working area. After nesting, if there is pace to cover other pieces, system will import
other piece of other size to nest in this space. For example, if the space can contain 3 little
pieces, but selected pattern just have 2 pieces. In this case, system would choose the best
one piece from anther pattern to cover the remainder space.
236
RICHPEACE MARKING SYSTEM
Show marker by width
Operation:
Click the icon, full width of marker is shown.
Show all pieces
Operation:
Click the icon, all the pieces on the marker are shown.
Show Full length marker
Operation:
Click the icon, full length of marker is shown.
Limit Rotation (L)
Function:
This command is used to limit the usage of these tools such as,
and
rotate piece by any angle,
rotate 90 deg.
Operation:
1. Click to make the icon use toggle/ button on/off insteadof concave and convex, or click
【Options】——【Limit Rotation】and tick it, or press the shortcut key Alt+O+L.
2. The setting about rotating in 【Piece】—【Information】—【Limit Marking】will do work.
3. Click to make the icon convex, and then you can rotate pieces freely.
Tip:
:
Usage of key 1(rotate clockwise) or key 3 (rotate anti-clockwise)—Make the icon convex,
select the piece when it shows bias, and press key 1 or key 3. The piece will rotate at a
certain angle by one time. You can set the rotation angle in 【Options】—【Parameter】—
【Fixed Deg】, then input the angle.
when the icon is concave, the above operation can not be implemented.
Usage of Key 5(rotate 90 deg)—Make the icon concave, select the piece when it shows bias,
and press key 5. The piece will flip vertically if only 【Limit Marking】is set as 2 way in
【Piece】—【Information】; Make the icon convex, the piece will rotate at 90 deg in any
direction.
237
RICHPEACE MARKING SYSTEM
Limit Flip
Function:
This command is used to limit the usage of these tools such as
vertically,
flip horizontally,
flip
flip piece.
Operation
1. Click it to make the icon concave, or click 【Options】——【Limit Flip】, or press the shortcut
key Alt+O+T.
2. The setting about flipping in 【Piece】—【Information】—【Limit Marking】will start
functioning.
3. Click to make the icon convex and the piece will be flipped without the limits in the dialog box
of 【Piece Info】.
Tips:
1. Usage of key 7 (rotate vertically) or key 9 (rotate horizontally)—Make the icon concave,
piece doesn’t flip neither with key 7 nor with key 9 as long as 【Quantity】shows 【1】
and 【Attribute】shows 【single】in 【Piece】—【Information】; but make it convex,
under this situation, piece flips vertically with key 7 and with key 9 horizontally.
2. Usage of key 7 (rotate vertically) or key 9 (rotate horizontally)—Make the icon concave or
convex, piece can flip vertically with key 7 and horizontally with key 9, as long as
【Quantity】shows 【2】and 【Attribute】shows 【Pairing】, and 【Limit marking】
tick 【Flip allowed】in 【Piece】—【Information】.
Zoon in
Function:
It can be used for magnifying the specified area.
Operation:
1. Click the icon.
2. Click or click and drag a rectangle marquee to select the area to be magnified, and then
loose the mouse.
3. After zooming in, you can click the right button to return to the previous state.
Tip:
:
When select “select pieces”tool, Press space button can turn to“Zoom in”tool。
238
RICHPEACE MARKING SYSTEM
Clean marker
Ctrl + C
Function:
It can be used to clear all pieces on marker and move them from workaround to the piece list
box.
Operation:
1. Click the icon, or click 【Marker】——【Clear marker】, or use the shortcut key Ctrl+C to clear
marker.
2. Click 【Yes】in the comeing out dialog box to clean all the pieces on the marker, otherwise
click 【No】。
Measure
Function:
It can be used for measuring the distance between any two points on marker.
Operation:
1. Click the icon.
2. Click the left button and drag the mouse from the start point to the end point on marker, and
then loose the mouse.
3. The distance of DX, DY will be displayed in the status bar.
Rotate piece any angle
While
is concave, you can set up the degree and direction to rotate the piece with this
tool.
Operation:
1. Click the icon, then pop up a dialog box.,
2. Input the degree and direction in the box.
3. Click 【Ok】, the selected piece will rotate as per your setting.
239
RICHPEACE MARKING SYSTEM
Rotate 90 degree
Function:
When the icon
is concave, select 【Four-way】or 【Any】in 【Piece】—【Information】
-- 【Limit Marking】, you can click this tool rotate the selected piece by 90 degree on marker.
Operation:
1. Click the piece to be rotated on marker.
2. Click the icon or click right button of the mouse or key 5 in small keypad to rotate the piece at
90°.
Note
Did not select “Rotate piece by hot key acoording weaveline limit”in“set parameter”,Press 5
rotate 90 degree.
Flip horizontally
Function:
It can be used to flip the piece on marker horizontally when you select 2-way, 4-way, or Any in
【Piece】—【Information】—【Limit Marking】and select the flip allowed as the same.
Operation:
:
Select the pieces, single click the icon or key 9, pieces will flip horizontally accordingly.
Flip vertically
Function:
It can be used to flip the piece on marker vertically when you select the flip allowed in 【Piece】
—【Information】—【Limit Marking】.
Operation:
:
Select the pieces, single click the icon or key 7, pieces will flip vertically accordingly.
Text
Function:
It is used to add the text on the marker.
Operation:
:
240
RICHPEACE MARKING SYSTEM
Select the tool, and click the piece on the marker, then pop up a dialog box of 【Text】, input the
text, click 【OK】.
Parameter explanation inside 【TEXT】:
:It is used to adjust the position of the text. You can click the arrows for up, down, left
and right movement; pressing CTRL also can accelerate the movement.
【Height】and 【Angle】: They are used to adjust the height and angle of the text. If you need
more fine adjustment, you can edit the 【Font】.
【All sizes】: Tick it, the above texts will be added to all sizes automatically.
Marker Text
Function:
It is used to input text in the blank of the marker.
Operation:
1. Select this tool;
2. Click the blank on marker and the dialog box 【Marker Text】will be popped out;
3. Input the text in the dialog box, and then click 【OK】.
Note: You must tick 【Show Marker Text】under 【Options】; otherwise, it will not be displayed.
Group
Function:
It is used to form two or more piece to be grouped together.
Operation:
1. Rectangle marquee two or more pieces, the pieces are in the selected status.
2. Single click the icon in the toolbar, these piece group together automatically.
3. Pieces can be move as a group by the same time.
241
RICHPEACE MARKING SYSTEM
Ungroup
Function:
It is opposite to
, and used to split up the group.
Operation:
Select the grouped pieces, click this tool, then pieces can be split up.
242
RICHPEACE MARKING SYSTEM
Section 6
Marker toolbar 2
Show width of aided marker
Operation:
:
Click
this icon, Aided maker will appear in max width.
Show all pieces in aided marker
Operation:
Click this tool; all the pieces in the aided marker can be displayed.
Show whole aided marker
Operation:
Click this tool; whole aided marker can be displayed
Unfold pieces
Operation:
:
Select fold pattern, Click
this icon, You can see pattern folded and opened again.
Right fold, Left fold, Bottom fold, Top fold
Function:
When you need to nest the tubular marker, you can fold the pieces up or bottom for which
requests symmetry up and bottom; you can fold the pieces by left or right side for which
requests symmetry by left and right.
Operation:
1.In 【Marker】—【Define Marker】, set the 【Plies】as 2, and 【Layout mode】is 【Faced】,
then set the 【Folded mode】as 【Bottom folded】.
243
RICHPEACE MARKING SYSTEM
2.Click piece which requests symmetry up and bottom, then select the
Bottom fold. You
can view the piece is folded half, and stay in the folded side on the marker accordingly.
3. Likewise,click piece which requests symmetry by left and right side, then pick up the
or
. You can view the piece is folded half, and stay in the folded side on the marker
accordingly.
Cut order set up
Function:
It is used to set up the cutting sequence when pieces are cut in auto-cutter.
Operation:
1.Click the icon, then you can see the cutting sequence on the pieces.
2.Press CTRL, click the piece, and then pop up a dialog box of Cutting setup;
244
RICHPEACE MARKING SYSTEM
3. Input the number in the 【Cut order】, then the cutting sequence can be changed.
4. Click
or
in the 【Start Point】, you can move the cutting starting point.
5. Tick 【Set all same piece】, and click 【OK】, then select the piece again. The starting point
for all the pieces on the marker is the same.
Draw rectangle
Function:
It is used to draw the rectangle, and can be printed or plotted along with the marker.
Operation:
1. Select this tool, click on the marker, release and drag the mouse, and then a rectangle can be
drawn.
2. Select
, move the mouse to the outline of rectangle. When the cursor turn a arrow, right
click, a delete box come up, click delete, then the rectangle is deleted.
Overlapped checking
Function:
It is used to check the overlapped value when pieces overlap together.
Operation:
1. Click this tool, and the icon become concave.
2. Move the mouse and click the overlapped piece showed as below. Then you can see the max
overlapped value to the selected piece with another piece.
245
RICHPEACE MARKING SYSTEM
Define layer
Function:
It is used to define the overlapped part to reserve or discard when two pieces overlapped
together.
Operation:
:
1. Select this tool
2. Click the piece which you need to plot entirely and set it as 1 layer (top), then the other piece
will be set as 2 layers (bottom) automatically.
3. When plotting, the piece set as 1 layer (top) can be output entirely, but for the one set as 2
layers (bottom), the overlapped part with grey line shown as below can be selected not to
output or plot in dashed line.
Note:
You can change the number optionally for this two overlapped pieces by left click the mouse
inside piece. The rule is that piece with smaller number overlay the piece with bigger number,
such as No2 overlay No3, No4 overlay No8, and No 15 overlay No20.
Cap nest
Function:
It is used to define the nest method for pieces, such as normal, interleaving, reverse, etc.
246
RICHPEACE MARKING SYSTEM
Operation:
1. Select the pieces, and then click the icon.
2. Pop up a dialog box of【Cap pieces nesting】.
3. Define the nesting method in the 【Mode】. You can tick 【Same distance】, 【Nest whole
row only】,【Show distance】optionally Then click【OK】, you can do the nest for the particular
size for this piece.
Same proportion marker and aided marker
Function:
It is used to show the major and aided marker in proportion.
Operation:
Click this tool and make the icon concave, then the pieces on the major and aided marker are
shown in proportion. If you click the tool again, the proportion turns back as before.
Place pieces to aided marker
Function:
It is used to place the pieces in the piece box to the aided marker.
Operation:
Click the icon, pop up a dialog box, select the certain size or all size, then click 【Put】, all the
selected size are placed in the aided marker. Then click 【Close】.
247
RICHPEACE MARKING SYSTEM
Clean aided marker
Function:
Click this tool; you can move all the pieces on the aided marker to the piece box.
Cut view pieces
Function:
:
Cut piece on marker overlap part
Operation:
:
1. Select pattern which will cut, Click cut view pieces icon
, See following picture,
You can see a blue cut line, There are rectangle in both side and middle.
2. Click one rectangle on side,Then loose mouse, Drag mouse to required place,Cutline
Will rotate,The rotate center is another side rectangle, Angel will appear at [Degree],Input
seamallowance. Click middle rectangle, Then loose mouse, it is move cut line, Click
【Vertically】and【Horizontal】,Cutline will be vertically or horizontal cut, Click ok.
248
RICHPEACE MARKING SYSTEM
Cutter stripe setup
Function:
:
It is used for stripe for auto cutter
Operation:
:
1. Pattern stripe as normal process.
2. Click
this icon, Pattern which already striped in workarea will appear in orange colour ,
Means
Pattern which go to autocutter need to strip, No stripe pattern appear in grey colour;
3. If do not want to ajust stripe, Click pattern which have striped, Pattern colour will turn form
orange to blue, It means pattern need not use stripe, Click this pattern again, Pattern colour
turn form blue colour to orange,Also you can right click, See following picture to set.
Note:
:
Select【Option】-【ajust strip】,
can active.
Zoom pieces
Function:
:
Zoom in or zoom out whole pattern
249
RICHPEACE MARKING SYSTEM
Operation:
:
1. Select pattern which need to zoom in or zoom out;
2. You can see【Scaling pattern】dialogue table, Input “+”, Pattern will zoom out,
Input“-”,Pattern will Zoom in.
3. Click [ok].
250
RICHPEACE MARKING SYSTEM
Section 7
Matrial toolbar
Function:
:
Select different material and make marker
Operation:
:
Click right arrow, You can see all the material type, Select one, It will appear all the pattern .
Section 8
Hiden toolbar
Click【option】-【Custom toolbar】,Can show hidden tool .
Up、Bottom、left、Right
Function:
:
Move pattern Up、bottom、Left、Right direction, Same as smallboard 8、2、4、6 function.
Option
Remove selected pieces
Delete or double click
Function:
Remove selected pieces from marker, And go back to piece list, Different from deleting pieces.
Operation:
:
1. Select pattern on marker with 【move selected piece】 tool
2. Click[remove selected pieces]
.
icon, or select 【marker] 】- 【clear selected piece】
or press delete.
3. All the selected pattern go back to piece window。
251
RICHPEACE MARKING SYSTEM
Tip:
:
Select “move selected pieces” tool
and double click pattern on marker place.
Round After Rotation
Function:
:
Command which used for rotating pattern by mouse.
Operation:
:
Click【option】--【Round after rotation】Hollow,pattern rotat 0°,90°,180°,270°
Four direction,(About 6 degree), Rotate degree will near the similar degree, Heave, NO.
show marker Guage
Function
Open or close marker Guage.
Operation:
:
Click this icon, Guage appear, Click again, Guage hide.
Merge
Function:
:
Merge two marker to one marker, marker width for both markers should be same
Operation:
:
1. Open a marker file
2. Click【File】Menu--【Merge】
,you can see【union marker file】dialogue table;
3. Open a mkr file in file list, Opened marker will be added after current marker.
Context help
Function:
It used for shortcut when useing help
Operation:
:
Select this tool, Then click any tool,You can see 【Help】dialogue table.
Zoom Out
Function:
:
Make pattern in main marker zoom out to before proportion
252
RICHPEACE MARKING SYSTEM
Operation:
:
Under the zoom in status, Click zoom out
icon, Click one time, will come back before
proportion one time until icon turn grey, Mean finish.
zoom out aided marker
Function:
:
Make pattern in aided marker zoom out to before proportion
Operation :
Under the zoom in status, Click zoom out
icon, Click one time, will come back before
proportion one time until icon turn grey, Mean finish.
Rotate 90 degree anti-clockwise
Function:
:
【pieces info】--【limited marking】,when select【Four way】or【Any】Or select other option,
not selected,Can rotate selected patern 90 degree .
When
Operation:
:
Select this pattern,Click this icon
can rotate 90 degree.
Tip:
:
If it is 【Double-way】,right click or click number 5,Can rotate 180 degree。
Rotate 180 degree
Function:
:
When grain line is 【Double way】、
【Four way】或【Any way】,Can rotate pattern 180 degree.
Operation:
:
Select icon which need to rotate,click this icon
pattern can rotate 180 degree.
Note:
:
hollow,Right click or click number 5,Can rotate 90 degree.
253
RICHPEACE MARKING SYSTEM
Specific rotation
Function:
:
1.
Not select,Use specific tool can rotate pattern any way in the clicked axis point
2.
select,When grainline is 【Double-way】,Can rotate pattern 180 degree in click axis
point,Grain line is【Four-way】,rotate 90 degree, 【Any】rotate in anyway.
Operation:
:
1. Click specific rotation tool
2. Click pattern ,Press and hold then rotate;
3. When rotate degree meet requirement, Then loosen mouse.
Center rotation
Function:
:
1.
not select,Use specific tool can rotate pattern any way in the clicked center point
2.
select,When grainline is 【Double-way】,Can rotate pattern 180 degree in clicked
center point,Grain line is【Four-way】,rotate 90 degree, 【Any】rotate in anyway.
Operation:
:
Refer to center rotation
Tip:
:
With number 1(clockwise) or number 3 (anti-clockwise),Rotate a little, Press one time rotate
one degree ,You can click 【option】--【Set parameter】--【degree】
】 to input value.
Bind pattern
Function:
:
Bind any pattern on marker.
254
RICHPEACE MARKING SYSTEM
Option:
1.
Select pattern which need to bind;
2.
Click bind pattern button
.
Instruction:
:
Bind pattern, Relative place do not change when make marker,It is sole group when bind
solely.
No bind pattern
Function:
:
It is a opposite operation of binding pattern, Binded pattern do not have bind property.
Operation:
1. Select binded pattern
2. Click ,No bind pattern icon
Fix piece position
Function:
:
Fix one or more pattern on marker.
Operation:
1.Select patterns which need to be fixed on marker.
2.Click fix pieces position icon
Instruction:
:
Fixed pattern position, Pattern position and style do not change when make marker,
Can not drag, Can not rotate, It is a sole group when fixed onetime.
Unfixed pattern position
Function:
:
It is Opposite operation for fixed pattern, Fixed pattern do not have fixed property.
Opeation:
1.
Select fixed pattern;
255
RICHPEACE MARKING SYSTEM
2.
Click unfixed pattern position.
Embbeded pattern
Function:
:
For overlapped pattern,Embbeded pattern to near spacing.
Operation:
1. There are pattern on marker;
2. Click Embbeded pattern
3. You can see【compact overlapped patterns】dialogue table
4. Select one type, Then click ok.
Instruction:
:
1.
Normal:Can not set time, System will make marker to overlapped pattern automatically,
When finish, will stop;
2.
Advanced:Can set compact time, When finish, System will close , Or times out, System
will finish to deal with automatically;
3.
Can close by hand.
Change distance between pattern
Function:
:
Set the minimum distance for pattern
Operation:
Operation:
1.
There are pattern on marker
2. Click “change distance between pattern” button
3.
You can see set distance between pattern dialogue table
256
RICHPEACE MARKING SYSTEM
Change width of marker
Function :
When change marker width, Deal with marker automatically.
Operation:
1. There are pattern on marker
2. Click change width of marker icon,You can see【change width of marker】dialogue table;
3. Select one module , Input new marker width,Click ok.
Compact marker
Function:
:
Compact marker file Left direction ,It is for all the pattern compact on marker in order
to improve efficiency.
Operation:
1. There are pattern on marker
2. Click compact marker button ,You can see【compact marker】dialogue table;
257
RICHPEACE MARKING SYSTEM
3. Select one moduel, Click ok
258
RICHPEACE MARKING SYSTEM
Section 9
Toolbar menu
File menu
File menu has various commands including 【New】, 【Open】, 【Merge】, 【Save】, 【Plot】
and【Print】
etc. These commands such as【Open a pattern file】,【New】,【Open】,【Merge】,
【Save】, 【Save current nesting】, 【Print】, 【Preview】, 【About】, 【Help】have the
corresponding icons in file toolbar.
259
RICHPEACE MARKING SYSTEM
Open HP-GL file
【H】
】
Function:
:
It is used to open HP-GL file from exported from other CAD software, then output through
Plotter.
Operation:
:
1. Click 【File】—【Open HP-GL file】,
2. come out the dialog box of 【Open】to select files with HP-GL format, then double click Open
3. Click 【Plot】to plot this file.
Close HP-GL file 【L】
】
Function:
:
It is used to close opened HP-GL file.
Operation:
:
After open HP-GL the file, click 【File】—【Close HP-GL】, then you can close this file.
Out put to DXF
Function:
:
Save marker as dxf format, Other Cad system can use, So match with other CAD
Depart with single material
【T】
】 Ctrl+T
Function:
It is used to save the current opened marker as multiple marker files according to sizes.
260
RICHPEACE MARKING SYSTEM
Operation: (refer to fig. as above)
1. Click 【File】——【New】to set marker, select and load file.
2. Click 【File】——【Depart with single material】to get the dialog box 【Depart】.
3. Click 【Auto Depart】 to popup the dialog box 【Auto Depart】, and then edit each
item as you require. Click 【Ok】, the system will automatically depart the marker
for you; you can also depart it by yourself. Click 【Add】and then input the quantity
of each size under the relevant size name. Add markers one by one in the same
way until you complete all.
4. You can input the filename to the textbox 【Filename】or click 【filename】at right
to create filename automatically.
5. Click 【Browse】to select saving path.
6. Return the original 【Depart】dialog box, click 【Save】.
Note:
:
Click
then you will find the new departed files already there. Open a file and you will see
that the selected sizes in size list have been put on one marker. If you need make your
marker, you can do it by using automatic marking or manual marking. Finally click
to
save the marker.
Depart with multiple material
【R】
】 Ctrl+R
Function:
It is used to save the current opened marker as multiple material marker files as per the color of
cloth and unit as set.
Operation (refer to fig. as above)
1. Click 【File】——【New】to set marker, select and load pattern files, then click 【Ok】.
261
RICHPEACE MARKING SYSTEM
2. Click 【File】——【Depart with multiple material】to get thedialog box.
3. Click 【Add】to add the material number, click once for one number.
4. Input the number of sets for each size of each marker according to different material
numbers.
5. Click 【Auto depart】to get the dialog box 【Auto depart】, edit each item as you demand,
click 【OK】.
6. Input the filename in 【Filename】or press 【filename】, the system will create a filename
automatically.
7. Click 【Browse】to select saving path, and then click 【OK】.
8. Return to the original depart dialog box, and then click 【Save】.
Note:
:
Click
to get the dialog box, then open a file in it, you will see that the pieces with the
same material number has been put on one marker. If you need make the marker, you can do
it by using automatic marking or manual marking. Finally click
to save the marker.
Separate pieces according to material
Function:
It is used to save the opened marker as multiple material marker files according to material.
Operation: (refer to fig. as above)
1. Click 【File】——【New】to set marker, select and load pattern files, then click 【Ok】.
2. Click 【File】——【Separate pieces according to material】to get the dialog box.
3. Click 【OK】.
Note:
:
Click
to get a dialog box. Open a file and you will see that the pieces of the same material
have been placed on one marker. If you need make your marker, you can do it by using
automatic marking or manual marking. Finally click
262
to save the marker.
RICHPEACE MARKING SYSTEM
Calculation File
Calculation file includes: New single Material Calculation file, Open single Material Calculation
File, New multiple Material Calculation file, Open multiple Material Calculation file. If you want to
align only one material, you can select the single Material Calculation file; if you want to align
more materials, you can select multiple Material Calculation file.
New single Material Calculation file【N】
Function:
:
It is used to calculate the total cloth quantity used for one order instantly.
Operation:
:
1. Create a new marker, load a pattern files, click 【File】—【Calculation file】-- 【New single
Material Calculation file】.
2. come out a dialog box to input a file name to click 【Save】to save this file.
3. come out a 【New Calculation】file and input the set quantity in the 【Total】.
4. Click 【Auto Depart】to popup a dialog box.
263
RICHPEACE MARKING SYSTEM
5.Input the set amounts which needs to lay per marker in 【Sets in a Marker】, the max plies
amounts in 【Max Plies】and select 【Allowed Same Size in Marker】
, if it is allowed to have
the same size in marker. Then click 【Ok】.
6.Return to the previous dialog box. The system has nested already. Click 【Unit same
marker】, it is used to unit the files. Click 【File Name】, and input the 【Head】, 【Tail】,
【Waste】, 【Wastage】, then click 【Save & Continue】.
7. come out the dialog box of 【Calculation】. Click 【Auto Nest】, you can calculate the
efficiency and total quantity of cloth.
8. Click 【Save】.
9. If you need to nest manually, you can select the file name which needs to nest by hand, then
click 【Manual Nest】to draw out this file to nest manually.
10. Click 【File】—【Apply and Return to return】to the 【Calculation】dialog box after the
manual nest.
11. Repeat step of 8-9 to calculate all markers, then 【Save】.
Note:
:
System will select the higher efficiency marker compared between Auto nest and Manual
nest, and calculate the best fabric usage. Can output txt file,It is easy for checking the result.
264
RICHPEACE MARKING SYSTEM
Open Sigle Material Calculate File
Function:
:
It is used for opening calculation file which have saved.
Operation :
1. Click【file】-【Caculation file 】--【Open sigle material calculation file】;
2. After checking,Click [ok].
3. Also you can open one marker file directly.
Open Multiple Material Calculate File
Function:
It is used to calculate the total cloth quantity used for one order as per difference material
instantly.
Operation:
:
Like new single material calculate file. Add an option” add material”
Open Multiple Material Calculate File
Function:
:
It is used for opening calculation file which have saved.
Operation:
:
1.Click【file】-【Caculation file 】--【Open Multiple material calculation file】;
2.After checking,Click [ok].
3.Also you can open one marker file directly.
Save as
Ctrl + A
Function:
:
It is used to open the saved calculation files.
Operation:
Click 【File】——【Save as】to get the dialog box 【Save as】, input the file name and select
the path to save, then click 【OK】.
Note:
The system will add the same extension name .MRK to each marker file automatically.
Cancel encrypt
Function:
Cancel encrypt for already encrypt file.
Opertation:
Click【file】Menu---【Cancel
encrypt】,Input password in dialogue table,Click ok.
--
Size Exchange
Function:
:
In order to improve efficiency,Replace one or more size on finished marker.
265
RICHPEACE MARKING SYSTEM
Operation:
:
1. Click【file】--【size exchange】,You can see following dialogue table:
2. Select size will your want to change in 【Size exchange】,Click【OK】.Select【show pattern】,
You can show style name.
3. If there are internal or overlap, Please adjust first ,and then click save as.
Associate
Function
It is used if piece is required to be revised in DGS after it aligned on marker. But by this function,
after revision, this piece updates automatically on the previous marker and does not need to
re-align again. (File name can not be amended)
Operation:
:
1. Click 【File】—【Associate】to get a dialog box.
2. Select the path for 【Original File】and 【Associate File】
3. Click Ok to fulfill this function.
266
RICHPEACE MARKING SYSTEM
【Associate】Parameter instruction:
Both name and material same:
:
Order for marker making pattern name, Material same as name and material in dgs file;
Name same only:
:
Pattern name in dgs and in order for making is same, But material is different, If front
Material is A in gs, But in gms front do not have material name or other, Select this option;
One:For marker which have finished, after change shrink in dgs and save, When use
Associate function in gms, Select original file
When load more pattern and make marker, Default file is loaded first time, If associate other file,
Need to select browser find file;
Use shrink of Dgs:
Two: For marker which have finished, If changed shrink in order for maker making,but
Ever change pattern in dgs(grading or curve shape or internal line) and save file,
Select use shrink of GMS
Note:
:
1. Pattern name should not same in dgs.
2.When make marker, Shrink can not change freely, Please understand the meaning
clearly,Please do not change shirnk freely.
Plot Preview
Function
You can plot files by select the page.
Operation:
:
1. Click 【File】—【Plot Preview】.;
2. System will divide it to different page automatically,See following picture;
3. Click 【File】--【Plot】—【Plot Selected Pages】. You can select the page to plot.
Export Bitmap
Function:
:
It is used to export the whole marker including some information as a .bmp format file.
267
RICHPEACE MARKING SYSTEM
Person who do not have cad, Also can check marker.
Operation
Click 【File】——【Export Bitmap】.
Edit the length and height of the bitmap and then click 【OK】.
Note:
:
The width of the bitmap is the length of the marker.
Printer Setup
Function:
:
It used for seting printer type,Paper size and print direction etc.
Print Marker
【Print Marker】
】Parameter instruction
Function
It is used for seting marker size and page border.
Operation
1. Click 【File】-【Print Marker】--【Setup】.
2. Come out a dialog box of 【Print】;
3. Select the proportion for the marker after outputting in 【Size】and input the 【Pager Margin】
in the blank of Left, Right, Top and Bottom if needed.
268
RICHPEACE MARKING SYSTEM
Preview:
It is used to check the printing result of marker.
Option:
:
1. Click icon printpreview
on filetoolbar or click【File】-【Print marker】--【Preview】
2.It will come out the interface of print preview, if you are satisfied with the interface, you can
click 【OK】.
Print
Function:
:
Output marker to printer in small proportion.
Operation:
:
1.Click plot icon
on file toolbar Or click【File】-【Print marker】--【Plot】;
2.You can see【Print】dialogue table,Click【OK】then plot.
Note:
:
Click【Property】,Click paper,Select direction of paper
MutiLine Marker Preview
Function:
:
It is used to review the printed effect for MutiLine Marker.
Operation:
:
1. Click 【File】-【Print Marker】——【Muti Line Marker Preview】.
2. come out the interface, if you are satisfactory with the effect, you can click 【OK】.
Note: Line change place operation Click 【Marker】—【Define enter line 】
MutiLine Marker Print
Function:
:
It is used to print the Muti Line Marker
269
RICHPEACE MARKING SYSTEM
Operation:
1. Click 【File】-【Print Marker】——【MutiLine Marker Print】.;
2. Set parameter in dialogue table,Then click 【OK】
Print File Setup
Function:
:
It is used to define a file with work or Excel format under the printed marker. Normally it is
applicable to MutiLine Marker Print.
Operation:
1. Click 【File】—【Print Marker】—【Print File Setup】
2. come out the dialog box of 【Print File Setup】, and click 【Browse】to open a file, then click
【Open】to return to the previous dialog box.;
3.Select【Print File】Set【page margin】,Click【OK】;
270
RICHPEACE MARKING SYSTEM
4.Click【
【File】--【Print marker】--【Multiple marker print】
Print Information
Setup
Function:
:
It is used to setup the information of marker information.
271
RICHPEACE MARKING SYSTEM
Operation:
1.Click 【File】
】——【
【Print Information】
】——【
【Setup】
】;
2.It will come out the dialog box of【Nesting Information】;
3.Click the small triangle following by 【All Info】or 【Size Info】, and then click to tick the items
you need.(In this dialogue table, You can change line, insert or delete)
4.ou can also check and edit again all contents in the textbox 【All Info】and 【Size Info】. And
these contents can be shown in the 【Preview】;
5. Finally click 【OK】。
Note:
:
If you want to display the contents selected in 【Size Info】, you must tick the 【Size Info】in
the last option 【All Size】.
Preview
Function:
:
It is used to check the printing result of marker information.
Operation:
:
1. Click 【File】-【Print Info】——【Preview】
It will come out the interface of print preview, if you are satisfactory with the interface, you can
click 【OK】
Print
Function:
:
It is used to print the marker info.
272
RICHPEACE MARKING SYSTEM
Operation:
:
1. Click【File】- 【Print Information】——【Print】;
2. Click 【OK】in the dialog box Print。
The last five files used before
Function:
:
It is used to open the last five file used before.
Operation:
:
Click 【File】to select a file on the list, then you can open this file.
Exit
Alt+F4
Function:
:
It is used to end the operation of this system.
Operation:
Click this command to exit the system.
Note:
Click
on the top right of the system interface,you can also exit this system.
Piece menu(P)
(P)
Function:
:
It contains some commands directly relate to the operation and attributes of pieces, such as
【Pieces info】, 【Rotate pieces】, and 【Internals】parameter etc. (see fig. as above)
【Information】, 【Flip piece】, 【Rotate】, 【Cut】and 【Delete】, all these commands have
the shortcut icons in pieces toolbar and the operation please refer to the instructions.
273
RICHPEACE MARKING SYSTEM
Internals
Function:
:
This command is used to revise the attributes of all internals such as notches, holes and
buttons. Users can check and revise their size, type, etc.
Operation:
:
1. Click the piece on marker that you want to revise some attributes of its internals.
2. Click 【Piece】--【Internals】,to get the dialog box 【Internals】;
3. Select the internals and revise the attributes of it in the dialog box;
4. Click 【Close】after you complete the revision。
【Internals】parameters instruction:
:
【Previous】, 【Next】:
Click 【Previous】or 【Next】to select the previous or next internal to be edited in the right
preview window.
【Internals type】:
:
The types of internals such as notches and buttons will be shown in this dialog box. Internals
type contains three forms: notch, button hole and apex.
【Notch】:
After you select a notch from the selected piece, the contents of【notch】 in the dialog box of
【Internals】will light and you can alter its type like T, U, and Box etc. Input new values in the
textboxes following 【Length】and【Width】.
【Hole】:
While you select a button from the selected piece, only one textbox 【Length】is light. Input a
new value in this textbox then press 【Apply】to alter the length for button hole.
【Apex】:
Select a Dart from the selected piece. If there are notches and holes at the dart apex and dart
waist, all these contents of 【notch】and 【Hole】in the dialog box of 【internals】will be light.
The following setup about notch and hole please refer to the instruction of Drill in DGS manual
and Notch previous mentioned.
274
RICHPEACE MARKING SYSTEM
Note:
Two options 【Radius】and 【Distance】are listed in 【Hole】. It shows the radius of the drilled
hole and distance between this hole and the apex of the dart. Input the value, and click
【Apply】.
Tick this option, the series codes of various internals will be shown in the right preview window.
【Number】:
This option is used to alter the arranging order of the selected internals by inputting a new
number.
【Delete】:
It is used to delete the selected internals.
【Apply】:
You must click this option after you edit internals of one piece; it can’t take the editing result
effect immediately.
Global Internals【
【T】
】
Function:
This command can be used to alter internal attributes of the pieces. It is often used to
simultaneously alter one internal attribute for all pieces on marker, and the above command
【Internals】just can alter the attribute of one internal in one Piece.
【Global internals】 Parameters Instruction
【Piece】
Current While you tick this option, it only aims at one current size of the current selected piece.
The attribute of selected internals for the current selected size will be altered;
Current all sizes. While you tick this option, it aims at all sizes of the current selected piece.
The attribute of selected internals for all size will be altered.
All. While you tick this option, it aims at all pieces of all sizes. The attribute of selected internals
for all pieces will be edited.
【Type of internals】
There are several kinds of internals in this item like 【Drill】, 【Notch】and 【Dart】etc. When
275
RICHPEACE MARKING SYSTEM
you select one internal, the system will show you the current state of it in this dialog box and you
can edit it in the right area.
【Original notch area】and 【Original drill area】
This area is used to select the type of the current 【Notches】or 【Drills】. For example, there
are three types of notches in a piece: T, V and U. If you want to change all type U into type T,
and change all type V into type BOX, firstly you need select type U from 【Original notch area】
in the left, then select type T from 【Alter notch area】, then click 【Apply】to change type V
into type BOX in the same way.
【Parameters】
1. You can tick the box to alter attributes of the selected internals such as notch, button and
drill etc.
2. Length and width. You can edit the length and width of notches and buttons here.
3. Radius. It is used to control the radius of the drills and buttons.
4. Distance. While you edit the dart, you can control the distance between drill point and the
dart apex or dart waist.
【Alter notch area】and 【Alter drill area】
It is used to alter and edit the attributes of notches and drills. Please refer to the detailed
instruction in above example 【Original notch area】and 【Original drill area】.
Edit Weave Line
Function:
:
It is used to adjust the weave line of selected piece.
1. Click 【Piece】—【Weave Line】.
2. Popup a dialog box of 【Edit Weave Line】. You can click the four arrows
to adjust the
position of weave line.
3. 【Lengthen】, 【Shorten】, it can lengthen and shorten the weave line.
4. 【Vertical Center】, 【Horizontal Center】, it can make the weave line center vertically and
horizontally.
5. Click 【Apply】to close the window if you finish the adjustment.
276
RICHPEACE MARKING SYSTEM
Edit Weave Line of All pieces
Function:
:
It is used to adjust the weave line for all pieces.
Operation:
:
Click 【Piece】—【Edit Weave Line of All Pieces】to get the dialog box, click the 【Vertical
Center】, 【Horizontal Center】to make the weave line center vertically and horizontally for all
pieces.
Set All Piece’s Count to1
Function:
:
It is used to set the quantity of all pieces as 1.
Operation:
:
1. Click 【Piece】—【Set All Piece’s Count 1】.
2. The quantity of all pieces is displayed as 1 in Piece Window
3. If you need to turn back to the previous quantity, you can follow below instruction.
1) Click
to open pattern file
2) Come out the dialog of【Select Pattern Files】, click file name and select【View】.
3) Cpme out the dialog of【Order for Maker Making】, click 【Ok】to return previous
dialog box and click 【Ok】, the quantity in Piece Window is resumed
277
RICHPEACE MARKING SYSTEM
Marker Menu(M)
(M)
Function:
This menu contains some commands related to marker and marker making. Through these
commands, you can specify the size of your marker, clear marker, put pieces on marker, move
pieces out of marker and check the overlapped pieces etc.
【Clear marker】, 【Clear selected pieces】, 【Define marker】, 【Reference Marker】
and 【Work units】, all these commands have the corresponding icons in Utility toolbar.
Select All Pieces =
Function:
:
Select all pattern in marker with this command.
Operation:
:
Click 【Marker】—【Select All Pieces】, then all the pieces on the marker are selected
Select Folded Piece【F】
【Piece on marker top】
Function:
:
All the marker fold on the top.
278
RICHPEACE MARKING SYSTEM
Operation:
:
Click【Marker】Menu--【Select folded pieces】--【Pieces on marker top】
】,All the pattern
folded on the top of marker will be selected.
【Piece on marker bottom】
Function:
:
All the marker fold on the bottom.
Operation
Click【Marker】Menu--【Select folded pieces】--【Pieces on marker bottom】
】,All the pattern
folded on the bottom of marker will be selected.
【Piece on marker Left】
Function:
:
All the marker fold on the left.
Operation:
:
Click【Marker】Menu--【Select folded pieces】--【Pieces on marker left】
】,All the pattern
folded on the left of marker will be selected.
All folded pieces:
Function
All the folded pattern is selected.
Operation:
Click【Marker】Menu--【Select folded pieces】--【All folded pieces】
】,All the pattern folded
on marker will be selected.
Select Current Piece, Current Size
Function:
:
Selected pattern current size all pattern is selected
Operation:
:
Click 【Marker】—【Select Current Piece, Current Size】, then the current piece is selected.
Select Current Piece, All size
Function:
:
Selected pattern All size all pattern is selected
Operation:
:
Click 【Marker】—【Select Current Piece, All size】, then all sizes of current piece are selected.
Select All Piece, Current Size
Function:
:
Select all pattern of current selected pattern.
Operation:
:
279
RICHPEACE MARKING SYSTEM
Click 【Marker】—【Select All Piece, Current size】, then all pieces with same size are
selected.
Select all fixed pieces
Function:
:
All the fixed pieces is selected.
Operation:
:
Click 【Marker】Menu-【Select all fixed pieces】,All the fixed pieces is selected.
Check Overlapped Pieces
Operation
1.Click 【Marker】——【Check overlapped pieces】, or press Alt+M+O, come out a dialog box
of 【Overlapped Pieces】.
2.Tick 【Check overlapped Piece】and click 【Ok】, then the all overlapped pieces on marker
will be lighting. In addition, the overlapped pieces are non-filled and a Warn dialog box will be
come out automatically.
3.【Overlapped pieces large than】, and type the value in the blank, click 【Ok】to get a dialog
box to inform you that how many pieces to satisfy the this condition.
4.The 【Largest lap】, click 【Ok】to get the dialog box to inform you of the largest overlapped
value.
Check Current Solution
Function:
While pieces are placed on marker, you can check the current marker solution. You can check
the completed sets, uncompleted sets and overlapped pieces through this command. In the
meanwhile, you can also view the original sets, piece quantity for each set and incomplete
piece etc.
Operation:
1. Click 【Marker】——【Check current solution】, or press Alt+M+K to get the dialog box
280
RICHPEACE MARKING SYSTEM
【Check Solution】.
2. Select the【Patten】and【Size】by clicking the pull-down arrow to check the size for needed
pattern.
3. Select 【Complete】or 【Incomplete】to check pieces.
【Check solution】parameters instruction:
:
【Pattern】
It shows you the path and filename of the current piece. If you want to check another file,
you can click the pull-down slider and select the required file in this list.
【Size】
It shows you the current size. You can select another size by clicking the pull-down slider on the
right side of 【Size】and check all info about each size.
【Initial order】
It can show pieces sets required to be completed in the marker.
【Complete】
It shows you the total quantity of sets completed on marker.
【Plies】
It shows you the plies of cloth on marker. You can alter it in 【Marker】---【Define Marker】.
【Pieces in one set】
It shows you the quantity of pieces in each set.
【Pieces in incomplete】
It shows you the quantity of the pieces for the specified size on marker after making marker.
【Complete】
Click this button then all pieces in complete sets will flash, finally all these complete pieces will
be shown in selected state.
【Incomplete】
Click this button then all pieces in incomplete sets will flash, finally all these incomplete pieces
will be shown in selected state.
Define Material Pattern
Function:
:
It is used to show the material pattern on the marker.
Operation:
281
RICHPEACE MARKING SYSTEM
1. Click 【Option】—【Show Piece’s pattern】.
2. Click 【Marker】—【Define Material Pattern】to get a dialog box. Click 【Selected Pattern】,
【Open】dialog come out again.
3.Pick out the required material pattern and click 【Open】;
4.Then click 【OK】, the pattern is shown on the marker.
5. If you want to alter or delete the material pattern, you can click 【Marker】—【Define Material
Pattern】to get a dialog box. Repeat step 2, then you can alter the pattern; if you click 【Delete
Pattern】, pattern on the marker can be removed.
Fix Marker Length
Function:
:
It is used to fix the marker length.
Operation:
:
Click 【Marker】–【Fix Marker Length】, marker length will be fixed as per the current length.
You can alter the marker length in the 【Marker Definitions】by clicking icon
Define Baseline
Function:
:
Make sign on marker, Can refer when making marker, Show align line, When move different
Direction, Can make pattern align according to this line, Also can confirm pin situation
On strip marker, Also can print bas line situation and distance on print(Usually used in
pearl ,cap nesting, high or lower maker making)
Operation:
1. Click 【Marker】——【Define Base Line】;
282
RICHPEACE MARKING SYSTEM
2. It will get the dialog box【Edit Base Line】. Click【Add】under the column【Vertical Line】
and 【Horizontal Line】and input the value to define the position for one Vertical Line and
horizontal base line. Defining all horizontal and vertical lines one by one in the same way.
Click 【ADD】to create one baseline, Click 【Delete】to cancel one.
3. Finally click 【OK】.
4. You can also select a base line first and then delete it by clicking 【Delete】.
Note:
:
You must tick 【Show Base Line】in the menu 【Options】. Otherwise, it will not be shown.
Skill:
You can drag base line from top and bottom.
1. Select “Move selected pieces”tool
, Move mouse to marker left or top, When mouse
Turn to double direction arrow ,Move mouse can drag a vertical base line, Can drag more.
2. Mover cursor on baseline, When cursor turn to double arrow right click, Select delete will
delete base line, Click Edit, Will appear dialogue table,Can modify base line.
283
RICHPEACE MARKING SYSTEM
3. Click to right, Base line will near to marker length side.
Define Enter line
Function:
:
It is used to define the position where the page is separated when printing and plotting, or
define the space between two markers.
Operation:
:
1. Click 【Marker】—【Define Enter line】.
2. Come out the dialog of【Define Enter line】, click【Add】to input the value in the【Position】
and 【Space】. You can add, delete and clear the line by this way, then click 【OK】.
3. The line is shown on the marker automatically. You can adjust the position by dragging the
line with mouse.
4. Click 【Print Marker】—【MultiLine Marker Preview】.
5. You can view the printed effect with separated page.
284
RICHPEACE MARKING SYSTEM
Define Stripes
Function
This command is used to define the stripes, grids, stamps or imitating design. When you want
to place one piece in material with one specific design, and you also hope this specific design is
in the specific position of the piece, you can use the command 【Define Stripes】. This
command can let ther pieces be cut correctly to ensure the specific design is complete.
Operation
Check quick accidence.
【Stripe Definitions】parameter instruction:
:
【 X】
This value is used to define the beginning of stripe (horizontal) in the X direction; it begins with
the left side of marker.
【 Y】
This value is used to define the beginning of stripe (vertical) in the Y direction; it begins with the
topside of marker.
【Horizontal distance】
It can be used to input the distance between two horizontal stripes
【Vertical distance】
It can be used to input the distance between two vertical stripes.
【Horizontal angle】
It means the inclination between one stripe line and the horizontal line. We define the
counter-clockwise direction as the positive direction.
【Vertical angle】
It means the inclination between the other stripe line and the vertical line. We define the
counter-clockwise direction as the positive direction.
285
RICHPEACE MARKING SYSTEM
【A, B, C, D】
It is another way to define the stripe.
【Define Stripe Marks】parameter instruction:
:
【Pattern】
It is used to show and select the style name for the loaded piece, this name has been input in
【Piece Information】of DGS.
【Size】
It is used to select the size with this defined stripe mark.
【Add】
It is used to add a new mark for stripe adjustment. Click it to popup the dialog box 【Add mark】,
(refer to fig. as below), then input the mark name and tick 【horizontal】---【adjust】and
【vertical】---【adjust】, finally click 【Ok】.
【Edit】
It is used to alter the stripe mark. Click it to popup the dialog box 【Edit a mark】, you can edit
the selected mark again here.
【Delete】
You can delete the current selected mark by selecting it then clicking this command.
【Clear】
You can click this button to delete all stripe marks.
【Add a mark】parameter instruction
286
RICHPEACE MARKING SYSTEM
【Name】: You can input letters or numbers to name a mark.
【Horizontal】indicates the horizontal attributes of the mark,Select 【Set offset】,Need to input
distance with original point in 【offset】
Note:
:
Select【Set offset】,When strip, Sign must match seted place, If do not select,Pattern put
to workarea second time will strip basing on first pattern.
【Vertical】
Same as horizontal, Difference is vertical
Note:
:
You must specify the same serial number (stripe mark), notch or button type for the matching
points sewn together. For example, if the front piece and back piece need be sewn together,
you must add the same notch and specify the same serial number for the matching position
(such as the matching position both in front and back waist lines). If you want to sew a side
pocket on the right of front piece, you must add one internal hole on both the front piece and
side pocket respectively and specify the same serial number of the stripe mark. Then, while
the first piece is placed on marker, the second piece will be decided its position to be placed
according to the first one
Automatically all pieces with the same mark serial number will be placed in the right place on
marker according to the first piece.Stripe adjustment doesn’t work during automatic marking.
Align
Function:
It is used to align the two selected pieces according to these commands.
Operation:
Click the blank on marker, and drag a rectangle marquee to select several pieces.
287
RICHPEACE MARKING SYSTEM
Click 【Marker】——【Align】, select any of modes as required, such as 【Left】, 【Right】,
【Top】, 【Bottom】, 【Horizontal Center】, 【Vertical Center】.
Tick the required modes, the selected pieces will be aligned according to these modes.
Left
right
Top
vertical center
Bottom
Rearrange Auxiliary Marker
Horizontal center
F3
Function:
Arrange Auxiliary pattern according to size
Operation
Click 【Maker】—【Rearrange Auxiliary Marker】, pieces on the Auxiliary Marker will align
automatically according to size.
Note:
:
Only used in Auxiliary marker.
Refresh
F5
Function
It’s used to clear the useless points created during running this program.
Operation
Click 【Marker】——【Refresh】or click F5
288
RICHPEACE MARKING SYSTEM
Options Menu(O)
(O)
Function:
:
This menu contains some commonly used show/hide commands. (see fig. as above)
For the following items:【Parameter】,【Limit rotation】,【Limit flip】,【Round after rotation】
,
【Colors】and 【Fonts】, you can find the corresponding shortcut icons in utility toolbar. Please
refer to the detailed instruction introduced before.
Adjust Stripe
Function:
:
This command is one show/hide command to be used for adjusting stripe position for the
material with stripes and grids.
Operation:
Click 【Options】——【Adjust Stripe】to tick for the adjustment of stripes and grids.
Tip:
The command Stripe definition in marker menu can be used to define the intervals between
stripes or grids.
Show stripe
289
RICHPEACE MARKING SYSTEM
Operation:
Click 【Options】and tick 【Show stripe】.
Show Base line
Function:
:
It is used to show or hide the base line on marker.
Operation:
Click to tick 【Options】——【Show Base Line】, and click again to cancel the tick
Show Marker Text
Function:
:
It is used to show or hide the material pattern on marker.
Option:
Click the 【Options】and tick 【Show Marker Text】then you can show or edit marker text.
Show Marker’s Pattern
Function:
:
It is used to show or hide the material pattern on marker.
Operation:
:
Click the 【Options】and tick 【Show Marker’s Pattern】, and click again to cancel the tick.
Show Piece’s Pattern
Function:
:
It is used to show or hide the material pattern on piece.
Operation:
:
Click the 【Options】and tick 【Show Piece’s Pattern】, and click again to cancel the tick.
Piece on Marker
Function:
This command is used to show the specific information on pieces or export them together with
files. All selected information you want to export will be shown in the screen.
Operation:
1. Click 【Options】——【Pieces on marker】, or press the shortcut key Alt+O+D to popup
the dialog box 【Show pieces on marker】.
2. Tick some options and click OK then some information related to the selected options will
be shown in the screen and exported together with the files.
290
RICHPEACE MARKING SYSTEM
【Show pieces on marker】parameter instruction:
:
【Piece】:
【Border】
It is to output the marker by printer and plotter with border line. This option is suggested to tick.
【Virtual Border】
This option is used to control to show/off the buffer figure on the screen. You can export pieces
with all attributes set here by a plotter. If you want to export the buffer figure through plotter, you
should tick this option.
【Fill color】
It can be used to fill pieces. You can change the color through the command 【Color】in
【Option】menu.
【Color of set】
Ticking this option then the system will show you the piece color according to set. On no ticking,
it will show you the piece color according to size. You can alter the color of set and size through
the command menu 【Color】.
【Weave line】
It means to show the weave line by ticking this option, or hide it without ticking this option.
【Auxiliary line】
It means to show auxiliary line by ticking, or hide it without ticking this option.
【Text】
It means to show the texts on pieces that input through text tool in PDS or GGS by ticking, or
hide them by no ticking.
【Internals】
Drill, Button, Notch, Dart, Button Hole, Cutting line and Pleat:
You can show and export the internals like drill, button, notch, dart, button hole, cutting line and
pleat by ticking them or hide them without ticking.
【Mode】
】Option:
【Draw】
Select, Will show drill or notch mode etc in 【Internals】draw Property.
291
RICHPEACE MARKING SYSTEM
Note: Internals show in which way, Can define in 【piece】-【Internals】
【Cut】【Drill】and 【Drill M43,
,M44,
,M68】:
Select, Will show drill or notch mode etc in 【Internals】draw property.
【Description】
】
You can click the arrow slider following the textbox to get the pull-down list and tick the items
you want to show above or under the weave line. You can also directly input text or the code of
each command in textbox. The texts or items you selected will be shown on pieces.
【Reverse Piece Mark】
Select, You can see reverse marker , Like REV, When nesting, You can see reverse pieces
show reverse sign.
No REV
input REV
【Font on Woveling Upwards always】
】
Tick this option, the font on the weave line is shown always in upwards direction. Non tick, the
font is shown in the opposite direction.
Select
Unselect
Toolbar and windows
292
RICHPEACE MARKING SYSTEM
Function:
:
It is used for controlling toolbar show or not
Operation:
Click【option】-【Toolbar and windows】-Select name of different toolbar,It will show,
Otherwise will close,Default is select.
Define material toolbar:
It is used for define material toolbar size.
Operation:
:
Click【Option】Menu--【toolbar and windows】--【Define material toolbar】,Input a number
In dialogue table, Click【Ok】
Auto save
Function:
:
It is used for saving command.Different is that this command can set according to time,
Save file according to original path and file automatically to avoid power off or other
File lost.
Operation:
:
1. Click【option】--【Auto save】,You can see【Auto save】dialogue table,Select【Enable
auto save】;
2. Input time in 【Interval】,Click【OK】;
3. If your marker already saved, Marker will save according to original path and file name
when time get to,
4. If did not save before, Will appear save as dialogue table, Select path, Click save.
Custom toolbar
293
RICHPEACE MARKING SYSTEM
Function:
:
Add custom toolbar.
Option:
:
1.Click 【option】
】-【
【Custom toolba】
】,You can see above dialogue table;
2.Select arrow on the left corner,Select Customize toolbar option your want to set;
3.Select icon on the right side which will add;
4.Click【add】,Icon will appear on custom;
5. Click 【upward】
、【Downward】
】,Can move selected tool up or down;
6. Click【
【ok】
】;
7. After defining toolbar,Right click on any toolbar,You can see following picture;
Select any custom toolbar will appear.
294
RICHPEACE MARKING SYSTEM
Nesting menu(N)
(N)
It is including related nesting command.
Stop
Function:
:
It is used for stoping auto nesting program.
Operation:
1. Click 【Nesting】——【Start AutoNesting】.
2. If you want to stop the nesting process, you can press 【Nesting】——【Stop】.
3. It will come out the dialog box 【Check solution】.
4. If you want to continue the nesting, click Nesting——Start AutoNesting.
Start AutoNesting
Function:
This command is used to start automatic marking.
Operation:
:
1. Click 【Nesting】——【Start AutoNesting】.
2. When completion, it will come out a dialog box of 【Check Solution】.
3. If some pieces have already put on the marker, system continues to align the remained
pieces and will finish nesting if you don’t stop.
Group auto nesting
Function
It is used for cutting plotter, Make group marker according to paper size
295
RICHPEACE MARKING SYSTEM
Operation:
:
1. Click【nesting】--【Group auto nest】;
2. Input group and internal in dialogue table;
3. Click ok.
Setup Parameters
Function:
:
This command is used to set 【Speed】for automatic marking. You can limit the whole automatic
marking process according to the settings in this dialog box before starting your marking.
Note:
:
At normal or slow status, 【Fill Hole of nested piece】effect.
【Auto Nesting Setup】parameters instruction:
【Fill Hole of Nested Pieces】: Tick this option, in the 【Normal】and 【Slow】speed; some
little pieces are inserted intelligently in the hole between pieces for a nested marker.
Time nest
296
RICHPEACE MARKING SYSTEM
Function:
:
It is used to set up the time and Efficiency when nesting.
Operation:
Click【Nesting】--【Time nest】
Instruction:
:
Select【Apply and Continue】,If get to set efficiency, System will nest continuousely ,
It will appear the highest efficiency marker,Select【Apply and Exit】,If get to set efficiency,
System do not make marker again.
Duplicate All
Function:
While in manual marking, some pieces have been put on marker and you want to align
remainder pieces refer to the completed parts. You can use this command to mirror and copy
the position for each remainder piece.
Operation:
::
1. Select
, and then double click pieces in piece list box to place them on marker, move
them to the right position.
2. Click 【Marker】——【Duplicate All】, the remaining piece will be completed according to
the previous pieces.
3. If there are incomplete sets, a dialog box will be popped out to query if you continue
duplicating the remainder pieces. Clicking 【Ok】to continue or click 【No】to stop
duplicating.
4. If you can not use this function to duplicate pieces, as to the following situation, you might
notice it
A:Click【Not duplication when insufficiency】in【Parameter】—【Parameter of Nesting】,
then the warning message of 【Piece quantity is not enough】appear when you click
【Duplication All】. If you want to carry out this function successfully, you should add the
pieces 【Quantity】and 【Sets】in 【Order and Marker Marking】by clicking
. Then execute
this command again.
B:Non tick 【Not duplication when insufficiency】in 【Parameter】—【Parameter of
297
RICHPEACE MARKING SYSTEM
Nesting】, then the warning message of 【Piece quantity is not enough】appear. Click 【Yes】,
then the pieces are duplicated, but the quantity in the 【Size List】will represent minus count. If
you want to calculate the material usage, it is better to add the quantity for the pieces, otherwise
the calculation will be wrong.
Duplicated Reverse All
Function:
:
Select this option to make remained pieces aligned referring the completed parts and laid on
the marker at 180 degree.
Operation:
:
After aligning some parts, click 【Nesting】—【Duplicated Reverse All】, then duplicate the
remainder pieces in the same nesting status and they are laid on the marker at 180 degree as
well. Others, you can refer to Duplicate All
Duplicated Selected
Function:
:
Select this command to make remainder pieces for selected pieces to align referring the
competed pieces.
Operation:
:
After aligning some parts, click
or Ctrl +
to select the reference pieces, then pick out
【Nesting】—【Duplicated Selected】to duplicate the remainder pieces by the same nesting
status and they lay on the marker flatly.
Duplicated Reverse Selected
Function
Select this command to make the remainder pieces for selected pieces aligned referring to the
completed parts, and laid on the marker at 180 degree.
Operation:
:
After aligning come parted, click
or Ctrl +
to select the reference pieces. Then click
【Nesting】—【Duplicated Reverse Selected】to duplicate the remainder pieces by the same
298
RICHPEACE MARKING SYSTEM
nesting status and lay on the marker at 180 degree.
Rotate 180 Degree for All Piece of a Set
F4
Function:
:
Select this command to rotate all pieces of a set for the selected pieces at 180 degree.
Operation:
:
1. Select on pattern on marker
2. Press F4 or click 【Nesting】—【Rotate 180 degree for all piece is a set】
Report
Function:
It shows that the current marking solution such as efficiency, complete sets, plies, size and
quantity of one set, etc. (see Fig. as below)
Operation:
During or after marker making, click 【Nesting】——【Report】to check the current marking
solution. Click 【Ok】after you view it.
Supernest
Function:
:
Supernest efficiency is higher than Manual nesting in short time.
Operation:
:
1. Load pattern file, Set marker width;
2.Click【Nesting】Menu-【Supernest】,You can see 【Set supernest】dialogue table;
299
RICHPEACE MARKING SYSTEM
3.Input 3 or ten minutes;
4.Click【OK】,Start making marker.
No avoid color shade
【Set supernest】Parameter instruction:
:
Time:It is used for seting nesting time.
Select【Efficiency】、Select【Apply and Continue】,When efficiency get to set efficiency,
Will nesting continue;
Select【Efficiency】、Select【Apply and Exit】,When efficiency get to set efficiency, Will exit
And do not nest.
【Avoide color shade】
:Select this option, There are three type, Avoid horizontal color
shade、Avoid vertical Color shade、Avoide mixed color shade;
【Allowed slope】:Select this option, 【Slant angel allow】In 【Piece info】can effect;
【Between pieces overlap allowed】Select this option, different set can interest eachother;
pieces overlap allowed
300
RICHPEACE MARKING SYSTEM
Do not select Pieces overlap allowed
【Avoide horizontal color shade】:Select this option,Nesting from left to right See above
picture;
【Avoide vertical color shade】
:Select this option,Nesting from top to bottom;
【Mixed color shade(Portrait X)】: Select this option, All the pattern nesting according to
way 1 of x set, From left to right. Following portrait is 2 set.
【Only nesting main】
: Select, Only nesting main marker pattern, Do not select,Nest
together with pattern on piece list;
【Clear aided marker】:Select,Clear aided marker pattern and make marker together with
other pattern when use supernest, Do not select, Aided marker do not make marker when
use supernest.
【Marker length】:Select,When actual marker length is more than set marker, Will make
marker continuously.Other wise ,Do not make marker when more than set marker.
301
RICHPEACE MARKING SYSTEM
Cutter Menu(C)
(C)
【Edit cutting order】
】already introduce in marker toolbar2
Auto Set cutting Order
Function:
:
Cuting order edited manual, This command can creat cutting order again.
Operation:
:
Click 【Cutter】--【Auto set cutting order】,Can creat cutter order again, Auto cutter
Can cut according to this order.
Set symmetry cut
Function: It is used for setting pattern symmetry cut property.
Operation:
:
Click【
【Cutter】
】--【
【Set symmetry cut】
】,U can see set symmetry cut dialogue table,Click
Arrow to confirm start point.
Note: 1.If u donot want to set symmetry cut property,Click reset.
2. Click 【set parameters】
】-【
【plot or print】
】-【
【symmetry cutter】
】,When file is
Export to auto cutter, This pattern will be symmetry cut.
302
RICHPEACE MARKING SYSTEM
Calculate Menu
Calculate material weight
Function:
:
It is used to calculate the weight for used material.
Operation:
:
1. After pieces complete aligning, click 【Calculate Material Weight】.
2. come out the dialog box to input the 【Weight per Unite】. System will calculate the weight of
material automatically (width*length*Plies* weight per unite).
Calculate Efficiency and Marker Length
Function:
:
It used to calculate the marker length as per the efficiency.
Operation:
:
1. Click 【Calculate】-- 【Calculate Efficiency and Marker Length】.
2. Input the Efficiency. System will calculate the material length as per the efficiency.
303
RICHPEACE MARKING SYSTEM
Cap Nesting Menu
Setup
Function:
It is used to setup the parameters of the pieces of cap, here, most parameters are similar with
the dialog of 【Order for Marker Making】, including counts of each size, quantity of pieces,
material and mode of nesting, you can define nesting mode for each mode.
Operation:
:
Click 【Cap Nesting】—【Setup】to get the dialog box of 【Para Setup】. You can input the
【Quantity】, 【Sets per Unit】in the dialog box and nesting mode under Mode in the right
position, such as Normal, Reverse, and Interleaving.
Sets per unit:
: Can set freely, How much set is one unit,1、6 or 12 ect;
Count:
: Sets in “order for marker making” Divide “sets per unit”,For example, Sets is 60 quantity,
“sets per unit”is 5;
Part:It shows pattern name;
Quantity:
:How much pattern in one sets;
Materail:
: Materail type;
Mode: Select in Normal、
、Reverse 、interleaving、
、@ Reverse、
、@ Interleaving.
Estimate Material
Operation:
:
Click 【Nesting】—【Estimate material】to popup a dialog box, you can define the 【Unit】
304
RICHPEACE MARKING SYSTEM
and 【Wastage】, when finish, click 【Calculate】, then you can calculate the material usage
for each size, then click 【OK】.
Pattern: Show style name and size;
Count:
:Appear quantity in above“set”option;
Width:
:Material width;
Part:
:Show pattern name;
Mode: Appear nesting mode in above “set”option
When mode is normal:
Count: Maximum pattern quantity in one line appointed width;
Length:Marker length minus less one line marker length;
Like above, Five line marker length is 98.9 cm, Four line marker length is 79.2cm, So
Length is 19.7(98.9cm-79.2cm),Width is maker width minus less on row marker width;
305
RICHPEACE MARKING SYSTEM
Like above picture, Nine row width is 121.45cm, Eight row width is 108.28cm, So width is
13.17cm(121.45cm-108.28cm)
When mode is reverse
Count:Two line pattern quantity in appointed width;
Length:Marker length minus less two line marker length divide 2;
See above picture,Six line length is 86.23, Four line width is 57.49, So length is 14.37cm
(
86.23 − 57.49
2
),
Width is marker width minus less one reapt width;
See above picture, First marker width is 88.12cm, Second less one reapt is 78.33cm,
So marker width is 9.79cm(88.12cm-78.33)
When Mode is interleaving
Count:One line pattern quantity in appointed width;
Length;One line marker length;
306
RICHPEACE MARKING SYSTEM
Width:Marker width divide maximum pattern quantity in one line;
When mode is @ interleaving
Count: Two lines pattern quantity in appointed marker width;
Length: Even line marker length minus less two line marker length
See above picture, First marker length 117.9, Second marker length is 99.45cm,
So marker length is 18.45cm, Width is marker width minus less one reapt marker width divide
2;
When mode is @ interleaving
Count:One line pattern quantity in appointed marker width;
Length:Even line marker length divide line;
Width: Two line marker width minus less one line marker width;
307
RICHPEACE MARKING SYSTEM
See above, First marker width is 122.61 cm, Second marker width is 109.3cm, So marker
Width is 13.31cm (122.61cm-109.3cm)
Consume:
At length unit, Length divide count.
At area unit, Length divide count then multiply width;
Waste:
:Can input material waste;
Material consume: One material consume in one size;
Comment:
:Can input special comment;
Calculate:This command is used for calculating material length;
Setup:
:
Interval:
: It is used for seting internal or no internal in width direction;
Piece: It is used for selecting available length or area unit;
Single piece consum:
:Select, It is one single pieces material consum, Do not select, It is one
set pattern piece consume;
Material:
:You can select available length or area unit according to factory requirement;
To file:
: When export.txt file, Can select output Result;
308
RICHPEACE MARKING SYSTEM
Unit:
: It is used for selecting area unit or length unit in table;
Print set:
:It is used for seting page border、Printer type and print direction;
Preview:
:Preview before plotting
Print:
:It is used for ploting estimate material;
Export file:
: Can export *.txt file, Can check result at any computer;
Close:
:Close estimate material window;
Nest
Function :
When use cap nesting, Nest all the pattern.
Not Reverse piece:
: No distance nest when Mode is set Normal、interleavig、@Interleavig,Also
can select have distance;
Reverse Piece: It is refer to Mode is reverse、@reverse, Can select no distance nest;
Nest intergrity pieces: The remine pieces did not form on line, Can select nest together or nest
at last.
Not one line nest
309
RICHPEACE MARKING SYSTEM
Not one line at last
Operation:
:
Click【Cap nest】--【Nest】, You can define the 【Not Reverse Piece】or 【Reverse Piece】.
Then click OK, system can do the nesting automatically.
Help menu(
(H)
)
About
Function:
:
Check version、VID、Copy right etc.
Operation:
:
Click【Help】--【About】,You can see following dialogue , After checking, Click【OK】.
310
RICHPEACE MARKING SYSTEM
311
RICHPEACE MARKING SYSTEM
Conclusion
Thanks for reading the garment CAD user manual of Richpeace. This is a user manual
especially for Richpeace garment CAD. If there are some operations in this book are different
from the practical operations during using this software and hardware, you should refer to the
practical operation. If some functions introduced inside this manual vary from real functions, it is
possibly because you are using the different version from the book stated. Richpeace Company
reserves the final interpretation right of usage of software and hardware. If you have any
questions, please contact us by the following ways:
Website: Http://www.richpeace.com
Address: 21 F, Lian Tai Mansion, Zi Zhu six road, Zhu Zi Lin, ShenNan Road, Fu Tian District,
Shen Zhen, China.
Telephone: +86 755-82538629
Fax:
+86 755-82538641
312