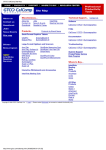
1
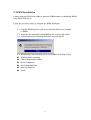
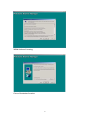
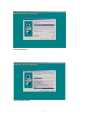
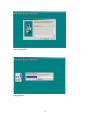
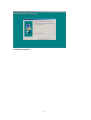
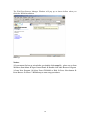
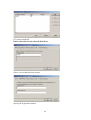
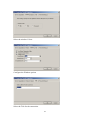
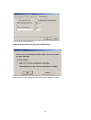
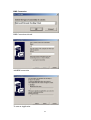
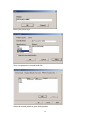
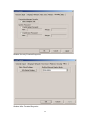
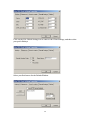
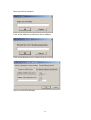
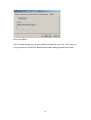
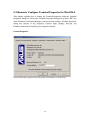
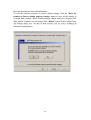
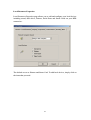
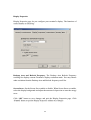
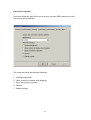
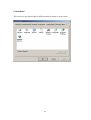
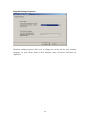
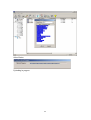
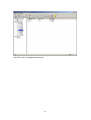
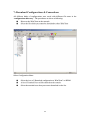
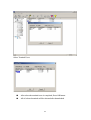
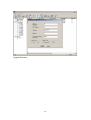
WinClient® Remote Manager USER’S MANUAL Revision: WRM 2.1 –2002/10/22 Copyright This manual and any accompanying software and firmware are copyrighted. No parts of this publication may be reproduced, stored in a retrieval system, or transmitted, in any form or by any means, electronic, mechanical, photocopy, recording, or otherwise, without prior written consent except for copies retained by the purchaser for backup purposes. Trademarks Product and company names mentioned in this manual are for identification purposes only and may be trademarks of their respective companies. Microsoft and Windows are registered trademarks of Microsoft Corporation. ICA, MetaFtrame, WinFrame are registered trademarks of Citrix Systems, Inc. Disclaimer The information described in this manual is intended for instructional purposes only. The Vendor reserves the right to revise this manual and all accompany software, firmware without obligation to notify any person or organization of the revision or change. The Vendor accepts no responsibility or liability for errors or misleading information that may be contained in this manual. Notice: The changes or modifications not expressly approved by the party responsible for compliance could void the user's authority to operate the equipment. 2 CONTENTS 1: Introduction ............................................................................................................... 4 1: Features........................................................................................................... 4 1.2: System Requirements .................................................................................. 4 1.3: WinClient Firmware Version Requirements................................................ 4 2: WRM Installation...................................................................................................... 5 3: Start Up ....................................................................................................................11 4: Discover WinClients ............................................................................................... 12 4.1: How to Add IP Address Range.................................................................. 13 4.2: Discover WinClients on the Network........................................................ 14 5:Shadow Configurator ............................................................................................... 16 5-1: Remotely Add / Edit / Delete Connections ............................................... 16 5-2:Remotely Configure Terminal Properties for WinCE 3.0 .......................... 29 5-3:Remotely Configure Terminal Properties for WinCE4.0 ........................... 39 6:Upload Configurationsn & Connections.................................................................. 61 7: Download Configurations & Connections .............................................................. 64 8: Wakeup / Power off Winclient ............................................................................. 66 8-1: Wakeup on Lan.......................................................................................... 66 8-2: Power-off winclients remotely .................................................................. 67 9: Remotely Upgrade firmware to single/Multiple clients.......................................... 69 10 : Winclient Remote Manager “ Hot Keys ”............................................................ 71 3 1: Introduction WinClient Remote Manager, WRM, is a system management tool that can be used to manage AXUS WinClient series. In order to achieve the ideal goal of simplify our computing environment, AXUS Microsystems Inc. designed WRM to help administrators to serve more users effectively. WinClient Remote Manager as a central management tool for its Thin Client products networking. Administrators could help the users to operate his/her Thin Clients remotely, effortlessly and centrally. Its friendly graphic interface not only enable administrators to learn the course within 10 minutes, but also provide its user with comfortable functionalities of “IP manager”, “configuration manager”, “F/W manager”, and “wakeup on LAN”. In addition, “thin client refresh support” help administrators to offer real time service to all end users. 1: Features Discover Winclients on the network. Easy to manage/control the Winclients on remote site. Remotely upload client’s properties & connections. Remotely download “properties” and ”connections” to single/multiple clients. Upgrade Firmware to single /multiple clients via FTP on WRM Remote duplicate connections & properties to single/multiple Winclients. Remotely wake-up/power-off the single/multiple clients . 1.2: System Requirements WinClient Remote Manager must be installed on Microsoft NT Terminal Server or Windows 2000 operating systems 1.3: WinClient Firmware Version Requirements WinClient Remote Manager is a system management tool that can be used to manage AXUS WinClient series. In order to utilize the full features of WRM, it is highly recommended that upgrade WinClient firmware version to 1.3.2 or higher. 4 2: WRM Installation Contact with your WinClient vender to grant you WRM software or download WRM from AXUS FTP Server. Follow the procedures below to complete the WRM installation. 2-1 Copy the WRM zip file to your server hard disk Director for example C:\WRM. 2-2 Locate the file and double click WRM zip file to extract the zip file. 2-3 Follow instructions of WinZip Wizard to extract the zip file. 2-4 WRM Setup wizard will help you to set up WRM. Following is steps. WRM Software Licensing Choose Destination Location Select Component Select Program Folder Start Copying Files Finish 5 WRM Software Licensing Choose Destination Location 6 Select Component Select Program Folder 7 Start Copying File Copying Files 8 Installation Completed 9 The WinClient Remote Manager Window will pop up as shown bellow when you finish the WRM installation. Start Up Notices *If you cannot find set up wizard after you double click setup file . please set up from Windows Start Menu Æ Open Control Panel Æ Double click Add / Remove Program *Create New Program Æ Select From CD-ROM or Disk Æ Press Next button Æ Press Browse Æ select C:\WRM\setup to start setup procedures. 10 3: Start Up After WRM installation is completed, please run WRM program on Microsoft Windows 2000 or Windows NT4.0 TSE then you will get following features. Add a new IP address range. Remote Upgrade WinClient’s firmware. Upload configurations from WinClient. Download configurations to WinClients. Remotely Power on/Wakup on Lan WinClients ( TC-320 and TC800 series only). Remotely Power off WinClients ( TC-320 and TC800 series only). Discover WinClients on the network currently. Remotely setup WinClient’s properties. Remotely setup WinClient’s connections. WinClient Remote Manager 11 4: Discover WinClients Administrator could set the managed IP range of thin clients or group the thin clients. 12 4.1: How to Add IP Address Range Select the icon of “Add a new IP address Range”. Entry starting IP address & ending IP address. Add IP address Range 13 4.2: Discover WinClients on the Network While WinClients are on the network, the refresh function could help administrator to maintain the Ethernet Address of every clients within managed IP range. Select the icon of “Refresh Current Snapshot”. WRM start to search WinClients on that defined IP address range. 14 4.3:Grouping The main function of Grouping is to divided users into group. There maybe a lot of users login to the Thin Client at the same time. However, they may not all using the same models. Thus, it will be more convenient for them if they can be divided into groups. Click on the others icon to add your own group Click the right button of the mouse and then select “add new group” to insert your group name 15 5:Shadow Configurator Administrator can use Shadow Configurator to create a “sample” WinClient remotely. The sample configurations could be duplicated to other WinClients through Upload and Download Configurations and connections in WRM. There are two versions of the WinCE firmware available on the Clients, WinCE 3.0 and WinCE 4.0(WinCE .Net). The configuration for both are described in chapter 5-2 and 5-3. 5-1: Remotely Add / Edit / Delete Connections Discover Winclients on the network. Select a WinClient which you have searched before Select the icon of “connections setup “ to Add/Edit/Delete connections for the selected WinClient. The GUI of Shadow configurator is very similar to that of local WinClient. They are shown as follows. Add Connections for the selected WinClient Shadow Terminal Connection Manager Select the type of connection form the list 16 ICA Connection selected Choose a connection type for the remote application WRM can’t browse the Critrix server automatically. You have to key-in the name/IP of Citrix server on dialog box. Add ICA connection 17 Specify the command line and working directory Specify the application window Set your SoundQuery 18 Set your SpeedScreen Set your Encryption Level FireWall Settings 19 ICA setup completed Edit Connections for the selected WinClient Select a server that has been created Specify the Application details 20 Select the window Colors Configure the Window options Select the Title for the connection 21 Select the Firewall Settings Startup Connections for the selected WinClient Choose one of the options for the connection you have created 22 RDP Connection RDP Connection selected Add RDP connection To start an Application 23 RDP connection created Editing the RDP connection 24 Terminal Emulator Connection Add Emulator connection 25 Insert the Host Name, Terminal ID, Terminal and the Port # Terminal Emulator Connection Created 26 Internet Browser Connection Add Internet browser connection Insert the description for your Internet Browser Connection 27 Internet Browser Connection Created After the connections has been add/edit completely, press “OK” button to save connections into WinClient. Winclient will reboot when connections are saved. 28 5-2:Remotely Configure Terminal Properties for WinCE 3.0 Discover Winclients on the network Select a Winclient which you have searched before Select the icon of “Terminal properties setup” Shadow Terminal Properties Administrator can modify the properties of WinClient on remote site. Shadow General Terminal Properties By click on the Reset will set the terminal back to its default settings 29 Shadow Input Terminal Properties Shadow Display Terminal Properties 30 Shadow Network Terminal Properties Insert your Specify IP address 31 Click on the Advance Network icon to insert your advance network settings Shadow TimeZone Terminal Properties 32 Shadow Printers Terminal Properties Select your printer from the list Or click on the Other icon to create your own printer 33 Insert your printer type Your own printer now created in the list Select the created printer as your default printer 34 Shadow Security Terminal Properties Shadow Misc Terminal Properties 35 Click on the ICA Global Setting icon to enter to the Client Settings, and then select your prefer Hotkeys Select your Preferences for the Default Window 36 Insert your Server Location Click on the Add icon to add a new Server Address Click on the Rename icon to rename the Server Group Select your FireWall Settings 37 Insert your PNLite After Terminal Properties has been modified completely, press the “OK” button to save properties into WinClient. Winclient will reboot when properties were saved 38 5-3:Remotely Configure Terminal Properties for WinCE4.0 This chapter explains how to change the Terminal Properties using the Terminal Properties dialog box. Invoke the Terminal Properties dialog box by press “F2” key while Terminal Connection Manager is the most front window. Terminal Properties dialog box consists of five properties, General, Input, Display, Network, and Firmware that can be invoked by press respective buttons. General Properties General Properties page describes the general information of WinClient. 39 Reset the Terminal to Factory Default Settings To reset the terminal properties to factory default settings, click the "Reset the terminal to factory default property settings" button to clear all the settings in on-board flash memory. When System Settings change dialog box display, click "Yes" button. Confirm erase all settings Click “Reboot” button in the Confirm Erase All Settings dialog box. All data in flash memory will be erased, including all connection configurations. 40 Local Resources Properties Local Resources Properties page allows you to add and configure your local devices including sound, disk drives, Printers, Serial Ports and Smart Cards on your RDP connection. . The default are set as Printers and Smart Card. To add local devices, simply click on the items that you need. 41 Display Properties Display Properties page let you configure your terminal’s display. The functions of control buttons as following: Desktop Area and Refresh Frequency: The Desktop Area Refresh Frequency scrolling list displays current Terminal’s display resolution mode. You may choose other resolution from the Desktop Area and Refresh frequency scroll list. Screen Saver: Set the Screen Saver enable or disable. When Screen Saver set enable, select the display background and adjust the amount of elapse time to start the energy saver Click “OK” button to save changes and quit the Display Properties page. Click “Cancel” button to quit the Display Properties without save changes. 42 Experience Properties Experience Properties page allows you to choose your own RDP connection in order to maximize the performance. The connection allow the following functions : 1. 2. 3. 4. 5. Desktop background Show contents of window while dragging Menu and window animation Themes Bitmap caching 43 Control Panel This section is specially design for different kind of setting on your clients. 44 Regional Settings Properties Regional setting properties allow you to change the locale and the user interface language for your clients. Such as how numbers, dates, currencies and times are displayed. 45 Network and Dial-Up Properties This properties allows you to set up the configuration for your Network and Dial-up connections. Make New Connection properties contain 3 different types of connections. 1. Dial-Up Connection Dial-up connection page let you configure your Modem and dial up to a RAS Server. The communication between the system and the clients is connected through dial-up modem. 2. Direct Connection The communication between the systems and the clients is connected through a serial port via LAN connection. 3. Virtual Private Network Connection The communication is connected through an established virtual channel between the system and the client itself in the entire network. Date will be encrypted when being transform between the two. 46 Network for RTL8139 LAN Card properties: TCP\IP Settings. Set up your assigned IP address or use the ‘DHCP’ function to assign the client’s IP address and configuration of your clients. IP Address Settings: Name Server Settings 47 Printers Properties Printer Properties support the local printer installation and network printer mapping. Choose the local printer port and then press add icon will enable users to choose all kind of printer driver. Select the printer port that you wish your printer to use. 48 If you are unable to locate an printer type from the list provided, check the ‘User Defined‘ item to make an printer type of your own. Assuming our printer’s name to be AGFA-AccuSet v52.3 , type it o the column provided and then press the next button. 49 The system will provide the function of whether to make the printer is default. The wizard finished. 50 You have now successfully configured your own printer. 51 Keyboard Properties Keyboard Properties page allows you to set up the configuration of your keyboard. 52 System Properties System Properties page provide you the general information of the client. Those information includes: General : Device Name Copyrights 53 Mouse Properties Keyboard Properties page allows you to set up the configuration of your keyboard. 54 Volume and Sounds Properties Volume and sound properties page allows you the make an adjustment on your client’s sound qualities. 55 Date and Time Properties This section is specially design for different time zone purpose, as one may have such need for the time requirement. It will enable user to set up the time for the local requirement. 56 Security Properties Security Properties page enable the administrator or user to hide Configure Tab in Terminal Connection Manager and set up system passwords. These properties provide administrator or users more security level choices to access WinClient Hide Configure Tab: Once it was selected, Configure Tab in the Terminal Connection Manager will be hidden. User can not Add/Edit/Delete connections. System Password: There are two types of password protection supported: 1. Setup Password is provided as a protection for authorized user to setup WinClient Terminal Properties. Once set, a Setup Password input dialog will be prompted while user presses F2 at Terminal Connection Manager program. 2. User Password is provided as a protection for authorized user to use this WinClient device. Once set, a User Password input dialog will be prompted at the system boot. WARNING: Please be aware that once either user or setup password is set, and in case you forget password, there is no way to recover it without the original password except upgrading firmware image from boot ROM, please contact with your local distributor in case you encounter this problem. 57 Miscellaneous Properties ICA Global Setting: Note: Refer to Citrix ICA client for Windows CE Windows-Based Terminal User Guide to set up ICA Global Settings. Under ICA Global Setting, users can adjust the following functions according to their needs. HotKeys 58 Preferences Server Location Firewall Settings 59 PNLite 60 6:Upload Configurationsn & Connections WRM can upload configurations & connections from a targeted Winclient remotely. The specific entries of configurations and connections could be saved into a file. The upload procedures are shown as following: Discover the WinClients on the network Select a WinClient which you want to upload Select the icon of “upload configuration from winclient” There are some entries in the menu. Select them and give it a different name then press OK button. 61 Select Entries Uploading in progress 62 Save File to the “Configuration directory”. 63 7: Download Configurations & Connections All different kinds of configurations were saved with different file name in the “configurations directory”. The procedures are show as following: Discover the WinClient on the network Select the file which you wanted to download to other WinClient. Select Configuration Name Select the icon of “Download configuration to WinClient” on WRM. A list of Terminal Users will be showed on the console. Select the terminal users that you want to download on the list. 64 Select Terminal Users After select the terminal users is completed, Press OK button . All of selected terminals will be rebooted after downloaded. 65 8: Wakeup / Power off Winclient 8-1: Wakeup on Lan While the WinClient Remote Manager keeps Thin Client’s Ethernet address, the wake on LAN function could power-on the thin client desktop when it’s power off. The Winclient’s Mac address & Terminal name will be saved in the “MAC address directory”. All of the discovered Terminals were recorded here. Select the WinClient which you want to wakeup .WRM supports multiple selection Select WinClients to Wake Up Press the icon of “Wakeup on LAN” All of the selected Winclients will be power-on automatically. 66 8-2: Power-off winclients remotely WRM can Power-off WinClients remotely. The procedures are showed as following: Discover WinClients on the network Select the WinClient which you wanted to Power-off .WRM supports multiple selection. Select WinClients to Power-off Press the icon of “ Power-off” on WRM to power off the selected WinClients automatically. 67 Click Yes to power-off the system 68 9: Remotely Upgrade firmware to single/Multiple clients WRM could upgrade the firmware to single/multiple WinClients through FTP remotely. The procedures are showed as following: Discover the WinClients on the network Select the WinClients you wanted to upgrade firmware. Select WinClients to Upgrade Press the icon of “upgrade Winclient’s firmware” on WRM After Upgrade Dialog box appeared, please type in FTP server’s IP/Name. Please key-in the name of firmware for FTP pathname. No password (left blanking) Press OK button to upgrade Firmware to selected WinClients. 69 Upgrade Firmware 70 10 : Winclient Remote Manager “ Hot Keys ” Functions Hot keys Functions Hot keys Add IP Address Range Key: F2 Power Off Key: None Change IP Address Range Key: Alt + F2 Refresh Key: F5 Upgrade Firmware Key: F3 Upload Configuration Key: F4 Terminal Properties Key: F8 Setup Connections Setup Key: F9 Download Configuration Key: Alt + F4 Delete Key: Delete button Wakeup On LAN Key: F7 Exit Key: F10 Help Key: F1 71