Download Model:IPcall-100 User Manual Products Advantage It needs to know
Transcript
Model:IPcall-100 User Manual
For Windows2000 /XP /Vista /Win7 User
Ref. IPcall-100-DHCP Ver. 20120423
Products Advantage
l
l
l
l
Call Landline and Cellphones world wide from this Freecall Dongle at Free Cost absolutely to
more than 45 countries. You can use it to make calls wherever you are after accessing to internet.
Now you will save much expensive IDD expenses every year since having this unique USB
Freecall dongle when you are traveling over the World.
It is convenient to be used, simply plug it into any laptop; netbook or desktop PC. Then it will
become an amazing telephone since your PC has connected into internet through CAT-5 cable to
router; WiFi; High speed 3G network..
The appearance User-Interface looks quite simple for easy operation.
High-quality conversation effect, performing the intelligent human-computer interaction function
operation.
It needs to know before usage
l
l
l
This USB Freecall Dongle is guaranteed for free toll unlimited calls within a full year after
purchased. It will be valid within 365 days since it is activated which 10 calls have been made
successfully. You can continue to use the service by paying an annual fee for our server
maintenance in additional years. There will be a pop up ALERT Warning before 30 days of the
expired date to remind you. Please call your local agent whom you bought the IPcall-100 from to
pay for and tell him what your unique S/N which attached on the device packing.
In your current network, if someone is carrying on BT for downloading or large-scale game, may
have certain influence on conversation quality of this machine at the same time. Try to counterchange their usage period.
If you will choose a 3G network to accessing internet, please be sure the 3G network to be high
speed in UPLOAD performance to avoid a poor conversation problem on the receive party.
Normally, the 3G Upload speed will not be lower than 320Kbps (0.32Mbps) at any time for an
acceptable conversation quality. Otherwise, it is highly recommended to use WiFi network for
making calls.
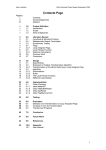
Table of Content
1. INTRODUCTION……………………………………………………………………
1.2. PACKING CONTENT ...................................................................................................................................... 2
1.3. PREPARATION ...................................................................................................................................................
1.4. PORT FOR CONNECTING .....................................................................................................................................
2. INITIAL CONNECTING AND SETTING.........................................................................................................
2.1. GETTING START
2.2. INITIAL SETTING
2.3.Subscribe On Server
3. BASIC FUNCTIONS
3.1. BASIC OPERATION
3.1.1. Dial Rules
3.1.2. Making a call from Calls History
3.1.3. Redial a calll
3.1.4.Add ContactsError! Bookmark not defined.
3.1.5. Contacts Details& Search for a Contact
3.1.6. FREE COUNTRY & DISTRICT LIST
4. TROUBLE SHOOTING
1. Introduction for IPcall-100
1.2. Packing Content
The original packing contains the following parts:
1. USB Dongle x1
2. Instruction manual (May download from the web-site:
http://www.computechnic.com/Download.html
1.3. Preparation
This USB Dongle will work under the Minimal System Requirement:
1. Windows2000 /XP /Vista /Win7 with 1G of Ram and support USB 1.0 or above device.
2. Good quality Headset or Earphone in order to eliminate Echo during conversation.
3. Adjust your Laptop / Netbook / Desk-PC screen
resolution for 1024 x600 or Higher)
4. Your computer is accessing internet before plug-in
this USB dongle. Choose a fastest connection
network if possible. The first choice is connected to a
router by a CAT-5 cable. Second is WiFi. If you
prefer to use 3G network, the performance of upload
speed should be very important for smoothly
conversation. It is required the 3G upload speed not
less than 320Kbps (0.32Mbps) at any time in order to
avoid Sound Interrupted problem on receive party.
5. There is no any mission that for uploading or downloading at the same moment of expecting to
make a call with this USB device.
1.4. Ports for USB Connecting
This USB Freecall dongle is compatible for USB 1.0 / 2.0 port on your PC. When you turn ON the
PC and wait for the PC initializing to be done completely, you can plug the Dongle into either one
USB port.
1.5. Ports for MIC and EARPHONE
Also, the headset with MIC and SPEAKER plugs are recommended to the Audio IN/ OUT ports of
the PC. In some case for using in Desktop PC, you may be required to set the AUDIO source from the
Front or Rear from the PC Panel to match your headset where it is plugged in. In some of Brand of
Netbooks like “HP brand”, you must check the MIC setting in the control panel in order to make a
selection for Internal MIC or External MIC as your current Microphone device. Also you need to
check if the Audio IN/OUT (Speaker / Mic) port is in a same 3.5mm jack or separately in order to
prepare a matched headset to work for the Freecall Dongle. You may find this information from your
desktop PC instruction manual.
2. Initial Connection and Setting
2.1. Getting Start
Before plug-in this Dongle, be sure you are already connecting to internet firstly and did visit any new
web-sites without any problem. Since the Dongle is plugged in, an auto run processing will be activated
and a several pops will appear depend on your windows plat form. You may set the Auto-Run option in the
control panel of Window if you want to let the PC to run the Freecall program itself completely next time.
Also, you have to accept a prompt to accept “Unblock” our Freecall call program when the Window
Firewall pop up in the first time of use. You may ignore other pop-ups and may close them by the way.
Then you will see the main User Interface Dial Key pad appear as below.
If every things are correct, you will see the prompt text “Login Successful” on top. And another prompt
to show “ Please Dial the Number”. That means you have done to subscribe into our server and try to set-up
for your Speaker /Headphone as well as Microphone later.
Note: If “Login Failed” appear, you will not make any calls until a network problem will be resolved later.
2.2. Initial Setting
Before making calls, it is recommended to do some setup
processing step by step as the description below after click the
TAB “Audio set”:
SPEAKER Level:
You may either set this option from the small Speaker Icon in the
system tray of right bottom corner of the desktop screen or click
the “Speaker Volume” in the Audio Set TAB from the dial pad.
Try to set it to Right for a Maximum level when it is initial test
firstly.
MICROPHONE Level:
Be sure the MIC feature will be able controlled by the Dongle,
you need to check if the MIC function working fine in the control
panel of your PC for either Internal MIC or External MIC depend
on what you are using.
Do it with the same similar as Speaker level set from the
Recording Option in the Windows Sound setting or click the
“Microphone Gain” in the Audio Set TAB from the dial pad. Try
to set it to 20~30% level for initial test firstly. In fact, it is not
recommended to set for Maximum in order to avoid too much noises in background if your Microphone
might be very sensitive.
Perform a further Microphone test in the SOUND Device option from the control panel to see if the
microphone is working fine according to the Microphone response level meter when you try to speak to the
headset microphone.
2.3. Subscribe On Server
Since the program of the Dongle is executed completely itself and there is no problem to access to internet,
you will see a message on top under the Tabs with “Login Successfully” means you have done to logon the
gateway server. Now, the PC is ready to dial any toll free calls.
3. Basic Function
3.1 Basic Operation
3.1.1 Dial Rule
Now you can input your desired number fill in the second window box through the keypad, then press
DIAL button. You may also select a country where you will often to call from the first window box.
Call for a Mobile Phone:
‘900’+Country code + Cellphone / Mobile number +
Dial for a Landline Phone:
DIAL
‘900’+Country code + Area code + Landline phone No. +
DIAL
Note:
1. If you have selected a country from the pull-down list, you will no need to dial with the 900
(prefix No + the country code). Just dial the local number in this country only. Of course
there is no problem for dialing if you press all digits as regular dial for international calls
2. Suppose you have joined for a special plan that the specified country may not be found
in the country list, just push the key pad for a complete dial number as the dial rule and
ignore a display “Out of Country List”. In any case, you can ignore what country is
displaying on top if you try to dial with a complete dial number as the dial rule to make
a international call.
To Dial for DEMO calls to Senegal
Please use the “012” prefix no. instead of “900” and then 221 + Cellphone or Landline no. of
Senegal.. For example:
Call Senegal Landline 221- 338-200888
Dial 012221338200888
Dial to other members who are using IPcall-200 or Ipbox-300 in Freecall Community
You can communicate with any other Freecall members if you know their no. Just only press the 8
digits Freecall Number directly. (The unique Phone S/N No of each Freecall unit is printed on it’s
bottom and outside of packing). There is no need to add 900 prefix + country code.
Dial for other Freecall Dongle IPcall-100 / IPcall-400 Mini Freecall phone
You can communicate with any other Freecall members who are using Freecall dongle or mini
Freecall phone when they are on line also. Just dial S/N No. 11 digits Number only (The unique
Phone No of each Freecall Dongle which shown on top line of the dial pad ). There is no need to add
900 prefix + country code.
After does dial, you will see “DIALING” appear and need to wait for a few seconds to get ring back tone.
When a connection is done successfully, a calling timer will start to display for a duration of this
conversation. If you can not get back a ring back tone when a trouble for the current connection after
1minute or no one pick up your call or busy, you will always see a popup to show “Line Busy”. Then press
Hang UP button to disconnect and press Dial once to make a redial.
3.1.2 Make a Call From CALLS HISTORY
Select the History Tab, find a called number from history record list and double click it. Screen will get
back to the Call-Out Tab start to call automatically.
3.1.3 Redial a Call
Every time you disconnected a call after press Hang-UP button, you can make a redial immediately by
pressing DIAL once again. A redial call will be highly recommended to call after 30s of each. (Do not
double click the DIAL button to avoid a wrong alert)
CAUTION: In case you forget to disconnect a previous call and try to re-dial, you will always get a prompt
“Line is busy”
3.1.4 Add a Contact
You can add a contact into the phone book for frequent used. Select the Contacts Tab and fill with
information into each boxes. All of Phone No will be able for searching from the Dial-out page. Therefore,
please fill the phone no which you will often to call into the boxes in order to be searched from the Dial
Pad future.
3.1.5 Contact Details and Search for a Contact
You can find; modify; or delete against the details of each contact in the “Details” Tab. After back to CallOut Tab, you will able to search for a contact from the bottom box. In case you click with the desired
contact, this contact’s phone no will appear in the dialing box on top, then press DIAL key to make a call.
3.1.6 Free Country and District Cover List
Both Cell Phone and PSTN landline Phone are available for the following countries:
North America: USA / Canada
Asia: China / Hong Kong / Singapore / Malaysia / Thailand / India / Indonesia / Plus >
[ Philippine / Vietnam / Pakistan / / Maldives / Sri Lanka / Bangladesh (with a special plan
offerred)]
Other countries and cities for PSTN landline Phone over the World such as:
Asia: Taiwan , Japan , Korea , Australia (Sub-Charge for Cell phone Connection will be Available
with a special plan)
Euro: England (U.K.), France, New Zealand, Denmark, Germany, Italy, Spain, Sweden, Portugal,
Russia, Romania, Kazakhstan, Austria, Irish, San Marino, Poland, Hungary, Switzerland, Greece,
Luxembourg, Belgium, Norway
Middle East:
Cyprus , Israel , / [ DUBAI - SAUDI ARABIA - YEMEN - BEIRUT - IRAN IRAQ - KUWAIT - KAJISTAN - EGYPT (with a special plan)]
South America:
Colombia, Mexico, Argentina (Buenos Aires), Brazil, Venezuela, Peurto- Rico
Africa: [South Africa, including Cellphone with a special plan]
More countries will be added into the list frequently. Please bookmark the link for update the
information from our website http://www.computechnic.com/products-Ipphone-Coverlist.html
4. Trouble Shooting
Many problem may occurred by an improper setting. You may look for an answer from the link as below:
http://www.computechnic.com/support.html


