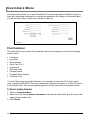
1
Rent Centric V 2.0 User Manual Developed by Rent Centric, Inc. Copyright © 2011 Rent Centric Inc. tm. All rights reserved. Reproduction of this work in whole or in part by any method, Hard copy or digital Distribution is prohibited. Last Update: Friday, June 24, 2011 Table of Contents Introduction.................................................................................................................................1 Login to rent centric ...................................................................................................................2 Navigating Rent Centric .............................................................................................................3 Top Navigation Bar ..................................................................................................................................... 4 Real-time dashboard................................................................................................................................... 5 Quick Menu................................................................................................................................................. 6 Skin Change ............................................................................................................................................... 7 Rent Centric List Navigation ....................................................................................................................... 7 Getting Started Guide.................................................................................................................8 Administration Menu ..................................................................................................................9 Location ...................................................................................................................................................... 9 Configuration............................................................................................................................................. 10 Management ............................................................................................................................................. 30 Companies / Corporates ........................................................................................................................... 32 Rates and Settings.................................................................................................................................... 33 Vehicle options.......................................................................................................................................... 42 Customers Menu.......................................................................................................................44 Find Customer .......................................................................................................................................... 44 Add New Customer ................................................................................................................................... 45 Agreements Menu.....................................................................................................................48 Find Agreement ........................................................................................................................................ 48 Reservations .............................................................................................................................53 Vehicles .....................................................................................................................................57 Add New Vehicle....................................................................................................................................... 57 Find Vehicle .............................................................................................................................................. 58 Reports Menu............................................................................................................................62 Manage Menu ............................................................................................................................66 Quote ....................................................................................................................................................... 68 Quick Reference .......................................................................................................................68 Checkout................................................................................................................................................... 68 Check-In.................................................................................................................................................... 70 Reservation............................................................................................................................................... 71 Introduction About Rent Centric, Inc. Rent Centric Inc. ™ is Canada's leading provider of web based automotive rental and customer management software suite. Proud holder of the highest Better Business Bureau Rating of A+ for Customer Satisfaction. Our Technologies are dedicated to delivering scalable web-based fleet management software that will be tailored to meet the requirements of both small and large operations. Rent Centric prides itself in having achieved satisfactory results with our customers time and time again. Our proven technology combined with our team of professionals have allowed us to realize our goal; to provide fleet management solutions that deliver measurable and sustained returns on our clients' investments. About Rent Centric Vehicle Rental Software Rent Centric™ is a full featured web-based application designed specifically for your automotive fleet management. With Rent Centric™ you can focus on the task of running your business, economically and worry free. Rent Centric™ will run your back-office and front-end office. Your customers will be able to quickly and easily make online reservations and monitor their accounts through the system’s web based and user friendly environment. Contact Rent Centric Head Office 1 Yonge Street, Suite 1801 (Toronto Star Building) Toronto, Ontario, Canada, M5E 1W7 24/7 x 365 Network Support 9 AM to 5 PM Eastern Standard Time Monday to Friday Training Phone Support (except statutory holidays) Tel: 416-250-1519 Ext. 22 Fax: 416-250-1082 Toll Free: 1-866-999-1519 Ext. 22 E-mail: [email protected] User Manual 1 Login to Rent Centric You can to login Rent Centric from PC or Mac with any web browser at: Supported Browsers are: Microsoft Internet Explorer, Mozilla Firefox, Google Chrome, Apple Safari, and Opera (We recommend Internet Explorer 7 and higher) Your default login ID and Password will be given to you by Rent Centric support staff. It is then recommended that you change your password once you login for the first time (please see “changing password” section). https://www.rentcentric.com/login.aspx 2 Rent Centric V 2.0 Navigating Rent Centric Once you are logged into Rent Centric, you will have two sets of navigation buttons and quick menus available to you: 1. Top Navigation Bar 2. Real-time Dashboard 3. Quick Menu 4. Skin Change User Manual 3 Top Navigation Bar This bar will appear at the top of your page at all times, giving you easy access to the following menus: Home Brings you back to the main page in the system. Administration Contains the main system settings. You can change your option configurations under this tab (e.g. managing multiple locations). Customers Allows you to add/search/modify customers and performs a variety of tasks such as making a reservations or opening an agreement, Reservations Allows you to add/search/modify/edit reservations. Agreements Allows you to add/search/modify/edit agreements. Vehicles Allows you to add/search/modify vehicles and manage their information such as repairs, accidents, maintenance etc. Reports Allows you to generate detailed Customer, fleet and operation reports. Logout Will log the active administrator out of the system. Help Will launch the User Manual for the system. Print Will printout the main content screen of the software. Primarily used to print rental agreements. 4 Rent Centric V 2.0 Real-time dashboard Real-time dashboard displays real-time information from your rental and fleet which you can refresh by clicking on the refresh button. By clicking on individual links in real-time dashboard you will obtain a list for selected item. 1. InFleet Displays total number of vehicles in your fleet 2. On-Rent Displays total number rental agreements open at the present time 3. Available Displays total number available vehicles at the present time 4. Due in and Overdue Displays total number of open rentals due in and over due (late) 5. Rez Today Reservations scheduled to be pick-up today 6. No Showup Reservations where customers did not show up on time 7. Refresh Click here to refresh the real-time dashboard. User Manual 5 Home Menu Quick Menu The Quick Menu displays 4 sections which are used often during a daily car rental operation: 1. Quick Look up You could quickly search for existing agreements, reservations, customers, vehicles. Agreement: You could quickly search for existing agreements Agreement #: # assigned to previously opened rental agreement Unit #: System Vehicle ID # of vehicle assigned to rental agreement Full Name: Renter's full name Reservation: Res #: # assigned to previously opened reservation Vehicle Type: Vehicle Type of vehicle assigned to reservation Vehicle ID: System Vehicle ID # of vehicle assigned to reservation Full Name: Renter's full name Customer: You could quickly search for existing customers First Name: Renter's first name Last Name: Renter's last name Phone Number: Renter's telephone # License Number: Renter's driver's license # Vehicle: You could quickly search for existing vehicles Unit #: System Vehicle ID # Vehicle Type: Vehicle type assigned to vehicle License Plate Number: License plate # assigned to vehicle You could quickly search for existing reservations 2. Current Status You can see current status of your vehicle and upcoming reservations in the next 7 days. 6 Vehicles: Pie chart or bar graph of vehicle status'. Colors may be changed from Administration tab > Status Reservations: Bar graph of confirmed reservations for the next 7 days Rent Centric V 2.0 3. Vehicle Availability You could quickly search for available vehicles on a given date and type of vehicle. Location: Location where vehicle may be located or renter's pick up location Detailed Look up: You may search by Vehicle ID, License Plate #, Vehicle Type, Active/Non-Active, Location and Date range. Num Days: Number of days of proposed RES or RA Vehicle Type: Vehicle Type assigned to vehicle Vehicle ID: System Vehicle ID # 4. Quick Menu You could quickly create new reservation or open a new rental agreement (checkout) Skin Change You can click on the bottom left side of the screen to select your personal skin to change the color schemes of the system. Rent Centric List Navigation In Rent Centric you can perform the following actions: Add New Item Sort Select Delete User Manual 7 Getting Started Guide To get started with Rent Centric please follow the steps below: 1. Learn how to browse and use the system 2. Edit your location information Click on Administration > Location Information 3. Enter Makes, Model and Vehicle Types which you have in your fleet Click on Administration > Makes or Models or Vehicle Types > Add New 4. Enter you vehicles Click on Vehicles > Add New 5. Enter new Rates Click on Administration > Rental Rates > Add New 6. Enter your local Taxes Click on Administration > Taxes > Add New 7. Enter Misc Charges and Insurances Click on Administration > Misc Charges > Add New 8. Learn how to create a quote, reservation and checkout Please refer to related sections in this manual 9. Setup your online reservation website Please refer to Web Customer section in this manual 8 Rent Centric V 2.0 Administration Menu The administration utilities are designed specifically for system administrators to manage multiple locations, rates and other specific settings. In order to change any location setting click on Administration and from there you have access to all setup pages. The menu is divided under four key headings: 1. Configuration 2. Rates & Settings 3. Management 4. Vehicle Options Location This option allows you to add/modify different locations and their individual settings. To add a Location 1. Click on Administration 2. Click Add New Location under the menu bar 3. Fill out the location Information form (See “Location Information Fields” under the Location Settings Section for details) 4. Click Save The Location Settings main screen will display. Please see the Location Settings Menu section for more details on these options. To modify a Location 1. Click on Administration 2. Select the location you wish to modify from the location drop down under the menu bar. The Location Settings main screen will display. Please see the Location Settings Menu section for more details on these options. User Manual 9 Configuration Location Information Allows you to edit the information on your existing location(s). Location Information: This section contains the main information on a location, such as address, phone numbers and location contact. o Location Name: Operational name of location this name will print on contract o Location Code: May be initials of location, your selection. Prints on some reports o Contact Full Name: Full name of contact at this specific location o Address: street address of location o City: City of location o State/Province: State/Province of location o Zip/Postal: Zip/Postal code of location o Country: Country in which location is located o Closest Intersection: o Closest Airport: Street intersection of location Airport closest to location o Email: Email address of location o Phone: o Fax: Phone number of location Fax # of location o Toll Free Number: Toll Free # of location, if any. o Legal Name (D.B.A.): Legal Name of business o GST/TaxID #: Tax ID # or HST # o Memo: Note Location Setup: This section allows you to modify or update each location individual setup and parameters. o Location Time Zone: Select your correct time zone where the rental location is located in order to accurately display the time on rentals and reservations or any event that happens in the system. o Date Format: Select your local date format and everything which displays a date in the system including .your calendars will show your local date format o Currency: Select the correct currency for your business all currency will be formatted with the currency of choice. − Local Currency: You can enter a local currency with its exchange rate in order to run some of reports for your local government. For example in Mexico the advertized rental rates are in US Dollars but they are required to report income tax in Mexican Pesos. In this example user enters Mexican Pesos as local currency with the latest exchange rate so the system would convert the US Dollars X Exchange rate and 10 Rent Centric V 2.0 display the value in Mexican Pesos including the symbol on the reports required for government. Please note the system goes with the exchange rate which was valid with the transaction date. For example if user enters an exchange rate for 10 Mexican Pesos for 1 US dollar on December 1st and then enter 11 Mexican Pesos for 1 US Dollar in December 5th then if you run the report for transaction which happened on December 2nd the exchange rate will be 10 Mexican Pesos and if you run the report for December 6th exchange rate will be 11 Mexican Pesos. o Language: Choose the default location language for user information. o Region: This field is used for one way setup which allows you to assign your locations to regions in your one way table (please refer to one way configuration for more information) o Latitude and Longitude: this field will be used to pin point your location on maps displayed in the software o Mileage Buffer: Set miles allowed outside location area o Charge Per Mile: This field is the location wide extra driven mileage or KM charge for excess driven mileage. You can override this value when setting up rates. o Industry: By selecting your correct industry the software will display industry related information in various sections of the system such as damages of vehicle and vehicle specifications. o Convenience ReFuel Rate: Enter the fuel charge price when customers return the vehicle with fuel in less than fuel out. o Prepaid Fuel Rate: Enter fuel rate for prepaid fuel option at checkout process. Note this rate is usually lower than Convenience refueling rate. o Gas/Diesel: Depending on vehicle fuel type, gas or diesel, the fuel numbers you enter will be used for calculating the fuel charges. For example if you enter $1.00 for pre-paid fuel and your vehicle tank size is 40 liters, if the tank comes back empty system will charge 40 x $1.00 = $40.00 for fuel. This feature works with both liters and gallons. o Driver’s Min Age/Underage: This field specifies minimum driver’s age required to open a rental agreement at time of checkout. System will prevent opening a rental agreement if minimum age is not met. You can also enter an underage Misc Charge and at the Misc Charge setting check ON the underage check box so the misc charge would be applied automatically to the rental when a driver is underage. o Reservation, Agreement, Daily Business Report, Quote and PO Number: Enter the starting sequence number for these items in the software. You can enter numbers only or mix of word and numbers such as LAX0001. o Edit Quote Email, Quote SMS: Click on these links to edit the outgoing email and SMS text message when sending quotes to your customers. o #Days in Month: Specify number of days in month for the daily rate to switch to monthly rate. Some rentals use 28 and others use 30. o Enable Corp Rate: Check this field ON to enable filtering rates by selected Company at time of generating quote, reservation or checkout. Note if you enable this feature, you will not obtain any rates if selected company does not have any rates setup under their profile. o Enable Online Booking for this Location: Allows this location to present vehicles and accept online reservations from the link provided in Web Customer. User Manual 11 o Odometer Indicator: Select the right indicator based on your region for KM and Mile and all the information on vehicle or rentals will be displayed correctly based on your selection. e.g. 200 Miles allowed per day vs. 200 KM allowed per day o One Way: Select One Way charge type if more than one location or disable o Location Weather ID: Click on the link to find your location and enter the correct weather ID for displaying weather information on online reservation website. o Website: Enter your website address, if applicable. o Active: Check this option to activate the location. If not activated, the location will not show up in any sections of the application. o Signature Pad: Click on this option to enable capturing client digital signature at checkout screen if you have Topaz Signature Pad Device. o Copy Location on Reservation Emails: Check if location is to receive a copy of reservation confirmation emails sent to customer Offsite Locations Offsite locations are often added for adding additional depot or locations which are not full locations and are used just for tracking your fleet. 12 Location Name: Location Name or Airport counter for example Code: Initials of location or airport code your selection Contact Name: Contact Name at offsite location Address: Street Address of offsite location City: City of offsite location State/Province: State/Province of offsite location Country: Country of offsite location Phone: Phone # of offsite location, if applicable Fax: Fax # of offsite location, if applicable Email: Email address of offsite location, if applicable Hours of Operation: Hours during which the business is open Is Active: Check if offsite is active and available for selection throughout the system Use One Way: Check if one way rentals will be permitted Memo: Note Rent Centric V 2.0 Administrators This screen allows you to add/modify employees to your system and giving them access to logon to the system. You can define permissions for each specific user which gives you a greater flexibility to control your employees. For example if you check off the Insurances View permission checkbox, that user will not be able to modify any insurance settings. Admin Information: Contains general information on the administrator (e.g. ID, Name, etc.). Note: Username must be in email address format. o Admin ID: Username set up in email address format o Full Name: Name of AdminID, user or employee o Title: CSR, Rental Clerk or Manager for example o Full Administrator Account Select this option if you are granting the full administrator rights to the user. This will allow the user to view all locations in the system. o If not selected (highly recommended) the user will only be able to view their location information and settings. o Active Check this option to activate the Administrator. If not activated, the administrator will not have the ability to login to the system. o Language: Sets the language for this user. If you are interested in other languages, please contact us at support and we will provide you with the translation sheet to update the system. o Theme: To personalize your system skin and floors choose different display themes o Password: The Password can be changed at any time. The next log in will require the new password. o Confirm Password: Retype same password o Title: Title of the Admin ID, Rental Clerk for example. o Commission Type: Commission paid to your Admin ID or employee based on % or $. o Commission Amount: Amount of % or $ from commission type. o Max Discount: The maximum discount your Admin ID may select on a rental agreement or reservation. o Commission Structure: Select a commission structure which applies to this user. (To Manage Commission Structure please refer to the section in this manual) User Manual 13 Admin Group: (See below admin group) drop down is used pre-populated permissions. Admin Permissions: With checking permissions ON/OFF you can enable or disable access to certain functionalities within the system for individual users. o Customers Information: Information of your renter such as name, address, telephone and credit card #'s − View Add Disable Edit : Allows AdminID to view, add or edit customer information or disable/deactivate customer o Credit Card & Transactions − View Credit Card: If checked allows AdminID to view renter's credit card information − Process Credit Card : If checked allows AdminID to process a payment on the renter's credit card − Refund: If checked allows AdminID to process a refund on the renter's credit card − Delete Transactions: If checked allows AdminID to delete entire transaction − Edit Transactions: If checked allows AdminID to edit any and all information related to the transaction − Void Transactions: If checked allows AdminID to void entire transaction o Reservations − View Add Disable Edit : If checked allows AdminID to view, add, disable or edit a reservation − Web Customer Setup: If checked allows AdminID to Web Customer set up; please see tip on Administration tab > Webcustomer o Agreements − View Add Disable Edit: If checked allows AdminID to edit any and all information related to the transaction 14 Rent Centric V 2.0 − Check in: If checked allows AdminID to check in a vehicle or close a rental agreement − Check out: If checked allows AdminID to check out a vehicle or open a rental agreement − Rate Change: If checked allows AdminID to edit rental rates a rental agreement − Date/Time Change agreement If checked allows AdminID to edit date/time on a rental − Allow Overbook: If checked allows AdminID overbook a vehicle; open / close dates overlap − Edit Closed Agreements: If checked allows AdminID to edit a closed rental agreement o Rates Setting − View Add Disable Edit: If checked allows AdminID to view, add, disable or rental rates o Insurances Setting − View Add Disable Edit: If checked allows AdminID to view, add, disable or edit insurance rates o Miscellaneous Charges Setting − View Add Disable Edit: If checked allows AdminID to view, add, disable or edit miscellaneous charges o Locations Setting − View Add Disable Edit: If checked allows AdminID to view, add, disable or edit location information o Agreements/Invoices Forms − View Add Disable Edit : If checked allows AdminID to view, add, disable or edit agreements/invoice forms o Claims Management Section − View Add Disable Edit: If checked allows AdminID to view, add, disable or edit a claim o Seats − View Add Disable Edit : If checked allows AdminID to view, add, disable seat; this option for per user license only o Company Settings − View Add Disable Edit : If checked allows AdminID to view, add, disable or edit companies/corporates o Bill Split Settings − View Add Disable Edit If checked allows AdminID to view, add, disable or edit a bill split on rental agreement o Notes Settings User Manual 15 − Add Delete Edit notes in system o Location Access − If checked allows AdminID access to "All" or only selected locations o Menu tool bar − If checked allows AdminID access to tabs on the top tool bar − Reports If checked allows AdminID access to Reports tab on the top tool bar − Administration: If checked allows AdminID access to Administration tab on the top tool bar − Management Reports: If checked allows AdminID access to Management Reports from Reports tabs on the top tool bar − Manage: If checked allows AdminID access to Manage tab on the top tool bar o Vehicles Management − View Add Disable Edit vehicles management If checked allows AdminID to view, add, disable or edit o Vehicle Maintenance − View Add Disable Edit If checked allows AdminID to view, add, disable or edit vehicle maintenance such as oil changes etc. o Vehicle Repairs − View Add Disable Edit vehicle repairs If checked allows AdminID to view, add, disable or edit o Vehicle Problems − View Add Disable Edit vehicle problems If checked allows AdminID to view, add, disable or edit o Vehicle Carwash − View Add Disable Edit vehicle carwashes If checked allows AdminID to view, add, disable or edit o Vehicle Damages − View Add Edit If checked allows AdminID to view, add or edit vehicle damages o Vehicle Accidents − View Add Disable Edit vehicle accidents If checked allows AdminID to view, add, disable or edit o Traffic Tickets − View Add Disable Edit traffic tickets If checked allows AdminID to view, add, disable or edit o Administrators − View Add Disable Edit Administrators 16 If checked allows AdminID to view, add, disable or edit Rent Centric V 2.0 o Corporate Rates − View Add Disable Edit corporate rates If checked allows AdminID to view, add, disable or edit o Update Vehicle Location − If checked allows AdminID to move vehicles from one location to another o Commissions − View Add Disable Edit If checked allows AdminID to view, add, disable or edit commission set up on RA or reservation Location Access: If you have multiple locations, you are able to grant access to multiple locations for each user. This will add selected locations to the location drop down under menu bar. Admin Group In order to make adding new users easier, you can set Admin groups with certain permissions and while adding new users, you can select the admin group to automatically pre-populate permissions. Common Settings Common settings contain numerous configuration pages that are common between all locations if you have single or multiple locations. Location Regions: For one way setup per region enter regions in this page. Location Copy: This is a useful feature for copying setup information from one location to another by choosing the source location, destination location click ON setup tables you like to copy over. System will automatically prevent duplicates. One Way Rates: In order to setup one way rates between your regions, use this table to populate the information by selecting Region From, Region To and One Way Fee to populate the one way rate. Once entered, at Quote, Reservation and Checkout screens the one way fee will apply as an additional charge. State/Provinces: Use this screen to add/remove different state names and state codes. Countries: Use this screen to add/remove different country names and country codes which are used across the application. Master System Setup: You can manage master system setup for mandatory and optional fields or simply add a survey to appear on the checkin process. SMS Provides: Manage your SMS provider carriers and their respective SMS gateway for sending SMS text messages to your users and customers. User Manual 17 Internet Payment Gateway Rent Centric offers secure internet credit card processing systems. This allows Car Rental locations to process customer’s credit cards online through their desired payment gateway which offers a more robust, high speed and accurate credit card processing since credit cards are processed in less than a second. By simply entering the customer’s credit card information into the system you’re able to process their credit card without having to utilize a POS terminal. This way, the customer information and their transactions all reside in Rent Centric, which makes tracking much easier. To enable processing through Rent Centric, contact your bank or desired processing company, once you are signed up, they will provide you with a merchant number or password depending on the processor requirements. Go to internet payment gateway screen, choose the processor and enter your merchant information. Once entered, you will be able to start processing credit cards in real-time. Note: Central Coast Processing requires batching everyday when you are done for the day which you can do by clicking on Batch Process and submitting the transactions for settlement at the bank. Merchant Number: Once your application is approved by a payment gateway company they will issue you a merchant ID# Username/Terminal ID: May or may not be provided by payment gateway company depends on company. Merchant Password: May or may not be provided by payment gateway company depends on company. Key Value: May or may not be provided by payment gateway company depends on company. Key File: May or may not be provided by payment gateway company depends on company. Config: May or may not be provided by payment gateway company depends on company. GST/TaxID #: Your Tax ID# Serial #: May or may not be provided by payment gateway company depends on company. 18 Rent Centric V 2.0 Agreement/Invoices Printout Rent Centric provides many choices for your agreement (contract) and invoices print outs. Default Agreements: You can simply use one of the existing agreements in the system. Standard is used for rental agreements. Invoice is used to generate an invoice for customers tax proposes. Bill Split Invoice is used when you split the rental bill with one or more parties. Custom By: Rent Centric: Rent Centric offers customization services for developing any type of rental agreement. Simply email us a scanned copy of your current rental agreement our Rent Centric staff will develop an identical contract and add it to your system. Contact us at [email protected] if you need assistance. Custom By: User: If you have HTML and design experience Rent Centric gives you the option of creating your own Rental Agreement. From the drop down simply select Custom By: User and an Editor will appear. Start building the HTML contract simply drag and drop the values from left to the editor which then will be replaced in real-time which rental agreement is printed. Custom By If you select Custom By: Rent Centric then we would upload the custom agreement and enter the file name If you select Custom By User then you can use the editor above to create your rental agreement. User Manual 19 Agreement Type If agreement is selected, it will appear under agreement pages such as checkout, check in and print. If Reservation is selected, it will appear under reservation pages. If you select Custom By: Rent Centric then we would upload the custom agreement and enter the file name If you select Custom By: Rent Centric then we would upload the custom agreement and enter the file name Active: Check if contract is active and available for selection Default: Check if contract is to be default or set first for selection Auto Print: Check and Print Options box will automatically appear to print contract Email Friendly: Check and friendly version will be emailed to your customer Upload Logo Click here to upload your location logo which will appear on the top, right side of your software and also on your agreement, reservation, quote printouts. 20 Rent Centric V 2.0 SMS Notifications Utilize SMS notifications to send real-time SMS text messages to your device when: 1. Someone makes an online reservation on your website 2. Get updates on your rental operation such as receiving real-time dashboard information You can use keywords in your outgoing SMS text message to get replaced with real-time information. For New Reservations use the keyword to the left and for Real-time dashboard notifications use keywords to the right. To enable and disable the real Real-time dashboard notifications use the Enable and specify the time of day when you would like to receive these updates You can specify users with their phone numbers to receive the SMS notifications. After you setup the user, click on Send Test SMS to try the setup. User Manual 21 Web Customer Rent Centric built-in real-time reservation website comes as a standard offering with your system. With many powerful features and extensive setup functionality you can fully customize your reservation website features and layout to meet your specific business needs such as rates and charges, look and feel. When customers make an online booking, you will receive a confirmation email which you can customize as well. To access your online reservation website, on your address bar where you see rentcentric.com replace the last part, Main.aspx with Webcustomer/Webcustomer.aspx To access the standard online reservation website (full website) Webcustomer/MobileWebcustomer.aspx To access Mobile reservation website designed for iphone or other mobile browser 22 Rent Centric V 2.0 Webcustomer/Widget.aspx You can place Rent Centric reservation widget on your homepage. Once clients select the location and dates to continue, it will redirect the clients to reservation process step 2. (Please refer to Widget Setup in this manual) Webcustomer/Rotator.aspx You can place Rent Centric vehicle rotator on your homepage. Once client click on a vehicle, they will be redirected to Rent Centric reservation step 2. On your website you can display specific pages from Rent Centric Webcustomer by adding the page name in a query string like examples below to show those specific pages. Webcustomer/Webcustomer.aspx?Page=Vehicles Webcustomer/Webcustomer.aspx?Page=Locations Webcustomer/Webcustomer.aspx?Page=RentalPolicy Webcustomer/Webcustomer.aspx?Page=VehicleSales Example: https://www2.rentcentric.com/ClientXXXX/webcustomer/WebCustomer.aspx?Page=Vehicles Note: If you plan on taking credit card information it is mandatory for you to use the secure link https:// to access Rent Centric online reservation website. Please remember if you user secure are referencing to an external style sheet or HTML headers or footers, remember if you selected https for secure site User Manual 23 Webcustomer Setup Menu Email Setup You can setup, customize and edit outgoing reservation emails. From Name: Select from Name which is usually your company name or “Your Company Reservations” From Email: Enter the from email address. Reply To Email: Enter email address where email replies will be sent to. Email Format: Select the outgoing format. HTML is always recommended which offers a much cleaner layout. You are able to store two separate email format, one in HTML and one in Text. By selecting the format drop down system will populate the saved format email layout from the database. Email Subject: Enter the email subject Email Body: Enter, customize and save the email content from this area. To Edit simply click on Edit >> link and modify the email body in the HTML editor. Reservation Reminder: Reservation reminder allows you to setup email reminders to go out in X number of Days previous to the reservation checkout date to remind customer of their upcoming reservation. Simply enter the subject, email content and select the number of days prior to checkout date for the email to go out automatically. 24 Rent Centric V 2.0 Rental Policies Enter your master policy or add more policies from this screen. Featured Specials This feature allows you to setup discounts or specials, based on a specific Location, Vehicle Type and rate available in a date range. You can also upload an image for this special which will be displayed online. Add/Edit web pages You can simply add/edit more tabs and add content to your website. At Add/Edit Webpage screen you simply search for your pages from the search field on the top or click Add New. When adding new Web Page simply select Page Type which can be a webpage (tab) on your website or an external link to another website which will hide the body area and you can enter link. Make sure you enter the external link as http://www.SampleWebsite.com/page.htm. Target can be pop up or same page which makes the tab pop up a new window or remain on the same window. Enter the content of your webpage and click on save. User Manual 25 Hours of Operation Enter location’s hours of operation by checking ON the day of the week when car rental is open and entering the start and end business hours. No pickup will be allowed with in XX hours will ensure no one will book a vehicle on your website X hours prior to pick up. For example if you like your first reservation to be in two days from now, simply enter 48. Black out Days Enter the holidays on your calendar when the car rental is closed for business so your clients will not be able to pickup or drop off on those days. Reservation Setup You are able to fully customize your reservation website features and functionality from Reservation setup for example turning specific features on/off. Credit Card Processing: Choose to authorize or charge customers credit card at time of reservation. Remember you need to turn on Ask for Credit Card Info so by collecting credit card information, you would be able to authorize/charge customer’s credit card. Remember this option works if are setup with a payment gateway to process real time credit card transactions. Ask For Specific Information: Turn these options ON if you would like to ask your customers for specific information when they make an online booking on your website. It will simply display the fields for input. 26 Rent Centric V 2.0 Allow Additional Drivers: Turn this option ON to allow your customers enter up to two additional drivers when making reservation on your website. Allow One Way Rental: This option allows your customers to pickup and drop off at different locations. Display Offsite Locations: By turning ON this option your offsite locations will display in the location drop down list. Your customers will be able to select the offsite locations as their preferred pickup or drop off locations. All the rates and information will still come from the parent location and the only information from child location would be the Pickup and Dropoff location of the reservation. Show Different Tabs: Buy turning on and off these options you can show/hide different tabs on your website. Vehicle Unavailable Message: You can specify a custom message to be displayed when a specific vehicle type is not available for booking. Read Only Mandatory Insurance/Misc Charges: with this option you make your mandatory insurances or misc charges read only (disabled) so your customers will not be able to uncheck them on your website. For example your rental operation might have mandatory insurances on specific vehicle types. Allow Rate Code/Company Code Input: By turning on this option your customers are able to enter a specific rate code or their company code to get preferred or discount rates. For example you can add a new rate called “Ski” and by providing this code to your customers they will be able to visit your website and enter “Ski” in the Discount Code to get the preferred rate. For company code, if you have setup Companies in Rent Centric with special Corporate Rates, your clients are then able to enter the Company Code into the text box and get the special rate you designated that company. Allow Customer Login: By turning ON this option, your customers are able to click on login tab and login to their account by entering either confirmation number and last name or last name and password (you need to provide them) and view/edit their reservations, previous rentals and print them, edit their personal information and make a new reservation. Automatically Assign Vehicle: By turning ON this option, when customers create an online reservation, Rent Centric system will automatically reserve a specific vehicle from the selected type from your fleet. It’s recommended to turn this option OFF since there is possibility of a spammer or competition to book all your vehicles with junk information. Automatically Confirm Reservation: By turning ON this option, when customers create an online reservation, by default the reservation will be confirmed. If this option is OFF, all User Manual 27 reservations require a user to view and then confirm the reservation made online. It’s recommended to turn this option OFF since there is possibility of a spammer or competition to book all your vehicles with junk information. Show Home Special Rotator: By turning ON this option your vehicle rotator will display online on your homepage. Rate Type Priority: You can specify which rate types you would like to display first and give priority. For example if you have two rates for the requested vehicle type, one has standard rate type and one is multiday rate type, with this utility you can give priority to either rates to display first and if not available to show the next rate in the list. Website design You can fully customize the look and feel of the website with this screen Header HTML: Enter the HTML code for the website header section. Footer HTML: Enter the HTML code for the website Footer section. Google Analytics Code: Enter your Google analytics tracking code to track your leads for more information visit www.google.com/analytics/ Google Conversion Code: Enter your Google conversion code for tracking your visitors when they complete the booking. When inserting conversion code replace the google_conversion_value with ##Total## so the reservation total amount would show when code loads. For more information please search for Google conversion. Background and Text color: Select your background and text colors. Background Image: Browse and upload background image Image Logo: Browse and upload your logo image Style Sheet: Enter you own CSS style sheet code to override default web customer style sheet. This will allow you to customize the look and feel of the website. Display Skin: You can select from preset skins and color schemes which come with Rent Centric. Compact WebCustomer Width: Enter the width of compact web customer to your desired pixel. 28 Rent Centric V 2.0 Widget Setup You can place Rent Centric reservation widget on your homepage inside a frame or an Iframe.. Once clients select the location and dates to continue, it will redirect the clients to reservation process step 2. If you have a custom reservation website please enter the Online Reservation Page name in the text box. Also you can have the widget as POP up or same window when clicking on Continue to go to step2. File Explorer You are able to upload images, CSS files and other types of files used in customizing your online reservation from the File Explorer page. This feature is especially useful in preventing security warning when referencing to an external file by simply uploading the file locally to Rent Centric folders. Click on Upload and browse for your file to upload to Rent Centric Custom Folder. Once file is uploaded you can use /Custom/FileName.jpg to access the file. User Manual 29 Management Claims Management Claims Management allows you to manage all your claims and accidents information such as claim documents, vehicles, contacts, etc. Claims management keeps track of every piece of data that you may have in an accident. Claims Management Main Screen Claims Information General information regarding the claim, such as customer name, claim date, claim location, etc. Claims Information Fields Claim Date: The Date the accident happened. You would be entering your information for the first time. Claim Close Date: Once the claim process is completed on a claim, you can close it and identify its close date here. Claim Type: There are three types of claims: 1. Renter: is used for the person who has rented the car. 2. 3rd party: is used when your fleet vehicle had an accident with a 3rd party. 3. Other: is used for any other accident scenario which has affected one of your vehicles. Vehicles: This section allows you to enter or modify the information for all the vehicles involved in this accident. Contacts: Allows you to enter or modify all the contacts involved in this claim. Expenditure and Payments: Use this section to manage your expenses and payments for this claim. Repairs: This section allows you to enter all the repairs done on vehicles involved in this claims. Location: The location OUT of rental vehicle Police Dept: Police department accident was first reported to. Police Rep: Representative at the Police department 30 Rent Centric V 2.0 Entered By: AdminID or employee who entered this claim Date First Entered: Auto field date claim entered in to system by AdminID Documents In Hand: Check when documents are received, Police report for example Memo: Any additional Notes To Add a New Claim 1. Click on Claims Management 2. Click New 3. Enter the Claims information (see “Claims Information Fields” below for more details) 4. Click Save To Modify Claims 1. Click on Claims Management 2. Select the radio button next to the claim you would like to edit 3. Click Select 4. Modify the claim information (see “Claims Information Fields” below for more details) 5. Click Save Referrals You can manage your referrals from this screen. Referrals are companies or individuals who send you business with this tool you will be able to track referrals and run reports to find out who sent you the most business. Whenever you enter a new reservation or agreement, you can specify a referral from the existing list or simply add a new one by clicking on Add New beside the drop down. In the referral management screen you are able to setup commissions, banking information etc. You can simply select the commission type, dollar amount $ or % percentage and enter the commission amount. You can also select the items which are commissionable in a rental agreement. Based on these parameters, when you run the referrals report, you can see the calculated commission amount. User Manual 31 Repair Order/Maintenance Program Used to track repairs/maintenance and expenses done to your vehicles Add Repair Order: Add new repair order or maintenance program Repair / Maintenance Programs: Add new program name and specific vehicle models Find Repair Order: Search for previously entered RO #’s Repair Order Email Notification: Add AdminID who is to receive email notification Setup: Used to establish starting RO and PO #'s and whether to use system wide Companies / Corporates Add companies who would be paying for a rental an insurance company for example Company Name: Full company name Company Type: Please Select Insurance Corporate Dealership Body shop Bank/Finance Travel Agency Hotel Repair Service Affiliate Law Firm Travel Wholesaler Franchise Leasing Other or CHARITY Address 1: Street address of company City: City of company Zip/Postal: Zip/postal code of company Phone: Business telephone # of company Email: Business email address of company Insurance Company: Name of insurance company of business if business is paying for rental for their employees Claims Office: Claims office or adjustors name if insurance company Policy Expiry: Expiry date of insurance policy Minimum Age: Minimum age allowed to rent Code: Initials of Company Name, SFI for State Farm Insurance for example or any code you desire Contact Name: Name of Company contact Address 2: Address of Company State/Province: State/Province where company is located Country: Country where company is located Fax: Fax # of company SSN/SIN: Social Security Number / Social Insurance Number, not mandatory Insurance Rep: Representative or adjustor of Insurance Company Policy Number: Policy # of Insurance company Copy Insurance: Check to send a copy of Companies/Corporates information to the insurance company listed Mileage Cap Total mileage allowed 32 Rent Centric V 2.0 Regions Regions are used to monitor your customers in each region. For example you could divide a city by multiple regions and assign each customer to a region. This screen allows you to add/remove different regions in conjunction with customer records. To Add Region 1. Click on Regions from the Administration screen. 2. Click New 3. Enter the Region Name (e.g. Orange County) 4. Click on Save. To Delete a Region 1. Click on Regions from the Administration screen 2. Select the radio button next to the region name you would like to delete 3. Click Delete 4. You will be prompted with a deletion conformation message. Click Yes to delete the Region. Accounting Used to set up export from Rent Centric to accounting software GL Codes: Set items as expense, income or general ledge codes used for QuickBooks Export: Export to QuickBooks Rates and Settings Rental Rates The rental rates screen allows you to enter and manage your rental rates in Rent Centric. When you click on rates from administration, you will be able to search for existing rates by entering the information and clicking on search or simply click on Add New. On rate setup screen, you have basic and advance tab available to you. Basic tab allows you to enter basic information for adding a rate such as rate code, vehicle type and rate values. Advance tab allows you to setup more advance features on the rate e.g. standard or multi-day. User Manual 33 How Add / Edit New Rates 1. Click on Rental Rates 2. Click Add New or On a Rate to Edit 3. On Basic Tab enter the rate information (see “Rate Information Fields” below for more details) 4. Click on Advanced tab to access more setup information. 5. Click on Save Basic Tab Rate Code: Rate code identifies the cost of renting out your vehicles by specific time allotments (e.g. daily, hourly, weekend, etc.) This Rate Code will display in your rate selection drop down menu when checking in or checking out vehicles. Vehicle Type: Vehicle type refers to the size of the vehicle (e.g. compact, economy, full size, luxury, etc.) Throughout the application, when the vehicle type is selected, it will automatically identify with the rate code entered with it on this screen. You can select ALL to apply this rate to all vehicle types or select one or more vehicle types from the list Daily, Weekly and Monthly Rates: Enter your rate values for example 20, 140 and 600. When daily rate is entered system will auto-populate weekly and monthly by multiplying the daily rate by 7 and 30 (or the number of days set in the month under Location Information) Mileage/KM Allowed: Enter maximum mileage allowed per daily, week and month. At time of rental, if rental mileage/KM exceed maximum allowed, you can charge client for additional mileage/km charge. To enter additional mileage charge click on Advance tab. Enter 0 in all three boxes to allow unlimited mileage and enter number 1 to charge for every Mileage/KM driven. Display Online: Select this option if you like to make this rate available online. Value Pricing: When selected, the application will automatically check to see if the higher line rate is cheaper than the final calculated rate. For example if someone rents the car for 6 days and the total is greater than the weekly rate, the software will automatically use the weekly rate. Active: Check this option to activate the rate. If the rate in not activated, it will not display anywhere in the application Advance Tab Calculation By: This specifies the Calculation method used by this rate. 24 Hour calculation is the standard calculation method for most car rentals. Every 24 Hours is calculated as a rental day. However some rentals use Calendar type calculation where every date change is calculated as a full day. For example if some one rents the car from 4 PM today to 11AM tomorrow, the Calendar day will calculate the rate for two days, even though the vehicle was only rented for 19 hours, which is less than a day. Rate Type o Standard: The most common used rate type which simply starts from daily and goes to weekly and monthly as days are added. 34 Rent Centric V 2.0 o 1 to 30 Day Multiday: Multi day rate type is used from 1 to 30 days if you have a specific number of rental days. For example if you have a 7 day rate which is different from other rates, at online reservation website when your customers request a 7 day rental, this rate takes priority. o Min/Max Days: This is same as above multiday rate and it allows you to select a range of multiday to apply a single rate to. For example if you have a rate for 7 to 14 days you can simply select this rate type and enter min days and max days in the input boxes on the right of the screen. o Hourly/Daily/Weekly/Monthly Rate Types: Select these rate types if you would like to charge only based on this unit. For example if you like to charge a daily rate from first day and not switch to weekly or monthly, select Daily. o 1 to 30 Day Flat: This rate type is for flat rate rentals which allow you to enter a flat daily rate and amount will be for the entire rental. For example if you select 2 day Flat and enter $130 in daily, the system will charge a flat rate of $130 regardless of days and hours. This rate is the least popular rate type and we recommend using Multiday rates instead to enter the daily rate amounts in daily field. o Hourly Block: This rate type is used in Bicycle rentals or other hourly rental industries. Once you select this rate type a link will appear beside rate type. By clicking on this link you can setup up to 10 hourly rates for the rental. For example if the first hour is $45 you can enter $40 for second hour and $35 for third hour and continue entering the hourly rates. Minimum: Select minimum minutes for this rate. For example if the minimum charge is 15 minutes you can select 15 and the rental will charge 15 minutes minimum even if the rental is 10 minutes. o Minute Block: Select the block of minutes in an hour. The hourly rate will be pro-rated to the blocks selected. For example if you select 15 minute blocks, on a $40 hourly rate, the rate will be divided by 4 which will be 4 - 15 minute blocks in an hour which is $10. Then at the beginning of every block $10 will be charged. o Weekend: This rate type allows you to provide a weekend specific rate with pickup date/time and drop off date/time range. For example you can setup $24 weekend rate and enter Pickup Date Friday, Pickup Time 9 AM and Drop off day of Monday, Drop off time 4 PM. In this example, if clients request a rental anytime after 9 AM on Friday and before 4 PM on Monday which is between pick up and drop off date/time, this rate will be available to them. Pickup Day: Please refer to Weekend Rate Type above. Return Day: Please refer to Weekend Rate Type above. Effective Date: The start date of the rental rate. End Date: The expiry date of the rental rate. Available On: Select the days of the week this rate will be available online. Rate: You may click Skip on Start for Hourly rate; complete Daily, Extra Day and tab for the system to calculate the balance of rates. Mileage: Enter allowed mileage/km. User Manual 35 Extra Mileage/KM Charge: This charge will apply if the total driven KM / Mileage exceeds the total allowed in the agreement. Use zero if you would like to allow for unlimited KM / Mileage. Use 1 if you would like to charge per each driven KM / Mileage. Fuel Charge: Fuel charge applies to if fuel in is less then fuel out. The charge is calculated based on the rented vehicle tank size which is specified under vehicle specifications. Grace Minutes: Enter minutes which you will allow the customer to be late when returning the vehicle. System will give 59 minutes by default. Any number entered in this field will be added to 59 minutes. You are able to enter a negative number for example -59 which means 0 grace minutes. Minimum Rental Days: Set minimum days for a rental period Manage IPs: Enter the start and end IP address range for your customers booking online. With this feature you are able to limit your exposure by region and have higher or lower rates per regions. (Please consult with Rent Centric staff if you have any questions about this feature) Insurances Coverage Use this utility to enter specific insurance coverages. Insurance coverages are used for customers who would like to purchase additional protection for their vehicle rental. To Add New Insurance 1. Click on Insurances Coverage 2. Click New 3. Enter the insurance information (see “Insurance Fields” below for more details) 4. Click on Advanced tab to access more setup information. 5. Click Save To Edit Insurance 1. Click on Insurances Coverage 2. Select the radio button next to the Insurance Rate you would like to edit 3. Click Edit 4. Modify the insurance information (see “Insurance Fields” below for more details) 5. Click on Save Insurance Fields Basic Tab Basic tab allows you to quickly add or edit insurance. If you like to have more setup simply click on Advance tab. Insurance Name: In this field, you can identify the full name of the Insurance Code. This “friendly” version of the code will appear when printing out agreements or checking out vehicles (e.g. PDW = Personal Damage Waver) Insurance Code: Insurance code is used to identify the insurance name on the rental agreements (e.g. PDW) Please use short codes or acronyms if possible. Please do not use space in the code title. 36 Rent Centric V 2.0 Vehicle Type: Vehicle type refers to the size of the vehicle (e.g. compact, economy, full size, luxury, etc.) Throughout the application, when the vehicle type is selected, it will automatically identify with the insurance entered with it on this screen. You can select ALL to apply this rate to all vehicle types or select one or more vehicle types from the list Calculation By: This allows you to select different calculation methods. You can choose between standard 24 hour and calendar day. Daily, Weekly and Monthly Rates: Enter your rate values for example 20, 140 and 600. When daily rate is entered system will auto-populate weekly and monthly by multiplying the daily rate by 7 and 30 (or the number of days set in the month under Location Information). The hourly will be populated automatically in the advance tab by dividing the daily rate by 4 which you can change. Display Online: Select this option to make this insurance available online Active: Check this option to activate the insurance. If the insurance in not activated, it will not display anywhere in the application Advance Tab Deductible: This field is mostly for display on the rental agreement to show the insurance coverage deductible amount. Grace Minutes: Enter minutes which you will allow the customer to be late when returning the vehicle. System will give 59 minutes by default. Any number entered in this field will be added to 59 minutes. You are able to enter a negative number for example -59 which means 0 grace minutes. Province/State: Select province or state of location Country: Select country of location Effective Date and End Date: Enter the start and end date range for insurance to be available. Image: Browse to Upload an image for this insurance. For example for CDW you can use a safe driver wearing seatbelt. This image will show on your website when you clients click on Optional Extras areas to view more details about your insurances. Value Pricing: When selected, the application will automatically check to see if the higher line rate is cheaper than the final calculated rate. For example if someone rents the car for 6 days and the total is greater than the weekly rate, the software will automatically use the weekly rate. Mandatory Insurance: This insurance will be mandatory when this vehicle type is selected. User Manual 37 Payment Methods Add/Remove payment methods you accept in this screen Payment Details Add/Remove payment details when adding Other Charges in checkout or reservation. Type: Payment will allow detail to be available in Payments & Charges Type: Charge will allow detail to be available in Other Charges I – IV. 38 Rent Centric V 2.0 Taxes Tax code is designed to let you define the tax configuration for each location. The taxes are used in the total amount when checking out a vehicle. To Add a New Tax 1. Click on Taxes 2. Click New 3. Enter the Tax information (see “Tax Information Fields” below for more details) 4. Click on Advanced tab to access more setup information. 5. Click on Save To Edit Tax 1. Click on Taxes 2. Select the radio button next to the Tax Rate you would like to edit 3. Click Edit 4. Modify the Tax information (see “Tax Information Fields” below for more details) 5. Click on Save Tax Information Fields Basic Tab Name: Provides the description or full name of the tax when printing out agreements or checking out vehicles. (e.g. Goods & Services Tax) Code: Tax code is used to identify the Tax name on the rental agreements. Please use a short name or acronym (e.g. GST) Vehicle Type: Vehicle type refers to the size of the vehicle (e.g. compact, economy, full size, luxury, etc.) Throughout the application, when the vehicle type is selected, it will automatically identify with the tax entered with it on this screen. You can select ALL to apply this rate to all vehicle types or select one or more vehicle types from the list Calculation By: Most of the taxes are calculated by percentage type but you are also able to have other types of calculation such as 24 Hour, Calendar Day and Flat. For example you could use the 24 Hour calculation for Vehicle Licensing Tax. Rate: Enter the tax rate. For example for 5% tax enter “5” in the rate field and not “0.05” Active: Check this option to activate the rate. If the rate in not activated, it will not display anywhere in the application Display Online: Select this option to have this tax available online User Manual 39 Advance Tab Applicable Taxes, Insurances and Misc. Charges: Click on ALL or select specific items that are taxable. Mandatory Tax: Select this option to make this tax mandatory Value Pricing: When selected, the application will automatically check to see if the higher line rate is cheaper than the final calculated rate. For example if someone rents the car for 6 days and the total is greater than the weekly rate, the software will automatically use the weekly rate. Taxable: This option allows you to have tax on tax and it’s only applicable to any calculation type except Percentage. Misc. (Miscellaneous) Charges Misc. Charge is designed to let you specify all your miscellaneous charges such as additional driver or baby seats. To Add New MiscCharge 1. Click on MiscCharges 2. Click New 3. Enter the MiscCharge information (see “MiscCharge Fields” below for more details) 4. Click on Save To Edit MiscCharge 1. Click on MiscCharges 2. Select the MiscCharge Rate you would like to edit 3. Modify the information (see “MiscCharge Fields” below for more details) 4. Click on Save MiscCharge Fields Basic Tab MiscCharge Code: Used to identify the miscellaneous charge name on the rental agreements. Please use a short name or acronym. (e.g. AD) for additional driver MiscCharge Name: Describes the description or full name of the miscellanies charge when printing out agreements or checking out vehicles.(Additional Driver) Vehicle Type: Vehicle type refers to the size of the vehicle (e.g. compact, economy, full size, luxury, etc.) Throughout the application, when the vehicle type is selected, it will automatically identify with the Misc. Charge entered with it on this screen. You can select ALL to apply this rate to all vehicle types or select one or more vehicle types from the list 40 Rent Centric V 2.0 Calculation By: Most of the miscellaneous charges are calculated by standard 24 Hour calculation, but you are also able to select percentage calculation for specific charges such as Airport tax. Display Online: Select this option to have this tax available online Active: Check this option to activate the miscellaneous charge rate. If the rate in not activated, it will not display anywhere in the application. Advance Tab Grace Minutes: Enter minutes which you will allow the customer to be late when returning the vehicle. System will give 59 minutes by default. Any number entered in this field will be added to 59 minutes. You are able to enter a negative number for example -59 which means 0 grace minutes. Effective Date and End Date: Enter the start and end date range for insurance to be available. Image: Browse to Upload an image for this insurance. For example for CDW you can use a safe driver wearing seatbelt. This image will show on your website when you clients click on Optional Extras areas to view more details about your insurances. Value Pricing: When selected, the application will automatically check to see if the higher line rate is cheaper than the final calculated rate. For example if someone rents the car for 6 days and the total is greater than the weekly rate, the software will automatically use the weekly rate. Driver is Underage: This charge will apply if the driver is underage. You can set the underage value at Location Information page. Additional Driver: This charge will apply if additional driver is added to the reservation or agreement. Prepaid Fuel Charge: Click if you wish prepaid fuel to automatically charge on agreements. Default MiscCharge: Click if you wish this MiscCharge to automatically charge on agreements. Rental / Discount Reasons Rental / Discount reasons are used to keep track of any specific reasons a car may have been rented or discounted to a customer. This screen allows you to add/remove rental/discount reasons which are used in customer agreements. User Manual 41 To Add Rental/Discount reason 1. Click on Rental/Discount reasons from the Administration screen. 2. Click New 3. Enter the Rental/Discount reason (e.g. Business, Pleasure, Holidays, etc.) 4. From the Type drop down menu select either “Rental” or “Discount” to identify the reason 5. Type any additional information you like in the memo window (optional) 6. Click Save To Delete a Rental/Discount reason 1. Click on Rental/Discount reason from the Administration screen 2. Select the radio button next to the Rental/Discount reason you would like to delete 3. Click Delete 4. You will be prompted with a deletion conformation message. Click Yes to delete the Rental/Discount reason Vehicle options Vehicle Makes Vehicle make is used when adding a vehicle. This screen allows you to add/remove different vehicle makes. Vehicle makes are used across all locations. To Add Vehicle Make 1. Click on Vehicle Makes from the Administration screen. 2. Click New 3. Enter the Vehicle Make Name (e.g. Honda) 4. Click Save To Delete a Vehicle Make 1. Click on Vehicle Makes from the Administration screen 2. Select the radio button next to the Vehicle Make you would like to delete 3. Click Delete 4. You will be prompted with a deletion conformation message. Click Yes to delete the Vehicle Make Vehicle Models Vehicle model is used in conjunction with vehicle make when adding a new vehicle. This screen allows you to add/remove different vehicle models in conjunction with Vehicle Makes. Vehicle models are used across all locations. To Add Vehicle Model 1. Click on Vehicle Models from the Administration screen. 2. Click New 42 Rent Centric V 2.0 3. From the Make drop down menu, select an Associated Make (e.g. Toyota) 4. Enter the Vehicle Model Name for the selected make (e.g. Corolla) 5. Click Save To Delete a Vehicle Model 1. Click on Vehicle Models from the Administration screen 2. Select the radio button next to the Vehicle Model that you would like to delete 3. Click Delete 4. You will be prompted with a deletion conformation message. Click Yes to delete the Vehicle Model Vehicle Types Vehicle Types are used to group different vehicles. For example you can group Economy or Full Size cars by assigning them a vehicle type. This helps when arranging rates or giving quotes to customers. Use this screen to add/remove different Vehicle Types during checkout and check-in transactions To Add Vehicle Type 1. Click on Vehicle Types from the Administration screen 2. Click New 3. Enter the Vehicle Type Name (e.g. Full-Size) 4. Click Save To Delete a Vehicle Type 1. Click on Vehicle Types from the Administration screen 2. Select the radio button next to the Vehicle Type that you would like to delete 3. Click Delete 4. You will be prompted with a deletion conformation message. Click Yes to delete the Vehicle Type Status A new status such as "Staff" may be added you may then change the status of the vehicle in Vehicle Specifications. You may also select the color which appears on the Vehicle Status pie chart on the Home page Body You may add a new vehicle body such as "Trailer" for example User Manual 43 Customers Menu Customers menu allows you to search/add/modify Customers and perform different actions on them such as making a reservation or opening an agreement. By clicking on Customers Menu you will have the option to either find customer or add new. Find Customer This utility allows you to search for an existing customer by entering one or all of the following search criteria: First Name Last Name Phone Number Credit Card 1 or 2 Customer ID Zip/Postal Code Company Name Company Phone number Customer Code You could also search by partial information. For example you can enter “b” for first name in order to search for Bill Smith. This value retrieves all customers who have “b” in their first names such as Bob or Rob. This search capability applies to all the other fields in the search screen. To find an existing Customer 1. Click on Customers Menu 2. Enter one or all of the customer information in the search criteria fields (e.g. first name, last name, phone number, etc.) 3. Click Search 44 Rent Centric V 2.0 Add New Customer Use this screen to add new customers to the system. To Add a New Customer 1. Click on Customers Menu 2. Click on Add New 3. Enter customer information with the following methods a. Enter all the requirement fields. b. If you have a card reader, place your cursor into the card reader field. Swipe the driver’s license and the system will automatically read the content of the driver’s license and place them in the appropriate fields. If you have an ID Scanner; scan ID hit the enter key and the system will automatically enter information in to appropriate fields. Enter any other required information marked with star (*) and click next. 4. Click Save. You will be forwarded to main customer screen After retrieving and selecting a customer you are able to perform different actions such as modifying their information or opening an agreement. First Name: Enter your customer's first name Last Name: Enter your customer's last name Address: Enter your customer's address Address2: Enter additional address information, if required Zip: Enter your customer's zip or postal code City: Enter your customer's city of residence State: Enter your customer's state or province of residence Country: Enter your customer's home country Phone: Enter your customer's home telephone number Local Phone: Enter your customer's local telephone number Email : Enter your customer's email address Customer Notes: Enter notes Driver’s License Number: Customer's driver's license # License State: Customer's driver's license state or province Date of Birth: Customer's date of birth License Expiry: Customer's driver's license expiry date Insurance Company: Customer's insurance company name Policy Number: Customer's insurance policy number Insurance Expiry: Customer's insurance policy expiry date Insurance Phone: Customer's insurance company's telephone number Insurance Fax: Customer's insurance company's fax number User Manual 45 More Info o Gender: Select Male or Female from drop down menu o Title: Select Mr, Mrs, Ms, Miss, Dr, Prince or Shk from drop down menu o Source Of Referral: Enter referral of where your customer's business came from, internet for example o Undesired Active Preferred Check one or more o SSN/SIN: Social security number or social insurance number o Cell/Fax: Cell or fax numbers o AAA Membership Number: American Automobile Association membership number, if applicable o License Country: Country of driver's license o Are you licensed to driver a motorcycle?: Select Yes or No from drop down menu o Policy Number: Customer's insurance policy number o Agent: Customer's insurance company's agent's name o Approved By: The name of the person approving the information provided o Company/Corporate: The company where the customer is employed from drop down menu o Employer Name: The company where the customer is employed o Employer Address: Customer's employer's address o Employer City: Customer's employer's city o Zip/Postal Code: Customer's employer's zip or postal code o Employer Fax: Customer's employer's fax number o Frequent TravelerID: Frequent traveler ID #, if applicable o Company Phone: Customer's employer's telephone number o Employer Email: Customer's employer's email address o State/Province: Customer's employer's state or province o Region: Region to which customer may be assigned o Password: Password established by customer to allow release of private information o Band Name: Customer's band name, if applicable o Preferred Body: Preferred vehicle body type, if applicable o Job Position: Customer's job title o Tax ID: Tax ID# if tax exempt o DBA Name: Doing business as name, if applicable o Passport Number: Passport number, if applicable 46 Rent Centric V 2.0 Customer Information This screen allows you to modify customer information. You can also add, modify or delete notes for each customer on this screen To add a Note 1. Click on New 2. Enter your note context 3. Click Save To edit a Note 1. Select the radio button next to the note you would like to modify 2. Click on Edit 3. Modify the note and click Save To delete a Note 1. Select the radio button next to the note you would like to delete 2. Click Delete 3. You will be prompted with a deletion confirmation message. Click Yes to delete the note Open New Agreement (Check out) By clicking on this link you will be able to open a new agreement (checkout vehicle) for a customer. (Please refer to checkout process in this manual) Close Last Agreement (Check In) By clicking on this link you are able to check in a vehicle or close the last agreement for a customer. (Please refer to check-in process in this manual) Agreements This screen shows you all the agreements for the selected customer and you’re able to perform different actions on each agreement Reservations On this screen you can view the existing reservations for the selected customer or perform the following actions User Manual 47 Agreements Menu Agreements menu allows you to search/add/modify agreements and perform different actions on them such as editing, closing (checkin) or applying payment on an agreement. By clicking on Agreements Menu you will have the option to either find customer or add new. Find Agreement This utility allows you to search for an existing agreement by entering one or all of the following search criteria: Agreement # Pickup and Return dates First Name Last Name Location Out/In Reservation # Credit Card 1 or 2 Agreement Status Vehicle ID Vehicle Make Vehicle Type Vehicle’s License Plate Vehicle Color You could also search by partial information. For example you can enter “b” for first name in order to search for Bill Smith. This value retrieves all agreements of renter's with “b” in their first names such as Bob or Rob. This search capability applies to all the other fields in the search screen. 48 Rent Centric V 2.0 One you find the agreement, click on the agreement and now you are in agreement main screen. Agreement Details: Use this screen to see detailed agreement information. Close Agreement: Click here to close agreement (checkin process). Please refer to checkin process in this document. Print Agreement/Invoice: You can simply re-print selected rental agreement or invoices. Edit/Void/Delete Agreement: You can click here to edit/Void/Delete rental agreement depending on your permission. Notes: Click here to enter notes under this agreement. Payments/Charges: This screen allows you to manage payments and charges under rental agreements. If you have enabled internet payment gateway feature (please refer to internet payment gateway section in this document) you can process credit cards by: 1. Clicking on Process Credit Card 2. Enter the amount 3. Select transaction type (Authorize, Payment or Refund) 4. Select the card on file or click to Add New 5. Click on More to specify more information and click Submit. You can apply a payment by entering a pre-authorize number and transaction code and clicking on Submit. If you don’t specify this information, system will generate a fresh payment with new authorization and transaction codes. For refund, you must enter the amount and enter the authorization and transaction codes to specify which payment is being refunded in this transaction and then click on Submit. User Manual 49 Bill Split: Bill Split allows you to split the rental amount between one or more parties. You are able to create a new Bill, select the company who will be sharing or completely paying this bill and enter the amount to create a new split bill between the customer and for example insurance company. o Company: Select company from drop down menu pulls from Companies/Corporates on Administration page o Claim Type: Select Renter, 3rd Party or Other if insurance claim for example o Insurance Company: Add Insurance company if insurance claim or leave blank o Policy Number: Enter policy number if insurance claim or leave blank o Policy Expiry: Enter policy expiry date if insurance claim or leave blank o Pre-Paid: Enter amount if company has prepaid amount o Lump Sum: Enter amount of lump sum payment o Amount : Enter daily amount lump sum payment o Adjusters: Select Adjusters name from Company if insurance claim o Pay Total: Check if company is paying total rental bill o Memo Add memo o Insured: Enter Insured name if insurance claim usually renter's name on RA o RO#: Add repair order #, if applicable o PO#: Add purchase order #, if applicable o Loss Date: Enter date of accident if insurance claim o Claim #: Enter claim # from insurance company o Max Pay: Enter amount of maximum payment o Company Pays: Enter % company will pay o Number Of Days: Enter # of days of rental if "Amount" box is daily amount or 1 if lump sum amount o Pay All Taxes: Check if company pays all taxes o Taxes: Check specific tax(es) company will pay Note: Company must be added from the Administration tab -Companies/Corporates prior to generating a bill split. 50 Rent Centric V 2.0 Traffic Tickets: Use this utility to manage/add/delete traffic tickets for each customer. o To add a Traffic Ticket 1. Click on New 2. Enter the ticket information into the fields 3. Click Save o To edit a Traffic Ticket 1. Select the radio button next to the ticket you would like to modify 2. Click on Edit 3. Modify the ticket information and click Save o To delete a Traffic Ticket 1. Select the radio button next to the ticket you would like to delete 2. Click Delete 3. You will be prompted with a deletion confirmation message. Click Yes to delete the ticket o Ticket Date: Date offence occurred o Offence: What offence is i.e. parking, speeding etc., o Location: Location of offence o Amount : Amount of ticket o Officer: Police Officer's name on ticket, if applicable o Is Paid: If paid; it will apply both Credit and Debit. If not paid this will only apply a Debit o City: City where offence occurred o State: State where offence occurred o Country: Country where offence occurred o Memo: Note o Apply Payments: Check to apply payments o Process Credit Card: Check to process credit card; select credit card from drop down list Additional Drivers: After you open the rental, you are able to add/edit additional drivers via this screen. You can simply Add New or Search existing customers to add additional drivers. o First Name: First name of additional driver or new customer o Last Name: Last name of additional driver or new customer o Address: Address of additional driver or new customer o City: City of additional driver or new customer o State: State of additional driver or new customer o Zip: Zip/Postal code of additional driver or new customer o Memo: Note for additional driver or new customer o Phone: Telephone # of additional driver or new customer User Manual 51 o Fax: Cell or fax # of additional driver or new customer o Email: Email address of additional driver or new customer o Birthday: Date of birth of additional driver or new customer o License Number: Driver's license of additional driver or new customer o License Expiry: Driver's license expiry date of additional driver or new customer o Country: Country on driver's license of additional driver or new customer o State: State/Province on driver's license of additional driver or new customer Pickups/Drop-offs: Enter pickup or drop off information here. Vehicle Exchange: You can perform vehicle exchanges (swaps) as many times as required. On the left simply enter the incoming (current) vehicle information such as odometer, fuel and status and on the right side, search for the new vehicle or enter the vehicle ID, odometer and fuel will populate automatically and then you can save and from this point vehicle on the rental agreement will be the new vehicle entered by the user. 52 Rent Centric V 2.0 Reservations This button is to perform a search for reservations or add new reservations. This is an easier way to search for a customer with their reservation information. Reservation Search Utility: This utility allows you to search for an existing customer by entering one or all of the following search criteria: This utility allows you to search for existing reservations by entering one or all of the following search criteria: Reservation ID Date Out Begin and End First Name Last Name Phone Number Vehicle Type Location Company Name. One you find the agreement, click on the agreement and now you are in agreement main screen. User Manual 53 Edit/Cancel/Delete Reservation: You can click here to edit/cancel/delete reservation depending on your permission. Print Invoice: You can simply re-print selected rental agreement or invoices. Checkout: Click here to start a rental from this reservation. All the reservation information will carry over to your rental eliminating repeat data entry and making it a quick process. Notes: Click here to enter notes under this agreement. Move Reservation: Click here to find/add a customer and move this reservation under that customer. Email Reservation Details: Click here to email reservation details to the customer. Payments/Charges: This screen allows you to manage payments and charges under reservations. If you have enabled internet payment gateway feature (please refer to internet payment gateway section in this document) you can process credit cards by: 1. Clicking on Process Credit Card 2. Enter the amount 3. Select transaction type (Authorize, Payment or Refund) 4. Select the card on file or click to Add New 5. Click on More to specify more information and click Submit. You can apply a payment by entering a pre-authorize number and transaction code and clicking on Submit. If you don’t specify this information, system will generate a fresh payment with new authorization and transaction codes. For refund, you must enter the amount and enter the authorization and transaction codes to specify which payment is being refunded in this transaction and then click on Submit. Add New Reservation o Reservation #: Automatic numbering set up in Location Information from the Administration tab or over ride the field. o First Name: Add renter's first name or click Search to search for customer in your database o Last Name: Add renter's Last name o Email: Add renter's email address o Phone: Add renter's telephone # o Location Out: Select Location Out from drop down menu o Location In: Select Location In from drop down menu o Date Out: Enter date vehicle is to leave location. You may select date from the calendar or enter in input box. You may select time from clock or enter time in input box 54 Rent Centric V 2.0 o Num Days: Enter number of days of rental to auto complete Date In o Date In: Enter date vehicle is to return to the location. You may select date from the calendar or enter in input box. You may select time from clock or enter time in input box o Company: Enter company name of customer's employer or search companies/corporates database o Vehicle Type: Select Vehicle type from drop down menu o Rate: Select rental rate specific to vehicle type selected o Vehicle: You may assign a specific vehicle or leave the reservation for a vehicle type only o Discount: Select % or $ and amount of discount, if applicable. Amount will subtract from the rental agreement o Discount Reason: Select discount reason from drop down menu added previously from the Administration tab > Rental/Discount Reason o Referral: Add New referral or select from drop down menu previously added from the Administration tab > Referrals o Airline: Airline of renter's flight, if applicable o Flight #: Flight # of renter's flight, if applicable o Hotel: Local hotel of renter, if applicable o Arrival Airport: Local airport of renter's flight, if applicable o Customer Notes: Notes for customer, pick up at airport for example o Memo: Add note o Change Reason: Required for edit of reservation such as extension to date o Insurance: Check any insurances to be charged such as CDW. o MiscCharges: Check any MiscCharges to be charged such as Additional Driver o Sales Tax: Check to charge tax on taxable items. See Administration tab > Taxes to edit taxable items o Add/Edit Other Charges: Click to add/edit other charges. Use to add a random charge such as extreme cleaning or enter minus amount (-50 for example) to provide a discount not taxed if entered in other charges o Update Charges Summary: Any items charged will appear here and may be updated if changed. o Payment Processing: If set up to process debit/credit cards in Internet Payment Gateway on the Administration page you may apply a processed payment or add cash payment o Swipe for Better Discount Rate: Swipe the credit/debit card to receive a better transaction charge rate or enter manually o Process Credit Card: Check to process debit/credit card o Payment Method: Select pay method such as Visa, MasterCard or cash User Manual 55 o Credit Card: Select from drop down menu credit/debit card previously entered in Credit Cards on customer profile screen o Amount: Enter amount of payment o Transaction Type: Select from drop down menu; Payment, Authorization or Refund o Authorization Code: Enter 0 or authorization code o Transaction Code: Leave blank if obtaining an authorization or enter # if processing payment from an authorization o Apply Payment: Click to process payment o Save: Click to save reservation information o To print to paper please click on the printer icon on the top tool bar. Bill Split: Bill Split allows you to split the rental amount between one or more parties. You are able to create a new Bill, select the company who will be sharing or completely paying this bill and enter the amount to create a new split bill between the customer and for example insurance company. Please see information under Agreements Bill Split. Note: Company must be added from the Administration tab -Companies/Corporates prior to generating a bill split. Additional Drivers: After you open the rental, you are able to add/edit additional drivers via this screen. You can simply Add New or Search existing customers to add additional drivers. Please see information under Agreements Additional Drivers. 56 Rent Centric V 2.0 Vehicles Vehicles menu allows you to search/add/modify vehicles and perform different actions on them. Add New Vehicle By clicking on this link you could add a new vehicle to you fleet To add a New Vehicle: 1. Click on Vehicles Menu 2. Click on Add New Vehicle 3. Enter the vehicle specs accurately. This screen will prompt you to enter the required fields. Click Save 4. Enter the ownership information, this information is needed for reporting and vehicle payment and sales tracking. Assigned ID: System will automatically assign a vehicle ID# this may be over written with license plate # or partial VIN Original Odometer: Odometer reading when vehicle purchased/leased Current Odometer: Odometer reading of vehicle now Year: Year of manufacture of vehicle Transmission: Select Automatic, manual or tip tonic Colour: Enter color of vehicle Vehicle Type: Select vehicle type from drop down menu previously added from the Administration tab Rental Location: Current rental location of vehicle Owning Location: Location which owns the vehicle Current Location: Current rental or offsite location of vehicle i.e. LAX airport Active: Check for active, available vehicle in your fleet, uncheck to deactivate Spot Number Make: Make of vehicle such as Ford Model: Model of vehicle such as Escort Model Code: Model Code such as XLT Doors: Number of Doors on vehicle Cylinders: Number of cylinders of the vehicles engine Memo: Note on vehicle Current : Status of vehicle Available or On-Rent for example Body: Select body of vehicle Car or Truck for example previously added from the Administration tab Options: Add Options available in this vehicle User Manual : # in your parking lot where vehicle is located 57 Fuel Type: Select from drop down menu Gas or Diesel for example Fuel Level: Set current fuel level of vehicle. Fuel IN of RA will update this fuel level Tank Size: Set # of gallons/liters used to calculate Fuel Charge if fuel IN is less than fuel OUT Maintenance Every: Set # of km/miles between maintenance, every 5000 for example Inspection Date: Enter date vehicle was last inspected Insurance Amount: Enter amount paid for insurance Inspection Amount: Enter amount paid for vehicle inspection License Number: Enter license plate # or temp License State: Enter license plate # state/province License Amount: Enter license plate amount License First Registered: Enter date vehicle was first registered License Expiry Date: Enter date license plate expires; system will trigger a pop-up reminder message LDW: Enter amount paid for loss damage waiver VIN: Enter vehicle identification number Key Number: Enter number entered on vehicle keys Vehicle Image: Upload vehicle image displayed internally only from here Dimensions: Enter dimensions of vehicle Power Train: Select 4x2 or 4x4 Find Vehicle This utility allows you to search for an existing vehicle in your fleet by entering one or all of the following search criteria: 58 Vehicle ID License Plate Number Make Current Status Owning Location Current Location. Transmission VIN Number Current Status Vehicle Type Year Active / None Active Rent Centric V 2.0 To search for a vehicle 1. 2. 3. 4. Click on Vehicles on the Menu Click Find a Vehicle Enter the partial or complete search criteria and click Search If your search is successful click on the radio button beside the vehicle ID and click Search. Now you are in vehicles main screen. Vehicles Main Screen The following submenus are available on the vehicle main screen. Vehicle Specifications: This screen is used to modify/update and track vehicle specifications. You an also change the vehicle type, location or status. Ownership Information: This screen is used to modify and update vehicle leasing and sales information o Price: Original price paid for vehicle o Buy Back Value: Amount of buy back value, if applicable o Monthly Payment: Monthly payments for load, if applicable o Acquisition Type: How vehicle was acquired i.e. auction o Acquisition Date: Date vehicle was acquired o Acquisition Price: Price vehicle was acquired for o Selling Company: Company Selling vehicle, if applicable o Clean Wholesale: Wholesale price of vehicle without liens or loans o Book Retail: Retail book value of the vehicle o Registered Owner: Registered owner of vehicle, if applicable, select from drop down menu of Registered owners entered previously from Administration tab > Common Settings User Manual 59 o Average Auction Value: Average auction value for vehicle o Title Comment : Any comments made on Title document of vehicle o Loan Number: Loan number, if applicable o Bank: Bank where loan was processed or holding loan, if applicable. Select from drop down menu. Entered in Companies/Corporates with Company Type of "Bank/Finance" o Lease Term: Terms of the lease agreement, if applicable i.e. 5 year term o Finance Amount: Amount of loan o Finance Date: Date loan acquired o Interest Rate: Interest rate on loan o Payment Amount: Monthly payment amount o Monthly Depreciation %: Vehicle Depreciate % i.e. .02 o Book Value: Retail book value of vehicle o Asking Price $: Asking price if selling vehicle o Title Location: Location of title document for vehicle o Title Date: Date title was obtained for vehicle o Owner First Name: Owner's first name or owning location name o Owner Last Name: Owner's last name o Owner Address: Owner's or location's address o Owner City: Owner's or location's address o Owner Zip: Owner's or location's address o Owner State: Owner's or location's address o Owner Phone: Owner's or location's telephone # o Owner Fax: Owner's or location's fax # o Date Sold: Date vehicle sold, if applicable o Sold: Retail Wholesale Export Originating Dealer Buyer o Out Of Service Odometer: Odometer reading when vehicle went or is to go out of service o Out Of Service Date: Date when vehicle went or is to go out of service o Sales Price: Price vehicle sold for, if applicable o Buyer: Person or company who purchased the vehicle o Balance Owed : Any outstanding balance owed on vehicle, if applicable o Sell Online: Check if selling online Damages: Use this screen to enter/modify damages on a vehicle. By looking at the picture on the left hand side you could enter the damage level such as Scratch or bent on the right hand side including the description and total damage amount. Accidents: With this screen you could enter and track vehicles accidents and date they occurred. 60 Rent Centric V 2.0 Carwash: Enter your carwash activity with this screen. You can enter carwash information such date and odometer the car was washed at. Maintenance: This screen allows you to enter and track the maintenance history of a vehicle such as oil service or full service. Every time you enter a new maintenance record you can enter the next maintenance type and odometer and these values will show up in the next maintenance entry. o Current Maintenance Date: Date maintenance completed o Current Maintenance Type: Type of maintenance i.e. oil change or tire rotation o Current Maintenance Odometer: Odometer reading when maintenance completed o Maintenance Shop: Shop where maintenance was completed such as Jiffy Lube for an oil change o Shop Contact Name: Main contact name at shop o Shop Phone Number: Shop's phone # o Labor Cost: Total labor cost of maintenance o Memo: Notes o Future Maintenance Reminder: System will auto-complete date 3 months in to the future, you may adjust this date o Future Maintenance Type: Enter maintenance type such as oil change o PO#: Purchase Order #, if applicable o Payment Type: How maintenance was paid for o Payment Amount: Amount paid for maintenance o Parts Cost: Amount paid for parts, if applicable Problems: This is screen is used to log the vehicle problems. By checking the provided check box you’re able to automatically change a vehicle status to “Vehicle Has a Problem” which will make the vehicle unavailable. To change the status back to available simply go to vehicle information screen and select Available for vehicle status. o Description: Description of vehicles problem, i.e. squeaky fan belt o Problem Date: Date problem occurred o Odometer: Odometer reading when problem occurred o Status: Current status of vehicle, i.e. Out of Service Repairs: Use Repairs screen to enter and track the repair orders. Always enter the total cost and labor to have accurate reporting. Upload/Delete Image: You can upload actual vehicle images under this vehicle. Deactivate: To remove (delete) vehicles from your fleet simply click on this button or go to Vehicle specification screen and click on Active check box. This will not delete the vehicle from your database but will only send it to archives which are not accessible for rentals and reservations. You will still be able to access this vehicle or activate it again. User Manual 61 Reports Menu Reports are designed to allow you monitor your business accurately. All reports are web-based and viewable online through a web browser. You need to download the report viewer to view the reports. Simply click on the link provided on reports page and download the report viewer. If any complete or partial value is provided the report is narrowed down to the specified value. For example if you are generating customer list, if you enter bill for first name, the report will generate all customer with bill as their first name. All reports are exportable to the following formats: 1. Excel 2. Word 3. Rich Text 4. PDF To export a report 1. Generate a report 2. Click on the export button on the report screen 3. Select the format. 4. Browse to the location you would like to save the export. 5. Click OK 6. Then you will be prompted to open the exported report. o Vehicle List: Reports vehicle information including current odometer reading, VIN and vehicle type o Vehicle Status: Provides a real-time pie charge and list of current fleet status. You may filter by vehicle make, model, type, status or location o Fleet Utilization: Provides information on # of rentals, dates rented and % of utilization. You may filter by vehicle make, model, type, location and date range. o Vehicle License Expiration: Provides a list of vehicle license expiration with in the date range selected. You may filter by vehicle make, model , type, status or location o Vehicle DueIn: Provides a list of vehicles due in from a rental with in the date range selected. You may filter by vehicle make, model , type or location o Vehicle Profit/Loss: Provides a list of profit or loss for your fleet. Revenue less expenses and depreciation. You may filter by date range, vehicle make, model, type, status or location o Fleet Utilization Chart: Provides a line graph of fleet utilization based on date range and vehicle type. 62 Rent Centric V 2.0 o Vehicle Repairs: Provides a list of repairs including shop, parts and labor charges. You may filter by date range, vehicle make, model , type or location o Vehicle Lease/ Loan: Reports detailed ownership information such as Acquisition type, date, Loan #, bank and terms. o Vehicle Maintenance: Provides a list of vehicle maintenance due within the date range selected. Information includes Shop, maintenance type such as oil change and amount o Vehicle Maintenance Alert: Provides a summary of up coming maintenance with KM/Mileage until maintenance is due o Snap Shot.: Over all view of rentals per vehicle type o Vehicle Insurance: Provides a summary by Vehicle ID as to what type of coverage the vehicle has such as liability Only or Full Coverage o KM Difference/Missing: Provides a list of RA's with Odometer Out/IN and difference grouped by Vehicle ID for a selected date range o Agreement Status: Provides list and pie chart of the status of RA's with in a selected date range o Vehicle Rental Calendar: Provides a bar graph of RA's based on date range selected o Corporate A/R By Bills: Provides an aged list of bill split invoices generated for companies may be filtered to age or balance owing o Customer A/R Report: Provides a list of RA's with Res# may be filtered to balance owing, zero balance or all o Reservation A/R by Bills: Provides a list of bill split invoices generated for companies on a reservation may be filtered to balance owing o Corporate A/R Analysis: Provides a list of Corporate accounts receivable split in to aged columns, 30 day, 30-60 day columns o Fleet Grid: Provides a summary grid of Fleet count, on rent, Res Out and a number of items including what's available for each day of your selected range o Custom: Any report you have developed will be located here o Reservations: Provides a list of reservations with dollar amounts based on date range, make, vehicle type or status o Reservation Manifest: Provides a list of reservations based on date range, make, vehicle type or status o Reservation Forecast: Provides a grid for each vehicle type of In fleet, booked and expected returns for date range selected o Reservation Grid: Provides a grid of In fleet, Res Out, On Rent and Due In for selected date range o Reservations No Showup/Cancelled: Provides a detailed list of reservation information of reservations not honored for a selected date range o Reservations Calendar: Provides a bar graph of Reservations with Vehicle ID for selected date range User Manual 63 o Dynamic Scheduler: Provides a bar graph of Agreement and reservation for a selected date range. Reservations may be moved to a different vehicle making way for a longer rental/reservation; information will automatically update on moved reservation o Visual Scheduler: Provides a bar graph of Agreement and reservation for a selected date range. o Customer List: Provides a list of all customers or customer's birth dates with in a selected date range o Customer By Region: Provides a list sorted by region if customer placed in regions o Traffic Tickets: Provides a list of RA's where traffic tickets have been added and whether they are paid o Referral: Provides a list of RA's where a referral has been entered for a selected date range. List sorted by referral o Payments & Charges: Provides a list of Payments & Charges sorted by payment method, AmEx for example o Customer Notes: Provides a list of notes made to a customer and when they were entered in the system o Customers Undesired: Provides a list of customers flagged as "Undesired" o Daily Business Report: DBR lists RAs closed with in date range selected summarizing revenue, MiscCharges and taxes o Daily Cash Summary: Reports payment methods received in a selected date range sorted by payment method o Month To Date: Report summarizes revenue and breaks down items sold with in MiscCharges, Insurances and taxes for example for selected month o Agreements: Provides a list of agreements for selected date range. Sorted by AdminID subtotaling several categories such as insurance sold. o Event Tracking: Provides a report of system events based on AdminID or keyword for a selected date range. For example you may track what AdminID [email protected] has done for the past day or week. o Tasks: Provides a list of tasks generated with in a selected date range may be filtered by subject name o Commissions: Provides a list of RA's with commission amounts if AdminID set up with commission payment o Sales Projection: Provides a list of RA's with Location and amount information o Work In Progress: Provides a list of open RA's sorted by AdminID o Revenue by Customer: Provides a list of RA's sorted by All or a specific customer as specified by filter and date range o Revenue by Vehicle: Provides a list of RA's sorted by All or a specific vehicle as specified by filter and date range o Revenue by Location: Provides a list of RA's sorted by All or a specific location as specified by filter and date range 64 Rent Centric V 2.0 o Revenue by Rates: Provides a list of RA's sorted by All or a specific rental rate as specified by filter and date range o Revenue by Company: Provides a list of RA's sorted by All or a specific company as specified by filter and date range o Non-Revenue: Provides a list of RA's where "Non-Revenue" has been checked for a selected date range o Revenue by Options: Provides a list of RA's sorted by All or a specific option as specified by filter and date range User Manual 65 Manage Menu Manage menu allows you to access some of the most used functionalities of the administration which is commonly used by your staff. Here we will address features which are not in the administration. Import Utilities You are able to import vehicles, customers, companies and many more of your existing information via a CSV file into Rent Centric. Simply click here to download the latest documentation and import file templates: http://www.rentcentric.com/UploadTemplatesAndSpecs.zip Tasks Rent Centric helps substantially increase productivity and improve internal communication with its task system. The feature allows for easy communication, between employees and different locations. This page option works like an email system. Each time a task is opened for user, when the user logs in the system will notify them that they have a task waiting for them. They could update, add or even delete task from their screen. In addition the system will email the user with their task making it easy for them to view task from their email clients. Point Of Sale With this utility, you are able to add merchandise inventory, create purchase orders and printing invoices by creating new orders. Email Marketing With this tool you can send out marketing email to your customers based on different filters. Re-open Agreement This tool allows you to automatically close and re-open agreements with same information and generate new rental agreements with new date range. 66 Rent Centric V 2.0 Quote This tool allows you to generate a quotation of a rental including taxes and any insurances or MiscCharges added. o Look Up Quote: You may search for a quote by Quote # o Advanced Search: You may search for a quote by Quote #, client first name and/or last name, phone # or a date range o Pickup Date: Expected Date out of vehicle o Return Date: Expected Date in of vehicle o Pickup Location: Location Out of vehicle o Return Location: Location IN of vehicle o Company: Company of employment for client o Vehicle Type: Vehicle type assigned to vehicle for quote o Rate: Rental rate assigned to vehicle type for quote o Discount: You may generate a discount based on % or $ o Options: You may check MiscCharges and/or insurance to quote o Add/Edit Other Charges: You may add/edit Other Charges I - IV o Generate Quote: System will calculate all items in quote o Save: You may save the quote o Rent: You may generate a rental agreement based on quote information o Reserve: You may generate a reservation based on quote information o Email: You may email the quote to your client, after saving quote o SMS: You may sent quote information to your client's cell phone, after saving quote o Print: You may print the quote, after saving quote User Manual 67 Quick Reference Checkout On the Home page, click on Rent Now to go to Checkout page. A. On Customer tab Choose one of three options for entering customer information: Option A: Manual entry 1. Start typing customer information into the provided fields (be sure to complete any mandatory fields marked with required) Option B: ID Scan 1. Click on ID Scan to open ID Scan window 2. Place the driver’s license in the scanner and begin the scan 3. Place the Passport in the scanner and begin the scan 4. Customer information will populate in the ID Scan window 5. Make any necessary adjustments and click Populate Data to return to the Checkout screen. 6. Enter arrival date and click browse to upload passport and driver's license scanned images. Option C: Search for Customer 1. Click on Search to open customer search window 2. Enter complete or partial customer information (e.g. last name, driver’s license number, etc.) 3. Click Search button 4. Find your customer in the list and click on Select to populate data and return to Checkout Screen 5. Complete any missing mandatory fields manually To add additional drivers: Scroll to the bottom of the Checkout page and click Add More Drivers. Follow any of the above three options to enter additional drivers. Note: To edit or remove any of the existing drivers, you can click on Edit or Delete in the driver’s list at the bottom of the screen. Click on Save And Go to Agreement Tab to continue to the Agreement tab 68 Rent Centric V 2.0 B. On the Agreement tab 1. Enter the number of days required in the Number of Days field (either manually or using the provided calendars) 2. Select a Vehicle Type and the rate will automatically populate 3. Select Rate (Rate Detail can be used, by authorized users, to override rate values) 4. Enter Vehicle ID either manually or by clicking on Search next to the Vehicle ID field. Click Search again in the Vehicle Search window to select the required Vehicle ID. Click Select in front of the Vehicle ID needed. 5. Odometer and Fuel level Out can be manually adjusted if necessary 6. Select options and add-ons from the list by checking on the boxes 7. Click on Update Charges Summary to apply any new options selected. (you can override any of the option values by clicking on the option name inside the Charges Summary box). 8. If required, enter payment information (either manually or by swiping the Credit Card) 9. Click on Apply Payment 10. Select Agreement Printout 11. Click on Complete and Print Agreement 12. The agreement will print on the screen and you can click the Print icon on the top right of the menu bar to print the document on paper User Manual 69 Check-In On the Home page, under the Quick Look Up section, entre the agreement number in the Agreement # field and click Search Once you find the agreement, click Return button next to the agreement to begin the Check In process On the Check In page 13. Adjust the Dates (if necessary) 14. Enter the Odometer In 15. Adjust Fuel In slider to the current level 16. Click Damages button to enter any damages on the vehicle 17. If required, enter payment information (either manually or by swiping the Credit Card) 18. Click on Apply Payment 19. Select Agreement Printout from the drop down menu 20. Click Close Rental Agreement 21. You will be asked to confirm if you want to close the Rental Agreement. Click OK to continue 22. The agreement will print on the screen and you can click the Print icon on the top right of the menu bar to print the document on paper 70 Rent Centric V 2.0 Reservation On the Home page, click on Reserve Now to go to Reservation page. On the Reservation Page Choose one of two options to enter customer information Option A: Manual Customer Entry 23. Start typing customer information into the provided fields (be sure to complete any mandatory fields marked with REQUIRED) Option B: Search for Customer 24. Click on Search to open customer search window 25. Enter complete or partial customer information (e.g. last name, driver’s license number, etc.) 26. Click Search button 27. Find your customer in the list and click on Select to populate data and return to Reservation Screen 28. Click on Customer Tab to entre any remaining information. Once complete click on Save and Go To Reservation tab. 29. Enter the number of days required in the Number of Days field (either manually or using the provided calendars) 30. Select a Vehicle Type and the rate will automatically populate 31. Select Rate (Rate Detail can be used, by authorized users, to override rate values) OPTIONAL: Entre Vehicle ID either manually or by clicking on Search next to the Vehicle ID field. Click Search again in the Vehicle Search window to select the required Vehicle ID. Click Select in front of the Vehicle ID needed. Select options and add-ons from the list by checking the boxes Click on Update Charges Summary to apply any new options selected. (you can override any of the option values by clicking on the option name inside the Charges Summary box). 32. If required, entre Airline, Flight #, Hotel, Arrival Airport and any additional notes in the corresponding fields 33. Click Save User Manual 71 Quote On the Home page, click on Quote on the top menu bar. On the Quote page 1. Enter the number of days required in the Number of Days field (either manually or using the provided calendars) 2. Select a Vehicle Type and the rate will automatically populate 3. Select Rate (Rate Detail can be used, by authorized users, to override rate values) 4. Select options and add-ons from the list by checking on the boxes 5. Click on Generate Quote Once Quote is Generated You have six options: 1. Click on Save to save the quote by entering first and last name, phone and email address of the customer 2. Click on Rent to start the checkout process and carry over the quote information 3. Click on Reserve to create a new reservation and carry over the quote information 4. Click on Email to email the quote to the customer with attachments if required 5. Click on SMS to sent the quote information as a text message to the customer’s mobile device 6. Click on Print to print the quote on paper NOTE: You can Rent or Reserve a specific vehicle from the Available Vehicle List. 72 Rent Centric V 2.0