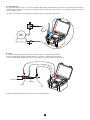
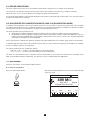
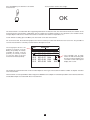
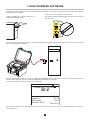
1
Megohmmeters 10 kV and 15 kV E N G L I S H User’s manual C.A 6550 C.A 6555 Thank you for purchasing a megohmmeter C.A 6550 or C.A 6555. For best results from your instrument: read these operating instructions carefully, comply with the precautions for use. WARNING, risk of DANGER! The operator must refer to these instructions whenever this danger symbol appears. Equipment protected by double insulation. Caution! Risk of electric shock. USB socket. Earth. The CE marking indicates conformity with European directives, in particular LVD and EMC. Chauvin Arnoux has adopted an Eco-Design approach in order to design this appliance. Analysis of the complete lifecycle has enabled us to control and optimize the effects of the product on the environment. In particular this appliance exceeds regulation requirements with respect to recycling and reuse. The rubbish bin with a line through it indicates that, in the European Union, the product must undergo selective disposal in compliance with Directive WEEE 2002/96/EC. This equipment must not be treated as household waste. Definition of measurement categories: Measurement category IV corresponds to measurements taken at the source of low-voltage installations. Example: power feeders, counters and protection devices. Measurement category III corresponds to measurements on building installations. Example: distribution panel, circuit-breakers, machines or fixed industrial devices. Measurement category II corresponds to measurements taken on circuits directly connected to low-voltage installations. Example: power supply to electro-domestic devices and portable tools. Precautions for use This instrument and its accessories comply with safety standards IEC 61010-1, IEC 61010-031, and IEC 61010-2-030 for voltages of 1000V in category IV at an altitude of less than 2000m, indoors, with a degree of pollution of not more than 2. Failure to observe the safety instructions may result in electric shock, fire, explosion, and destruction of the instrument and of the installations. T he operator and/or the responsible authority must carefully read and clearly understand the various precautions to be taken in use. Sound knowledge and a keen awareness of electrical hazards are essential when using this instrument. If you use this instrument other than as specified, the protection it provides may be compromised, thereby endangering you. Do not use the instrument on networks of which the voltage or category exceeds those mentioned. Do not use the instrument if it seems to be damaged, incomplete, or poorly closed. Before each use, check the condition of the insulation on the leads, housing, and accessories. Any item of which the insulation is deteriorated (even partially) must be set aside for repair or scrapping. Use only the leads and accessories supplied. Using leads (or accessories) of a lower voltage or category reduces the voltage or category of the combined instrument + leads (or accessories) to that of the leads (or accessories). Use personal protection equipment systematically. Keep your hands away from the terminals of the instrument. When handling the leads, test probes, and crocodile clips, keep your fingers behind the physical guard. As a safety measure, and to avoid interference, do not move and do not handle the leads during measurements. 2 Contents 1. Commissioning..................................................................................................................................................................... 4 1.1. Unpacking....................................................................................................................................................................... 4 1.2. Specifications label......................................................................................................................................................... 5 1.3. Charging the batteries..................................................................................................................................................... 5 1.4. Adjusting the brightness and contrast............................................................................................................................ 6 2. Description of the instrument.................................................................................................................................... 7 2.1. Functions......................................................................................................................................................................... 8 2.2. Display............................................................................................................................................................................. 8 2.3. Keypad.......................................................................................................................................................................... 10 2.4. PC software................................................................................................................................................................... 10 3. Procedure.......................................................................................................................................................................... 11 3.1. Using the leads.............................................................................................................................................................. 11 3.2. AC/DC voltage measurement........................................................................................................................................ 12 3.3. Insulation measurement................................................................................................................................................ 12 3.4. Error indications............................................................................................................................................................ 21 3.5. DAR (dielectric absorption ratio) and PI (polarization index)......................................................................................... 21 3.6. DD (dielectric discharge index)...................................................................................................................................... 23 3.7. Capacitance measurement........................................................................................................................................... 25 3.8. Measurement of the residual current............................................................................................................................. 25 4. Complementary functions.......................................................................................................................................... 26 4.1. TEMP key...................................................................................................................................................................... 26 4.2. ALARM key.................................................................................................................................................................... 27 4.3. CONFIG key.................................................................................................................................................................. 27 4.4. DISPLAY key ................................................................................................................................................................ 32 4.5. GRAPH key.................................................................................................................................................................... 32 4.6. FILTER key .................................................................................................................................................................... 33 4.7. HELP key....................................................................................................................................................................... 34 5. Configuration (SET-UP)................................................................................................................................................... 35 5.1. Restoring the initial configuration.................................................................................................................................. 35 5.2. General parameters....................................................................................................................................................... 36 5.3. Measurement parameters............................................................................................................................................. 36 5.4. Adjustment of the test voltages..................................................................................................................................... 37 5.5. Adjustment of the alarm thresholds.............................................................................................................................. 38 6. Memory function............................................................................................................................................................. 39 6.1. Recording of the measurements................................................................................................................................... 39 6.2. Reading recorded values............................................................................................................................................... 41 6.3. Erasing the memory...................................................................................................................................................... 42 6.4. List of coded errors....................................................................................................................................................... 44 7. Data transfer software............................................................................................................................................... 45 8. Specifications.................................................................................................................................................................... 46 8.1. Reference conditions..................................................................................................................................................... 46 8.2. Characteristics per function.......................................................................................................................................... 46 8.3. Power supply................................................................................................................................................................. 52 8.4. Environmental conditions.............................................................................................................................................. 53 8.5. Construction specification............................................................................................................................................. 54 8.6. Compliance with international standards...................................................................................................................... 54 8.7. Variations in the domain of use..................................................................................................................................... 54 8.8. Intrinsic uncertainty and operating uncertainty............................................................................................................. 54 9. Maintenance....................................................................................................................................................................... 55 9.1. Maintenance.................................................................................................................................................................. 55 9.2. Metrological check........................................................................................................................................................ 55 9.3. Repair............................................................................................................................................................................ 55 9.4. Updating of the internal software.................................................................................................................................. 56 10. Warranty .......................................................................................................................................................................... 57 11. To order............................................................................................................................................................................. 58 11.1. Accessories................................................................................................................................................................. 58 11.2. Replacement parts...................................................................................................................................................... 58 3 1. Commissioning 1.1. Unpacking ➅ FICHE DE SÉCURITÉ DU C.A 6116 (FR) Vous venez d’acquérir un contrôleur d’installation C.A 6116 et nous vous remercions de votre confiance. Pour obtenir le meilleur service de votre appareil : lisez attentivement cette notice de fonctionnement, respectez les précautions d’emploi. ATTENTION, risque de DANGER ! L’opérateur s’engage à consulter la présente notice à chaque fois que ce symbole de danger est rencontré. Appareil protégé par une isolation double. Polarité du connecteur d’alimentation en tension continue. Le marquage CE atteste la conformité aux directives européennes. La poubelle barrée signifie que, dans l’Union Européenne, le produit doit faire l’objet d’un tri sélectif des déchets pour le recyclage des matériels électriques et électroniques conformément à la directive WEEE 2002/96/EC. Définition des catégories de mesure : La catégorie de mesure IV correspond aux mesurages réalisés à la source de l’installation basse tension. La catégorie de mesure III correspond aux mesurages réalisés dans l’installation du bâtiment. La catégorie de mesure II correspond aux mesurages réalisés sur les circuits directement branchés à l’installation basse tension. La catégorie de mesure I correspond aux mesurages réalisés sur des circuits non reliés directement au réseau. x5 ➁ PRÉCAUTIONS D’EMPLOI Cet appareil est protégé contre des tensions accidentelles n’excédant pas 600 V par rapport à la terre en catégorie de mesure III ou 300 V par rapport à la terre en catégorie de mesure IV. La protection assurée par l’appareil peut-être compromise si celui-ci est utilisé de façon non spécifiée par le constructeur. Respectez la tension et l’intensité maximales assignées ainsi que la catégorie de mesure. Ne dépassez jamais les valeurs limites de protection indiquées dans les spécifications. Respectez les conditions d’utilisation, à savoir la température, l’humidité, l’altitude, le degré de pollution et le lieu d’utilisation. N’utilisez pas l’appareil ou ses accessoires s’ils paraissent endommagés. Pour le recharge de la batterie, utilisez uniquement le bloc adaptateur secteur fourni avec l’appareil. Utilisez des accessoires de branchement dont la catégorie de surtension et la tension de service sont supérieures ou égales à celles de l’appareil de mesure (600 V CAT III). Toute procédure de dépannage ou de vérification métrologique doit être effectuée par du personnel compétent et agréé. Utilisez les moyens de protection adaptés. 10 04 - 2009 Code 691923A01 - Ed. 1 ➀ ➈ x5 11 ➂ ➆ ➇ ➃ 1 One power cord 2 metres long for recharging the battery. 2 One data transfer software program and one optical-USB cord. 3 Two safety leads (red and blue), 3 metres long, with high-voltage plugs at both ends. 4 One shielded safety lead (black), 3m long, with two high-voltage plugs, one of them with a rear pick-up. 5 One safety lead (blue), 0.5m long, with two high-voltage plugs, one of them with a rear pick-up. 6 One carrying bag for the accessories. 7 Three crocodile clips (red, black, and blue). 8 Two test probes (red and black). 9 Six user manuals (one per language) on a CD-ROM. 10 Six safety sheets (one per language). 11 Five specifications labels (one per language). 4 ➄ 1.2. Specifications label Attach one of the 5 specifications labels, with your appropriate language, on the inside of the lid. 1.3. Charging the batteries When using the instrument for the first time, start by fully charging the batteries. Charging must be done at a temperature between 0 and 30°C. Set the switch to OFF. Connect the mains cord. SET-UP MR U-STEP U-RAMP U-VAR. U-FIXED OFF > 90 Vac < 260 Vac 50 / 60 Hz OFF During the charging, the instrument displays the following information: Battery 1 2% 12.4 V 1953 mA 26.4°C 00:05:30 Battery 2 3% 11.7V 13 mA 26.7°C 00:05:20 Charging The percentage charge of each of the batteries, their voltages, their charging currents, their temperatures, and the charging times. To reduce the power to be supplied and make it possible to use the instrument during the charging, the batteries are charged alternately at 2A for 10 seconds. It is for this reason that the charging current keeps varying. The text on the side indicates: Charging = battery being charged, Full = battery fully charged, Cold = battery too cold to be charged, Hot = battery too hot to be charged, Defect = battery faulty (must be replaced). 5 Battery 1 100% 11.4 V 15 mA 55.1°C 02:34:41 Battery 2 100% 11.4 V 15 mA 55.1°C 02:34:24 Charging time: between 6 and 10 hours, depending on the initial charge condition. Full Full Following prolonged storage, the batteries may be completely discharged. In this case, the first charge may last longer. Charging when the instrument is in operation is also possible. In this case the symbol flashes. The charging current then depends on the test voltage and on the resistance measured. If the power necessary for the measurement exceeds 10W, the batteries are no longer charged. 1.4. Adjusting the brightness and contrast Press the HELP key for more than two seconds. Press the keys to adjust the contrast. Press the keys to adjust the brightness. CONTRAST & BACKLIGHT > 2s Display Contrast HELP Backlight Press the HELP key to validate. HELP These adjustments are stored even after the instrument is switched off. 1.5. Choice of language Before using the instrument, first choose the language in which you want the instrument to display its messages. To do this, log on to our site: http://www.chauvin-arnoux.com Download the desired language and install it on the instrument (see § 9.4). 6 7 Help and backlight key. To re f e r t h e m e a s u re d resistance value to the reference temperature. MEM HELP GRAPH FILTER CONFIG DISPLAY CONFIG OFF U-FIXED U-VAR. U-RAMP U-STEP MR SET-UP C.A 6555 15kV MEGOHMMETER 110-230V 50/60 Hz 80 VA max Display of all parameters of a measurement. DISPLAY Display of the resistance and test voltage curves versus time. GRAPH Configuration of the measurement parameters. ALARM TEMP Smoothing of the measurements. FILTER R e c o rd i n g o f t h e measurements. Activation/deactivation of the alarms. Programming of the alarms. HELP MEM 1000V CAT III 600V CAT IV ( 2500V ) ALARM Connection terminals. TEMP M Graphic screen. Charging batteries. START/STOP To s t a r t a n d stop the measurements. A r ro w k e y s f o r browsing in the graphic screen. Rotary switch to select a measurement function, SET-UP, or memory read. Tr a n s f e r o f data to a PC. 2. Description of the instrument 2.1. Functions C.A 6550 and C.A 6555 megohmmeters are high-end portable measuring instruments intended for the measurement of very high electrical insulation and resistance values, mounted in a rugged site housing with a cover; they have graphic screens and can operate on battery or mains power. The C.A. 6550 makes insulation measurements at voltages up to 10,000V, the C.A. 6555 up to 15,000V. Their main functions are: detection and measurement of input voltage, frequency, and current; quantitative and qualitative insulation measurement: measurement at a fixed test voltage of 500, 1,000, 2,500, 5,000, 10,000 or 15,000Vdc; measurement at an adjustable test voltage between 40 and 15,000Vdc; measurement with a voltage ramp from 40 to 1,100V, or from 500 to 15,000V; measurement with a voltage in steps from 40 to 15,000V; non-destructive (Early break) test, test stopped at a preset current (Break at I-limit) or Burning; calculation of the DAR, PI, and DD (dielectric discharge index) quality ratios; calculation of the measured resistance referred to a reference temperature. measurement of the capacitance of the circuit tested; measurement of the residual current. These megohmmeters contribute to the safety of electrical installations and equipment. Their operation is managed by microprocessors that acquire, process, display, and store the measurements. They have many advantages, such as: digital filtering of insulation measurements; measurement of the voltage; the programming of thresholds to trigger audible alarms; the timer for measurement duration checks; the programming of a limitation of the measurement current; the plotting of the resistance, voltage, and current vs. time curves and the current vs. voltage curve: R(t), U(t), I(t), and I(U); protection of the device by fuse, with detection of defective fuse; operator safety thanks to the automatic discharging of the test voltage on the tested device at the end of the measurement; automatic power save mode of the device to save battery power; indication of battery charge condition; large graphic display with backlight capability; a memory to store the measurements, a real-time clock, and a USB interface; data export to a PC (using the software provided). 2.2. Display The display unit is a graphic display with a resolution of 320x240 pixels. It has built-in back-lighting, which can be controlled by a long press on the key (see §1.4). 2.2.1. Example of display before the measurement The alarm is active. Test with programmed duration. Value of the next lower available test voltage. Value of the external voltage present on the terminals and its frequency. Current flowing between the terminals. BURN ALARM The blinking value can be modified using the keys. FIXED VOLTAGE 500 V 1000 V 2500 V Test Run Time 00:02:00 Input voltage Frequency Input current Date 2011.05.23 -0.1 V DC 0.2 Hz 112 pA Time 10:31 No current programmed. Condition of the batteries. Type of test voltage. Value of the next higher available test voltage. Programmed duration of the test. Date and time. 8 limitation 2.2.2. Example of display during the measurement DH The measurement smoothing DF 20s ALARM filtering is active, with a time constant of 20 seconds. I-LIM 303.3 MΩ Value of the insulation resistance. 984 V Programmed current limitation. 3.244 µA Elapsed Time 00:00:48 The voltage generated is >70Vdc and therefore dangerous. kΩ 1 10 100 True value of the test voltage. MΩ 1 10 100 GΩ 1 10 100 TΩ 10 Current flowing between the terminals. Elapsed time since the beginning of the measurement. Value of the insulation resistance on the bargraph. 2.2.3. Example of display after the measurement The measurement range is fixed. RANGE 528 V Ancillary results. E-BRK 995 MΩ Value of the insulation resistance. True value of the test voltage at the end of the measurement. ALARM 531 nA Elapsed Time 00:01:12 DAR (30s/60s) PI (1.0m/10m) Capacitance 1.00 --2 nF The alarm threshold has been crossed. The type of measurement is a non-destructive test. Current at the end of the measurement. Duration of the measurement. The symbol indicates blinking. If values are undetermined, they are represented by - - - -. 9 2.3. Keypad If the audible signal has not been deactivated in SET-UP, the instrument confirms each key press by an audible beep. If the beep is more acute, pressing the key is prohibited or will have no effect. A long press (press maintained for more than two seconds) is confirmed by a second audible beep. 2.4. PC software This Pc software is used to: transfer data stored in the instrument, print customised test protocols in accordance with user needs, create ExcelTM spreadsheets, to set the instrument up and control it entirely via the USB link. The recommended minimum configuration is a PC running XP, Vista, or Windows 7. 10 3. Procedure When they leave the factory, the C.A. 6550 and C.A. 6555 are configured so that they can be used without modifying the parameters. For most measurements, you simply choose the test voltage and press the START/STOP button. If you want to modify parameters, most of them can be configured using the CONFIG key, and also in SET-UP. The SET-UP function allows overall configuration of the instrument independently of which measurement functions are chosen. The CONFIG key allows configuration of the chosen measurement function before and during a measurement. A configuration modified in one of these two ways is updated for both (SET-UP or CONFIG key). 3.1. Using the leads Specific leads are supplied with the instrument. To use them, you must add test probes or crocodile clips (also supplied with the instrument). These accessories have guards. For safety reasons, the user’s hands must always be behind the guard. The positions the hands must not go beyond are indicated below: When measuring: a voltage ≤1000V on mains, insulation using a test voltage ≤5000V. 15 kV max 15 kV max For an insulation measurement with a test voltage ≥5000V. Measurements of voltages ≥1000V on mains must be made using the test probes only, with the user’s hands behind the guard on the lead. Remark: The leads with large clips (automobile battery charger type) proposed as accessories cannot be used for mains voltage measurements because their jaws are not insulated. 11 3.2. AC/DC voltage measurement Turning the switch to any insulation measurement position (U-FIXED, U-VAR, U-RAMP, or U-STEP) sets the instrument to AC/ DC voltage measurement. The voltage between the input terminals is measured at all times and indicated as RMS value on the display unit: Input Voltage. Switching between AC and DC mode is automatic. In the case of an AC signal, the instrument measures the frequency. It also measures the residual DC current between the terminals of the instrument. This measurement is used to evaluate its impact on the insulation measurement about to be made. The insulation measurements cannot be started if there is an excessively high external voltage (>0.4 UN where UN is the test voltage, with a maximum of 1000 Vac) on the terminals. BURN FIXED VOLTAGE -- V 500 V Input voltage Frequency Input current Date 2011.05.23 When the external voltage exceeds 25V, the blinking ( 1000 V 230 V AC 50.0 Hz 24.6 nA Time 10:31 ) symbol is displayed alongside it. The only errors possible in a voltage measurement are: The frequency is outside the measurement range (see §8.2.1) The voltage is outside the measurement range (see §8.2.1). 3.3. Insulation measurement The insulation measurement is made on an object that is not live. This measurement varies greatly with the temperature and the relative humidity. It is therefore essential to measure them and to record them with the insulation value. % The ambient temperature can be entered in the instrument as a parameter, making it possible to refer the measured insulation resistance value to a reference temperature (see § 4.1). The value of the test voltage is generally twice the voltage at which the object to be tested is used, unless a standard stipulates otherwise. For example, for a motor that operates on 230V mains, the test will be performed at 500V. 3.3.1. Description of the measurement principle The instrument generates a DC test voltage equal to the chosen nominal voltage UN between the + and - terminals. More precisely, the value of this voltage depends on the resistance to be measured (see the curves of §8.2.3). The instrument measures the voltage and the current between the two terminals and from them deduces R=V/I. The instrument measures the external voltage present on the terminals. It can make the measurement if the peak voltage is less than 0.4UN or 1000 Vac maximum. Beyond this value, it reports an error and does not make the measurement. 12 3.3.2. With a fixed voltage The following screen appears. Set the switch to U-FIXED BURN SET-UP FIXED VOLTAGE MR U-STEP 500 V -- V U-RAMP 1000 V U-VAR. U-FIXED Input voltage Frequency Input current Date 2011.05.23 U-FIXED OFF 10 V AC 50.0 Hz 24 pA Time 10:31 Use the keys to select the test voltage: 500, 1,000, 2,500, 5,000, 10,000, or 15,000Vdc, When the resistance to be measured is low (R<RN=UN/1mA), the voltage generated is lower than the fixed voltage selected. In this case, it is better to use a variable voltage and adjust UN to the desired value after a first resistance measurement. 3.3.3. With a Variable voltage Set the switch to U-VAR. The following screen appears. BURN SET-UP ADJUSTABLE VOLTAGE 1 MR 50 V U-STEP U-RAMP U-VAR. U-VAR. Input voltage Frequency Input current Date 2011.05.24 U-FIXED OFF 0.1 V AC 0.2 Hz 11 pA Time 15:31 There are already 3 preset voltages that can be modified in SET-UP (see §5). Use the keys to select one of them: Adjustable Voltage 1: 50V Adjustable Voltage 2: 800V Adjustable Voltage 3: 7,000V Otherwise, use the keys to go to the voltage value, then use the keys to adjust the value of the test voltage. The adjustment is in 10V steps up to 1,000V, then in 100V steps. Keep the keys pressed to speed up the adjustment. BURN ADJUSTABLE VOLTAGE 750 V Input voltage Frequency Input current Date 2011.05.24 13 0.1 V AC 0.2 Hz 11 pA Time 15:31 U-RAMP 3.3.4. With a voltage ramp This test is based on the principle that an ideal insulation produces the same resistance whatever the test voltage applied. Any negative variation of the insulation resistance therefore means that the insulation is defective: the resistance of defective insulation decreases as the test voltage increases. This phenomenon is barely observable with low test voltages. At least 2,500V must therefore be applied. Since the application of the voltage is gradual, it causes no premature ageing or deterioration of the device tested. Unlike the increase in steps, the gradual increase of the current means that the capacitive current is constant. A variation of the current therefore directly represents a variation of the insulation resistance. Evaluating the result: a negative slope of the resistance versus test voltage curve exceeding 500ppm/V generally indicates the presence of mildew or other deterioration. a larger negative slope, or a sudden drop, indicates the presence of localized physical damage (arcing, perforation of the insulation, etc.). The test with a voltage ramp is ideally suited for testing semiconductors (diodes, transistors, and thyristors). Take care in this case to choose a non-destructive type of test: Break at I-limit (see § 4.3.1) and a maximum output current less than or equal to 1 mA. Set the switch to U-RAMP. The following screen appears: BURN SET-UP RAMP FUNCTION 1 MR Min. U-STEP U-RAMP 50 V Max. 500 V Test Run Time 00:03:00 U-VAR. Input voltage Frequency Input current Date 2011.05.24 U-FIXED OFF -0.1 V DC 0.2 Hz 55.7 nA Time 15:31 Use the keys to select a preset test voltage ramp: Ramp function 1: 50 to 500V Ramp function 2: 500 to 5,000V Ramp function 3: 1,000 to 10,000V The voltages at the beginning and end of the ramp can be programmed with the CONFIG key (see §4.3). The duration of the test is the sum of the three durations specified: the duration of the initial plateau, the duration of the ramp, and the duration of the final plateau. 3.3.5. With a stepped voltage The stepped voltage has ten plateaus. The duration of each of the voltage plateaus is identical. At the end of each plateau, the capacitive current is normally zero and only the measurement current remains. Unlike the ramp test, the step test stresses the insulation and can cause a breakdown. A sudden increase of the current (or a sudden decrease of the insulation resistance) means that a breakdown point is near. It is then possible to discontinue the measurement by hand (by pressing the START/STOP button) or automatically (E-BRK or Break at I-Limit type of test; see §4.3.1). A drop of 25% or more between the insulation resistance of the first plateau and that of the second plateau is a sign of deterioration of the insulation. 14 U-STEP Set the switch to U-STEP. The following screen appears. BURN SET-UP STEP FUNCTION 1 MR Min. U-STEP U-RAMP 50 V Max. 500 V Test Run Time 00:05:00 U-VAR. Input voltage Frequency Input current Date 2011.05.24 U-FIXED OFF 1 V AC 50.0 Hz 24.6 nA Time 15:31 Use the keys to choose the preset step type of test: Step function 1: 50 to 500V Step function 2: 500 to 5.000V Step function 3: 1.000 to 10.000V The values of the voltages at the beginning and end of a step, the number of steps, and the duration of each step can be programmed using the CONFIG key (see §4.3). 3.3.6. Connection Depending on the measurements to be made, there are three ways of connecting the instrument. In all cases, disconnect the device to be tested from mains. Low insulation Connect the red high-voltage lead between earth and the + terminal of the instrument. Connect the black high-voltage lead between one phase of the motor and the - terminal of the instrument. + - M 15 High insulation For very high insulation values, connect the small blue high-voltage lead between the rear pick-up of the black lead and the G terminal of the instrument in order to avoid leakage current and capacitive current effects or to eliminate the influence of the surface leakage current. This reduces the influence of the operator’s hands and gives a more stable measurement. + - M Cable Connect the red high-voltage lead between the braid and the + terminal of the instrument. Connect the black high-voltage lead between the core and the - terminal of the instrument. Connect the blue high-voltage lead between the insulation and the G terminal of the instrument. + G - Outer insulation Insulation Braid Core Using the guard eliminates the influence of the surface leakage current. 16 3.3.7. Before the measurement It is possible to configure the measurement using the CONFIG key CONFIG DISPLAY If the U-FIXED or U-VAR. test voltages have been selected, it is possible to select a measurement configuration by pressing the CONFIG key (see §4.3): Manual Stop Manual Stop + DD Timed Run Timed Run + DD DAR PI Then set the type of test, the maximum current, the current range, the filtering of the measurement, and the value of the alarm threshold: Test Type Maximum Output Current I-range Disturbance Level Alarm To activate the alarm, press the ALARM key. An audible beep will sound if the result of the measurement is below the programmed threshold. ALARM 3.3.8. During the measurement The instrument generates the high voltage. To indicate that the measurement is in progress, the instrument emits an audible beep every ten seconds and the START/STOP button lights red. Press the START/STOP button to start the measurement. START/STOP If the test voltage generated is >5000V, the START/STOP button blinks. START/STOP At the end of a few seconds, the measurement is displayed in digital form and in analog form on a bargraph. If the measurement is unstable, the instrument automatically filters the signal, but it is possible to apply a digital filter in addition by pressing the FILTER key (see §4.6). E-BRK 995 MΩ 528 V Set: 500 V 531 nA Elapsed Time 00:00:23 kΩ 1 10 100 MΩ 1 10 100 GΩ 1 10 100 TΩ 10 FILTER 17 E-BRK It is possible to view the available digital values by pressing the DISPLAY key. 995 MΩ 528 V Set: 500 V 531 nA Elapsed Time 00:01:12 DAR (30s/60s) PI (1.0m/10m) Capacitance 1.00 ----- DISPLAY In the case of a step test voltage (10 steps at most) or ramp test voltage (3 steps), the progress of the steps is indicated. E-BRK 5.03 GΩ Step 2/10. Voltage of the second step. Step 2/10 209.4 nA 1030 V Remaining Time 00:01:25 kΩ 1 10 100 MΩ 1 10 100 GΩ 1 10 100 Remaining measurement time. TΩ 10 GRAPH You can view the resistance, voltage, and current vs. time curves by pressing the GRAPH key. For more details, refer to § 4.5. 00:01:32 00:01:32 V 510 1500 500 1000 490 500 480 0 GRAPH 858 GΩ 858 GΩ 500 V 500 V GΩ 2000 0 1:00 2:00 3:00 470 4:00 It is also possible to change the measurement parameters, by pressing the CONFIG key. It is possible to fix the measurement current, to add an analogue filter, or to change the test voltage if in the variable test voltage mode (U-VAR). For more details, refer to § 4.3. CONFIG In the case of a ramp measurement, the resistance displayed is always greater than the true resistance because of the permanent capacitive current due to the permanent variation of the voltage. The value displayed will be exact only at the end of the test, during the voltage plateau. 18 When the instrument is configured for a manual stop, once the measurement obtained is stable, press the START/ STOP button again to stop the measurement. In the other cases (programmed duration: Timed Run, Timed Run + DD, DAR, PI, U-RAMP, or U-STEP), the measurement stops automatically at the end of the test. START/STOP At the end of the measurement, the instrument switches back to voltage measurement, but the result of the insulation resistance measurement remains displayed. To display the voltage, press the DISPLAY key. ALARM 995 MΩ Value of the insulation resistance. 528 V Value of the test voltage at the end of the measurement. E-BRK 531 nA Elapsed Time 00:01:12 DAR (30s/60s) PI (1.0m/10m) Capacitance 1.00 ----- Type of test. The alarm is active and the threshold has been crossed. Current at the end of the measurement. Duration of the measurement. Ancillary results. 3.3.9. After the measurement Once the measurement has been stopped, the instrument discharges the device being tested in a few seconds. For your safety, therefore, wait a little before disconnecting the leads. Normally, this happens rapidly and the user is unaware of it. But if the load is highly capacitive, the discharging time is longer. In this case, for as long as the voltage exceeds 25V, the instrument so indicates on the display unit and by an audible signal. E-BRK 995 MΩ 503 nA 502 V Elapsed Time 00:01:20 DAR (30s/60s) PI (1.0m/10m) Capacitance 1.00 --<1 nF The DISPLAY key is used to look up all information available after the measurement. This information depends on the type of measurement chosen (see §4.4). DISPLAY 19 In the case of a ramp or step measurement, the measurement result is displayed as follows: Test with programmed duration. E-BRK Value of the insulation resistance. Value of the test voltage at the end of the measurement. ∆R: difference of insulation resistance between the final resistance (highest test voltage) and the initial resistance (lowest test voltage). 5.03 GΩ 516 V 98.7 nA Remaining Time 00:00:00 ∆R ∆V ∆R/(R*∆V) (ppm/V) Capacitance 47.9 MΩ 53.3 V 9 < 1 nF Current at the end of the measurement. Duration of the measurement. Voltage coefficient in ppm/V. Capacitance of the device tested. ∆V: difference between the final and initial test voltages. Record the measurement and compare it to earlier measurements in order to assess the evolution of its value. Also record the temperature and the ambient relative humidity. If, at equivalent temperature and humidity, the insulation resistance has fallen significantly, the insulation is deteriorated and maintenance must be carried out on the device tested. The result remains displayed until another measurement is made, the switch is turned, or the measurement configuration is changed. After a test with programmed duration, pressing the GRAPH key displays the insulation versus time curve (see §4.5). GRAPH Pressing the TEMP key opens the temperature menu (see §4.1). TEMP Pressing the MEM key records the measurements in memory (see §6.1). MEM At any time, you can press the HELP key for a reminder of the functions of the keys. HELP 20 3.4. Error indications The most common error in the case of an insulation measurement is the presence of a voltage on the terminals. The instrument can make the measurement if the peak value of this voltage is less than 0.4UN or 1000 Vac maximum. Above this value, it is necessary to eliminate the voltage and repeat the measurement. If an external voltage appears on the terminals during the measurement, and its peak value is greater than 1.1UN, the measurement is broken off and the error is indicated. 3.5. DAR (dielectric absorption ratio) and PI (polarization index) In addition to the quantitative value of the insulation resistance, it is very useful to calculate the quality ratios of the insulation (the DAR and the PI) because they can eliminate the influence of certain parameters likely to invalidate the “absolute” insulation measurement. They also serve to predict the evolution of insulation quality over time. The most important of these parameters are: temperature and relative humidity, with which insulation resistance varies according to a quasi-exponential law. the disturbance currents (capacitive charging current, dielectric absorption current) created by the application of the test voltage. Even if they gradually fade, they perturb the measurement at the start, for a more or less long time depending on whether the insulation is sound or degraded. These ratios therefore complete the “absolute” insulation value and reliably reflect the condition, good or bad, of the insulation. In addition, long-term observation of the evolution of these ratios is a way to monitor the ageing of the insulation. For example, that of a revolving machine or of a long cable. The values of DAR and PI are calculated as follows: DAR = R 1 min/R 30s (2 values to be noted during a 1-min measurement) PI = R 10 min/R 1 min (2 values to be noted during a 10-min measurement) The times of 1 and 10 minutes for the calculation of the PI and the times of 30 seconds and 1 minute for the calculation of the DAR can be modified using the CONFIG key or in SET-UP (see §5), to adapt to particular applications. 3.5.1. Measurement There are several ways of measuring the DAR and the PI: In manual configuration Press the START/STOP button. Wait one minute for the DAR or ten minutes for the PI (if the default values are used). BURN 499 MΩ 502 V START/STOP 978 nA Set: 500 V Elapsed Time 00:10:08 kΩ 1 10 100 21 MΩ 1 10 100 GΩ 1 10 100 TΩ 10 Press the START/STOP button again to stop the measurement. BURN 502 MΩ 502 V 978 nA Elapsed Time 00:10:10 DAR (30s/60s) PI (1.0m/10m) Capacitance START/STOP 2.64 1.05 320 nF In automatic configuration (preferable) Press the CONFIG key. CONFIG Total Run Time Manual Stop Manual Stop + DD Timed Run (m:s) Timed Run + DD DAR (s/s) PI (m/m) CONFIG --2:00 30/60 1.0/10 Use the keys to select DAR or PI. CONFIG Total Run Time Manual Stop Manual Stop + DD Timed Run (m:s) Timed Run + DD DAR (s/s) PI (m/m) CONFIG Total Run Time Manual Stop Manual Stop + DD Timed Run (m:s) Timed Run + DD DAR (s/s) PI (m/m) 00:01:00 2:00 30/60 1.0/10 Press CONFIG to confirm the new measurement configuration. DAR or PI is displayed in the top left corner of the display unit to recall the configuration chosen. 00:10:00 2:00 30/60 1.0/10 Press the START/STOP button to start the measurement. It stops automatically and the values of DAR and PI are displayed. START/STOP CONFIG 22 3.5.2. Interpretation of the results DAR PI DAR < 1,25 1,25 ≤ DAR < 1,6 Condition of insulation PI < 1 1 ≤ PI < 2 Poor or even dangerous 2 ≤ PI < 4 1,6 ≤ DAR 4 ≤ PI Good Excellent A capacitance in parallel to the insulation resistance extends the settling times of the measurements. This can affect or even inhibit the measurement of DAR or PI (depending on the time set for recording the first resistance value). The table below indicates the typical values of the capacitances in parallel with the insulation resistance, making it possible to measure the DAR and the PI without changing their preset durations. 100 kW 1 MW 10 MW 100 MW 1 GW 10 GW 100 GW 500 V 10 µF 10 µF 10 µF 6 µF 4 µF 2 µF 1 µF 1,000 V 5 µF 5 µF 5 µF 3 µF 2 µF 1 µF 0.5 µF 2,500 V 2 µF 2 µF 2 µF 1.2 µF 1 µF 0.5 µF 0.2 µF 5,000 V 1 µF 1 µF 1 µF 0.6 µF 0.4 µF 0.3 µF 0.1 µF 10,000 V 0.5 µF 0.5 µF 0.5 µF 0.3 µF 0.2 µF 0.1 µF 0 µF 15,000 V 0.3 µF 0.3 µF 0.3 µF 0.2 µF 0.1 µF 0.1 µF 0 µF 3.6. DD (dielectric discharge index) In the case of multilayer insulation, if one of the layers is defective but the resistance of all the others is high, neither the quantitative insulation measurement nor the calculation of the PI and DAR quality ratios will reveal the problem. This makes it judicious to perform a dielectric discharge test, from which the DD term can be calculated. This test measures the dielectric absorption of heterogeneous or multilayer insulation and disregards parallel-surface leakage currents. The dielectric discharge test is especially well suited to measuring the insulation of revolving machines and more generally to measuring the insulation on heterogeneous or multi-layer insulating materials containing organic substances. It involves applying a test voltage for long enough to electrically “charge” the insulation to be measured (typically, a voltage of 500 V is applied for 30 minutes). At the end of the measurement, the instrument induces rapid discharging, during which the capacitance of the insulation is measured, then, one minute later, it measures the residual current flowing in the insulation. The DD term is then calculated as follows: DD = current measured after 1 minute (mA)/[test voltage (V) x measured capacitance (F)] 3.6.1. Measurement Press the CONFIG key. CONFIG Total Run Time Manual Stop Manual Stop + DD Timed Run (m:s) Timed Run + DD DAR (s/s) PI (m/m) CONFIG 23 --2:00 30/60 1.0/10 Use the keys to select Manual Stop + DD or Timed Run + DD (manual or automatic measurement). CONFIG Total Run Time Manual Stop Manual Stop + DD Timed Run (m:s) Timed Run + DD DAR (s/s) PI (m/m) CONFIG Total Run Time Manual Stop Manual Stop + DD Timed Run (m:s) Timed Run + DD DAR (s/s) PI (m/m) --2:00 30/60 1.0/10 00:03:00 2:00 30/60 1.0/10 To set the duration of the measurement, place the cursor on Timed Run (m:s). Then use the and keys to set the minutes and seconds. The minimum duration of the measurement is one minute. CONFIG Total Run Time Manual Stop Manual Stop + DD Timed Run (m:s) Timed Run + DD DAR (s/s) PI (m/m) 00:02:00 Once the duration has been set, move the cursor back to Timed Run + DD. Press CONFIG to confirm the new measurement configuration. DD or DD is displayed in the top left corner of the display unit to recall the configuration chosen. 2:00 30/60 1.0/10 CONFIG Press the START/STOP button to start the measurement. In the Manual Stop + DD configuration, wait until the elapsed time is greater than one minute, then press the START/STOP button to stop the measurement. In the Timed Run + DD configuration (indicated by the symbol), the measurement stops automatically. START/STOP In both cases, it is necessary to wait one minute after the measurement is stopped (countdown on the display unit) for the instrument to display the result. During this time, the START/STOP button blinks but the instrument does not emit an audible signal. The result is then displayed. DD BURN 234.5 MΩ 507 V 224.6 pA Elapsed Time 00:02:00 DAR (30s/60s) 1.42 PI (1.0m/10m) --Capacitance 2 nF DD current 11 pA DD 2.55 START/STOP 24 3.6.2. INTERPRETATION OF THE RESULT Value of DD 7 < DD Quality insulation Very poor 4 < DD < 7 poor 2 < DD < 4 Borderline DD < 2 Good 3.7. Capacitance measurement The capacitance measurement is made automatically during the insulation measurement, and is displayed after the measurement has been stopped and the device tested has been discharged. 3.8. Measurement of the residual current The measurement of the residual current flowing in the device tested is made automatically as soon as the connection to the device tested is made, then during and after the insulation measurement. 25 4. Complementary functions 4.1. TEMP key This function is accessible only when the measurement is over. It is used to refer the measurement result to a temperature other that the one at which the measurement was made. This is because the temperature causes the resistance to vary according to a quasi exponential law. To a rough approximation, raising the temperature by 10°C halves the insulation resistance; conversely, lowering the temperature by 10°C doubles the insulation resistance. Referring the measurements to a single temperature makes it easier to compare them and gives a better idea of the evolution of the insulation resistance. And this is true whatever the temperature at the time of the measurement. Similarly, measuring the humidity improves the correlation between the various measurements made on a given device. Procedure: Make a measurement in U-FIXED or U-VAR mode. Press the TEMP key. TEMPERATURE Air Temperature --- °C Humidity --- % Probe Temperature --- °C Rc Reference Temperature --- °C ∆T for R/2 --- °C R measured 5.00 GΩ Rc at --- °C --- kΩ TEMP Use the and keys to enter the various parameters: Air Temperature: the ambient temperature (optional) Humidity: the ambient relative humidity (optional) Probe Temperature: the temperature of the device tested. If it has not warmed up during the measurement, it is equal to the ambient temperature. Rc Reference Temperature: the temperature to which the measured resistance will be referred. ∆T for R/2: the temperature variation, known or estimated, sufficient to halve the insulation resistance. To facilitate the programming, the instrument proposes default values. The instrument then displays the insulation resistance referred to the reference temperature. TEMPERATURE Air Temperature 23 °C Humidity 40% Probe Temperature 23 °C Rc Reference Temperature 40 °C ∆T for R/2 10 °C R measured 5.00 GΩ Rc at 40 °C 1.529 GΩ If coefficient ∆T for R/2 is not known, it can be calculated from a minimum of 3 measurements made on the same device at different temperatures. 26 Detail concerning the calculation performed: The insulation resistance varies with the measurement temperature. This dependence can be approximated by an exponential function: Rc = Kt * Rt where Rc: insulation resistance referred to 40°C. Rt: insulation resistance measured at ambient temperature T. Kt: coefficient defined as follows: Kt = (1/2) ^ ((40 - T)/∆T) where ∆T: temperature difference at which the insulation resistance is halved. 4.2. ALARM key Press the ALARM key to activate the alarm defined using the CONFIG key (see 4.3) or in SET-UP (see §5). The ALARM symbol is then displayed. If the measurement is less than the alarm threshold, the instrument so indicates by the blinking of the ALARM symbol on the display unit and the emission of an audible signal. Press the ALARM key again to deactivate the alarm; the ALARM symbol disappears from the display unit. ALARM 4.3. CONFIG key 4.3.1. Before the measurement If the U-FIXED or U-VAR. test voltages have been chosen, there are two configuration screens. There is only one for the U-RAMP and U-STEP test voltages. Press the CONFIG key: CONFIG Total Run Time Manual Stop Manual Stop + DD Timed Run (m:s) Timed Run + DD DAR (s/s) PI (m/m) CONFIG --2:00 30/60 1.0/10 Manual Stop: manual stoppage of the measurement. Manual Stop + DD: manual stoppage of the measurement and calculation of the DD. Timed Run (m:s): automatic stoppage of the measurement at the end of the programmed duration. Timed Run + DD: automatic stoppage of the measurement at the end of the programmed duration and calculation of the DD. DAR: automatic stoppage of the measurement at the end of one minute (or of the programmed time, if different). PI: automatic stoppage of the measurement at the end of 10 minutes (or of the programmed time, if different). It is always possible to stop a measurement during a test with programmed duration, by pressing the START/STOP button. The keys are used to select the measurement configuration. The chosen configuration is validated by pressing the CONFIG key again. CONFIG 27 When you select Timed Run (test with programmed duration) or Timed Run + DD, you can set the duration of the measurement (m:s). CONFIG Total Run Time Manual Stop Manual Stop + DD Timed Run (m:s) Timed Run + DD DAR (s/s) PI (m/m) 00:02:00 2:00 To do this, use the and keys. 30/60 1.0/10 The test will last the time programmed. However, if, during the measurement, the rotary switch is turned or the START/STOP button is pressed, the measurement will be broken off. Press the DISPLAY key to see the second configuration screen. CONFIG Test Type Burning Maximum Ouput Current 1 mA I-Range Auto(2) Disturbance Level Low Alarm 2500V < 2.5 M Ω The keys are used to select the measurement configuration. The chosen configuration is validated by pressing the CONFIG key again. DISPLAY CONFIG The second configuration screen depends on the setting of the switch. The U-RAMP and U-STEP settings do not use the first page of the configuration screen, only the second. The second configuration screen is used to choose: The type of test (Test Type) Nondestructive test (Early break) The measurement will be stopped at the first breakdown current peak detected. This type of test is used for non-destructive tests. The current is limited to 0,2 mA. The E-BRK symbol is displayed. E-BRK FIXED VOLTAGE 500 V 1000 V Input voltage Frequency Input current Date 2011.05.23 28 2500 V 10 V AC 50.0 Hz 24 pA Time 10:31 Stoppage of the test at a preset current (Break at I-limit) The measurement will be stopped when the current reaches the maximum value (Maximum Output Current) defined by the user (see below). This type of test is useful for testing varistors or other types of voltage limiter. The I-LIM symbol is displayed. I-LIM FIXED VOLTAGE 1000 V 500 V Input voltage Frequency Input current Date 2011.05.23 2500 V 10 V AC 50.0 Hz 24.6 nA Time 10:31 Burning (Burning) The measurement is not stopped, whatever the value of the current. Depending on the application, this type of test can be used to determine the position of insulation faults when there is Burning: appearance of an electric arc during the test or burn spot after the test. The BURN symbol is displayed. BURN FIXED VOLTAGE 1000 V 500 V Input voltage Frequency Input current Date 2011.05.23 2500 V 10 V AC 50.0 Hz 24.6 nA Time 10:31 The maximum current (Maximum Output Current) This is the current not to be exceeded in the Break at I-limit type of test. (Break at I-limit). Use the keys to set it to between 0.2 and 5mA. The current range (I-range) This function is used to make measurements more rapidly when their order of magnitude is already known. Use the keys to set its value to Auto or Fix. Then choose the current range: Current < 300 nA 60 nA < I < 50 µA 10 µA < I < 6 mA Current range 1 2 3 Current range 1 2 3 Resistance R > 30 GW 200 MW < R < 16,6 GW 10 MW* < R < 1 GW For example for UN = 10,000 V : * : 10MW because Imax = 1 mA at 10,000 V. The fixed current range remains active for as long as the switch is not turned. 29 The RANGE symbol is displayed. RANGE BURN FIXED VOLTAGE 500 V 1000 V Input voltage Frequency Input current Date 2011.05.23 2500 V 10 V AC 50.0 Hz 24.6 nA Time 10:31 Perturbation of the signal (Disturbance Level) Use the keys to set its value, from Low to High. The DH symbol is then displayed. DH FIXED VOLTAGE 500 V 1000 V Input voltage Frequency Input current Date 2011.05.23 2500 V 10 V AC 50.0 Hz 24.6 nA Time 10:31 Setting to High is recommended when you make measurements in the presence of strong electromagnetic fields at the network frequency (for example near high-voltage lines). If the instrument detects an interfering AC voltage that is too high, it automatically switches to High, which places an analogue filter on the inputs. In the U-FIXED and U-VAR modes: the alarm threshold Use the keys to set the alarm threshold. The alarm threshold can also be set in SET-UP (see §5.5) The ALARM symbol is displayed if the alarm is active. ALARM BURN FIXED VOLTAGE 500 V 1000 V Input voltage Frequency Input current Date 2011.05.23 2500 V 10 V AC 50.0 Hz 24.6 nA Time 10:31 In the U-RAMP mode: the programming of the ramp (Set Ramp Function). Use the keys to go to Set Ramp Function; the instrument displays the voltage ramp values programming screen. This programming can also be done in SET-UP (see §5.4). 30 In the U-STEP mode: the programming of the step (Set Step Function). Use the keys to go to Set Step Function; the instrument displays the voltage step values programming screen. This programming can also be done in SET-UP (see §5.4). 4.3.2. During the measurement During the measurement, the CONFIG key is used to choose the current range: automatic (default) or fixed. For more details, refer to the previous section. The following screen appears: Once the measurement has started, press the CONFIG key. BURN 502 MΩ 502 V Set 500V 978 nA Elapsed Time 00:00:12 CONFIG I-Range Disturbance Level CONFIG Auto(2) Low Use the and keys to modify the measurement current range: Then validate your choice by pressing the CONFIG key again. If the range is fixed, the RANGE symbol is displayed. The choice remains active until the switch is turned. CONFIG During the measurement, it is also possible to trigger the analogue filter of the measurement (Disturbance Level). For more details, refer to the previous section. In the case of a variable test voltage, the voltage set is also displayed and can be modified during the measurement. RANGE BURN 502 MΩ 2305 V Set 2300V 4.61 µA Elapsed Time 00:00:12 CONFIG I-Range Disturbance Level Adjustable Voltage 31 Fix 2 Low 2300 V 4.4. DISPLAY key This key is used to browse through the various accessible screens containing all information available before, during or after the measurement. Depending on the measurement mode and the configuration chosen (CONFIG key), the screens are different. 4.5. GRAPH key During the measurement and at the end of each measurement, pressing the GRAPH key displays the curve of variation of the insulation resistance versus time. Minimum and maximum values of the voltage and the resistance and time at the location of the cursor. GRAPH GRAPH Insulation resistance axis. Curve R(t). Time axis. 508 V 508 V MΩ 3050 00:01:00 00:01:00 V 510 3.018 GΩ 3.018 GΩ 3000 500 2950 490 2900 480 2850 0 1:00 2:00 Test voltage axis. Curve V(t), identified by x’s. 470 4:00 3:00 This curve is plotted using samples recorded during the measurement. The keys are used to move along the curve to display the exact values of each sample. The minimum and maximum values may be the same if the time scale of the graph is too short. In the case of a measurement in U-RAMP or U-STEP mode, this gives: GRAPH 497 V 497 V GΩ 10.0 GRAPH 263 V 263 V GΩ 10.0 00:01:30 00:01:30 V 1000 5.045 GΩ 5.045 GΩ 3.096 GΩ 3.096 GΩ 7.5 750 7.5 750 5.0 500 5.0 500 2.5 250 2.5 250 0 0 0 0 1:00 2:00 3:00 4:00 0 It is possible to zoom. 00:00:35 00:00:35 V 1000 Press the CONFIG key. The keys are used to modify the time scale of the graph. The keys are used to modify the resistance scale of the graph. CONFIG 32 2:00 4:00 6:00 0 Press the DISPLAY key to view the current vs. time curve. Axis of the current. GRAPH 2.985 GΩ 2.985 GΩ nA 170 00:02:00 00:02:00 167.8 nA 167.8 nA Minimum and maximum values of the current at the position of the cursor. 165 Curve I(t). 160 155 DISPLAY Time axis. 150 0 1:00 2:00 3:00 4:00 The keys are used to move along the curve to display the exact values of each sample. It is possible to zoom, as in the case of the R(t) and U(t) curves. Press the DISPLAY key again to view the current vs. voltage curve. GRAPH nA 700 600 500 400 DISPLAY 300 0 1 2 3 4kV This curve is useful primarily in the case of a measurement in U-RAMP mode. There is no cursor and it is not possible to zoom on this curve. 4.6. FILTER key When the instrument detects that the measurement is disturbed by an AC voltage that is too large, it switches an analogue filter on the terminals and so indicates by displaying the DH symbol (Disturbation High). DH ALARM I-LIM 303.3 MΩ 984 V 3.244 µA Elapsed Time 00:00:48 kΩ 1 10 100 MΩ 1 10 100 GΩ 1 10 100 TΩ 10 Complementing this, the FILTER key can be used to activate and deactivate a digital filter for the insulation measurements. This filter affects only the display (which is smoothed), not the measurements. The recorded data therefore remain raw (no filter). This function is useful in case of high instability of the insulation values displayed, but it is also possible to estimate the measurement on the bargraph. 33 FILTER Once the measurement has started, if you find that it is perturbed, press the FILTER key. Start by applying the DF10s filter. If that is not enough, go to the DF20s filter, then to the DF40s filter. The larger the time constant, the smoother (and slower) the measurement. Successive presses on the FILTER key modify or remove the filter: DF 10: time constant 10 seconds, DF 20: time constant 20 seconds, DF 30: time constant 40 seconds, no filter. The filter is calculated as follows: RN = RN-1 + (R - RN-1 )/N If N is set to 20, the time constant of this filter will be approximately 20 seconds. DF 20s DH ALARM I-LIM 303.3 MΩ 984 V 3.244 µA Elapsed Time 00:00:48 kΩ 1 10 100 MΩ 1 10 100 GΩ 1 10 100 TΩ 10 Selecting digital filtering (DF) is recommended for measurements of fluctuating high insulation resistance values. Such fluctuations may be due to hand effects, fluctuating capacitances in the device tested, insulation that varies because of conducting dust, an ionizing and polarizing effect of this dust, etc., or again to the presence of an AC voltage superposed on the measurement. The FILTER key is active before and during the measurement. 4.7. HELP key HELP > 2s A short press on the HELP key opens the help function, in which the actions of the keys are explained. This operation changes with the context: setting of the switch, operating mode, before, during, or after a measurement. Below, an example in U-FIXED mode: Help DISPLAY: next page GRAPH: graph R(t)+U(t), I(t), I(U) CONFIG: configuration menu FILTER: 3 digital filters DF, off ALARM: alarm on/off MEM: store data record menu TEMP: temperature menu , : select test voltage - lower - higher A long press on the HELP key lets you set the contrast of the display unit and the backlighting (see §1.4) HELP 34 ET-UP 5. Configuration (SET-UP) This function is used to change the configuration of the instrument by directly accessing the parameters to be modified. Set the switch to SET-UP. The following screen appears. General Settings Set Default Parameter 1 Buzzer On Power Down 38400 Baud rate 2011-05-25 Date 9:41 Time Celsius Temperature Unit 100213 Instrument Number 1.0/1.0 Firmware SET-UP MR U-STEP U-RAMP U-VAR. U-FIXED OFF To select and modify a parameter, use the , , and arrow keys. To validate a modification, move the blinking cursor back to the left margin. To exit without applying the last modification, turn the switch. 5.1. Restoring the initial configuration To return to the initial configuration, choose Set Default Parameter. The instrument requests confirmation. SET-UP ! WARNING ! All parameters will be reset ! O.K. CANCEL If you accept by choosing OK, the following data will be modified: The audible level of the buzzer returns to 1. The automatic switching off of the instrument will occur at the end of 5 minutes. The data rate will be 38400 bauds. The duration of the measurements with programmed duration will be 2 minutes. The sampling duration will be 10 seconds. The DAR will be 30/60 and the PI 1/10. The type of test will be Burning. The maximum output current will be 5mA. The maximum output voltage will be 10kV (15kV for the C.A. 6555). The adjustable test voltages will be 50, 500 and 2500V. The ramp and step test voltages return to their original values, as do all alarm thresholds. 35 5.2. General parameters Buzzer: to set the audible level of beeps: 1, 2, 3, or Off (no sound). Power down: automatic switching off of the instrument: On (switching off at the end of 5 minutes), Off (no switching off). Baud rate: to set the data rate to 9600, 19200, 38400 or 57600 bauds. Date: to set the date in yyyy-mm-dd format. Time: to set the time in hh:mm format. Temperature unit: to choose the unit of temperature: Celsius or Fahrenheit. Instrument Number: indicates the number of the instrument. This line is informative and cannot be modified. Firmware: indicates the two version numbers of the firmware in the instrument. This line is informative and cannot be modified. 5.3. Measurement parameters Press the DISPLAY key to see the following screen: Test Timing Timed Run (m:s) DAR (s/s) PI (m/m) 2:00 30/60 1.0/10 DISPLAY Timed Run: to set the measurement duration (in minutes:seconds) for measurements with programmed duration. The adjustment range is from 00:10 to 99:59, in 1-second steps. DAR: to set the time at which the measurements must be recorded to calculate the DAR. This can be used in special applications. The first time can be set from 10 to 90 seconds in 5-second steps. The second time can be set from 15 to 180 seconds in 5-second steps. PI: to set the time at which the measurements must be recorded to calculate the PI. This can be used in special applications. The first time can be set from 0.5 to 30 minutes in 0.5- then 1-minute steps. The second time can be set from 0.5 to 90 minutes in 0.5-, 1-, and 5-minute steps. Press the DISPLAY key to see the following screen: Test Parameters Burning Test Type Maximum Output Current 5.0 mA Maximum Output Voltage 15000 V 50 V Adjustable Voltage 1 800 V Adjustable Voltage 2 7000 V Adjustable Voltage 3 DISPLAY 36 Test Type: to choose the type of test: Burning, Early-Break, or Break at I-Limit. Maximum Output Current: to set the maximum output current, from 0.2 to 5mA. Maximum Output Voltage: to set the maximum output voltage. This can be useful to prevent handling errors. It make it possible to entrust the instrument to less experienced users, for particular applications (telephony, aviation, etc.) in which it is important not to exceed some maximum test voltage. For example, if the maximum voltage is set to 750V, the measurement will be made at 500V for the 500V fixed voltage, and at a maximum of 750V for all the other fixed voltages. The adjustment range is from 40 to 10,000V (15,000 V for the C.A 6555). 5.4. Adjustment of the test voltages Always on the third SET-UP screen. Adjustable Voltage 1, 2, and 3: to set the values of the 3 adjustable test voltages. The adjustment range is from 40 to 15000V. Press the DISPLAY key to see the following screen. Step & Ramp Functions Set Step Function 1 Set Step Function 2 Set Step Function 3 Set Ramp Function 1 Set Ramp Function 2 Set Ramp Function 3 DISPLAY Set Step Function 1, 2, and 3: in the case of a measurement with a stepped voltage, used to set the voltages and the durations of the steps. Pressing the key opens the following screen: Step & Ramp Functions Step Function 1 Step Voltage Duration (m:s) 0:30 1 50 V 0:30 2 100 V 0:30 3 150 V 0:30 4 200 V 0:30 5 250 V Total Run Time (m:s) 5:00 Press the DISPLAY key to see the rest of the screen. DISPLAY 37 Step & Ramp Functions Step Function 1 Step Voltage Duration (m:s) 0:30 6 300 V 0:30 7 350 V 0:30 8 400 V 0:30 9 450 V 0:30 10 500 V Total Run Time (m:s) 5:00 You can then set the voltage and duration of each of the 10 steps. The total duration of the measurement (Total Run Time) is calculated by the instrument. The adjustment range of the voltages is from 40 to 15,000V. The duration of the steps ranges from 00:10 to 99:59. If a duration is set to 0, the time displayed is -:- - and the step will be skipped during the test. Set Ramp Function 1, 2, and 3: in the case of a measurement with a ramped voltage, used to set the starting voltage, the slope of the ramp, and the final voltage. Pressing the key opens the following screen: Step & Ramp Functions Ramp Function 1 Step Voltage Duration (m:s) 0:30 Start 50 V 2:00 Ramp 0:30 End 500 V Total Run Time (m:s) 3:00 You can then set the voltage and duration of the starting plateau and of the final plateau, along with the duration of the ramp. The total duration of the measurement (Total Run Time) is calculated by the instrument. The voltages can be adjusted in two ranges: between 40 and 1,100V or between 500 and 15000V. The duration of the steps can range from 00:10 to 99:59. Then, to validate your modifications and exit, press the key. 5.5. Adjustment of the alarm thresholds Press the DISPLAY key to see the following screen. Alarm Settings 500 V 1000 V 2500 V 5000 V 10000 V 15000 V Adjustable Voltage 1 Adjustable Voltage 2 Adjustable Voltage 3 DISPLAY < 500 kΩ < 1.0 MΩ < 2.5 MΩ < 5.0 MΩ < 10 MΩ < 15 MΩ < 50 kΩ < 100 kΩ < 250 kΩ These are the alarm thresholds below which the audible alarm is triggered. There is one for each fixed or adjustable voltage, and all of them can be modified. The adjustment of the number is independent of the adjustment of the units. For a test voltage of 500V, the alarm threshold is adjustable from 10kΩ to 990kΩ. For a test voltage of 1,000V, the alarm threshold is adjustable from 100kΩ to 4TΩ. For a test voltage of 2,500V, the alarm threshold is adjustable from 300kΩ to 10TΩ. For a test voltage of 5,000V, the alarm threshold is adjustable from 300kΩ to 10TΩ. For a test voltage of 10,000V, the alarm threshold is adjustable from 1MΩ to 10TΩ. For a test voltage of 15,000V, the alarm threshold is adjustable from 1MΩ to 10TΩ. For the adjustable test voltages, the alarm threshold depends on the voltage. It is adjustable between two values that depend on the test voltage. A further press on the DISPLAY key is used to validate the changes and return to the first SET-UP screen. 38 6. Memory function 6.1. Recording of the measurements It is possible to record each insulation measurement once it is over. It is not possible to record the voltage measurements. These results are recorded at addresses identified by an object number (OBJ) and a test number (TEST). An object can contain 99 tests. An object can therefore represent a machine or an installation on which a certain number of measurements will be made. At the end of the measurement, press the MEM key. The instrument proposes recording the result at the first available location in memory. It is possible to modify the numbers proposed using the and keys. Store MEMORY Obj. Test Date 01 01 2011-05-26 Time 09:04 Fct. 500V MEM Press the MEM key again to confirm the location of the record. The instrument then asks you if you want to Store Samples with the measurement. Store MEMORY Obj. Test Date Time 01 01 2011-05-26 09:04 Store Samples Sample Time (m:s) MEM Fct. 500V Yes Min. If you do this, you can then display the curve of the measurement by a single press on the GRAPH key (see §4.5) If this is not useful, set Store Samples to Off. If you set Store Samples to Yes, you can set the Sample Time using the and keys. The default sampling time is the minimum, meaning that all samples acquired during the measurement are recorded. The sampling time can be set to Auto (automatic), in which case the instrument itself determines the samples necessary for the plotting of the curve while using the least possible space in memory. If the measurement does not vary, it will take only one value, giving a perfectly flat curve. This value is recommended to optimize memory use. The sampling time can also be programmed, between 1 and 25 seconds. The longer the measurement, the longer the sampling time can be. For example, on a measurement lasting 10 minutes, the sampling time can be 10 seconds, giving 60 points for the curve, which is sufficient. Again, the more stable the measurement, the longer the sampling time can be. And the more unstable the measurement, the shorter the sampling time must be in order to correctly display variations of the insulation resistance. 39 Press the MEM key one last time to record the measurement. The instrument confirms the storage. OK MEM The measurement is recorded with all its supporting information: the date, the time, the measurement mode, the duration of the measurement, the measurement configuration, the test voltage, the insulation resistance, the capacitance, the residual current, and possibly the DAR, the PI, the DD, the resistance referred to the reference temperature, etc. To exit without recording, press the key. You then return to the last measurement. For each new record, the instrument proposes the first free memory location that follows the last record. It is also possible to record a measurement at a memory location that has already been used. The bargraph indicates the quantity of memory used (in black), the quantity of memory available (in white), and the quantity of memory needed to store the data of the last measurement made (shaded). Store Obj. Test 03 01 02 02 02 01 01 02 01 01 MEMORY Date 2011-05-28 2011-05-27 2011-05-27 2011-05-26 2011-05-26 Time 09:04 10:43 10:38 15:04 14:56 Fct. 2550V 1000V 500V The U-RAMP and U-STEP modes are indicated, along with the tests in which samples were recorded to allow subsequent display of the curve. The number of measurements that can be recorded depends on the type of measurement and the number of samples stored for each measurement. The instrument can use up to 64kb for data storage and 1,600kb to store samples. It is therefore possible to store 256 measurements and 80,000 samples associated with these measurements. 40 6.2. Reading recorded values Set the switch to MR. The instrument indicates the memory occupancy and the object number of the last record made, along with the lowest and highest test numbers it contains. SET-UP MR Objet 99 U-STEP 67 01 .. 08 80 U-RAMP Tests 60 U-VAR. U-FIX 40 OFF 20 , - select Object - show list at Object 01 Choose the object number using the keys, then press the key. The instrument then displays the list of records around the object chosen. Obj. Test 03 01 02 02 02 01 01 02 01 01 Date 2011-05-28 2011-05-27 2011-05-27 2011-05-26 2011-05-26 Time 09:04 10:43 10:38 15:04 14:56 To see details of a measurement, place the cursor on the object and the test chosen using the keys, then press the key. Obj. Test Date Time 02 02 2011-05-27 10:43 Fct. 2550V Resistance Voltage Current Elapsed time Sample time (m:s) 1000V 500V Fct. 5.05 GΩ 965 V 190.6 nA 00:01:40 Min Press the DISPLAY key to see the rest of the display. Obj. Test Date Time 02 02 2011-05-27 10:43 ∆R ∆V ∆R/(R+∆V) (ppm/V) Capacitance Fct. --- TΩ --- V --<1nF DISPLAY DISPLAY 41 Obj. Test Date Time Fct. 02 02 2011-05-27 10:43 Step Function Step Voltage Duration (m:s) 0:30 1 100 V 0:30 2 200 V 0:30 3 300 V 0:30 4 400 V 0:30 5 500 V When the symbol indicates that the samples have been recorded, you can press the GRAPH key to view the curve. Obj. Test Date Time Fct. 02 02 2011-05-27 10:43 Step Function Step Voltage Duration (m:s) 0:30 6 600 V 0:30 7 700 V 0:30 8 800 V 0:30 9 900 V 0:30 10 1000 V DISPLAY Press the GRAPH key to exit from the curve. In the case of a U-FIXED or U-VAR. measurement, you can press the TEMP key to view the information concerning the temperature. GRAPH 5.02 GΩ 5.02 GΩ 00:04:59 00:04:59 V 1000 750 5.0 500 2.5 250 0 2:00 4:00 6:00 0 The instrument can display only the information recorded with the measurement. Obj. Test Date Time Fct. 2500V 05 02 2011-05-27 10:43 Air Temperature 23 °C Humidity 40% Probe Temperature 23 °C Rc Reference Temperature 40 °C ∆T for R/2 10 °C R measured 5.00 GΩ Rc at 40 °C 1.529 GΩ TEMP + MEMORY 7.5 0 Recall 500 V 500 V GΩ 10.0 Press the TEMP key, then the key, to return to the list of recorded measurements.. TEMP 6.3. Erasing the memory Set the switch to MR. SET-UP MR U-STEP U-RAMP U-VAR. U-FIX OFF 42 6.3.1. Erasing one record Use the keys to select the record to be erased in the list of records in memory. Store Press the CONFIG key. The instrument requests confirmation of the deletion. MEMORY Obj. Test 03 01 02 02 02 01 01 02 01 01 Date 2011-05-28 2011-05-27 2011-05-27 2011-05-26 2011-05-26 Time 09:04 10:43 10:38 15:04 14:56 MEMORY ! WARNING ! Fct. 2550V 1000V 500V Selected data set will be cleared ! O.K. CANCEL CONFIG Select OK to confirm or CANCEL to cancel. The instrument then returns to the memory read entry screen. 99 80 Objet Tests 67 01 .. 08 60 40 20 , - select Object - show list at Object 01 6.3.2. Erasing all records The instrument requests confirmation of the deletion. Select OK to confirm or CANCEL to cancel. 99 80 Objet Tests 67 01 .. 08 60 40 20 01 , - select Object - show list at Object Press the CONFIG key. CONFIG 43 MEMORY ! WARNING ! All data sets will be cleared ! O.K. CANCEL The instrument in this case completely reformats the memory, which takes a few minutes. During this time, it displays WAIT. The instrument then returns to the memory read entry screen. But since there is no longer any record, it displays: No data records! 6.4. List of coded errors If an anomaly is detected when the instrument is started up or in operation, the display indicates an error code. The format of this error code is a one- or two-digit number. This number identifies the anomaly and states what to do to put the instrument back into service. Errors 1 to 9 concern problems on the boards and require a repair by a qualified individual. Error codes 20 to 25 help the repair personnel locate a malfunction If the recorded data are corrupted, the only way to make it possible to re-use the memory is to erase it completely (see §6.3.2). The instrument reports this problem to the user by displaying CLEAR MEMORY. All other errors require returning of the instrument for repair. 44 7. Data transfer software DataView®, the data transfer software supplied with the instrument, can be used to export the measurements and to present them in the form of a report. Set the switch to any position other than OFF. The data rate must be 38,400 bauds for the instrument (see §5.2) and for the PC. Start by installing the software using the CD supplied with the instrument. SET-UP MR U-STEP U-RAMP U-VAR. U-FIXED U-FIXED OFF Then connect the instrument to the PC using the optical-USB cord supplied with the instrument, after removing the cover that protects the port in the instrument. When in communication with a PC, the instrument displays REMOTE and no longer reacts to the user’s commands. The keys and the rotary switch are inactive, except for stopping the instrument (OFF setting). To use the data transfer software, refer to the on-line help. REMOTE ADJUSTABLE VOLTAGE 1 50 V Input voltage Frequency Input current Date 2011.05.24 0.1 V AC 0.2 Hz 11 pA Time 15:31 Once the data transfer is over, you can disconnect the instrument, then disconnect the cord. The instrument then resumes its normal operation. 45 8. Specifications 8.1. Reference conditions Influence quantities Reference values Temperature 23 ± 3°C Relative humidity 45 to 55% RH Supply voltage 9 to 12V Frequency range DC and 15.3 … 65Hz Capacitance in parallel on resistance 0µF Electric field null Magnetic field <40A/m The intrinsic uncertainty is the error specified for the reference conditions. The operating uncertainty includes the intrinsic uncertainty plus variations of the quantities of influence (supply voltage, temperature, interference, etc.) as defined in standard IEC-61557. 8.2. Characteristics per function 8.2.1. Voltage Characteristics Measurement range 1.0 … 99.9V 100 … 999V 0.1V 1V Resolution Intrinsic uncertainty ±(1% +5 pt) Frequency range 1000 … 2500V 2501 … 4000V 2V 2V ±(1% +1 pt) DC or 15 … 500 Hz DC Input impedance: 3MΩ 8.2.2. Current Specified measurement range (DC) 0.000 … 0.399 nA 0.400 … 3.999 nA 4.00 … 39.99 nA 40.0 … 399.9 nA 400 nA … 3.999 µA Resolution 1 pA 1 pA 10 pA 100 pA 1 nA Intrinsic uncertainty ±(15% + 10 pt) ±10% 4.00 … 39.99 µA 40.0 … 399.9 µA 400 µA … 3.999 mA 4.00 …9.999 mA 10 nA 100 nA 1 µA 10 µA Specified measurement range (DC) Resolution Intrinsic uncertainty ±5% ±5% 8.2.3. Insulation resistance Method: Voltage-current measurement per IEC-61557-2 from 300 to 10,000V and per DIN VDE 0413 Part 1/09.80). Nominal output voltage: 500, 1000, 2,500, 5000, 10000, and 15000Vdc for the C.A. 6555 or adjustable from 40 to 10,000Vdc and 15,000Vdc for the C.A. 6555 Intrinsic uncertainty ±1% adjustable from 40 to 10,00Vdc in 10-V steps adjustable from 1000 to 15,000Vdc in 100-V steps 46 Maximum current: ≤1mAdc from 40 to 999V 5 to 0.5mAdc from 1000 to 15000V. The user can adjust this current. Maximum acceptable peak AC voltage: 0,4 UN or 1000 Vac maximum . Short-circuit current: ≤5mAdc ±5%. This current can be limited in SET-UP, to between 0.2 and 5mA. It can also be limited by the maximum output power, which is 10W. The limit acts whatever the type of test: the power limit for Burning tests, and the current limit for the Break at I-Limit tests. Maximum output current as a function of the test voltage UN (V) I (mA) 50 100 200 300 1100 1200 1300 5000 10000 15000 0.22 0.46 0.93 1.07 1.07 5 5 2 1 0.5 ≤1 P (W) 10 If the current is limited in SET-UP, the values mentioned above that exceed the limit will be lowered. Fixed test voltage Test voltage (V) Specified measurement range Resolution 500 - 1000 - 2500 - 5000 - 10000 – 15000 10 … 999 kΩ 1.000 … 3.999 MΩ 4.00 … 39.99 MΩ 1 kΩ 10 kΩ 40.0 … 399.9 MΩ 400 … 3.999 GΩ 4.00 … 39.99 GΩ 100 kΩ 1 MΩ 10 MΩ ≥1000 ≥2500 ≥5000 Intrinsic uncertainty ±(5% + 3 pt) Operating error ±(10% + 6 pt) Test voltage (V) Specified measurement range Resolution 500 - 1000 - 2500 - 5000 10000 – 15000 40.0 … 399.9 GΩ 400 … 999 GΩ 1.000 … 1.999 TΩ 2.000 … 3.999 TΩ 4.00 … 10.00 TΩ 4.00 … 15.00 TΩ 100 MΩ 1 GΩ 1 GΩ 10 GΩ 10 GΩ Intrinsic uncertainty ±(15% + 10 pt) Operating error ±(20% + 15 pt) Test voltage (V) ≥10000 15000 (C.A.6555 only) 4.00 … 25.00 TΩ 4.00 … 29.00 TΩ 10 GΩ 10 GΩ ±(20% + 10 pt) ±(20% + 10 pt) Specified measurement range Resolution Intrinsic uncertainty Operating error ±(20% + 10 pt) ±(30% + 15 pt) ±(30% + 15 pt) Variable test voltage Minimum resistance measured = 10kΩ Maximum resistance measured = to be interpolated from the values in the tables of fixed test voltages above. The intrinsic uncertainty depends on the test voltage and on the resistance measured. It can be interpolated from the tables of fixed test voltages. 47 Measurement of the DC voltage during the insulation test Input impedance: 3MΩ up to 1,600V and 300MΩ thereafter. Specified measurement range (V) Resolution 40.0 … 99.9 100 … 1500 1600 … 5100 5100 … 16000 0.1V 1V 1-2V 2-4V Intrinsic uncertainty ±1% Measurement of the DC voltage during the discharging stage of the insulation test Specified measurement range (Vdc) Resolution 25 … 16000V 0.2% Un Intrinsic uncertainty ±(5% ± 3 pt) Typical discharge time of a capacitive element to reach 25Vdc Test voltage Discharge time (C at µF) Test voltage Discharge time (C at µF) 50V 100V 250V 500V 1000V 2500V 0.25 s x C 0.5 s x C 1sxC 2sxC 4sxC 7sxC 5000V 10000 V 15000V 14 s x C 27 s x C 57 s x C Typical curves of evolution of the test voltages as a function of the charge 500V range V 600 500 400 300 200 100 0 1,E-02 10 kk W 1,E-01 100 100kk 1,E+00 1 1MM 1,E+01 10 10MM 1,E+02 100 M M 100 48 11,E+03 G1 G 101,E+04 G 10 G 100 1,E+05 G 100 G 1 T1,E+06 1T 1000V range V 1200 1000 800 600 400 200 W 0 1,E-02 10 k 1,E-01 100 100kk 1,E+00 11MM 1,E+01 10 10MM 1,E+02 100 M M 100 1,E+03 1G 1G 101,E+04 G 10 G 1001,E+05 G G 100 1 T1,E+06 1T 10 T1,E+07 10 T 10 1,E+04 10 G G 100 1001,E+05 G G 1 1,E+06 T1T 10 1,E+07 T10 T 2500V range V 3000 2500 2000 1500 1000 500 0 10 1,E-02 10 k k W 100k k 1,E-01 100 1M 1,E+00 1 M 10 M 101,E+01 M 100 1001,E+02 M M 49 11,E+03 G1 G 5000V range V 6000 5000 4000 3000 2000 1000 0 1,E-02 10 k W 1,E-01 100 100 kk 1,E+00 1 1MM 1,E+01 10 10 MM 1,E+02 100 100 M M 11,E+03 G1 G 10 101,E+04 G G 100 1001,E+05 G G 1,E+06 1T 1T 1,E+07 10 T 10 T 10000V range V 12000 10000 8000 6000 4000 2000 0 1,E-02 10 kk 10 W 1,E-01 100 100 k k 1,E+00 11MM 1,E+01 10 10 MM 1,E+02 100 100 M M 50 1,E+03 1GG 1 1,E+04 10 10 G G 1,E+05 100 100 G G 11,E+06 T1 T 101,E+07 T10 T 15000V range V 16000 14000 12000 10000 8000 6000 4000 2000 0 1,E-02 10 10 kk W 1,E-01 100kk 100 1,E+00 11MM 1,E+01 10 10 MM 1,E+02 100 100 MM 11,E+03 G1 G 10 G 101,E+04 G 1,E+05 100 100 G G 1 1,E+06 T 1T 10 1,E+07 T10 T 100 1,E+08 T100 T 8.2.4. DAR, PI, and DD Calculation of the DAR and PI terms Specified range Resolution Intrinsic uncertainty 0.02 … 50.00 0.01 ± (5% + 1 pt) Calculation of the DD term Specified range Resolution Intrinsic uncertainty 0.02 … 50.00 0.01 ±( 10% + 1 pt) 8.2.5. Capacitance Capacitance measurement This measurement is made following the discharging of the element tested, after each measurement Specified measurement range Resolution Intrinsic uncertainty * 0.005 … 9.999µF 10.00 … 49.99µF 1 nF 10 nF ± (10% + 1 pt) ± 10% *: this uncertainty is specified only for a test voltage ≥500V. 51 8.3. Power supply Power supply to the instrument is from two rechargeable 9.6V, 4Ah NiMH battery packs. Charging is carried out by connecting the instrument to mains, at a voltage of 90 to 260V and a frequency of 50-60Hz, with an ambient temperature of 0 to 30°C. 8.3.1. NiMH TECHNOLOGY The NiMH technology has many advantages, such as: long life between charges with limited bulk and weight, the possibility of recharging your battery rapidly, a very small memory effect: you can recharge your battery even if it is not fully discharged, without reducing its capacity, protection of the environment through the absence of polluting materials such as lead and cadmium. The NiMH technology allows a limited number of charging/discharging cycles that depends on the conditions of use and the charging conditions. Under optimum conditions, this number of cycles is 200. 8.3.2. Battery charging The built-in charger manages the charging current, the battery voltage, and the internal temperature of the battery simultaneously. This optimizes the charging, while ensuring a long battery life. The day before you use your device, check its charge condition. If the battery level indicator shows less than three bars, charge the device overnight (see §1.3). The charging time varies between 6h and 10h. A half-hour charge restores 10% of the capacity of the battery, enough to make a few measurements. It is possible to recharge the batteries while making insulation measurements, provided that the voltages used are not too high and the measured values are high enough. In this case, the recharging time will exceed 6 hours; it will depend on the frequency of the measurements made. Otherwise, the battery will be discharged faster than it is charged. In order to extend the life of your battery: Charge your device only between 10 and 30°C. Observe the conditions of use and storage stated in this data sheet. A new battery becomes fully effective only after several complete charging/discharging cycles. This will not however prevent you from using your device when it has been charged for the first time. However, we recommend making the first charge a full charge (at least 10 hours). If the instrument indicates that charging is over, do not hesitate to disconnect the charger for a few seconds, then reconnect it to top up the charge. The battery in your instrument, like any rechargeable battery, is subject to significant residual discharging, even when the instrument is off. If your device has not been used for several weeks, it is probable that the battery will be partially discharged, even if it had been fully recharged just before going into storage. In this case, before using it again, you should fully recharge the battery (at least 10 hours). The longer your battery is stored, the more it is discharged. After three months’ storage of the battery without periodic recharging, the battery is probably fully discharged. Possible consequences are: Failure of the instrument to switch on, as long as the mains cord is not connected. A loss of the instrument’s date and time (it reverts to 1 January 2010). 8.3.3. OPTIMIZE BATTERY CHARGING During charging, the temperature of the battery rises substantially, especially towards the end. A safety device, built into the battery, checks constantly that the battery temperature does not exceed an acceptable maximum. If this maximum is exceeded, the charger switches off automatically, even if charging is not complete. Above 30°C, it is not possible to charge the battery fully because the charging will cause overheating. 52 8.3.4. LIFE BETWEEN CHARGES The mean battery life depends on the type of measurement and on how the device is used. Test voltage (V) 500 1 000 2 500 5 000 10 000 15 000 Voltmeter Battery life (h) 15 12 2 2 2 2 25 How long your device can operate when the battery is fully charged depends on several factors: The consumption of the device, which depends on the measurements you make, The capacity of the battery. It is greatest when the battery is new, and declines as the battery ages. Here are a few ways to extend battery life between charges,: Use the back-lighting only when it is strictly necessary, Set the brightness of the back-lighting to the lowest level at which you can still read the display unit, Program an automatic switching off (see SET-UP, § 5.2), During insulation measurements made in MANUAL mode, with high test voltages, stop the measurement by pressing the START/STOP button when the measurement is over. 8.3.5. “Defect” message When a battery is deeply discharged or its storage temperature is low, the charger may execute a prior battery reactivation cycle. That means that the charger applies a slow charge until the battery reaches either a minimum temperature threshold or a minimum charge threshold. If the battery is in good condition, this reactivation stage ends after about 45 mins and the charger switches over to fast charging. However, if the maximum time allowed for the reactivation stage is exceeded, the instrument declares the battery defective in the form of a message (Defect) on the screen of the measuring instrument. The instrument must then be sent in for repair (see § 9.3). 8.3.6. END OF BATTERY LIFE The internal resistance of a battery at the end of its life is high. The result is an abnormally short charging time. After a full charge, the instrument indicates “Full”, but as soon as the charger is disconnected, the display unit loses its contrast and goes off, meaning that the battery no longer holds the charge. The instrument must then be sent in for repair (see § 9.3) for replacement of the battery. 8.4. Environmental conditions Range of use The relative humidity can significantly affect insulation. Take care not to make an insulation resistance measurement if the temperature is below the dew point. 0 to 45°C, 0 to 90% RH Specified domain of use 0 to 35°C, 0 to 75% RH Storage (without the batteries) -40 to 70°C, 10 to 90% RH Altitude: <2000m Degree of pollution: 2 53 8.5. Construction specification Overall dimensions of the instrument (LxWxH): 340 x 300 x 200mm Weight: approximately 6,2kg 8.6. Compliance with international standards Electrical safety per: IEC-61010-1, IEC-61557 parts 1 and 2 (up to 10 kV) or VDE 0413. Double insulation Degree of pollution: 2 Voltage measurement category: 1,000V Cat. IV. Maximum voltage with respect to earth: 1,000Vrms Cat IV. Maximum voltage between guard terminal G and the - terminal: 1,000Vac. 8.6.1. Electromagnetic compatibility Emissions and immunity in an industrial environment per IEC-61326-1. 8.6.2. Mechanical Protections IP 65 according to IEC-60529 with the housing closed and IP 54 with the housing open. IK 04 according to IEC-50102. 8.7. Variations in the domain of use Range of influence Quantity influenced (1) 9 … 12V Temperature Influence quantity Influence Typical Maximum V MΩ < 1 pt < 1 pt 2 pt 3 pt -10 … +55°C V MΩ - GΩ U >7.5 kV and R < 10 TΩ ±0.15%/10°C ±0.2%/10°C ±1.5%/10°C ±(0,3%/10°C + 1 pt) ±(1%/10°C + 2 pt) ±(3%/10°C + 2 pt) Humidity 10 … 75%HR with t ≤ 35 °C V MΩ (10 kΩ … 40 GΩ) MΩ (40 GΩ … 10 TΩ) U > 7.5 kV and 3 TW < R < 10 TΩ ±0,2% ±0,2% ±0,3% ±(15% + 5 pt) ±(1% + 2 pt) ±(1% + 5 pt) ±(15% + 5 pt) ±(30% + 5 pt) Frequency 15 … 500 Hz V ±3% ±(0.5% + 1 pt) AC voltage superimposed on test voltage 0 … 20%Un MΩ ±0.1%/%Un ±(0.5%/%Un + 5 pt) Battery voltage (1): The DAR, PI and DD terms and the capacitance and leakage current measurements are included in the quantity “MΩ”. 8.8. Intrinsic uncertainty and operating uncertainty C.A 6550 and C.A 6555 megohmmeters comply with standard IEC-61557, which requires that the operating uncertainty, called B, be less than 30%. In insulation measurements, B = ± ( |A| + 1,15 √ E1² + E2² + E3² ) with A = intrinsic uncertainty E1 = influence of the reference position ±90°. E2 = influence of the supply voltage within the limits indicated by the manufacturer. E3 = influence of the temperature between 0 and 35°C. 54 9. Maintenance Any unauthorized repair or replacement of a part by an “equivalent” may gravely impair safety. 9.1. Maintenance 9.1.1. Cleaning Disconnect the unit completely and turn the rotary switch to OFF. Use a soft cloth, dampened with soapy water. Rinse with a damp cloth and dry rapidly with a dry cloth or forced air. Do not use alcohol, solvents, or hydrocarbons. 9.1.2. REPLACING THE BATTERIES The batteries can be replaced only by competent, accredited personnel. Warning: replacing the battery entails the loss of the stored data. Back up these data before sending the instrument in for repair. When the repaired instrument is returned: Erase the memory completely (see §6.3.2) to be able to use the MEM/MR functions once again. If necessary, reset the date and time of the instrument (see § 5). Fully recharge the battery. 9.1.3. Replacing the fuse If the GUARD FUSE message appears on the display unit, the guard terminal fuse must be replaced. The fuse can be replaced only by competent, accredited personnel. 9.1.4. Storage If the instrument has not been used over a prolonged period (more than two months) fully charge the battery before use. 9.2. Metrological check Like all measuring or testing devices, the instrument must be checked regularly. This instrument should be checked at least once a year. For checking and calibration, contact one of our accredited metrology laboratories (information and contact details available on request), at our Chauvin Arnoux subsidiary or the branch in your country. 9.3. Repair For all repairs before or after expiry of warranty, please return the device to your distributor. 55 9.4. Updating of the internal software With a view to providing, at all times, the best possible service in terms of performance and technical upgrades, Chauvin Arnoux invites you to update the embedded software of the device by downloading the new version, available free of charge on our web site. Our site: http://www.chauvin-arnoux.com Sign in and open your account. Then go to “Support”, then “Download Firmware Update”,then “Firmware”, then “C.A 6550 and C.A 6555”. Connect the device to your PC using the USB cord provided. The update of the embedded software depends on its compatibility with the hardware version of the instrument. This version is indicated in SET-UP (see §5). Attention: updating the embedded software resets the configuration and causes the loss of the stored data. As a precaution, save the stored data to a PC before updating the embedded software. It is also possible to change the language in which messages are displayed. To do this, go to “Languages”, then “C.A 6550 and C.A 6555”. Download the desired language, then reboot your instrument. 56 10. Warranty Except as otherwise stated, our warranty is valid for twelve months starting from the date on which the equipment was sold. Extract from our General Conditions of Sale provided on request. The warranty does not apply in the following cases: Inappropriate use of the equipment or use with incompatible equipment; Modifications made to the equipment without the explicit permission of the manufacturer’s technical staff; Work done on the device by a person not approved by the manufacturer; Adaptation to a particular application not anticipated in the definition of the equipment or not indicated in the user’s manual; Damage caused by shocks, falls, or floods. 57 11. To order Megohmmeter C.A. 6550 .......................................................................................................................................... P01139705 Megohmmeter C.A. 6555 .......................................................................................................................................... P01139706 Delivered with bag containing: 1 mains power cord, 2m long, 1 DataView® data transfer software, 1 optical-USB cord, 2 safety leads (red and blue), 3 metres long, with high-voltage plugs at both ends, 1 shielded safety lead (black), 3 metres long, with a high-voltage plug with rear pick-up and a high-voltage plug, 1 lead with rear pick-up (blue), 0.5 metre long, with high-voltage plugs at both ends, 3 crocodile clips (red, black, and blue), 2 test probes (red and black), 5 specifications labels (one per language) 6 user manuals (one per language) on CD-ROM. 6 safety sheets (one per language). 11.1. Accessories Set of 3 shielded safety leads (black, red, and blue), 3 metres long, with a high-voltage plug at one end (with rear pick-up on the black lead) and a large crocodile clip at the other .............................................................. P01295466 Shielded safety lead (black), 8 metres long, with a high-voltage plug with rear pick-up at one end and a large crocodile clip at the other ................................................................................................................................ Safety lead (red), 8 metres long, with a high-voltage plug at one end and a large crocodile clip at the other ........... Safety lead (blue), 8 metres long, with a high-voltage plug at one end and a large crocodile clip at the other.......... Shielded safety lead (black), 15 metres long, with a high-voltage plug with rear pick-up at one end and a large crocodile clip at the other ................................................................................................................................ Safety lead (red), 15 metres long, with a high-voltage plug at one end and a large crocodile clip at the other ......... Safety lead (blue), 15 metres long, with a high-voltage plug at one end and a large crocodile clip at the other........ Thermocouple thermometer C.A. 861.......................................................................................................................... Thermo-hygrometer C.A.846 ....................................................................................................................................... P01295470 P01295469 P01295468 P01295473 P01295472 P01295471 P01650101Z P01156301Z 11.2. Replacement parts One carrying bag ......................................................................................................................................................... Set of 3 HV leads, 3 metres long (red, blue, and black with rear pick-up) .................................................................. Lead with rear pick-up (blue), 0.5 metre long .............................................................................................................. Set of 2 test probes (red and black) ............................................................................................................................ Set of 3 crocodile clips ................................................................................................................................................ Optical-USB cord ........................................................................................................................................................ European 2P mains cord ............................................................................................................................................. 58 P01298066 P01295465 P01295467 P01295454Z P01103062 HX0056-Z P01295174 59 02 - 2012 Code 692790A02 - Ed. 2 DEUTSCHLAND - Chauvin Arnoux GmbH Straßburger Str. 34 - 77694 Kehl / Rhein Tel: (07851) 99 26-0 - Fax: (07851) 99 26-60 SCHWEIZ - Chauvin Arnoux AG Moosacherstrasse 15 - 8804 AU / ZH Tel: 044 727 75 55 - Fax: 044 727 75 56 ESPAÑA - Chauvin Arnoux Ibérica S.A. C/ Roger de Flor, 293 - 1a Planta - 08025 Barcelona Tel: 902 20 22 26 - Fax: 93 459 14 43 UNITED KINGDOM - Chauvin Arnoux Ltd Unit 1 Nelson Ct - Flagship Sq - Shaw Cross Business Pk Dewsbury, West Yorkshire - WF12 7TH Tel: 01924 460 494 - Fax: 01924 455 328 ITALIA - Amra SpA Via Sant’Ambrogio, 23/25 - 20050 Macherio (MI) Tel: 039 245 75 45 - Fax: 039 481 561 MIDDLE EAST - Chauvin Arnoux Middle East P.O. BOX 60-154 - 1241 2020 JAL EL DIB (Beirut) - LEBANON Tel: (01) 890 425 - Fax: (01) 890 424 ÖSTERREICH - Chauvin Arnoux Ges.m.b.H Slamastrasse 29/2/4 - 1230 Wien Tel: 01 61 61 9 61-0 - Fax: 01 61 61 9 61-61 CHINA - Shanghai Pu-Jiang - Enerdis Instruments Co. Ltd 3 F, 3 rd Building - N° 381 Xiang De Road - 200081 SHANGHAI Tel: +86 21 65 21 51 96 - Fax: +86 21 65 21 61 07 SCANDINAVIA - CA Mätsystem AB Box 4501 - SE 18304 TÄBY Tel: +46 8 50 52 68 00 - Fax: +46 8 50 52 68 10 USA - Chauvin Arnoux Inc - d.b.a AEMC Instruments 200 Foxborough Blvd. - Foxborough - MA 02035 Tel: (508) 698-2115 - Fax: (508) 698-2118 http://www.chauvin-arnoux.com 190, rue Championnet - 75876 PARIS Cedex 18 - FRANCE Tél. : +33 1 44 85 44 85 - Fax : +33 1 46 27 73 89 - [email protected] Export : Tél. : +33 1 44 85 44 38 - Fax : +33 1 46 27 95 59 - [email protected]