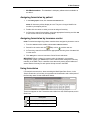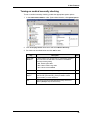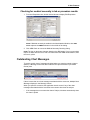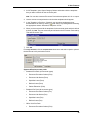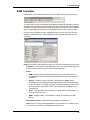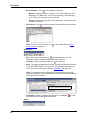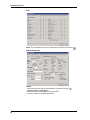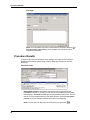
1
Now part of ALLSCRIPTS
HealthMatics EMR
2006 Release Notes
June 22, 2006
Statement of Confidentiality
The information contained herein is proprietary and confidential to A4 HEALTH SYSTEMS® NOW PART OF
ALLSCRIPTS. No part of this document may be reproduced or transmitted in any form or by any means,
electronic, written, or mechanical, including, but not limited to, photocopying and recording, or by
any information storage and retrieval system, without prior written permission from
A4 HEALTH SYSTEMS
Now part of Allscripts.
Statement of Accuracy
This document is thought to be fully consistent with the level of product it describes at the time of
printing. Information is subject to change without further notification. A4 HEALTH SYSTEMS does not
assume any liability, or provide any guarantees for the contents of this publication.
If you have any comments concerning this document, contact the Documentation Department at
A4 HEALTH SYSTEMS
Now part of Allscripts.
Statement of Responsibility
Client agrees to be fully responsible for the operation of the system as outlined in the HEALTHMATICS
User Manual and in accordance with the laws of its state.
To contact A4 HEALTH SYSTEMS NOW PART OF ALLSCRIPTS:
A4 HEALTH SYSTEMS
Phone: (888) 672-3282
5501 Dillard Drive
(919) 851-6177
Cary, NC 27518-9233
Fax:
(919) 851-5991
USA
Web site – http://www.a4healthsystems.com
Revision History and Copyright/Trademark Information
Original Release Date: 6/22/06
Revision Release Date: 6/22/06
Copyright 2006, A4 HEALTH SYSTEMS® NOW PART OF ALLSCRIPTS. All rights reserved. Printed in USA.
A4 HEALTH SYSTEMS® and HEALTHMATICS® are Registered in the US Patent and Trademark Office.
RSMrefresh, Copyright (C) 2006 A4 Health Systems
HealthMatics EMR 2006 Release Notes
Table of Contents
1. HealthMatics EMR 2006 . . . . . . . . . . . . . . . . . . . . . . . . . . . . . . . . . . . . . . . . . . . 1
New Features Overview. . . . . . . . . . . . . . . . . . . . . . . . . . . . . . . . . . . . . . . . . . . . . . . . . 1
Enhancements Overview. . . . . . . . . . . . . . . . . . . . . . . . . . . . . . . . . . . . . . . . . . . . . . . . 2
2. New Features . . . . . . . . . . . . . . . . . . . . . . . . . . . . . . . . . . . . . . . . . . . . . . . . . . . . 7
General . . . . . . . . . . . . . . . . . . . . . . . . . . . . . . . . . . . . . . . . . . . . . . . . . . . . . . . . . . . . . . 7
Database conversion . . . . . . . . . . . . . . . . . . . . . . . . . . . . . . . . . . . . . . . . . . . . . . . . . 7
Redesign . . . . . . . . . . . . . . . . . . . . . . . . . . . . . . . . . . . . . . . . . . . . . . . . . . . . . . . . . . 7
Additional Results . . . . . . . . . . . . . . . . . . . . . . . . . . . . . . . . . . . . . . . . . . . . . . . . . . . . . 8
Clinical Decision Support (Isabel) . . . . . . . . . . . . . . . . . . . . . . . . . . . . . . . . . . . . . . . . 9
Concurrent Encounters . . . . . . . . . . . . . . . . . . . . . . . . . . . . . . . . . . . . . . . . . . . . . . . . . 9
Enabling concurrent encounters . . . . . . . . . . . . . . . . . . . . . . . . . . . . . . . . . . . . . . . 10
Pulling charts with concurrent encounters enabled . . . . . . . . . . . . . . . . . . . . . . . . . 10
Customizable Toolbar . . . . . . . . . . . . . . . . . . . . . . . . . . . . . . . . . . . . . . . . . . . . . . . . . 11
Electronic Patient Signatures . . . . . . . . . . . . . . . . . . . . . . . . . . . . . . . . . . . . . . . . . . . 12
Building templates to include electronic patient signatures . . . . . . . . . . . . . . . . . . . 12
Collecting electronic signatures in queued documents . . . . . . . . . . . . . . . . . . . . . . 13
Explorer Views . . . . . . . . . . . . . . . . . . . . . . . . . . . . . . . . . . . . . . . . . . . . . . . . . . . . . . . 14
Formularies. . . . . . . . . . . . . . . . . . . . . . . . . . . . . . . . . . . . . . . . . . . . . . . . . . . . . . . . . .
Assigning formularies by patient . . . . . . . . . . . . . . . . . . . . . . . . . . . . . . . . . . . . . . .
Assigning formularies by insurance carrier . . . . . . . . . . . . . . . . . . . . . . . . . . . . . . .
Using formularies . . . . . . . . . . . . . . . . . . . . . . . . . . . . . . . . . . . . . . . . . . . . . . . . . . .
14
15
15
15
Input Manager. . . . . . . . . . . . . . . . . . . . . . . . . . . . . . . . . . . . . . . . . . . . . . . . . . . . . . . . 16
Documents . . . . . . . . . . . . . . . . . . . . . . . . . . . . . . . . . . . . . . . . . . . . . . . . . . . . . . . . 18
Scanned documents . . . . . . . . . . . . . . . . . . . . . . . . . . . . . . . . . . . . . . . . . . . . . . . . . . . . 18
Transcription documents . . . . . . . . . . . . . . . . . . . . . . . . . . . . . . . . . . . . . . . . . . . . . . . . . 18
Reconciler . . . . . . . . . . . . . . . . . . . . . . . . . . . . . . . . . . . . . . . . . . . . . . . . . . . . . . . . 18
PM interface options . . . . . . . . . . . . . . . . . . . . . . . . . . . . . . . . . . . . . . . . . . . . . . . . 19
Logical Observation Identifiers Names and Codes . . . . . . . . . . . . . . . . . . . . . . . . . 19
Mail Merge. . . . . . . . . . . . . . . . . . . . . . . . . . . . . . . . . . . . . . . . . . . . . . . . . . . . . . . . . . . 20
Creating mail merge letter templates . . . . . . . . . . . . . . . . . . . . . . . . . . . . . . . . . . . . 20
Performing mail merges . . . . . . . . . . . . . . . . . . . . . . . . . . . . . . . . . . . . . . . . . . . . . . 20
Medical Necessity Checking . . . . . . . . . . . . . . . . . . . . . . . . . . . . . . . . . . . . . . . . . . . .
Turning on medical necessity checking . . . . . . . . . . . . . . . . . . . . . . . . . . . . . . . . . .
Checking for medical necessity in A/P . . . . . . . . . . . . . . . . . . . . . . . . . . . . . . . . . . .
Checking for medical necessity in lab or procedure results . . . . . . . . . . . . . . . . . . .
22
23
25
27
iii
HealthMatics EMR 2006 Release Notes
Outstanding Chart Messages . . . . . . . . . . . . . . . . . . . . . . . . . . . . . . . . . . . . . . . . . . . 27
Outstanding Patient Messages. . . . . . . . . . . . . . . . . . . . . . . . . . . . . . . . . . . . . . . . . . 29
Patient Manager . . . . . . . . . . . . . . . . . . . . . . . . . . . . . . . . . . . . . . . . . . . . . . . . . . . . . . 29
Print Integration . . . . . . . . . . . . . . . . . . . . . . . . . . . . . . . . . . . . . . . . . . . . . . . . . . . . . .
Templates available . . . . . . . . . . . . . . . . . . . . . . . . . . . . . . . . . . . . . . . . . . . . . . . . .
Print toolbar icons . . . . . . . . . . . . . . . . . . . . . . . . . . . . . . . . . . . . . . . . . . . . . . . . . .
Output defaults. . . . . . . . . . . . . . . . . . . . . . . . . . . . . . . . . . . . . . . . . . . . . . . . . . . . .
31
31
32
34
To access output defaults in the administration module . . . . . . . . . . . . . . . . . . . . . . . . 34
To build printer sets . . . . . . . . . . . . . . . . . . . . . . . . . . . . . . . . . . . . . . . . . . . . . . . . . . . . 35
To apply a named set of printer defaults . . . . . . . . . . . . . . . . . . . . . . . . . . . . . . . . . . . . 35
Output settings . . . . . . . . . . . . . . . . . . . . . . . . . . . . . . . . . . . . . . . . . . . . . . . . . . . . .
Selecting output templates for each screen . . . . . . . . . . . . . . . . . . . . . . . . . . . . . . .
Creating encounter packs . . . . . . . . . . . . . . . . . . . . . . . . . . . . . . . . . . . . . . . . . . . .
Output queue . . . . . . . . . . . . . . . . . . . . . . . . . . . . . . . . . . . . . . . . . . . . . . . . . . . . . .
36
36
38
41
Performing output tasks from the output queue . . . . . . . . . . . . . . . . . . . . . . . . . . . . . . . 41
Creating new output from the output queue. . . . . . . . . . . . . . . . . . . . . . . . . . . . . . . . . . 42
Assigning security for refaxing or reprinting prescriptions . . . . . . . . . . . . . . . . . . . . . . . 42
Procedure Results Entry . . . . . . . . . . . . . . . . . . . . . . . . . . . . . . . . . . . . . . . . . . . . . . . 43
Creating my procedure lists . . . . . . . . . . . . . . . . . . . . . . . . . . . . . . . . . . . . . . . . . . . 43
Quick Filters . . . . . . . . . . . . . . . . . . . . . . . . . . . . . . . . . . . . . . . . . . . . . . . . . . . . . . . . . 45
Creating and using quick filters . . . . . . . . . . . . . . . . . . . . . . . . . . . . . . . . . . . . . . . . 45
Setting default quick filters . . . . . . . . . . . . . . . . . . . . . . . . . . . . . . . . . . . . . . . . . . . . 45
3. Enhancements . . . . . . . . . . . . . . . . . . . . . . . . . . . . . . . . . . . . . . . . . . . . . . . . . 47
Administration Module . . . . . . . . . . . . . . . . . . . . . . . . . . . . . . . . . . . . . . . . . . . . . . . . 47
Appointments. . . . . . . . . . . . . . . . . . . . . . . . . . . . . . . . . . . . . . . . . . . . . . . . . . . . . . . . 49
Assessment/Plan . . . . . . . . . . . . . . . . . . . . . . . . . . . . . . . . . . . . . . . . . . . . . . . . . . . . . 50
Billing Reconciliation . . . . . . . . . . . . . . . . . . . . . . . . . . . . . . . . . . . . . . . . . . . . . . . . . 51
Caregiver Options . . . . . . . . . . . . . . . . . . . . . . . . . . . . . . . . . . . . . . . . . . . . . . . . . . . . 52
Clinical Customization Module. . . . . . . . . . . . . . . . . . . . . . . . . . . . . . . . . . . . . . . . . . 53
Knowledge . . . . . . . . . . . . . . . . . . . . . . . . . . . . . . . . . . . . . . . . . . . . . . . . . . . . . . . . 53
Contact screen knowledge . . . . . . . . . . . . . . . . . . . . . . . . . . . . . . . . . . . . . . . . . . . . . . . 53
Ownership override . . . . . . . . . . . . . . . . . . . . . . . . . . . . . . . . . . . . . . . . . . . . . . . . . . . . 55
Short lists . . . . . . . . . . . . . . . . . . . . . . . . . . . . . . . . . . . . . . . . . . . . . . . . . . . . . . . . .
Exam templates . . . . . . . . . . . . . . . . . . . . . . . . . . . . . . . . . . . . . . . . . . . . . . . . . . . .
Catalogs . . . . . . . . . . . . . . . . . . . . . . . . . . . . . . . . . . . . . . . . . . . . . . . . . . . . . . . . . .
Templates . . . . . . . . . . . . . . . . . . . . . . . . . . . . . . . . . . . . . . . . . . . . . . . . . . . . . . . .
Lab order entry setup . . . . . . . . . . . . . . . . . . . . . . . . . . . . . . . . . . . . . . . . . . . . . . . .
55
56
56
58
59
Demographics . . . . . . . . . . . . . . . . . . . . . . . . . . . . . . . . . . . . . . . . . . . . . . . . . . . . . . . 59
Documents . . . . . . . . . . . . . . . . . . . . . . . . . . . . . . . . . . . . . . . . . . . . . . . . . . . . . . . . . . 60
iv
HealthMatics EMR 2006 Release Notes
E&M Calculator. . . . . . . . . . . . . . . . . . . . . . . . . . . . . . . . . . . . . . . . . . . . . . . . . . . . . . . 61
Electronic Prescriptions . . . . . . . . . . . . . . . . . . . . . . . . . . . . . . . . . . . . . . . . . . . . . . . 62
Face Sheets . . . . . . . . . . . . . . . . . . . . . . . . . . . . . . . . . . . . . . . . . . . . . . . . . . . . . . . . . 63
Fast Tracks . . . . . . . . . . . . . . . . . . . . . . . . . . . . . . . . . . . . . . . . . . . . . . . . . . . . . . . . . . 67
Flow sheet templates. . . . . . . . . . . . . . . . . . . . . . . . . . . . . . . . . . . . . . . . . . . . . . . . . . 69
History. . . . . . . . . . . . . . . . . . . . . . . . . . . . . . . . . . . . . . . . . . . . . . . . . . . . . . . . . . . . . . 69
H&P Report . . . . . . . . . . . . . . . . . . . . . . . . . . . . . . . . . . . . . . . . . . . . . . . . . . . . . . . . . . 70
Lab Results. . . . . . . . . . . . . . . . . . . . . . . . . . . . . . . . . . . . . . . . . . . . . . . . . . . . . . . . . . 71
Lab tasks . . . . . . . . . . . . . . . . . . . . . . . . . . . . . . . . . . . . . . . . . . . . . . . . . . . . . . . . . 72
Review lab results . . . . . . . . . . . . . . . . . . . . . . . . . . . . . . . . . . . . . . . . . . . . . . . . . . . . . . 72
Merge orders with outstanding results. . . . . . . . . . . . . . . . . . . . . . . . . . . . . . . . . . . . . . . 72
Lab trends . . . . . . . . . . . . . . . . . . . . . . . . . . . . . . . . . . . . . . . . . . . . . . . . . . . . . . . . . . . . 72
Lab result entry screen. . . . . . . . . . . . . . . . . . . . . . . . . . . . . . . . . . . . . . . . . . . . . . . 73
Edit lab results screen . . . . . . . . . . . . . . . . . . . . . . . . . . . . . . . . . . . . . . . . . . . . . . . 73
Office Manager . . . . . . . . . . . . . . . . . . . . . . . . . . . . . . . . . . . . . . . . . . . . . . . . . . . . . . . 74
Output Manager . . . . . . . . . . . . . . . . . . . . . . . . . . . . . . . . . . . . . . . . . . . . . . . . . . . . . . 74
To print entire chart . . . . . . . . . . . . . . . . . . . . . . . . . . . . . . . . . . . . . . . . . . . . . . . . . . . . . 77
Pregnancy Record . . . . . . . . . . . . . . . . . . . . . . . . . . . . . . . . . . . . . . . . . . . . . . . . . . . . 78
Procedure Results . . . . . . . . . . . . . . . . . . . . . . . . . . . . . . . . . . . . . . . . . . . . . . . . . . . . 84
Reason for Visit . . . . . . . . . . . . . . . . . . . . . . . . . . . . . . . . . . . . . . . . . . . . . . . . . . . . . . 86
Prescriptions . . . . . . . . . . . . . . . . . . . . . . . . . . . . . . . . . . . . . . . . . . . . . . . . . . . . . . . .
Refill requests . . . . . . . . . . . . . . . . . . . . . . . . . . . . . . . . . . . . . . . . . . . . . . . . . . . . .
Medication . . . . . . . . . . . . . . . . . . . . . . . . . . . . . . . . . . . . . . . . . . . . . . . . . . . . . . . .
Prescription properties . . . . . . . . . . . . . . . . . . . . . . . . . . . . . . . . . . . . . . . . . . . . . . .
87
87
88
88
Reminders. . . . . . . . . . . . . . . . . . . . . . . . . . . . . . . . . . . . . . . . . . . . . . . . . . . . . . . . . . . 90
Result Notifications . . . . . . . . . . . . . . . . . . . . . . . . . . . . . . . . . . . . . . . . . . . . . . . . . . . 90
Result Summaries . . . . . . . . . . . . . . . . . . . . . . . . . . . . . . . . . . . . . . . . . . . . . . . . . . . . 91
Security . . . . . . . . . . . . . . . . . . . . . . . . . . . . . . . . . . . . . . . . . . . . . . . . . . . . . . . . . . . . .
Clinical module . . . . . . . . . . . . . . . . . . . . . . . . . . . . . . . . . . . . . . . . . . . . . . . . . . . . .
Administration module . . . . . . . . . . . . . . . . . . . . . . . . . . . . . . . . . . . . . . . . . . . . . . .
Clinical customization module . . . . . . . . . . . . . . . . . . . . . . . . . . . . . . . . . . . . . . . . .
Reporting module. . . . . . . . . . . . . . . . . . . . . . . . . . . . . . . . . . . . . . . . . . . . . . . . . . .
Input manager . . . . . . . . . . . . . . . . . . . . . . . . . . . . . . . . . . . . . . . . . . . . . . . . . . . . .
Output manager . . . . . . . . . . . . . . . . . . . . . . . . . . . . . . . . . . . . . . . . . . . . . . . . . . . .
Override . . . . . . . . . . . . . . . . . . . . . . . . . . . . . . . . . . . . . . . . . . . . . . . . . . . . . . . . . .
91
91
93
94
94
94
95
95
Sign Off . . . . . . . . . . . . . . . . . . . . . . . . . . . . . . . . . . . . . . . . . . . . . . . . . . . . . . . . . . . . . 95
Unspecified diagnoses . . . . . . . . . . . . . . . . . . . . . . . . . . . . . . . . . . . . . . . . . . . . . . . 95
Printing at sign off . . . . . . . . . . . . . . . . . . . . . . . . . . . . . . . . . . . . . . . . . . . . . . . . . . 96
v
HealthMatics EMR 2006 Release Notes
Tools . . . . . . . . . . . . . . . . . . . . . . . . . . . . . . . . . . . . . . . . . . . . . . . . . . . . . . . . . . . . . . . 97
Vitals . . . . . . . . . . . . . . . . . . . . . . . . . . . . . . . . . . . . . . . . . . . . . . . . . . . . . . . . . . . . . . . 97
4. HealthMatics Interface Engines . . . . . . . . . . . . . . . . . . . . . . . . . . . . . . . . . . . . 99
Data Exchange Administration. . . . . . . . . . . . . . . . . . . . . . . . . . . . . . . . . . . . . . . . . . 99
Data exchange . . . . . . . . . . . . . . . . . . . . . . . . . . . . . . . . . . . . . . . . . . . . . . . . . . . . 101
Event log . . . . . . . . . . . . . . . . . . . . . . . . . . . . . . . . . . . . . . . . . . . . . . . . . . . . . . . . 103
Utilities . . . . . . . . . . . . . . . . . . . . . . . . . . . . . . . . . . . . . . . . . . . . . . . . . . . . . . . . . . . . 103
Demographic export. . . . . . . . . . . . . . . . . . . . . . . . . . . . . . . . . . . . . . . . . . . . . . . . 104
Appointment export . . . . . . . . . . . . . . . . . . . . . . . . . . . . . . . . . . . . . . . . . . . . . . . . 104
Index . . . . . . . . . . . . . . . . . . . . . . . . . . . . . . . . . . . . . . . . . . . . . . . . . . . . . . . . . . . 105
vi
1. HealthMatics EMR 2006
1. HealthMatics EMR 2006
HealthMatics® EMR 2006 includes many new features and enhancements to the 2005
product functionality. This overview contains a brief description of each new feature and
enhancement, accompanied by cross-references to more detailed information when
appropriate.
New Features Overview
•
Additional results - A new view, Additional Results, is available when a patient
chart is pulled. It contains messages about authored text, referrals, and other
miscellaneous plan items that are awaiting caregiver review (see Additional
Results on page 8).
•
Clinical decision support - A new web-based clinical decision support tool
(Isabel) is now available on the A/P screen. It can suggest alternative and/or
additional diagnoses, based on data documented in Reason for Visit, Review of
Systems, and Physical Exam (see Clinical Decision Support (Isabel) on page 9).
•
Concurrent encounters - One or several caregivers can now open multiple
encounters for a patient at the same time (see Concurrent Encounters on page 9).
•
Customizable toolbar - You can now completely customize your Clinical Module
toolbar to display only the icons you want to see, in the order you select (see
Customizable Toolbar on page 11).
•
Database conversion - HealthMatics EMR now uses a SQL (rather than Oracle)
database, which improves performance and consistency across all screens (see
Database conversion on page 7).
•
Electronic patient signatures - You can now capture patient signatures
electronically on forms and other documents that you don’t need to print either
using Topaz (see Electronic Patient Signatures on page 12) or a Tablet PC.
•
Explore - All face sheet panes now include Explorer screens to facilitate chart
review, (see Explorer Views on page 14).
•
Fast tracks - You can now select the contact screens in each Fast Track
template, and easily retrace steps using Fast Track for the current encounter (see
Fast Tracks on page 67).
•
Formularies - A formulary database provided by MediMedia provides instant
access to formularies at the point of care (see Formularies on page 14).
•
Input manager - A new module, Input Manager replaces Document Input
Manager. It includes functionality formerly located in the Transcription Module and
the Results Reconciler, as well as the Provider and Location Import Queues that
interface with your Practice Management system (see Input Manager on
page 16).
•
LOINC - The Lab Catalog now includes LOINC codes for universal searching and
matching (see Logical Observation Identifiers Names and Codes on page 19).
•
Mail merge - Output Manager has new functionality that allows you to mail merge
report results from patient lists generated in the Reporting Module (see Mail Merge
on page 20).
1
Enhancements Overview
•
Medical necessity check - You can now perform medical necessity checks on
CPT-ICD-9 pairings against Medicare’s guidelines using the Alpha II/Unicore Med
database (see Medical Necessity Checking on page 22).
•
Patient manager - A new Patient Manager view assists with patient management
by displaying all items awaiting review for a selected patient, along with pending
messages, reminders, and refill requests, and more (see Patient Manager on
page 29)
•
Printing - You can now print, fax, queue, save to log, or export documents using
system- or custom-defined templates directly from the point of care (see Print
Integration on page 31).
•
Procedure results entry- You can now associate procedure rules with multiple
CPT codes and create customized procedure lists containing just those items that
each caregiver type needs to document (see Procedure Results Entry on
page 43).
•
Quick filters - A new filter system allows you to select multiple conditions and
then filter a list of items with a single click (see Quick Filters on page 45).
•
Redesign - All modules and windows throughout the HealthMatics EMR suite of
products now reflect new GUI standards that provide a consistent look and feel
(see Redesign on page 7).
•
Reporting module - A new Reporting Module includes all report-building activities
and, when reports are run, can generate patient reminders that display in Patient
Manager (see Patient Manager on page 29) and also the ability to create mail
merge letters from report results (see Mail Merge on page 20). Refer to the
HealthMatics EMR Reporting Module manual for detailed instructions.
Enhancements Overview
HealthMatics EMR 2006 enhancements are listed below. Cross-references provide
links to additional information where appropriate.
2
•
Action items - Mark an action complete without opening it. Select it and click
Complete on the secondary toolbar. In addition, the Date/Time column has been
renamed Sent to indicate the date and time the action item was sent to the
desktop.
•
Administration module - Several options have been relocated or eliminated (if
no longer needed) from the left pane. New password options are now available
added in Site Settings (see Administration Module on page 47).
•
Allergies - The Free Text tab was removed from the Allergy screen in History.
Previously entered free text allergy items will migrate to 2006 and can be used in
the current encounter. However, you should select the most closely related allergy
item using Search, and not free text, to ensure that allergy alerts work
appropriately.
•
Appointments - Search for Appointments using new Date filters, and use many
other new features (see Appointments on page 49).
•
Assessment/plan - Print drafts of documents generated during the encounter
from the A/P screen. Medication allergy alerts can no longer be deactivated (see
Assessment/Plan on page 50).
1. HealthMatics EMR 2006
•
Audit open encounters - Audit Open Encounters (available from the left pane on
the desktop or the Office menu) replaces the Open Encounters Report. It lists all
open encounters in the database. You can sort the encounters by Caregiver,
Location, or Patient. You can also view H&P reports and/or pull charts for the
patients/encounters listed in this view. Open encounters more than a week old
display in red.
•
Auto-replace - Auto-replace functionality is no longer case sensitive, thus
avoiding duplication in future entries (that is, items entered in both lower and
upper case).
•
Batch refill - A new Output button replaces the Fax and Print buttons and opens
the new Prescription Properties screen (see Prescriptions on page 87).
•
Billing reconciliation - Access Billing Reconciliation directly from the left pane of
the desktop. It includes an additional Patient filter to help you find the items
requiring action (see Billing Reconciliation on page 51).
•
Caregiver options - New caregiver options are available for Desktop, Toolbar,
Face Sheet, Patient Manager, Results, Review of Systems, Vitals, Physical Exam,
Assessment and Plan, Electronic Prescriptions, Sign Off, Title Bar, and History
(see Caregiver Options on page 52).
•
Chart attachments - Chart attachments can no longer be deleted. Instead, you
can mark them erroneous to maintain a history/audit trail.
•
Change my password - Change passwords by clicking Change My Password on
the Administration Module toolbar (see Administration Module on page 47).
•
Clinical customization module- All customization functions are located in the
new Clinical Customization Module. This module provides a consistent method for
adding Knowledge terms, has new security options, an Ownership Override
privilege, and numerous improvements regarding Procedure Entry Rules (see
Clinical Customization Module on page 53).
•
Daily schedule - Print the daily schedule from the Appointments view by clicking
click
> Daily Schedule on the application toolbar.
•
Definitive diagnosis pending - This functionality has been removed in 2006. It is
no longer needed due to the ability to create concurrent encounters (see
Concurrent Encounters on page 9).
•
Demographics - The PM interface no longer overrides miscellaneous
demographic information in the EMR, such as marital status, ethnicity, and
language. In addition, Web accounts set up (if any) now display on the main
demographics page (see Demographics on page 59).
•
Desk references - User-added desk references now display on the Launch menu
above the Edit Desk References menu option.
•
Desktop navigation - The left pane of the desktop now contains icons for Batch
Refill, Reminders, Lab Results, Procedure Results, Additional Results, Report
Results, Output Queue, Work Log, Billing Reconciliation, Audit Open Encounters,
and the Lab Order Entry options -- Orders, Requisitions, and Batch Processing.
NOTE: The Office menu contains the same options.
•
Documents - Received Documents (now called Documents) has a new column
(From) listing the names of who sent documents to your inbox. A new Information
3
Enhancements Overview
column shows patient names and document length. Additional enhancements are
listed in Documents on page 60.
4
•
Drug interactions - Drug interactions now display in red on the Drug Interactions
pop-up window in A/P, regardless of the site settings for drug/food/alcohol in the
Administration Module. To protect vital information, the drug interaction message
can no longer be turned off.
•
E&M calculator - New Alpha II/Unicore Med technology analyzes procedures
documented and suggests evaluation and management levels in the E&M
Calculator. Management Options replaces the Risk Tables (see E&M Calculator on
page 61).
•
Electronic prescriptions - Edit and forward electronic prescriptions to other
caregivers. In addition, electronic prescriptions now contain send/receive order
numbers (see Electronic Prescriptions on page 62).
•
eRefill requests - Several new buttons/functions were added to eRefills (see
Electronic Prescriptions on page 62).
•
Face sheets - Find and view specific information quickly using numerous
enhancements on the Face Sheet (see Face Sheets on page 63).
•
Flow sheet templates - Archive flow sheet templates (see Flow sheet templates
on page 69).
•
History - The History view contains enhancements made for Allergy,
Immunizations, and Search (see History on page 69).
•
H&P report - Items on the H&P Report screen are rearranged to improve
efficiency (see H&P Report on page 70).
•
Lab results - Items on the Lab Results screen are rearranged to improve
efficiency and new buttons are available (see Lab Results on page 71).
•
Location import queue - The Location Import Queue now resides in Input
Manager (Launch > Input Manager).
•
Logins - Failed logins now appear in the Work Log in red font. To be listed, they
must have at least a valid Login Name.
•
Medications - Any medication prescribed, either from A/P, the Face Sheet, or
Refill Request is set to a status of Ordered. Any History medications with an active
status that you have not refilled has a status of Active. This provides a way to
differentiate between medications that you are managing with those that you are
not.
•
Office manager - The stacks area on the application desktop is now called Office
Manager. Customize the view in Caregivers Options (see Office Manager on
page 74).
1. HealthMatics EMR 2006
•
Output manager - Printing from output templates has been moved from Output
Manager to the EMR. Additional changes include new output blocks and icons,
the ability to archive layouts, and new templates (see Print Integration on page 31
and Output Manager on page 74).
•
Outstanding messages - View outstanding messages on a patient’s chart and
outstanding patient messages (see Outstanding Chart Messages on page 27 and
Outstanding Patient Messages on page 29).
•
Passwords - Passwords can now be case-sensitive. Strength rules are
configured at the site level.
•
Pregnancy record - A new Pregnancy Record provides the ability to record an
pregnancy visit all from one screen (see Pregnancy Record on page 78).
•
Procedure results - The new Procedure Results screen is more organized and
less cluttered, and includes new filters and icons (see Procedure Results on
page 84).
•
Provider import queue - The Provider Import Queue (formerly called Caregiver
Import Queue) now resides in new Input Manager (Launch > Input Manager).
•
Pulled charts - Pulled charts is now called Open Encounters (see Concurrent
Encounters on page 9), and a new secondary toolbar button was added to Send
Chart.
•
Reason for visit - You can now tag visits as follow ups for earlier visits. Free text
complaints have also been enhanced (see Reason for Visit on page 86).
•
Refill requests - New buttons, columns and a new screen, Prescription
Properties, facilitate the approval process (see Prescriptions on page 87).
•
Reminders - You can now add reminders without pulling charts, mark them
complete and send a message about a reminder to another caregiver. You can
also set reminders about handling of lab specimens for other caregivers, and
generate health maintenance reminders for procedures such as immunizations,
mammograms, pap smears, and flu shots (see Reminders on page 90).
•
Requisitions - You can now designate the Ordering Caregiver on the Edit
Requisition screen if the user entering the order is not the ordering caregiver. This
assures that the result notification will go to the appropriate caregiver.
•
Result notifications - A quick review button is now available in Result
Notifications, and several changes were made in the columns (see Result
Notifications on page 90).
•
Result summaries - Additional vitals information is now available in Result
Summaries (see Result Summaries on page 91).
•
Security - Many new security options are now available to grant individual
caregivers or caregiver types access to specific tasks and screens (see Security
on page 91).
•
Scanned documents - Re-index scanned documents from the face sheet. In
addition, you can now also see annotations, who reviewed/indexed the document,
and page information (see Explorer Views on page 14) and Documents on
page 60).
5
Enhancements Overview
6
•
Security settings for customization - Security has been added for the
customization functions in the new Clinical Customization Module (see Clinical
Customization Module on page 53).
•
Sign off - Printing improvement makes the sign-off procedure more efficient. In
addition, the system now generates Unspecified diagnosis reminders at sign-off
(see Sign Off on page 95).
•
Vitals - Vitals has new options for the LMP date, waist and neck measurements,
and new default settings in Caregiver Options (see Vitals on page 97).
•
Web accounts - Security words have been added so that if a user forgets their
password, an email will auto generate to tell them their password if they enter the
correct security word. In addition, users are now prompted to change their
passwords automatically.
•
Work logs - Work logs now track failed login attempts if a valid login name was
used. In addition, contacts that did not have associated saved data were
displayed as “<No details are associated with this contact>.” They now state,
<Chart Reviewed without edits>. In addition, contact with patient charts that do
involve saved data now display in the form of Edited <screen name>, instead of
just listing the screen name.
2. New Features
2. New Features
HealthMatics EMR contains the following new features:
General on page 7
Additional Results on page 8
Clinical Decision Support (Isabel) on page 9
Concurrent Encounters on page 9
Customizable Toolbar on page 11
Electronic Patient Signatures on page 12
Explorer Views on page 14
Formularies on page 14
Input Manager on page 16
Logical Observation Identifiers Names and Codes on page 19
Mail Merge on page 20
Medical Necessity Checking on page 22
Outstanding Chart Messages on page 27
Outstanding Patient Messages on page 29
Patient Manager on page 29
Print Integration on page 31
Procedure Results Entry on page 43
Quick Filters on page 45
General
Database conversion
To modernize the look and feel of the application and to allow us to re-use functionality
across the application to improve consistency and performance, Healthmatics EMR
2006 has switched from an Oracle to a SQL database.
Redesign
To make learning the application easier, and to facilitate the transfer of knowledge from
one module to another, the HealthMatics suite of products has been redesigned with a
common look and feel. Most screens have been redesigned to reflect the new GUI
standards.
Example: New buttons help you retrace your steps among contact screens during
encounters, and print/fax functions are now context sensitive and available from the
toolbar and many EMR screens.
7
Additional Results
Additional Results
To unclutter the Lab Results and Procedure Results views, all ordered items that are
not labs have been removed from the Lab Results view, and all ordered items that are
not procedures have been removed from the Procedures Results view. These items
are now located on the Additional Results screen.
To view, finalize, enter completion dates and comments on referral letters, and all
authored text items such as office procedures, discharge plans, and patient education,
from the left pane of the desktop or any contact view, select Additional Results.
•
Select an item to display details in the preview pane.
•
Double-click an item to open a dialog box showing the entire document/details
and comments (if any) attached
You can click Previous and Next to move to other Additional Results documents or
click the down arrow to display a list of Additional Results items.
From the Additional Results Entry screen, you can do the following:
8
>
Completed dates - Enter or change the date the item was completed by
clicking the Completed down-arrow and time spin-arrow.
>
Finalize - Mark the item Final by clicking Final.
>
Review - Mark the item Reviewed by clicking Review
>
Navigate - Move quickly through all items in the selected list by clicking
Previous or Next.
>
Comments - Enter comments prior to review about the result by clicking the
Comments tab.
2. New Features
Clinical Decision Support (Isabel)
To enhance the caregiver’s decision-making ability for a given set of symptoms,
HealthMatics EMR is now integrated with a web-based, clinical decision support
system, Isabel (www.isabelhealthcare.com). This third-party software can be
subscribed to at an additional charge.
Based on the subjective and objective clinical findings documented in Reason for Visit
(complaints and their associated features), Review of Systems (positives), and Physical
Exam (positives), Isabel provides a list of likely diagnoses and causative drugs relative
to the patient’s age, gender, and (for a woman) if she is pregnant. Using knowledge
from medical text books, annotated images, journal abstracts, Isabel provides relevant
answers to clinical questions.
NOTE: Isabel does not search information contained in the patient’s words or notes
throughout the application.
To use this feature, from the toolbar in the center of the A/P screen, click Isabel.
For more information about Isabel, refer to Isabel’s website, http://
www.isabelhealthcare.com.
Concurrent Encounters
To provide the ability to open more than one encounter for a patient with back-to-back
appointments in multi-specialty clinics and other large practices, HealthMatics EMR
2006 now allows you to open concurrent encounters.
The ability to open concurrent encounters prevents the “being edited elsewhere”
message for Problems and History items. In addition, Problems and History items now
display immediately on face sheets, based on the most recent revision of that item.
9
Concurrent Encounters
Real-time updates make it possible for all Problem, History, and Medication revisions
to be visible immediately on the patient’s face sheet. (In 2005, they are only visible after
Sign Off.)
NOTES
•
In order to bill each encounter, each concurrent encounter must be pulled from a
scheduled appointment.
•
The ability to create concurrent encounters makes the need to file charts with
definitive diagnoses pending unnecessary, so this functionality has been
removed.
Enabling concurrent encounters
In Administration Module > Site Settings, you can indicate the Number of Concurrent
Encounters Allowed (per Chart).
•
Select 1 to disable concurrent encounters.
•
Select any other number (depending upon your workflow needs) to enable
concurrent encounters.
Pulling charts with concurrent encounters enabled
IF concurrent encounters is enabled (see Enabling concurrent encounters on page 10),
when you pull the chart of a patient with one or more encounters in progress, Encounter
Selection appears.
To continue documenting an encounter that is open, select it from the list; otherwise,
select <New Encounter>. Then click OK.
NOTES
•
10
Encounters started more than 24 hours ago display in red.
2. New Features
•
In Encounter Selection, you can click H&P Report, or Face Sheet, or click Details to
see additional information for the encounter selected.
Customizable Toolbar
Users can now customize toolbars based on roles and workflow within the practice.
Each user can indicate which icons they want to see on the toolbar and the order in
which they appear.
1. From the Clinical module menu bar, select Options > Edit Options and select
Toolbar.
2. In the Toolbar Properties box, double-click items on the left to move them to the
toolbar list on the right, then sort and organize the icons by selecting them and
clicking the directional arrow buttons.
3. To separate groups of related icons on the toolbar (such as Pull Chart, File Chart,
Send Chart), list them consecutively and insert a Separator (
) before
and after the group.
4. Click OK to save and display your toolbar icons.
NOTE: Click Reset Settings to return the toolbar to its factory setting.
11
Electronic Patient Signatures
Electronic Patient Signatures
To eliminate staff time needed to print, sign, scan, review, and store paper items
requiring patient signatures, HealthMatics EMR 2006 provides the ability to capture
electronic patient signatures that can be used for consent forms such as ABNs and
HIPAA forms. You can also retain guardian or multiple signatures on file. Patients can
sign directly on the caregiver’s tablet computer or on the Topaz System signature pad if
your practice has purchased one.
Building templates to include electronic patient signatures
1. To capture patient signatures, your template must include one or more Electronic
Signatures data elements. From Output Manager, go to the Output Block
Properties screen and select System > Electronic Signatures > Common to see the
data elements you can include:
Include the block containing the Electronic Signature data element(s) in a
template. Exit HealthMatics EMR and log back in so that the Clinical Module
recognizes the new output template.
2. Open a patient chart, click
(Print) on the toolbar, and select the template
containing the Electronic Signature data element(s). When you click Print, the
Select Signature Method dialog box opens.
3. Indicate how you are going to collect the signature. Click the Collect the
Signature(s) from down-arrow and select either <Sign on the Screen> or Topaz
Signature Pad (if you have purchased the pad).
4. To indicate where you want the signature to be captured, click one of the
following:
>
12
Sign local - Opens the Electronic Signature entry box for “on screen” signing,
or activates the signature pad for signing, depending upon your selection in
2. New Features
the previous screen.
Sign on the screen and click OK or sign on the signature pad and click Done.
NOTE: If you send the document to the Output Queue, it appears in the Output
Queue with a Status of Sig Pending.
>
Sign remote - Select an available remote computer (if any) and click Sign
Remote to open the signature entry dialog with signing remote activated.
>
Sign paper - The system inserts a blank image in the place of the signature,
so that the patient can sign the paper.
NOTE: The Output Queue “stamps” the document with the Date/Time the electronic
signature was collected. To see the signature collection date, select Output Queue,
double-click the document to display Output Properties, and then click the Action
History tab.
Collecting electronic signatures in queued documents
To collect an electronic patient signature on a queued document, from the left pane on
the desktop, click Output Queue, highlight a Queued ( ) document requiring an
electronic patient signature and do one of the following:
13
Explorer Views
•
Right-click it and select Collect Signature or
•
Click the Output Tasks down-arrow and select Electronic Signature or
•
Click Print.
Explorer Views
To provide an up-to-the minute overview of what happened last with each item in the
patient summary, you can now click
(Explorer icon) on the toolbar of each pane of
the face sheet or, on the application menu bar, click Explore and select the view.
To enhance the ability to read details in the pane on the right, click Expand View. To
return to the normal view, click Collapse View.
•
To see the most recent occurrence of items in a folder, click a folder in the left
pane to see the details for the most recent occurrence of each item in the folder.
•
To see the history of one item, click a single item within a folder to see a
detailed history for that item in the pane on the right.
For additional information about each pane, see Face Sheets on page 63.
Formularies
To help providers choose the appropriate drug for a patient, you can now access
formularies at the point of care. This allows you to see drug information based on the
patient’s insurance, region, Medicare Part D, and whether a prior authorization is
required for coverage. Icons indicate which drugs are Preferred, Approved, and Nonformulary. $$ signs indicate the price comparison of drugs within that drug class.
This information is accessible from both the A/P screen (on the Search, My Short Lists,
or Short Lists tab) and from Refill Request (when approving refill requests).
NOTES
14
•
Workflow - If patient insurance changes are entered into your PM system
(insurance name, address, group number, or certification number), you must reenter the formulary information in HealthMatics EMR (see Assigning formularies
by patient on page 15 and Assigning formularies by insurance carrier on page 15).
•
System option - To use the formulary database, you must enable the system
option for the formularies and assign the appropriate formulary to each respective
insurance carrier. Call the HealthMatics EMR Support Desk for assistance. The
MediMedia database that provides formulary information updates monthly.
2. New Features
•
MediMedia database - This database is third party software that is available as
an add on.
Assigning formularies by patient
1. In the Demographics view, click the Insurance Policies tab.
NOTE: All insurance policies display at once. They are no longer identified as
medical or prescription policies.
2. Double-click the carrier to which you want to assign a formulary.
3. At Formulary, search for and select, select the appropriate formulary and click OK
to link it to the carrier for the selected patient.
Assigning formularies by insurance carrier
NOTE: Formularies assigned by patient overwrite those assigned by insurance carrier.
1. From the Clinical module toolbar, select Tools > Edit Ins Carriers.
2. Search for the carrier and click
(Edit) or click
to add a new one.
3. At Formulary, search for and select the appropriate formulary, then click OK to link
it to the carrier.
4. Click OK again to return to Insurance Carrier Search and Close.
IMPORTANT! When a patient’s insurance carrier is changed in your practice
management system, you must make a note of that and then change the formulary
manually in the EMR. This is a workflow issue that each practice should address to
assure that the formulary for each patient is kept current in the EMR.
Using formularies
If Formularies are turned on, when searching the Medi-Span Data Source, in the
Search Results box, a formulary icon precedes each medication and a description of
the formulary status for that medication follows.
These icons appear on the Formularies tabs visible from A/P, Refill Requests, and in
Short Lists:
Icon
Description
Preferred (lowest co-pay) - green asterisk
Approved (higher co-pay) - green check
15
Input Manager
Icon
Description
Non-formulary (highest co-pay) - red check
Coverage varies - question mark
Not Reimbursed - circle with line through it
When you select a medication for the encounter, a new Formularies tab in the
Medication dialog displays formulary information for the selected medication.
NOTES
•
The relative cost, when known, is indicated by dollar signs ($). The greater the
number of dollar signs, the higher the relative cost for drugs in that Class.
•
The status icon (
box.
•
The Medication screen and Formularies tab also display when caregivers click
Approve w/Changes on the Refill Request dialog box.
) also displays on the Formularies tab in the Medication dialog
Input Manager
To increase efficiency, improve workflow, and provide the ability to correct indexing
errors, a new module, Input Manager, replaces Document Input Manager and the
Transcription Module. For detailed instructions for using this new module, refer to the
HealthMatics EMR Input Manager manual.
The new module includes the following functionality:
16
•
Scanning and indexing
•
Transcribing (both external and internal dictation)
•
Setting administrative options for both functions and capturing transcription
statistics
•
Reconciling unmatched caregivers and patients with respect to incoming test
result of external sources, as well as providing an audit log for matching activities.
•
Matching providers and locations imported from Ntierprise over your practice
management interface to caregivers and locations in the HealthMatics EMR
database.
2. New Features
To access the Input Module, from the Clinical Module menu bar, select Launch > Input
Module.
•
Security - Assign security to your users for this new module in Administration
Module > Function Access > Input Manager.
•
Work flow - The new module supports multiple workflow scanning/indexing
scenarios. Small practices may have one or two people indexing as they scan.
Larger practices can separate the scanning and indexing functions and assign
them according to staff abilities and training.
•
Indexing - Change indexing information on the spot, if necessary, before
approving and saving documents to patient charts.
•
Transcription - Transcribe documents from both internal (voice notes) and
external (hand-held devices) sources from one place.
•
Forwarding - Forward documents to the appropriate caregiver if they were
misdirected and another caregiver needs to approve them.
•
Processing documents - Approve/reject documents received from either your
inbox or from Input Manager.
•
Viewing documents - View documents attached to patient charts from their face
sheets.
•
Reconciling results - Match caregivers and patients for incoming results from
external labs using the Reconciler in Input Manager. (NOTE: The Reconciler was
moved from the Administration Module.
•
Tracking activities - Track and view matching activities in the Audit Log in Input
Manager, and break matches made previously, if they are subsequently found to
be incorrect.
•
Matching imported items - Match providers and locations imported from your
Ntierprise practice management system to HealthMatics EMR caregivers and
locations in PM Interface Options. (NOTE: The import queues were moved from
the Administration Module.)
For detailed instructions for using this new module, refer to the Input Manager manual.
17
Input Manager
Documents
Scanned documents
In Scanned Documents, you can do the following new things:
•
Scan various types of documents into one group by patient or scan multiple pages
into groups by document type.
In Scanned Document, click
to Add Page(s) or Add Group.
•
Scanners (and transcriptionists) can now see rejected documents in their inboxes.
•
View scanned documents from anywhere that you can see a scanned document
listed, including the patient’s face sheet. You no longer need to go anywhere else
to view it.
In the Face Sheet, click Encounter Explorer > Scanned Documents.
•
Link scanned documents to encounters, diagnoses, or plans.
From the indexing screen of Scanned Document, click the Index down-arrow.
•
See all items that are ready for indexing, and then index multiple documents as a
separate function.
From the Scanned Document view, click the Status down-arrow and select Ready
for Indexing.
•
Designate a caregiver to submit the document to when the document needs
review as either the caregiver linked to the encounter or the preferred caregiver.
From the Scanned Documents view, click the Caregiver down-arrow.
•
Convert a scanned document back to a job so that it can be edited if you are the
sender of the message. If the document is Approved, you need the Scanned
Documents and/or Re-assign Patient Function Access to convert the document.
From the Scanned Documents view, click Convert to Job.
•
Merge multiple scanning jobs into one, with the first selected job serving as the
“bucket” for all the others.
From the Scanned Documents view, select two documents and click Merge Jobs.
The groups of the lower job are attached to the upper job.
Transcription documents
•
In HealthMatics 2006, access all transcription from Input Manager (Launch > Input
Manager > and then select either External Transcriptions or Internal Transcriptions
from the left pane). Transcription functionality has not changed. However, in the
list of transcribed documents, the column headings, Dictated by and Transcribed
by now clearly indicate who did what.
•
Quick filters are available in both transcriptions views (see Quick Filters on
page 45).
Reconciler
•
18
Matching - To facilitate workflow and provide consistency, unmatched results
from external sources are now reconciled in the Reconciler in Input Manager.
Separate Caregiver Matching and Patient Matching views simplify the process.
You can click the Matched . . . radio button to see matches that have been made.
2. New Features
You can delete tests or patients received in error without completing a match, or
delete matches made in error to prevent future results from going to the previously
matched patient record. From View Results, you can view the Import Event (HL7
code) or print a Result Report.
•
Audit log - To provide the ability to review reconciliation activities, an Audit Log
now tracks all reconciliation activities, as well as other interface activities. It
produces an audit trail similar to the familiar Work Log. From the Audit Log, you
can view the HL7 code for the import event, view the results, or print a report of
the results. You can also see matches that were deleted.
PM interface options
The Provider and Location Import Queues have moved from the Administration Module
in 2005 to Input Manager in 2006. Functionality has not changed.
Logical Observation Identifiers Names and Codes
Logical Observation Identifiers Names and Codes (LOINC) are the nationally accepted
standard for laboratory codes. The difference between LOINC and CPT codes is that
each individual test within a panel has its own LOINC code.
Example: A CBC panel has one CPT code, but each test within the CBC has an
individual LOINC code.
The purpose of these codes is to facilitate the exchange and summary of clinical results
via HL7 messages. The EMR uses LOINC codes to match unsolicited labs in Result
Summary and the Pregnancy Report.
To facilitate reporting and to allow searching for labs by LOINC and key words,
HealthMatics EMR now includes the LOINC database in its Lab Catalog. The database
will be updated twice a year on the Knowledge Updates CDs, along with the CPTs and
ICD-9s.
You can now do the following:
•
Print (mapped) LOINCs on lab orders, requisitions, and results.
•
Search or report using LOINC codes
In the 2006 EMR upgrade, LOINC codes now display in an extra column added to the
Lab Catalog.
NOTE: LOINC codes are mapped to system-defined lab tests in the Lab Catalog
automatically. However, you must manually map LOINC codes to user-defined labs in
order to make them available for Patient Manager and Reporting.
19
Mail Merge
Mail Merge
To provide the ability to send mass mailings to segments of the patient base, you can
now create mail merge letters for lists of patients identified in the Reporting Module.
After running the report, send the results with the list of patients to your inbox via a
Message. (For additional information, refer to the Reporting Module manual.)
Creating mail merge letter templates
The system provides one mail merge letter template, Diagnostic Tests Letter. You can
create others as needed.
To create a new mail merge letter template, follow the steps below. For more detailed
instructions refer to the 2006 Output Manager manual.
1. In Output Manager > Output Blocks, create new blocks to be used for a mail merge
letter template.
•
Use data elements from the following folders only: System, Site, Location,
Caregiver, and Reports.
•
Access patient demographic data elements from Reports > Mail Merge >
Patients.
•
If desired, select the data element, System > Free Text to make a generic letter
fit a specific need. During the print process, a text box appears for entering
the free text information. See the Example below:
Dear Ashton:
Your [free text]. Since all results were normal, you do not need to contact the
office unless you have questions.
Insert into the free text box:
* lab results were within normal limits
* stress test was normal
* pathology report showed no signs of abnormal cells
2. In Output Manager > Output Templates > System Default, create your own mail
merge letter template using the output blocks that you created.
NOTES
•
You can also create a new mail merge letter template by copying, and then editing
the copy of the Diagnostic Test Letter for Mail Merge template.
•
If you create your own mail merge letter template, in Output Template Properties,
select Report Results for the Output Category.
Performing mail merges
1. Access Mail Merge from any of the following locations:
•
Inbox
Reports > (double-click item) > Report tab > Print > Mail Merge
•
Desktop
Report Results > (double-click item) > Print > Mail Merge
20
2. New Features
•
Menu bar
Launch > Reporting Module > Reports > (select item) > Results > Print > Mail
Merge
2. Click Mail Merge
•
Optionally, click Preview to view the merge letter and Close to return to Print
Mail Merge.
•
Select a Printer, Location and Template and click OK to print the letters for the
patients listed in the report results.
21
Medical Necessity Checking
Medical Necessity Checking
To alert Medicare patients to the possibility of a denial for procedures that do not meet
local or regional guidelines for medical necessity or for noncovered services,
HealthMatics EMR can now check CPT and ICD-9 code pairings at the point of care
and print ABNs and NEMBs when needed. Medical Necessity Check databases will be
updated quarterly via the website.
Medical Necessity information is available from any of the following places in
HealthMatics EMR:
•
Assessment/Plan
•
Lab Results
•
Procedure Results
•
Appointments
•
Create Requisition
Medical necessity checking is done by third-party software (Alpha II/Unicore Med) that
queries Medicare National Coverage Determinations (NCD) and/or Medicare Local
Coverage Determinations (LCD) via a web service for patients with an insurance Plan
Type identified in Demographics as Medicare. Alpha II checks the CPT, ICD-9, and
modifier codes for orders based on the following System Options in the Administration
Module: Use LMRP, Use CPT Excluded, Use Proprietary.
NOTE: The Medical Necessity web service must be restarted for any changes to apply.
Medical Necessity Checking provides the following:
ABNs and NEMBs - If Medicare is likely to deny a service based on the ICD-9
documented, the caregiver is alerted and can print an Advanced Beneficiary Notice
(ABN) for the patient to sign. If a procedure you want to order is not covered by
Medicare, you can print a Notice of Exclusion from Medical Benefits (NEMB), to
document that you have notified your Medicare patient of that fact.
E&M calculator - The E&M Calculator cross-checks items selected in Diagnosis and
Management Options to assure that they match with the diagnoses selected in A/P.
Electronic patient signatures - You can use electronic patient signatures for ABNs or
NEMBs and attach them to the chart under a new chart attachment type called ABN.
See Electronic Patient Signatures on page 12.
22
2. New Features
Turning on medical necessity checking
To turn on medical necessity checking, enable the appropriate system options.
1. In the Administration Module, under System Administration, click System Options.
2. Click the Display Section down-arrow and select Medical Necessity.
3. Set Values as described below and click OK for each.
Key
Description
Value
Apply ABN
Modifiers
To allow modifiers (GA, GYZ and GY) to automatically append to
CPT codes when the ABN Status is modified in the Medical
Necessity Checking dialog.
• GA - Patient signed ABN
• GZ - Patient unable to sign ABN
• GY - Patient reviewed NEMB
1
Enabled
To enable Medical Necessity Checking (Site specific)
1
Geographical
Region
Enter your geographical region. (Example: NC) See http://
www.cms.hhs.gov/mcd/county_list.asp for details. Call the
Support Desk if you need assistance.
Url
Type/confirm the appropriate Medical Necessity web service
address (Example: http://localhost/1253)
1
23
Medical Necessity Checking
Key
Description
Use CPT
Excluded
To use ABN checking for CPT Excluded items provided by Alpha
II
Determine
coverage
Indicate how you will determine coverage by setting
options:
• Use LMRP - Local Medicare Review Policy to use Medicare
National Coverage Determinations (NCD) and/or Medicare
Local Coverage Determinations (LCD) edits to
determine when an ABN is needed for Medicare
patients
• Use Proprietary - Proprietary is a general database used
to review medical necessity policies and determine
when an ABN is necessary for non-Medicare patients.
Value
1
1
1
• Use SITE Defined (see below)
Use SITE defined - Type 1 to use a site defined database to determine medical
necessity Limited Coverage selections for Medicare. Site-defined selections always
override Alpha II edits; that is, items marked Medicare Limited Coverage always fail
Medical Necessity Checking and require signed ABNs and NEMBs for Medicare
patients.
Limited Coverage is maintained in the following two Catalog screens in the Clinical
Customization Module:
Catalogs > Lab Catalog > Lab Test Properties.
24
2. New Features
Checking for medical necessity in A/P
1. Open an encounter and from A/P, select a diagnosis (ICD9) and procedure (CPT).
2. From the toolbar in the center of the screen, click ABN Check to display Medical
Necessity Checking.
The system displays a list of the patient’s procedures ordered during the
encounter, along with the Status, Form, ABN Status and Modifier for each. If
medical necessity is substantiated, based on the CPT and ICD-9 codes
documented, then PASS displays in the Status column; otherwise, FAIL displays.
NOTE: To display orders that “passed” medical necessity checking, select Show
All Orders.
3. Highlight a FAILed item to display details in the bottom pane:
•
Message - The Message explains why medical necessity is unsubstantiated.
•
Source - The Source shows the source of the edit.
NOTE: If the Source is Site defined, even though a code might pass Alpha II
edits, site-defined edits supersede Alpha II edits, so the CPT code could show
as failing.
•
Modifier - The Modifier shows the modifier appended to the CPT code.
4. To print ABNs and NEMBs, on the toolbar, click Print and select one of the
following:
•
Print all - Initiates Output Manager to print ABN or NEMB forms as applicable
for all orders that failed medical necessity checking.
•
Print selected - Initiates Output Manager to print ABN or NEMB forms as
applicable for the selected orders.
NOTE: Providing Medicare patients with ABNs and NEMBs gives them
25
Medical Necessity Checking
information they need before deciding whether to accept services offered,
based on the fact that Medicare may not cover them, and documents the fact
that they received it. If a patient chooses to have the service, have the patient
sign the form, scan it, and attach it to the encounter.
5. Click ABN Status and select a status from the following:
•
Patient signed Yes - Updates the ABN Status to indicate the ABN has been
signed. Also, if the System Option (in Administration), Apply ABN Modifiers is
enabled, attaches the GA Modifier to the order.
•
Patient signed No - Updates the ABN Status to indicate the ABN has not
been signed. No modifier applies, since the patient is declining the service.
•
Patient unable to sign - Updates the ABN Status to indicate the patient is
unable to sign the ABN. Also, if the System Option (in Administration), Apply
ABN Modifiers is enabled, attaches the GZ Modifier to the order.
•
NEMB reviewed - Updates the ABN Status to indicate the NEMB was
reviewed with the patient. NEMBs apply only to excluded services. Also, if the
System Option (in Administration), Apply ABN Modifiers is enabled, attaches
the GY Modifier to the order.
•
Clear ABN status - Clears the order’s ABN Status field. Updates modifiers as
appropriate.
NOTES
26
•
Requisitions and orders - The ABN status also displays on requisitions, as well
as lab and procedure orders, from which, you can also access the Medical
Necessity Checking dialog.
•
Appointments - Medical Necessity Checking can also be accessed from the
desktop Appointments view.
•
Re-check - To recheck orders for medical necessity, on the toolbar in Medical
Necessity Checking, click Re-check and then select either Re-check Selected
Orders to check only those orders selected, or Re-check Encounter to re-check all
orders on the encounter.
2. New Features
Checking for medical necessity in lab or procedure results
1. From the Requisition view, double-click a lab test to display Edit Requisition.
NOTE: If Medical necessity is enabled in the Administration Module, then ABN
Check replaces the ABN Print button in the middle of the dialog.
2. Click ABN Check to access the Medical Necessity Checking dialog.
NOTE: The icon on the button changes, based on the ABN status. If one or more orders
require an ABN, then the icon is red. If all orders have their ABN needs satisfied, then
the icon is yellow.
Outstanding Chart Messages
To provide a quick view of messages included when one caregiver sends a chart to
another, a Message column has been added to the Open Encounters (old Pulled
Charts) view.
If there is more than one chart message associated with the encounter, Multiple Chart
Messages displays in the Message column.
When you open the encounter, the application checks to see if any of the chart
messages associated with the encounter have content other than the subject.
•
If the message has no content other than a Subject, it deletes automatically when
the chart is pulled.
27
Outstanding Chart Messages
•
If the message does have content, the Outstanding Chart Messages dialog
appears.
After reading the message, click
(or press Delete on your keyboard) to delete
the message and close the dialog or click OK to close the dialog without deleting
the message.
NOTES
28
•
Only messages with content appear in the dialog, so even if you saw the Multiple
Chart Messages subject in your list of open encounters, you may only see one
message here.
•
The dialog displays all messages associated with the encounter -- not just those
sent to you.
2. New Features
Outstanding Patient Messages
To alert caregivers to outstanding messages from a patient, the following dialog
displays when you click Send Patient Message and select the patient.
NOTE: This read-only dialog only appears when you select a patient to create a
message. Messages in your inbox are not marked as “read” when viewed from this
dialog.
Highlight an item to view the text of the message in the preview pane.
Patient Manager
To provide a single place to manage a patient’s medical conditions and to view
reminders for preventive health maintenance needs, HealthMatics EMR now provides
a Patient Manager view.
Patient Manager lists all items awaiting review for a selected patient, including results,
documents, and transcriptions. The Patient Manager view also lists pending
messages, refill requests, and health maintenance reminders for the patient, and
provides hyperlinks to the screens needed to review, trend, schedule, order, or refill the
items.
29
Patient Manager
To access this view, with a patient chart open, in the left pane, select Patient Manager
or click the Patient Manager bar.
The Patient Manager bars in the lower left corner reflect the number of items available
for review for the selected patient. Those that are overdue or include abnormal results
display in both the bars and the preview pane in red.
Patient Manager displays the following information:
•
Appointments - Lists all future scheduled appointments. Click Open to view
appointment details.
•
Pending messages
•
30
>
Patient messages - Lists patient messages that have not been Saved to Chart
or deleted. Items in red are High Priority messages. Click Open to view the
message.
>
Transcriptions - Lists transcriptions not yet reviewed. Click Review to mark the
item Reviewed.
>
Scanned documents - Lists scanned documents not reviewed. Click Review to
mark the item Reviewed.
Lab results - Lists results with the status of Final or Needs Review (in red and
bold if abnormal)
>
Click Review to open the Lab Review dialog.
>
Click Trend to open the Lab Trend dialog.
•
Procedure results - Lists results marked final or needs review (in red and bold if
abnormal). Click Review to open the corresponding dialog.
•
Additional results - Lists referrals, authored text, and patient education if they
have not been marked final. Click Review to open the corresponding dialog and
mark the item Final.
•
Medications - Lists pending refill requests (in red and bold if high priority).
2. New Features
•
>
Refill Requests - Click Open to see the refill request for the selected
medication.
>
Needing Refills within 1 Week - Click Refill to open the Medication dialog.
Reminders - Lists health maintenance reminders, such as reminders for flu shots
or immunizations. Click Open to view the reminder.
See also Caregiver Options on page 52 to set defaults for Patient Manager.
Print Integration
To provide the ability to quickly generate documents from the point of care, the printing
function of Output Manager is now integrated into the Clinical Module, which enables
you to print, fax, and import custom documents without leaving the current screen.
You can also send documents to the Output Queue to print later, and still have them
documented as having been generated from within the EMR.
Printer defaults set up in EMR 2005 will migrate to EMR 2006 with the exception of
“Default caregiver” and “Other printer,” which do not exist in the 2006 application.
Templates available
When you click
(Print) on the toolbar, you can generate output from any of the
templates that display. If you want to make additional templates available with assigned
actions from the menu, click Customize and add them.
NOTE: Customizing within the EMR is for the user logged in. To select Site and
Location output templates for each view, go to the Administration Module.
•
By caregiver logged in - On the toolbar, click My Output Defaults.
•
By location - Select Locations >
•
By site - Select Site Settings > Output Defaults
> Output Defaults
For additional instructions, see Selecting output templates for each screen on page 36.
31
Print Integration
When you make a selection and the application needs more information before it can
print, a bubble message displays the additional information needed (Example: Location
or date). Supply the information needed, then try to print again. Click OK to display the
Print screen.
Print toolbar icons
Use toolbar icons to do any of the following:
Icon
Name
Action
Print
Print a document from the view. Click Properties to select Paper/
Quality, or change other printer properties.
Fax
Fax a document from the view.
Queue
Send the document to an output queue for later printing. Enter a
queue comment if desired
Save to Log
Save the item in the database. Enter a log Comment.
Export
Export the document to a file on your PC. Enter the Filename.
Preview (F9)
Preview the document in the viewer (Preview tab).
Fill in information in the dialog that displays and click the appropriate button at the
bottom of the screen to Print, Fax, Queue, Save to Log, Export or Preview.
(See the respective screens below.)
32
2. New Features
Fax
•
Search for fax numbers - To locate the fax number, click any of the search
buttons: Pharmacy, Referral Caregiver, Institution, or Patient.
•
Set speed dial - To save the fax number, once you locate it, click Set and then
click a number (1 through 8). The Description name displays on the selected
button.
Queue and Save to Log
•
Enter a Comment if desired and click either Queue or Save to Log.
Examples: “Please send additional copy of this document to Dr. X.” or “Patient will
pick up after 3 PM.”
•
Only documents containing patient data can be queued or saved to log.
Export
Click
to select a file name and directory and click Save to export the file and open
the application associated with the file type (.pdf or .html).
33
Print Integration
Preview
Output defaults
To provide the ability to set site, location, and/or caregiver defaults for layout and printer
for each category output, these defaults (previously set in Output Manager Layouts),
are now set in the Administration Module:
To access output defaults in the administration module
•
By user logged in - On the toolbar, click My Output Defaults, select the Output
Category, and click
(Edit Layout Default) or press F2.
NOTES
* The layout set for each Output Category should be consistent across caregivers,
locations, and site. The default printer may vary.
* Users can also set personal output defaults from the Clinical Module menu bar:
Options > Edit Output Defaults.
34
•
By site - In the left pane, select Site Settings >
•
By location - In the left pane, select Locations > (select a location) >
Defaults.
•
By caregiver - In the left pane, select Caregivers > (select a caregiver) >
Output Defaults.
> Output Defaults.
> Output
>
2. New Features
To build printer sets
To provide the ability for caregivers to build multiple sets of output defaults to use when
they switch locations, you can now build and save printer sets for the various locations.
Example: If a caregiver works on Hall A one week, and Hall B the next, he can build a
set of printer defaults for each hall.
NOTE: When migrating from HealthMatics 2005 to 2006, if a caregiver only has printers
defined for one location, a set will not be created. If a caregiver had printers defined for
multiple locations in 2005, then a set will be created for each location and named for
the location. In that case, no default set will be selected.
1. In Options > Edit Output Defaults, select an Output Category and click
Output Default Properties for it.
to set
2. Repeat for each Output Category.
3. Click
(Save Set).
4. In Printer Set Name, enter a name for your printer set and click OK.
To apply a named set of printer defaults
1. In Caregiver Output Defaults, click the Set down-arrow to select a named set of
printer defaults and enable the icons to the right.
2. Click
(Apply Set).
The set of defaults is applied and the Caregiver Output Defaults screen resets itself for
a <New Set>.
NOTES
•
Apply Set and Delete Set are only enabled if you have selected a named set (not
<New Set>.
•
Clicking Apply Set only updates printer defaults, not layouts.
•
Clicking Delete Set removes the set from the Set drop-down list. It does not clear
the currently selected printers.
35
Print Integration
Output settings
To facilitate printing during a patient visit and at checkout, you can now select output
templates that you want to have available from each screen, and create encounter
packs that bundle certain items for various types of visits. You can select settings either
by site, location, or caregiver in the Administration Module.
•
By site - Select Site Settings >
•
By caregiver - Select Caregivers > (select a caregiver) >
> Output Settings
> Output Settings
On the Screen/Templates tab, you can select the output templates that you want to be
able to print from each screen (see Selecting output templates for each screen on
page 36).
On the Encounter Packs tab, you can create bundles of document templates that can
be printed all at once at discharge (see Creating encounter packs on page 38).
NOTE: When you assign templates to a view, the screen name on the Output Template
Settings screen displays in bold, indicating the view to which you have assigned
templates.
Selecting output templates for each screen
Access Screen Templates (to select templates available for a screen) from any of the
following, depending upon the level at which you want to set them:
•
Site level - Administration Module > Site Settings >
> Output Settings > doubleclick the Screen for which you want to set output templates.
(These templates display under Site Templates in the drop-down list.)
•
Location level - Administration Module > Locations > (select a location) >
Output Settings > double-click the Screen for which you want to set output
templates.
(These templates display under Location Templates in the drop-down list.)
•
Caregiver level - Clinical Module >
(from the toolbar on any view) >
Customize.
(These templates display under My Templates in the drop-down list.)
36
>
2. New Features
After accessing Screen Templates from any of the locations listed above, follow the
steps below to select the templates that you want to make available for each Screen.
1. Select the templates - At All Templates, open Output Category folders and
double-click templates that you want to make available from the selected Screen.
2. Determine the order - Use the up-down arrows to put the templates in the
desired order.
3. Set template action - In the Screen Templates box, you can set an action for
each template by selecting it by clicking
(Edit Action), right-clicking for a dropdown menu, or pressing F2 and selecting the appropriate action. Otherwise,
accept the default, <Prompt>, which allows you to select the desired action each
time.
NOTE: Queue and Save to Log both send the document generated to the Output
Queue to await further action. However, details for items marked Queue are
purged periodically, leaving just the title of the output item in the queue, while
Save to Log retains both the document titles and detail indefinitely. This is useful
for the following items:
* Consent forms containing patient signatures
* Documents containing patient signature on a hardware device at check-in
* Documents that the patient does not want a copy of (requires no printing
exporting or faxing), but you may want to print it later
4. After selecting all templates and setting default actions, click OK.
NOTE: When you return to Output Template Settings, the names of the screens for
which you added templates display in bold.
37
Print Integration
To see the templates you selected for each view, from the Clinical Module, access the
view and click
(Print) on the toolbar.
Creating encounter packs
Administration Module > Site Settings >
> Output Settings
To facilitate printing at checkout, you can create bundles of output templates, called
Encounter (or Template) Packs, for various encounter types.
1. In Output Template Settings, select the Encounter Packs tab and click
(Add
Encounter Set) or press Insert on your keyboard to display Encounter Pack.
2. Enter an Encounter Pack Title and select and Encounter Type.
38
2. New Features
3. At All Templates, open Output Category folders and double-click the templates
that you want to bundle for the encounter pack.
HINT: You can also create an Encounter Pack with no templates in it for no output.
4. Use the arrows to manipulate the order that the templates should appear.
5. In the Templates in Pack box, if desired, you can select templates and set
defaults/actions for them by clicking
(Edit Action) or pressing F2 and selecting
the appropriate actions. Otherwise, accept the <Print>.
6. When you have selected all the templates for the encounter pack and their default
actions, click OK. The new encounter pack is listed on the Encounter Packs tab by
Title and Encounter Type.
7. Click OK.
From Sign Off Chart, click the Template Pack down-arrow and select a pack to print all
the documents in the pack with one click.
System-defined encounter packs
•
•
•
Standard Print Pack (all encounter types)
>
Encounter Procedure Orders (Print)
>
Encounter Lab Orders (Print)
>
Specialist Letter (Print)
>
Referral Letter (Print)
>
Patient Education (Print)
Standard Fax Pack (all encounter types)
>
Encounter Procedure Orders (Fax)
>
Encounter Lab Orders (Fax)
>
Specialist Letter (Fax)
>
Referral Letter (Fax)
Office Visit Print Pack
>
Encounter Procedure Orders (Print)
39
Print Integration
•
•
•
•
>
Encounter Lab Orders (Print)
>
Specialist Letter (Print)
>
Referral Letter (Print)
>
Patient Education (Print)
Office Visit Fax Pack
>
Encounter Procedure Orders (Fax)
>
Encounter Lab Orders (Fax)
>
Specialist Letter (Fax)
>
Referral Letter (Fax)
>
Patient Education (Fax)
Nurse Visit Print Pack
>
Encounter Procedure Orders (Print)
>
Encounter Lab Orders (Print)
>
Patient Education (Print)
>
Encounter H&P (Print)
Nurse Visit Fax Pack
>
Encounter Procedure Orders (Fax)
>
Encounter Lab Orders (Fax)
>
Patient Education (Fax)
>
Encounter H&P (Fax)
Phone Encounter Print Pack
>
•
Phone Encounter Fax Pack
>
•
•
•
40
Encounter H&P (Print)
Encounter H&P (Fax)
Consult Print Pack
>
Encounter H&P (Print)
>
Specialist Letter (Print)
Consult Fax Pack
>
Encounter H&P (Fax)
>
Specialist Letter (Fax)
Admission Note Print Pack
>
Encounter Procedure Orders (Print)
>
Encounter Lab Orders (Print)
>
Encounter H&P (Print)
2. New Features
•
•
Admission Note Fax Pack
>
Encounter Procedure Orders (Fax)
>
Encounter Lab Orders (Fax)
>
Encounter H&P (Fax)
Admission Note Print Pack (Pregnancy Record)
>
•
Pregnancy Record Detailed [by Date] (Print)
Admission Note Fax Pack (Pregnancy Record)
>
Pregnancy Record Detailed [by Date] (Print)
Output queue
To improve workflow and security, saved, exported, queued, and transmitted
prescriptions (from the Prescription Properties dialog) flow through Output Manager
and into the Output Queue. The queue lists all output with its related information,
providing an audit trail of the actions taken.
Access the Output Queue from the left pane of the desktop or, from the menu bar,
select Office > Output Queue.
From the Output Queue, you can reprint or refax output items. Select the appropriate
criteria to locate the output item, enter a Reason (if refaxing or reprinting a
prescription), and then process as needed.
NOTE: The Output Queue contains security so that you can only access items for
patients for whom you have chart access. If you try to open an item for which you do
not have access, an Access Denied message appears.
•
Locate documents - Set up quick filters ( )to locate items most commonly
needed in the Output Queue (see Quick Filters on page 45), or click the Status
down-arrow and select <All Requiring Action>.
•
Show only signed documents - Click Show only Signed Documents to see only
those documents with electronic signatures.
•
Process documents - Select a document from the list and click Output Tasks to
process.
Performing output tasks from the output queue
1. In the Output Queue, select search criteria or a quick filter (
document to process.
) to locate the
2. Select the output item and click Output Tasks.
41
Print Integration
3. Select the appropriate action from the drop-down menu (Electronic Signature,
Print, Fax, Save to Log, or Export).
NOTE: If you print an historical document from the Face Sheet, Explorer or Output
Queue, the document is printed, based on the template as it existed in Output Manager
at the time the document was originally generated. If you make changes to the template
in Output Manager, you must regenerate the document in order for the changes to be
reflected.
Creating new output from the output queue
1. In the Output Queue view, click
(Add Document to Queue) or press Insert on
your keyboard to display a list of all available output templates.
2. Select the Location and Patient for the output.
NOTE: A new button ( ) displays a drop-down list of the most recent patients.
3. Select the Encounter and Template from the list and click OK to display the Print
dialog, from which you can Print, Fax, Queue, Save to Log, Export, or Preview the
document (see Print Integration on page 31).
Assigning security for refaxing or reprinting prescriptions
In the Administration Module, assign access for refaxing or reprinting prescriptions
either by individual caregiver or by caregiver type:
•
42
By caregiver - Select Caregivers > highlight the caregiver >
> Access >
Clinical Module > Office Functions > Output Queue, select Refax/Reprint
Prescriptions.
2. New Features
•
By caregiver type - Select Function Access > Clinical Module > Office Functions
> Output Queue, select Refax/Reprint Prescriptions.
Procedure Results Entry
NOTE: See also enhancements to Procedure Results on page 84.
•
Multiple CPT codes - To eliminate the need to create duplicate rules for multiple
CPT codes, you can now associate rules with more than one CPT code.
•
Navigation
To improve navigation and documentation regarding Procedure Results, the
following tabs were added:
>
Required - Click to display only required fields for the selected rule.
>
My procedure lists - For procedures that must be documented by multiple
caregivers (such as the Pre-Op Nurse, the Post-Op Nurse, and the
Physician), click to display only those items that you need to document within
a selected rule. Follow the instructions below for creating My Procedure Lists.
>
Search - Click Search, type a few characters and click Search again to locate
the question quickly.
Creating my procedure lists
1. Select a patient with a surgical procedure ordered.
2. From Procedure Results, double-click the procedure or select it and click
Procedure Tasks > Result Entry to display Procedure Results Entry.
43
Procedure Results Entry
3. Click the My Procedure Lists tab, and then click New to create a user-defined set of
items that you need to document for the selected rule.
4. At Title, enter a name for the user-defined list.
5. Click (+) to view all the items to be documented for the rule.
6. Select items from the list on the left and move them to the user-defined list on the
right, positioning them as needed and then click OK to display only those userdefined items for the new list in Procedure Results Entry.
7. Click each item in the list on the left to navigate quickly to the appropriate
questions on the right.
NOTE: Once user-defined lists are created, you can click the down-arrow to quickly
select the list of questions that you need to document for the selected rule.
44
2. New Features
Quick Filters
To provide the ability to filter items by multiple criteria with a single click, HealthMatics
2006 now allows you to create quick filters in the following areas:
•
Additional Results
•
Input Manager
•
Lab Results
•
Output Queue
•
Procedure Results
Creating and using quick filters
1. On one of the screens listed above, set the Patient, Dates, and Status fields to the
most commonly used criteria for locating documents, such as:
•
All Patients, The Past Week, All Statuses
•
All Patients, All Dates, All Requiring Action
•
All Patients, All Dates, Ready for Indexing
2. On the secondary toolbar, click
>Set Filter > #1, enter a reference name
for the selected criteria, and click OK to set the filter.
3. Repeat this process to create additional “quick” filters using other criteria sets as
desired.
4. To use the quick filters to locate documents, on the secondary toolbar, click
and click the filter to display documents that meet all the criteria selected
for that filter.
Setting default quick filters
1. On the secondary toolbar, click
> Set User Default.
2. Click the user-defined filter you wish to set as your default filter.
A check displays beside the default filter selection.
When you open the view, the data displayed automatically reflect the criteria you
selected for your default filter.
45
Quick Filters
46
3. Enhancements
3. Enhancements
Administration Module
The Administration Module screen reflects the new GUI standards:
•
•
Name changes - For clarity, the following selections have been renamed:
>
Site Options (2005) is now referred to as Settings (in 2006) and
>
Settings (in 2005) is now referred to as Site Settings (in 2006).
Toolbar changes - For ease and clarity, there are some new toolbar icons and
others have been renamed.
Icon
Name
Change
Go Backward
NEW - For quick navigation, go backward to
previously opened view. Click the down-arrow to see
list of previously opened views
Go Forward
NEW - For quick navigation, go forward to previously
opened view. Click the down-arrow to see list of
previously opened views.
Toggle Explorer Tree
NEW - To toggle the left pane to show/hide
Change My Password
Change My Password added for clarity
My Output Defaults
My Output Defaults added for clarity. Set your own
printer defaults with this button.
My Grantees
My Grantees added for clarity
Logout
Now a stand-alone icon; no longer underneath Exit.
Exit
Now a stand-alone icon
47
Administration Module
•
Functions relocated and removed
Function
Prescription Templates
Clinical Customization Module > Templates >
Prescription
Scanned Document Types
Input Manager > Administration > Document Types
Anatomical Pictures
Clinical Customization Module > Catalogs
Header/footer Setup
Output Manager > Output Blocks
Resource Monitor Log,
Resource Reporter Settings,
Resource Monitor Thresholds
Removed
Interface Options
• Patient Matching Rules
• Provider Import Queue
• Location Import Queue
•
Relocated to . . .
Not needed with SQL database
• Input Manager > Reconciler
• Input Manager > PM Interface Options
• Input Manager > PM Interface Options
Site settings/password changes - In Site Settings > Edit, you can now do the
following changes to improve security:
>
Set a Minimum Password Length.
>
Select Case Sensitive Passwords.
NOTE: Passwords are stored in the system in upper case. Therefore, if you
check this box, users will need to enter previously selected passwords in
upper case. They can then change them, if desired, in Administration >
Caregivers Properties. The Case Sensitive Passwords feature is meant to be
set once and then left, to avoid creating login problems.
48
•
Function access - Many security options have been added to Function Access,
including the following: To provide the ability to delete irrelevant scanned
documents or to correct indexing, in Administration > Function Access > Input
Manager > Scanned Documents, assign privileges for Change Scanned Documents
and/or Re-assign Patient. For a complete listing of new security options, see
Security on page 91.
•
Web accounts - To improve identification, the list of web accounts now displays
the address of the primary patient.
3. Enhancements
Appointments
The Appointments screen reflects the new GUI standards:
•
Edit - Click
•
Appointment button changes
>
to enter or change appointment detail information/time.
To speed workflow, some Appointment button functions were replaced with
icons on the toolbar:
–
Click
to add an appointment or block time.
–
Click
to search for appointments or press F3.
Click
(or
to select the current patient). All appointments for the
patient (past and future scheduled) display. Select an appointment and
click Go to to display it.
>
•
To improve access to Ntierprise screens and other views, new functions were
added to the Appointment ( ) menu:
–
Ntierprise - Access Registration and Financial Inquiry as well as
Appointment Scheduling.
–
Pull chart - Moved from toolbar button to Appointment on the secondary
toolbar or from the right-click menu.
–
View - View H&P Report, Billing Information, Labs, Reminders, Worklog
from the Appointment button on the secondary toolbar or from the rightclick menu.
Date filters - To help caregivers quickly locate appointments, the Appointments
view has additional Date filter buttons.
>
Click Today to display the current day’s appointments.
>
Click -1 to view appointments for one day earlier than the date shown.
>
Click +1 to view appointments for one day later than the date shown.
49
Assessment/Plan
•
Appointment colors and status icons - To help track the status of patients once
they check in for their appointments, new colored arrow icons display in the Time
column on the schedule:
,
, and
.
•
Printing - To provide more printing options from the Appointments view, you can
now click
on the application toolbar to print the Daily Schedule, as well as a
vast array of other customized documents from the templates available.
Assessment/Plan
The Assessment/Plan screen reflects the new GUI standards:
•
Buttons - Buttons now display icons and are located at the top of the screen and
between the upper and lower panes.
>
Patient/medication tabs - “Include All” is now called Include Active.
>
Move buttons are now arrows.
>
Isabel provides decision-making support (see Clinical Decision Support
(Isabel) on page 9).
>
50
ABN Check checks the IC9 codes against the CPT codes for medical
necessity (see Medical Necessity Checking on page 22).
•
Medication allergies - To assure that caregivers are always alerted to
documented medication allergies, the check box, “Do not show this message
again” was removed from the medication allergy pop-up.
•
Ordered for - To provide the ability for one caregiver to place orders and have the
results go to another, if you have the appropriate security privileges in Function
Access and Caregiver Grants, in A/P you can order a lab, then double-click it (or
click
) to open a Lab Order dialog box. From there you can click the Ordered
For down arrow and select the appropriate caregiver’s name. The lab order and
requisition print “ordering on behalf of.”
3. Enhancements
•
Problem dialog box - To provide additional space for caregiver comments about
a diagnosis, little-used functionality in the Problem dialog has been moved to a
new tab, Additional, and the Comments text box was enlarged.
•
Printing - To provide the ability to print directly from Assessment/Plan, you can
now click
on the application toolbar and select Draft to open a dialog box to
select an encounter pack to print. You can also print from any templates on the
various lists that display, or click Customize to select or edit the templates that you
have chosen to make available under My Templates (see Print Integration on
page 31).
•
Free text diagnosis - The “Free Text” tab was renamed Free Text Diagnosis.
Billing Reconciliation
The Billing Reconciliation screen reflects the new GUI standards.
To provide a quick way to access information and filter data, the following changes were
made to Billing Reconciliation
•
You can now quickly access Billing Reconciliation from two places:
51
Caregiver Options
>
In the left pane of the desktop, click Billing Reconciliation or
>
From the application menu bar, select Office > Billing Reconciliation.
•
You can now pull a patient’s chart from Billing Reconciliation.
•
Filter items by Patient, as well as by Provider and Location, to display only those
items of interest.
>
Select an item at any level and click View Details to view Billing Details.
NOTE: To print from Billing Details, click
>
or press Ctrl+P on your keyboard.
Select a patient’s name and click Pull Chart to view a patient’s chart.
NOTE: Billable items that aren’t pulled from the schedule appear in red, since
they cannot be billed electronically. Non-billable items appear in gray.
Caregiver Options
To increase your ability to tailor HealthMatics EMR to reflect your workflow, many new
caregiver options are now available. To see them, from the menu bar, select Options >
Edit Options:
52
•
Desktop - Display the stacks horizontally or vertically, and decide which stacks
and status bar icons you want to see.
•
Toolbar - Determine the icons that appear on the application toolbar and the
order in which they appear (see Customizable Toolbar on page 11).
•
Face sheet
>
History - Set a new default, Common, which displays information from
Allergy, Family, Past Medical, and Social history.
>
Orders - Set a new default, Ordered, to view all orders for the patient grouped
in categories such as Today, One Week Ago, Less Than a Month Ago, etc.
•
Patient manager - Set a Date Range default. Then select the items you want to
display in Patient Manager and determine their order and position in the view (see
Patient Manager on page 29).
•
Results - “Lab results” was renamed Results. Defaults apply to all “results” views:
Lab Results, Procedure Results, and Additional Results.
•
Review of Systems - The “Expand Mapped Images” default was removed, as it is
no longer needed in the new Review of Systems view.
3. Enhancements
•
Vitals - Set default measurement units for head circumference, and waist
measurements (Vitals on page 97).
•
Assessment and plan
>
Diagnoses - Decide whether you want the Problem dialog to open
automatically when you select a new diagnosis from a Data Source in Search.
>
Orders - Click the down-arrow to select the caregiver you want to default in
the Ordered For field. Choices include: Appointment Caregiver, Preferred
Caregiver, blank (none - this is the default), and a list of grantors so that you
can select a specific caregiver.
>
General - Determine the tab you want to display by default: Patient Problem
List, Patient Medications, My Short Lists, Short Lists, Search, or Free Text.
•
Sign off - Set a Default Service for the E&M calculator from an extensive dropdown list, rather than just the patient type.
•
History - Set a default tab: Previously Entered History, My Short Lists, Short Lists,
Search, or Free Text.
Clinical Customization Module
To improve the speed and ease of customizing HealthMatics EMR, all customization
processes are now accessed through the new Clinical Customization Module. The
process for creating new knowledge terms in Reason for Visit, Review of Systems,
History, and Physical Exam, as well as in Procedure Rules has been improved. For
detailed instructions for using this new module, refer to the HealthMatics EMR Clinical
Customization manual.
From the Clinical Module menu bar, select Launch > Clinical Customization Module.The
Clinical Customization Module screen reflects the new GUI standards.
Knowledge
To provide consistency, there is now one method for adding knowledge terms for all
contact screens.
Contact screen knowledge
•
Reason for visit - You can now customize Reason for Visit complaints the same
way you do knowledge terms for the other contact screen. Characteristics and
Details are now in folders, rather than “libraries.”
53
Clinical Customization Module
•
•
54
>
Create/edit terms - Launch the Clinical Customization Module, select
Knowledge > Reason for Visit >
or
Copy a system-defined term and edit
the copy.
>
Display - To see only user-defined complaints, select Hide System Items. To
see archived terms, select Show Archived.
Review of systems/physical exam
>
Naming convention - User-friendly terminology replaces items such as
“subsystems.” The new naming convention now refers to folders and terms.
>
Folder behavior - Value refers to the answer type: Positive only, Negative
only, Positive and negative, or None. You can copy knowledge folders, but not
body system folders. If a folder name and text match exactly, the folder name
appears bolded in the H&P Report.
>
Displaying disabled items - To display archived items, select Show Archived
(which replaces the “Show enabled only” check box).
>
Editing system-defined terms -To change a system-defined term, select it
and, on the secondary toolbar, click
Copy. Archive (
) the systemdefined term and then edit the copy as needed.
>
Properties tabs - When adding or editing terms, the Properties dialog box
contains three tabs to simplify the editing process: General, E&M Mappings,
and Mutually Exclusive List. You can set multiple E&M mappings.
>
Sorting - Click secondary toolbar arrows (
within a list.
>
Reloading knowledge - To make knowledge changes available for use, go to
the Clinical Module menu bar and select Options > Edit Options > Physical
Exam (or Review of Systems), and click Reload Knowledge. Knowledge also
reloads when you log out and back in to the Clinical Module.
) to reposition items
History
>
Add subfolders, as well as terms to history. To do so, select a subfolder from
the list and, on the secondary toolbar, click
to add either a Folder or Term.
In addition, you can edit what detail folders are associated with the selection
folders.
>
When adding history details, there are now default lists, category lists, item
lists, and default and category lists:
–
Default lists - These are system-defined lists.
–
Category list - Added details are available for each selection in the
history category.
–
Item list - Added details are available for selections the user associates
with the item list.
–
Category and default - The category list defaults to open for all
selections in the category.
3. Enhancements
•
Physical Exam
>
Adding subfolders/terms - Add subfolders, as well as terms, in PE. To do
so, select a folder from the list and click
to add either a Folder, Term, Size,
or Measurement.
>
Navigation - In both the folder properties or term properties dialog boxes, you
can now click tabs to enter E&M Mappings and the Mutually Exclusive List.
Ownership override
To enable designated users to edit user-added Knowledge terms, you can assign
Ownership Override privileges. Caregivers (or caregiver types) with this privilege
granted in the Administration Module can change knowledge terms created by other
caregivers. This is useful if a practice needs to change individual user-added items if a
caregiver has left the practice or is on vacation.
To assign ownership override privileges
You can assign ownership override privileges for an individual caregiver or for a type of
caregiver. To do so, In the Administration Module, do the following:
•
By caregiver, select Caregivers > select the caregiver >
> Access > expand
Clinical Customization > Ownership Override > Edit
•
By caregiver type, select Function Access > expand Clinical Customization >
Ownership Override >
> (select a Type) > Edit.
To use ownership override
To use the Ownership Override privilege, do the following:
1. In the Clinical Customization Module, expand Knowledge.
2. Locate and select a user-added term (in blue) that another caregiver created and,
on the secondary toolbar, click
(Take Ownership) to edit the term.
NOTE: Currently, Ownership Override can be used for Knowledge terms, Exam
Templates, and Procedure Entry Rules.
Short lists
To provide consistency of terminology between Properties and Attributes, they now do
the following in Short Lists:
55
Clinical Customization Module
•
Properties - Use to edit the customization-building aspects of an item, such as
the Name, Description, Type, or Status (Enabled or Archived).
•
Attributes - Use to edit the clinical aspects of the item, such as acuity,
significance for assessments or medication attributes.
Exam templates
When adding ( ) a new ROS or PE exam template, you can now add notes ( )or
mark the item significant ( ). You can also include Life Art as part of your templates.
Catalogs
•
56
Lab catalog
>
The Lab Catalog was relocated from the Office menu bar in the Clinical
module to the Clinical Customization module.
>
Add Test, Add Panel and Add Super are now accessed from
>
The Find buttons have been replaced with a Search field.
>
For clarity, the “Custom Data Only” check box was replaced with Hide System
Items.
>
In 2005, when creating a list of values for a lab test in Lab Entry List Values,
you had the option to select a Group in which to put your value Selections. To
enhance the ability to locate values for test results, in 2006, selecting a Group
for your selections is mandatory (from Lab Test Properties > Edit List Values).
.
3. Enhancements
•
Procedure entry rules - To facilitate the process of creating new procedure entry
rules, the following changes were made.
>
Questions and answers - Questions and answers are now maintained in
separate folders accessed from the left pane.
>
Status - When creating a new rule, the status defaults to Archived until you
are ready to Enable it. The only other status setting is Enabled.
>
Procedure codes - All active CPT and SNOMED procedure codes (billing
codes) can now be associated with a procedure rule. A billing code that has
been associated with a procedure rule can be deleted, enabled, or archived if
the rule has not be used by the EMR. Once the rule has been used, the billing
code can not be deleted -- only archived. You can, however, add new billing
codes to the rule.
>
Preview - Preview or test new procedure rules by clicking Preview. To review
a paper copy of the text, click
(Print). At the top of the preview window,
data display hierarchically to show their relative positions within the rule. The
display corresponds with whatever text is highlighted.
>
Grammar for questions and answers - Type grammar for a question or
answer. The entered grammar displays on the report in the place of the
question or answer. Example: If the question is ”Type of dressing” and the
grammar is “The site was covered with a”, the report will say, “The site was
covered with a: “ when you select an answer.
•
Billing modifiers - Relocated from the Tools menu in the Clinical Module.
•
Anatomical pictures - Anatomical pictures moved from the Administration
Module to the Clinical Customization Module.
57
Clinical Customization Module
Templates
•
Fast track - To improve the usability of fast track templates, you can now decide
in which order you want screens to display. You can also use Fast Track to access
places in the current encounter (see Fast Tracks on page 67).
•
Prescription - To ease the process of creating prescription templates (which were
moved from the Administration module), they now use the same familiar token
building blocks that you are used to using when creating forms and letters. You
can also now set Schedule I through Schedule V Drugs default templates by
state.
•
Authored text - To facilitate the review of authored text documents in charts,
authored text templates (Discharge Plans, Patient Education, Office Procedures,
Nursing Services, and Form/Letter), includes a Mark Complete check box that
allows you to default the documents to a Completed status. Authored text
documents, including Referrals are now viewed by clicking Additional Results in
the left pane of the desktop. Use Attach to Encounter when customizing to always
attach the authored text to the encounter.
NOTES
* Only titles of authored text documents display in H&P Reports, so it is important
to enter descriptive titles. To see or print the body of authored text documents, go
to the left pane from any screen and click Additional Results.
* When the encounter is printed, the full text for discharge plans, office
procedures, and nursing services display.
•
Result summary - Result summaries allow you to analyze patient data over time
in a spreadsheet or graphical format. For instance, you could monitor the HgbAIC
for diabetic patients, along with their blood pressure, eye examination, sensation
testing, etc. You can quickly extract elements from a Result Summary template to
view on a graph, assisting you in identifying data trends.
You can create Custom Result Cells for interfaced labs to ensure that, regardless
of whether the lab is sent out or you result it in house, the results will populate the
lab portion of the Result Summary Template.
NOTE: Mapping lab orders and lab results are two different processes.
•
58
Flow sheet - You can now archive flow sheet templates. The wizard was replaced
with a dialog box, and you can view new flow sheet templates in a Preview pane
at the bottom of the screen.
3. Enhancements
Lab order entry setup
•
•
Laboratories - To provide prompts for required mapping elements, the Laboratory
Properties dialog contains two new checkboxes used to create requisitions. When
selected, if the laboratory requires insurance or order mapping and the
information is missing, you cannot create a requisition. Mapped external codes
print on requisitions sent electronically via the bi-directional orders interface to the
laboratory.
>
Ins mapping required - Select this box if the insurance carrier for a
requisition must have a mapped external code.
>
Order mapping required - Select this box if the lab tests on the requisition
must have a mapped external code.
External IDs - If needed, you can now map External IDs to Insurance Plans, Race
and Patient Relationships.
Demographics
The Demographics view (formerly called Received Documents) reflects the new GUI
standards including a new icon ( ).
•
Miscellaneous information such as marital status, ethnicity and language, that
are not defined in the Practice Management system are no longer overwritten in
HealthMatics EMR.
59
Documents
•
Web accounts set up (if any) now display on the Patient Demographics tab of the
patient chart.
•
Date of death can now be entered on the Emergency Contacts tab.
Documents
The Documents view reflects the new GUI standards.
60
•
Information - A new Information column provides the patient name and type of
document.
•
Delete irrelevant scanned documents - To provide the ability to delete irrelevant
scanned documents, a new Delete button was added to the Send Scanned
Document dialog box. IF you have the appropriate privileges, you can delete a
scanned document, even if it has been approved, from both the Send Scanned
Document dialog from your inbox, and from Input Manager.
•
Reviewing and linking scanned documents - To provide the ability to mark a
scanned “plan” document Final, Reviewed, and link it automatically to the original
order, the appropriate dialog box now opens when the caregiver clicks Approve in
the Send Scanned Document screen. Example:
>
A caregiver orders a referral letter in A/P.
>
A scanner/indexer scans and indexes the letter received back from the
referral provider into Input Manager, selecting Plan from the Type drop-down
list, then sends it to the caregiver for review/approval.
>
The caregiver opens the document from the inbox, and clicks Approve. The
Referral Result dialog opens, from which the caregiver can mark the
document Reviewed.
>
The system automatically attaches the referral letter to the appropriate order
and marks it Final, Reviewed.
>
View the scanned document with the order in the Order Explorer view from
the patient’s face sheet.
3. Enhancements
E&M Calculator
In EMR 2006, access the E&M Calculator from the H&P Report secondary toolbar.
To improve the accuracy of Evaluation & Management coding, the calculator now uses
Alpha II/Unicore Med technology to analyze procedures documented and to suggest
an E&M level for the encounter. The calculator increases the amount of data retrieved
and pre-loads additional information on the E&M Calculator screen where possible.
In order to use the E&M Calculator, a diagnosis must be active in the A/P view and
qualified in the E&M screen, and the Based On fields (Service and Exam) must be
completed.
NOTE: Since Alpha II does not allow override, the “Override” button has been removed.
•
Qualifiers - Click anywhere in the Qualifier column to the right of each Diagnosis
to select a description from the drop-down list that appears.
•
Levels
•
>
E&M - Displays the Evaluation & Management level that results when you
click Calculate, based on the data documented and the items selected in the
calculator.
>
History - Problem focused, Detailed, Comprehensive. (NOTE: History
characteristics are now mapped more appropriately to the HPI elements used
in the calculation. The History calculation no longer displays the level of each
element of history (HPI, ROS, PFSH.) This information is available on the
Summary tab.
>
Exam - This calculation did not change. It is still based on documentation in
Vitals and Physical Exam.
>
MDM - Straight forward, Low, Moderate, or High. This shows in the H&P
Report.
Management options - Expanded options appear as checkboxes.
NOTE: Risk is no longer calculated based on your selection in a risk table, but on
the selections you make on the Management Options tab.
61
Electronic Prescriptions
•
Data/risk - CPT Medicine Test refers to any diagnostic test in the 90000-range.
Lab, CPT, and Radiology will auto check, based on orders in A/P.
•
Based on
>
Service - The Service drop-down list contains a wide selection of choices to
define the type of service provided.
NOTE: You can set defaults for the Billing Service and Exam Type in the E/M
calculator (Options > Edit Options > Quick Lists).
>
Exam types - All exam types are now available to caregivers and all possible
exam systems, body parts, and organ parts mapping are complete within the
database.
•
Time for visit - Allows for documentation of visit time to capture counseling.
•
Defaults - You can set defaults for the Service level and Exam type at the
caregiver level in Options > Edit Options > Sign Off.
•
Buttons - Alpha II does not allow overrides, so the Override button has been
removed. New buttons include the following:
>
Clear - Clears all fields in the E&M Calculator.
>
Calculate - Calculates the E&M level based on the items selected/
documented. If you make changes, you must calculate again.
>
Summary - Lists the Component Details and Elements Found on which the
E&M calculations are based.
Electronic Prescriptions
The eRefill Request view reflects the new GUI standards.
To improve the reconciliation process, the following changes were made to eRefill
Requests:
•
62
Drug descriptions - The description field was lengthened from 35 to 105
characters. However, only pharmacies that can handle the long drug descriptions
will be able to see them in the messages.
3. Enhancements
•
Order numbers - To improve the ability to match patients and medication orders,
electronic prescriptions now include send/receive order numbers. If an order
number is not received in a refill request, the system uses the National Drug Code
(NDC) to locate the medication in the EMR database.
•
Change prescription - To change doses, number of refills, etc. for eRefill
requests, click Approve > Approve With Changes.
•
Reject eRefill and order new prescription - Click Reject > Reject, Send New
Prescription. Behind the scenes, the system “disapproves” the original refill
request and then creates a new one.
•
Delete eRefills - Click Delete to delete eRefill Requests sent in error for patients
who are not under the care of a physician in the practice.
•
Add pharmacy - Click
view.
•
Select current patient - In the bottom pane, click
for the eRefill request.
to add pharmacy information from the eRefill
to select the current patient
Face Sheets
The Face Sheet view reflects the new GUI standards.
Many enhancements have been made to the face sheet that facilitate workflow:
•
Real time updates - All panes (except Encounters) now update in real time. With
the advent of concurrent encounters enabled, it is possible for one caregiver to
make revisions and save them while you are in the process of making additional
revisions. The system displays a message as needed to tell you another revision
has been saved since you began yours. You then have the option of choosing
what to save.
NOTE: Medications functionality works the same as it did in 2005. If a medication
is ordered by a second physician, a message appears stating that the medication
is being “edited elsewhere.”
63
Face Sheets
•
Expanding panes - To make it easier to enlarge panes quickly, you can now just
double-click the title bar of the pane to toggle it between the normal view and full
screen.
•
Scanned documents - To improve the ability to view and correct index
information for scanned documents, the following enhancements were made:
>
Re-indexing - You can now correct indexing information on scanned
documents from the face sheet in the Problem, Encounter, or Orders Explorer
views IF you have the Change Documents (and Re-assign Patient) privileges.
Select the document and click
(Edit). (For privilege assignment, see
Administration Module on page 47).
>
Viewing details - A new Detail tab was added to the Encounter Details pane
to display indexing and scanning information, and reviewer/indexer
annotations, if any were entered.
•
Explorer views - To provide a global overview of the latest revision of each active
item in each area, all five panes now have Explorer ( ) windows (see Explorer
Views on page 14).
•
Problems
>
Edit problem - Select a problem and click
to open the Problem dialog to
upgrade the diagnosis or edit Status, Acuity, dates, and to add comments
about the problem.
NOTE: You can now sort problems by chronic and acute status.
>
•
(Inactivate Problem)
History
>
Edit history - Select a history item and click
to open the History dialog to
rename an item, change its Status or add details.
>
Sort - To help you find history items quickly from the face sheet, the toggle
filter ( ) allows you to sort history items by the categories in the History
view:
>
64
Inactivate problem - Select a problem and click
–
Full (all 6 History categories)
–
Allergies
–
Immunizations
–
Common (Allergies, Past Medical, and Social history).
Immunizations - Click
(View Immunizations) to access Edit Assessment/
Plan, where you can do the following:
3. Enhancements
–
Immunization record - Show all immunizations and/or include the
immunization record in the H&P Report.
–
Edit immunizations.
*
Add historical.
Once added to the bottom pane, you can
click in the Date Given field to add or edit the
date.
*
(Edit) - With an entry selected, change the name, date, mark it
erroneous, or add comments.
•
Encounters
>
Edit - Select an encounter and click
(Edit Encounter) to open Encounter
Addendum to view the H&P Report, add Addendum Notes to the H&P Report
or view Billing Information for the encounter.
65
Face Sheets
>
>
Sort encounters - Click
to sort categories two ways:
–
By date - Categories include: Yesterday, Less Than a Week Ago, One
Week Ago, Two Weeks Ago, Less Than a Month Ago, One Month Ago,
Less Than a Year Ago, More Than a Year Ago
–
By type - Categories include Encounters, Messages, Chart Attachments,
Scanned Documents.
Flow sheets - Click
to open the patient’s flow sheets from the face sheet.
NOTE: To return to the face sheet, click
on the toolbar. (See also Flow
sheet templates on page 69.)
•
Medications
>
Edit - Select a medication and click
(Edit Medication) to open the
Medication dialog to change its status, add dates, notes, etc.
>
Inactivate - Select a medication and click
>
Refill - Click
(Refill Medications) to open Prescription Properties with a list
of the patient’s medications. From here you can generate a prescription for
one or more of the medications. (See also Prescriptions on page 87.)
to inactivate it.
NOTE: The disposition of the refill appears (bulleted) in the Explorer view
under the medication name. If a prescription is re-printed/faxed, that appears
as an Addendum/Annotation.
>
•
66
Interactions - Select a medication and click the icon (Example:
the details about the medications interactions.
Orders
) to view
3. Enhancements
>
Edit - (Disabled)
>
Attach - With an order selected, click
Current, or Both encounters.
>
Lab orders - With a lab order selected, a new Trend tab displays the values
that resulted.
>
Referrals - With a referral letter selected, click
encounter.
to attach the order to Original,
to attach it to the Original
Fast Tracks
To improve the usability of Fast Tracks, you can now rearrange the order of the contact
screens in your Fast Track templates and can use Fast Tracks for current encounters.
In addition, Fast Tracks is now embedded in each views’ title bar, rather than in a
separate dialog accessed from the toolbar.
New buttons enable you to move back and forth among the contact screens with a click
or you can click a third button to see a list of all the contact screens available
(depending upon which fast track template you select), and then select the screen you
need from the list.
Icon
Name
Back in current Fast Track
Action
Takes you back to the previous screen.
67
Fast Tracks
Icon
Name
Action
Forward in current Fast Track Takes you forward to the previous screen.
Show details of Fast Track
• For Current Encounter, displays a list of all
contact screens, and shows those with data in
bold.
• For a Fast Track, displays a list of contact screens
in the Fast Track, with a red arrow indicating the
current screen.
Show Details for Current Encounter vs. other fast track template:
To change the order of the contact screens in Fast Track templates, in the Clinical
Customization Module, select Templates folder > Fast Track > select template >
.
68
3. Enhancements
Flow sheet templates
To allow caregivers to hide obsolete templates, you can now archive user-defined flow
sheet templates. In the Clinical Customization Module, select Templates > Flow Sheet
Templates, select the user-defined template you want to hide and click
(Delete
Template) to archive it.
NOTE: To display a list of archived templates, select Show Archived. Archived templates
display in gray with a line through them.
History
The History view reflects the new GUI standards.
•
Allergy
>
Free text tab - To prevent inadvertent drug allergy oversights, the “Free Text”
tab was removed from Allergy History, forcing the user to choose a true
allergy from the database. This is necessary for the enhanced allergy
warnings that pop up on the A/P screen.
NOTE: Previously entered free text allergies still pull up in the patient’s history,
and can be added to a current encounter by clicking Include. However, for
new allergies, search for and select an allergy that is most similar to what you
need.
>
•
NKA - In addition, clicking a new button, NKA, quickly documents No Known
Allergies.
Immunization
Click Immunization Record to view the patient’s immunizations, and then click
69
H&P Report
either Up to Date or Not up to Date to record the status of the patient’s
immunizations in the current encounter.
•
Search - To facilitate the reporting function of true diagnoses, only ICD-9 and
SNOMEDs display for Family History and Past Medical History on the Search tab.
NOTE: New history Knowledge should not affect current short lists in History.
H&P Report
The H&P Report view reflects the new GUI standards.
To improve efficiency, the 2006 H&P Report includes the following enhancements:
•
E&M - The E&M calculator icon now appears on the H&P Report toolbar.
•
Submit - The “Send for Review” button (renamed Submit) now appears on the
H&P Report toolbar to prevent caregivers from confusing the Send for Review
function with the Send Chart icon on the toolbar.
•
Printing - To provide the ability to print directly from the H&P Report, on the
toolbar, click
, then select the following:
>
Draft - To select items from the encounter pack that you want to print (H&P
report, lab orders, referral letters, and so forth).
>
Templates - To print from any of the available templates.
>
Customize - To select/edit your caregiver preferences for output templates
that you want to display automatically in the (Print) drop-down list under My
Templates
See also Print Integration on page 31.
70
3. Enhancements
Lab Results
The Lab Results view reflects the new GUI standards:
NOTES
•
Default status - If you access the Lab Results screen from the toolbar, the Status
defaults to Ordered. If you access the screen from Results Notifications, the
Status defaults to Needs Review. To change either of these defaults, set a quick
filter and make it your default (see Quick Filters on page 45).
•
Preview - To see an easy to read report of labs needing review, click
toolbar and select Lab Results (Preview) > All (or Selected).
NOTE: Patient names must be highlighted to preview all.
on the
In addition, many new enhancements have been made to unclutter the screen and
increase efficiency:
•
New buttons include: Expand All, Collapse All, Use Current Patient (
new quick filter ( ). See Quick Filters on page 45.)
•
Tasks now appear in drop-down menus under their respective categories.
), and the
>
Lab tasks - Review All, Publish to Web, Review Patient, Publish to Web
(Selected Patient), Result Entry, Merge, Lab Trends (see Lab tasks on
page 72)
>
Chart tasks - Pull Chart, Face Sheet, Attach to Encounter
>
Messages - Send Patient Message, Send Reminder, Send Web Message
•
Referral Results have been moved to the new view, Additional Results (see
Additional Results on page 8) and the Show Labs and Show Referrals buttons
were removed.
•
The preview pane now includes additional test information: ordering caregiver,
date/time stamp, site, and the diagnosis attached to the order.
NOTE: Rules set in HealthMatics EMR have lab results returned to caregivers for
review in the following order:
1. Appointment caregiver or (if not available, then)
2. Ordering caregiver or (if not available, then)
3. Preferred provider
However, lab vendor interface rules override all HealthMatics EMR rules.
71
Lab Results
Lab tasks
Review lab results
•
Review all - To improve efficiency during the review process, buttons now display
at the top of the screen, and new buttons allow you to Toggle Publish (if you have
HealthMatics Access) and Toggle Review on and off to view all patients with labs
needing review.
•
Publish to Web - Click to send all publishable lab results to the website.
•
Review patient - To facilitate the ability to quickly see all lab results awaiting
review for only one patient, you can now click Review Patient to see and review
results for the sElected Patient Only.
•
Publish to Web (selected patient) - To facilitate the ability to quickly publish only
one patient’s reviewed lab results to the Web, you can now click Lab Tasks >
Publish to Web (Selected Patient). The Web Publish Lab Results screen is the
same as Review Lab Results screen, except that it only displays results already
marked Reviewed, and the Annotate and Toggle Review buttons are not present.
Merge orders with outstanding results
To merge orders with outstanding results received across the interface, select a test
with the status of Ordered, and click Lab Tasks > Merge.
In the Merge Orders dialog box, select the test and click OK
Lab trends
To maximize the screen display, the view is now consolidated so that all labs drawn on
the same day appear in the Tests list.
To select tests for the graph or table, click
to select all tests or
to deselect all tests
and then select individual check boxes to be included in the trend.
72
3. Enhancements
Lab result entry screen
To facilitate quicker documentation on the Lab Result Entry screen, you can now move
from one lab to the next by clicking the Previous (Alt+p) and Next (Alt+n) buttons at the
top of the screen.
The Tab key
moves you
quickly through
the fields.
Edit lab results screen
To facilitate the review of multiple lab results, Previous (Alt+p) and Next (Alt+n) buttons
now display at the bottom of the Edit Lab Results screen.
73
Office Manager
Office Manager
To improve the readability of the stacks on the desktop (now called Office Manager),
they can be displayed either horizontally or vertically (see the new Desktop caregiver
option on page 52). In addition, information about the items in each stack displays in
an easily read format at the bottom of the Office Manager box.
Hover the cursor over a stack to select it and display the
type and number of items it contains at the bottom of the
screen.
The numbers indicate the following:
• Black - Total number of items in the stack
• Red - Number of items designated High Priority/
Abnormal Results
• Green Refill Requests - Total number of eRefill
requests; Appointments patient check in
• Gray - Number of normal (not priority) items
• Purple - Appointments patient check out
NOTE: Click
(toggle explorer tree) to switch desktop view from active Office
Manager view to inactive.
Output Manager
74
•
Print function integration - To enable caregivers to generate customized output
from within the Clinical module, the Output Manager print function is now fully
integrated into HealthMatics EMR. This lets you print both system-defined and
customized output from approximately 34 screens throughout the application.
(See also Print Integration on page 31.)
•
Output categories - “Layout Categories” are now called Output Categories and
are located on the Output Templates secondary toolbar ( ).
3. Enhancements
•
•
New system output templates - New templates include the following:
>
Diagnostic Tests - Diagnostic tests letter for mail merge
>
Patient Flow Sheets (Dialog) - Flow sheets of patient with dialog
New system output blocks
>
>
>
Encounter
–
Assessment Transcription
–
Flow Sheets (Dialog) - Flow sheets of patient for encounter with dialog
–
Flow Sheets Flipped (Dialog)
–
History & Physical of Encounter
–
Miscellaneous Transcription - Miscellaneous transcription for encounter
–
Objective Transcription
–
Physical Exam (Dialog)
–
Plan Transcription
–
Subjective Transcription
Patient
–
Encounter Summary - List of patient’s encounters
–
History Summary - Patient history summary
–
Medication Summary - Summary of patient’s medications
–
Problem Summary - List of patient’s problems organized by status
Reports - Diagnostic Tests Letter (for Reporting Mail Merge)
NOTE: For instructions for using Mail Merge, refer to the new Reporting
Module manual.
•
New system data elements
>
>
System
–
Electronic signatures - Use to capture electronic signatures in
documents for: Patient, Parent, Guardian, Caregiver, and Witness.
–
Free text - Use Note 1 and Note 2 to add impressions, annotations, and
further define assessments and plans in an existing template.
Patient
–
Antepartum record [by Date] (Dialog)
In Common, added Urine Nitrite. Previously there was only one element
each for Fetal Heart Rate, Fetal Heart Rate Tones, and Fetal Heart Rate
Tone Quadrant. Now there are four each, and these are notated by the
capital letters A, B, C, D.
Previously there was only one element for Edema. Now there are three:
Edema (Face), Edema (Hands), and Edema (Legs and Feet).
In EDDs, added EDD by Physician and deleted “EDD Sonar.”
75
Output Manager
>
–
Encounters - Contains all new tokens: Start Date, Encounter Type,
Billing Level, Billing Description, Billable, Billing Status, Caregiver Name,
Location, Diagnoses.
–
Immunization - Added Immunization Order.
–
Insurance - Renamed the folder “Active Medical Policies” to Active
Insurance Policies, and deleted “Active prescription policies.”
–
Medications - Contains all new data elements.
–
Patient education (Dx dialog) - Added Modified Text.
–
Vitals - Added Pulse Ox Citation, Pertinent LMP Hx, Waist Measurement,
Neck Measurement.
Encounter
–
Addendum - A new folder, Addendum, is inside the following folders:
Complaints, Complaints (Dialog), Diagnoses/Plans, Diagnoses/Plans
(Dialog), Physical Exam, Physical Exam (Dialog), Review of Systems, Vitals.
Addendum contains Note Text, Note Image, Caregiver Name, Note Date.
–
Note - A new folder, Note, is inside the following folders: Physical Exam,
Physical Exam (Dialog), Review of Systems
Note contains Note Text, Note Image.
•
76
–
Flow sheets (Dialog) - Contains all new data elements.
–
Laboratories (Dialog) - Added Ordered for, Result Note, Diagnosis.
–
Patient education - Added Modified Text.
–
Procedures - Added Ordered for, Diagnosis, Order Note.
–
Procedures (Dialog) - Added Ordered for, Diagnosis, Order Note.
–
Transcription - In Assessment, Miscellaneous, Objective, Plan, and
Subjective, added Transcription Header, Transcription Note, Transcription
Date, and Transcriptionist Name.
–
Vitals - In Common, added Pulse Ox Citation, Pertinent LMP Hx, Waist
Measurement, Neck Measurement.
>
Location - In Logo, added Logo Small, Logo Medium, Logo Large.
>
Reports (in Mail merge > Patients) - Added Title, First Name, Middle Initial,
Last Name, Suffix, Full Name, Full Name (Last Name First).
–
Preferred caregiver - Contains Full Name, Full Name (Last Name First),
Title, First Name, Middle Initial, Last Name, Specialty, Signature > Image.
–
Home address - Added Street, City/State/Zip, City, State, State Name,
Zip Code, Phone, Fax, Pager, Mobile, Email.
Location logos - To provide the ability to have different logos for each location,
Header Location in the Output Block folder, Header/Footer (System), now
supports location logos. Header Site still displays the site logo. All prescription
and forms/letters templates also use the correct location.
3. Enhancements
•
Layouts - To enable you to view archived layouts, we added a Show Archived
check box to the Layouts view.
•
Reprinting historical documents - When reprinting historical documents from
the Face Sheet Explorer panes or from the Output Queue, the document printed
is a copy of the original. It does not reflect changes made to the template in
Output Manager after the original document was generated. When you generate a
document, the application looks at the template in Output Manager at that
moment and generates the document. The generated document never includes
edits made in Output Manager after it generates (this is important for document
integrity within the patient chart). If you regenerate the document from
in the
Output Queue, the document generates based on the current template in Output
Manager.
To print entire chart
•
Print entire chart - To facilitate the process of producing copies of medical
records, you can now print a patient chart, including orders, from the Face Sheet
toolbar. Click
> Print Entire Chart.
Select the items to Include, the date range and printer, and click Print. If you check
all three boxes, the system prints copies of all documents in the chart, including
scanned images, transcription, messages, and chart attachments. Everything
comes out assembled as one package, which can then be sent out as needed.
77
Pregnancy Record
Pregnancy Record
You can now enter the Pregnancy Record from the menu bar or from Patient Manager.
When you enter the record, you’re asked for the LMP or EDD date. The system uses
this date to display information from that date based on the expected gestational period
for the pregnancy.
1. To access the Pregnancy Record, open a chart for a patient being seen for
Routine Obstetric Care, go to A/P and order the 59400 CPT.
2. From the menu bar, select Tools > Pregnancy Record.
NOTE: The LMP and/or EDD date entered is reflected in the Pregnancy Record,
Vital Signs, and the H&P Report when you click OK.
3. Enter the appropriate date, click either LMP (Last Menstrual Period) or EDD
(Estimated Date of Delivery), then click OK.
Displays a list of relevant pregnancy records determined by the LMP or EDD date entered.
Gestational Age is calculated based on the LMP or EDD date entered.
NOTE: You can only view/edit details for an open encounter.
Tabs
• Prenatal Record - Displays a row for each 59400 documented.
• Active Problems - Lists all active problems for the patient.
• Active Medications - Lists all active medications for the patient.
4. To document the current encounter, in the top pane, select the current date and
click , then click tabs as needed to document the visit (see the screens that
follow).
78
3. Enhancements
•
Vitals
NOTES
* This information can also be documented in Vital Signs ( ).
* Cumulative Weight Gain calculates from the first weight entered.
* Blood Type is reflected in Demographics.
* Urinalysis includes any orders with the word “urinalysis” in the test name.
* Allergies are populated from Allergy History.
•
Pregnancy Labs
Choose whether or not to filter labs based on LMP date.
NOTE: LMP date filters labs from the LMP date and beyond.
79
Pregnancy Record
•
ROS
NOTE: This information can also be documented in Review of Systems (
•
Maternal/Fetal Data
NOTES
* This information can also be documented in Procedure Results (
Procedure Tasks > Result Entry).
* EDD calculates automatically based on the LMP.
* A field for Father of the Baby was added.
80
>
).
3. Enhancements
•
Cervix
NOTES
* This information can also be documented in Procedure Results
(
> Procedure Tasks > Result Entry).
* Bishop Score field was added.
81
Pregnancy Record
•
Med Hx - Page 1
Med Hx - Page 2
NOTE: Information documented here also displays in Pregnancy/Birth History
(
82
)
- Past Medical History
- Family History
- Maternal Past Medical History 1-10
3. Enhancements
•
OB History
NOTE: Information documented here also displays in Pregnancy/Birth History
(
•
), and Maternal Past Medical History 1-10.
Pelvimetry
NOTES
* This information can also be documented in Procedure Results (
Procedure Tasks > Result Entry).
* New Pelvis Proven To: field added.
>
83
Procedure Results
•
Next Appt
NOTE: This information can also be documented in Procedure Results (
Procedure Tasks > Result Entry). Once complete, the procedure can be
>
finalized and reviewed.
Procedure Results
To improve efficiency and workflow, many changes were made to the Procedure
Results and Procedure Results Entry screens, along with changing to new GUI
standards.
Procedure result.
•
Hide patient reported - Hide patient reported is used in conjunction with
HealthMatics Access. In Access, you can now fill out questionnaires and have
them display in HealthMatics EMR after Synchronization is performed. This can
lead to a lot of procedures filling up Procedure Results. Select the Hide patient
reported box to prevent those questionnaire items from displaying.
NOTE: You can also turn this option on/off by using the quick filter
84
.
3. Enhancements
•
Access the old “button” tasks under their respective drop-down categories on the
secondary toolbar:
Procedure Tasks
•
•
•
•
•
•
•
Review All
Review
Finalize
Result Entry
Acquire data from
Merge
Chart Tasks
• Pull Chart
• Face Sheet
• Attach To Encounter
Messages
• Send Patient Message
• Send Web Message
• Send Reminder
To help you locate items in the Procedure Results view quickly, click the following
buttons:
Icon
Name
Action
Expand All
Expand all folders to display procedures.
Collapse All
Collapse all folders to hide procedures.
Filter
Select a quick filter to locate an item (see Quick Filters on
page 45).
Procedure results entry screen
To further facilitate documentation, the following are now available:
•
Auto-expand - Auto-expand functionality now works in Procedure Results Entry.
•
Voice/images - You can add voice and images associated with the rule.
•
Buttons - New Previous and Next buttons on the secondary toolbar allow you to
move quickly from one item to another.
•
Tabs - New navigation tabs similar to those found in ROS and PE facilitate
documentation: Required, My Procedure Lists, and Search (see Procedure
Results Entry on page 43). To see required questions, click the Required tab.
•
Folders - Folders now default to open, so you don’t have to open them to
document.
For detailed instructions for creating templates for this screen, refer to the HealthMatics
EMR Clinical Customization manual.
85
Reason for Visit
Reason for Visit
The Reason for Visit view reflect the new GUI standards.
To speed the documentation process in Reason for Visit, the following changes were
made:
•
Follow up visits - A Recheck box allows you to indicate that the current
encounter is for a followup visit.
When you double-click a complaint from the Previous Complaints tab to include it
in the current encounter, a Recheck box displays to the right of the complaint.
Click the box to change No to Yes.This changes the first line of the H&P Report to
read as follows:
•
Free text complaints - You can ‘enter free text complaints and attach additional
description to them for the H&P Report:
>
Click the Fee Text tab, enter a term such as “coughing spells,” and click
Include.
86
>
In the Exams / Complaints box, double-click the term, add description such as
“Unable to catch breath.” and then click OK.
>
Click the Preview button to view the documentation generated for the H&P
Report: “The patient presents with a complaint of persistent cough. Unable to
catch breath.”
3. Enhancements
Prescriptions
To speed the process of approving refill requests, new buttons were added to the Refill
Request screen, and a new dialog provides the ability to dispatch multiple medication
prescriptions from the Refill Request screen, the patient Face Sheet, or at Sign Off.
Refill requests
Refills sent to output are preceded by the outline of the green check icons ( ) in the
Refill Request dialog box, to indicate refills were processed. From Refill Request,
select the medication and click Save to Chart to save the refill request to the patient face
sheet and remove the refill message from your inbox.
Refill request details are documented on the patient face sheet in both Refill Requests
from the Encounters pane and in Revision History in the Medications pane.
The Refill Requests screen reflects the new GUI standards.
•
The # column was not needed and has been removed.
The Refill Request dialog box reflects the new GUI standards.
•
Send - Click Send to send the refill to the caregiver in the To field -- either to
approve or to process the refill (replaces the OK button in 2005).
•
Approve - Click Approve to approve the refill, keeping all prescribing details the
same.
•
Approve w/changes - Click Approve w/Changes to open the Medication dialog to
review or make changes to the prescribing details.
•
Output all - Available only after medication is approved. Click Output All to open a
new dialog, Prescription Properties (see Prescription properties on page 88).
87
Prescriptions
Medication
To avoid having the status of a prescribed medication with a set number of days
automatically change to Inactive, a new check box appears in the Medication dialog
once the rules to automatically inactivate are met.
IF Refills is set to None, at Days, enter a number to display Do not Auto-Inactivate.
Select the box to keep the medication status Active, even after the number of days
indicated have passed.
Prescription properties
The new Prescription Properties dialog box reflects the new GUI standards.
To process prescription refills for a patient, access Prescription Properties from any of
the following five places:
•
Refill Request >
•
Batch Refill >
•
A/P >
•
H&P Report > Sign-Off > A&P Prescriptions > OK
•
Face sheet >
Output All (on secondary toolbar)
Output
(on toolbar) > Draft > A&P Prescriptions (check box) > OK
(on Medications toolbar)
Field and table elements:
88
•
Use signature - Enter password for signatures and eRefills if required in
Administration Module > Site Settings.
•
Use license - Displays the icon that appears in the table below. You can click the
icon in the column heading to include the approving caregiver’s license on all
3. Enhancements
refills or include your electronic signature only on individually selected
prescriptions.
•
Preferred pharmacy - Displays the patient’s default pharmacy (from
Demographics). Click the search button at the end of this field to make changes.
•
Template - Select a prescription template for the highlighted medication. Licenses
are selected as follows:
•
>
If the selected prescription template is the <System Default>, which has no
state association, then the ordering caregiver’s default state license is used.
>
Otherwise, the prescription template’s associated state is used to select the
caregiver’s license. If the ordering caregiver does not have a license defined
for that state, then no license information is included in the prescription.
Apply to all - Click to apply the selected template to all medications.
Columns
Action
Select all prescriptions to process or click to select individual prescriptions in
this column to process.
NOTE: Medications preceded by the
the application.
icon are locked for editing elsewhere in
Apply your DEA license number to all (unlocked) prescriptions listed or click
individual boxes to selectively apply your number.
Apply your electronic signature to all (unlocked) prescriptions listed or click
individual boxes to selectively apply your signature.
NOTE: Bitmap signatures must be loaded for each caregiver in Administration
Module > Caregivers > Signature.
Medication
List all of the patient’s prescriptions awaiting refills.
Select all (unlocked) prescriptions for printing or click individual boxes to
selectively print.
NOTE: If the default printer does not display or needs to be changed, click the
search button at the right of the Destination field and select a printer.
If Faxpress is installed, select all (unlocked) prescriptions for faxing or click
individual boxes to selectively fax prescriptions to pharmacies.
NOTE: You cannot fax prescriptions for controlled substances.
If ePrescribe is installed, select all (unlocked) prescriptions for electronic
transmittal or click individual boxes to selectively transmit prescriptions to
pharmacies.
NOTE: You cannot transmit prescriptions for controlled substances.
Destination
Displays printer, pharmacy, and so forth, where prescription will be sent. If the
information does not display or needs to be changed, click the drop-down arrow
to the right.
Select printer defaults in Administration > My Output Defaults (on toolbar) >
Prescriptions or (from the menu bar) Options > Edit Output Defaults.
Pharmacies default to the preferred pharmacy or the last used pharmacy on the
medication
89
Reminders
Reminders
The Reminders view reflects the new GUI standards.
This screen provides the following enhancements:
•
Quick chart reminders - From the left pane of the desktop, click Reminders and
. Using this method, you can have a chart pulled for one patient, click
Reminders, and quickly put a note on a different chart.
•
Reminder screen changes
>
View - Reminder details display in the preview pane at the bottom of the
screen. You no longer need to click a button to view it.
>
Buttons - All buttons are now located on the toolbar. New buttons allow you
to create a new reminder, send a message to another caregiver, and print the
reminder.
>
Priority - High priority items now display a red exclamation point in the (!)
column.
>
Entered by - A new column, Entered By, shows who entered the reminder.
Result Notifications
The Result Notifications view reflects the new GUI Standards.
•
90
Quick review - To quickly mark a result reviewed, select the message from the list
and click the new
button on the secondary toolbar to go directly to the
Review Results dialog to view patient results and mark them reviewed.
3. Enhancements
•
Column changes
>
Test has been renamed Subject.
>
The new From column tells who sent the results to you.
NOTE: Interface-generated messages always list System Manager as the
source of the message.
Result Summaries
To speed generation and review of result summary information, Result Summaries now
displays all functionality and data from one screen.
•
Click Options to set a default template, indicate what information to display, and
set vitals measurement units.
•
Click the Graph tab to see trends and/or create new graphs.
Security
To reflect changes in the way functions are organized in HealthMatics 2006, Function
Access categories in the Administration Module are rearranged. Privileges for access
to functions now list under their respective modules and under Input Manager and
Output Manager.
To provide more security and to enhance the ability to grant or restrict access to specific
screens and functions, many new security options were added.
A complete list of security options follows. NEW options are bolded. Explanatory notes
accompany changed items when needed.
Clinical module
•
Office functions
>
Appointments - NEW
>
Inbox/messages - NEW - Applies to all Inbox views and the Outbox
91
Security
–
>
Batch refill - NEW
>
Report results - NEW
–
>
92
Refax/Reprint Prescriptions
>
Work log - NEW
>
Billing Reconciliation (relocated - used to be a stand-alone function)
>
Audit open encounters - NEW
>
Lab Order Entry (Requisitions, Setup, and Lab Catalog were relocated to the
Clinical Customization Module)
>
Patient Merge (relocated - used to be a stand-alone function)
Patient summary
>
Face Sheet
>
Patient manager - NEW
>
Demographics
>
Reminders
–
Create Reminders
–
Complete Reminders
>
Flow Sheets
>
Immunizations - NEW
>
Chart attachments - NEW
>
Orders/Results (formerly, “Orders”) - Includes Lab Results, Procedure
Results, and Additional Results
>
•
View Restricted Report Results This is the same as the “Override Privacy
Request.
Output queue - NEW
–
•
Sensitive Web Messages
–
Enter Results
–
Complete Orders
–
Review Orders
–
Undo Complete
–
Undo Review
Result summaries - NEW
Patient contact
>
Reason for Visit (formerly, “Chief Complaint”)
>
Review of Systems
>
History
3. Enhancements
>
Vitals
>
Physical Exam
>
Assessment and Plan
–
>
Send Bill (formerly, “Send A & P to PMS”)
H&P Report
–
Save Patient Chart
–
Chart Addendums
–
E&M Calculator (used to be a stand-alone function)
NOTE: “Problem Management” is no longer used and was removed.
Administration module
“Site Options” in 2005 is called Settings in 2006. You can now control access to each
view individually.
•
•
Settings - NEW
>
License & Registration
>
Site Settings
>
Locations - also controls access to the Location Import Queue
>
Caregivers - also controls access to the provider Import Queue
>
Function Access
>
Message Subjects
>
Dictionary
>
Web Accounts
>
Web Servers
System administration - NEW
>
System Options
>
Scheduled Tasks
>
Locked Charts/Patients
>
Error Log
>
Job Log
>
Error Reporter Settings
NOTE: “Header/Footer Setup” was moved to Output Manager. However, the data
remain in the database so you can import old headers and footers into Output Manager
templates if desired.
93
Security
Clinical customization module
All security for customization functions is new. You must assign function access to
users who need access to the Clinical Customization Module in order to customize the
Clinical application.
•
Knowledge - includes Reason for Visit, Review of Systems, History, and Physical
Exam
•
Short Lists - Includes Reason for Visit, History, and Assessment/Plan
•
Exam Templates - Includes Review of Systems and Physical Exam
•
Catalogs - Includes Lab Catalog, Procedure Entry Rules, Billing Modifiers, and
Anatomical Pictures
•
Templates - Includes Fast Track, Prescription, Authored Text, Form/Letter, Result
summary (including Custom Result Cells), and Flow Sheet
•
Lab Order Entry
•
Ownership Override (see Ownership override on page 55)
Reporting module
•
•
•
Segments - NEW
>
Edit/Execute/View Results
>
Schedule
Reports (formerly, “Chart Explorer”)
>
Edit/Execute/View Results - NEW
>
Schedule - NEW
>
Actions (formerly called “Automated Reminders” under Cognos Tools)
Mappings - NEW
NOTE: Other StatPoint topics were deleted.
Input manager
•
Scanned Documents (formerly, “Approve Scanned Documents”)
•
Transcription (formerly, “Transcription Entry”)
•
Administration
•
Reconciler (formerly, “Lab Reconciler”)
>
Caregiver matching - NEW
–
>
Patient matching - NEW
–
94
Matched Caregivers
Matched Patients
3. Enhancements
>
Results - NEW
–
>
Result Report
Audit log - NEW
Output manager
No change
Override
Override was formerly under Patient Contact > EM Calculator.
Sign Off
Unspecified diagnoses
To provide a reminder that you are about to sign off a chart with an unbillable diagnosis,
the following conventions are followed to alert the caregiver:
•
IF the billing Interface supports free-text diagnoses, then the text is black and
there is no red alert icon -- indicating that the diagnosis is billable.
•
IF the billing Interface does not support free-text diagnoses, then the diagnosis is
preceded with a red alert icon -- indicating that it is not billable.
•
IF a SNOMED diagnosis does not have a corresponding ICD-9 and the Billing
Interface does not support either SNOMED or free-text diagnoses, it will be
preceded by a red alert icon.
Example
Here are explanations for the items in the screen above:
•
Unspecified Diagnosis appears with a red alert icon because it is a free text and
the interface does not support free-text. It is not billable.
95
Sign Off
•
TRAUMATIC AGENT, NOS is a SNOMED without a corresponding ICD-9, and
the interface does not support SNOMED or free-text diagnoses. So it appears with
a red alert icon. It is not billable.
•
HEARING LOSS, NOS is a SNOMED diagnosis, but has a corresponding ICD-9,
so it appears like any other ICD-9-based diagnosis. It is billable.
Printing at sign off
To make patient checkout more efficient, multiple items can print at checkout. If
needed, “parameter” dialog screens appear for you to select items such as lab tests or
procedures for which you want to print orders. (For example, if you have seven lab
orders but two of them were performed inhouse, dialog box parameters let you deselect
those orders rather than print them unnecessarily.) After selecting the appropriate
parameters, the Multiple Output dialog displays.
1. For each output item you want to print from the list on the left, select a printer and
layout. These selections are only necessary if output defaults are not set. (Click
the Preview tab to see how the finished document will look.)
2. Items requiring additional information or printing instructions display an icon after
the check box (icon explanations display at screen bottom). When the item is
ready for printing, the
(Ready) icon displays.
3. When all items you want to print have green checks, click OK to print all.
96
3. Enhancements
Tools
The customization functions removed from the 2005 Tools menu are now accessed in
the Clinical Customization Module:
2005 Tools Menu
2006 Tools Menu
Vitals
The Vitals view reflects the new GUI standards.
NOTE: Vitals “Options” are now set from the Clinical module menu bar (Options > Edit
Options > Vitals).
New options available:
•
Waist and neck (in cm or inches)
•
LMP date (document the Full Date, Month/Year Only, or Year Only)
•
Pertinent Hx (for LMP)
97
Vitals
98
4. HealthMatics Interface Engines
4. HealthMatics Interface Engines
The HealthMatics Interface Engines (HIE) are now compatible with both HealthMatics
EMR and HealthMatics Ntierprise. The HIE controls all interfaces, regardless of: the
types and features each contains; whether they are TCP/IP; dialers; shared directories;
or bi-directional. DOQ-IT Reporting is also sent out through the engines.
The interface engines control five services that enable communication between the
Practice Management system and HealthMatics EMR:
•
Export events - Extracts data from Ntierprise in XML, translates it to HL7
messages and sends it to the EMR.
•
Message processing - Message data (such as charge information and
demographics,) passes through the bi-directional Message Processing service (to
and from Ntierprise and EMR).
•
Import events - In the EMR, Import Events formats the message data into tables
and sends it to be linked to caregivers and patients.
•
Import linking - Import Linking determines if the data items match EMR items
and sends the data either to Auto Import or to a Import Queue to be linked
manually.
•
Auto import - Auto Import automatically attaches linked data to an Import Queue
in the EMR. (NOTE: Import Linking and Auto Import are only for the EMR. All data
imported into Ntierprise is linked manually.)
You can access these services from the server (not through terminal services or a
client workstation).
NOTE: All five services should be running at all times in order for the HealthMatics
Office interface to function.
Many changes were made to the HealthMatics Interface Engine, including a new folder
called Data Exchange Administration (which provides easy access to the five services)
and Utilities. The HIE will be updated often through 2006 as new interfaces are
available.
Data Exchange Administration
1. Access HealthMatics Interface Engine (HIE) on the server by doing one of the
following:
>
From the EMR server desktop, click
(HealthMatics Interface Engine) or
>
From the desktop Start menu All Programs > HealthMatics Interface Engine >
HealthMatics Interface Engine.
99
Data Exchange Administration
2. Select the EMR database and log on as system manager.
3. In the left pane, select Data Exchange Administration.
Data Exchange Administration has two tabs: Data Exchange and Event Log.
100
4. HealthMatics Interface Engines
Data exchange
The Data Exchange tab has three parts: Data Exchange Status, Activity Log Info, and
Windows Services
•
Data exchange status - Data Exchange Status displays number of Unprocessed
and Processed messages received that day. It displays a snapshot of activity
(which refreshes every 30 seconds) for the export, import and messaging
services.
It gives a count of the total number of unprocessed records, number of processed
records for today (starting at 12 a.m.) and the total number of errors for today.
NOTE: To manually refresh this screen if you don’t want to wait 30 seconds, click x
in the upper right corner to close the screen, and then reopen it.
>
>
Import events - Import Events includes all messages received by EMR from
the PM system such as the following:
–
Patient imports - Patient demographics imported from the PM system
–
Appointment imports - Patient appointments imported from the PM
system
–
Provider imports - Scheduling providers and referral caregivers received
from the PM system
–
Location imports - Scheduling locations and updates received from the
PM system
–
Service code imports - Custom service codes generated in the PM
system
–
Total unprocessed - Number of messages received that are waiting to
be imported into the EMR. New providers and locations must be matched
to providers and locations in the EMR and remain in this queue until
matched (in Input Manager > Provider Import Queue/Location Import
Queue). This number is a running total and only decreases once these
messages have been imported.
–
Processed today - Number of messages that have been imported into
the EMR. This number is reset to 0 at 12:00 a.m. each day.
–
Errors today - Any errors generated while processing these messages.
Details are available in the Activity Log. This number is reset to 0 at 12:00
a.m. each day.
Export events - Export Events includes all messages generated in the EMR
for the PM or other system.
101
Data Exchange Administration
•
•
–
Format class: Ntierprise - All outgoing charges to Ntierprise are
grouped in this class. Other interfaces (Examples: other PM systems,
laboratories) will be listed under another class name.
–
Total unprocessed - Number of messages generated and ready to send
to Ntierprise. This number is a running total and only decreases once
these messages have been sent.
–
Processed today - Number of messages sent to Ntierprise. This number
is reset to 0 at 12:00 a.m. each day.
–
Errors today - Any errors generated while processing these messages.
Details are available in the Activity Log. This number is reset to 0 at 12:00
a.m. each day.
Activity log info - Activity Log Info (in the middle of Data Exchange
Administration) shows messages generated by the five services controlled by the
HIE, such as start and stop services, informational data, duplicate data, etc. If a
user deletes a patient or caregiver match in the reconciler, that activity is captured
in the log.
>
Check Show All Entries to view any errors recorded.
(This box toggles between all entries and just entries that are of an
Informational nature.)
>
Review the Category column. Any messages with the categories, Fatal or
General Exception, should be reported to A4 Support.
Windows services - Go to Windows Services to start or stop any of the five
services. These services manage the activity of all the interfaces on the server,
whether EMR, NTP, or both.
NOTE: This section is only active when displayed from the server on which
Windows Services is installed. If viewed from any other machine, the following
message displays: “Service Control Unavailable from this machine.”
102
>
Shows the current statuses of the five services (Started or Stopped) used by
all databases (both NTP and EMR).
>
Services continue running even when the HIE application is closed.
>
Services may need to be recycled (stopped and restarted) if the interfaces are
not running properly due to a software or hardware glitch.
4. HealthMatics Interface Engines
>
To start or stop services, click Start (or Stop, if available) at the bottom right
corner of the screen to display Start Services.
In the Start column, check the services you want started and then click OK.
–
Export events service - Sends charges to the PM system
–
Import events service - Sends patient demographics, schedules, etc.,
from the PM system
–
Message events service - Should always be on
–
Import linking service - Should always be on if Import Event Service is
on
–
Auto import service - Should always be on if Import Event Service is on
Event log
The Event Log was designed to enable you to preview or print a log of the activity or
errors that occurred by Format Class for a specific date or date range. This function is
not currently in use.
Utilities
The new function bar in the left pane of the HealthMatics Interface Engine holds two
utilities folders:
•
Ntierprise Demographic Export
•
Ntierprise Appointment Export.
103
Utilities
Demographic export
The Ntierprise Demographic Export generates patient demographic export messages
for each Active Information Broker Form with a trigger event type of Register a Patient.
Appointment export
The Ntierprise Appointment Export generates appointment export messages for each
Active Information Broker Format with an appointment-related trigger event type.
104
Index
Index
A
A/P
ABN check button 50
caregiver options, new 53
enhancements 50
enhancements overview 2
formularies 15
free text diagnosis 51
Isabel
accessing 9
definition 50
medical necessity check, using 25
ordered for 50
problem comment space enlarged 51
security 93
ABN check, from A/P 50
ABNs, medical necessity checking 22
Access Module, password security changes 6
action items, screen changes 2
actions, security 94
activity log info, HIE 102
acuity items, problem dialog 64
acute problems, sorting by 64
add page(s)/group, in scanned document 18
addendum
new folder of data elements 76
notes, adding from face sheet 65
additional results 8
icon 3
in patient manager 30
items moved from lab results 71
overview 1
additional, new tab in problem dialog box 51
address, web accounts 48
Administration Module
anatomical pictures 57
change password 3
concurrent encounters 10
encounter packs, creating 38
enhancements
list 47
overview 2
function access, new privileges 91
import queues, relocated 17
interface options, relocated 48
medical necessity check, enabling 23
name changes 47
output
defaults 34
settings 36
templates, selecting for views 36
ownership override 55
reconciler, relocated 17
relocated/removed functions 48
resource monitor/log/settings removed 48
security 93
refaxing/reprinting 42
administration security, Input Manager 94
alerts, medication allergies 50
allergies
alerts about medications 50
free text
disallowed 2
tab removed from history 69
Alpha II/Unicore Med
E&M calculator 61
medical necessity check 2
anatomical pictures 57
relocation 48
annotate, web publish lab results 72
antepartum
data elements, new 75
documentation enhancements overview 5
appointment imports, HIE import events 101
appointments
daily schedule, printing 3
date filters 49
enhancements
description of 49
overview 2
export, HIE utilities 104
patient manager 30
search icon 49
security 91
status icons 50
approve
one-click refill request approval 87
w/changes, on refill requests screen 87
archived items, displaying in knowledge 54
assessment
attached to orders 71
transcription, new output block 75
attach to encounter, authored text 58
attributes in short lists 55
audit
log 18
reconciler 19
security 95
open encounters
description of 3
security 92
authored text
105
Index
reviewing in additional results 8
templates 58
auto
expand, procedure results entry screen 85
replace, no longer case sensitive 3
auto import, HIE windows services 103
automated reminders, renamed 94
B
batch refill
enhancement overview 3
icon 3
security 92
billing
appointments, access from 49
data elements, new 76
face sheet, viewing from 65
reconciliation 51
enhancement overview 3
icon 3
blocking time, appointments 49
C
calculate, new E&M calculator button 62
caregiver import queue 19
Input Manager 48
relocated 17
renamed 5
caregiver options
enhancement overview 3
list of new 52
sign off chart 62
toolbar 11
caregivers
matching
reconciler 18
security 94
ordering, on requisitions 5
output defaults 34
security 93
submitting documents to 18
catalogs
enhancements 56
security 94
change my password
Administration Module 3
button change 47
chart
attachments
erroneous, marking 3
security 92
lab results, tasks 71
outstanding messages 27
106
print entire 77
procedure results, tasks 85
reminders, adding quickly 90
review
submit button 70
without edits 6
saving, security for 93
sign off, enhancements overview 6
chart addendum, security 93
chief complaint, security 92
chronic problems, sorting by 64
Clinical Customization Module
access and enhancements 53
anatomical pictures 57
enhancements
list of 53
overview 3
flow sheet templates 69
security 94
settings for 6
terms, editing 55
clinical decision support
Isabel 9, 50
overview 1
Clinical Module, new security 91
Cognos Tools, security 94
collapse
all, new button in lab results 71
view, explorer 14
common default, face sheet 52
complaint editor, knowledge customization 53
concurrent encounters 9
enabling 10
overview 1
pulling charts with 10
conversion to SQL 7
convert to job, scanned documents 18
CPT codes
associating with procedure entry rules 57
multiple in procedure entry rules 43
CPT medicine test, definition of 62
current encounter, in fast tracks 68
custom data only, lab catalog 56
customizable toolbar 11
overview 1
customize, printing from A/P 51
D
daily schedule, printing 3
data elements
electronic signature 75
system in Output Manager 75
data exchange administration
Index
accessing 99
data exchange administration, HIE 100
data exchange status, HIE 101
database
conversion 7
overview 1
databases
LOINC 19
MediMedia availability 15
MediMedia for formularies 14
date filters, appointments 49
date of death, demographics 60
date/time, in lab results 71
defaults
E&M calculator 62
service 53
face sheet 52
history caregiver options 53
output, Administration Module 47
printers, applying sets 35
quick filters, setting for 45
definitive diagnosis pending, removed 3, 10
demographic export, HIE utilities 104
demographics
assigning formularies to patients 15
enhancements 59
overview 3
desk references
enhancements overview 3
desktop
audit open encounters 3
caregiver options, new 52
navigation, additional icons 3
detail tab, scanned documents 64
details, viewing encounter 11
diagnoses
definitive pending, removed 10
E&M calculator 22
scanned documents, linking to 18
unspecified 95
diagnostic tests letter
mail merge 20
new output block 75
Output Manager template 75
dictated by, transcriptions 18
dictionary, security 93
documents
enhancements 60
overview 3
historical, reprinting 77
printing from output queue 41
queued, collecting electronic signatures 13
rejected, in inboxes 18
scanned types, relocated 48
show signed only in output queue 41
draft
A/P, printing from 51
H&P report 70
drug interactions, overview 4
E
E&M calculator
button in H&P report 70
calculate button 62
caregiver option 53
clear 62
coding 61
diagnosis/management option 22
enhancements 61
overview 4
override security 95
qualifiers 61
risk tables 61
security 93
E&M mappings, PE customization 55
EDD, in antepartum record 75
edit
history from face sheet 64
lab results, screen changes 73
medications from face sheet 66
problems from face sheet 64
electronic patient signatures
queued documents, collecting in 13
templates, building 12
electronic prescriptions
editing 63
enhancements
list of 62
overview 4
electronic signatures
medical necessity checking 22
Output Manager data element 75
overview 1
electronic signatures, using 12
encounter packs
A/P, using from 39
creating 38
encounter selection 10
encounter summary, new output block 75
encounters
audit open 3
concurrent 9
pulling charts for 10
data elements, new 76
enabling concurrent 10
enhancements on face sheets 65
107
Index
face sheet, editing from 65
Output Manager blocks, new 75
scanned documents, linking to 18
selecting new 10
enhancements, 2006 47
eRefills
new buttons 4
rejecting/ordering new 63
error log, security 93
error reporter settings, security 93
errors today
export events 102
HIE import events 101
exam
E&M coding 61
templates
marking significant/adding notes 56
security 94
types, E&M calculator 62
exit, button change in Administration 47
expand
all, lab results 71
view, explorer 14
explorer
encounters 65
history 64
medications 66
orders 66
overview 1
problems 64
scanned documents, viewing 18
views, overview 14, 64
export events, HIE data exchange 101
export events, HIE windows services 103
export screen 33
external IDs, mapping to insurance 59
F
face sheet
acuity items in problem dialog 64
caregiver options, new 52
encounter selection, accessing from 11
enhancements 63
overview 4
expanding panes 64
explorer views 14
overview 1
historical immunizations, add/edit 65
immunization record 65
real-time updates 10
scanned documents, viewing from 18
failed logins 4, 6
fast tracks
108
enhancements 67
overview 1
templates 58
fax screen 33
filters
appointment dates 49
quick 45
flow sheets
data elements, new 76
icon on face sheets 66
Output Manager blocks, new 75
templates 75
archiving 58
enhancements 69
enhancements overview 4
folders, results entry screen 85
follow up visits, on reason for visit screen 86
footer setup
Output Manager 93
relocated 48
format class-Ntierprise, HIE export events 102
formularies
A/P 15
assigning
by insurance carrier 15
by patient 15
insurance changes 15
MediMedia database 14
overview 1
refill requests 16
free text
complaints on reason for visit screen 86
diagnosis 51
Input Manager data element 75
tab removed from allergy history 69
function access
options, new 91
scanned documents 48
security settings 93
security, overview 48
G
GA, GZ, GY, definitions of 23
geographic region, medical necessity 23
go backward, Administration Module 47
go forward, Administration Module 47
GPI, electronic prescriptions 63
grantees, button change 47
group, adding in scanned document 18
GUI, new 7
H
H&P report
Index
accessing from encounter selection 11
appointments, access from 49
enhancements 70
overview 4
output blocks, new 75
security 93
submit button 70
head measurement, in vitals 97
header setup
Output Manager 93
relocated 48
headers, including location logos 76
HealthMatics Interface Engine
activity log info 102
windows services 102
HealthMatics Interface Engine, maintenance 99
HealthMatics Interface Engines
utilities 103
hide
patient reported, procedure results entry 84
system items
lab catalog 56
reason for visit 54
HIE, accessing 99
historical immunizations, from face sheet 65
history
caregiver options 53
customization enhancements 54
E&M coding 61
edit from face sheet 64
enhancements 69
overview 4
face sheet enhancements 64
security 92
summary, new output block 75
history default, common on face sheet 52
I
images, on procedure results entry screen 85
immunizations
data element, new 76
historical, add/edit 65
history/face sheet icon 64
record
face sheet, displaying from 65
history, displaying from 69
security 92
import
event, reconciler 19
queues
Input Manager 48
relocated 17
import event, HIE windows services 103
import events, HIE data exchange 101
import linking, HIE windows services 103
inactivate
medications from face sheet 66
problems from face sheet 64
inbox, security 91
include active, A/P 50
indexing
linking to encounters/diagnoses/plans 18
ready for 18
scanned documents 64
Input Manager
administration security 94
free text data element 75
interface options 48
overview 1, 16
provider import queue 5
security 94
transcriptions 18
insurance
data element, new 76
formularies, changing 15
mapping required 59
plans, mapping external IDs 59
interactions
overview 4
view from face sheet 66
interfaces
maintenance 99
interfaces, provider/location import queues 19
Isabel
A/P 50
clinical decision support 9
overview 1
J
job log, security 93
K
knowledge
customization enhancements 53
displaying 54
editing 55
security 94
terms, ownership override 55
L
lab catalog
enhancements 56
LOINC mapping 19
lab order entry
icons 3
109
Index
setup enhancements 59
lab orders, explorer trend tab 67
lab result entry, screen changes 73
lab results
appointments, access from 49
enhancements 71
overview 4
icon 3
items removed from view 8
medical necessity check, using 27
patient manager 30
lab tasks
enhancements 72
in lab results 71
lab test properties screen 24
lab trends, on review lab results screen 72
laboratories
mapping 59
new data elements 76
layout categories, renamed 74
layouts, show archived 77
levels, E&M coding 61
license & registration, security 93
LMP
date, in vitals 97
Hx, data element 76
LMRP, definition of 24
location
logos in output blocks 76
Output Manager, new data elements 76
security 93
location import queue 4, 19
Input Manager 48
relocated 17
security 93
location imports, HIE import events 101
locked charts/patients, security 93
logins, failed 4
logos, for locations 76
logout, new icon in Administration 47
LOINC
in lab catalog 19
overview 1
M
mail merge 20
data elements 76
overview 1
performing 20
Reporting Module 2, 75
templates, creating 20
maintenance, HealthMatics Interface Engine 99
management options
110
E&M calculator 61
medical necessity checking 22
mapping
lab catalog entries to LOINC 19
laboratories 59
mappings, Reporting Module security 94
mark complete, action items 2
mark complete, authored text 58
matching, caregivers/patients 18
MCM, E&M coding 61
medical necessity check
enabling 23
from A/P 50
lab or procedure results 27
overview 2, 22
turning on 23
using in A/P 25
web service 22
Medicare
ABNs and NEMBs 22
limited coverage indicators 24
Part D, formularies 14
medication screen, formularies 16
medication summary, new output block 75
medications
allergy alerts 50
data elements, new 76
edit/inactivate, refill from face sheet 66
enhancements 66
in patient manager 30
status, ordered vs active 4
using NDC to locate 63
MediMedia database, formularies 14
MediMedia, database availability 15
merge
jobs, scanned documents 18
orders, changes 72
message events, HIE windows services 103
message subjects, security 93
messages
chart, outstanding 27
lab results 71
patient
manager 30
outstanding 29
pending 30
procedure results, from 85
security 91
miscellaneous transcription, Output Manager
block 75
multiple
CPT codes, in procedure entry rules 43
output, printing at sign-off 96
Index
mutually exclusive list, PE customization 55
my
grantees, button change 47
output defaults, button change 47
procedure lists
creating 43
procedure results entry 43
templates, A/P 51
N
name changes, administration 47
navigation
desktop 3
on procedure results entry screen 85
procedure results, entry 43
NDC, electronic prescriptions 63
neck measurement, data element 76
NEMBs, medical necessity checking 22
next button
edit lab results screen 73
procedure results entry screen 85
NKA button, allergy history 69
not up to date, immunization history button 70
notes, data elements 76
Ntierprise, appointments, access from 49
O
objective transcription, Output Manager block 75
office functions, security 91
office manager 74
overview 4
open
charts report 3
encounters, overview 5
options
list of new caregiver 52
vitals 97
Oracle to SQL conversion 7
order
default, face sheet 52
explorer, enhancements 66
mapping required 59
numbers, electronic prescriptions 63
ordered for, A/P 50
ordered medications 4
ordering caregiver
in lab results 71
on requisitions 5
outbox, security 91
output
all, for refill requests 87
defaults
accessing 34
Administration Module 34
Administration Module button 47
migration 31
printer sets, building 35
sets, applying 35
encounter packs, creating 38
Output Manager
blocks 75
categories 74
queue 41
icon 3
new output, creating 42
security 92
using 41
settings, in Administration Module 36
templates
Output Manager 75
selecting for views 36
Output Manager
electronic signature data element 75
enhancements 74
overview 5
footer setup 93
print entire chart 77
report results 2
output tasks, output queue 41
outstanding messages
chart 27
patient 29
override
E&M calculator security 95
privacy request, name change 92
ownership override 55
security 94
overview 3
P
pages, adding scanned 18
passwords
Access Module, security 6
Administration Module, changing in 3
change button 47
changes, security 48
patient
assigning formulary to 15
contact, security 92
education, data element 76
electronic signatures 12
flow sheets, output template 75
matching 18
rules, Input Manager 48
security 94
messages, outstanding 29
111
Index
Output Manager blocks 75
problem/medication lists, include active 50
relationships, mapping external IDs to 59
patient imports, HIE import events 101
patient manager 29
caregiver options 52
overview 2
security 92
patient summary, security 92
PE
customization enhancements 55
knowledge customization 54
notes/significance in exam templates 56
Output Manager dialog block 75
security 93
pending
diagnoses, removed 10
messages 30
pharmacy button, eRefill requests 4
pictures, anatomical 57
plan transcription, Output Manager block 75
plans, linking scanned documents to 18
PM interface, maintenance 99
PM system, miscellaneous demographics 59
pregnancy record 78
Output Manager data elements 75
prescription
enhancements 87
properties
access to 88
screen 87
security for refaxing/reprinting 42
templates 48, 58
previous
button
edit lab results screen 73
procedure results entry screen 85
complaint, follow up visits 86
printer default migration 31
printer sets
applying 35
building 35
printing 31
A/P 51
appointments 50
at signoff 96
daily schedule 3
documents from output queue 41
entire chart 77
export screen 33
fax screen 33
function integration 74
H&P report 70
112
historical documents 77
icons 32
multiple output 96
output
defaults, setting 34
queue 41
overview 2
queue/save to log screen 33
templates available 31
toolbar icon definition 32
problem
acuity items 64
comment space, A/P 51
edit from face sheet 64
explorer, scanned documents 64
inactivate from face sheet 64
management, removed 93
summary, new output block 75
procedure
codes, associating with rules 57
Output Manager data elements 76
tasks, drop-down menu items 85
procedure results
enhancement overview 5
enhancements and screen 84
entry
creating my procedure lists 43
my procedure lists 43
navigation improvements 43
new functions 43
overview 2
required tab 43
rules, enhancements 57
screen 85
search 43
icons 3
medical necessity check, using 27
patient manager 30
tasks/message drop-down buttons 85
processed today
HIE export events 102
HIE import events 101
properties in short lists 55
proprietary, definition of 24
provider import queue 19
relocated 17
security 93
provider imports, HIE import events 101
pull chart
billing reconciliation 52
from appointments 49
renamed 5
with concurrent encounters 10
Index
pulse ox citation, data element 76
Q
qualifiers, on the E&M calculator 61
queue
definition of toolbar icon 32
provider/location 19
screen 33
queued documents, collecting electronic signatures 13
quick filters 45
overview 2
R
race, mapping external IDs to 59
ready for indexing, status 18
real-time updates
concurrent encounters 10
face sheet panes 63
reason for visit
enhancements 86
enhancements overview 5
knowledge customization 53
security 92
reassign patients
scanned documents 64
security 48
received documents, enhancements overview 3
recheck
medical necessity 26
reason for visit 86
reconciler 18
relocated 17
security 94
reconciliation, billing 51
redesign
new GUI standards 7
overview 2
refaxing/reprinting prescriptions, security for 42
referral letters
order explorer, attaching in 67
reviewing in additional results 8
refill requests
electronic, editing 63
enhancements 87
overview 5
eRefill buttons 4
formularies
tab 16
using in A/P 15
generate from face sheet 66
one-click approval 87
re-indexing scanned documents, from orders 64
rejected documents, in inboxes 18
reload knowledge 54
reminders
add without pulling chart 90
appointments, access from 49
enhancements 90
icon 3
overview 5
patient manager 31
report results
mail merge, performing 20
Output Manager 2
security 92
Reporting Module
overview 2
security 94
reports
data elements, new 76
Output Manager blocks, new 75
security 94
reprinting historical documents 77
required tab, procedure results entry 43
requisitions
ordering caregiver 5
requisitions, ABN check 27
reset settings
toolbar 11
resource monitor log/settings/thresholds 48
result
notifications, enhancements 5, 90
report, reconciler 19
result summaries
enhancements 91
overview 5
security 92
templates 58
results
caregiver option renamed 52
security 95
review button in result notifications 5
review lab results, screen changes 72
risk tables, E&M calculator 61
ROS
caregiver options 52
knowledge customization 54
notes/significance, in exam template 56
security 92
rules, associating procedure codes with 57
S
save
patient chart, security 93
to log 33
113
Index
scanned documents
changes 18
deleting 60
linking to
encounters/diagnoses/plans 18
orders/marking reviewed 60
order explorer, viewing from 64
security 48
types, relocated 48
viewing from face sheet 18
scanning
add page(s)/group 18
convert to job 18
merge jobs 18
ready for indexing status 18
schedule
printing 50
printing daily 3
Reporting Module security 94
scheduled tasks, security 93
search
appointments 49
history 70
in lab catalog 56
procedure results entry 43
security
enhancement overview 5
function access additions 91
password changes 48
prescriptions, refaxing/reprinting 42
settings for customization 6
segments, security 94
send
bill, security 93
for review, button name change 70
service code imports, HIE import events 101
service, E&M calculator 62
sets, printer defaults 35
settings
name changes 47
security 93
short lists
formulary icons 15
properties and attributes 55
security 94
show archived 54
layouts, Output Manager 77
sign off
caregiver options 53, 62
enhancements 95
enhancements overview 6
printing 96
template packs, using 39
114
unspecified diagnoses 95
signatures
electronic 12, 75
signatures, electronic
queued documents, collecting in 13
templates, building 12
site settings
changes 48
name change 47
security 93
site, attached to orders 71
SNOMEDs, associating with procedure entry
rules 57
sort
history from face sheets 64
sort encounters, on face sheets 66
SQL database change 7
stacks, display on desktop 52
status bar icons, displayed 52
status, for procedure entry rules 57
subjective transcription, new output block 75
submit
button (send for review) 70
caregivers, selecting 18
summary button, E&M calculator 62
system administration, security 93
system data elements, Output Manager 75
system options, security 93
system-defined terms, copying/editing 54
T
templates
archiving flow sheets 58
authored text 58
available for printing 31
customizing 58
electronic patient signatures 12
encounter packs, creating 38
exam notes for ROS/PE 56
fast track 58
flow sheets, enhancements 69
mail merge, creating 20
Output Manager 75
output, selecting for views 36
packs, using from sign off chart 39
prescription
relocated 48
token building blocks 58
result summary 58
security 94
toggle
explorer tree, Administration Module 47
publish/toggle review, review lab results 72
Index
review, web publish lab results 72
toolbar
customizing 11
in caregiver options 52
overview 1
tools menu, changes to 97
Topaz
overview 1
Topaz signature pad 12
total unprocessed
HIE export events 102
HIE import events 101
transcriptions
data elements, new 76
Input Manager 18
miscellaneous, Output Manager block 75
new buttons 18
trend tab, order explorer 67
security 93
publish lab results 72
servers, security 93
service for medical necessity check 22
windows services, HIE 102
work log
appointments, access from 49
enhancements 6
failed logins 4
icon 3
security 92
U
unmatched patients, reconciler 18
unspecified diagnoses, conventions 95
up to date, immunization history 70
use current chart
eRefill request 4
lab results 71
user-added terms, editing 55
utilities
appointment export 104
demographic export 104
utilities, HealthMatics Interface Engines 103
V
view
restricted report results, security 92
results, Reporting security 94
vitals
caregiver options, new 53
data elements 76
enhancements 97
overview 6
security 93
W
waist measurement
data element 76
vitals 97
web
accounts
Access Module security changes 6
demographics 60
primary patient address 48
115