1
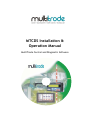
MTCDS Installation &
Operation Manual
MultiTrode Control and Diagnostic Software
MTCDS Installation & Operation Manual
Page 2 of 59
MTCDS v8-0-5 Manual R8.1
MTCDS Installation & Operation Manual
This Manual is the support documentation for the installation,
commissioning and operation of MultiTrode MTCDS.
Document Version 8.0
MTCDS V8.0.5
To support equipment version up to 8.0.x
This revision update: 05-Jan-2006
NOTICE
This document is proprietary to MultiTrode Pty Ltd (the company) and for sole use within the
company notwithstanding that this document may from time to time be made available to the
company’s subcontractors, suppliers, customers and others for purposes associated with
manufacturing and other processes as authorised on an individual basis by MultiTrode Pty Ltd
or their representative. In such cases where the document has been issued to external parties,
its contents shall not be transcribed, copied, relayed, or divulged to any other party whatsoever
and after satisfying the requirements for which the document was originally issued to any
external party shall be either returned to the company, or destroyed as required by the
company’s document control procedure and as attested to by the recipient at the time of taking
possession of the document. MultiTrode Pty Ltd shall not be held liable in any way whatsoever
for any act or omission, either direct or consequential, arising from the use of the information
contained herein.
MULTITRODE® and MULTISMART® are registered trademarks of MultiTrode Pty Ltd in Australia, USA, and
Europe. PUMPVIEW® is a registered trademark of MultiTrode Pty Ltd in the USA and Australia. Designs
registered for the MultiSmart Pump Controller Remote and Base Modules in Australia, USA, Europe and China.
Patents pending in Australia, USA, and Europe.
©2009 MultiTrode Pty Ltd. This publication is protected by copyright. No part of this publication may be
reproduced by any process, electronic or otherwise, without the express written permission of MultiTrode Pty
Ltd.
MTCDS v8-0-5 Manual R8.1
Page 3 of 59
MTCDS Installation & Operation Manual
Contents
1
Warnings & Cautions...........................................................................................6
1.1
2
Introduction ..........................................................................................................9
2.1
3
4
5
6
Terms used in this Manual ..................................................................................... 6
Features & Benefits of the Control and Diagnostics Software ............................... 9
Firmware Compatibility Chart ...........................................................................10
3.1
How different firmware versions relate to the new MTCDS ................................. 10
3.2
DIP Switch Settings .............................................................................................. 12
Installation ..........................................................................................................12
4.1
Check the contents:.............................................................................................. 12
4.2
System Requirements .......................................................................................... 12
4.3
Software Installation ............................................................................................. 12
4.4
Hardware installation............................................................................................ 12
4.5
PC Software Configuration................................................................................... 12
Overview .............................................................................................................12
5.1
MultiTrode Settings Change Program.................................................................. 12
5.2
MultiTrode Status/Datalog Program ..................................................................... 12
5.3
MTCDS Utility Packages ...................................................................................... 12
Operation ............................................................................................................12
6.1
MultiTrode Settings Change Program.................................................................. 12
6.2
MonitorPro ............................................................................................................ 12
6.3
MultiTode Status/Datalog program....................................................................... 12
6.4
TinyMon Automatic Programmer.......................................................................... 12
7
Dialup Points Configuration..............................................................................12
8
Appendix A – Radio Configuration...................................................................12
9
10
8.1
Radio Link Communication .................................................................................. 12
8.2
Equipment Required............................................................................................. 12
8.3
Remote Radio Installation .................................................................................... 12
8.4
PC Radio Installation............................................................................................ 12
8.5
PC Software configuration.................................................................................... 12
Appendix B – Modem Configuration ................................................................12
9.1
Configuration of Modems when using the Dial-up Feature.................................. 12
9.2
Equipment Required............................................................................................. 12
9.3
Remote Modem Setup ......................................................................................... 12
9.4
PC Modem SETUP............................................................................................... 12
Appendix C – Upgrading Firmware ..................................................................12
10.1
11
Page 4 of 59
Firmware upgrade steps for Pre V7.00 firmware units......................................... 12
Appendix D – USB Converters..........................................................................12
MTCDS v8-0-5 Manual R8.1
MTCDS Installation & Operation Manual
11.1
Using USB to Serial Converters........................................................................... 12
11.2
Solution ................................................................................................................ 12
12
Glossary of Terms ............................................................................................. 12
13
Abbreviations .................................................................................................... 12
14
Accessories ....................................................................................................... 12
14.1
MultiTrode Outpost............................................................................................... 12
14.2
MT2PC & MT3PC................................................................................................. 12
14.3
MonitorPro Station Supervisor ............................................................................. 12
14.4
MultiTode Probe ................................................................................................... 12
14.5
MultiTode Relays.................................................................................................. 12
MTCDS v8-0-5 Manual R8.1
Page 5 of 59
MTCDS Installation & Operation Manual
1
Warnings & Cautions
Information to User
Read through the manual obtain working knowledge and maximum performance from the product. After
reading, put the manual away in a safe place for future reference.
1.1
Terms used in this Manual
DANGER:
THIS SYMBOL IS USED WHERE NON-COMPLIANCE COULD RESULT IN
INJURY OR DEATH.
WARNING:
THIS SYMBOL IS USED WHERE NON-COMPLIANCE COULD RESULT IN
INCORRECT OPERATION, DAMAGE TO OR FAILURE OF THE
EQUIPMENT.
NOTE:
THIS SYMBOL IS USED TO HIGHLIGHT AN ISSUE OR SPECIAL CASE
WITHIN THE BODY OF THE MANUAL.
NOTICE
This document is proprietary to MultiTrode Pty Ltd (the company) and for sole use within the company notwithstanding that this document may from time to time be made
available to the company’s subcontractors, suppliers, customers and others for purposes associated with manufacturing and other processes as authorised on an individual
basis by MultiTrode Pty Ltd or their representative. In such cases where the document has been issued to external parties, its contents shall not be transcribed, copied, relayed,
or divulged to any other party whatsoever and after satisfying the requirements for which the document was originally issued to any external party shall be either returned to the
Page 6 of 59
MTCDS v8-0-5 Manual R8.1
MTCDS Installation & Operation Manual
company, or destroyed as required by the company’s document control procedure and as attested to by the recipient at the time of taking possession of the document.
MultiTrode Pty Ltd shall not be held liable in any way whatsoever for any act or omission, either direct or consequential, arising from the use of the information contained herein.
MTCDS v8-0-5 Manual R8.1
Page 7 of 59
MTCDS Installation & Operation Manual
Company Profile
Figure 1 - MultiTrode's Brisbane Head Office
Our vision is for MultiTrode to be the world leader in level sensing, pump monitoring and pump station
management systems.
We recognise that total customer satisfaction is integral to the achievement of this vision, and to this end
the company has adopted the following initiatives.
Appropriate solutions
MultiTrode has developed and will continue to produce a complete range of products so that customers
may purchase an appropriate solution for their needs.
The products range from level sensing probes and simple relay based controllers to sophisticated
microprocessor based systems and PC based supervisory control software providing full pump-station
management.
Simplicity of use
All MultiTrode products are designed for easy installation and operation by the end user and are supplied
with complete installation and operating instructions.
Research and development
MultiTrode maintains an extensive research and development program. While taking account of user
needs, we ensure that our products and systems include the best possible technology and provide the
benchmark by which pump-station management systems are measured.
Free technical support
MultiTrode provides free pre and post sale technical support by telephone, fax or email. Any inquiry
regarding the use of our products will be responded to promptly by our engineering support staff.
Global service
Our products are distributed worldwide.
Your investment is protected by our service and support network.
Satisfaction guaranteed
All MultiTrode products are covered by a minimum 2 year warranty and repairs are carried out by our own
highly trained technicians. In a critical situation, customers are supplied with exchange units.
Page 8 of 59
MTCDS v8-0-5 Manual R8.1
MTCDS Installation & Operation Manual
2
Introduction
Congratulations on your purchase of the MultiTrode Control & Diagnostic Software.
Figure 2 – MTCDS Screens
MultiTrode’s Control and Diagnostic Software has been designed to allow operators to view, save or
change current system settings, upgrade product software and to customise the data received, all from
the comfort of their personal computer or laptop. Its main aim is to make the control and monitoring of
MultiTrode systems as easy as possible.
The basic system is designed to integrate with MultiTrode’s range of digital pump controllers and remote
station monitors. Communication, using standard modem, radio and cable systems, allows users to
change or save site details and to access and update reports.
2.1
Features & Benefits of the Control and Diagnostics Software
•
Set pump and alarm levels
•
Set pump and alarm delays
•
Set probe sensitivity
•
Set Electronic DIP Switches (EDS)
•
Access to controls at anytime
•
Tailored trending and reports
•
View trend data in formatted charts
•
Intuitive click and drag settings controls
•
Tailored reports that can be printed out or filed in a database
•
Upgrade products with the latest software
Combining all these features with its ability to generate precise and informative reports makes the
MultiTrode Control and Diagnostic Software stand out from all other packages which offer the user,
control and reporting capabilities for their station management.
Once again, MultiTrode is the answer to all your pump station needs
MTCDS v8-0-5 Manual R8.1
Page 9 of 59
MTCDS Installation & Operation Manual
3
Firmware Compatibility Chart
3.1
How different firmware versions relate to the new MTCDS
MultiTrode has an aggressive policy of continually seeking to improve our products to conform to
customer requirements. These changes inevitably lead to improvements in the product and methods of
interfacing to the products which can cause different versions to not be directly compatible.
Below is a comprehensive description of the new MTCDS and how it relates to existing and new versions
of product firmware.
See “Firmware Compatibility Chart” over page. Firmware is defined as software that is programmed into
the MonitorPRO and Pump Controller, it is identified in the chart by versions numbers, for example;
V7.00; V8.0.5.
Software is defined as an application that runs on a computer. The following software is used in the
chart:
1.
MTSettingsChange is used to extract and change settings on either the MonitorPRO or Pump
Controller.
2.
MTStatLog is used to extract the datalog file information from the MonitorPRO and also show the
remote site status of the Pump Controllers.
3.
MTConfig is used to configure the information for dial-up remote sites.
4.
TinyMon is a software utility that is used to upgrade the firmware (i.e. the program inside the product)
in the MonitorPRO, Remote Reservoir Monitor and Pump Controller.
The MultiTrode Control and Diagnostic Software has the same version number as the firmware that it
uses to upgrade a device so MTCDSVersion8.0.5 has V8.0.5 firmware packaged within it.
Page 10 of 59
MTCDS v8-0-5 Manual R8.1
MTCDS v8-0-5 Manual R8.1
MTSettingsChange can only
read settings from units with
these firmware versions. These
read settings can then be sent
to a unit with V8.0.x firmware.
Settings can be read from and
sent to these firmware versions
MTCDS Version 8.0.5 supports
all firmware versions from
V7.00 to V8.0.5.
MTCDS Version 8.0.5 supports
all firmware versions from
V7.00 to V8.0.5
From V7.00
From V8.0.0
to V8.0.x
to V7.7.3
The above software application
in no way works with Pre V7.00
firmware products.
MTSettingsChange (1)
The above software
applications in no way work
with Pre V7.00 firmware
products.
MTConfig
(3)
MTStatLog (2)
Follow the instructions as described
in the manual.
The unit can be reset from the front
keypad for this upgrade and power
does not need to be cycled.
Follow the instructions as described in
the manual.
All firmware versions V7.00 and above
will be able to be upgraded as the
hardware version will be correct.
Should the hardware version be
correct then follow the steps in
Appendix C.
Only hardware versions 5.00 and
above can be upgraded to V8.0.5. If
the hardware version is too old and
features from V8.0.5 are required,
either purchase a new unit or send the
unit back to the factory for an upgrade.
N.B. To use Tinymon on older
versions of firmware, the existing
settings should be hand extracted
from the product, so they can be reentered after firmware upgrade.
Tinymon (4)
V8.0.5 supports all firmware
versions from V7.00 to V8.0.5
These firmware versions are
supported via a direct
connection.
V7.03a – V7.7.3:
The above software does not
work with these firmware
versions when connected
directly to the RS232
communications port of the
Pump Controller BUT will work
via the RS232 port of the
MonPro.
V7.00 – Pre7.03a:
The above software applications
in no way work with Pre V7.00
firmware products.
MTConfig
(3)
MTStatLog (2)
Settings can be read from and
sent to these firmware versions
MTSettingsChange can only read
settings from units with these
firmware versions. These read
settings can then be sent to a unit
with V8.0.x firmware.
The above software application in
no way works with Pre V7.00
firmware products.
MTSettingsChange (1)
PUMP CONTROLLER
Follow the instructions as described
in the manual.
The unit can be reset from the front
keypad for this upgrade and power
does not need to be cycled.
Firmware versions V7.00 and above
will be able to be upgraded as the
hardware version will be correct.
Follow the instructions as described in
the manual.
Should the hardware version be
correct then follow the steps in
Appendix C.
Only hardware versions 5.00 and
above can be upgraded to V8.0.5. If
the hardware version is too old and
features from V8.0.5 are required,
either purchase a new unit or send
the unit back to the factory for an
upgrade.
N.B. To use Tinymon on older
versions of firmware, the existing
settings should be hand extracted
from the product, so they can be reentered after firmware upgrade.
Tinymon (4)
3.1.1
Pre V7.00
Version of
current
firmware
MONITORPRO
MTCDS Installation & Operation Manual
Using MTCDS Version 8.0.5 via the RS232 Communications Port
Page 11 of 59
MTCDS Installation & Operation Manual
3.2
DIP Switch Settings
3.2.1
Hardware Versions 7.01 and above
As of MonitorPRO Hardware Version 7.01, the eight DIP switches on the rear (DIN rail clip side) of the
unit have been removed. As a result, no DIP switches need to be altered to select between MODEM
(as used with SCADA) and RS232 link (as used for software upgrade and with settings change
program).
This means that when the unit has been set up for SCADA with the radio MODEM, then to perform
MonitorPro software upgrade the unit does not need to have DIP switches changed. Similarly, when
using the RS232 mode for MultiTrode’s Control and Diagnostic Software, no DIP switches need to be
changed.
Note:
When using the RS232 port for a MonitorPRO software upgrade, or for the MultiTrode’s Control and
Diagnostic Software in RS232 mode, any radio which is attached should be turned off, or preferably
unplugged from the MonitorPRO. If this is not done, then transmissions from the radio will occur which can
interfere with SCADA communications to other sites. SCADA transmissions can also interfere with the
software upgrade process.
Reminder:
Once you have finished the MonitorPRO software upgrade or use of the MultiTrode’s Control and Diagnostic
Software, remember to switch the radio back on or plug it back in.
3.2.2
Hardware Version 7.00 and Below
DIP Switches for the configuration of the RS232 and MODEM ports can be found on the rear (DIN rail clip
side) of the MonitorPro’s chassis. The keypad will need to be detached to gain access if the unit is panel
mounted. The eight DIP’s have the following functions:
DIP Number
Function
Default Setting
1
Reserved - Do not change
OFF
2
Reserved - Do not change
OFF
3
MODEM CCITT V23 Mode
OFF
4
MODEM Bell 202 Mode
OFF
5
Modem/ RS232 Selection
OFF
6
Modem/ RS232 Selection
ON
7
Modem/ RS232 Selection
OFF
8
Modem/ RS232 Selection
ON
To enable the modem for use with internal radio modem, set dip switches as follows:
1
2
3
4
5
6
7
8
OFF
OFF
OFF
ON
ON
OFF
ON
OFF
To enable the Rs232 Port for use software upgrades, set dip switches as follows:
1
2
3
4
5
6
7
8
OFF
OFF
OFF
OFF
OFF
ON
OFF
ON
Figure 3 – Dip Switch Settings
Page 12 of 59
MTCDS v8-0-5 Manual R8.1
MTCDS Installation & Operation Manual
4
Installation
4.1
Check the contents:
Please check that all the accessories below have been included with this package.
4.1.1
MultiTrode RS232 Modem Cable
This cable must be used to connect a modem to the MonitorPro in the field. Note that the “MultiTrode RS232 Software Cable” is not
used in the field.
MultiTrode RS232 Modem Cable
This cable must be used to connect a modem to the MonitorPro in the field.
Note that the “MultiTrode RS232 Software Cable” is not used in the field.
MultiTrode RS232 Software Cable
This cable is used, together with the “MultiTrode RS232 Modem Cable”, when a
MonitorPro or Pump Controller is directly connected to a personal computer.
MultiTrode Control and Diagnostic Software CD-ROM
User’s Manual (this manual)
If any of these items are missing or damaged, contact your place of purchase immediately.
4.2
System Requirements
•
Microsoft Windows 95/98, NT Workstation 4.0 or Windows 2000
•
Pentium 120 (or higher)
•
250MB available hard disk space
•
16MB RAM
•
CD-ROM drive
4.2.1
Installation of the MultiTrode CDS software involves the following:
•
Software Installation
•
Hardware Installation
•
PC Communication Configuration
Once these tasks have been completed, you will have a fully functional system
MTCDS v8-0-5 Manual R8.1
Page 13 of 59
MTCDS Installation & Operation Manual
4.3
Software Installation
4.3.1
Follow these steps to install MTCDS
1.
Insert the MTCDS CD into the CD-ROM drive of the PC.
2.
Run Windows Explorer, open the MTCDS directory and run ‘setup.exe’
3.
Read the instructions presented and press ‘NEXT >’ to continue.
4.
Accept the default destination folder C:\Program Files\ MultiTrode Pump Management, or designate
a directory by entering the appropriate path. Press ‘NEXT >’ to continue.
Figure 4 - Default destination folder
5.
Choose the appropriate software package from the list presented and follow the instructions that
display on the screen.
6.
After the installation is complete, select ‘Finish’ when asked. The computer will restart and the
necessary files will be installed.
Page 14 of 59
MTCDS v8-0-5 Manual R8.1
MTCDS Installation & Operation Manual
4.4
Hardware installation
The following describes the hardware connections needed to enable system communications using the
MultiTrode RS 232 cables supplied.
Note:
For information on radio installation, see Appendix A
For information on modem installation, see Appendix B
Alternatively this software package comes with an extensive online Help, accessed by pressing the F1
key. Help contents are shown below:
Figure 5 - Help Contents
4.4.1
1.
Connecting the Modem
Connect the male modem end of the MultiTrode Modem cable to either end of the Software Adapter
cable, as per the diagram below.
Male End
Female End
Software Adaptor Cable
MultiTrode Modem Cable
Figure 6 – Connecting the Modem
WARNING:
Only use the supplied MultiTode connection cables. Using other cables may result in incorrect
operation or even damage to the MultiTode device.
2.
With the MultiTrode Modem and Software Adapter cables in place, position the PC or laptop and/or
the MultiTrode device as to allow ease of connection with.
MTCDS v8-0-5 Manual R8.1
Page 15 of 59
MTCDS Installation & Operation Manual
3.
Connect one end of this cable, to an available port on the PC or laptop and the other end to the
‘Comms Interface’ port on the MultiTrode device:
User’s PC
Mult iTrode Device
Joined Cables
Device’s internal
flash ROM
Figure 7 – Connect the cable to the PC/Laptop and the MultiTrode device.
Note:
The communication interface connection on the Monitor Pro and
Pump Controller is the port to where the RS232 serial cable,
MTCIU cable, radio modem, or telephone modem is connected.
Note:
When connecting directly to a pump controller, EDS 44 (Communications with Network) must be
set to OF. For convenience a shortcut method for changing EDS 44 is shown below.
4.4.2
Set EDS 44 to Off
Simultaneously press ‘Select One’,
‘Select Two’ and ‘Alarm Reset”.
When pressed, an LED test will
commence.
Page 16 of 59
MTCDS v8-0-5 Manual R8.1
MTCDS Installation & Operation Manual
4.5
PC Software Configuration
For successful communications with the MonitorPro or Pump Controller in the field, the Control and
Diagnostics software communications mode settings need to be configured for one of the following
communication devises.
•
RS 232 (MultiTrode Cables - supplied)
•
RS 485 (MultiTrode Computer Interface Unit, MTCIU – not supplied)
•
Radio (MultiTrode approved Radios – not supplied, see Appendix A)
•
Modem (MultiTrode approved Modems – not supplied, see Appendix A)
4.5.1
Software Configuration Procedure
Follow these instructions to configure the communication settings.
1.
After the installation of MTCDS, double-click on the ‘MT Settings Change’ shortcut icon.
The following menu will display.
Figure 8 – MTSettingsChange Menu
2.
Click ‘Communications Options’.
3.
The ‘Options dialog box now appears. Refer to the table on the following page for an explanation of
this screen.
Figure 9 – Communications Options Window
MTCDS v8-0-5 Manual R8.1
Page 17 of 59
MTCDS Installation & Operation Manual
4.
Press the ‘OK’ button. To ignore changes, press ‘Cancel’ or to return to the default settings, press
‘Restore Defaults’.
Note:
If a USB to serial adapter is being used the COM port may need to be checked or changed, refer
to Appendix D for details.
4.5.2
Options Dialogue Definitions
Field
Description
COM Port
Specifies the PC serial communications port that will be use for communicating with the unit.
This is the port to which the RS232 serial cable, MTCIU cable, radio or telephone modem is
to be connected.
If a USB to serial adapter is being used the COM port may need to be checked or changed,
refer to appendix D for details.
RS485
The Settings Change program will communicate with the unit via an RS485 cable. This
requires the use of an MTCIU (MultiTrode Computer Interface Unit) cable, (MTCIU switch
must be set to "Settings Change and Datalog"). This cable needs to be ordered separately.
Communications
Mode
Note:
If you are experiencing communications problems in RS485 mode, try disabling the FIFOs
for the Serial Port of the PC:
For Windows 98, go to Start Menu, 'Settings', 'Control Panel'. Select 'System', and click on
the Device Manager tab. Expand 'Communication Ports' in the list and select the serial port
that being used for this program. Click on 'Properties', then select the 'Port Settings' tab and
press 'Advanced'. Uncheck the 'Use FIFO Buffers' check box.
For Windows NT 4, go to Start Menu, 'Settings', 'Control Panel'. Select 'Ports', then the
serial port that being used for this program. Click on 'Settings', then 'Advanced', and then
uncheck the 'FIFO Enabled' check box.
RADIO The Settings Change program will communicate with the unit via a radio channel.
Requires use of a MTRM (MultiTrode Radio Modem) and pair of UHF radios. See Appendix
A. The MTRM & radios need to be ordered separately.
RS232
The Settings Change program will communicate with the unit via the MultiTrode RS232
cables (supplied), or alternatively an MTCIU cable (MTCIU switch must be set to “Software
Upgrade”).
MODEM
The Settings Change program will communicate with the unit via a telephone modem
connection. Requires use of a pair of Hayes-compatible telephone modems and telephone
line. See Appendix B.
Comms Timeout
The maximum period of time in seconds that the program will wait for a reply from the unit.
This should be set to 15 seconds for optimum performance.
Tx Raise Delay
Reserved
Tx Lower Delay
Reserved
Modem
Initialization
String
Command sequence that is sent to the modem when using dialup. See Appendix B.
Page 18 of 59
MTCDS v8-0-5 Manual R8.1
MTCDS Installation & Operation Manual
5
Overview
The Control and Diagnostic Software consists of two main software packages. Each is designed to allow
various control, monitoring and reporting functions via easy to use graphical interfaces.
To access a particular software program, double-click on the corresponding shortcut icon.
5.1
MultiTrode Settings Change Program
Figure 10 – Settings Change Menu
The MultiTrode Settings Change program enables the user to access the following settings;
•
Monitor Pro
•
Pump Controller
•
SCADA Pump Controller
•
Communication options for PC
•
Dialup connection for modem sites
5.2
MultiTrode Status/Datalog Program
Figure 11 – Status Dialog Icon
Figure 12 – Status Dialog Window
MTCDS v8-0-5 Manual R8.1
Page 19 of 59
MTCDS Installation & Operation Manual
The MultiTrode Status and Datalog program enables the user to access the following;
•
Datalog information from a Monitor Pro.
•
Up-to-date status information of both Monitor Pro and Pump Controller
•
Dialup configuration for -modem sites
•
Communication options for user’s PC.
5.3
MTCDS Utility Packages
The Control and Diagnostic Software also consists of two utility packages. These packages allow for
remote site communications configuration and firmware upgrade via graphical interfaces that are based
on a classic windows “look and feel”. To access a utility package, double-click on the corresponding
shortcut icon.
5.3.1
MultiTrode Dialup Points Configuration
This software enables the user to add or edit remote modem site configuration. See Appendix B for
details.
Figure 13 – Configuration Icon
Figure 14 – Configuration Window
5.3.2
MultiTrode TinyMon Automatic Programmer
The MultiTrode TinyMon program enables the user to upgrade the firmware running on the following
devices:
•
Monitor Pro
•
MT2PC
•
MT3PC
•
Reservoir Monitor
Figure 15 – TinyMon Icon
Figure 16 – TinyMon Window
Page 20 of 59
MTCDS v8-0-5 Manual R8.1
MTCDS Installation & Operation Manual
6
Operation
This section covers the basics of the Control and Diagnostics Software.
6.1
MultiTrode Settings Change Program
Figure 17 – Settings Change Menu
The MultiTrode Settings Change program allows operators to view, save or change current system
settings using established communication between the PC and the relevant pump controller and/or
station monitor.
Communication to the station site is via the RS232 serial cable, MTCIU cable, radio modem, or telephone
modem. To configure the communication network, see Section 6.2.3.
The setting change program has the following main functions:
•
MonitorPro Settings
•
Pump Controller and SCADA Pump Controller Settings
•
DialUp
•
Communication Options
MTCDS v8-0-5 Manual R8.1
Page 21 of 59
MTCDS Installation & Operation Manual
6.2
MonitorPro
Note:
The Operations, File Operations and Communications categories are explained in Section 6.2.2.
From the “Settings Change Menu”, please select “MonitorPro Settings”.
OPERATIONS
FILE OPERATIONS
SETTINGS
COMMUNICATIONS
Figure 18 - Select "MonitorPro Settings" button.
Note:
The purpose of the MonitorPro Settings section is to enable the user to both configure and obtain
settings from a specified station monitor.
Page 22 of 59
MTCDS v8-0-5 Manual R8.1
MTCDS Installation & Operation Manual
6.2.1
Settings
“Settings” is divided up into the following options:
•
Motor Protection
•
Date/Time, Comms, Security, Data logging
•
Analog/Digital Inputs
•
Flow
•
Analog/Digital Outputs
Figure 19 – Motor Protection Button
This function allows the user to configure the pump protection settings for a MonitorPro. For a complete
description of pump protection settings refer to the MultiTrode MonitorPro user manual.
Figure 20 – Date/time and settings Button
This button allows configuration of date/time, communications, security and data logging settings for a
MonitorPro. For a complete description of these settings refer to the MultiTrode MonitorPro user manual.
A user can also receive the date/time settings from the MonitorPro by clicking on the ‘Get Date/Time’
button located on the Date/Time/Unit Details screen. If there is a considerable difference between the
unit’s date/time and that of the user’s PC’s system clock, a notification message is shown. To send the
date and time to the unit, click on the ‘Set System Time’ button and then click ‘Send Date/Time’. This will
result in the designated unit being synchronised with the PC system clock of the user’s PC.
Figure 21 – Inputs Button
This button allows configuration analog and digital input settings for a MonitorPro. For a complete
description of these input settings refer to the MultiTrode MonitorPro user manual.
Figure 22 – Flow Button
This button allows configuration of the flow settings for a MonitorPro. For a complete description of the
flow settings refer to the MultiTrode MonitorPro user manual.
Figure 23 – Outputs Button
This button allows configuration both the analog and digital output settings for a MonitorPro. For a
complete description of these output settings refer to the MultiTrode MonitorPro user manual.
MTCDS v8-0-5 Manual R8.1
Page 23 of 59
MTCDS Installation & Operation Manual
6.2.2
Pump Controller and SCADA Pump Controller Settings
OPERATIONS
OPERATIONS
FILE OPERATIONS
SETTINGS
COMMUNICATIONS
Figure 24 –SCADA/Pump Controller Settings Menu
The Pump Controller interface enables the user to configure and obtain settings from a specified pump
controller unit.
Note:
For further operational functions on the Monitor Pro, see Section 6.2
6.2.2.1
Operations
Note:
If the Pump Controller is connected to a Monitor Pro via a LAN network, ensure EDS 44 is set to
Off.
Using this function, a complete list of all the current settings from a Pump Controller or Monitor Pro can
be obtained. The user will be asked to wait several seconds while the communications process
completes. After the completion of the communications process, the Setting Change Program will contain
all settings of the connected unit.
Note:
MultiTrode does not recommend transmitting 'settings' data via radio link systems as data
corruption may occur. Radio communication systems have inherent signal loss problems.
The purpose of ‘Send Settings’ is to reprogram the Pump Controller or Monitor Pro with newly configured
setting changes or to load settings stored on disk. See Section 6.2.2.2 The user will be informed if any of
the settings will result in the loss of communications between the MultiTrode device and the users PC.
Page 24 of 59
MTCDS v8-0-5 Manual R8.1
MTCDS Installation & Operation Manual
Figure 25 – System Reset prompt
Upon completion of the data send, the pump controller will perform a system reset and the following
dialog box will appear. If necessary, reinitialise LAN communications and press ‘OK’.
This function can be used to configure a Pump Controller/Monitor Pro with its original factory default
settings. To do this click ‘Reset Defaults’ followed by the ‘Send Settings’ function button.
6.2.2.2
File Operations
File operations consist of;
•
Save Settings
•
Load Settings
•
Print Preview
This function provides a mechanism for saving Pump Controller/Monitor Pro settings for future reference
(current unit settings can be obtained using the ‘Retrieve Settings’ function).
Saving system settings safeguards against data loss from system failure, accidental overwrite or data
deletion. It can also be used as a basis for making any new changes to the system. When saving
system data, ensure the chosen file name accurately describes the site.
This function will load Pump Controller/ Monitor Pro settings from a file on disk into the system view. This
is useful for reinstating the units settings where the data has been corrupted or after a TinyMon firmware
upgrade.
MTCDS v8-0-5 Manual R8.1
Page 25 of 59
MTCDS Installation & Operation Manual
This function provides a method for printing a hardcopy of the settings. When the print preview button is
clicked, a preview of the settings is displayed. The user can edit the text and then print, copy, or save to
disk in rich text format file (.rtf).
Figure 26 – Print Preview Window
6.2.3
Communications
This section of the graphical interface is comprised of:
•
Site Number
•
Group Number
•
Unit Type
Site Number:
The number to which the remote site
has been assigned.
Unit Type:
The unit may be master or slave type.
Only required if using multiple MonitorPro’s.
Group Number:
The number to which the Pump controller belongs. Only required if using Rs485
communications. For other communications modes, the unit must be Group Number 1.
Figure 27 – Communications Options
Page 26 of 59
MTCDS v8-0-5 Manual R8.1
MTCDS Installation & Operation Manual
6.2.4
Exit
Clicking ‘Exit’ terminates this part of the program. If any changes to system data have been made, saving
the data before exiting is recommended.
If connected to a system via a RS232 cable, the following dialog box will be displayed upon exit:
Figure 28 – Reinitialise LAN comms dialog box
6.2.5
Level, Delay and EDS Settings
The process for the configuration of pump and alarm activation/deactivation levels, pump delay settings
as well as Electronic DIP Switches (EDS), used to configure the majority of functions within the pump
controller, is explained here.
For further information on the Monitor Pro Interface operation, see section 5.1.3.1.
Note:
Consult the MultiTrode Pump Controller manual for setting descriptions, defaults and allowable
ranges.
6.2.5.1
Controls and Indicators
Controls and indicators allow configuration of the pump controller settings to suit the specific application
and consist of drop-down menus and sliders with value indicators.
Drop-Down Menus
Drop-down menus are assigned to EDS settings and provides the user with a complete range of
selectable values.
To access the drop-down menu, click the button
on the right-hand side of the appropriate dialog.
Click on the desired value to nominate the selection.
MTCDS v8-0-5 Manual R8.1
Page 27 of 59
MTCDS Installation & Operation Manual
6.2.5.2
Sliders
The pump controller settings program offers two different types of sliders, incremental and analog.
Incremented sliders align to the desired value reference line when moved.
Click on and hold the left mouse button to move the slide controller to the desired position. Releasing the
mouse button sets the slider to the new position.
Analog sliders allow change of variable indicators by changing slider position. The value indicator will
increase as the slider is moved up and decrease when moved down.
Page 28 of 59
MTCDS v8-0-5 Manual R8.1
MTCDS Installation & Operation Manual
6.2.6
Configurable Pump Controller Settings
Note:
Consult the MultiTrode Pump Controller manual for setting descriptions, defaults and allowable
ranges.
•
EDS Settings 1-87
All 87 EDS’s are available within the Pump Controller settings interface.
•
Pump Levels Normal / Pump Levels Peak
Contains the level settings for a maximum of three pump controllers and caters for peak/normal level
and charge/discharge mode settings.
•
Alarm Levels
Contains normal and peak alarm level settings for alarms 1 and 2. This setting is for a maximum of
three pump controllers, one Master and two Slave units.
•
Pump Delays
Contains the normal and peak activation/deactivation pump delays for pumps 1, 2, and 3. Maximum
of three pump controllers.
•
Alarm Delays
Contains activation and deactivation alarm delays for alarms 1 and 2. Maximum of three pump
controllers.
•
Sensitivity and Zero Span
Contains zero-span and probe sensitivity level settings for the Master Pump Controller.
•
VFD Settings Normal and Peak
Contains the Variable Frequency Drive settings. Maximum of three pump controllers.
6.2.7
DialUp
The dialup connection allows connection to a remote modem site. See Section 7, MultiTrode DialUp
Points Configuration for details on adding or editing modem site details.
Figure 29 – Dialup Connection
To establish a connection, highlight a phone number from the list provided and click on the Dial button. A
successful connection will result provided the phone number is valid. After establishing this connection,
click on the ‘HangUp’ button to disconnect.
MTCDS v8-0-5 Manual R8.1
Page 29 of 59
MTCDS Installation & Operation Manual
6.3
MultiTode Status/Datalog program
Figure 30 - MultiTode Status/Datalog program
The MultiTrode Status/Datalog program allows the operator to view up-to-date system status information,
store records of events that have occurred and log system events or time-based periodical values. This
program relies on establishing communications between the PC and the relevant pump controller and/or
station monitor.
The Status/Datalog program has four system options
•
Datalog
•
Status
•
DialUp
•
Communications Options
6.3.1
DialUp
The Dialup Connection allows the user to establish a connection with a remote modem site. See section
5 (Dial Up) for more information.
6.3.2
Communications Options
Communication to the station site is via the RS232 serial cable, MTCIU cable, radio modem, or telephone
modem. To configure the communication network, see Section 4.5.
Page 30 of 59
MTCDS v8-0-5 Manual R8.1
MTCDS Installation & Operation Manual
6.3.3
DataLog
This screen provides an interface for downloading datalog entries from a MonitorPro.
Receive one page of data at a time
in either a forwards (Next)
or backwards (Previous) direction.
Reads from where data was last
downloaded so that only new data
entries are shown.
Obtain a complete copy
of the datalog
Guide to how much data
still needs to be read.
Figure 31 – Datalog Screen
Stops a datalog download process or used to close the datalog application. Remember to save any
changes made before exiting the application.
Used to open previously saved datalog files. A datalog file has a Microsoft Access (.mdb) filename
extension.
Note:
This function will only load a file with an .mdb extension. Ensure that the datalog is saved as a
Microsoft Access© database (.mdb extension).
MTCDS v8-0-5 Manual R8.1
Page 31 of 59
MTCDS Installation & Operation Manual
This allows the data currently displayed in the datalog to be saved to either a Microsoft Access© database
(.mdb extension) file or as a Comma Space Delimited (.csv extension) file, for use with Microsoft Excel© ,
Lotus 1-2-3 © or other spreadsheet programs. Normal spreadsheet capabilities can be used to format the
datalog information that has been saved.
To change the type of file that the datalog is saved to, select the desired type from the ‘Save as type’ box
in the ‘Save’ screen.
Note:
©
To Load the datalog into MTStatlog again it is necessary to save the file as a Microsoft Access
database (.mdb extension) file.
The datalog can be saved twice, using a different file format extension each time. To do this,
save using one file format (e.g. Microsoft Access© file) extension and then press the save button
again this time using the other file format (e.g. Comma Space Delimited file).
This function is very similar to the ‘Next’ function except that it gets the page before the read pointer. This
also sets the read pointer to the beginning of the data just read. This means that if the 'Previous' function
is used repeatedly, the pages will be read moving backward from the read pointer, until the read pointer
reaches the beginning of the datalog.
If this function is used in conjunction with Set To End, the entire datalog can be read backwards.
This function retrieves a single page (2K Bytes) of data from the datalog. This data is read from the
current read pointer. The read pointer is also moved forward to allow retrieval of the next data in the log.
This allows the user to get the entire datalog, a page at a time, by using this function continuously until
reaching the end of the datalog.
This function downloads the entire datalog from the beginning of data (the oldest data) to the end (the
newest data). This means that any data previously read will be retrieved again.
It is recommend that an operator use this function if it has been longer than three weeks since the last
datalog download from the unit. Users of this function should note that if the datalog of the MonitorPro
were full, then this function will take approx 20 minutes (RS232 mode), 40 minutes (RS485 mode), or 100
minutes (Radio or Modem mode) to complete. Performing regular datalog downloads from the unit
avoids building up these lengthy delays.
This function provides a means of sorting the entire list of downloaded entries according to Date, Time
and ID. The resulting sorted data is displayed at the top of the previously unsorted datalog entries.
Page 32 of 59
MTCDS v8-0-5 Manual R8.1
MTCDS Installation & Operation Manual
This function allows the user to retrieve any new datalog entries that have been logged on the MonitorPro
since the last time this program was used to download data. By using this function the entire datalog
does not have to be downloaded. This function should only be used if downloads from the MonitorPro
are performed on a regular basis.
This is the preferred operation for normal use of the datalog since it only retrieves data which has not
previously been read. The normal way to use this is to Load the data previously retrieved from a file on
disk, then do a 'Get to End' to retrieve the new data. The new data will be appended to the old.
Example of Typical Download
The logging of flow, level, fault, and start/stop information for an average of 5 pump cycles/hour would
result in 75 datalog entries per hour. One page of the MonitorPro’s datalog can contain a maximum of
256 entries; a full datalog (192 pages) would contain 49152 entries. In this example, it would take
approximately 27 days for the MonitorPro’s datalog to become completely full. To prevent data loss (this
can happen if the datalog becomes full), the operator should perform regular downloads with a maximum
desired period of 3 weeks.
This function sets the 'Read Pointer' to the beginning of the datalog. This can be used to re-read old
data.
This function sets the 'Read Pointer' to the end of the datalog (where the latest data is being written).
This can be useful for two purposes:
1.
To ignore all old data and set the unit so that the next data read will contain new entries only.
2.
To look at the most recent data in the log perform a 'Set to End’ to set the read pointer to the end of
the datalog (the most recent data). Then use ‘Get Previous’ to read the most recent data backwards
from the end.
MTCDS v8-0-5 Manual R8.1
Page 33 of 59
MTCDS Installation & Operation Manual
6.3.4
Status
The Status section provides an up-to-date view of the status of both a MonitorPro and accompanying
Master Pump Controller (if present). This is not an exhaustive account of all the information available, but
contains the most important parts.
Figure 32 – Status Screen
The program will call for the current status of the unit(s) once only. The user may click the ‘Start Polling’
button to begin the status cycle that will repeat at the interval set in the ‘Communications Options’ section
of the program. To stop this cycle, the click on the ‘Stop Polling’ button.
When a connection with the remote site is established, the Pump screens present information pertaining
directly to individual pump sites.
As with the Control Panel screen, the user is presented with the Manual, Off and Auto buttons, but only
for the selected pump. Also present is the same fault Reset button that appears in the Control Panel
screen.
The Pump screen also provides a list of possible Pump Controller and MonitorPro faults, a red light
indicates a fault at site.
Page 34 of 59
MTCDS v8-0-5 Manual R8.1
MTCDS Installation & Operation Manual
Figure 33 –Alarm Screen
The Alarm/Supply screen shows the status of:
•
Site’s level alarms
•
Mains or DC supply values (along with warning lights should these values drop below or exceed their
set limits)
•
Communications failure warning light
•
Total flow meter
The ‘Alarm Reset’ button will reset any unacknowledged level alarm condition
MTCDS v8-0-5 Manual R8.1
Page 35 of 59
MTCDS Installation & Operation Manual
6.4
TinyMon Automatic Programmer
Figure 34 – TinyMon Automatic Programmer
The MultiTrode TinyMon program allows the operator to update system hardware with the latest firmware.
•
Firmware upgrade is based upon the product model and hardware version
•
Simple graphical user interface, provides a classic windows look and feel
•
This program has the ability to utilise any serial port on the PC
The TinyMon software facilitates the upgrade of firmware in the following MultiTrode products:
•
MonitorPro (firmware versions 2.25, 7.04 to 8.05)
•
Pump Controller (MTxPC – firmware versions 4.25, 5.25, 6.25, 7.04 to 8.0.5)
•
Reservoir Monitor (firmware versions 2.25, 7.04 to 8.0.5)
•
Communication between the user’s PC and the MultiTrode device is only available via the RS232
serial communication cables supplied.
Note:
It is recommended, before upgrading any hardware, that a current list of settings for the
particular unit is recorded.
User’s PC
MultiTrode Device
Joined Cables
Page 36 of 59
Device’s internal
flash ROM
MTCDS v8-0-5 Manual R8.1
MTCDS Installation & Operation Manual
Once communications are established, TinyMon will reprogram the device’s internal Flash ROM with the
latest firmware version.
MTCDS v8-0-5 Manual R8.1
Page 37 of 59
MTCDS Installation & Operation Manual
The TinyMon dialog box contains the following controls:
COM Port Selection Box:
Displays only the available COM ports on the system.
Program Button:
Activates the programming of the RAM and FLASH ROM.
The button remains inactive until the user has selected a
device and firmware version. If the user reselects the
device they wish to program, this button again becomes
inactive until firmware is once again selected.
Help Button:
This button presents the user with a help file explaining
the general operation of the TinyMon application.
Exit button:
This button has two operational modes. During the
reprogramming process, the ‘Exit’ button is delegated as
the ‘Abort’ button and pressing at this time will cancel the
programming of the device. Pressing at any other time
will close TinyMon.
Firmware selection box:
Shows the available firmware upgrades based upon the
result of the Device selection combo box. The box
remains inactive until communications have been
established.
Figure 35 - TinyMon Dialog Box
Device selection box: Shows the devices available for
upgrade. This combo box remains inactive until
communications have been established.
Check Software button: This button only appears once an
MTxPC has been selected as the device. Pressing this
button opens another window showing what extra
functionality the unit has (e.g. VFD enabled or SCADA
enabled).
Page 38 of 59
MTCDS v8-0-5 Manual R8.1
MTCDS Installation & Operation Manual
6.4.1
Firmware Upgrade Procedure
The follow is detailed procedure for firmware upgrade of MultiTrode devices.
To install TinyMon, the following items are needed. They are included in the Control and Diagnostic
package.
•
MultiTrode Modem cable
•
Software Adapter cable
As previously mentioned, communication between the user’s PC and the MultiTrode device is only
available via the RS232 serial communication cables supplied with this software package.
Note:
It is recommended, before upgrading any hardware that a current list of settings for the particular
unit is recorded, as the unit’s settings may change during the upgrade procedure.
1.
Connect the male modem end of the MultiTrode Modem cable to either end of the Software Adapter
cable.
Male End
Female End
Software Adaptor Cable
MultiTrode Modem Cable
Note:
Only use the supplied MultiTrode connection cables. Using other cables may result in incorrect
operation or damage to the MultiTrode device.
2.
With the MultiTrode Modem and Software Adapter cables now connected, position the PC or laptop
and/or the MultiTrode device as to allow ease of connection with the connected cables.
3.
Connect one end of this cable, to an available port on the PC or laptop and the other end to the
‘Comms Interface’ port on the MultiTrode device. As per the diagram below.
User’s PC
MultiTrode Device
Joined Cables
MTCDS v8-0-5 Manual R8.1
Device’s internal
flash ROM
Page 39 of 59
MTCDS Installation & Operation Manual
The comms interface connection on the Monitor Pro, Reservoir Monitor, and
Pump Controller is the port to which the RS232 serial cable, MTCIU cable,
radio modem, or telephone modem is to be connected.
4.
Double-click the ‘TinyMon’ icon, on the desktop, to launch the program.
Figure 36 - TinyMon Desktop Icon
Figure 37 - TinyMon Window
5.
Select the ‘COM’ port to which the MultiTrode device is connected.
Note:
Between steps 5 and 6, there is a 10-second time limit period in which to perform a full reset. It
is recommended that the user carefully read through these steps before proceeding.
Page 40 of 59
MTCDS v8-0-5 Manual R8.1
MTCDS Installation & Operation Manual
6.
Once the ‘COM’ port has been selected, perform a full reset of the device using one of the following
appropriate methods:
For Monitor Pro and Reservoir Monitor units:
•
Simultaneously press ’Left’, ‘Right’, and ‘Help’ buttons.
Figure 38 – Reset the MonitorPro device
For MTxPC units:
•
Simultaneously press ‘Select One’, ‘Select Two’, and ‘Duty Select’ buttons.
•
A lamp test commences.
Figure 39 – Reset the MTxPC device.
7.
Wait for communications to be established. If the following dialog box appears, please check the
MultiTrode unit and cable connections. Press ‘OK’ and repeat steps 5 through 6.
Figure 40 – Communications error message.
If communications have been successfully established between the MultiTrode unit and the PC, the
following dialog box appears. Press ‘OK’.
Figure 41 – Communications established message.
MTCDS v8-0-5 Manual R8.1
Page 41 of 59
MTCDS Installation & Operation Manual
8.
Select the MultiTode device from the drop-down
list.
9.
Select the firmware version to be installed onto
the unit.
10. The ‘Program’ button is now enabled. Press this button to program the device with the selected firmware
version. The device and firmware may be re-selected before clicking ‘Program’. The Exit button (before
programming starts) will terminate the TinyMon application, leaving the original firmware still in the
MultiTrode unit.
11. Programming may take approximately 5 minutes.
These indicators show the file and the progress of the
firmware being downloaded.
Pressing the Abort button will cancel the programming of the unit and return the user to the COM port selection
screen. The device will now be in an indeterminate state. Reselect, and then reprogram the device with the
appropriate firmware application.
Note:
Never operate a MultiTrode product without the correct firmware installed.
12. Once programming is complete, press ‘OK’. The firmware selected is
now embedded into the MultiTrode device. To ensure that the device
operates correctly, it is advisable to reload the devices settings saved
prior to the firmware upgrade.
Page 42 of 59
MTCDS v8-0-5 Manual R8.1
MTCDS Installation & Operation Manual
7
Dialup Points Configuration
The MultiTrode Dialup Points Configuration program allows the user to add or edit remote modem site
details. Only used for Modem connections.
Figure 42 - Dialup Points Configuration Interface
1.
On the Dialup Points Configuration interface, click on the ‘Add’ button. The ‘Enter New Site Details’
dialog box will appear.
Figure 43 - New Site Details window
2.
In the ‘Site Description’ field, type the new site’s area location, short and descriptive as possible.
3.
In the ‘Phone Number’ field, type the new modems contact phone number, include all area codes.
4.
When completed, press ‘OK’.
MTCDS v8-0-5 Manual R8.1
Page 43 of 59
MTCDS Installation & Operation Manual
To edit a site, simply highlight the field and type the new
information.
To delete a site, press the corresponding left-hand-side marker,
this highlights the entire dialup site, pressing the Delete button
will then permanently remove this site.
Figure 44 - Edit/Delete Sites Screen
Page 44 of 59
MTCDS v8-0-5 Manual R8.1
MTCDS Installation & Operation Manual
8
Appendix A – Radio Configuration
8.1
Radio Link Communication
This document details the steps required to install radios when using the dialup feature in the MultiTrode
Control and Diagnostic Software (MTSettingsChange and MTStatlog programs) and a MultiTrode Monitor
Pro (not to used with Pump Controllers).
Two radio modems and radios are required when using this feature. One radio modem and radio is
located at the PC end and the others are located at the MultiTrode Monitor Pro (remote) end.
Note:
Radio communication systems have inherent signal loss problems.
The dial-up feature operates in the following manner:
PC Radio
User’s PC
PC Radio
Modem
Remote Radio
The MTCDS software uses a radio via a
radio modem to communicate to another
radio at the remote site.
The radio modem at the remote site
automatically answers the call.
A data connection is automatically made
Remote Radio Modem
between the modems.
The MTCDS software may then be used
to retrieve the settings data from the
Multitrode device.
MultiTrode Device
Note:
MultiTrode does not recommend transmitting ‘settings’ data to a MultiTrode device via radio link
systems, as data corruption may occur.
MTCDS v8-0-5 Manual R8.1
Page 45 of 59
MTCDS Installation & Operation Manual
8.2
Equipment Required
•
Monitor Pro
•
2 x MTRM-1 radio modems (contact the nearest MultiTrode supplier)
•
2 x radio (see table below for list of approved radios)
•
Coax cables (not-supplied)
•
Antennas
•
PC with a spare COM port, and running the MultiTrode Control and Diagnostic Software.
Radio brand
Model
Motorola
M120 and M130
Maxon
SD- 125U2 Data Radio
Maxon
SM 2450 Base Station
Tait
2015 Data Radio
8.3
Remote Radio Installation
Perform the following steps to install the remote radio:
1.
Connect an MTRM-1 radio modem to a ‘MODEM’ port on the Monitor Pro.
2.
Connect the MTRM-1 radio modem to the Radio using the radio cable.
3.
Connect the antenna.
4.
Connect power to the radio.
5.
Connect power to the MTRM-1 using the supplied cable or plug pack.
8.4
PC Radio Installation
Perform the following steps to install the PC radio:
1.
Connect an MTRM-1 radio modem to a communications port on to the PC using the MultiTrode
Control and Diagnostic software. MultiTrode recommends COM Port 3 for the radio channel.
Note:
The radio modem must connect to one of the ports on the ‘communication port card’ (which is
plugged into the bus). It must not be installed on one of the communication ports that our
connected to the motherboard, as these ports do not support radio comms data.
2.
Connect the MTRM-1 radio modem to the Radio using the radio cable. Check the rear label of the
MTRM-1 to ensure the modem is configured correctly for the type of radio used. An approved
MultiTrode Radio must be used.
3.
Connect the antenna.
4.
Connect power to the radio.
5.
Connect power to the MTRM-1 using the supplied cable or plug pack.
Page 46 of 59
MTCDS v8-0-5 Manual R8.1
MTCDS Installation & Operation Manual
8.5
PC Software configuration
Performing the following steps configures the PC software:
1.
Run the MTSettingsChange or MTStatlog program.
2.
From the main form, click the ‘Communication Options’ button.
The following dialog box appears:
Figure 45 - PC Software Configuration Screen
Enter the following settings in the ‘Options’ dialog box:
Communications Mode:
Select ‘RADIO’.
Comm Port:
Select the PC COM port number that radio is connected to
(MultiTrode recommends Com 3).
Comms Timeout (sec):
15
Tx Raise Delay (mS):
5
Tx Lower Delay (mS):
5
3.
Press the ‘OK’ button. This completes the PC software configuration.
MTCDS v8-0-5 Manual R8.1
Page 47 of 59
MTCDS Installation & Operation Manual
9
Appendix B – Modem Configuration
9.1
Configuration of Modems when using the Dial-up Feature
This document details the steps required to configure the modems when using the dialup feature in the
MultiTrode Control and Diagnostic Software (MTSettingsChange and MTStatlog programs).
Two modems are required when using this feature. One modem is located at the PC end and the other is
located at the MultiTrode device (remote) end.
Std Null
Modem Cable
MutiTrode Modem
Cable (supplied)
Telephone Line
PC Modem
Remote Modem
MultiTrode Device
User’s PC
Figure 46 – Modem Configuration
The dial-up feature works in the following manner:
•
The PC software uses a modem to dial-up another modem at the remote site.
•
The modem at the remote site automatically answers the call.
•
A data connection is automatically made between the modems.
•
The PC software may then be used to modify the settings or to retrieve the stored datalog from the
MultiTrode device at the remote site.
Note:
Please ensure that there is no other equipment (e.g. fax machines or other modems) connected
to the telephone line.
9.2
Equipment Required
•
2 x telephone modems (see modem approval list below)
•
1 x standard RS232 modem cable
•
1 x MultiTrode Modem cable (supplied)
•
Telephone line
•
PC with a spare COM port, and running the MultiTrode Control and Diagnostic Software.
Modem brand
Model
Hayes
Accura 336 Message Modem
3Com / US Robotics
56K Voice Faxmodem
Netcomm
Roadster 56 Ultra
Dynalink
V1433VQE
Page 48 of 59
MTCDS v8-0-5 Manual R8.1
MTCDS Installation & Operation Manual
9.3
Remote Modem Setup
9.3.1
Remote Modem Configuration
1.
Connect the modem to the spare PC COM port using a standard RS232 modem cable.
2.
Turn on the modem.
3.
Run the Windows HyperTerminal program, by selecting:
Start button ∗ Programs ∗ Accessories ∗ HyperTerminal ∗ HyperTerminal
4.
Under ‘Name’, enter a description such as “Modem config”. Press the ‘OK’ button.
Figure 47 - Modem Configuration - Software
5.
The ‘Connect To’ dialog box appears. In the ‘Connect using’ box, select ‘COMx’ where x is the PC
COM port to which the modem is connected. Press the ‘OK’ button.
Figure 48 - Connection Dialog
MTCDS v8-0-5 Manual R8.1
Page 49 of 59
MTCDS Installation & Operation Manual
6.
The ‘COM Properties’ dialog box now appears. Make the selections as per the following figure.
Press the ‘OK’ button.
Figure 49 - Com Properties Dialog
7.
The main ‘HyperTerminal’ window now appears. Type “at” and press [Enter]. The modem should
respond with the response ‘OK’, displayed in the main window.
Figure 50 - HyperTerminal Window
Page 50 of 59
MTCDS v8-0-5 Manual R8.1
MTCDS Installation & Operation Manual
8.
In the ‘HyperTerminal’ window, enter the strings as listed in the table below, followed by [Enter].
Check that the response “OK” is displayed after entering each string.
Figure 51 –HyperTerminal “string” entry window
Modem brand
Model
Hayes
Accura 336 Message Modem
3Com / US
Robotics
56K Voice Faxmodem
Netcomm
Roadster 56 Ultra
Dynalink
V1433VQE
Other
9.
String
AT&FS0=3&K0 [Enter]
AT&W0 [Enter]
AT&Y0 [Enter]
AT&FS0=3&K0&H0&R1 [Enter]
AT&W0 [Enter]
ATY0 [Enter]
AT&FS0=3&K0&D0%C0\N1+MS=1,1,1200,1200 [Enter]
AT&W0 [Enter]
AT&Y0 [Enter]
AT&FS0=3&K0 [Enter]
AT&W0 [Enter]
AT&Y0 [Enter]
Contact the place of purchase.
Turn off the modem and disconnect from PC. This completes the remote modem configuration.
MTCDS v8-0-5 Manual R8.1
Page 51 of 59
MTCDS Installation & Operation Manual
9.3.2
1.
Remote Modem Installation
Using the MultiTrode Modem cable (supplied), connect the modem to the MultiTrode device via the
port marked ‘Comms Interface’
Figure 52 - Comms Interface Port
WARNING:
Only use the supplied MultiTrode connection cables. Using other cables may result in incorrect
operation or even damage to the MultiTrode device.
2.
Connect the modem to a telephone wall socket. Refer to manufacturer’s instructions.
3.
Turn on the modem. This completes the remote modem installation.
Std Null
Modem Cable
PC Modem
MutiTrode Modem
Cable (supplied)
Telephone Line
Remote Modem
User’s PC
MultiTrode Device
Figure 53 - Remote Modem Installation
9.4
PC Modem SETUP
9.4.1
PC Modem Installation
1.
Connect the modem to a spare PC COM port using a standard RS232 modem cable.
2.
Turn on the modem. This completes the PC modem installation.
Page 52 of 59
MTCDS v8-0-5 Manual R8.1
MTCDS Installation & Operation Manual
9.4.2
PC Software configuration
1.
Run the MTSettingsChange or MTStatlog program.
2.
From the main form, click the ‘Communication Options’ button. The following dialog box appears:
Figure 54 - Communications Options
3.
Enter the following settings in the ‘Options’ dialog box:
Com Port
Select the PC COM port number that the modem is connected to.
Communications Mode:
Select ‘MODEM’
Comms Timeout (sec):
Modem Initialization
String:
15
Enter the modem initialisation string according to the table below.
Modem brand
Model
String
Hayes
Accura 336 Message Modem
AT&FS37=5
3Com / US
Robotics
56K Voice Faxmodem
AT&F&N2
Netcomm
Roadster 56 Ultra
AT&F&K0&D0%C0\N1+MS=1,1,1200, 1200
Other
4.
Contact the place of purchase.
Press the ‘OK’ button. This completes the PC software configuration.
MTCDS v8-0-5 Manual R8.1
Page 53 of 59
MTCDS Installation & Operation Manual
10 Appendix C – Upgrading Firmware
10.1
10.1.1
Firmware upgrade steps for Pre V7.00 firmware units
Monitor Pro
1.
Hand-extract the settings and configurations from the unit.
2.
Switch power OFF to the unit.
3.
Check section 3 to see if DIP switches require changing. Ensure the DIP switches are returned to
their original state after firmware upgrade.
4.
Connect both the Modem and Software cables together and connect these cables between the unit
and the computer.
5.
Run TinyMon and follow the instructions in Section 6.4.
10.1.2
MTxPC
1.
Hand-extract the settings and configurations from the unit.
2.
Switch power OFF to the unit.
3.
Connect both the Modem and Software cables together and connect these cables between the unit
and the computer.
4.
Run TinyMon and follow the instructions in Section 6.4.
Page 54 of 59
MTCDS v8-0-5 Manual R8.1
MTCDS Installation & Operation Manual
11 Appendix D – USB Converters
11.1
Using USB to Serial Converters
A serial port connected through the USB is assigned a COM port number by the operating system.
Sometimes the number is outside the range COM1 - COM4. MTCDS cannot communicate on serial ports
outside this range.
11.2
Solution
The assigned port number can be changed from the computer control panel using the following
procedure:
1.
Open the Control Panel and switch to "classic view" if using win XP
2.
Double Click "System", click "Hardware" and "Device Manager"
3.
Expand the "Ports" item by clicking on the plus sign (+)
Figure 55 - This is the serial port for the USB to serial connection. Note that the COM port is outside of the 1-4 range
1.
Find the item in the list for the USB to Serial converter
2.
Right click the list item and select "Properties"
3.
Click on "Port Settings" and "Advanced"
4.
Change the Port Number to be within the range COM 1-4
Figure 56 - Change the port number if required (the value shown is OK)
MTCDS v8-0-5 Manual R8.1
Page 55 of 59
MTCDS Installation & Operation Manual
12 Glossary of Terms
Activation Level
The point at which a pump or alarm is switched On.
Alternate Mode
The pump controller is automatically alternating (switching or changing) between the
two pumps.
Charge Mode
When the pump controller is set to fill a tank or pit.
Cleared Fault
A fault which has occurred is no longer present and has been reset by the operator.
Deactivation Level
The point at which a pump or alarm is switched Off.
Decommissioned
Pump
A pump that has been removed from duty or an installation, e.g. for maintenance
purposes.
Discharge Mode
When the pump controller is set to empty a tank or pit.
Duty Pump
The main pump or the first pump to start within a pumping cycle.
Fixed Sequence
Pump 1 or pump 2 is fixed as the duty pump.
InterPump Start Delay
The delay between any two pumps starting.
InterPump Stop Delay
The delay between any two pumps stopping.
Present Fault
A current fault condition exists.
Standby Pump
The secondary pump or the next pump to start within a pumping cycle.
Probe
MultiTrode manufactures a range of conductive level sensors. They have many
advantages over traditional devices such as ball floats. Advantages include: resistance
to fatty deposit build-up, tangle-free and an adjustable sensitivity to liquid to prevent
false readings.
13 Abbreviations
Ω
Resistance Value (Ohm)
EMC
Electromagnetic Compatibility
Hz
Frequency (Hertz)
LED
Light Emitting Diode
MTPC
MultiTrode Pump Controller
N/O
Normally Open
VAC
Alternating Current Voltage
VDC
Direct Current Voltage
Page 56 of 59
MTCDS v8-0-5 Manual R8.1
MTCDS Installation & Operation Manual
14 Accessories
14.1
MultiTrode Outpost
The MultiTrode Outpost management system is a centralised system, enabling the user to monitor and
assume full control of over 300 points at each pump station, 24 hours a day.
It’s a powerful and cost effective management solution:
•
Reducing running costs.
•
Increased reliability.
•
Easy maintenance and upgrades.
•
Provides management with vital information for productive organisations.
Figure 57 –Outpost Screens
14.2
MT2PC & MT3PC
These products make many of the control components found in pump switchboards redundant. Their
simplified design, ease of installation and reduced construction, together with reduced operating and
maintenance costs make them market leaders in pump control systems.
Figure 58 –The MultiTode Duplex and Triplex Pump Controllers
MTCDS v8-0-5 Manual R8.1
Page 57 of 59
MTCDS Installation & Operation Manual
14.3
MonitorPro Station Supervisor
Figure 59 - MonitorPro Station Supervisor
The MultiTrode MonitorPro will monitor, control, display and log all functions in a multi-pump station. In
conjunction with a MT2PC or MT3PC, the MonitorPro, will eliminate the majority of individual conventional
logic control and protection devices required in a typical pump station. Many expensive functions such as
flow monitoring, advanced motor protection, pump protection and data communication, are included in
this cost effective control unit
14.4
MultiTode Probe
The patented MultiTrode probe has proved to be the most reliable and costeffective liquid level control system available. It was designed for the
arduous and turbulent conditions encountered in municipal wastewater.
This probe was still fully operational despite the build-up. The operator is
pulling the probe through the standard cleaning bracket to clean off the
build-up.
14.5
MultiTode Relays
The MTR level relay has proven itself to be simple and extremely reliable in
pump stations everywhere. The MTR controls one pump or one alarm. The
MTRA controls one pump and one alarm
Page 58 of 59
MTCDS v8-0-5 Manual R8.1
MTCDS Installation & Operation Manual
MultiTrode Pty Ltd—UK Operations
Ivybridge, Devon
Tel: +44 1752 547355
Fax: +44 1752 894615
E-mail:[email protected]
MultiTrode Pty Ltd—Head Office
Brisbane Technology Park
18 Brandl Street
PO Box 4633
Eight Mile Plains Qld 4113
Ph: +61 7 3340 7000
Fx: +61 7 3340 7077
E-mail: [email protected]
MultiTrode Inc—USA
Unit 3, 990 South Rogers Circle
Boca Raton Florida 33487
Tel: +1 561 994 8090
Fax: +1 561 994 6282
E-mail: [email protected]
Visit www.multitrode.com for the latest information
MTCDS v8-0-5 Manual R8.1
Page 59 of 59