1
PrintList Pro
User Manual
Version 4.7.1
e-Node
30 rue de la République
33150 Cenon
France
www.e-node.net
Copyright and Trademarks
Copyright and Trademarks
All trade names referenced in this document are the trademark or registered trademark of their
respective holders.
PrintList Pro is copyright Beckware LLC and exclusively published worldwide by e-Node.
4th Dimension, 4D Compiler, 4D, 4D Server, 4D Client, and 4D Insider are trademarks of 4D SAS.
Windows, Excel and Vista are trademarks of Microsoft Corporation.
Macintosh, MacOS and MacOS X are trademarks of Apple, Inc.
2
Table of Contents
Copyright and Trademarks
2
Table of Contents
3
About PrintList Pro
9
Compatibility Information......................................................................................................................... 9
Technical Support..................................................................................................................................... 9
Registration............................................................................................................................................ 10
License types......................................................................................................................................... 10
Using the PrintList Pro Manual............................................................................................................... 11
Cross-Referencing Format..................................................................................................................... 11
Command List........................................................................................................................................ 11
Constant List.......................................................................................................................................... 11
Command Descriptions and Syntax...................................................................................................... 12
Installing PrintList Pro
12
Installation: Plug-In bundle (MacOS & Windows)................................................................................... 12
Configuring PrintList Pro
13
Creating a PrintList Pro Object on a Form
13
To Configure a Variable Object as a PrintList Pro Object....................................................................... 14
PrintList Pro Object Dimensions............................................................................................................ 15
Developing with PrintList Pro
16
Using the PrintList Pro Commands........................................................................................................ 16
When to use the PrintList Pro Commands ............................................................................................ 17
Developer Alert....................................................................................................................................... 17
Configuration Commands
18
Using Defined Constants with PrintList Pro........................................................................................... 18
Specifying the Arrays to Print................................................................................................................. 19
Printing Records..................................................................................................................................... 20
Headers.................................................................................................................................................. 20
Sorting Arrays......................................................................................................................................... 20
Formatting.............................................................................................................................................. 21
Styles...................................................................................................................................................... 21
3
Table of Contents
Column and Header Styles....................................................................................................................... 21
Row-Specific Styles................................................................................................................................. 21
Cell-Specific Styles ................................................................................................................................. 21
Color....................................................................................................................................................... 21
Column and Header Colors...................................................................................................................... 21
Row-Specific Colors................................................................................................................................. 22
Cell-Specific Colors.................................................................................................................................. 22
Multiple Lines in each Row.................................................................................................................... 22
Variable Height Rows ............................................................................................................................ 22
Column Widths....................................................................................................................................... 23
Dividing Lines, Frame and Header Separator Lines............................................................................... 23
Hairline Line Width................................................................................................................................... 23
Using Picture Arrays............................................................................................................................... 23
End of Page Callback Method............................................................................................................... 24
Performance Issues with Formatting Commands.................................................................................. 24
Borders and Frames............................................................................................................................... 24
Header / Cell Icon Support...................................................................................................................... 25
The Escape Sentence System................................................................................................................. 25
Using Icons with Escape Sentences........................................................................................................ 25
Using Picture Library Items with Escape Sentences................................................................................ 26
Longint Reference System....................................................................................................................... 27
Picture Objects in Headers....................................................................................................................... 27
Commands............................................................................................................................................. 28
PL_Register (registrationKey:S) ➞ resultCode:L..................................................................................... 28
%PrintListPro........................................................................................................................................... 29
PL_SetArraysNam (areaRef:L; columnNumber:I; numArrays:I; array1:S; …; arrayN:S)
➞ resultCode:L......................................................................................................................................... 29
PL_SetHeaders (areaRef:L; columnNumber:I; numHeaders:I; header1:S; …; headerN:S)...................... 31
PL_SetHeaderIcon (areaRef:L; columnNumber:I; iconAlignment:I picture:P;
horPosition:I; vertPosition:I; offset:I; scaling:I)......................................................................................... 32
PL_SetFormat (areaRef:L; columnNumber:I; format:S; columnJust:I; headerJust:I; usePictHeight:I)..... 34
PL_SetWidths (areaRef:L; columnNumber:I; numWidths:I; width1:I; …; widthN:I).................................. 37
PL_SetHdrStyle (areaRef:L; columnNumber:I; fontName:S; size:I; styleNum:I)....................................... 37
PL_SetHdrOpts (areaRef:L; printHeaders:I; printPixelWidth:I)................................................................. 38
PL_SetMiscOptions (areaRef:L; escapeChar:S; useEllipsis:I).................................................................. 39
PL_SetStyle (areaRef:L; columnNumber:I; fontName:S; size:I; styleNum:I)............................................. 40
PL_SetForeClr (areaRef:L; columnNumber:I; plpHdrForeColor:S; 4dHdrForeColor:I;
plpListForeColor:S; 4dListForeColor:I)..................................................................................................... 41
PL_SetForeRGBColor (areaRef:L; columnNumber:L; hdrForeRed:L; hdrForeGreen:L;
hdrForeBlue:L; listForeRed:L; listForeGreen:L; listForeBlue:L)................................................................ 42
4
Table of contents
Contents
PL_SetBackClr (areaRef:L; plpHdrBackColor:S; 4dHdrBackColor:I; plpListBackColor:S;
4dListBackColor:I).................................................................................................................................... 43
PL_SetBackRGBColor (areaRef:L; hdrBackRed:L; hdrBackGreen:L; hdrBackBlue:L; listBackRed:L;
listBackGreen:L; listBackBlue:L; ftrBackRed:L; ftrBackGreen:L; ftrBackBlue:L)..................................... 44
PL_SetColBackColor (areaRef:L; columnNumber:I; plpHdrBackColor:S;
4dHdrBackColor:I; plpListBackColor:S; 4dListBackColor:I).................................................................... 45
PL_SetColBackRGBColor (areaRef:L; columnNumber:L; hdrBackRed:L; hdrBackGreen:L;
hdrBackBlue:L; listBackRed:L; listBackGreen:L; listBackBlue:L)............................................................ 46
PL_SetRowStyle (areaRef:L; rowNumber:L; styleNum:I; fontName:S; fontSize:I)................................... 47
PL_SetRowColor (areaRef:L; rowNumber:L; plpRowForeColor:S; 4dRowForeColor:L;
plpRowBackColor:S; 4dRowBackColor:L)............................................................................................... 48
PL_SetRowRGBColor (areaRef:L; rowNumber:L; rowForeRed:L; rowForeGreen:L; rowForeBlue:L;
rowBackRed:L; rowBackGreen:L; rowBackBlue:L).................................................................................. 50
PL_SetDividers (areaRef:L; colDividerWidth:F; colDividerPattern:S; plpColDividerColor:S;
4dColDividerColor:I; rowDividerWidth:F; rowDividerPattern:S; plpRowDividerColor:S;
4dRowDividerColor:I)................................................................................................................................ 51
PL_SetRGBDividers (areaRef:L; colDividerWidth:F; colDividerPattern:S; colDividerRed:L;
colDividerGreen:L; colDividerBlue:L; rowDividerWidth:F; rowDividerPattern:S; rowDividerRed:L;
rowDividerGreen:L; rowDividerBlue:L)...................................................................................................... 52
PL_SetFrame (areaRef:L; frameLineWidth:F; frameLinePattern:S; plpFrameLineColor:S;
4dFrameLineColor:I; headerLineWidth:F; headerLinePattern:S; plpHeaderLineColor:S;
4dHeaderLineColor:I)............................................................................................................................... 53
PL_SetRGBFrame (areaRef:L; frameLineWidth:F; frameLinePattern:S; frameLineRed:L;
frameLineGreen:L; frameLineBlue:L; headerLineWidth:F; headerLinePattern:S; headerLineRed:L;
headerLineGreen:L; headerLineBlue:L;)................................................................................................... 54
PL_SetHeight (areaRef:L; numHeaderLines:I; headerHeightPad:I; numRowLines:I; rowHeightPad:I)........ 56
PL_SetSort (areaRef:L; column1:I; …; columnN:I)................................................................................... 57
PL_SetColOpts (areaRef:L; hideLastColumns:I; hideDetailArea:I)........................................................... 57
PL_SetCellStyle (areaRef:L; firstCellCol:I; firstCellRow:L; lastCellCol:I; lastCellRow:L; cellArray:X;
styleNum:I; fontName:S; fontSize:I).......................................................................................................... 58
PL_SetCellColor (areaRef:L; firstCellCol:I; firstCellRow:L; lastCellCol:I; lastCellRow:L;
cellArray:X; plpForeColor:S; 4dForeColor:I; plpBackColor:S; 4dBackColor:I)......................................... 60
PL_SetCellRGBColor (areaRef:L; firstCellCol:I; firstCellRow:L; lastCellCol:I; lastCellRow:L;
cellArray:X; cellForeRed:L; cellForeGreen:L; cellForeBlue:L; cellBackRed:L; cellBackGreen:L;
cellBackBlue:L)......................................................................................................................................... 62
PL_SetCellIcon (areaRef:L; cellColumn:I; cellRow:L; pictRef:P; iconAlignment:I; horPosition:I;
vertPosition:I; offset:I; scaling:I) ............................................................................................................... 63
PL_SetCellBorder (areaRef:L; cellColumn:I; cellRow:L; borderLeft:I; borderTop:I; borderRight:I;
borderBottom:I; offset:I; width:F; redColor:I; greenColor:I; blueColor:I).................................................. 66
PL_SetCellFrame (areaRef:L; firstCellCol:I; firstCellRow:L; lastCellCol:I; lastCellRow:L;
offset:I; width:F; redLightColor:I; greenLightColor:I; blueLightColor:I; redDarkColor:I;
greenDarkColor:I; blueDarkColor:I; clearAllBorders:I).............................................................................. 67
PL_SetPageProc (areaRef:L; callbackMethod:S)..................................................................................... 68
5
Table of Contents
Using the Callback Methods
69
Summary................................................................................................................................................ 69
Warnings................................................................................................................................................ 69
End of Page Callback............................................................................................................................. 69
Custom Calculations in a Break............................................................................................................. 70
Custom Calculations in a Break Header................................................................................................ 70
Calculated Column Callback.................................................................................................................. 71
Field and Record Commands
72
Using the Field Printing Capability......................................................................................................... 72
Temporary Arrays..................................................................................................................................... 72
Arrays and Fields...................................................................................................................................... 72
Setting a Calculated Column................................................................................................................. 72
Setting the Callback Method.................................................................................................................... 73
Time Data................................................................................................................................................. 74
Printing 4D Fields................................................................................................................................... 74
Fields from Related One Tables............................................................................................................. 74
Sorting...................................................................................................................................................... 74
Maximum Number of Records Printed..................................................................................................... 74
Using Break Level Calculations With Fields............................................................................................. 74
Performance Issues When Printing Fields................................................................................................ 74
Commands............................................................................................................................................. 75
PL_SetFile (areaRef:L; tableNum:I) ➞ resultCode:L................................................................................. 75
PL_SetFields (areaRef:L; tableNum:I; columnNumber:I; numFields:I; fieldNum1; …; fieldNumN:I)
➞ resultCode:L......................................................................................................................................... 76
PL_SetCalcCall (areaRef:L; columnNumber:I; calcCallback:S)................................................................ 77
PL_SetSubSelect (areaRef:L; firstRecord:L; numRecords:L)................................................................... 78
Break Level Processing
79
About PrintList Pro Break Level Processing ......................................................................................... 79
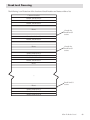
When Do Breaks Occur? ....................................................................................................................... 79
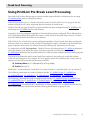
Using PrintList Pro Break Level Processing .......................................................................................... 81
Setting a Break Level ............................................................................................................................ 82
Text Overflow and Justification in Breaks ............................................................................................. 82
Built-in Calculations in a Break ............................................................................................................. 82
Custom Calculations in a Break ............................................................................................................ 82
Suppressing Repeated Values in the List .............................................................................................. 83
Style and Color in Breaks....................................................................................................................... 83
Multiple Lines in a Break ....................................................................................................................... 83
6
Table of Contents
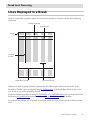
Lines Displayed in a Break..................................................................................................................... 84
Hide the Detail Area ............................................................................................................................... 85
Page Breaks........................................................................................................................................... 85
Variable Height Breaks .......................................................................................................................... 85
Using Break Headers............................................................................................................................. 86
Using Break Levels When Printing Records .......................................................................................... 86
Commands............................................................................................................................................. 87
PL_SetPageBreak (areaRef:L; breakLevel:I; insertPageBreak:I)............................................................... 87
PL_SetBrkOpts (areaRef:L; printLastPageBreak:I)................................................................................... 88
PL_SetBrkOrder (areaRef:L; columnNum1:I; …; columnNumN:I)............................................................ 88
PL_SetRepeatVal (areaRef:L; columnNum:I; repeatValues:I).................................................................... 89
PL_SetBrkText (areaRef:L; breakLevel:I; columnNum:I; breakText:T;
numColsToOverflow:I; justification:I)........................................................................................................ 89
PL_SetBkHText (areaRef:L; breakLevel:I; columnNum:I; breakText:T;
numColsToOverflow:I; justification:I)........................................................................................................ 92
PL_SetBrkFunc (areaRef:L; functionName:S)........................................................................................... 92
PL_SetBkHFunc (areaRef:L; functionName:S)......................................................................................... 93
PL_SetBrkStyle (areaRef:L; breakLevel:I; columnNum:I; fontName:S; size:I; styleNum:I)....................... 93
PL_SetBkHStyle (areaRef:L; breakLevel:I; columnNum:I; fontName:S; size:I; styleNum:I)...................... 94
PL_SetBrkColor (areaRef:L; breakLevel:I; columnNum:I; plpForeColor:S; 4dForeColor:I;
plpBackColor:S; 4dBackColor:I).............................................................................................................. 95
PL_SetBrkRGBColor (areaRef:L; breakLevel:I; columnNum:I; breakForeRed:L; breakForeGreen:L;
breakForeBlue:L; breakBackRed:L; breakBackGreen:L; breakBackBlue:L)............................................ 96
PL_SetBkHColor (areaRef:L; breakLevel:I; columnNum:I; plpForeColor:S; 4dForeColor:I;
plpBackColor:S; 4dBackColor:I).............................................................................................................. 96
PL_SetBkHRGBColor (areaRef:L; breakLevel:I; columnNum:I; brkHdrForeRed:L;
brkHdrForeGreen:L; brkHdrForeBlue:L; brkHdrBackRed:L; brkHdrBackGreen:L; brkHdrBackBlue:L)...... 97
PL_SetBrkHeight (areaRef:L; breakLevel:I; numBreakLines:I; breakHeightPad:I).................................... 98
PL_SetBkHHeight (areaRef:L; breakLevel:I; numBreakLines:I; breakHeightPad:I).................................. 99
PL_SetBrkRowDiv (areaRef:L; lineWidth:F; pattern:S; plpColor:S; 4dColor:I)......................................... 99
PL_SetBrkColOpt (areaRef:L; breakLevel:I; columnNum:I; showColDivider:I;
lineWidth:F; pattern:S; plpColor:S; 4dColor:I)........................................................................................ 100
PL_SetBkHColOpt (areaRef:L; breakLevel:I; columnNum:I; showColDivider:I;
lineWidth:F; pattern:S; plpColor:S; 4dColor:I)........................................................................................ 102
Obsolete Commands 103
7
Table of Contents
Examples104
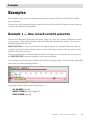
Example 1 — One record current selection......................................................................................... 104
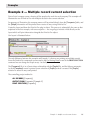
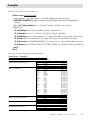
Example 2 — Multiple record current selection................................................................................... 106
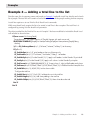
Example 3 — Adding a total line to the list.......................................................................................... 108
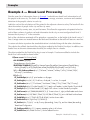
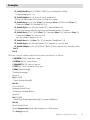
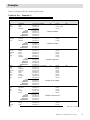
Example 4 — Break Level Processing................................................................................................. 110
PrintList Pro Command Reference Alphabetical
113
PrintList Pro Constant List
116
PLP Colors........................................................................................................................................... 116
PLP Patterns........................................................................................................................................ 116
PLP Command Results........................................................................................................................ 116
PLP Justification................................................................................................................................... 117
PLP Font Style...................................................................................................................................... 117
PLP Break Levels................................................................................................................................. 118
PLP Options......................................................................................................................................... 118
8
About PrintList Pro
About PrintList Pro
PrintList Pro is an easy-to-use tool for printing arrays and records on 4th Dimension layouts. It lets you
print arrays or fields.
PrintList Pro is the perfect complete to AreaList Pro, providing a full-featured plug-in which can be used
to print columns of data. You can use PrintList Pro for any standard columnar output (arrays or fields)
and it be configured to easily print a PrintList Pro object, retaining all formatting features.
Because PrintList Pro is a plug-in, it is very fast, and provides capabilities not available to you using
native 4D arrays or report printing tools, such as automatic column sizing, custom formatting, robust
break level processing, and more.
Data is passed to PrintList Pro using 4D arrays, or field numbers. If only two columns need to be
printed, create two arrays or specify two fields and pass them as parameters to PrintList Pro.
No string parsing or other contortions are needed.
PrintList Pro can be used with just one command — no special formatting is required. For those
cases when more control is needed, several optional commands give you complete control over the
appearance of the area.
Special tools are implemented if you wish to customize the appearance and configuration of PrintList
Pro, allowing the customization to be implemented rapidly.
PrintList Pro’s break level processing includes the ability to apply a variety of built-in calculations as
well as the ability to perform custom calculations. Complete control over style, color, and formatting of
all break level information is given.
Compatibility Information
PrintList Pro is fully compatible with 4D / 4D Server 2004 or greater (including 4D v11 SQL). It is
compatible with MacOS and Windows clients.
PrintList Pro provides the perfect companion to 4D v11 SQL new SQL language and direct array filling.
Using a simple generic form for all your SQL queries, you can easily output the SQL result set to any
print location (including 4Ds built-in PDF output capabilities).
Technical Support
Technical support for PrintList Pro will be provided electronically via e-mail or our online support
reporting system. You are encouraged to use the online web reporting form as it will be correctly
routed to the appropriate support personnel.
www.e-node.net
Compatibility Information - Technical Support
9
About PrintList Pro
Registration
PrintList Pro requires a registration key to “unlock” the product making it a full working version. Call the
PL_Register command (see PL_Register for complete details) in the On Startup method.
Without the registration key, PrintList Pro will operate in demonstration mode during 20 minutes.
Version 4.7 introduced a new license design. Previous licenses will not work with this release.
In order to activate PrintList Pro 4.7 and above, you need to require a new license key from e-Node.
Upgrades from version 4.6 to version 4.7 are provided for free to all registered users (proof of purchase
will be required if the previous license was not purchased from e-Node).
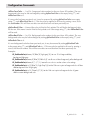
License types
Like all e-Node plug-ins, PrintList Pro offers six different license types. There are no such things as
MacOS vs Windows or Development vs Deployment:
Single user license. This license allows development (interpreted mode) or deployment
(interpreted or compiled mode) on 4D Standalone or Runtime. Since the registration key is
linked to a specific 4D license, you need to provide the number returned by the 4D command
GET SERIAL INFORMATION (first parameter). A new license will be supplied for free at any
time if you change your 4D version and / or get a new 4D registration key, provided that your
previous licenses match the current public version at the exchange time.
■■
Small server. This license allows development (interpreted mode) or deployment (interpreted
or compiled mode) on 4D Server up to 10 users. The registration key is linked to your 4D Server
license just as above.
■■
Medium server. This license allows development (interpreted mode) or deployment (interpreted or compiled mode) on 4D Server up with 11 to 20 users. The registration key is linked to
your 4D Server license just as above.
■■
Large server. This license allows development (interpreted mode) or deployment (interpreted
or compiled mode) on 4D Server over 20 users. The registration key is linked to your 4D Server
license just as above.
■■
Unlimited Single User. This license allows development (interpreted mode) or deployment
(interpreted or compiled mode) on as many 4D Standalone, Runtime or Engine copies that run
your 4D application(s). This is a yearly license, which expires after the date when it is to be
renewed. The expiration only affects interpreted mode. Compiled applications using an obsolete
license will never expire.
■■
Unlimited OEM. This license allows development (interpreted mode) or deployment (interpreted or compiled mode) on as many 4D Server (of any umber of users), 4D Standalone, Runtime or Engine copies that run your 4D application(s). This is a yearly license, which expires
after the date when it is to be renewed. The expiration only affects interpreted mode. Compiled
applications using an obsolete license will never expire.
■■
A 4D database used to retrieve your 4D serial information is available from the following link:
http://www.e-node.net/ftp/GetSerialInfo
Registration - License types
10
About PrintList Pro
Using the PrintList Pro Manual
An overview of the PrintList Pro commands and usage is covered in Developing with PrintList Pro.
Commands are organized by topic into individual chapters. Each chapter begins with an overview of the
topic, and how to use the different commands. Each command is then covered in detail, and examples
provided.
Commands and parameters that are new in PrintList Pro version 4.6 are displayed in green characters.
Items that are new or modified in PrintList Pro version 4.7 are displayed in pink (magenta) characters.
If you are unable to resolve a problem using this manual, you can contact our Technical Support
Department. See Technical Support.
Cross-Referencing Format
Each time a command or section is mentioned, a cross-reference is given through hyperlinks to let you
quickly find the definition for the command.
Command List
The alphabetical list includes the parameters for each command and the page number / link to the
command definition.
Constant List
A full list of PrintList Pro constants is also available, organized by theme with each constant’s
actual value.
Using the PrintList Pro Manual - Cross-Referencing Format - Command List - Constant List
11
Installing PrintList Pro
Command Descriptions and Syntax
Each PrintList Pro command (or routine) has a syntax, or rules, that describe how to use the command
in your 4D database. For each command, the name of the command is followed by the command’s
parameters. The parameters are enclosed in parenthesis, and separated by semicolons.
Following the command syntax description, an explanation of the command’s parameters is provided.
For each parameter, the type of the parameter and a description is shown. Examples are provided,
showing the syntax as well as how the various commands are used together.
The first parameter for most commands is the long integer reference of the PrintList Pro object on the
layout. This parameter is required to allow the commands to operate on the correct object.
Some routines are actually functions, which return a long integer result value. Unless otherwise
indicated, the value is 0 when no error occurred, or -50 (paramErr) when a wrong parameter
has been received.
In some instances (unlikely with the recent hardware and OS versions), PrintList Pro routines can also
return memory manager errors.
Installing PrintList Pro
This chapter outlines the steps necessary for installing PrintList Pro into your existing applications.
PrintList Pro must be installed (and de-installed) using the bundle installation method described herein.
Installation: Plug-In bundle (MacOS & Windows)
PrintList Pro is provided as a plug-in bundle for 4D 2004, 4D v11 SQL or higher.
This single version will work with MacOS and Windows deployments (you don’t need separate
MacOS and Windows versions).
1 — Locate the folder where PrintList Pro has been installed on your computer.
2 — Locate the 4th Dimension structure where you wish to install the PrintList Pro plug-in.
3 — If you don’t already have a directory labeled “Plugins”, create one now.
4 — Copy the following plug-in to your applications Plugins folder: plp.bundle.
Command Descriptions and Syntax - Installation: Plug-In bundle (MacOS & Windows)
12
Configuring PrintList Pro - Creating a PrintList Pro Object on a Form
Configuring PrintList Pro
PrintList Pro is comprised of a suite of plug-in routines and 4th Dimension methods, designed to extend
the existing 4th Dimension command set, providing a variety of miscellaneous utility routines.
PrintList Pro Plug-In routines are routines that exist in the PrintList Pro plug-in and do not require
an addition installation or configuration actions outside of standard plug-in installation.
Just make sure you have successfully registered your copy of PrintList Pro by calling the plug-in’s
registration routines (please see PL_Register for more information).
$ret:=PL_Register ("registrationKey")
Creating a PrintList Pro Object on a Form
Implementing PrintList Pro in your 4D databases is very easy; in fact, printing data in a PrintList Pro area
can be accomplished with only one plug-in command. The PrintList Pro object is drawn on a 4D layout
using the plug-in area tool.
Plug-in area tool
4D opens the Property List for the object, which is where the object is named and configured.
The name (variable) will be used as the areaRef parameter for the PrintList Pro commands.
Be careful to never have two PrintList Pro objects with the same name on a 4D layout.
13
Creating a PrintList Pro Object on a Form
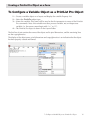
To Configure a Variable Object as a PrintList Pro Object
1 — Create a variable object on a layout and display the variable Property List.
2 — Select the PrintListPro object type.
3 — Name the variable. This name will be used as the first parameter to many of the PrintList
Pro commands. Note: this variable must be a process variable, not an interprocess
variable (i.e. the name cannot begin with “<>” or “◊”).
4 — The PrintList Pro object is drawn in the Layout Editor.
The first line of text contains the name of the object and its pixel dimensions, and the remaining lines
are the copyright notice.
The display of the object name, pixel dimensions and copyright notice is an indication that the object
has been properly created and named.
To Configure a Variable Object as a PrintList Pro Object
14
Creating a PrintList Pro Object on a Form
PrintList Pro Object Dimensions
PrintList Pro provides information to allow you to properly size the PrintList Pro area and to align it with
other objects on the layout in the 4th Dimension Design environment.
A scale at the top of the plug-in area indicates the pixel width of the PrintList Pro object. This may be
used to align other layout objects which appear adjacent to the PrintList Pro object.
Displayed next to the object’s name is the width and the height of the object as it is drawn on the layout.
These values include the entire area printed by PrintList Pro, including the header, and they will be
updated whenever the object is resized.
PrintList Pro Object Dimensions
15
Developing with PrintList Pro
Developing with PrintList Pro
PrintList Pro provides the ability to print up to 512 columns.
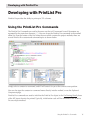
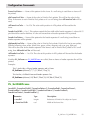
Using the PrintList Pro Commands
The PrintList Pro Commands are used in the same way that a 4D command is used. Parameters are
separated by the semicolon character (“;”). You can access the PrintList Pro commands in the method
editor list. Near the bottom of the list, below the area which contains the project methods, there are
several PrintList Pro constant and command topics as shown below.
Simply select a constant or command, and 4D will enter it for you at the current cursor position.
You can also type the constant or command name directly into the method, or use the Explorer’s
Component page.
PrintList Pro commands are used to initialize the PrintList Pro object in the On Printing Detail phase
of the 4D layout about to be printed. Typically, initialization code will be contained in the PrintList
Pro area object method.
Using the PrintList Pro Commands
16
Developing with PrintList Pro
When to use the PrintList Pro Commands
The PrintList Pro commands must only be executed in the On Printing Detail phase of a form method
or object method during the execution of the PRINT SELECTION or PRINT RECORD command.
The PRINT SELECTION command will execute a On Printing Detail phase for each record in the
current selection (and requires at least one record in the current selection to be executed at all).
PrintList Pro will print the array(s) in any PrintList Pro object once for every record in the current
selection.
If you wish to use PRINT SELECTION to print an array only once, ensure that there is only one record
in the current selection of the table used for printing (the one that holds the layout, which doesn't
have to be related to the data that is actually printed).
If you wish to use PRINT RECORD, ensure that there a current record in the table used for printing
(the one that holds the layout, which doesn't have to be related to the data that is actually printed).
Developer Alert
If the first parameter passed to any PrintList Pro command is not the object reference, an alert box will
appear, informing you of the syntax error.
If this object reference is an AreaList Pro area or another plug-in area, PrintList Pro will also pass this
information to you.
When to use the PrintList Pro Commands - Developer Alert
17
Configuration Commands
Configuration Commands
A PrintList Pro object is initialized in the On Printing Detail phase as the record is about to be printed.
This initialization will be contained in the PrintList Pro plug-in area object method or in the form
method.
Using Defined Constants with PrintList Pro
There are defined constants that may be used as values for many parameters in the PrintList Pro
commands. See the Constants tab of the Explorer in the 4D Design environment.
These constants are categorized according to the type of command that they are associated with, such
as PLP Break Levels, PLP Colors, etc.
Using Defined Constants with PrintList Pro
18
Configuration Commands
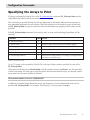
Specifying the Arrays to Print
4D arrays are passed to PrintList Pro via the PL_SetArraysNam command. PL_SetArraysNam must be
called before any other PrintList Pro commands are executed.
This is necessary to provide PrintList Pro with an opportunity to allocate the data structures necessary to
store formatting information for each column. These data structures are allocated on a per column basis,
and PL_SetArraysNam for a given column must be executed before any property of that column can be
specified.
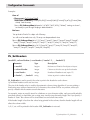
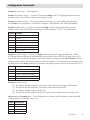
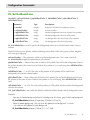
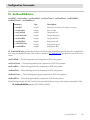
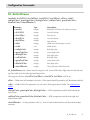
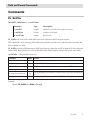
If the PL_SetArraysNam command is incorrectly used, an error code indicating the problem will be
returned:
Constant
Value Action
PL SetArrays Passed
0
PL Not an array
1
Check to make sure all arrays are correctly typed
PL Wrong type of array
2
Pointer and two-dimensional arrays are not allowed
PL Wrong number of rows
3
Make sure that all arrays have the same number of elements
PL Maximum number of arrays exc
4
512 arrays is the maximum
PL Not enough memory
5
Increase 4D’s RAM partition, or change your approach to
use fewer or smaller arrays
Array setup error codes
Up to 512 arrays can be printed by PrintList Pro, with up to fifteen columns specified in each call to
PL_SetArraysNam.
The position of the first array, columnNumber, and the number of arrays, numArrays, are also specified
in these commands. All array types except for pointer and two dimensional arrays, are allowed, and all
arrays must have the same number of elements.
The maximum number of rows is 2,000,000,000.
In addition to standard single-dimension arrays, one dimension of a two-dimensional array may be
passed to PL_SetArraysNam. For example: “My2DArray{1}” may be passed as array1.
Specifying the Arrays to Print
19
Configuration Commands
Printing Records
PrintList Pro provides the capability to print 4D records directly, rather than using arrays. Please read the
section Field and Record Commands for more information.
Headers
The column header labels are set using PL_SetHeaders. The headers can be printed on all pages, the first
page or not at all using PL_SetHdrOpts.
The font, size, and style of each header may be set individually using PL_SetHdrStyle. The justification
may be set using PL_SetFormat and the color of the headers using PL_SetForeClr. Multiple lines of text
may be shown in the headers using PL_SetHeight.
Sorting Arrays
PrintList Pro can perform multi-level sorting upon all the arrays using PL_SetSort. Up to 15 levels of
sorting are available, and each column specified in the sort order can be sorted in either ascending or
descending order. While 15 columns can be used for the sorting critera, all the arrays passed to PrintList
will stay “in sync” and reflect the new sort order.
Some of the arrays can be hidden from printing using PL_SetColOpts, which allows all the arrays to be
kept in sync for sorting purposes, yet hides them during actual printing.
If the arrays passed to PrintList Pro are already sorted, use PL_SetBrkOrder to communicate the sort
order to PrintList Pro without performing another sort. Also, repeated values in a list can be suppressed
using PL_SetRepeatVal. Please read the section Break Level Processing for more information.
If a column containing a picture array is passed to PL_SetSort, it and all subsequent arrays will be ignored.
Printing Records - Headers - Sorting Arrays
20
Configuration Commands
Formatting
Use PL_SetFormat to control the format and justification of all array information. All valid 4D formats may
be used including any custom formats created in the Design Environment. See Break Level Processing
for information about formatting break headers and break footers.
Styles
Column and Header Styles
Styles for arrays can be set on a column by column basis using PL_SetStyle to set the style for the data,
and PL_SetHdrStyle to set the header style. If a 0 (zero) is used in the columnNumber parameter, the style
will be applied to all columns.
Row-Specific Styles
PL_SetRowStyle is used to set the font and style of a specified row, and will override any column
specification.
Cell-Specific Styles
Individual array elements, called cells, can be assigned a unique font, size and style. This capability can
be used to provide special formatting to design more attractive and useful reports.
You can use PL_SetCellStyle to set the font, size and style configuration for an individual cell, a range of
cells, or a selection of discontiguous cells. You can choose to set all or just one of the style attributes of
this command.
PrintList Pro will keep the cell and row-specific style settings with a row when the list is sorted. If you do
not want the cell and row style settings to move when the list is sorted, you should use the cell and row
style routines after the call to PL_SetSort.
Color
When using color or grayscale printers, many PrintList objects can be given color settings. Be sure to set
the printer Color/Grayscale option to obtain the proper results.
Column and Header Colors
Foreground and background colors can be specified for a PrintList Pro object using PL_SetForeClr and
PL_SetBackClr. The foreground color can be specified for each column and column header, and the
background color can be specified for the list and header areas.
In addition, PL_SetForeRGBColor and PL_SetBackRGBColor can be used to perform similar settings
with standard RGB component values.
Formatting - Styles - Color
21
Configuration Commands
Row-Specific Colors
PL_SetRowColor is used to set the foreground and background color of a specified row, and will override
any column specification. You can revert to the original column settings by setting the plpRowForeColor or
plpRowBackColor parameter to the empty string (""), and the 4dRowForeColor or 4dRowBackColor
parameter to -1. Use this command to override all row-specific color settings by passing 0 for the
rowNumber parameter.
Cell-Specific Colors
Individual array elements, called cells, can be assigned a unique foreground color and background
color. This capability can be used to set negative numbers in red, provide special formatting to show the
current selected or enterable cell, and design more attractive and useful lists.
You can use PL_SetCellColor or PL_SetCellRGBColor to set the color configuration for an individual
cell, a range of cells, or a selection of discontiguous cells.
PrintList Pro will keep the cell and row-specific color setting with a row when the list is sorted. If you do
not want the cell and row color settings to move when the list is sorted, be sure to call the cell and row
color routines after the call to PL_SetSort.
Multiple Lines in each Row
Multiple lines of text can be shown for each row using PL_SetHeight. All rows will be printed with the
number of lines specified, or with a variable height for each row. PL_SetHeight can also be used to give
each row additional space above and below the row’s contents to give more spread out rows vertically.
Variable Height Rows
All rows can be printed with a varying height depending on the data that is to be printed. For rows,
PrintList Pro will examine each row’s text, string, and picture element using the applied font and style
settings to determine the tallest cell of each row.
Any given row can be of no height (i.e. no data) up to the height of an entire page. For any row that is
larger than a page, PrintList Pro will attempt to show as much of it as possible by starting the row at the
top of the page. The row will be truncated to a page — no one row can span two pages.
To set all rows to be variable height, use PL_SetHeight and set the numRowLines parameter to zero.
Setting an individual row or cell font size may cause PrintList Pro to override a fixed height row setting
and print the row using a larger height. In order to accommodate the larger font, PrintList Pro uses the
variable height calculation to determine the height of the row based upon the font size setting.
Color - Multiple Lines in each Row - Variable Height Rows
22
Configuration Commands
Column Widths
Columns are automatically sized by default; however, a column size can be programmed using
PL_SetWidths. All widths are given in pixels. For development purposes, the actual column widths
can be printed in the headers using PL_SetHdrOpts.
Column widths can be set manually using PL_SetWidths; however, you may desire to use the widths
generated by PrintList Pro’s automatic column sizing as a good starting reference. The printPixelWidth
parameter of PL_SetHdrOpts will print the width of each column in pixels.
Be sure to enable the printing of headers using the printHeaders parameter in the same command.
Dividing Lines, Frame and Header Separator Lines
Dividing lines can be added between rows and columns using PL_SetDividers or PL_SetRGBDividers.
The line width, pattern, and color of the lines can be specified. The default is no dividing lines.
The PrintList Pro frame and header separator (the line between the headers and the list or detail area)
lines can be set using PL_SetFrame.
Hairline Line Width
When using PostScript printers, lines can be printed a fraction of the line width seen on screen (1 pixel).
Typically, ¼ (.25) pixel produces the best results. All the lines that PrintList Pro prints may be given a
fractional line width.
When printing hairlines, patterns can produce unpredictable results due to their resolution. Using colors
rather than patterns will often produce better results. You (or the database end-user) must be sure to set
the Color/Grayscale option in the print dialog when using colors.
Using Picture Arrays
PrintList Pro supports the printing of picture arrays. The format parameter of PL_SetFormat will cause the
picture to be printed in one of four ways:
■■
truncated and justified to the upper left of the cell
■■
truncated and centered in the cell
■■
scaled to fit the cell
■■
scaled proportionally to fit the cell
The usePictHeight parameter of PL_SetFormat will tell PrintList Pro whether to use a picture’s original
height, which is stored with the picture, when calculating the row height for the PrintList Pro area.
If you choose not to use the picture’s height in the row height calculation and additional space is
needed to print the picture, the numRowLines parameter of PL_SetHeight should be used to increase
the row height.
Column Widths - Dividing Lines, Frame and Header Separator Lines - Using Picture Arrays
23
Configuration Commands
End of Page Callback Method
In 4th Dimension, a “callback” method is a project method called from an plug-in. PrintList Pro makes
use of a callback method to inform you when the end of a printed page is reached. This enables you to
perform any necessary processing associated with the end of the page, for example, changing information
printed in the footer area of that page or the header area of the next page.
Use PL_SetPageProc to specify the 4D method PrintList Pro is to call. PrintList Pro will pass the method
specified by callbackMethod two parameters: the first indicates which PrintList Pro area is calling the
method, and the second specifies the last row printed on that page.
Performance Issues with Formatting Commands
PrintList Pro uses an algorithm to automatically size the columns. Because of this, there is usually no
need to use PL_SetWidths to manually size a column prior to printing a list. However, if the number of
items in the list is very large (several thousand items with many columns), then the list might take a few
seconds longer to generate, due to the automatic sizing calculation.
If this is the case, using PL_SetWidths will improve the generation time of the list. Text and string arrays
will take the longest to automatically size.
Since you can use PL_SetWidths on just some of the columns, if you are printing very large arrays, but
only one is text or string, you could use PL_SetWidths on just the text or string array, and let PrintList
Pro automatically calculate the other column widths.
To determine the optimum width for a column, you can print out the pixel widths of columns
in the headers during your design process and then use PL_SetWidths to set the width. See the
PL_SetHdrOpts command for information on printing pixel widths.
PL_SetFormat does not affect the performance of PrintList Pro, regardless of the size of the arrays being
printed.
Borders and Frames
PL_SetCellBorder provides the ability to set the border style for a cell.
PL_SetCellFrame prints a frame around a range of cells.
Both commands use RGB colors.
End of Page Callback Method - Performance Issues with Formatting Commands - Borders and Frames
24
Configuration Commands
Header / Cell Icon Support
The Escape Sentence System
PrintList Pro provides the ability to print icons in PrintList Pro headers (PL_SetHeaders) and cell data
(PL_SetFormat), using picture data contained in the “cicn” or “PICT” resources, or items stored in the
4th Dimension Picture Library.
For example, when creating the arrays or header values, you can instruct PrintList Pro to print any
picture type data.
An “escape sentence” system can be used for headers and individual cells. If any text (cell, header, etc.)
contains an escape sentence, an icon is printed instead of the sentence. Based on the number, it may be
a “cicn” resource, a “PICT” resource or a Picture Library object.
Using Icons with Escape Sentences
To print an icon in the header, reference the icon resource as "^nnnHeader", where nnn is the desired
“cicn” resource ID:
PL_SetHeaders (area;1;1;"^150Header")
To print the icon at the end of the text, reference the icon resource as "Header^nnn" where nnn is the
desired “cicn” resource ID.
If you want to use “PICT” resources instead of “cicn”, add the 4D constant Use PICT resource to the
resource ID:
PL_SetHeaders (area;1;1;"^"+String (Use PICT resource+150) +"Header")
See the 4th Dimension Language Reference regarding the SET LIST ITEM PROPERTIES command,
which uses the same icon syntax.
When printing icons in headers, it may be necessary to adjust the header height to accommodate the
height of the icon. You can use the PL_SetHeight routine to increase the size of an PrintList Pro header
based on your requirements.
Similarly, if you wish to print icons in cell data, you would use the same technique when building the
arrays for which you are using in the PrintList Pro area.
The default “escape” character (used in the call before the icon resource ID) can be modified with
PL_SetMiscOptions.
Header / Cell Icon Support
25
Configuration Commands
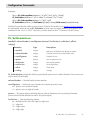
Using Picture Library Items with Escape Sentences
If you would like to use an item from the 4D Picture Library, you would reference the picture ID as
“Use PicRef + N”, where N is the reference number of a picture from the Design environment Picture
Library.
Use PicRef is a 4D constant. See the 4th Dimension Language Reference regarding the SET LIST ITEM
PROPERTIES command, which uses the same icon syntax.
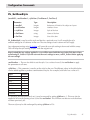
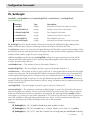
Picture Library containing custom checkboxes
For example, if you would like to configure boolean columns to print custom checkbox icons instead
of the traditional text (True;False), you can use the PL_SetFormat routine to provide references to icon
resources contained in the 4D Picture Library.
$iconStr:="^"+String (Use PicRef + 880)+";"+"^"+String (Use PicRef + 881)
PL_SetFormat (eArea;1;$iconStr)
The default “escape” character (used in the call before the icon Picture Library ID) can be modified with
PL_SetMiscOptions.
Header / Cell Icon Support
26
Configuration Commands
Longint Reference System
Resources and Picture Library items are also used by PL_SetCellIcon, which places icons into individual
cells.
This routine includes an iconRef parameter, which is one of the following:
■■
N, where N is the resource ID of Mac OS-based “cicn” resource
■■
Use PICT resource + N, where N is the the resource ID of a Mac OS-based “PICT” resource
■■
se PicRef + N, where N is the reference number of a picture from the Design environment
U
Picture Library
■■
pass zero (0) if you do not want any icon for the cell
Picture Objects in Headers
In addition, PL_SetHeaderIcon provides the ability to procedurally place icons in column headers using
4D picture objects (fields or variables).
Header / Cell Icon Support
27
Configuration Commands
Commands
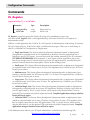
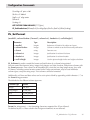
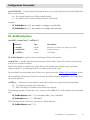
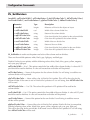
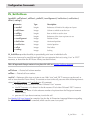
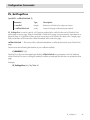
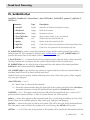
PL_Register
(registrationKey:S) ➞ resultCode:L
Parameter
Type
Description
➞ registrationKey
string
Registration key
longint
Result code
resultCode
PL_Register is used to register the PrintList Pro plug-in for standalone or server use.
You must call PL_Register with a valid registration key; otherwise PrintList Pro will operate in
demonstration mode.
Without a valid registration key, PrintList Pro will operate in demonstration mode during 20 minutes.
Like all e-Node plug-ins, PrintList Pro offers six different license types. There are no such things as
MacOS vs Windows or Development vs Deployment:
Single user license. This license allows development (interpreted mode) or deployment
(interpreted or compiled mode) on 4D Standalone or Runtime. Since the registration key is
linked to a specific 4D license, you need to provide the number returned by the 4D command
GET SERIAL INFORMATION (first parameter). A new license will be supplied for free at any
time if you change your 4D version and / or get a new 4D registration key, provided that your
previous licenses match the current public version at the exchange time.
■■
Small server. This license allows development (interpreted mode) or deployment (interpreted
or compiled mode) on 4D Server up to 10 users. The registration key is linked to your 4D Server
license just as above.
■■
Medium server. This license allows development (interpreted mode) or deployment (interpreted or compiled mode) on 4D Server up with 11 to 20 users. The registration key is linked to
your 4D Server license just as above.
■■
Large server. This license allows development (interpreted mode) or deployment (interpreted
or compiled mode) on 4D Server over 20 users. The registration key is linked to your 4D Server
license just as above.
■■
Unlimited Single User. This license allows development (interpreted mode) or deployment
(interpreted or compiled mode) on as many 4D Standalone, Runtime or Engine copies that run
your 4D application(s). This is a yearly license, which expires after the date when it is to be
renewed. The expiration only affects interpreted mode. Compiled applications using an obsolete
license will never expire.
■■
Unlimited OEM. This license allows development (interpreted mode) or deployment (interpreted or compiled mode) on as many 4D Server (of any umber of users), 4D Standalone, Runtime or Engine copies that run your 4D application(s). This is a yearly license, which expires
after the date when it is to be renewed. The expiration only affects interpreted mode. Compiled
applications using an obsolete license will never expire.
■■
A 4D database used to retrieve your 4D serial information is available from the following link:
http://www.e-node.net/ftp/GetSerialInfo
PL_Register
28
Configuration Commands
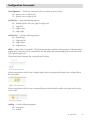
The registration system has been modified in version 4.7. Only one registration key is now required.
registrationKey — Pass the registration key to register your copy of PrintList Pro. Only one registration key is required. The key is either linked to the 4D or 4D Server serial number, or to the name of the
company / developer, depending on the license type.
resultCode — This will return a value of 1 if the registration key is valid and a value of 0 if the registration
key is invalid. You should verify the correctness of the registration key by tracing over the call to
PL_Register and examining resultCode.
Multiple calls to PL_Register are allowed. The plug-in will be activated if at least one valid key is used.
Example:
C_LONGINT ($result)
$result:=PL_Register ("Place your registration key here")
If ($result#1) `error
ALERT ("PrintList Pro could not be registered:"+String ($result))
End if
Example with multiple calls:
C_LONGINT ($result) `ignored in this case
$result:=PL_Register (“Registration key one”)
$result:=PL_Register (“Registration key two”)
$result:=PL_Register (“Registration key three”)
`etc.
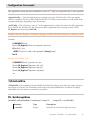
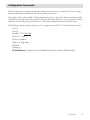
%PrintListPro
%PrintListPro is the command used to identify the PrintList Pro plug-in area when you create a plug-in
area object on a layout. This command is only used in the object definition for a PrintList Pro object,
and should never be used as a command in a method.
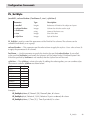
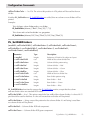
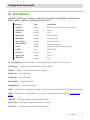
PL_SetArraysNam
(areaRef:L; columnNumber:I; numArrays:I; array1:S; …; arrayN:S) ➞ resultCode:L
Parameter
Type
Description
➞ areaRef
longint
Reference of PrintList Pro object on layout
PL_Register - %PrintListPro - PL_SetArraysNam
29
Configuration Commands
➞ columnNumber
integer
Column at which to set the first array
➞ numArrays
integer
Number of arrays to set (up to 15)
➞ array1; …; arrayN
string
Names of 4D arrays
integer
Result code
resultCode
PL_SetArraysNam tells PrintList Pro what arrays to print. Up to fifteen arrays can be set at a time.
Any 4D array type can be used except pointer and two-dimensional arrays.
Since PrintList Pro can print up to 512 arrays, this command may have to be used more than once.
There are three very important points to note about this command:
■■
his command must be called first, before any of the other commands, in the On Printing
T
Detail phase.
■■
he columns must be added in sequential order, unless the particular column has already been
T
added. In other words, to set 30 arrays, you must set arrays 1 through 15 prior to setting arrays
16 through 30.
■■
ll arrays set with this command must have the same number of elements as each other
A
and as any other arrays previously set.
You can pass process arrays and interprocess arrays to PrintList Pro, but not local arrays (a local array has
a name that starts with a "$" character; an interprocess array has a name that starts with a "◊" character
on MacOS and the "<>" characters on Windows).
One dimension of a two-dimensional array may be passed in the array1; …; arrayN parameters.
For example: “my2DArray{1}” may be passed as array1.
areaRef — PrintList Pro area reference.
columnNumber — This parameter specifies the column number to set the first array being passed by
this call of PL_SetArraysNam.
numArrays — This parameter specifies the number of columns being set with this call to
PL_SetArraysNam.
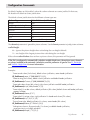
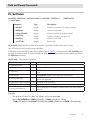
resultCode — The possible values are:
Constant
Value Action
PL SetArrays Passed
0
PL Not an array
1
Check to make sure all arrays are correctly typed
PL Wrong type of array
2
Pointer and two-dimensional arrays are not allowed
PL Wrong number of rows
3
Make sure that all arrays have the same number of elements
PL Maximum number of arrays exc
4
512 arrays is the maximum
PL Not enough memory
5
Increase 4D’s RAM partition, or change your approach to
use fewer or smaller arrays
PL_SetArraysNam
30
Configuration Commands
Examples:
Case of
: (Form event=On Printing Detail)
SELECTION TO ARRAY ([Contacts]FN;aFN;[Contacts]LN;aLN;[Contacts]City;aCity;[Contacts]State;
aState) `load the arrays
$error:=PL_SetArraysNam (eNameList;1;4;"aFN";"aLN";"aCity";"aState") `starting at column 1,
set 4 arrays to print through the plug-in area eNameList
End case
`Set up the eList PrintList Pro object with 25 arrays
`two calls must be made since only 15 arrays can be passed each time
$error:=PL_SetArraysNam (eList;1;15;"array1";"array2";"array3";"array4";"array5";"array6";
"array7";"array8";"array9";"array10";"array11";"array12";"array13";"array14";"array15")
$error:=PL_SetArraysNam (eList;16;10;"array16";"array17";"array18";"array19";"array20";
"array21";"array22";"array23";"array24";"array25")
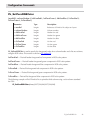
PL_SetHeaders
(areaRef:L; columnNumber:I; numHeaders:I; header1:S; …; headerN:S)
Parameter
Type
Description
➞ areaRef
longint
Reference of PrintList Pro object on layout
➞ columnNumber
integer
Column at which to set up the first header
➞ numHeaders
integer
Number of headers to set (up to 15)
➞ header1; …; headerN
string
Values to print in column headers
PL_SetHeaders is used to specify the value to print in the header for each column.
Up to fifteen headers can be set at a time.
The size of the header value is used by the automatic column sizing algorithm. If you are printing a
fixed-string array with an element size of 2 characters, the column will be very narrow, unless you
specify a header which contains several characters.
For example, states are usually stored in a database as a two-character alpha, and you would probably
print them directly or load them into a string array sized for two-characters length. But if you specify a
header of “State” the column will be sized about two and a half times wider.
If the header length is less than the values being printed in the column, then the header length will not
affect the column width.
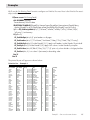
A, B, C, etc. will be printed in the headers if PL_SetHeaders is not used.
PL_SetArraysNam - PL_SetHeaders
31
Configuration Commands
Examples:
$error:=PL_SetArraysNam (eNameList;1;4;"aFN";"aLN";"aCity";"aState")
PL_SetHeaders (eNameList;1;4;"First Name";"Last Name";"City";"State")
$error:=PL_SetArraysNam (eNames;1;2;"aFN";"aLN")
PL_SetHeaders (eNames;1;2;Field name ([People]FirstName);Field name ([People]LastName))
PrintList Pro provides the ability to print icons in PrintList Pro headers. See Header / Cell Icon Support
for information about the use of PL_SetHeaders to print icons in column headers, using picture data
contained in the “cicn” or “PICT” resources, or items stored in the 4th Dimension Picture Library.
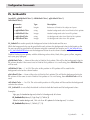
PL_SetHeaderIcon
(areaRef:L; columnNumber:I; iconAlignment:I picture:P; horPosition:I; vertPosition:I; offset:I;
scaling:I)
Parameter
Type
Description
➞ areaRef
longint
Reference of PrintList Pro object on layout
➞ columnNumber
integer
Column at which to set the header icon
➞ iconAlignment
integer
Position of icon
➞ picture
picture
Icon or picture to use
➞ horPosition
integer
Horizontal position
➞ vertPosition
integer
Vertical position
➞ offset
integer
Pixel offset
➞ scaling
integer
Scaling
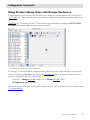
PL_SetHeaderIcon provides the ability to procedurally print icons in column headers. One or two icons
may be used (left and right).
columnNumber — Desired header column number.
iconAlignment — Position of icon (a header can contain up to two icons):
0 — places icon on left of header
1 — places icon on right of header
picture — 4D picture object containing the icon (due to limitations of icons printing in headers,
you must first load the desired icon into a 4D picture object).
horPosition — One the following options:
0 — default (left for left icon, right for right icon)
1 — align left
2 — align center
3 — align right
PL_SetHeaders - PL_SetHeaderIcon
32
Configuration Commands
vertPosition — One the following options:
0 — default (top)
1 — align top
2 — align center
3 — align bottom
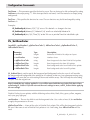
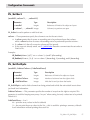
offset — Offset of the “icon guide”. The horizontal position is relative to this position.
If the horizontal alignment is center, the icon is centered between the guide and
corresponding side of cell (left for left icon, right for right icon).
The picture below illustrates the icon guide and its offset:
Icon guide and offset
In the picture below, the left icon is aligned right to the icon guide and the right icon is aligned left to
the icon guide:
Left icon aligned right - Right icon aligned left
In the picture below, the left icon is centered between the left border and the icon guide and no right
icon is used:
Left icon centered
scaling — One the following options:
0 — truncated
1 — scaled
The cell content (text) is printed into the space that is left once the icon is printed. If the icon is larger
than the remaining available space, the text is printed over the icon.
For example, if the column width is 100 pixels and you print a 15 pixel icon, there is remaining width
of 85 pixels where the text will be printed. If, however, the total width (icon + text) exceeds the column
width, the text will be printed over the picture. This allows background pictures behind the text.
The following example will use the same icon as PL_SetCellIcon, but it will first load the icon into a 4D
picture object:
C_PICTURE ($pict)
C_INTEGER ($col;$iconAlign;$horPos;$verPos;$offset;$scaling)
$col:=3 `place icon in 3rd column
PL_SetHeaderIcon
33
Configuration Commands
$iconAlign:=0 `print on left
$horPos:=0 `default
$verPos:=2 `align center
$offset:=5
$scaling:=0
GET PICTURE FROM LIBRARY (1717;$pict)
PL_SetHeaderIcon (PLParea;$col;$iconAlign;$pict;$horPos;$verPos;$offset;$scaling)
PL_SetFormat
(areaRef:L; columnNumber:I; format:S; columnJust:I; headerJust:I; usePictHeight:I)
Parameter
Type
Description
➞ areaRef
longint
Reference of PrintList Pro object on layout
➞ columnNumber
➞ format
integer
Column at which to set the format and justification
string
Format to use
➞ columnJust
integer
Justification for column list items
➞ headerJust
integer
Justification for column header
➞ usePictHeight
integer
Use the picture height in the row height calculation
PL_SetFormat is used to control the format and justification of a column being printed.
You can control the format of string, integer, long integer, real, date, boolean, and picture columns with
the format parameter. Time values can be formatted also, since they use long integer arrays. Any valid
4D format, including custom formats created in the Design environment, may be used with these
column types, except for string arrays. Text columns cannot be formatted.
Additionally, null time and date values can be set to print a blank by appending a dash character (“-”) to
the format string parameter.
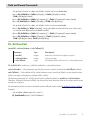
The defaults for the different column types are:
Column Type
Format
Integer
“##,##0”
Long Integer
“#,###,##0”
Real
“#,###,##0.00”
Boolean
“True;False”
Date
“0”
Picture
“0”
format (for string arrays) — Any formatting characters supported for 4D are allowed.
Pre-defined styles (i.e. those saved in the Design environment) are not allowed.
PL_SetHeaderIcon - PL_SetFormat
34
Configuration Commands
format (for text arrays) — Not supported.
format (for numeric arrays) — See the 4D command String in the 4D Language Reference for the
possible values. Any valid 4D numeric format may be used.
format (for boolean arrays) — The string contains two formats, one for the True value, the other
for the False value, separated by a semicolon. Examples: “Male;Female” and “MacOS;Windows.”
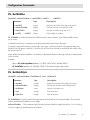
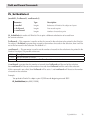
format (for date arrays) — See the 4D command String in the 4D Language Reference for the
possible values. Any valid 4D date format may be used. Examples: “0” or “3” are valid formats.
Format Example
0
1
2
3
4
5
09/20/07 (default)
9/20/07
Thu, Sep 20, 2007
Thursday, September 20, 2007
09/20/07 or 09/20/1997
September 20, 2007
6
Sep 20, 2007
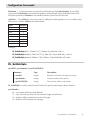
format (for “time” arrays) — See the 4D String command in the 4D Language Reference, and the
4D Design Reference discussion of formatting for the possible values. There are no time arrays in 4D
as such, they are in reality long integer arrays. These arrays are printed as time PL_SetFormat values by
using the proper format. The format is the two character sequence “&/” followed by the number given in
the discussion of the String command. For example, one proper format for a time array would be “&/2”.
Format Example
1
2
3
4
5
01:02:03
01:02
1 hour 2 minutes 3 seconds
1 hour 2 minutes
1:02 AM
format (for picture arrays):
0 — the picture will be truncated, if necessary, and justified to the upper left (default)
1 — the picture will be truncated, if necessary, and centered in the cell
2 — the picture will be scaled to fit the cell
3 — the picture will be scaled to fit the cell, and remain proportional to its original size
columnJust and headerJust — The justification for a column and its header can be controlled
independently. The possible values are:
Value
0
1
2
3
Justification
Default
Left
Center
Right
PL_SetFormat
35
Configuration Commands
By default, headers are left justified, unless the column elements are center justified. In that case,
the header will default to center justification.
The default column justifications for the different column types are:
Column Type
Default Column Justification
Integer
Long Integer (including Time)
Real
Boolean
Date
String
Text
Picture
right
right
right
left
right
left
left
n / a — see the format parameter
The columnJust parameter is ignored for picture columns. Use the format parameter to justify picture columns.
usePictHeight:
0 — ignore the picture height when calculating the row height (default)
1 — use height of the largest picture when calculating the row height
If the column columnNumber does not have a picture column, this parameter will be ignored.
If the list is configured to automatically calculate variable height rows, then picture array elements
are always included in the automatic calculation, and this parameter is ignored. See PL_SetHeight
and Variable Height Rows for more information.
Examples:
`Format a real column (3rd column), default column justification, center header justification
PL_SetFormat (names;3;"$###,###.00";0;2;0)
`Format a string (2nd column), default column justification and default header justification
PL_SetFormat (eContacts;2;"(###) ###-####";0;0;0)
`Format a boolean column (4th column), right column justification and left header justification
PL_SetFormat (eList;4;"Male;Female";3;1;0)
`Format style 3 for a date column, default justification (5th column), default column and header justification,
suppress null dates
PL_SetFormat (eNames;5;"3-")
`Format style 2 for a time column, right justification for header and column (7th column)
PL_SetFormat (eList;7;"&/2";3;3;0)
`Custom format style, default justification for column, center header (5th column)
PL_SetFormat (eNames;5;"|Dollars";0;2;0)
`Scale picture column to fit proportionally (1st column), use default header justification,
use picture size in row height calculation
PL_SetFormat (ePeople;1;"3";0;0;1)
PL_SetFormat
36
Configuration Commands
PL_SetWidths
(areaRef:L; columnNumber:I; numWidths:I; width1:I; …; widthN:I)
Parameter
Type
Description
➞ areaRef
longint
Reference of PrintList Pro object on layout
➞ columnNumber
integer
Column at which to set the first width
➞ numWidths
integer
Number of widths to set (up to 15)
➞ width1; …; widthN
integer
Pixel widths of columns
PL_SetWidths is used to set the pixel width for one or more columns. Up to fifteen widths can be
set at a time.
A width of zero forces a column to be sized automatically based on its data type.
A column cannot be less than 3 pixels wide. If you pass a value of less than 3 but greater than zero,
PrintList Pro will ignore it and use 3. PrintList Pro will not let a column be wider than the width of the
list area minus 20.
If not called, the default width for all columns is determined based on the type of array or field printed
in the column.
Example:
$error:=PL_SetArraysNam (eNames;1;5;"aFN";"aLN";"aCity";"aState";"aZip")
PL_SetWidths (eNames;1;5;150;50;0;100;0) `0 forces autosizing for that column
PL_SetHdrStyle
(areaRef:L; columnNumber:I; fontName:S; size:I; styleNum:I)
Parameter
Type
Description
➞ areaRef
longint
Reference of PrintList Pro object on layout
➞ columnNumber
➞ fontName
integer
Column for which to set the header style
string
Name of the font to use
➞ size
integer
Size of the font
➞ styleNum
integer
Style of the font
PL_SetHdrStyle is used to control the appearance of the PrintList Pro column headers. The columns
can be controlled individually or as a group.
columnNumber — This parameter specifies what column header to apply the style to. Use a value of
zero (0) to apply the parameters to all columns.
PL_SetWidths - PL_SetHdrStyle
37
Configuration Commands
fontName — Use this parameter to specify the font for the specified columnNumber. If not called,
or the specified fontName is not found, the header(s) will be printed in the OS defined System Font.
If the font specified by fontName is not installed, then the System Font will be used.
styleNum — The styleNum is a font style code. By adding the codes together, you can combine styles.
The numeric codes for styleNum are shown below:
Style
Number
Plain
Bold
Italic
Underline
Outline
Shadow
Condensed
Extended
0
1
2
4
8
16
32
64
Examples:
PL_SetHdrStyle (eList;1;"Geneva";12;1) `Geneva 12 point bold, column 1
PL_SetHdrStyle (Names;3;"New York";12;3) `New York 12 point bold italic, column 3
PL_SetHdrStyle (Names;0;"Palatino";10;3) `Palatino 10 point bold italic, all columns
PL_SetHdrOpts
(areaRef:L; printHeaders:I; printPixelWidth:I)
Parameter
Type
Description
➞ areaRef
longint
Reference of PrintList Pro object on layout
➞ printHeaders
➞ printPixelWidth
integer
Print the headers above the list
integer
Print column widths in the header
PL_SetHdrOpts is used to control several PrintList Pro options pertaining to column headers.
printHeaders:
0 — no headers will be printed (default)
1 — only one cell at a time may be selected (single cell selection)
2 — headers will be printed only on the first page
3 — headers will be printed on all pages
PL_SetHdrStyle - PL_SetHdrOpts
38
Configuration Commands
printPixelWidth — Used during development to allow you to easily determine what pixel width looks
best for each column:
0 — the normal header text will be printed (default)
1 — the width of the column will be printed in each header
Examples:
PL_SetHdrOpts (eList;2;0) `print headers on all pages, no pixel widths
PL_SetHdrOpts (eList;1;1) `print headers on first page, and pixel widths
PL_SetMiscOptions
(areaRef:L; escapeChar:S; useEllipsis:I)
Parameter
Type
Description
➞ areaRef
longint
Reference of PrintList Pro object on layout
➞ escapeChar
string
Escape character
➞ useEllipsis
integer
Use ellipsis
PL_SetMiscOptions is used to control miscellaneous PrintList Pro options.
escapeChar — Sets the alternate escape character used to inform PrintList Pro where icon references
exist in your cell data or headers.
You have the ability to include icons within PrintList Pro headers and cell data using a formatted
character (default ^) to informing PrintList Pro where to look for the icons.
For more details on using header and cell data icons, please refer to the Header / Cell Icon Support section.
For compatibility with previous PrintList Pro versions, the default value for escapeChar is the empty string
(no escape character).
useEllipsis — Determines if auto-ellipsis is used when columns are smaller than the printed data:
0 — use ellipsis in header and column data
1 — don’t use ellipsis in header and column data (default)
The following example will print the “cicn” resource with a resID of 150 in the header before the header
text:
PL_SetMiscOptions (area;"~";0) `set escape to tilde ~, do not use ellipsis
PL_SetHeaders (area;1;1;"~150Header")
The following example will mimic AreaList Pro's default behavior:
PL_SetMiscOptions (area;"^";0)
PL_SetHdrOpts - PL_SetMiscOptions
39
Configuration Commands
PL_SetStyle
(areaRef:L; columnNumber:I; fontName:S; size:I; styleNum:I)
Parameter
Type
Description
➞ areaRef
longint
Reference of PrintList Pro object on layout
➞ columnNumber
➞ fontName
integer
Column for which to set the style
string
Name of the font to use
➞ size
integer
Size of the font
➞ styleNum
integer
Style of the font
PL_SetStyle is used to control the appearance of the PrintList Pro columns. The columns can be
controlled individually or as a group.
columnNumber — This parameter specifies what column to apply the style to. Use a value of zero (0)
to apply the parameters to all columns.
fontName — Use this parameter to specify the font for the specified columnNumber. If not called,
or the specified fontName is not found, the column(s) will be printed in the OS defined System Font.
If the font specified by fontName is not installed, then the System Font will be used.
styleNum — The styleNum is a font style code. By adding the codes together, you can combine styles.
The numeric codes for styleNum are shown below:
Style
Plain
Bold
Italic
Underline
Outline
Shadow
Condensed
Extended
Number
0
1
2
4
8
16
32
64
Examples:
PL_SetStyle (eNames;0;"Geneva";9;0) `Geneva 9 plain, all columns
PL_SetStyle (eList;4;"Helvetica";12;32) `Helvetica 12 point condensed, 4th column
PL_SetStyle (eNames;1;"Times";9;1) `Times 9 point bold, 1st column
PL_SetStyle
40
Configuration Commands
PL_SetForeClr
(areaRef:L; columnNumber:I; plpHdrForeColor:S; 4dHdrForeColor:I; plpListForeColor:S;
4dListForeColor:I)
Parameter
Type
Description
➞ areaRef
longint
Reference of PrintList Pro object on layout
➞ columnNumber
➞ plpHdrForeColor
integer
Column number
string
Header foreground color from PrintList Pro’s palette
➞ 4dHdrForeColor
integer
Header foreground color from 4D’s palette
➞ plpListForeColor
➞ 4dListForeColor
string
List foreground color from PrintList Pro’s palette
integer
List foreground color from 4D’s palette
PL_SetForeClr is used to specify the foreground colors for a column header and a list area column.
PrintList Pro has its own palette, with the following colors: white, black, blue, green, yellow, magenta,
red, cyan, gray, light gray.
columnNumber — The column for which to set the foreground color. Use a value of zero (0)
for columnNumber to apply the parameters to all columns.
plpHdrForeColor — Name of the color in PrintList Pro’s palette. This will be the foreground color for
the column header. If the name is not in PrintList Pro’s palette or it is a null string, then 4dHdrForeColor
will be used.
4dHdrForeColor — 1 to 256. The color at this position in 4D’s palette will be used for the
foreground color for the column header.
plpListForeColor — Name of the color in PrintList Pro’s palette. This will be the foreground color for
the column. If the name is not in PrintList Pro’s palette or it is a null string, then 4dListForeColor will be
used.
4dListForeColor — 1 to 256. The color at this position in 4D’s palette will be used for the foreground
color for the column.
If PL_SetForeClr is not called, the default is black for both the header and list foreground colors.
Examples:
`Red for column header foreground, light gray for column foreground (all columns)
PL_SetForeClr (eNames;0;"Red";0;"Light Gray";0)
`Green for column header foreground, 13th color from 4D’s palette for column foreground (4th column)
PL_SetForeClr (eNames;4;"Green";0;"";13)
PL_SetForeClr
41
Configuration Commands
PL_SetForeRGBColor
(areaRef:L; columnNumber:L; hdrForeRed:L; hdrForeGreen:L; hdrForeBlue:L; listForeRed:L;
listForeGreen:L; listForeBlue:L)
Parameter
Type
Description
➞ areaRef
longint
Reference of PrintList Pro object on layout
➞ columnNumber
➞ hdrForeRed
longint
Column number
longint
Header fore red
➞ hdrForeGreen
longint
Header fore green
➞ hdrForeBlue
➞ listForeRed
longint
Header fore blue
longint
List fore red
➞ listForeGreen
longint
List fore green
➞ listForeBlue
longint
List fore blue
PL_SetForeRGBColor is used to specify the foreground colors for a column header and a list area column,
using the RGB values. This routine is similar to PL_SetForeClr.
hdrForeRed — Desired header foreground red component in RGB color pattern.
hdrForeGreen — Desired header foreground green component in RGB color pattern.
hdrForeBlue — Desired header foreground blue component in RGB color pattern.
listForeRed — Desired list foreground red component in RGB color pattern.
listForeGreen — Desired list foreground green component in RGB color pattern.
listForeBlue — Desired list foreground blue component in RGB color pattern.
The following example will tell PrintList Pro to print the third column using a color scheme standard
for OSX:
PL_SetForeRGBColor (xArea;3;237;254;243;237;254;243)
PL_SetForeRGBColor
42
Configuration Commands
PL_SetBackClr
(areaRef:L; plpHdrBackColor:S; 4dHdrBackColor:I; plpListBackColor:S;
4dListBackColor:I)
Parameter
Type
Description
➞ areaRef
➞ plpHdrBackColor
longint
Reference of PrintList Pro object on layout
string
Header background color from PrintList Pro’s palette
➞ 4dHdrBackColor
integer
Header background color from 4D’s palette
➞ plpListBackColor
➞ 4dListBackColor
string
List background color from PrintList Pro’s palette
integer
List background color from 4D’s palette
PL_SetBackClr is used to specify the background colors for the header and list area.
While the foreground color can be specified for each column, the background color for the header or the
list area can only be specified for all columns using this command. You need to use PL_SetColBackColor
or PL_SetColBackRGBColor to set the background colors of each column's header and each column itself.
PrintList Pro has its own palette, with the following colors: white, black, blue, green, yellow, magenta,
red, cyan, gray, light gray.
plpHdrBackColor — Name of the color in PrintList Pro’s palette. This will be the background color for
the column header. If the name is not in PrintList Pro’s palette or it is a null string, then 4dHdrBackColor
will be used.
4dHdrBackColor — 1 to 256. The color at this position in 4D’s palette will be used for the
background color for the column header.
plpListBackColor — Name of the color in PrintList Pro’s palette. This will be the background color for
the column. If the name is not in PrintList Pro’s palette or it is a null string, then 4dListBackColor will be
used.
4dListBackColor — 1 to 256. The color at this position in 4D’s palette will be used for the background
color for the column.
If PL_SetBackClr is not called, the default is white for both the header and list background colors.
Examples:
`Light gray for header background, white for list background, all columns
PL_SetBackClr (eNames;0;"Light Gray";0;"White";0)
`White for header background, 13th color from 4D’s palette for list background, 1st column
PL_SetBackClr (eNames;1;"White";0;"";13)
PL_SetBackClr
43
Configuration Commands
PL_SetBackRGBColor
(areaRef:L; hdrBackRed:L; hdrBackGreen:L; hdrBackBlue:L; listBackRed:L;
listBackGreen:L; listBackBlue:L; ftrBackRed:L; ftrBackGreen:L; ftrBackBlue:L)
Parameter
Type
Description
➞ areaRef
➞ hdrBackRed
longint
Reference of PrintList Pro object on layout
longint
Header back red
➞ hdrBackGreen
longint
Header back green
➞ hdrBackBlue
➞ listBackRed
longint
Header back blue
longint
List back red
➞ listBackGreen
longint
List back green
➞ listBackBlue
longint
List back blue
➞ ftrBackRed
longint
Footer back red
➞ ftrBackGreen
longint
Footer back green
➞ ftrBackBlue
longint
Footer back blue
PL_SetBackRGBColor is used to specify the background colors for the header and list area, using the
RGB values. This routine is similar to PL_SetBackClr.
While the foreground color can be specified for each column, the background color for the header or the
list area can only be specified for all columns using this command. You need to use PL_SetColBackColor
or PL_SetColBackRGBColor to set the background colors of each column's header and each column itself.
hdrBackRed — Desired header background red component in RGB color pattern.
hdrBackGreen — Desired header background green component in RGB color pattern.
hdrBackBlue — Desired header background blue component in RGB color pattern.
listBackRed — Desired list background red component in RGB color pattern.
listBackGreen — Desired list background green component in RGB color pattern.
listBackBlue — Desired list background blue component in RGB color pattern.
ftrBackRed — Desired footer background red component in RGB color pattern.
ftrBackGreen — Desired footer background green component in RGB color pattern.
ftrBackBlue — Desired footer background blue component in RGB color pattern.
The following example will tell PrintList Pro to print the list using a color scheme standard for OSX:
PL_SetBackRGBColor (xArea;237;254;243;237;254;243;237;254;243)
PL_SetBackRGBColor
44
Configuration Commands
PL_SetColBackColor
(areaRef:L; columnNumber:I; plpHdrBackColor:S; 4dHdrBackColor:I; plpListBackColor:S;
4dListBackColor:I)
Parameter
Type
Description
➞ areaRef
longint
Reference of PrintList Pro object on layout
➞ columnNumber
➞ plpHdrBackColor
integer
Column number
string
Header background color from PrintList Pro’s palette
➞ 4dHdrBackColor
integer
Header background color from 4D’s palette
➞ plpListBackColor
➞ 4dListBackColor
string
List background color from PrintList Pro’s palette
integer
List background color from 4D’s palette
PL_SetColBackColor is used to specify the background colors for a column header and a list area
column.
PrintList Pro has its own palette, with the following colors: white, black, blue, green, yellow, magenta,
red, cyan, gray, light gray.
columnNumber — The column for which to set the background color. Use a value of zero (0)
for columnNumber to apply the parameters to all columns.
plpHdrBackColor — Name of the color in PrintList Pro’s palette. This will be the background color for
the column header. If the name is not in PrintList Pro’s palette or it is a null string, then 4dHdrBackColor
will be used.
4dHdrBackColor — 1 to 256. The color at this position in 4D’s palette will be used for the
background color for the column header.
plpListBackColor — Name of the color in PrintList Pro’s palette. This will be the background color for
the column. If the name is not in PrintList Pro’s palette or it is a null string, then 4dListBackColor will be
used.
4dListBackColor — 1 to 256. The color at this position in 4D’s palette will be used for the background
color for the column.
If PL_SetColBackColor is not called, the default is white for both the header and list background colors.
Examples:
`Light gray for header background, white for list background, all columns, gray for the footer background
PL_SetColBackColor (eNames;0;"Light Gray";0;"White";0;"Gray";0)
`White for header background, 13th color from 4D’s palette for list background, 1st column,
color 246 from 4D’s palette for footer background
PL_SetColBackColor (eNames;1;"White";0;"";13;"";246)
PL_SetColBackColor
45
Configuration Commands
PL_SetColBackRGBColor
(areaRef:L; columnNumber:L; hdrBackRed:L; hdrBackGreen:L; hdrBackBlue:L; listBackRed:L;
listBackGreen:L; listBackBlue:L)
Parameter
Type
Description
➞ areaRef
longint
Reference of PrintList Pro object on layout
➞ columnNumber
➞ hdrBackRed
longint
Column number
longint
Header back red
➞ hdrBackGreen
longint
Header back green
➞ hdrBackBlue
➞ listBackRed
longint
Header back blue
longint
List back red
➞ listBackGreen
longint
List back green
➞ listBackBlue
longint
List back blue
PL_SetColBackRGBColor is used to specify the background colors for a column header and a list area
column, using the RGB values. This routine is similar to PL_SetColBackColor.
columnNumber — The column for which to set the background color. Use a value of zero (0)
for columnNumber to apply the parameters to all columns.
hdrBackRed — Desired header background red component in RGB color pattern.
hdrBackGreen — Desired header background green component in RGB color pattern.
hdrBackBlue — Desired header background blue component in RGB color pattern.
listBackRed — Desired list background red component in RGB color pattern.
listBackGreen — Desired list background green component in RGB color pattern.
listBackBlue — Desired list background blue component in RGB color pattern.
The following example will tell PrintList Pro to print the third column using a color scheme standard for
OSX:
PL_SetColBackRGBColor (xArea;3;237;254;243;237;254;243;237;254;243)
PL_SetColBackRGBColor
46
Configuration Commands
PL_SetRowStyle
(areaRef:L; rowNumber:L; styleNum:I; fontName:S; fontSize:I)
Parameter
Type
Description
➞ areaRef
longint
Reference of PrintList Pro object on layout
➞ rowNumber
➞ styleNum
longint
Number of row
integer
Style of the font
➞ fontName
string
Name of the font
➞ fontSize
integer
Size of the font
PL_SetRowStyle is used to set the style and font for a particular row. It will override the style
and font settings for all columns in that row. The size settings of each column will still apply.
Any subsequent sorting using PL_SetSort will cause the row style setting to be moved with the arrays.
This will keep the style setting “in sync” with the original row.
Keep in mind that any settings applied to a row will be moved with that row’s data if the data is later
sorted using PL_SetSort. If you do not want the row’s settings to move, call PL_SetSort before applying
the row settings.
rowNumber — The row for which to set the style. Use a value of zero (0) for rowNumber to apply
the parameters to all rows.
styleNum — This parameter is used to set the style for the row. The different values in the table below
can be added together to produce combinations of styles. For example, bold italic has a value of 3.
Style
Plain
Bold
Italic
Underline
Outline
Shadow
Condensed
Extended
Number
0
1
2
4
8
16
32
64
If a row style has been previously set, it may be removed by setting styleNum to -1. This may also be
applied to all rows by passing a zero (0) for the rowNumber. This will have no effect on rows that have
not been previously set.
The row style may be left unchanged by setting styleNum to 256.
PL_SetRowStyle
47
Configuration Commands
fontName — This parameter specifies the font for a row. The row font may be left unchanged by setting
fontName to the empty string (""). If the font specified is not found, it will be treated as an empty string
and ignored.
fontSize — This specifies the font size for a row. The row font size may be left unchanged by setting
fontSize to 0.
Examples:
PL_SetRowStyle (eNames;10;2;"";0) `set row 10 to be italic - no change in font size
PL_SetRowStyle (eNames;0;1;"Helvetica";14) `set all rows to be bold, Helvetica 14
PL_SetRowStyle (eList;12;3;"Times";0) `set the 12th row to print the Times font in bold italic style
PL_SetRowColor
(areaRef:L; rowNumber:L; plpRowForeColor:S; 4dRowForeColor:L; plpRowBackColor:S;
4dRowBackColor:L)
Parameter
Type
Description
➞ areaRef
longint
Reference of PrintList Pro object on layout
➞ rowNumber
➞ plpRowForeColor
longint
Number of row
string
Row foreground color from PrintList Pro’s palette
➞ 4dRowForeColor
longint
Row foreground color from 4D’s palette
➞ plpRowBackColor
➞ 4dRowBackColor
string
Row background color from PrintList Pro’s palette
longint
Row background color from 4D’s palette
PL_SetRowColor is used to specify the foreground and background colors for a row. It will override
the foreground and background color settings for all columns in that row. Any subsequent sorting using
PL_SetSort will cause the row color setting to be moved with the arrays. This will keep the color setting
“in sync” with the original row.
Keep in mind that any settings applied to a row will be moved with that row’s data if the data is later
sorted using PL_SetSort. If you do not want the row’s settings to move, call PL_SetSort before applying
the row settings.
PrintList Pro has its own palette, with the following colors: white, black, blue, green, yellow, magenta,
red, cyan, gray, light gray.
rowNumber — The row for which to set the foreground color. Use a value of zero (0) for rowNumber
to apply the parameters to all rows.
plpRowForeColor — Name of the color in PrintList Pro’s palette. This will be the foreground color for
the row. If the name is not in PrintList Pro’s palette or it is a null string, then 4dRowForeColor will be
used.
PL_SetRowStyle - PL_SetRowColor
48
Configuration Commands
4dRowForeColor — 1 to 256. Foreground color number for the row (from 4D’s palette). The row
foreground color may be left unchanged by setting plpRowForeColor to the empty string (""), and
4dRowForeColor to 0.
If a row color has been previously set, it may be removed by setting plpRowForeColor to an empty
string (""), and 4dRowForeColor to -1. This may also be applied to all rows by passing a zero (0) for
the rowNumber. This will have no effect on rows that have not been previously set.
plpRowBackColor — Name of the color in PrintList Pro’s palette. This will be the background color
for the row. If the name is not in PrintList Pro’s palette or it is the empty string (""), then 4dRowBackColor
will be used.
4dRowBackColor —1 to 256. Background color number for the row (from 4D’s palette). The row
background color may be left unchanged by setting plpRowBackColor to the empty string (""), and
4dRowBackColor to 0.
If a row background color has been previously set, it may be removed by setting plpRowBackColor
to the empty string (""), and 4dRowBackColor to -1. This may also be applied to all rows by passing a
zero (0) for the row number. This will have no effect on rows that have not been previously set.
Examples:
PL_SetRowColor (eNames;10;"Blue";0;"Light gray";0) `set row 10 to foreground blue,
background light gray
PL_SetRowColor (eNames;0;"Blue";0;"Yellow";0) `set all rows to blue foreground, yellow background
PL_SetRowColor (eNames;0;"";-1;"";-1) `reset all row colors to use the column color settings
PL_SetRowColor (eList;10;"Blue";0;"Light Gray";0)`set the 10th row to print a foreground color of blue
and background color of light gray
PL_SetRowColor (eList;12;"Green";0;"";0) `set the 12th row to print a foreground color of green
and the current background color
PL_SetRowColor
49
Configuration Commands
PL_SetRowRGBColor
(areaRef:L; rowNumber:L; rowForeRed:L; rowForeGreen:L; rowForeBlue:L; rowBackRed:L;
rowBackGreen:L; rowBackBlue:L)
Parameter
Type
Description
➞ areaRef
longint
Reference of PrintList Pro object on layout
➞ rowNumber
➞ rowForeRed
longint
Row number
longint
Foreground red
➞ rowForeGreen
longint
Foreground green
➞ rowForeBlue
➞ rowBackRed
longint
Foreground blue
longint
Background red
➞ rowBackGreen
longint
Background green
➞ rowBackBlue
longint
Background blue
PL_SetRowRGBColor provides the ability to set the foreground and background colors for an individual
row using standard RGB colors. This routine is similar to PL_SetRowColor, except that it uses RGB color
values.
rowForeRed — Desired foreground red component in RGB color pattern.
rowForeGreen — Desired foreground green component in RGB color pattern.
rowForeBlue — Desired foreground blue component in RGB color pattern.
rowBackRed — Desired background red component in RGB color pattern.
rowBackGreen — Desired background green component in RGB color pattern.
rowBackBlue — Desired background blue component in RGB color pattern.
The following example will tell PrintList Pro to print the third row using a color scheme standard for OSX:
PL_SetRowRGBColor (xArea;3;237;0;243;0;254;0)
PL_SetRowRGBColor
50
Configuration Commands
PL_SetDividers
(areaRef:L; colDividerWidth:F; colDividerPattern:S; plpColDividerColor:S; 4dColDividerColor:I;
rowDividerWidth:F; rowDividerPattern:S; plpRowDividerColor:S; 4dRowDividerColor:I)
Parameter
Type
Description
➞ areaRef
longint
Reference of PrintList Pro object on layout
➞ colDividerWidth
real
Width of the column divider line
➞ colDividerPattern
➞ plpColDividerColor
string
Pattern of the column divider
string
Color from PrintList Pro’s palette for the column divider
➞ 4dColDividerColor
integer
Color from 4D’s palette for the column divider
➞ rowDividerWidth
real
Width of the row divider line
➞ rowDividerPattern
➞ plpRowDividerColor
string
Pattern of the row divider
string
Color from PrintList Pro’s palette for the row divider
➞ 4dRowDividerColor
integer
Color from 4D’s palette for the row divider
PL_SetDividers is used to set the pattern and color of the column and row dividers.
These are the available patterns: white, black, gray, light gray, and dark gray.
PrintList Pro has its own palette, with the following colors: white, black, blue, green, yellow, magenta,
red, cyan, gray, light gray.
colDividerWidth — 0 to 1. This option controls the line width of the column dividers. A value of 0.25
pixel should be used for hairlines. A value of 0 means that no dividers will be printed.
colDividerPattern — Name of the pattern for the column divider. If a null string is used then no
column divider will be printed.
plpColDividerColor — Name of the color in PrintList Pro’s palette. This will be the color for the
column divider. If the name is not in PrintList Pro’s palette or it is a null string, then 4dColDividerColor
will be used.
4dColDividerColor — 1 to 256. The color at this position in 4D’s palette will be used for the
column divider.
rowDividerWidth — 0 to 1. This option controls the line width of the row dividers. A value of 0.25 pixel
should be used for hairlines. A value of 0 means that no dividers will be printed.
rowDividerPattern — Name of the pattern for the row divider. If a null string is used then no row
divider will be printed.
plpRowDividerColor — Name of the color in PrintList Pro’s palette. PrintList Pro has its own palette,
with the following colors: white, black, blue, green, yellow, magenta, red, cyan, gray, light gray.
This will be the color for the row divider. If the name is not in PrintList Pro’s palette or it is a null string,
then 4dRowDividerColor will be used.
PL_SetDividers
51
Configuration Commands
4dRowDividerColor — 1 to 256. The color at this position in 4D’s palette will be used for the row
divider.
If neither PL_SetDividers nor PL_SetRGBDividers are called, then no column or row dividers will be
printed.
Examples:
`Print solid gray column dividers and no row dividers
PL_SetDividers (eNames;1;"Black";"Gray";0;0;"";"";0)
`Print column and row hairline dividers in a gray pattern
PL_SetDividers (eNames;0.25;"Gray";"Black";0;0.25;"Gray";"Black";0)
PL_SetRGBDividers
(areaRef:L; colDividerWidth:F; colDividerPattern:S; colDividerRed:L; colDividerGreen:L;
colDividerBlue:L; rowDividerWidth:F; rowDividerPattern:S; rowDividerRed:L;
rowDividerGreen:L; rowDividerBlue:L)
Parameter
Type
Description
➞ areaRef
longint
Reference of PrintList Pro object on layout
➞ colDividerWidth
real
Width of the column divider line
➞ colDividerPattern
➞ colDividerRed
string
Column divider pattern string
longint
Column divider — Red
➞ colDividerGreen
longint
Column divider — Green
➞ colDividerBlue
longint
Column divider — Blue
➞ rowDividerWidth
➞ rowDividerPattern
real
Width of the row divider line
string
Row divider pattern string
➞ rowDividerRed
longint
Row divider — Red
➞ rowDividerGreen
longint
Row divider — Green
➞ rowDividerBlue
longint
Row divider — Blue
PL_SetRGBDividers functions the same as the PL_SetDividers routine, except that the column
and row divider colors use standard RGB values.
colDividerWidth — 0 to 1. This option controls the line width of the column dividers. A value of 0.25
pixel should be used for hairlines. A value of 0 means that no dividers will be printed.
colDividerPattern — String, name of the pattern for the column divider. If a null string is used then
no column divider will be printed.
colDividerRed — Column divider RGB red component.
colDividerGreen — Column divider RGB green component.
PL_SetDividers - PL_SetRGBDividers
52
Configuration Commands
colDividerBlue — Column divider RGB blue component.
rowDividerWidth — 0 to 1. This option controls the line width of the row dividers. A value of 0.25
pixel should be used for hairlines. A value of 0 means that no dividers will be printed.
rowDividerPattern — String, name of the pattern for the row divider. If a null string is used then
no row divider will be printed.
rowDividerRed — Row divider RGB red component.
rowDividerGreen — Row divider RGB green component.
rowDividerBlue — Row divider RGB blue component.
If neither PL_SetDividers nor PL_SetRGBDividers are called, then no column or row dividers will be
printed.
The following example will set the column / row dividers using the PL_SetRGBDividers routine:
`Print column and row dividers in a hairline gray pattern
PL_SetRGBDividers (eNames;0.25;"Gray";209; 209; 209;0.25;"Gray"; 209; 209; 209)
PL_SetFrame
(areaRef:L; frameLineWidth:F; frameLinePattern:S; plpFrameLineColor:S; 4dFrameLineColor:I;
headerLineWidth:F; headerLinePattern:S; plpHeaderLineColor:S; 4dHeaderLineColor:I)
Parameter
Type
Description
➞ areaRef
longint
Reference of PrintList Pro object on layout
➞ frameLineWidth
real
Width of the frame line
➞ frameLinePattern
➞ plpFrameLineColor
string
Pattern of the frame line
string
Color from PrintList Pro’s palette for the frame
➞ 4dFrameLineColor
integer
Color from 4D’s palette for the frame
➞ headerLineWidth
real
Width of the header separator
➞ headerLinePattern
➞ plpHeaderLineColor
string
Pattern of the header separator
string
Color from PrintList Pro’s palette for the header separator
➞ 4dHeaderLineColor
integer
Color from 4D’s palette for the header separator
PL_SetFrame is used to set the pattern and color of the frame and header separator lines.
These are the available patterns: white, black, gray, light gray, and dark gray.
PrintList Pro has its own palette, with the following colors: white, black, blue, green, yellow, magenta,
red, cyan, gray, light gray.
frameLineWidth — 0 to 1. This option controls the line width of the frame. A value of 0.25 pixel
should be used for hairlines. A value of 0 means that no frame will be printed.
PL_SetRGBDividers - PL_SetFrame
53
Configuration Commands
frameLinePattern — Name of the pattern for the frame. If a null string is used then no frame will
be printed.
plpFrameLineColor — Name of the color in PrintList Pro’s palette. This will be the color for the
frame. If the name is not in PrintList Pro’s palette or it is a null string, then 4dFrameLineColor will be
used.
4dFrameLineColor — 1 to 256. The color at this position in 4D’s palette will be used for the
frame.
headerLineWidth — 0 to 1. This option controls the line width of the header separator. A value of 0.25
pixel should be used for hairlines. A value of 0 means that no header separator will be printed.
headerLinePattern — Name of the pattern for the header separator. If a null string is used then no
header separator will be printed.
plpHeaderLineColor — Name of the color in PrintList Pro’s palette. PrintList Pro has its own palette,
with the following colors: white, black, blue, green, yellow, magenta, red, cyan, gray, light gray.
This will be the color for the header separator. If the name is not in PrintList Pro’s palette or it is a null
string, then 4dHeaderLineColor will be used.
4dHeaderLineColor — 1 to 256. The color at this position in 4D’s palette will be used for the header
separator.
If neither PL_SetFrame nor PL_SetRGBFrame are called, then no frame or header separator line will be
printed.
Examples:
`Print 1 pixel wide, solid gray header separator and no frame
PL_SetFrame (eNames;0;"";"";0;1;"Black";"Gray";0)
`Print hairline, solid black frame and header separator line
PL_SetFrame (eNames;0.25;"Black";"Black";0;0.25;"Black";"Black";0)
PL_SetRGBFrame
(areaRef:L; frameLineWidth:F; frameLinePattern:S; frameLineRed:L; frameLineGreen:L;
frameLineBlue:L; headerLineWidth:F; headerLinePattern:S; headerLineRed:L;
headerLineGreen:L; headerLineBlue:L;)
Parameter
Type
Description
➞ areaRef
longint
Reference of PrintList Pro object on layout
➞ frameLineWidth
real
Width of the frame line
PL_SetFrame - PL_SetRGBFrame
54
Configuration Commands
➞ frameLinePattern
➞ frameLineRed
string
Pattern of the frame line
longint
Frame line — Red
➞ frameLineGreen
longint
Frame line — Green
➞ frameLineBlue
longint
Frame line — Blue
➞ headerLineWidth
real
Width of the header separator
➞ headerLinePattern
➞ headerLineRed
string
Pattern of the header separator
longint
Header separator — Red
➞ headerLineGreen
longint
Header separator — Green
➞ headerLineBlue
longint
Header separator — Blue
PL_SetRGBFrame functions the same as the PL_SetFrame routine, except that the frame and header
separator colors use standard RGB values.
frameLineWidth — 0 to 1. This option controls the line width of the frame. A value of 0.25 pixel
should be used for hairlines. A value of 0 means that no frame will be printed.
frameLinePattern — Name of the pattern for the frame. If a null string is used then no frame will
be printed.
frameLineRed — Frame line RGB red component.
frameLineGreen — Frame line RGB green component.
frameLineBlue — Frame line RGB blue component.
headerLineWidth — 0 to 1. This option controls the line width of the header separator. A value of 0.25
pixel should be used for hairlines. A value of 0 means that no header separator will be printed.
headerLinePattern — Name of the pattern for the header separator. If a null string is used then no
header separator will be printed.
headerLineRed — Header separator RGB red component.
headerLineGreen — Header separator RGB green component.
headerLineBlue — Header separator RGB blue component.
If neither PL_SetFrame nor PL_SetRGBFrame are called, then no frame or header separator line will be
printed.
The following example will set the frame and header separator line using the PL_SetRGBFrame routine:
`Print frame and header separator line in a hairline gray pattern
PL_SetRGBFrame (eNames;0.25;"Gray";209; 209; 209;0.25;"Gray"; 209; 209; 209)
PL_SetRGBFrame
55
Configuration Commands
PL_SetHeight
(areaRef:L; numHeaderLines:I; headerHeightPad:I; numRowLines:I; rowHeightPad:I;
minimumHeight:I)
Parameter
Type
Description
➞ areaRef
longint
Reference of PrintList Pro object on layout
➞ numHeaderLines
➞ headerHeightPad
integer
Number of text lines in the header
integer
Extra height for the header
➞ numRowLines
integer
Number of text lines in each row
➞ rowHeightPad
integer
Extra height for each row
➞ minimumHeight
integer
Minimum pixel height remaining on the page
PL_SetHeight is used to set the number of lines of text along with additional height padding in the
header and in the rows. Only text and string columns can wrap to more than one line.
If numRowLines is set to 2 or more, text and string elements will be able to wrap into the number of lines
specified for each row. Note that all rows will be given the same number of lines regardless of the actual
number of lines used by a specific text or string element.
Additional padding may be set using rowHeightPad to allow more space between rows. Text will be
centered vertically in the header or row. Note that the padding applies to the entire row and not on
a line by line basis within the row.
numHeaderLines — The number of lines in the header. Default is 1.
headerHeightPad — The extra height, in pixels, to give to the header. Default is 2.
numRowLines — The number of lines to give to each row. A value greater than 0 means that the height
of each row is the same. The fixed height will either be a function of the number of text lines specified
or the height of the largest picture in a picture array if so configured (refer to PL_SetFormat). A value of
zero means that the height of each row is to be calculated automatically based on the data that is to be
printed. PrintList Pro examines the elements of all text, string, and picture arrays to determine the height
of each row. Default is 1.
rowHeightPad — The extra height, in pixels, to give to each row. Default is 0.
minimumHeight — The minimum remaining available height, in pixels, for the PrintList Pro area to
print on the page. For example, if there are several PrintList Pro areas on one form, and you want to
make sure that at least two rows are printed on one page for the area specified by areaRef, and the
row height is 12 points, you can set this parameter to 24. PrintList Pro will test if it has 24 pixels (two
rows) left available on the page before printing the area. If not, it will proceed onto the following
page. You should specify at least the height of one row in this parameter.
Examples:
PL_SetHeight (eList;1;4;1;2) `pad the header by 4 pixels and the rows by 2
PL_SetHeight (eList;2;5;2;0) `set header lines to 2, pad to 5 pixels, set row lines to 2, no padding
PL_SetHeight (eList;1;4;1;2;12) `check that 12 pixels (one row height here) are available before printing
PL_SetHeight
56
Configuration Commands
PL_SetSort
(areaRef:L; column1:I; …; columnN:I)
Parameter
Type
Description
➞ areaRef
longint
Reference of PrintList Pro object on layout
➞ column1; …; columnN integer
Column(s) to perform sort upon
PL_SetSort is used to perform a multi-level sort.
column — These parameters specify the columns to use for the sort criteria.
■■
A column greater than 0 causes an ascending sort to be performed upon that column,
while a column less than 0 causes a descending sort to be performed upon that column..
■■
If a column is 0, then all successive columns will be ignored.
■■
If the arrays are already sorted, use PL_SetBrkOrder instead to communicate the sort order to
PrintList Pro.
Examples:
PL_SetSort (eNames;3;4;7) `sort on columns 3, 4, and 7 (all ascending)
PL_SetSort (eContacts;-1;3;-2) `sort on columns 1 (descending), 3 (ascending), and 2 (descending)
PL_SetColOpts
(areaRef:L; hideLastColumns:I; hideDetailArea:I)
Parameter
Type
Description
➞ areaRef
longint
Reference of PrintList Pro object on layout
➞ hideLastColumns
➞ hideDetailArea
integer
Number of columns from the right to hide
integer
Hide the list and just show the breaks
PL_SetColOpts is used to hide columns from being printed and to hide the entire detail area to show
just break level information.
hideLastColumns — This parameter specifies the number of arrays from the right to not print. This
parameter is useful for keeping many arrays “in sync” when sorting, but only a subset are to be printed.
Default is 0.
hideDetailArea — 0 or 1:
0 — print the array values in the list (default)
1 — do not print the array values in the list — this is useful for printing a summary of break
level information without printing the actual list
PL_SetSort - PL_SetColOpts
57
Configuration Commands
Examples:
PL_SetColOpts (eList;2;0) `hide the last two columns
PL_SetColOpts (eList;0;1) `hide the detail area, show only the breaks
PL_SetCellStyle
(areaRef:L; firstCellCol:I; firstCellRow:L; lastCellCol:I; lastCellRow:L; cellArray:X; styleNum:I;
fontName:S; fontSize:I)
Parameter
Type
Description
➞ areaRef
longint
Reference of PrintList Pro object on layout
➞ firstCellCol
➞ firstCellRow
integer
First cell column
longint
First cell row
➞ lastCellCol
integer
Last cell column
➞ lastCellRow
longint
Last cell row
➞ cellArray
two-dimensional longint array
Discontiguous cells
➞ styleNum
integer
Style of the font
➞ fontName
string
Name of the font
➞ fontSize
integer
Size of the font
PL_SetCellStyle is used to set the font and / or style of a specific cell, range of cells, or list of cells.
■■
o specify a single cell. If firstCellCol and firstCellRow are greater than 0 and lastCellCol
T
or lastCellRow are less than or equal to 0 then only [firstCellCol, firstCellRow] will be set.
■■
o specify a range of cells. If firstCellCol and firstCellRow are greater than 0 and lastCellCol
T
and lastCellRow are greater than 0 then the range of cells from [firstCellCol, firstCellRow]
to [lastCellCol, lastCellRow] will be set.
■■
o specify discontiguous cells. If firstCellCol or firstCellRow are less than or equal to 0 then
T
the cells in cellArray will be set.
cellArray — Two-dimensional long integer array. The first dimension must be two. The first array is
for the column indices and the second array is for the row indices. The second dimension must be the
same as the number of cells that are to be selected. See the following illustration.
cellArray
0
1
2
0
0
1
2
Cell 1 1
Cell 2 2
Cell n n
Column
n
Row
PL_SetColOpts - PL_SetCellStyle
58
Configuration Commands
styleNum —This parameter is used to set the style for the specified cells. The values shown below
can be added together to combine styles.
Style
Plain
Bold
Italic
Underline
Outline
Shadow
Condensed
Extended
Number
0
1
2
4
8
16
32
64
If a cell style has been previously set, the style may be removed by setting styleNum to -1. The cell style
may be left unchanged by setting styleNum to 256.
fontName — This specifies the font for a cell. The cell font may be left unchanged by setting fontName
to the empty string (""). If the specified font is not found, it will be treated as an empty string and ignored.
fontSize — This specifies the font size for a cell. The cell font size may be left unchanged by setting
fontSize to 0.
Keep in mind that any settings applied to a cell will be moved with that cell's data if the data is later
sorted using PL_SetSort. If you do not want the cell's settings to move, call PL_SetSort before applying
the cell settings.
Example:
ARRAY LONGINT (aCellSet;2;4)
`Set cell at column 1, row 3 to bold Helvetica - no change in font size
PL_SetCellStyle (eArea;1;3;0;0;aCellSet;1;"Helvetica";0)
`Set cells from column 2, row 2 to column 5, row 5 to font size 14, no change in style and font
PL_SetCellStyle (eArea;2;2;5;5;aCellSet;256;"";14)
`Set the cells in aCellSet to Times
aCellSet{1}{1}:=1 `column 1, row 1
aCellSet{2}{1}:=1
aCellSet{1}{2}:=1 `column 1, row 2
aCellSet{2}{2}:=2
aCellSet{1}{3}:=2 `column 2, row 5
aCellSet{2}{3}:=5
aCellSet{1}{4}:=2 `column 2, row 6
aCellSet{2}{4}:=6
PL_SetCellStyle (eArea;0;0;0;0;aCellSet;256;"Times";0)
PL_SetCellStyle
59
Configuration Commands
PL_SetCellColor
(areaRef:L; firstCellCol:I; firstCellRow:L; lastCellCol:I; lastCellRow:L; cellArray:X;
plpForeColor:S; 4dForeColor:I; plpBackColor:S; 4dBackColor:I)
Parameter
Type
Description
➞ areaRef
longint
Reference of PrintList Pro object on layout
➞ firstCellCol
➞ firstCellRow
integer
First cell column
longint
First cell row
➞ lastCellCol
integer
Last cell column
➞ lastCellRow
longint
Last cell row
➞ cellArray
two-dimensional longint array
Discontiguous cells
➞ plpForeColor
string
Foreground color from PrintList Pro’s palette
➞ 4dForeColor
integer
Foreground color from 4D’s palette
➞ plpBackColor
string
Background color from PrintList Pro’s palette
➞ 4dBackColor
integer
Background color from 4D’s palette
PL_SetCellColor is used to set the foreground color and / or background color of a specific cell,
range of cells, or list of cells.
PrintList Pro has its own palette, with the following colors: white, black, blue, green, yellow, magenta,
red, cyan, gray, light gray.
■■
o specify a single cell. If firstCellCol and firstCellRow are greater than 0 and lastCellCol
T
or lastCellRow are less than or equal to 0 then only [firstCellCol, firstCellRow] will be set.
■■
o specify a range of cells. If firstCellCol and firstCellRow are greater than 0 and lastCellCol
T
and lastCellRow are greater than 0 then the range of cells from [firstCellCol, firstCellRow]
to [lastCellCol, lastCellRow] will be set.
■■
o specify discontiguous cells. If firstCellCol or firstCellRow are less than or equal to 0 then
T
the cells in cellArray will be set.
cellArray — Two-dimensional long integer array. The first dimension must be two. The first array is for
the column indices and the second array is for the row indices. The second dimension must be the same
as the number of cells that are to be selected. See the following illustration.
cellArray
0
1
2
0
0
1
2
Cell 1 1
Cell 2 2
Cell n n
Column
n
Row
PL_SetCellColor
60
Configuration Commands
plpForeColor — Name of the color in PrintList Pro’s palette. This will be the foreground color for the
cell. If the name is not in PrintList Pro’s palette or it is the empty string (""), then 4dForeColor will be
used.
4dForeColor — 1 to 256. Foreground color number for the cell (from 4D’s palette). If a cell foreground
color has been previously set, it may be removed by setting plpForeColor to the empty string (""), and
4dForeColor to 1. The cell foreground color may be left unchanged by setting plpForeColor to the empty
string (""), and 4dForeColor to 0.
plpBackColor — Name of the color in PrintList Pro’s palette. This will be the background color for the
cell. If the name is not in PrintList Pro’s palette or it is the empty string (""), then 4dBackColor will be
used.
4dBackColor — 1 to 256. Background color number for the cell (from 4D’s palette).
If a cell background color has been previously set, it may be removed by setting plpBackColor to the
empty string (""), and 4dBackColor to 1. The cell background color may be left unchanged by setting
plpBackColor to the empty string (""), and 4dBackColor to 0.
Keep in mind that any settings applied to a cell will be moved with that cell's data if the data is later
sorted using PL_SetSort. If you do not want the cell's settings to move, call PL_SetSort before applying
the cell settings.
Example:
ARRAY LONGINT (aCellArray;2;0) `MUST initialize a two-dimensional long integer array
`Set the foreground color of the cell at column 1, row 3 to blue
PL_SetCellColor (eList;1;3;0;0;aCellArray;"blue";0;"";0)
`Set background color of cells from column 2, row 2 to column 5, row 5 to green
PL_SetCellColor (eList;2;2;5;5;aCellArray;"";0;"Green";0)
`Set all negative values in the third column, a real array, to have a foreground color of red
For ($i;1;Size of array (aRevenue)) `check each element in the array
If (aRevenue{$i}<0) `is the value in this element negative?
PL_SetCellColor (eList;3;$i;0;0;aCellArray;"Red";0;"";0) `if so, then print it in red
End if
End for
PL_SetCellColor
61
Configuration Commands
PL_SetCellRGBColor
(areaRef:L; firstCellCol:I; firstCellRow:L; lastCellCol:I; lastCellRow:L; cellArray:X;
cellForeRed:L; cellForeGreen:L; cellForeBlue:L; cellBackRed:L; cellBackGreen:L;
cellBackBlue:L)
Parameter
Type
Description
➞ areaRef
longint
Reference of PrintList Pro object on layout
➞ firstCellCol
➞ firstCellRow
integer
First cell column
longint
First cell row
➞ lastCellCol
integer
Last cell column
➞ lastCellRow
longint
Last cell row
➞ cellArray
two-dimensional longint array
Discontiguous cells
➞ cellForeRed
longint
Foreground red
➞ cellForeGreen
longint
Foreground green
➞ cellForeBlue
longint
Foreground blue
➞ cellBackRed
longint
Background red
➞ cellBackGreen
longint
Background green
➞ cellBackBlue
longint
Background blue
PL_SetCellRGBColor is used to set the foreground and / or background color of a specific cell,
range of cells, or list of cells. This routine works in the same manner as PL_SetCellColor,
except it allows you to specify the colors using standard RGB values.
cellForeRed — Desired foreground red component in RGB color pattern.
cellForeGreen — Desired foreground green component in RGB color pattern.
cellForeBlue — Desired foreground blue component in RGB color pattern.
cellBackRed — Desired background red component in RGB color pattern.
cellBackGreen — Desired background green component in RGB color pattern.
cellBackBlue — Desired background blue component in RGB color pattern.
PL_SetCellRGBColor
62
Configuration Commands
PL_SetCellIcon
(areaRef:L; cellColumn:I; cellRow:L; pictRef:P; iconAlignment:I; horPosition:I; vertPosition:I;
offset:I; scaling:I)
Parameter
Type
Description
➞ areaRef
➞ cellColumn
longint
Reference of PrintList Pro object on layout
integer
Column at which to set the icon
➞ cellRow
longint
Row at which to set the icon
➞ iconRef
longint
Reference of the icon or picture to use
➞ iconAlignment
integer
Position of icon
➞ horPosition
integer
Horizontal position
➞ vertPosition
integer
Vertical position
➞ offset
integer
Pixel offset
➞ scaling
integer
Scaling
PL_SetCellIcon provides the ability to procedurally print icons in individual cells.
One or two icons may be used (left and right). You can customize the icon(s) using “cicn” or “PICT”
resources, or items from the 4D Picture Library (see details below).
This call supersedes Escape sentence icons placed in cells (see Header / Cell Icon Support).
cellColumn — Desired cell column number.
cellRow — Desired cell row number.
iconRef — Reference of the icon or picture to use. Both “cicn” and “PICT” resources can be used, as
well as items from the Picture Library. To associate an icon to the cell, pass one of the following numeric
values (Use PICT resource and Use PicRef are 4D constants):
■■
N, where N is the resource ID of Mac OS-based “cicn” resource
■■
Use PICT resource + N, where N is the the resource ID of a Mac OS-based “PICT” resource
■■
se PicRef + N, where N is the reference number of a picture from the Design environment
U
Picture Library
■■
pass zero (0) if you do not want any icon for the cell
See Header / Cell Icon Support for examples. See also the 4th Dimension Language Reference regarding
the SET LIST ITEM PROPERTIES command, which uses the same icon syntax.
PL_SetCellIcon
63
Configuration Commands
iconAlignment — Position of icon (each cell can contain up to two icons):
0 — places icon on left of cell
1 — places icon on right of cell
horPosition — One the following options:
0 — default (left for left icon, right for right icon)
1 — align left
2 — align center
3 — align right
vertPosition — One the following options:
0 — default (top)
1 — align top left
2 — align center
3 — align bottom
offset — offset of the “icon guide”. The horizontal position is relative to this position. If the horizontal
alignment is center, the icon is centered between the guide and corresponding side of cell (left for left
icon, right for right icon).
The picture below illustrates the icon guide and its offset:
Icon guide and offset
In the picture below, the left icon is aligned right to the icon guide and the right icon is aligned left to
the icon guide:
Left icon aligned right
Right icon aligned left
In the picture below, the left icon is centered between the left border and the icon guide and no right
icon is used:
Left icon centered
scaling — One the following options:
0 — truncated
1 — scaled
PL_SetCellIcon
64
Configuration Commands
The cell content (text) is printed into the space that is left once the icon is printed. If the icon is larger
than the remaining available space, the text is printed over the icon.
For example, if the column width is 100 pixels and you print a 15 pixel icon, there is remaining width
of 85 pixels where the text will be printed. If, however, the total width (icon + text) exceeds the column
width, the text will be printed over the picture. This allows background pictures behind the text.
The following example will print an icon in r3c2, using an item (resID 1717) from the Picture Library:
$col:=2
$row:=3
$iconRef:=1717+Use PicRef
$iconPos:=1 `right
$horPos:=0 `default
$verPos:=2 `align center
$offset:=5
$scaling:=0
PL_SetCellIcon (ePL_Output;$col;$row;$iconRef;$iconPos;$horPos;$verPos;$offset;$scaling)
PL_SetCellIcon
65
Configuration Commands
PL_SetCellBorder
(areaRef:L; cellColumn:I; cellRow:L; borderLeft:I; borderTop:I; borderRight:I; borderBottom:I;
offset:I; width:F; redColor:I; greenColor:I; blueColor:I)
Parameter
Type
Description
➞ areaRef
longint
Reference of PrintList Pro object on layout
➞ cellColumn
➞ cellRow
integer
Column
longint
Row
➞ borderLeft
integer
Print left border
➞ borderTop
➞ borderRight
integer
Print top border
integer
Print right border
➞ borderBottom
integer
Print bottom border
➞ offset
integer
Offset from cell boundary in pixels
➞ width
real
Width of line
➞ redColor
integer
Red
➞ greenColor
integer
Green
➞ blueColor
integer
Blue
PL_SetCellBorder provides the ability to set the border style and RGB color for a cell.
cellColumn — Column of cell where border will be applied.
cellRow — Row of cell where border will be applied.
borderLeft — Print left border.
borderTop — Print top border.
borderRight — Print right border.
borderBottom — Print bottom border.
offset —
Offset from cell boundary in pixels. 0 if the border should be printed at cell boundary (default).
width — Width of line. This parameter is a real value, allowing fractional widths. See Hairline Line
Width.
redColor — RGB red component used for the border.
greenColor — RGB green component used for the border.
blueColor — RGB blue component used for the border.
PL_SetCellBorder
66
Configuration Commands
PL_SetCellFrame
(areaRef:L; firstCellCol:I; firstCellRow:L; lastCellCol:I; lastCellRow:L; offset:I; width:F;
redLightColor:I; greenLightColor:I; blueLightColor:I; redDarkColor:I; greenDarkColor:I;
blueDarkColor:I; clearAllBorders:I)
Parameter
Type
Description
➞ areaRef
longint
Reference of PrintList Pro object on layout
➞ firstCellCol
➞ firstCellRow
integer
First cell column
longint
First cell row
➞ lastCellCol
integer
Last cell column
➞ lastCellRow
longint
Last cell row
➞ offset
integer
Offset from cell boundary in pixels
➞ width
real
Width of line
➞ redLightColor
integer
Red (light color)
➞ greenLightColor
integer
Green (light color)
➞ blueLightColor
integer
Blue (light color)
➞ redDarkColor
integer
Red (dark color)
➞ greenDarkColor
integer
Green (dark color)
➞ blueDarkColor
integer
Blue (dark color)
➞ clearAllBorders
integer
Clear all borders within the frame
PL_SetCellFrame prints a frame around a range of cells. It uses RGB colors: light color for both left and
top lines, dark color for both right and bottom line.
The range of cells from [firstCellCol, firstCellRow] to [lastCellCol, lastCellRow] will be set.
offset —
Offset from cell boundaries in pixels. 0 if the frame should be printed at cell boundaries (default).
width — Width of line. This parameter is a real value, allowing fractional widths. See Hairline Line
Width.
redLightColor, greenLightColor, blueLightColor — RGB components used for both left and top
lines colors.
redDarkColor, greenDarkColor, blueDarkColor — RGB components used for both right and
bottom lines colors.
clearAllBorders — It this parameter value is 1, then all cells inside the frame will have their borders
removed.
PL_SetCellFrame
67
Configuration Commands
PL_SetPageProc
(areaRef:L; callbackMethod:S)
Parameter
Type
Description
➞ areaRef
longint
Reference of PrintList Pro object on layout
➞ callbackMethod
string
Name of the page callback project method
PL_SetPageProc is used to specify a 4D project method to be called at the end of PrintList Pro’s
processing on every page. Keep in mind that a PrintList Pro page is not necessarily equivalent to a
physical page. It is possible to have several occurrences of a PrintList Pro object for a single page.
Each occurrence will invoke the callback method at the end of its page.
callbackMethod — The name of the callback method that is called at the end of every PrintList Pro
page.
You must use the following declaration in your callback method:
C_LONGINT ($1;$2)
PrintList Pro will pass the method specified by callbackMethod two parameters: the first indicates
which PrintList Pro area is calling the method, and the second specifies the last row printed on that
page.
Example:
PL_SetPageProc (eList;"MyCallback")
PL_SetPageProc
68
Using the Callback Methods
Using the Callback Methods
A “callback” is a 4D project method which is executed by a plug-in. PrintList Pro lets you make use
of callbacks when printing a PrintList Pro object.
Summary
PrintList Pro provides four different callback methods:
■■
when the end of a printed page is reached (callbackMethod parameter of PL_SetPageProc)
■■
custom calculations in a break (functionName parameter of PL_SetBrkFunc)
■■
custom calculations in a break header (functionName parameter of PL_SetBkHFunc)
■■
calculated columns (calcCallback parameter of PL_SetCalcCall)
Warnings
■■
allback methods may use most 4D commands, but should not call any PrintList Pro commands
C
or any 4D commands that affect the arrays.
■■
allback methods should preserve the current selection of the printing layout’s file by saving
C
and restoring the selection if necessary.
■■
All callbacks receive parameters, which need to be declared as documented below.
End of Page Callback
PrintList Pro makes use of a callback method to inform you when the end of a printed page is reached.
This enables you to perform any necessary processing associated with the end of the page, for example,
changing information printed in the footer area of that page or the header area of the next page.
Use PL_SetPageProc to specify the 4D project method PrintList Pro is to call. PrintList Pro will pass
the method specified by callbackMethod two parameters: the first indicates which PrintList Pro area is
calling the method, and the second specifies the last row printed on that page.
You must use the following declaration in your callback method:
C_LONGINT ($1;$2)
Summary - Warnings - End of Page Callback
69
Using the Callback Methods
Custom Calculations in a Break
PL_SetBrkFunc is used to specify the callback function for use with custom calculations. The callback
function functionName is called whenever PrintList Pro encounters the string “\Function” within the text
that is to be printed for a specific break level.
Refer to PL_SetBrkText for details on how to embed the custom calculation string.
PrintList Pro passes information needed for the custom calculation to the callback function.
You must use the following declarations in your callback method:
C_INTEGER ($1;$2) `break level, column
C_STRING (82;$3) `column format
C_LONGINT ($4;$5) `start row, end row
C_TEXT ($0) `custom calculation result to print
Custom Calculations in a Break Header
A break header will print information just prior to the group of related values.
PL_SetBkHFunc is used to specify the name of the break header callback function. This function will be
called for any break header that contains a break function. Refer to PL_SetBrkText and PL_SetBkHText
to determine how to set a break function for a break level. The syntax of this command is identical to
that of PL_SetBrkFunc.
The callback function functionName is called whenever PrintList Pro encounters the string “\Function”
within the text that is to be printed for a specific break level. PrintList Pro passes information needed for
the custom calculation to the callback function.
You must use the following declarations in your callback method:
C_INTEGER ($1;$2) `break level, column
C_STRING (82;$3) `column format
C_LONGINT ($4;$5) `start row, end row
C_TEXT ($0) `custom calculation result to print
Custom Calculations in a Break - Custom Calculations in a Break Header
70
Using the Callback Methods
Calculated Column Callback
A 4D callback may be attached to a specific column. When information is needed for this column,
PrintList Pro will execute the callback to allow you to fill the column with data. This allows the printing
of data calculated from one or more fields as well as any ad hoc data that is desired.
Parameter
Description
$1
Reference of PrintList Pro object on layout
$2
Column number
$3
Type of data in this column
$4
Pointer to temporary 4D array
$5
First record for which to calculate cell
$6
Number of cells to calculate in column
The first three parameters are not absolutely necessary to determine how to fill the column.
They are provided to give you more flexibility in the implementation of the callback method.
■■
he first parameter is the areaRef. This gives you the ability to use this callback method for
T
more than one PrintList Pro object.
■■
he second parameter is the column number. This gives you the ability to use this callback
T
method for many columns within a PrintList Pro object.
■■
The third parameter is the type of data in the column.
The last three parameters are absolutely necessary.
■■
he fourth parameter is a pointer to one of the temporary 4D arrays declared in the
T
Compiler_PLP method. This is where you will load the data to be printed in the column.
■■
he fifth parameter is the number of the first cell that needs to be filled in the column.
T
This is the same as the selected number of the row that contains this cell.
■■
The sixth parameter is the number of cells to be filled in the column.
You must declare all six parameters ($1 to $6) in the calculated column callback. If any of these
parameters are not declared, you will get an error when compiling the database.
You must use the following declarations in your callback method:
C_LONGINT ($1;$2;$3;$5;$6)
C_POINTER ($4)
See Setting a Calculated Column for details.
Calculated Column Callback
71
Field and Record Commands
Field and Record Commands
PrintList Pro uses the SELECTION RANGE TO ARRAY command in 4D to get the records for printing.
Up to 512 fields (columns) can be printed in a PrintList Pro object.
Using the Field Printing Capability
Temporary Arrays
PrintList Pro internally uses interprocess 4D arrays to get the record data from 4th Dimension. These
arrays must be declared in 4D. A text file has been included that contains these declarations. Simply
create a 4D global method named Compiler_PLP and copy these declarations into it. There is no need
to call this method from your 4D code, PrintList Pro will call it for you. This method must exist whether
your database is interpreted or compiled.
Do not access the data within these temporary arrays. These arrays are for PrintList Pro’s internal use
only and their contents may change at any time.
Only 30 arrays of each of the 9 data types that PrintList Pro supports are declared. If you will be
printing more than 30 fields of a certain type, then you must add more declarations within the
Compiler_PLP project method.
Conversely, you may remove some of these declarations if you never print fields (or print very few fields)
of a certain type. Be very careful (when adding or removing declarations) to follow exactly the syntax of
the existing declarations.
Arrays and Fields
Arrays and fields may not be printed together in the same PrintList Pro object. If arrays are printed in
an object, then the field commands will be ignored. Conversely, if fields are printed in an object, then
the array commands will be ignored.
Setting a Calculated Column
The PL_SetFields command is used both to set fields to be printed and to set up calculated columns.
If the fieldNum parameter contains an integer greater than or equal to 1, the column wil print the field
represented by that number.
If the fieldNum parameter contains an integer less than or equal to 0, the column will print calculated
data. The absolute value of fieldNum will determine the type of data to be printed in the column.
Using the Field Printing Capability - Setting a Calculated Column
72
Field and Record Commands
The following table shows the data types that may be printed in a calculated column.
Constant
Value
Is Alpha Field
Is Real
Is Text
Is Picture
Is Date
Is Boolean
Is Integer
Is LongInt
Is Time
0
1
2
3
4
6
8
9
11
For example, to print a calculated solumn of type Real, pass Is Real (-1) in the fieldNum parameter.
Setting the Callback Method
Use the PL_SetCalcCall command to set the callback method for a column.
PrintList Pro will dimension the temporary array before invoking the calculated column callback.
There is no need to do it in the callback itself.
The following is an example of a calculated callback method. It merely calculates an employee’s one
year anniversary by adding 365 to their hire date (this obviously does not take into account leap years,
but is sufficient as an example).
`CalcColCallback
`$1: Area reference (PrintList Pro longint reference)
`$2: Column number
`$3: Type of data in this column
`$4: Pointer to temporary 4D array
`$5: First record for which to calculate cell
`$6: Number of cells to calculate in column
`Declare the parameters
C_LONGINT ($1;$2;$3;$5;$6) `these must be declared
C_POINTER ($4) `this must be declared
C_LONGINT ($i)
ARRAY DATE ($aHireDate;0)
SELECTION RANGE TO ARRAY ($5;$5+$6-1;[Employee]Hire Date;$aHireDate)
For ($i;1;$6)
$4->{$i}:=$aHireDate{$i}+365
End for
Setting a Calculated Column
73
Field and Record Commands
Time Data
Time data will be converted to a longint since this is how it is stored internally by 4D.
Printing 4D Fields
Fields from Related One Tables
Fields from a main table and from related one tables may be printed in the same PrintList Pro object. See
the commands PL_SetFile and PL_SetFields for further information about printing fields from
related one tables.
Sorting
PrintList Pro uses 4th Dimension’s sorting routines when sorting fields. 4D only uses indexes when performing a single level sort. Indexes are ignored when performing a multiple level sort.
When printing records, fields from a related one table can be included in a sort.
Maximum Number of Records Printed
PrintList Pro supports a maximum of 2 billion (exactly 2 147 483 647) records printed in a PrintList Pro
object.
You can also print a selection with any desired number of records up to this limit, using PL_SetSubSelect to
specify what record range within the current selection you wish to print.
Using Break Level Calculations With Fields
The Sum, Average, Min and Max calculations will not work in a break header. Only BreakValue (retrieve
the current row’s data) and BreakFunc will work in a break header. Remember, when printing using fields,
no array information is available. 4D records may be accessed from the current selection. Be sure that you
don’t change the current selection.
Performance Issues When Printing Fields
When PrintList Pro prints fields, the automatic column sizing algorithm uses only the first 20 records
(or less, if the selection contains less than 20 records) in the selection. These records are always read
regardless of whether the columns are automatically or manually sized.
Therefore there is no performance penalty using the automatic column sizing algorithm when printing
fields. See Performance Issues with Formatting Commands for more information.
Setting a Calculated Column - Printing 4D Fields
74
Field and Record Commands
Commands
PL_SetFile
(areaRef:L; tableNum:I) ➞ resultCode:L
Parameter
Type
Description
➞ areaRef
longint
Reference of PrintList Pro object on layout
➞ tableNum
resultCode
integer
Number of 4D table
longint
Result code
PL_SetFile tells PrintList Pro what table is the main table from which to print records.
This command is only necessary if the field to be printed in column one is not from the main table, but
from a related one table.
PL_SetFile must be called before any fields have been set, otherwise it will be ignored. If this command
is not called, then PrintList Pro will use the table of the field printed in column one as the main table.
resultCode — The possible values are:
Constant
Value Action
PL SetFile Passed
0
PL Not enough memory
5
Increase 4D’s RAM partition
PL Not a file
6
Check to make sure that the table represented by tableNum does exist
PL Wrong 4D version
10
(obsolete)
PL Arrays have been set
11
You’ve attempted to set fields or a table when arrays have already been
set
PL Fields have been set
12
You’ve attempted to set arrays when fields have already been set
Example:
$result:=PL_SetFile (eList;Table (->[People]))
PL_SetFile
75
Field and Record Commands
PL_SetFields
(areaRef:L; tableNum:I; columnNumber:I; numFields:I; fieldNum1; …; fieldNumN:I)
➞ resultCode:L
Parameter
Type
Description
➞ areaRef
longint
Reference of PrintList Pro object on layout
➞ tableNum
➞ columnNumber
integer
Number of 4D table
integer
Column at which to set the first field
➞ numFields
integer
Number of fields to set (up to 15)
➞ fieldNum
integer
Number of 4D field
longint
Result code
resultCode
PL_SetFields tells PrintList Pro what fields to print. Up to fifteen fields can be set at a time.
Any 4D field type can be used except sub-tables.
Fields from related one tables may also be printed (see PL_SetFile). A separate call to PL_SetFields must
be made to set these fields. To print a related one field, pass the table number of the related one table in
the tableNum parameter.
resultCode — The possible values are:
Constant
Value Action
PL SetFields Passed
0
PL Not enough memory
5
Increase 4D’s RAM partition
PL Not a file
6
Check to make sure that the table represented by tableNum does
exist
PL Not a field
7
PL Wrong field type
8
PL Maximum fields exceeded
9
The fieldNum passed is not a valid 4D field number
The field passed cannot be used by PrintList because the field’s
type is not supported
512 fields is the maximum
PL Wrong 4D version
10
(obsolete)
PL Arrays have been set
11
You’ve attempted to set fields or a table when arrays have already
been set
Examples:
`Set up the eList PrintList Pro object with 5 fields, all from the same table
$error:=PL_SetFields (eList;Table (->[People]);1;5;Field (->[People]First Name);
Field (->[People]Last Name);Field (->[People]Salary);Field (->[People]Arrival);Field (->[People]Male))
PL_SetFields
76
Field and Record Commands
`Set up the eList PrintList Pro object with 4 fields, the third one from a related table
$error:=PL_SetFields (eList;Table (->[People]);1;2;Field (->[People]First Name);
Field (->[People]Last Name))
$error:=PL_SetFields (eList;Table (->[Companies]);3;1;Field (->[Companies]Company Name))
$error: PL_SetFields (eList;Table (->[People]);4;1;Field (->[People]Salary))
`Set up the eList PrintList Pro object with 4 fields, the first one from a related table
$error:=PL_SetFile (eList;Table (->[People])) `set the main table since the field to be set in column one is
not from the main table, but from a related one table
$error:=PL_SetFields (eList;Table (->[Companies]);1;1;Field (->[Companies]Company Name))
$error:=PL_SetFields (eList;Table (->[People]);2;3;Field (->[People]First Name);
Field (->[People]Last Name); Field (->[People]Salary))
PL_SetCalcCall
(areaRef:L; columnNumber:I; calcCallback:S)
Parameter
Type
Description
➞ areaRef
longint
Reference of PrintList Pro object on layout
➞ columnNumber
➞ calcCallback
integer
Column number
string
4D method called ot fill row(s) of a calculated column
PL_SetCalcCall is used to set a callback method for a calculated column.
columnNumber — This parameter specifies the column on which to attach the calcCallback method.
calcCallback — This method will be called whenever row(s) need to be filled in a calculated column.
If this is an empty string then no method will be called.
The first two parameters ($1 and $2) passed to this callback method are areaRef and columnNumber.
Therefore, if desired, the same callback can be used for more than one PrintList Pro object and for many
columns in an object.
For information on how to write a calculated column callback, see the section Calculated Column Callback.
Example:
`Set calculated callback method for column 3
PL_SetCalcCall (eArea;3;"CalcColCallback")
PL_SetFields - PL_SetCalcCall
77
Field and Record Commands
PL_SetSubSelect
(areaRef:L; firstRecord:L; numRecords:L)
Parameter
Type
Description
➞ areaRef
➞ firstRecord
longint
Reference of PrintList Pro object on layout
longint
First record to print
➞ numRecords
longint
Number of records to print
PL_SetSubSelect is used to tell PrintList Pro to print a different subselection of records from
the current selection.
firstRecord — This parameter is used to set the first record in the selection to be printed in the PrintList
Pro object. If firstRecord is greater than or equal to the number of records in the selection, then it will be
set to the last record in the selection. The default is 1.
numRecords — This parameter is used to set the number of records in the selection to be printed in the
PrintList Pro object. The possible values are:
Value
>= 0
-1
Description
Print this number of records
Print the number of records from firstRecord until the end of the selection
If numRecords is greater than the number of records from firstRecord until the end of the selection,
then numRecords will be set to the number of records from firstRecord until the end of the selection.
If this command is not called, then firstRecord will be set to 1 and numRecords will be set to the number
of records in the selection.
Example:
`Set up the eList PrintList Pro object to print 10,000 records beginning at record 5001
PL_SetSubSelect (eList;5001;10000)
PL_SetSubSelect
78
Break Level Processing
Break Level Processing
About PrintList Pro Break Level Processing
The PrintList Pro break level processing routines provide the functionality of 4D’s Quick Report
capabilities, and much more. You can choose to display a variety of information for any break level and
any column within that break including: static text, Quick Report calculations, custom calculations or
break data insertion for each break.
Each piece of information can be shown in different fonts, sizes and styles as well as different colors.
You can also control the display of repeated values.
When Do Breaks Occur?
When a list is sorted, often some of the sorted array elements will have groups of identical values.
For example, if the membership of a club that consisted of members from many different countries was
sorted by country, the membership list would likely consist of many members that were from the same
country. Because the list is sorted, all the members from the same country would be grouped together in
the list. A “break” would occur in the list anytime the group changes (the country is different).
Multiple break levels occur when the list is sorted on multiple criteria. The number of any break level
is determined by its position in the sort order. If the same membership list is sorted by country first and
then by city, a break for break level one (country) would occur whenever the country changes in the list,
and a break for break level two (city) would occur whenever the city changes in the list.
When a break occurs for a certain level, every break level higher than it will occur as well. In the club
example, break level 2 (city) will always break whenever a break for break level 1 (country) occurs.
You may want to show leading or summary information for the groups of information within the list. In
PrintList Pro, these areas are called break headers and break footers respectively.
A break header will print information just prior to the group of related values while a break footer will
print information immediately after the group.
About PrintList Pro Break Level Processing - When Do Breaks Occur?
79
Break Level Processing
The following is an illustration of the location of break headers and footers within a list:
Column Headers
Header, break-level 0
Header, break-level 1
Header, break-level 2
Rows
A break for
break-level 2
occurs
Footer, break-level 2
Header, break-level 2
Rows
A break for
break-level 1
occurs
Footer, break-level 2
Footer, break-level 1
Header, break-level 1
Header, break-level 2
Rows
...
Rows
Break-level 0
occurs
Footer, break-level 2
Footer, break-level 1
Footer, break-level 0
When Do Breaks Occur?
80
Break Level Processing
Using PrintList Pro Break Level Processing
Any break level routine that accepts a column number requires that the column/array be set using
PL_SetArraysNam prior to calling that routine.
PrintList Pro provides up to 15 break levels and a total line at the end of list. For any given list, the
number of break levels can be no greater than the number of sorted arrays.
PrintList Pro will only print a break for a break level that has been configured using PL_SetBrkText for
break footers or PL_SetBkHText for break headers.
A break level can be configured regardless if lower breaks have been configured. This is different than
4D’s Quick Report Editor that requires the users to “stack” break levels upon lower (closer to 0) break
levels and hide the break levels that are not desired.
With PrintList Pro, a break level can be configured regardless if lower breaks have been configured;
therefore, there is no need to “hide” a break. In the people example, information can be shown for a
group of people in the same city without necessarily showing any information for the state.
In conjunction with PL_SetArraysNam , PrintList Pro uses the information in PL_SetSort to determine
where the breaks occur within the arrays. If the arrays passed to PrintList Pro are pre-sorted,
PL_SetBrkOrder should be used to notify PrintList Pro of the sort order without forcing an unnecessary sort.
The break level parameter used in many break level routines is the position of a particular column
within the sort order given. For example, if a list of people were to be sorted by state, county, and city
respectively, the calls to set and sort the arrays would be:
PL_SetArraysNam (eList;1;4;aPeople;aCity;aCounty;aState)
PL_SetSort (eList;4;3;2)
Break level 1 is state (column 4), break level 2 is county (column 3), and break level 3 is city (column 2).
The following commands are used to configure breaks: PL_SetBrkColOpt, PL_SetBrkColor,
PL_SetBrkRGBColor, PL_SetBrkFunc, PL_SetBrkHeight, PL_SetBrkStyle, PL_SetBrkText.
The following commands are used to configure break headers: PL_SetBkHColOpt, PL_SetBkHColor,
PL_SetBkHRGBColor, PL_SetBkHFunc, PL_SetBkHHeight, PL_SetBkHStyle, PL_SetBkHText.
PL_SetBrkRowDiv is not specifically a break footer or header routine. This command specifies the line
that is drawn between a break footer and the following break header or group of rows.
Using PrintList Pro Break Level Processing
81
Break Level Processing
Setting a Break Level
To show information for a break level, you will need to use PL_SetBrkText for break footers and
PL_SetBkHText for break headers.
A text variable containing the information to be printed is passed in for a particular cell within the
break. Because a break can consist of more than one text line, the supplied text may wrap into several
lines. See Multiple Lines in a Break and Variable Height Breaks for more information.
Carriage returns may be embedded into the text to force wrapping.
Text Overflow and Justification in Breaks
Unlike a Quick Report, information to be printed in a cell can overflow into adjacent columns depending
on the justification.
As specified in the call to PL_SetBrkText or PL_SetBkHText , the area used to print the text is taken from
the column specified and adjacent columns to the right for left justification, columns to the left for right
justification, and columns on both sides for center justification.
Built-in Calculations in a Break
Calculations may be embedded into the text passed to PL_SetBrkText or PL_SetBkHText.
Built-in functions — sum, average, minimum, maximum, count and break value — can be inserted into
the text at any desired location. These are identical to 4D’s QuickReport calculations except for break
value which inserts the value from the array that caused the break.
Custom Calculations in a Break
You may create custom calculations to be used with or instead of the built-in calculations.
When PrintList Pro sees the custom calculation delimiter, it will execute a callback method, specified
using PL_SetBrkFunc for break footers and PL_SetBkHFunc for break headers, that performs the custom
calculation.
The callback method may use most 4D commands, but should not call any PrintList Pro commands or
any 4D commands that affect the arrays.
Also, the callback method should preserve the current selection of the printing layout’s file by saving
and restoring the selection if necessary. The value returned by the callback method will then be printed
at the embedded position within the break text.
Setting a Break Level - Text Overflow and Justification - Built-in Calculations - Custom Calculations
82
Break Level Processing
Suppressing Repeated Values in the List
Repeated values in a sorted list can be suppressed using PL_SetRepeatVal. The repeated value is shown
on the first occurrence and at the top of each page thereafter.
PL_SetRepeatVal works on any sorted list regardless of whether any break level information is shown
or not.
Style and Color in Breaks
Style and color settings can be provided for each column within each break level using:
■■
L_SetBrkColor for break footers and PL_SetBkHColor for break headers to set foreground and
P
background colors using PrintList Pro’s palette or 4D’s palette.
■■
L_SetBrkRGBColor for break footers and PL_SetBkHRGBColor for break headers to set
P
foreground and background colors using standard RGB values.
■■
PL_SetBrkStyle for break footers and PL_SetBkHStyle for break headers to set text style settings
If no style or color information is given, PrintList Pro will use the corresponding column settings from
the list.
Multiple Lines in a Break
Both break headers and footers can be configured to be a fixed number of lines per break or a variable
number of lines.
To set the number of lines to be printed in a break level, use PL_SetBrkHeight for break footers and
PL_SetBkHHeight for break headers.
Please read the section Variable Height Breaks for more information.
If no calls to PL_SetBrkText are made for a specific break level, nothing will be displayed for any break
occurring for that level regardless of the number of lines or height pad specified in PL_SetBrkHeight.
Suppressing Repeated Values in the List - Style and Color in Breaks - Multiple Lines in a Break
83
Break Level Processing
Lines Displayed in a Break
PrintList Pro provides complete control over all the lines printed in a break as shown in the following
illustration:
Header Separator
Row Divider
Frame
Column
Divider
Break/Row Divider
Horizontal Break
Whenever a break or group of breaks is printed, the line following the last break, referred to as the
Break/Row Divider, can be configured using PL_SetBrkRowDiv. If the Break/Row divider is not set, the
row divider (if set) will be printed by default.
If column dividers have been set using PL_SetDividers or PL_SetRGBDividers, they can be printed in the
break using PL_SetBrkColOpt for break footers and PL_SetBkHColOpt for break headers.
If set, the column divider will be printed in the break area to the right of each column within the break
level.
Lines Displayed in a Break
84
Break Level Processing
A horizontal line, referred to in the illustration on the previous page as the Horizontal Break line, may
be printed within the break areas as well.
■■
for break footers, use PL_SetBrkColOpt to print a line at the top of the cell within the break
footer area
■■
for break headers, use PL_SetBkHColOpt to print a line at the bottom of the cell within the
break header area
Hide the Detail Area
The detail area (the list of array data) can be hidden to show only the break level information on the
page using PL_SetColOpts. This is ideal for giving a summary of the array information.
Page Breaks
PL_SetPageBreak tells PrintList Pro whether or not to force a page break on any given break level.
The page break will occur immediately after the break footer is printed for that break level. However, a
page break can be set for a break level regardless of whether a break level is configured to print a break
footer.
PL_SetBrkOpts can be called with the parameter printLastPageBreak to print or suppress a a page break
if it occurs on the last page. This option is used to avoid the printing of an unneeded blank page at the
end of a PrintList Pro report.
Variable Height Breaks
Any given break level can be set to be a variable height. The same rules apply to breaks as to the rows
in that a break can be of no height or up to the height of an entire page.
When a break level is set to be variable height, PrintList Pro will perform the necessary break level
calculation(s) to determine the height of the text that is to be printed in the break.
To set a break level to be variable height use PL_SetBrkHeight for break footers and PL_SetBkHHeight
for break headers.
Lines Displayed in a Break - Hide the Detail Area - Page Breaks - Variable Height Breaks
85
Break Level Processing
Using Break Headers
The ability to configure break headers is identical to that of break footers including:
■■
all calculations: sum, average, min, max, count, and break value
■■
a callback for the break function (one callback for all break headers)
■■
full style (font, size, style) control for each cell within the break
■■
horizontal and vertical line/divider control
■■
foreground and background colors for each cell within the break
■■
variable height breaks
Break headers can be configured using six commands: PL_SetBkHText, PL_SetBkHFunc, PL_SetBkHStyle,
PL_SetBkHColor, PL_SetBkHHeight, and PL_SetBkHColOpt. These commands are identical in syntax to
the break footer commands.
PL_SetBrkColOpt can be called to print horizontal lines at the top of a cell with a break footer. With
break headers, the equivalent command PL_SetBkHColOpt will print lines at the bottom of a cell within
the break header.
Just as with break footers, break headers will only be printed if the command to set the break text,
PL_SetBkHText, has been called for a particular break level.
Break headers can be configured to be fixed or variable height and have full background color control
as is now available with break footers.
Using Break Levels When Printing Records
A few limitations are present when printing records using PrintList Pro.
Please read the section Using Break Level Calculations With Fields for more information.
Using Break Headers - Using Break Levels When Printing Records
86
Break Level Processing
Commands
PL_SetPageBreak
(areaRef:L; breakLevel:I; insertPageBreak:I)
Parameter
Type
Description
➞ areaRef
longint
Reference of PrintList Pro object on layout
➞ breakLevel
integer
Break level number
➞ insertPageBreak
integer
Insert a page break after the break level
PL_SetPageBreak is used to set a page break after each break at the specified break level.
A page break can be inserted provided the rows are sorted. However, it is not necessary to configure a
break level using PL_SetBrkText or PL_SetBkHText in order to insert a page break.
For the specified break level, the break header, the rows, and the break footer will print (if so configured)
prior to the page break. Any subsequent break footers or rows will be printed at the top of the following
page.
breakLevel — The position in the sort order specified in PL_SetSort or PL_SetBrkOrder i.e. 1 through n,
where n is the number of levels of sort.
insertPageBreak — 0 or 1:
0 — no page break will be inserted (default)
1 — a page break will be inserted after each break at the specified break level
Refer to PL_SetBrkOpts to see how to print or suppress a page break on the last page of a PrintList
report.
Example:
PL_SetPageBreak (eList;1;1) `force a page break after printing each break of break level 1
PL_SetPageBreak
87
Break Level Processing
PL_SetBrkOpts
(areaRef:L; printLastPageBreak:I)
Parameter
Type
Description
➞ areaRef
longint
Reference of PrintList Pro object on layout
➞ printLastPageBreak
integer
Print a page break on the last page
PL_SetBrkOpts is used to set options pertaining to break levels.
printLastPageBreak — 0 or 1:
0 — the page break will be suppressed (default)
1 — if there is a page break on the last page, it will be printed
Refer to PL_SetPageBreak for configuring page breaks.
Example:
PL_SetBrkOpts (eList;0) `don’t print the last page break
PL_SetBrkOrder
(areaRef:L; columnNum1:I; …; columnNumN:I)
Parameter
Type
Description
➞ areaRef
longint
Reference of PrintList Pro object on layout
➞ columnNum1; …; columnNumN integer
Column(s) that reflects the sort order
PL_SetBrkOrder is used to communicate the sort order of a previously sorted list to PrintList Pro. The
sort information is used by PrintList Pro to determine where breaks occur within the sorted list.
The syntax of this call is identical to that of PL_SetSort.
columnNum — A value greater than 0 indicates that an ascending sort was performed upon that column, while a value less than 0 indicates that a descending sort was performed upon that column. If a
columnNum is 0 then all successive columns will be ignored.
PL_SetBrkOrder does not perform a sort.
Examples:
PL_SetBrkOrder (eContacts;3;4;7) `was sorted on columns 3, 4, and 7 (all ascending)
PL_SetBrkOrder (eContacts;-1;3;-2) `was sorted on columns 1 descending, 3 ascending, 2 descending
PL_SetBrkOpts - PL_SetBrkOrder
88
Break Level Processing
PL_SetRepeatVal
(areaRef:L; columnNum:I; repeatValues:I)
Parameter
Type
Description
➞ areaRef
longint
Reference of PrintList Pro object on layout
➞ columnNum
integer
Column number
➞ repeatValues
integer
Hide/print repeated values for this column
PL_SetRepeatVal is used to control the printing of repeated values within a sorted column.
Use PL_SetSort to sort the arrays or if already sorted, use PL_SetBrkOrder to communicate the sorted
order to PrintList Pro.
columnNum — The column number to apply this command to. Use a value of zero (0) for columnNum
to apply the repeat value to all columns in the list.
repeatValues — 0 or 1:
0 — only print the first occurence of a repeated value after reaching a break and at the top of each
page thereafter
1 — print all repeated values (default)
Examples:
PL_SetRepeatVal (eList;3;0) `show repeat values for column 3
PL_SetRepeatVal (eList;0;1) `hide repeat values for all columns
PL_SetBrkText
(areaRef:L; breakLevel:I; columnNum:I; breakText:T; numColsToOverflow:I; justification:I)
Parameter
Type
Description
➞ areaRef
longint
Reference of PrintList Pro object on layout
➞ breakLevel
integer
Break level number
➞ columnNum
integer
Column number
➞ breakText
integer
Text to be printed when a break occurs
➞ numColsToOverflow
integer
Number of adjacent columns to overflow into
➞ justification
integer
Justification of the break text
PL_SetBrkText is used to specify the text, passed in as breakText, to be printed in the breakLevel and
columnNum specified.
PL_SetRepeatVal - PL_SetBrkText
89
Break Level Processing
Calculations can be performed upon the corresponding values in the list. A calculation is performed by
embedding a special calculation string(s) into breakText as described below.
Text can overflow to adjacent columns using the numColsToOverflow parameter. The text is justified within
a column(s) using the justification parameter.
If no call to PL_SetBrkText is made for breakLevel, no break information will be printed for that break level.
breakLevel — The position in the sort order specified in PL_SetSort or PL_SetBrkOrder — i.e., 1 through
n, where n is the number of levels of sort. Use a value of 0 to specify the total line to be printed at the end
of the list.
columnNum — The column number at which the specified text will be placed for the specified
breakLevel.
breakText — The text to be shown in columnNum whenever a break occurs for breakLevel. The text may
automatically wrap to multiple lines or carriage returns can be embedded to force text wrapping. Use
PL_SetBrkHeight or PL_SetBkHHeight to set the number of text lines for a break level if more than 1 line
is anticipated.
A calculation may be performed on all the values in columnNum since the last break for breakLevel.
breakText can include embedded calculation strings which inform PrintList Pro to perform the desired calculation using the array values associated with columnNum. The result of the calculation is formatted into a
string which replaces the calculation string at its location within breakText. The following table shows a list
of the calculations and the associated strings (not case-sensitive) that can be included in breakText:
Calculation
Calculation String
Sum
"\Sum"
Average
"\Average"
Minimum
"\Minimum"
Maximum
"\Maximum"
Count
"\Count"
Break Value Insertion
"\BreakValue"
Custom Calculation
"\Function"
Sum, Average, Minimum, Maximum, and Count are identical to that of 4D’s QuickReport editor.
Break Value Insertion will use the array value from the sorted column that is associated with breakLevel for
insertion into breakText.
Custom Calculation will execute the callback function specified in PL_SetBrkFunc or PL_SetBkHFunc to
retrieve a string for insertion into breakText. See PL_SetBrkFunc and PL_SetBkHFunc for details of performing custom calculations using the callback function.
PL_SetBrkText
90
Break Level Processing
Not all calculations are available on all array types. The following table lists the calculations possible for the
various array data types and the resulting type of the calculation:
Column Data Type
Calculation
Data Type of Result
numeric
Sum
same as column
numeric
Average
real
numeric
Minimum
same as column
numeric
Maximum
same as column
all
Count
integer
all
Break Value Insertion
same as break column
all
Custom Calculation
formatted text
When the resulting value’s data type is the same as the columnNum data type, the value is formatted using
the column’s format. Otherwise, the calculations’ results will use PrintList Pro’s real and integer default
formats where appropriate. The result of the custom calculation is formatted by the callback function which
returns text.
numColsToOverflow — Number of adjacent columns to use when overflowing to the right (when left
justified), or left (when right justified), or both (when center justified) of columnNum. A value of zero,
which is the default, indicates that breakText will only be printed within the column.
justification — The justification of breakText within the column (or columns if numColsToOverflow is
greater than 0):
0 — default (justification of columnNum in the list detail area will be used)
1 — left
2 — center
3 — right
Examples:
`Break level 1, column 3, overflow 2 columns to the right, left-justified
PL_SetBrkText (eList;1;3;"Company Subtotals";2;1)
`Break level 3, column 6, no column overflow, use default justification
PL_SetBrkText (eList;3;6;"\Sum";0;0)
`Break level 4, column 3, overflow into 1 column on both sides of this column, center-justified
PL_SetBrkText (eList;4;3;"There are \Count people in this department.";1;2)
PL_SetBrkText
91
Break Level Processing
PL_SetBkHText
(areaRef:L; breakLevel:I; columnNum:I; breakText:T; numColsToOverflow:I; justification:I)
Parameter
Type
Description
➞ areaRef
longint
Reference of PrintList Pro object on layout
➞ breakLevel
integer
Break level number
➞ columnNum
integer
Column number
➞ breakText
integer
Text to be printed when a break occurs
➞ numColsToOverflow
integer
Number of adjacent columns to overflow into
➞ justification
integer
Justification of the break text
PL_SetBkHText is used to specify the text that is to be printed in the break header. The syntax of this
command is identical to that of PL_SetBrkText.
PL_SetBrkFunc
(areaRef:L; functionName:S)
Parameter
Type
Description
➞ areaRef
longint
Reference of PrintList Pro object on layout
➞ functionName
string
Function name to be called back
PL_SetBrkFunc is used to specify the callback function for use with custom calculations. The callback
function functionName is called whenever PrintList Pro encounters the string "\Function" within the text
that is to be printed for a specific break level.
Refer to PL_SetBrkText for details on how to embed the custom calculation string.
PrintList Pro passes information needed for the custom calculation to the callback function.
The callback function should be created using the following interface:
`Function: MyBreakFunction (breakLevel; column; colFormat; startRow; endRow)
C_INTEGER ($1;$2) `break level, column
C_STRING (82;$3) `column format
C_LONGINT ($4;$5) `start row, end row
C_TEXT ($0) `custom calculation result to print
`... perform the custom calculation
$0:=String (customCalc;$3) `format the string using the column format
PL_SetBkHText - PL_SetBrkFunc
92
Break Level Processing
The callback function is passed the break level number for which the break has occurred, the column
number, the format of that column, and the starting and ending indexes of the corresponding array.
The function should return, as formatted text, the result of the calculation. The return variable, $0,
should be of type text and should be 255 characters or less.
Example:
PL_SetBrkFunc (eList;"Break Function") `custom calculation callback
See Example 4 — Break Level Processing for an example of a custom calculation callback function.
PL_SetBkHFunc
(areaRef:L; functionName:S)
Parameter
Type
Description
➞ areaRef
longint
Reference of PrintList Pro object on layout
➞ functionName
string
Function name to be called back
PL_SetBkHFunc is used to specify the name of the break header callback function. This function will be
called for any break header that contains a break function.
Refer to PL_SetBrkText and PL_SetBkHText to determine how to set a break function for a break level.
The syntax of this command is identical to that of PL_SetBrkFunc.
PL_SetBrkStyle
(areaRef:L; breakLevel:I; columnNum:I; fontName:S; size:I; styleNum:I)
Parameter
Type
Description
➞ areaRef
longint
Reference of PrintList Pro object on layout
➞ breakLevel
integer
Break level number
➞ columnNum
integer
Column number
➞ fontName
string
Name of the font
➞ size
integer
Size of the font
➞ styleNum
integer
Style of the font
PL_SetBrkStyle is used to control the appearance of the break level text for the breakLevel and
columnNum specified. The columns can be controlled individually or as a group.
PL_SetBrkFunc - PL_SetBkHFunc - PL_SetBrkStyle
93
Break Level Processing
breakLevel — This parameter specifies the break level to apply this command to.
columnNum — The column to apply this command to. Use a value of zero (0) for columnNum to apply
the parameters to all columns within that break level.
fontName — This specifies the font for the break. The break font may be left unchanged by setting
fontName to the empty string (""). If the font specified is not found, it will be treated as an empty
string and ignored.
fontSize — This specifies the font size for the break. The break font size may be left unchanged by
setting fontSize to 0.
styleNum — This parameter is a font style code. By adding the codes together, you can combine styles.
The numeric codes for styleNum are shown below.
Style
Number
Plain
Bold
Italic
Underline
Outline
Shadow
Condensed
Extended
0
1
2
4
8
16
32
64
PL_SetBkHStyle
(areaRef:L; breakLevel:I; columnNum:I; fontName:S; size:I; styleNum:I)
Parameter
Type
Description
➞ areaRef
longint
Reference of PrintList Pro object on layout
➞ breakLevel
integer
Break level number
➞ columnNum
integer
Column number
➞ fontName
string
Name of the font
➞ size
integer
Size of the font
➞ styleNum
integer
Style of the font
PL_SetBkHStyle is used to set the style of the text that is to be printed in the break header.
The syntax of this command is identical to that of PL_SetBrkStyle.
PL_SetBrkStyle - PL_SetBkHStyle
94
Break Level Processing
PL_SetBrkColor
(areaRef:L; breakLevel:I; columnNum:I; plpForeColor:S; 4dForeColor:I; plpBackColor:S;
4dBackColor:I)
Parameter
Type
Description
➞ areaRef
longint
Reference of PrintList Pro object on layout
➞ breakLevel
integer
Break level number
➞ columnNum
integer
Column number
➞ plpForeColor
string
Foreground color from PrintList Pro’s palette
➞ 4dForeColor
integer
Foreground color from 4D’s palette
➞ plpBackColor
string
Background color from PrintList Pro’s palette
➞ 4dBackColor
integer
Background color from 4D’s palette
PL_SetBrkColor is used to specify the color of the text to be printed in the specified columnNum and
breakLevel.
PrintList Pro has its own palette, with the following colors: white, black, blue, green, yellow, magenta,
red, cyan, gray, light gray.
breakLevel — This parameter specifies the break level to apply this command to.
columnNum — The column to apply this command to. Use a value of zero (0) for columnNum to apply
the colors to all columns within that break level.
plpForeColor — Name of the color in PrintList Pro’s palette. This will be the foreground color for the
break. If the name is not in PrintList Pro’s palette or it is the empty string (""), then 4dForeColor will be
used.
4dForeColor — 1 to 256. Foreground color number for the break (from 4D’s palette). If a break
foreground color has been previously set, it may be removed by setting plpForeColor to the empty
string (""), and 4dForeColor to 1. The break foreground color may be left unchanged by setting
plpForeColor to the empty string (""), and 4dForeColor to 0.
plpBackColor — Name of the color in PrintList Pro’s palette. This will be the background color for the
break. If the name is not in PrintList Pro’s palette or it is the empty string (""), then 4dBackColor will be
used.
4dBackColor — 1 to 256. Background color number for the break (from 4D’s palette).
If a break background color has been previously set, it may be removed by setting plpBackColor to the
empty string (""), and 4dBackColor to 1. The break background color may be left unchanged by setting
plpBackColor to the empty string (""), and 4dBackColor to 0.
PL_SetBrkColor
95
Break Level Processing
Examples:
`Set the foreground color for the break in column 3, break level 1, to red - no background color
PL_SetBrkColor (eList;1;3;"red";0;"";0)
`Set the background color for the break in column 3, break level 1, to blue - no foreground color
PL_SetBrkColor (eList;1;3;"";0;"Blue";0)
PL_SetBrkRGBColor
(areaRef:L; breakLevel:I; columnNum:I; breakForeRed:L; breakForeGreen:L; breakForeBlue:L;
breakBackRed:L; breakBackGreen:L; breakBackBlue:L)
Parameter
Type
Description
➞ areaRef
longint
Reference of PrintList Pro object on layout
➞ breakLevel
integer
Break level number
➞ columnNum
integer
Column number
➞ breakForeRed
longint
Foreground red
➞ breakForeGreen
longint
Foreground green
➞ breakForeBlue
longint
Foreground blue
➞ breakBackRed
longint
Background red
➞ breakBackGreen
longint
Background green
➞ breakBackBlue
longint
Background blue
PL_SetBrkRGBColor is used to specify the color of the text to be printed in the specified columnNum
and breakLevel. This routine works in the same manner as PL_SetBrkColor, except it allows you to
specify the colors using standard RGB values.
PL_SetBkHColor
(areaRef:L; breakLevel:I; columnNum:I; plpForeColor:S; 4dForeColor:I; plpBackColor:S;
4dBackColor:I)
Parameter
Type
Description
➞ areaRef
longint
Reference of PrintList Pro object on layout
➞ breakLevel
integer
Break level number
➞ columnNum
integer
Column number
➞ plpForeColor
string
Foreground color from PrintList Pro’s palette
➞ 4dForeColor
integer
Foreground color from 4D’s palette
PL_SetBrkColor - PL_SetBrkRGBColor - PL_SetBkHColor
96
Break Level Processing
➞ plpBackColor
string
Background color from PrintList Pro’s palette
➞ 4dBackColor
integer
Background color from 4D’s palette
PL_SetBkHColor is used to specify the color of the text to be printed in the break header for the
specified columnNum and breakLevel.
PrintList Pro has its own palette, with the following colors: white, black, blue, green, yellow, magenta,
red, cyan, gray, light gray.
breakLevel — This parameter specifies the break level to apply this command to.
columnNum — The column to apply this command to. Use a value of zero (0) for columnNum to apply
the colors to all columns within that break level.
plpForeColor — Name of the color in PrintList Pro’s palette. This will be the foreground color for the
break. If the name is not in PrintList Pro’s palette or it is the empty string (""), then 4dForeColor will be
used.
4dForeColor — 1 to 256. Foreground color number for the break header (from 4D’s palette). If a break
header foreground color has been previously set, it may be removed by setting plpForeColor to the
empty string (""), and 4dForeColor to 1. The break header foreground color may be left unchanged by
setting plpForeColor to the empty string (""), and 4dForeColor to 0.
plpBackColor — Name of the color in PrintList Pro’s palette. This will be the background color for the
break header. If the name is not in PrintList Pro’s palette or it is the empty string (""), then 4dBackColor
will be used.
4dBackColor — 1 to 256. Background color number for the break header (from 4D’s palette). If a
break header background color has been previously set, it may be removed by setting plpBackColor to
the empty string (""), and 4dBackColor to 1. The break header background color may be left unchanged
by setting plpBackColor to the empty string (""), and 4dBackColor to 0.
Examples:
`Set the foreground color for the break header in column 3, break level 1, to red - no background color
PL_SetBkHColor (eList;1;3;"red";0;"";0)
`Set the background color for the break header in column 3, break level 1, to blue - no foreground color
PL_SetBrkColor (eList;1;3;"";0;"Blue";0)
PL_SetBkHRGBColor
(areaRef:L; breakLevel:I; columnNum:I; brkHdrForeRed:L; brkHdrForeGreen:L;
brkHdrForeBlue:L; brkHdrBackRed:L; brkHdrBackGreen:L; brkHdrBackBlue:L)
Parameter
Type
Description
➞ areaRef
longint
Reference of PrintList Pro object on layout
➞ breakLevel
integer
Break level number
PL_SetBkHColor - PL_SetBkHRGBColor
97
Break Level Processing
➞ columnNum
integer
Column number
➞ brkHdrForeRed
longint
Foreground red
➞ brkHdrForeGreen
longint
Foreground green
➞ brkHdrForeBlue
longint
Foreground blue
➞ brkHdrBackRed
longint
Background red
➞ brkHdrBackGreen
longint
Background green
➞ brkHdrBackBlue
longint
Background blue
PL_SetBkHRGBColor is used to specify the color of the text to be printed in the break header for the
specified columnNum and breakLevel. This routine works in the same manner as PL_SetBkHColor,
except it allows you to specify the colors using standard RGB values.
PL_SetBrkHeight
(areaRef:L; breakLevel:I; numBreakLines:I; breakHeightPad:I)
Parameter
Type
Description
➞ areaRef
longint
Reference of PrintList Pro object on layout
➞ breakLevel
integer
Break level number
➞ numBreakLines
integer
Number of text lines in the break
➞ breakHeightPad
integer
Extra height for the break
PL_SetBrkHeight is used to set the number of lines of text along with additional height pad for
breakLevel. If no calls to PL_SetBrkText are made for breakLevel, nothing will be displayed for any
break occurring for that level regardless of the number of lines or height pad specified in PL_SetBkHeight.
numBreakLines — The number of lines to give to each break of the specified break level. A value
greater than 0 means that the height of each break is the same. The fixed height will be a function of the
number of text lines specified. A value of zero means that the height of each break is to be calculated
automatically based on the data that is to be printed. Default is 1.
breakHeightPad — The extra height to give to the break level. An additional padding may be set using
breakHeightPad to allow more space around the break.Text will be centered vertically within the break.
Default is 0.
The padding applies to the entire break and not on a line by line basis within the break.
Examples:
`Allocate 5 lines and no pad for break level 3
PL_SetBrkHeight (eList;3;5;0)
`Break level 2, Pad by 4 pixels, only 1 line
PL_SetBrkColor (eList;2;1;4)
PL_SetBkHRGBColor - PL_SetBrkHeight
98
Break Level Processing
PL_SetBkHHeight
(areaRef:L; breakLevel:I; numBreakLines:I; breakHeightPad:I)
Parameter
Type
Description
➞ areaRef
longint
Reference of PrintList Pro object on layout
➞ breakLevel
integer
Break level number
➞ numBreakLines
integer
Number of text lines in the break
➞ breakHeightPad
integer
Extra height for the break
PL_SetBkHHeight is used to set the number of lines of text along with additional height pad for the
specified break header level. The syntax of this command is identical to that of PL_SetBrkHeight.
numBreakLines — The number of lines to give to each break of the specified break level. A value
greater than 0 means that the height of each break is the same. The fixed height will be a function of the
number of text lines specified. A value of zero means that the height of each break is to be calculated
automatically based on the data that is to be printed. Default is 1.
breakHeightPad — The extra height to give to the break level. An additional padding may be set using
breakHeightPad to allow more space around the break.Text will be centered vertically within the break.
Default is 0.
The padding applies to the entire break and not on a line by line basis within the break.
PL_SetBrkRowDiv
(areaRef:L; lineWidth:F; pattern:S; plpColor:S; 4dColor:I)
Parameter
Type
Description
➞ areaRef
longint
Reference of PrintList Pro object on layout
➞ lineWidth
real
Width of the break/row divider line
➞ pattern
string
Pattern of the line
➞ plpColor
string
Color from PrintList Pro’s palette for the line
➞ 4dColor
integer
Color from 4D’s palette for the line
PL_SetBrkRowDiv is used to set the line width, pattern and color of the break/row divider line which is
drawn between any/all break level information and the rows of list data (detail area) that immediately
follow.
PrintList Pro has its own palette, with the following colors: white, black, blue, green, yellow, magenta,
red, cyan, gray, light gray.
PL_SetBkHHeight - PL_SetBrkRowDiv
99
Break Level Processing
lineWidth — 0 to 1. This option controls the line width of the break/row divider line. A value of 0.25
pixels should be used for hairlines. A value of 0 means that no line will be printed.
pattern — Name of the pattern for the break/row divider line. If a null string is used then no line will be
printed. These are the available patterns: white, black, gray, light gray, and dark gray.
plpColor — Name of the color in PrintList Pro’s palette. This will be the color for the break/row divider
line. If the name is not in PrintList Pro’s palette or it is a null string, then 4dColor will be used.
4dColor — 1 to 256. The color at this position in 4D’s palette will be used for the break/row divider
line.
If PL_SetBrkRowDiv is not called, then the settings for the detail area row dividers, if any, will be used.
Examples:
`Print 1 pixel wide, solid Red break/row divider line
PL_SetBrkRowDiv (eList;1;"Black";"Red";0)
`Print hairline width, solid gray break/row divider line
PL_SetBrkRowDiv (eList;0.25;"Black";"Gray";0)
PL_SetBrkColOpt
(areaRef:L; breakLevel:I; columnNum:I; showColDivider:I; lineWidth:F; pattern:S; plpColor:S;
4dColor:I)
Parameter
Type
Description
➞ areaRef
longint
Reference of PrintList Pro object on layout
➞ breakLevel
integer
Break level number
➞ columnNum
integer
Number of column
➞ showColDivider
integer
Show column divider, if any, in the break
➞ lineWidth
real
Width of the horizontal break line
➞ pattern
string
Pattern of the horizontal break line
➞ plpColor
string
Color from PrintList Pro’s palette for the horizontal break line
➞ 4dColor
integer
Color from 4D’s palette for the horizontal break line
PL_SetBrkColOpt is used to control the printing of column dividers and horizontal lines within the
breakLevel for each columnNum and to print a horizontal line within a column for this break level.
PL_SetBrkRowDiv - PL_SetBrkColOpt
100
Break Level Processing
If showColDivider is 1, a column divider will be printed along the right side of the column specified.
The line characteristics are identical to the column divider shown in the list (detail area).
PL_SetBrkColOpt may be called to show a horizontal line at the top of the break specified in breakLevel
in the column specified by columnNum. This horizontal line could be used as a subtotal line to separate a
column of values from a sum or average that is calculated in the break.
If PL_SetBrkColOpt is not called for any columns in a given break level, then no column dividers or
horizontal break lines will be printed for that break level.
PrintList Pro has its own palette, with the following colors: white, black, blue, green, yellow, magenta,
red, cyan, gray, light gray.
showColDivider — 0 or 1:
0 — don’t show a column divider (default)
1 — show the column divider along the right side of the column specified in the columnNum
parameter whenever a break for the break level specified in breakLevel occurs
lineWidth — 0 to 1. This option controls the line width of the horizontal break line. A value of 0.25
pixels should be used for hairlines. A value of 0 means that no line will be printed.
pattern — Name of the pattern for the horizontal break line. If a null string is used then no line will be
printed. These are the available patterns: white, black, gray, light gray, and dark gray.
plpColor — Name of the color in PrintList Pro’s palette. This will be the color for the horizontal break
line. If the name is not in PrintList Pro’s palette or it is a null string, then 4dColor will be used.
4dColor — 1 to 256. The color at this position in 4D’s palette will be used for the horizontal break line.
Examples:
`Break level 2, column 3, print column divider and a hairline wide, solid Blue horizontal line in column
PL_SetBrkColOpt (eList;2;3;1;0.25;"Black";"Blue";0)
`Break level 4, print the column dividers in all columns, no horizontal break lines
PL_SetBrkColOpt (eList;4;0;1;0;"";"";0)
PL_SetBrkColOpt
101
Break Level Processing
PL_SetBkHColOpt
(areaRef:L; breakLevel:I; columnNum:I; showColDivider:I; lineWidth:F; pattern:S; plpColor:S;
4dColor:I)
Parameter
Type
Description
➞ areaRef
longint
Reference of PrintList Pro object on layout
➞ breakLevel
integer
Break level number
➞ columnNum
integer
Number of column
➞ showColDivider
integer
Show column divider, if any, in the break
➞ lineWidth
real
Width of the horizontal break line
➞ pattern
string
Pattern of the horizontal break line
➞ plpColor
string
Color from PrintList Pro’s palette for the horizontal break line
➞ 4dColor
integer
Color from 4D’s palette for the horizontal break line
PL_SetBrkColOpt is used to control the printing of column dividers and horizontal lines within a
break header cell. This command is identical to PL_SetBrkColOpt, except PL_SetBkHColOpt will
print the horizontal lines at the bottom of the cell instead of at the top.
If showColDivider is 1, a column divider will be printed along the right side of the column specified.
The line characteristics are identical to the column divider shown in the list (detail area).
PL_SetBkHColOpt may be called to show a horizontal line at the bottom of the break specified in
breakLevel in the column specified by columnNum.
If PL_SetBkHColOpt is not called for any columns in a given break level, then no column dividers or
horizontal break lines will be shown for that break level.
PrintList Pro has its own palette, with the following colors: white, black, blue, green, yellow, magenta,
red, cyan, gray, light gray.
showColDivider — 0 or 1:
0 — don’t show a column divider (default)
1 — show the column divider along the right side of the column specified in the columnNum
parameter whenever a break for the break level specified in breakLevel occurs
lineWidth — 0 to 1. This option controls the line width of the horizontal break line. A value of 0.25
pixels should be used for hairlines. A value of 0 means that no line will be printed.
pattern — Name of the pattern for the horizontal break line. If a null string is used then no line will be
printed. These are the available patterns: white, black, gray, light gray, and dark gray.
plpColor — Name of the color in PrintList Pro’s palette. This will be the color for the horizontal break
line. If the name is not in PrintList Pro’s palette or it is a null string, then 4dColor will be used.
4dColor — 1 to 256. The color at this position in 4D’s palette will be used for the horizontal break line.
PL_SetBkHColOpt
102
Obsolete Commands
Obsolete Commands
Several commands are obsolete in PrintList Pro’s current version, but are still supported for compatibility.
You should not use these commands for new projects.
This chapter provides a simple list for these commands and their syntax.
PL_SetArrays (areaRef:L; columnNumber:I; numArrays:I; array1:X; …; arrayN:X) ➞ resultCode:L)
PL_SaveData (areaRef:L; savePict:P) ➞ resultCode:L
PL_RestoreData (areaRef:L; restorePict:P) ➞ resultCode:L
Obsolete Commands
103
Examples
Examples
The examples in this section are designed to provide an overview of the use of PrintList Pro and the
basic commands.
You may also wish to examine the non-compiled version of the PrintList Pro demo, for more examples
on the various PrintList Pro capabilities.
Example 1 — One record current selection
Print a list of information (First name, Last name, Salary, City, State, Zip, Country) contained in a series
of seven arrays. Show column headers and print dividing lines between the columns. Do not print
dividing lines between the rows.
PRINT SELECTION is used to print PrintList Pro plug-in objects. It is important therefore, that you
carefully control the current selection, since a PrintList Pro plug-in object will print once for each
record in the current selection.
This example illustrates a situation where the PrintList Pro object is to be printed once, so we can use
the PRINT RECORD command regardless of the current selection.
First we need to create the layout and draw the PrintList Pro plug-in object. We’ll name the object eList.
Our layout now looks something like this:
The project method which controls the printing is:
ALL RECORDS ([Layouts])
OUTPUT FORM ([Layouts];"Example 1")
PRINT RECORD ([Layouts])
Example 1 — One record current selection
104
Examples
We’ll use the On Printing Detail event to configure our PrintList Pro area. Here is the PrintList Pro area's
object method:
If (Form event=On Printing Detail)
ALL RECORDS ([People])
`Create the arrays from the data
SELECTION TO ARRAY ([People]First Name;aFname;[People]Last Name;aLname;[People]Salary;
aSalary;[People]City;aCity;[People]State;aState;[People]Zip;aZip;[People]Country;aCountry)
$plErr:=PL_SetArraysNam (eList;1;7;"aFname";"aLname";"aSalary";"aCity";"aState";"aZip";
"aCountry") `set the arrays
If ($plErr=0)
PL_SetHdrOpts (eList;2;0) `print headers on all pages
PL_SetHeaders (eList;1;7;"First Name";"Last Name";"Salary";"City";"State";"Zip";"Country")
PL_SetHdrStyle (eList;0;"Lucida Grande";10;1) `apply to all headers: Lucida Grande 10 point bold
PL_SetStyle (eList;0;"Lucida Grande";9;0) `apply to all columns: Lucida Grande 9 point plain
PL_SetDividers (eList;25;"Black";"Gray";0;0;"";"";0) `print only column dividers: solid gray hairlines
PL_SetSort (eList;-2) `sort column 2 (Last name) in descending order
End if
End if
The printed layout will appear as shown below:
PrintList Pro - Example 1
First Name
Last Name
Todd
Bob
Jeffrey
Del
Curtis
William
Ron
Ron
Amy
Robert
Clair
Joel
Peter
John
George
Steve
Larry
Michael
Jeffrey
Harry
Karen
Michael
Mitch
Sherwin
Martha
Steven
David
Doug
Mike
Pradeep
Rich
Richard
Dan
Jonathan
Patricia
John
Scott
James
Stephen
Jonathan
Steve
Mort
Zipnick
Yuderman
Young
Yocam
Wright
Woodward
Wong
Wolf
Wohl
Wiggins
Whitmer
Weiss
Watkins
Warnock
Voltz
Vollum
Tesler
Tchong
Tarter
Sweere
Sullivan
Stern
Stein
Steffin
Steffen
Stansel
Smith
Sleeter
Slade
Singh
Shapero
Shaffer
Shafer
Seybold
Seybold
Sculley
Schwarts
Sanford
Saltzman
Rotenberg
Rosenthal
Rosenthal
Salary
52,230.08
22,295.00
49,687.96
63,118.86
84,651.42
26,602.10
24,500.00
25,432.96
62,771.94
75,296.34
27,975.08
86,803.50
92,377.74
95,805.78
60,843.30
63,119.84
39,933.04
24,963.54
65,115.12
60,111.24
61,707.66
28,716.94
26,078.78
70,962.78
50,354.36
24,130.54
23,551.36
65,797.20
47,057.64
49,758.52
61,049.10
26,659.92
21,181.72
22,741.88
44,395.96
25,392.78
24,334.38
61,424.44
62,937.56
66,305.82
56,808.64
61,939.92
City
State
Zip
Country
Phoenix
Paris
Los Angeles
San Jose
Rome
Bangkok
San Jose
Minneapolis
London
Jersulaem
Tapei
Redmond
Portland
Milan
San Jose
Munich
Santa Fe
Cupertino
Denver
Boston
Portland
Brooklyn
Portland
Cupertino
Tapei
San Jose
Los Angeles
Santa Fe
Boston
Munich
Tapei
Quincy
Ft. Worth
Dallas
Milan
Redmond
Los Angeles
London
Los Angeles
Denver
Boston
Telluride
AZ
60090
94538
94404
95014
95113
94107
95014
95190
19004
94306
94105
94544
95014
94039-7900
02144
97005
95014
94105
02138
55121
10018
19131
94039-7900
91302
95014
01867
92670
95014
98072
98072
94501
10016
94062
90265
02109
95014
85203
95014
97207
02108
94797
02090
USA
France
USA
USA
Italy
Thailand
USA
USA
England
Israel
ROC
USA
USA
Italy
USA
Germany
USA
USA
USA
USA
USA
USA
USA
USA
ROC
USA
USA
USA
USA
Germany
ROC
USA
USA
USA
Italy
USA
USA
England
USA
USA
USA
USA
CA
CA
CA
MN
Ta
WA
OR
CA
NM
CA
CO
MA
OR
NY
OR
CA
Ta
CA
CA
NM
MA
Ta
MA
TX
TX
WA
CA
CA
CO
MA
CO
Example 1 — One record current selection
105
Examples
Example 2 — Multiple record current selection
Print a list of company names, showing all the people who work for each company. This example will
illustrate the use of PrintList Pro with multiple records in the current selection.
For purposes of illustration, the company names will be printed directly from the [Companies] table, and
the [People] information will be printed from a series of arrays using PrintList Pro.
Create the layout and draw the PrintList Pro plug-in object. This process is substantially the same as that
explained in the first example, with one exception — we are going to include a field directly on the
layout which will print information alongside the PrintList Pro object.
Our layout is illustrated below:
The only difference between this example and Example 1 is that we are printing out multiple records.
Since the PrintList Pro commands are executed in the On Printing Detail event of the PRINT SELECTION
command we can change the People arrays “on the fly”.
The [Companies] file is in a One-to-Many relationship with the [People] file, and the links are automatic.
As each [Companies] record is printed a new selection of [People] records is created. This [People]
selection is stored in arrays and printed.
The controlling project method is:
ALL RECORDS ([Companies])
OUTPUT FORM ([Companies];"Example 2")
PRINT SELECTION ([Companies])
Example 2 — Multiple record current selection
106
Examples
The PrintList Pro area's object method is:
If (Form event=On Printing Detail)
`Create the arrays . The current selection of [People] changes with each new record
SELECTION TO ARRAY ([People]First Name;aFname;[People]Last Name;aLname;[People]Salary;
aSalary)
$plErr:=PL_SetArraysNam (eList;1;3;"aFname";"aLname";"aSalary") `set the arrays
If ($plErr=0)
PL_SetHdrOpts (eList;1;0) `print headers at the top of the area only
PL_SetHeaders (eList;1;3;"First Name";"Last Name";"Salary") `set headers
PL_SetHdrStyle (eList;0;"Lucida Grande";10;1) `apply to all headers: Lucida Grande 10 point bold
PL_SetStyle (eList;0;"Lucida Grande";9;0) `apply to all columns: Lucida Grande 9 point plain
PL_SetFormat (eList;3;"$###,###,###.00";3;3) `format column 3, right justified header and column
PL_SetFrame (eList;0.25;"Black";"Black";0;0.25;"Black";"Black";0) `solid black hairline frame/hdr line
End if
End if
A portion of our resulting printout appears below:
PrintList Pro - Example 2
Company
Addison-Wesley Publishing Co.,
Company
Apple Computer, Inc.
Employees/Salaries
First Name
Last Name
Mike
Erickson
Steven
Stansel
Employees/Salaries
First Name
Last Name
Company
Barbara
Anderson
Samir
Arora
Randy
Battat
Bill
Coldrick
Debi
Coleman
Moira
Cullen
David
Eyes
Jonathan
Fader
Jim
Floyd
Linda
Glish
Russ
Havard
Mike
Homer
Barbara
Krause
Tim
Kreps
Jon
Magill
John
Sculley
Doug
Sleeter
Martha
Steffen
Larry
Tesler
Peter
Watkins
Ron
Wong
Employees/Salaries
National Apple Professional In
Company
Mike
Bailey
Employees/Salaries
CompuServe
Company
Sharon
Jones
Employees/Salaries
Affinity Microsystems, Ltd.
Company
Rick
Barron
Employees/Salaries
San Jose Mercury News
Company
Think Educational Software, In
First Name
First Name
First Name
First Name
Last Name
Last Name
Last Name
Last Name
Jim
Bartimo
Rory
O'Connor
Ron
Wolf
Employees/Salaries
First Name
Last Name
Salary
$1,000.00
$24,130.54
Salary
$68,484.36
$63,847.98
$26,898.06
$42,369.32
$71,092.14
$69,613.32
$28,964.88
$30,048.76
$25,055.66
$63,990.08
$20,953.38
$46,056.08
$41,832.28
$80,500.14
$59,917.20
$25,392.78
$65,797.20
$50,354.36
$39,933.04
$92,377.74
$24,500.00
Salary
$83,410.74
Salary
$90,019.86
Salary
$59,908.38
Salary
$21,418.88
$63,409.92
$25,432.96
Example 2 — Multiple record current selection
Salary
107
Examples
Example 3 — Adding a total line to the list
Print the same list of company names and people as Example 2 and add a total line after the end of each
list of people. The total line will contain a sum of the salaries for all the people working for that company.
A total line requires us to use PrintList Pro’s Break Level commands.
While most break levels require the list to be sorted, a total line is the exception. The total line is is
configured by passing 0 for the break level parameter.
The object method for the PrintList Pro area in Example 2 has been modified to include the Break Level
calls needed as shown below:
If (Form event=On Printing Detail)
`Create the arrays . The current selection of [People] changes with each new record
SELECTION TO ARRAY ([People]First Name;aFname;[People]Last Name;aLname;[People]Salary;
aSalary)
$plErr:=PL_SetArraysNam (eList;1;3;"aFname";"aLname";"aSalary") `set the arrays
If ($plErr=0)
PL_SetHdrOpts (eList;1;0) `print headers at the top of the area only
PL_SetHeaders (eList;1;3;"First Name";"Last Name";"Salary") `set headers
PL_SetHdrStyle (eList;0;"Lucida Grande";10;1) `apply to all headers: Lucida Grande 10 point bold
PL_SetStyle (eList;0;"Lucida Grande";9;0) `apply to all columns: Lucida Grande 9 point plain
PL_SetFormat (eList;3;"$###,###,###.00";3;3) `format column 3, right justified header and column
PL_SetFrame (eList;0.25;"Black";"Black";0;0.25;"Black";"Black";0) `solid black hairline frame/hdr line
PL_SetWidths (eList;1;3;80;80;100) `set the column widths
`Configure the total line
PL_SetBrkText (eList;0;3;"\Sum";0;0) `calculate the sum in the total line
PL_SetBrkHeight (eList;0;1;4) `add some padding to the total line
PL_SetBrkColOpt (eList;0;3;0;0.25;"Black";"Black";0) `draw a line above the total
End if
End if
Example 3 — Adding a total line to the list
108
Examples
The total line now appears in the list as is shown below:
PrintList Pro - Example 3
Company
Addison-Wesley Publishing Co.,
Company
Apple Computer, Inc.
Company
National Apple Professional In
Company
CompuServe
Company
Affinity Microsystems, Ltd.
Company
San Jose Mercury News
Company
Think Educational Software, In
Employees/Salaries
First Name
Last Name
Mike
Steven
Erickson
Stansel
$1,000.00
$24,130.54
Employees/Salaries
$25,130.54
First Name
Last Name
Barbara
Samir
Randy
Bill
Debi
Moira
David
Jonathan
Jim
Linda
Russ
Mike
Barbara
Tim
Jon
John
Doug
Martha
Larry
Peter
Ron
Anderson
Arora
Battat
Coldrick
Coleman
Cullen
Eyes
Fader
Floyd
Glish
Havard
Homer
Krause
Kreps
Magill
Sculley
Sleeter
Steffen
Tesler
Watkins
Wong
Employees/Salaries
First Name
Last Name
Mike
Bailey
Employees/Salaries
First Name
Last Name
Sharon
Jones
Employees/Salaries
First Name
Last Name
Rick
Barron
Employees/Salaries
First Name
Last Name
Jim
Rory
Ron
Bartimo
O'Connor
Wolf
Employees/Salaries
First Name
Last Name
Gregory
Berkin
Salary
Salary
$68,484.36
$63,847.98
$26,898.06
$42,369.32
$71,092.14
$69,613.32
$28,964.88
$30,048.76
$25,055.66
$63,990.08
$20,953.38
$46,056.08
$41,832.28
$80,500.14
$59,917.20
$25,392.78
$65,797.20
$50,354.36
$39,933.04
$92,377.74
$24,500.00
$1,037,978.76
Salary
$83,410.74
$83,410.74
Salary
$90,019.86
$90,019.86
Salary
$59,908.38
$59,908.38
Salary
$21,418.88
$63,409.92
$25,432.96
$110,261.76
Salary
$62,239.80
$62,239.80
Page 1
Mon, Feb 11, 2008
Example 3 — Adding a total line to the list
109
Examples
Example 4 — Break Level Processing
Print the same list of information shown in Example 1 and add some break level information for all
the people in the same city. The break will show a sum, average, minimum, maximum and standard
deviation of the people’s salaries in each city.
Labels for each of the calculations will be printed in the adjacent column to salary. The break will also
show the number of people in the city and the city name.
The list is sorted by country, state, city and last name. This allows the suppression of repeated values for
each of these columns. In order to set break information for the city, we must configure break level 3
because the city array is 3rd in the sort order.
Each of the calculations mentioned will be printed on a separate line, so the height of the break is set to 5
lines. Carriage returns are inserted between the labels and calculations so that each will start on a new line.
A custom calculation to perform the standard deviation is included along with the other calculations.
The code for the callback function follows the object method to the PrintList Pro object. In addition, two
header lines are shown to demonstrate the ability for multiple lines in a header.
The object method for the PrintList Pro plug-in area in Example 1 has been modified to include the
Break Level calls needed as shown below:
If (Form event=On Printing Detail)
ALL RECORDS ([People])
`Create the arrays from the data
SELECTION TO ARRAY ([People]First Name;aFname;[People]Last Name;aLname;[People]Salary;
aSalary;[People]City;aCity;[People]State;aState;[People]Zip;aZip;[People]Country;aCountry)
$plErr:=PL_SetArraysNam (eList;1;7;"aFname";"aLname";"aSalary";"aCity";"aState";"aZip";
"aCountry") `set the arrays
If ($plErr=0)
PL_SetHdrOpts (eList;2;0) `print headers on all pages
PL_SetHeight (eList;2;4;1;0) `2 hdr lines, 4 hdr pad, 1 row line, 2 row pad
PL_SetHeaders (eList;1;7;"First Name";"Last Name";"Salary";"City";"State";"Zip";"Country")
PL_SetHdrStyle (eList;0;"Lucida Grande";10;1) `apply to all headers: Lucida Grande 10 point bold
PL_SetStyle (eList;0;"Lucida Grande";9;0) `apply to all columns: Lucida Grande 9 point plain
PL_SetFormat (eList;3;"$###,###,###.00";3;3) `format column 3, right justified header and column
PL_SetFrame (eList;0.25;"Black";"Black";0;0.25;"Black";"Black";0) `print solid black hairline frame
PL_SetWidths (eList;1;7;76;80;89;79;45;80;48) `set the column widths
PL_SetBackClr (eList;"Light Gray";0;"White";0)
PL_SetSort (eList;-7;5;4;-2) `sort by Country (descending), State, City, and Last Name (descending)
`Break level Configuration
PL_SetRepeatVal (eList;0;1) `suppress repeating values in all columns
PL_SetBrkFunc (eList;"Break Function") `set the callback function
Example 4 — Break Level Processing
110
Examples
PL_SetBrkRowDiv (eList;0.25;"Black";"Black";0) `print a Break/Row divider
` Configure break level 3, city
PL_SetBrkHeight (eList;3;5;4) `print 5 lines for break level 3
`Print the calculation labels in the column to the left of the salaries
PL_SetBrkText (eList;3;2;"Sum"+Char (13)+"Average"+Char (13)+"Minimum"+Char (13)
+"Maximum"+Char (13)+"Standard Dev";0;3)
PL_SetBrkStyle (eList;3;2;"Lucida Grande";9;1) `make the labels bold
`Print the Sum, Average, Minimum, Maximum, and Standard Deviation for salaries
PL_SetBrkText (eList;3;3;"\Sum"+Char (13)+"\Average"+Char (13)+"\Minimum"+Char (13)
+"\Maximum"+Char (13)+"\Function";0;0)
`Show the number of people in this city
PL_SetBrkText (eList;3;5;Char (13)+"\Count people in \breakValue";1;2)
PL_SetBrkStyle (eList;3;5;"Lucida Grande";9;3) `make the city count info bold
PL_SetBrkColOpt (eList;3;3;0;0.25;"Black";"Black";0) `print a subtotal line in the salary column
End if
End if
The Break Function callback method for the custom calculation is as follows:
C_INTEGER ($1;$2) `break level, column
C_STRING (82;$3) `column format
C_LONGINT ($4;$5) `start row, end row
C_TEXT ($0) `custom calculation result to print
C_REAL ($result;$average)
`Calculate the average
$result:=0
For ($i;$4;$5)
$result:=$result+aSalary{$i}
End for
$count:=$5-$4+1
$average:=$result/$count
`Calculate the standard deviation
$result:=0
For ($i;$4;$5)
$result:=$result+(($average-aSalary{$i})^2) `square the difference
End for
$result:=$result/$count
$result:=Square root ($result) `take the square root of the variance
$0:=String ($result;$3)
Example 4 — Break Level Processing
111
Examples
Here is a sample of the list containing the breaks:
PrintList Pro - Example 4
First Name
Last Name
Bill
Stan
Yogen
Bill
Goodhew
Getz
Dalal
Coldrick
Todd
Michelle
John
Sum
Average
Minimum
Maximum
Standard Dev
Zipnick
Preston
Markoff
$168,092.54
$42,023.13
$23,275.98
$60,956.00
$13,325.83
$52,230.08 Phoenix
$31,782.38
$20,416.34
Michael
Sherwin
Jonathan
Mary
Moira
Ed
Sum
Average
Minimum
Maximum
Standard Dev
Tchong
Steffin
Fader
Evslin
Cullen
Cheffetz
$104,428.80
$34,809.60
3 people in Phoenix
$20,416.34
$52,230.08
$13,163.11
$24,963.54 Cupertino
CA
94105
$70,962.78
91302
$30,048.76
95014
$46,685.24
05602
$69,613.32
95014
$53,588.36
33634
Jeffrey
David
Scott
Stephen
Bill
Bruce
Raines
Paul
Lofty
Sum
Average
Minimum
Maximum
Standard Dev
Young
Smith
Schwarts
Saltzman
Gates
Davis
Cohen
Brainerd
Becker
$295,862.00
$49,310.33
6 people in Cupertino
$24,963.54
$70,962.78
$17,654.11
$49,687.96 Los Angeles
CA
94404
$23,551.36
92670
$24,334.38
85203
$62,937.56
97207
$26,287.52
98072
$57,186.92
94025
$29,784.16
94709
$59,952.48
98104
$85,627.50
06105
Christopher
Regis
Bob
Mike
Ed
Sum
Average
Minimum
Maximum
Standard Dev
Robert
McKenna
Leff
Kramer
Bogas
$419,349.84
$46,594.42
9 people in Los Angeles
$23,551.36
$85,627.50
$20,581.37
$51,063.88 San Francisco
CA
02090
$57,916.04
94303
$87,341.52
90312
$21,337.54
77098
$51,108.96
94583
Del
Ron
George
Sum
Average
Minimum
Maximum
Standard Dev
Yocam
Wong
Voltz
$268,767.94
$53,753.58
5 people in San Francisco
$21,337.54
$87,341.52
$21,026.19
$63,118.86 San Jose
CA
95014
$24,500.00
95014
$60,843.30
02144
Page 1
Salary City
$23,275.98 Podunk
$60,956.00
$41,491.24
$42,369.32
State
Zip
Country
AR
30093
USA
95052-8168
95110
4 people in Podunk
AZ
60090
10004
10036
USA
USA
USA
USA
USA
Mon, Feb 11, 2008
Example 4 — Break Level Processing
112
PrintList Pro Command Reference Alphabetical
PrintList Pro Command Reference
Alphabetical
%PrintListPro................................................................................................................................ 29
PL_Register (registrationKey:S) ➞ resultCode:L.......................................................................................... 28
PL_SetArraysNam (areaRef:L; columnNumber:I; numArrays:I; array1:S; …; arrayN:S) ➞ resultCode:L......................... 29
PL_SetBackClr (areaRef:L; plpHdrBackColor:S; 4dHdrBackColor:I; plpListBackColor:S; 4dListBackColor:I)................... 43
PL_SetBackRGBColor (areaRef:L; hdrBackRed:L; hdrBackGreen:L; hdrBackBlue:L; listBackRed:L; listBackGreen:L;
listBackBlue:L; ftrBackRed:L; ftrBackGreen:L; ftrBackBlue:L).......................................................................... 44
PL_SetBkHColOpt (areaRef:L; breakLevel:I; columnNum:I; showColDivider:I; lineWidth:F; pattern:S;
plpColor:S; 4dColor:I)...................................................................................................................... 102
PL_SetBkHColor (areaRef:L; breakLevel:I; columnNum:I; plpForeColor:S; 4dForeColor:I; plpBackColor:S;
4dBackColor:I).. .............................................................................................................................. 96
PL_SetBkHFunc (areaRef:L; functionName:S). . .......................................................................................... 93
PL_SetBkHHeight (areaRef:L; breakLevel:I; numBreakLines:I; breakHeightPad:I). . ................................................. 99
PL_SetBkHRGBColor (areaRef:L; breakLevel:I; columnNum:I; brkHdrForeRed:L; brkHdrForeGreen:L;
brkHdrForeBlue:L; brkHdrBackRed:L; brkHdrBackGreen:L; brkHdrBackBlue:L).. .................................................. 97
PL_SetBkHStyle (areaRef:L; breakLevel:I; columnNum:I; fontName:S; size:I; styleNum:I)........................................ 94
PL_SetBkHText (areaRef:L; breakLevel:I; columnNum:I; breakText:T; numColsToOverflow:I; justification:I)..........................92
PL_SetBrkColOpt (areaRef:L; breakLevel:I; columnNum:I; showColDivider:I; lineWidth:F; pattern:S;
plpColor:S; 4dColor:I).........................................................................................................................................................100
PL_SetBrkColor (areaRef:L; breakLevel:I; columnNum:I; plpForeColor:S; 4dForeColor:I; plpBackColor:S; 4dBackColor:I)........95
PL_SetBrkFunc (areaRef:L; functionName:S).........................................................................................................................92
PL_SetBrkHeight (areaRef:L; breakLevel:I; numBreakLines:I; breakHeightPad:I)....................................................................98
PL_SetBrkOpts (areaRef:L; printLastPageBreak:I)...................................................................................................................88
PL_SetBrkOrder (areaRef:L; columnNum1:I; …; columnNumN:I)........................................................................................88
PL_SetBrkRGBColor (areaRef:L; breakLevel:I; columnNum:I; breakForeRed:L; breakForeGreen:L; breakForeBlue:L;
breakBackRed:L; breakBackGreen:L; breakBackBlue:L)........................................................................................................96
PL_SetBrkRowDiv (areaRef:L; lineWidth:F; pattern:S; plpColor:S; 4dColor:I)........................................................................99
PL_SetBrkStyle (areaRef:L; breakLevel:I; columnNum:I; fontName:S; size:I; styleNum:I)......................................................93
PL_SetBrkText (areaRef:L; breakLevel:I; columnNum:I; breakText:T; numColsToOverflow:I; justification:I)...........................89
PrintList Pro Command Reference — Alphabetical
113
PrintList Pro Command Reference Alphabetical
PL_SetCalcCall (areaRef:L; columnNumber:I; calcCallback:S)..............................................................................................77
PL_SetCellBorder (areaRef:L; cellColumn:I; cellRow:L; borderLeft:I; borderTop:I; borderRight:I; borderBottom:I;
offset:I; width:F; redColor:I; greenColor:I; blueColor:I)..........................................................................................................66
PL_SetCellColor (areaRef:L; firstCellCol:I; firstCellRow:L; lastCellCol:I; lastCellRow:L; cellArray:X; plpForeColor:S;
4dForeColor:I; plpBackColor:S; 4dBackColor:I)....................................................................................................................60
PL_SetCellFrame (areaRef:L; firstCellCol:I; firstCellRow:L; lastCellCol:I; lastCellRow:L; offset:I; width:F; redLightColor:I;
greenLightColor:I; blueLightColor:I; redDarkColor:I; greenDarkColor:I; blueDarkColor:I; clearAllBorders:I).........................67
PL_SetCellIcon (areaRef:L; cellColumn:I; cellRow:L; pictRef:P; iconAlignment:I; horPosition:I; vertPosition:I;
offset:I; scaling:I) ..................................................................................................................................................................63
PL_SetCellRGBColor (areaRef:L; firstCellCol:I; firstCellRow:L; lastCellCol:I; lastCellRow:L; cellArray:X; cellForeRed:L;
cellForeGreen:L; cellForeBlue:L; cellBackRed:L; cellBackGreen:L; cellBackBlue:L)..............................................................62
PL_SetCellStyle (areaRef:L; firstCellCol:I; firstCellRow:L; lastCellCol:I; lastCellRow:L; cellArray:X; styleNum:I;
fontName:S; fontSize:I).........................................................................................................................................................58
PL_SetColBackColor (areaRef:L; columnNumber:I; plpHdrBackColor:S; 4dHdrBackColor:I; plpListBackColor:S;
4dListBackColor:I)................................................................................................................................................................45
PL_SetColBackRGBColor (areaRef:L; columnNumber:L; hdrBackRed:L; hdrBackGreen:L; hdrBackBlue:L;
listBackRed:L; listBackGreen:L; listBackBlue:L).....................................................................................................................46
PL_SetColOpts (areaRef:L; hideLastColumns:I; hideDetailArea:I)..........................................................................................57
PL_SetDividers (areaRef:L; colDividerWidth:F; colDividerPattern:S; plpColDividerColor:S; 4dColDividerColor:I;
rowDividerWidth:F; rowDividerPattern:S; plpRowDividerColor:S; 4dRowDividerColor:I).....................................................51
PL_SetFields (areaRef:L; tableNum:I; columnNumber:I; numFields:I; fieldNum1; …; fieldNumN:I) ➞ resultCode:L..............76
PL_SetFile (areaRef:L; tableNum:I) ➞ resultCode:L...............................................................................................................75
PL_SetForeClr (areaRef:L; columnNumber:I; plpHdrForeColor:S; 4dHdrForeColor:I; plpListForeColor:S; 4dListForeColor:I)......41
PL_SetForeRGBColor (areaRef:L; columnNumber:L; hdrForeRed:L; hdrForeGreen:L; hdrForeBlue:L; listForeRed:L;
listForeGreen:L; listForeBlue:L).............................................................................................................................................42
PL_SetFormat (areaRef:L; columnNumber:I; format:S; columnJust:I; headerJust:I; usePictHeight:I)........................................34
PL_SetFrame (areaRef:L; frameLineWidth:F; frameLinePattern:S; plpFrameLineColor:S; 4dFrameLineColor:I;
headerLineWidth:F; headerLinePattern:S; plpHeaderLineColor:S; 4dHeaderLineColor:I).......................................................53
PL_SetHdrOpts (areaRef:L; printHeaders:I; printPixelWidth:I)...............................................................................................38
PL_SetHdrStyle (areaRef:L; columnNumber:I; fontName:S; size:I; styleNum:I).....................................................................37
PL_SetHeaderIcon (areaRef:L; columnNumber:I; iconAlignment:I picture:P; horPosition:I; vertPosition:I; offset:I; scaling:I)......32
PL_SetHeaders (areaRef:L; columnNumber:I; numHeaders:I; header1:S; …; headerN:S)......................................................31
PL_SetHeight (areaRef:L; numHeaderLines:I; headerHeightPad:I; numRowLines:I; rowHeightPad:I; minimumHeight:I)........56
PL_SetMiscOptions (areaRef:L; escapeChar:S; useEllipsis:I)..................................................................................................39
PL_SetPageBreak (areaRef:L; breakLevel:I; insertPageBreak:I)................................................................................................87
PrintList Pro Command Reference — Alphabetical
114
PrintList Pro Command Reference Alphabetical
PL_SetPageProc (areaRef:L; callbackMethod:S).....................................................................................................................68
PL_SetRepeatVal (areaRef:L; columnNum:I; repeatValues:I)..................................................................................................89
PL_SetRGBDividers (areaRef:L; colDividerWidth:F; colDividerPattern:S; colDividerRed:L; colDividerGreen:L;
colDividerBlue:L; rowDividerWidth:F; rowDividerPattern:S; rowDividerRed:L; rowDividerGreen:L; rowDividerBlue:L).......52
PL_SetRGBFrame (areaRef:L; frameLineWidth:F; frameLinePattern:S; frameLineRed:L; frameLineGreen:L;
frameLineBlue:L; headerLineWidth:F; headerLinePattern:S; headerLineRed:L; headerLineGreen:L; headerLineBlue:L;).........54
PL_SetRowColor (areaRef:L; rowNumber:L; plpRowForeColor:S; 4dRowForeColor:L; plpRowBackColor:S;
4dRowBackColor:L)..............................................................................................................................................................48
PL_SetRowRGBColor (areaRef:L; rowNumber:L; rowForeRed:L; rowForeGreen:L; rowForeBlue:L; rowBackRed:L;
rowBackGreen:L; rowBackBlue:L)........................................................................................................................................50
PL_SetRowStyle (areaRef:L; rowNumber:L; styleNum:I; fontName:S; fontSize:I)...................................................................47
PL_SetSort (areaRef:L; column1:I; …; columnN:I)................................................................................................................57
PL_SetStyle (areaRef:L; columnNumber:I; fontName:S; size:I; styleNum:I)............................................................................40
PL_SetSubSelect (areaRef:L; firstRecord:L; numRecords:L)....................................................................................................78
PL_SetWidths (areaRef:L; columnNumber:I; numWidths:I; width1:I; …; widthN:I)...............................................................37
PrintList Pro Command Reference — Alphabetical
115
PrintList Pro Constant List
PrintList Pro Constant List
PLP Colors
Constant
PL White
PL Black
PL Magenta
PL Red
PL Cyan
PL Green
PL Blue
PL Yellow
PL Gray
PL Light gray
PL Use 4D palette color
TypeValue
S
white
S
black
S
magenta
S
red
S
cyan
S
green
S
blue
S
yellow
S
gray
S
light gray
S
PLP Patterns
PL White pattern
PL Black pattern
PL Gray pattern
PL Light gray pattern
PL Dark gray pattern
S
S
S
S
S
white
black
gray
light gray
dark gray
L
L
L
L
L
L
L
L
0
1
0
1
2
3
4
5
PLP Command Results
PL Registration Failed
PL Registration Passed
PL SetArrays Passed
PL Not an array
PL Wrong type of array
PL Wrong number of rows
PL Maximum number of arrays exc
PL Not enough memory
PrintList Pro Constant List
116
PrintList Pro Constant List
PL SetFile Passed
PL Not a file
PL Wrong 4D version
PL Arrays have been set
PL Fields have been set
PL SetFields Passed
PL Not a field
PL Wrong field type
PL Maximum fields exceeded
PL Save Data Passed
PL Save Data Failed
PL Restore Data Passed
PL Restore Data Failed
L
L
L
L
L
L
L
L
L
L
L
L
L
0
6
10
11
12
0
7
8
9
0
1
0
1
L
L
L
L
0
1
2
3
L
L
L
L
L
L
L
L
0
1
2
4
8
16
32
64
PLP Justification
PL Just Default
PL Just Left
PL Just Center
PL Just Right
PLP Font Style
PL Plain
PL Bold
PL Italic
PL Underline
PL Outline
PL Shadow
PL Condensed
PL Extended
PrintList Pro Constant List
117
PrintList Pro Constant List
PLP Break Levels
PL Break Level 1
PL Break Level 2
PL Break Level 3
PL Break Level 4
PL Break Level 5
PL Break Level 6
PL Break Level 7
PL Break Level 8
PL Break Level 9
PL Sum
PL Average
PL Minimum
PL Maximum
PL Count
PL Break Value Insertion
PL Custom Calculation
L
L
L
L
L
L
L
L
L
S
S
S
S
S
S
S
1
2
3
4
5
6
7
8
9
\Sum
\Average
\Minimum
\Maximum
\Count
\BreakValue
\Function
L
L
L
L
L
L
L
L
L
L
L
L
L
L
L
L
L
0
1
2
0
1
0
1
-1
1
0
1
0
0
1
0
1
1
PLP Options
PL No Headers
PL First Page Header
PL Print All Headers
PL Suppress Pixel Width
PL Print Pixel Width
PL Print Array
PL Hide Array
PL Print All Records
PL Print Page Breaks
PL Suppress Page Breaks
PL Print Last Page Break
PL Suppress Last Page Break
PL Print Repeated Values
PL Suppress Repeated Values
PL Print Column Divider
PL Suppress Column Divider
PL Suppress Detail Area
PrintList Pro Constant List
118