1
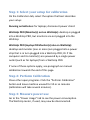
Step 1: Select your setup for calibration
On the Calibration tab, select the option that best describes
your setup:
Running on batteries: for laptops; disconnect power chord
WattsUp PRO (Monitor(s) not on WattsUp): desktop is plugged
into a WattsUp PRO, but monitors are not plugged into the
WattsUp
WattsUp PRO (Laptop OR Monitor(s) also on WattsUp):
desktop and monitor (one or more) are plugged into a power
strip that is in turn plugged into a WattsUp PRO; Or if the
computer and its monitor(s) are powered by a single power
outlet (such as for laptops) from a WattsUp PRO.
If none of these options apply, see paragraph on manual
calibration towards the end of this page.
Step 2: Perform Calibration
Close other open programs. Click the “Perform Calibration”
button and leave machine unused for 10 or so minutes
(calibration will take several minutes).
Step 3: Measure power use
Go to the “Power Usage” tab to see the power consumption.
The WattsUp meter, if used, may now be disconnected.
Note: All power values are in Watts. Base power is computer’s
power consumption when powered on but sitting idle. CPU
power is the additional power used when some program(s) or
the OS use the CPU. Disk power is the additional power
consumed by the disk due to IO activity (disk spinning power is
included in the base power). Monitor power, if shown, is the
additional power consumption of the monitor and may change
with brightness.
Application Power: Enter the name of the program executable,
such as “myProgram.exe” and click “Start.” If the
“myProgram.exe” is not yet running, Joulemeter will wait for it
to be started.
Save to file: Data is saved in comma separated values format
that can be opened in Microsoft Excel for easy plotting, or
viewed in any text editor.
Manual Calibration
If none of the battery or WattsUp based setups is available, the
expected range of power values can be manually entered. On
the Calibration tab, click the “Manual Entry” button. Select the
Model type to be a laptop, desktop, or one of the values shown.
Joulemeter will recommend typical values to be entered. Edit
the “Base power” to be the value when the computer is simply
turned on but not performing much work. In “Processor peak
power (high frequency)” enter the power consumed at 100%
CPU utilization with the processor using its highest frequency.
This power value may be available in your processor’s data
sheet as the Thermal Design Power (TDP) value. In “Processor
peak power (low frequency)” enter the power consumed at
100% CPU utilization with the processor using its lowest P-state
frequency. In “Monitor power” enter the power consumption of
your monitor (available from the monitor user manual). If using
more than one monitor, add up the power consumption of all
monitors.
Please consult the User Manual for more details.