1
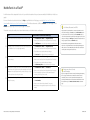
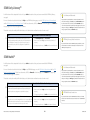
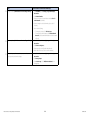
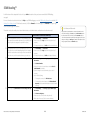
Getting Ready for a
New School Year
RENAISSANCE PLACE™
Perform these tasks to get ready to use your Renaissance Place products in the next school year. (You do not need to wait for the old
school year to end; you can simply choose to work in the new school year before you follow these steps.)
No matter which products you have, your school or school network needs to perform the Renaissance Place tasks that start on
page 2.
After that, you can find the tasks for each product on these pages:
Accelerated Maths™ . . . . . . . . . . . 6
STAR Early Literacy™ . . . . . . . . . . 11
Accelerated Reader™ . . . . . . . . . . 8
STAR Maths™. . . . . . . . . . . . . . . . . 11
KeyWords™. . . . . . . . . . . . . . . . . . . 9
STAR Reading™ . . . . . . . . . . . . . . . 13
MathsFacts in a Flash™. . . . . . . . . 10
Renaissance Learning UK Ltd | 32 Harbour Exchange Square | London, E14 9GE | www.renlearn.co.uk
Renaissance Learning Australia | PO Box 329 | Toowong DC QLD 4066 | www.renaissance.com.au
All logos, designs, and brand names for Accelerated Maths, AM, Accelerated Maths Fluency, Accelerated Reader, AR, ATOS, KeyWords, MathsFacts in a Flash, NEO, NEO 2, Renaissance Home Connect, Renaissance Learning,
Renaissance-U, STAR, STAR Assessments, STAR Early Literacy, STAR Maths and STAR Reading, are trademarks of Renaissance Learning, Inc. and its subsidiaries, registered, common law, or pending registration in Australia,
the United Kingdom, United States and other countries. All other product and company names should be considered as the property of their respective companies and organisations.
© 2015 Renaissance Learning, Inc. All rights reserved.
Renaissance Place™: Setting Up the Data
Checklist for RP Administrators, School Administrators
and Non-Teaching Staff
For more information about the tasks below, click Help on any Renaissance Place page, or see the following:
• the Renaissance Place Software Manual
• the Renaissance Place Tips for Getting Started
• the Renaissance Place Tips for Consolidated Reports and the Dashboard
Summer School
To find these documents, click ? on the Home page, then Manuals, or click Manuals in the upper-right corner of any other page in
Renaissance Place. These tasks can be performed by RP administrators, school network staff, school administrators and school staff unless
otherwise noted.
£
£
Task
How to Start the Task from the Home Page
Add the new school year start and end dates (must be done by the
RP administrator or a school network staff member). When the
new school year begins, it will be the year that all users are working in
automatically when they log in.
1. On the Home page, click School Years.
Add the marking periods for each school (used for targets and reports).
You can also copy the marking periods from the previous school year.
1. On the Home page, click School Years.
If you copy last year’s classes (see the next page), your class marking
periods will also be copied, so you do not need to add the marking
periods.
£
Add the non-teaching days during the school year for each school
(used for report calculations). You can also copy the non-teaching days
from the previous school year.
For tips on using your Renaissance Place Programs during summer
school, see Knowledge Base article 7901571 at http://support.renlearn.
com/techkb/techkb/7901571e.asp.
2. Click Add School Year.
2. If the school year is still in the future, click Work in a Different
School Year and choose to work in that school year. This is not
necessary if the new school year is the current year.
3. Click Add/Edit Marking Periods. (If you want to use the marking
periods with the Reading and Maths Dashboards, be sure to
choose “Marking Period” for the Type.)
1. On the Home page, click School Years.
2. If the school year is still in the future, click Work in a Different
School Year and choose to work in that school year. This is not
necessary if the new school year is the current year.
3. Click Add/Edit Non-Teaching Days.
£
Set reporting periods for Consolidated Reports (RP administrator or
school administrators only).
1. On the Home page, click Consolidated Reports.
2. Click View Reporting Periods.
3. On the View Reporting Periods page, click Add Reporting Period
to add new reporting periods, or use the Edit or Delete links to
make changes to existing reporting periods as needed.
Renaissance Place—Getting Ready for a New School Year
2
Importing Data Files
You can also import student, personnel, class and course information
(including updates to student enrolments and personnel assignments) if
you have a properly formatted file from another source (such as a student
information system). For more information, see the Renaissance Place
help or Renaissance Place Software Manual.
R53419.1511
Task
How to Start the Task from the Home Page
Review the list of personnel to see if any need to be added or changed.
Edit personnel information or school assignments if necessary.
1. On the Home page, click Users.
You may also want to check capabilities for personnel. Although the
default capabilities will work well for most users, you can add or
restrict capabilities for certain groups or individuals.
3. Search for specific personnel or just click Search to see the full list.
£
Add personnel if necessary. Be sure to give each person the user name
and password that you assign.
1. On the Home page, click Users.
£
Review the list of students to see if any need to be added or changed.
Edit student information or characteristics if necessary.
1. On the Home page, click Users.
You do not need to change students’ years; students are
automatically promoted to the next year in the software when a new
school year starts.
3. Search for specific students or choose a school, year and/or class
to see a group.
Transfer students from one school to another as needed, and un-enrol
those who are not returning to your school(s).
1. On the Home page, click Users.
£
£
2. Click View Personnel.
4. If you need to change a person’s information or school, click
Select next to the person’s name. Then, click one of the links on
the next page to edit information or school assignments.
2. Click Add School Personnel or Add School Network Personnel.
2. Click View Students.
4. If you need to change a student’s information or characteristics,
click the student’s name, then click the tab that requires the
changes.
2. Click Edit Multiple School Enrolments.
3. Select a school, search for the students, tick the ones who need
changes and choose the desired settings on the left.
£
Add new students.
1. On the Home page, click Users.
2. Click Add Student.
£
£
£
Check your course list to see if any need to be added for the new
school year. Add courses if necessary. (Courses stay in the list from one
year to the next.)
1. On the Home page, click Courses and Classes.
If your classes are similar to those from the previous school year, copy
your previous classes (if they are available). When you do this, you can
choose whether to copy the assigned teachers, assigned products and
enrolled students. (Usually you should not copy enrolled students since
class enrolments change from year to year.) Class preference settings
will also be copied. Check your school marking periods after you copy
classes; the dates for copied marking periods may need to be changed.
1. On the Home page, click Courses and Classes.
Add additional classes as needed. As you add classes, choose the
primary teacher, select the products the classes will use and add
students to the classes. (You can also add and remove team teachers
for each class from the list of classes in a course.)
1. On the Home page, click Courses and Classes.
Renaissance Place—Getting Ready for a New School Year
Adding or Transferring Students
If the RP administrator will be adding students or transferring them from
one school to another, school personnel should wait until this is done
before adding their students to avoid adding the same student more than
once.
2. Choose a school if necessary.
3. If courses need to be added to the list for the school, click Add
Course.
2. Click the Copy/Edit Classes link.
2. Choose a school if necessary.
3. Click the course name.
4. Click Add Class.
3
R53419.1511
£
Task
How to Start the Task from the Home Page
Set the Learning Standards preference to choose which Learning
Progression to use with the Maths Dashboard and the Reading
Dashboard. To keep the skills and Learning Progression used by your
classes consistent, set this preference at the beginning of the school
year, and then leave the preference as is throughout the school year.
1. On the Home page, click Product Administration.
2. Click Set Learning Standards.
3. For each subject (Reading and Maths), choose a progression to use.
4. Click Save.
Checklist for Technology/Computer Coordinators
To open the instructions or documents listed in the third column below, click the links.
£
Task
How to Start the Task
Where to Get More Information
Check for required supporting software on any
new or updated computers that will be used
with the Renaissance Place software. Make
sure that you check both teacher and student
computers. You must be logged in to each
computer with the rights required to install
software for all users.
1. Before logging in to Renaissance Place,
click Check Software Requirements on
the Renaissance Place welcome page, OR,
after logging in, on the Home page, click
Product Administration, then Download
Supporting Software.
•
Complete steps in the help:
Checking Software Requirements
•
For Accelerated Maths:
2. Click Downloads on the left side of the
page (or the top) and view the tab for your
operating system.
•
AccelScan software instructions
•
Renaissance Responder software
instructions
3. If you will be using an AccelScan scanner
with Accelerated Maths on this computer,
click Download for AccelScan and install
the program.
Supporting Software Updates
This is also a good time to recheck computers that have had supporting
software installed in case they need updates or additional software. You
may also want to take advantage of updated technologies with better
built-in security features (such as newer browser versions).
4. If you will be using Renaissance Responders
or NEO 2s with Accelerated Maths and a
Renaissance Receiver on this computer,
click Download for Renaissance Responder
and install the program.
5. If you are using programs that require the
Renaissance Place Print Plug-In, click
Download for instructions.
6. Make sure all required software Third-Party
downloads are installed. If any software is
not installed, click Download for
instructions.
Renaissance Place—Getting Ready for a New School Year
4
R53419.1511
£
Task
How to Start the Task
Where to Get More Information
To prevent students from working from home,
restrict the computers that can access
Renaissance Place.
1. On the Home page, select Product
Administration.
•
Setting Security Options for Students
2. Select Set Security Options for
Students.
3. In the Restrict Student Workstations field,
enter the external IP addresses of
computers that students can use to access
Renaissance Place. You can use ranges or
individual IP addresses as shown; on
individual computers, you can click Add
to List to add the computer’s IP address.
4. Click Done.
£
Make sure each computer (or tablet) that will
be used with the Renaissance Place software
has a shortcut or favourite set up that points
to the current Renaissance Place address.
1. Follow the instructions for your computer’s —
operating system and/or browser.
£
If you are using AccelScan scanners with
Accelerated Maths, make sure they are
connected to the computers where they will
be used, and make sure those computers
have the AccelScan Scanning software
installed.
1. Using the cable provided, connect each
AccelScan to the computer where it will be
used.
If you will be using either NEO 2s or
Renaissance Responders with Renaissance
Place software (Accelerated Maths,
Accelerated Reader and MathsFacts in a
Flash), make sure the Renaissance Receivers
are connected to the correct computers.
If you will be using Accelerated Reader for iOS
on iPad®, iPhone® or iPod touch® or STAR for
iOS on iPad®, make certain:
£
£
•
The app is downloaded on each device.
•
You have connected the app to
Renaissance Place.
Renaissance Place—Getting Ready for a New School Year
•
AccelScan Setup instructions
1. Using the cable provided, connect each
Renaissance Receiver to the computer
where it will be used.
•
2Know! Classroom Response System
Installation and Set-Up Guide
•
Accelerated Maths Software Manual
2. Using the Renaissance Wireless Server
Utility, set the Network Name and set the
Renaissance Place address if necessary.
•
Accelerated Reader Software Manual
•
MathsFacts in a Flash Software Manual
You can get the app for each device in the app
store.
•
For Accelerated Reader: Before Students
Quiz on a Mobile Device
To establish settings, connect to Renaissance
Place on one device, then share those settings
with all of the other devices.
•
For STAR Early Literacy: Using an iPad®
with STAR Early Literacy
•
For STAR Maths: Using an iPad® with STAR
Maths
•
For STAR Reading: Using an iPad® with
STAR Reading
2. If you are using an 1100 USB scanner,
install the AccelScan drivers.
5
R53419.1511
Accelerated Maths™
Do the Renaissance Place setup tasks for the school year before these tasks so that your classes are available for Accelerated Maths; see
page 2.
For more information about the tasks below, click Help on any Accelerated Maths page, or see the Accelerated Maths Software Manual and
the Accelerated Maths Tips for Getting Started. To find these documents, click ?, then Manuals on the Home page, or click Manuals in the
upper-right corner of any other page in the software.
These tasks can be performed by the RP administrator, school administrators and teachers unless otherwise noted.
£
Task
How to Start the Task from the Home Page
Set up groups if necessary for each class. (Groups allow some students
to work on objectives that the class as a whole is not working on.)
1. Click Accelerated Maths, then Assignment Book.
2. Use the drop-down lists to choose the school and class if
necessary.
3. Click Create Group.
£
Review the objective lists available to make sure you have the ones
you need for your classes and groups.
1. Click Accelerated Maths, then Libraries.
2. Click Manage Objectives.
3. Click View/Edit Lists.
4. Review the available objective lists. To see the objectives in any
one objective list, click View in the row for that list.
£
Create/add new objective lists if necessary.
1. Click Accelerated Maths, then Libraries.
2. Click Manage Objectives.
3. Click Create New List. Then, enter the information and choose
the objectives.
£
Select/assign an objective list for each class and group.
1. Click Accelerated Maths, then Assignment Book.
2. Use the drop-down lists to choose the school and class if
necessary. (If you are choosing a list for a group, select the group.)
3. Click Manage Objectives.
4. Click Select/Copy Existing List. (You can click Create New List if
you need a new list.)
£
Assign objectives to students in each class and group.
1. Click Accelerated Maths, then Assignment Book.
(For Accelerated Maths for Intervention, you do not assign objectives
until after each student’s first diagnostic test.)
2. Use the drop-down lists to choose the school and class if
necessary. (If you are assigning objectives for students in a group,
select the group.)
User Names and Passwords
If you use online assignments, be prepared to help students with user
names and passwords. To find them, on the Home page, click Users; then,
click View Students. Search for your students. In the search results, click
the Passwords tab to see user names and passwords. If you want to print
the page of search results that you are viewing, click Print Page. To print
all of the results and choose how to group and sort them, click View PDF
instead.
3. Tick the boxes next to the student names.
4. Click Assign.
5. Click Done.
Renaissance Place—Getting Ready for a New School Year
6
R53419.1511
£
Task
How to Start the Task from the Home Page
Set targets for students. (You can also set up teams from the Teams
and Targets page.)
1. Click Accelerated Maths, then Teams and Targets.
2. Choose a school if necessary.
3. Click Manage Targets.
4. If necessary, click Select Class Marking Periods to choose the
target time periods before setting the targets.
£
£
Review the preference settings. Since classes do not automatically
carry over from one school year to the next, these settings do not carry
over either unless you have copied classes from the previous school
year, so you need to set preferences for this year’s classes.
1. Click Accelerated Maths, then Preferences.
Generate the students’ first assignment.
1. Click Accelerated Maths, then Assignment Book.
2. Choose a school and class from the drop-down lists if necessary.
3. To change a preference, click its name.
2. Use the drop-down lists to choose the school and class if
necessary. (If you are generating assignments for a group, select
the group.)
3. Tick the boxes next to students who need assignments.
4. Click Generate Practice, Generate Exercise or Generate
Diagnostic.
Renaissance Place—Getting Ready for a New School Year
7
Renaissance Home Connect
and Advantage
If you are using Renaissance Home Connect (for Advantage subscriptions),
this is also a good time to make sure Renaissance Home Connect is
activated for your schools and to print Informational Letters for the
parents of your Accelerated Maths students.
R53419.1511
Accelerated Reader™
Do the Renaissance Place setup tasks for the school year before these tasks so that your classes are available for Accelerated Reader; see
page 2.
For more information about the tasks below, click Help on any Accelerated Reader page, or see the Accelerated Reader Software Manual
and the Accelerated Reader Tips for Getting Started. To find these documents, click ?, then Manuals on the Home page, or click Manuals in
the upper-right corner of any other page in the software.
These tasks can be performed by the RP administrator, school administrators and teachers.
£
Task
How to Start the Task from the Home Page
If you use the Date and Time Restrictions preference to restrict student
quizzing before and after specified dates, review this preference for
each school and set your new school year dates.
1. Click Accelerated Reader, then Preferences.
2. Click Date and Time Restrictions under School Preferences.
3. Use the drop-down list to choose a school if necessary.
4. Click Edit Date and Time Restrictions.
5. Change the settings as needed; make sure the Before Date and
After Date settings are up-to-date.
6. Click Save.
7. Repeat these steps for other schools if necessary.
£
Review the settings of the other school preferences and make changes
if necessary. These settings carry over from year to year (except for
Monitor Override).
1. Click Accelerated Reader, then Preferences.
2. Click a preference link under School Preferences.
3. Use the drop-down list to choose a school if necessary.
4. Review the current preference settings. If any need changing, click
the Edit link.
5. Repeat steps 2–4 for each school preference category.
£
Review classroom preference settings. Since classes do not
automatically carry over from year to year, these settings do not carry
over either unless you have copied classes from the previous school
year, so you need to check and set preferences for this year’s classes.
1. Click Accelerated Reader, then Preferences.
Note: Individual Student Settings do carry over from one school year
to the next, regardless of the student’s school or class enrolment.
However, it is a good idea to check these with each new school year in
case some settings are no longer appropriate.
4. Review the preference settings. If any need changing, click the Edit
link(s).
Renaissance Place—Getting Ready for a New School Year
User Names and Passwords
Be prepared to help students with user names and passwords. To find
them, on the Home page, click Users; then, click View Students. Search
for your students. In the search results, click the Passwords tab to see
user names and passwords. If you want to print the page of search results
that you are viewing, click Print Page. To print all of the results and choose
how to group and sort them, click View PDF instead.
2. Click a preference link under Classroom Preferences.
3. Use the drop-down lists to choose the school and class if
necessary.
5. Repeat steps 2–4 for each classroom preference category.
8
R53419.1511
£
Task
How to Start the Task from the Home Page
Select the marking periods for Reading Practice targets and set the
targets for students in your new classes if necessary.
1. Click Accelerated Reader, then Record Books and Targets.
Note: For Reading Practice targets to carry over from one marking
period to another, you must have those marking periods selected
before each one starts. Select all marking periods for the entire school
year at the beginning of the year.
2. Use the drop-down lists to choose the school and class if
necessary.
3. Click Reading Practice Targets.
4. Click Select Marking Periods. Select the marking periods that will
be used for targets; then, click Save.
5. Set the targets and click Save.
£
Set Reading Practice certification targets if necessary.
1. Click Accelerated Reader, then Record Books and Targets.
2. Use the drop-down lists to choose the school and class if
necessary.
Renaissance Home Connect
If you are using Renaissance Home Connect, this is also a good time to
make sure Renaissance Home Connect is activated for your schools and
to print Informational Letters for the parents of your Accelerated Reader
students.
3. Click Reading Practice Certifications.
KeyWords™
Do the Renaissance Place setup tasks for the school year before this task so that your classes are available for KeyWords; see page 2.
For more information about the task below, see the NEO User Manual, which is installed with NEO Manager. You can find the manual in the
Windows Start menu or in the Macintosh program folder.
£
Task
How to Start the Task
Reset the KeyWords students on NEO 2s to remove previous students
and their work.
1. Connect either individual NEO 2s or a SmartOption Bundle to a
computer with NEO Manager software installed.
2. In NEO Manager, click the Setup menu and choose Reset
KeyWords Students.
Renaissance Place—Getting Ready for a New School Year
9
R53419.1511
MathsFacts in a Flash™
Do the Renaissance Place setup tasks for the school year before these tasks so that your classes are available for MathsFacts in a Flash; see
page 2.
For more information about the tasks below, click Help on any MathsFacts in a Flash page, or see the MathsFacts in a Flash Software
Manual and the MathsFacts in a Flash Tips for Getting Started. To find these documents, click ?, then Manuals on the Home page, or click
Manuals in the upper-right corner of any other page in the software.
These tasks can be performed by school network administrators, school administrators, and teachers.
£
Task
How to Start the Task from the Home Page
For each class, tick the levels and add or remove levels as needed.
1. Click MathsFacts in a Flash, then Assignment Book.
2. Choose a school and class from the drop-down lists if necessary.
3. Click Add/Remove on the left to begin viewing the available levels.
£
Set starting levels for any students who need to start at a higher level
than 1 (Addition of 0 or 1 to a single-digit number).
1. Click MathsFacts in a Flash, then Assignment Book.
2. Choose a school and class from the drop-down lists if necessary.
3. Tick the boxes next to students who need changes.
User Names, Passwords and PINs
Be prepared to help students with user names and passwords. To find
them, on the Home page, click Users; then, click View Students. Search
for your students. In the search results, click the Passwords tab to see
user names and passwords. If you want to print the page of search results
that you are viewing, click Print Page. To print all of the results and choose
how to group and sort them, click View PDF instead.
If students will be practising maths facts offline on Renaissance
Responders or using the MathsFacts in a Flash (Offline) SmartApplet on
NEO 2, be sure to note the NEO 2/Responder PIN as well so students can
send the practice history to Renaissance Place.
4. Click Set Level on the left and choose the starting levels.
£
Change mastery times for students who need longer or shorter times
than two minutes.
1. Click MathsFacts in a Flash, then Assignment Book.
2. Choose a school and class from the drop-down lists if necessary.
3. Tick the boxes next to students who need changes.
4. Click Edit Mastery Time on the left and make your changes.
£
£
Review preference settings. Since classes do not automatically carry
over from one school year to the next, these settings do not carry over
unless you have copied classes from the previous school year, so you
need to set preferences for this year’s classes.
1. Click MathsFacts in a Flash, then Preferences.
Review benchmark settings for the school. Administrators can make
changes if necessary.
1. Click MathsFacts in a Flash, then Preferences.
2. Choose a school and class from the drop-down lists if necessary.
3. To see the settings for a preference (and to make changes if
necessary), click the preference name.
2. Click Benchmarks.
3. Choose a school from the drop-down list if necessary.
Renaissance Home Connect
and Advantage
If you are using Renaissance Home Connect (for Advantage subscriptions),
this is also a good time to make sure Renaissance Home Connect is
activated for your schools and to print Informational Letters for the
parents of your MathsFacts in a Flash students. You will find the links for
these tasks when you click Renaissance Home Connect on the Home
page.
4. Make changes to the target date and year-level benchmarks as
needed.
Renaissance Place—Getting Ready for a New School Year
10
R53419.1511
STAR Early Literacy™
Do the Renaissance Place setup tasks for the school year before these tasks so that your classes are available for STAR Early Literacy;
see page 2.
For more information about the tasks below, click Help on any STAR Early Literacy page, or see the STAR Early Literacy Software Manual
and the STAR Early Literacy Tips for Getting Started. To find these documents, click ?, then Manuals on the Home page, or click Manuals in
the upper-right corner of any other page in the software.
These tasks can be performed by the RP administrator, school administrators and teachers unless otherwise noted.
£
Task
How to Start the Task from the Home Page
Set class preferences for each STAR Early Literacy class to set the
monitor password requirements and options for the demonstration
video and hands-on exercise. (If you copied last year’s classes in
Renaissance Place, the preference settings were copied with the
classes.)
1. Click STAR Early Literacy, then Preferences.
2. Choose a school and a single class from the drop-down lists if
necessary.
3. To change the preferences, click Edit under Classroom Preferences.
User Names and Passwords
Be prepared to help students with user names and passwords. To find
them, on the Home page, click Users; then, click View Students. Search
for your students. In the search results, click the Passwords tab to see
user names and passwords. If you want to print the page of search results
that you are viewing, click Print Page. To print all of the results and choose
how to group and sort them, click View PDF instead.
STAR Early Literacy Pretest Instructions
If your students have not taken a STAR Early Literacy test before, use the
Pretest Instructions to introduce the test; these instructions are in the
STAR Early Literacy Resources.
STAR Maths™
Do the Renaissance Place setup tasks for the school year before these tasks so that your classes are available for STAR Maths;
see page 2.
For more information about the tasks below, click Help on any STAR Maths page, or see the STAR Maths Software Manual and the STAR
Maths Tips for Getting Started. To find these documents, click ?, then Manuals on the Home page, or click Manuals in the upper-right
corner of any other page in the software.
These tasks can be performed by the RP administrator, school administrators and teachers unless otherwise noted.
£
Task
How to Start the Task from the Home Page
Set the Testing Password preferences for each STAR Maths class to set
the authorisation password requirements. (If you copied last year’s
classes, the preference settings were copied with the classes.)
1. Click STAR Maths, then Preferences.
2. Choose a school and a single class from the drop-down lists if
necessary.
3. To change the preferences, click Edit under Classroom Preferences.
£
Set the student preferences for each STAR Maths class. You can use
these preferences to set an Estimated Maths Level or an extended time
limit for students who need them. (If you choose extended time limits,
these carry over for the students from one year to the next.)
Renaissance Place—Getting Ready for a New School Year
1. Click STAR Maths, then Preferences.
2. Choose a school and a single class from the drop-down lists if
necessary.
User Names and Passwords
Be prepared to help students with user names and passwords. To find
them, on the Home page, click Users; then, click View Students. Search
for your students. In the search results, click the Passwords tab to see
user names and passwords. If you want to print the page of search results
that you are viewing, click Print Page. To print all of the results and choose
how to group and sort them, click View PDF instead.
STAR Maths Pretest Instructions
If your students have not taken a STAR Maths test before, use the Pretest
Instructions to introduce the test; these instructions are in the STAR Maths
Resources.
3. To change the preferences, click Edit under Student Preferences.
11
R53419.1511
£
Task
How to Start the Task from the Home Page
Set up benchmarks (administrators and non-teaching staff only).
1. Click STAR Maths, then Screening, Progress Monitoring &
Intervention.
2. Click View Benchmarks.
3. Click one of the tabs to choose whether to view the School or
School Network benchmarks.
4. If you are viewing the school benchmark, select a school if
necessary.
5. You can do the following:
£
Set screening dates (administrators and non-teaching staff only).
•
To change the cut scores, click Edit Cut Scores.
•
To change the benchmark structure, click Edit Benchmark
Structure (school network administrators and school network
staff only).
1. Click STAR Maths, then Screening, Progress Monitoring &
Intervention.
2. Click View Screening Dates.
3. If necessary, select a school from the drop-down list.
4. Edit the dates if necessary. (Teachers cannot edit dates.)
£
Set up student groups if necessary. Groups carry over from year to
year, but you may need to make changes.
1. Click STAR Maths, then Screening, Progress Monitoring &
Intervention.
2. Click Manage Groups.
3. Click Create Group, or click Add/Remove Students for an
existing group.
Renaissance Place—Getting Ready for a New School Year
12
R53419.1511
STAR Reading™
Do the Renaissance Place setup tasks for the school year before these tasks so that your classes are available for STAR Reading;
see page 2.
For more information about the tasks below, click Help on any STAR Reading page, or see the STAR Reading Software Manual and the STAR
Reading Tips for Getting Started. To find these documents, click ?, then Manuals on the Home page, or click Manuals in the upper-right
corner of any other page in the software.
These tasks can be performed by school network administrators, school administrators, and teachers unless otherwise noted.
£
Task
How to Start the Task from the Home Page
Set the Testing Password preferences for each STAR Reading class to
set the authorisation password requirements. (If you copied last year’s
classes, the preference settings were copied with the classes.)
1. Click STAR Reading, then Preferences.
2. Choose a school and a single class from the drop-down lists if
necessary.
User Names and Passwords
Be prepared to help students with user names and passwords. To find
them, on the Home page, click Users; then, click View Students. Search
for your students. In the search results, click the Passwords tab to see
user names and passwords. If you want to print the page of search results
that you are viewing, click Print Page. To print all of the results and choose
how to group and sort them, click View PDF instead.
3. To change the preferences, click Edit under Classroom Preferences.
£
£
Set the student preferences for each STAR Reading class. You can use
these preferences to set an Estimated Reading Level or an extended
time limit for students who need them. (If you choose extended time
limits, these carry over for the students from one year to the next.)
1. Click STAR Reading, then Preferences.
Set up benchmarks (administrators and non-teaching staff only).
1. Click STAR Reading, then Screening, Progress Monitoring &
Intervention.
2. Choose a school and a single class from the drop-down lists if
necessary.
3. To change the preferences, click Edit under Student Preferences.
2. Click View Benchmarks.
3. Click one of the tabs to choose whether to view the School or
School Network benchmarks.
4. If you are viewing the school benchmark, select a school if
necessary.
5. You can do the following:
£
Set screening dates (administrators and non-teaching staff only).
•
To change the cut scores, click Edit Cut Scores.
•
To change the benchmark structure, click Edit Benchmark
Structure (school network administrators and school network
staff only).
1. Click STAR Reading, then Screening, Progress Monitoring &
Intervention.
2. Click View Screening Dates.
3. If necessary, select a school from the drop-down list.
4. Edit the dates if necessary. (Teachers cannot edit dates.)
Renaissance Place—Getting Ready for a New School Year
13
R53419.1511
£
Task
How to Start the Task from the Home Page
Set up student groups if necessary. Groups carry over from year to
year, but you may need to make changes.
1. Click STAR Reading, then Screening, Progress Monitoring &
Intervention.
2. Click Manage Groups.
3. Click Create Group, or click Add/Remove Students for an
existing group.
Renaissance Place—Getting Ready for a New School Year
14
R53419.1511