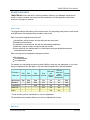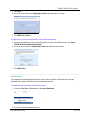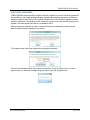
1
TRAIN TRACK User Manual
Using TRAIN TRACK ® v 10
Copyright 2000 - 2013. All Rights Reserved Worldwide.
Phone: 619-284-8013
Email: [email protected]
Web: http://www.libertylabs.com
www.LibertyLabs.com
1 / 164
Table of Contents
About .................................................................................................................................................................................................... 1
Tips ........................................................................................................................................................................................................ 3
Introduction ..................................................................................................................................................................................... 4
Technical Specifications ........................................................................................................................................................ 6
Maintenance ................................................................................................................................................................................ 8
What's New .............................................................................................................................................................................. 10
Installation ..................................................................................................................................................................................... 20
Setup ........................................................................................................................................................................................... 22
Security and Users ................................................................................................................................................................ 25
Menus and Navigation ........................................................................................................................................................ 31
Start Menu ................................................................................................................................................................................ 33
Working with Data ................................................................................................................................................................. 36
Barcodes .................................................................................................................................................................................... 41
Training ........................................................................................................................................................................................... 44
Training List .............................................................................................................................................................................. 46
Training Detail ......................................................................................................................................................................... 50
Status and Expiration Dates .......................................................................................................................................... 55
Requirements .................................................................................................................................................................... 56
Completions ....................................................................................................................................................................... 61
Status .................................................................................................................................................................................. 65
Instructors ........................................................................................................................................................................... 68
Scheduled Classes ........................................................................................................................................................... 69
Exams .................................................................................................................................................................................. 74
Revisions ............................................................................................................................................................................ 76
Parent and Child Modules .............................................................................................................................................. 80
Series ................................................................................................................................................................................... 82
Employees .................................................................................................................................................................................... 83
Employee List .......................................................................................................................................................................... 84
Employee Detail ..................................................................................................................................................................... 88
Requirements .................................................................................................................................................................... 92
Exceptions .......................................................................................................................................................................... 94
Completions ....................................................................................................................................................................... 95
Skills and Qualifications ................................................................................................................................................. 98
Notes .................................................................................................................................................................................... 99
Exam Records ................................................................................................................................................................ 100
Human Resources ......................................................................................................................................................... 101
Other Data ................................................................................................................................................................................. 102
Job Titles ................................................................................................................................................................................ 103
Department ............................................................................................................................................................................ 108
Shifts, Locations, Types ................................................................................................................................................... 112
Training Types and Class Locations ........................................................................................................................... 114
Import Data ................................................................................................................................................................................ 116
Import Employees ............................................................................................................................................................... 117
Import Training ..................................................................................................................................................................... 121
Import Completions ........................................................................................................................................................... 125
Import Requirements ........................................................................................................................................................ 128
Export Data ............................................................................................................................................................................... 130
Reports ......................................................................................................................................................................................... 133
Standard Reports ................................................................................................................................................................ 136
Custom Report Filter ......................................................................................................................................................... 138
Email Reports ....................................................................................................................................................................... 142
Automatic Email Notices ................................................................................................................................................. 144
Audit Trail ................................................................................................................................................................................... 145
View Audit Trail .................................................................................................................................................................... 148
Electronic Signatures ........................................................................................................................................................ 150
Exam Menu ............................................................................................................................................................................... 151
Exams ...................................................................................................................................................................................... 154
Troubleshooting .................................................................................................................................................................... 157
Modifying the Program .................................................................................................................................................... 160
TRAIN TRACK User Manual
TOP 10 TIPS
1. Always keep a backup of your database.
2. Run Compact and Repair from the Menu Bar weekly to prevent database problems.
3. To SORT records by any field, right-click and select A-Z or Z-A. To FIND records by any
field, right-click and select Find. Use CTRL+TAB to move between sections on any
screen.
4. To filter reports by any criteria, click Custom Report Filter from the Start Menu.
5. To schedule a group of employees for a class all at once, go to Training Details >
Classes > Scheduled. Select a class and click Add Employees. To record completions
for a whole class at once, go to Training Details > Classes > Scheduled. Select a class
and click Mark All Complete. To record completions for any group of employees for any
training, from the Start Menu click Quick Add Completions as a Group.
6. Double-click on a Training Title, Employee Name, or List item to open that record in
detail view.
7. Set up automatic email notices from the Report Menu, Email tab.
8. To DELETE records, right-click to the left of the record and select "cut". To restore the
deleted record, right-click and select "paste". To UNDO a change, right-click and select
"Saved Record", or select Undo from the Menu Bar.
9. The program can be customized to meet your needs.
10. Allow any level of user to view/edit all records, just their subordinates, or just one
department.
www.LibertyLabs.com
3 / 164
TRAIN TRACK User Manual
INTRODUCTION
TRAIN TRACK® gives you the tools you need to make sure training requirements are met.
Quickly see what training is needed or completed.
Assign required training by department, job title, or individual.
Allow employees to enroll in classes and take electronic exams.
TRAIN TRACK® has been fully validated, and is compliant with FDA 21 CFR part 11 and
other regulations.
View all record changes with an audit trail.
Add electronic signatures.
Provide documentation if you have an audit.
TRAIN TRACK® is a self-contained database program which is ready to use right out of the box. It
comes with everything you need, including an optional Microsoft® SQL Server ® Express™
database and web-based user interface. The program is fully customizable and can be modified to
meet your needs.
Program Overview
This application tracks employee training data:
What training is required for each employee?
What training has been completed by each employee?
What training needs to be completed?
The program consists of two main data sets, Training records and Employee records. The
relationships that you set up between these two data sets determine what training is required,
completed, or needed for each employee.
Just enter your data:
Employees
Trainings
Training completion dates
Select training required by:
Job title
Department
Individual
TRAIN TRACK ® will do the rest:
Determine what training is needed for each employee
Determine when/if each training expires
Track the status of each requirement:
www.LibertyLabs.com
4 / 164
TRAIN TRACK User Manual
Needed
Registered
Completed
Failed (if an exam is required)
Expired
Expiring soon
Maintain records of all completed training, required or not
Generate reports to print, export, or email
Available Editions
Different features are available in each edition. TRAIN TRACK ® is available as a standalone or a
client/server desktop application. The web application is covered in a separate user manual. All
editions are also available as customizable applications.
Licenses
The basic TRAIN TRACK ® license allows you to have one database at one location with one user.
The program is licensed for individual named users. Each person who edits data needs to have their
own user license. The licenses are not for concurrent users, but they are transferrable. To increase
the number of licensed users, visit http://www.LibertyLabs.com. The license agreement can be found
in your installation folder, or you may request a copy from Liberty Labs.
Using this Manual
This manual is intended to provide information to help users enter and edit data, view records, and
generate reports. It also includes information about installing and maintaining the database. If you
need additional help, please contact us and we will be happy to provide assistance.
Be sure to review the section on Working with Data for valuable information on finding, sorting,
adding and deleting records, and arranging columns.
Note: The images in this manual may differ slightly from those on your screen.
www.LibertyLabs.com
5 / 164
TRAIN TRACK User Manual
TECHNICAL SPECIFICATIONS
The application will function on most standard desktop or laptop computers. Specific requirements
are listed below. For additional information, please see Installation.
Platform
TRAIN TRACK® standard edition is a self-contained Microsoft® Access ™ 2010 database file. You
do not need to have Access™ to use the program; you can install the FREE run-time version.
Access™ was chosen because it can be easily modified, even by the end-user with no programming
experience.
The program is available in both 32-bit and 64-bit formats.
Configuration
TRAIN TRACK® can be installed on a local drive, or a network drive for access by multiple users.
For network use, all users must have full rights for the folder where you install the database,
including the ability to create a file.
TRAIN TRACK® Client/Server edition consists of a SQL server database installed on a network
server, and client applications installed on individual workstations.
TRAIN TRACK® Web interface is an application that uses active server pages installed on your web
server, and links to the same back-end database as the client interface. A hosted web edition is also
available.
System Requirements
A standard PC running Windows® XP/Vista/7/8.
Microsoft® Access™ 2007/2010 OR If you don't have Access™, you may use the FREE runtime version. The full version of Access™ is required to make modifications.
At least 10 MB disk space.
A note about Office 2007 : Access™ 2007 does not always allow you to right-click to get a context
menu when viewing records in table format; you may need to use the menu buttons instead. Access
2007 uses the "ribbon" instead of traditional toolbars. If you are using the customizable edition, the
standard menu bar can be found under "add-ins". In addition, Outlook™ 2007 requires the user to
verify authorization for each email automatically generated from any outside program. This does not
cause any errors, it's just an annoying security feature.
www.LibertyLabs.com
6 / 164
TRAIN TRACK User Manual
Capacity
Standalone edition:
Up to 2 GB of data (over 2 million records).
255 concurrent users.
The client/server edition does not have a limit on the amount of data or users; this is only limited by
the configuration of your server.
www.LibertyLabs.com
7 / 164
TRAIN TRACK User Manual
MAINTENANCE
Maintenance consists of regularly compacting and repairing your database, and always keeping a
backup copy.
Compact, Repair, and Clean
To keep your program in good working order, please compact and repair your database at least once
per week. This function removes extra space that has been created within the database during
normal operation, and checks for errors.
To compact and repair your database, follow these steps:
1. Open the database.
2. Locate the Menu Bar at the top of your screen.
3. Click Compact and Repair.
You may also wish to run Database Cleanup. This function locates and deletes stray records (for
example, training completion records for an employee that is no longer in the database).
To run database cleanup, follow these steps:
1.
2.
3.
4.
5.
Open any screen.
From the Navigation Panel at the left, select Start Menu.
The Start Menu will open. Go to the Database tab.
Click Database Cleanup.
You will be asked to confirm the cleanup. Click Yes.
Backup
It is important to always keep a backup copy of your database. Your backup files should be stored on
a separate drive from the main database. You may add the date to the name of each backup file. We
recommend keeping a current backup plus historical backups from the previous week and previous
month, at a minimum.
www.LibertyLabs.com
8 / 164
TRAIN TRACK User Manual
Backups can be created by Including TRAIN TRACK® in your normal network backup proceedure. If
you are using the standalone edition (all of your data and the user interface contained in one file),
you may create a backup copy by simply copying the database file and pasting it into a separate
folder. If you are using the client/server edition, you may create or schedule backups using the SQL
Management Studio.
BE SURE TO TEST YOUR BACKUP TO MAKE SURE YOU HAVE A WORKING COPY WITH
ALL DATA INCLUDED.
www.LibertyLabs.com
9 / 164
TRAIN TRACK User Manual
WHAT'S NEW
For users of previous versions, here are some highlights of the features that are new in each
version.
Version 10
With this version, the back end has been completely re-designed from the ground up to provide
better performance, and to allow the program to more intelligently evaluate your data.
Standard User Interface Re-designed
Improved performance.
Cleaner layout and updated graphics. Start menu re-organized.
Tabs have been replaced with drop-down menus to allow users to filter data displayed on the
screen.
All queries have been re-written and the application has been optimized for Access 2010.
User authentication has been moved to the server for better performance.
More data entry validation to prevent errors and duplicate records.
Automatic Email Notices
Automatically send notices to employees when training is due, when they are registered for a
class, or to remind them of upcoming classes.
View a list of notices that have been automatically sent.
Automated email can be configured to use any SMTP mail server and does not require that you
use any particular email program (it does NOT require that you use Outlook).
In addition to the automatic notices, you may now send notices to employees of scheduled
classes, and continue to send notices of training due to employees, supervisors, or a list of
recipients.
More User Levels
Assign users the ability to view and edit all records, just one department, or just their
subordinates.
A new "Completions" user level may only edit training completion records for their assigned
group of employees (all, one department, or their subordinates).
Regulatory Compliance Enhancement
All of the features from the Compliance Edition are now included in the client/server edition at
no extra charge
Audit trail function at the database level
Automatic email alerts for multiple login failures.
Restore deleted employee records.
Restore deleted training records.
Add electronic signatures to existing records.
You may set the length of time before the program automatically shuts down due to inactivity.
Import and Export Improvements
Export all training records.
Export all employee records.
www.LibertyLabs.com
10 / 164
TRAIN TRACK User Manual
Now you can export any report to Excel and keep the sorting and grouping levels.
Employee records and completion records may be updated from Excel by linking name or ID
number to existing records.
Training records may now also be updated from Excel, and only the new information will be
added.
Calculating expiration dates and determining completion status fully automated
Expiration dates are automatically calculated based on the months to expire and the next
revision release date.
No more manually updating records:
if you enter a completion for an old version, it will automatically show as expired.
Parent and child training completions are automatically included in status calculations.
You can over-ride the calculated date with an earlier expiration date.
Training Groups and Substitutions
Now when you set up a parent module with child training grouped underneath, you can specify
the number of child trainings needed in order for the parent to show as complete.
You may substitute one training for another by placing both acceptable training records unser a
parent group and indicating that only one of them must be completed.
Classes
Class records now include start and end times, which may be selected from a clock function
that you can configure--only the time periods and increments you want will be available for
selection.
Class locations may be selected from an editable list of available locations.
Each location includes a capacity, and registration reports display the capacity and the current
enrollment. Once the capacity is reached, additional enrollments are not allowed.
The program prevents enrolling duplicate employees.
Employee Records
Filter the data you see on the employee detail screen, including historical completions,
scheduled classes, and more.
Supervisors are now selected from a list of existing employees for better linking of subordinates
to supervisors.
Employee ID numbers allow alphanumeric characters.
The program prevents entering duplicate records.
Reports
Reports have been streamlined and improved.
New reports including a report showing the source of each requirement (i.e. job title, individual,
parent module, etc.)
More custom report filter choices.
More reports include total hours and total cost.
Revisions
Now you can add a revision with a lower number.
You can edit previous revision records.
www.LibertyLabs.com
11 / 164
TRAIN TRACK User Manual
All revisions, including the initial revision, are included in the revision history with release and
expiration dates.
Training Records
Release date added to training detail.
Description added to training detail.
Training types are selected from an editable list of available types, making it easier to generate
a report for a specific type of training.
Easier to see if a training is required for all employees.
View the parent module for a child training.
The program prevents entering duplicate records.
Exams
Exam users have a new login screen and a new main menu with options to review documents,
take exams or record training completions, and more.
Employees may take exams that are due to expire within the next 30 days.
Version 9.5
Audit Trail and Electronic Signatures added to Client/Server and Web Component
Audit Trail: Retain a history of every record change.
Electronic Signatures: sign and lock records from further editing.
Web Component
Import records from Excel ®
Update a group of records all at once.
Send email notifications of class registration.
Users may reset their own password.
Search employee records and training records.
Audit trail tracks all record changes.
Calendar pop-ups added to date selection fields.
Additional reports, including filter by department or training.
Version 9.0
Compliance
The Compliance Edition has been completely revised and updated, with the compliance
features fully integrated into the program:
Audit Trail
Electronic Signatures
Additional Security
Search and Report or Export
The program has been fully validated.
www.LibertyLabs.com
12 / 164
TRAIN TRACK User Manual
Search, Report and Export
Search for multiple criteria from any field, and view results in a report or export to multiple file
formats.
Improved Export to Excel ® Function: Easily export any report to Excel ® just by clicking a button
on the report menu. Works with any version of Microsoft® Access ™!
Security
Employees can now set and change their own password for added security.
Administrators can reset forgotten passwords.
Administrators can set the length of time before passwords expire.
Certificates of Completion
Easier to print individual certificates of completion.
Print certificates of completion for an entire class at once.
Import from previous version into SQL Server
Automatic import into the client/server edition database from any other edition.
Reports
Select the date range for Due by Employee, Due by Date, and Due by Department reports.
Other Minor Fixes and Enhancements
Sort orders fixed for Microsoft® Access ™ 2010.
Version 8.0
Barcode Scanning
You may now print sign-in sheets with a barcode for each employee. To record completion
of the training, the user may simply scan the barcode for each employee who completed
the class.
Certificates
You may now print certificates for individual training completions.
Web Component
The optional web-based user interface runs on any web browser. The web interface
connects to the same back-end database as your traditional user interface, and both may
be used at the same time.
Faster performance
Employees may log on to register for scheduled classes, view their status, or take an exam
An additional user level allows users to view and edit data for those they supervise
Home page includes overall training totals by status
www.LibertyLabs.com
13 / 164
TRAIN TRACK User Manual
Nothing to install on individual workstations
Validation Package
The program has been validated by experts from an outside agency.
A complete documentation package is available.
.Part 11 Toolkit
Search and Report: Search multiple fields and create reports or output results to Excel.
Audit Trail: Retain a history of every record change.
Added Security and User and Password administration.
Electronic Signatures.
Inactivity timeout..
Screen Resize
If you are using Access 2007 or 2010, the fields will automatically resize when you resize your
screen.
Other minor fixes and enhancements.
2009 version 7.5
Performance
Significant improvements to performance, especially with large data sets, on both the employee
detail and training detail screens.
Import
When you import employee records from your Excel template, you may include "status" and
"linked document".
Custom Reports
You may now delete custom reports.
2009 version 7.3
When you import employee records, existing records will be updated.
2009 version 7.2
www.LibertyLabs.com
14 / 164
TRAIN TRACK User Manual
Exceptions to Requirements
You may now select individual employees to exclude from training requirements, even if the
training is required for their department, job title, or for all employees.
Enter and Edit Data
Add Photo, Address, DOB and SS# to Employee Records.
"Quick Add" screen allows you to quickly add training completions as a group for any training,
without the need to locate the specific training detail screen.
You may now delete revisions, or edit revision details including revision number, and track if
retraining was required for each revision.
The Employee Detail screen, Completed tab, history view includes inactive employees or
trainings, and failed trainings, but current view does not.
Job detail screen now lists all employees having the job title as either a primary or secondary
job title, and only lists active employees.
“Delete Record” command added to menu bar and shortcut menus.
"Mark all Complete" from the Training Detail screen, Scheduled tab, now also inserts score and
pass/fail.
Automatically insert completion dates for all training components if a module is complete.
Reports
New Sign-in Sheets:
All Employees for Any Training.
All Employees for Selected Training.
All Required Employees for Selected Training.
Supervisors (limited users) are now able to view records for those they supervise, plus the
employees that report to those they supervise, two levels down.
Send email notices of trainings due within 90 days to all or selected employees.
You may now edit the message for all email notifications.
Status by Job Title report added.
View
When employees logs on to take an exam, they may view the linked document directly from
exam screen.
Quick links to relevant help pages have been added to each screen.
Plus other minor fixes and enhancements.
Version 7
TRAIN TRACK™ 2009 is a completely new program designed for Access 2003 or 2007. While this
is not an update for TRAIN TRACK ™ 2000 or TRAIN TRACK ™ 2003, it is based on the proven and
tested technology used in the earlier editions. All of the code, functions, and processes have been
thoroughly reviewed and optimized to bring you an even better application. We have added many
exciting new features based on requests from users, and improved many of the existing features.
Improved user interface and graphics
www.LibertyLabs.com
15 / 164
TRAIN TRACK User Manual
TRAIN TRACK™ 2009 has a whole new look, with a larger screen size and updated visual
user interface.
In list view, you may now re-arrange and re-size the columns, and sort by multiple columns.
Menus and navigation controls have also been updated, with the addition of quick links and
new menu categories.
It is now easier to view the exam screen or the limited user screen, then return to the main
application.
More ways to track trainings
Training modules
You may designate a training as a module, and select component trainings to be a
part of the module.
When the module is assigned as a required training, all component trainings are
automatically included as required.
There is an automated function to record the completion of the module when all
components are completed.
Training series
You may designate a training to be required a specified time period after another
training has been completed.
The second training will show as required after the specified time period from the first
training.
Training detail screen
Link a document to each training completion record.
Select to show only non-expired, or a history of all completions. Expired completions
are shown in gray.
You may delete a scheduled class, and the records of enrolled students are also
deleted.
Revision numbers or letters are validated (cannot be less than or equal to current
revision).
When marking all complete for a scheduled training, the scheduled date is entered.
Employee detail screen
New tab listing only Needed trainings.
Select to show only non-expired, or a history of all completions. Expired completions
are shown in gray.
Select from list
Select employee shift and employee location from drop-down menus which you may
edit.
Select trainers and class locations from those previously entered.
Status options have been changed to “Active” and “Inactive” instead of “Current” and
“Removed”.
Easier to find records
www.LibertyLabs.com
16 / 164
TRAIN TRACK User Manual
Search functions
Type in a full or partial training title, or employee name, click “go”, and the records
that match your search will be displayed.
Show only required employees on add-as-a-group
You may now select to only show the employees that are required to complete the
training on the selection screen, making it easier to check off the appropriate names.
Available when scheduling employees as a group, and when adding training
completion records as a group.
Mark reports as favorites
You may select the reports you use frequently as "favorites".
Favorites are listed at the top of the report menu so that you can find them easily.
You may remove a report from "favorites" at any time.
Easier to import data
When you import data from Excel ®, duplicate records are not imported, and the number of
records imported is displayed.
You may now import training requirements.
When you import required trainings or training completion records, any new trainings or new
employees are added to the database.
More Report Options
More than 10 new reports have been added
All reports and queries have been reviewed and optimized as needed.
Option to include only non-expired or a history of all completions on individual reports.
Added Security
More user access levels
You may now allow users to have read-only access to all screens.
Better Exam Security
You may indicate the number of answers an employee is allowed to select for each
exam question.
Updated installer
You may select which components to install.
Previous Versions
www.LibertyLabs.com
17 / 164
TRAIN TRACK User Manual
Highlights of improvements in version 6:
Login: TRAIN TRACK now authenticates users through their network login, so there is no need to
type in a separate user name and password. This makes it more secure and easier to use.
Easier Navigation: Saved sort orders (only for the open database version; sort order cannot be
saved in the standard version), more links on the navigation bar, and a "back" button to return to the
previous screen.
Add data on the fly: Add new departments and job titles by typing them right into the field; no need
to open the edit screen.
User Levels: The program now includes five levels of access:
Administrator: The administrator can edit all records, and can also edit users and user
levels.
Standard user: The standard user has the ability to edit all records.
Read-only user: The read-only user has the ability to view all records, but cannot edit
any records.
Restricted user: The restricted user may only view reports for the employees under their
direct supervision.
Employee: The employee may log on to take exams, open documents linked to each
training, and review their own training status information. The employee does not need a
license to use these features.
Select date ranges or criteria for reports: Select a date range from a pop-up calendar for all
completed training reports. There are also new summary reports with charts. For the custom reports,
your logo is now displayed, and you may now select to include only required trainings, only
completed trainings, or both.
Cost: You may now record costs for each individual employee training.
Send emails to supervisors: You may now send an email summary to all supervisors listing only
their employees.
Assign multiple job titles: You may now assign multiple job titles for each employee. The
requirements for all assigned job titles will be reflected for that employee.
Add requirements as a group: You may now select from a list of employees to insert requirements
as a group.
More Employee data: Employee type has been added, and you may also edit the list of available
types. A new section has been added to record qualifications such as education, skills, experience,
and certificates.
Lockout recovery tool: You will not be locked out of the program if the original user leaves your
company. You will be able to open the program with your original registration code.
.pdf help files: In addition to the html help files, the program now also comes with a .pdf version.
www.LibertyLabs.com
18 / 164
TRAIN TRACK User Manual
Department tracking: A change made to the name of a department will now automatically be
reflected for all employees in that department
Link a document to each training: You may insert a link to a document for each training.
Highlights from version 5:
Version Tracking: Document Revisions are now incorporated, making it easy to track re-training
needed for a new version.
Custom Reports: Now you can save your custom report criteria to use again, including a report
title. You can also select to include required trainings or completed trainings on your custom reports.
Editing: It's now easier to add, edit or delete records from all screens, and you can add a training
requirement directly onto the employee screen. Groups of records can be updated all at once.
Exam Tracking: You may simply record pass/fail and score for each exam, store all questions and
answers and print exams, or even allow users to take exams electronically.
Export Data: Now you can export any report to Excel or other file formats using a menu button. You
can also send reports as email attachments.
HTML Help Files: The User Manual has been replaced with standard Windows Help files which are
easy to search and navigate.
Import Data from Excel: Import lists of employees, trainings, or training completion data at any
time.
Reports: A new Report Matrix defines the criteria used for each report. Additional reports are
included, date range has been added to selected reports, and totals are included on most reports.
You can also add your own logo to the reports.
Required Trainings: Now you can require a training only for employees hired within a specific date
range. You can view the Status of a training for all required employees from the training screen. You
no longer need to enter a class in order to schedule trainings in advance.
Screens: Improved menus and screens, with larger data fields and more options. A separate screen
has been added to track approved trainers for each training.
Data Fields: Fields have been added to track Training Hours, Employee Shift and Location, Exam
score and Pass/Fail.
www.LibertyLabs.com
19 / 164
TRAIN TRACK User Manual
INSTALLATION
Installing the Trial Edition
The trial edition comes with an installer that will guide you through the installation. It will install
everything you need; just follow the instructions on your screen. You may install the program on your
local drive, or on a shared network drive. Please make sure all users have full permissions under
Windows for the folder you are using. The trial edition includes sample data for testing, or you may
remove the sample data and enter your own. Use it free for 30 days, then automatically transfer your
data to the licensed version.
Using the Installer
The automated installation package will install the program on your computer. Depending on the
version you are installing, you may select to add an icon to your start menu, and install the help files.
If you plan to share the database with multiple users, you will need to install it on a network drive that
all of the users have access to. All users need to have FULL rights for the directory where the
program is installed. You will also need to make sure the file is backed up regularly.
Upgrading from a Previous Version
Always create a backup copy before you begin the upgrade process! If you are upgrading
from a previous version, be sure to install the program into A NEW DIRECTORY. If you try to install it
to the same directory as your current version, the program will not be installed to the same folder if
there is already a file there with the same name. Once you install it into a new directory, you will be
able to import the data from your current version during setup.
Moving the Program to a New Location
With the standard edition, if you need to move the program to a different computer or a different
location on the network, you may simply move the TRAIN TRACK® folder from where it is to the
new location. You will have to update any shortcuts or links to the program.
Uninstalling
An uninstaller is included with the program installation. Just browse to where you installed the
program, or use your start menu, and select Uninstall.
Installing Other Editions
www.LibertyLabs.com
20 / 164
TRAIN TRACK User Manual
Instructions for installing other editions are included in a separate document that is included with
your setup files.
www.LibertyLabs.com
21 / 164
TRAIN TRACK User Manual
SETUP
After the program is installed, you will need to open the program to finish the setup process. To open
the program, go to Start > Programs > TRAIN TRACK, or use the shortcut if you created one
during installation.
Setting up the Trial Edition
With the trial edition, you have the option of testing the application with the sample data included, or
removing the sample data and entering your own data for testing. If you enter your own data, you will
not lose your data, even if your trial expires, and you will be able to import it into the licensed edition.
The first time you use TRAIN TRACK ®, the startup screen will be displayed, allowing you to select
one of the options below.
To evaluate the program, follow these steps:
1. If you are a new user and wish to test the program, select Begin or continue the 30 day trial.
During the free trial period, any user may access the program (see Security).
2. The Main Menu will open.
3. Begin using the program.
To clear sample data, follow these steps:
1. Select Clear sample data and enter your own data.
2. Confirm that you wish to remove all existing data. During the free trial period, any user may
access the program (see Security).
3. The Main Menu will open.
4. Begin using the program.
Import Data from a Previous Version
If you have data you would like to import from an earlier edition of TRAIN TRACK, version 7 or
www.LibertyLabs.com
22 / 164
TRAIN TRACK User Manual
higher, select this option. Note: if you are using an older version, you must upgrade to version 7
before you can upgrade to later versions.
To import data from a previous version, follow these steps:
1. From the startup screen, click Import data from a previous version.
2. The Import screen will open. Click Browse.
3. The Browse box will open. Browse to your file, select it, and click Open.
4. Click Import.
5. The import dialog will open and the import process will begin. You will be prompted to accept
the number of employee records to be imported.
CAUTION: Do not delete your old file until you are sure everything was imported correctly. We
recommend keeping the old version as one of your backup files.
Enter a Registration Code
Select Enter a registration code if you have recently purchased a license from Liberty Labs and
have a new registration code to enter, or if you have already imported data and need to enter a new
registration code.
Enter your Company name and Registration code, and click OK. If your code only uncludes 4
sets of numbers, enter them in the first 4 boxes and leave the last one blank.
www.LibertyLabs.com
23 / 164
TRAIN TRACK User Manual
Contact Liberty Labs
Select this option if you need to purchase a license. You may purchase by phone, online, or by mail.
Phone: call 619-284-8013 Monday - Friday 10:00 a.m. to 5:00 p.m. Eastern time
Online: visit www.LibertyLabs.com/TRAINTRACKPurchase.html
Mail: send payment to:
Liberty Labs
3245 University Ave., Suite 1122
San Diego, CA 92104
www.LibertyLabs.com
24 / 164
TRAIN TRACK User Manual
SECURITY AND USERS
TRAIN TRACK® comes with built-in security measures; however, your database should also be
stored on a secure network, and only those with permission to use the application should have
access to it through your network.
User Levels
The program offers a wide variety of user access levels. You may assign each person a user access
level AND restrict the employees they are able to view or edit.
Each user may be assigned an access level:
Administrator: edit all records, and also edit users and user levels.
Standard: edit all records.
Completions: view all records, but may only edit training completions.
Read-only: view all records, but may not edit any records.
Exam: view their own training status, or to take exams, and open attached documents
associated with the exams.
Each user may also be assigned an employee recordset:
All employees
Their subordinates
One department
For example, you may assign a read-only user the ability to view only one department, or you could
assign a completions user the ability to only edit training completions for their subordinates.
Privileges -> Edit
Edit
Edit
View
users
records
completions
records
User Level
Administrator Yes
Standard
Completions
Read-only
Exam
-
Yes
Yes*
-
Yes
Yes*
Yes*
-
Yes
Yes*
Yes*
Yes*
-
Take an
View their
exam and
own
License
open
training
required
attached
status
documents
Yes
Yes
Yes
Yes
Yes
Yes
Yes
Yes
Yes
Yes
Yes
Yes
Yes
-
* For all records, just their subordinates, or just one department.
The web-based user interface allows you to set up a separate set of users.
Edit Users
www.LibertyLabs.com
25 / 164
TRAIN TRACK User Manual
To edit user names and levels, you need to be logged in as an administrator. If you are unable to log
in as an administrator, you may still edit users if you have the original registration code (see Lockout
Recovery below).
To edit users, follow these steps:
1.
2.
3.
4.
Open any screen.
From the Navigation Panel to the left, select Start Menu.
On the Start Menu, select the Setup tab.
Click Edit Users.
5. The Edit Users screen will open.
6. Enter the Windows Login Name for each user. This is the name they use when they first start
their computer and log in to Windows.TRAIN TRACK® is able to capture the name of the user
currently logged in to the computer, and compare that name to this list of users. This allows you
to start the program without entering a separate user name and password. The program will not
let you in if you have not already entered a correct user name and password when you logged
in to Windows. This way, all security rules you have set up for your network are automatically
applied to this program, such as required character length and expiration dates. Any time you
are logged in to the program, your login name will be displayed on the screen (usually in the
bottom left corner).
7. Select the related employee name. (Optional . This is how the correct subordinates are linked
to the user.)
8. Check the box under Admin, Standard, Read-Only, or Completions for the appropriate level
of access.
9. Select the employee Record Group (all, department, or subordinates) you wish to give them
www.LibertyLabs.com
26 / 164
TRAIN TRACK User Manual
access to. If you select Department, then pick the department from the list.
10. Enter a web user name and password, if you also wish to give them access to your web
interface (if applicable).
11. Click Save and Close.
The user names that are highlighted in yellow are users that do not require a user license. If the total
number of users requiring a license is greater than the number of users you are licensed for, you will
be asked to remove some users.
If you make changes to the level of the user that is logged in to the program, you will need to close
and re-open it for your changes to take effect.
Password Administration
To reset a password, follow these steps:
1.
2.
3.
4.
Open any screen.
From the Navigation Panel to the left, select Start Menu.
On the Start Menu, select the Setup tab.
Click Reset Password.
5. The Reset Password screen will open.
6. Select an employee from the list. Note: the list will only include employees who have already
set their password.
7. Click Reset Password.
8. A message box will ask you to confirm resetting the password.
To change password expiration, follow these steps:
1.
2.
3.
4.
Open any screen.
From the Navigation Pane to the left, select Start Menu.
On the Start Menu, select the Setup tab.
Click Change Password Expiration.
www.LibertyLabs.com
27 / 164
TRAIN TRACK User Manual
5. A dialog box will open.
6. Enter the number of days until passwords will expire.
7. Click OK.
Associate Supervisor Users with their Employees
In order to assign users to view only their subordinates, you need to associate their user login name
with their name from your database, and select them as the supervisor for their employees.
In the above example, user Juan Ramirez would see records for his employee, Carol Bradley, when
he logged in.
To associate a supervisor with an employee, follow these steps:
1. From the Edit Users screen, type in the Login Name.
2. Select the Employee Name.
3. From the Employee Detail screen, locate a subordinate employee, and select the Supervisor
name.
Lockout Recovery
If you are unable to get to the Start Menu, and instead see the login box for the Exam Menu, this
means your Windows® login is not listed as an administrator user. To edit users in this situation, if
you have the original registration code, you may use the lockout recovery function.
To edit users if you are not listed as an administrator, follow these steps:
1. If you are able to log in, but not designated as an administrator, from the Start Menu, Setup tab,
click Edit Users.
2. A message box will indicate that you are not an administrator, and ask if you want to edit users
with the registration code.
www.LibertyLabs.com
28 / 164
TRAIN TRACK User Manual
3. Click Yes.
4. A box will open. Enter your Registration Code that came with your license.
5. Click Edit List of Users.
To edit users if you are not listed as a user, follow these steps:
1. If you are not listed as a user at all, and only able to log in to the Exam screen, click Open
TRAIN TRACK in Administrator Mode.
2. A box will open. Enter the Registration Code that came with your license.
3. Click Edit Users.
Auto Shutdown
The program will automatically shut down if it has not been used for several minutes. You may
determine the number of minutes until the program shuts down.
To configure auto shutsown, follow these steps:
1. From the Start Menu, Database tab, click Auto Shutdown.
2. The auto shutdown window will open.
www.LibertyLabs.com
29 / 164
TRAIN TRACK User Manual
3. Enter the number of minutes after which you would like to program to alert the user if there is
no activity.
4. Enter the number of minutes after which you would like to program to shut down if there is no
activity (this should be greater than the first number).
5. Click OK.
www.LibertyLabs.com
30 / 164
TRAIN TRACK User Manual
MENUS AND NAVIGATION
This section explains the menu options and record navigation used in the program.
Menu Bar
At the top of your screen is a Menu Bar which is available from any screen within the program.
The Menu Bar contains the following commands:
Save
Page setup
Print preview
Print
Send as email attachment
Undo
Cut
Copy
Paste
Delete
Delete record
Find
Sort A-Z
Sort Z-A
Filter
Remove filter
Compact and repair: Database maintenance function that should be performed weekly, or as
needed.
.html Help Files: .html help files
.pdf User Manual: printable .pdf help files
Access help
Navigation Pane
All of the primary screens contain a navigation pane along the left side to allow you to easily move
between screens.
www.LibertyLabs.com
31 / 164
TRAIN TRACK User Manual
The navigation pane contains buttons to open the following screens:
Start Menu
Report Menu
Training List
Training Detail
Employee List
Employee Detail
Job Titles
Departments
Import Data
Help
Exit Program
www.LibertyLabs.com
32 / 164
TRAIN TRACK User Manual
START MENU
The Start Menu is the first screen you will see when you open the program (after your initial setup).
The Start Menu, combined with the Menu Bar and the Navigation Pane, provides access to all of
the screens and functions available in the program. The tabbed pages on the screen contain links to
other screens, database maintenance tools, setup options, and registration links.
View Tab
The View tab contains links to popular screens:
Custom Report Filter
Quick Add Training Completions
Links to the help files:
Online Help Files
Local Help Files
Link to the startup screen that exam users see when they log in:
Exam Screen: The screen employees see at login which allows them to take an exam or view
their own training status.
To open any of these screens, click on the associated button.
Setup Tab
The Setup tab contains links for editing users, password administration, and editing lists for dropdown menus:
Edit Users
Reset Password
Change Password Expiration
Edit Employee Types
www.LibertyLabs.com
33 / 164
TRAIN TRACK User Manual
Edit Locations
Edit Shifts
Edit Training Types
Edit Class Locations
Edit Time Selection for scheduling classes
For details on setting up users and managing passwords, please see Security and Users .
To edit any of the lists, click on the associated button and view or edit data.
Database Tab
The Database tab contains links for database administration:
Linked Table Manager
DSN-Less Connection
Auto-Shutdown
Database Cleanup: This function locates and deletes stray records (for example, training
completion records for an employee that is no longer in the database).
Delete Records with status Inactive: This function is disaabled in the Compliance Edition.
This function will permanently delete records with a status of "Inactive". If you need to keep
historical data, it is best to leave these records in your database. You should only use this
function to clean out irrelevant information, if you are sure none of the records you need to
keep are marked as "Inactive". The advantage to deleting records this way instead of directly
from the data screens is that all of the related records are also deleted. You may also clear out
related records that are no longer associated with an employee by selecting Database Cleanup
above.
Clear Sample and Test Data: This function clears out the sample data or test data used when
evaluating the program. It can only be used once, and may be disabled in some editions.
Enter registration code
Purchase online
Purchase by phone
Print registration form to mail
www.LibertyLabs.com
34 / 164
TRAIN TRACK User Manual
To register the program, click the appropriate button and follow the instructions.
www.LibertyLabs.com
35 / 164
TRAIN TRACK User Manual
WORKING WITH DATA
TRAIN TRACK® includes many built-in features designed to make it easier to find, sort, and edit
records. You may use the Find or Sort functions on any field on any screen. Each screen includes
either a scroll bar to navigate through the recordset, or navigation buttons at the bottom of the
screen to page through the records. Data is automatically saved as soon as you move to the next
record. You may also use the standard Cut, Copy, Paste, and Undo functions. You may add or
delete records, as well as edit them.
Special functions in TRAIN TRACK® include the ability to jump to a related record. Any time you see
an employee name on your screen, double-click on it to open the employee record. Any time you see
a training title, double-click on it to open the training record. You may also double-click on a job title,
department, shift, location, or employee type to open those records. This allows you to quickly open
a related record.
Many screens also allow you to re-arrange and re-size columns, sort by multiple columns, and
change the font and background color. Primary screens will automatically re-size to fit your screen.
Sorting Records
To sort records on any screen by any field, follow these steps:
1. Click on the field you wish to sort by.
2. From the Menu Bar , select Sort A-Z or Sort Z-A.
Or you may follow these steps:
1. Right-click on the field you wish to sort by.
2. A pop-up menu will open.
3. Select Sort A-Z or Sort Z-A from the pop-up menu.
After sorting records, click Save from the menu bar and your sort order will be saved for the next
time you return to that screen (open database edition only; this feature is not available in the
standard edition).
Scan Barcodes
To easily record training completion data, take the completed sign-in sheets to a workstation
equipped with a barcode reader.
To record completions by scanning the barcodes, follow these steps:
1.
2.
3.
4.
5.
Open any screen.
From the Navigation Panel at the left, click on Start Menu.
The Start Menu screen will open.
From the Start Menu screen, select the Quick Links tab.
Click Quick Add as a Group.
www.LibertyLabs.com
36 / 164
TRAIN TRACK User Manual
6.
7.
8.
9.
10.
The Quick Add as a Group screen will open.
Select a Training, then click Scan Barcodes.
Scan the Barcode for each employee you wish to record as completed.
Click Done when finished scanning all of the barcodes in this group.
On the Quick Add as a Group screen, enter the date and click Add.
As you scan each code, you will see the employee name displayed on the screen. If you need to
make any corrections, you will see the entire list of scanned records and you may edit them before
saving the records.
Record Navigation
To scroll through records, use the navigation bar at the bottom of the screen.
Jumping to Related Records
Double-click on a Training Title to jump to that training record. Double-click on an Employee
Name to jump to that employee record. Double-click on a Job Title, Department, Shift, Location, or
Employee Type to open those records.
Adding Records
To add a new record, click New from the navigation buttons at the bottom of the screen.
Duplicate Records
If the program recognizes a duplicate employee, training, or training completion record, it will alert the
user and not allow the record to be added.
Deleting Records
Some screens include a red "X" to allow you to delete the record. When you see the "X", you may
www.LibertyLabs.com
37 / 164
TRAIN TRACK User Manual
click on it to delete the record. You will be asked to confirm the deletion. In most cases, once you
delete a record, you will not be able to restore it. The exception is for training records and employee
records which can be restored from the audit trail menu.
For screens without an "X" where records can be deleted:
To delete a record, follow these steps:
1.
2.
3.
4.
Locate the record you wish to delete.
Right-click on the record.
A pop-up menu will open.
Select Delete Record.
5. You will be asked to confirm the deletion. Click Yes.
To delete all records with the status "Inactive", go to the Start Menu, Tools tab.
Undoing Changes
To undo a change, right-click and select Saved Record, or select Undo from the Menu Bar .
Arranging Columns in List View
On some of the list view screens, you may re-arrange the columns, re-size the columns, and sort the
records by multiple columns. Screens with these features:
Training List
Training Detail screen, Completed tab
Training Detail screen, Status tab
Employee List
Employee Detail screen, Required tab
Employee Detail screen, Completed tab
Add as a Group screens
To re-arrange columns, follow these steps:
1. Select the column you want to move by clicking on the column heading.
www.LibertyLabs.com
38 / 164
TRAIN TRACK User Manual
2. Click and drag the column to where you want it.
To sort by multiple columns, follow these steps:
1. To select columns in a range, click and hold your mouse on one of them, then drag to the left or
to the right to cover the other desired column or columns. When all desired columns are
highlighted, release the mouse
2. From the Menu Bar, select A-Z or Z-A.
To re-size the columns, follow these steps:
1. Position the mouse on the border of the column header. The mouse pointer will change into a
horizontal double arrow crossed by a vertical line.
2. Click and drag the column to the size you want.
To select font, background color, and row height, follow these steps:
1. Right-click in the data grid.
2. A pop-up menu will open.
www.LibertyLabs.com
39 / 164
TRAIN TRACK User Manual
3. Select the option you wish to change.
4. Make the change in the box that opens, and click OK.
After arranging records, click Save from the menu bar and your changes will be saved for the next
time you return to that screen (open database edition only; this feature is not available in the
standard edition).
Linking Documents
You may link any type of document or file to each training record, employee record, or training
completion record. To do this, right-click on the link field and select "Hyperlink", then browse to the
file you wish to link.
If you are going to have a large number of linked documents, we recommend that you place all of the
documents in a folder within the TRAIN TRACK® folder. This way, if you need to move the program,
you can just move the entire parent folder and your links will not be broken. You will be able to store
the links as relative links (relative to where the program file is located). For example, if you created a
folder called "docs" within the TRAIN TRACK® folder, your link would look like this:
docs\linkeddoc.doc
www.LibertyLabs.com
40 / 164
TRAIN TRACK User Manual
BARCODE DATA ENTRY
You may enter training completion data by scanning barcodes with a barcode reader. You may scan
the codes from employee badges as they attend a training, or you may print a sign-in sheet with
barcodes, and then scan in the barcodes from the sheet after employees have signed in.
Print Sign-In Sheets with Barcodes
To scan codes from a sign-in sheet, first you will need to print the sign-in sheet. You may print a
general sheet for any training listing all employees, or you may print a sheet for a specific scheduled
class.
To print a sheet for any training, listing all employees, follow these steps:
1.
2.
3.
4.
5.
Open any screen.
From the Navigation Panel at the left, click on Report Menu.
The Report Menu screen will open.
From theReport Menu screen, select the Class Sign-In Sheet with Barcodes report.
Click View or Print.
The sign-in sheet lists all employees, with a space for their signature, and a barcode based on their
ID Number.
To print a sheet for a scheduled training, listing enrolled employees, follow these steps:
1.
2.
3.
4.
5.
6.
7.
8.
9.
Open any screen.
From the Navigation Panel at the left, click on Training List.
The Training List screen will open.
From the Training List screen, locate the training you wish to print a sign-in sheet for.
Double-click on the Training Title.
The Training Detail screen will open.
In the middle of the screen, select the category classes and the sub-category scheduled.
Select the scheduled class.
Under Print Sign-in Sheets, click This Class.
www.LibertyLabs.com
41 / 164
TRAIN TRACK User Manual
10. From the Menu Bar , select Print.
The sign-in sheet lists enrolled employees, with a space for their signature, and a barcode based on
their ID Number.
Scan Barcodes
To easily record training completion data, take the completed sign-in sheets to a workstation
equipped with a barcode reader.
To be able to scan in multiple barcodes in succession, you will need to configure your copy of
Microsoft Access.
To configure your client, follow these steps:
1. Open Access without opening TRAIN TRACK.
2. Go to File > Options > Client Settings.
3. Set "Move after enter" to Don't move.
To record completions by scanning the barcodes, follow these steps:
1.
2.
3.
4.
5.
6.
Open any screen.
From the Navigation Panel at the left, click on Start Menu.
The Start Menu screen will open.
From the Start Menu screen, click Quick Add as a Group.
The Quick Add as a Group screen will open.
Select a Training..
www.LibertyLabs.com
42 / 164
6. Select a Training..
7. Click in the Barcode field.
TRAIN TRACK User Manual
8. Using your barcode scanner, scan the Barcode for each employee you wish to record as
completed.
9. Enter the training completion date and click Add.
As you scan each code, you will see the employee name displayed on the screen. If you need to
make any corrections, you will see the entire list of scanned records and you may edit them before
saving the records.
www.LibertyLabs.com
43 / 164
TRAIN TRACK User Manual
TRAINING
TRAIN TRACK® allows you to list all of your training, assign required training to employees, and
track training completion data. Training can be viewed as a list, allowing you to easily scroll through
the records to find a training. From the list, you can select a training and double-click on it to open it
in detail view.
Training records store general information about each training:
Training Title
Number
Revision
Release Date
Training Type
Description
Training Hours
Exam Required?
Status: Active or Inactive
Expires In: The number of months this training will be valid before a renewal is needed.
Expiration dates are automatically calculated based on this number. Leave this field blank if you
do not want a training to expire.
Link: Allows you to link any type of document to the training record. Linked documents may be
viewed by employees prior to taking an electronic exam.
Required for all employees?
The user may select related data to display by selecting items from the drop-down menus for
category and sub-category:
Category
Sub-Category
Classes
Scheduled
Instructors
Completions Not Expired
All Completions
All Records
RequirementsBy Department
By Individual
By Job Title
Child Module
Exceptions
Hire Date
Parent Module
Series
Status
www.LibertyLabs.com
All Required
Completed
Expired
Failed
Description
Classes scheduled for this training.
Approved instructors for this training.
Completions that are not expired.
All completion records.
All records scheduled, completed, failed, or
expired.
Required departments.
Required individuals.
Required job titles.
If the training is a Parent, the Children associated
with it.
Employees exempt from completing the training.
Hire date range for requirements.
If the training is a Child, the Parents it is
associated with.
If the training is part of a series, the subsequent
training required.
Status of all required employees.
Required employees with status “Complete”.
Required employees with status “Expired”.
Required employees with status “Failed”.
44 / 164
TRAIN TRACK User Manual
Needed
Scheduled
Training Info Exam
Notes
Revision
Required employees with status “Needed”.
Employees with status “Scheduled”.
Exam questions and answers.
Any notes associated with the training.
Revision history.
Training can be required for all employees, for a specific job title or department, employees hired
within a date range, for an individual employee, or any combination. Exceptions to these
requirements can be made for individuals. Training can be set to expire in any number of months, or
to never expire. Exams can be required, and can be stored within the program. Training records can
also be imported from Excel®.
www.LibertyLabs.com
45 / 164
TRAIN TRACK User Manual
TRAINING LIST
You may view training as a list using the Training List screen. This screen allows you to scroll
through the list of all training and easily locate the record you wish to view or edit. You may rearrange or re-size the columns, and sort by multiple columns. Columns shown are:
Training
Number
Revision
Type
Hours
Status
Months
Exam
The left side of the screen contains the Navigation Pane. At the top of the screen is a search box.
The center of the screen shows the training list. At the bottom is a drop-down menu to allow you to
filter the records by status.
To edit the record, you will need to open it in detail view. This is to prevent accidental changes to
records in the list view. To open a record in detail view, double-click the Training Title from the
training list.
View Training as a List
To view trainings as a list, follow these steps:
1. Open any screen.
2. From the Navigation Panel on the left, click Training List.
3. The Training List screen opens.
The default view will display only active training.
To view inactive training, or all training, follow these steps:
1. Open the Training List screen.
www.LibertyLabs.com
46 / 164
TRAIN TRACK User Manual
2. At the bottom of the screen, select the Status you wish to display, or select All to display all
records.
Search
The Search box at the top of the screen is designed to help you easily find a training record.
To search by training title, follow these steps:
1.
2.
3.
4.
5.
Open the Training List screen.
Type all or part of the training title into the Search box.
Click Search.
Matching trainings will be listed in the training list section.
Double-click on the Training Title to open the detail record.
To search by any field, follow these steps:
1.
2.
3.
4.
5.
Right-click on the field you wish to search.
A pop-up menu will open.
Select Find from the pop-up menu.
The Find and Replace box will open.
In Find What , type the text you wish to find. If you have only entered part of the text you wish to
find, you also need to select "any part of field" next to match.
6. Click Find Next.
Arrange Columns and Sort
The Training List screen allows you to re-arrange and re-size the columns, and sort by multiple
columns.
To re-arrange columns, follow these steps:
1. Select the column you want to move by clicking on the column heading.
www.LibertyLabs.com
47 / 164
TRAIN TRACK User Manual
2. Click and drag the column to where you want it.
To re-size the columns, follow these steps:
1. Position the mouse on the border of the column header. The mouse pointer will change into a
horizontal double arrow crossed by a vertical line.
2. Click and drag the column to the size you want.
To sort on any column, follow these steps:
1.
2.
3.
4.
Right-click on the column you wish to sort by.
A pop-up menu will open.
Select A-Z or Z-A.
Your sort order will be retained the next time you open this screen (open database and
client/server version only).
To sort by multiple columns, follow these steps:
1. To select columns in a range, click and hold your mouse on one of them, then drag to the left or
to the right to cover the other desired column or columns. When all desired columns are
highlighted, release the mouse
2. From the Menu Bar, select A-Z or Z-A.
Add, Edit or Delete a Training
www.LibertyLabs.com
48 / 164
TRAIN TRACK User Manual
To add, edit, or delete training records, go to the Training Detail screen.
www.LibertyLabs.com
49 / 164
TRAIN TRACK User Manual
TRAINING DETAIL
The Training Detail screen allows you to view individual training records in detail. You may use the
navigation buttons at the bottom of the screen to page through records, or you may use the sort or
find functions on any field.
The top of this screen contains training information:
Training Title
Number
Revision
Release Date
Description
Training Type: Select a type from the list, or type in a new one, or double-click the field to
open the list of types.
Link: Allows you to link any type of document, file, or folder to the training record. Linked
documents may be viewed by employees prior to taking an electronic exam. (if you are unable
to open the link, see Troubleshooting ).
Status: Active or Inactive
Training Hours
Exam Required?
Expires In: The number of months this training will be valid before a renewal is needed.
Expiration dates are automatically calculated based on this number. Leave this field blank if you
do not want a training to expire.
Required for All employees?
The center of the screen contains two drop-down menus that allow you to select a category and
sub-category of related data to display. Information about specific categories of data is described in
the following sections.
To display related data follow these steps:
1. On the Training Detail screen, locate the training you wish to view data for.
2. Select a category from the menu on the left.
www.LibertyLabs.com
50 / 164
TRAIN TRACK User Manual
3. Select a sub-category from the menu on the right.
At the bottom left of the screen are buttons for:
Add a New Revision (see Training Revision )
Add Required as a Group (see Required Training )
Add Completed as a Group (see Completed Training )
Add Individual Completions (see Completed Training )
At the bottom right are buttons to print reports for this training (see Reports below):
Status Report
Complete Report
History Report
View or Edit Training Details
To view or edit individual training records, follow these steps:
1.
2.
3.
4.
5.
Open any screen.
From the navigation pane on the left, select Training List.
From the Training List screen, locate the training you wish to view or edit.
Double-click on Training Title to open the detail record.
View or edit records in the Training Detail screen.
Or you may follow these steps:
1. Open any screen.
2. From the navigation pane on the left, select Training Detail.
3. The Training Detail screen will open. If you have not entered any data, a new (blank) record
will be displayed.
4. Use the navigation buttons at the bottom of the screen to page through records, or right-click on
any field to sort or find by that field.
5. View or edit records.
Find a Training
www.LibertyLabs.com
51 / 164
TRAIN TRACK User Manual
There are three common methods for finding a training on the Training Detail screen:
1. Use the "Search" box.
2. Use the "Find" function.
3. Sort the records, then use the navigation buttons to page through the records.
To find a training using the search box, follow these steps:
1.
2.
3.
4.
Open the Training Detail screen.
Type all or part of the training title you wish to find into the Search box.
Click Go.
If a matching record is found, it will be displayed.
To find a training using the find function, follow these steps:
Open the Training Detail screen.
Click on the field you wish to search.
From the Menu Bar , select Find.
The Find and Replace box will open.
In Find What, type the text you wish to find. If you have only entered part of the text you wish to
find, you also need to select "any part of field" next to Match.
6. Click Find Next.
1.
2.
3.
4.
5.
To find a training using the navigation buttons, follow these steps:
1.
2.
3.
4.
Open the Training Detail screen.
Click on the field you wish to sort by.
From the Menu Bar , select Sort A-Z or Sort Z-A.
Use the navigation buttons at the bottom to page through the records.
Add a Training
You may add a new training from the Training Detail screen.
To add a new training, follow these steps:
1.
2.
3.
4.
5.
Open the Training Detail screen.
Click the New button on the navigation buttons at the bottom of the screen.
A new (blank) record will open.
Type in the Training Title.
Add data to the other fields as needed.
www.LibertyLabs.com
52 / 164
TRAIN TRACK User Manual
Duplicate Training Records
If the program recognizes a duplicate training record, it will alert the user and not allow the record to
be added.
Delete a Training
To delete a training, follow these steps:
1.
2.
3.
4.
Open the Training Detail screen.
Locate the training you wish to delete.
Click the Delete button.
A pop-up box will ask if you want to delete the record. Click Yes.
Print Reports
From the Training Detail screen, you may print reports that include only the individual training shown
on the screen. The Status report lists all employees who are required to complete the training, and
their status. The Complete report lists all employees who have completed the training (where the
training completion has not expired), and the History report includes a history of all completions.
To print the Status report, follow these steps:
1.
2.
3.
4.
5.
6.
Open the Training Detail screen.
At the bottom of the screen, click Status Report.
The report will open in print preview.
Click Print from the Menu Bar .
The print dialog will open.
Select printer settings, and click Print.
www.LibertyLabs.com
53 / 164
TRAIN TRACK User Manual
To print the Complete report, follow these steps:
1.
2.
3.
4.
5.
6.
Open the Training Detail screen.
At the bottom of the screen, click Complete Report.
The report will open in print preview.
Click Print from the Menu Bar .
The print dialog will open.
Select printer settings, and click Print.
To print the History report, follow these steps:
1.
2.
3.
4.
5.
6.
Open the Training Detail screen.
At the bottom of the screen, click History Report.
The report will open in print preview.
Click Print from the Menu Bar .
The print dialog will open.
Select printer settings, and click Print.
www.LibertyLabs.com
54 / 164
TRAIN TRACK User Manual
TRAINING COMPLETION STATUS AND EXPIRATION DATES
Calculating Expiration Dates
When training completion records are entered, the program determines the expiration date by looking
at several variables:
The number of months before the training normally expires
New revisions that require re-training
Manually entered expiration dates
Parent or child modules that may have expired
The program will review the number of months since the training was completed, the current
revision, and any manually entered dates, and use the earlies of these as the expiration. For
example, if a training normally expires every 12 months and an employee completed the training in
January, then it would expire the following January. However, if there was a revision in June, then
any completions from the previous revision would expire in June. In addition, if there was a manually
entered expiration date for March, then the training would expire in March.
Determining Completion Status
Based on the completion date and the expiration date, the program determines the completion status
for the training:
Needed
Completed
Expired
Failed
Scheduled
The factors involved in this determination are:
Is the training required for the individual?
Is the training required for the department?
Is the training required for the job title?
Is the training required for an additional job title?
Is the requirement limited by hire date range?
Is the individual exempted from the training?
Does the training have a parent module that is required?
Has the training been completed?
Is the completion expired? (see above)
If there is an exam required, did the employee pass?
Is the employee scheduled to complete the training?
Is the status for the training "Active"?
Is the status for the employee "Active"?
Using the completion status, the program displays groups of data for each training as described in
the following sections.
www.LibertyLabs.com
55 / 164
TRAIN TRACK User Manual
REQUIRED TRAINING
From the Training Detail screen, The Required tab displays who is required to complete each
training. You may assign training requirements by job title, department, individual, or any
combination. You may also limit the requirements by hire date range, or indicate individual employees
who are not required to complete the training (see Exceptions). Training may be required as part of a
parent/child module, or as part of a series. You may add requirements from the training screen,
employee screen, job title screen, or department screen.
You may add or delete requirements from the following screens. You may not edit an existing
requirement; to make a change, you will need to delete the existing requirement and add a new one.
Required for All Employees
To require training for all employees, follow these steps:
1. Open the Training Detail screen and locate the training record.
2. In the top section, click "Required for all employees".
Required by Job Title
If a training is required for a job title, then all employees who have that job title listed as either their
main job title, or as an additional job title, will automatically be required to complete the training.
To require training for a job title, follow these steps:
1.
2.
3.
4.
5.
Open the Training Detail screen to the correct training record.
In the middle of the screen, select the category "Requirements".
Select the sub-category "By Job Title".
Required job titles will be displayed.
At the bottom of the list, select a job title from the drop-down menu.
Or you may follow these steps:
1. Go to the Job Title Detail screen.
www.LibertyLabs.com
56 / 164
TRAIN TRACK User Manual
2. Under "Trainings required for this job title", select each required Training Title.
Required by Department
You may assign training requirements to a department, and all employees who have that department
listed will automatically be required to complete the training.
To require training for a department, follow these steps:
1.
2.
3.
4.
5.
Open the Training Detail screen to the correct training record.
In the middle of the screen, select the category "Requirements".
Select the sub-category "By Department".
Required departments will be displayed.
At the bottom of the list, select a department from the drop-down menu.
Or you may follow these steps:
1. Go to the Department Detail screen.
2. Under "Training required for this department", select each required training.
Required by Individual
You may assign training requirements to an individual.
To assign required training for a group of individuals all at once, follow these steps:
1. Open the Training Detail screen to the record for the training you want to require.
2. At the bottom of the screen, click Add Required Individuals.
3. A pop-up screen will open.
www.LibertyLabs.com
57 / 164
TRAIN TRACK User Manual
4. Select employees to include by checking the box next to each name.
5. To check the names for a job title and/or department all at once, select the title and/or
department and click Check.
6. When all required employees are checked, click Add.
To re-arrange the columns, click the column header to select the column, then click and drag the
column to the new location. To sort by multiple columns, click and drag across the columns to be
sorted, then from the Menu Bar , select A-Z or Z-A.
Or you may follow these steps:
1. Go to the Employee Detail screen.
2. At the bottom of the screen, under "Add a Training Requirement", select the required training.
3. Click Add.
www.LibertyLabs.com
58 / 164
TRAIN TRACK User Manual
Exceptions to Requirements
When training requirements are assigned by job title, by department, or for all employees, you may
select individual employees who are not required to complete the training. For these employees, the
training will not be required, even if it is required for their job title, their department, or for all
employees.
To exempt employees from a training requirement, follow these steps:
1.
2.
3.
4.
Open the Training Detail screen and select the category "Requirements".
Select the sub-category "Exceptions".
Select the Employee.
Enter a Reason.
Limit Requirement by Hire Date Range
You may limit a training requirement to only those employees hired within a specified date range.
You may also use this feature if a training will no longer be required for new employees, or if it is
only required for new employees.
If you enter a date range here, then the training will only show as required for employees who are
included in one of the categories you have selected in the boxes, AND were hired within the date
range. If you want to require the training for ALL employees hired within the date range, you also
need to select "Required for all employees".
Both a start date and end date are required. Leave both fields blank to require the training for all
employees included in the categories selected from the boxes regardless of hire date.
Note: If the training is no longer required, you may set the status to "inactive" instead of
using the date range. If a training is "inactive", you will retain the historical data, but the
training will no longer be included in reports, with the exception of the History report.
To limit training requirements by hire date range, follow these steps:
www.LibertyLabs.com
59 / 164
TRAIN TRACK User Manual
1. Open the Training Detail screen and select the category "Required".
2. Select the sub-category "Hire Date Range".
3. Enter the Start Date and End Date for the date range.
Required Parent/Child Modules
The program allows you to set up parent and child training modules. You may designate a training as
a parent, and specify each child training which is required under the parent. For more information,
see the Modules section.
Required Series
You may assign a training to be required a specified time period after another training has been
completed. For more information, see the Series section.
Delete a Requirement
To delete a training requirement, right-click on the record and select Delete Record from the pop-up
menu.
www.LibertyLabs.com
60 / 164
TRAIN TRACK User Manual
COMPLETED TRAINING
Under the category "Completions", you may view "All Completions", "Not Expired", or "All Records".
All Completions displays all records where there is a completion date.
Not Expired displays all non-expired completions.
All Records displays all events, including training that was scheduled, completed, failed, and
expired. If an employee has been scheduled for a training but has not yet completed it, the
training will be listed with no completion date. This is the section where you may edit records.
Completions that have been signed with an electronic signature cannot be edited.
You may re-arrange or re-size the columns, and sort by multiple columns (see Working with Data ).
The completed section contains data about each completed training (columns vary by sub-category
selection):
Employee Name
Job Title
Department
Revision Number
Cost
Document Link
Class Date
Completion Status
Completed Date
Expiration Date
Score
Pass/Fail
Delete
Electronic Signature By
Electronic Signature Date
Electronic Signature Meaning
Note: The electronic signature feature is only available in the Client/Server Edition.
All Completions
The "All Completions" sub-category displays all records where there is a completion date, regardless
of current completion status. This section will include expired completions and may display multiple
completions for each employee.
To view all completions, follow these steps:
1. Open the Training Detail screen to the correct training record.
www.LibertyLabs.com
61 / 164
TRAIN TRACK User Manual
2.
3.
4.
5.
In the middle of the screen, select the category "Completed".
Select the sub-category "All Completions".
View completed training records.
To delete a record, click on the "X".
Not Expired
The "Not Expired" sub-category displays all non-expired completions. Records cannot be edited from
this section.
To view current completed training, follow these steps:
1. Open the Training Detail screen to the correct record.
2. In the middle of the screen, select the category "Completed".
3. Select the sub-category "Not Expired".
All Records
The "All Records" sub-category displays all records: items scheduled, failed, expired or completed,
regardless of current completion status. This section may display multiple completions for each
employee. This screen allows you to edit completion records.
To view or edit completions, follow these steps:
1.
2.
3.
4.
5.
Open the Training Detail screen to the correct record.
In the middle of the screen, select the category "Completed".
Select the sub-category "All Records".
View or edit completed training records.
To delete a record, click on the "X".
Completions that have been signed with an electronic signature can't be edited in the Client/Server
Edition.
Enter Completed Training
To add training completion records, follow these steps:
Open the Training Detail screen to the correct training record.
Click Add Individual Completions at the bottom of the screen.
Select the Employee name from the drop-down menu.
Type in the date Complete, or leave the default current date. The expiration date will be
automatically calculated for you, based on the number of months to expire, but can be overwritten if needed. The current revision number will also be inserted.
5. Enter the Score, Pass, and Cost (optional).
6. Click Add or Add with Electronic Signature.
7. Repeat steps 3 to 7 to add another completion.
1.
2.
3.
4.
www.LibertyLabs.com
62 / 164
TRAIN TRACK User Manual
Enter Completed Training as a Group
You may insert completion records for a group of employees for a specific training, or you may use
"Quick Add" to enter completions for any training without having to open the specific training record.
To insert completion dates for several employees at once, for a specific training, follow
these steps:
1. Open the Training Detail screen, Completed tab.
2. Click Add Completions as a Group at the bottom of the screen.
3. A pop-up selection screen will open. Check the box next to the names of the employees who
have completed the training, or select a department or job title and click Check to automatically
check a group of names.
4. Enter the Completion Date and check Pass if they all passed.
5. Click Add.
To "Quick Add" completion dates for several employees at once, for ANY training,
follow these steps:
From the Start Menu, click Quick Add Completions as a Group.
A pop-up selection screen will open.
Select a Training.
Click Select Employees to Add as a Group.
Check the box next to the names of the employees who have completed the training,
or select a department or job title and click Check to automatically check a group of
names.
6. Enter the Completion Date and check Pass if they all passed.
7. Click Add.
1.
2.
3.
4.
5.
To enter another set of completions, repeat steps 3 - 7.
www.LibertyLabs.com
63 / 164
TRAIN TRACK User Manual
Duplicate Completion Records
If the program recognizes a duplicate training completion record, it will alert the user and not allow
the record to be added.
Delete Completed Training
To delete a training completion record , follow these steps:
1.
2.
3.
4.
5.
6.
Open the Training Detail screen to the correct record.
In the middle of the screen, select the category "Completed".
Select the sub-category "All Records".
Locate the record you wish to delete.
Click on the "X".
Confirm the deletion.
Expiration Dates
When you enter a completion date, the expiration date will be automatically calculated for you, based
on the number of months to expire, but can be over-written if needed . For example, if a training
usually expires after two years, but a particular class provides a 1-year certification, you may edit the
expiration date for those records to reflect the correct time period.
www.LibertyLabs.com
64 / 164
TRAIN TRACK User Manual
TRAINING STATUS
This section displays a list of all employees who are required to complete the training, and their
status. Only the employees who are required to complete the training will be listed here. If an
employee has completed a training more than once, only the most recent completion will be
displayed. You may select to show the status for All, Completed, Expired, Failed, Needed, or
Scheduled.
You may not edit data from this tab, but you may still use the sort and find functions. You may rearrange or re-size the columns, and sort by multiple columns (see Working with Data ).
The status section contains information about each employee required to complete the training:
Last Name
First Name
Completion Status
Date Completed
Date Expires
Revision
Score
Pass/Fail
Cost
All
This section shows all required employees, and their completion status.
To view All training status, follow these steps:
1.
2.
3.
4.
Open the Training Detail screen to the correct training record.
At the center of the screen, select the category "Status".
Select the sub-category "All".
The bottom portion of the screen will display a list of all required employees, and their
completion status.
Completed
This section shows all required employees with the status "completed".
To view Completed training status, follow these steps:
1. Open the Training Detail screen to the correct training record.
www.LibertyLabs.com
65 / 164
TRAIN TRACK User Manual
2. At the center of the screen, select the category "Status".
3. Select the sub-category "Completed".
4. The bottom portion of the screen will display a list of all required employees with the status
"completed".
Expired
This section shows all required employees with the status "expired".
To view Expired training status, follow these steps:
1.
2.
3.
4.
Open the Training Detail screen to the correct training record.
At the center of the screen, select the category "Status".
Select the sub-category "Expired".
The bottom portion of the screen will display a list of all required employees with the status
"expired".
Failed
This section shows all required employees with the status "failed".
To view Completed training status, follow these steps:
1.
2.
3.
4.
Open the Training Detail screen to the correct training record.
At the center of the screen, select the category "Status".
Select the sub-category "Failed".
The bottom portion of the screen will display a list of all required employees with the status
"failed".
Needed
This section shows all required employees that need to complete the training. This includes the
status "needed" (those who have not yet completed the training), "expired", and "failed".
To view Needed training status, follow these steps:
1.
2.
3.
4.
Open the Training Detail screen to the correct training record.
At the center of the screen, select the category "Status".
Select the sub-category "Needed".
The bottom portion of the screen will display a list of all required employees that need to
complete the training.
www.LibertyLabs.com
66 / 164
TRAIN TRACK User Manual
Scheduled
This section shows all required employees that are scheduled to complete the training. Note: To see
both required and non-required employees scheduled for a training, please refer to the section
Scheduled Classes.
To view Scheduled training status, follow these steps:
1.
2.
3.
4.
Open the Training Detail screen to the correct training record.
At the center of the screen, select the category "Status".
Select the sub-category "Scheduled".
The bottom portion of the screen will display a list of all required employees that are
scheduled to complete the training.
www.LibertyLabs.com
67 / 164
TRAIN TRACK User Manual
w INSTRUCTORS
The Instructors section allows you to record approved instructors for each training. You may also
track projected training costs (actual cost for each employee can be entered with the completion
records). After you have entered instructors here, you will be alble to select them for scheduled
classes in the Classes > Scheduled section.
www.LibertyLabs.com
68 / 164
TRAIN TRACK User Manual
SCHEDULED CLASSES
This section is used to schedule classes in advance, and enroll employees in each scheduled class.
If a required employee has not yet completed a training, but is already scheduled to attend a class,
the training completion status will be "scheduled".
The Scheduled section contains data about each scheduled training:
Date
Start Time
End Time
Trainer: select from the list of approved trainers, or type in a new one.
Location: select from the list of class locations, or type in a new one.
Each scheduled class is listed in the top section. Select a scheduled class, and the enrolled
employees are displayed in the section below.
View or Edit Scheduled Classes
To view or edit scheduled classes, follow these steps:
1.
2.
3.
4.
5.
Open the Training Detail screen to the training you wish to view or edit.
Next to Category, select "Classes".
Next to Sub-Category, select "Scheduled".
Scheduled classes and enrolled employees will be displayed.
View or edit records.
Add or Delete a Scheduled Class
To schedule a class, follow these steps:
Open the Training Detail screen to the training you wish to schedule classes for.
Next to Category, select "Classes".
Next to Sub-Category, select "Scheduled".
Scheduled classes and enrolled employees will be displayed.
In the top section, scroll to the bottom of the list and locate the new (blank) record marked with
a *.
6. Enter the Date and Time of the class.
7. Select an Instructor from those listed under the Instructors tab, or enter a new one (optional).
1.
2.
3.
4.
5.
www.LibertyLabs.com
69 / 164
TRAIN TRACK User
7. Select an
Manualfrom those listed under the Instructors tab, or enter a new one
8. Select a Location or enter a new one (optional).
(optional).
To delete a scheduled class, follow these steps:
1.
2.
3.
4.
5.
6.
7.
Open the Training Detail screen to the training you wish to delete classes for.
Next to Category, select "Classes".
Next to Sub-Category, select "Scheduled".
Scheduled classes and enrolled employees will be displayed.
In the top section of the tab, locate the record you wish to delete.
Click Delete Class.
To confirm the deletion, click Yes.
Using this method to delete the record will ensure that the enrolled employees are also deleted.
Class Capacity
You may record a capacity for each class location. The capacity for the selected location will be
displayed with each scheduled class. You will not be able to enroll more employees than the capacity
allows.
Enroll Employees
To enroll employees individually, follow these steps:
1.
2.
3.
4.
5.
6.
Open the Training Detail screen to the training you wish to enroll employees for.
Next to Category, select "Classes".
Next to Sub-Category, select "Scheduled".
Scheduled classes and enrolled employees will be displayed.
In the top section, select the scheduled class.
In the section below, select the Employee Name.
Enroll Employees as a Group
To enroll employees as a group, follow these steps:
1.
2.
3.
4.
5.
6.
7.
8.
9.
Open the Training Detail screen to the training you wish to enroll employees for.
Next to Category, select "Classes".
Next to Sub-Category, select "Scheduled".
Scheduled classes and enrolled employees will be displayed.
In the top section, select the scheduled class.
Next to the scheduled class, click Add as a Group.
A pop-up window will open.
Mark the Check-box next to the names of the employees you wish to schedule.
To automatically check all employees from a specific job title, select the Job Title, and click
www.LibertyLabs.com
70 / 164
TRAIN TRACK User Manual
Check.
10. To automatically check all employees from a specific department, select the Department, and
click Check.
11. Click Add.
Once an employee has been scheduled for a required training, the status will show as "Scheduled".
Enter Completion Data
You may enter the completion date, exam score, and pass/fail for individual employees, or you may
enter the data for all enrolled employees at once using "Mark All Complete".
To enter completion data individually, follow these steps:
Open the Training Detail screen to the training you wish to record completions for.
Next to Category, select "Classes".
Next to Sub-Category, select "Scheduled".
Scheduled classes and enrolled employees will be displayed.
In the top section, select the scheduled class.
In the section below, locate the record of the employee you wish to enter data for.
Enter the Date Completed, or Double-click on the Completed field to enter today's date. The
expiration date will automatically be filled in based on the number of months to expire entered
with the training detail record.
8. Enter the Score and check Pass.
1.
2.
3.
4.
5.
6.
7.
Mark All Complete
To insert the completion date for all enrolled employees, you may use the "Mark All Complete"
function.
To enter completion data for all enrolled employees at once, follow these steps:
1.
2.
3.
4.
5.
6.
Open the Training Detail screen to the training you wish to record completions for.
Next to Category, select "Classes".
Next to Sub-Category, select "Scheduled".
Scheduled classes and enrolled employees will be displayed.
In the top section, select the scheduled class.
In the section below, click Mark All Complete.
www.LibertyLabs.com
71 / 164
TRAIN TRACK User Manual
7. A box will open prompting you for "Pass?". Enter Yes or No, or leave blank to leave this field
blank.
8. A box will open prompting you for Score". Enter a number, or leave blank to leave this field
blank.
9. The date the class was scheduled for will be inserted as the completion date for all enrolled
employees, and the expiration date will be calculated.
Note: You may also select a group of employees to mark as complete from the Completed tab.
Print Roster and Sign-in Sheet
You may print a Roster listing all employees enrolled for the class, or a Sign-in Sheet for
employees to sign when they attend the class. Class rosters and sign-in sheets list all employees,
and are not limited to only the subordinates or the department of the user.
To print a class roster for a specific class, follow these steps:
1.
2.
3.
4.
5.
6.
Open the Training Detail screen to the training you wish to print reports for.
Next to Category, select "Classes".
Next to Sub-Category, select "Scheduled".
Scheduled classes and enrolled employees will be displayed.
Select the scheduled class in the top section of the tab.
Click Print Class Roster.
You may select to print sign-in sheets including:
All employees for any training
All employees for a specific training
Required employees for a specific training
Scheduled employees for a specific class
To print a class sign-in sheet for ALL employees for ANY training, follow these steps:
1. From the Report Menu, select Class Sign-in Sheet.
2. Click Print.
To print a class sign-in sheet for ALL employees for a specific training, follow these steps:
www.LibertyLabs.com
72 / 164
TRAIN TRACK User Manual
1.
2.
3.
4.
5.
6.
Open the Training Detail screen to the training you wish to print reports for.
Next to Category, select "Classes".
Next to Sub-Category, select "Scheduled".
Scheduled classes and enrolled employees will be displayed.
Select the scheduled class in the top section of the tab.
Click Print Class Sign-in Sheet for All Employees.
To print a class sign-in sheet for REQUIRED employees for a specific training, follow these
steps:
1.
2.
3.
4.
5.
6.
Open the Training Detail screen to the training you wish to print reports for.
Next to Category, select "Classes".
Next to Sub-Category, select "Scheduled".
Scheduled classes and enrolled employees will be displayed.
Select the scheduled class in the top section of the tab.
Click Print Class Sign-in Sheet for Required Employees.
To print a class sign-in sheet for SCHEDULED employees for a specific class, follow these
steps:
1.
2.
3.
4.
5.
6.
Open the Training Detail screen to the training you wish to print reports for.
Next to Category, select "Classes".
Next to Sub-Category, select "Scheduled".
Scheduled classes and enrolled employees will be displayed.
Select the scheduled class in the top section of the tab.
Click Print Class Sign-in Sheet.
www.LibertyLabs.com
73 / 164
TRAIN TRACK User Manual
EXAMS
From the Training Detail screen, the Exam section allows you to store the exam questions and
answers. Exams can be printed out to administer on paper, or taken electronically. If they are taken
electronically, they are automatically scored and the results are posted to the employee record and
the training record. In the Client/Server Edition , employees can add an electronic signature to the
exam completion record. Exam information consists of:
Exam Type
Method
Passing Score
Note
All of the fields above are optional, but you will need to fill in the passing score if you plan to have
employees take the exam electronically, so that their score can be calculated and the program can
determine if they passed or failed.
In the exams, each question will be numbered, followed by a set of answers identified by a letter (i.e.
Question 1 could have answer choices A, B, and C). You may assign the question order and the
answer letter. For each exam, you may enter multiple exam questions:
Order: Determines the order the questions will appear in the exam
Question
Number of Answers Allowed : The number of answers an employee may select when
answering this question.
For each question, you may list multiple possible answers. You may assign a point value to each
answer. For example, if each question in your exam was worth 10 points, and you had a true/false
question where the correct answer was "True", you would assign a point value of 10 to "True" and a
point value of 0 to "False". If the employee selected "True" as their answer, they would get 10 points,
and if they selected "False", they would get 0 points for that question.
For each question, you may also indicate the number of answers an employee may select. In the
above example, the employee would only be allowed to select one answer. This prevents an
employee from selecting both answers and still getting the 10 points. If you have multiple choice
questions where you want the employee to select more than one out of several options, you may
allow any number of answers to be selected, and give points for each correct answer.
Answer data includes:
Letter: Determines the order the answers will appear in the exam
Answer
Points: Value assigned if the employee selects this answer
www.LibertyLabs.com
74 / 164
TRAIN TRACK User Manual
You may assign different point values for each question.
Exam Required
If an exam is required to complete the training, check Exam Required on the top section of the
Training Detail screen. If an exam is required, employees must have "Pass" checked for the training
to be considered complete. If an employee has a completion date but "Pass" is not checked, their
status for this training will be "Failed".
Create an Exam
To create an exam, follow these steps:
1. From the Training Detail screen, select the category "Training Info" and the sub-category
"Exam".
2. Enter exam Type, delivery Method, and Notes (optional).
3. Enter the Passing Score. If you administer exams electronically, they will be automatically
scored, and pass/fail will be determined based on the score you enter here (but can be
manually edited).
4. Type in a Question and the Order. Questions will show up on exams in the order you specify
here. When each question is selected in the top section, the corresponding answers will be
displayed below.
5. For each question, enter each possible Answer and the answer Letter. Answers will appear on
exams alphabetically according to the assigned letter.
6. Enter Points for each possible answer.
7. Make sure Exam Required is checked for the training.
Print an Exam
Click Print Exam at the bottom of the screen to print a blank exam that can be given to employees
to complete. Employees may also take the exam electronically.
www.LibertyLabs.com
75 / 164
TRAIN TRACK User Manual
TRAINING REVISION
This section allows you to track the revision history for each training. If you have revision numbers
entered, the current revision will be saved with each training completion record, giving you a record
of which revision was completed by each employee. As new revisions are released, you have the
option to require everyone who was trained on the previous version to be re-trained on the new
version.
The Revision section contains revision history data:
Training or Document Title
Training or Document Number
Revision
Release Date
Retrain? tracks whether you required all employees to be re-trained for this revision
View Revision History
To view revision history records, follow these steps:
1. Open the Training Detail screen to the correct training record.
2. In the middle of the screen, select the category "Training Info" and the sub-category
"Revision".
3. View revision history records.
Add a New Revision
Once a revision level has been entered for a training, in order to change it you need to click Add
New Revision. When you add a new revision, you will be given the option to expire trainings from
the old version. With this option, any trainings completed for the previous revision will expire on the
release date of the new revision. If an employee is required to complete the training, it will then be
displayed as "expired", and the employee will need to be re-trained. The most recent revision number
will be displayed at the top of the screen, and will also be recorded with training completion data.
Note: If you enter training completion data for a previous revision after you have entered the new
revision and expired the old trainings, this new record will be expired automatically.
To add a new revision, follow these steps:
www.LibertyLabs.com
76 / 164
TRAIN TRACK User Manual
1. Open the Training Detail
screen to the correct training
record.
2. At the bottom of the screen,
click Add a new Revision.
3. A pop-up window will open.
www.LibertyLabs.com
77 / 164
TRAIN TRACK User Manual
4. Enter the Revision and
Release Date.
5. Select "No retraining
needed" or "Everyone
NEEDS RETRAINING".
Tip: If you want training from
the old revision to be expired,
select "Everyone needs
retraining". If you are just
updating your records and do
not need to re-train
employees, select "No
retraining needed".
6. Click Add.
The new revision number will be displayed at the top of the screen and saved with each new
completion record.
Edit Revisions
To edit revision history, follow these steps:
1. Open the Training Detail screen to the correct training record.
2. In the middle of the screen, select the category "Training Info", and the sub-category
"Revisions".
www.LibertyLabs.com
78 / 164
TRAIN TRACK User Manual
3.
4.
5.
6.
Locate the revision record you wish to edit.
Click Edit. The edit box will open.
Edit the record as needed.
Click OK.
Delete a Revision
To delete a revision, follow these steps:
1. Open the Training Detail screen to the correct training record.
2. In the middle of the screen, select the category "Training Info", and the sub-category
"Revisions".
3. Locate the revision you wish to delete.
4. Click Edit. The edit box will open.
5. Select Delete Record.
6. To confirm the deletion, click Yes.
www.LibertyLabs.com
79 / 164
TRAIN TRACK User Manual
PARENT AND CHILD TRAINING MODULES
The program allows you to set up parent and child training modules. You may designate a training as
a parent, and specify each child training which is required under the parent. You may specify the
number of child trainings that need to be completed in order for the parent to be listed as completed.
You may also use this section to have one training substitute for another. For example, if you have
CPR as a requirement, but the employee may take the Red Cross or the Heart Association class, you
could list CPR as the parent, with the Red Cross and Heart Association classes as the children, and
designate that only one of the child trainings needs to be completed.
You may indicate the number of children the employee will need to complete in order for the
parent to be considered complete.
When an employee has completed the required number of child trainings, the parent training
will be displayed as complete.
When an employee has completed the parent training, each child will be displayed as complete.
For example, you could designate Proficiency in Microsoft® Office™ as a parent, with child training
in Excel®, Word™, and Outlook®. If you marked Proficiency in Microsoft® Office™ as complete,
the employee would show Excel®, Word™, and Outlook® as complete as well.
Require Child Training
An example of a parent and child module is "Proficiency in Microsoft® Office™" , where the
employee needs to complete training in Excel®, Word™, and Outlook®. In this case, you would
indicate that all 3 children need to be completed (but you could indicate that only one or two need to
be completed).
Parent
Office
Child
Excel
Word
Outlook
To set up a Parent with multiple Child trainings, follow these steps:
1. List each item as a separate training in your database: i.e. Office, Excel, Word and Outlook.
2. Open the Training Detail screen to the Parent training (i.e. Office).
3. In the middle of the screen, select the category "Required" and the sub-category "Child
Module".
4. Type in the Number of children the employee needs to complete in order to show the parent as
completed.
5. Select each child training, i.e. Excel, Word, and Outlook.
6. Set the parent training as required for a job title, department, or individual. Each child training
will automatically show as required.
www.LibertyLabs.com
80 / 164
TRAIN TRACK User Manual
To delete child training for a parent, follow these steps:
1. Open the Training Detail screen to the Parent training (i.e. Office).
2. In the middle of the screen, select the category "Required" and the sub-category "Child
Module".
3. Select the child training you wish to delete by clicking on the arrow to the left of the record.
4. Right-click and select Delete.
5. You will be asked to confirm the deletion. Click Yes.
To record the Parent as complete and have the program automatically show the Children as
complete, follow these steps:
1. Open the Training Detail screen for the parent training.
2. Record a completion date for the parent (i.e. Office).
3. The child trainings will be displayed as complete.
To record the Children as complete and have the program automatically show the Parent as
complete, follow these steps:
1.
2.
3.
4.
Open the Training Detail screen for the child training.
Record a completion date for the child (i.e. Excel).
Repeat step 1 and 2 for each child.
The parent training will be displayed as complete.
View Parent Modules
To view Parent training for a Child, follow these steps:
1. Open the Training Detail screen to the Child training (i.e. Excel).
2. In the middle of the screen, select the category "Required" and the sub-category "Parent
Module".
www.LibertyLabs.com
81 / 164
TRAIN TRACK User Manual
TRAINING SERIES
The program allows you to set up training as a series. You may assign a second training to be
required a specified time period after the first training has been completed. This feature may be used
to required one training initially, and then a follow-up or refresher course annually (for example,
Basic Safety Full Course at initial hire, then Basic Safety Refresher every year after that).
To set up a series, you will need to set the first training as required. You will NOT set the second
training as required; instead, you will list it as a series for the first training, and the requirement will
only become activated based on completion of the first training.
To set up series training, follow these steps:
1. Open the Training Detail screen to the training record for the initial training.
2. Leave the "Expires in ___ months" field blank (you don't want the employee to have to repeat
this training, you want them to complete a different training).
3. Set this training as required by job title, department, or individual.
4. In the middle of the screen, select the category "Required" and the sub-category "Series".
5. Under Series, select the second training.
6. Enter the number of days after the first training is completed that you want the second to
become required.
7. If you want the second training repeated (for example, annually), then open the record for the
second training and set the number of months to expire.
Set the first training as a required training, and the second will automatically be required the
specified number of days after the first is completed. If you want the second training repeated (for
example, every year), set the months to expire for the second training only.
The following example shows an initial training, with a second training required annually:
Series
Training
First
Basic Safety Full Course
Second Basic Safety Refresher
www.LibertyLabs.com
Required? Expires in
Series Training
Yes
(leave blank) Basic Safety Refresher
No
12
None
82 / 164
TRAIN TRACK User Manual
EMPLOYEES
TRAIN TRACK ® allows you to list all of your employees, record general information, view or edit
training requirements, and track training completion data. Employees can be viewed as a list,
allowing you to easily scroll through the records to find an employee. From the list, you can select an
employee and double-click on it to open it in detail view. You may also search for an employee name
from both the employee list and the employee detail screens.
Employee records store general information about each employee:
Last Name
First Name
ID Number: Employee number or Social Security number
Phone Number
Email: If the employee is a supervisor, email will be used to send reports
Job Title: Select a job title from the list or type in a new one to add it to the list.
Secondary Job Titles: You may assign multiple job titles to an employee. Trainings required
for all assigned job titles will be required for the employee.
Department: Select a department from the list or type in a new one to add it to the list.
Supervisor: Select a name from the list of employees, or type in another name or a job role.
Shift: Select a shift from the list or type in a new one.
Location: Select a location from the list or type in a new one.
Employee Type: Select a type from the list or type in a new one to add it to the list.
Status: Active or Inactive.
Start Date
End Date
Other: You can use this field to store other needed information.
Status: Active or Inactive
Link: Allows you to link any type of document to the employee record.
Employee records also display related training information:
Skills and qualifications
Notes
Electronic exam records
HR (Human Resources)
Employee records can also be imported from Excel ®.
www.LibertyLabs.com
83 / 164
TRAIN TRACK User Manual
EMPLOYEE LIST
You may view employees as a list using the Employee List screen. This screen allows you to scroll
through the list of all employees and easily locate the record you wish to view or edit. The Employee
List screen displays:
Last Name
First Name
ID Number
Job Title
Department
Location
Shift
Supervisor
Status
You may re-arrange or re-size the columns, and sort by multiple columns. You may not edit data on
this screen, to prevent accidentally changing data while searching for a record.
The left side of the screen contains the Navigation Pane. At the top of the screen is a search box
and a refresh button. The center of the screen shows the employee list. At the bottom is a drop-down
menu to allow you to filter the records by status.
To open a record in detail view, double-click the Employee Name from the employee list.
View Employees as a List
To view employees as a list, follow these steps:
1. Open any screen.
2. From the navigation pane on the left, click Employee List.
3. The Employee List screen will open.
www.LibertyLabs.com
84 / 164
TRAIN TRACK User Manual
The default view will display only active employees.
To view inactive employees, or all employees, follow these steps:
1. Open the Employee List screen.
2. At the bottom of the screen, select the Status you wish to display, or select All to display all
records.
Search
The Search box at the top of the screen is designed to help you easily find an employee record.
To search by employee last name, follow these steps:
1.
2.
3.
4.
5.
Open the Employee List screen.
Type all or part of the first or last name into the Search box.
Click Go.
Matching employees will be listed in the employee list section.
Double-click on the Employee Name to open the detail record.
To clear the search and list all employees, follow these steps:
1. Leave the Search box blank.
2. Click Go.
3. All employees will be listed in the employee list section.
To search by any field, follow these steps:
1.
2.
3.
4.
5.
Right-click on the field you wish to search.
A pop-up menu will open.
Select Find from the pop-up menu.
The Find and Replace box will open.
In Find What , type the text you wish to find. If you have only entered part of the text you wish to
find, you also need to select "any part of field" next to match.
6. Click Find Next.
Refresh
www.LibertyLabs.com
85 / 164
TRAIN TRACK User Manual
To update your screen to reflect recent record changes on another screen, click Refresh.
Arrange Columns and Sort
The Training List screen allows you to re-arrange and re-size the columns, and sort by multiple
columns.
To re-arrange columns, follow these steps:
1. Select the column you want to move by clicking on the column heading.
2. Click and drag the column to where you want it.
To re-size the columns, follow these steps:
1. Position the mouse on the border of the column header. The mouse pointer will change into a
horizontal double arrow crossed by a vertical line.
2. Click and drag the column to the size you want.
To sort on any column, follow these steps:
www.LibertyLabs.com
86 / 164
TRAIN TRACK User Manual
1.
2.
3.
4.
Right-click on the column you wish to sort by.
A pop-up menu will open.
Select A-Z or Z-A.
Your sort order will be retained the next time you open this screen (open database and
client/server version only).
To sort by multiple columns, follow these steps:
1. To select columns in a range, click and hold your mouse on one of them, then drag to the left or
to the right to cover the other desired column or columns. When all desired columns are
highlighted, release the mouse
2. From the Menu Bar, select A-Z or Z-A.
Add, Edit, Delete or Restore an Employee
To add, edit, or delete an employee record, go to the Employee Detail screen. To restore a deleted
employee record, go to the Audit Trail screen.
Related Records
From the Employee List screen, you may open the Job Title List screen by double-clicking on Job
Title, or the Department List screen by double-clicking on Department.
www.LibertyLabs.com
87 / 164
TRAIN TRACK User Manual
EMPLOYEE DETAILS
This screen allows you to view individual employee records in detail. You may use the navigation
buttons at the bottom of the screen to page through records, or you may use the sort or find
functions on any field. You may also search for an employee name.
The Employee Detail screen contains:
Last Name
First Name
ID Number
Phone
Email
Job Title
Department
Supervisor
Shift
Location
Employee Type
Status
Start Date
End Date
Other
Secondary Job Titles
Document Link
View or Edit Employee Details
To view or edit individual employee records, follow these steps:
1.
2.
3.
4.
5.
Open any screen.
From the navigation panel on the left, click Employee List.
From the Employee List screen, locate the employee you wish to view or edit.
Double-click on Employee Name to open the detail record.
View or edit records in the Employee Detail screen.
Or you may follow these steps:
1. Open any screen.
2. From the Navigation Pane on the left, select Employee Detail.
3. The Employee Detail screen will open. If you have not entered any data, a new (blank) record
will be displayed.
4. Use the navigation buttons at the bottom of the screen to page through records, or right-click on
any field to sort or find by that field.
5. View or edit records.
www.LibertyLabs.com
88 / 164
TRAIN TRACK User Manual
Search for an Employee
There are three common methods for finding an employee on the Employee Detail screen:
1. Use the "Search" box.
2. Use the "Find" function.
3. Sort the records, then use the navigation buttons to page through the records.
To find an employee using the search box, follow these steps:
1.
2.
3.
4.
Open the Employee Detail screen.
Type all or part of the employee last name you wish to find into the Search box.
Click Search (magnifying glass icon).
If a matching record is found, it will be displayed.
To find an employee using the find function, follow these steps:
Open the Employee Detail screen.
Click on the field you wish to search.
From the Menu Bar , select Find.
The Find and Replace box will open.
In Find What, type the text you wish to find. If you have only entered part of the text you wish to
find, you also need to select "any part of field" next to Match.
6. Click Find Next.
1.
2.
3.
4.
5.
To find an employee using the navigation buttons, follow these steps:
1.
2.
3.
4.
Open the Employee Detail screen.
Click on the field you wish to sort by.
From the Menu Bar , select Sort A-Z or Sort Z-A.
Use the navigation buttons at the bottom to page through the records.
www.LibertyLabs.com
89 / 164
TRAIN TRACK User Manual
Add an Employee
You may add a new employee from the Employee Detail screen.
To add a new employee, follow these steps:
1.
2.
3.
4.
5.
Open the Employee Detail screen.
Click >* on the navigation buttons at the bottom of the screen.
A new (blank) record will open.
Type in the Last Name.
Add data to the other fields as needed.
Duplicate Employee Records
If the program recognizes a duplicate employee record, it will alert the user and not allow the record
to be added.
Delete an Employee
To delete an employee, follow these steps:
1.
2.
3.
4.
Open the Employee Detail screen.
Locate the employee you wish to delete.
Click the Delete button.
A pop-up box will ask you to confirm the deletion.Click Yes.
Print Summary, Status, or History Report
From the Employee Detail screen, you may print reports that include only the individual employee
shown on the screen.
The Summary report is a condensed report listing required and completed training.
www.LibertyLabs.com
90 / 164
TRAIN TRACK User Manual
The Status report includes the status of all required training, non-expired completed training,
notes, additional job titles, skills, and exams.
The History report includes the status of all required training, a history of all completed
training, notes, additional job titles, skills, and exams.
To print the individual report, follow these steps:
1.
2.
3.
4.
5.
6.
Open the Employee Detail screen.
At the bottom of the screen, click the button for the report you wish to print.
The report will open in report view.
Click Print from the Menu Bar .
The print dialog will open.
Select printer settings, and click Print.
www.LibertyLabs.com
91 / 164
TRAIN TRACK User Manual
REQUIRED BY EMPLOYEE
From the Employee Detail screen, the Required section displays all training requirements for each
employee, and the status of each. These requirements may be assigned to the employee as an
individual, to all employees, or to a job title or department the employee is a member of. To view the
specifics of a required training, double-click on the Training Title to open the Training Detail record.
Data included:
Training Title
Number
Status
Cost
Completed
Expires
Score
Pass/Fail
You may re-arrange and re-size the columns, and sort by multiple columns (see Working with Data ).
To add or delete required training for an employee, you will need to go to the Training Detail screen.
Status of Required Training
The status of required training is defined as:
Needed: Not yet completed
Scheduled: Enrolled in a class but not completed
Completed: Completed and not expired
Failed: Completed, but an exam is required and was not passed
Expired: Completed, but the expiration date has passed or there is a new revisio
View Required Training
To view required training for an employee, follow these steps:
1. Open the Employee Detail screen to the correct employee record.
2. In the middle of the screen, select the category "Required" and the sub-category "All".
3. All required training will be displayed.
www.LibertyLabs.com
92 / 164
TRAIN TRACK User Manual
www.LibertyLabs.com
93 / 164
TRAIN TRACK User Manual
EXCEPTIONS
When training requirements are assigned by job title, by department, or for all employees, you may
select individual employees who are not required to complete the training. For these employees, the
training will not be required, even if it is required for their job title, their department, or for all
employees.
To exempt an employee from a training requirement, follow these steps:
1. Open the Employee Detail screen to the correct employee record.
2. In the middle of the screen, select the category "Required" and the sub-category
"Exceptions".
3. On the blank line below "Training", select the training to exempt.
4. Type in a reason.
www.LibertyLabs.com
94 / 164
TRAIN TRACK User Manual
COMPLETIONS BY EMPLOYEE
This section displays all training the employee has completed (required or not). If an employee has
been scheduled for a training but has not yet completed it, the training will be listed here with no
completion date. You may select to show:
All Completions: All training that has a completion date (expired or not).
Not Expired: All non-expired completions.
Exams: Exams completed.
All Records: All activity, including scheduled, completed, failed or expired.
Fields included (all fields may not appear in all sections):
Training
Number
Revision
Cost
Hours
Completion Status
Complete
Expires
Date Started
Date Due
Score
Pass/Fail
Electronic Signature Date
Electronic Signature Score
Electronic Signature Pass/Fail
Electronic Signature By
You may re-arrange or re-size the columns, and sort by multiple columns (see Working with Data ).
Electronic Signatures are only available in the Client/Server Edition. If a record has an electronic
signature, it can't be edited. You may add a signature to an existing record from the Training Detail
screen. For more information on electronic signatures, see Electronic Signatures.
www.LibertyLabs.com
95 / 164
TRAIN TRACK User Manual
In the Desktop Edition, you will see the signature fields when an exam is signed, but there is no
restriction on editing or deleting these records, and you cannot add electronic signatures to existing
records.
View Completions by Employee
To view completed training by employee, follow these steps:
1. Open the Employee Detail screen to the correct employee record.
2. In the middle of the screen, select the category "Completions" and the sub-category "All
Completions", "Not Expired", or "All Records".
3. View records.
Add Completed Training by Employee
To add a completed training by employee, follow these steps:
1. Open the Employee Detail screen to the correct employee record.
2. In the middle of the screen, select the category "Completed" and the sub-category "All
Records".
3. Go to a new record at the bottom of the screen and select the Training Title.
4. Enter the date completed.
5. The expiration date will be calculated for you. You may over-ride this calculation with an earlier
date if desired, by right-clicking on the expiration field and entering the new expiration date.
6. Enter the cost, score and pass/fail (optional).
7. If you would like to add an electronic signature to the record, double-click on the signature field.
Only training that is already listed under your training records may be added from this screen. To add
a training that is not on the list, go to the Training Detail screen.
Duplicate Records
The program prevents you from adding duplicate completion records. If you attempt to add a
completion record and there is already a record for that training on that date, the program will alert
you and the record will not be added.
Edit Completed Training by Employee
Completion records that do not include an electronic signature may be edited.
www.LibertyLabs.com
96 / 164
TRAIN TRACK User Manual
To edit completed training by employee, follow these steps:
1. Open the Employee Detail screen to the correct employee record.
2. In the middle of the screen, select the category "Completed" and the sub-category "All
Records".
3. Edit records.
Delete Completed Training by Employee
To delete a completed training by employee, follow these steps:
1. The Employee Detail screen to the correct employee record.
2. In the middle of the screen, select the category "Completed" and the sub-category "All
Records".
3. Click on the red "X".
4. Confirm the deletion.
www.LibertyLabs.com
97 / 164
TRAIN TRACK User Manual
SKILLS AND QUALIFICATIONS
This section allows you to list education, qualifications, skills or certificates for each employee. You
may list multiple items for each employee. Skills data consists of:
Date
Education, Skills, Qualifications and Certificates description
View or Edit Skills and Qualifications
To view or edit skills, follow these steps:
1. Open the Employee Detail screen to the correct employee record.
2. In the middle of the screen, select the category "Employee Info" and the sub-category "Skills".
3. View or edit records.
www.LibertyLabs.com
98 / 164
TRAIN TRACK User Manual
NOTES
The Notes section allows you to store a series of notes for each employee. The records contain:
Date
Note
You may enter an unlimited number of notes for each employee. These notes will appear on the
Employee Status and Employee History reports.
View or Edit Notes
To view or edit notes, these steps:
1. Open the Employee Detail screen to the correct employee record.
2. In the middle of the screen, select the category "Employee Info" and the sub-category
"Notes".
3. View or edit records.
www.LibertyLabs.com
99 / 164
TRAIN TRACK User Manual
EXAM RECORDS
This section displays results of exams taken electronically. The scores shown here are calculated
from the stored electronic exams and cannot be edited.
Set Exam Passwords for Employees
Employees are required to set their password the first time they log in.
For the employees logging on to take exams, each employee will need to set their password the first
time they log on. All employees should be required to log on for the first time under the
supervision of a manager who has already established the identity of each employee. This
will ensure that the company has established the identity for each person being assigned an
electronic signature. Alternatively, you could set up the initial password for each employee, securely
provide these password to each employee, and instruct them to change their password at first login.
You may also set the passwords to expire immediately so that they would need to be changed at first
login.
Passwords are required for employees to take exams. Passwords must be at least 6 characters, and
must be changed every 120 days (or the number of days you specify in the Client/Server Edition).
View or Print Completed Exams
To view or print a completed exam, follow these steps:
1.
2.
3.
4.
Open the Employee Detail screen to the correct employee record.
In the middle of the screen, select the category "completed" and the sub-category "exams".
Locate the exam you wish to view or print.
Click View or Print.
www.LibertyLabs.com
100 / 164
TRAIN TRACK User Manual
HUMAN RESOURCES
This section displays Human Resources information. You may paste in a photo of each employee,
record personal information, and insert a link to any type of file or folder. Fields included:
Address
Work phone
Home phone
Cell phone
End date
Date of birth
Social security number
Email
Linked document
To add a photo, follow these steps:
1. In your graphics program, open the picture you wish to use (you need to be able to see the
picture on your screen).
2. Copy the picture.
3. Open the Employee Detail screen to the correct employee record.
4. Paste the photo into the field.
To add a linked document, follow these steps:
1.
2.
3.
4.
5.
Open the Employee Detail screen to the correct employee record.
Right-click on the link document field.
A pop-up menu will open. Select "Hyperlink...".
In the hyperlink dialog box, browse to the file or folder you wish to link to.
Click OK.
www.LibertyLabs.com
101 / 164
TRAIN TRACK User Manual
OTHER DATA
This section covers other types of data used to organize employee records:
Job Titles
Departments
Shifts
Locations
Employee Types
and other types of data used to organize training records:
Training types
Class locations
Each of these data sets is a list which you may edit. Then, when entering employee or training data,
you may select items from your list using a drop-down menu. These lists can be set up in advance,
or you may add items to each list as you need them.
www.LibertyLabs.com
102 / 164
TRAIN TRACK User Manual
JOB TITLES
TRAIN TRACK ® allows you to list all of your job titles, assign training requirements to each job title,
and assign job titles to each employee. Job titles can be viewed as a list, allowing you to easily scroll
through the records. From the list, you can select a job title and double-click on it to open it in detail
view.
Entering job titles allows you to assign required trainings for all employees with that job title. For
example, you may require all employees with the job title “Teacher” to have a CPR certification. You
may assign multiple job titles for each employee, and the required training for all associated job titles
will be required for the employee.
Job titles can also be imported form Excel ® along with your employee records.
Job Title List
You may view or edit job titles as a list using the Job Title List screen. This screen allows you to
scroll through the list of all job titles and easily locate the record you wish to view or edit.
To view job titles as a list, follow these steps:
1. Open any screen.
2. From the Navigation Panel on the left, click Job Titles.
3. View or edit records.
Or you may follow these steps:
1. Open the Employee List, Employee Detail , or Training Detail screen, required tab.
2. Double click on Job Title.
3. View or edit records.
www.LibertyLabs.com
103 / 164
TRAIN TRACK User Manual
Job Title Details
The job title details screen allows you to view and edit individual job title records in detail. This
screen contains job titles, a list of all training requiremments for the job title, and a list of all
employees assigned to that job title. You may use the navigation buttons at the bottom of the screen
to page through records, or you can use the sort or find functions on any field. You may also open
the related training or employee records by double-clicking on them.
If you edit a job title, the edited title will be reflected in the records of all employees with that job title
assigned to them. For example, if you have 10 employees with the title "Admin" and you edit that title
to say "Administrative Assistant", all 10 employees will now show a job title of "Administrative
Assistant".
To view or edit individual job title records, follow these steps:
1.
2.
3.
4.
5.
Open the Job Title List screen.
Locate the job title you wish to view or edit.
Double-click on the Job Title.
The Job Title Detail screen will open.
View or edit records.
Add a Job Title
You may enter job titles as you need them, or you may enter them all in advance.
You may import job titles when you import employee data from Excel ®. Just include the job title in the
appropriate column, and any new job titles will be automatically added to your selection list.
To add a new job title, follow these steps:
1. Open the Job Title List screen.
2. At the bottom of the list, locate the blank line for a new record.
3. Type in the name of the new Job Title.
Or you may follow these steps:
1. Open the Job Title Detail screen.
2. From the navigation buttons at the bottom of the screen, click New ( >*).
www.LibertyLabs.com
104 / 164
TRAIN TRACK User Manual
2. From the navigation buttons at the bottom of the screen, click New ( >*).
3. A new (blank) record will open.
4. Type in the name of the new Job Title.
Or you may follow these steps:
1.
2.
3.
4.
Open the Employee List, Employee Detail , or Training Detail screen, required tab.
In Job Title, type in the name of the new job title.
A dialog box will open.
To confirm the addition of the new job title, click Yes.
Delete a Job Title
CAUTION: If you delete a job title, it will no longer be displayed with any employees or trainings that
have already been associated with it.
To delete a job title, follow these steps:
1.
2.
3.
4.
5.
6.
7.
Open the Job Title List screen.
Locate the job title you wish to delete.
Right-click on the record.
A pop-up menu will open.
Select Delete Record.
A dialog box will open.
To confirm deletion of the job title, click Yes.
Or you may follow these steps:
1.
2.
3.
4.
5.
6.
7.
Open the Job Title Detail screen.
Locate the job title you wish to delete.
Right-click on the record.
A pop-up menu will open.
Select Delete Record.
A dialog box will open.
To confirm deletion of the job title, click Yes.
www.LibertyLabs.com
105 / 164
TRAIN TRACK User Manual
Assign Job Titles to Employees
You may assign job titles to employees from the employee detail screen.
To assign a job title to an employee, follow these steps:
1. Open the Employee Detail screen to the correct employee record.
2. Select the Job Title from the list, or type in a new job title.
To remove a job title from an employee record, follow these steps:
1. Open the Employee Detail screen to the correct employee record.
2. Delete the Job Title.
To view employees assigned to a job title, follow these steps:
1.
2.
3.
4.
Open the Job Title List screen.
Locate the job title to view.
Double-click on the Job Title. The detail screen will open.
View employees listed under Employees with this job title.
Employees cannot be edited from this screen. To edit employee job titles, please go to the employee
record.
Additional Job Titles
To assign additional job titles to an employee, follow these steps:
1. Open the Employee Detail screen to the correct employee record.
2. In the middle of the screen, select the category "Employee Info" and the sub-category
"Additional Job Titles".
3. Select a job title from the list.
Trainings required for any of the job titles assigned will be required for this individual. Note: reports
showing job title will display the primary job title.
Assign Required Training by Job Title
You may assign required training for each job title from the Training Detail screen, required by job
title section, or from the Job Title Detail screen.
To assign required training to a job title, follow these steps:
1. Open the Job Title Detail screen to the correct job title record.
2. Under "training required for this job title", go to the bottom of a list to a new (blank) record and
select the training title.
3. This training will now be required for all employees assigned to this job title.
www.LibertyLabs.com
106 / 164
TRAIN TRACK User Manual
To remove required training from a job title, follow these steps:
1.
2.
3.
4.
5.
Open the Job Title detail screen to the correct job title record.
Under Required Trainings, locate the training you wish to remove.
Right-click in the training.
A pop-up menu will open.
Select Delete Record.
www.LibertyLabs.com
107 / 164
TRAIN TRACK User Manual
a DEPARTMENTS
Entering departments allows you to assign a required training for all employees within that
department. For example, you may require all employees in the Document Control department to
complete a Change Management training. You may enter departments as you need them, or you may
enter them all in advance. You may also import departments when you import employee data. Any
new departments will be automatically added to your list of departments.
You may view or edit department records using the Department List and Department Detail screens.
If you edit a department name, the revision will automatically be reflected in all employee and training
records associated with the department.
Department List
You may view or edit departments as a list using the Department List screen. This screen allows you
to easily scroll through all departments.
To view or edit departments as a list, follow these steps:
1.
2.
3.
4.
Open any screen.
From the navigation panel on the left, click Departments.
The Department List screen will open.
View or edit records.
Or you may follow these steps:
1.
2.
3.
4.
Open the Employee List, Employee Detail , or Training Detail screen.
Double click on Department.
The Department List screen will open.
View or edit records.
Department Details
You may view or edit departments individually using the Depatment Detail screen. This screen
includes a list of the training required for each department, and a list of employees assigned to each
www.LibertyLabs.com
108 / 164
TRAIN TRACK User Manual
department. Use the arrows at the bottom to navigate through the records, or right-click on any field
to sort or find by that field. To return to the list of all departmens, click on Open Department List.
To view or edit department details, follow these steps:
1.
2.
3.
4.
5.
Open the Department List screen.
Locate the department to view or edit.
Double-click on the Department.
The Department Detail screen will open.
View or edit records.
To view employees assigned to a department, follow these steps:
1.
2.
3.
4.
Open the Department List screen.
Locate the department to view.
Double-click on the Department.
View employees listed under Employees in this department.
Employees cannot be edited from this screen. To edit employee departments, please go to the
Employee Detail screen.
Add a Department
You may enter departments as you need them, or you may enter them all in advance.
You may import departments when you import employee data from Excel ®. Just include the
department in the appropriate column, and any new departments will be automatically added to your
list.
To add a new department, follow these steps:
1. Open the Department List screen.
2. At the bottom of the screen locate the blank line for a new record.
3. Type in the name of the new department.
Or you may follow these steps:
www.LibertyLabs.com
109 / 164
TRAIN TRACK User Manual
1.
2.
3.
4.
5.
Open the Department Detail screen.
At the bottom of the screen locate the navigation buttons.
Click New (>*).
A new (blank) department record will open.
Type in the name of the new department
Or you may follow these steps:
1.
2.
3.
4.
Open the Employee List, Employee Detail , or Training Detail screen, Required tab.
In Department, type in the name of the new department.
A dialog box will open.
To confirm the addition of the new department, click Yes.
Delete a Department
CAUTION: If you delete a department, it will no longer be displayed with any employees or trainings
that have already been associated with it.
To delete a department, follow these steps:
1.
2.
3.
4.
5.
Open the Department List screen to the record you wish to delete.
Right-click on the record.
A pop-up menu will open.
Select Delete Record.
You will be asked to confirm the deletion. Click Yes.
Or you may follow these steps:
1.
2.
3.
4.
5.
Open the Department Detail screen to the record you wish to delete.
Right-click on the record.
A pop-up menu will open.
Select Delete Record.
You will be asked to confirm the deletion. Click Yes.
Assign Departments to Employees
You may assign departments to employees from the Employee Detail screen.
To assign a department to an employee, follow these steps:
1. Open the Employee Detail screen to the correct employee record.
2. Select the Department from the list, or type in a new department.
To remove a department from an employee record, follow these steps:
1. Open the Employee Detail screen to the correct employee record.
2. Delete the text in the department field.
www.LibertyLabs.com
110 / 164
TRAIN TRACK User Manual
Assign Required Training by Department
You may assign required training for each department from the Training Detail screen, Required
section, or from the Department Detail screen.
To assign required training to a department, follow these steps:
1. Open the Department Detail screen to the correct department record.
2. Under Trainings Required for this Department , go to the bottom of a list to a new (blank)
record and select the Department.
3. This training will now be required for all employees assigned to this department.
Or follow these steps:
1. Open the Training Detail screen to the correct training record.
2. In the middle of the screen, select the category "Required" and the sub-category "By
Department".
3. Under Required Department, go to the bottom of a list to a new (blank) record and select the
Department.
4. This training will now be required for all employees assigned to this department.
To remove required training from a department, follow these steps:
1.
2.
3.
4.
5.
6.
Open the Department Detail screen to the correct department record.
Under Trainings Required for this Department , locate the training you wish to remove.
Right-click on the required training record.
A pop-up menu will open.
Select Delete Record.
Confirm the deletion.
Or follow these steps:
1. Open the Training Detail screen to the correct training record.
2. In the middle of the screen, select the category "Required" and the sub-category "By
Department".
3. Under Required Department , locate the department you wish to delete.
4. Right-click on the required department record.
5. A pop-up menu will open.
6. Select Delete Record.
7. Confirm the deletion.
www.LibertyLabs.com
111 / 164
TRAIN TRACK User Manual
SHIFTS, LOCATIONS AND EMPLOYEE TYPES
You may edit the drop-down menu lists for shifts, locations, and employee types. The data you enter
will then be available for selection.
View or Edit Shifts
You may view or edit shifts as a list using the Shift List screen. This screen allows you to easily
scroll through all shifts and add or edit records.
To view or edit shifts as a list, follow these steps:
1.
2.
3.
4.
Open the Start Menu, Setup tab.
Click Shifts.
The Shift List screen will open.
View or edit the text in the list of shifts.
Or you may follow these steps:
1.
2.
3.
4.
Open the Employee Detail screen.
Double click on Shift.
The Shift List screen will open.
View or edit the text in the list of shifts.
View or Edit Locations
You may view or edit locations as a list using the Location List screen. This screen allows you to
easily scroll through all locations and add or edit records.
To view or edit locations as a list, follow these steps:
1.
2.
3.
4.
Open the Start Menu, Setup tab.
Click Locations.
The Location List screen will open.
View or edit the text in the list of locations.
www.LibertyLabs.com
112 / 164
TRAIN TRACK User Manual
Or you may follow these steps:
1.
2.
3.
4.
Open the Employee Detail screen.
Double click on Location.
The Location List screen will open.
View or edit the text in the list of locations.
View or Edit Employee Types
You may view or edit employee types as a list using the Employee Type List screen. This screen
allows you to easily scroll through all employee types and add or edit records.
To view or edit employee types as a list, follow these steps:
1.
2.
3.
4.
Open the Start Menu, Setup tab.
Click Employee Types.
The Employee Type List screen will open.
View or edit the text in the list of employee types.
Or you may follow these steps:
1.
2.
3.
4.
Open the Employee Detail screen.
Double click on Employee Type.
The Employee Type List screen will open.
View or edit the text in the list of employee types.
www.LibertyLabs.com
113 / 164
TRAIN TRACK User Manual
TRAINING TYPES AND CLASS LOCATIONS
You may edit the drop-down menu lists for training types and class locations. The data you enter will
then be available for selection.
View or Edit Training Types
You may view or edit training types as a list using the Training Type List screen. This screen allows
you to easily scroll through all training types and add or edit records.
To view or edit training types as a list, follow these steps:
1.
2.
3.
4.
Open the Start Menu,Setup tab.
Click Training Types.
The Training Type List screen will open.
View or edit records.
Or you may follow these steps:
1.
2.
3.
4.
Open the Training Detail screen.
Double click on Type.
The Training Type List screen will open.
View or edit records.
View or Edit Class Locations
You may view or edit class locations as a list using the Class Location List screen. This screen
allows you to easily scroll through all class locations and add or edit records.
To view or edit class locations as a list, follow these steps:
1.
2.
3.
4.
Open the Start Menu, Setup tab.
Click Class Locations.
The Class Location List screen will open.
View or edit records.
Or you may follow these steps:
1.
2.
3.
4.
5.
Open the Training Detail screen.
In the middle of the screen, select the category "Classes" and the sub-category "Scheduled".
Double click on Location.
The Location List screen will open.
View or edit the text in the list of locations.
www.LibertyLabs.com
114 / 164
TRAIN TRACK User Manual
www.LibertyLabs.com
115 / 164
TRAIN TRACK User Manual
IMPORT DATA
The program allows you to import all of your data from a previous version, and to import additional
data at any time from another source.
To import data from a previous version of TRAIN TRACK® , see Setup.
Import data from another source
To import data from another source, you will need to first export it from the source application into an
Excel ® spreadsheet. From there, you may paste your data into the provided templates and
automatically import it into TRAIN TRACK®.
The types of data that you may import:
Employee records (including new job titles, departments. shifts, employee types and locations)
Training records
Training completion data (including new trainings and new employees)
Training requirements (including new training, employees, job titles,and departments)
If you have more than one type of data to import, it is best to import training and employee records
first and import requirements and completions second.
You may import all of your data when you first start using the program, and you may import additional
data at any time. Duplicate records will not be imported. When you import employee records, any
new job titles, departments, shifts, employee types or locations will also be imported and added to
the appropriate lists. When you import training completion records, any new employee or training
names will also be imported and added to the appropriate data sets.
NOTE: In order to be matched up with existing data, the training title, employee name, department, or
job title must be an exact match for the one already in the database. For example, if you try to
import data that includes an employee name with a space in front of it, the program will not recognize
this as a match for the existing record and it will insert it as a new record. In the illustration below, the
fourth record would be seen as a new employee name:
If you have data in an Excel ® file that you wish to import, follow the steps in the following sections. If
you have data in another program that you wish to import, you will need to first export it or save it to
an Excel ® file.
www.LibertyLabs.com
116 / 164
TRAIN TRACK User Manual
IMPORT EMPLOYEE RECORDS
The program allows you to import all of your data from a previous version, and to import additional
data at any time from another source.
You may import all of your data when you first start using the program, and you may import additional
data at any time. Duplicate records will not be imported. When you import employee records, any
new job titles, departments, shifts, employee types or locations will also be imported and added to
the appropriate selection lists.
Update Existing Records
Employee records may be imported as new records, or you may use the same import template to
update your existing employee records. When you import records that already exist, the program will
update the fields that have changed since your last import. This allows you to maintain your
employee information in the Excel sheet, or export it from another source, and easily update your
records in TRAIN TRACK®.
You may select to update employee records by linking them to existing records using the employee
name OR the employee ID number. Simply select one of these options during the import process
described below.
NOTE: In order to be matched up with existing data, the employee name or employee ID number
must be an exact match for the one already in the database. For example, if you are linking records
by employee name, and you try to import data that includes an employee name with a space in front
of it, the program will not recognize this as a match for the existing record and it will insert it as a new
record. In the illustration below, the fourth record would be seen as a new employee name:
Import Employee Template
The following fields are included in the import template.
Last Name: Required
First Name
Status (Active or Inactive)
Employee Number: Alphanumeric
Deptartment
Supervisor Last Name
Supervisor First Name
Shift
Location
www.LibertyLabs.com
117 / 164
TRAIN TRACK User Manual
Job Title (you can only import one job title per employee)
Employee Type
Email
Phone
Home Phone
Cell Phone
Start Date
End Date
Address
Date of Birth
Social Security Number
Other: User-defined
Linked Document: Hyperlink to a file or folder
You will need to paste your data into the existing columns. Tip: re-arrange the columns in your
source file to match the template, then copy and paste the entire block of data at once. Paste your
data below the column headings, and do not delete the column headings. If you do not have any
data for some of the columns, just leave them blank.
If you are using the template to update existing records, the fields that are different will be updated.
Blank fields will not be updated.
Import Employee Records
If you have data in an Excel ® file that you wish to import, follow the steps below. If you have data in
another program that you wish to import, you will need to first export it or save it to an Excel ® file.
To import employee records from another source, follow these steps:
1.
2.
3.
4.
From any screen, click Import Data from the navigation pane on the left.
The Import screen will open.
Click Import Employee Records.
The import dialog will open.
5. Click Browse.
www.LibertyLabs.com
118 / 164
TRAIN TRACK User Manual
6. A browse box will open. Select the location where you want to save your template, and click
OK.
7. Click Open Template to open the template file in Excel®.
8. Paste in your data. You will need to paste your data into the existing columns. Tip: re-arrange
the columns in your source file to match the template, then copy and paste the entire block of
data at once. Paste your data below the column headings, and do not delete the column
headings. If you do not have any data for some of the columns, just leave them blank.
9. Close and Save the file.
10. Return to TRAIN TRACK ™. Select to match any existing employees by Name or ID Number. If
you use names, the names have to match exactly. We recommend that you use ID numbers
when possible.
www.LibertyLabs.com
119 / 164
TRAIN TRACK User Manual
11. Click Import.
12. You will see a message indicating the number of records imported. Click Close.
www.LibertyLabs.com
120 / 164
TRAIN TRACK User Manual
IMPORT TRAINING RECORDS
The program allows you to import training records at any time from another source. Duplicate
records will ot be imported, and your existing records can be updated with information from the new
records. NOTE: In order to be matched up with existing data, the training title must be an exact
match for the one already in the database.
You may import training records by pasting the following columns into the template:
Training Name: Required
Training Number
Revision
Type
Hours
ExamRequired: yes/no
Months to Expire: The number of months before the training expires.
Release Date
Description
Status
Import data from another source
To import data from another source, you will need to first export it from the source application into an
Excel ® spreadsheet. From there, you may paste your data into the provided templates and
automatically import it into TRAIN TRACK®.
If you have data in an Excel ® file that you want to import, follow the steps below. If you have data in
another program that you wish to import, you will need to first export it or save it to an Excel ® file.
To import training records from another source, follow these steps:
1. From any screen, click Import Data from the navigation pane on the left.
2. The Import screen will open.
3. Click Import Training Records.
www.LibertyLabs.com
121 / 164
TRAIN TRACK User Manual
4. The import dialog will open.
5. Click Browse to locate a folder to export the template to.
6. A browse box will open. Select a location to save your template, and click OK.
7. Click Open Template to open the template file in Excel®.
8. Paste in your data. You will need to paste your data into the existing columns. Tip: re-arrange
www.LibertyLabs.com
122 / 164
TRAIN TRACK User Manual
the columns in your source file to match the template, then copy and paste the entire block of
data at once. Paste your data below the column headings, and do not delete the column
headings. If you do not have any data for some of the columns, just leave them blank.
9. Close and Save the file.
10. Return to TRAIN TRACK ™ and click Import.
11. You will see a message indicating the number of records imported. Click Close.
www.LibertyLabs.com
123 / 164
TRAIN TRACK User Manual
www.LibertyLabs.com
124 / 164
TRAIN TRACK User Manual
IMPORT COMPLETION RECORDS
The program allows you to import training completion records at any time from another source. If
there are new training records or new employee records in your import, they will also be added to
the appropriate data tables. Duplicate completions will not be imported. NOTE: In order to be
matched up with existing data, the training title must be an exact match for the one already in the
database.
You may import training completion records by pasting the following columns into the template:
TrainingName
LastName
FirstName
DateComplete: mm/dd/yyyy
DateExpires: mm/dd/yyyy. Leave blank if you want it calculated.
Paid: Currency
Score: Number
Pass: yes/no
Import data from another source
To import data from another source, you will need to first export it from the source application into an
Excel ® spreadsheet. From there, you may paste your data into the provided templates and
automatically import it into TRAIN TRACK®.
If you have data in an Excel ® file that you wish to import, follow the steps below. If you have data in
another program that you wish to import, you will need to first export it or save it to an Excel ® file.
To import training completion records from another source, follow these steps:
1.
2.
3.
4.
From any screen, click Import Data from the navigation panel on the left.
The Import screen will open.
Click Import Training Completion Records.
The import dialog will open.
5. Click Browse.
6. A browse box will open. Select the location where you want to save your template, and click
OK.
www.LibertyLabs.com
125 / 164
TRAIN TRACK User Manual
7. Click Open Template to open the template file in Excel®.
8. Paste in your data. You will need to paste your data into the existing columns. Tip: re-arrange
the columns in your source file to match the template, then copy and paste the entire block of
data at once. Paste your data below the column headings, and do not delete the column
headings. If you do not have any data for some of the columns, just leave them blank.
9. Close and Save the file.
10. Return to TRAIN TRACK ™. Select to link employee records by Name or ID Number. If you
select Name, the names must match exactly. We recommend using ID Number when possible.
11. Click Import.
www.LibertyLabs.com
126 / 164
TRAIN TRACK User Manual
12. You will see a message indicating the number of records imported. Click Close.
www.LibertyLabs.com
127 / 164
TRAIN TRACK User Manual
IMPORT REQUIREMENTS
The program allows you to import training requirements at any time from another source. Any new
training, employee, job title, or department records will also be added to the appropriate data tables.
NOTE: In order to be matched up with existing data, the training title, employee name, department, or
job title must be an exact match for the one already in the database.
You may import training requirements by pasting the following columns into the template:
Training
Department
Job Title
Last Name
First Name
The first column is for the required training. The sheet has columns for department, job title, and
individual--but you only need to list ONE of these next to the training. If the training is required for a
department, just list the department. You do not need to also include each employee and job title in
the department. For example, your sheet may look like this:
Note that "Chris Smith" is NOT an Administrative Assistant, those are two separate requirements.
Next to each training, you can list a department, job title, or an individual by last and first name. It's
ok to have data in more than one column, and it's ok to list each training several times with different
requirements next to it.
Import data from another source
To import requirements from another source, you will need to first export it from the source
application into an Excel ® spreadsheet. From there, you may paste your data into the provided
template and automatically import it into TRAIN TRACK®.
If you have data in an Excel ® file that you want to import, follow the steps below. If you have data in
another program that you wish to import, you will need to first export it or save it to an Excel ® file.
To import training requirements from another source, follow these steps:
1.
2.
3.
4.
5.
6.
From any screen, click Import Data from the navigation pane on the left.
The Import screen will open.
Click Import Training Requirements.
The import dialog will open.
Click Browse.
A browse box will open. Select a location to save your template, and click OK.
www.LibertyLabs.com
128 / 164
TRAIN TRACK User Manual
7. Click Open Template to open the template file in Excel®.
8. Paste in your data. You will need to paste your data into the existing columns. Tip: re-arrange
the columns in your source file to match the template, then copy and paste the entire block of
data at once. Paste your data below the column headings, and do not delete the column
headings. If you do not have any data for some of the columns, just leave them blank.
9. Close and Save the file.
10. Return to TRAIN TRACK ™ and click Import.
11. You will see a message indicating the number of records imported. Click Close.
www.LibertyLabs.com
129 / 164
TRAIN TRACK User Manual
EXPORT DATA
The program allows you to export data to Excel ® or other standard file formats in order to format it
yourself or combine it with other data. You may export any report, including reports created with the
custom report filter, or you may export sets of records (all required training, all completed training, all
employees, or all training records).
Export Standard Reports
To export a report from the Standard Report Menu, follow these steps:
1. Open the report menu and select the report you wish to export.
2. Click Export to File.
3. If the report includes a date range, the date range selection box will open. Select your date
range and click Export to File.
4. A dialog box will open to allow you to specify the type of file you would like to export to. Note:
you may have different file types available from those pictured, depending on your Windows
environment and how your system is configured.
5. Select a file type and click OK. A browse box will open.
www.LibertyLabs.com
130 / 164
TRAIN TRACK User Manual
6. Select the folder where you want to export the data. You may select any folder to export to, but
you will need to remember where you exported the data so that you can find it later.
7. Click OK.
8. A message box will confirm that the report was exported.
Export from Custom Report Filter
To export a report from the Custom Report Filter, follow these steps:
1. Open the Custom Report Filter screen and select the data you want in your report.
2. Click Export to File.
3. Follow steps 4 to 8 above.
Export Data to Excel®
You may export four different sets of data:
Required training status: a list of each required training for each employee, and the current
status.
Completed training: a list of all training completions, required or not, including training
completed multiple times, and inactive training and employees.
Training list: all training records.
Employee list: all employee records.
To export data to Excel®, follow these steps.
1. Open the Report Menu, Export/Email tab.
2. Click the button for the data you wish to export.
3. The Export Dialog will open. Click Browse.
4. A browse box will open. Select the folder where you want to export the data. You may select any
folder to export to. You will need to remember where you exported the data so that you can find
it later.
5. Click OK.
www.LibertyLabs.com
131 / 164
TRAIN TRACK User Manual
6. Click Export.
7. The location the file was exported to will be dispalyed.
8. Click Close.
www.LibertyLabs.com
132 / 164
TRAIN TRACK User Manual
REPORTS
TRAIN TRACK ® includes a variety of standard reports, and a custom report filter that allows you to
filter for any criteria from multiple fields, and view or export your results.
For information on exporting reports to other file formats, please see the Export Data section.
Report Menu
The Report Menu displays the available standard reports which you may view, print, or export.
Report functions are organized under tabbed pages:
Standard
Export/Email
Audit Trail
To view the report menu, follow these steps:
1. Open any screen.
2. From the Navigation Pane, select Report Menu.
3. The Report Menu will open.
On the Reports tab, the standard reports are listed. You may move reports you use often to the top
of the list by marking them as favorites. Standard report data includes:
Favorite?: This column shows which reports you have marked as favorites. Your favorites are
displayed at the top of the list.
Report Title
Description
Date Range?: This column indicates if the report is based on a date range that you specify.
Rqd Only?: This column indicates if the report only includes training that is required, or
www.LibertyLabs.com
133 / 164
TRAIN TRACK User Manual
includes all training.
Status: This column lists the training completion statuses included in the report.
Status key:
N = Needed
S = Scheduled
C = Completed
F = Failed
E = Expired
I = Inactive (Inactive training and inactive employees are included)
Favorites
To mark a report as a favorite, follow these steps:
1. From the Report Menu, select the report.
2. Click Mark as Favorite.
To remove a report from favorites, follow these steps:
1. From the Report Menu, select the report.
2. Click Remove from Favorites.
View or Print Reports
To view a report, follow these steps:
1. From the Report Menu, select the report.
2. Click View Report.
3. If it is a date range report, a screen will open where you may select the date range for the
report, and then click View Report.
To print a report, follow these steps:
1. From the Report Menu, select the report.
2. Click Print Report.
3. If it is a date range report, a screen will open where you may select the date range for the repor,
www.LibertyLabs.com
134 / 164
TRAIN TRACK User Manual
and then click Print Report.
Using Your Logo on Reports
The program allows you to specify a logo image to include on all of your reports in place of the
default TRAIN TRACK ® logo. The logo will need to be saved to each workstation using the
program. If you wish to save the existing logo, rename the existing file before placing your logo in the
directory.
To set up your own logo for reports, follow these steps:
1. Create your logo in .jpg format, no larger than 80 x 320 pixels.
2. Save your logo to C:\Program Files\TRAINTRACK\logo.jpg.
Page Setup
To change the page setup, paper size, and printer, open the report and select Page Setup from the
menu bar.
Report Matrix
From the report menu, you may view the report titled "Report Matrix" to see what's included on each
report.
www.LibertyLabs.com
135 / 164
TRAIN TRACK User Manual
STANDARD REPORTS INDEX
Standard reports available through the Report Menu:
Classes
Class Registration by Date: Employees registered for classes in date range.
Class Registration by Training: Employees registered for classes in date range.
Class Sign-In Sheet: A sign-in sheet listing all employees that can be used for any training.
Class Sign-In Sheet with Barcode: A sign-in sheet listing all employees that can be used for
any training, with barcodes to scan in to easily record completions.
Classes Scheduled by Date: Classes scheduled in date range.
Classes Scheduled by Instructor: Classes scheduled in date range for each instructor.
Classes Scheduled by Location: Classes scheduled in date range for each class location.
Trainers Approved: Iinstructors approved for each training.
Complete (with status "Complete")
Complete by Department: Status "Complete" for each deparatment.
Complete by Employee: Status "Complete" for each employee.
Complete by Training: Status "Complete" for each training.
Complete by Training Type: Status "Complete" for each training type.
Complete Percent by Department: Percent of required training completed by department.
Complete Percent by Department with Chart: Percent of required training completed by
departmentwith chart.
Completed In Date Range
Completed by Department: Completed for each department in date range.
Completed by Employee: Completed for each employee in date range.
Completed by Employee Location: Completed for each employee location in date range.
Completed by Employee Type: Completed for each employee type in date range.
Completed by Employee / TrainingType: Completed for each employee and training type in
date range.
Completed by Job Title: Completed for each job title in date range.
Completed by Other: Completed for each user defined category in date range (this report will
group records according to the data you enter in the "other" field on the employee detail
screen).
Completed by Shift: Completed for each shift in date range.
Completed by Supervisor: Completed for each supervisor in date range.
Completed by Training: Completed for each training in date range.
Completed by Training Summary: Completed for each training in date range with chart.
Complete with Electronic Signature: Records with electronic signatures.
Training Due
Due by Department: Due within date range for each department.
Due by Employee: Due within date range for each employee.
Due by Month: Due within date range for each month.
Due by Training: Due within date range for each training.
Employees
www.LibertyLabs.com
136 / 164
TRAIN TRACK User Manual
Employee Roster: All employees.
Employee Supervisors: Supervisors and their employees.
History
History by Employee: History of all training activity by employee.
History by Training: History of all training activity by training.
Requirements
Required by Employee: Required training by employee.
Required by Training: Required employees by training.
Requirements by Department: Requirements for each department.
Requirements by Job Title: Rrequirements for each job title.
Requirements by Training: Roles required for each training.
Status
Status by Department: Status of required training for each department.
Status by Employee: Status of required training for each employee.
Status by Job Title: Status of required training for each job title.
Status by Training: Status of required training.
Status by Training Summary: Chart showing total for each status.
General
Report Matrix: Report parameters.
Training List: All training.
Additional reports are available from the employee and training record screens:
Individual Employee Summary Report
Individual Employee Status Report
Individual Employee History Report
Individual Training Status Report
Individual Training Complete Report
Individual Training History Report
Class Roster
Class Sign-in Sheet (selected class).
Class Sign-in Sheet (selected training).
Class Sign-in Sheet (required employees for selected training).
Completed Electronic Exam
Paper Exam
www.LibertyLabs.com
137 / 164
TRAIN TRACK User Manual
CUSTOM REPORT FILTER
TRAIN TRACK ® allows you to search all of your records and view or export the results using the
custom report filter. You may specify any criteria from multiple fields in the database. The results can
be viewed in a formatted report, or exported to Excel®. Instructions for using this screen are
provided below, as well as some example searches below the instructions.
Create a Report
To open the custom report filter screen, follow these steps:
1. Open the Report Menu.
2. Click Custom Report Filter. (Note: you may also open the filter from the button on the Start
Menu, View tab.)
3. The custom report filter screen will open.
To select your criteria, follow these steps:
1. Select the records to search.
www.LibertyLabs.com
138 / 164
TRAIN TRACK User Manual
2. Select the first field to search, select the operator, and enter the search criteria.
3. Select "And" or "Or" and select the second field to search, select the operator, and enter the
search criteria.
4. Select the date range (or leave blank for all dates).
5. Select your report.
6. Click View Report or Export to Excel.
Example A: Search from your completed training records to find out which employees from the
Facilities department completed the "Hazardous Materials" training.
www.LibertyLabs.com
139 / 164
TRAIN TRACK User Manual
Example B: Search from your scheduled classes to find out which employees from the Facilities
department, or with a job title that contains "Manager", are scheduled for a class during the
next month.
Example C: Search your employee records to find employees who started working in 2009 or
later.
www.LibertyLabs.com
140 / 164
TRAIN TRACK User Manual
View Results in a Formatted Report
To view the results of your search in a formatted report, select the report from the list before you
click "View Report". Select a report that reflects the choices you made in your search criteria. For
example, if you are searching completed training records, you would most likely select the
"Completed by Employee" or "Completed by Training" report.
Export Results to Excel
To export the results to Excel®, click Export to Excel. The exported data will be the same data as
you would see in the formatted report, but you will be able to work with it or use it for other purposes
from Excel®.
www.LibertyLabs.com
141 / 164
TRAIN TRACK User Manual
EMAIL REPORTS
The program allows you to email reports to supervisors, employees, or to a list of recipients. In order
to be able to send email to supervisors or employees, you must first enter the email addresses and
associate the correct employees with each supervisor.
For emails that are sent automatically, please see Automated Email .
You may also export any report to a standard file format (i.e. Excel ® or as a text file) and then send it
to any email recipient. For more information, please see Export.
To set up supervisors and employees for email reports, follow these steps:
1. Open the Employee Detail screen to the correct employee record.
2. Select the Supervisor.
3. Select the category "Employee Info" and the sub-category "HR".
4. Enter the email address.
5. Navigate to the next record and repeat step 2 to 4.
To email reports to supervisors, follow these steps:
1.
2.
3.
4.
Open the Report Menu, Export/Email tab.
Click To Supervisors Only.
A box will open listing each supervisor, and the trainings due for their subordinates.
Click Send to Selected Supervisor or Send to All Supervisors.
Note: Some versions of Outlook may require you to verify each email being sent.
www.LibertyLabs.com
142 / 164
TRAIN TRACK User Manual
To email reports to employees, follow these steps:
1.
2.
3.
4.
Open the Report Menu, Export/Email tab.
Click To Employees Only.
A box will open listing each employee, and the trainings due.
Click Send to Selected Employee, or Send to AllEmployees.
Note: Some versions of Outlook may require you to verify each email being sent.
To send email to a list of recipients, follow these steps:
1. Open the Report Menu, Export/Email tab.
2. Click To a List of Recipients.
3.
4.
5.
6.
7.
The send dialog will open.
Type in the email addresses to send to.
Enter the number of days due within to include.
Click OK.
An email dialog will open to allow you to customize and send the email messages.
www.LibertyLabs.com
143 / 164
TRAIN TRACK User Manual
AUTOMATIC EMAIL NOTICES
The program may be configured to automatically send email notices using an SMTP mail server. The
program can send notices of training that will expire within a specified number of days, notices of
scheduled training as soon as it is scheculed, and reminders of training scheduled within a specified
number of days.
To set up automatic email notices, follow these steps:
1. From the Report Menu screen, Export/Email tab, click configure automatic email.
2. Enter the name of your outgoing SMTP mail server (this will be unique for your organization.
Please check with your IT representative for help).
3. Enter your mail account login name and password.
4. Enter the mail from address.
5. Enter the address to send email alerts to when there are failed login attempts.
6. Enter your server port.
7. Select if your server requires authentication.
8. Click send test message. You will see a confirmation that the email was sent. Check your email
for the test message to confirm that your settings are correct.
9. Check each box for the type of notices you want sent. Enter the number of days, and edit the
message text if desired. You may also view the records to be sent, and send them now. If you
do not send them now, they will be automatically sent each day when the program is in use.
www.LibertyLabs.com
144 / 164
TRAIN TRACK User Manual
AUDIT TRAIL
TRAIN TRACK® includes an audit trail feature, available through both the client user interface and
the web user interface. The standalone (desktop) edition does not include the audit trail feature. If
you need the audit trail, you may upgrade to the client/server edition.
Each time a user adds, edits, or deletes a record, this information is saved to the audit trail. The
audit trail includes the date of the change, the user making the change, the type of change, the
record being changed, the old value, and the new value. Audit trail records include sequential ID
numbers generated by the program which can't be modified, and a date and time stamp.
The audit trail also records adding, editing, or deleting users, and changes to user access levels. It
records each time a user logs on or off, enters the wrong password, or changes their password. If a
user enters the wrong password 3 times, an automatic email alert is sent to the administrator (see
Automatic Email ).
The audit trail filter allows users to filter audit trail records for viewing. Users may view a history of all
changes to a record, all new records, all deleted records, and other combinations of records. Users
can trace changes, and use the information to restore data that was accidentally changed or deleted.
Users may also restore deleted employee records and deleted training records through the audit
trail.
The process of saving changes to the audit trail runs at the database level, not the user interface.
This allows all changes to the database to be captured, regardless of how the changes were made
or which interface was used.
Data Included in the Audit Trail
The audit trail captures additions, edits and deletions to:
Class Enrollments
Employee Records
General Employee Information
Additional Job Titles
Required Training
Exceptions
Parent/Child Module Requirements
Required Departments
Required Individuals
Required Job Titles
Series Requirements
Users
User Accounts and Access Levels
Setting or Resetting Passwords
User Login and Logout
User Login Failure
Training Completions
Training Records
www.LibertyLabs.com
145 / 164
TRAIN TRACK User Manual
The audit trail DOES NOT record information about changes to records that are not directly related
to training requirements:
Classes
Approved Trainers
Scheduled Classes (unless employees are enrolled)
Employees
Employee HR Information
Employee Notes
Employee Skills
Lookup Lists
Class Location Lookup List
Department Lookup List
Employee Type Lookup List
Job Title Lookup List
Location Lookup List
Shift Lookup List
Training Type Lookup List
Training
Exam Questions and Answers
Training Notes
Training Revisions (these are tracked within the program)
Validation and Compliance
In order to maintain the integrity of the audit trail, users cannot have access to the data tables
outside the user interface. During an audit (or a self-audit), you will need to demonstrate that the
people who have access to the database are not users of the application. You will also need to
demonstrate that you are following the user name and password policies, and that each user has a
separate Windows login name and password, and that users do not reveal their passwords to others.
For the employees logging on to take exams, each employee will need to set their password the first
time they log in. All employees should be required to log in for the first time under the
supervision of a manager who has already established the identity of each employee. This
will ensure that the company has established the identity for each person being assigned an
electronic signature.
Deleted Records
Deleted training records and employee recordsmay be restored by administrator users from the
Report Menu, Audit Trail tab.For more information please see the training detail or employee detail
page.
Email Notification of Failed Logins
www.LibertyLabs.com
146 / 164
TRAIN TRACK User Manual
You may configure your application to automatically send alert emails to a designated email address
when a user enters the incorrect password 3 times in a row. For more information, see Automatic
Email Notices.
www.LibertyLabs.com
147 / 164
TRAIN TRACK User Manual
VIEW AUDIT TRAIL RECORDS
You may view audit trail records from the Report Menu, Audit Trail tab. You may also export the
records to Excel ®.
View Record Changes
Under View Record Changes , you may select from a variety of criteria to filter the data. You may
select to:
View all records
Filter by record type (training, employee or completion)
Display all changes to an individual training or employee record
Filter by change type (add, edit or delete)
Display all changes made by a specific user
You may also filter for a date range within any of the above selections. You may select to either view
the results, or export them to Excel ®.
To view record changes, follow these steps:
1. From the Report Menu, go to the Audit Trail tab.
2. Click View Record Changes. A dialog box will open.
3. Select the filter type. If you select to filter for employee records or training records, you may
select an individual record. For example, you may see all changes concerning the "Workplace
Safety" training, or all changes for one employee.
4. Enter the date range. Keep in mind that it is a date and time stamp, so to see all records for a
specific date, you need to set the range for the following date.
5. Click View Records or Export.
www.LibertyLabs.com
148 / 164
TRAIN TRACK User Manual
If you change the filters at the top, click View Records to update the data below.
View User Logins
Under View User Logins, you may view each login event:
User login
User logout
Login failure
Set or reset password
To view user logins, follow these steps:
1. From the Report Menu, go to the Audit Trail tab.
2. Click View User Logins.
3. The view login screen will open.
4. Select the filter type.
5. Enter the date range. Keep in mind that it is a date and time stamp, so to see all records for a
specific date, you need to set the range for the following date.
6. Click View Records or Export.
If you change the filters at the top, click View Records to update the data below.
www.LibertyLabs.com
149 / 164
TRAIN TRACK User Manual
ELECTRONIC SIGNATURES
TRAIN TRACK ® includes the ability to add an electronic signature to a record. Electronic Signatures
are intended to be the legally binding equivalent of traditional handwritten signatures. An Electronic
Signature verifies that the owner of the signature submitted the record. Electronic signatures require
password verification. The signature record includes the signer's name, date, and the meaning of the
signature, and each signatue is linked to one database record.
When an employee completes an exam, or verifies that they have completed a training, they are
asked to add an electronic signature to the record.
The employee must confirm the signature by entering their password.
Once a record has been signed with an electronic signature, it can't be edited. If you try to edit a
signed record, you will see a message telling you that you can't edit a signed record.
www.LibertyLabs.com
150 / 164
TRAIN TRACK User Manual
EXAM MENU
An employee who is not listed as a user for TRAIN TRACK® will see the Exam Menu screen when
they log in to the program. This screen provides access to viewing their own status, taking exams,
and related functions.
Logging in as an Exam User
When and Exam-level user opens TRAIN TRACK ®, the user will need to log in to the program with
a user name and password.
To log in as an Exam user, if you have not yet set your password, follow these steps:
1. Open the program. In the dialog box, select your user name.
2. A box will open prompting you to set your password.
www.LibertyLabs.com
151 / 164
TRAIN TRACK User Manual
3. Type in your password. Type it in again to confirm.
4. Click OK.
Your password must be at least 6 characters in length.
To log in as an Exam user, if you have already set your password, follow these steps:
1. Open the program. In the dialog box, select your user name.
2. Type in your password and click OK.
View My Training Status
Exam-level users may view their own training status. This screen will display all required training,
and the completion status of each. The user may also click on any hyperlinks you have saved with
your records to open related documents.
To view your own training status, follow these steps:
1. Log in to the program.
2. From the Exam Menu, click View My Training Status.
3. When finished, click close.
View Training Documents
Users may view any documents that you have linked to the training records.
To view training documents, follow these steps:
1. Log in to the program as an Exam user.
www.LibertyLabs.com
152 / 164
TRAIN TRACK User Manual
2.
3.
4.
5.
From the Exam Menu, click View Training Documents.
The list of training and linked documents will open.
Click on the link for the document you wish to view.
When finished, click close.
Take and Exam or Record Training Completed
Users may take an electronic exam by clicking the "Take an Exam or Record Training Completion"
button from the Exam Menu. For more details, see Exams.
Change My Password
Users may change their passwords at any time.
To change your password, follow these steps:
1.
2.
3.
4.
5.
Log in to the program as an Exam user.
From the Exam Menu, click Change My Password.
Type in your old password.
Type in your new password. Type it in again to confirm.
Click OK.
Your new password cannot be the same as your old password.
Open in Administrator Mode
If you are an authorized user, but only see the ecam menu when you log on, you may open the
program in administrator mode by entering your registration code.
www.LibertyLabs.com
153 / 164
TRAIN TRACK User Manual
EXAMS
You may allow employees to take exams electronically and have the results automatically scored and
stored with their employee record. To allow users to take exams electronically, you will need to set
up the exams and the users. On the Training Details screen, the Exam Required box must be
checked in order for the exam to be available electronically, and the questions and answers for the
exam must be entered. The Training Detail screen, Exam section displays the questions and
answers for the electronic exams for each training.
The Training Detail screen, Exam section contains:
Exam Type
Method
Passing Score
Note
Exam Questions
Possible Answers
For help on setting up exams, please see Training Records, Exams .
Take an Exam using an Electronic Signature
To open the exam screen, follow these steps:
1. From the Exam Menu screen, click Take an Exam or Record Training Completion.
2. The Exam screen will open.
To take an exam electronically, follow these steps:
1. Select an Exam.
www.LibertyLabs.com
154 / 164
TRAIN TRACK User Manual
If there is a linked document to view, the link will appear next to the selected exam:
2. Click Start.
3. The exam questions will be displayed in the box below. With each question will be a list of
possible answers. Click on the box next to the correct answer.
4. Use the arrow to go to the next question. Repeat until all questions are answered.
5. A message box will tell you if you have reached the end of the exam. Click OK.
6. A box will open asking if you want to add an electronic signature. Click Yes.
7. Enter your password and click Yes.
www.LibertyLabs.com
155 / 164
TRAIN TRACK User Manual
The exam completion record will be saved with your electronic signature. Records with electronic
signatures can't be edited or deleted in the client/server edition.
www.LibertyLabs.com
156 / 164
TRAIN TRACK User Manual
TROUBLESHOOTING
Here are some tips for troubleshooting problems with your database. If you cannot resolve the issue,
customer support can be reached M - F 10:00 am to 5 pm Eastern Time at 619-284-8013, or by
email at [email protected]. Support is free for the first year after you purchase your license,
and you may extend your support by purchasing an annual support contract after the first year.
Multiple Users
For the standalone desktop edition only:
If multiple users are unable to open the database at the same time, please check the
following:
1. All users need to have full permissions for the folder where the database is stored. They need
to be able to create a file in that folder in order to create the .ldb file needed to run the
application.
2. If you have an Adobe® Acrobat® add-in installed in Access®, you will need to remove it.
3. Microsoft® Access® needs to be set to open in shared mode. Go to each computer, open
Access®, and go to Tools > Options > Advanced. Make sure the “Default open mode” is set to
“shared”.
4. When everyone has the database closed, look in the folder where the database is stored and
see if there is a file called “TRAINTRACKx.ldb. This will be a very small file. If you see this file,
delete it. This is the database locking file that should disappear when everyone closes the
database. IMPORTANT: Make sure the file you are deleting has the "ldb" file extension. If you
can't see the file extensions, go to your Windows® Explorer options screen and un-check the
box "hide extensions for known file types".
5. If the users are opening the program using a shortcut, try browsing to the file instead. If this
works, you can try deleting the existing shortcut and then creating a new separate shortcut for
each user (don’t copy and paste it, it has to be a new one for each user).
6. If you are unable to use a shortcut, open Access® first and go to File > Open, then open the
application.
7. In some cases, all users need to have the exact same permissions for the Windows® folder
where the database is stored.
8. If you are still unable to share the file, you might want to consider upgrading to the client/server
edition, where each user has their own copy of the user interface connected to a shared backend database. The client/server model is the preferred way to share the database.
Linked Files
If you are unable to open hyperlinks to .pdf files, follow these steps:
This is a Windows® setting. Set .pdf file types to be opened using Internet Explorer® and you will
be able to open the files. You will need to locate this setting based on the Windows® version you are
using.
www.LibertyLabs.com
157 / 164
TRAIN TRACK User Manual
SQL Server®
For the Client/Server edition only:
If you are unable to connect from the client to the server:
Make sure SQL Server ® is running.
Stop and re-start your SQL Server if you have made any changes.
Make sure you have correctly identified the server name in the ODBC connection.
From Linked Table Manager, try creating a NEW ODBC connection, and over-writing the
original one.
5. Make sure the user is listed as a user in SQL Server ®
1.
2.
3.
4.
1.
2.
3.
4.
5.
6.
7.
8.
9.
On your server, start SQL Server® Management Studio.
Click Connect (top left) and connect to your server.
From the tree at the left, select Security > Logins.
Right-click and select New Login.
Add the windows group that contains the users of your TRAIN TRACK® application. If you
do not have an appropriate group, then you will have to add the users individually.
In 'default database', select the database you want to have them automatically log into (this
will be “TRAINTRACK” if you installed it using the default name).
In user mapping, check the TRAIN TRACK® database. In database role membership,
check db_datareader and db_datawriter. This will give them read and write access to
that database.
To set up the ODBC connection, go to the client computer and set it up using Windows
authentication.
Now everyone in that windows group should be able to connect using windows
authentication. In the future when someone needs to have access, just add them to the
windows group and set up the ODBC connection on their workstation.
6. If you are using a group for login permissions and it is not working, try creating a login for an
individual user.
7. Check your driver under ODBC. The recommended driver is the SQL Native Client 10 or higher.
8. Make sure SQL Server ® is set to accept remote connections.
1. Open SQL Server ® > Configuration Tools > SQL Server ® Surface Area Configuration.
2. Under Surface Area Configuration for Services and Connections, click on remote
connections, and select to allow both TCP/IP and named pipes.
9. Make sure there is not a firewall blocking port 1433 or 1434.
10. Check to see if you have an error log file located at %ProgramFile%Microsoft SQL
Server/MSSQLxx.xxx/MSSQL/Log.
11. Verify that you are using the SQL Native Client driver, 10 for SQL 2008 or 11 for SQL 2012.
Web
www.LibertyLabs.com
158 / 164
TRAIN TRACK User Manual
For the web edition only:
1.
2.
3.
4.
Make sure the web server is running.
Make sure it is set to allow 32-bit applications.
Make sure .asp pages have been enabled.
Check your ODBC connection or your connection string.
Error Messages
No records found or there was an error printing your report
If you are sure there should be data for the report (you have training set up as
required and completed) it may be caused by not having a printer configured.
You need to have a printer set up even if you only want to view and not actually
print the reports, because the program needs to know how to set up the report
on the page.
Overflow
If you get an "overflow" error when importing data, this may be caused by having
some dates in your database that the computer can't recognize, such as
"1/1/122".
www.LibertyLabs.com
159 / 164
TRAIN TRACK User Manual
MODIFYING THE PROGRAM
Customizable License
The ability to modify the program requires the purchase of a special "Customizable Edition" license.
If you wish to modify the program, your existing license may be upgraded to the Customizable
Edition.
The Customizable Edition is an .mdb file which can be modified using Microsoft® Access®. Making
modifications to your program is recommended for advanced users. This guide does not provide
instructions on programming using Access® or Visual Basic® for Applications (VBA) ; you will need
to use the resources that come with Access® or that can be found on the web, and you may use
Answers for Access®, available as shareware from Liberty Labs.
Development Environment
DO NOT MAKE DESIGN CHANGES TO YOUR WORKING COPY OF THE DATABASE! Make a
copy of your database and make changes to the copy; that way you can go back to the original if
you encounter any problems. We recommend making a backup copy each time before you begin
making changes.
All changes should be documented and tested before going into production. Liberty Labs
will not be able to provide support if you do not follow these procedures.
After you have modified your copy of the program, and documented all changes, make another copy
to distribute to the users. You can make this an .mde file if desired. Be sure to keep your .mdb file so
that you can make additional changes as needed. You may then import your existing data when you
are ready to release your new version (select Import Data from the navigation pane).
Permitted and Restricted Uses
With the Customizable Edition, you may make functional modifications to the database for use within
your own company at one location. You may not remove the Liberty Labs logo or TRAIN
TRACK® trademark, or modify the "About" dialog. You may not distribute any part of the
software or code to anyone else. You may install a development copy of the software for making
modifications. Please see your license agreement for full details on restricted and permitted uses.
You may NOT:
- Rent, sublicense or lease the Software.
- Modify, translate, reverse engineer, decompile or otherwise disassemble the Software.
- Distribute the Software or any portion of the Software or any of its code to any other individual or
commercial concern.
- Remove or modify the LIBERTY LABS logo.
- Remove or modify the TRAIN TRACK® trademark.
- Modify the Software's "ABOUT" dialog.
- Copy the documentation.
www.LibertyLabs.com
160 / 164
TRAIN TRACK User Manual
- Re-purpose the application.
- Modify the program to be used for tracking unrelated data.
- Export or redistribute any portion of the product.
To assist with modifications, you may refer to the Software Design Specification. This document
provides detailed information about the design of the software, including table relationship diagrams,
report data sources, and a query index. It is included with the setup files.
Support
While we can provide technical support (if there is something wrong with the application or if you
need more information on a specific function), we cannot show you how to make changes to the
program. If you make changes that cause the program to function incorrectly, we cannot help you fix
these issues.
General
To make modifications, you need to be able to open objects in design view. You can do this by first
opening the object, then selecting View > Design View from the Functions toolbar. You can also
open objects in design view from the Navigation Pane in Access 2007 or 2010.
To open the Navigation Pane on Access 2007 or 2010, follow these steps:
1.
2.
3.
4.
5.
6.
7.
8.
9.
10.
11.
12.
Right-click on the gray area of the menu bar and select Functions.
A new toolbar will open allowing access to the database window and other functions.
Click Tools > Startup.
The startup properties box will open.
Check the box Allow built-in menus.
Close and re-open the database.
The ribbon will now be displayed.
Click the circle at the top right of the ribbon.
At the bottom of the pop-up window, select Access Options.
Select the tab Current Database.
Check Show navigation pane.
Close and re-open the database again.
Note: When the ribbon is open, you can find the TRAIN TRACK™ toolbars under "Add-ins".
To make an .mde file, follow these steps:
1. from the toolbar, select File > Save and Publish > Make MDE.
2. Select a location and file name to save the file and click Save.
3. Open the copy you plan to distribute, and from the toolbar, select File > Options > Current
Database. Un-check the boxes for any options you don't want the users to have.
4. Import your current data into the modified .mde file and complete your testing before you
distribute.
www.LibertyLabs.com
161 / 164
TRAIN TRACK User Manual
Reports
To add a report to the report menu, follow these steps:
1. Create and save your report.
2. Add the report name to tblReports. The exact report name needs to be in the "Name" column.
Add a title and description under the "Title" and "Desc." columns. You do not need to enter
anything in the other columns.
To create a new report by modifying an existing report:
1.
2.
3.
4.
5.
6.
7.
8.
9.
10.
Open the report you wish to modify.
Right-click and select Report Design. The report will open in design view.
Select File > Save as and save the report with a new name.
From the menu bar, select View > Properties (or double-click on the square at the top left
corner of the report). The properties box will open.
Select the Data tab.
Locate Record Source and click on the ellipse (...). The query that provides the data for the
report will open.
From the menu bar, select File > Save as and save the query with a new name.
Modify the query. For example, if you wish to add filtering criteria, add it to the criteria line below
the column.
Close and save. View your new report.
In tblReports, copy the line for the original report and paste it to a new line. Change the title,
description, and name to match your new report.
Adding Features
Add a New Requirement Category
1. To add a new requirement category (for example, to require training by Shift) you will need to
first add a column to store the required shifts in the table tblRqd.
2. Next, you will need to create a screen for the user to select the shifts and add them to this table.
You can copy on of the existing screens used to add another type of requirement.
3. To add your new child form to the training detail screen, you will need to list the new form in the
table tblScreen. Add the category and sub-category for the user to select, and the name of the
form.
4. You will then need to update the base query that determines the first level of requirements for
each employee, qryRqd. This is a union query, and you will be adding another union statement
onto the existing query to add shift requirements. You can copy one of the ones that are already
there and just change it to match your data.
Add another category selection to the Training Detail screen
To add another child form to the training detail screen, you will need to list the new form in the table
tblScreen. Add the category and sub-category for the user to select, and the name of the form.
www.LibertyLabs.com
162 / 164
Converted by Atop CHM to PDF Converter free version!
Add another category selection to the Employee Detail screen
To add another child form to the employee detail screen, you will need to list the new form in the
table tblScreenEmp. Add the category and sub-category for the user to select, and the name of the
form.
Add a new Field
To add a new field to a form, first add it to the record source for the form, then add it to the form.
Open the form in design view and open the properties box to determine the record source. If it is a
query, you will need to add the field to the underlying table, then add it to the query.
www.LibertyLabs.com
163 / 164
www.LibertyLabs.com
164 / 164