1
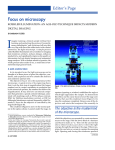
Research Scope
Instruction Manual
T-29031 Binocular Acromat Research Scope
T-29041 Trinocular Acromat Research Scope
T-29032 Binocular Semi-Plan Research Scope
T-29042 Trinocular Semi-Plan Research Scope
T-29033 Binocular Acromat Plan Research Scope
T-29043 Trinocular Acromat Plan Research Scope
T-29034 Binocular Infinity Achromat Research Scope
T-29044 Trinocular Infinity Achromat Research Scope
T-29035 Binocular Infinity Semi-Plan Research Scope
T-29045 Trinocular Infinity Semi-Plan Research Scope
T-29036 Binocular Infinity Plan Research Scope
T-29046 Trinocular Infinity Plan Research Scope
2
Thank you for purchasing a Ken-A-Vision Research Microscope. The modern
Ken-A-Vision research microscope is a professional laboratory instrument
designed for modern biology and medical science classrooms, clinical
experiments in biology, pharmacology, bacteriology, microbiology and
genetics. Its modular design allows for a full range of accessories. It has a
modern, ergonomic design with many advanced features so users can operate
the instrument conveniently and safely.
T-29031
T-29041
T-29032
T-29042
T-29033
T-29043
Halogen Light
12V 20 W
D
D
D
D
D
D
High Bright Köhler
Illumination
D
D
D
D
D
D
Low Coaxial Fine Focus
Scale 0.002mm
D
D
D
D
D
D
30° Inclined Binocular
55mm - 75mm
D
30° Inclined Trinocular
55mm-75mm
Eyepieces - 10X
D
D
D
D
D
D
D
D
D
D
D
Achromat
Achomat
Semi-Plan
Achomat
Semi-Plan
Achomat
Plan
Achomat
Plan
Achromat
Double layered
mechanical stage
180mm x 150 mm
D
D
D
D
D
D
Gimbaled N.A. 1.25
Abbé Condenser with
built-in Iris Diaphragm
and filters for Köhler
Illumination
D
D
D
D
D
D
DIN 4X, 10X, 40X,
100X Oil Objectives
3
T-29034
T-29044
T-29035
T-29045
T-29036
T-29046
Halogen Light
12V 20 W
D
D
D
D
D
D
High Bright Köhler
Illumination
D
D
D
D
D
D
Low Coaxial Fine Focus
Scale 0.002mm
D
D
D
D
D
D
30° Inclined Binocular
55mm - 75mm
D
30° Inclined Trinocular
55mm-75mm
Eyepieces - 10X
D
D
D
D
D
D
D
D
D
D
D
Achomat
Infinity
Achomat
Infinity
Semi-Plan
Infinity
Semi-Plan
Infinity
Plan
Infinity
Plan
Infinity
Double layered
mechanical stage
180mm x 150 mm
D
D
D
D
D
D
Gimbaled N.A. 1.25
Abbé Condenser with
built-in Iris Diaphragm
and filters for Köhler
Illumination
D
D
D
D
D
D
DIN 4X, 10X, 40X,
100X Oil Objectives
4
OPERATION
Illumination: On any light microscope, the ability to adjust light is probably
the most import element after the quality of the lens systems. The Ken-A-Vision
Research Microscope has 4 distinct mechanisms to adjust light intensity, and
thereby allowing for High Bright Köhler Illumination. The degree of light intensity needed depends on individual conditions such as specimen
density, contrast, translucence and staining, objective magnification and
individual users eyesight Avoid turning the light onto full brightness as this
shortens the life of the bulb.
Too little or two much light is rarely recommended. Light entering into the
objective from the sub-stage illuminator may be modified by:
• A Dimmer (Rheostat) switch on the bottom left side
• A Disc Iris diaphragm (Field Diaphragm) on the top of the illuminator
in the base
• A Disc Iris diaphragm (Condenser Diaphragm) mounted within the
Abbé Condenser
• Raising and lowering the condenser
The amount of light may also be manipulated by moving the gimbaled
condenser by using the three substage manipulating screws.
High Bright Köhler Illumination:
Köhler Illumination - Defined
Köhler illumination is a method to reduce an old problem of transmitted
light microscopes. The filament of illuminating bulb of the microscope is often
visible in the same plane as the sample, reducing resolution and sharp focus.
One simple, partial solution is to reduce the amount of light striking the
specimen, however reducing voltage to reduce light intensity may also reduce
the breath of wavelengths (hues) reaching the specimen. Various other
modifications have been done over time including opal bulbs, or placing a
glass diffuser lens in front of the bulb. Though all these techniques work to
some degree, they tend to reduce the quality (some wavelengths of light are
lost) or the amount of incident light. Köhler illumination can be created
on microscopes with quality diaphragms, a moveable (both horizontally and
vertically) condenser, and a variable light source. Uniformity of light is
essential to avoid shadows, glare, and inadequate contrast when taking
photomicrographs. Köhler illumination overcomes these limitations.
5
How to set up your Ken-A-Vision Research Microscope
for High Bright Köhler Illumination
•
•
•
•
•
•
•
•
Focus on the specimen with whatever objective desired for use.
Close the field diaphragm (located on top of the illuminator in the
base) to its most closed position - you may see the edges of the
diaphragm within the microscope field (they may be blurry).
Using the black condenser knob at the sub-stage back left of the
microscope, bring the edges of the field diaphragm into the best focus
possible.
Now using the condenser centering screws of the gimbaled mount, center
the image of the closed field diaphragm in the field of view. IMPORTANT
NOTE - There are three screws in the gimbals, the rear-most one on the
right side is a locking screw, not a positioning screw. Before making ANY
adjustments, loosen this screw and then center the image as described
above using the other two screws, one on the right and one on the left.
Lock the gimbals into position with the third screw.
Open the field diaphragm just enough so that its edges are just
beyond (outside) the field of view.
Now work with the condenser diaphragm by adjusting it to introduce
the desired amount of contrast into the sample. Be careful, too much
contrast can introduce artifacts into your view, and misrepresent what you
actually see in the specimen.
Finally adjust the light intensity to your comfort level. If available, it is better to use a neutral density filter in the filter holder (below the bottom
of the condenser) then severely reducing the light intensity. A neutral
density filter tends to block all wave lengths equally. Reduction of voltage to the light source, particularly with Tungsten lights, tends to alter the
actual wave spectrum being emitted by the light source and thereby the
hues of light actually being transmitted through the specimen to the
objectives.
Focus:
Place a specimen slide on the center of stage. Before looking into the
eyepieces and using either the 4X or 10X objectives with the 10X eyepiece,
raise the stage as high as possible.
While looking through the eyepieces, slowly rotate the coarse focus knob
(stage will lower). When image begins to appear, switch to using the fine focus
knob to obtain a sharp image. To switch to higher powers, rotate the
objectives clockwise (from right to left). When changing to other objectives,
the T-290XX objective lens is parfocal, and only a slight adjustment (if any) of
the fine adjust, will bring the image quickly into clear focus.
As you go up in power, the objectives are getting closer to the cover slip of the
specimen (the working distance is getting smaller). The 40X and above
6
objectives are all spring-loaded so they should slide onto the cover slip
WITHOUT any force. If you have to force the objecting into position, STOP,
your specimen and/or cover slip may be too thick, and you risk scratching the
objective and/or smashing the slide.
The tightness of the coarse focus knob has been adjusted at the factory. If it is
too loose (the stage falls automatically), please adjust the tension using the
coarse adjustment tension ring (located on the right side of the microscope,
between the coarse adjust knob and the body of the microscope. To tighten
the tension, turn the knob clockwise (towards the back), to loosen the tension
turn the knob counterclockwise (towards the front of the microscope) until a
suitable position is found. The stage should not move on its own as it sits
waiting for your next use.
Bulb replacement - (Replacement bulb is Ken-A-Vision
Part # T6V20WP)
IMPORTANT NOTE: Before replacing the lamp, turn OFF the power switch
and unplug from electrical source. Place microscope on its side or back,
exposing the bottom of the unit. Unscrew the knurled knob that is towards the
front of the unit to open the access door. (Be careful, if unit has been recently
used, knurled knob could be very hot). Pull lamp door down and remove
lamp by pulling straight out of socket. When replacing the lamp, do not touch
the glass of the bulb with bare hands, as the oil from your fingers can damage
the bulb and definitely will shorten the life of the bulb. Wear gloves or keep
the protective cover on the bulb during installation. Should you accidentally
put any fingerprints on the bulb, wipe then off carefully using a clean cloth.
7
Useful microscopy definitions and Research Scope
options
Objective Lenses
There are typically three types of objective lenses found on brightfield
microscopes - Achromat, semi-plan, and plan objectives.
To
understand the difference, realize that all microscope lenses are curved, which
results in an image that is slightly out of focus at the edges, and may produce
chromatic or spherical aberrations due to this curved shape.
Achromat Objective - An achromatic lens (achromat) is an objective
lens that is designed to limit the effects of chromatic and spherical
aberration (See notes below). Achromatic lenses are corrected by bringing
two wavelengths (typically red and blue) into focus in the same plane. An
objective that is Achromatic carries the implication (guarantee) that at least
60% of the field of view will have a quality flat focus.
Semi-Plan Objective - Semi-Plan objectives are guaranteed to have a
quality flat field of focus for 80% of the field of view. A Semi-Plan
Achromat lens is also corrected for chromatic aberrations, as described
above.
Plan Objective - Plan Objectives guarantee a quality flat field of focus for
100% of the field of view. A Plan Achromat lens will also have the same
corrections for chromatic aberrations as noted above. In Plan Objectives
when imaging the field, parts of the specimen at the edge of the visual field
are almost as well focused as those in the center. Straight lines on the
specimen appear straight throughout the visual field, without any aberrations.
Such microscopes are especially good for photomicrography. In general, the
better the plan field objective, the more expensive the lens.
Flat Field Objectives - As one looks at the field of view, there may be slight
blurring at the edge of the field. This edge blurring of Flat Field objectives is
slight and easily corrected by a small tweak of the fine focus knob as one looks
toward the edge of the field, or by moving the specimen so that the portion
that is at the edge is moved into the center of the viewing field. Flat Field
Objectives tend to be inexpensive when compared to Plan Field.
Plan Field versus Flat Field Objectives - Most educational, teaching
microscopes are Flat Field Objectives due to this cost difference.
Infinity - Infinity lenses - In microscopy, the term "infinity" means that the
objective lenses are designed to project their images to infinity, not to some
finite distance. Traditional brightlight microscopes had a "fixed" focal point at
8
160 mm established by standard in the 1800's. The infinity optical system
provides an "infinite" region of parallel light between objective and eyepiece,
pushing the image out approaching infinity
Aberrations - Chromatic, Achromatic or Spherical - Any change from
idealized and/or uniform light conditions coming through a
lens is called an aberration.
Chromatic aberration - White light is made up with all
the colors or wavelengths of the visible spectrum. These color
components travel through the lens at different wave lengths
and in doing so the lenses of the microscope may cause the
different colors to refract (bend from a straight line) at
different angles; This is called chromatic aberration.
Achromatic aberrations - Achromatic aberrations are
caused by distortions in the smoothness of the lenses. The
image appears blurry in places.
Spherical aberrations - Spherical aberration occurs
when the rays of light passing through the center of the lens
tend to focus on a different plane than those entering near
the edge of the lens. This is because the curvature of the
lens is not perfect. The variance in cost of microscopes, in
general, is often attributed to the cost of lenses needed to
cure this problem. Often the only way that these problems
can be overcome is by using a series of lenses, each lens
carefully being designed to counteract the aberrations of the
other lenses.
Phase Contrast microscopy - Phase contrast microscopy is an
illumination technique useful when looking at transparent specimens, which
because they lack color are difficult to visualize. This modification of the
microscope causes small phase shifts in the light passing through a transparent specimen and these shifts are converted into amplitude or contrast
changes in the wave lengths of the light being transmitted through the image
and up to the observer's eye.
9
CARE AND MAINTENANCE
Cleaning
The T-290XX Research Microscopes are precision instruments. Routine or
protective care and maintenance is highly recommended.
• Always wipe off any (immersion) oil from objectives, stage and condenser
immediately. More persistent dirt, such as fingerprints, grease and/or oil,
may be removed with soft cotton or lens tissue, lightly moistened with lens
cleaner.
• Frequently wipe off eyepieces, objective lenses and condenser lens with
high quality lens paper. Particularly remove any oils accumulated from
finger prints and hands resting on microscope parts.
• Dry objective lenses, condenser lens, and stage immediately after any
water spillage.
• Never leave the microscope with any of the objectives or eyepieces
removed as dust and debris will collect in tubes and on ends of eyepieces.
• Always protect the microscope with the dust cover when not in use.
• Store microscope in a dry environment, particularly avoid storing unit
where it may be exposed to any chemical volatiles or other airborne
corrosives.
Long Term Maintenance
All optical and mechanical equipment requires periodic servicing to keep it
performing properly. Ken-A-Vision recommends the user anticipate this need
by establishing a schedule of regular preventive maintenance to help to assure
long life and sustain optimum performance of your instrument. Such a
program of planned preventive maintenance should be done by qualified
trained personnel. This maintenance should include:
• A thorough cleaning of eyepieces and objective lenses
• Cleaning and checking for corrosion of retractable lenses
• Adjustment of all mechanical parts including the coarse and fine adjust,
tension adjustment, mechanical stage, 360° head rotation
• Electrical system -power cord (damage, fraying, other wear), check for
evidence of any wire or socket damage within the light bulb compartment
• Check for any rust or corrosion, other physical damage to the unit.
Ken-A-Vision has quality technicians on staff to repair and service your
microscopes.
Contact Ken-A-Vision at 1.816.353.4787 for more details.
10
Accessories
If you are interested in purchasing accessories or replacement parts for your
Research Scope, visit the Ken-A-Vision Web site, http://store.kenavision.com/
catalog/ or contact your local Ken-A-Vision Dealer.
11
Ken-A-Vision reserves the right to make design improvements and other changes in accordance with the
latest technology. There is no obligation to make changes in products already manufactured. Patents
Pending Copyright 2009 Ken-A-Vision Corporation.
5615 Raytown Road • Kansas City, MO 64133 U.S.A.
Tel.: 816-353-4787 • Fax: 816-358-5072
email:[email protected] • www.ken-a-vision.com
INS-SC29