1
User’s Guide
®
MobiSystems
OfficeSuite
For Symbian S60 SmartPhones
© Copyright Mobile Systems Inc, 2003-2006
All rights reserved. This manual and the programs referred to herein are copyrighted works
of Mobile Systems, Inc.
The information in this document is a subject to change without notice.
Mobile Systems, Inc. accepts no liability for loss or consequential loss from misuse or any
defect or failure of the programs howsoever arising.
© 2003-2006 Mobile Systems Inc.
MobiSystems® OfficeSuite and the MobiSystems® OfficeSuite logo are trademarks or
registered trademarks of Mobile Systems, Inc. in the U.S. and/or other countries. All rights
reserved.
Acrobat and PDF are trademarks of Adobe. All other brands and product names may be
trademarks or registered trademarks of their respective holders.
The TrueType support is based on the FreeType Project.
© 1996 - 2002 All rights reserved.
MobiSystems® OfficeSuite
• 2
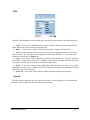
CONTENTS
CONTENTS ................................................................................................................................... 3
LICENSE AGREEMENT .................................................................................................................. 6
LICENSE AND DISTRIBUTION........................................................................................................ 6
RESTRICTIONS .............................................................................................................................. 6
NO WARRANTIES ......................................................................................................................... 6
LIMITATION OF LIABILITY ........................................................................................................... 6
GETTING STARTED ................................................................................................................... 7
SYSTEM REQUIREMENTS .............................................................................................................. 7
INSTALLATION AND UN-INSTALLATION....................................................................................... 7
Installing OfficeSuite................................................................................................................. 7
Un-installation........................................................................................................................... 8
REGISTRATION ............................................................................................................................. 8
OFFICESUITE FILE EXPLORER ........................................................................................... 10
BROWSING DIRECTORIES AND FILES ......................................................................................... 10
USING THE 5-WAY NAVIGATION BUTTON .................................................................................. 11
FILE EXPLORER MENU ............................................................................................................... 11
New.......................................................................................................................................... 11
File .......................................................................................................................................... 11
Send ......................................................................................................................................... 11
Register.................................................................................................................................... 11
About ....................................................................................................................................... 11
Exit .......................................................................................................................................... 11
TRANSFERRING FILES ................................................................................................................ 11
FILE FORMATS AND FORMAT CONVERTING .............................................................................. 13
TEXT FORMATS:.......................................................................................................................... 13
Spreadsheet formats: ............................................................................................................... 13
CHANGING THE FORMAT OF EXISTING FILES ............................................................................ 13
WORKING WITH TEXT DOCUMENTS................................................................................ 15
VIEW MODE ............................................................................................................................... 15
VIEW MODE MENU .................................................................................................................... 15
Edit Mode ................................................................................................................................ 15
File .......................................................................................................................................... 15
Full Screen .............................................................................................................................. 16
Search...................................................................................................................................... 16
Go to ........................................................................................................................................ 17
Zoom........................................................................................................................................ 17
Word Count ............................................................................................................................. 17
Options .................................................................................................................................... 18
Help ......................................................................................................................................... 18
Scrolling .................................................................................................................................. 19
EDITING DOCUMENTS ................................................................................................................ 20
EDIT MODE MENU ..................................................................................................................... 20
View Mode............................................................................................................................... 20
MobiSystems® OfficeSuite
• 3
File .......................................................................................................................................... 20
Edit .......................................................................................................................................... 21
Search...................................................................................................................................... 21
Go to ........................................................................................................................................ 22
Format ..................................................................................................................................... 22
Zoom........................................................................................................................................ 24
Word Count ............................................................................................................................. 24
Hyperlink ................................................................................................................................. 24
Insert........................................................................................................................................ 25
Bullets...................................................................................................................................... 25
Numbering ............................................................................................................................... 26
Picture ..................................................................................................................................... 26
Table........................................................................................................................................ 27
Page Breaks............................................................................................................................. 27
Bookmarks ............................................................................................................................... 28
Options .................................................................................................................................... 28
Preferences.............................................................................................................................. 29
Spelling Options ...................................................................................................................... 29
Dictionaries Management ....................................................................................................... 30
Help ......................................................................................................................................... 30
Registration ............................................................................................................................. 31
WORKING WITH WORKSHEETS AND WORKBOOKS ................................................... 32
EDIT MODE MENU ..................................................................................................................... 32
Edit Cell................................................................................................................................... 32
File .......................................................................................................................................... 33
Edit .......................................................................................................................................... 33
Insert........................................................................................................................................ 34
Search...................................................................................................................................... 35
Managing Worksheets ............................................................................................................. 36
Full Screen .............................................................................................................................. 36
Page Scroll .............................................................................................................................. 36
CELL FORMATTING .................................................................................................................... 36
Cell Format Types and Settings .............................................................................................. 37
Alignment................................................................................................................................. 38
Fonts........................................................................................................................................ 38
Hide ......................................................................................................................................... 38
Freeze ...................................................................................................................................... 38
Zoom........................................................................................................................................ 39
Column Width.......................................................................................................................... 39
Preferences.............................................................................................................................. 39
Register.................................................................................................................................... 39
Help ......................................................................................................................................... 39
WORKING WITH FUNCTIONS .............................................................................................. 40
INSERTING A FUNCTION.............................................................................................................. 40
FORMULA ERRORS ..................................................................................................................... 41
FUNCTION DESCRIPTIONS .......................................................................................................... 43
Math and Trigonometry........................................................................................................... 43
Database.................................................................................................................................. 48
Financial ................................................................................................................................. 50
Logical..................................................................................................................................... 54
Date and Time ......................................................................................................................... 55
Information.............................................................................................................................. 57
MobiSystems® OfficeSuite
• 4
Error Types.............................................................................................................................. 59
IS Functions............................................................................................................................. 60
N function values ..................................................................................................................... 60
Lookup and Reference ............................................................................................................. 61
Text and Data .......................................................................................................................... 65
MobiSystems® OfficeSuite
• 5
License Agreement
*** Please read this entire agreement ***
This End-User License Agreement (the "Agreement") is a legal agreement between you
("Licensee"), the end-user, and Mobile Systems Inc. ("Mobile Systems") for the use of the
MobiSystems® Docs software product ("Software"). By using this Software or any part of it,
you are agreeing to be bound by the terms of this Agreement. If you do not agree to the terms
of this Agreement do not install this Software.
License and Distribution
The evaluation copy of this Software is free of charge for 30 days trial period of time. You
must pay the license fee and register your copy to continue to use the Software and remove
the nag screen after this period.
The evaluation copy is fully functional except for the nag screen that slows the start up the
more times you start the program. You are allowed to make as many copies of this evaluation
version (in UNMODIFIED form) as you wish to distribute.
Restrictions
You may not nor permit anyone else to de-compile, reverse engineer, or disassemble,
modify, or create derivative works based on the SOFTWARE or the documentation in whole
or in part. You may not use the Software for any commercial purpose or public display,
performance, sale or rental. You may not use the Software to perform any unauthorized
transfer of information (e.g. transfer of files in violation of a copyright) or for any illegal
purpose.
No Warranties
This software and any related documentation is provided "as is" without warranty of any
kind.
Mobile Systems Inc. specifically disclaims all warranties, expressed or implied, including
but not limited to implied warranties of fitness for any particular purpose and of
merchantability.
Limitation of Liability
In no event will Mobile Systems Inc. be liable to you for any damages, including but not
limited to any loss of data, lost profits, lost savings, commercial damage or other incidental or
consequential damages arising out of the use or inability to use this program directly or
indirectly, or for any claim by any other party.
MobiSystems® OfficeSuite
• 6
Getting Started
System Requirements
Any Symbian S60 2nd or 3rd edition running device.
Installation and Un-installation
Installing OfficeSuite
1. Download OfficeSuite.zip (Windows) or .sit (Mac OS) file on your desktop PC.
2. Extract the zip or sit archive file to desired folder on your desktop PC. The
archive file contains:
a. Installation SIS file for the OfficeSuite
b. User’s guide in Acrobat PDF format
3. Bluetooth
4. Enable the Bluetooth transfer on both the desktop PC and SmartPhone and use
a Bluetooth connection to install the SIS files on your mobile device.
5. The newly transferred SIS file will appear as new messages in the inbox of your
phone. Open the Inbox and start it to install the program on your mobile phone.
6. Follow the instructions on the screen to install the software. Once the
installation is complete the OfficeSuite icon will appear in the default install
directory on your phone.
USB Cable Connection
1. Connect your phone to your desktop PC and make sure that the Nokia PC Suite
software is installed and enabled on your PC.
The Nokia PC Suite is free of charge and comes with your mobile phone. You can also
obtain the software from http://www.nokia.com.
2. On the desktop PC start the File Manager that is part of the Nokia PC suite.
3. Use the file manager to copy the extracted SIS files to one of the following
directories on your mobile phone:
a. Nokia Phone Browser\<phone>\Phone memory\Nokia\Installs
b. Nokia Phone Browser\<phone>\<memory card>\Nokia\Installs
Where <phone> is your mobile phone as it appears in the file explorer and respectively
<memory card> is the memory card that is currently inserted in the phone.
4. On your mobile use the applications button, to go the Menu form.
MobiSystems® OfficeSuite
• 7
5. Select Settings > Tools > Manager to start the applications manager.
6. Select Diets from the list of applications and select Install from the Options menu.
7. Follow the on-screen instructions to complete the installation.
Un-installation
To delete the OfficeSuite program from your mobile device:
1. Go to the Application Manager and select the OfficeSuite.
2. With the left soft key select Options>Remove..
3. A message notifying you of the deletion will appear. Press Yes to confirm.
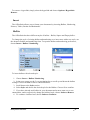
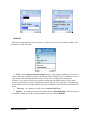
Registration
MobiSystems OfficeSuite is a downloadable shareware product available for limited free
evaluation period or registration at our home site: www.mobi-systems.com. A license key for
the software will be sent to the e-mail address specified during your order shortly. The license
key is a numeric combination of 2x5 symbols (for example: 32454-11562).
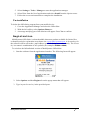
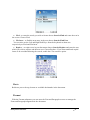
To switch to the full unlimited version of MobiSystems OfficeSuite:
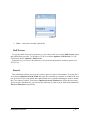
1. Start the software from the applications launcher. The following form will appear.
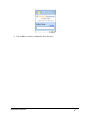
2. Select Options and then Register from the popup menu that will appear.
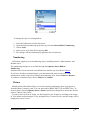
3. Type in your license key in the provided space.
MobiSystems® OfficeSuite
• 8
4. Tap on OK to confirm or Cancel to abort the entry.
MobiSystems® OfficeSuite
• 9
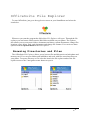
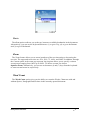
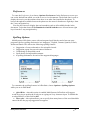
OfficeSuite File Explorer
To start OfficeSuite, just go to the application menu on your SmartPhone and select the
icon below.
Whenever you start the program the OfficeSuite File Explorer will open. Through the file
explorer you can browse all directories and folders available on your phone. The explorer
also allows you to create new folders, documents and sheets, rename documents, change files
locations, open, delete, find, send documents, and change file formats. You can access these
options from the Options menu in the File Explorer.
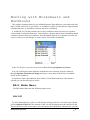
Browsing Directories and Files
The OfficeSuite File Explorer allows you to browse files and directories on both phone and
memory card. You can open folders and subfolders and work with files stored anywhere on
your phone. To open a directory or file select the item in the file explorer and use the file
explorer menu or the 5-navigaiton center button to open it.
MobiSystems® OfficeSuite
• 10
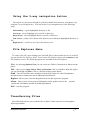
Using the 5-way navigation button
The easiest way to browse through or open the available directories on your phone is by
using the 5-way navigation key. You can use the 5-way navigation key in the following
ways:
Selection Key – opens highlighted directory or file
Arrow up – moves highlight up by one file or directory
Down arrow - moves highlight down by one file or directory
Left Arrow – scrolls a level down in the directory tree and opens highlighted directory or
file
Right Arrow – scrolls one level up in the directory tree
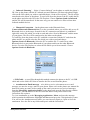
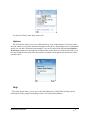
File Explorer Menu
To create a new file, open existing ones, and send files to other mobile devices or to the PC
you can use the File Explorer Menu. To access the File Explorer Menu select Options in the
File Explorer screen. The following options are available in the File Explorer:
New - by choosing Options>New you can create new Folders, Documents or Sheets on the
phone.
File - allows you to Open, Delete, Find, and Rename a file or worksheet. With this option
you can also Copy and Move a file to a desired location on the phone.
Send - You can send files and worksheet from the File Explorer to other Smartphones
through wireless connections such as Bluetooth and Infrared:
Register- allows you to enter the Registration screen and register the program
About – allows you to access general information on the product such as the product
version and web address and the included Help Manuel.
Exit – exits the program.
Transferring Files
The OfficeSuite allows you to transfer files to the PC and to other devices through the
following methods:
MobiSystems® OfficeSuite
• 11
• Infrared “Beaming” – Select “Connect Infrared” on the phone to enable the phone’s
IR. Line up the phone with the PC infrared port and Windows will detect the phone. Right
click on the files which you wish to send and choose “Send to IR recipient”. The file will be
transferred to the Inbox of the phone. To send a file from the phone to the PC enable the IR
on the phone and select the file in the File Explorer. Choose Options>Send via Infrared
and the file will be transferred. In the same way you can send/receive files to/from other
Infrared enabled devices.
• Bluetooth Connection – On the phone turn on the Bluetooth from
Connect>Bluetooth>Bluetooth On. Go to the second tab where you will be able to see all
Bluetooth devices in the range. Search for the PC connection and when it is established
right click on the file which you wish to send and select “Send to Bluetooth” and the name
of your phone. The file will be transferred to the inbox on the phone.
To send files from the phone to the PC establish a connection with the PC and when the
phone and PC are paired select the file which you wish to send and choose
Options>Send>via Bluetooth. Select the PC to send the file. To send files to other
Bluetooth devices turn on the Bluetooth of your phone and locate the other Bluetooth
device. Go to the File Explorer to select the file which you wish to transfer. Choose
Options>Send>via Bluetooth.
• USB Cable – to send files through this method connects the phone to the PC via USB
cable and use the Nokia PC Suite to transfer the files to and from the phone.
• Attachment in Email message – to be able to receive a document as an e-mail
message you need to set-up e-mail on your phone. Please refer to the phone user manual for
details on setting up email. After setting up the email you can access received messages
from the Messaging Application>Inbox on the phone and open the files directly with the
OfficeSuite. You can also move the files from the Inbox to any other folder in the
OfficeSuite file explorer.
To view attachments go to the Messaging Application> Inbox and open the message
which contains the attachment. Highlight attachment and press the 5 navigation key center.
You will see the Attachment menu where you can choose to Retrieve, Open or Save the
attachment. Save the file in any folder and open it with the OfficeSuite.
MobiSystems® OfficeSuite
• 12
• Memory Card Reader – You can copy files from the PC to a memory card reader
and insert the memory card to the phone. From the phone to the PC save the files to the
memory card and open the files on the PC using the PC memory card reader.
File Formats and Format Converting
In addition to the MobiSystems native document formats for text documents, the program
allows you to work with some external native text and spreadsheet files without the need of
any format conversion.
The file formats that MobiSystems OfficeSuite recognizes and the program is capable to
open and modify are:
Text formats:
o
MWD – this is the native file format of MobiSystems Docs. MWD documents can
be kept on both memory card and the main memory of your PDA. In the file explorer the
MWD documents appear with MWD extension.
o
DOC – Microsoft Word text documents. Can be kept in both the main memory and
on memory card. You can directly access DOC files from memory cards.
o
TXT – the commonly used TXT format ensures the compatibility of OfficeSuite
with third party desktop programs. TXT files can be saved in both the main memory and on
memory cards.
o
RTF – the rich text format is supported by almost any desktop text editor. The
OfficeSuite is the only OfficeSuite for Symbian to support RTF files.
Spreadsheet formats:
XLS – this is the native file format of Microsoft Excel. XLS documents can be
o
kept on both memory card and the main memory of your PDA. This format ensures the
compatibility between MobiSystems Spreadsheet and the commonly used Microsoft Office
software.
o
XML – The XML files are supported by Microsoft Excel 2003 and XP. XML files
can be stored in both the main memory and on memory card.
o
CSV – the commonly used CSV (comma separated) format ensures the
compatibility of OfficeSuite with third party desktop programs. The CSV format is not
capable of saving and showing the cells formatting. Workbooks in this format can contain
only one spreadsheet.
Changing the Format of Existing Files
OfficeSuite allows you to change the format and/or the destination of an existing file for
easier data processing and exchange. To change the file format of an existing file:
MobiSystems® OfficeSuite
• 13
1. Open the file.
2. Choose Options>File>Save As.
3. Choose the new destination of the file and the new file format and press Ok
You can choose among Excel Workbook (XLS), XML Spreadsheet (XML), and Comma
Delimited (CSV) file formats for worksheets and among MobiSystems Docs Format
(MWD), Text Documents (TXT), Microsoft Word Documents (DOC), and RTF for
text documents.
4. Press Ok to confirm.
MobiSystems® OfficeSuite
• 14
Working with Text Documents
The OfficeSuite has two main modes which you can use to view and edit your documents –
View Mode and Edit Mode.
View Mode
Whenever you open a document it is opened by default in View Mode. This mode facilitates
your viewing of a document and allows you to easily scroll the information in files. To open
an existing document, select it in the file list in the file explorer and then choose
Options>File>Open. Alternatively, you can press the 5-way navigation center key and the
file will open.
View Mode Menu
If a document is not in View Mode you can access the View Mode Menu by choosing
Options>View Mode. The View Mode Menu has the following menu items:
Edit Mode
By choosing Options>Edit Mode you will enter the Edit Mode where you can edit the
document you have opened. Edit Mode has its own edit menu which is explained further
down this manual.
File
With the File submenus you can manage the currently opened document in the following
ways:
• Save- saves the document without changing it’s title, location or format
• Save As - saves the document and allows you to choose a new title, location and/or
file format. You can choose among these file formats: native DOC, RTF, TXT and MWD
and any desired location on the phone.
• Protect – The OfficeSuite allows you to protect your files from unauthorized viewing
through assigning passwords. To assign a password to a file open it and choose
Options>File>Protect. Enter a password in the space provided. Choose Ok to confirm.
Upon closing the password protected file you need to save it so that the encryption is saved.
Next time you open the file you will be requested to enter your Password. To remove the
Password open the file and choose Options>File>Unprotect and Save the file again to
keep the changes.
MobiSystems® OfficeSuite
• 15
•
Close – closes the currently opened file.
Full Screen
To use the whole screen of your phone as a text entry work area, use the Full Screen option
that OfficeSuite provides. To switch to Full Screen choose Options> Full Screen. To exit
Full Screen choose Options> Full Screen.
Alternatively, you can use the shortcut (*) key from the keyboard to switch to and to exit
Full Screen.
Search
The OfficeSuite allows you to locate words or part of words in a document. To search for a
word choose Options>Search >Find and enter the word that you want to be found in the text
box provided. If you want small and capital letters to be considered during the search, enable
the Case sensitive option. You can use Options>Search >Find next to locate the next entry
for the search. Alternatively, you can use the shortcuts (3) and (6) keys from the keyboard for
Find and Find Next respectively.
MobiSystems® OfficeSuite
• 16
Go to
The Go to option redirects you to the top, bottom or available bookmarks in the document.
Alternatively, you can use the keyboard shortcuts: (1) to go to Top, (0) to go to the Bottom
and (2) to go to Bookmark.
Zoom
The Zoom feature allows you to zoom in and out of the text increasing or decreasing the
text size. The supported zoom sizes are 25%, 50%, 75, 100%, and 200%. In addition, through
the Custom option in the zoom pop-up menu, the program allows you to specify a custom
zoom percent ranging from 100% up to 200%. To choose a zoom size choose
Options>Zoom. Alternatively, you can use as shortcuts (4) and (7) keys from the keyboard
to zoom out and zoom in, respectively.
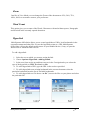
Word Count
The Word Count option gives you the ability to count the Words, Characters with and
without Spaces, Paragraphs and Sections in the currently opened document.
MobiSystems® OfficeSuite
• 17
To close the Word Count form choose Ok .
Options
The OfficeSuite allows you to set a default Font to view all documents if you do not have
the font which is used in the document installed to the phone. Depending on your smartphone
model you can have different fonts installed. You can set the default font through Options >
Preferences and browse through all available fonts on the phone to set the desired one. If on
the other hand the font used in the document is available on the phone the document will be
opened with it.
Help
The Help option allows you to access the Help Manual for OfficeSuite and the general
information of the program including version, web and mailing address
MobiSystems® OfficeSuite
• 18
Scrolling
View Mode allows you to scroll by lines and by full pages. Use the 5-way navigator up and
down arrows to scroll one line at a time. Use the 5-way navigator left and right arrows to
scroll full pages.
In View Mode you can preview pictures and images, scroll through tables and through any
hyperlinks available in the document. To preview an image scroll to the image so that it is
visible on the screen and press the 5-way navigation key. The image will be selected. Choose
Preview with the left soft key and the image will be opened in a separate screen.
To scroll within a table, move to the table and press the 5-way navigation key. The table
border will change into green and you will see a Scroll option in the low left corner of the
screen. Press the left soft key under Scroll and then use the arrow left and arrow right keys to
move through the table.
To follow a hyperlink scroll to the hyperlink so that it is visible on the screen and press the
5-way navigation center key. The hyperlink will be highlighted and you can press Go to Link
to follow it.
MobiSystems® OfficeSuite
• 19
Editing Documents
To manage documents the OfficeSuite has a special Edit Mode. To enter into Edit Mode
open a document and choose Options>Edit Mode.
Edit Mode Menu
The Edit Mode Menu has the following menu items:
View Mode
By choosing Options >View Mode you will enter the View Mode for the document. The
View mode functionality was described earlier in this document.
File
With the File submenus you can manage the currently opened document in the following
ways:
• Save - saves the document without changing it’s title, location or format
• Save As - saves the document and allows you to choose a new title, location or file
format if you wish.
• Check Spelling - the OfficeSuite has a built in spell checker which works with the
dictionaries which you have installed together with the program.
• Protect - you can use this option to and protect your private documents from
unauthorized opening. Choose Options>File>Protect and enter a password in the space
provided. Choose Ok to confirm. Upon closing the password protected file you need to save
it so that the encryption is saved. Next time you open the file you will be requested to enter
your Password. To remove the Password open the file and choose
Options>File>Unprotect and Save the file again to keep the changes.
• Close- closes the file.
MobiSystems® OfficeSuite
• 20
Edit
With the Edit submenus you can manage the text inside a document in the following way:
• Undo - if you wish to undo the latest actions you have done to the document choose
Undo and the file will return to its original state.
• Redo – if you wish to redo the action which you have undone choose Redo
• Cut saves the contents of the selection in the systems clipboard and the cut selection
area is deleted. The operation is used altogether with Copy and Paste. To cut a cell value
select the cell and choose Edit>Cut
• Copy – the contents of the clipboard is copied in the selected area. The copy selection
area must be of the same type (rows or columns) as the data in the clipboard. The operation
is usually used after Cut as well as in combination with Paste..
• Paste – Copies the contents of the clipboard usually selected with Copy or Cut, in the
highlighted area of rows or columns. The size of the paste selection area should be the same
as the contents of the clipboard.
• Select All – selects the entire contents of the document both text and images
Search
With the Search submenus you can locate and replace a word or part of a word within the
document. The Search menu has the following submenus:
MobiSystems® OfficeSuite
• 21
• Find – to enter the words you wish to locate choose Search>Find and enter the text in
the screen. Choose Find.
• Find next – to find the next entry in the text choose Search>Find Next
You can also use the Left and Right Soft Keys from the keyboard as short cuts
respectively as Find and Find next.
• Replace – to replace text in your document choose Search>Replace and enter the text
which you wish to replace and the new text. Choose Replace. If you want small and capital
letters to be considered during the search, enable the Case sensitive option
Go to
Redirects you to the top, bottom or available bookmarks in the document.
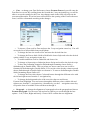
Format
With the Format submenus you can enter the Font and Paragraph screens to manage the
Fonts and Paragraph alignment in the document.
MobiSystems® OfficeSuite
• 22
• Font – to change your Font Preferences choose Format>Font and you will enter the
Font Preview screen. By scrolling down the list with the 5-way navigation key you will be
able to access the settings for the Font. Any changes made in the form will reflect in the
text entered thereafter. If text has been selected before the opening of the Font Preferences
form, it will be reformatted according to the changes.
o To choose a Font scroll to Font and press the 5-way navigation center key. You will
access the list of all available fonts on the phone.
o To change the font size scroll to Size and enter the desired font size.
o To change the Font to Italic, Bold or Bold Italic choose Style and select the desired
option with the 5-way navigation center key.
o To enable underline scroll to Underline and choose On.
o To change to Superscript or Subscript choose Script and scroll to the desired script
o To have the formatting changed to Strikethrough formatting choose Strike >
Strikethrough or Double Strike. This way when you start to enter new text it will be
formatted to Strikethrough or Double Strike. You can also select already written text and
choose Strikethrough or Double Strike to reformat it. To remove Strikethrough or Double
Strike formatting choose Strike>off.
o To change the Font color choose Color and browse through the different color with
the left and right arrows from the 5 –navigation key
o To change the background color of the text select the text and choose
Format>Font>Highlight. You can browse through the different colors with the left and
right arrows from the 5 –navigation key. Alternatively, use the 5 – navigation center key
to open the form of available colors and browse through it.
• Paragraph – to change the alignment of a paragraph select the paragraph and choose
Format>Paragraph. Use the arrow left and arrow right keys to scroll through the four
options – Left, Center, Right and Justify. Choose Ok to confirm the new alignment.
MobiSystems® OfficeSuite
• 23
Zoom
Just like in View Mode you can change the Zoom of the document to 25%, 50%, 75%,
100%, 200% or customize zoom to your preference..
Word Count
This option gives you a count of the Words, Characters with and without spaces, Paragraphs
and Sections in the currently opened document.
Hyperlink
MobiSystems OfficeSuite allows you to create hyperlinks to URLs, local bookmarks in the
current document and other files. In case the hyperlink points to a URL MobiSystems
OfficeSuite will use the default web browser on your handled device, if any, to open the
Internet site to which the link refers to.
To add a hyperlink:
1. Select the text to which you want to assign the link.
2. Choose Options>Hyperlink >Add hyperlink.
3. In the next form use the up and down arrows in the 5-navigation keys to select the
type of the hyperlink- to URL, Bookmark or file.
4. To add a hyperlink to URL, type the URL in the text box provided.
5. To add a hyperlink to an existing bookmark in the current document select the
particular bookmark form the list of available bookmarks.
6. To add a hyperlink to a file choose “to file”, browse the files on your phone and select
the particular file.
MobiSystems® OfficeSuite
• 24
To remove a hyperlink, simply select the hyperlink and choose Options> Hyperlink>
Remove.
Insert
The OfficeSuite allows you to format your documents by inserting Bullets, Numbering,
Pictures, Tables, Breaks and Bookmarks
Bullets
The OfficeSuite has three different styles of bullets – Bullet, Square and Empty bullet. .
To change the style of existing bullets and numbering or to insert ones with a new style, use
the advanced bullets and numbering form. To open the bullets and numbering preferences,
choose Insert > Bullets/ Numbering.
To insert bullets with selected style:
1. Choose Insert > Bullets/ Numbering.
2. In the next screen use the 5-way navigation key to scroll up and down the bullets
settings. Choose the List section to choose Bulleted.
3. Scroll down to the Style section.
4. Select Style and choose the desired style for the Bullets. Choose Ok to confirm.
5. If you have already used bullets in your document and want to start over a new
enumeration, and/or respectively change the bulleted style, choose Indexes>Restart.
6. To continue a bulleted text, choose Indexes>Continue.
MobiSystems® OfficeSuite
• 25
To change the style of existing bullets:
1.
2.
3.
4.
5.
Select the bulleted text in the document.
Open the bullets/numbering preference by selection Insert Bullets/ Numbering.
Choose Style.
Select a new style from the list and tap OK.
The changes will be automatically applied to the selected text.
Numbering
OfficeSuite supports several numbering styles, including numeric, alpha-numeric, and
Roman styles.
The numbering settings are accessible through the Options>Insert Bullets /
Numbering
Numbered text can be inserted or modified in the similar way described in Bullets.
If you have already used numbering in your document and want to start over a new
enumeration, and/or respectively change the numbering style, choose Indexes> Restart.
To continue a numbered text, choose Indexes> Continue.
Picture
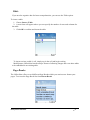
MobiSystems OfficeSuite allows you to insert pictures and images from your phone or
from the phone’s memory card. You can insert native BMP, PNG, GIF and JPEG files. To
insert a picture choose Options>Insert >Picture and browse the phone to locate the desired
picture. Choose Ok to insert.
To take a closer look at an image, use the Image Preview feature by scrolling to the image
in View Mode and pressing the 5-way navigation key. Choose Preview and the image will be
displayed in a new screen.
MobiSystems® OfficeSuite
• 26
Table
If you need to organize data for better comprehension, you can use the Table option.
To insert a table:
1. Choose Insert >Table.
2. A new form will appear where you can specify the number of rows and columns for
the table.
3. Click OK to confirm and insert the table
To insert text into a table’s cell, simply tap in the cell and begin writing.
MobiSystems OfficeSuite has the unique feature of allowing images and even other tables
to be embedded in an existing table.
Page Breaks
The OfficeSuite offers several different Page Breaks which you can insert to format your
pages. To access the Page Break list from Insert>Break.
MobiSystems® OfficeSuite
• 27
Bookmarks
The bookmark feature allows you to create virtual marks at desired places in your text
document so you access these places easier later.
To add a bookmark:
1. Select the text to which you want to assign a book mark
2. Choose Insert>Bookmark>Options >New and type in a name for the bookmark in
the box provided.
3. Choose Done and the bookmark will be set.
4. To go to a bookmarked place:
5. Choose Options>Go to>Bookmark.
6. Choose the desired Bookmark by scrolling with the 5-way navigation key and choose
Done.
7. The program will return to the chosen bookmark in the document.
To delete a bookmark:
1.
Choose Insert> Bookmark>Options>Delete.
You can sort the list of existing bookmarks by Name (alphabetically) and by Location. To
do that choose Insert>Bookmark>Options>Sort by Name or Insert> Bookmark>
Options>Sort by Location.
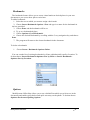
Options
MobiSystems OfficeSuite allows you to set a default Font which you wish to use in the
documents and enable spell checker and quick text entry on the phone. To do that choose
Options>Preferences/Spelling Options
MobiSystems® OfficeSuite
• 28
Preferences
To enter the Preference form choose Options>Preferences. In the Preferences screen you
can set the default font which you wish to use to view documents. The default font is used to
display the text in your documents when there is no other font installed to the phone. To
browse through the available fonts on the phone use the arrow left and arrow right keys from
the 5-way navigation key.
You can also choose to display the text boundaries such as all available breaks in the
document. To do that choose Text Boundaries On/Off with the arrow left and arrow right
keys form the 5-way navigation key.
Spelling Options
MobiSystems OfficeSuite comes with an integrated spell checker and a fast text-entry
program with free spelling dictionaries in 6 languages - English, German, Spanish, French,
Italian and Dutch. This allows the following spelling features:
• Suggestion of correct alternatives for misspelled words
• Suggestion popup lists on each entered character
• Underlining of misspelled words
• Spell checks for imported documents
• 4 spelling dictionaries for each of the supported languages
To customize the spelling features in OfficeSuite, choose Options> Spelling Options
while you are in Edit Mode.
• QuickWrite - when this option is enabled MobiSystems OfficeSuite will suggest
words by trying to predict the word you are typing on every character input. To disable the
word prediction, set this field to Off.
• Show after – this option allows you to specify how many letters of the word should be
entered before the pop-up suggestion list appears.
MobiSystems® OfficeSuite
• 29
• List Size - to change the number of words shown in the pop-up suggestion list, open
the list with available choices with the 5-way navigation center key and select a length
between 2, 3, or 4 words.
• List Sorting - this field determines the sorting of the words in the pop- up suggestion
list. You can choose between sorting by word usage frequency or alphabetical order. The
sorting by frequency significantly increases the typing speed. The more you use
MobiSystems OfficeSuite, the more accurate and relevant the suggestion lists gets.
• Spell Check - when this feature is enabled, MobiSystems® OfficeSuite will
automatically check and underline all misspelled words. To disable the misspelled words
underlining, set the field to Off.
Dictionaries Management
Mobile Systems’ dictionary databases have been developed to meet the requirements of a
wide range of users. Their entries have been selected and compiled after thorough analyses of
various texts and speech patterns.
The OfficeSuite comes with dictionaries in 6 different languages – English, German,
Italian, Spanish, French and Dutch. The dictionaries are included in the installation .sis file
for the OfficeSuite program. When you install the program the installation allows you to
choose the dictionaries which you wish to install from a list. To install a dictionary check the
dictionary checkbox next to it. To remove a dictionary from the list of dictionaries to be
installed uncheck the checkbox next to its name.
The dictionaries will be located by the program the first time you open a file in Edit Mode.
Choose Ok with the left soft key to confirm adding the dictionaries to the program. After that
again while you are in Edit Mode you can choose the dictionary which you wish to use. To
set the dictionary choose Options>Spelling Options. In the Dictionary field use the arrow
left and arrow right keys scroll through the dictionaries. After you choose the desired
dictionary press Save.
Help
You can access the Help for the Office Suite from Options>Help.
MobiSystems® OfficeSuite
• 30
Registration
To Register the program choose Options>Registration and enter the unlock key which you
have received after the purchase in the space box provided.
MobiSystems® OfficeSuite
• 31
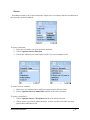
Working with Worksheets and
Workbooks
The primary document that you use in MobiSystems® Spreadsheet to store and work with
data is called worksheet or spreadsheet. A worksheet consists of cells that are organized into
columns and rows. A worksheet is always stored in a workbook.
A workbook is a file that contains one or more worksheets that you can use to organize
various kinds of related information. You can enter, edit data and perform calculations based
on data from more than one worksheet. Each Workbook appears as a separate file in the file
explorer where you can manage it- create, delete, and rename workbooks.
In the File Explorer you can create new workbook through Options>New>Sheet.
You can switch between the different worksheets in the currently opened workbook
through Options>Worksheet>Change and select a new sheet from the list of available
sheets in the workbook.
In contrast to Docs, Spreadsheets does not have View Mode and when a document is
opened you can directly begin to edit it.
Edit Mode Menu
The Edit Mode Menu has the following menu items:
Edit Cell
To enter information in a cell or to edit already existing values in a cell select the cell and
choose Options>Edit Cell. The contents of the cell will be displayed in the edit filed in the
lower left corner of the screen where you can change the information. Alternatively, you can
MobiSystems® OfficeSuite
• 32
use the 5-way navigation center button to access the data in a cell and edit it. After you have
entered the new data press the 5-way navigation center button or Edit >Apply Edited Text to
enter the new text in the cell.
File
With the File submenus you can manage the currently opened workbook in the following
ways:
• Save - saves the workbook without changing it’s title, location or format
• Save As - saves the workbook and allows you to choose a new title, location or file
format if you wish.
• Go to - the Go to function allows you to directly move to a cell by specifying its
number.
• Recalculate - the Recalculate function recalculates all cell values automatically.
• Close - closes the workbook.
Edit
With the Edit submenus you can manage the data inside a workbook in the following way:
• Undo – if you wish to undo the latest actions you have done to the document choose
Undo and the file will return to its original state.
• Redo – if you wish to redo the action which you have undone choose Redo
• Cut - saves the contents of the selection in the systems clipboard and the cut selection
area is deleted. The operation is used altogether with Copy and Paste. To cut a cell value
select the cell and choose Edit>Cut.
• Copy – the contents of the clipboard is copied in the selected area. The copy selection
area must be of the same type (rows or columns) as the data in the clipboard. The operation
is usually used after Cut as well as in combination with Paste.
• Paste – Copies the contents of the clipboard usually selected with Copy or Cut, in the
highlighted area of rows or columns. The size of the paste selection area should be the same
as the contents of the clipboard.
• Select All – selects the entire contents of the document both text and images
• Delete – with Delete you can delete entire rows and columns. Select the row/column
which you wish to delete and choose Options>Delete>Entire Row or Entire Column.
MobiSystems® OfficeSuite
• 33
Insert
Spreadsheet allows you to insert functions, single rows or columns, and new worksheets to
the currently opened workbook.
To insert a function:
1. Select the cell where you wish insert the function.
2. Choose Options>Insert>Function.
3. Choose the function you want from Formula Type screen and press Ok.
To insert rows or columns:
1. Select row or a column next to which you want to place the new item.
2. Choose Options>Insert Column/Row and the item will be inserted. .
To insert a worksheet:
1. Choose Options>Insert >Worksheet and the item will be inserted.
2. Choose where you wish to insert the sheet - before or at the end of the currently
opened sheet and choose Ok.
MobiSystems® OfficeSuite
• 34
Search
With the Search submenus you search for a word, part of a word or a number within a cell
and replace it with new data:
• Find - choose Options>Search>Find and type in the string or numbers you want to
locate in the space provided. Scroll to the Match entire cell and Yes if would like to receive
only whole cells matching the find criteria. Scroll down to Match Case and choose
Sensitive if you want an exact case sensitive match after the find function. If the search
returns any matches, the first cell that has the find criteria will be selected. To continue the
search and move next cell that matches the search condition, select Find Next from the Edit
menu.
• Find next – to continue a search choose Search>Find Next
• Replace – to replace text in your document choose Search>Replace and enter the text
or numbers which you wish to replace and the new text. Choose Replace.
MobiSystems® OfficeSuite
• 35
Managing Worksheets
In MobiSystems® Spreadsheet you can add new worksheets, rename, delete and protect
existing ones and switch between the different sheets in a currently opened workbook. These
options are available through the submenus in Options>Worksheet.
• Insert - To insert a new worksheet in the currently opened workbook, just choose
Options>Worksheet>Insert and enter the name for the new sheet in the provided text box.
• Change – if you wish to switch to another worksheet within the opened workbook
choose Options>Worksheet>Change
• Rename – to Rename a worksheet make sure the sheet is active and choose
Options>Worksheet>Rename. Enter the new name in the textbox provided and press Ok
to confirm.
• Delete – to Delete a worksheet make sure the sheet is active and choose
Options>Worksheet>Delete.
• Protect – you can protect a worksheet from unauthorized viewing by a password. To
do that open the worksheet and choose Options>Worksheet>Protect. To remove the
password choose Options>Worksheet>Unprotect .
Please note that you can protect worksheets only and not an entire workbook.
Full Screen
To use the whole screen of your phone as a text entry work area, use the Full Screen option
that Spreadsheets provides. To switch to Full Screen choose Options> Full Screen. To exit
Full Screen choose Options> Full Screen.
Alternatively, you can use the shortcut (*) key from the keyboard to switch to and to exit
Full Screen.
Page Scroll
The OfficeSuite allows you to scroll your spreadsheets one line at a time or by pages. To
activate the Page Scroll choose Options>Page Scroll. After that use the 5-way navigation key
to scroll up and down the sheet. Alternatively, you can activate the Page Scroll by pressing
the (#) key from the keyboard.
Cell Formatting
The Spreadsheet program allows you to assign and modify a cell type, as well as specify a
common format for the selected type. You can also manage the text aligning in cells and
MobiSystems® OfficeSuite
• 36
access advanced font types, styles and color settings. All these options are accessible through
Options>Format
Cell Format Types and Settings
The cell properties and settings vary for the different cell types. To assign a particular type
to a cell or range of cells:
1. Select the cell or the range of cells in the worksheet.
2. Choose Options>Format>Number.
3. The Format Type screen will open where you can choose the desired format for the
cell or range of cells.
4. The following cell formats are available
a. Number – for cells of type Number, you can specify the number of decimal
places to be shown; whether 1000 separators should be used and the format in
which negative numbers should be shown.
b. General – you can enter data in any formatting.
c. Currency – for the currency type you can specify the number of decimal places,
the currency symbol, position of the currency symbol, and the format of the
negative values.
d. Date – MobiSystems® Spreadsheet allows you to select date format among a list
of 16 different formats
e. Time – you can select the desired time format among a list of five different
formats.
f. Percentage – you can specify the number of decimal places to be shown for the
percentage type.
g. Text
MobiSystems® OfficeSuite
• 37
Alignment
The different Alignment options are accessible through Options>Format>Alignment. You
can choose among four styles: General, Left, Center and Right. To align one cell or a range
of cells select them and choose the desired alignment option.
Fonts
The font settings font type, size, style and color are directly accessible through
Options>Format>Font. The font form also allows you to change the background color of a
cell and use of the strike through font style.
To open the fonts settings form:
1. Select the cell or the range of cells in the worksheet.
2. Choose Options>Format>Font and enter the Font Preview form
3. Use the 5-way navigation key to scroll down the list of available options.
4. Use the arrow left and arrow right keys to scroll through the different Fonts, Styles
and colors.
5. Choose the desired Font and font settings and choose Ok.
Hide
This operation can be applied only to whole columns or rows, or alternatively multiple
columns or rows. To hide a column (or row), select the column, select it and choose
Options>Format>Hide. To hide a range of columns or rows select them and choose
Options>Format>Hide.
To unhide a column or row, select a column or row adjacent to it and choose
Options>Format>Unhide.
Freeze
The freeze function allows you to “freeze” selected row or column so it is constantly visible
while you scroll the other columns.
To freeze a column or row (or selection of columns or rows), select the object(s) and choose
Options>Format> Freeze.
To unfreeze a row or column choose Options>Format> Unfreeze
MobiSystems® OfficeSuite
• 38
Zoom
The Zoom option allows you to Zoom in and out of the text increasing or decreasing the
text size. The supported zoom sizes are 25%, 50%, 75%, 100%, and 200%. In addition,
through the Custom option in the zoom pop-up menu, the program allows you to specify a
custom zoom percent ranging from 100% up to 200%.
Column Width
With MobiSystems Spreadsheet you can change the size of width of column. To widen or
narrow a column select one or more cells from the column and choose Options>Adjust
Column Width. With the arrow left and arrow right keys widen or narrow the column and
press the 5-way navigation center key to confirm the desired width.
Preferences
MobiSystems Spreadsheet allows you to choose different CSV separators, enable
Automatic calculation of formulas and show and hide Gridlines and Headers in a worksheet.
To set your desired preferences choose Options>Preferences and enter the Preferences form.
Use the 5-way navigation button to scroll down the available fields.
Register
From Options>Register you can enter the Registration form and enter the Unlock key to
register the program to your phone.
Help
The program offers a Help Manual which you can access through Options>Help.
MobiSystems® OfficeSuite
• 39
Working with Functions
Functions are predefined formulas that perform calculations by using specific values, called
arguments given in field order. Functions can be used to perform simple or complex
calculations.
Functions can be embedded in worksheet cells. Each function begins with an equal sign (=),
followed by the function name, an opening parenthesis, the arguments for the function
separated by commas, and a closing parenthesis.
The arguments can be numbers, text, logical values such as TRUE or FALSE, arrays, or
cell ranges. Arguments can also be constants, formulas, or other functions.
Nested Functions
In certain cases, you may need to use a function as one of the arguments of another
function. For example, the following formula uses a nested SUM function and compares the
result with the value 30.
=IF(SUM(A1:A7)>30,SUM(B1:B7),C1)
When a nested function is used as an argument, it must return the same type of value that
the argument uses.
Inserting a function
To insert a function:
1. Select the cell where you want to place the function.
2. Choose Options>Insert>Function.
3. Scroll down through the function types until you locate the function that you need.
4. When you find the desired function, select it and tap the OK button.
5. The function will be inserted in the edit field and now you can provide its arguments.
Each next selected cell will be added as an argument separated with a comma from the
previous one.
To give cells range as an argument of the function, just tap on the first cell from the range
and drag it in the desired direction until the whole range is selected.
If you are sure about the syntax of a function and its arguments, you can skip steps 2-6 and
type in the function directly in the cell edit box in the cell toolbar. For instance, you can
directly type in =SUM(A1:A6).
6. When you have finished entering the function choose Edit>Insert Function to
execute it.
MobiSystems® OfficeSuite
• 40
Formula Errors
Below is a table of the error messages that MobiSystems® SpreadSheet can display in case
there is something wrong with a functions arguments.
FORMULA ERROR
Error evaluating formula. Out of
memory.
DESCRIPTION
Insufficient memory for calculating the
formula. Please check the available free
space on your Palm device and try to free
some space.
Error. Invalid formula.
Formula error. Missing operand.
Formula error. Missing operator.
Formula error. Illegal token.
Formula error. Missing quote ( " ).
Formula error. Missing array closing
bracket. " ] ".
Formula error. Illegal identifier.
Formula error. Inconsistent array.
MobiSystems® OfficeSuite
Incorrect formula syntax. Check if the
formula starts with =, +, or -.
Missing operator. For instance =5%10
will result in this error because there is
not operator mathematical operator. The
correct formula is
'=5+%10' or '=5-%10'.
Missing argument. For example, '=5 2'.
Correcy formulas are '=5+ 2'.
'=SUM(5,2)’, etc.
Example: '= 5+4)' – missing left
parenthesis
Check the formula syntax and correct
the error.
Missing quotations. Example: '="ala" +
"bala '
Check the formula syntax and correct
the error.
Example: ( } ): '={5, 3'
The array closing bracket is missing.
Check the formula syntax.
Illegal formula argument.
Example: '=SUM(ABCDEF)'
The provided argument is neither
reference to existing cell, nor predefined
name.
Arrays used as function arguments
should have the following syntax:
'{a1,a2,a3;b1,b2,b3;…}'
The items in each array row are
separated by comma and the different
rows are separated by semi-column.
This error message indicates incorrect
array definition.
• 41
Formula error. Missing array element.
Formula error. Illegal array element.
Formula error. Missing function closing
bracket " ) ".
Formula error. Too deep function
nesting.
Formula error. Unknown function.
Formula error. Missing single quote ( '
).
Formula error. Circular reference.
Unknown evaluation error.
Formula error. Not enough arguments.
Incorrect array definition. This error
indicates that array item has been
omitted.
Example: '={1,2, ,4}'
The third array item is omitted.
Incorrect array definition. This error
indicates that invalid array item has been
provided.
Arrays can consist of numbers, errors
(e.g. #REF!), and logical values
(true/false).
References cannot be used as array
items.
Example: '= {1,2,A1}'
The last item in the array is a reference
to cell A1.
Check the function syntax. A closing
parenthesis is missing. Example:
‘=SUM(A1:B2'
The function nesting is on more than 7
levels.
Unknown function. Check the function
syntax and name. Example:
‘=ALABALA(5)'
This error message indicated that an
opening or closing apostrophe is missing.
Example: '= 'Sheet 1!A1' (the
apostrophe between 1 and ! is omitted)
This error indicates a circular
expression that cannot be calculated.
Example: A1 '=B1' and B1 '=A1'
Evaluation error. Check the syntax of
the formula and recalculate the formula.
Invalid formula syntax. Not enough
arguments were provided for the given
formula. Check the formula syntax and
provide the necessary arguments.
Unknown formula error.
Formula error. Too much arguments.
MobiSystems® OfficeSuite
Invalid formula syntax. Too much
function arguments are provided. Check
the formula syntax and provide the
necessary arguments.
• 42
Function Descriptions
Math and Trigonometry
Returns the absolute
value of a number. The
absolute value of a
number is the number
without its sign.
ABS(number)
Number is the real number of
which you want the absolute
value.
ACOS
Returns the arccosine,
or inverse cosine, of a
number. The arccosine is
the angle whose cosine is
number. The returned
angle is given in radians
in the range 0 (zero) to pi.
ACOS(number)
Number is the cosine of the
angle you want and must be from
-1 to 1.
=ACOS(-0.5)
Arccosine of -0.5 in
radians, 2*pi/3
(2.094395)
ACOSH
Returns the inverse
hyperbolic cosine of a
number. Number must be
greater than or equal to 1.
The inverse hyperbolic
cosine is the value whose
hyperbolic cosine is
number, so
ACOSH(COSH(number))
equals number.
ACOSH(number)
Number is any real number
equal to or greater than 1.
=ACOSH(1)
Inverse hyperbolic
cosine of 1 (0)
ASIN
Returns the arcsine, or
inverse sine, of a number.
The arcsine is the angle
whose sine is number.
The returned angle is
given in radians in the
range -pi/2 to pi/2.
ASIN(number)
Number is the sine of the
angle you want and must be from
-1 to 1.
=ASIN(-0.5)
Arcsine of -0.5 in
radians, -pi/6 (-0.5236)
ASINH
Returns the inverse
hyperbolic sine of a
number. The inverse
hyperbolic sine is the
value whose hyperbolic
sine is number, so
ASINH(SINH(number))
equals number.
ASINH(number)
Number is any real number.
=ASINH(-2.5)
Inverse hyperbolic
sine of -2.5 (-1.64723)
ABS
MobiSystems® OfficeSuite
=ABS(2)
Absolute value of 2
(2)
• 43
ATAN
Returns the
arctangent, or inverse
tangent, of a number. The
arctangent is the angle
whose tangent is number.
The returned angle is
given in radians in the
range -pi/2 to pi/2.
ATAN (number)
Number is the tangent of the
angle you want.
=ATAN(1)
Arctangent of 1 in
radians, pi/4 (0.785398)
ATAN2
Returns the
arctangent, or inverse
tangent, of the specified
x- and y-coordinates. The
arctangent is the angle
from the x-axis to a line
containing the origin (0,
0) and a point with
coordinates (x_num,
y_num). The angle is
given in radians between pi and pi, excluding -pi.
ATAN2(X,Y)
X is the x-coordinate of the
point and Y is the y-coordinate of
the point.
=ATAN2(1, 1)
Arctangent of the
point 1,1 in radians, pi/4
(0.785398)
ATANH
Returns the inverse
hyperbolic tangent of a
number. Number must be
between -1 and 1
(excluding -1 and 1). The
inverse hyperbolic tangent
is the value whose
hyperbolic tangent is
number, so
ATANH(TANH(number)
) equals number.
ATANH(number)
Number is any real number
between 1 and -1.
16)
COS
Returns the cosine of
the given angle.
COS(number)
Number is the angle in radians
for which you want the cosine.
=COS(60*PI()/180)
Cosine of 60 degrees
(0.5)
COSH
Returns the hyperbolic
cosine of a number.
COSH(number)
Number is any real number
for which you want to find the
hyperbolic cosine.
=COSH(4)
Hyperbolic cosine of
4 (27.30823)
Counts the number of
cells within a range that
meet the given criteria.
COUNTIF(range,criteria)
Range is the range of cells
from which you want to count
cells.
Criteria is the criteria in the
form of a number, expression, or
text that defines which cells will
be counted.
=COUNTIF(B2:B5,
">55")
Number of cells
with a value greater
than 55 in the second
column above (2)
Converts radians into
DEGRE
degrees.
ES
DEGREES(angle)
Angle is the angle in radians
that you want to convert.
=DEGREES(PI())
Degrees of pi
radians (180)
COUN
TIF
MobiSystems® OfficeSuite
=ATANH(0.761594
Inverse hyperbolic
tangent of 0.76159416
(1, approximately)
• 44
EVEN
Returns number
rounded up to the nearest
even integer. You can use
this function for
processing items that
come in twos. For
example, a packing crate
accepts rows of one or
two items. The crate is
full when the number of
items, rounded up to the
nearest two, matches the
crate's capacity.
The function can be
used only for numeric
fields
EXP
Returns e constant
raised to the power of
number. The constant e
equals
2.71828182845904, the
base of the natural
logarithm. EXP is the
inverse of LN, the natural
logarithm of number.
EXP(number)
Number is the exponent
applied to the base e.
FACT
Returns the factorial
of a number. The factorial
of a number is equal to
1*2*3*...* number.
FACT(number)
Number is the nonnegative
number you want the factorial of.
If number is not an integer, it is
truncated
INT
Rounds a number
down to the nearest
integer.
INT(number)
Number is the real number
you want to round down to an
integer.
EVEN(number)
Number is the value to round.
=EVEN(1.5)
Rounds 1.5 up to the
nearest even integer (2)
=EVEN(3)
Rounds 3 up to the
nearest even integer (4)
=FACT(5)
Factorial of 5, or
1*2*3*4*5 (120)
=INT(8.9)
Rounds 8.9 down
(8)
=INT(-8.9)
Rounds -8.9 down (9)
LN
LOG
Returns the natural
logarithm of a number.
Natural logarithms are
based on the constant e
(2.71828182845904). LN
is the inverse of the EXP
function.
Returns the logarithm
of a number to the base
you specify.
LN(number)
Number is the positive real
number for which you want the
natural logarithm.
LOG(number,base)
Number is the positive real
number for which you want the
logarithm.
=LN(86)
Natural logarithm of
86 (4.454347)
=LN(2.7182818)
Natural logarithm of
the value of the constant
e (1)
=LOG(10)
Logarithm of 10 (1)
=LOG(8, 2)
Logarithm of 8 with
base 2 (3)
Base is the base of the
logarithm. If base is omitted, it is
assumed to be 10.
MobiSystems® OfficeSuite
• 45
LOG10
Returns the base-10
logarithm of a number.
LOG10(number)
Number is the positive real
number for which you want the
base-10 logarithm.
=LOG10(10)
Base-10 logarithm
of 10 (1)
=LOG10(1E5)
Base-10 logarithm
of 1E5 (5)
MOD
Returns the remainder
after number is divided by
divisor. The result has the
same sign as divisor. The
MOD function can be
expressed in terms of the
INT function: MOD(n,
d) = n d*INT(n/d)
MOD(number,divisor)
Number is the number for
which you want to find the
remainder.
Divisor is the number by
which you want to divide number.
=MOD(3, 2)
Remainder of 3/2 (1)
=MOD(-3, 2)
Remainder of -3/2.
The sign is the same as
divisor (1)
ODD
Returns number
rounded up to the nearest
odd integer. The function
can be used for numeric
fields.
ODD(number)
Number is the value to round.
PI
Returns the number
3.14159265358979, the
mathematical constant pi.
PI( )
POWE
Returns the result of a
number raised to a power.
R
Multiplies all the
PRODU
numbers
given as
CT
arguments and returns the
product.
RADIA
NS
RAND
Converts degrees to
radians.
Returns an evenly
distributed random
number greater than or
equal to 0 and less than 1.
A new random number is
returned every time the
worksheet is calculated.
MobiSystems® OfficeSuite
POWER(number,power)
Number is the base number. It
can be any real number.
Power is the exponent to
which the base number is raised.
=ODD(1.5)
Rounds 1.5 up to the
nearest odd integer (3)
=PI()/2
Pi/2 (1.570796327)
=POWER(5,2)
5 squared (25)
PRODUCT(number1,number2
,…)
Number1, number2, etc. are 1
to 30 numbers that you want to
multiply.
PRODUCT(A2:A4)
Multiplies the
numbers contained in
cells A2, A3 and A4.
RADIANS(angle)
Angle is an angle in degrees
that you want to convert.
=RADIANS(270)
270 degrees as
radians (4.712389 or
3π/2 radians)
RAND( )
• 46
Rounds a number to a
specified number of
digits.
ROUND(number,num_digits)
Number is the number you
want to round.
Num_digits specifies the
number of digits to which you
want to round number.
If num_digits is greater than 0
(zero), then number is rounded to
the specified number of decimal
places.
If num_digits is 0, then
number is rounded to the nearest
integer.
If num_digits is less than 0,
then number is rounded to the left
of the decimal point.
=ROUND(2.15, 1)
Rounds 2.15 to one
decimal place (2.2)
ROUN
DDOWN
Rounds a number
down, toward zero.
ROUNDDOWN behaves
like ROUND, except that
it always rounds a number
down.
ROUNDDOWN(number,num_
digits)
Number is any real number
that you want rounded down.
Num_digits is the number of
digits to which you want to round
number.
=ROUNDDOWN(3.
2, 0)
Rounds 3.2 down to
zero decimal places (3)
ROUN
DUP
Rounds a number up,
away from 0 (zero).
ROUNDUP behaves like
ROUND, except that it
always rounds a number
up.
ROUNDUP(number,num_digi
=ROUNDUP(3.2,0)
Rounds 3.2 up to
zero decimal places (4)
SIN
Returns the sine of the
given angle. If your
argument is in degrees,
multiply it by PI()/180 or
use the RADIANS
function to convert it to
radians.
SIN(number)
Number is the angle in radians
for which you want the sine.
=SIN(30*PI()/180)
Sine of 30 degrees
(0.5)
SINH
Returns the hyperbolic
sine of a number.
SINH(number)
Number is any real number.
=SINH(1)
Hyperbolic sine of 1
(1.175201194)
SQRT
Returns a positive
square root. If number is
negative, SQRT returns
an error value.
SQRT(number)
Number is the number for
which you want the square root.
=SQRT(16)
Square root of 16 (4)
Adds all the numbers
in a range of cells.
SUM(number1,number2, ...)
ROUN
D
SUM
ts)
Number is any real number
that you want rounded up.
Num_digits is the number of
digits to which you want to round
number.
Number1, number2, etc. are 1
to 30 arguments for which you
want the total value or sum.
MobiSystems® OfficeSuite
=SUM(A2:A4)
Adds the first three
numbers in the column
above.
• 47
SUMIF
TAN
TANH
TRUNC
Adds the cells
specified by a given
criteria.
Returns the tangent of
the given angle.
Returns the hyperbolic
tangent of a number.
Truncates a number to
an integer by removing
the fractional part of the
number.
SUMIF(range,criteria,sum_ra
nge)
Range is the range of cells you
want evaluated.
Criteria is the criteria in the
form of a number, expression, or
text that defines which cells will
be added. For example, criteria
can be expressed as 32, "32",
">32", "apples".
Sum_range are the actual
cells to sum.
TAN(number)
Number is the angle in radians
for which you want the tangent.
TAN(number)
Number is the angle in radians
for which you want the tangent.
TRUNC(number,num_digits)
Number is the number you
want to truncate.
Num_digits is a number
specifying the precision of the
truncation. The default value for
num_digits is 0 (zero).
=TAN(45*PI()/180)
Tangent of 45
degrees (1)
=TANH(-2)
Hyperbolic tangent
of -2 (-0.96403)
=TRUNC(8.9)
Integer part of 8.9
(8)
Database
The database functions have the following arguments:
o Database is the range of cells that makes up the list or database. A database is a list of
related data in which rows of related information are records, and columns of data are
fields. The first row of the list contains labels for each column.
o Field indicates which column is used in the function. Field can be given as text with
the column label enclosed between double quotation marks, such as "Age" or "Yield," or as
a number that represents the position of the column within the list: 1 for the first column, 2
for the second column, and so on.
o Criteria is the range of cells that contains the conditions you specify. You can use
any range for the criteria argument, as long as it includes at least one column label and at
least one cell below the column label for specifying a condition for the column.
Averages the values in
DAVER
a column of a list or
AGE
database that match
DCOUN
T
conditions you specify.
Counts the cells that
contain numbers in a
column of a list or
database that match
MobiSystems® OfficeSuite
DAVERAGE(database,field,criteria)
DCOUNT(database,field,criteria)
• 48
conditions you specify.
DCOUN
TA
The field argument is
optional. If field is
omitted, DCOUNT counts
all records in the database
that match the criteria.
Counts the nonblank
cells in a column of a list
or database that match
conditions you specify.
DCOUNTA(database,field,criteria)
The field argument is
optional. If field is
omitted, DCOUNTA
counts all records in the
database that match the
criteria.
DGET
DMAX
DMIN
DPROD
UCT
DSTDE
V
DSTDE
VP
Extracts a single
value from a column
of a list or database
that matches
conditions you
specify.
DGET(database,field,criteria)
Returns the largest
number in a column of a
list or database that
matches conditions you
specify.
Returns the smallest
number in a column of a
list or database that
matches conditions you
specify.
Multiplies the values
in a column of a list or
database that match
conditions you specify.
Estimates the standard
deviation of a population
based on a sample by
using the numbers in a
column of a list or
database that match
conditions you specify.
DMAX(database,field,criteria)
Calculates the
standard deviation of a
population based on the
entire population, using
the numbers in a column
of a list or database that
match conditions you
specify.
DSTDEVP(database,field,criteria)
MobiSystems® OfficeSuite
DMIN(database,field,criteria)
DPRODUCT(database,field,criteria)
DSTDEV(database,field,criteria)
• 49
DSUM
DVAR
DVARP
Adds the numbers in a
column of a list or
database that match
conditions you specify.
Estimates the variance
of a population based on a
sample by using the
numbers in a column of a
list or database that match
conditions you specify.
Calculates the
variance of a population
based on the entire
population by using the
numbers in a column of a
list or database that match
conditions you specify.
DSUM(database,field,criteria)
Returns the
depreciation of an asset
for a specified period
using the doubledeclining balance method
or some other method you
specify.
DDB(cost,salvage,life,period,factor)
DVAR(database,field,criteria)
DVARP(database,field,criteria)
Financial
DDB
Cost is the initial cost of the asset.
Salvage is the value at the end of the depreciation.
Life is the number of periods over which the asset is being
depreciated (the useful life of the asset).
Period is the period for which you want to calculate the
depreciation. Period must use the same units as life.
EFFEC
T
Returns the effective
annual interest rate, given
the nominal annual
interest rate and the
number of compounding
periods per year.
Factor is the rate at which the balance declines. If factor is
omitted, it is assumed to be 2 (the double-declining balance
method).
EFFECT(nominal_rate,npery)
Nominal_rate is the nominal interest rate.
Npery is the number of compounding periods per year.
EFFECT is calculated as follows:
FV
Returns the future
value of an investment
based on periodic,
constant payments and a
constant interest rate.
EFFECT= POWER((1+Nominal_rate/Npery),Npery) -1
FV(rate,nper,pmt,pv,type)
Rate is the interest rate per period.
Nper is the total number of payment periods in an annuity.
Pmt is the payment made each period; it cannot change
over the life of the annuity. Typically, pmt contains principal
and interest but no other fees or taxes. If pmt is omitted, you
MobiSystems® OfficeSuite
• 50
must include the pv argument.
Pv is the present value, or the lump-sum amount that a
series of future payments is worth right now. If pv is omitted,
it is assumed to be 0 (zero), and you must include the pmt
argument.
IPMT
Returns the interest
payment for a given
period for an investment
based on periodic,
constant payments and a
constant interest rate. For
a more complete
description of the
arguments in IPMT and
for more information
about annuity functions,
see PV.
Type is the number 0 or 1 and indicates when payments
are due. If type is omitted, it is assumed to be 0.
IPMT(rate,per,nper,pv,fv,type)
Rate is the interest rate per period.
Per is the period for which you want to find the interest
and must be in the range 1 to nper.
Nper is the total number of payment periods in an annuity.
Pv is the present value, or the lump-sum amount that a
series of future payments is worth right now.
Fv is the future value, or a cash balance you want to attain
after the last payment is made. If fv is omitted, it is assumed
to be 0 (the future value of a loan, for example, is 0).
Returns the nominal
NOMIN
annual
interest rate, given
AL
the effective rate and the
number of compounding
periods per year.
NPER
Returns the number of
periods for an investment
based on periodic,
constant payments and a
constant interest rate.
Type is the number 0 or 1 and indicates when payments
are due. If type is omitted, it is assumed to be 0.
NOMINAL(effect_rate,npery)
Effect_rate is the effective interest rate.
Npery is the number of compounding periods per year.
NPER(rate, pmt, pv, fv, type)
For a more complete description of the arguments in
NPER and for more information about annuity functions, see
PV.
Rate is the interest rate per period.
Pmt is the payment made each period; it cannot change
over the life of the annuity. Typically, pmt contains principal
and interest but no other fees or taxes.
Pv is the present value, or the lump-sum amount that a
series of future payments is worth right now.
Fv is the future value, or a cash balance you want to attain
after the last payment is made. If fv is omitted, it is assumed
to be 0 (the future value of a loan, for example, is 0).
Type is the number 0 or 1 and indicates when payments
are due.
NPV
Calculates the net
present value of an
MobiSystems® OfficeSuite
NPV(rate,value1,value2, ...)
• 51
*1 See the
remarks below
the table
PPMT
investment by using a
discount rate and a series
of future payments
(negative values) and
income (positive values).
Returns the payment
on the principal for a
given period for an
investment based on
periodic, constant
payments and a constant
interest rate.
Rate is the rate of discount over the length of
one period.
Value1, value2, ... are 1 to 29 arguments
representing the payments and income.
PPMT(rate,per,nper,pv,fv,type)
Rate is the interest rate per period.
Per specifies the period and must be in the range 1 to nper.
Nper is the total number of payment periods in an annuity.
Pv is the present value — the total amount that a series of
future payments is worth now.
Fv is the future value, or a cash balance you want to attain
after the last payment is made. If fv is omitted, it is assumed
to be 0 (zero), that is, the future value of a loan is 0.
Type is the number 0 or 1 and indicates when payments
are due.
PMT
Calculates the
payment for a loan based
on constant payments and
a constant interest rate.
PMT(rate,nper,pv,fv,type)
For a more complete description of the
arguments in PMT, see the PV function.
Rateis the interest rate for the loan.
Nper is the total number of payments for the
loan.
Pv is the present value, or the total amount that a
series of future payments is worth now; also known
as the principal.
Fv is the future value, or a cash balance you
want to attain after the last payment is made. If fv is
omitted, it is assumed to be 0 (zero), that is, the
future value of a loan is 0.
Type is the number 0 (zero) or 1 and indicates
when payments are due.
PV
Returns the present
value of an investment.
The present value is the
total amount that a series
of future payments is
worth now. For example,
when you borrow money,
the loan amount is the
present value to the
MobiSystems® OfficeSuite
PV(rate,nper,pmt,fv,type)
Rate is the interest rate per period. For example, if you
obtain an automobile loan at a 10 percent annual interest rate
and make monthly payments, your interest rate per month is
10%/12, or 0.83%. You would enter 10%/12, or 0.83%, or
0.0083, into the formula as the rate.
Nper is the total number of payment periods in an annuity.
• 52
lender.
For example, if you get a four-year car loan and make
monthly payments, your loan has 4*12 (or 48) periods. You
would enter 48 into the formula for nper.
Pmt is the payment made each period and cannot change
over the life of the annuity. Typically, pmt includes principal
and interest but no other fees or taxes. For example, the
monthly payments on a $10,000, four-year car loan at 12
percent are $263.33. You would enter -263.33 into the
formula as the pmt. If pmt is omitted, you must include the fv
argument.
Fv is the future value, or a cash balance you want to attain
after the last payment is made. If fv is omitted, it is assumed
to be 0 (the future value of a loan, for example, is 0). For
example, if you want to save $50,000 to pay for a special
project in 18 years, then $50,000 is the future value. You
could then make a conservative guess at an interest rate and
determine how much you must save each month. If fv is
omitted, you must include the pmt argument.
SLN
Returns the straightline depreciation of an
asset for one period.
Type is the number 0 or 1 and indicates when payments
are due.
SLN(cost,salvage,life)
Cost is the initial cost of the asset.
Salvage is the value at the end of the depreciation
(sometimes called the salvage value of the asset).
Life is the number of periods over which the asset is
depreciated (sometimes called the useful life of the asset).
SYD
Returns the sum-ofyears' digits depreciation
of an asset for a specified
period.
SYD is calculated as
follows:
SYD= ((costsalvage)*(lifeper+1)*2)/life*(life+1)
SYD(cost,salvage,life,per)
Cost is the initial cost of the asset.
Salvage is the value at the end of the
depreciation (sometimes called the salvage value of
the asset).
Life is the number of periods over which the
asset is depreciated (sometimes called the useful
life of the asset).
Per is the period and must use the same units as
life.
*1 Remarks for the NPV function:
•
Value1, value2, ... must be equally spaced in time and occur at the end of each period.
MobiSystems® OfficeSuite
• 53
• NPV uses the order of value1, value2, ... to interpret the order of cash flows. Be sure
to enter your payment and income values in the correct sequence.
• Arguments that are numbers, empty cells, logical values, or text representations of
numbers are counted; arguments that are error values or text that cannot be translated into
numbers are ignored.
• If an argument is an array or reference, only numbers in that array or reference are
counted. Empty cells, logical values, text, or error values in the array or reference are
ignored.
• The NPV investment begins one period before the date of the value1 cash flow and
ends with the last cash flow in the list. The NPV calculation is based on future cash flows.
If your first cash flow occurs at the beginning of the first period, the first value must be
added to the NPV result, not included in the values arguments. For more information, see
the examples below.
• NPV is similar to the PV function (present value). The primary difference between
PV and NPV is that PV allows cash flows to begin either at the end or at the beginning of
the period. Unlike the variable NPV cash flow values, PV cash flows must be constant
throughout the investment. For information about annuities and financial functions, see PV.
• NPV is also related to the IRR function (internal rate of return). IRR is the rate for
which NPV equals zero: NPV(IRR(...), ...) = 0.
Logical
AND
Returns TRUE if all
its arguments are TRUE;
returns FALSE if one or
more argument is FALSE.
AND(logical1,logical2, ...)
Logical1, logical2, ... are 1 to 30 conditions you want to
test that can be either TRUE or FALSE.
The arguments must evaluate to logical values
such as TRUE or FALSE, or the arguments must be
arrays or references that contain logical values.
FALSE
IF
Returns the logical
value FALSE.
Returns one value if a
condition you specify
evaluates to TRUE and
another value if it
evaluates to FALSE.
Use IF to conduct
conditional tests on values
and formulas.
NOT
Reverses the value of
its argument. Use NOT
when you want to make
sure a value is not equal
to one particular value.
MobiSystems® OfficeSuite
FALSE( )
You can also type the word FALSE directly onto the
worksheet or into the formula, and the program interprets it as
the logical value FALSE.
IF(logical_test,value_if_true,value_if_false)
Logical_test is any value or expression that can be
evaluated to TRUE or FALSE. This argument can use any
comparison calculation operator.
Value_if_true is the value that is returned if logical_test
is TRUE. Value_if_true can be another formula.
Value_if_false is the value that is returned if logical_test
is FALSE. Value_if_false can be another formula.
NOT(logical)
Logical is a value or expression that can be evaluated to
• 54
TRUE or FALSE.
OR
Returns TRUE if any
argument is TRUE;
returns FALSE if all
arguments are FALSE.
OR(logical1,logical2,...)
Logical1,logical2,... are 1 to 30 conditions you want to
test that can be either TRUE or FALSE.
The arguments
must evaluate to
logical values such as
TRUE or FALSE, or
in arrays or
references that
contain logical
values.
If an array or
reference argument
contains text or
empty cells, those
values are ignored.
TRUE
Returns the logical
value TRUE.
TRUE( )
You can enter the value TRUE directly into cells and
formulas without using this function. The TRUE function is
provided primarily for compatibility with other spreadsheet
programs.
Date and Time
Dates are stored as sequential serial numbers so they can be used in calculations. By
default, January 1, 1900 is serial number 1, and January 1, 2008 is serial number 39448
because it is 39,448 days after January 1, 1900.
Time values are a portion of a date value and represented by a decimal number (for
example, 12:00 PM is represented as 0.5 because it is half of a day).
DATE
DAY
*1
Returns the
sequential serial
number that
represents a particular
date.
Returns the day of a
date, represented by a
serial number. The day is
MobiSystems® OfficeSuite
DATE(year,month,day)
Year- The year argument can be one to four digits.
Month is a number representing the month of the year
Day is a number representing the day of the month. If day
is greater than the number of days in the month specified, day
adds that number of days to the first day in the month. For
example, DATE(2008,1,35) returns the serial number
representing February 4, 2008.
DAY(serial_number)
Serial_number is the date of the day you are trying to find.
• 55
given as an integer
ranging from 1 to 31.
HOUR
MINUT
E
MONT
H
*1
NOW
SECON
D
TIME
Returns the hour of a
time value. The hour is
given as an integer,
ranging from 0 (12:00
A.M.) to 23 (11:00 P.M.).
Returns the minutes of
a time value. The minute
is given as an integer,
ranging from 0 to 59.
Returns the month of a
date represented by a
serial number. The month
is given as an integer,
ranging from 1 (January)
to 12 (December).
Returns the serial
number of the current date
and time.
Returns the seconds of
a time value. The second
is given as an integer in
the range 0 (zero) to 59.
Returns the decimal
number for a particular
time. The decimal number
returned by TIME is a
value ranging from 0
(zero) to 0.99999999,
representing the times
from 0:00:00 (12:00:00
AM) to 23:59:59
(11:59:59 P.M.).
Dates should be entered by using the DATE function, or as
results of other formulas or functions. For example, use
DATE(2008,5,23) for the 23rd day of May, 2008.
HOUR(serial_number)
Serial_number is the time that contains the hour you want
to find. Times may be entered as text strings within quotation
marks (for example, "6:45 PM"), as decimal numbers (for
example, 0.78125, which represents 6:45 PM), or as results of
other formulas or functions (for example,
TIMEVALUE("6:45 PM")).
MINUTE(serial_number)
Serial_number is the time that contains the minute you
want to find. Times may be entered as text strings within
quotation marks (for example, "6:45 PM"), as decimal
numbers (for example, 0.78125, which represents 6:45 PM),
or as results of other formulas or functions (for example,
TIMEVALUE("6:45 PM")).
MONTH(serial_number)
Serial_number is the date of the month you are trying to
find. Dates should be entered by using the DATE function, or
as results of other formulas or functions. For example, use
DATE(2008,5,23) for the 23rd day of May, 2008. Problems
can occur if dates are entered as text
NOW( )
The NOW function changes only when the worksheet is
calculated. It is not updated continuously.
SECOND(serial_number)
Serial_number is the time that contains the seconds you
want to find. Times may be entered as text strings within
quotation marks (for example, "6:45 PM"), as decimal
numbers (for example, 0.78125, which represents 6:45 PM),
or as results of other formulas or functions (for example,
TIMEVALUE("6:45 PM")).
Time values are a portion of a date value and represented
by a decimal number (for example, 12:00 PM is represented
as 0.5 because it is half of a day).
TIME(hour,minute,second)
Hour is a number from 0 (zero) to 32767 representing the
hour. Any value greater than 23 will be divided by 24 and the
remainder will be treated as the hour value. For example,
TIME(27,0,0) = TIME(3,0,0) = .125 or 3:00 AM.
Minute is a number from 0 to 32767 representing the
minute. Any value greater than 59 will be converted to hours
and minutes. For example, TIME(0,750,0) = TIME(12,30,0) =
.520833 or 12:30 PM.
Second is a number from 0 to 32767 representing the
second. Any value greater than 59 will be converted to hours,
minutes, and seconds. For example, TIME(0,0,2000) =
MobiSystems® OfficeSuite
• 56
TODA
Y
WEEK
DAY
YEAR
*1
Returns the serial
number of the current
date. The serial number is
the date-time code used
for date and time
calculations.
Returns the day of the
week corresponding to a
date. The day is given as
an integer, ranging from 1
(Sunday) to 7 (Saturday),
by default.
Returns the year
corresponding to a date.
The year is returned as an
integer in the range 19009999.
TIME(0,33,22) = .023148 or 12:33:20 AM
TODAY( )
WEEKDAY(serial_number,return_type)
Serial_number is a sequential number that represents the
date of the day you are trying to find. Dates should be entered
by using the DATE function, or as results of other formulas or
functions. For example, use DATE(2008,5,23) for the 23rd
day of May, 2008.
YEAR(serial_number)
Serial_number is the date of the year you want to find.
Dates should be entered by using the DATE function, or as
results of other formulas or functions. For example, use
DATE(2008,5,23) for the 23rd day of May, 2008.
*1 - Values returned by the YEAR, MONTH and DAY functions will be Gregorian
values regardless of the display format for the supplied date value. For example, if the display
format of the supplied date was “Hijri,” the returned values for the YEAR, MONTH and
DAY functions will be values associated with the equivalent Gregorian date.
Information
ERRO
R.TYPE
(see index of
the different
errors and their
codes in the end
of Information
functions)
ISBLA
NK
*(see IS
Functions)
ISERR
*(see IS
Returns a number
corresponding to one
of the error values in
Microsoft Excel or
returns the #N/A
error if no error
exists. You can use
ERROR.TYPE in an
IF function to test for
an error value and
return a text string,
such as a message,
instead of the error
value.
Checks the type of
value and returns
TRUE or FALSE
depending on the
outcome. Returns
TRUE if the value is
blank.
Checks the type of
value and returns
MobiSystems® OfficeSuite
ERROR.TYPE(error_val)
Error_val is the error value whose identifying
number you want to find. Although error_val can
be the actual error value, it will usually be a
reference to a cell containing a formula that you
want to test.
ISBLANK(value)
Value is the value you want tested. Value can be
a blank (empty cell), error, logical, text, number, or
reference value, or a name referring to any of these,
that you want to test.
ISERR(value)
• 57
TRUE or FALSE
depending on the
outcome. Returns
TRUE if the value is
any error value
except #N/A.
Checks the type of
ISERR
value
and returns
OR
TRUE or FALSE
*(see IS
depending on the
Functions)
outcome. Returns
TRUE if the value is
any an error value.
Checks the type of
ISLOGI
value and returns
CAL
TRUE or FALSE
*(see IS
depending on the
Functions)
outcome. Returns
TRUE if the value is
a logical value.
Checks the type of
ISNA
value and returns
*(see IS
TRUE or FALSE
Functions)
depending on the
outcome. Returns
TRUE if the value is
the #N/A error value.
Checks the type of
ISNON
value
and returns
TEXT
TRUE or FALSE
*(see IS
depending on the
Functions)
outcome. Returns
TRUE if the value is
not text.
Checks the type of
ISNUM
value
and returns
BER
TRUE or FALSE
*(see IS
depending on the
Functions)
outcome. Returns
TRUE if the value is
a number
Checks the type of
ISREF
value and returns
*(see IS
TRUE or FALSE
Functions)
depending on the
outcome. Returns
TRUE if the value is
a reference.
Functions)
MobiSystems® OfficeSuite
Value is the value you want tested. Value can be
a blank (empty cell), error, logical, text, number, or
reference value, or a name referring to any of these,
that you want to test.
ISERROR(value)
Value is the value you want tested. Value can be
a blank (empty cell), error, logical, text, number, or
reference value, or a name referring to any of these,
that you want to test.
ISLOGICAL(value)
Value is the value you want tested. Value can be
a blank (empty cell), error, logical, text, number, or
reference value, or a name referring to any of these,
that you want to test.
ISNA(value)
Value is the value you want tested. Value can be
a blank (empty cell), error, logical, text, number, or
reference value, or a name referring to any of these,
that you want to test.
ISNONTEXT(value)
Value is the value you want tested. Value can be
a blank (empty cell), error, logical, text, number, or
reference value, or a name referring to any of these,
that you want to test.
ISNUMBER(value)
Value is the value you want tested. Value can be
a blank (empty cell), error, logical, text, number, or
reference value, or a name referring to any of these,
that you want to test.
ISREF(value)
Value is the value you want tested. Value can be
a blank (empty cell), error, logical, text, number, or
reference value, or a name referring to any of these,
that you want to test.
• 58
ISTEX
T
*(see IS
Functions)
ISEVE
N
ISODD
N
(see N
Checks the type of
value and returns
TRUE or FALSE
depending on the
outcome. Returns
TRUE if the value is
text.
Returns TRUE if
number is even, or
FALSE if number is odd.
If this function is not
available, and returns the
#NAME? Error.
Returns TRUE if
number is odd, or FALSE
if number is even. If this
function is not available,
and returns the #NAME?
Error.
Returns a value
converted to a number.
Value is the value you want tested. Value can be
a blank (empty cell), error, logical, text, number, or
reference value, or a name referring to any of these,
that you want to test.
ISEVEN(number)
Number is the value to test. If number is not an integer, it
is truncated.
ISODD(number)
Number is the value to test. If number is not an integer, it
is truncated. If number is nonnumeric, ISODD returns the
#VALUE! error value.
N(value)
Value is the value you want converted. N converts values
listed in the following table.
function values)
NA
ISTEXT(value)
Returns the error value
#N/A. #N/A is the error
value that means "no
value is available." Use
NA to mark empty cells.
By entering #N/A in cells
where you are missing
information, you can
avoid the problem of
unintentionally including
empty cells in your
calculations.
NA( )
Error Types
If error_val is
ERROR.TYPE
returns
#NULL!
1
#DIV/0!
2
#VALUE!
3
#REF!
4
#NAME?
5
#NUM!
6
MobiSystems® OfficeSuite
• 59
#N/A
7
Anything else
#N/A
IS Functions
Each of these functions, referred to collectively as the IS functions, checks the type of value
and returns TRUE or FALSE depending on the outcome. For example, the ISBLANK
function returns the logical value TRUE if value is a reference to an empty cell; otherwise it
returns FALSE.
ISBLANK(value), ISERR(value), ISERROR(value), ISLOGICAL(value),
ISNA(value), ISNONTEXT(value), ISNUMBER(value), ISREF(value), ISTEXT(value)
The IS functions are useful in formulas for testing the outcome of a calculation. When
combined with the IF function, they provide a method for locating errors in formulas (see the
following examples).
Function
Returns TRUE if
ISBLANK
Value refers to an empty cell.
ISERR
Value refers to any error value except #N/A.
ISERROR
Value refers to any error value (#N/A, #VALUE!, #REF!, #DIV/0!,
#NUM!, #NAME?, or #NULL!).
ISLOGICAL
Value refers to a logical value.
ISNA
Value refers to the #N/A (value not available) error value.
ISNONTEXT
Value refers to any item that is not text. (Note that this function returns
TRUE if value refers to a blank cell.)
ISNUMBER
Value refers to a number.
ISREF
Value refers to a reference.
ISTEXT
Value refers to text.
N function values
If value is or refers to
N returns
A number
That number
A date, in one of the built-in date formats
available in Microsoft Excel
MobiSystems® OfficeSuite
The serial number of
that date
• 60
TRUE
1
FALSE
0
An error value, such as #DIV/0!
The error value
Anything else
0
Lookup and Reference
CHOO
SE
COLU
MN
Uses index_num to
return a value from the list
of value arguments. Use
CHOOSE to select one of
up to 29 values based on
the index number. For
example, if value1
through value7 are the
days of the week,
CHOOSE returns one of
the days when a number
between 1 and 7 is used as
index_num.
Returns the column
number of the given
reference.
CHOOSE(index_num,value1,value2,...)
Index_num specifies which value argument is selected.
Index_num must be a number between 1 and 29, or a formula
or reference to a cell containing a number between 1 and 29.
Value1,value2,... are 1 to 29 value arguments from which
CHOOSE selects a value or an action to perform based on
index_num. The arguments can be numbers, cell references,
defined names, formulas, functions, or text.
COLUMN(reference)
Reference is the cell or range of cells for which you want
the column number.
If reference is omitted, it is assumed to be the reference of
the cell in which the COLUMN function appears.
COLU
MNS
HLOO
KUP
Returns the number of
columns in an array or
reference.
Searches for a
value in the top row
of an array of values,
and then returns a
value in the same
column from a row
you specify in the
table or array.
Reference cannot refer to multiple areas.
COLUMNS(array)
Array is an array or array formula, or a reference to a
range of cells for which you want the number of columns.
HLOOKUP(lookup_value,table_array,row_index_num,ra
nge_lookup)
Lookup_value is the value to be found in the first row of
the array. Lookup_value can be a value, a reference, or a text
string.
Table_array is a table of information in which data is
looked up. Use a reference to a range or a range name.
Row_index_num is the row number in table_array from
which the matching value will be returned. A row_index_num
of 1 returns the first row value in table_array, a
row_index_num of 2 returns the second row value in
table_array, and so on. Range_lookup is a logical value that
MobiSystems® OfficeSuite
• 61
INDEX
Returns the value of
an element in a table or an
array, selected by the row
and column number
indexes.
The INDEX function
has two syntax forms:
array and reference. The
array form always returns
a value or array of values;
the reference form always
returns a reference. Use
the array form if the first
argument to INDEX is an
array constant.
specifies whether you want HLOOKUP to find an exact
match or an approximate match. If TRUE or omitted, an
approximate match is returned. In other words, if an exact
match is not found, the next largest value that is less than
lookup_value is returned.
INDEX(array,row_num,column_num)
Array is a range of cells or an array constant.
If array contains only one row or column, the
corresponding row_num or column_num argument is
optional.
If array has more than one row and more than one column,
and only row_num or column_num is used, INDEX returns
an array of the entire row or column in array.
Row_num selects the row in array from which to return a
value. If row_num is omitted, column_num is required.
Column_num selects the column in array from
which to return a value. If column_num is omitted,
row_num is required.
INDEX(reference,row_num,column_num,area_num)
Reference is a reference to one or more cell ranges.
If you are entering a nonadjacent range for the reference,
enclose reference in parentheses.
If each area in reference contains only one row or column,
the row_num or column_num argument, respectively, is
optional. For example, for a single row reference, use
INDEX(reference,,column_num).
Row_num is the number of the row in reference from
which to return a reference.
Column_num is the number of the column in reference
from which to return a reference.
Area_num selects a range in reference from which to
return the intersection of row_num and column_num. The
first area selected or entered is numbered 1, the second is 2,
and so on. If area_num is omitted, INDEX uses area 1.
LOOK
UP
Returns a value either
from a one-row or onecolumn range or from an
array. The LOOKUP
function has two syntax
forms: vector and array.
The vector form of
LOOKUP looks in a onerow or one-column range
(known as a vector) for a
MobiSystems® OfficeSuite
LOOKUP(lookup_value,lookup_vector,result_ve
ctor)
Lookup_value is a value that LOOKUP searches
for in the first vector. Lookup_value can be a
number, text, a logical value, or a name or
reference that refers to a value.
• 62
value and returns a value
from the same position in
a second one-row or onecolumn range. The array
form of LOOKUP looks
in the first row or column
of an array for the
specified value and
returns a value from the
same position in the last
row or column of the
array.
Lookup_vector is a range that contains only one
row or one column. The values in lookup_vector
can be text, numbers, or logical values.
The values in lookup_vector must be placed in
ascending order: ...,-2, -1, 0, 1, 2, ..., A-Z, FALSE,
TRUE; otherwise, LOOKUP may not give the
correct value. Uppercase and lowercase text are
equivalent.
Result_vector is a range that contains only one
row or column. It must be the same size as
lookup_vector.
LOOKUP(lookup_value,array)
Lookup_value is a value that LOOKUP searches for in an
array. Lookup_value can be a number, text, a logical value, or
a name or reference that refers to a value.
If LOOKUP can't find the lookup_value, it uses the largest
value in the array that is less than or equal to lookup_value.
If lookup_value is smaller than the smallest value in the
first row or column (depending on the array dimensions),
LOOKUP returns the #N/A error value.
Array is a range of cells that contains text, numbers, or
logical values that you want to compare with lookup_value.
The array form of LOOKUP is very similar to the
HLOOKUP and VLOOKUP functions. The difference is that
HLOOKUP searches for lookup_value in the first row,
VLOOKUP searches in the first column, and LOOKUP
searches according to the dimensions of array.
If array covers an area that is wider than it is tall (more
columns than rows), LOOKUP searches for lookup_value in
the first row.
If array is square or is taller than it is wide (more rows
than columns), LOOKUP searches in the first column.
With HLOOKUP and VLOOKUP, you can index down or
across, but LOOKUP always selects the last value in the row
or column.
MATC
H
Returns the relative
position of an item in an
array or a reference that
MobiSystems® OfficeSuite
The values in array must be placed in ascending order: ...,2, -1, 0, 1, 2, ..., A-Z, FALSE, TRUE; otherwise, LOOKUP
may not give the correct value. Uppercase and lowercase text
are equivalent.
MATCH(lookup_value,lookup_array,match_type)
Lookup_value is the value you use to find the value you
• 63
matches a specified value
in a specified order. Use
MATCH instead of one of
the LOOKUP functions
when you need the
position of an item in a
range instead of the item
itself.
want in a table.
Lookup_value is the value you want to match in
lookup_array. For example, when you look up someone's
number in a telephone book, you are using the person's name
as the lookup value, but the telephone number is the value you
want.
Lookup_value can be a value (number, text, or logical
value) or a cell reference to a number, text, or logical value.
Lookup_array is a contiguous range of cells containing
possible lookup values. Lookup_array must be an array or an
array reference.
Match_type is the number -1, 0, or 1. Match_type
specifies how Microsoft Excel matches lookup_value with
values in lookup_array.
If match_type is 1, MATCH finds the largest value that is
less than or equal to lookup_value. Lookup_array must be
placed in ascending order: ...-2, -1, 0, 1, 2, ..., A-Z, FALSE,
TRUE.
If match_type is 0, MATCH finds the first value that is
exactly equal to lookup_value. Lookup_array can be in any
order.
If match_type is -1, MATCH finds the smallest value that
is greater than or equal to lookup_value. Lookup_array must
be placed in descending order: TRUE, FALSE, Z-A, ...2, 1, 0,
-1, -2, ..., and so on.
ROW
Returns the row
number of a reference.
If match_type is omitted, it is assumed to be 1.
ROW(reference)
Reference is the cell or range of cells for which you want
the row number.
If reference is omitted, it is assumed to be the reference of
the cell in which the ROW function appears.
ROWS
TRANS
POSE
Returns the number of
rows in a reference or
array.
Returns a vertical
range of cells as a
horizontal range, or vice
versa. TRANSPOSE must
be entered as an array
formula in a range that
has the same number of
rows and columns,
respectively, as an array
MobiSystems® OfficeSuite
Reference cannot refer to multiple areas.
ROWS(array)
Array is an array, an array formula, or a reference to a
range of cells for which you want the number of rows.
TRANSPOSE(array)
Array is an array or range of cells on a worksheet that you
want to transpose. The transpose of an array is created by
using the first row of the array as the first column of the new
array, the second row of the array as the second column of the
new array, and so on.
• 64
VLOO
KUP
has columns and rows.
Use TRANSPOSE to shift
the vertical and horizontal
orientation of an array on
a worksheet.
Searches for a value in
the leftmost column of a
table, and then returns a
value in the same row
from a column you
specify in the table. Use
VLOOKUP instead of
HLOOKUP when your
comparison values are
located in a column to the
left of the data you want
to find.
The V in VLOOKUP
stands for "Vertical."
VLOOKUP(lookup_value,table_array,col_index_num,ran
ge_lookup)
Lookup_value is the value to be found in the first column
of the array. Lookup_value can be a value, a reference, or a
text string.
Table_array is the table of information in which data is
looked up. Use a reference to a range or a range name, such as
Database or List.
If range_lookup is TRUE, the values in the first column of
table_array must be placed in ascending order: ..., -2, -1, 0, 1,
2, ..., A-Z, FALSE, TRUE; otherwise VLOOKUP may not
give the correct value. If range_lookup is FALSE, table_array
does not need to be sorted.
You can put the values in ascending order by choosing the
Sort command from the Data menu and selecting Ascending.
The values in the first column of table_array can be text,
numbers, or logical values.
Col_index_num is the column number in table_array from
which the matching value must be returned. A col_index_num
of 1 returns the value in the first column in table_array; a
col_index_num of 2 returns the value in the second column in
table_array, and so on
Range_lookup is a logical value that specifies whether you
want VLOOKUP to find an exact match or an approximate
match. If TRUE or omitted, an approximate match is returned.
In other words, if an exact match is not found, the next largest
value that is less than lookup_value is returned
Text and Data
CHAR
CONC
ATENAT
Returns the
CHAR(number)
character specified by
a number. Use CHAR
Number is a number between 1 and 255
to translate code page specifying which character you want. The character
numbers you might
is from the character set used by your handheld.
get from files on
other types of
computers into
characters.
Joins several text
strings into one text
MobiSystems® OfficeSuite
CONCATENATE (text1,text2,...)
Text1, text2, ... are 1 to 30 text items to be joined into a
• 65
string.
E
EXACT
FIND
LEFT
Compares two text
strings and returns TRUE
if they are exactly the
same, FALSE otherwise.
EXACT is case-sensitive
but ignores formatting
differences. Use EXACT
to test text being entered
into a document.
FIND finds one text
string (find_text) within
another text string
(within_text), and returns
the number of the starting
position of find_text, from
the first character of
within_text. You can also
use SEARCH to find one
text string within another,
but unlike SEARCH,
FIND is case sensitive
and doesn't allow
wildcard characters.
LEFT returns the first
character or characters in
a text string, based on the
number of characters you
specify.
single text item. The text items can be text strings, numbers,
or single-cell references.
EXACT(text1,text2)
Text1 is the first text string. Text2 is the second text
string.
FIND(find_text,within_text,start_num)
Find_text is the text you want to find.
Within_text is the text containing the text you want to
find.
Start_num specifies the character at which to start the
search. The first character in within_text is character number
1. If you omit start_num, it is assumed to be 1.
LEFT(text,num_chars)
Text is the text string that contains the characters you want
to extract.
Num_chars specifies the number of characters you want
LEFT to extract.
LEN
LOWE
R
MID
LEN returns the
number of characters in a
text string.
Converts all uppercase
letters in a text string to
lowercase.
MID returns a specific
number of characters from
a text string, starting at
the position you specify,
based on the number of
characters you specify.
Num_chars must be greater than or equal to zero. If
num_chars is greater than the length of text, LEFT returns all
of text. If num_chars is omitted, it is assumed to be 1.
LEN(text)
Text is the text whose length you want to find. Spaces
count as characters.
LOWER(text)
Text is the text you want to convert to lowercase. LOWER
does not change characters in text that are not letters.
MID(text,start_num,num_chars)
Text is the text string containing the characters you want
to extract.
Start_num is the position of the first character you want to
extract in text. The first character in text has start_num 1, and
so on.
Num_chars specifies the number of characters you want
MID to return from text.
MobiSystems® OfficeSuite
• 66
PROPE
R
REPLA
CE
Capitalizes the first
letter in a text string and
any other letters in text
that follow any character
other than a letter.
Converts all other letters
to lowercase letters.
REPLACE replaces
part of a text string, based
on the number of
characters you specify,
with a different text
string.
PROPER(text)
Text is text enclosed in quotation marks, a formula that
returns text, or a reference to a cell containing the text you
want to partially capitalize.
REPLACE(old_text,start_num,num_chars,new_text)
Old_text is text in which you want to replace some
characters.
Start_num is the position of the character in old_text that
you want to replace with new_text.
Num_chars is the number of characters in old_text that
you want REPLACE to replace with new_text.
REPT
Repeats text a given
number of times. Use
REPT to fill a cell with a
number of instances of a
text string.
If number_times is 0
(zero), REPT returns ""
(empty text). If
number_times is not an
integer, it is truncated.
RIGHT
RIGHT returns the
last character or
characters in a text
string, based on the
number of characters
you specify.
New_text is the text that will replace characters in
old_text.
REPT(text,number_times)
Text is the text you want to repeat.
Number_times is a positive number specifying the number
of times to repeat text.
RIGHT(text,num_chars)
Text is the text string containing the characters
you want to extract.
Num_chars specifies the number of characters
you want RIGHT to extract.
Num_chars must
be greater than or
Num_bytes specifies the number of characters
equal to zero. If
you want RIGHTB to extract, based on bytes.
num_chars is greater
than the length of
text, RIGHT returns
all of text. If
num_chars is omitted,
it is assumed to be 1.
Substitutes new_text
SUBSTI
for old_text in a text
TUTE
string. Use SUBSTITUTE
when you want to replace
specific text in a text
string; use REPLACE
when you want to replace
MobiSystems® OfficeSuite
SUBSTITUTE(text,old_text,new_text,instance_num)
Text is the text or the reference to a cell containing text for
which you want to substitute characters.
Old_text is the text you want to replace.
• 67
any text that occurs in a
specific location in a text
string.
T
Returns the text
referred to by value.
New_text is the text you want to replace old_text with.
Instance_num specifies which occurrence of old_text you
want to replace with new_text. If you specify instance_num,
only that instance of old_text is replaced. Otherwise, every
occurrence of old_text in text is changed to new_text.
T(value)
Value is the value you want to test.
If value is or refers to
text, T returns value. If
value does not refer to
text, T returns "" (empty
text).
TRIM
UPPER
You do not generally
need to use the T function
in a formula because
Microsoft Excel
automatically converts
values as necessary. This
function is provided for
compatibility with other
spreadsheet programs.
Removes all spaces
from text except for single
spaces between words.
Use TRIM on text that
you have received from
another application that
may have irregular
spacing.
Converts text to
uppercase.
TRIM(text)
Text is the text from which you want spaces removed.
UPPER(text)
Text is the text you want converted to uppercase. Text can
be a reference or text string.
MobiSystems® OfficeSuite
• 68