1
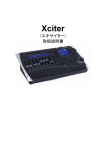
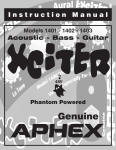
Evolved Sonic Solutions, L.L.C.
301 Main Plaza, Suite 308, New Braunfels, TX 78130 USA
©2011 Evolved Sonic Solutions, L.L.C. All rights reserved. Evolved
Sonic Solutions, Evolved Sonic, EXO Xciter, the EXO Xciter logo,
EXO Surface Mount, EXO Cable, Xcite your world, Are you an
Xciter?, Live out loud, and share the experience are trademarks of
Evolved Sonic Solutions, L.L.C. All other logos and trademarks are
the property of their respective owners.
Quick Start Guide
User’s Manual
Warranty
Instructions available at
exoxciter.com
Contents of Packaging
EXO Xciter
EXO Cable
EXO Mount (removable)
Thank you
for your purchase.
It is our goal to offer you the highest quality
and innovative products, each designed to Xcite
your world™. We look forward to growing our
relationship with you and hope you will let us know
how we’re doing. Please email us your thoughts,
ideas and comments to [email protected]
Thank you,
The Evolved Sonic Team
Follow EXO Xciter on:
exoxciter.com
Table of Contents
pg2
- Quick Start Guide
pg4
- Product Overview
- Charging
pg5
- Turning On and Off
- Pairing to a Bluetooth Enabled Device
pg6
- De-Pairing
- Functions
- Connecting to a non-Bluetooth device
pg7
- Using EXO Xciter for Conference calls
pg8
- Performance Specifications
- Precautions
pg9
- FCC Compliance
pg10
- FAQ
pg12
- Warranty
1
EXO Xciter™ Quick Start Guide
Conferencing (For conference calls)
1. Turn the Bluetooth OFF on your cellular phone.
2. Connect the EXO Xciter to your cellular phone
using the EXO Cable (3.5mm stereo jack) provided
in the packaging.
3. Turn ON the EXO Xciter without turning on the Bluetooth .
4. Place your call.
®
Play
Place the EXO Xciter on many surfaces to find and
experience the best sound.
Power On
Press and hold the power icon for three seconds or until it
beeps.
Charging
Connect the EXO Xciter to any USB 5.0VDC charger such as
a powered USB port on a computer or USB wall charger with
the supplied EXO cable.
Pairing
The EXO Xciter can be paired with any Bluetooth enabled
device. After pairing, the EXO Xciter will automatically re-pair
to the audio device it was most recently paired.
®
Pairing Instructions
1. Press the Bluetooth icon. The LED will “blink” RED
and BLUE
2. Search for new Bluetooth device on your audio/
source device
3. Select EXO Xciter
4. Enter code 0000 if required
®
®
Re-Pair Instructions
Simply turn the EXO Xciter ON (DO NOT press the
Bluetooth icon after turning the unit on). It will automatically
re-pair with your audio/source device.
®
2
®
If there is an echo, simply extend the cable to full length and
lower the volume on your phone.
Mount Instructions
1. Remove the EXO Xciter and temporary EXO
Mount ring, which is attached to the EXO Xciter in
the packaging.
2. With the EXO Xciter placed in the EXO Mount,
remove the tape and place on a smooth surface.
(The EXO Mount is easily removed and can be re-used)
Safety Tips
Driving
Please check with the laws and regulations on the use of
wireless phones and their accessories in the areas where
you drive. Always obey them. The use of this device may be
prohibited or restricted in certain areas.
Aircraft
When instructed by airline personnel, please turn off device
and suspend use. Please do not use in-flight until airline crew
clears the use of electronic devices.
3
Product Overview
Turning On and Off
Power On / Off (Hold for 3 full seconds)
Pair / Play / Pause (Only active with Bluetooth link)
Volume Up / Next Track (Only active with Bluetooth link)
Power on: Touch and hold the
key for 3 seconds until you
hear a ‘ding-dong’ prompt tone. The On/Off LED indicator
will change to GREEN. (Note: If it is charging, the indicator will
be ORANGE).
Volume Down / Previous track (Only Active with Bluetooth link)
EXO Xciter is designed to transform your world into
wireless sound.
Place the EXO Xciter on any semi rigid surface such as:
wood, glass, drywall, plastic, fiberglass, etc., and you are now
an Xciter!
Share the experience.
Charging
Connect the EXO Xciter to any USB 5.0VDC charger such as
a powered USB port on a computer or USB wall charger with
the supplied EXO Cable.
Power off: Touch and hold the
key for 3 seconds until a
‘ding-dong’ prompt tone appears again and the indicator is off
(Note: If it is charging, the indicator will turn RED).
Pairing to a Bluetooth Enabled
Phone/Computer/Etc.
After power on, touch the
key (no need to hold the key),
the indicator LED will turn BLUE. After several seconds the
indicator LED will turn to a blinking BLUE/RED and sound a
‘beep’ prompt tone and ‘beep-beep’ prompt tone.
This indicates that the EXO Xciter is now ready to pair. While
it is in pairing mode, access the Bluetooth menu of your
Phone/Computer/Etc. and pair the EXO Xciter.
The On/Off indicator LED next to the
will turn to red
indicating charging and EXO Xciter power is off.
Select EXO Xciter from the found devices list. Your Phone/
Computer/Etc. will request a Password/PIN Code, enter 0000
and press OK.
The On/Off indicator LED will turn to ORANGE if charging
and EXO Xciter turned On.
Pairing is successful once the ‘blinking’ BLUE LED indicator
turns to a steady BLUE and sounds a ‘beep’ prompt tone.
After Charging
Green On/Off LED indicates the unit is On.
The EXO Xciter is now ready to use.
Note: Next time the EXO Xciter is turned off and back on, it
will re-link to the last paired device automatically.
No On/Off LED indicates the unit is Off.
4
5
De-Pair
To De-Pair the EXO Xciter from a paired Bluetooth source,
go to the device Bluetooth menu and “forget” EXO Xciter
from its menu.
EXO Xciter Functions (Bluetooth connection only)
the USB mini connector on the EXO Xciter and plug the USB
connector into your computer, or the 3.5mm audio jack into
the headphone output of your device.
(Note: In this play mode, keys on the EXO Xciter will not function
except for the power On/Off key)
Using the EXO Xciter for
Mobile Phone Conference Calls
Play/Pause
Touch the key (no need to hold the key).
The Play/Pause functions of the key are only active after pairing is successful. (Note: Some mobile phones or PC multimedia players do not support these operations).
Volume Up
Touch the key repeatedly (no need to hold the key). The volume is up to maximum when ‘beep’ tone occurs.
Volume down
Touch the key repeatedly (no need to hold the key).
Plug the USB mini connector of the EXO Cable into the EXO
Xciter. Place call.
Next Track
Touch and hold for 3 seconds to select next song
(Note: Some devices will not support this operation).
Features
Previous Track
Touch and hold the key for 3 seconds to select previous song (Note: Some devices will not support this operation).
Connecting with Non Bluetooth
Audio Sources
The supplied EXO Cable (Combo USB, USB Power, 3.5mm
stereo jack) is used to connect the EXO Xciter to any audio
source with a (3.5mm / 1/8”) stereo headphone audio output.
Plug the USB mini connector of the supplied EXO Cable into
6
To make a conference call, go to your phone settings and turn
OFF Bluetooth to de-pair the EXO Xciter from your phone.
Turn OFF the EXO Xciter and then turn the EXO Xciter back
ON (DO NOT press the Bluetooth icon on the EXO Xciter).
®
®
Plug the 3.5mm stereo jack of the supplied EXO Cable into
the headphone output on your phone.
1. Solid State acoustic motor technology
2. Rechargeable Lithium-ion Battery
3. EXO Cable (Combo USB, USB Power, 3.5mm stereo jack)
connectivity
Benefits
The EXO Xciter Bluetooth provides high quality audio for
multiple applications including music sharing, conference calls,
presentations, video audio playback, and audio enhancement
of your favorite video games. The EXO Xciter Bluetooth will
link with Bluetooth enabled devices such as smart phones,
7
Mp3 players, computers, video cameras, gaming consoles,
projectors, etc.
Connecting the EXO Xciter to conventional audio sources
is easily done with the EXO Cable (Combo USB, USB Power,
3.5mm stereo jack).
For EXO Xciter accessories visit www.exoxciter.com
Performance Specifications
Compliant with Bluetooth V2.1+EDR
Supported Bluetooth Profiles: HSP/HPF, SPP, OPP, PBAP, A2DP
and AVRCP
Operating Range: 10 meters (Class 2, Bluetooth standard)
Max Peak Power: 5 watts RMS
Charging Time: 2 hours
Standby Time: Up to 1 month
Built-in Battery Charger (charging by PC/Laptop USB connector
or AC Wall Charger compatible with USB port).
Frequency Range: 200 to 20kHz
Music Playing Time: 4 to 5 hours (high volume level)
Precautions
•
•
•
•
•
•
•
8
Carefully read the instructions and check the accessories before use.
Do not drop.
Do not disassemble.
Do not force EXO Xciter against a surface.
Audio quality varies by surface application. Explore a variety of surfaces to achieve best sound quality.
Make sure the EXO Xciter Elastomeric disk on the bottom is clean and makes good contact with surface.
Turn off EXO Xciter when not in use.
FCC Compliance
This device complies with Part 15 of the FCC Rules. Operation
is subject to the following two conditions:
(1) this device may not cause harmful interference, and,
(2) this device must accept any interference received, including
interference that may cause undesired operation.
Changes or modifications not expressly approved by the party
responsible for compliance could void the user’s authority to
operate the equipment.
This equipment has been tested and found to comply with the
limits for a Class B digital device, pursuant to part 15 of the
FCC Rules. These limits are designed to provide reasonable
protection against harmful interference in a residential
installation.This equipment generates uses and can radiate radio
frequency energy and, if not installed and used in accordance
with the instructions, may cause harmful interference to radio
communications.
However, there is no guarantee that interference will not occur
in a particular installation. If this equipment does cause harmful
interference to radio or television reception, which can be
determined by turning the equipment off and on, the user is
encouraged to try to correct the interference by one or more
of the following measures:
- Reorient or relocate the receiving antenna.
- Increase the separation between the equipment and receiver.
- Connect the equipment into an outlet on a circuit different
from that to which the receiver is connected.
- Consult the dealer or an experienced radio/TV technician
for help.
9
FAQ
Q: The volume is low after I have turned the unit to
full volume.
Q: When phone call comes in and I’m playing music from my cellular phone bluetooth paired to my Xciter the call is only heard on my phone not the Xciter.
A: Make sure the Xciter has good contact with the
surface and if that does not work try another surface or recharge battery.
A:
The teleconferencing feature only works when your cellular phone is connected to your Xciter with the 3.5 stereo jack cable (coming from Bluetooth to 3.5 stereo jack connection you must turn your Xciter OFF and ON).
Q: I turned off the Bluetooth on my cellular phone, connected the EXO Xciter to my phone, dialed a number and the EXO Xciter was squawking.
A: Simply turn your Xciter OFF and then ON again. The power cycle will disrupt the auto-pair mode.
Q: I press the power button for three seconds and there is not a beep or GREEN light.
A: This is an indication that your Xciter is out of power... recharge your Xciter using the EXO Cable.
Q: The Xciter is blinking blue indicating the unit is paired but no sound.
A: Verify the Bluetooth connect (blinking BLUE LED) press the mute button on your Xciter... check volume, selected audio output and mute position on your phone.
10
Q: I can not pair to the Xciter with another phone.
A: Disconnect with the first audio device prior to pairing with second audio device.
Q: How do I use the Xciter with devices that are not Bluetooth enabled.
A: Connect the Xciter to device with the 3.5 mm stereo jack on the EXO Cable.
Q: I plugged my Xciter into my gaming device (Nintendo DS) using the 3.5 stereo jack cable but no sound.
A: Turn the Xciter OFF then back ON and check the volume on the gaming device.
Q: My audio device is searching for the EXO Xciter but is not finding it.
A: Turn the Xciter OFF and then ON... and then repeat Bluetooth pairing instructions on page 3 of this manual.
If your question is not answered in this section, go to
www.exoxciter.com or call 888.814.4440
11
Limited Warranty
What Does The Warranty Cover?
Evolved Sonic warrants that its products shall be free from
defects in materials or workmanship, with the exceptions
stated below.
What Is The Period Of Coverage?
90 days from the date of purchase. The term of any warranties
implied by law shall expire when your limited warranty expires.
What Does The Warranty Not Cover?
This warranty does not cover any defect, malfunction or
failure that occurs as a result of: improper installation; misuse
or failure to follow the product directions; abuse; or use with
improper, unintended or faulty equipment. (For information
on proper installation, operation and use consult the instructions
supplied with the product. If you require a replacement manual,
you may download a manual from www.exoxciter.com). Also,
consequential and incidental damages are not recoverable
under this warranty.
What Will Evolved Sonic Do To Correct The Problem?
Evolved Sonic will, at its option, repair or replace any product
that proves to be defective in material or workmanship.
are experiencing. In the United States, you may alternatively
contact Evolved Sonic by telephone at 888-814-4440. Please
be prepared to provide the same information. If the problem
appears to be related to a defect in material or workmanship,
Evolved Sonic will provide you a return authorization and
instructions for return shipment. Return shipments shall be at
the customer’s expense, and the return must be accompanied
by the original proof of purchase. You should insure the
shipment as appropriate because you are responsible for the
product until it arrives at Evolved Sonic.
Customer Service
The answers to most setup and performance questions can be
found in the guide. If you live in North America and still can’t
find the information you need on our website, please call our
customer service team for assistance before returning the
device under our return policy.
Tel: 888-814-4440
Email: [email protected]
For the most up-to-date information, be sure to check
our website at: www.exoxciter.com
How To Get Warranty Service:
To get a covered product repaired or replaced, you must
contact Evolved Sonic during the warranty period by email at
techsupport@exoxciter. com. You must include in your email,
your name, address, email address, telephone number, date
of purchase and a complete description of the problem you
12
13