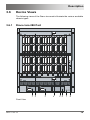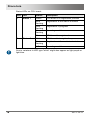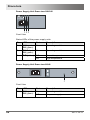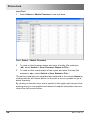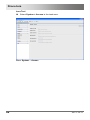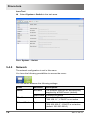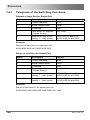
1
User Manual Edition: 2011-10-11 Draco tera Model: 480 Series IHSE GmbH Maybachstrasse 11 88094 Oberteuringen Germany [email protected] www.ihse.de Tel. +49 7546-9248-0 Fax +49 7546-9248-48 Draco tera Copyright © 2011. All rights reserved. This information may not be reproduced in any manner without the prior written consent of the manufacturer. Information in this document is subject to change without notice. Trademarks All trademark and trade names mentioned in this document are acknowledged to be the property of their respective owners. Disclaimer While every precaution has been taken during preparation of this manual, the manufacturer assumes no liability for errors or omissions. Neither does the manufacturer assume any liability for damages resulting from the use of the information contained herein. The manufacturer reserves the right to change specifications, functions, or circuitry of the product without notice. The manufacturer cannot accept liability for damage due to misuse of the product or due to any other circumstances outside the manufacturer’s control (whether environmental or installation related). The manufacturer shall not be liable for any loss, damage, or injury arising directly, indirectly, incidentally, or consequently from the use of this product. 2 2011-10-11 Contents Contents 1 About This Manual ....................................................................... 7 1.1 Scope.................................................................................. 7 1.2 Validity ................................................................................ 7 1.3 Cautions and Notes ............................................................ 7 1.1 Spellings ............................................................................. 7 2 Safety Instructions ....................................................................... 8 3 Description ................................................................................... 9 3.1 Application .......................................................................... 9 3.2 Access Options ................................................................... 9 3.3 System Overview .............................................................. 10 3.4 Product Range .................................................................. 11 3.5 Accessories....................................................................... 11 3.6 Device Views .................................................................... 13 3.7 3.8 4 3.6.1 Draco tera 288 Port............................................. 13 3.6.2 Draco tera 160 Port............................................. 14 3.6.3 Draco tera 80 Port............................................... 15 3.6.4 Draco tera 48 Port............................................... 16 3.6.5 Draco tera 8 Port................................................. 16 Diagnostics and Status ..................................................... 17 3.7.1 Status LEDs ........................................................ 17 3.7.2 Port Status .......................................................... 23 3.7.3 Extender OSD..................................................... 25 3.7.4 Network Status.................................................... 26 3.7.5 Firmware Status Matrix ....................................... 29 3.7.6 Firmware Status Extender................................... 31 Trace Function .................................................................. 32 Installation .................................................................................. 33 4.1 Package Contents............................................................. 33 4.2 System Setup.................................................................... 33 4.3 Example Applications........................................................ 34 4.3.1 2011-10-11 KVM Matrix ......................................................... 35 3 Draco tera 5 4.3.2 Video Matrix ........................................................ 36 4.3.3 Video Editing....................................................... 36 4.3.4 Parallel Operation (Stacking) .............................. 37 4.3.5 Cascading ........................................................... 38 Configuration.............................................................................. 40 5.1 Command Mode ............................................................... 40 5.2 Control Options ................................................................. 41 5.2.1 5.3 5.4 5.5 5.2.2 Control via Java Tool .......................................... 47 5.2.3 Control via Serial Interface.................................. 54 Assignment ....................................................................... 54 5.3.1 Virtual CPU to real CPU...................................... 55 5.3.2 Real Console to Virtual Console ......................... 56 System Settings ................................................................ 58 5.4.1 System Data ....................................................... 58 5.4.2 Automatic ID ....................................................... 61 5.4.3 Access ................................................................ 63 5.4.4 Switch ................................................................. 67 5.4.5 Network............................................................... 70 5.4.6 Date and Time .................................................... 72 User Settings .................................................................... 74 5.5.1 User Data............................................................ 74 5.6 Extender Settings.............................................................. 77 5.7 CPU Settings .................................................................... 80 5.8 Console Settings ............................................................... 84 5.9 5.8.1 CON Devices ...................................................... 84 5.8.2 Mouse and Keyboard .......................................... 88 Saving and Loading of Configurations .............................. 90 5.9.1 4 Control via OSD .................................................. 42 Active Configuration ............................................ 91 5.9.2 Saving of Configurations (internal) ...................... 91 5.9.3 Loading of Configurations (internal) .................... 93 5.9.4 Saving of Configurations (external) ..................... 95 2011-10-11 Contents 5.9.5 5.10 5.11 6 Export and Import Options ................................................ 97 5.10.1 Export Options .................................................... 98 5.10.2 Import Options .................................................... 99 Firmware Update ............................................................ 100 5.11.1 Matrix Update.................................................... 100 5.11.2 Extender Update ............................................... 101 Operation .................................................................................. 104 6.1 7 Operation via 'Hot Keys'.................................................. 105 6.1.1 Direct Switching ................................................ 105 6.1.2 Scan Mode........................................................ 106 6.1.3 Addressing of Main and Sub Matrices .............. 106 6.1.4 Function Keys <F1>–<F12>.............................. 107 6.2 KVM-Switching................................................................ 107 6.3 Serial Interface................................................................ 110 6.4 Power On and Power Down Functions ........................... 111 6.4.1 Restart .............................................................. 111 6.4.2 Reset ................................................................ 111 6.4.3 Power Down...................................................... 111 Specifications ........................................................................... 112 7.1 Interfaces ........................................................................ 112 7.1.1 7.2 2011-10-11 Loading of Configurations (external) ................... 96 DVI-D Single Link.............................................. 112 7.1.2 USB-HID ........................................................... 112 7.1.3 RJ45 (Network) ................................................. 113 7.1.4 RS-232 (Serial) ................................................. 113 7.1.5 RJ45 (Interconnect) .......................................... 113 7.1.6 Fiber SFP Type LC (Interconnect) .................... 113 7.1.7 SDI (Interconnect)............................................. 114 Interconnect Cable .......................................................... 114 7.2.1 Cat X ................................................................. 114 7.2.2 Fiber.................................................................. 116 7.2.3 Coaxial .............................................................. 117 5 Draco tera 7.3 7.4 Supported Peripherals .................................................... 117 7.3.1 KVM Extenders ................................................. 117 7.3.2 USB 2.0 Extender ............................................. 119 7.3.3 Video-Extender ................................................. 119 Serial Control .................................................................. 120 7.4.1 7.5 8 9 11 Connector Pinouts .......................................................... 133 7.5.1 CPU Board........................................................ 133 7.5.2 I/O Board Cat X................................................. 134 7.5.3 I/O Board SFP................................................... 134 7.5.4 I/O Board SDI.................................................... 135 7.6 Power Supply.................................................................. 135 7.7 Environmental Conditions ............................................... 135 7.8 Size ................................................................................. 136 7.9 Shipping Weight .............................................................. 137 Troubleshooting ....................................................................... 138 8.1 External Failure............................................................... 138 8.2 Video Interference........................................................... 138 8.3 Malfunction of Fans......................................................... 138 8.4 Malfunction of Power Supply Units ................................. 139 8.5 Network Error.................................................................. 139 8.6 Failure at the Matrix ........................................................ 139 8.7 Blank Screen................................................................... 140 Technical Support .................................................................... 141 9.1 10 Telegrams of the Switching Functions .............. 122 Support Checklist ............................................................ 141 9.2 Shipping Checklist .......................................................... 141 Certificates................................................................................ 142 10.1 CE Declaration Of Conformity......................................... 142 10.2 North American Regulatory Compliance ......................... 143 10.3 WEEE ............................................................................. 143 10.4 RoHS .............................................................................. 143 Glossary.................................................................................... 144 11.1 Matrix specific Glossary .................................................. 147 Pos: 1 /806-IHSE/Zu diesem Handbuch/ATB_Zu diesem Handbuch @ 5\mod_1278573163276_6.doc @ 41510 @ 1222 @ 1 6 2011-10-11 About This Manual 1 About This Manual 1.1 Scope This manual describes how to install your Draco tera, how to operate it and how to perform trouble shooting. 1.2 Validity This manual is valid for all devices listed on the front page. The product code is printed on the base of the devices. 1.3 Cautions and Notes The following symbols are used in this manual: This symbol indicates an important operating instruction that should be followed to avoid any potential damage to hardware or property, loss of data, or personal injury. This symbol indicates important information to help you make the best use of this product. Pos: 2 /806-IHSE/Zu diesem Handbuch/ATB_Schreibweisen @ 7\mod_1309932297321_6.doc @ 52440 @ @ 4 1.1 Spellings You can find the following spellings in the manual: Spelling Description <key> Description of a key on the keyboard <key> + <key> Press keys simultaneously <key>, <key> Press keys successively 2x <key> Press key 2x in quick succession (cf. mouse double click) Menu item Description of a menu item in the software Menu item > Menu item Select menu items successively Bold print Description of terms that are used in the device software Pos: 3 /806-IHSE/Sicherheitshinweise/480_Sicherheitshinweise @ 7\mod_1310643167940_6.doc @ 54240 @ @ 4 2011-10-11 7 Draco tera 2 Safety Instructions To ensure reliable and safe long-term operation of your Draco tera please note the following guidelines: Installation Only use the device according to this User Manual. Otherwise the provided safety can be affected. Only use in dry, indoor environments. The Draco tera and the power supply units can get warm. Do not situate them in an enclosed space without any airflow. Do not obscure ventilation holes. Only use power supplies originally supplied with the product or manufacturer-approved replacements. Do not use a power supply if it appears to be defective or has a damaged chassis. Connect all power supplies to grounded outlets. In each case, ensure that the ground connection is maintained from the outlet socket through to the power supply's AC power input. Do not connect the link interface to any other equipment, particularly network or telecommunications equipment. Only connect devices to the serial interface that are sufficiently secured against short circuit currents and false voltages at the serial interface. Take any required ESD precautions. Repair Do not attempt to open or repair a power supply unit. Do not attempt to open or repair the Draco tera. There are no user serviceable parts inside. Please contact your dealer or manufacturer if there is a fault. Pos: 4 /806-IHSE/Beschreibung/UEB_Beschreibung @ 5\mod_1278573379151_6.doc @ 41546 @ 1 @ 1 8 2011-10-11 Description 3 Description Pos: 5 /806-IHSE/Beschreibung/Verwendungszweck/480-xx @ 7\mod_1309932919008_6.doc @ 52458 @ @ 4 3.1 Application The Draco tera matrix is used to establish connections from consoles (monitor, keyboard, mouse, and other peripheral devices) to various sources (computer, CPU). In a maximum configuration, up to 288 independent ports can be defined and switched either as a console or a CPU. The Draco tera matrix is mainly specified for the use with extenders that are able to transmit video, KVM and USB 2.0 signals. But it can be also run as a video matrix. The connection between the matrix and the peripheral devices, such as KVM extenders or video sources, can be made by Cat X, fiber or coaxial cables. The matrix serves as a repeater. Thus, the matrix can be run at a maximum distance of 10 km from the consoles and 10 km from the sources. Pos: 6 /806-IHSE/Beschreibung/Zugriffsmöglichkeiten/480-xx @ 7\mod_1309933105946_6.doc @ 52477 @ @ 4 3.2 Access Options You have the following options to access the Draco tera for configuration and operation: Access Option Symbol OSD Java tool Serial interface Pos: 7 /806-IHSE/Beschreibung/System-Übersicht /480-xx @ 7\mod_1309933171196_6.doc @ 52495 @ @ 4 4.3 2011-10-11 9 Draco tera 3.3 System Overview A Draco tera matrix system consists of a Draco tera matrix and, for KVM applications, of one or more CPU Units / CON Units. The Draco tera matrix is connected to the CPU Units / CON Units by interconnect cables or connected directly to the video devices where used as a video matrix. The CPU units are connected directly to the sources (computer, CPU) by the provided cables. Monitor(s), keyboard and mouse are connected to the CON units. The communication between the Draco tera matrix and the CPU Units / CON Units takes place over the respective interconnect cables. 1 2 3 4 3 5 6 System Overview (exemplary) 1 Source (computer, CPU) 2 CPU Units 3 Interconnect cable 4 Draco tera matrix 5 CON Units 6 Console (monitor, keyboard, mouse) See Chapter 4.3, Page 34 for installation examples. Pos: 8 /806-IHSE/Beschreibung/Gerätetypen/480-xx @ 7\mod_1309934329227_6.doc @ 52513 @ @ 4 10 2011-10-11 Description 3.4 Product Range Part No. Description K480-288 Draco tera matrix with 288 ports, empty, free configuration K480-160 Draco tera matrix with 160 ports, empty, free configuration K480-080 Draco tera matrix with 80 ports, empty, free configuration K480-048 Draco tera matrix with 48 ports, empty, free configuration K480-008 Draco tera matrix with 8 ports, empty, free configuration Pos: 9 /806-IHSE/Beschreibung/Zubehör/480-xx @ 7\mod_1309934367915_6.doc @ 52531 @ @ 4 3.5 Accessories Part No. Description 480-C8 Draco tera Cat X I/O board 480-M8 Draco tera fiber I/O board, Multi-mode 480-S8 Draco tera fiber I/O board, Single-mode 480-SDI16 Draco tera I/O board video 480-X8 Draco tera fiber I/O board, empty, free configuration 480-CTRL Draco tera CPU board 459-1C Cat X GBIC for the use with Draco tera 459-1M Multi-mode GBIC for the use with Draco minor / major / tera 459-1S Single-mode GBIC for the use with Draco minor / major / tera 480-3M Multi-mode GBIC for the use with Draco tera (3.125 Gbit/s) 480-3S Single-mode GBIC for the use with Draco tera (3.125 Gbit/s) 480-TSHD Single-mode GBIC (transmitter), dual-unidirectional, for the use with Draco tera (HD-SDI) 480-TS3G Single-mode GBIC (transmitter), dual-unidirectional, for the use with Draco tera (3G-SDI) 480-TBHD Koax GBIC (transmitter), dual-unidirectional, for the use with Draco tera (HD-SDI) 2011-10-11 11 Draco tera Part No. Description 480-TB3G Koax GBIC (transmitter), dual-unidirectional, for the use with Draco tera (3G-SDI) 480-RSHD Single-mode GBIC (receiver), dual-unidirectional, for the use with Draco tera (HD-SDI) 480-RS3G Single-mode GBIC (receiver), dual-unidirectional, for the use with Draco tera (3G-SDI) 480-RBHD Koax GBIC (receiver), dual-unidirectional, for the use with Draco tera (HD-SDI) 480-RB3G Koax GBIC (receiver), dual-unidirectional, for the use with Draco tera (3G-SDI) 480-FAN160 Draco tera 288/160 fan tray (spare part) 480-FAN80 Draco tera 80 fan tray (spare part) 480-FAN48 Draco tera 48 fan tray (spare part) 480-RED160 Draco tera 160 plug-in power supply unit (spare part or redundancy) 480-RED80 Draco tera 80 plug-in power supply unit (spare part or redundancy) 480-RED48 Draco tera 48 plug-in power supply unit (spare part or redundancy) 480-RED288 Draco tera 288 plug-in power supply unit (spare part or redundancy) 480-SLTR160 Draco tera 160 filter pads as consumable supply 480-SLTR80 Draco tera 80 filter pads as consumable supply 480-SLTR48 Draco tera 48 filter pads as consumable supply You can find appropriate extenders or other components in Chapter 7.3, Page 117. Pos: 10 /806-IHSE/Beschreibung/Geräteansichten/480_Geräteansichten @ 7\mod_1310643525018_6.doc @ 54278 @ @ 4 12 2011-10-11 Description 3.6 Device Views The following views of the Draco tera matrix illustrate the various available chassis types. Pos: 11 /806-IHSE/Beschreibung/Geräteansichten/480-xx/Draco tera 288 Port @ 7\mod_1309934693586_6.doc @ 52550 @ @ 4 3.6.1 Draco tera 288 Port FAN TRAY OK HS FILTER FAN TRAY OK HS + + 1 2 3 4 5 6 7 8 Front View 2011-10-11 13 Draco tera 1 Slot for power supply unit 1 2 Slot for fan tray 1 3 Slot for power supply unit 2 4 Slot for fan tray 2 5 Slot for I/O boards #1–36 6 Slot for power supply unit 3 7 Slot for CPU board 8 Grounding Pos: 12 /806-IHSE/Beschreibung/Geräteansichten/480-xx/Draco tera 160 Port @ 7\mod_1309934740805_6.doc @ 52568 @ @ 4 3.6.2 Draco tera 160 Port FAN TRAY OK HS FILTER FAN TRAY OK HS + + 1 2 3 4 5 6 7 8 Front View 14 2011-10-11 Description 1 Slot for power supply unit 1 2 Slot for fan tray 1 3 Slot for power supply unit 2 4 Slot for fan tray 2 5 Slot for I/O boards #1–20 6 Slot for power supply unit 3 7 Slot for CPU board 8 Grounding Pos: 13 /806-IHSE/Beschreibung/Geräteansichten/480-xx/Draco tera 80 Port @ 7\mod_1309934775696_6.doc @ 52586 @ @ 4 Draco tera 80 Port FILTER TOP 3.6.3 FAN TRAY HS OK 1 2 3 4 5 FAN TRAY HS OK 6 7 Front View 1 Slot for fan tray 2 Slot for power supply unit 1 3 Slot for I/O boards #1–10 4 Slot for power supply unit 2 5 Slot for CPU board 6 Slot for air filter 7 Slot for fan tray 2 Pos: 14 /806-IHSE/Beschreibung/Geräteansichten/480-xx/Draco tera 48 Port @ 7\mod_1311324635246_6.doc @ 54330 @ @ 4 2011-10-11 15 Draco tera Draco tera 48 Port FILTER TOP 3.6.4 FAN TRAY HS OK 1 2 3 4 5 FAN TRAY HS OK 6 7 Front View 1 Slot for fan tray 2 Slot for power supply unit 1 3 Slot for I/O boards #1–10 4 Slot for power supply unit 2 5 Slot for CPU board 6 Slot for air filter 7 Slot for fan tray 2 Pos: 15 /806-IHSE/Beschreibung/Geräteansichten/480-xx/Draco tera 8 Port @ 7\mod_1311324681380_6.doc @ 54348 @ @ 4 3.6.5 Draco tera 8 Port !Text/Bild kommt! Pos: 16 /806-IHSE/Beschreibung/Status/UEB_Diagnose_und_Status @ 7\mod_1309935121461_6.doc @ 52641 @ @ 4 16 2011-10-11 Description 3.7 Diagnostics and Status Pos: 17 /806-IHSE/Beschreibung/Diagnose LEDs/480-xx @ 7\mod_1309934983180_6.doc @ 52622 @ @ 4 3.7.1 Status LEDs The Draco tera components are fitted with the following LEDs for overall status indication: CPU Board Front View 2011-10-11 17 Draco tera Status LEDs on CPU board: Pos. LED Status Description 1 White CPU board is in registration process Blue flashing Registration at the matrix is started Red flashing Registration in progress Green flashing Operating condition Green CPU board de-registered White CPU board is in registration process Red flashing Registration at the matrix is started Off Operating condition 2 Status 1 Status 2 Due to variations in LED type "white" might also appear as light purple or light blue. 18 2011-10-11 Description I/O Board Cat X SFP Fiber SFP Coax Front View 2011-10-11 19 Draco tera Status LEDs at I/O boards: Pos. LED Status Description 1 Light blue I/O board in boot process Red flashing I/O board in registration process Green flashing Operating condition, I/O board registered at the matrix Green I/O board de-registered (locking pin pulled out) White I/O board in boot process Blue I/O board in registration process Blue flashing Operating condition, communication active with CPU board active Red flashing I/O board de-registered (locking pin pulled out) Status 1 2 Status 2 Ports I/O Board Cat X SFP Fiber SFP Coax Front View 20 1 Status LED 1 2 Status LED 2 2011-10-11 Description Status LEDs at the ports of the I/O boards: Pos. LED Status Description 1 Off Port not activated Flashing Port activated, no connection via interconnect cable On Connection via interconnect cable ok, data traffic active Off Port not activated Flashing Port activated, no connection via interconnect cable On Connection via interconnect cable ok, data traffic active Link status (green) 2 Link status (orange) Fan Tray FAN TRAY OK HS 1 2 3 Front View 1 Status LED 1 2 Status LED 1 3 Hot Swap LED Status LEDs of the fan trays: Pos. LED Status Description 1 Status 1 (green) On Operating condition 2 Status 2 (blue) Off Operating condition 3 Hot Swap (blue) 2011-10-11 On Error indication Off Hot Swap option deactivated On Hot Swap option activated 21 Draco tera Power Supply Unit Draco tera 288/160 1 2 3 Front View Status LEDs of the power supply units Pos. LED Status Description 1 AC Input OK (green) On Operating condition 2 DC Output OK (green) On Operating condition 3 O/T (yellow) Off Normal temperature On High temperature Power Supply Unit Draco tera 80/48 1 Front View Pos. LED Status Description 1 On Operating condition Off No power supply DC Input OK (green) Pos: 18 /806-IHSE/Beschreibung/Status/Port-Status/480-xx @ 7\mod_1309935423961_6.doc @ 52661 @ @ 4 22 2011-10-11 Description 3.7.2 Port Status The connections and the switching status between the various consoles and CPUs are shown in this menu. You have the following possibilities to access the menu: .. OSD !Text kommt! Java Tool The current port configuration of the Draco tera is illustrated in this menu. Select Status > Matrix View in the task area in online mode. Menu Status – Matrix View 2011-10-11 23 Draco tera The colors indicates the connection status: Color Description Black Port not connected Yellow Video connection Green KVM connection The symbol indicates the extender that is recognized and defined at a certain port: Symbol Description Port connected to a CPU unit Port connected to a CON unit Port connected to an USB 2.0 CPU unit Port connected to an USB 2.0 CON unit Red framed ports are defined as "fixed" (e. g. for USB 2.0 connections). The port with a static blue frame is currently selected. The ports with a flashing blue frame show the currently assigned connections. To show the extender information of the currently selected port in the right part of the working area, press the left mouse button. The following information is available: Field Description Extender Name Name of the selected extenders 24 Extender Type Type of the selected extender Port ID Number of the selected port Device Name Name of the connected console or CPU Connections Listing of assigned connections to the marked port (Full Access or Video Access) 2011-10-11 Description To open the context menu for the currently selected port with further functions, press the right mouse button. The following context functions are available: Function Description Open Extender The menu for definition of the currently selected extender is opened Open Device The menu for definition of the currently selected console or CPU is opened Switch The menu for execution of switching operations is opened To reload the Matrix View you have the following possibilities: Press the key <F5> of a connected keyboard Execute Edit > Reload in the menu bar Press the Button Reload in the tool bar Pos: 19 /806-IHSE/Beschreibung/Status/Extender-OSD/480-xx @ 7\mod_1317829749536_6.doc @ 54621 @ @ 4 3.7.3 Extender OSD All extenders used with the Draco tera are standardly provided with their own OSD to display the connection status of the own console. Example View Extender OSD 2011-10-11 25 Draco tera The following information is shown in the OSD menu: Field Description CON Name of the own console CPU Name of the currently connected CPU Access Full Access: The own console has a KVM connection to the displayed CPU. Video Access: The own console has a video only connection to the displayed CPU. not connected: The own console is not connected to a CPU. If the options Mouse Connect or Keyboard Connect (see Chapter 5.4.4, Page 67) are used, the name of the console with keyboard / mouse control will be displayed at those consoles that do not have K/M control at the moment. The console is displayed in yellow color under Access. Pos: 20 /806-IHSE/Beschreibung/Status/Netzwerk-Status/480-xx @ 7\mod_1309935505711_6.doc @ 52680 @ @ 4 3.7.4 Network Status The current network configuration is shown in this menu. You have the following possibilities to access the menu: The following information is shown in this menu: 26 Field Description DHCP Information if the network settings are applied dynamically. Display Y (Yes) or N (No) IP Address Information about the IP address as provided manually or via DHCP Subnet Mask Information about the subnet mask as provided manually or via DHCP Gateway Information about the gateway address as provided manually or via DHCP MAC ID Information about the MAC address in the matrix 2011-10-11 Description OSD Select Status > Network in the main menu. Menu Status – Network 2011-10-11 27 Draco tera Java Tool 1. Select Status > Matrix View in the task area. Menu Status – Matrix View 2. Use the left mouse button to click on the network port of the CPU board. The corresponding network status will be shown in the right part of the working area. Pos: 21 /806-IHSE/Beschreibung/Status/Firmware-Status/480-xx @ 7\mod_1309935560836_6.doc @ 52699 @ 33 @ 4 28 2011-10-11 Description 3.7.5 Firmware Status Matrix The current firmware status of the installed boards is shown in this menu. You have the following possibilities to access the menu: The following information is shown in this menu: Field Description Name Description of the modules Type Type number Ports Number of ports Version Complete description of the firmware version Date Date of the firmware version Status Module status OSD Select Status > Firmware in the main menu. Menu Status – Firmware 2011-10-11 29 Draco tera Java Tool 1. Select Status > Matrix Firmware in the task area. Menu Status – Matrix Firmware 2. To read out the firmware status and store it locally (file extension .dtf), select Switch > Save Firmware Status to File.... 3. To read out the overall status of the matrix and store it locally (file extension .zip), select Switch > Save Status to File.... The various modules can expanded and retracted in the column Name by clicking with the left mouse button on the plus or minus symbols to get a better overview. By clicking on the plus resp. minus symbol in the upper right corner of the working area you can expand and retract all module information with one click at the left mouse button. 30 2011-10-11 Description 3.7.6 Firmware Status Extender The current firmware status of the connected extenders is shown in this menu. You have the following possibility to access the menu: The following information is shown in this menu: Field Description Name Description of the firmware Type Description of the extender module Ports Number of ports Cur. Version Description of the current firmware version Cur. Date Date of the current firmware version Select Status > EXT Firmware in the task area. Menu Status – EXT Firmware Pos: 22 /806-IHSE/Beschreibung/Funktion Trace/480-xx @ 7\mod_1309935652618_6.doc @ 52718 @ @ 4 2011-10-11 31 Draco tera 3.8 Trace Function All events, e.g. activities and switching operations of the Draco tera matrix, are logged and displayed in this menu. This function is used for diagnostic purposes. You have the possibility to request various trace views in the menu: The following information is shown in this menu: Field Description Time Timestamp Message Detailed description of the event Trace possibilities Select Status > Trace IO Board in the main menu to check the events on your current I/O boards. Select Status > Trace Matrix to check the matrix events. Pos: 23 /806-IHSE/Installation/UEB_Installation @ 5\mod_1278574971589_6.doc @ 41768 @ 1 @ 1 32 2011-10-11 Installation 4 Installation Pos: 24 /806-IHSE/Installation/Lieferumfang prüfen/480-xx @ 7\mod_1309935842774_6.doc @ 52736 @ @ 4 4.1 Package Contents Your package contains the following items: Draco tera matrix 1x power cord per built-in power supply unit 1x serial control cable Mounting accessories User Manual Java Tool 1x Cat X network cable (cross-wired) If anything is missing, contact your dealer. Pos: 25 /806-IHSE/Installation/System anschließen/480-xx @ 7\mod_1309935998118_6.doc @ 52754 @ @ 4 4.2 System Setup First time users are recommended to setup the system in the same room as a test setup. This will allow you to identify and solve any cabling problems, and experiment with your system more conveniently. Setup of the matrix 1. Install the CPU and I/O boards. 2. Connect keyboard, mouse and monitor to the CPU board of the matrix. 3. Connect the matrix to the power supply. 4. Open OSD via 'Hot Key' and login with administrator rights in the main menu under configuration (see Chapter 5.2.1, Page 42). 5. Configure initially as requested. After the configuration of the system it is recommended to save the configuration by selecting Configuration > Save and restart the matrix by selecting Restart Matrix. 6. 2011-10-11 Optional: Establish a network connection between the matrix and the Java tool in order to set an extended configuration (see Chapter 5.2.2, Page 47). 33 Draco tera Setup of Extender 1. Connect the CON units to the matrix by using the interconnect cables (Cat X or fiber). 2. Connect the CON units to the input devices that has to be used (for example keyboard and mouse). 3. Connect the 5VDC power supply units to the CON units. 4. Check the basic function of the CON unit by opening the OSD via 'Hot Key'. 5. Connect the source (computer, CPU) to the CPU unit of the extender by using the provided connection cables. 6. Connect the CPU unit to the matrix by using the provided interconnect cables (Cat X or fiber). 7. If you have a video matrix, connect the video source directly to the matrix by using the interconnect cables (coax, fiber). 8. Connect the 5VDC power supply units to the CPU units. 9. Start the system. Pos: 26 /806-IHSE/Installation/Installationsbeispiele/UEB_Installationsbeispiele_480-xx @ 7\mod_1311338893738_6.doc @ 54459 @ @ 4 4.3 Example Applications The Draco tera supports a most flexible configuration of your system environment: Pos: 27 /806-IHSE/Installation/Installationsbeispiele/480-xx/Installationsbeispiele @ 7\mod_1309936170836_6.doc @ 52791 @ @ 4 A part of the Draco tera can be configured as a Single-Head work station, a part as Dual-Head, as Quad-Head or even as a video matrix for example. In addition to that there are configurations with KVM and USB 2.0 available. Among the access via OSD by the keyboard connected to the CPU board or an extender CON unit, you have the following additional access options: via Java Tool via serial interface A connection to common media controls is possible, too. The following part shows typical exemplary installations of the Draco tera: Pos: 28 /806-IHSE/Installation/Installationsbeispiele/480-xx/KVM-Matrix @ 7\mod_1309936183571_6.doc @ 52810 @ @ 4 34 2011-10-11 Installation 4.3.1 KVM Matrix In Single-Head mode, up to 288 ports can be used either as an input or as an output port depending on components and equipment. At the same time there is a non blocking access for all users, i.e. user access is not limited by the activities of another user. 1 2 3 4 3 5 6 Single-Head KVM Matrix 1 Source (computer, CPU) 2 CPU unit 3 Interconnect cable 4 Draco tera matrix 5 CON unit 6 Console (monitor, keyboard, mouse) If you have a Single-Head console, you can also get access to a DualHead or Quad-Head console for example. However control is only possible at monitor 1. Any signal source can be switched to any number of monitors that will show the video signal at the same time. In addition to that even (optional) audio can be switched. Pos: 29 /806-IHSE/Installation/Installationsbeispiele/480-xx/Videomatrix @ 7\mod_1309936380821_6.doc @ 52828 @ @ 4 2011-10-11 35 Draco tera 4.3.2 Video Matrix If you use the Draco tera as a video matrix, up to 288 input ports can be switched to up to 288 output ports depending on components and equipment. 1 2 3 2 4 Video Matrix 1 Video source (e. g. SDI camera) 2 Interconnect cable 3 Draco tera matrix 4 Video sink (e. g. monitor) Pos: 30 /806-IHSE/Installation/Installationsbeispiele/480-xx/Videobearbeitung @ 7\mod_1311326562605_6.doc @ 54366 @ @ 4 4.3.3 Video Editing !Text kommt! Pos: 31 /806-IHSE/Installation/Installationsbeispiele/480-xx/Parallelbetrieb (Stacking) @ 7\mod_1309936438040_6.doc @ 52846 @ @ 4 36 2011-10-11 Installation 4.3.4 Parallel Operation (Stacking) If you have special configurations, especially at installations with several monitors per work station or additional support of USB 2.0 transmission paths, the number of connectable CPUs and consoles can be increased by a parallel operation (stacking) of several Draco tera devices. One of the Draco tera matrices has to be defined as the master matrix, all the others have to be configured as slave matrix and the IP address of the master matrix has to be entered in the field Master IP Address (see Chapter 5.4.1, Page 58). They have to be connected to the master matrix via network connector (RJ45) of the CPU board. The option Enable LAN Echo has to be activated at the master matrix (see Chapter 5.4.1, Page 58). If a switching command is done in the OSD, the slave matrices will also switch automatically. Switching of stacked devices might be delayed by several seconds. 1 2 3 4 5 6 3 7 8 Parallel Operation (Stacking) 2011-10-11 37 Draco tera 1 Dual-Head source (computer, CPU) 2 CPU unit 3 Interconnect cable 4 Draco tera matrix (master matrix) 5 Draco tera matrix (slave matrix) 6 Network connection master / slave(s) 7 CON unit 8 Console (2x monitor, keyboard, mouse) Pos: 32 /806-IHSE/Installation/Installationsbeispiele/480-xx/Kaskadierung @ 7\mod_1309936471961_6.doc @ 52864 @ @ 4 4.3.5 Cascading For applications exceeding the number of available ports, the system can be extended by cascading. In this case, the Draco tera devices are connected by so-called "tie lines". The tie lines are dynamically configured to support connections in both directions. To access cascaded matrices from a console, one of the matrices has to be configured as sub matrix (see Chapter 6.1.3, Page 106). 1 2 3 4 3 5 3 6 7 Cascading 38 2011-10-11 Installation 1 Source (computer, CPU) 2 CPU unit 3 Interconnect cable 4 Draco tera (sub matrix) 5 Draco tera (main matrix) 6 CON unit 7 Console (monitor, keyboard, mouse) Pos: 33 /806-IHSE/Konfiguration/UEB_Konfiguration @ 5\mod_1278575517073_6.doc @ 41846 @ 1 @ 1 2011-10-11 39 Draco tera 5 Configuration Pos: 34 /806-IHSE/Konfiguration/Kommando-Modus/480-xx @ 7\mod_1309936855602_6.doc @ 52882 @ @ 4 5.1 Command Mode The Draco tera has a Command Mode that allows several functions via keyboard command during normal use. To enter Command Mode use a 'Hot Key' sequence and to exit Command Mode, press <Esc>. While in Command Mode, the LEDs Shift and Scroll on the console keyboard will flash. In Command Mode normal keyboard and mouse operation will cease. Only selected keyboard commands are available. The following table lists the keyboard commands to enter and to exit Command Mode and to change the 'Hot Key' sequence: Function Keyboard Command Enter Command Mode (default) 2x <Right Shift> (or 'Hot Key') Exit Command Mode <Esc> Change 'Hot Key' sequence <current 'Hot Key'> + <c>, <new 'Hot Key' code>, <Enter> Until 2011-30-09: <Left Ctrl> + <Left Shift> + <c>, <'Hot Key' Code>, <Enter> <Key> + <Key> <Key>, <Key> 2x <Key> 40 Press keys simultaneously Press keys successively Press key quickly, twice in a row (similar to a mouse double-click) 2011-10-11 Configuration The 'Hot Key' sequence to enter Command Mode can be changed. The following table lists the 'Hot Key' Codes for the available key sequences: 'Hot Key' Code 'Hot Key' 1 <Left Ctrl> + <Left Shift> + <i> 2 2x <Scroll> 3 2x <Left Shift> 4 2x <Left Ctrl> 5 2x <Left Alt> 6 2x <Right Shift> 7 2x <Right Ctrl> 8 2x <Right Alt> In a combined KVM matrix / U-Switch configuration, choose different 'Hot Keys' for the KVM matrix and the U-Switch. Pos: 35 /806-IHSE/Konfiguration/Ansteuerung/480-xx/Ansteuerungsoptionen @ 7\mod_1309936958868_6.doc @ 52902 @ @ 4 5.2 Control Options The Draco tera contains an internal CPU that allows you to control all functions from any console without the need for an external CPU or media control. You have the following possibilities to access the Draco tera for configuration and operation: via OSD via Java Tool via serial interface Pos: 36 /806-IHSE/Konfiguration/Ansteuerung/480-xx/Ansteuerung via OSD @ 7\mod_1309937635540_6.doc @ 52920 @ @ 4 2011-10-11 41 Draco tera 5.2.1 Control via OSD Via OSD (On-Screen-Display) you set the configuration of the Draco tera operating system. The settings of the menu Configuration are described below. All other menus are described in later chapters. You have the following possibilities to enter the OSD of the Draco tera: via keyboard connected to the CPU board via keyboard connected to a CON unit of an extender Entering OSD 1. Start Command Mode with the 'Hot Key' (see Chapter 5.1, Page 40). 2. Press <o> to open OSD. You will see a list of all available CPUs as a start menu. 3. Press <Esc> to enter the main menu. Leaving OSD Press <Shift> + <Esc> simultaneously. The OSD will be closed without any further changes and the currently active CPU connection will be displayed. 42 2011-10-11 Configuration Menu Structure Example View The general layout of the OSD is structured into three areas: Upper status area (topmost two text lines) Working area Lower status area (lowest two text lines) Keyboard control You can select between the following keyboard commands: Function Keyboard Command Left cursor - only within an input field or a switching screen <Cursor Left> Right Cursor - only within an input field or a <Cursor Right> switching screen 2011-10-11 In input fields: Line up (with wrap around) In menus: Line up (without wrap around) <Cursor Up> 43 Draco tera Function <Cursor Down> Previous page in menus with more than one page <Page Up> Next page in menus with more than one page <Page Down> Next input field <Tab> Previous input field <Left Shift> + <Tab> Next option in selection fields <+> Previous option in selection fields <-> Switching in selection fields between two conditions, e. g. between ON / OFF or Y (Yes) / N (No) <Space> In menus with input fields: Save data In menus: Select menu item In menus with input fields: Cancel data <Esc> input without saving In menus with selection fields: Go back to the superior menu 44 In input fields: Line down (with wrap around) In menus: Line down (without wrap around) Keyboard Command <Enter> 2011-10-11 Configuration Sorting Function Lists and tables in the Java Tool offer a sorting function for fast and smooth search. You have the possibility to use the following sorting functions: Function Keyboard Command Sort ID numbers in a descending order or in an ascending order by pressing the keyboard command twice (ID). <F1> Sort ID names in a descending order or in an ascending order by pressing the keyboard command twice (Name). <F2> Go to the next result in the list of results of the search field (Next). <F3> Go to the previous result in the list of results of the search field (Previous). <F4> Refresh the currently shown list (Refresh). <F5> Jump between the search field and the list of results (Find). <F6> 2011-10-11 45 Draco tera Password request You have to login with administrator rights to be able to set configurations. Menu Login Access to the configuration menu requires administrator rights. User login is mandatory. Field Input User admin Password admin For security reasons. please change the administrator password as soon as possible (see Chapter 5.4.1, Page 58). Pos: 37 /806-IHSE/Konfiguration/Ansteuerung/480-xx/Ansteuerung via Java-Tool @ 7\mod_1309937697743_6.doc @ 52938 @ @ 4 46 2011-10-11 Configuration 5.2.2 Control via Java Tool Requirements If you want to use the Java Tool, the following requirements have to be fulfilled: Computer with an executable Java Tool and an installed Java Runtime Environment (JRE, version 1.6 or higher) Java Tool software Available network connection between the Java Tool and the matrix Contact your system administrator concerning JRE and network connection. Installation of the Java Tool The Java Tool is available as a single executable program file that does not require a separate installation. Copy the tool after receiving the file to a directory on your computer. If you do not have a Java Tool, contact your dealer. Computer Connection to the Matrix For a direct connection between computer and matrix, a cross-wired network cable is required. For a connection between computer and matrix via switch or hub, a parallel assembled network cable is required. Connect the network cable to the RJ45 ports of computer and CPU board of the matrix. Start of the Java Tool Open the Java Tool by a double click on the program icon or use the <Enter> key of the keyboard. 2011-10-11 47 Draco tera Connection to the Matrix Administrator rights are required. 1. Open the Java Tool. 2. Select Switch > Connect in the menu bar. 3. Enter the IP address in the popup input field according to the network configuration of the Draco tera (see Chapter 5.2.3, Page 54). 4. Enter the user name and password for the Draco tera (see Chapter 5.4.1, Page 58). 5. Confirm your inputs with the button OK or reject with Cancel. Menu Connect Up to eight connections between the matrix and the Java tool can be established at the same time due to a limitation of available sockets. 48 2011-10-11 Configuration Menu structure Example View (System – Switch) The menu structure of the Java Tools is subdivided into various sections: Menu bar (top line) Toolbar (second line) Tab bar (third line) Task area (left menu section) Working area (right menu section) Status bar (bottom line section) Operating Instructions The operation of the Java Tool is intuitive and corresponds to the user interface of common operating systems. The Java Tool contains its own support function. The manual of the Draco tera only describes how to find and open the appropriate menus in the Java Tool. For further operation use the support function of the tool. The integrated help texts in the working area of the Java Tool can be activated or deactivated by the checkbox in the upper right corner. 2011-10-11 49 Draco tera Mouse Control You can select between the following mouse commands: Function Mouse Command Menu selection, marking Left mouse button Open function specific selection menus Double click left mouse button Open context specific selection menus Right mouse button Keyboard Control You can select between the following keyboard commands: Function Keyboard Command Cursor to the left <Cursor Left> Cursor to the right <Cursor Right> Line up <Cursor Up> Line down <Cursor Down> Previous page in input or status menus with more than one page <Page Up> Next page in input or status menus with more than one page <Page Down> Next field in input menus <Tab> Previous field in input menus <Left Shift> + <Tab> Switching in selection fields between <Space> two conditions (checkmark or not). Open already marked fields with editing or selecting possibility. In menus: Data saving Menu item selection <Enter> Leave tables Jump from tables into the next field <Ctrl> + <Tab> Leave tables Jump from tables into the previous field <Ctrl> + <Left Shift> + <Tab> Various functions within the menus in the menu bar can be executed with the provided keyboard commands (e. g. press <Ctrl> + <S> to execute Save) that are listed to the right of the respective menu item. 50 2011-10-11 Configuration Reload Options The information shown in the Java Tool can be reloaded in different ways. Via <F5> key on the used keyboard Via Edit > Reload in the menu bar Via "Reload"-Symbol in the symbol bar Context Function The Java Tool offers several context functions that support a user friendly and effective operation of the tool. The context functions are described in the respective chapters. To execute a context function, use the right mouse button on the corresponding field and select the desired function. Sorting Function Lists and tables in the Java Tool offer a sorting function for fast and smooth search. 1. For ascending sort status, use the left mouse button once to click into the header of the column to be sorted. The sort status is indicated by an arrow that points upwards. 2. For descending sort, use the left mouse button twice to click on the header of the column that has to be sorted. The sort is displayed by an arrow that points downwards. 3. To cancel the sort, use the left mouse button once or twice to click on the header of the column that is sorted until the displayed arrow will disappear. 2011-10-11 51 Draco tera Filter Function Lists and tables in the Java Tool offer a filter function that allows a fast and smooth search inside. 1. To activate a filter, use the right mouse button to click on the header of the column that has to be filtered and select Set Filter. 2. Write directly the word or part of a word that has to be filtered into the header. The filter results are shown immediately. 3. To delete a filter, use the right mouse button to click on the header of the column that has to be filtered and select Clear Filter. An active filter is indicated by an asterix in the header. The filter function is based on the functional principle of common web search engines. Configuration in the Java Tool Configuration and system settings via Java Tool can only be changed in offline mode without a direct connection between matrix and Java Tool. To activate a configuration in the matrix, please proceed as follows: 1. Select File > Upload to in the menu bar. 2. Enter the IP address of the matrix (see Chapter 5.2.3, Page 54) and the name and password of the user authorization and select the storage location of the new configuration (default or config01-08) in the menu Select Configuration. 3. Select Switch > Connect in the menu bar and enter the IP address of the matrix and the name and password for user authorization. 4. Select Administration > Activate Configuration in the task area and select the storage location that has been selected above. 5. Use the button Activate to open the selected configuration within the matrix. The connection and the open tab will be closed and the matrix will be restarted. During the activation of a configuration, the matrix is temporarily not available. 52 2011-10-11 Configuration Configuration File The Java tool is equipped with an additional configuration file (defaults.cfg) by default. This file allows the user to set various configuration parameters of the Java tool. The file can be opened and edited by standard text editor programs. The following configuration parameters can be edited: Parameter Description IP Default IP address of the matrix required for connection User Default user name required for connection sys.dir Default directory for configuration files upd.dir Default directory for update files dfw.dir Default directory for the firmware status impexp.dir Default directory for import and export files Pos: 38 /806-IHSE/Konfiguration/Ansteuerung/480-xx/Ansteuerung via serieller Schnittstelle @ 7\mod_1309937747180_6.doc @ 52956 @ @ 4 2011-10-11 53 Draco tera 5.2.3 Control via Serial Interface The Draco tera operating system offers various functions for an operation via serial interface (see Chapter 7.4, Page 120). There are telegrams for Switching single or all connections available, both unidirectional and bidirectional. In addition to that, there are telegrams for an overall definition of the total switching status and for saving and loading such switching states. By request, the Draco tera optionally provides an echo of all effected switching operations via serial interface or network interface. That is why you have the possibility to track the current configurations of the matrix at any time and so update your own applications. As an additional application you can switch parallely Draco tera clones as slaves (Stacking) via serial network interface. Pos: 39 /806-IHSE/Konfiguration/Zuordnung/480-xx/Zuordnung @ 7\mod_1309937797383_6.doc @ 52976 @ @ 4 5.3 Assignment The Draco tera offers the possibility of a console specific or a CPU specific assignment. The first possibility is to assign virtual CPUs to real CPUs. The second possibility is to assign real consoles to virtual consoles. Pos: 40 /806-IHSE/Konfiguration/Zuordnung/480-xx/Virtuelle CPU zu realer CPU @ 7\mod_1309937891305_6.doc @ 53012 @ @ 4 54 2011-10-11 Configuration 5.3.1 Virtual CPU to real CPU You can assign virtual to real CPUs in this menu. With this function the effort for switching several consoles to the same CPU can be reduced. If there a several consoles connected to a virtual CPU that is assigned to a real CPU, you will only have to chance the real CPU once and all consoles will receive the video signal of the new CPU. You have the following possibilities to access the menu: OSD Under development Java Tool Select Assignment > Virtual to Real CPU in the task area. Menu Assignment – Virtual to Real CPU 2011-10-11 55 Draco tera For an assignment, proceed as follows: 1. Select a virtual CPU in the list Virtual CPU. 2. Double click in the column Real CPU to get a list of all available real CPUs. 3. Select a real CPU. You can select between the following buttons: Button Function Send Send assignments to the matrix Reload Reload changes By activating the function Auto Send in the left lower corner of the working area, switching operations will be done immediately without confirmation by pressing the button Send. The selection boxes in the column Real CPU contain a filter function for an easy selection of single consoles from a larger pool of consoles (see Chapter 5.2.2, Page 47). The Java tool additionally offers the possibility to go directly from the menu Assignment to the menu Definition to check specific settings for the respective console or CPU. Use the right mouse button to select the respective console or CPU and select Open CON Device or Open CPU Device. Pos: 41 /806-IHSE/Konfiguration/Zuordnung/480-xx/Echte Konsole zu virtueller Konsole @ 7\mod_1309937842805_6.doc @ 52994 @ @ 4 5.3.2 Real Console to Virtual Console You can assign real consoles to virtual consoles in this menu. With this function the effort to set and change access permissions can be reduced by changing the permissions of the virtual console and so applying them to all assigned real consoles, too. You have the following possibilities to access the menu: OSD Under development 56 2011-10-11 Configuration Java Tool Select Assignment > Real to Virtual Console in the task area. Menu Assignment – Real to Virtual Console To place an assignment, proceed as follows: 1. Select the required real console in the table Real Console. 2. Double click in the column Virtual Console to get a list of all available virtual consoles. 3. Select the required virtual console. You can select between the following buttons: Button Function Send Send assignments to the matrix Cancel Reject changes By activating the function Auto Send in the left lower corner of the working area, switching operations will be done immediately without confirmation by pressing the button Send. The selection boxes in the column Virtual Console contain a filter function for an easy selection of single CPU from a larger pool of CPUs (see Chapter 5.2.2, Page 47). 2011-10-11 57 Draco tera Pos: 42 /806-IHSE/Konfiguration/Systemeinstellung/480-xx/Systemeinstellungen @ 7\mod_1309937961274_6.doc @ 53032 @ @ 4 5.4 System Settings You have the possibility to configure the following system settings at the Draco tera. The configuration of the system settings can only be set by users with administrator rights. Pos: 43 /806-IHSE/Konfiguration/Systemeinstellung/480-xx/System Data @ 7\mod_1309938005493_6.doc @ 53050 @ @ 4 5.4.1 System Data The system configuration is set in this menu. You have the following possibilities to access the menu: You can select between the following settings: Field Selection Description Device Text Enter the device name of the matrix (default: SWITCH_01) Name Text Enter the name of the configuration that is used to save the current settings (default: Standard) Info Text Additional text field to describe the configuration (default: Factory settings) Sub Matrix activated If the matrix is defined as a sub matrix in the OSD, the user will loose control automatically. Control can be recovered by using the keyboard command <Shift>, <Shift>, <s>, <o>. The OSD now will be opened again in the matrix that has been defined as sub matrix. Auto Save 58 deactivated Function not active (default) activated Save the current configuration of the matrix in the flash memory periodically. deactivated Function not active (default) 2011-10-11 Configuration Field Selection Description Enable COM Echo activated Send all performed switching commands in the matrix as an echo via serial interface. Note: This function should be enabled when using a media control via serial interface. Enable LAN Echo Slave Matrix Master IP Address 2011-10-11 deactivated Function not active (default) activated Send all performed switching commands in the matrix as an echo via LAN connection. Note: This function should be enabled when using a media control via LAN connection. deactivated Function not active (default) activated Synchronize the slave matrix according to the switch status of the master matrix. deactivated Function not active (default) Numerical value Set the network address of the master matrix (default value: 000.000.000.000) 59 Draco tera OSD Select Configuration > System in the main menu. Menu Configuration – System You can select between the following buttons: 60 Button Function Cancel Reject changes Save Save changes 2011-10-11 Configuration Java Tool Menu System – System Data Pos: 44 /806-IHSE/Konfiguration/Systemeinstellung/480-xx/Automatic ID @ 7\mod_1309938041118_6.doc @ 53068 @ @ 4 5.4.2 Automatic ID The settings for the automatic creation of CPU and CON devices by connecting a new extender unit are made in this menu. You have the following possibilities to access the menu: You can select between the following settings: Field Selection Description Enable Auto Config activated Automatic creation of a new CPU or CON device if new extender units are connected (default) ID Real CPU Device Numerical value deactivated Function not active 2011-10-11 Initial value of the automatic ID for real CPUs (default value: 1000) 61 Draco tera Field Selection Description ID Virtual CPU Device Numerical value Initial value of the automatic ID for virtual CPUs (default value: 2000) ID Real CON Device Numerical value Initial value of the automatic ID for real CONs (default value: 3000) ID Virtual CON Device Numerical value Initial value of the automatic ID for virtual CONs (default value: 4000) OSD Select Configuration > System in the main menu. Menu Configuration – System You can select between the following buttons: 62 Button Function Cancel Reject changes Save Save changes 2011-10-11 Configuration Java Tool Select System > Automatic ID in the task area. Menu System – Automatic ID Pos: 45 /806-IHSE/Konfiguration/Systemeinstellung/480-xx/Zugang @ 7\mod_1309938080446_6.doc @ 53086 @ @ 4 5.4.3 Access The access configuration is set in this menu. You have the following possibilities to access the menu: You can select between the following settings: Field Selection Description Enable User Login activated The user has to login with a user name and a password once to enter OSD. Thereafter the user remains logged in until he explicitly logs out or an auto logout is effected. deactivated Function not active (default) 2011-10-11 63 Draco tera Field Selection Description Enable User ACL activated CPU access is restricted according to the permissions in the ACL (Access Control List). User login is required. Switching by keyboard 'Hot Keys' requires a prior login. deactivated Function not active (default) Enable Console ACL activated CPU access is restricted according to the permissions in the respective Console ACL (Access Control List). No login required deactivated Function not active (default) Auto Disconnect activated Upon opening the OSD, the console will be automatically disconnected from the current CPU. deactivated Function not active (default) OSD Timeout 0-999 seconds Period of inactivity after which OSD will be closed automatically. Select 0 seconds, for no timeout (default: 0 seconds) Auto Logout 0-999 minutes Period of inactivity after which a user is automatically logged out from the OSD at this console. The timer is not active as long as the OSD is open. Select 0 minutes for an immediate logout. OSD Select Configuration > Access in the main menu. 64 2011-10-11 Configuration Menu Configuration – Access You can select between the following buttons: Button Function Cancel Reject changes Save Save changes 2011-10-11 65 Draco tera Java Tool Select System > Access in the task area. Menu System – Access Pos: 46 /806-IHSE/Konfiguration/Systemeinstellung/480-xx/Switch @ 7\mod_1309938125852_6.doc @ 53104 @ @ 4 66 2011-10-11 Configuration 5.4.4 Switch The configuration of the switching parameters is set in this menu. You have the following possibilities to access the menu: You can select between the following settings: Field Selection Description Video Sharing activated The user can switch to any CPU as an observer, even to such ones that are already assigned to another user (observer without keyboard/mouse access). Note: Switching with the key <Space>, not <Enter>. The operator will not be informed if further users connect as an observer to the CPU that is connected to his console. deactivated Function not active (default) Force Connect activated The user can connect to every single CPU as an operator, even to such ones that are related to another user. Note: The previous user is set to video only status. To share K/M control, Force Connect has to be activated. deactivated Function not active (default) Force Disconnect activated Extension of Force Connect: If the user connects to a CPU as an operator that is already related to another user, the connection to the previous user will be completely disconnected. Note: To share K/M control Force Disconnect has to be deactivated. deactivated Function not active (default) 2011-10-11 67 Draco tera Field Selection Description CPU Auto Connect activated If a console is not connected to a CPU, you can establish an automatic connection to the next available CPU by hitting any key or mouse button. deactivated Function not active (default) CPU Timeout 0 – 999 minutes Period of inactivity after which a console will be automatically disconnected from its current CPU (default value: 0 minutes) Keyboard Connect activated Activate request of K/M control by keyboard event (key will be lost) deactivated Function not active (default) Mouse Connect activated Activate request of K/M control by mouse event deactivated Function not active (default) Release Time 0-999 seconds Period of inactivity of a connected console after which K/M control can be requested by other consoles connected to the CPU. Note: Set "0" for an immediate transfer in real-time. Only one console can have keyboard and mouse control at the same time. The other consoles that are connected to the same CPU have a video only status (default value: 10 seconds) If the options Keyboard Connect and/or Mouse Connect are activated, the condition Release Time will have to be met until a new user will gain control. 68 2011-10-11 Configuration OSD Select Configuration > Switch in the main menu. Menu Configuration – Switch You can select between the following buttons: Button Function Cancel Reject changes Save Save changes 2011-10-11 69 Draco tera Java Tool Select System > Switch in the task area. Menu System – Switch Pos: 47 /806-IHSE/Konfiguration/Systemeinstellung/480-xx/Netzwerk (Network) @ 7\mod_1309938178305_6.doc @ 53122 @ @ 4 5.4.5 Network The network configuration is set in this menu. You have the following possibilities to access the menu: You can select between the following settings: Field Selection Description DHCP activated The network settings are automatically supplied by a DNS server (default) deactivated Function not active 70 IP address Byte Input of the IP address in the form "192.168.1.1", if DHCP is not active Subnet Mask Byte Input of the subnet mask in the form "255.255.255.0", if DHCP is not active (default: 255.255.255.0) 2011-10-11 Configuration Field Selection Description Gateway Byte Input of the subnet mask in the form "192.168.1.1", if DHCP is not active Activate the modified network parameters by doing a restart. Consult your system administrator before modifying the network parameters. Otherwise unexpected results and failures can occur in combination with the network. OSD Select Configuration > Network in the main menu. Menu Configuration – Network You can select between the following buttons: Button Function Cancel Reject changes Save Save changes 2011-10-11 71 Draco tera Java Tool Select System > Network in the task area. Menu System – Network Pos: 48 /806-IHSE/Konfiguration/Systemeinstellung/480-xx/Datum und Uhrzeit @ 7\mod_1309938224352_6.doc @ 53140 @ @ 4 5.4.6 Date and Time Date and Time are set in this menu. You have the following possibility to access the menu: You can select between the following settings: 72 Field Selection Description Month 1–12 Enter month Date 1–31 Enter date Year 1–99 Enter year Day of the week 1–7 Enter week Hours 0–23 Enter hour Minutes 0–59 Enter minute 2011-10-11 Configuration Field Selection Description Seconds 0–59 Enter second Date format according to the English notation. OSD Select Configuration > Date+Time in the main menu. Menu Configuration – Date + Time You can select between the following buttons: Button Function Cancel Reject changes Save Save changes Pos: 49 /806-IHSE/Konfiguration/Benutzereinstellungen/480-xx/Benutzereinstellungen (User) @ 7\mod_1309938277711_6.doc @ 53160 @ @ 4 2011-10-11 73 Draco tera 5.5 User Settings You have the possibility to configure the following user settings: Pos: 50 /806-IHSE/Konfiguration/Benutzereinstellungen/480-xx/User Data @ 7\mod_1309938316977_6.doc @ 53178 @ @ 4 5.5.1 User Data New users and their user settings and permissions are set in this menu. You have the following possibilities to access the menu: You can select between the following settings: Field Selection Description Name Text User name (case sensitive) Password Text User password (case sensitive) Repeat Password Text Repeat user password (case sensitive) HTTP activated Access permission via HTTP. deactivated Function not active (default). FTP activated Access permission via FTP. This setting is necessary for file access from the Java tool or any web browser. deactivated Function not active (default). TEL activated Access permission via Telnet. deactivated Function not active (default). POW activated User has user rights Permission for crosspoint operations deactivated Function not active (default). ADM activated Permission for system configuration and all switching operations User has administrator rights This setting is required for an online connection with the Java tool deactivated Function not active (default). 74 2011-10-11 Configuration OSD Select Configuration > User in the main menu. Menu Configuration – User You can select between the following buttons: Button Function New Create a new user Edit Edit an existing user Delete Delete an existing user Cancel Reject changes Save Save changes 2011-10-11 75 Draco tera Java Tool Select User > User Data in the task area. Menu User – User Data You can select between the following buttons: Button Function New Open a new user configuration Delete Delete an existing user Apply Create a new user account Cancel Reject changes To configure a user access rights for CPUs, proceed as follows: 76 1. Select a user in the list User Data. 2. By using the right mouse button once on a CPU in one of the respective access lists (Full Access, Video Access and No Access) two lists for selection will appear in which the respective CPU can be moved and the access rights can be changed. 3. Confirm the configuration with the button Apply. 2011-10-11 Configuration To create a new user, proceed as follows: 1. Press the button New. 2. Select a template of an existing user if applicable (Choose template). 3. Press the button OK. 4. Set password. 5. Set general access permissions. 6. Set user permissions for CPU access (paste function). 7. Set user favorites for OSD access. 8. Press the Button Apply to save the new user settings. You can select between the following keyboard commands: Function Keyboard Command Add CPU to list Full Access <F> Add CPU to list Video Access <V> Add CPU to list No Access <N> Pos: 51 /806-IHSE/Konfiguration/Extender-Einstellungen/480-xx @ 7\mod_1309938366618_6.doc @ 53197 @ @ 4 5.6 Extender Settings All extender units are managed in this menu. This also contains the creation of new extender units and the deletion of existing extender units. The extender unit describes the connection of an physical extender to the matrix. Every extender board with a direct cable connection to the matrix is recognized as an extender unit. Dual-Head KVM extenders will be recognized as two independent extender units. KVM Extenders automatically create extender units inside the matrix. You have the following possibilities to access the menu: 2011-10-11 77 Draco tera You can select between the following settings: Field Selection Description ID Text Numerical value of the extender ID (KVM Extenders: ID is provided by extender unit (Serial No.) and cannot be changed) Name Text Name of the extender unit Fixed activated Create an extender unit with a fixed port assignment (default) deactivated Function not active. Port 1–288 (depending on the matrix) Port number of the extender unit OSD Select Configuration > EXT Units in the main menu. Menu Configuration – EXT Units 78 2011-10-11 Configuration You can select between the following buttons: Button Function New Create a new extender unit Edit Edit an existing extender unit Delete Delete an existing extender unit Cancel Reject changes Save Save changes The settings for the tab OSD Data are described in Chapter 5.8.2, Page 88. Java Tool Select Definition > EXT Units in the task area. Menu Definition – EXT Units You can select between the following buttons: Button Function New Create a new extender unit Delete Delete an existing unit Apply Confirm changes of an extender unit Cancel Reject changes 2011-10-11 79 Draco tera 1. To create a new extender unit press the button New. 2. Select, if a template of an existing extender unit (Choose extender as template), a template of an predefined extender type (Choose extender type) or no template (None) should be used. 3. Press the button OK. 4. Set all relevant parameters for the extender unit. 5. Press the button Apply to save the new extender unit. Created extender units are always set as fixed port extender. These configurations are necessary, if you want to switch e. g. USB 2.0 connections via the matrix. Pos: 52 /806-IHSE/Konfiguration/CPU-Einstellungen/480-xx @ 7\mod_1309938442055_6.doc @ 53216 @ @ 4 5.7 CPU Settings New CPU devices are configured in this menu including their assignment to extenders. The assignment helps to describe and switch more complex computer configurations (e.g. Quad-Head with USB 2.0) in the matrix. You have the following possibilities to access the menu: You can select between the following settings: Field Selection Description ID Text ID of the CPU unit (see Chapter 5.4.2, Page 61 Name Text Name of the CPU Device. Virtual Device activated Create new CPU device as a virtual one. deactivated Function not active. 80 2011-10-11 Configuration OSD Select Configuration > CPU Units in the main menu. Menu Configuration – CPU Devices You can select between the following buttons: Button Function New R. Create a new real CPU device New V. Create a new virtual CPU device Edit Edit an existing CPU device Delete Delete an existing CPU device Cancel Reject changes Save Save changes 2011-10-11 81 Draco tera Java Tool Select Definition > CPU Devices in the task area. Menu Definition – CPU Devices You can select between the following buttons: 82 Button Function New Open a new CPU Device Delete Delete a new CPU Device Apply Confirm a created CPU Device Cancel Reject changes > Assign selected extender units >> Assign all available extender units < Remove the selected extender units << Remove all extender units 2011-10-11 Configuration You can select between the following keyboard commands: Function Keyboard Command Change assignment number of the EXT unit upwards <+> Change assignment number of the EXT unit downwards <-> To create a new CPU device, proceed as follows: 1. Press the button New. 2. Select, if a real CPU (Create a real CPU) or a virtual CPU (Create a virtual CPU) should be created or a template of an existing CPU should be used (Choose template). A template can only be used, if there is at least one existing CPU device. 3. Press the button OK. 4. Determine all parameters that are relevant for the CPU. 5. To confirm the new CPU, press the button Apply. To access a new CPU via matrix, an assignment of one or more CPU type extender units is required. Proceed as follows: 1. Select the new CPU in the list CPU Devices. 2. Select one or more extenders in the list Extender available. 3. Perform the assignment by pressing the button >. To assign all available extenders to the CPU, press the button >>. The assignments are displayed in the list Extender assigned. 4. Confirm the assignment by pressing the button Apply. To remove an extender assignment, proceed as follows: 1. Select a CPU in the list CPU Devices. 2. Select one or more extenders in the list Extender assigned. 3. Remove the assignment with the button <. To remove all existing assignments, press the button <<. 4. Confirm the removal with the button Apply. Pos: 53 /806-IHSE/Konfiguration/Konsolen-Einstellungen/480-xx/Konsolen-Einstellungen @ 7\mod_1309938518774_6.doc @ 53236 @ @ 4 2011-10-11 83 Draco tera 5.8 Console Settings You have the possibility to perform the following console settings: Pos: 54 /806-IHSE/Konfiguration/Konsolen-Einstellungen/480-xx/CON Devices @ 7\mod_1309938548274_6.doc @ 53254 @ @ 4 5.8.1 CON Devices New CON devices are created in this menu including access rights and assignment to extenders. You have the following possibilities to access the menu: You can select between the following settings: Field Selection Description ID Text ID of the CON unit (see Chapter 5.4.2, Page 61). Name Text Name of the CON Device. Virtual Device activated Create new CON device as a virtual one. deactivated Function not active (default). activated Allow user login at this CON device. deactivated Function not active (default). Force Login activated Force user login at this CON device. deactivated Function not active (default). LOS Frame activated Allow Login deactivated 84 If there is a loss of connection, the last picture shown will be still displayed and is surrounded by an orange frame. If you switch to a CPU without video signal, a blank screen will appear surrounded by an orange frame. Function not active (default). 2011-10-11 Configuration OSD Select Configuration > CON Devices in the main menu. Menu Configuration – CON Devices You can select between the following buttons: Button Function New R. Create a real console New V. Create a virtual console Edit Edit an existing console Delete Delete an existing console Cancel Reject changes Save Save changes Java Tool Select Definition > CON Devices in the task area. 2011-10-11 85 Draco tera Menu Configuration – CON Devices You can select between the following buttons: Button Function New Open a new CON device Delete Delete a new CON device Apply Confirm a created CON device Cancel Reject changes > Assign selected extender units >> Assign all available extender units < Remove the selected extender units << Remove all extender units You can select between the following keyboard commands: 86 Function Keyboard Command Decrease assignment number of the extender unit <+> Increase assignment number of the extender unit <-> 2011-10-11 Configuration To create a new console, proceed as follows: 1. Press the button New. 2. Select, if a real console (Create a real Console) or a virtual console (Create a virtual Console) should be created or a template of an existing console should be used (Choose template). A template can only be used, if there is at least on existing CON device. 3. Press the button OK. 4. Determine all parameters that are relevant for the console. 5. To confirm a created console, press the button Apply. To run a created CPU via matrix, it requires an assignment of one or more CON units (extender). To place an assignment, please proceed as follows: 1. Select the console in the list CON Devices that has to be assigned to an extender. 2. Select the extender in the list Extender available that should be assigned to the CON. 3. Perform the assignment by pressing the button >. To assign all available extenders to the console, press the button >>. The assignments are displayed in the list Extender assigned. 4. Confirm the assignment by pressing the button Apply. To remove an extender assignment, proceed as follows: 1. Select the console in the list CON Devices to be modified. 2. Select the extender(s) in the list Extender assigned to be removed. 3. Remove the assignment with the button <. To remove all existing assignments, press the button <<. 4. Confirm the changes by pressing the button Apply. 2011-10-11 87 Draco tera To configure the access rights of consoles to CPUs, please proceed as follows: 1. Select a console in the list CON Devices. 2. Open the tab CPU Access Control. 3. Assign new access rights by using the right mouse button or the respective keyboard commands (cf. below). 4. Confirm the configuration by pressing the button Apply. After creating a new user, he is provided automatically with Full Access to all available CPUs. You can select between the following keyboard commands: Function Keyboard Command Add CPU to list Full Access <F> Add CPU to list Video Access <V> Add CPU to list No Access <N> Pos: 55 /806-IHSE/Konfiguration/Konsolen-Einstellungen/480-xx/Maus und Tastatur @ 7\mod_1309938591211_6.doc @ 53272 @ @ 4 5.8.2 Mouse and Keyboard The OSD configuration for mouse and keyboard is made in this menu. You have the following possibilities to access the menu: You can select between the following settings: 88 Field Selection Description Hor. Speed 1/x 1–9 Adjustment of the horizontal mouse speed, 1 = slow, 9 = fast (default value: 4) Ver. Speed 1/x 1–9 Adjustment of the vertical mouse speed, 1 = slow, 9 = fast (default value: 5) Double Click 100–800 Adjustment of the time slot for a double click (default value: 200 ms) Keyboard layout Region Set the OSD keyboard layout according to the used keyboard (default: German (DE)) 2011-10-11 Configuration Field Selection Description Video Mode Variable or specific resolution Resolution that is used when opening OSD The mouse and keyboard settings are console specific and can be separately set for every console. OSD Select Configuration > EXT Units in the main menu. Menu Configuration – EXT Units You can select between the following buttons: Button Function Cancel Reject changes Save Save changes 2011-10-11 89 Draco tera Java Tool Select Definition > EXT Units in the task area. Mouse and keyboard settings are made in the tab OSD Data. Menu Definition – EXT Units Pos: 56 /806-IHSE/Konfiguration/Speichern und Laden von Konfigurationen/480-xx/Speichern und Laden von Konfigurationen @ 7\mod_1309938757899_6.doc @ 53292 @ @ 4 5.9 Saving and Loading of Configurations You have the possibility to set the following administration of configurations: Pos: 57 /806-IHSE/Konfiguration/Speichern und Laden von Konfigurationen/480-xx/Zwischenspeichern von Konfigurationen @ 7\mod_1309945736118_6.doc @ 54172 @ @ 4 90 2011-10-11 Configuration 5.9.1 Active Configuration You have the following possibility to access the menu: Select Configuration > Save in the main menu. By selecting this menu item, the active configuration of the matrix is saved to the permanent matrix memory. By default, the last configuration that has been saved in this way will be restored after a restart of the matrix. Changing configurations or saving them blocks the matrix memory and leads to a freeze of all OSD menus for a few seconds. The switching connections are not affected by this freeze. If you select Auto Save within the system settings an additional automatic saving of the configuration will be performed periodically (see Chapter 5.3.2, Page 56). Pos: 58 /806-IHSE/Konfiguration/Speichern und Laden von Konfigurationen/480-xx/Speichern von Konfigurationen (intern) @ 7\mod_1309938789321_6.doc @ 53310 @ @ 4 5.9.2 Saving of Configurations (internal) In this menu the current matrix configuration to predefined storage locations is saved. However, it does not replace the buffering of configuration (see Chapter 5.9.1, Page 91). You have the following possibilities to access the menu: In Active, the name and detailed information of the current configuration are shown. This configuration can be saved now. In Default and File #1 to File #8, the name and the detailed information of the respective saved configuration are shown. These storage locations can be overwritten. The storage location that has to be overwritten by the current configuration must be selected explicitly. Afterwards the current configuration will be saved to this storage location and will be immediately shown in the menu. The previously saved configuration that has been saved to this storage location is deleted. 2011-10-11 91 Draco tera OSD You have the possibility to save the created configuration within eight storage locations in the matrix (File #1 – File #8). Additionally a configuration can also be saved as default configuration. 1. Select Configuration > Save As… in the main menu. 2. Select the required storage location (File #1 – File #8) or Default. Menu Configuration – Save as Java Tool To save the configuration into the internal matrix memory, proceed as follows: 92 1. Select File > Upload to… in the menu bar. 2. Enter the IP address of the matrix, your user name and your password and select the storage location in that the configuration has to be saved (default or config01 – config08). 3. Confirm with the button OK. 2011-10-11 Configuration Menu File – Upload to… Pos: 59 /806-IHSE/Konfiguration/Speichern und Laden von Konfigurationen/480-xx/Laden von Konfigurationen (intern) @ 7\mod_1309938889118_6.doc @ 53346 @ @ 4 5.9.3 Loading of Configurations (internal) Previously saved configurations are loaded in this menu. You have the following possibilities to load configurations from files: In Active, the currently loaded configuration is displayed. In addition to the default configuration, up to eight further configurations can be loaded. The selection of the configuration that has to be loaded can be made between eight personalizable configurations and the default settings. The selected configuration is will be immediately loaded and displayed in the menu as Active. The previously active configuration is deleted. 2011-10-11 93 Draco tera OSD 1. Select Configuration > Open in the main menu. 2. Select the desired configuration. 3. Load the configuration by pressing the key <Enter>. Menu Configuration – Open... Java Tool 94 1. Select Administration > Activate Configuration during online-mode in the task area 2. Select the required configuration. 3. Load the configuration by pressing the button Activate. 2011-10-11 Configuration Menu Administration – Activate Configuration on Switch Pos: 60 /806-IHSE/Konfiguration/Speichern und Laden von Konfigurationen/480-xx/Speichern von Konfigurationen (extern) @ 7\mod_1309938846930_6.doc @ 53328 @ @ 4 5.9.4 Saving of Configurations (external) Created configurations can be saved as a file and so become independent of the matrix and transportable. You have the following possibility to access the menu: 1. Select File > Save As in the menu bar. 2. Select the directory of the configuration on your storage medium where it has to be saved. Configurations are always saved in a file with the ending dtc. 2011-10-11 95 Draco tera Menu File – Save As Pos: 61 /806-IHSE/Konfiguration/Speichern und Laden von Konfigurationen/480-xx/Laden von Konfigurationen (extern) @ 7\mod_1309938925211_6.doc @ 53364 @ @ 4 5.9.5 Loading of Configurations (external) Externally saved configurations are opened and activated in this menu. You have the following possibilities to load configurations from files: 1. Select File > Open… during offline-mode and select the storage location of the configuration file that has to be opened. 2. Open the configuration by pressing the button Open. 3. Select File > Upload to… in the menu bar to transfer the opened configuration to the matrix. Enter the necessary parameters. 4. Select Switch > Connect in the menu bar to make a connection between the matrix and the Java tool. Enter the necessary parameters. 5. Select Administration > Activate Configuration and select the configuration that has to be activated. 6. Confirm the process with the button Activate. The opened configuration is activated now and can be used. 96 2011-10-11 Configuration Menu File – Open… Pos: 62 /806-IHSE/Konfiguration/Export und Import von Listen/480-xx/Export und Import von Listen @ 7\mod_1309939181868_6.doc @ 53390 @ @ 4 5.10 Export and Import Options The Draco tera offers the possibility to read out available configuration lists (extender, CPUs, consoles and users) for exporting and importing again via Java tool. You have the following possibilities to handle configuration lists. Exported configuration lists are always saved in .csv format that allows offline editing with common spreadsheet applications. You have the following possibilities to export or import configuration lists: Pos: 63 /806-IHSE/Konfiguration/Export und Import von Listen/480-xx/Export von Listen @ 7\mod_1309939231696_6.doc @ 53408 @ @ 4 2011-10-11 97 Draco tera 5.10.1 Export Options Configuration lists are exported in this menu. To export, proceed as follows: 1. Select File > Export in the menu bar. 2. After opening the menu, select the list to export (Extender, CPU, Console or User). 3. Select the storage location for the export file. 4. Confirm the export with the button Finish. Menu File – Export Pos: 64 /806-IHSE/Konfiguration/Export und Import von Listen/480-xx/Import von Listen @ 7\mod_1309939264649_6.doc @ 53426 @ @ 4 98 2011-10-11 Configuration 5.10.2 Import Options Configuration lists are imported in this menu. To import, proceed as follows: 1. Select File > Import in the menu bar. 2. After opening the menu, select the list to import (Extender, CPU, Console or User). 3. Select the directory of the list to import. 4. Confirm the import with the button Finish. Menu File – Import... Pos: 65 /806-IHSE/Konfiguration/Firmware Aktualisierung/480-xx/Firmware-Aktualisierung @ 7\mod_1313482000731_6.doc @ 54542 @ 233 @ 4 2011-10-11 99 Draco tera 5.11 Firmware Update 5.11.1 Matrix Update The firmware of the matrix can be updated in this menu. You have the following possibility to access the menu: Java Tool Only use computers to update the matrix that are self-sustaining and not integrated in the KVM extender / matrix setup. 1. Select Administration > Update Matrix Firmware in the task area. Menu Administration – Update Matrix Firmware 2. Select the directory in the lower part of the working area in which the update files can be found. Open the file defaults.cfg and insert in the parameter upd.dir the directory from which the update files should be standardly sourced. 100 2011-10-11 Configuration 3. Select those modules in the list that have to be updated and enable the respective checkbox in the column Update. 4. Start the update by pressing the button Update in the appearing pop up window. 5. If the expected period of time for one update will exceed 20 minutes, cancel the update. Open the file defaults.cfg and set the parameter safemode to true. 6. Restart the Matrix after the update by pressing the button Restart matrix in the lower part of the working area. Serial Interface !Text folgt! 5.11.2 Extender Update The firmware of the extenders connected to the matrix can be updated in this menu. You have the following possibilities to access the menu: 1. 2011-10-11 Select Administration > Update EXT Firmware in the task area. 101 Draco tera Menu Administration > Update EXT Firmware 2. Set the matrix into Service Mode upon request in the popup window or via Switch > Activate Service Mode in the menu bar. During activation, all matrix functions are disabled. An OSD picture indicates the activation of the Service Mode and is displayed on all monitors that are connected to the matrix via a CON device. Additionally, the Service Mode is indicated by a red tool icon in the lower part of the working area. 102 2011-10-11 Configuration OSD View Service Mode 3. Select the directory in the lower part of the working area in which the update files can be found. 4. Select those extender modules in the list that have to be updated and enable the respective checkbox in the column Update. 5. Start the update by pressing the button Update in the lower part of the working area. 6. Quit Service Mode after updating upon request in the popup window or via Switch > Deactivate Service Mode in the task area. Pos: 66 /806-IHSE/Betrieb/UEB_Betrieb @ 5\mod_1278577614980_6.doc @ 41970 @ 1 @ 1 2011-10-11 103 Draco tera 6 Operation Pos: 67 /806-IHSE/Betrieb/480-xx @ 7\mod_1309939496086_6.doc @ 53444 @ @ 4 The Draco tera can be operated in three different ways: 1. Direct Switching via a keyboard connected to a CON port and the 'Hot Keys' by a macro keyboard connected to a console port 2. OSD via keyboard/mouse directly connected to the CPU board of the matrix via keyboard/mouse connected to a CON Unit and the OSD 3. External Switching Commands: via an external computer via Java tool (network connection required) via a media control (network or serial connection required) Pos: 68 /806-IHSE/Betrieb/Bedienung über HotKeys/480-xx/UEB_Bedienung_über_Hotkeys @ 7\mod_1309939558243_6.doc @ 53464 @ @ 4 104 2011-10-11 Operation 6.1 Operation via 'Hot Keys' Pos: 69 /806-IHSE/Betrieb/Bedienung über HotKeys/480-xx/Direktumschaltung @ 7\mod_1309940339211_6.doc @ 53490 @ @ 4 6.1.1 Direct Switching The direct switching by 'Hot Keys' on a keyboard is the fastest possibility for a user to switch at his console between different CPUs. There is a possibility to switch video, keyboard and mouse or only video. Direct Switching of Video, Keyboard and Mouse 1. Start Command Mode with the 'Hot Key'. For control, the LEDs Shift and Scroll flash at the keyboard, if Command Mode is activated. 2. Enter the index number of the new CPU from the list of favorites and confirm with <Enter>. At the same time the Command Mode is closed and the console is connected to the new CPU with complete control. Best results regarding switching time can be achieved by using identical mice, keyboards and monitors. This contributes to a smooth and delayless direct switching of the matrix. Direct Switching of Video 1. Start Command Mode with the 'Hot Key'. For control, the LEDs Shift and Scroll flashes at the keyboard, if command mode is activated. 2. Enter the index number of the new CPU from the list of favorites and confirm with <Space>. At the same time the Command Mode is closed and the console is connected to the new CPU with video only. You can only switch to not used and allowed CPUs with the 'Hot Keys'. The options Force Connect and Force Disconnect as well as the restrictions of the User ACL and CON ACL are taken into account. 'Hot Keys' are only supported, if neither Enable User Login nor the Enable User ACL is selected and the user is logged in the OSD. Pos: 70 /806-IHSE/Betrieb/Bedienung über HotKeys/480-xx/Scan-Modus @ 7\mod_1309940746290_6.doc @ 53508 @ @ 4 2011-10-11 105 Draco tera 6.1.2 Scan Mode The Scan Mode offers the possibility to show video signals of the different CPUs fast and without delay and offers switching in between without continuously using the 'Hot Key'. The switching between two video signals can even take place within one frame. 1. Start command mode with the 'Hot Key'. For control, the LEDs Shift and Scroll flashes at the keyboard, if command mode is activated. 2. Press the key <Left Shift> and hold it down. You can now enter the index numbers of the various CPUs from the list of favorites with the keyboard and immediately switch to the video signal of the respective CPU after entering the index number. 3. Leave Scan Mode by pressing <Left Shift> + <Esc>. Optimal results can be achieved by the use of as identical resolutions as possible. This contributes to a smooth and delay less function of the scan mode. Pos: 71 /806-IHSE/Betrieb/Bedienung über HotKeys/480-xx/Adressierung von Main-Matrix und Sub-Matrix @ 7\mod_1309940780680_6.doc @ 53526 @ @ 4 6.1.3 Addressing of Main and Sub Matrices The Draco tera can be cascaded in two steps. You can optionally send the commands (including opening the OSD) to the main or the sub matrix. Whenever command mode is activated, you can select by a <m> or a <s>, if all of the following commands should be handled in the main or in the sub matrix. OSD Access OSD access to the main matrix: <Left Shift>, <Left Shift>, <m> (optional), <o> OSD access to the sub matrix: <Left Shift>, <Left Shift>, <s>, <o> Example: Switching to the CPU port 23 of the sub matrix. 106 1. Switching to the CPU Port (e.g. 12) of the master matrix that have the connection to the sub matrix: <Left Shift>, <Left Shift>, <m> (optional), <1>, <2>, <Enter> 2. Switching to the CPU Port 23 of the sub matrix: <Left Shift>, <Left Shift>, <s>, <2>, <3>, <Enter> 2011-10-11 Operation The selected main matrix / sub matrix mode is permanently activated until the other mode will be manually activated. This means that if you select <s> for example, all prospective commands will be sent to the slave, but not if the Command Mode is left in the meantime. Pos: 72 /806-IHSE/Betrieb/Bedienung über HotKeys/480-xx/Funktionstasten <F1> - <F12> @ 7\mod_1309940812665_6.doc @ 53544 @ @ 4 6.1.4 Function Keys <F1>–<F12> In Command Mode you can retrieve the macros 1–12 with the function keys <F1>–<F12> of the connected standard keyboard instead of the special macro keyboard. The deposited command sequence for the appropriate function key is executed and Command Mode is left immediately. By a prefixed <s> or <S> and <m> or <M> you can select, if the command sequence should be executed for the master or the slave. The chosen control level remains selected, until the other one will be selected, but not if Command Mode is left in the meantime. Pos: 73 /806-IHSE/Betrieb/Switch/480-xx @ 7\mod_1309940863555_6.doc @ 53563 @ @ 4 6.2 KVM-Switching You have the following possibilities to perform switching operation with the Draco tera: OSD Select Switch in the main menu. 2011-10-11 107 Draco tera Menu Switch The following information is shown in this menu: Field Description CON device Assigned physical extender unit (CON unit) CON assigned Virtual CON Device that is assigned to the real CON device CPU connected Currently connected CPU device 108 CON status Current connection status (CON device) EXT list List of all available physical extender units (CON units) CPU device Assigned physical extender unit (CPU unit) CPU assigned Real CPU device that is assigned to a virtual CPU device CON connected Currently connected CON device CPU status Current connection status (CPU device) EXT list List of all available physical extender units (CPU units) 2011-10-11 Operation You can select between the following switching functions: Function Keyboard Command Set a video only connection. <Space> Set a KVM connection. <Enter> Set a KVM connection in private mode (video sharing disabled). <Shift> + <Enter> Disconnect own CON device from CPU device. <Backspace> Switching operations from the own CON device can only be done to CPU devices that are available in the list CPU Devices. Java Tool Select Switch > Switch Console to CPU in the task area. Menu Switch – Switch Console to CPU All connected consoles and the associated CPU connections are shown in columns in the working area in this menu. Switching operations can only be performed in online mode, that means an active network connection between the matrix and the Java Tool is needed. 2011-10-11 109 Draco tera To set a KVM connection between a console and a CPU, doubleclick on the corresponding selection box within the CPU column and select the requested CPU (green). To set a video connection between a console and a CPU, doubleclick on the corresponding selection box within the CPU column and select the requested CPU (orange). CPUs whose respective console does not have access rights, will not appear in the list. You can use the following button to perform a switching operation: Button Function Send Send effected switching operations to the matrix By activating the function Auto Send in the left lower corner of the working area, switching operations will be done immediately without confirmation by pressing the button Send. Additionally, the menu offers the possibility to get from any console or CPU into the associated configuration menu in the task area. 1. To get directly to Definition > CON Devices, use the right mouse button to click on the respective console in the list and select Open CON Device. 2. To get directly to Definition > CPU Devices use the right mouse button to click on the respective console in the list and select Open CPU Device. Pos: 74 /806-IHSE/Betrieb/Serielle Schnittstellen/480-xx @ 7\mod_1309940914961_6.doc @ 53582 @ @ 4 6.3 Serial Interface The Draco tera offers the possibility to switch via a serial interface (RS232). Detailed information for the serial interface and the corresponding switching commands can be found in Chapter 7.4, Page 120. Pos: 75 /806-IHSE/Betrieb/EIn- und Ausschaltfunktionen/UEB_Ein-_und_Ausschaltfunktionen @ 7\mod_1309940964258_6.doc @ 53601 @ @ 4 110 2011-10-11 Operation 6.4 Power On and Power Down Functions Pos: 76 /806-IHSE/Betrieb/EIn- und Ausschaltfunktionen/480-xx/Neustart @ 7\mod_1309941015165_6.doc @ 53620 @ @ 4 6.4.1 Restart You have the following possibilities to perform a restart: OSD 1. Select Configuration > Restart Matrix or Restart IO Board in the main menu to restart either the matrix or the I/O boards. 2. Confirm the selection with button YES. The Draco tera will be restarted with the current settings. Java Tool Select Switch > Restart Matrix in the menu bar. The Draco tera will be restarted with the current settings. Pos: 77 /806-IHSE/Betrieb/EIn- und Ausschaltfunktionen/480-xx/Reset @ 7\mod_1309941081774_6.doc @ 53638 @ @ 4 6.4.2 Reset You have the following possibilities to perform a reset of the system: If a firmware update has been done since the delivery, the matrix will be set to the state defined there. OSD 1. Select Configuration > Reset Matrix in the main menu. 2. Confirm the selection with the button YES. The Draco tera will be reset to factory settings. Pos: 78 /806-IHSE/Betrieb/EIn- und Ausschaltfunktionen/480-xx/480_Ausschalten @ 7\mod_1310646450471_6.doc @ 54300 @ @ 4 6.4.3 Power Down Slide the on and off switch at the main sockets of the power supply units to start or switch off the matrix. Pos: 79 /806-IHSE/Technische Daten/UEB_Technische Daten @ 5\mod_1278578165261_6.doc @ 42096 @ 1 @ 1 2011-10-11 111 Draco tera 7 Specifications Pos: 80 /806-IHSE/Technische Daten/Schnittstellen/UEB_Schnittstellen @ 5\mod_1278578201870_6.doc @ 42114 @ 2 @ 1 7.1 Interfaces Pos: 81 /806-IHSE/Technische Daten/Schnittstellen/DVI-D-Single-Link @ 5\mod_1278578254058_6.doc @ 42132 @ 3 @ 1 7.1.1 DVI-D Single Link The video interface supports the DVI-D protocol. All signals that comply to DVI-D Single Link norm can be transmitted. This includes e.g. monitor resolutions such as 1920x1200@60Hz, Full HD (1080p) or 2K HD (up to 2048x1152). Data rate is limited to 165 MPixel/s. Pos: 82 /806-IHSE/Technische Daten/Schnittstellen/USB-HID @ 5\mod_1278578292214_6.doc @ 42150 @ 3 @ 1 7.1.2 USB-HID Our devices with USB-HID interface support a maximum of two devices with USB-HID protocol. Each USB-HID port provides a maximum current of 100 mA. Keyboard Compatible with most USB keyboards. Certain keyboards with additional functions may require custom firmware to operate. Keyboards with an integral USB Hub (Mac keyboards e.g.) are also supported. Mouse Compatible with most 2-button, 3-button and scroll mice. Other USB-HID devices The proprietary USB emulation also supports certain other USB-HID devices, such as specific touch screens, graphic tablets, barcode scanners or special keyboards. Support cannot be guaranteed, however, for every USB-HID device. Only two USB-HID devices are supported concurrently, such as keyboard and mouse or keyboard and touch screen. A hub is allowed, but it does not increase the number of HID devices allowed. To support other USB 'non-HID' devices, such as scanners, web cams or memory devices, choose our devices with transparent USB support. Pos: 83 /806-IHSE/Technische Daten/Schnittstellen/RJ45 (Netzwerk) @ 7\mod_1309942049133_6.doc @ 53692 @ @ 4 112 2011-10-11 Specifications 7.1.3 RJ45 (Network) The communication of the Cat X devices requires a 1000BASE-T connection. The cabling has to be done according to EIA/TIA-568-B (1000BASE-T) with RJ45 connectors at both ends. All of the four wire pairs are used in both directions. The cabling is suitable for a full duplex operation. For the cable connection to a source (computer, CPU), a crossed network cable (cross cable) has to be used. Pos: 84 /806-IHSE/Technische Daten/Schnittstellen/RS-232 (seriell) @ 7\mod_1309942120758_6.doc @ 53710 @ @ 4 7.1.4 RS-232 (Serial) The communication takes place with a transmission speed of up to 115.2 KBaud, regardless of the file format. The transmission takes place with eight data bits and a stop bit, but without a parity bit. Limited hardware handshake (DSR) is possible. Pos: 85 /806-IHSE/Technische Daten/Schnittstellen/RJ45 (Gerätekommunikation) @ 5\mod_1278578339308_6.doc @ 42186 @ 3 @ 1 7.1.5 RJ45 (Interconnect) The communication of the Cat X devices requires a 1000BASE-T connection. Connector wiring must comply with EIA/TIA-568-B (1000BASE-T), with RJ45 connectors at both ends. All four cable wire pairs are used. Pos: 86 /806-IHSE/Technische Daten/Schnittstellen/Glasfaser SFP Typ LC @ 5\mod_1278937700855_6.doc @ 43149 @ 3 @ 1 7.1.6 Fiber SFP Type LC (Interconnect) The communication of fiber devices is performed via Gigabit SFPs that have to be connected to suitable fibers fitted with connectors type LC (see Chapter 7.2.2, Page 116). The correct function of the device can only be guaranteed with SFPs provided by the manufacturer. SFP modules can be damaged by electrostatic discharge (ESD). Please consider ESD handling specifications. Pos: 87 /806-IHSE/Technische Daten/Schnittstellen/SDI (Gerätekommunikation) @ 7\mod_1309941998461_6.doc @ 53674 @ @ 4 2011-10-11 113 Draco tera 7.1.7 SDI (Interconnect) The communication of the SDI devices requires a mini coax connection with mini BNC connectors or 3G SFPs with transmission speeds of 0,360 Gbit/s (SD-SDI, SMPTE 259M), 1,485 Gbit/s (HD-SDI, SMPTE 292M) and 2,970 Gbit/s (3G SDI). Pos: 88 /806-IHSE/Technische Daten/Verbindungskabel/UEB_Verbindungskabel @ 5\mod_1279191107845_6.doc @ 43870 @ 2 @ 1 7.2 Interconnect Cable Pos: 89 /806-IHSE/Technische Daten/Verbindungskabel/Verbindungskabel (Cat X) @ 5\mod_1278578406026_6.doc @ 42205 @ 3 @ 1 7.2.1 Cat X A point-to-point connection is required. Operation with several patch fields is possible. Routing over an active network component, such as an Ethernet Hub, Router or Matrix, is not allowed. Avoid routing Cat X cables along power cables. If the site has 3-phase AC power, try to ensure that CPU Unit and CON Unit are on the same phase. To maintain regulatory EMC compliance, correctly installed shielded Cat X cable must be used throughout the interconnection link. To maintain regulatory EMC compliance, all Cat X cables need to carry ferrites on both cable ends close to the device. 114 2011-10-11 Specifications Type of Interconnect Cable The Draco tera requires interconnect cabling specified for Gigabit Ethernet (1000BASE-T). The use of solid-core (AWG24), shielded, Cat 5e (or better) is recommended. Cat X Solid-Core Cable AWG24 S/UTP (Cat 5e) cable according to EIA/TIA568-B. Four pairs of wires AWG24. Connection according to EIA/TIA-568-B (1000BASE-T). Cat X Patch Cable AWG26/8 S/UTP (Cat 5e) cable according to EIA/TIA568-B. Four pairs of wires AWG26/8. Connection according to EIA/TIA-568-B (1000BASE-T). The use of flexible cables (patch cables) type AWG26/8 is possible, however the maximum possible extension distance is halved. Pos: 90 /806-IHSE/Technische Daten/Verbindungskabel/Verbindungskabel (Cat X)_Kabellänge 477-xx @ 5\mod_1278937761105_6.doc @ 43167 @ @ 1 Maximum Acceptable Cable Length Cat X Installation Cable AWG24 140 m (400 ft) Cat X Patch Cable AWG26/8 70 m (200 ft) Pos: 91 /806-IHSE/Technische Daten/Verbindungskabel/480-xx/Glasfaser @ 7\mod_1309942335305_6.doc @ 53729 @ @ 4 2011-10-11 115 Draco tera 7.2.2 Fiber A point-to-point connection is necessary. Operation with multiple patch panels is allowed. Routing over active network components, such as Ethernet Hubs, Matrixes or Routers, is not allowed. Type of Interconnect Cable (Cable notations according to VDE) Type of cable Specifications Single-mode 9μm Two fibers 9μm I-V(ZN)H 2E9 (in-house patch cable) I-V(ZN)HH 2E9 (in-house breakout cable) I/AD(ZN)H 4E9 (in-house or outdoor breakout cable, resistant) A/DQ(ZN)B2Y 4G9 (outdoor cable, with protection against rodents) Multi-mode 50μm Two fibers 50μm I-V(ZN)H 2G50 (in-house patch cable) I/AD(ZN)H 4G50 (in-house or outdoor breakout cable, resistant) Multi-mode 62.5μm Two fibers 62.5μm I-V(ZN)HH 2G62,5 (in-house breakout cable) A/DQ(ZN)B2Y 4G62,5 (outdoor cable, with protection against rodents) Only use Single-mode connection cables for fiber connections that are based on 3G SFPs. Maximum Acceptable Cable Length Type of cable Maximum Acceptable Cable Length Single-mode 9μm 10,000 m (32,800 ft) Multi-mode 50μm (OM3) 1,000 m (3,280 ft) Multi-mode 50μm 400 m (1,300 ft) Multi-mode 62.5μm 200 m (650 ft) If you use single-mode SFPs with multi-mode fibers, you normally can double the maximum acceptable cable length. 116 2011-10-11 Specifications Type of Connector LC Connector Connector Pos: 92 /806-IHSE/Technische Daten/Verbindungskabel/Koaxial @ 7\mod_1309942381352_6.doc @ 53747 @ @ 4 7.2.3 Coaxial A point-to-point connection is necessary. Type of Interconnect Cable Cable Type Specifications Mini coaxial cable AWG 18 RG 6 impedance 75 Ω Maximum Acceptable Cable Length Band Width Maximum Acceptable Cable Length 0.270 Gbit/s 400 m (1,312 ft) 1.485 Gbit/s 140 m (459 ft) 2.970 Gbit/s 120 m (394 ft) Type of Connector Mini BNC connector Connector Pos: 93 /806-IHSE/Technische Daten/Getestete Peripherie/UEB_Getestete Peripherie @ 5\mod_1278578478761_6.doc @ 42242 @ 2 @ 1 7.3 Supported Peripherals Pos: 94 /806-IHSE/Technische Daten/Getestete Peripherie/480-xx/KVM-Extender @ 7\mod_1311332022151_6.doc @ 54403 @ @ 4 7.3.1 KVM Extenders The following KVM extenders are released for the use with the Draco tera: KVM Extender with Cat X Connection, K477 Series Type Description L477-1SHC Draco tera KVM CPU Unit, Single-Head, 2x USB-HID R477-1SHC Draco tera KVM CON Unit, Single-Head, 2x USB-HID L477-1S4CA Draco tera KVM CPU Unit, Single-Head, Analog Audio, 4x USB-HID R477-1S4CA Draco tera KVM CON Unit, Single-Head, Analog Audio, 4x USB-HID 2011-10-11 117 Draco tera Type Description L477-1S4CD Draco tera KVM CPU Unit, Single-Head, Digital Audio, 4x USB-HID R477-1S4CD Draco tera KVM CON Unit, Single-Head, Digital Audio, 4x USB-HID L477-1STC Draco tera KVM CPU Unit, Single-Head, 2x USB-HID, 4x USB 2.0 R477-1STC Draco tera KVM CON Unit, Single-Head, 2x USB-HID, 4x USB 2.0 L477-2S4C Draco tera KVM CPU Unit, Dual-Head, 4x USB-HID R477-2S4C Draco tera KVM CON Unit, Dual-Head, 4x USB-HID L477-SHCV Draco tera KVM CPU Unit, Single-Head, DVI-I input (VGA), 2x USB-HID R477-SHCV Draco tera KVM CON Unit, Single-Head, DVI-I Input (VGA), 2x USB-HID KVM Extender with Cat X Connection, K474 Series Type Description L474-BSHC Draco tera KVM CPU Unit, Single-Head, 2x USB-HID R474-BSHC Draco tera KVM CON Unit, Single-Head, 2x USB-HID L474-BSHCV Draco tera KVM CPU Unit, Single-Head, DVI-I input (VGA), 2x USB-HID R474-BSHCV Draco tera KVM CON Unit, Single-Head, IR receiver, 2x USB-HID KVM Extender with Fiber Connection (Single-Mode), K477 Series 118 Type Description L477-1SHS Draco tera KVM CPU Unit, Single-Head, 2x USB-HID R477-1SHS Draco tera KVM CON Unit, Single-Head, 2x USB-HID L477-1S4SA Draco tera KVM CPU Unit, Single-Head, Analog Audio, 4x USB-HID R477-1S4SA Draco tera KVM CON Unit, Single-Head, AnalogAudio, 4x USB-HID L477-1S4SD Draco tera KVM CPU Unit, Single-Head, Digital Audio, 4x USB-HID R477-1S4SD Draco tera KVM CON Unit, Single-Head, Digital Audio, 4x USB-HID 2011-10-11 Specifications Type Description L477-1STS Draco tera KVM CPU Unit, Single-Head, 2x USB-HID, 4x USB 2.0 R477-1STS Draco tera KVM CON Unit, Single-Head, 2x USB-HID, 4x USB 2.0 L477-2S4S Draco tera KVM CPU Unit, Dual-Head, 4x USB-HID R477-2S4S Draco tera KVM CON Unit, Dual-Head, 4x USB-HID L477-SHSV Draco tera KVM CPU Unit, Single-Head, DVI-I input (VGA), 2x USB-HID KVM Extender with Fiber Connection (Single-Mode), K474 Series Type Description L474-BSHS Draco tera KVM CPU Unit, Single-Head, 2x USB-HID R474-BSHS Draco tera KVM CON Unit, Single-Head, 2x USB-HID L474-BSHSV Draco tera KVM CPU Unit, Single-Head, DVI-I Input (VGA), 2x USB-HID R474-BSHSV Draco tera KVM CON Unit, Single-Head, IR receiver, 2x USB-HID Pos: 95 /806-IHSE/Technische Daten/Getestete Peripherie/480-xx/USB-2.0-Extender @ 7\mod_1311332022526_6.doc @ 54422 @ @ 4 7.3.2 USB 2.0 Extender USB 2.0 Extender with Cat X Connection, K474 Series Type Description L474-BXTC Draco tera USB 2.0 CPU Unit, 4x USB 2.0 R474-BXTC Draco tera USB 2.0 CON Unit, 4x USB 2.0 USB 2.0 Extender with Fiber Connection (Single-Mode), K474 Series Type Description L474-BXTS Draco tera USB 2.0 CPU Unit, 4x USB 2.0 R474-BXTS Draco tera USB 2.0 CON Unit, 4x USB 2.0 Pos: 96 /806-IHSE/Technische Daten/Getestete Peripherie/480-xx/Video-Extender @ 7\mod_1311332121134_6.doc @ 54441 @ @ 4 7.3.3 Video-Extender !Text kommt! Pos: 97 /806-IHSE/Technische Daten/Serielle Ausstattung/Serielle Ansteuerung @ 7\mod_1309942515852_6.doc @ 53784 @ @ 4 2011-10-11 119 Draco tera 7.4 Serial Control To control the Draco tera via serial interface, the following parameters certain parameters are used. In order to communicate set the format for serial data transmission. 115.2K, 8, 1, NO (115.2 KBAUD, 8 data bits, 1 stop bit, no parity) Command <STX>, <command byte (CMD)>, [data bytes (D0…DN)], <ETX> [ ] = Optional elements Response <ACK> , [<ECHO>] [ ] = Optional elements <ECHO> reports the matrix sequences solicited by a command and thus the new switching status of the matrix. The echo can be used to update user applications and to operate several matrices in parallel. Parameter Description Command byte: In the range 0x40 to 0x6F (see list of allowed commands below) Data bytes: a) Binary data: In order to prevent that, during the transmission of binary data, control statements of control commands are transferred, the data are divided into low-nibble and high-nibble. The data are distributed to the low-nibbles of two bytes and provided with an offset by 0x60 e.g. 0x1F => 0x61 + 0x6F b) 7bit data: (0x0 to 0x7F) are provided with an offset by 0x80, e.g. 0000011 => 0x83 c) ASCII data => 0x20 to 0x7E are transmitted unencryptedly. 120 2011-10-11 Specifications (Special) characters: ACK NAK STX ETX CR ESC HTAB LF 0x06 0x15 0x02 0x03 0x0D 0x1B 0x09 0x0A Sequence of a Data Communication Draco tera Matrix Control CPU – Sending of a command Acquiring of a command, processing of a command, blocking of further commands – a) Errors occurred: <NAK> b) No errors: <ACK><ECHO> c) Optional: Reply telegram with data – – a) Repeat telegram b) Next command c) Receive and process the repeat telegram The serial interface can be blocked while OSD has been opened. Pos: 98 /806-IHSE/Technische Daten/Serielle Ausstattung/Telegramme der Schaltfunktionen @ 7\mod_1309942765508_6.doc @ 53802 @ @ 4 2011-10-11 121 Draco tera 7.4.1 Telegrams of the Switching Functions Request of Input Port for Output Port Bytes Description Coding 1 Control character 0x1B 1 Server identification 0X5B 1 Command 0x42 2 Total length of telegram (7 bytes, binary) 0x07 0x00 2 Requested output port (binary, 1…max. ports) 0x01 0x00 (for port 1) to 0x120 0x00 (for port 288) Example: Request of input port for output port 160 0x1B 0x5B 0x42 0x07 0x00 0xA0 0x00 Return of Input Port for Output Port Bytes Description Coding 1 Control character 0x1B 1 Server identification 0X5D 1 Command 0x42 2 Total length of telegram (9 bytes, binary) 0x09 0x00 2 Requested output port (binary, 1…max. ports) 0x01 0x00 (for port 1) to 0x120 0x00 (for port 288) 2 Assigned input port (binary, 1…max. ports) 0x01 0x00 (for port 1) to 0x120 0x00 (for port 288) Example: Return of input port 17 for output port 160 0x1B 0x5D 0x42 0x09 0x00 0xA0 0x00 0x11 0x00 122 2011-10-11 Specifications Connection of Input Port with Output Port Bytes Description Coding 1 Control character 0x1B 1 Server identification 0X5B 1 Command 0x43 2 Total length of telegram (9 bytes, binary) 0x09 0x00 2 Requested output port (binary, 1…max. ports) 0x01 0x00 (for port 1) to 0x120 0x00 (for port 288) 2 Assigned input port (binary, 1…max. ports) 0x01 0x00 (for port 1) to 0x120 0x00 (for port 288) Example: Connection of input port 17 with output port 160 0x1B 0x5B 0x43 0x09 0x00 0xA0 0x00 0x11 0x00 Request of Input Port for Output Port with a fixed total Port Number Bytes Description Coding 1 Control character 0x1B 1 Server identification 0X5B 1 Command 0x44 2 Total length of telegram (9 bytes, binary) 0x09 0x00 2 Number of output ports (binary, 1…max. 287 ports) 0x01 0x00 (for 1 port) to 0x11F 0x00 (for 287 ports) 2 Requested output port (binary, 1…max. ports) 0x01 0x00 (for port 1) to 0x120 0x00 (for port 288) Example: Request of input port for output port 25 with a total port number of 160 0x1B 0x5B 0x44 0x09 0x00 0xA0 0x00 0x19 0x00 2011-10-11 123 Draco tera Return of Input Port for Output Port with a fixed Port Number Bytes Description Coding 1 Control character 0x1B 1 Server identification 0X5D 1 Command 0x44 2 Total length of telegram (7 bytes, binary) 0x07 0x00 2 Number of output ports (binary, 1…max. 288 ports) 0x01 0x00 (for 1 port) to 0x11F 0x00 (for 287 ports) Example: Return of input port 17 for output port 25 with a total port number of 160 0x1B 0x5D 0x44 0x09 0x00 0xA0 0x00 0x19 0x00 0x11 0x00 Connection of Input Port with Output Port with a fixed total Port Number Bytes Description Coding 1 Control character 0x1B 1 Server identification 0X5B 1 Command 0x45 2 Total length of telegram (7 bytes, binary) 0x07 0x00 2 Number of output ports (binary, 1…max. 287 ports) 0x01 0x00 (for 1 ports) to 0x11F 0x00 (for 287 ports) Example: Connection of input port 17 with output port 25 with a total port number of 160 0x1B 0x5B 0x45 0x07 0x00 0xA0 0x00 0x19 0x00 0x11 0x00 124 2011-10-11 Specifications Request of Switching Matrix Bytes Description Coding 1 Control character 0x1B 1 Server identification 0X5B 1 Command 0x46 Return of the Switching Matrix (Input Port for all Output Ports) Bytes Description Coding 1 Control character 0x1B 1 Server identification 0X5D 1 Command 0x46 2 Total length of telegram (7 bytes, binary) 0x07 0x00 2 Input port whose signal is send to output port OutPort (n) 0x01 0x00 (for 1 port) to 0x120 0x00 (for 288 ports) Example: Return input port 17 for all output ports 0x1B 0x5D 0x46 0x07 0x00 0x11 0x00 Request of CPU (Input) for CON (Output) Bytes Description Coding 1 Control character 0x1B 1 Server identification 0X5B 1 Command 0x47 2 Total length of telegram (7 bytes, binary) 0x07 0x00 2 Requested output console 0x01 0x00 (for console 1) to 0x11F 0x00 (for console 287) Example: Request of CPU (input) for console 23 0x1B 0x5B 0x47 0x07 0x00 0x17 0x00 2011-10-11 125 Draco tera Return of CPU (Input) for CON (Output) Bytes Description Coding 1 Control character 0x1B 1 Server identification 0X5D 1 Command 0x47 2 Total length of telegram (9 bytes, binary) 0x09 0x00 2 Requested output console 0x01 0x00 (for console 1) to 0x11F 0x00 (for console 287) 2 Requested input CPU 0x01 0x00 (for CPU 1) to 0x11F 0x00 (for CPU 287) Example: Return of CPU 34 for console 23 0x1B 0x5D 0x47 0x09 0x00 0x17 0x00 0x22 0x00 Connection of CPU (Input) with CON (Output) Bytes Description Coding 1 Control character 0x1B 1 Server identification 0X5B 1 Command 0x48 2 Total length of telegram (9 bytes, binary) 0x09 0x00 2 Requested console 0x01 0x00 (for console 1) to 0x11F 0x00 (for console 287) 2 Requested CPU 0x01 0x00 (for CPU 1) to 0x11F 0x00 (for CPU 287) Example: Connection of CPU 43 with console 23 0x1B 0x5B 0x48 0x09 0x00 0x17 0x00 0x2B 0x00 126 2011-10-11 Specifications Request of CPU (Input) for CON (Output with a fixed Console Number Bytes Description Coding 1 Control character 0x1B 1 Server identification 0X5B 1 Command 0x49 2 Total length of telegram (9 bytes, binary) 0x09 0x00 2 Total number of consoles 0x01 0x00 (for 1 console) to (binary, 1...max. CONs) 0x11F 0x00 (for 287 consoles) 2 Requested consoles 0x01 0x00 (for console 1) to 0x11F 0x00 (for console 287) Example: Request of CPU (input) for console 23 with 50 consoles in total 0x1B 0x5B 0x49 0x09 0x00 0x32 0x00 0x17 0x00 Return of CPU (Input) for CON (Output) with a fixed Console Number Bytes Description Coding 1 Control character 0x1B 1 Server identification 0X5D 1 Command 0x49 2 Total length of telegram (7 bytes, binary) 0x07 0x00 2 Total number of consoles 0x01 0x00 (for 1 console) to (binary, 1...max. CONs) 0x11F 0x00 (for 287 consoles) Example: Return of CPU 43 for console 23 with 50 consoles in total 0x1B 0x5D 0x49 0x07 0x00 0x32 0x00 0x17 0x00 0x2B 0x00 2011-10-11 127 Draco tera Connection of CPU (Input) with CON (Output) with a fixed Console Number Bytes Description Coding 1 Control character 0x1B 1 Server identification 0X5B 1 Command 0x50 2 Total length of telegram (7 bytes, binary) 0x07 0x00 2 Total number of consoles 0x01 0x00 (for 1 console) to (binary, 1...max. CONs) 0x11F 0x00 (for 287 consoles) Example: Connection of 43 with console 23 with 50 consoles in total 0x1B 0x5B 0x50 0x07 0x00 0x32 0x00 0x17 0x00 0x2B 0x00 Request of CON (Input) for CPU (Output) Bytes Description Coding 1 Control character 0x1B 1 Server identification 0X5B 1 Command 0x51 2 Total length of telegram (7 bytes, binary) 0x07 0x00 2 Requested output for CPU 0x01 0x00 (for CPU 1) to 0x11F 0x00 (for CPU 287) Example: Request of CON (input) for CPU 23 0x1B 0x5B 0x51 0x07 0x00 0x17 0x00 128 2011-10-11 Specifications Return of CON (Input) for CPU (Output) Bytes Description Coding 1 Control character 0x1B 1 Server identification 0X5D 1 Command 0x51 2 Total length of telegram (9 bytes, binary) 0x09 0x00 2 Requested output CPU 0x01 0x00 (for CPU 1) to 0x11F 0x00 (for CPU 287) 2 Requested input console 0x01 0x00 (for console 1) to 0x11F 0x00 (for console 287) Example: Request of console 23 for CPU 43 0x1B 0x5D 0x51 0x09 0x00 0x2B 0x00 0x17 0x00 Connection of CON (Input) with CPU (Output) Bytes Description Coding 1 Control character 0x1B 1 Server identification 0X5B 1 Command 0x52 2 Total length of telegram (9 bytes, binary) 0x09 0x00 2 Requested output CPU 0x01 0x00 (for CPU 1) to 0x11F 0x00 (for CPU 287) 2 Requested input console 0x01 0x00 (for console 1) to 0x11F 0x00 (for console 287) Example: Connection of console 23 with CPU 43 0x1B 0x5B 0x52 0x09 0x00 0x2B 0x00 0x17 0x00 2011-10-11 129 Draco tera Request CON (Input) for CPU (Output) with a fixed CPU number Bytes Description Coding 1 Control character 0x1B 1 Server identification 0X5B 1 Command 0x53 2 Total length of telegram (9 bytes, binary) 0x09 0x00 2 Total number of CPUs 0x01 0x00 (for 1 CPU) to 0x11F 0x00 (for 159 CPUs) 2 Requested output for CPU (binary, 1…max. CPUs) 0x01 0x00 (for CPU 1) to 0x11F 0x00 (for CPU 287) Example: Request for CPU 43 with 50 CPUs in total 0x1B 0x5B 0x53 0x09 0x00 0x32 0x00 0x2B 0x00 Return of CON (Input) for CPU (Output) with a fixed CPU Number Bytes Description Coding 1 Control character 0x1B 1 Server identification 0X5D 1 Command 0x53 2 Total length of telegram (7 bytes, binary) 0x07 0x00 2 Total number of CPUs 0x01 0x00 (for 1 CPU) to 0x11F 0x00 (for 287 CPUs) Example: Return of console 23 for CPU 43 with 50 CPUs in total 0x1B 0x5D 0x53 0x07 0x00 0x32 0x00 0x2B 0x00 0x17 0x00 130 2011-10-11 Specifications Connection of CON (Input) with CPU (Output) with a fixed total CPU Number Bytes Description Coding 1 Control character 0x1B 1 Server identification 0X5B 1 Command 0x54 2 Total length of telegram (7 bytes, binary) 0x07 0x00 2 Total number of CPUs 0x01 0x00 (for 1 CPU) to 0x11F 0x00 (for 287 CPUs) Example: Connection of console 23 with CPU 43 with 50 CPUs in total 0x1B 0x5B 0x54 0x07 0x00 0x32 0x00 0x2B 0x00 0x17 0x00 Connection of CON (Input) with CPU (Output) and CPU (Input) with CON (Output) Bytes Description Coding 1 Control character 0x1B 1 Server identification 0X5B 1 Command 0x55 2 Total length of telegram (9 bytes, binary) 0x09 0x00 2 Requested CPU 0x01 0x00 (for CPU 1) to 0x11F 0x00 (for CPU 287) 2 Requested console 0x01 0x00 (for console 1) to 0x11F 0x00 (for console 287) Example: Connection of console 23 (input) with CPU 43 (output) 0x1B 0x5B 0x55 0x09 0x00 0x2B 0x00 0x17 0x00 2011-10-11 131 Draco tera Connection of CON (Input) with CPU (Output) and CPU (Input) with CON (Output) with a fixed CPU Number Bytes Description Coding 1 Control character 0x1B 1 Server identification 0X5B 1 Command 0x56 2 Total length of telegram (7 bytes, binary) 0x07 0x00 2 Total number of CPUs 0x01 0x00 (for 1 CPU) to 0x11F 0x00 (for 287 CPUs) Example: Connection of console 23 with CPU 43 and console 24 with CPU 44 with 50 existing CPUs 0x1B 0x5B 0x56 0x07 0x00 0x32 0x00 0x2B 0x00 0x17 0x00 0x2C 0x00 0x18 0x00 Pos: 99 /806-IHSE/Technische Daten/Pinbelegungen/UEB_Pinbelegungen @ 5\mod_1278578683636_6.doc @ 42315 @ 2 @ 1 132 2011-10-11 Specifications 7.5 Connector Pinouts Pos: 100 /806-IHSE/Technische Daten/Pinbelegungen/UEB_CPU-Karte @ 7\mod_1309942897790_6.doc @ 53820 @ @ 4 7.5.1 CPU Board Pos: 101 /806-IHSE/Technische Daten/Pinbelegungen/Buchse DVI-D Single-Link @ 5\mod_1278578723073_6.doc @ 42333 @ @ 1 Connector DVI-D Single-Link 1.............................8 C1 C2 C5 17...........................24 C3 C4 Pin Signal 1 T.M.D.S data 2 – 9 Pin T.M.D.S data 1 – 17 T.M.D.S data 0 – 2 T.M.D.S data 2 + 10 T.M.D.S data 1 + 18 T.M.D.S data 0 + 3 T.M.D.S data 2 GND 11 T.M.D.S data 1 GND 19 T.M.D.S data 0 GND 4 n.c. 12 n.c. 20 n.c. 5 n.c. 13 n.c. 21 n.c. 6 DDC Input (SCL) 14 +5VDC high impedance 22 T.M.D.S clock GND 7 DDC Output (SDA) 15 GND 23 T.M.D.S clock + 8 Internal use 16 Hot Plug recognition 24 T.M.D.S clock – C1 Internal use C3 Internal use C2 n.c. C4 Internal use C5 Signal GND Pin Signal Pos: 102 /806-IHSE/Technische Daten/Pinbelegungen/Buchse USB Typ A @ 5\mod_1278578771214_6.doc @ 42369 @ @ 1 Connector USB Type A Picture 1 2 3 4 Pin Signal Color 1 VCC (+5VDC) Red 2 Data – White 3 Data + Green 4 GND Black Pos: 103 /806-IHSE/Technische Daten/Pinbelegungen/D-Sub 9 (Seriell) @ 5\mod_1291128631437_6.doc @ 44882 @ @ 1 2011-10-11 133 Draco tera D-Sub 9 (Serial) Picture 1.................5 6...........9 Pin Signal Pin Signal 1 n.c. 6 DTR 2 CTS 7 TxD 3 RTS 8 RxD 4 DSR 9 n.c. 5 GND Pin Signal Pin Signal 1 D1+ 5 n.c 2 D1– 6 D2– 3 D2+ 7 n.c 4 n.c 8 n.c Pin Signal Pin Signal 1 D1+ 5 D3– 2 D1– 6 D2– 3 D2+ 7 D4+ 4 D3+ 8 D4– Pos: 104 /806-IHSE/Technische Daten/Pinbelegungen/480-xx/RJ45 @ 7\mod_1309943226649_6.doc @ 53857 @ @ 4 RJ45 Picture 8..........1 Pos: 105 /806-IHSE/Technische Daten/Pinbelegungen/UEB_E/A-Karte Cat X @ 7\mod_1309943361243_6.doc @ 53876 @ @ 4 7.5.2 I/O Board Cat X Pos: 106 /806-IHSE/Technische Daten/Pinbelegungen/RJ45 @ 5\mod_1278578820011_6.doc @ 42405 @ @ 1 RJ45 Picture 8..........1 Pos: 107 /806-IHSE/Technische Daten/Pinbelegungen/UEB_E/A-Karte SFP @ 7\mod_1309943436008_6.doc @ 53894 @ @ 4 7.5.3 I/O Board SFP Pos: 108 /806-IHSE/Technische Daten/Pinbelegungen/Glasfaser SFP Typ LC @ 5\mod_1278938501151_6.doc @ 43210 @ @ 1 Fiber SFP Typ LC Picture 1 Diode Signal 1 Data OUT 2 Data IN 2 Pos: 109 /806-IHSE/Technische Daten/Pinbelegungen/UEB_E/A-Karte SDI @ 7\mod_1309943510165_6.doc @ 53912 @ @ 4 134 2011-10-11 Specifications 7.5.4 I/O Board SDI Pos: 110 /806-IHSE/Technische Daten/Pinbelegungen/Mini-BNC (SDI) @ 7\mod_1309943545633_6.doc @ 53930 @ @ 4 Mini BNC (SDI) Picture 1 2 Pin Signal 1 Data IN 2 GND Pos: 111 /806-IHSE/Technische Daten/Stromversorgung/480-xx @ 7\mod_1309943583946_6.doc @ 53948 @ @ 4 7.6 Power Supply Voltage 100-240V~, 50-60Hz Strombedarf Draco tera 288 max. 202 W without I/O boards Draco tera 160 max. 188 W without I/O boards Draco tera 80 max. 99 W without I/O boards Draco tera 48 max. 94 W without I/O boards Draco tera 8 max. 15 W without I/O boards I/O Board max. 13 W Pos: 112 /806-IHSE/Technische Daten/Einsatzbedingungen/ATB_Einsatzbedingungen @ 5\mod_1278578980026_6.doc @ 42480 @ 2 @ 1 7.7 Environmental Conditions Operating Temperature 41 to 113°F (5 to 45°C) Storage Temperature –13 to 140°F (–25 to 60°C) Relative Humidity Max. 80% non-condensing Pos: 113 /806-IHSE/Technische Daten/Abmessungen/480-xx @ 7\mod_1309943734415_6.doc @ 53966 @ @ 4 2011-10-11 135 Draco tera 7.8 Size Draco tera 288 Matrix 483 x 578 x 330 mm (19.0" x 22.8" x 12.0") Shipping Box 650 x 680 x 760 mm (25.6" x 26.8" x 29.9") Draco tera 160 Matrix 483 x 400 x 330 mm (19.0" x 15.8" x 12.0") Shipping Box 650 x 680 x 540 mm (25.6" x 26.8" x 21.3") Draco tera 80 Matrix 483 x 178 x 230 mm (19.0" x 7.0" x 9.1") Shipping Box 640 x 570 x 360 mm (25.2" x 22.4" x 14.2") Draco tera 48 Matrix 483 x 133 x 230 mm (19.0" x 5.3" x 9.1") Shipping Box 640 x 570 x 316 mm (25.2" x 22.4" x 12.4") Draco tera 8 Matrix Shipping Box Pos: 114 /806-IHSE/Technische Daten/Transportgewicht /480-xx @ 7\mod_1309943775602_6.doc @ 53984 @ @ 4 136 2011-10-11 Specifications 7.9 Shipping Weight Draco tera 288 Matrix 34.6 kg (76.2 lb) fully equipped Shipping Box 41.1 kg (90.6 lb) Draco tera 160 Matrix 26.3 kg (60.0 lb) fully equipped Shipping Box 31.7 kg (69.9 lb) Draco tera 80 Matrix 11.1 kg (24.5 lb) fully equipped Shipping Box 15.6 kg (34.4 lb) Draco tera 48 Matrix 8.9 kg (19.6 lb) fully equipped Shipping Box 12.1 kg (26.7 lb) Draco tera 8 Matrix Shipping Box Pos: 115 /806-IHSE/Hilfe im Problemfall/UEB_Hilfe im Problemfall @ 5\mod_1278579113839_6.doc @ 42536 @ 1 @ 1 2011-10-11 137 Draco tera 8 Troubleshooting Pos: 116 /806-IHSE/Hilfe im Problemfall/Hilfe im Problemfall (480-xx) @ 7\mod_1309943852774_6.doc @ 54002 @ @ 4 In the following chapters support for problems with the Draco tera matrix is provided. This help is based as regards content on a functional extender route. Please ensure before running your extenders with the matrix that they work over a peer-to-peer connection. This can be supported by the use of a Cat X or fiber coupler. If you have problems referring to this, the manuals of the respective extenders will offer support. Pos: 117 /806-IHSE/Hilfe im Problemfall/Externe Störung/480-xx @ 7\mod_1309944289555_6.doc @ 54021 @ @ 4 8.1 External Failure Diagnosis Possible Reason Matrix cannot be Fuse at the standard started appliance outlet. anymore. Measure Check fuse. Pos: 118 /806-IHSE/Hilfe im Problemfall/Bildstörung/480-xx @ 7\mod_1309944461727_6.doc @ 54076 @ @ 4 8.2 Video Interference Diagnosis Possible Reason Measure Opening the OSD not possible No OSD jumper set Set jumper 11 on the CON unit. Incorrect video display Cable connection disturbed Check the connection, length and quality of the interconnect cable to the units. Pos: 119 /806-IHSE/Hilfe im Problemfall/Lüfterstörung/480-xx @ 7\mod_1309944511868_6.doc @ 54095 @ @ 4 8.3 Malfunction of Fans Diagnosis Possible Reason Measure Fans only run under full load Communication to fan tray is disturbed Removal and und reinstallation of the fan tray Fans do not Fans defective run, LED OK on Contact your dialer Fans do not Power supply run, LED OK off Check power supply and power connection Pos: 120 /806-IHSE/Hilfe im Problemfall/Störung der Netzteile/480-xx @ 7\mod_1309944565727_6.doc @ 54114 @ @ 4 138 2011-10-11 Troubleshooting 8.4 Malfunction of Power Supply Units Diagnosis Possible Reason Measure Matrix cannot be started Power supply units not locked correctly Check lock and plug-in of the power supply units No power supply available Check, if cables for the power supply are connected correctly Power supply units are not switched on Check slide to switch on the power supply units Pos: 121 /806-IHSE/Hilfe im Problemfall/Netzwerkstörung/480-xx @ 7\mod_1309944607415_6.doc @ 54133 @ @ 4 8.5 Network Error Diagnosis Possible Reason Measure Network settings are not assumed after editing. Restart of the matrix not yet completed. Do a restart. Pos: 122 /806-IHSE/Hilfe im Problemfall/Störung an der Matrix/480-xx @ 7\mod_1309944331383_6.doc @ 54040 @ @ 4 8.6 Failure at the Matrix Diagnosis Possible Reason Measure Serial control impossible or only restrictedly possible. Different Baud rate of CPU and matrix. Adapt Baud rate in the matrix and in the CPU (see Chapter 5.3.2, Page 56). Serial control via Wrong network cable. RJ45 port not possible. Use a crossed network cable Port definitions as USB 2.0 invalid. Do a restart. Restart of the matrix not yet completed. Pos: 123 /806-IHSE/Hilfe im Problemfall/Bildausfall/480-xx @ 7\mod_1309944397665_6.doc @ 54058 @ @ 4 2011-10-11 139 Draco tera 8.7 Blank Screen 1 2 3 12 3 Rear View 3 Front View Diagnosis Possible Reason Measure Monitors remains dark after switching operation Switching to a CPU Port without active Source (computer, CPU). Switching to a CPU Port with an active source (computer, CPU). LED 1 on or LED 2 off Connections CON unit, matrix and CPU unit. Check connecting cables and connectors. (No cable, cable break, CPU/CON unit offline, CPU/CON unit connected to the wrong port) LED 3 off Power supply Check power supply units and the connection to the power network. Connection of a console Check connections regarding CON and CPU ports at the with a CON port or matrix. connection of a CPU to a CPU port not established correctly. Pos: 124 /806-IHSE/Technische Unterstützung/ATB_Technische Unterstützung @ 5\mod_1278579487089_6.doc @ 42650 @ 122 @ 1 140 2011-10-11 Technical Support 9 Technical Support Prior to contacting support please ensure you have read this manual, and then installed and set-up your Draco tera as recommended. 9.1 Support Checklist To efficiently handle your request it is necessary to complete our checklist for support and problem cases (Download). Keep the following information available before you call: 9.2 Company, name, phone number and email Type and serial number of the device (see bottom of device) Date and number of sales receipt, name of dealer if necessary Issue date of the existing manual Nature, circumstances and duration of the problem Involved components (such as graphic source/CPU, OS, graphic card, monitor, USB-HID/USB 2.0 devices, interconnect cable) including manufacturer and model number Results from any testing you have done Shipping Checklist 1. To return your device, contact your dealer to obtain a RMA number (Return-Material-Authorization). 2. Package your devices carefully, preferably using the original box. Add all pieces which you received originally. 3. Note your RMA number visibly on your shipment. Devices that are sent in without a RMA number cannot be accepted. The shipment will be sent back without being opened, postage unpaid. Pos: 125 /806-IHSE/Zertifikate/UEB_Zertifikate @ 5\mod_1278579534933_6.doc @ 42668 @ 1 @ 1 2011-10-11 141 Draco tera 10 Certificates Pos: 126 /806-IHSE/Zertifikate/ATB_Europäische Konformitätserklärung @ 5\mod_1278579640901_6.doc @ 42686 @ 2 @ 1 10.1 CE Declaration Of Conformity The products listed below in the form as delivered comply with the provisions of the following European Directives: 2004/108/EG Council Directive on the approximation of the laws of the Member States relating to electromagnetic compatibility CE Marking 2009 Product list: 480 Series The products comply with the following harmonized standards for Information Technology Equipment: EN 55022:2006 + A1:2007 (Class A) EN 55024:1998 + A1:2001 + A2:2003 This declaration certifies the conformity to the specified directives but contains no assurance of properties. The safety instructions and installation guidelines noted in this manual shall be considered in detail. Compliance with the specifications for cable lengths and types is mandatory. Manufacturer: Oberteuringen, 26 January 2010 IHSE GmbH Maybachstrasse 11 88094 Oberteuringen Deutschland The Management Use in a Domestic Environment This is a Class A product. In a domestic environment, this product may cause radio interference in which case the user may be required to take adequate measures. 142 2011-10-11 Certificates 10.2 North American Regulatory Compliance This equipment has been found to comply with the limits for a Class A digital device, pursuant to Part 15 of the FCC Rules. These limits are designed to provide reasonable protection against harmful interference when the equipment is operated in a commercial environment. This equipment generates, uses, and can radiate radio frequency energy and, if not installed and used in accordance with the instruction manual, may cause harmful interference to radio communications. Operation of this equipment in a residential area is likely to cause harmful interference in which case the user will be required to correct the interference at his own expense. Changes or modifications not expressly approved by the party responsible for compliance could void the user’s authority to operate the equipment. Shielded cables must be used with this equipment to maintain compliance with radio frequency energy emission regulations and ensure a suitably high level of immunity to electromagnetic disturbances. All power supplies are certified to the relevant major international safety standards. Pos: 127 /806-IHSE/Zertifikate/ATB_WEEE @ 5\mod_1278579673292_6.doc @ 42704 @ 2 @ 1 10.3 WEEE The manufacturer complies with the EC Directive 2002/96/EG on the prevention of waste electrical and electronic equipment (WEEE). The device labels carry a respective marking. Pos: 128 /806-IHSE/Zertifikate/ATB_RoHS @ 5\mod_1278579714214_6.doc @ 42722 @ 2 @ 1 10.4 RoHS This device complies with the EC Directive 2002/95/EG on the Restriction of the use of certain Hazardous Substances in electrical and electronic equipment (RoHS). The device labels carry a respective marking. Pos: 129 /806-IHSE/Glossar/ATB_Glossar @ 5\mod_1278576825433_6.doc @ 41890 @ 1 @ 1 2011-10-11 143 Draco tera 11 Glossary The following terms are commonly used in this guide or in video and KVM technology: Term Explanation AES/EBU Digital audio standard that is officially known as AES3 and that is used for carrying digital audio signals between devices. Cat X Any Cat 5e (Cat 6, Cat 7) cable CGA The Color Graphics Adapter (CGA) is an old analog graphic standard with up to 16 displayable colors and a maximum resolution of 640x400 pixels. Component Video The Component Video (YPbPr) is a high-quality video standard that consists of three independently and separately transmittable video signals, the luminance signal and two color difference signals. Composite Video The Composite Video is also called CVBS and it is part of the PAL TV standard. 144 CON Unit Component of a Draco tera or Media Extender to connect to the console (monitor(s), keyboard and mouse; optionally also with USB 2.0 devices) CPU Unit Component of a Draco tera or Media Extender to connect to a source (computer, CPU) DDC The Display Data Channel (DDC) is a serial communication interface between monitor and source (computer, CPU. It allows a data exchange via monitor cable and an automatic installation and configuration of a monitor driver by the operating system. Dual Access A system to operate a source (computer, CPU) from two consoles Dual-Head A system with two video connections Dual Link A DVI-D interface for resolutions up to 2560x2048 by signal transmission of up to 330 MPixel/s (24-bit) DVI Digital video standard, introduced by the Digital Display Working Group (http://www.ddwg.org). Single Link and Dual Link standard are distinguished. The signals have TMDS level. 2011-10-11 Glossary Term Explanation DVI-I A combined signal (digital and analog) that allows running a VGA monitor at a DVI-I port – in contrast to DVI-D (see DVI). Fiber Single-mode or multi-mode fiber cables EGA The Enhanced Graphics Adapter (EGA) is an old analog graphic standard, introduced by IBM in 1984. A D-Sub 9 connector is used for connection. Console Keyboard, mouse and monitor CVBS The analog color video baseband signal (CVBS) is also called Composite Video and it is part of the PAL TV standard. KVM Keyboard, video and mouse Mini-XLR Industrial standard for electrical plug connections (3 pole) for the transmission of digital audio and control signals Multi-mode 62.5µ multi-mode fiber cable or 50µ multi-mode fiber cable OSD The On-Screen-Display is used to display information or to operate a device. Quad-Head A system with four video connections RCA (Cinch) A not standardized plug connection for transmission of electrical audio and video signals, especially with coaxial cables SFP SFPs (Small Form Factor Pluggable) are pluggable interface modules for Gigabit connections. SFP modules are available for Cat X and fiber interconnect cables. S/PDIF A digital audio interconnect that is used in consumer audio equipment over relatively short distances. Single-Head A system with one video connection Single Link A DVI-D interface for resolutions up to 1920x1200 by signal transmission of up to 165 MPixel/s (24-bit). Alternative frequencies are Full HD (1080p), 2K HD (2048x1080) and 2048x1152. Single-mode 9µ single-mode fiber cable S-Video (Y/C) The S-Video (Y/C) is a video format transmitting luminance and chrominance signals separately. Thereby it has a higher quality standard than CVBS. 2011-10-11 145 Draco tera Term Explanation TOSLINK Standardized fiber connection system for digital transmission of audio signals (F05 plug connection) Triple-Head A system with three video connections USB-HID USB-HID devices (Human Interface Device) allow for data input. There is no need for a special driver during installation; "New USB-HID device found" is reported. Typical HID devices include keyboards, mice, graphics tablets and touch screens. Storage, video and audio devices are not HID. VGA Video Graphics Array (VGA) is a computer graphics standard with a typical resolution of 640x480 pixels and up to 262,144 colors. It can be seen as a follower of the graphics standards MDA, CGA and EGA. Pos: 130 /806-IHSE/Glossar/480-xx @ 7\mod_1309944815290_6.doc @ 54151 @ @ 4 146 2011-10-11 Glossary 11.1 Matrix specific Glossary Term Explanation Auto Disconnect Matrix function that allows an automatic disconnect between a console and a CPU, if OSD is opened via this console. Auto Logout Matrix function that describes the duration of inactivity after the user haws been logged out from the OSD at this console. CON Device Logical term that summarizes several physical extenders to switch more complex console systems via matrix. CON Timeout Matrix function that allows an automatic disconnect of the own console from the connected CPU after a predefined time. Console ACL Console Access Control List is a list that shows the respective switching rights for the various consoles. CPU Auto Connect Matrix function that allows an automatic connection establishment between the own console and a random CPU that is available. CPU Device Logical term that summarizes several physical extenders to switch more complex CPU systems via matrix. CPU Timeout Matrix function that allows the user to disconnect after a predefined period of time of inactivity from the respective CPU. EXT Unit Part or extender board of a CON or CPU unit with a connection to the matrix. A CON or CPU unit can consist of several EXT devices. Force Connect Matrix function that allows to switch with the own console to a CPU that is already used and in doing so to take keyboard and mouse control. The connected console so far loses K/M control, but keeps video. Force Disconnect Matrix function that allows to switch with the own console to a CPU that is already used and in doing so to take KVM control. The connected console so far loses complete KVM control. Java Tool Java based control and configuration tool for the Draco tera matrix. 2011-10-11 147 Draco tera Term Explanation Keyboard Connect Matrix function that allows taking over the keyboard control of an inactive console. Macro Keys Programmable keys that can execute a stringing together of commands to the matrix. Mouse Connect Matrix function that allows taking the mouse control of an inactive console. Non-BlockingAccess Matrix configuration where no user can be disturbed by an activity of another user. OSD Timeout Matrix function that closes the OSD automatically after a predefined period of time of inactivity. Release Time Matrix function that allows a console that is connected with the same CPU to release the K/M control after a predefined time. Tie-Line Communication connection to and between extension modules in a network environment. User ACL User Access Control List is a list that shows the respective switching rights fort he various users. Video Sharing Matrix function that allows switching from the own console to any CPU with video. === Ende der Liste für Textmarke Inhalt === 148 2011-10-11