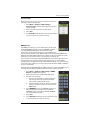
1
OutbackName
MAX
Product
GuideGuide
QuickUser
Reference
Part No. 875-0325-000
Rev A1
Part No.
This device complies with part 15 of the FCC Rules. Operation is subject to the following two
conditions:
(1) This device may not cause harmful interference, and
(2) this device must accept any interference received, including interference that may cause
undesired operation.
Copyright Notice
Hemisphere GPS Precision GPS Applications
Copyright © Hemisphere GPS (2012). All rights reserved.
No part of this manual may be reproduced, transmitted, transcribed, stored in a retrieval system or
translated into any language or computer language, in any form or by any means, electronic,
mechanical, magnetic, optical, chemical, manual or otherwise, without the prior written
permission of Hemisphere GPS.
Trademarks
Hemisphere GPS®, the Hemisphere GPS logo, A100TM, A20TM, A21TM, A220TM, A221TM, A30TM,
A31TM, A320TM, A321TM, A325TM, A42TM, A52TM, AC110TM, AerialACETM, AgJunction®, AirStarTM,
AirTracTM, AutoMateTM, BantamTM, BaseLineHDTM, BaseLineXTM, BEELINE®, COASTTM, Contour
LockTM, Crescent®, Earthworks®, EclipseTM, e-Dif®, eDrive®, eDriveTCTM, eDriveVSiTM, eDriveXTM,
FliteTracTM, G100TM, G4TM, GateMateTM, GPSteerTM, H102TM, H320TM, HQTM, IntelliFlow®,
IntelliGateTM, IntelliStarTM, IntelliTracTM, Just Let GoTM, L-DifTM, LiteStar IITM, LV101TM, LX-1TM, LX-2TM,
M3TM, MapStar®, MBX-4TM, miniEclipseTM, OutbackTM, Outback 360TM, Outback ConnXTM, Outback f
CenterTM, Outback Guidance®, Outback HitchTM, Outback MAXTM, Outback STM, Outback S2TM,
Outback S3TM, Outback S-LiteTM, Outback StsTM, Outback Steering GuideTM, PocketMAX PCTM,
PocketMAXTM, PocketMax3TM, R100TM, R131TM, R220TM, R320TM, S320TM, Satloc®, the Satloc logo,
SBX-4TM, SLXMonTM, V101TM, V102TM, V103TM, V111TM, V113TM, VS101TM, VS111TM, VectorTM, X200TM,
X300TM, XF1TM, XF100TM, XF101TM, and XF102TM are proprietary trademarks of Hemisphere GPS.
Other trademarks are the properties of their respective owners.
Patents
The Outback STM and S-LiteTM automated navigation and steering guide systems are covered by
U.S. Patents No. 6,539,303 and No. 6,711,501. The Outback HitchTM automated hitch control system
is covered by U.S. Patent No. 6,631,916. The Outback eDriveTCTM GPS assisted steering system is
covered by U.S. Patent No. 7,142,956. Hemisphere GPS products may be covered by one or more
of the following U.S. Patents:
6,111,549
6,397,147
6,469,663
6,501,346
6,539,303
6,549,091
6,631,916
6,711,501
6,744,404
6,865,465
6,876,920
7,142,956
7,162,348
7,277,792
7,292,185
7,292,186
7,373,231
7,400,956
7,400,294
7,388,539
7,429,952
7,437,230
7,460,942
Other U.S. and foreign patents pending.
Notice to Customers
Contact your local dealer for technical assistance. To find the authorized dealer near you:
Outback Guidance
2207 Iowa Street
Hiawatha, KS 66434
Phone: 785-742-2976
Fax: 785-742-4584
[email protected]
www.outbackguidance.com
Technical Support
If you need to contact Outback Guidance Technical Support:
North America
Australia
Outback Guidance
Hemisphere GPS
2207 Iowa Street
Hiawatha, KS 66434
Phone: (800) 247-3808
Fax: (785) 742-4584
Email: [email protected]
Outback Australia
Unit 2, 305 Montague Road
West End, QLD 4101
Phone: (07) 3004 6789
Fax: (07) 3004 6799
Email: [email protected]
Outback Canada
326 Saulteaux Crescent
Winnipeg, MB R3J 3T2
Phone: (866) 888-4472
Fax: (204) 888-0991
Documentation Feedback
Hemisphere GPS is committed to the quality and continuous improvement of our products and
services. We urge you to provide Hemisphere GPS with any feedback regarding this guide by
writing to the following email address: [email protected].
Contents
Chapter 1
Getting Started . . . . . . . . . . . . . . . . . . . . . . . . . . . . 1
Overview . . . . . . . . . . . . . . . . . . . . . . . . . . . . . . . . . . . . . . . . . . . . . . . 2
What’s Included . . . . . . . . . . . . . . . . . . . . . . . . . . . . . . . . . . . . . . . . . 2
Starting Outback MAX . . . . . . . . . . . . . . . . . . . . . . . . . . . . . . . . . . . . 3
Starting Outback MAX the First Time . . . . . . . . . . . . . . . . . . . 3
Starting Outback MAX after Working with a Job . . . . . . . . . . 4
Terminal Buttons . . . . . . . . . . . . . . . . . . . . . . . . . . . . . . . . . . . . 4
Outback MAX Touchscreen . . . . . . . . . . . . . . . . . . . . . . . . . . . . . . . . 5
Indicator Tab . . . . . . . . . . . . . . . . . . . . . . . . . . . . . . . . . . . . . . . 9
Panels . . . . . . . . . . . . . . . . . . . . . . . . . . . . . . . . . . . . . . . . . . . . 10
Editing Field Data . . . . . . . . . . . . . . . . . . . . . . . . . . . . . . . . . . . 12
Zooming In and Out on the Map Screen . . . . . . . . . . . . . . . . 12
Favorites . . . . . . . . . . . . . . . . . . . . . . . . . . . . . . . . . . . . . . . . . . . . . . 13
Configuring the System . . . . . . . . . . . . . . . . . . . . . . . . . . . . . . . . . . 14
Entering Systemwide Settings . . . . . . . . . . . . . . . . . . . . . . . . 14
GPS Settings . . . . . . . . . . . . . . . . . . . . . . . . . . . . . . . . . . . . . . 18
Map Settings . . . . . . . . . . . . . . . . . . . . . . . . . . . . . . . . . . . . . . 24
Rate Control Settings . . . . . . . . . . . . . . . . . . . . . . . . . . . . . . . . 24
Lightbar Settings . . . . . . . . . . . . . . . . . . . . . . . . . . . . . . . . . . . 24
Switchbox Settings . . . . . . . . . . . . . . . . . . . . . . . . . . . . . . . . . 25
ConnX Settings . . . . . . . . . . . . . . . . . . . . . . . . . . . . . . . . . . . . 25
Help Messages . . . . . . . . . . . . . . . . . . . . . . . . . . . . . . . . . . . . . . . . . 26
Chapter 2
Autosteering Overview and Setup . . . . . . . . . . . . 27
Log Files and eDriveX . . . . . . . . . . . . . . . . . . . . . . . . . . . . . . . . . . . 28
Log File Numbering . . . . . . . . . . . . . . . . . . . . . . . . . . . . . . . . . 28
Exporting Log Files . . . . . . . . . . . . . . . . . . . . . . . . . . . . . . . . . 28
Performing a Steering Test . . . . . . . . . . . . . . . . . . . . . . . . . . . . . . . 30
Antenna Pivot . . . . . . . . . . . . . . . . . . . . . . . . . . . . . . . . . . . . . . . . . . 31
Antenna Offset . . . . . . . . . . . . . . . . . . . . . . . . . . . . . . . . . . . . . . . . . 33
Antenna Offset (L/R) Overview . . . . . . . . . . . . . . . . . . . . . . . . 33
Determining Antenna Offset . . . . . . . . . . . . . . . . . . . . . . . . . . 34
Implement Offsets . . . . . . . . . . . . . . . . . . . . . . . . . . . . . . . . . . . . . . 38
Implement Offset (L/R) . . . . . . . . . . . . . . . . . . . . . . . . . . . . . . 38
Implement Offset (F/B) . . . . . . . . . . . . . . . . . . . . . . . . . . . . . . 44
Vehicle Calibration . . . . . . . . . . . . . . . . . . . . . . . . . . . . . . . . . . . . . . 45
Before Calibrating a Vehicle . . . . . . . . . . . . . . . . . . . . . . . . . . 45
Calibration Steps and Different Vehicle Types . . . . . . . . . . . 45
Outback MAX User Guide
iii
PN 875-0325-000 Rev A1
Contents
Completing Vehicle Calibration Steps in Sequence . . . . . . . 46
Making Changes to a Completed Calibration Step . . . . . . . . 46
About Engine Speed During Calibration . . . . . . . . . . . . . . . . 46
Converging Filters . . . . . . . . . . . . . . . . . . . . . . . . . . . . . . . . . . 47
Steering Options . . . . . . . . . . . . . . . . . . . . . . . . . . . . . . . . . . . . . . . 49
Steering Sensitivity . . . . . . . . . . . . . . . . . . . . . . . . . . . . . . . . . 49
Steering Attack . . . . . . . . . . . . . . . . . . . . . . . . . . . . . . . . . . . . . 50
Steering Smoothing . . . . . . . . . . . . . . . . . . . . . . . . . . . . . . . . 50
Chapter 3
Working with Vehicles and Implements . . . . . . . . 51
Working with Vehicles . . . . . . . . . . . . . . . . . . . . . . . . . . . . . . . . . . . 52
Adding a New Vehicle . . . . . . . . . . . . . . . . . . . . . . . . . . . . . . . 53
Editing a Vehicle . . . . . . . . . . . . . . . . . . . . . . . . . . . . . . . . . . . 57
Loading a Previous Vehicle . . . . . . . . . . . . . . . . . . . . . . . . . . . 57
Importing a Vehicle . . . . . . . . . . . . . . . . . . . . . . . . . . . . . . . . . 57
Exporting a Vehicle . . . . . . . . . . . . . . . . . . . . . . . . . . . . . . . . . 58
Deleting a Vehicle . . . . . . . . . . . . . . . . . . . . . . . . . . . . . . . . . . 58
Working with Implements . . . . . . . . . . . . . . . . . . . . . . . . . . . . . . . . 59
Adding an Implement . . . . . . . . . . . . . . . . . . . . . . . . . . . . . . . 60
Editing an Implement . . . . . . . . . . . . . . . . . . . . . . . . . . . . . . . 64
Loading a Previous Implement . . . . . . . . . . . . . . . . . . . . . . . . 65
Importing an Implement . . . . . . . . . . . . . . . . . . . . . . . . . . . . . 65
Exporting an Implement . . . . . . . . . . . . . . . . . . . . . . . . . . . . . 66
Deleting an Implement . . . . . . . . . . . . . . . . . . . . . . . . . . . . . . 66
Chapter 4
Jobs and Job Templates . . . . . . . . . . . . . . . . . . . . 67
Working with Jobs . . . . . . . . . . . . . . . . . . . . . . . . . . . . . . . . . . . . . . 68
What is a Job? . . . . . . . . . . . . . . . . . . . . . . . . . . . . . . . . . . . . . 68
Before You Start A Job . . . . . . . . . . . . . . . . . . . . . . . . . . . . . . 68
Starting a New Job . . . . . . . . . . . . . . . . . . . . . . . . . . . . . . . . . 68
Loading a Previous Job . . . . . . . . . . . . . . . . . . . . . . . . . . . . . . 69
Continuing a Job . . . . . . . . . . . . . . . . . . . . . . . . . . . . . . . . . . . 70
Importing a Job . . . . . . . . . . . . . . . . . . . . . . . . . . . . . . . . . . . . 70
Exporting a Job . . . . . . . . . . . . . . . . . . . . . . . . . . . . . . . . . . . . 71
Closing a Job . . . . . . . . . . . . . . . . . . . . . . . . . . . . . . . . . . . . . . 71
Deleting Jobs and Associated Items . . . . . . . . . . . . . . . . . . . 72
Working with Job Templates . . . . . . . . . . . . . . . . . . . . . . . . . . . . . 73
Creating a Job Template . . . . . . . . . . . . . . . . . . . . . . . . . . . . . 73
Using a Job Template . . . . . . . . . . . . . . . . . . . . . . . . . . . . . . . 74
Chapter 5
Working with Maps . . . . . . . . . . . . . . . . . . . . . . . 75
Mapping Options . . . . . . . . . . . . . . . . . . . . . . . . . . . . . . . . . . . . . . . 76
Map Views, Perspectives, and Positions . . . . . . . . . . . . . . . . 76
Map Layers . . . . . . . . . . . . . . . . . . . . . . . . . . . . . . . . . . . . . . . . 80
Outback MAX User Guide
iv
PN 875-0325-000 Rev A1
Contents
Event Markers . . . . . . . . . . . . . . . . . . . . . . . . . . . . . . . . . . . . . 81
Applied Color Maps . . . . . . . . . . . . . . . . . . . . . . . . . . . . . . . . . 83
Map Settings . . . . . . . . . . . . . . . . . . . . . . . . . . . . . . . . . . . . . . . . . . 85
Setting A=B (Guidance) Line Display . . . . . . . . . . . . . . . . . . . 85
Map Imagery . . . . . . . . . . . . . . . . . . . . . . . . . . . . . . . . . . . . . . 85
Chapter 6
Path Planning and Boundaries . . . . . . . . . . . . . . . 89
Path Planning Basics . . . . . . . . . . . . . . . . . . . . . . . . . . . . . . . . . . . . 90
Setting Paths . . . . . . . . . . . . . . . . . . . . . . . . . . . . . . . . . . . . . . . . . . 90
Straight Paths Overview . . . . . . . . . . . . . . . . . . . . . . . . . . . . . 91
Setting Path Options . . . . . . . . . . . . . . . . . . . . . . . . . . . . . . . . 92
Setting Straight Paths . . . . . . . . . . . . . . . . . . . . . . . . . . . . . . . 93
Pivot Paths . . . . . . . . . . . . . . . . . . . . . . . . . . . . . . . . . . . . . . . . 97
Contour Paths . . . . . . . . . . . . . . . . . . . . . . . . . . . . . . . . . . . . . . 98
Adjusting Paths . . . . . . . . . . . . . . . . . . . . . . . . . . . . . . . . . . . . . . . 100
Contour Lock . . . . . . . . . . . . . . . . . . . . . . . . . . . . . . . . . . . . . . . . . 104
eTurns . . . . . . . . . . . . . . . . . . . . . . . . . . . . . . . . . . . . . . . . . . . . . . . 105
Calibrating eTurns . . . . . . . . . . . . . . . . . . . . . . . . . . . . . . . . . 105
Configuring and Making eTurns . . . . . . . . . . . . . . . . . . . . . . 107
Predicted Turns and Actual Turns . . . . . . . . . . . . . . . . . . . . 109
eTurns and Speed . . . . . . . . . . . . . . . . . . . . . . . . . . . . . . . . . 110
eTurns Settings and Resulting Actions . . . . . . . . . . . . . . . . 111
Setting Boundaries . . . . . . . . . . . . . . . . . . . . . . . . . . . . . . . . . . . . 112
Chapter 7
Rate Control and Section Control . . . . . . . . . . . 115
Rate Control and Section Control Overview . . . . . . . . . . . . . . . . 116
Rate and Section Control Indicators and Buttons . . . . . . . . 116
Rate Control . . . . . . . . . . . . . . . . . . . . . . . . . . . . . . . . . . . . . . . . . . 119
Entering Basic Rate Control Settings . . . . . . . . . . . . . . . . . . 119
Setting Up Rate Control . . . . . . . . . . . . . . . . . . . . . . . . . . . . 122
Calibrating Rate Control . . . . . . . . . . . . . . . . . . . . . . . . . . . . 126
Using Rate Control . . . . . . . . . . . . . . . . . . . . . . . . . . . . . . . . . 128
Using Prescription Maps . . . . . . . . . . . . . . . . . . . . . . . . . . . . 130
Section Control . . . . . . . . . . . . . . . . . . . . . . . . . . . . . . . . . . . . . . . . 132
Setting Up Section Control . . . . . . . . . . . . . . . . . . . . . . . . . . 132
Using Section Control . . . . . . . . . . . . . . . . . . . . . . . . . . . . . . 136
Rate and Section Control Scenarios . . . . . . . . . . . . . . . . . . . . . . . 136
Chapter 8
Other Optional Features . . . . . . . . . . . . . . . . . . . 139
Using External Cameras . . . . . . . . . . . . . . . . . . . . . . . . . . . . . . . . 140
Using the External Lightbar . . . . . . . . . . . . . . . . . . . . . . . . . . . . . 142
Using the Switchbox . . . . . . . . . . . . . . . . . . . . . . . . . . . . . . . . . . . 143
Appendix A
Troubleshooting and Status Information . . . . . . 145
Outback MAX User Guide
v
PN 875-0325-000 Rev A1
Contents
Viewing Status and Diagnostics Information . . . . . . . . . . . . . . . 146
GPS Status Screen . . . . . . . . . . . . . . . . . . . . . . . . . . . . . . . . . 147
Terminal Diagnostics Screen . . . . . . . . . . . . . . . . . . . . . . . . 150
eDriveX Status Screen . . . . . . . . . . . . . . . . . . . . . . . . . . . . . . 152
eDriveX Diagnostics Screen . . . . . . . . . . . . . . . . . . . . . . . . . 154
Rate Section Control Diagnostics Screen . . . . . . . . . . . . . . 155
OmniSTAR Status Screen . . . . . . . . . . . . . . . . . . . . . . . . . . . 156
Capturing Screen Images . . . . . . . . . . . . . . . . . . . . . . . . . . . . . . . 157
Appendix B
Frequently Asked Questions . . . . . . . . . . . . . . . 159
About GPS Guidance . . . . . . . . . . . . . . . . . . . . . . . . . . . . . . . . . . . 160
About Outback MAX . . . . . . . . . . . . . . . . . . . . . . . . . . . . . . . . . . . 161
Index . . . . . . . . . . . . . . . . . . . . . . . . . . . . . . . . . . . . . . . . . . . . . . 163
End User License Agreement . . . . . . . . . . . . . . . . . . . . . . . . . . . 169
Warranty Notice . . . . . . . . . . . . . . . . . . . . . . . . . . . . . . . . . . . . . 172
Outback MAX User Guide
vi
PN 875-0325-000 Rev A1
Chapter 1: Getting Started
Overview
What’s Included
Starting Outback MAX
Outback MAX Touchscreen
Favorites
Configuring the System
Help Messages
Outback MAX User Guide
1
PN 875-0325-000 Rev A1
Chapter 1: Getting Started
Overview
Note: Before using Outback MAX™ make sure you have read the Outback MAX Quick
Start Guide and have properly installed and powered on Outback MAX and any
optional components.
The Outback MAX GPS guidance system features a high-resolution touchscreen,
multi-language support, and clear, easy-to-read job data and system status
information in real time. Outback MAX provides the following features:
•
Simplified user interface
Precision farming is easier with the Outback MAX user interface. Configure
the screen with your favorites or most used functions. Select overhead or
bird’s eye view angles that provide superior situational awareness.
•
Powerful mapping engine
Farm with the greatest accuracy and most effectively by stacking up the 3
separate layers of data – prescription, imagery and as applied maps.
•
Beneficial connectivity
Make the best farming decisions through the all-new Outback ConnX™, a
web-based system that seamlessly interfaces and simplifies data transfer
between the MAX terminal, office, truck, mobile phone or anywhere with an
Internet connection.
As a first-time or experienced user of Outback products, you should acquaint yourself
with the instructions contained in this user guide. You will find many useful tips and
suggestions to help you get the most from your investment.
What’s Included
An Outback MAX kit consists of the following components:
•
Touchscreen terminal with mounting hardware
•
Antenna assembly, cable, and mounting plate
•
Required cables, (power cable, I/O cables)
•
USB flash drive
Your kit may also include one or more of the following optional components:
•
Lightbar
•
Switchbox
•
Foot switch
•
RTK kit (base station and rover antennas)
•
Cell modem
•
Video cable (for use with user-supplied cameras)
•
eDriveX (hydraulic, steer-ready, or VSi automated steering machines)
•
AC110 section/rate control system
Refer to the Outback MAX Quick Start Guide for more information on all the
components of your Outback MAX system.
Outback MAX User Guide
2
PN 875-0325-000 Rev A1
Chapter 1: Getting Started
Starting Outback MAX
This section describes how to start Outback MAX the first time.
Starting Outback MAX the First Time
To start Outback MAX:
1.
Power up Outback MAX. If you
have any additional
components connected to
Outback MAX power them up
as well. Upon powerup
Outback MAX completes a self
test and the following screen
appears.
Upon startup Outback MAX
starts acquiring a DGPS signal
(as long as the antenna has a clear view of the sky)—this may take several
minutes, during which time the vehicle can be moving and you can perform
certain functions.
•
Upon achieving a GPS signal,
the satellite icon on the
Indicator tab turns from red to
orange and “3d” appears on
the panel indicating a 3dimensional solution (see top
photo at right).
GPS
DGPS
•
RTK
Upon acquiring a DGPS
signal, the satellite icon turns
green and the Indicator tab
displays “3D” indicating a differentially corrected 3-dimensional
solution (see middle photo at right).
•
Upon acquiring an RTK position (with optional RTK equipment) the
Indicator tab displays “RTK” (see bottom photo at right).
Note: Outback MAX must have GPS to begin a job and provide guidance.
2.
Press I Accept. The Start Up
Menu window appears.
The Start Up Menu window
includes read-only fields for
the current vehicle, current
implement, and last job
number.
When you start Outback MAX
for the first time only the
Vehicle Profiles, Implement Profiles, and Skip buttons are displayed; you will
Outback MAX User Guide
3
PN 875-0325-000 Rev A1
Chapter 1: Getting Started
not see any job-related buttons. You must define a vehicle and an implement
before any job functionality is enabled.
3.
Press Vehicle Profiles to start adding a vehicle. See “Working with
Vehicles” on page 52 for information on adding a vehicle as well as
information to keep in mind before adding a vehicle.
or
Press Implement Profiles to start adding an implement. See “Working
with Implements” on page 59 for information on adding an implement.
or
Press Skip to go straight to the map screen. You can start here to familiarize
yourself with the Outback MAX touchscreen interface. However, you must
still add a vehicle and implement before beginning a job.
Starting Outback MAX after Working with a Job
After you have worked with a job
different options appear on the Start Up
Menu window the next time you power
up Outback MAX. The Start Up menu
still includes the read-only fields for the
current vehicle, current implement, and
last job number. However, instead of
the Vehicle Profiles and Implement
Profiles buttons, the Start Up Menu
window includes the following buttons:
•
New Job - press to begin a new job. Outback MAX automatically assigns a
job name
•
Previous Jobs - press to display the Previous Jobs panel where you can
select a previous job number
•
Continue Job - press to have Outback MAX load the most recently
performed job (the job number displayed under Last Job on the Start Up
Menu)
•
Skip - press to start working with Outback MAX with no job
See Chapter 4, “Jobs and Job Templates” for information on working with jobs.
Terminal Buttons
The Outback MAX terminal includes four
buttons to the right of the touchscreen.
The Engage and Favorites buttons on the
touchscreen perform the same functions as the
Engage and Favorites buttons on the terminal.
Note: When you insert a USB flash drive (with a
“screenshots” folder at the root level) the
Favorites button on the terminal (not the
touchscreen button) functions as a screen
capture tool, saving a capture of the entire
screen as a .png file in the screenshots folder
on the flash drive.
Outback MAX User Guide
4
Engage/
disengage
steering
Display
Favorites
panel
Increase/
decrease
sceen
brightess
Touchscreen
buttons with
same
functionality
PN 875-0325-000 Rev A1
Chapter 1: Getting Started
Outback MAX Touchscreen
The Outback MAX touchscreen consists of the following:
•
Map screen - a moving graphical representation of the field operation. You
can use zoom features and steering indicators, as well as view the applied
area total for quick reference.
•
Buttons and indicators - these appear along the edges of the display and
provide quick access to settings, allow you to zoom in and out on the field,
and show current navigational parameters.
Headland
alert
Virtual
lightbar
Indicator
tab
Zoom buttons
Vehicle
Implement
Crosstrack
error
Favorites
Path Planning
Mapping Options
Camera
Apply
Steering
Menu
Contour Lock
or
eTurns
Figure 1-1: Outback MAX touchscreen
Table 1-1 describes the main screen controls shown in Figure 1-1 and includes links to
other sections in this manual with more detailed information on these controls.
Table 1-1: Outback MAX touchscreen items
Screen Item
Description
Onscreen lightbar
Provides visual cues to stay on a guidance line:
Outback MAX User Guide
•
Red bars left of center indicate you need to steer
to the right. As you steer to the right the red bars
change to gray (from left to right).
•
Green bars right of center indicate you need to
turn steer to the left. As you steer to the left the
green bars change to gray (right to left).
5
PN 875-0325-000 Rev A1
Chapter 1: Getting Started
Table 1-1: Outback MAX touchscreen items (continued)
Screen Item
Description
Indicator tab
•
Displays information in upper right of screen
•
By default only the top row appears on the
screen. Press the tab to display all three rows;
press the tab again to hide the two bottom rows.
See “Indicator Tab” on page 9 for more information.
Zoom buttons
•
Press the Zoom Out (minus) button to zoom out
on the field (vehicle appears smaller)
•
Press the Zoom in (plus) button to zoom in on
the field (vehicle appears larger)
See “Zooming In and Out on the Map Screen” on
page 12 for more information.
Vehicle indicator
Representation of selected vehicle
See “Working with Vehicles” on page 52 for more
information.
Implement indicator
•
Can be either a trailed or rigid implement
•
Width of actual implement is indicated by width
of implement icon (for example, a wider
implement will appear wider onscreen than a
narrower implement)
•
You can set an offset - how far behind the vehicle
the implement will be, and this is represented
graphically onscreen (see screenshots at left)
No offset
2 m offset
See “Working with Implements” on page 59 for more
information.
Cross Track error
Distance from your current driving position to your
guidance line. For example, if you are driving an A-B and
you veer to the right and are off your line by 6 inches,
then your cross track error is 6 inches.
Outback MAX User Guide
6
PN 875-0325-000 Rev A1
Chapter 1: Getting Started
Table 1-1: Outback MAX touchscreen items (continued)
Screen Item
Description
Contour Lock or eTurns button:
Contour
Lock Off
Contour
Lock On
Contour
Lock locked
•
Contour Lock button is only displayed when
system is in Contour mode.
•
eTurns button is only displayed when A=B
guidelines are displayed.
•
All other times the Favorites button is displayed
(see Favorites button later in this table).
See “Contour Lock” on page 104, “eTurns” on page 105,
and “Favorites” on page 13 for more information.
eTurns
ready
eTurns
inactive
Favorites
Mapping Options button
Displays the Mapping Options panel where you set map
view and perspective, map layers, event markers, and
return to point options.
See “Mapping Options” on page 76 for more information
Path Planning button
Displays the Path Planning panel, where you set or
adjust paths, select a previous path, and select eTurns.
Apply button
Apply Off
Apply On
Select to have Outback MAX log application or coverage
data for the current job. Press this button (or press the
floor switch) to stop or hold logging job data:
•
On (green button) indicates data logging
•
Off (blue button) indicates no data logging
Camera button
Displays the Camera window, where you can view:
•
Each camera individually in default view (small
window)
•
Each camera individually in full screen view
(window fills the screen)
•
All four cameras at once (fills the screen)
See “Using External Cameras” on page 140 for more
information.
Menu button
Displays the Menu Options panel—this is the main panel,
the highest level of panels from which all options are
accessible.
Outback MAX User Guide
7
PN 875-0325-000 Rev A1
Chapter 1: Getting Started
Table 1-1: Outback MAX touchscreen items (continued)
Screen Item
Description
Favorites button
Displays the Favorites panel, where you display up to
eight buttons to access your most commonly used
options/settings. Outback MAX displays five buttons on
the Favorites panel by default.
See “Favorites” on page 13 for more information.
Headland alert indicator
Indicator that appears in the upper left of the map screen
any time the implement crosses into a previously applied
area.
See “Setting the Headland Alert” on page 16 for more
information.
Zoom distance (lower left corner of screen)
Distance between the grid lines on the screen (value
increases or decreases as you zoom in or out)
See “Zooming In and Out on the Map Screen” on
page 12 for more information.
Steering button
Not connected
(no button visible)
This button appears on in the lower middle of the map
screen if a steering controller is connected. If no steering
controller is connected the button does not appear.
When a steering controller is connected, states are:
Not ready to
engage (errors if
exclamation also
present)
•
Not ready to engage (errors if exclamation
present - see “eDriveX Status Screen” on
page 152)
•
Ready to engage
•
Engaged
Ready to engage
Engaged
Outback MAX User Guide
8
PN 875-0325-000 Rev A1
Chapter 1: Getting Started
Indicator Tab
The Indicator tab (Figure 1-2) displays three rows of commonly used read-only
information at the top right of the map screen. By default only the top row appears on
the screen. Press the Indicator tab to display all three rows; press the tab again to hide
the two bottom rows. Table 1-2 describes each row of the Indicator tab.
Default (top row)
Expanded (all three rows)
Figure 1-2: Indicator tab - single row and expanded
Table 1-2: Indicator tab field descriptions
Tab Row
Item
Description
Top
(GPS)
Speed
Current speed of the vehicle
Pass
Pass Number
Once the A-B line is set, all passes are numbered. Pass 1 is
to the right of the A-B line, and Pass -1 to the left.
Signal
(Correction)
Type
Differential
(Diff) Age
Signal
Status
Signal
Strength
Outback MAX is receiving the following signals
•
No signal type (blank) - not receiving a GPS signal
•
3d = 3 dimensional signal
•
3D = 3 dimensional differential signal (DGPS)
•
RTK = Real Time Kinematic corrections
Age of the corrections used in the DGPS correction:
•
SBAS signals - typically 6 to 10 seconds
•
RTK - optimal operating values are < 5 seconds
Satellite icon color indicates the following:
•
Red = no fix on a DGPS signal
•
Orange = tracking satellites
•
Green = receiving a GPS signal
Vertical bars indicate the quality of the GPS signal related
to the standard deviation of the solution:
•
SBAS - 3 to 4 bars are typical
•
RTK - 4 bars are typical
Middle
(location and
heading)
Lat
Vehicle’s latitude
Lon
Vehicle’s longitude
Heading
Vehicle’s heading
Bottom
(job)
Job
Current job number
Worked
Area of job worked so far
Field
Field size for the job
Outback MAX User Guide
9
PN 875-0325-000 Rev A1
Chapter 1: Getting Started
Panels
In Outback MAX a panel is a popout tab that appears along the right side of the screen
and contains buttons you use to select settings and options on your system. You start
by pressing a button on the map screen. Figure 1-3 shows the map screen buttons you
can press to display a panel where you can change a setting or display another panel
for additional settings.
Figure 1-3: Map screen buttons and resulting panels
Outback MAX User Guide
10
PN 875-0325-000 Rev A1
Chapter 1: Getting Started
Depending on the type of button you press on a panel Outback MAX may display
another panel. Additionally, at the bottom of each panel is a button that displays one
of the following:
•
Back - closes the current panel and displays the previous panel
•
Close - closes the current panel (no panels are visible)
•
Save - saves the currently selected options (where applicable)
•
Done - completes a selection and returns you to the previous panel
Tip! You can also close all the panels at once by pressing
the Close arrows to the upper left of any panel.
Figure 1-4 illustrates using multiple panels to set the units of measure as either U.S. or
Metric.
Figure 1-4: Outback MAX panels example
For instructions in this manual the following example based on Figure 1-4 illustrates
the nomenclature used for navigating the menus.
1.
Press Menu > Settings > System Preferences > Units to display the
Units of Measure panel.
2.
Press U.S. or Metric to set the units.
3.
Press Back/Close repeatedly or press the Close arrows to close the panels
and return to the map.
Outback MAX User Guide
11
PN 875-0325-000 Rev A1
Chapter 1: Getting Started
Editing Field Data
Fields/buttons appear in different colors and may or may not show the current setting.
Table 1-3 provides descriptions/examples of several Outback MAX field/button types.
Table 1-3: Fields and buttons
Field Type
Example
Function When Pressed
Blue button
with no
setting value
displayed
System Preferences
Displays a panel where you select/enter
values (see the System Preferences panel
in “Entering Systemwide Settings” on
page 14)
Blue button
with value
setting
displayed
Lightbar Brightness
Displays a slider that you drag or press
arrows to select a value (see the Lightbar
Brightness slider in “Lightbar Settings” on
page 24)
Units
Displays buttons to select a value (see the
first three buttons of the System
Preferences panel in “Entering
Systemwide Settings” on page 14)
Green with
arrow
Headland Alert
Displays a drop-down list to select a value
(see the Headland Alert drop-down with
values shown in “Setting the Headland
Alert” on page 16)
White field
IP (part of NTRIP settings)
Displays a data entry window where you
enter a value (see the NTRIP Settings panel
in “NTRIP Settings” on page 21)
Zooming In and Out on the Map Screen
The zoom buttons on the allow you to zoom in (-) or zoom
out (+). Press either button as many times as necessary to
obtain the desired zoom level. The zoom buttons are located
on the left and right of the map screen (left screen below); however, when you display
a panel on the right side of the screen the Zoom In button moves to the left side of the
screen (right figure below).
Zoom buttons (default location)
Outback MAX User Guide
Zoom buttons (both on left of screen)
12
PN 875-0325-000 Rev A1
Chapter 1: Getting Started
Favorites
Favorites are buttons you use often and want quick access to.
MAX includes five favorites button by default (shown at right),
but you can add favorites for a maximum of eight favorites or
delete favorites.
When you add a favorite the button appears on the Favorites
panel exactly as it appears in its default location (and the button
is still accessible from its default location).
Deleting a favorite only removes the button from the Favorites
panel; it does not remove it from its original location. For
example, if you delete the New Job button as a Favorite that
button is still available on the Jobs panel (after you press Menu >
Jobs).
Note: You can also delete all Favorites if you want to start over
and place all new Favorites on the panel.
To select a favorite:
1.
Press Favorites. The Favorites panel appears.
2.
Press the desired button.
To add a favorite:
1.
Navigate to the button you want to add as a favorite. For example, if you
want to add the New Job button as a Favorite press Menu > Jobs to display
the Jobs panel (which contains the New Job button).
2.
Press and hold the desired button for approximately 5 seconds until the Add
to Favorites window appears.
3.
Press Yes. The button is added to the bottom of the buttons (but above the
Close button) on the Favorites panel.
To delete a favorite:
1.
Press Favorites. The Favorites panel appears.
2.
Press and hold the desired button for approximately 5 seconds until the
Remove from Favorites window appears.
3.
Press Yes. The button is removed from the Favorites panel.
Outback MAX User Guide
13
PN 875-0325-000 Rev A1
Chapter 1: Getting Started
Configuring the System
Outback MAX has several screens in which you configure important settings before
you begin working with vehicles, implement, and jobs.
Entering Systemwide Settings
Systemwide settings include night mode, units of measure, and
local time. You access all systemwide settings (except screen
brightness) from the System Preferences panel (shown at right).
Adjusting the Screen Brightness
You adjust screen brightness using the physical Up and Down
buttons (shown below) located on the lower right of the terminal.
•
Press the Up button to increase screen brightness
•
Press the Down button to decrease brightness
Up and Down
buttons
Setting the Language
Your Outback MAX terminal should be set to the language you requested when you
ordered the unit. Follow this procedure if you need to change the language.
1.
Press Menu > Settings > System Preferences. The System Preferences
panel appears and the Language button displays the current language.
2.
Press Language. The Select Language panel appears.
3.
Press the scroll buttons until you see the desired
language.
4.
Press the desired language button. A message similar
to that below appears briefly and the language is
changed.
5.
Press Back/Close repeatedly or press the Close arrows
to close the panels and return to the map.
Outback MAX User Guide
14
PN 875-0325-000 Rev A1
Chapter 1: Getting Started
Setting Units of Measure
Set the unit of measurement (U.S. or Metric) in which the system displays and records
all measurements.
1.
Press Menu > Settings > System Preferences. The System Preferences
panel appears and the Units button displays the current units of measure.
2.
Press Units. The Units of Measure panel appears (top
of panel shown at right).
3.
Press the desired button. The Units of Measure panel
closes and the selected unit of measure appears on the
Units button.
4.
Press Back/Close repeatedly or press the Close arrows
to close the panels and return to the map.
Setting the Local Time (GMT Offset)
The default system time is based on GMT. To set your local time you must enter an
offset from GMT. For example, if your local time is seven hours before GMT then set
the GMT offset to -7 hr(s). Local time is used for display in debug logs and appears on
the GPS Status screen (see “GPS Status Screen” on page 147 form more information
on diagnostics).
1.
Press Menu > Settings > System Preferences. The System Preferences
panel appears and the GMT Offset button displays the current offset.
2.
Press GMT Offset. The GMT Offset panel appears (top
of panel shown at right).
3.
Press the Down Arrow button to decrease the offset or
press the Up Arrow button to increase the offset (the
offset changes in increments of 0.5 hours).
4.
Press Back. The GMT Offset panel closes and the new
offset appears on the GMT Offset button.
5.
Press Back/Close repeatedly or press the Close arrows
to close the panels and return to the map.
Setting Steering Smoothing
Steering smoothing determines the amount of smoothing of contours. The smoothing
applied to the current contour is based on the smoothing setting that was active
during the preceding pass.
Depending on preference and needs, you can adjust smoothing to Off (the default),
Low, Medium, or High. For example, you may need to adjust smoothing if a vehicle/
implement combination does not allow turning within a tight radius. In addition, a
very sharp curvature might not be desired during high-speed operation, such as
spraying, in which case a medium or high smoothing may be applied. Planting or
seeding may require no or low smoothing to keep the guess rows equidistant.
Outback MAX User Guide
15
PN 875-0325-000 Rev A1
Chapter 1: Getting Started
Performance for the steering smoothing settings are as follows:
•
Off (default) - Outback MAX tries to follow every contour, even if the contour
has a very tight curvature, but may disengage when following a very tight
turn.
•
Low - Outback MAX applies minimum smoothing.
•
Medium - Outback MAX applies medium smoothing.
•
High - Outback MAX generates optimized control paths for high-speed
operation where the minimum curvature for each turn is large. It is not
suitable for tight-turn operations as unwanted coverage gaps may occur.
To set steering smoothing:
1.
Press Menu > Settings > System Preferences. The
System Preferences panel appears and the Smoothing
button displays the current setting.
2.
Press Smoothing. A drop-down appears (shown at right)
showing the options: Off, Low, Medium, and High.
3.
Press the desired setting. The new setting appears on the
Smoothing button.
4.
Press Back/Close repeatedly or press the Close arrows to
close the panels and return to the map.
Setting 2D or 3D Projection
The A-B projection mode relates to the effect of the earth's curvature on guidance
accuracy. Select 3D as the A=B projection mode for wide field operations or
interoperability with third party guidance systems that also use 3D guidance line
projection
Note: 3D A-B projection is unrelated to the 3D map view or the 3D GPS position type.
To set 2D or 3D projection:
1.
Press Menu > Settings > System Preferences. The System Preferences
panel appears and the Projection button displays the current setting.
2.
Press Projection. A drop-down appears showing the
options: 2D and 3D.
3.
Press the desired setting. The new setting appears on the
Projection button.
4.
Press Back/Close repeatedly or press the Close arrows to
close the panels and return to the map.
Setting the Headland Alert
A headland alert occurs when the
implement enters a headland—a
previously applied area. The alert is
both an audible tone as well as an
indicator that appears in the upper left
of the screen (shown at right).
Outback MAX User Guide
Headland Alert
indicator
16
PN 875-0325-000 Rev A1
Chapter 1: Getting Started
To set the headland alert:
1.
Press Menu > Settings > System Preferences. The System Preferences
panel appears and the Projection button displays the current setting.
2.
Press Headland Alert. A drop-down appears showing the
options: On and Off.
3.
Press On to enable the headland alert or press Off to turn
the headland alert off (the new setting appears on the
Headland Alert button).
4.
Press Back/Close repeatedly or press the Close arrows to
close the panels and return to the map.
Using Night Mode
Using night mode provides better ambient lighting while operating at night. Figure 1-5
shows the screen with Night mode off and on.
Night mode off
Night mode off
Figure 1-5: Night mode off and on
To turn night mode on/off:
1.
Press Menu > Settings > System Preferences. The System Preferences
panel appears and the Night Mode button displays the current lighting
mode.
2.
Press Night Mode. A drop-down appears showing two
options: On and Off (shown at right).
3.
Press On. The screen immediately switches to night
mode.
or
Press Off to turn night mode off.
4.
Press Back/Close repeatedly or press the Close arrows to close the panels
and return to the map.
Note: Rebooting the terminal resets the Night Mode to Off.
Outback MAX User Guide
17
PN 875-0325-000 Rev A1
Chapter 1: Getting Started
GPS Settings
Depending on the correction type you select (see “Correction Type” on page 19)
different buttons may appear on the GPS Settings panel (as shown in Figure 1-6).
SBAS
correction type
RTK
correction type
OmniSTAR
correction type
Figure 1-6: Correction types and related GPS Settings panel buttons
You can set/view the following:
•
Correction type
•
NMEA output
•
Subscriptions
•
GPS status
•
SBAS settings (only appears if SBAS is the correction type)
•
NTRIP settings (only appears if RTK is the correction type)
•
Radio link (only appears if RTK is the correction type)
•
OmniStar status (only appears if OmniSTAR is the correction type)
Outback MAX User Guide
18
PN 875-0325-000 Rev A1
Chapter 1: Getting Started
Correction Type
Note: See Figure 1-6 on page 18 for an overview of the effect of
selecting a specific correction type.
1.
Press Menu > Settings > GPS Settings >
Correction Type. The Correction Type panel appears
(shown at right).
2.
Select a correction type from the drop-down.
3.
Press Save.
4.
Press Back/Close repeatedly or press the Close arrows
to close the panels and return to the map.
NMEA Output
The NMEA panel allows you to set the baud rate, set the output
for available NMEA messages, and turn GLONASS on/off. You
can share Outback DGPS signals with third-party mobile
applications. Any application designed to receive DGPS signals
from an external receiver over an RS-232 serial interface using either NMEA 0183 or
RTCM will work with Outback MAX. Various cables and kits are available for specific
applications such as yield monitors, rate controllers, and laptop PCs.
For successful communication both Outback MAX and the external application must
be configured to communicate similarly. Many applications can use the default
settings, while some applications may require different settings. If you select a higher
output rate (5 HZ or 10 HZ), you must also select a faster baud rate (57600 or 19200) for
proper communication.
Note: I/O cable 051-0282-000# (with its GNSS serial port) is required for NMEA output.
Contact your local dealer or Outback Guidance Customer Service for details.
1.
Press Menu > Settings > GPS Settings > NMEA
Output. The NMEA panel appears.
2.
Select a baud rate from the Baud Rate drop-down.
3.
For each of the messages:
a.
Press the message button to display a panel for
that message. The panel shows the available
output rates, including an Off setting.
b.
Press the desired output rate. After you select the
rate the panel closes and you are returned to the
NMEA panel.
4.
Press GLONASS to turn the GLONASS logging on or
off. This setting does not affect your reception of
GLONASS signals; it only affects whether GLONASS
sats are included in log data.
5.
Press Save.
6.
Press Back/Close repeatedly or press the Close arrows
to close the panels and return to the map.
Outback MAX User Guide
19
PN 875-0325-000 Rev A1
Chapter 1: Getting Started
Viewing and Entering Subscription Information
When you enter a feature code you are unlocking the features of that GNSS
subscription (GLONASS, L2, etc.) or specific application (eTurns).
Note: Before you can enter a code you must first contact Outback Customer Service to
obtain the code.
1.
Display the Subscriptions screen using any of the following methods:
Press Menu > Settings > GPS Settings > Subscriptions.
Press Menu > Settings > Subscriptions.
Press Menu > Settings > GPS Status > Subscriptions.
The Subscriptions screen
appears with the following
read-only information:
•
Serial Number - serial
number of terminal
(also appears on the
GPS Status screen—see
“GPS Status Screen” on
page 147).
2.
3.
•
GPS Subscriptions current valid
subscriptions
•
Feature Licenses current valid features
To enter a new subscription code:
a.
Press Enter Code. The Enter Code
window appears (shown at right).
b.
Enter the code and press Done. A
success message appears.
Press Back/Close repeatedly or press the
Close arrows to close the panels and return
to the map.
GPS Status Information
The GPS Status screen displays GPS information you may find useful, especially if
you need to troubleshoot an issue. The fields on the screen are partially dependent on
your selected correction type (SBAS, RTK, or OmniSTAR)—for example, some of the
fields appear regardless of the correction type, but fields such as RTK Mode and Base
Slip only appear when RTK is the correction type.
See “GPS Status Screen” on page 147 for information on each field of the GPS Status
screen.
Outback MAX User Guide
20
PN 875-0325-000 Rev A1
Chapter 1: Getting Started
SBAS Settings
The SBAS Settings panel allows you to change the SBAS satellites used in the
system’s position calculation. The default value for each SBAS setting is Auto
(Outback MAX automatically selects from the available satellites).
If you change any of these settings and then set any of them back to Auto all three are
automatically set back to Auto (you cannot have a mix of manual and auto settings).
Note: You can only edit/view SBAS settings if you set the Correction Type to SBAS.
See “Correction Type” on page 19 for more information.
1.
Press Menu > Settings > GPS Settings > SBAS
Settings. The SBAS Settings panel appears.
2.
For each of the SBAS buttons:
3.
a.
Press the button to display a panel for that button.
The panel shows the available satellites to select.
b.
Use the scroll buttons to scroll through the list of
satellites and then press to select the desired
satellite. The panel closes and the selected satellite
is displayed on the button.
Press Back/Close repeatedly or press the Close arrows
to close the panels and return to the map.
NTRIP Settings
NTRIP (Networked Transport of RTCM via Internet
Protocol) is the protocol for transmitting GNSS data
over the internet. Outback MAX has an internal NTRIP
client that is used when receiving RTK corrections
through a network RTK solution.
Receiving NTRIP RTK corrections requires that you have
the optional cellular modem kit installed on your
system. Contact your local dealer for more information.
After you connect to NTRIP Outback MAX will try to
reconnect to NTRIP the next time you power on the
terminal. To disable this reconnect feature, press
Disconnect on the NTRIP Settings panel to disconnect
NTRIP prior to powering off Outback MAX.
Note: You can only edit/view NTRIP settings if you set
the Correction Type to RTK. See “Correction Type” on
page 19 for more information.
1.
Press Menu > Settings > GPS Settings >
NTRIP Settings. The NTRIP Settings panel
appears (shown at right).
2.
Enter values in the five white background fields (your network RTK provider
should provide these values).
3.
Press Connect.
4.
Press Back/Close repeatedly or press the Close arrows to close the panels
and return to the map.
Outback MAX User Guide
21
PN 875-0325-000 Rev A1
Chapter 1: Getting Started
Radio Link Settings
The Radio Link button on the GPS Settings panel (top of panel
shown at right) enables you to select the appropriate radio
channel/frequency and mode. Refer to the documentation for
your RTK kit for more information on radio channel/frequency
and mode.
The Radio Link button only appears on the GPS Setting panel if
you select RTK as the Correction Type (see “GPS Settings” on
page 18 and “Correction Type” on page 19).
Note: Connecting NTRIP disables (dims) the Radio Link button
and disconnecting NTRIP re-enables the Radio Link button—
make sure you disconnect NTRIP (if connected) if you want enter
radio settings.
1.
Press Menu > Settings > GPS
Settings > Radio Link. The panel
appears.
The radio in your RTK kit (and thus
the subscription for your RTK kit)
determines what panel appears.
2.
•
If you have a 400 MHz radio kit
and subscription, the panel
near right appears.
•
If you have a 900 MHz ratio kit
and subscription, the panel far
right appears.
Set the frequency/
channel.
For the 400 MHz radio:
a.
Press Frequency.
The Frequency panel
appears (shown near
right).
b.
Enter the same
frequency you
entered on your base
station radio and
press Done.
For the 900 MHz radio:
Outback MAX User Guide
22
PN 875-0325-000 Rev A1
Chapter 1: Getting Started
a.
Press Channel. The Channel panel appears (shown far right).
b.
Enter the same channel you entered on your base station radio and
press Done.
3.
Select the mode. For both 400 MHz and 900 MHz radios, press Mode and
select the desired mode from the drop-down list.
4.
Press Save. The panel closes and you are returned to the GPS Settings
panel.
5.
Press Back/Close repeatedly or press the Close arrows to close the panels
and return to the map.
OmniSTAR Settings
On the OmniSTAR Status panel you can only set the AutoSeed feature to On/Off.
Autoseed improves convergence time when on (checks if receiver has moved when it was
last powered down and uses that location if it has not moved).
The remaining information on this screen is read-only. See“OmniSTAR Status Screen”
on page 156 for information on the read-only fields of this screen.
1.
Press Menu > Settings > GPS Settings > OmniStar Status. The
OmniSTAR Status screen appears; the eight fields at the top of this screen
are read-only.
2.
Press Autoseed to turn the Autoseed feature on or off.
3.
Press Back/Close repeatedly or press the Close arrows to close the panels
and return to the map.
Outback MAX User Guide
23
PN 875-0325-000 Rev A1
Chapter 1: Getting Started
Map Settings
You work with maps in various ways in Outback MAX. You enter
Map settings (such as setting grid spacing and importing map
imagery) via the Map Settings panel (shown at right), while you
work with maps (such as dropping markers) via the Mapping
Options panel.
See “Setting Path Options” on page 92 for information on setting
the A=B Lines option and setting the A=B grid spacing.
See Chapter 5, “Chapter 5: Working with Maps” for information
on all other mapping options and tasks.
Rate Control Settings
Rate control settings apply to the optional rate and section control hardware that you
can install and then operate via Outback MAX.
See “Rate Control and Section Control Overview” on page 116 for information on
entering rate control and section control settings.
Lightbar Settings
You can set the following lightbar options:
•
Lightbar on/off (external lightbar only)
•
Sensitivity (onscreen lightbar and external lightbar)
•
Brightness (external lightbar only)
To set lightbar settings:
1.
Press Menu > Settings > Lightbar Settings. The
Lightbar Settings panel appears (shown at right).
2.
Press Lightbar and select On or Off from the
drop-down. The selected setting appears on the
Lightbar button.
3.
Press Sensitivity and select Low, Medium, or High
from the drop-down. The selected setting appears on
the Sensitivity button.
4.
Press Lightbar Brightness to display the Lightbar
Brightness slider (shown below).
Drag the slider or press the left and right arrows to set
the brightness level and then press Close. The selected
setting appears on the Lightbar Brightness button.
5.
Press Save.
6.
Press Back/Close repeatedly or press the Close arrows to close the panels
and return to the map.
Outback MAX User Guide
24
PN 875-0325-000 Rev A1
Chapter 1: Getting Started
Switchbox Settings
This setting controls the brightness of the LEDs on the optional
external switchbox. See “Using the Switchbox” on page 143 for
information on the switchbox.
1.
Press Menu > Settings > Switchbox Settings. The
Switchbox Settings panel appears.
2.
Press Switchbox Brightness. The Switchbox
Brightness slider appears.
3.
Drag the slider or press the left and right arrows to set
the brightness level.
4.
Press Close. The selected setting appears on the
Switchbox Brightness button.
5.
Press Save.
6.
Press Back/Close repeatedly or press the Close arrows
to close the panels and return to the map.
ConnX Settings
ConnX provides asset tracking, allows you to push
prescription maps from a website to Outback MAX
(using that map during a job), and enables you to
export jobs back to ConnX or to a PC in an office. If
you have has a ConnX account you can enter your
user information on the ConnX Settings panel.
Note: Refer to the Outback ConnX Quick Reference
Guide for more information on using Outback ConnX.
1.
Press Menu > Settings > ConnX
Settings. The ConnX Settings panel
appears.
2.
Enter your ConnX user ID and password:
a.
Press the UserID field, enter your ID in
the Enter UserID window, and then
press Done.
b.
Press the Password field, enter your ID
in the Enter Password window, and
then press Done.
Note: In the Enter UserID and Enter Password window press the Alt key to
display additional characters (such as “@” and “#”).
3.
Select the appropriate system from the System drop-down.
4.
Select On or Off from the Position Tracking drop-down.
5.
Press Done.
6.
Press Back/Close repeatedly or press the Close arrows to close the panels
and return to the map.
Outback MAX User Guide
25
PN 875-0325-000 Rev A1
Chapter 1: Getting Started
Help Messages
While using Outback MAX a Help message may appear—usually this occurs when
action cannot be performed, such as when pressing an inactive/dimmed button.
If a Help message appears, press Ok to close the message.
Figure 1-7 provides examples of Help messages that may appear while operating
Outback MAX.
Help message that appears
after pressing the Path
Planning button when there is
no active job
Help message that appears
after pressing the Path
Adjustment button when not
in A=B (Straight) guidance or
pivot guidance mode
Help message that appears
after pressing the Vehicle
Calibration button when
eDriveX is not installed and
connected
Figure 1-7: Outback MAX Help messages
Outback MAX User Guide
26
PN 875-0325-000 Rev A1
Chapter 2: Autosteering Overview and Setup
Log Files and eDriveX
Performing a Steering Test
Antenna Pivot
Antenna Offset
Implement Offsets
Vehicle Calibration
Steering Options
Outback MAX User Guide
27
PN 875-0325-000 Rev A1
Chapter 2: Autosteering Overview and Setup
Note: This chapter and steps 6 through 9 of “Adding a New Vehicle” on page 53
(calibration, dimensions, sensitivity, and attack sections) only apply if you have
automated steering (eDriveX) installed and connected to your system.
Before you add a vehicle review the following sections regarding:
•
Log files and eDriveX
•
Performing a steering test
•
Antenna pivot
•
Antenna offset
•
Converging filters
•
Vehicle calibration
Log Files and eDriveX
All the time eDriveX is powered on, session data is recorded (logged). The Copy Logs
button is used to collect these data logs for eDriveX troubleshooting purposes. You
will only need to use this feature if requested by Outback Guidance Customer Service.
Log File Numbering
Each time you turn eDriveX on, the log number increments. The log stores data for the
current session. When you export data using the Copy Logs button on the eDriveX
Diagnostics screen (see “eDriveX Diagnostics Screen” on page 154 for more
information on this screen), the log number identifies each file (so each session).
Knowing the log (file) number for each session helps in the analysis of the ECU’s
performance data when troubleshooting a particular session.
Note: The current log file number, as displayed, is added to the log filename (with
added zeros) when the session ends (eDriveX powered off). If you use the Export ECU
Logs feature without ending the session, the current log number will not show in the
exported file, but will show as ‘snapshot.tgz’.
Exporting Log Files
You must insert a USB flash drive into the USB port on the eDrive ECU (not a USB port
on Outback MAX) to export ECU logs files.
Each separate session (power on to power off) has its own filename and the session’s
log number is included in the session/log filename.
Outback MAX User Guide
28
PN 875-0325-000 Rev A1
Chapter 2: Autosteering Overview and Setup
To export log files:
1.
Insert a USB flash drive into the eDriveX ECU.
2.
On Outback MAX press Menu > Diagnostics > eDriveX Diagnostics.
The eDriveX Diagnostics screen appears. The Copy Logs button is active.
3.
Press Copy Logs. A status message appears (as shown below) while the
ECU logs files are copied to the USB flash drive.
When the copying is completed the status message closes.
4.
Press Back to close the eDriveX Diagnostics screen.
5.
Press Back/Close repeatedly or press the Close arrows to close the panels
and return to the map.
Outback MAX User Guide
29
PN 875-0325-000 Rev A1
Chapter 2: Autosteering Overview and Setup
Performing a Steering Test
Perform a steering test to check the connectivity of the system. Test the steering with:
•
The vehicle moving at no more than 5 kph (3 mph).
•
The eDriveX power switch in the ‘STEER’ position.
To test the steering connectivity:
1.
Press Menu > Diagnostics > eDriveX Diagnostics. The eDriveX
Diagnostics screen appears.
2.
In the lower right corner of the screen locate the Steer Test buttons.
3.
Press the left arrow button and verify the vehicle steers to the left. Press the stop
button (middle button) as soon as the direction is confirmed.
4.
Press the right arrow button and verify the vehicle steers to the right. Press
the stop button as soon as the direction is confirmed.
If the system passes the steering test, continue with the next section. If the system
does not pass the steering test see Table 2-1 below and re-check your installation; if
you are still unable to perform a successful steering test after troubleshooting, contact
your local Outback Guidance dealer or Outback Guidance Customer Service.
Table 2-1: Steering test troubleshooting
Problem
Solution
Wheels move into left or right lock
position, but the direction is switched
Swap the two cables that are connected to the
solenoid of the eDriveX hydraulic block.
Wheels do not move
Check the eDriveX installation for:
Hydraulics
Wheel angle sensor
Electronic components
eDriveX harness
Outback MAX User Guide
30
PN 875-0325-000 Rev A1
Chapter 2: Autosteering Overview and Setup
Antenna Pivot
Antenna pivot is the perpendicular distance of the center of the
antenna in front of or behind the vehicle’s pivot point. The pivot
point of a vehicle depends on its type: standard tractor,
articulated tractor, sprayer, combine or tracked tractor (as shown
on the Vehicle Type panel at right).
Figure 2-1 on page 32 shows how the antenna pivot dimension
(and other dimensions) are measured for each listed vehicle
type.
Note: Measure the antenna pivot as accurately as practical, as
this measurement has some impact on the accuracy of the
vehicle guidance and is also the reference point from which the
implement offset is calculated. Unlike the Antenna Offset
measurement, there is really no field method to verify or
improve the antenna pivot measurement.
Outback MAX User Guide
31
PN 875-0325-000 Rev A1
Chapter 2: Autosteering Overview and Setup
Standard tractor
Articulated tractor
Sprayer
Combine
Tracked tractor
Figure 2-1: Dimensions - wheel, track, articulated, combine, sprayer
Outback MAX User Guide
32
PN 875-0325-000 Rev A1
Chapter 2: Autosteering Overview and Setup
Antenna Offset
In order to achieve optimum steering accuracy, you must determine the antenna offset
in the field. However, you need to have completed the calibration procedure before
you can conduct the field tests, and to complete vehicle calibration, you need to enter
the antenna offset values on the Vehicle Dimensions screen (<need updated crossreference>). Since you do not have an accurate antenna offset when working through
calibration, you have two options:
•
Leave the antenna offset as 0.00 and enter the measured offset later.
•
Enter an estimated, ‘provisional’ offset value. (Suggested if you have a
noticeable antenna offset that you can measure or estimate.)
When you have completed the vehicle calibration and determined the actual antenna
offset, you can revisit vehicle calibration and add the actual value (you can revisit
individual steps without affecting subsequent steps once you have completed the
calibration - see “Making Changes to a Completed Calibration Step” on page 46).
To enter a provisional antenna offset:
Antenna L/R Offset
1.
Measure the perpendicular distance of the
center of the antenna from the centerline of the
vehicle.
2.
Enter the value as the antenna offset on the
Vehicle Dimensions screen (step 6, page 54).
Antenna
“Antenna Offset (L/R) Overview” below provides general
information on antenna offsets and “Determining
Antenna Offset” on page 34 describes two methods for
determining the antenna offset.
Antenna Offset (L/R) Overview
Antenna offset is the lateral (perpendicular) distance between the center of the GPS
antenna and the centerline of the vehicle. When ‘calibrating an antenna offset’ you are
actually compensating for a physical antenna offset. To compensate for physical
antenna offset you:
•
Measure the effect of the uncompensated antenna offset
•
Calculate the offset adjustment required
•
Enter the calculated adjustment to compensate for the physical antenna
offset
An offset—for which you will compensate—comprises a measured distance (the
amount of the offset) and a direction (left or right of vehicle centerline). In Figure 2-2,
the offset distance (or amount) is X, the direction is right.
Outback MAX User Guide
33
PN 875-0325-000 Rev A1
Chapter 2: Autosteering Overview and Setup
X
Antenna
Figure 2-2: Antenna offset (distance= X, direction = right)
Because it is difficult to measure the antenna offset on the vehicle, you must
determine the antenna offset in the field to ensure maximum steering accuracy.
However, you need to have completed the calibration wizard before you can conduct
the field tests, and to complete vehicle calibration, you need to enter the antenna
offset. This initial—or provisional—setting enables you to complete vehicle calibration
so you can conduct the field test for an exact antenna offset. See “Antenna Pivot” on
page 31.
Note: If the center of your antenna is exactly on the centerline of the vehicle, you have
no antenna offset and no compensation is required. When you carry out the
procedures for determining the offset, the result will be a measured offset of zero and
no further action will be required.
Calibration is required if the system shows an offset while driving up
and down on a guidance line without an implement after completing the roll bias
calibration.
Determining Antenna Offset
There are two ways to determine the antenna offset:
•
Track method (preferred): This method measures the track difference, in at
least three places, during two passes (one in each direction) on the same
A=B line. The method requires a surface where the vehicle clearly leaves
tracks.
Note: ‘Track’ in this context means wheel or track marks on the ground. The
track method for determining antenna offset is suitable for wheel and track
vehicles.
•
Marker method: This method measures the offset using at least three flags
(or other markers) to mark the center of the vehicle (hitch pin point) during
two runs (one in each direction) on the same A=B line. If using the marker
method, use at least three measurement points on the A=B line.
Whichever method you use, the antenna offset (the physical offset on the vehicle and
the compensating offset value you enter in the system) is half the measured difference
in the track of the vehicle over the two runs.
Outback MAX User Guide
34
PN 875-0325-000 Rev A1
Chapter 2: Autosteering Overview and Setup
Determining Antenna Offset - Track Method
Vehicle
centerline (Pass 1)
Vehicle
centerline (Pass 2)
Antenna Offset (T/2)
For example 3 cm
A=B Line
Pass 1
Pass 2
Track Difference (T)
For example, 6 cm (measure in at
least three places along A=B line)
Figure 2-3: Determining antenna offset (example 6/2 = 3 cm left)
Complete the following steps:
1.
Set up a straight A=B line.
2.
Maintaining a speed of 5 kph (3 mph) engage steering and let the system steer
you along the guideline for at least 100 m.
3.
Perform a keyhole turn, re-engage the steering and let the system steer you down
the same guideline.
4.
In three different places along the A=B line, measure the distance between the
corresponding track marks (inside edges, outside edges or centers, whichever are
easiest to see and measure, see Figure 2-3). If there is variation, calculate the
average difference. In our example (Figure 2-3) the track difference is 6 cm,
measured at the outside edges of the track marks at one point on the A=B line.
Note: Take your measurements where the vehicle was travelling with a cross track
of between 0-1, that is, not just after re-acquiring the A=B line after your turn (this
is sometimes referred to as ‘allowing settling time’).
Halve the measurement (3 cm). This is the amount of the physical antenna
offset—the offset you need to compensate for and need to enter as the antenna
offset (in meters, 0.03 m) at steps 6 and 7.
5.
Determine the direction of the offset. This is the direction in which the vehicle
would have to move for the second pass to track exactly over the first pass (this
tells you if the antenna center is to the left or the right of the vehicle centerline). In
Figure 2-4 on page 37, the vehicle would need to move to the left for the second
pass to be exactly on the first pass. (The direction of the offset can also be
described as the left or right direction of the antenna’s centerline relative to the
vehicle centerline when viewed in the direction of travel.)
Outback MAX User Guide
35
PN 875-0325-000 Rev A1
Chapter 2: Autosteering Overview and Setup
6.
Press Menu > Vehicle Profiles > Current Vehicle > Vehicle Dimensions.
The Vehicle Dimensions screen appears.
7.
Press the Antenna L/R Offset field (white box), enter an offset value using the
keypad on the right of the screen, press Left or Right (under the keypad), and
then press Done. The value is entered and the screen closes.
8.
Press Back/Close repeatedly or press the Close arrows to close the panels
and return to the map.
9.
Test the completed calibration by letting the system control up and down on a
new A=B line. The tracks should match. If they do not match, repeat the procedure
for determining the antenna offset.
A=B Line and
vehicle centerline
Pass 1
Pass 2
Track Difference (T) = 0
Outback MAX User Guide
36
PN 875-0325-000 Rev A1
Chapter 2: Autosteering Overview and Setup
Determining Antenna Offset - Marker Method
A=B Line
Vehicle centerline
(Pass 1)
2
2
Pass 1
1
Pass 2
3
3
Vehicle centerline
(Pass 2)
1
A=B Line
Track Difference (T) at 2nd
marker. For example 6 cm.
Antenna Offset (T/2)
For example 3 cm.
Figure 2-4: Determining the antenna offset (example 6/2 = 3 cm left)
To determine antenna offset (marker method):
1.
Set up a straight A=B line.
2.
Maintaining a speed of 5 kph (3 mph) engage steering and let the system steer
you along the wayline for at least 100 m. When the cross track has stabilized (0-1),
place markers along the A=B line—at least three—on the centerline of the vehicle
(the hitch pin point).
3.
Perform a keyhole turn, re-engage the steering and let the system steer you down
the same wayline. When the cross track is stabilized (0-1), place more markers
close to those placed on the first pass.
Note: Place your markers while the vehicle is travelling with a cross track of
between 0-1, that is, not just after re-acquiring the A=B line after your turn
(this is sometimes referred to as ‘allowing settling time’).
4.
Measure the distance between corresponding markers. In our example
(Figure 2-4) the centerline difference is 6 cm.
Halve the measurement (3 cm). This is the amount of the physical offset of the
antenna—the offset you need to compensate for and need to enter as the antenna
offset (in meters, 0.03 m).
5.
Determine the direction of the offset. This is the direction in which the vehicle
would have to move for the second pass to track exactly over the first pass (this
tells you if the antenna center is to the left or the right of the vehicle centerline). In
Figure 2-4 on page 37, the vehicle would need to move to the left for the second
pass to be exactly on the first pass. (The direction of the offset can also be
described as the left or right direction of the antenna’s centerline relative to the
vehicle centerline when viewed in the direction of travel.)
6.
Complete steps 6 through 8 in the track method (starts at page 35).
Outback MAX User Guide
37
PN 875-0325-000 Rev A1
Chapter 2: Autosteering Overview and Setup
7.
Test the completed calibration by letting the system control up and down on a
new A=B line and placing markers as before. The centerlines should match. If
they do not match, repeat the procedure for determining the antenna offset.
A=B Line
and
Vehicle centerline
2
Pass 1
1
Pass 2
3
3
2
1
Track Difference (T) at 2nd
marker = 0 cm.
Implement Offsets
In Outback MAX you can set two offsets for your implement:
•
L/R (left or right) offset
•
F/B (front or back) offset
See the following sections for an overview of each type of offset as well as
instructions on how to set the implement offsets.
Implement Offset (L/R)
The implement offset (L/R) is the lateral (perpendicular) distance between the center
of the implement and the centerline of the vehicle. When ‘calibrating an implement
offset’ you are actually compensating for a physical implement offset. And to
compensate for physical implement offset you:
•
Measure the effect of the uncompensated implement offset
•
Calculate the offset adjustment required
•
Enter the calculated adjustment to compensate for the physical implement
offset
Calibration is required if the vehicle successfully repeats its passes while driving up
and down on a straight A=B line without an implement, but still shows an offset (skip
or overlap) during field work with an implement attached. In this case it is likely that
the implement is not centered in relation to the centerline of the vehicle. To
compensate for this you need to complete an individual implement offset calibration
for each implement that is used with Outback MAX.
The implement offset—for which you will compensate—comprises a measured
distance (the amount of the offset) and a direction (left or right of vehicle centerline).
In Figure 2-5, the offset distance (or amount) is X, the direction is right.
Outback MAX User Guide
38
PN 875-0325-000 Rev A1
Chapter 2: Autosteering Overview and Setup
X
Implement
Figure 2-5: Implement offset (distance= X, direction = right)
Because it is difficult to measure the implement offset on the vehicle/implement
combination, you must determine the offset in the field to ensure maximum field work
accuracy.
Note: The calibration only compensates for a static implement offset that is caused by
the physical dimensions of the implement. It does not prevent offsets that are caused
by dynamic movements of the implement, like drift on a slope, for example.
There are two ways to determine the implement offset. The following section
describes the preferred method. There is a brief description of the other method after
the following step-by-step guidance through the preferred method. See also “Setting
the Implement Offset (L/R) - Alternative Method” on page 43.
Outback MAX User Guide
39
PN 875-0325-000 Rev A1
Chapter 2: Autosteering Overview and Setup
Setting the Implement Offset (L/R) - Preferred Method
This method for determining the implement offset is the preferred method because it
eliminates the possibility of errors caused by an incorrect vehicle width (see “Adding a
New Vehicle” on page 53).
Pass 1
Vehicle centerline (Pass 1)
Implement centerline
Pass 2
Implement is
offset to the left
Implement
centerline
Vehicle
centerline
(Pass 1)
Effect of offset
Example 1.00 m
Figure 2-6: Determining the effect of implement offset
To determine implement offset:
1.
Set up a straight A=B line.
2.
Maintaining a speed of 5 kph (3 mph) engage steering and, with good cross
track and with the implement straight, let the system steer you along the
wayline for at least 100 m. Ensure the implement is in sufficient contact with
the ground to leave a visible swath.
3.
Perform a keyhole turn, re-engage the steering and let the system steer you
down the same wayline, again with good cross track and with the implement
straight.
4.
Measure the effect of the uncompensated implement offset
shown in Figure 2-6 (1.00 m in example)—it is the width of the
first swath not covered by the second swath.
5.
Divide the measurement by two. This is the amount of the
physical offset of the implement—the offset you need to
compensate for and need to enter as the implement offset in
the vehicle setup screen - so 0.5 m in our example (see step 8).
6.
Determine the direction of the offset. This is the direction in which the
vehicle would have to move for the second pass to track exactly over the first
pass (this tells you if the antenna center is to the left or the right of the
vehicle centerline). In Figure 2-4 on page 37, the vehicle would need to move
to the left for the second pass to be exactly on the first pass.
Outback MAX User Guide
40
PN 875-0325-000 Rev A1
Chapter 2: Autosteering Overview and Setup
Note: The direction of the offset can also be described as the left or right
direction of the antenna’s centerline relative to the vehicle centerline when
viewed in the direction of travel.
7.
8.
Press Menu > Implement Profiles > Current Implement > Implement
Config. The Implement Configuration screen appears.
Enter the left or right implement offset:
a.
Press the appropriate offset field (white box).
b.
Enter an offset value using the keypad on the right of the screen. After
you enter the value the implement on this screen moves to the position
indicated by the offset; for example, if you enter a Right offset the
implement moves to the right.
c.
Press Done. The value is entered and the screen closes.
Outback MAX User Guide
41
PN 875-0325-000 Rev A1
Chapter 2: Autosteering Overview and Setup
9.
On the Edit Implement Profile panel press Save. The Edit Implement Profile
panel closes and the new implement position is indicated on the map.
Implement offset entered in
Implement Configuration
screen (left) and resulting
implement shift on map
(below)
10. Press Back/Close repeatedly or press the Close arrows to close the panels
and return to the map.
11.
Test the completed calibration by letting the system control up and down on a
new A=B line. The second swath should overlay the first exactly. If it does not,
repeat the calibration.
Swath
Pass 1
Swath
Pass 2
Implement
centerline
Note: If test results still show skips or overlaps after
calibrating both the antenna and implement offsets,
make sure the implement width (Width button on Edit
Implement Profile panel, shown at right) is correct.
Outback MAX User Guide
42
PN 875-0325-000 Rev A1
Chapter 2: Autosteering Overview and Setup
Setting the Implement Offset (L/R) - Alternative Method
With this method, instead of driving two passes on the same wayline—one in each
direction—you drive three passes on adjacent waylines. Depending on the direction of
your implement offset (left or right), you will get a skip or an overlap on the second
pass and the opposite on the third pass.
Pass 1
Implement
centerline
Pass 2
Vehicle
centerline
2X
Implement
centerline is
to the left of
the vehicle
centerline
when viewed
in direction of
travel (DOT)
Pass 3
2X
Vehicle
centerline
No implement offset entered. Skips and
overlaps occur (2X). Direction of offset is
Left when viewed in direction of travel.
Figure 2-7: Three-Pass method for determining implement offset
The amount of skip and overlay will be the same. Whichever you measure (2X) divide
it in half and enter the result as the implement offset (X) along with the direction of the
offset, which is left in the example (start at step 7 of the previous section “Setting the
Implement Offset (L/R) - Preferred Method”).
Note: If the offset was to the right, Pass 2 would produce overlay, Pass 3 would
produce skip.
Outback MAX User Guide
43
PN 875-0325-000 Rev A1
Chapter 2: Autosteering Overview and Setup
Implement Offset (F/B)
The implement offset (F/B) is the perpendicular distance between the vehicle's pivot
point and the application line (spray impact point, seed drop point, etc) of the
implement. The implement offset affects the section control ‘on/off’ points and the
variable rate control ‘change’ points as the implement passes over preset boundaries,
previously worked areas, or prescription map areas.
Setting the Implement Offset (F/B)
If the application line of the implement is in
front of the vehicle pivot point, measure the
distance from the antenna pivot point to the
application line and enter the value in the
Front box of the Implement Configuration
screen—the implement will be in front of
the vehicle on the map screen.
Front offset
Back offset
If the application line of the implement is
behind the vehicle pivot point, measure the
distance from the antenna pivot point to the application line and enter the value in the
Back box—the implement will trail behind the vehicle on the map screen.
1.
Press Menu > Implement Profiles > Current Implement > Implement
Config. The Implement Configuration screen appears.
2.
Enter the front or back implement offset:
a.
Press the appropriate offset field (white box).
b.
Enter an offset value using the keypad on the right of the screen. After
you enter the value the implement on this screen moves to the position
indicated by the offset; for example, if you enter a Front offset the
implement moves to the front.
c.
Press Done. The value is entered and the screen closes.
Note: Based on the location of the application line of the implement, you may need to
set a combination of left/right and front/back offsets on the implement.
Outback MAX User Guide
44
PN 875-0325-000 Rev A1
Chapter 2: Autosteering Overview and Setup
Vehicle Calibration
Outback MAX guides you through the vehicle calibration process using step-by-step
instructions in a defined sequence. With eDriveX installed and powered up, a
successful steering test completed and the prerequisites met (see “Before Calibrating
a Vehicle” below) you are ready to calibrate a vehicle.
This section provides general information on calibrating a vehicle and some stepspecific information. The step-by-step guidance sections in this chapter will refer you
back to the relevant parts of this section when appropriate.
Before Calibrating a Vehicle
Before calibrating a vehicle ensure that:
•
The GPS antenna/sensor is located in its final position and initialized.
•
You use the GPS source the vehicle will use in operations. For example, if
you plan to use RTK in the field you must use RTK during calibration.
•
All the items at the top of the eDriveX Status screen (see Table A-3 under
“eDriveX Status Screen” on page 152) are green (press Menu > Diagnostics
> eDriveX Status to view the screen).
•
The eDriveX power switch is in the ‘STEER’ position.
Calibration Steps and Different Vehicle Types
The calibration steps you complete are based on the type of vehicle you select. In
Outback MAX you can select from five vehicle types:
•
Standard tractor
•
Articulated tractor
•
Sprayer
•
Combine
•
Tracked tractor
Within each vehicle type there are subtypes. Some of the subtypes are included in all
vehicle types; for example, all five vehicle types contain subtypes for HGPS Standard
Flow and VSi. However, some subtypes are only for specific vehicle types; for
example, the Fendt subtype is only for the Standard Tractor subtype.
Note: The calibration steps and step labels (names) will change for certain valve
types, track machines and electric steering (valve type VSi). Table 2-2 shows the
steps\step labels that apply for the different vehicle\valve combinations.
Outback MAX User Guide
45
PN 875-0325-000 Rev A1
Chapter 2: Autosteering Overview and Setup
Table 2-2: Calibration steps and step labels for vehicle\valve types
Hydraulic Steering (includes Steer-Ready)
Calibration
Step
Wheel Vehicles
Track Vehicles
1
ECU Orientation
ECU Orientation
2
Coarse WAS
3
Curvature
4
Minimum Current
or Lock to Lock
or Minimum Spool
5
P-Gain (except for AGCO
PVED)
6
Fine WAS
7
Roll Bias
Electric Steering
(VSi)
ECU Orientation
Curvature
Lateral Acc
Steering Ratio
Lock to Lock
Roll Bias
Roll Bias
Completing Vehicle Calibration Steps in Sequence
Because the calibration steps must be completed in sequence, the
step buttons are inactive (grayed out) until you can perform that
step. For example you must complete the “ECU Orientation” step
(active button at right) before completing any of the other steps
(inactive buttons at right).
Making Changes to a Completed Calibration
Step
If you need to change a step you have already completed then you
must re-do all the subsequent steps that were also completed.
For example, you have completed all the calibration steps (1
through 7) for a wheeled hydraulic steering vehicle. You then need
to change the ECU orientation (step 1). After you make this change
only the next step (2, Coarse WAS) is available for you to change
(all other steps are inactive).
Note: This behavior is only until you have completed all the
calibration steps applicable to your vehicle. Once you have
completed the roll bias calibration, you can make changes at other steps without
having to revisit the subsequent steps.
About Engine Speed During Calibration
Some calibration steps should be carried out at full hydraulic pressure. Because some
hydraulic systems need higher engine speeds that others to achieve full hydraulic
pressure, we recommend executing those calibration steps with a minimum engine
speed of 1500 rev/min. This is indicated as a requirement where it applies.
Outback MAX User Guide
46
PN 875-0325-000 Rev A1
Chapter 2: Autosteering Overview and Setup
Converging Filters
Filters are an important part of the data processing that enables precision guidance
and auto-steering. To be effective, filters need to be converged.
Filters may be either converged (for immediate use) or converged with convergence
data stored (for immediate and subsequent reuse). Certain driving routines will result
in convergence but you need to meet more conditions for convergence data to be
stored.
A check mark in the Run Time Status section of the eDriveX Status screen indicates
that filters have been converged (Figure 2-8). It does not, however, indicate that the
convergence data is stored (although it may be - see “Filter Self-Convergence” on
page 48).
Figure 2-8: Filters Converged checked on the eDriveX Status screen
Note - vehicle/valve combination: Convergence data, if stored, is stored for each
vehicle/valve type combination. If you change the vehicle/valve type combination to a
combination for which there is no stored convergence data, you will need to repeat
the appropriate convergence and convergence data storage requirements.
Initial Convergence or Re-convergence
Initial filter convergence (and re-convergence if required) is achieved through a
driving pattern. The driving sequences executed manually or automatically during the
calibration process are normally enough for filters to converge. If the calibration
driving sequences are enough, the convergence status will show as checked. You will
then have to meet the requirements for convergence data storage (see “Drive the
vehicle at slow speed (typically 5-7 kph) as follows (in order) to achieve filter
convergence:The data storage (additional) driving requirements:” on page 48).
If the driving sequences within the calibration process do not result in filter
convergence, or a full calibration in not required, execute the ‘manual’ sequence
described below (and then the additional storage driving requirements detailed on
page 48). See also “Re-converging Filters” on page 48.
Note - antenna position: Filter convergence includes a calculation of the antenna
position. If there is a difference of more than 1 m between the calculated antenna
position and the entered antenna fore/aft (‘pivot’) dimension, the filters will converge
but the filter data will not be stored. To avoid this situation, ensure you have
accurately entered the antenna pivot dimension when adding a new vehicle (see
“Adding a New Vehicle” on page 53).
Outback MAX User Guide
47
PN 875-0325-000 Rev A1
Chapter 2: Autosteering Overview and Setup
Manual Driving Sequence
Drive the vehicle at slow speed (typically 5-7 kph) as follows (in order) to achieve filter
convergence:The data storage (additional) driving requirements:
•
100 m in a straight line
•
Two complete circles at near full lock
(in either direction - the second can
be the same as the first, not as shown
for illustrative purposes in Figure 2-9)
•
100 m in a straight line (the filters will
most likely have converged before
this step)
Figure 2-9: Manual filter convergence driving sequence
To store the newly acquired convergence data you must drive at least three minutes
(recommended minimum) under autosteering and bring the vehicle to a stop (the
point at which the data is stored). This can be cumulative—you do not have to
immediately drive under autosteer for three minutes and stop. Provided you have
three minutes of auto-steering (for which filters must be converged) and come to a
halt before you power off eDriveX, the convergence data will be stored (but see Note antenna position on page 47).
Filter Self-Convergence
On system startup, the filters converged status always indicates filters are not
converged: this is normal. After you drive forward for at least 10 seconds, the status
should become checked indicating the use of stored convergence data. If the status
does not change, it indicates convergence data is not stored. Refer to “Re-converging
Filters” below.
Re-converging Filters
Filters will need to be re-converged—and the new convergence data stored—if:
•
The filter convergence data was never stored
•
The antenna calibrated (entered) dimension is changed by more than 0.1 m
•
The vehicle/valve type combination is changed to one that has not been
used before (meaning there is no convergence data for the combination see Note: vehicle/valve combination, page 47).
If re-convergence is required, establish the reason and, accordingly, reset the antenna
data, complete the calibration process, and/or complete the driving requirements for
convergence and convergence data storage as detailed in the preceding sections.
Outback MAX User Guide
48
PN 875-0325-000 Rev A1
Chapter 2: Autosteering Overview and Setup
Steering Options
Steering adjustment options include:
•
Sensitivity - determines how aggressively the vehicle steers on the guidance
line when in close proximity
•
Attack - determines how aggressively the vehicle steers onto the guidance
line when approaching it from a distance
•
Smoothing - determines the amount of smoothing of contours
Steering Sensitivity
Steering sensitivity determines how aggressively the vehicle steers onto the guidance
line when approaching it from close proximity.Depending on preference and needs,
you can adjust sensitivity to between 0 and 20. The default setting 7 is a good value to
start with on most vehicles. Use Table 2-3 as a guide to setting the sensitivity.
Table 2-3: Sensitivity settings
Setting
Performance
Low value
Smooth steering adjustments, eventual lack of cross track accuracy (in
this sense, cross track is the real-time, constantly changing horizontal
offset of the vehicle to the desired position on the guidance line.
Medium value
Good compromise between smooth steering and cross track accuracy.
High value
Aggressive steering adjustments with the wheels being very active,
‘twitchy’. Highest cross track accuracy.
Adjust the sensitivity setting within the eDriveX calibration wizard to maintain the
GPS guideline accurately without rapidly overshooting or responding too slowly.
•
If the steering corrections are too rapid, causing the machine to jerk
erratically back and forth across the line, the sensitivity setting is too high.
•
If the machine slowly weaves down the guideline, the sensitivity setting is
too low (see Figure 2-10.
Vehicle Path
Vehicle Path
~ 3’
1m=
~ 3’
1m=
Figure 2-10: eDriveX control at different sensitivity settings
The best sensitivity setting for optimized machine control will depend on different
parameters, such as vehicle type, implement, working speed and field conditions.
Outback MAX User Guide
49
PN 875-0325-000 Rev A1
Chapter 2: Autosteering Overview and Setup
Steering Attack
Steering attack determines how aggressively the vehicle steers onto the guidance line
when approaching it from a distance. Depending on preference and needs, you can
set attack to between 0 and 10. The default setting 10 (maximum) is a good value to
start with on most vehicles. Use Table 2-4 as a guide to setting the attack.
Table 2-4: Attack settings
Setting
Performance
Low
Very slow line acquisition. The system is not overshooting the guidance line
during approach.
Medium
Good compromise between a fast line acquisition and a reasonable amount
of overshoot.
High
Fast line acquisition with the potential to overshoot the guidance line until the
system catches up.
Steering Smoothing
Steering smoothing determines the amount of smoothing of contours. The smoothing
applied to the current contour is based on the smoothing setting that was active
during the preceding pass.
Depending on preference and needs, smoothing can be adjusted to None (the
default), Low, Medium or High. For example, it might be necessary to adjust the
smoothing setting if a vehicle/implement combination does not allow turning within a
tight radius. In addition, a very sharp curvature might not be desired during highspeed operation. Use Table 2-5 as a guide to setting the smoothing.
Table 2-5: Smoothing settings
Setting
Performance
None
(default)
The system tries to follow every contour, even if the contour has a very tight
curvature but may disengage when following a very tight turn.
Low
The system applies minimum smoothing.
Medium
The system applies medium smoothing.
High
The system generates optimized control paths for high-speed operation
where the minimum curvature for each turn is large. It is not suitable for
tight-turn operations as unwanted coverage gaps may occur.
Outback MAX has a minimum radius for each setting and cannot generate the correct
path if the curve diameter is less than twice that minimum radius. The minimum
radius for each smoothing setting is:
•
None = 5 m
•
Low = 10 m
•
Medium = 15 m
•
High = 20 m
Outback MAX User Guide
50
PN 875-0325-000 Rev A1
Chapter 3: Working with Vehicles and
Implements
Working with Vehicles
Working with Implements
Outback MAX User Guide
51
PN 875-0325-000 Rev A1
Chapter 3: Working with Vehicles and Implements
Working with Vehicles
A vehicle in Outback MAX refers to a vehicle you drive in the field, such as a sprayer,
planter, tractor, etc. You can add as many vehicles to Outback MAX as you want and
then select the one you need for your job. The first time you turn on the system there
are no vehicles. After adding a vehicle (or vehicles) upon powerup Outback MAX will
(by default) use the vehicle profile that was used prior to the terminal being powered
down.
The selected vehicle appears on the map screen above the
selected implement (shown at right).
You can perform the following vehicle tasks:
•
Add a vehicle
•
Edit a vehicle
•
Load a previous (existing) vehicle
•
Import a vehicle
•
Export a vehicle
•
Delete a vehicle
Outback MAX User Guide
52
PN 875-0325-000 Rev A1
Chapter 3: Working with Vehicles and Implements
Adding a New Vehicle
You must add a vehicle and an implement before you can begin a job. When you add
a vehicle it remains in memory, even if you move the terminal to another vehicle.
1.
Press Menu > Vehicle Profiles > New Vehicle. The
New Vehicle Profile panel appears (shown at right). Only
the Vehicle Name and Vehicle Color fields are available.
As you enter field values more buttons become available.
For example, after you enter the Vehicle Name the Vehicle
Type button becomes available.
2.
Enter the vehicle name: Press Vehicle Name, enter a
name in the Enter Vehicle Name window, and then press Done. The new
vehicle name appears on the Vehicle Name button.
Tip! Use names you will recognize if entering many vehicles.
3.
Select the vehicle color: Press Vehicle Color and then press a color in the
Select Color window (shown below). The new color appears on the Vehicle
Color button and on the vehicle on the map.
Outback MAX User Guide
53
PN 875-0325-000 Rev A1
Chapter 3: Working with Vehicles and Implements
4.
Select a vehicle type: Press Vehicle Type and then
press a vehicle button on the Select Vehicle Type panel
(top of panel shown at right). The vehicle type appears
on the Vehicle Type button.
5.
Select a valve type: Press Valve Type and then press a
valve button on the Select Valve Type panel (top of
panel shown at right). The valve type appears on the
Valve Type button.
Note: You can change vehicle type and/or valve type.
After a change of either, a system message prompts
you to restart the ECU for the changes to take effect.
Press OK to acknowledge the message and continue you will restart the ECU after changing the valve type.
See also “Making Changes to a Completed Calibration
Step” on page 46.
Note: Only valve types valid for the currently selected
vehicle type are available for selection. If you change
the vehicle type and the currently selected valve type is
not valid for that vehicle, the Valve Type field becomes
blank and you need to reselect a valve.
6.
Enter vehicle dimensions: Press Vehicle Dimensions to display the Vehicle
Dimensions window.
Outback MAX User Guide
54
PN 875-0325-000 Rev A1
Chapter 3: Working with Vehicles and Implements
Complete the following, and then press Done.
•
Antenna Pivot: Press the Antenna Pivot field, enter a value using the
keypad, and then press Front (antenna in front of vehicle pivot point) or
Back (antenna behind vehicle pivot point).
See “Antenna Pivot” on page 31 for more information on this setting.
•
Antenna L/R Offset: Press the Antenna L/R Offset field, enter a value
using the keypad, and then press Left (antenna left of vehicle center
point) or Right (antenna right of vehicle center point).
See “Antenna Offset (L/R) Overview” on page 33 for more information
on this setting.
Note: You can leave this as 0.00 when first working through this step of
vehicle setup. See “Antenna Offset” on page 33.
7.
•
Antenna Height: Press the Antenna Height field and enter a value using
the keypad.
•
Wheelbase: Press the Wheelbase field and enter a value using the
keypad. Wheelbase of a vehicle is the distance between the centers of
its two axles.
Calibrate the vehicle:
a.
Press Vehicle Calibration. The Vehicle Calibration
panel appears (shown at right).
Only the ECU Orientation field is active at this point.
You must complete the calibration steps in order.
After you complete one of the steps shown at right
the button below that step becomes active (or
multiple buttons become active).
b.
Press ECU Orientation (applies to wheel and track vehicles). The ECU
Orientation panel appears. Press ECU Top and select an option, press
ECU Connector and select an option, and then press Done.
In the two ECU orientation screens (shown at top of next page) you set
the orientation of the top of the ECU (the face with the cooling fins) and
of the two connectors. The connector orientation options are
dependent on the orientation of the ECU’s top so you set the top
position first.
Outback MAX User Guide
55
PN 875-0325-000 Rev A1
Chapter 3: Working with Vehicles and Implements
Note: The panels that appear for
certain calibration steps have a
status bar that indicates if you
have met the conditions for that
step. For example, if the step
instructs you to drive less than a
certain speed it shows a red bar if
you are driving too fast or a green
bar if you are driving within the
correct range. Pay attention to the
progress bar to help guide you
through the calibration process.
Green - within range
Red - outside range
When instructed to center the steering aim at a specific landmark to ensure
that your are driving the vehicle in a straight line.
Continue with the calibration process onscreen prompts. When
finished calibrating go to step 8 to complete vehicle setup.
8.
Enter sensitivity: Press Sensitivity,
on the Sensitivity slider drag the
slider or press the left and right
arrows to set the sensitivity level,
and then press Close.
Sensitivity is how aggressive the
vehicle will try to stay on the line; it
ranges from 1 to 20. The default
value is 7.
9.
Enter attack: Press Attack, on the
Attack slider drag the slider or press
the left and right arrows to set the attack level, and then press Close.
Attack is how aggressive a vehicle will try to acquire the line; it ranges from
1 to 10. The default value is 10.
10. Press Save to save your vehicle settings. The new vehicle name appears on
the Current Vehicle button.
11.
Press Back/Close repeatedly or press the Close arrows to close the panels
and return to the map.
Outback MAX User Guide
56
PN 875-0325-000 Rev A1
Chapter 3: Working with Vehicles and Implements
Editing a Vehicle
You can only edit the currently loaded Vehicle Profile.
1.
Press Menu > Vehicle Profiles > Current Vehicle. The Edit Vehicle
Profile panel appears.
2.
Edit the desired settings, similar to entering the settings when adding a
vehicle (see the previous section “Adding a New Vehicle”).
Loading a Previous Vehicle
Each vehicle you create in Outback MAX is saved to memory
creating a list of vehicles. You can then load the appropriate
vehicle from a list of vehicles.
To load a previous vehicle:
1.
Press Menu > Vehicle Profiles > Previous Vehicles.
The Previous Vehicles panel appears (shown at right).
2.
Use the up/down scroll buttons to scroll through the list
of vehicles (if necessary) and then press to select the
desired vehicle.
The Previous Vehicle panel closes and the selected
vehicle appears on the Current Vehicle button.
3.
Press Back/Close repeatedly or press the Close arrows
to close the panels and return to the map.
Importing a Vehicle
You must have a USB flash drive plugged into one of the USB
ports to import a vehicle; otherwise, the functionality is disabled
(the Import Vehicles button on the Vehicle Profiles panel is
dimmed / not available).
The flash drive must contain a 'vehicles' folder at the root level of
the drive and all vehicle files must be in this folder For example,
if your USB flash drive is drive M on your PC then your vehicle
files should be in the following folder: M:\vehicles
To import a vehicle:
1.
Press Menu > Vehicle Profiles > Import Vehicles.
The Import Vehicles panel appears (shown at right).
2.
Use the up/down scroll buttons to scroll through the list
of vehicles (if necessary) and then press to select the
vehicle(s) you want to import. If you want to import all
vehicles press Select All.
3.
Press Import. The vehicle(s) are imported and the
panels close.
Note: Once you import a Vehicle Profile it will appear in the
Previous Vehicles list (see “Loading a Previous Vehicle” on page 57).
Outback MAX User Guide
57
PN 875-0325-000 Rev A1
Chapter 3: Working with Vehicles and Implements
Exporting a Vehicle
You must have a USB flash drive plugged into one of the USB
ports to export a vehicle; otherwise, the functionality is disabled
(the Export Vehicles button on the Vehicle Profiles panel is
dimmed / not available).
When you export a vehicle to a USB flash drive Outback MAX
creates a 'vehicles' folder on flash drive and copies the VEHICLE
file to that folder. For example, if you have a vehicle profile
named 'TestVehicle1' and export that vehicle to a flash drive it
will appear as follows: TestVehicle1.vehicle
To export a vehicle:
1.
Press Menu > Vehicle Profiles > Export Vehicles.
The Export Vehicles panel appears (shown at right).
2.
Use the up/down scroll buttons to scroll through the list
of vehicles (if necessary) and then press to select the
vehicle(s) you want to export. If you want to export all
vehicles press Select All.
3.
Press Export. The panels close and an export progress
message appears (shown below). When the export is
complete the message closes.
Deleting a Vehicle
Caution: Once you delete a vehicle it is permanently removed
from memory; you cannot retrieve a deleted vehicle.
You cannot delete the current vehicle—only vehicles that are not
the current vehicle will appear in the Delete Vehicles list.
To delete a vehicle:
1.
Press Menu > Vehicle Profiles > Delete Vehicles.
The Delete Vehicles panel appears (shown at right).
2.
Use the up/down scroll buttons to scroll through the list
of vehicles (if necessary) and then press to select the
vehicle(s) you want to delete. If you want to delete all
vehicles press Select All.
3.
Press Delete. A message appears asking if you are
sure you want to delete the selected vehicle(s).
4.
Press Yes. The vehicle(s) are deleted and no longer appear in the list on the
Delete Vehicles panel.
5.
Press Back/Close repeatedly or press the Close arrows to close the panels
and return to the map.
Outback MAX User Guide
58
PN 875-0325-000 Rev A1
Chapter 3: Working with Vehicles and Implements
Working with Implements
An implement in Outback MAX refers to machinery attached to your vehicle, such as a
sprayer, planter, or tillage equipment.
You can add as many implements to Outback MAX as you want and then select the
one you need for your job.
The selected implement appears on the map screen below the selected vehicle (see
example below). The distance between the implement and the vehicle is determined
by the back implement offset (see step 5, page 61).
You can perform the following implement tasks:
•
Add an implement
•
Edit an implement
•
Load a previous (existing) implement
•
Import an implement
•
Export an implement
•
Delete an implement
Note: If you have automated steering connected to Outback MAX and you entered a
valid eTurns subscription, the eTurns Calibration button on the New Implement Profile
panel and Edit Implement Profile panel is available after you complete the previous
implement setup steps (using the buttons above the eTurns Calibration button on
these panels). Without a valid eTurns subscription the eTurns button is always
dimmed (unavailable). See “eTurns” on page 105 for more information about eTurns
functionality.
Outback MAX User Guide
59
PN 875-0325-000 Rev A1
Chapter 3: Working with Vehicles and Implements
Adding an Implement
1.
Press Menu > Implement Profiles > New Implement.
The New Implement Profile panel appears (shown at
right). Only the Name field is available.
As you enter field values more buttons become available.
For example, after you enter the Name the Mount Type
button becomes available.
2.
Enter the implement name: Press Name, enter a name in
the Enter Name window, and then press Done. The new
implement name appears on the Name button.
Tip! Use names you will recognize if entering many
implements.
3.
Select the mount type: Press Mount Type and then
press either Trailed or Rigid in the Mount Type panel.
The selected type appears on the Mount Type button.
Rigid implements are mounted to the vehicle either
through a 3-point or a boom on a self propelled sprayer.
Outback MAX User Guide
60
PN 875-0325-000 Rev A1
Chapter 3: Working with Vehicles and Implements
4.
Enter the implement width: Press Width, using the
Width keypad press the ft and/or in (or meters) field
and enter a value, and then press Done. The value
appears on the Width button.
5.
Enter implement configuration (offset and skip/
overlay): Press Implement Config to display the
Implement Configuration window.
The Implement Configuration window contains a keypad on the right and
either the Implement Offset area (shown below) or the Skip/Overlap
Distance area (shown on the next page) on the left—you toggle between
these areas using the button below the keypad. When you first press
Implement Config the Implement Offset area appears and the button below
the keypad shows Skip/Overlap. Pressing the Skip/Overlap button displays
the Skip/Overlap area and the button changes to Implement Offset.
a.
For Implement Offset: Press the ft and/or in (or meters) field for any of
the measurements (Front, Right, Back, or Left) and enter a value using
the keypad. Repeat for each of the remaining measurements.
Outback MAX User Guide
61
PN 875-0325-000 Rev A1
Chapter 3: Working with Vehicles and Implements
b.
For Skip/Overlap: Press the ft and/or in (or meters) field for either Skip
or Overlap and enter a value using the keypad. Set this value to drive a
pattern where rows intentionally skip or overlap. When you enter a skip
or overlap the map screen shows this as an area between swaths in the
green coverage lines, where a skip is the non-sprayed area between
swaths and an overlap is the dark green overlap between swaths.
Note: If section control is enabled, the following two conditions must be
met for overlap to work properly (otherwise, section control will turn off
the outside sections and not allow overlap):
•
Overlap width must be less than the width of the outside sections.
•
Section control Coverage must be set at 100% (see Table 7-5 on
page 132 for more information on Coverage).
Outback MAX User Guide
Skip value entered
Overlap value entered
Skip example
Overlap example
62
PN 875-0325-000 Rev A1
Chapter 3: Working with Vehicles and Implements
6.
Select an operation: Press Operation and on the Select
Operation panel (top of panel shown at right) press the
desired operation.
(OPTIONAL): If your Outback MAX configuration
includes rate and section control functionality
complete steps 7 and 8; otherwise, go to step 9.
7.
8.
Enter rate control settings: Press Rate Control
Settings to display the Rate Control Settings panel and
complete the following:
a.
Press Controller Type and in the Controller Type
panel press HGPS. HGPS appears on the
Controller Type button.
b.
Press Rate Valve and in the Valve Type panel press the desired type.
The selected type appears on the Rate Valve button.
c.
Press the Open Valve and Close Valve buttons to manually open and
close the regulating valve to identify if an incorrect Rate Valve option
was selected or if a cable is not connected (you can see if the valve is
turning and verify you selected the correct valve type).
d.
Press On Look Ahead and in the On Look Ahead data entry window
enter a value (in seconds) and then press Done. The entered value
appears on the On Look Ahead button.
e.
Press Calibration and in the Calibrate Rate Control panel complete the
following:
i.
Press Meter Calibration, enter a value in the Meter Calibration
data entry window, and then press Done. The entered value
appears on the Meter Calibration button and the System
Calibration button is now available.
ii.
Press System Calibration, press Yes in the Calibrate window (a
timer status bar appears during calibration-see screenshot below),
and then press OK.
iii.
Press Calibration Values to display the Calibration Values panel
(with buttons for K, Trigger, Flow Range, and Min PWM). For each
value, press the button, enter a value in the data entry window that
appears, and then press Done. After you press Done for the last
value press Close > Back > Back to return to the Edit Implement
Profile panel.
Enter section control settings: Press Section Control to display the Section
Control Settings panel and complete the following:
a.
Press Controller Type and in the Controller Type panel press HGPS.
HGPS appears on the Controller Type button.
b.
Press Section Valve and in the Valve Type panel press the desired
type. The selected type appears on the Section Valve button.
c.
Press Number of Sections and in the Number of Sections data entry
window enter a value and then press Done. The entered value appears
on the Number of Sections button.
d.
Press Section Location/Width. In the Section Widths panel do one of
the following:
•
Press Auto-Locate to divide the sections equally based on the
implement width.
Outback MAX User Guide
63
PN 875-0325-000 Rev A1
Chapter 3: Working with Vehicles and Implements
•
Press each section button, enter a value in the corresponding data
entry window and then press Done.
e.
Press Coverage, enter a value in the Coverage data entry window, and
then press Done.
f.
Press On-Time, enter a value in the On-Time data entry window, and
then press Done.
g.
Press Off-Time, enter a value in the Off-Time data entry window, and
then press Done.
h.
Press External Switches (place check mark in box) to use the joystick
or boom switches built into your vehicle (instead of using the map
screen indicators/buttons) to turn Apply button ON and OFF and toggle
individual sections between ON and AUTO.
(OPTIONAL): If you have an eTurns subscription complete step 9;
otherwise, go to step 10.
9.
Press eTurns Calibration. The eTurns Calibration panel appears showing
Step 1 of 5. Follow the directions on the screen, press Next when instructed,
and press Done when calibration is complete.
10. Press Save to save your vehicle settings. The new implement name appears
on the Current Implement button.
11.
Press Back/Close repeatedly or press the Close arrows to close the panels
and return to the map.
Editing an Implement
You can only edit the currently loaded Implement Profile.
1.
Press Menu > Implement Profiles > Current Vehicle. The Edit
Implement Profile panel appears.
2.
Edit the desired settings, similar to entering the settings when adding an
implement (see the previous section “Adding an Implement”).
Outback MAX User Guide
64
PN 875-0325-000 Rev A1
Chapter 3: Working with Vehicles and Implements
Loading a Previous Implement
Each implement you create in Outback MAX is saved to memory
creating a list of implements. When you load an implement it will
use the dimensions and any section and rate control setup for
that implement.
1.
Press Menu > Implement Profiles > Previous
Implement. The Implement Profiles panel displays the
Filter drop-down button and a scroll list of implements.
2.
Press Filter and select a type to show only implements
of that type in the scroll list. Pressing All Types (default)
displays all implements in the scroll list, regardless of
type.
3.
Use the up/down scroll buttons to scroll through the list
of implements (if necessary) and then press to select
the desired implement.
4.
The panel closes and the selected vehicle appears on
the Current Implement button.
5.
Press Back/Close repeatedly or press the Close arrows
to close the panels and return to the map.
Importing an Implement
You must have a USB flash drive plugged into one of the USB
ports to import an implement; otherwise, the functionality is
disabled (the Import Implements button on the Implement
Profiles panel is dimmed / not available).
The flash drive must contain an 'implements' folder at the root
level of the drive and all implement files must be in this folder.
For example, if your USB flash drive is drive M on your PC then
your implement files should be in the following folder:
M:\implements
To import an implement:
1.
Press Menu > Implement Profiles > Import
Implements. The Import Implements panel appears
(shown at right).
2.
Use the up/down scroll buttons to scroll through the list
of implements and then press to select the
implement(s) you want to import. If you want to import
all implements press Select All.
3.
Press Import. The implement(s) are imported and the
panels close.
Note: Once you import an Implement Profile it will appear in the Previous Vehicles list
(see “Loading a Previous Implement” above).
Outback MAX User Guide
65
PN 875-0325-000 Rev A1
Chapter 3: Working with Vehicles and Implements
Exporting an Implement
You must have a USB flash drive plugged into one of the USB
ports to export an implement; otherwise, the functionality is
disabled (the Export Implements button on the Implement
Profiles panel is dimmed / not available).
When you export an implement to a USB flash drive Outback
MAX creates an 'implements' folder on flash drive and copies the
IMPL file to that folder. For example, if you have an implement
profile named 'TestImplement1' and export that implement to a
flash drive it will appear as follows: TestImplement1.impl
To export an implement:
1.
Press Menu > Implement Profiles > Export
Implements. The Export Implements panel appears
(shown at right).
2.
Use the up/down scroll buttons to scroll through the list
of implements and then press to select the
implement(s) you want to export. If you want to export
all implements press Select All.
3.
Press Export. The implement(s) are exported and the
panels close.
Deleting an Implement
Caution: Once you delete an implement it is permanently
removed from memory; you cannot retrieve a deleted
implement.
You cannot delete the current implement—only implements that
are not the current implement will appear in the Delete
Implements list.
To delete an implement:
1.
Press Menu > Implement Profiles > Delete
Implements. The Delete Implements panel appears
(shown at right).
2.
Use the up/down scroll buttons to scroll through the list
of implements (if necessary) and then press to select
the implement(s) you want to delete. If you want to
delete all implements press Select All.
3.
Press Delete. A message appears asking if you are
sure you want to delete the selected implement(s).
4.
Press Yes. The implement(s) are deleted and no longer appear in the list on
the Delete Implements panel.
5.
Press Back/Close repeatedly or press the Close arrows to close the panels
and return to the map.
Outback MAX User Guide
66
PN 875-0325-000 Rev A1
Chapter 4: Jobs and Job Templates
Working with Jobs
Working with Job Templates
Outback MAX User Guide
67
PN 875-0325-000 Rev A1
Chapter 4: Jobs and Job Templates
Working with Jobs
This chapter provides important information on what you need to do before starting a
job, working with jobs, and working with job templates.
What is a Job?
A job is a field task you perform, such as spraying, tilling, or harvesting. A job is
automatically assigned a job number by Outback MAX.
Before You Start A Job
Before you start a job you must perform the following:
•
Verify you have a GPS signal
On the Indicator tab in the upper right of the
touchscreen verify the satellite indicator is
green or orange.
–
If the satellite indicator is green or
orange then the Jobs button on the
Menu Options panel is enabled (you can
start and work with jobs)
–
If the satellite indicator is red then the
Jobs button on the Menu Options panel
is disabled (you cannot start and work
with jobs)
See “Indicator Tab” on page 9 for GPS signal
information.
•
Add a vehicle (have at least one vehicle in
Outback MAX) - see “Adding a New Vehicle”
on page 53 for more information
•
Add an implement (have at least one
implement in Outback MAX) - see “Adding an
Implement” on page 60 for more information
Starting a New Job
See “Before You Start A Job” on page 68 for information on what you need to do
before staring a job.
When you start a job Outback MAX automatically creates a job number for the job.
This job number appears on the expanded Indicator tab (see “Indicator Tab” on
page 9 for details on what information the Indicator tab displays).
Note: Starting a new job automatically closed the current job.
Outback MAX User Guide
68
PN 875-0325-000 Rev A1
Chapter 4: Jobs and Job Templates
To start a job:
1.
Press Menu > Jobs > New Job. The New Job panel
appears.
The Client, Farm, Field, and Crop fields are optional. If
you do not enter values for these fields Outback MAX
will assign default values.
Note: It is recommended that Outback ConnX Users
assign values to these fields.
2.
Enter a client, farm, field, and crop.
You enter each of these items in similar steps. The
following steps (a through c) illustrate entering a new
client.
3.
a.
Press Client to display the Select Client panel.
b.
Press New Client to display the Enter New Client
window.
c.
Enter a name and press Done. The new client
name appears on the Client button.
d.
Repeat steps a through c to enter a farm, a field,
and a crop.
Press Begin and then press Close. The panels close and the new job is
started. The Path Planning and Apply buttons are now active and the newly
created job number appears on the Indicator tab.
Loading a Previous Job
When you load a previous job you can display all jobs available or you can filter by
Client, Farm, and/or Field to narrow the list of jobs displayed.
Note: Loading a previous job automatically closed the current job.
1.
Press Menu > Jobs > Previous Jobs. The Previous
Jobs panel appears.
2.
Display the desired list of jobs by filtering the
following:
3.
a.
Press Client and select a client option on the
Select Client panel. The selected option appears
on the Client button.
b.
Press Farm and select a farm option on the Select
Farm panel. The selected option appears on the
Farm button.
c.
Press Field and select a field option on the Select
Field panel. The selected option appears on the
Field button.
Press the up/down scroll buttons to move the list up or
down until you see the desired job.
Outback MAX User Guide
69
PN 875-0325-000 Rev A1
Chapter 4: Jobs and Job Templates
4.
Press the desired job. The panels close and a Loading Job status message
appears (as shown below).
When the job finishes loading information associated with the job (such as
swath lines) appears on the map screen and the job number appears on the
Indicator tab.
Continuing a Job
You can quickly continue the most recent job without having to search for that job
from a list of jobs.
You can only continue a job if you
have no jobs loaded. When you
have a job loaded the top button on
the Jobs panel is Current Job. When
you have no jobs loaded the top
button on the Jobs panel is Continue
Job (see Jobs panel at right).
To continue a job:
•
Press Menu > Jobs >
Continue Job. The most
recent job is loaded (the
job number appears on the
Indicator tab).
Importing a Job
You must have a USB flash drive plugged into one of the USB
ports to import a job; otherwise, the functionality is disabled (the
Import Jobs button noted below is not available).
The flash drive must contain an 'S3Jobs' folder at the root level
of the drive and all job files must be in this folder. For example, if
your USB flash drive is drive M on your PC then your job files
should be in the M:\S3Jobs folder.
To import a job:
1.
Press Menu > Jobs > Import Jobs. The Import Jobs
panel appears (shown at right).
2.
Use the up/down scroll buttons to scroll through the list
of jobs and then press to select the job(s) you want to
import. If you want to import all jobs press Select All.
3.
Press Import. The panels close and an Importing Jobs
status message appears and then closes when the
import is completed.
Note: Once you import a job it will appear in the Previous Jobs
list (see “Loading a Previous Job” on page 69).
Outback MAX User Guide
70
PN 875-0325-000 Rev A1
Chapter 4: Jobs and Job Templates
Exporting a Job
You can export two types of job files: job log files and job template files.
•
You must have a USB flash drive plugged into one of
the USB ports to export a job; otherwise, the
functionality is disabled (the Export Jobs button noted
below is not available).
•
When you export a job to a USB flash drive Outback
MAX creates a 'jobs' folder on flash drive and copies
the text file (.Log for job logs) and/or template (.tem for
job templates) to that folder. For example, if you export
job number 12041101 to a flash drive it will appear as
follows: 12041101.Log.
•
You need to select “USB” from the drop-down (at the
top of the panel) if ConnX is connected.
You cannot export the current job—that is, you cannot export a
job unless it has been closed. For example, you have three jobs
and one of the jobs is open (current). When you display the
Export Jobs panel the current job does not appear in the jobs list.
Note: You can export jobs to your Outback ConnX account. Refer
to the Outback ConnX Supplemental Release Notes for detailed
information on using Outback ConnX.
To export a job:
1.
Press Menu > Jobs > Export Jobs. The Export Jobs panel appears.
2.
Use the up/down scroll buttons to scroll through all the jobs files and then
press to select the job(s) you want to export. If you want to export all jobs
press Select All.
3.
Press Export. The panels close and an Exporting Jobs status message
appears and then closes when the export is completed.
Closing a Job
1.
Press Menu > Jobs > Close Job. The job closes.
2.
Press Back/Close repeatedly or press the Close arrows to close the panels
and return to the map.
Outback MAX User Guide
71
PN 875-0325-000 Rev A1
Chapter 4: Jobs and Job Templates
Deleting Jobs and Associated Items
Once you delete a job it is permanently removed from memory; you cannot retrieve a
deleted job.
You cannot delete the current job—that is, you cannot delete a job unless it has been
closed. For example, you have three jobs and one of the jobs is open (current). When
you display the Delete Jobs panel the current job does not appear in the jobs list.
You can also delete items associated with jobs—clients, crops, farms, and fields. You
cannot delete any of these items without first deleting all jobs associated with these
items.
To delete job or an item associated with a job:
1.
Press Menu > Jobs > Delete Items. The Delete Items
panel appears (top of panel shown at right).
2.
Press the button for the item you want to delete. The
Delete panel for that item type appears. For example,
press Delete Jobs to display the Delete Jobs panel
(below left) or press Delete Farms. to display the
Delete Farms panel (below right)
3.
Use the up/down scroll buttons to scroll through the list of that particular
item and then press to select the items you want to delete. If you want to
delete all items press Select All.
4.
Press Delete. The item is deleted and the panels close.
Outback MAX User Guide
72
PN 875-0325-000 Rev A1
Chapter 4: Jobs and Job Templates
Working with Job Templates
A job template allows you to reuse certain parameters of a job log file. For example, if
you have a job log file with a specific client, farm, or boundary and you want to reuse
that information for a different field you can save the original job log file as a
template. When you then start a new job with this new field you will already have the
client and farm information entered. Items that are stored in a template are include
and exclude boundaries, A=B lines, pivots, guidance around a boundary, markers/
flags, and client, farm, and field names.
Creating a Job Template
Similar to loading a previous job you can display all jobs
available or you can filter by Client, Farm, and/or Field to narrow
the list of jobs displayed.
You cannot create a job template from the current job—that is,
you cannot create a job template from a job unless that job is
closed. For example, you have three jobs and one of the jobs is
open (current). When you display the Create Template panel the
current job does not appear in the jobs list.
To create a job template:
1.
Press Menu > Jobs > Create Template. The Create
Template panel appears.
2.
Display the desired list of jobs by filtering the
following:
a.
Press Client and select a client option on the
Select Client panel. The selected option appears
on the Client button.
b.
Press Farm and select a farm option on the Select
Farm panel. The selected option appears on the
Farm button.
c.
Press Field and select a field option on the Select Field panel. The
selected option appears on the Field button.
3.
Press the up/down scroll buttons to move the list up or down until you see
the desired job.
4.
Press the desired job. The panels close and the template is created from the
selected job.
Outback MAX User Guide
73
PN 875-0325-000 Rev A1
Chapter 4: Jobs and Job Templates
Using a Job Template
Using a template starts a new job based on the job template you select.
1.
Press Menu > Jobs > Use Template. The Use
Template panel appears.
2.
Display the desired list of templates by filtering the
following:
a.
Press Client and select a client option on the
Select Client panel. The selected option appears
on the Client button.
b.
Press Farm and select a farm option on the Select
Farm panel. The selected option appears on the
Farm button.
c.
Press Field and select a field option on the Select
Field panel. The selected option appears on the
Field button.
3.
Press the up/down scroll buttons to move the list up or
down until you see the desired template.
4.
Press the desired template. The panels close and a new
job is started based on the selected template.
Outback MAX User Guide
74
PN 875-0325-000 Rev A1
Chapter 5: Working with Maps
Mapping Options
Map Settings
Outback MAX User Guide
75
PN 875-0325-000 Rev A1
Chapter 5: Working with Maps
Mapping Options
Mapping options refer to how
you display your vehicle and
field, the map images you overlay
on your field, markers (flags) you
can set on your field, applied
maps, and returning-to-point
guidance. The following sections
discuss each of these options.
You begin working with mapping
options by displaying the
Mapping Options panel. You
display this panel by pressing the
Mapping Options button on the
map screen (shown at right).
Figure 5-1: Displaying the Mapping Options
panel
Note: The Mapping Options panel includes the Return To Point button. See “Returning
to a Point” on page 96 for more information on this feature.
Map Views, Perspectives, and Positions
Map views, map perspectives, and vehicle positions work together to provide you
with different ways to view your vehicle and field. There are two map views (Vehicle
and Field), two map perspectives (Top Down and 3D), and three vehicle positions
(Low, Middle, and High). The map view determines whether the vehicle appears
stationary and the map moves or vice versa. The map perspective refers to the angle
at which you view the map. The vehicle position refers to vertical position of the
vehicle on the touchscreen. Table 5-1 provides more information on map views,
perspectives, and vehicle positions.
Table 5-1: Map views and perspectives
Map Option
Map View
Description
Vehicle
Use Vehicle view to “follow” the vehicle while work is in
progress. In this view the map moves while the vehicle
appears stationary on the screen. The vehicle is always
pointing ‘up’ toward the top of the screen and the field adjusts.
Field
In this view, the vehicle appears to move while the map
appears stationary on the screen. You can pan to a specific
area on the map by touching the screen and dragging the area
into view. The field is oriented with North at the top of the
screen and the vehicle points in its actual direction. For
example, if the vehicle is driving southwest then it will point
toward the bottom left of the screen.
Outback MAX User Guide
76
PN 875-0325-000 Rev A1
Chapter 5: Working with Maps
Table 5-1: Map views and perspectives (continued)
Map Option
Perspective
Vehicle
Position
Description
Top Down
Provides a bird’s eye view of the job
3D
Provides a three-dimensional view down the field in the
direction of travel
Low
Vehicle appears near bottom of screen
Middle
Vehicle appears in middle of screen
High
Vehicle appears near top of screen
When first using Outback MAX select different view/perspective combinations to
become more familiar with how they appear on the screen. You should also review
the following combinations:
•
Correct: Vehicle:Top Down
•
Correct: Vehicle:3D
•
Correct: Field:Top Down
•
Incorrect: Field:3D (If you are in Field:Top Down and you select 3D the Map
View automatically changes to Vehicle. Also, If you are in Vehicle:3D and you
select Field the Perspective automatically changes to Top Down).
Both Map Views display the vehicle's position on the field and direction of travel. The
Zoom + and Zoom - buttons are available in both views as well. See “Zooming In and
Out on the Map Screen” on page 12 for more information on zooming in and out on
the screen.
Outback MAX User Guide
77
PN 875-0325-000 Rev A1
Chapter 5: Working with Maps
The following examples illustrate different map/perspective combinations.
Vehicle / Top Down
Vehicle / 3D
Field / Top Down
Outback MAX User Guide
78
PN 875-0325-000 Rev A1
Chapter 5: Working with Maps
The screens below show the different vehicle positions (low, middle, and high):
Low
Middle
High
To set the map view:
1.
Press Mapping Options. The Mapping Options panel
appears. (shown at right).
2.
Press Map View and select either Vehicle or Field.
3.
Press Back/Close repeatedly or press the Close arrows
to close the panels and return to the map.
To set the map perspective:
1.
Press Mapping Options. The Mapping Options panel
appears. (shown at right).
2.
Press Perspective and select either Top Down or 3D.
3.
Press Back/Close repeatedly or press the Close arrows
to close the panels and return to the map.
Outback MAX User Guide
79
PN 875-0325-000 Rev A1
Chapter 5: Working with Maps
Map Layers
A map layer refers to a specific feature you can display on the
map screen—available map layers are map imagery, prescription
maps, and applied areas. You show or hide these features as well
as adjust the opacity (transparency) of imagery and prescription
maps via the Map Layers panel (shown at right).
Note: The Prescription and As Applied buttons only appear on
the Map Layers panel if you have the optional rate and section
control installed on your system and connected to Outback MAX.
For more information on selecting and working with imagery,
prescription maps, and applied areas:
•
See “Map Imagery” on page 85 of this chapter for more
information on map imagery
•
See “Using Prescription Maps” on page 130 for more
information on prescription maps
•
See “Rate Control and Section Control Overview” on
page 116 for more information on applied areas
The screens below provide an example of showing/hiding map imagery:
Hide imagery
Show imagery
To adjust map layer options:
1.
Press Mapping Options > Map Layers. The Map Layers panel appears
(see figure at top right of this page).
2.
Press Imagery, Prescription, or As Applied to show/hide those options,
where:
•
Check mark shows the feature
•
No check mark hides the feature
Outback MAX User Guide
80
PN 875-0325-000 Rev A1
Chapter 5: Working with Maps
3.
Press Imagery Opacity or Prescription Opacity to adjust the opacity
(transparency) of imagery or prescription maps. An opacity window appears
(Image Opacity window shown below).
4.
Drag the slider or press the left and right arrows to set the opacity level and
then press Close. The selected setting appears on the Opacity button.
5.
Press Back/Close repeatedly or press the Close arrows to close the panels
and return to the map.
Event Markers
An event marker refers to any item you want to mark in a field,
such as a pole, a rock, or any other obstacle. Markers appear as
flags on the screen with the following identifiers:
•
Color - by default each event marker type is a different
color, such as green for a tree or blue for water
•
Label - accompanying text that identifies the marker
type, such as ‘rock’ or ‘ditch’
In addition to dropping markers you can edit the preset markers
(label and/or color) to suit your needs.
Dropping a Marker
Dropping a marker refers to placing a marker in the desired location.
To drop a marker:
1.
Press Mapping Options > Event Markers > Drop Preset Markers. The
Drop Preset Markers panel appears (see figure at right).
2.
Press the desired marker. The marker appears as a flag on the map screen
with an incremented text label and color of the marker.
For example, if you drop a Pole marker (gold color) and this is the first
marker you dropped then a gold ‘Pole1’ marker appears on the map screen
Outback MAX User Guide
81
PN 875-0325-000 Rev A1
Chapter 5: Working with Maps
at that point. If you then drop another Pole marker then that marker is
named ‘Pole2’ (also gold).
3.
Repeat step 2 as necessary as you are driving.
4.
Press Back/Close repeatedly or press the Close arrows to close the panels
and return to the map.
Editing a Preset Marker
You can change both the label (text) and color of a marker to
change a marker or create a new marker. For example, if you
rarely use the Ditch (gray) marker but have a need for a Fence
marker, you can change the Ditch marker text to ‘Fence.’
Keep in mind that editing a preset marker does not affect any
markers you have already dropped.
To edit a marker:
1.
2.
3.
Press Mapping Options > Event Markers > Edit
Preset Markers. The Edit Preset Markers panel
appears (shown at right).
To update the marker text:
a.
Press the text part of the marker. The Enter Marker
Label window appears.
b.
Enter a name and then press Done.
To update the marker color:
a.
Press the color box on the right side of the marker.
The Select Marker window appears.
b.
Press a color.
4.
Press Save.
5.
Press Back/Close repeatedly or press the Close arrows to close the panels
and return to the map.
Outback MAX User Guide
82
PN 875-0325-000 Rev A1
Chapter 5: Working with Maps
Deleting a Marker from a Job
Deleting a marker from a job enables the you to delete an individual marker (such as
Pole2) from the current job. This lets you delete a marker if you have made a mistake.
Note: Once you delete a marker from a job it is permanently
removed from that job; you cannot retrieve a deleted marker.
To delete a marker from a job:
1.
Press Mapping Options > Event Markers > Delete
Marker. The Delete Marker panel appears (shown at
right) showing all the markers you have dropped.
2.
Press the up/down scroll buttons to move the list up or
down until you see the desired marker.
3.
Press the marker you want to delete. The marker is
deleted from the map screen and no longer appears on
the Delete Marker panel.
4.
Press Back/Close repeatedly or press the Close arrows
to close the panels and return to the map.
Applied Color Maps
Note: The Applied Color Map button only appears on the
Mapping Options panel if you have the optional rate and section
control installed on your system and connected to Outback MAX.
When you use section and rate control through Outback MAX the
area to which you apply material (such as seeds or fertilizer) is
displayed as a specific color.
This section describes how to change the rate and color for High
Rate and Low Rate. For more detailed information on using rate
and section control and using applied maps see “Rate Control
and Section Control Overview” on page 116.
To change the applied color:
1.
Press Mapping Options > Applied Color Maps. The
Applied Color Map panel appears (shown at right).
The panel shows a rate and color for High Rate and
Low Rate.
2.
3.
To change a rate:
a.
Press High Rate or Low Rate. The corresponding
rate panel appears (High Rate example shown below left).
b.
Enter a rate and press Done. The panel closes and the new rate
appears on the rate button.
To change a color:
a.
Press the color (far right section) of the High Rate or Low Rate button.
The Select Color window appears (shown below right).
Outback MAX User Guide
83
PN 875-0325-000 Rev A1
Chapter 5: Working with Maps
b.
Press a color. The window closes and the new color appears on the rate
button.
Outback MAX User Guide
84
PN 875-0325-000 Rev A1
Chapter 5: Working with Maps
Map Settings
You work with maps in various ways in Outback MAX. You enter map settings (such as
setting grid spacing and importing map imagery) via the Map Settings panel, while
you work with maps (such as dropping markers) via the Mapping Options panel.
Setting A=B (Guidance) Line Display
An A=B line is the basic guidance line you follow with Outback MAX; it provides a
regular pattern over an area by which to guide. There are three A=B line display
options available: Off, A=B, and Grid.
See “Setting Path Options” on page 92 for a more information on setting these
options.
Map Imagery
Map imagery refers to a GPS satellite image you overlay onto
your screen. For example, you may want to add an aerial photo of
your farm and surrounding area.
You can perform the following map imagery functions via the
Map Imagery panel (shown at right):
•
Import map imagery
•
Select map imagery
•
Delete map imagery
To display the Map Imagery panel:
•
Press Menu > Settings > Map Settings > Map
Imagery.
Importing Map Imagery
Before you can select map imagery to display on your screen you must first add it to
Outback MAX by importing it. You import map imagery using a USB flash drive (such
as the one included in your Outback MAX terminal kit).
Map imagery requires the following:
•
Map imagery consist of two files (a map set): a map image file (.png file) and
a configuration settings file (.ini file)
•
Both files must reside in the same folder
•
Each map set folder you want to import must reside in an ‘imagery’ folder
that resides at the root level of the USB flash drive
Example: You have an ‘image.png’ file and an ‘image.ini’ file. These two files make
up your map imagery set that you refer to as ‘LowerWest.’ To import this map imagery
you would do the following:
Outback MAX User Guide
85
PN 875-0325-000 Rev A1
Chapter 5: Working with Maps
1.
Create an imagery
folder on your USB
flash drive.
2.
Create a LowerWest
folder in the ‘imagery’
folder.
3.
Copy the image.png
and image.ini files to
the LowerWest folder.
To import map imagery:
1.
Insert a USB flash drive (containing the appropriate
map files) into the Outback MAX terminal. See the
previous section for information on adding map files to
your flash drive.
2.
Press Menu > Settings > Map Settings > Map
Imagery > Import Imagery. The Import Map Imagery
panel appears showing each map set on the flash drive
(see figure at right). You can view up to six map sets at
once in this panel; if there are more than six map sets
on the flash drive use the scroll arrows to view the
additional map sets.
3.
Press each map set you want to import (a check mark
appears in the box next to each selected map set) or
press Select All to select all the map sets on the flash
drive.
4.
Press Import.An ‘Importing Imagery’ progress
message appears (as shown below).
When the process is complete the map sets are added to Outback MAX.
5.
Press Back/Close repeatedly or press the Close arrows to close the panels
and return to the map.
Outback MAX User Guide
86
PN 875-0325-000 Rev A1
Chapter 5: Working with Maps
Selecting Map Imagery
Before you can select map imagery to add to your screen you
must first import the appropriate map files (see the preceding
section “Importing Map Imagery” for details).
To select map imagery:
1.
Press Menu > Settings > Map Settings > Map
Imagery > Select Imagery. The Select Map Imagery
panel appears (see figure at right).
2.
Press the map set you want to display (map set refers
to the two files that make up the set—the .png file and
the .ini file). A ‘Preparing Imagery’ progress message
appears (as shown below).
When the process is complete the selected map
imagery button turns green and the map imagery
appears onscreen.
3.
Press Back/Close repeatedly or press the Close arrows to close the panels
and return to the map.
Outback MAX User Guide
87
PN 875-0325-000 Rev A1
Chapter 5: Working with Maps
Deleting Map Imagery
Note: Once you delete map imagery it is permanently removed
from memory; you cannot retrieve deleted map imagery.
To delete map imagery:
1.
Press Menu > Settings > Map Settings > Map
Imagery > Delete Imagery. The Delete Imagery panel
appears.
2.
Press each map set you want to delete (a check mark
appears in the box next to each selected map set) or
press Select All to select all the map sets.
3.
Press Delete. The map set is deleted and is removed
from the Delete Imagery panel.
4.
Press Back/Close repeatedly or press the Close arrows
to close the panels and return to the map.
Outback MAX User Guide
88
PN 875-0325-000 Rev A1
Chapter 6: Path Planning and Boundaries
Path Planning Basics
Setting Paths
Adjusting Paths
Contour Lock
eTurns
Setting Boundaries
Outback MAX User Guide
89
PN 875-0325-000 Rev A1
Chapter 6: Path Planning
This chapter provides information on path planning, which encompasses setting up
your initial pass lines (such as straight A=B lines), driving along contours, and using
eTurns to make automated turns.
Path Planning Basics
This chapter provides alternate steps depending on whether you have automated
steering (such as eDriveX) installed. If no automated steering is installed you will
manually perform steps that automated steering does for you.
If using automated steering, you cannot create any new guidance lines or recall
previous guidance lines while engaged on a guideline. You must disengage steering
before setting any new or previous guidance lines.
You cannot automatically engage any guideline. If you are already on a guideline, you
can manually disengage the guideline by pressing the Steering button, or you can
steer off of the guideline, at which point the automatic steering disengages. You then
must manually press the Steering button to reengage the steering on a guideline.
There are three available guidance modes: Straight guidance
mode, Pivot guidance mode, and Contour guidance mode. You
can switch to any guidance mode at any time as long as you are
not engaged on a guideline. The guidance mode buttons (on the
Path Planning panel—top of panel shown at right) are dimmed
and not available while engaged on a guideline.
Setting Paths
Note: You must have an active job before using path planning; otherwise, the Path
Planning buttons (on the map screen and on the Menu Options panel) are disabled.
A path in Outback MAX is a line you follow while driving your vehicle. There are three
types of paths in Outback MAX:
•
Straight path
–
A=B line—an imaginary line that passes through two points that you set
(Point A and Point B) to define the first pass
–
A + Direction line - where you define a beginning point (Point A) and
enter a heading angle
•
Pivot (circular) path
•
Contour (free-form) path
Outback MAX User Guide
90
PN 875-0325-000 Rev A1
Chapter 6: Path Planning
You begin working with paths by displaying the Path Planning panel (shown below).
There are two ways to display this panel:
•
On the map screen press the Path Planning button
•
On the map screen press the Menu button and then on the Menu Options
panel press the Pass Planning button
Figure 6-1: Displaying the Path Planning panel
Straight Paths Overview
The following steps illustrate how you work with straight paths (Straight guidance
mode) in Outback MAX, (depending on if you have automated steering installed).
Manual Steering
Automated Steering
1.
Create straight line (A=B line or A+
Direction line).
1.
2.
Outback MAX starts straight guidance.
2.
Outback MAX starts straight guidance.
3.
Steer along guidance line using screen
and light bar.
3.
Engage automated steering.
4.
Outback MAX automatically steers you
along guidance line.
Create straight line (A=B line or A+
Direction line).
Once an A=B line or A + Direction line is established Outback MAX provides adjacent
guidance lines so all other passes are perfectly spaced on both sides of the first pass.
When working with A=B lines you can also perform the following:
•
Return to a previously recorded point
•
Define a new A=B line
•
Use a previously defined A=B line
•
Use the previous A=B line
Outback MAX User Guide
91
PN 875-0325-000 Rev A1
Chapter 6: Path Planning
Setting Path Options
Before working with straight paths, verify the two straight path settings: A=B Lines
and A=B Grid Spacing. There are three A=B Lines display options available: On, Grid,
and Off (see Figure 6-2 on page 92). Grid lines are parallel guidance lines that are
perpendicular to the A=B line (and its parallel guidance lines)...thus forming a grid.
When Grid is selected the distance between the grid lines is based on the value set in
the A=B Grid Spacing field (see “Setting the A=B Grid Spacing” on page 93 for more
information).
A=B Lines = On (at left)
Guidance lines are displayed
parallel to and on both sides of
A=B line
A=B Lines = Grid (above)
Guidance lines are displayed
parallel to and on both sides of A=B
line and perpendicular grid lines are
displayed with user-defined spacing
A=B Lines = Off (at left)
No guidance lines are displayed
Figure 6-2: A=B Lines: On, Grid, and Off
Outback MAX User Guide
92
PN 875-0325-000 Rev A1
Chapter 6: Path Planning
Setting the A=B Lines Option
This option allows you to display guidance lines, guidance lines
with grid lines, or no guidance or grid lines for A=B lines and A +
Direction lines.
1.
Press Menu > Settings > Map Settings. The Map
Settings panel appears (top of panel shown at right).
2.
Press A=B Lines to cycle through the settings (On,
Grid, Off) until you display the desired setting.
3.
Press Back/Close repeatedly or press the Close arrows
to close the panels and return to the map.
Setting the A=B Grid Spacing
This option allows you to set the distance between the grid
lines on the map for A=B lines and A + Direction lines.
1.
Press Menu > Settings > Map Settings. The
Map Settings panel appears.
2.
Press A=B Grid Spacing. The A=B Grid Spacing
panel appears (shown at right).
3.
•
If you set your system to display U.S. units
then there are two data entry fields: one for
feet and one for inches.
•
If you set your system to display Metric units
then there is only one data entry field for
meters.
For U.S. units: The feet field is selected by default.
Enter a value for feet, press the inches field, and
then enter a value for inches.
For Metric units: Enter a value for meters.
4.
Press Done. The new value appears on the A=B
Grid Spacing button.
5.
Press Back/Close repeatedly or press the Close arrows to close the panels
and return to the map.
Setting Straight Paths
This section describes how to:
•
Set an A=B line
•
Set an A + Direction line
•
Return to a previously recorded point
•
Define a new A=B line
•
Use a previously defined A=B line
•
Use the previous (most recent) A=B line
Outback MAX User Guide
93
PN 875-0325-000 Rev A1
Chapter 6: Path Planning
Setting an A=B Line
1.
Position the vehicle at the beginning of the first pass.
2.
Press Path Planning > Straight > A=B. The A=B
panel appears (top of panel shown at right).
3.
Press Point A. A1 appears on the map (shown below)
at the location of the vehicle. Point A button is dimmed
and Point B button is active.
4.
Drive the first pass.
5.
At the end of the pass, press Point B (on the A=B
panel) to mark Point B. The panels close, B1 appears on the map (shown
below) at the point where you pressed Point B, and swath lines appear on
the map.
Automated steering installed: Outback MAX automatically
begins straight guidance and, after you press the Steering
button on the map screen to engage steering, steers your
vehicle along the A=B line. The Steering button must be in a state of “ready
to engage” (shown at right) before you press it to engage automated
steering.
No automated steering installed: Drive the first pass using the lightbar
(internal or external) to help you drive along the guidance line.
6.
At the end of the current pass turn around and steer your vehicle to the next
guidance line.
Automated steering installed: Press the Steering button to engage steering.
Outback MAX automatically steers your vehicle along the A=B line.
No automated steering installed: Drive the pass using the lightbar (internal
or external) to help you drive along the guidance line.
Note: If you are using eTurns to have Outback MAX automatically turn your vehicle for
you and start the next pass see “eTurns” on page 105.
Outback MAX User Guide
94
PN 875-0325-000 Rev A1
Chapter 6: Path Planning
Setting an A + Direction Line
1.
Position the vehicle at the beginning of the first pass.
2.
Press Path Planning > Straight > A + Direction.
The A + Direction panel appears (top of panel shown at
right).
3.
Press Point A. A1 appears on the map at the location
of the vehicle and the Enter Path Direction data entry
window appears (shown at right).
4.
Enter an angle and press Done.
The A + Direction guidance line is applied and appears
on the map and the Heading value on the Indicator tab
shows the heading value you entered (shown below).
Automated steering installed: Outback MAX automatically
begins straight guidance and, after you press the Steering
button on the map screen to engage steering, steers your
vehicle along the A + Direction line. The Steering button must be in a state of
“ready to engage” (shown at right) before you press it to engage automated
steering.
No automated steering installed: Drive the first pass using the lightbar
(internal or external) to help you drive along the guidance line.
5.
At the end of the current pass turn around and steer your vehicle to the next
guidance line.
Automated steering installed: Press the Steering button to engage steering.
Outback MAX automatically steers your vehicle along the A + Direction line.
No automated steering installed: Drive the pass using the lightbar (internal
or external) to help you drive along the guidance line.
Note: If you are using eTurns to have Outback MAX automatically turn your vehicle for
you and start the next pass see “eTurns” on page 105.
Outback MAX User Guide
95
PN 875-0325-000 Rev A1
Chapter 6: Path Planning
Returning to a Point
Outback MAX can provide guidance to an existing point—the Last Apply point, any A
or B point, or any dropped marker in the current job. Keep in mind that this feature
does not automatically take you to this point—it only provides guidance to this point
in the form of distance to the point and the bearing.
To return to a point:
1.
Press Mapping Options > Return To Point. The
Return To Point panel appears.
2.
Press the up/down scroll buttons to move the list up or
down until you see the desired point.
3.
Press the point. The panels close and a Return To Point
window appears showing the distance to the point and
the bearing (see left figure below). As you get closer to
the return point the distance and bearing reflect this (see
right figure below.
4.
Press Stop Guidance to stop guidance to the point.
Defining a New A=B Line
You can set a new A=B line at any point during the job.
1.
Press Path Planning > Straight > A=B. The A=B panel appears.
2.
Press Point A. A2 appears on the map at the location of the vehicle. The
Point A button is dimmed and Point B button is active.
3.
Drive the first pass.
4.
At the end of the pass, press Point B to mark Point B. B2 appears on the
map at the point where you press Point B and swath lines appear on the
map.
Using a Previously Defined A=B Line
Outback MAX stores all straight paths you create. If necessary, you can use a
previously defined A=B line for guidance.
1.
Press Path Planning > Previous Paths. The Select a
Previous Path panel appears (top of panel shown at
right).
2.
Press the desired previous path button. The selected
path is set as the guidance line.
3.
Press Back/Close repeatedly or press the Close arrows
to return to the map.
Outback MAX User Guide
96
PN 875-0325-000 Rev A1
Chapter 6: Path Planning
Using the Previous A=B Line
Outback MAX stores all straight paths you create. If necessary, you can use the
previous (most recent) defined A=B line for guidance.
1.
Press Path Planning > Straight > Last A=B. The previous A=B line is set
as the guidance line.
2.
Press Back/Close repeatedly or press the Close arrows to return to the map.
Pivot Paths
Pivot guidance is similar to straight guidance except that you define the circumference
of a circle rather than a straight line with A and B points. To do so, drive as much of
the circumference of a representative circle as possible. The more of the
circumference you drive, the better the accuracy.
Note: A job must be active for you to set paths; otherwise, the Path Planning button on
the map and on the Menu Options panel are dimmed (unavailable).
Setting the Pivot Path
1.
Position the vehicle at the beginning of the first pass.
2.
Press Path Planning > Pivot. The Pivot panel appears (left panel in figure
below).
3.
Press Start Pivot and begin driving the circle. “Logging pivot data...”
appears below the Start Pivot button (center panel in figure below). When
Outback MAX has collected enough data to calculate the circumference of
the circle being driven “Pivot OK” appears below the Start Pivot button and
the Finish Pivot button is active (right panel in figure below).
Outback MAX User Guide
97
PN 875-0325-000 Rev A1
Chapter 6: Path Planning
4.
At the end of the circle press Finish Pivot to end the pivot log. The panels
close and the pivot line (circle) appears on the map.
When traveling on or near a pivot guideline, the nearest guideline is shown
on the map as a red circular line (similar to the guideline used in other
guidance modes.)
Automated steering installed: Outback MAX automatically
begins pivot guidance and, after you press the Steering button
on the map screen to engage steering, steers your vehicle
along the pivot line. The Steering button must be in a state of “ready to
engage” (shown at right) before you press it to engage automated steering.
No automated steering installed: Turn the steering wheel in the direction
indicated by the pivot line to remain centered on the pivot line and drive the
first circle using the lightbar (internal or external) to help you drive along the
guidance line.
5.
When you have finished one circle move to either the right or left of the
original circle and steer your vehicle to the next guidance line.
Automated steering installed: Press the Steering button to engage steering.
Outback MAX automatically steers your vehicle along the circle.
No automated steering installed: Drive the circle using the lightbar (internal
or external) to help you drive along the guidance line.
Contour Paths
Use Contour guidance mode to follow any previous applied paths/area (straight, pivot,
or free form). Contour mode differs from Straight and Pivot guidance modes:
•
Straight and Pivot guidance modes follow predefined guidelines
•
Contour guidance mode follows previously defined paths
Outback MAX User Guide
98
PN 875-0325-000 Rev A1
Chapter 6: Path Planning
In Contour guidance mode Outback MAX is either logging an initial pass or guiding
from a previous pass. You generally use Contour guidance mode for working with
borders, turn areas, and following the contours created by obstacles.
Contour guidance provides a guidance line along any previously applied path. You
must steer your vehicle within an implement’s width of the guidance line, at which
point the Steering button becomes enabled (ready to engage). You can then press the
Steering button and the Outback MAX engages on the guidance line.
To use Contour guidance mode:
1.
Press Path Planning > Contour. The panels close and Contour guidance
mode is enabled.
2.
Press Apply (set it to On).
3.
Make your initial pass.
4.
Press Apply (set it to Off).
5.
Turn around to follow the previous pass.
Outback MAX User Guide
99
PN 875-0325-000 Rev A1
Chapter 6: Path Planning
As you get near the original pass, a red line appears indicating the guideline
you are to follow, and the lightbar and Cross Track error indicator both
indicate the direction you need to turn to follow the path.
Guiding on Subsequent Passes
Any time your vehicle is within a half swath width of a previously logged pass, and the
angle of Attack is within limits, you can engage Outback MAX automated steering. See
“Steering Attack” on page 50 for more information on steering attack.
Making a New First Pass
Occasionally a situation arises in the middle of a job when you need to make a pass
that follows a different path than the previous passes. Simply drive the new path.
Once it becomes obvious that you are defining a new pass, Outback MAX goes into
logging pass mode. Subsequent passes are guided from this newly defined pass.
Changing Guidance Modes
If you want to switch from Contour guidance mode to either Straight guidance mode
or Pivot guidance mode:
•
Press Path Planning > Straight > Last A=B to switch to Straight
guidance mode.
•
Press Path Planning > Pivot > Last Pivot to switch to Pivot guidance
mode.
Adjusting Paths
You can adjust both a straight guidance path (A=B line or A + Direction line) and a
pivot path. While receiving guidance in either of these modes you can adjust the
guidance line on-the-go (without interrupting normal guidance operation). This
feature is especially useful to correct for DGPS drift over time.
•
Path Offset - move the guidance line up to 1/2 implement width relative to
the original guideline.
•
Snap Here - move (snap) the guidance line to the vehicle’s current location
parallel to the original guidance line. This feature is best used to insert a
Outback MAX User Guide
100
PN 875-0325-000 Rev A1
Chapter 6: Path Planning
required gap between consecutive parallel swaths (for example, a
conservation barrier strip).
The amount of the snap from the original guideline is displayed in the Path
Offset amount. For example, if you steer off the guideline by 3 ft 6 in and
press Snap Here, the Path Offset displays 3 ft 6 in. Setting the Path Offset
back to zero returns you to the original guideline.
•
Shift - move the guidance line left or right (up to 1/2 implement width
relative to the previous shift) in small increments rather than re-establishing
a new guidance line.
The sum of all shifts is displayed in the Path Offset amount. For example,
three shifts of 2 ft to the right are displayed as a Path Offset of 6 ft to the
right. Setting the Path Offset back to zero returns you to the original
guideline.
•
Update B - If you need to correct Point B in an A=B line, you can adjust the
A=B line by pressing the Update B button on the initial pass.
Note: The Path Adjustment panel is the only place where you can adjust the
guidelines and maintain engaged steering. Any other guideline change requires
disengaging the steering. All path adjustments are removed when you close a job and
the original guidelines are restored when you continue the job.
Entering a Path (Guidance Line) Offset
While in either Straight guidance mode or Pivot guidance
mode you can enter a path offset to move a guidance line by
any amount.
1.
Press Path Planning > Path Adjustment > Path
Offset. The Path Offset panel appears (shown at
right).
2.
Press the appropriate distance button (ft and/or in
for U.S. units; m for metric units), use the keypad to
enter a value, and then under Choose offset
direction press either the left arrow or the right
arrow to shift (nudge) the guidance line left or right
relative to the direction of travel.
3.
Press Done. The Path Offset panel closes and the
guidance line shifts on the map by the selected
amount and direction.
Note: If you enter a path offset outside the
allowable range (between zero and half the current
implement width) and then press Done an error
message appears indicating this; press Ok to close
the message and then use an offset within the allowable range.
Outback MAX User Guide
101
PN 875-0325-000 Rev A1
Chapter 6: Path Planning
The screens below show a vehicle before entering a path offset (left screen
below) and after entering a path offset (right screen below) to the right
(pressing the right arrow button) by the amount in the Shift panel.
Before offset
4.
After offset
Press Back/Close repeatedly or press the Close arrows to return to the map.
Snapping a Guidance Line to the Current Location
While in either Straight guidance mode or Pivot guidance mode
you can ‘snap’ the guidance line to the vehicle’s current location
parallel to the original guidance line.
1.
Press Path Planning > Path Adjustment. The Path
Adjustment panel appears (top of panel shown at right).
2.
Press Snap Here. The panels close and the nearest
guideline is aligned with the current vehicle position.
The screens below show a vehicle before snapping a
guidance line (left screen) and after snapping a
guidance line (right screen) to the vehicle’s current position.
Before snap
Outback MAX User Guide
After snap
102
PN 875-0325-000 Rev A1
Chapter 6: Path Planning
Shifting a Guidance Line
While in either Straight guidance mode or Pivot guidance
mode you can use the shift function to have Outback MAX
move the guideline position by the designated distance and
the current pass number.
1.
Press Path Planning > Path Adjustment. The
Path Adjustment panel appears (top of panel shown
at right).
2.
Press Shift. The Shift panel appears.
3.
Press the appropriate distance button (ft and/or in
for U.S. units; m for metric units), use the keypad to
enter a value, and then press either the Shift Left
arrow or the Shift Right arrow to shift (nudge) the
guidance line left or right relative to the direction of
travel.
As soon as you press an arrow button the guidance
line shifts on the map by the selected amount and
direction and the panels close.
The screens below show a vehicle before shifting
the guidance line (left screen below) and after shifting the guidance line
(right screen below) to the right (pressing the right arrow button) by the
amount in the Shift panel.
Before shift
After shift
Updating Point B
While in either Straight guidance mode or Pivot guidance mode use the following
steps to use your current location as the new Point B. You can only update B within a
half swath width of the original A=B line. Once your vehicle moves more than 1/2
swath width from the primary guideline and the primary guideline shifts right or left,
then the Update B button is no longer available (dimmed).
1.
Press Path Planning > Path Adjustment > Update B. Outback MAX sets
your current location as the new Point B.
2.
Press Back/Close repeatedly or press the Close arrows to return to the map.
Outback MAX User Guide
103
PN 875-0325-000 Rev A1
Chapter 6: Path Planning
Contour Lock
When using Contour guidance Outback MAX constantly searches for the nearest
swath from which to provide guidance. Contour Lock™ enables you to stop Outback
MAX’s search for the closest swath. In the Contour Lock mode, guidance:
•
Remains locked on its current swath until you manually unlock it
•
Automatically unlocks if you drive offline by 2 m (or 10% of the swath width)
and begins searching for the closest swath again
Figure 6-3: Contour Lock mode
Contour Lock is helpful when you use guidance in close proximity to multiple swaths,
such as when working with “point-rows.” In these situations without Contour Lock,
guidance could jump around and guide you off on the wrong path whenever other
swaths come close to your current one. With Contour Lock, you can decide if you want
to stay on the current swath all the way until the end of the field or let Outback MAX
continue searching for the closest swath.
Note: When not in Contour Lock mode and when searching for the closest path,
Outback MAX only picks up a different path if it is at a small angle to the path you are
on. For example, if you cross a path at right angles, Outback MAX will not ‘find’ the
crossed path and switch guidance to it. Only paths at a small angle (close to parallel)
to the path you are on may be selected.
Complete the following steps to work with Contour Lock:
1.
In Contour guidance mode when on or approaching the required guidance
contour press the Contour Lock button.
This puts you in Contour Lock mode (lock engaged) and the Contour Lock
buttons shows a locked padlock. Outback MAX stops searching for, and
providing guidance on, passes for other defined contours (no matter how
close). If you move more than 2 m off the current guidance line, Contour
Lock, while still engaged, becomes inactive and the padlock appears
unlocked. Outback MAX resumes its contour search and locks again when
you are within 2 m of any guidance line.
Outback MAX User Guide
104
PN 875-0325-000 Rev A1
Chapter 6: Path Planning
2.
To deactivate Contour Lock, press the Contour Lock button. The button turns
gray/blue with the padlock unlocked. Contour Lock can be active (padlock
locked) or inactive (padlock unlocked) when you disengage it.
eTurns
Note: eTurns is a subscription-only eDriveX feature—you must have eDriveX installed
on your system and have a valid eTurns subscription to use eTurns. Contact your local
dealer or Outback Guidance Customer Service to obtain an eTurns subscription. To
enter your eTurns authorization code see “Viewing and Entering Subscription
Information” on page 20. If you do not have a valid eTurns subscription and you press
the eTurns button the following message appears.
eTurns enables the vehicle to automatically execute a turn at the end of a swath (you
determine which swath to turn onto).
The key points about eTurns are:
•
eTurns are only applicable to straight line A=B operations (A=B lines and A +
Direction lines)
•
The eTurns button (bottom right of screen) is not active until you have
calibrated eTurns
•
eTurns calibration is required for each implement
•
You can operate with a fixed turn configuration or change the configuration
in real time for individual turns
•
eTurns guides the vehicle turning path, not the implement’s turning path
•
The headland prompt, if used, is based on the vehicle position, not the
implement’s position
Note: Hemisphere GPS recommends you calibrate your autosteering system before
you calibrate eTurns (see “Vehicle Calibration” on page 45). Also, eTurns calibration is
required for each implement (unless implements are identical - see Warning in the
next section).
Calibrating eTurns
Because there is potential for damage to machinery if you use a larger
implement with the calibration data recorded for a smaller implement, you need to
recalibrate eTurns for different implements. When making the left and right turns
during eTurns calibration, make the minimum radius turns possible for the current
implement.
Outback MAX User Guide
105
PN 875-0325-000 Rev A1
Chapter 6: Path Planning
To calibrate eTurns:
1.
Create or load the desired vehicle and implement (see “Working with
Vehicles” on page 52 and “Working with Implements” on page 59 for
information).
2.
Press Menu > Implement Profiles. The Edit
Implement Profiles panel appears.
Note: You can also calibrate eTurns while in the process
of creating an implement—in this case you will still be
on the New Implement Profile screen.
3.
Press eTurns Calibration. The first eTurns Calibration
panel (Step 1 of 5) appears.
Note: For this step and subsequent steps refer to
Figure 6-4 below.
4.
Maintaining the recommended speed, steer to the left
at the minimum radius for the current implement
(tightest possible or practical turn for the current
implement) then press Next. The next panel (Step
2 of 5) appears, indicating calibration is in progress.
When calibration is complete the next calibration step
screen (Step 3 of 5) appears.
5.
Maintaining the recommended speed, steer to the right
at the minimum radius for the current implement
(tightest possible or practical turn for the current
implement) then press Next. The next panel (Step 4 of 5) appears, indicating
calibration is in progress. When calibration is complete the final calibration
step screen (Step 5 of 5) appears, displaying the minimum turning circles of
the vehicle on left and right lock.
6.
Press Done. The panel closes and you are returned to the Edit Implement
Profile panel.
7.
Press Back/Close repeatedly or press the Close arrows to return to the map.
Figure 6-4: eTurns calibration steps
Outback MAX User Guide
106
PN 875-0325-000 Rev A1
Chapter 6: Path Planning
Configuring and Making eTurns
After you have completed eTurns calibration you can configure
eTurns using the eTurns Setup panel (shown at right).
You can change any of these settings in real time to manage turns
individually or leave them as is for each eTurn.
Note: You must be engaged on an A=B line before using eTurns.
If you press the eTurns buttons while not engaged on an A=B line
the message below appears.
Table 6-1 describes each of the eTurns setup parameters.
Table 6-1: eTurns setup parameters
Parameter
Description
Max Speed
Speed at which you want your vehicle to execute the eTurn. The Speed
and the Headland Distance combine to determine the linear distance
from the headland that the prompt appears. If, during an eTurn, you
exceed the speed you set (here or on eTurns Control panel), automated
steering (so the eTurn also) will disengage.
Next Pass
Order in which rows are worked (or ‘steered to’ - also known as the
‘swath pattern’). Press the up arrow or down arrow displays the
following options:
•
Current Pass - automatically turn back onto the current row.
•
Next Pass - automatically turn onto the adjacent row
•
Skip Rows: # - skip the number of adjacent rows specified (for
example, for Skip Rows: 1, the vehicle will automatically turn
on the pattern 1, 3, 5, 7 etc.)
Turn Direction
Direction to turn (left or right)
Headland
Prompt
When selected (check mark appears in box) the headland prompt
appears on the map screen during operations. Headland is the end of
the current swath, a defined perimeter or a previously worked swath
(approached at any angle).
Headland
Distance
Distance at which the headland prompt appears on the map screen
during operations. The distance is specified as a time (in seconds)
because it is speed dependent.
Outback MAX User Guide
107
PN 875-0325-000 Rev A1
Chapter 6: Path Planning
To configure and make eTurns:
1.
When eDriveX is ready to engage
press Engage. The Engage
button turns from blue to green
and the eTurns button turns from
gray to blue (see figure at right).
Engage
2.
3.
eTurns
Press eTurns. The eTurns Setup
panel appears. The map shows
the current settings. Note the
following in the figure at right:
•
eTurn path appears
on the map
•
eTurn direction on
map corresponds to
green (selected) right
arrow under Turn
Direction
Make your selections:
a.
Press the Max Speed
down arrow (decrease
speed) or up arrow
(increase speed).
b.
Press the Next Pass down
arrow or up arrow. The
down arrow increases pass
numbers to the left and the up arrow increases pass numbers to the
right. As you press the buttons the eTurn path on the map changes.
Skip 1 pass left
Skip 2 passes left
c.
Press the Turn Direction left arrow (eTurn to left) or right arrow (eTurn
to right), As you press the button the eTurn path changes to either side
of the of the current swath.
d.
Press Headland Prompt to select it (check mark appears in box) or
press again to deselect it (clear check mark).
Outback MAX User Guide
108
PN 875-0325-000 Rev A1
Chapter 6: Path Planning
4.
e.
If you will use a headland prompt then press
Headland Distance to display the Headland
Distance data entry window (shown at right).
Enter a value in this window and press Done.
f.
Press Skip Setup to have Outback MAX only
display the eTurns Control panel (when
possible) when making eTurns (see “eTurns
Settings and Resulting Actions” on page 111
for more information making eTurns and the
Skip Setup parameter in particular).
Press Ok. The eTurns Control panel appears.
Note: You can also press Back to keep your settings
but complete an eTurn at a later time.
Predicted Turns and Actual Turns
You use the eTurns Control panel (shown at right) to initiate
an eTurn. You display this panel in two ways:
•
Pressing Ok on the eTurns Setup panel
•
Pressing the eTurns button in the lower right corner of
the map screen (only if you previously selected Skip
Setup on the eTurns Setup panel)
A predicted turn is what you see on the screen during setup
before you make the turn and the turn path is color code blue.
When you make the turn (pressing Go on the eTurns Control
panel) the panels close and the screen shows the actual path of
the turn in red (and the turn begins).
Predicted turn
(blue)
Actual turn
(red)
Outback MAX User Guide
109
PN 875-0325-000 Rev A1
Chapter 6: Path Planning
eTurns and Speed
The predicted and actual turn paths of an eTurn are determined by the speed at which
you set the turn to be made (and the curvature calibration for the tractor/implement
combination). Figure 6-5 show how the speed determines the turn path.
Slow speed (2 mph)
Fast speed (10 mph)
Figure 6-5: eTurns speed comparison
Note: If you exceed the set speed during the eTurn (beyond a small buffer value),
automated steering disengages. This applies to the speed you set on the eTurns Setup
panel or the speed you set (override) in the eTurns Control panel.
Outback MAX User Guide
110
PN 875-0325-000 Rev A1
Chapter 6: Path Planning
eTurns Settings and Resulting Actions
Exactly how you activate an eTurn depends on how you set up eTurns. Table 6-2
details the actions you take for each configuration. In all cases, the predicted turn path
(green) is shown until you press Go in the eTurns Control panel. The predicted turn
path travels with you until you press Go.
Table 6-2: eTurns configuration settings and resulting actions
eTurns Settings
Result
Skip Setup Selected
Headland Prompt Not Selected
1.
Press the eTurns button on the map screen.
2.
Press Go on the eTurns Control panel
Skip Setup Selected
Headland Prompt Selected
1.
Press Go on the eTurns Control panel.
2.
On subsequent passes the eTurns Control panel
will automatically appear based on the Headland
Prompt time setting.
Skip Setup Not Selected
Headland Prompt Not Selected
1.
Press the eTurns button on the map screen.
2.
Adjust the setup parameters on the eTurns Setup
panel and press OK.
3.
Press Go on the eTurns Control panel
1.
Adjust the setup parameters on the eTurns Setup
panel and press OK.
2.
Press Go on the eTurns Control panel.
3.
On subsequent passes the eTurns Control panel
will automatically appear based on the Headland
Prompt time setting.
Skip Setup Not Selected
Headland Prompt Selected
Note: If you are in Skip Setup mode (previously selected Skip Setup) and want to
adjust your eTurns configuration settings press Menu > Settings> eTurns Setup.
Outback MAX User Guide
111
PN 875-0325-000 Rev A1
Chapter 6: Path Planning
Setting Boundaries
Normally, you complete the first operational pass to set and record the boundary of
the field. The Boundary feature enables you to record field perimeters and save them
as templates for future operations—allowing boundary information to remain
consistent from job to job, season after season.
You can include multiple boundaries in a single job. When a field is divided into
multiple areas, Outback MAX adds the areas defined by the boundaries to calculate
the total job area.
You can also exclude boundaries. For example, if there is an obstacle in the field, such
as a body of water, you may want to excluded it from the total area calculation. Use
the same boundary function, except select Exclude—the resulting excluded area is
deducted from the total job area calculation.
To set a boundary:
1.
Drive to the starting position of the field.
2.
Press Menu > Boundaries. The Field Boundary panel
appears (shown at right).
3.
Press the upper drop-down (green field, showing
Center in the figure at right) and select Left, Center, or
Right to determine if the calculations should start from
the left edge, center, or right edge of the swath width.
4.
Press the lower drop-down (green field, showing
Include in the figure at right) and select:
5.
•
Include to get the total area calculation
•
Exclude to subtract the defined area from the
total area calculation
Press Start Boundary. The Start Boundary button
dims (unavailable) and the Finish Boundary button is
available.
Note: You can perform actual work while creating the
boundary (Apply On) or drive around the field with Apply
Off. The boundary is created from the edge or center of the
current Implement swath, regardless of whether Apply is On
or Off.
6.
Drive around the outside of the field as accurately as possible. A solid black
line indicates a boundary in progress.
Outback MAX User Guide
112
PN 875-0325-000 Rev A1
Chapter 6: Path Planning
The example below shows a Right Include boundary in progress (top two
buttons on Field Boundary panel).
Boundary in progress
(solid black line)
The boundary automatically closes anytime the vehicle is within a swath
width of the boundary’s starting point.
7.
To manually close the boundary at any time press Finish Boundary.
A finished boundary is indicated by a solid blue line (Include boundary) or a
solid red line (Exclude boundary).
Note: You should close the perimeter as close to the starting point as
possible.
The example below shows a finished Right Include boundary.
Finished Include boundary
(solid blue line)
Outback MAX User Guide
113
PN 875-0325-000 Rev A1
Chapter 7: Rate Control and Section Control
Rate Control and Section Control Overview
Rate Control
Section Control
Rate and Section Control Scenarios
Outback MAX User Guide
115
PN 875-0325-000 Rev A1
Chapter 7: Rate Control and Section Control
Rate Control and Section Control Overview
Note: Rate control and section control are optional features available for Outback
MAX. Contact Outback Guidance Customer Service for information on rate control and
section control systems compatible with Outback MAX.
Outback AC110 works with Outback MAX to provide rate and section application
control. Benefits include:
•
Single product, liquid and anhydrous, variable rate control
•
Automatic section control for up to ten sections
•
Onscreen display of sections w/ section override
•
Simple calibration
Rate and Section Control Indicators and Buttons
Once you install AC110 you must set up (configure) rate control settings, section
controls settings, or both (depending on what equipment you have installed and the
functionality you need). For example, if you have a rate controller and no section
controller then you only need to configure rate control settings in Outback MAX.
When you connect AC110 to Outback MAX certain rate control
and/or section control panels and buttons become available that
you use to set up, calibrate, and use AC110. For example,
connecting AC110 makes the Rate Control Settings and Section
Control buttons visible on the New Implement Profile panel and
Edit Implement Profile panel (shown at right).
One of the settings you configure for both rate and section
control is Controller Type (see Table 7-2 on page 119 and Table 7-5
on page 132). Once you set this field to something other than
“None” related tabs and buttons appear on the map screen, as
follows:
•
Set Controller Type for rate control - Product Details tab
appears on the map screen
•
Set Controller type for section control - Sections tab
and Boom Override button appear on the map screen
Figure 7-1 on page 117 shows all four scenarios of rate/section
control tabs and buttons displayed on the map screen: no rate or
section control configured, section control (only) configured, rate
control (only) configure, and both rate and section control
configured.
Outback MAX User Guide
116
PN 875-0325-000 Rev A1
Chapter 7: Rate Control and Section Control
Section control
indicators/buttons
Rate and section control not configured
Section control configured
Rate control
indicators/buttons
Rate and section control
indicators/buttons
Rate control configured
Rate and section control configured
Figure 7-1: Rate and section control indicators/buttons on map screen
Outback MAX User Guide
117
PN 875-0325-000 Rev A1
Chapter 7: Rate Control and Section Control
Table 7-1 describes the rate/section control tabs and buttons.
Table 7-1: Rate/section control indicators
Setting
Description
Product
Details
Provides two functions:
•
•
When the arrow points to the right (top figure above) press the
arrow to expand the row to display the Actual Rate, Target Rate,
and Tank Level. When the arrow points to the left (bottom two
figures above) press it to contract the row (hide the Target Rate
and Tank Level). The three values are defined as follows:
–
Actual Rate - current actual flow rate calculated from the
flow meter (when the actual rate is off by 20% from the
target rate the actual rate appears in red and the terminal
beeps; when not off by 20% the actual rate appears in
white)
–
Target Rate - your designated target rate
–
Tank Level - current tank volume (decreases as you spray)
Press the Product Details button (far left of row) to display the
Product Rate panel (see Figure 7-2 on page 128)
Sections
Displays section related information and allows you to set each section
manually to ON, AUTO, or OFF by pressing the section repeatedly to cycle
through the settings.
The color of the shading for ON and AUTO indicates spraying (green
background) or not spraying (red background).
Keep the following in mind when working with sections:
•
AUTO: turns sections On and Off based on previously applied
areas
•
OFF: section remains Off even if in an unapplied area
•
ON: section remains On even if in a previously applied area
Boom
Override
Press to activate boom override to toggle all sections between an AUTO
state and forced ON (opens all section valves) state. When all sections are
set to ON the Boom Override button is dark blue; when all sections are set
to AUTO the Boom Override button is light blue.
Outback MAX User Guide
118
PN 875-0325-000 Rev A1
Chapter 7: Rate Control and Section Control
Rate Control
Before using rate control you must first set up and calibrate your system. Setup and
calibration involves the following:
1.
Entering basic rate control settings (see below)
2.
Setting up rate control (see “Setting Up Rate Control” on page 122)
3.
Calibrating rate control (see “Calibrating Rate Control” on page 126)
You can then use Outback MAX for rate control (see “Using Rate Control” on
page 128).
Entering Basic Rate Control Settings
Note: This section describes how to set up rate control for an
existing implement. You can also set up rate control while setting
up a new implement (you just have to complete some implement
setup steps first before setting up rate control). See “Adding an
Implement” on page 60 for more information. Keep in mind that
you must enter these basic rate control settings for each
implement that you will use for rate/section control.
You use the Rate Control Settings panel (shown at right) to enter
rate control settings for an implement. Table 7-2 describes each
button on the panel. The steps for setting up rate control begin
on page 121.
Table 7-2: Rate Control panel settings
Setting
Description
Controller
Type
Press to display the Controller Type panel (top of
panel shown at right).
•
Setting the Controller Type to something
other than “None” displays the rate
control indicators and buttons on the map
screen and enables all rate control
functionality.
•
Setting the Controller Type to “None” disables all rate controller
panels and buttons in Outback MAX. Select this option if you are
not using rate control.
Outback MAX User Guide
119
PN 875-0325-000 Rev A1
Chapter 7: Rate Control and Section Control
Table 7-2: Rate Control panel settings (continued)
Setting
Description
Rate Valve
Press to display the Valve Type panel (top of panel
shown at right).
Identify the wiring going to the regulating valve
and determine if there are 2 or 3 wires. Most
sprayers will be 2-wire unless plumbed by-pass
(flow diverted back to tank), in which case it may
be 2-wire inverse. A good way to check is to open
the valve and if pressure increases, you selected
the correct valve.
Open Valve
and Close
Valve buttons
Useful in manually opening and closing the regulating valve to identify if
you selected an incorrect Rate Valve option or if a cable is not connected.
On Look
Ahead
Press to display the On Look Ahead data entry
window (shown at right).
The On Look Ahead value is the number of
seconds needed to open the rate valves and
build pressure ahead of an unapplied area.
Increase the number to turn on sooner.
This setting applies to prescription maps. See
“Using Prescription Maps” on page 130 for
information on working with prescription
maps.
Calibration
Press to display the Calibrate Rate Control panel
(top of panel shown at right).
See “Calibrating Rate Control” on page 126 for
information on performing rate control
calibration.
Outback MAX User Guide
120
PN 875-0325-000 Rev A1
Chapter 7: Rate Control and Section Control
Table 7-2: Rate Control panel settings (continued)
Setting
Description
NH3
Press to display a drop-down list of two options: On and Off.
•
Set to On for NH3 (anhydrous ammonia) control. Rate will be in
lbs nitrogen/acre (US) or kgs nitrogen/hectare (metric). Volume
remaining in tank will be lbs or kgs of NH3.
•
Set to Off to set any other liquid as the application liquid.
To enter basic rate control settings:
1.
2.
3.
4.
5.
6.
Press Menu > Implement Profiles > Current Implement > Rate
Control Settings. The Rate Control Settings panel appears (see panel at
top right of previous page).
Select a controller type:
a.
Press Controller Type. The Controller Type panel appears.
b.
Press the desired type. The Controller Type panel closes and your
selection appears on the Controller Type button.
Select a rate valve:
a.
Press Rate Valve. The Valve Type panel appears.
b.
Press the desired type. The Valve Type panel closes and your selection
appears on the Rate Valve button.
Set an on look-ahead value:
a.
Press On Look Ahead. The On Look Ahead data entry window
appears.
b.
Enter the desired time (in seconds) and press Done. The On Look
Ahead data entry window closes and your selection appears on the On
Look Ahead button.
(Optional) If you selected an incorrect Rate Valve type or if a cable is not
connected you can identify the problem using the Open Valve and Close
Valve buttons:
•
Press Open Valve to manually open the valve.
•
Press Close Valve to manually close the valve.
Press NH3 and select an option from the drop-down list.
Outback MAX User Guide
121
PN 875-0325-000 Rev A1
Chapter 7: Rate Control and Section Control
Setting Up Rate Control
Use the Rate Control panel (shown at right) to set up rate (flow)
control parameters.
You can access the Rate Control panel using the Menu button or
the Product 1 Details button (Product 1 rate control tab):
•
Press Menu > Settings > Rate Control.
or
•
Press Product 1 Details > Rate Control.
Table 7-3 describes the buttons on the Rate Control panel.
Table 7-3: Rate Control panel settings
Setting
Description
Rx Maps
Press to display the Rx Map Files panel
(shown at right) where you select a
prescription map to load and display on the
map screen.
You can use prescription maps located on
the Outback MAX hard drive or import
prescription maps from a USB flash drive
or from your ConnX account.
See “Using Prescription Maps” on
page 130 for information on loading and
using prescription maps.
Note: The Rx Maps button is available only
if you have an active (current) job;
otherwise the button is dimmed (not
available).
Refer to your ConnX documentation for
instructions on accessing prescription
maps from your ConnX account.
Outback MAX User Guide
122
PN 875-0325-000 Rev A1
Chapter 7: Rate Control and Section Control
Table 7-3: Rate Control panel settings (continued)
Setting
Description
Rate 1
Rate 2
Press to display the Rate 1 and Rate 2 data
entry windows (Rate 1 window shown at right)
where you enter predefined flow rates.
You can change these rates on the fly during
application. See “Changing the Target Rate
While Operating” on page 129 for more
information.
Tank Level
Press Tank Level to display the Tank Level data
entry window (shown at right).
Enter the volume of product in the tank. You
will need to adjust this value after each load.
While spraying, Outback MAX subtracts from
this value what has been applied and this
current volume appears on the rate/section
indicators.
Reset Tank To
Press this button to reset the tank level to the original level you entered
for the Tank Level (see previous row in this table). This enables you to
reset the tank level to full with one button push when refilling the tank;
otherwise, you have to re-enter data values for a full tank in the Tank
Level data entry window.
Outback MAX User Guide
123
PN 875-0325-000 Rev A1
Chapter 7: Rate Control and Section Control
Table 7-3: Rate Control panel settings (continued)
Setting
Description
Applied Color
Map
Press Applied Color Map to display the
Applied Color Map panel (shown at right).
This panel enables you to set the High and
Low flow rates and associated colors that are
displayed on the “As Applied” rate map.
When loading a prescription map, the High
and Low Rates are automatically set to the
high and low rate values on the map.
The figures below show the relationship
between setting the High and Low rates and
the color scale Outback MAX uses when
applying rates including and between the
High and Low rates. The Applied Color Legend
appears on the Product Rate panel (see
Figure 7-2 on page 128).
Delete Rx
Maps
Allows you to delete prescription maps
from the Outback MAX hard drive.
See “Deleting a Prescription Map” on
page 131 for more information.
To set up rate (flow) control:
1.
Press Menu > Settings > Rate Control. The Rate Control panel appears.
2.
(Optional) Load a prescription map. See “Using Prescription Maps” on
page 130 for more information on selecting a prescription map.
3.
Enter flow rates for Rate 1 and Rate 2.
Outback MAX User Guide
124
PN 875-0325-000 Rev A1
Chapter 7: Rate Control and Section Control
4.
5.
a.
Press Rate 1. The Rate 1 data entry window appears.
b.
Enter a flow rate and press Done. The data entry window closes and
the rate appears on the Rate 1 button.
c.
Repeat steps a and b for Rate 2.
Enter the tank level:
a.
Press the Tank Level. The Tank Level date entry window appears.
b.
Enter the tank level and press Done. The data entry window closes and
the rate appears on the Rate 2 button.
Set the rate and color for the high rate and low rate when displaying applied
color maps.
a.
Press Applied Color Map. The Applied Color Map panel appears.
b.
Press High Rate or Low Rate (left side of button). The corresponding
rate panel appears (High Rate example shown below left).
c.
Enter a rate and press Done. The panel closes and the new rate
appears on the rate button.
d.
Press the color (right side of button) of the High Rate or Low Rate
button. The Select Color window appears (shown below right).
e.
Press a color (the window closes and the new color appears on the rate
button) and then press Save.
f.
Press Back/Close repeatedly or press the Close arrows to close the
panels and return to the map.
Outback MAX User Guide
125
PN 875-0325-000 Rev A1
Chapter 7: Rate Control and Section Control
Calibrating Rate Control
Prior to using rate control, you must calibrate the rate control
valve on your implement. You perform rate (flow) calibration
from the Calibrate Rate Control panel (shown at right).
You can perform calibration with the vehicle parked or moving.
Perform the following before calibrating the flow:
•
Make sure the tank is clean with several hundred
gallons of water.
•
Unfold the booms and move the vehicle to a safe
location.
•
Make sure the vehicle is running at the operating RPM
used for spraying.
Table 7-4 on page 126 describes the buttons on the Calibrate Rate
Control panel. The four ‘Calibration Values’ fields in Table 7-4 are
accessible after you press the Calibration Values button on the
Calibrate Rate Control panel.
Note: The four ‘Calibration Values’ fields described in Table 7-4
are blank (zero) before calibration and are populated when
calibration is complete (successful).
During the calibration process the system will open and close the regulating valve
several times.
Table 7-4: Rate control calibration settings
Setting
Description
Meter Calibration
Locate the meter calibration tag or stamp
on the flow meter and the corresponding
calibration value.
•
For Raven systems, divide the
calibration number by 10 and
enter this number.
Example: If 169 is the calibration
value, enter 16.9.
•
For TeeJet meters, enter the
number as is.
Note: Many TeeJet meters list the
calibration value in pulses/liter. It may be
easier to change the units of measure in
Outback MAX to metric, enter the meter
calibration, and then change units of
measure back to U.S.
Outback MAX User Guide
126
PN 875-0325-000 Rev A1
Chapter 7: Rate Control and Section Control
Table 7-4: Rate control calibration settings (continued)
Setting
Description
Calibration Values
K field (shown at right) - gain, or how
fast the system attempts to hit the target
rate.
Trigger (l/min) field - how soon before
the target rate the system switches to
fine control.
Flow (l/min) field - distance (range)
between high flow and low flow.
Min PWM field - minimum current
needed to get the valve to move.
To calibrate rate control:
1.
Press Menu > Implement Profiles > Current Implement > Rate
Control Settings > Calibration. The Calibrate Rate Control panel appears
(see panel on page 126).
2.
Press Meter Calibration. The Meter Calibration data entry window appears
(see Table 7-4 on page 126).
Use the onscreen keypad to enter a value and press Done. The Meter
Calibration data entry window closes and the System Calibration button on
the Calibrate Rate Control panel is now active.
3.
Press System Calibration. A message appears similar to below.
Outback MAX User Guide
127
PN 875-0325-000 Rev A1
Chapter 7: Rate Control and Section Control
4.
Press Yes. The calibration process starts and may take up to 10 minutes. A
progress message (with elapsed calibration time) appears during calibration
(as shown below):
To cancel the calibration press Cancel in the message window. Once
calibration is complete the a message window similar to below appears.
Using Rate Control
After you set your rate/section control parameters and calibrate rate control you work
with rate/section control via the rate/section control tabs as well as via the Product
Rate panel. As shown in Figure 7-2 what is displayed on the Product Rate panel
depends on the button you press at the top of the panel.
Figure 7-2: Product Rate panel
Outback MAX User Guide
128
PN 875-0325-000 Rev A1
Chapter 7: Rate Control and Section Control
When using rate/section control you can:
•
Change the target rate incrementally while operating
Note: You can also change the default target rates (as well as other rate
control settings) by pressing Rate Control on Product Rate panel to access
the Rate Control panel (see “Setting Up Rate Control” on page 122).
•
Override all sections (set all sections to AUTO or forced ON)
•
Set individual sections to AUTO, ON, or OFF
Changing the Target Rate While Operating
1.
Press the Product Details button on the map screen.
The Product Rate panel appears.
2.
Press Rate 1 or Rate 2.
3.
Press the Rate Bump arrows—press the Up
arrow to increase the rate or press the Down
arrow to decrease the rate. The rate changes
on the Product Rate panel and the Target Rate
changes on the Product Details tab in the
upper left of the map screen. Each button
increments/decrements by 1 gallon or 10
liters.
4.
Press Close when finished. to close the Product Rate panel.
Outback MAX User Guide
129
PN 875-0325-000 Rev A1
Chapter 7: Rate Control and Section Control
Using Prescription Maps
A prescription map (Rx map) is a map of a particular land area divided into sections of
different application rates. You use prescription maps in conjunction with rate control
functionality to automatically spray different areas of your farm at different flow rates.
Note: You must select the Prescription button on the Map Layers panel (see “Map
Layers” on page 80) for prescription maps to appear on the screen.
Loading a Prescription Map
You can only load a prescription map when you have an active job—you are loading
the map for use during that job. If this is the first time you are loading a specific
prescription map you must load the map from a USB flash drive or your ConnX
account. When the map is loaded it is:
•
Stored on the Outback MAX hard drive
•
Attached to the active job (Outback MAX automatically loads that
prescription map whenever you open that same job as long as that
prescription map remains on the hard drive)
Once the prescription map is stored on the Outback MAX hard drive you can load that
map for use during a different job (once that job is active). During this process you
load the map from the hard drive.
When you first load a prescription map (from a USB drive or ConnX) you actually load
a shape (.shp) file—a popular map format for GIS software commonly used for rate
control maps. You then select a data type and rate. Outback MAX then converts the
.shp file into a prescription map (.pmh file) and stores it on the hard drive. Therefore,
when you load a prescription map from the hard drive you load a .pmh file, not a .shp
file (because Outback has already converted the file for use).
Note: Refer to your ConnX documentation for more information on using ConnX with
Outback MAX.
To load a prescription map:
1.
Press Menu > Settings > Rate Control > Rx
Maps. The Rx Map Files panel appears.
2.
Press the green button at the top of the panel,
and from the drop-down list that appears select
an option: Hard Drive, USB, or ConnX.
Note: ConnX only appears if you are logged into
your ConnX account through Outback MAX.
Hard Drive only appears if you previously loaded
the .shp file from a USB drive or ConnX and
Outback converted the file to a .pmh file and
stored it on the hard drive.
The prescription map files in the selected
location appear in the list on the panel (USB
example of .shp files shown at right).
3.
Use the up/down scroll buttons to scroll through
the list of files and then press to select the
desired file (.pmh file or .shp file).
Outback MAX User Guide
130
PN 875-0325-000 Rev A1
Chapter 7: Rate Control and Section Control
•
If you are loading a previously loaded prescription map (.pmh file), the
panels close, Outback MAX briefly displays a message similar to the
following...
... and the prescription map appears on the map screen. You are
finished with this procedure.
•
If you are loading a prescription map for the first time (selecting a .shp
file), Outback MAX will convert the .shp file after you select the data
type and units—go to Step 4.
4.
On the Rx Map Layers panel select the desired data type. The Rx Map Units
panel appears.
5.
Select the desired units. The panels close and a message similar to the
following appears briefly while Outback MAX converts the .shp file.
When the conversion is complete Outback MAX briefly displays a message
similar to the following...
... and the prescription map appears on the map screen.
Deleting a Prescription Map
Once you delete a prescription map it is permanently
removed from memory; you cannot retrieve a deleted
prescription map.
1.
Press Menu > Settings > Rate Control >
Delete RxMaps. The Delete RxMap Files panel
appears (shown at right).
2.
Use the up/down scroll buttons to scroll through
the list of prescription maps and then press to
select the map(s) you want to delete. If you want
to delete all maps press Select All.
Press Delete. The prescription map is deleted
and the panels close.
Outback MAX User Guide
131
PN 875-0325-000 Rev A1
Chapter 7: Rate Control and Section Control
Section Control
You must enter specific section control settings (see below) before using Outback
MAX for section control (see “Using Section Control” on page 136).
Setting Up Section Control
Note: This section describes how to set up section control for an
existing implement. You can also set up section control while
setting up a new implement (you just have to complete some
implement setup steps first before setting up section control).
See “Adding an Implement” on page 60 for more information.
You use the Section Control Settings panel (shown at right) to
enter rate control settings for an implement.
Table 7-5: Section Control panel settings
Setting
Description
Controller
Type
Press to display the Controller Type panel (top of
panel shown at right).
Section Valve
•
Setting the Controller Type to something
other than “None” displays the section
control indicators and buttons on the map
screen and enables all section control
functionality.
•
Setting the Controller Type to “None” disables all section
controller panels and buttons in Outback MAX. Select this option
if you are not using section control.
Press to display the Valve Type panel (top of panel
shown at right). Identify the wiring going to boom
valves—most will be 3-wire Direct.
Outback MAX User Guide
132
PN 875-0325-000 Rev A1
Chapter 7: Rate Control and Section Control
Table 7-5: Section Control panel settings (continued)
Setting
Description
Number of
Sections
Press to display the Number of Sections data
entry window (shown at right) where you set
the number of sections.
Test Sections
Allows you to test each
section before operation.
When you press the
button Outback MAX
displays the window
shown at right.
Section
Location/
Width
Press to display the Section Widths panel
(shown at right) where you enter the section
width for each section (up to ten sections,
one button for each section).
You can set each section width individually
or press Auto-Locate to evenly divide the
sections based on the total implement
width (default setting).
Note: If you change section widths and the
total is more or less than the original
implement width (Width button on Edit
Implement Profiles panel), the original
implement width is adjusted to equal the
new total.
Outback MAX User Guide
133
PN 875-0325-000 Rev A1
Chapter 7: Rate Control and Section Control
Table 7-5: Section Control panel settings (continued)
Setting
Description
Coverage
Press to display the Coverage data entry
window (shown at right) where you enter the
percentage of the boom section that must
enter or exit a previously applied area before
AC110 will turn it off or on.
On Time
Press to display the On Time data entry
window (shown at right). Enter the number of
seconds needed to open the boom valves and
build pressure ahead of an unapplied area.
Increase the number to turn on sooner.
Off Time
Press to display the Off Time data entry
window (similar to On Time data entry
window). Enter the number of seconds
needed to close the boom valves ahead of a
previously applied area. Increase the number
to turn off sooner.
External
Switches
Selecting this option (check mark appears in the box) enables you to
perform the following section control functions using the joystick or
boom switches built into your vehicle instead of using the map screen
indicators/buttons on the terminal.
•
Turn Apply button ON and OFF
•
Toggle individual sections between ON and AUTO
Note: Implementation is dependent on your vehicle installation kit.
Outback MAX User Guide
134
PN 875-0325-000 Rev A1
Chapter 7: Rate Control and Section Control
To set up section control:
1.
Press Menu > Implement Profiles > Current Implement > Section
Control. The Section Control panel appears (see panel at top right of
previous page).
2.
Select a controller type:
3.
4.
5.
a.
Press Controller Type. The Controller Type panel appears.
b.
Press the desired type. The Controller Type panel closes and your
selection appears on the Controller Type button.
Select a section valve:
a.
Press Section Valve. The Valve Type panel appears.
b.
Press the desired type. The Valve Type panel closes and your selection
appears on the Section Valve button.
Set the number of sections:
a.
Press Number of Sections. The Number of Sections data entry
window appears.
b.
Enter the number of sections and press Done. The data entry window
closes and the number appears on the Number of Sections button.
(Optional) Test each section.
a.
Press Test Sections. A message appears verifying you want to test the
sections.
b.
Press Yes. A message appears indicating the first section is being
tested.
The progress bar updates as each section opens and closes. This
continues until all sections are tested and then the window closes.
6.
7.
8.
9.
Enter a coverage percentage:
a.
Press Coverage. The Coverage data entry window appears.
b.
Enter a coverage value and press Done.The data entry window closes
and the value appears on the Coverage button.
Enter an on time value:
a.
Press On Time. The On Time data entry window appears.
b.
Enter an on time value and press Done.The data entry window closes
and the value appears on the On Time button.
Enter an off time value:
a.
Press Off Time. The Off Time data entry window appears.
b.
Enter an off time value and press Done.The data entry window closes
and the value appears on the Off Time button.
(Optional) Press External Switches (place a check mark in the box) to use the
joystick or boom switches built into your vehicle (instead of using the map
screen indicators/buttons) to turn Apply button ON and OFF and toggle
individual sections between ON and AUTO.
Outback MAX User Guide
135
PN 875-0325-000 Rev A1
Chapter 7: Rate Control and Section Control
Using Section Control
Note: Review Table 7-1 on page 118 to make sure you are familiar with the settings and
the background colors for the settings on the Sections tab before performing the
following two procedures.
Overriding All Sections
You can quickly override individual boom settings and set all sections to ON or AUTO
using the Boom Override button on the map screen.
•
Press the Boom Override button on the map screen.
Pressing this button toggles between setting all sections to
AUTO or setting all sections to ON. When all sections are
set to ON the Boom Override button is dark blue; when all sections are set to
AUTO the Boom Override button is light blue.
Setting Individual Sections to AUTO, ON, or OFF
At any time you can set each section individually to AUTO, ON, or OFF.
•
Press an individual section button repeatedly to cycle through the three
settings for that section. If you are currently spraying you will see:
–
No spray for sections you turn OFF (even if in an unapplied area)
–
Spray for sections you turn ON (even if in a previously applied area)
Rate and Section Control Scenarios
Use the scenarios in Table 7-6 to familiarize yourself with the elements of the Outback
MAX display related to rate/section control functionality.
Table 7-6: Rate/section control scenarios
Map Screen
Scenario
Target Rate (using Rate 1)
manually increased from 12.0
to 14.0 (Rate 1 button in
Product Rate panel is green;
Product 1 Details tab shows
new target rate)
No spraying (Apply button is
not pressed—button color is
blue/gray and displays “Off”;
background is red for “AUTO”
on Sections tab; no spray color
appears trailing the implement)
Auto mode enabled (“AUTO” is
highlighted on Sections tab)
Outback MAX User Guide
136
PN 875-0325-000 Rev A1
Chapter 7: Rate Control and Section Control
Table 7-6: Rate/section control scenarios (continued)
Map Screen
Scenario
On Product 1 tab the Actual
Rate is a non-zero value and the
Tank Level is below its initial
level and decreasing (based on
usage)
Spraying enabled (Apply
button pressed—button color is
green and displays “On”)
Auto mode enabled (“AUTO” is
highlighted on Sections tab)
Spraying occurring in all
sections (background is green
for “AUTO” on Sections tab;
spray color appears trailing the
implement)
On Product 1 tab the Actual
Rate is equal to the Target Rate
(bumped up from 12.0 to 14.0)
and the Tank Level is below its
initial level and decreasing
(based on usage)
Spraying enabled (Apply
button pressed—button color is
green and displays “On”)
Auto mode enabled (“AUTO” is
highlighted on Sections tab)
Spraying occurring in all
sections (background is green
for “AUTO” on Sections tab;
spray color appears trailing the
implement)
Outback MAX User Guide
137
PN 875-0325-000 Rev A1
Chapter 7: Rate Control and Section Control
Table 7-6: Rate/section control scenarios (continued)
Map Screen
Scenario
On Product 1 tab the Actual
Rate is below the Target Rate
(bumped up from 12.0 to 14.0)
and the Tank Level is below its
initial level and decreasing
(based on usage)
Spraying enabled (Apply
button pressed—button color is
green and displays “On”)
For sections 2, 3, 4:
•
Auto mode is enabled
(“AUTO” highlighted
on Sections tab)
•
Spraying is occurring
(background is green
for “AUTO” on Sections
tab)
•
Spray color appears
trailing the implement
for these sections
For sections 1, 5:
•
Manually turned off
(“OFF” highlighted red
on Sections tab)
•
No spray color trailing
the implement for
these sections
Spraying enabled (Apply
button pressed and green)
Auto mode is enabled (“AUTO”
highlighted on Sections tab)
No spraying occurring in all
sections:
Outback MAX User Guide
138
•
Actual Rate is zero on
Product Details tab
•
Background is red for
AUTO on Sections tab
•
Headland alert symbol
is displayed below
Boom Override button
PN 875-0325-000 Rev A1
Chapter 8: Other Optional Features
Using External Cameras
Using the External Lightbar
Using the Switchbox
Outback MAX User Guide
139
PN 875-0325-000 Rev A1
Chapter 8: Other Optional Features
Using External Cameras
You can connect up to four analog cameras to Outback MAX using the optional video
cable. Refer to the Outback MAX Quick Start Guide included with your Outback MAX
kit for information on connecting the video cable.
Note: Hemisphere GPS does not supply the cameras with your Outback MAX system.
Contact your dealer for information on purchasing cameras (and any additional
cables) suitable for your Outback MAX system.
To display the Camera window:
•
Press the Camera button at
the bottom right of the
main screen (top figure at
right) to display the
Camera window (bottom
figure at right).
The Camera window allows you to view:
•
Each camera individually in default view (small window, as shown above)
•
Each camera individually in full screen view (window fills the screen)
•
All four cameras at once (grid of four cameras that fills the screen)
See Figure 8-1 on the following page for information on displaying different cameras
and camera views.
Outback MAX User Guide
140
PN 875-0325-000 Rev A1
Chapter 8: Other Optional Features
Small single camera window
Close the
Camera
window
Cycle through
camera views
Switch to full screen
single camera window
(see figure below left)
Switch to full screen
grid window (see
figure below right)
Full screen single camera window
Press a camera
button to display
that camera
within the full
screen window
Switch to grid
window (see
figure at
right)
Full screen grid window
Close the
Camera
window
Switch to the small
camera window for a
particular camera
(depends on which of the
four buttons you press)
Close the
Camera
window
Switch to the small
camera window for a
particular camera
(depends on which of the
four buttons you press)
Figure 8-1: Camera window options
As an alternative to pressing the Close button in the small Camera window you can
also press the Camera button (lower right of map screen) to close the small Camera
window.
You also can move the Camera screen around on the screen by placing your finger on
camera window and dragging the window to the desired location.
Outback MAX User Guide
141
PN 875-0325-000 Rev A1
Chapter 8: Other Optional Features
Using the External Lightbar
The red and green lights on the external lightbar work just like the red and green bars
on the onscreen lightbar. See “Onscreen lightbar” on page 5 for information on the
onscreen lightbar.
Figure 8-2 shows the onscreen and external lightbar under similar scenarios.
Vehicle centered on
guidance line
Vehicle steering left of
guidance line
Vehicle steering very far
left of guidance line
Vehicle steering right of
guidance line
Vehicle steering very far
right of guidance line
Figure 8-2: Onscreen and external lightbar comparison
Outback MAX User Guide
142
PN 875-0325-000 Rev A1
Chapter 8: Other Optional Features
Using the Switchbox
The optional external switchbox enables you to perform the following tasks that you
normally would perform via the Outback MAX terminal touchscreen:
•
Apply spray
•
Toggle sections between ON, OFF, and AUTO
•
Select Rate 1, Rate 2, or the current prescription map
•
Bump rates
Figure 8-3 points out these functions on the switchbox.
Turn Apply
ON or OFF
Toggle sections between
ON (up), OFF (down), and AUTO (middle)
Manually adjust
(bump) selected
rate
Toggle between
Rate 1, Rate 2,
and prescription (Rx) map
Figure 8-3: Switchbox controls
Note: Refer to the appropriate sections in “Rate Control and Section Control” for more
information on rate control and section control.
When you connect the switchbox certain buttons/controls are disabled on the Outback
MAX touchscreen:
•
Sections tab is read-only (functionality is controlled via switchbox)
•
Boom Override button is not displayed
•
Rate 1, Rate 2, and Rx buttons are not available (functionality is controlled
via switchbox)
The Manual button on the touchscreen is still available and is the only way to turn
Manual mode ON or OFF—press the Manual button once to turn it ON and press it
again to turn it OFF and return the rate to whatever is selected on the switchbox.
Outback MAX User Guide
143
PN 875-0325-000 Rev A1
Chapter 8: Other Optional Features
Figure 8-4 illustrates the changes to the touchscreen with the switchbox connected.
Sections tab is dark
gray (read-only)
Rate 1 is selected on
switchbox (faded green
background on button)
Rate 2 and Rx buttons
are dark gray (not
selected and only
available via switchbox)
Manual button is light
blue (available)
Sections tab is dark
gray (read-only)
Rate 1, Rate 2, and Rx
buttons are dark gray
(not selected and only
available via switchbox)
Manual button is
selected (bright green)
on screen, regardless of
what is selected on
switchbox
Figure 8-4: Rate/section control controls with connected switchbox
Outback MAX User Guide
144
PN 875-0325-000 Rev A1
Appendix A: Troubleshooting and Status
Information
Viewing Status and Diagnostics Information
Capturing Screen Images
Outback MAX User Guide
145
PN 875-0325-000 Rev A1
Appendix A: Troubleshooting and Status Information
This appendix contains information on viewing diagnostics information available on
several Outback screens (and troubleshooting issues that arise using this information)
and capturing screen images.
Viewing Status and Diagnostics Information
Outback MAX includes the following status and diagnostics
screens that provide useful information to verify certain settings
as well as troubleshoot issues. All status and diagnostics screens
are accessible from the Diagnostics panel (shown at right).
•
GPS Status
•
OmniSTAR Status
(this button only appears if OmniSTAR is the correction
type...see “Correction Type” on page 19 for more
information)
•
Terminal Diagnostics
•
eDriveX Status
(this button is only active if eDriveX is communicating
with the terminal—that is, eDriveX is connected to the
terminal and powered on)
•
eDriveX Diagnostics
(this button is only active if eDriveX is communicating
with the terminal—that is, eDriveX is connected to the
terminal and powered on)
•
Rate Section Diagnostics
(this button is only active if the optional rate/section control equipment is
communicating with the terminal—that is, the rate/section control
equipment is connected to the terminal and powered on)
•
High Speed Logging (on/off)
To display a status or diagnostics screen:
1.
Press Menu > Diagnostics. The Diagnostics panel appears.
2.
Press the appropriate button to display the related status or diagnostics
screen.
3.
Press Back/Close repeatedly or press the Close arrows to close the panels
and return to the map.
To display the eDriveX Status screen (alternate method, if error exists):
•
Press the error symbol (red circle with exclamation
point) on the upper left of the Steering button on the
map screen.
Outback MAX User Guide
146
PN 875-0325-000 Rev A1
Appendix A: Troubleshooting and Status Information
GPS Status Screen
The GPS Status screen (Figure A-1) displays read-only GPS information you may find
useful, especially if you need to troubleshoot an issue. The fields on the screen are
partially dependent on your selected correction type (SBAS, RTK, or OmniSTAR). The
same fields appear on the screen for SBAS or OmniSTAR as the selected correction
type; however, additional fields appear if RTK is the correction type. See “Viewing
Status and Diagnostics Information” on page 146 for instructions on displaying the
GPS Status screen. Table A-1 describes each field on the GPS Status screen.
Figure A-1: GPS Status screen (top - SBAS or OmniSTAR, bottom - RTK)
Outback MAX User Guide
147
PN 875-0325-000 Rev A1
Appendix A: Troubleshooting and Status Information
Table A-1: GPS Status screen fields
Field
Description
Time
Current time.
Latitude
Vehicle’s current latitude position.
Longitude
Vehicle’s current longitude position.
Altitude
Vehicle’s current altitude.
Speed
Vehicle’s current speed.
Heading
Vehicle’s current heading in degrees.
Diff Age
Age of the corrections used in the DGPS calculation. Values > 120
seconds require acquiring a new RTK lock. For SBAS, the Diff Age is
typically 6 to 10 seconds.
Status
Status of the GPS receiver to receive GPS differential corrections.
Correction Type
Type of differential correction being used—may be WAAS (for SBAS),
RTK, or LBAND (for OmniSTAR).
GPS Firmware
GPS firmware version used by Outback MAX.
GPS Serial
Serial number of the receiver. Also appears in the Subscriptions
window (see “Viewing and Entering Subscription Information” on
page 20).
Std Dev
Pseudo-estimate of the DGPS solution accuracy determined as the
RMS value of the positional residual errors. STDEV is valid only if 6 or
more satellites are used in the solution calculation. Typical values for
SBAS correction are 0.5 ft – 1.5 ft (0.15m – 0.45m). Typical values for
RTK corrections are < 0.1 ft (3 cm).
GPS Sats Tracked Number of satellites currently visible in the sky (this is only GPS
satellites and does not include the correction satellites).
GPS Sats Used
Number of GPS satellites used to calculate the position.
Totals Sats Used
Total number of satellites (GPS, GLONASS, SBAS) used to calculate
the position.
HDOP
Horizontal dilution of precision
The influence of the current GPS satellite constellation geometry on
the horizontal accuracy of the position solution. Lower HDOP values
indicate better geometry. Typical values are 0.8 – 2.0.
BER
Bit error rate
Relative strength of the correction satellites. In the case of WAAS, two
numbers are shown separated by a hyphen. The number can be from
0 to 500, with 0 being the best and 500 being the worst.
If BER > 20 verify the antenna has a clear view of the sky to
properly find and track correction satellites. Outback MAX tracks
multiple correction satellites. Each satellite has a different BER
and the value in the BER field represents each value separated by
a hyphen.
For example, a value of 8-500 means Outback MAX has a very
good signal on one satellite (BER=8) and is not receiving
corrections from the other satellite (BER=500, the lowest
reception value). Only one satellite must have a low BER value
(less than 20) to provide differential corrections.
The following fields only appear on the GPS Status screen if RTK is the correction type
and a rover radio is installed and recognized by Outback MAX.
Outback MAX User Guide
148
PN 875-0325-000 Rev A1
Appendix A: Troubleshooting and Status Information
Table A-1: GPS Status screen fields (continued)
Field
RSSI
Description
Received signal strength indicator
Actual power in a received radio signal in dBm
Radio ID
Radio receiver channel
Only Radio ID when 900 MHz. Blank because no radio. Field goes
away if RTK not correction type.
RTK Mode
FIX,FLT,DIF,AUT,NO
RTK Type
Correction type (DFX,ROX,CMR,RTCM3)
Base Distance
Distance to base in kilometers (metric units) or miles (U.S. units)
RTK Stat
RTK accuracy status (hex) used for radio/base operation and NTRIP
where:
•
0x1 = no differential or differential too old, for the application
•
0x2 = problems with differential message
•
0x4 = horizontal position estimate poor for the application
•
0x8 = HDOP high, poor satellite geometry
•
0x10 = fewer than 6 L1 sats used
•
0x20 = poor L1 SNRs
•
0x40 = not in RTK mode
•
0x80 = RTK only recently solved, < 10 secs ago
•
0x100 = RTK solution compromised, may fail
The status message can be any of the above or any combination of the
above. For example, a status message of '047' indicates the following:
•
0x1 = no differential or differential too old, for the application
•
0x2 = problems with differential message
•
0x4 = horizontal position estimate poor for the application
•
0x40 = not in RTK mode
Note: This field is populated even if no radio installed.
Rover Slip
Rover slip flag (non zero if parity errors in last 5 minutes, good for
detecting jamming and TCXO issues)
Base Slip
Base slip flag
Scintillation
Ionospheric scintillation, values are:
Outback MAX User Guide
•
0 (little or no scintillation - does not adversely affect RTK
solution)
•
1-100 (scintillation detected - adversely affects RTK solution)
149
PN 875-0325-000 Rev A1
Appendix A: Troubleshooting and Status Information
Terminal Diagnostics Screen
The Terminal Diagnostics screen displays such information as software version,
current work profile (implement, vehicle, job), and status details for the optional
ConnX functionality. See “Viewing Status and Diagnostics Information” on page 146
for instructions on displaying the Terminal screen. Table A-2 describes each field on
the Terminal Diagnostics screen.
Table A-2: Terminal Diagnostics screen fields
Field
Description
Software Version
Outback MAX software version
IP Address
External network IP address
IP Internal
Modem internal IP address
Refresh IP Addresses button
Updates the IP addresses (i.e., when changing from static
to dynamic IP)
Current Profiles
Implement
Currently loaded implement (also appears on the Current
Implement button when you press Menu > Implement
Profiles).
Vehicle
Currently loaded vehicle (also appears on the Current
Vehicle button when you press Menu > Vehicle Profiles).
Job
Currently loaded job (also appears on the Indicator tab or
on the Current Job button when you press Menu > Jobs).
Job Information
Field Area
Field size for the job (also appears on the Indicator tab)
Worked Area
Area of job worked so far (also appears on the Indicator
tab)
Outback MAX User Guide
150
PN 875-0325-000 Rev A1
Appendix A: Troubleshooting and Status Information
Table A-2: Terminal Diagnostics screen fields (continued)
Field
Description
ConnX
Online Status
Current connection status of ConnX. Possible values are:
•
ConnX
•
AgJunction
•
Unreachable
Client IP
IP address of modem client
Display ID
Unique Terminal ID for use with ConnX subscriptions
Tracker State
Position Tracking socket state. Possible values are:
Tracker Status
Tracker Packets
Copy Logs button
•
OK
•
Get address info error
•
Local file not found
•
No such node or service
•
Remote file not found
•
Socket connection error
•
Socket is dead
•
Socket overflow
•
Socket read error
•
Socket select error
•
Unknown error
Current connection status of ConnX Position Tracking.
Possible values are:
•
Connection success
•
Connection failed
•
Disconnected
•
Unknown State
Real-time count of packets being sent to the ConnX server.
Updates every 60 sec (when connected).
Copies Outback MAX debug files to a USB flash drive.
Button is enabled when you insert the USB drive in the
terminal.
When you press the active Copy Logs button (with a USB
drive inserted) the Terminal Diagnostics screen closes and
an Exporting Logs progress window appears (shown
below):
Outback MAX User Guide
151
PN 875-0325-000 Rev A1
Appendix A: Troubleshooting and Status Information
eDriveX Status Screen
The eDriveX Status screen shows the hardware, calibration, and run time status of the
eDriveX system. See “Viewing Status and Diagnostics Information” on page 146 for
instructions on displaying the eDriveX Status screen.
Each item can show an alert (exclamation point, shown
at right) that indicates an error or limitation of some
kind. The alert may be flashing or static:
•
Flashing indicates a part of the system is not
ready for guidance/auto-steering (such as Filters Converged not OK)
•
Non-flashing indicates that some aspect of user setup is not complete (such
as one of the calibration steps is incomplete)
Note: A flashing alert also shows on the Steering button
so you can see that there are ‘system not ready’ alerts
even if you are not viewing the eDriveX Status screen.
Table A-3 through Table A-5 provide information on status alerts for eDriveX. If the
recommended action does not resolve the issue, contact Outback Guidance Customer
Service.
Table A-3: eDriveX Status screen hardware status alerts
Item
Reason(s)
Action(s) as Applicable
ECU Power
ECU Ready
This will never show an alert as you
cannot access this screen if eDriveX
is not ready (autosteer criteria not
met).
Outback MAX User Guide
152
PN 875-0325-000 Rev A1
Appendix A: Troubleshooting and Status Information
Table A-3: eDriveX Status screen hardware status alerts (continued)
Item
Reason(s)
ECU Hardware
CPU load (alert shows only on
startup)
Valve Online
Action(s) as Applicable
High CPU usage
Wait for two minutes, power
cycle eDriveX.
Low free memory
Cycle power to eDriveX.
Out of range (current WAS position
is outside calibrated values).
Power cycle steering controller.
Short/Open circuit
Check WAS harness
connections for damaged wires/
pins.
Open/short circuit on one or more of
solenoid lines.
DMU Sensor
Recalibrate WAS.
Current (mA) fault (not achieving the
required current - check current and
voltage rating on coils).
Power cycle steering controller.
WAS fault.
Review WAS troubleshooting.
Roll/Pitch out of range because ECU
orientation not set correctly.
Power cycle eDriveX.
Check solenoid harness for
broken or damaged wires/pins.
Recalibrate ECU orientation.
Failed DMU sensor.
GPS Sensor
Comms problem with GPS sensor
(power problem)
Power cycle eDriveX.
Failed GPS sensor
CAN Data
Green check mark indicates terminal
correctly talking to eDriveX (no
dropped messages)—sync button
appears if bad (in error)
Table A-4: eDriveX Status screen calibration status alerts
Item
Reason for Alert/Action
For all fields
Value not set, check calibration and set correct values.
Table A-5: eDriveX Status screen run time status alerts
Item
Reason for Alert/Action
Steer Override:
Inactive
Should be not active unless the steering wheel is being turned. If
active when steering wheel not being turned, problem with override
system is indicated. Power cycle the system, check alert state.
Wayline
Wayline not set. Select job / template or create new A=B line.
Filters
Converged
Perform filter converging process (a Help button appears next to this
field when you need to take action; press the Help button and follow
the prompts).
Ready to Engage
Not all conditions for engage are met. Drive onto A=B line and check
status while moving above 1 kph.
Position
Estimated
Usually occurs after startup. Drive machine for a few minutes above 4
kph, error should clear.
Outback MAX User Guide
153
PN 875-0325-000 Rev A1
Appendix A: Troubleshooting and Status Information
eDriveX Diagnostics Screen
The eDriveX Diagnostics screen provides the current firmware version of eDriveX as
well as measurable details of the eDriveX system. See “Viewing Status and
Diagnostics Information” on page 146 for instructions on displaying the eDriveX
Diagnostics screen. Table A-6 describes each field on the eDriveX Diagnostics screen.
Table A-6: eDriveX Diagnostics fields
Field
Firmware
Description
Current Version: current eDriveX firmware version
Upgrade Version: If you insert a USB flash drive (containing
upgrade firmware) into the eDriveX ECU the firmware version
appears in this field along with a button to install the upgrade
version.
Wheel Angle Sensor
Left/Right/Center: Wheel Angle Sensor counts at left lock, right
lock, and center
Min Radius
Left/Right: Turning circle of the vehicle
eTurns Min Radius
Left/Right: Turning circle of the vehicle with the implement
attached
Current
Left/Right: Minimum and maximum currents left and right for
steering valve
ECU Top
ECU top orientation (see “ECU Orientation” page 55 for more
information)
ECU Connector
ECU connector orientation (see “ECU Orientation” page 55 for
more information)
L to R Time
Lock-to-lock time going left to right
R to L Time
Lock-to-lock time going right to left
P-Gain
Wheel steering gain
Outback MAX User Guide
154
PN 875-0325-000 Rev A1
Appendix A: Troubleshooting and Status Information
Table A-6: eDriveX Diagnostics fields (continued)
Field
Description
Wheel Angle
Value the wheel angle sensor provides to the ECU at the time
Roll Bias
Mounting bias of the eDriveX ECU
Roll
How much is the system leaning over (in degrees)
Max Lat Accel
eTurns will be limited to the calibrated maximum g-force
GPS Course
Heading from GPS
Adjusted Course
Corrected heading from filters
Vehicle Direction
Direction of the currently loaded vehicle
Copy Logs button
Allows you to copy (export) eDriveX log files to a USB flash drive
(see “Log Files and eDriveX” on page 28 for more information).
Steer Test buttons
Allows you to perform a steering test before you calibrate
autosteering (see “Performing a Steering Test” on page 30 for
more information).
Rate Section Control Diagnostics Screen
The Rate Section Control Diagnostics screen shows such information as software
version and flow rate. Table A-7 on page 156 describes each field on the Rate Section
Control Diagnostics screen. You can use the Boot Loader button to update the rate/
section controller software (see procedure after Table A-7).
Outback MAX User Guide
155
PN 875-0325-000 Rev A1
Appendix A: Troubleshooting and Status Information
Table A-7: Rate Section Control Diagnostics fields
Field
Description
Mode
For future use
Version
Rate/section control (AC110) firmware version
Status
For future use
Flow
Current flow rate
To load AC110 software:
1.
Make sure the AC110 files are in a folder named ‘ac110’ that is at the root
level of a USB flash drive.
2.
Plug the flash drive into the Outback MAX terminal.
3.
Press Boot Loader. A “Loading New Bootloader” message appears.
4.
When the loading process is complete (after a few minutes) a success
message appears.
5.
Press Ok. The Version field on the Rate Section Control Diagnostics screen is
updated.
OmniSTAR Status Screen
The OmniSTAR status screen shows information related to you OmniSTAR
subscription and functionality. Table A-8 describes each field on the OmniSTAR Status
screen.
Outback MAX User Guide
156
PN 875-0325-000 Rev A1
Appendix A: Troubleshooting and Status Information
Table A-8: OmniSTAR Status screen fields
Field
Description
Frequency
Frequency of OmniSTAR satellite
Satellite Longitude
Satellite location (longitude) that covers the area in which you will
be working
Satellite Elevation
Elevation of OmniSTAR satellite
Azimuth
Azimuth of OmniSTAR satellite
Version
Version of service
Expiration Date
Subscription expiration date
Subscription Type
Level of service
Subscription Level
Sub-level of service
Capturing Screen Images
If you notice something on the touchscreen that you either do not understand or want
to save for later review you can take a screen capture of the entire display. Simply
insert a USB flash drive (with a “screenshots” folder at the root level) into the terminal
and the Favorites button on the terminal (not the touchscreen button) functions as a
screen capture tool. Each time you press the Favorites button Outback MAX saves a
capture of the entire screen as a .png file in the screenshots folder on the flash drive.
Outback MAX User Guide
157
PN 875-0325-000 Rev A1
Appendix B: Frequently Asked Questions
About GPS Guidance
About Outback MAX
Outback MAX User Guide
159
PN 875-0325-000 Rev A1
Appendix B: Frequently Asked Questions
About GPS Guidance
Q: What is GPS?
A: Global Positioning System (GPS) is a satellite-based signal operated by the U.S.
Department of Defense and is available to anyone to provide position information to
receivers on the ground. Several satellites are used by the receiver to pinpoint the
exact position.
Q: What is DGPS?
A: DGPS stands for differential GPS (or differential correction GPS). It means that a
second signal is used to correct inherent errors in the GPS signal making it even more
precise. Outback MAX can utilize SBAS, RTK, or L-band corrections.
Q: What is WAAS?
A: Wide Area Augmentation System (WAAS) is a satellite-based correction signal
operated by the U.S. Federal Aviation Administration that is free to those who use it.
WAAS provides relatively uniform accuracy and coverage from the Arctic Ocean to
Hawaii to the mid-Caribbean to the mid-Atlantic and the shores of Greenland. Other
SBAS systems, such as EGNOS (Europe) and MSAS (Japan), offer corrections in other
areas of the world. For more information about WAAS go to http://gps.faa.gov/.
Q: How accurate is Outback MAX DGPS?
A: Using SBAS corrections and operating under normal conditions (where each
subsequent pass is being made within minutes of the last), swath to swath accuracy is
just a few inches. The more time elapsed from one pass to the next may reduce
accuracy.
Q: What about foam markers and disk markers?
A: The answer is … use them if they help. The best guidance is what works for you.
The more visual indicators to guide from the better; however, GPS guidance will be
the primary guidance means and everything else will be secondary.
Q: Can I plant using GPS guidance?
A: GPS guidance is a great planting aid, especially for making the straightest rows
possible. Outback Guidance recommends differential GPS (like RTK) to provide you
with every possible advantage.
Q: How does weather affect the GPS signal?
A: Rain, sleet, snow, thunderstorms, and wind normally do not affect the GPS signal.
Lightning is not a problem unless it is a close strike—direct lightning strikes will
damage Outback MAX. Snow and ice accumulation on the antenna may also cause
problems.
Q: How do power transmission lines affect the GPS signal?
A: Normally, high voltage power transmission lines do not affect the GPS signal at all.
Outback MAX User Guide
160
PN 875-0325-000 Rev A1
Appendix B: Frequently Asked Questions
About Outback MAX
Q: Can I use Outback MAX as a receiver for other uses?
A: Yes. Outback MAX accommodates NMEA 0183 serial and NMEA 2000 CAN
communication protocols. Contact your Outback Guidance dealer for the latest
compatibility list.
Q: How long does it take Outback MAX to obtain a usable signal?
A: It normally takes 1 - 3 minutes. Outback MAX first acquires the GPS signal (“3d”
appears on the Indicator tab). Next, Outback MAX acquires the DGPS correction (“3D”
appears on the Indicator tab). For RTK corrections, it may take 15 minutes of
consistent corrections to establish an RTK lock. The vehicle can be in motion during
this process.
Q: Does Outback MAX have memory?
A: Outback MAX records all movement as long as guidance is on. When you pause a
job using either the Run/Hold floor switch or the Apply button, no data is recorded.
Outback MAX can record up to 30 hours of data for a single job. When the job is
finished, Outback MAX automatically saves the job data. Historical data for each job is
collected and stored on the system. You can import, export, or delete job data.
Q: How do I clear hard drive space?
A: To delete all job data press Menu > Jobs > Delete Items > Delete Jobs to
display the Delete Jobs panel. Press Select All and then press Delete to delete all
jobs. You can also delete unused vehicles and implements (see “Deleting a Vehicle”
on page 58 and “Deleting an Implement” on page 66).
Q: What is straight guidance?
A: In Straight guidance mode Outback MAX generates straight, parallel lines. Outback
MAX locks on the closest line based on the first A=B pass and the entered swath width
and then records the actual movement over those lines while guiding. You can
generate a new A=B line at any time with Outback MAX. You can also use straight
guidance to create circular (pivot) rows.
Q: What is pivot guidance?
A: Pivot guidance is similar to straight guidance except that you define the
circumference of a circle rather than a straight line with A and B points.
Q: What is contour guidance?
A: In Contour guidance mode Outback MAX records all movement as the vehicle
moves around, unless you pause Outback MAX using the Run/Hold floor switch or the
Apply button. During the initial pass, no guidance is given. When you make a second
pass and subsequent passes, Outback MAX guides along the previous pass.
Q: Can I switch from straight guidance to contour guidance in one job?
A: You can switch back and forth between Straight guidance mode and Contour
guidance mode, as needed. When Outback MAX is in Contour guidance mode, it
follows any pass (straight, circular, or contour) recorded in the current job.
Outback MAX User Guide
161
PN 875-0325-000 Rev A1
Appendix B: Frequently Asked Questions
Q: How do I perform headlands?
A: Press Menu > Settings > System Preferences > Headland Alert and select
On. The headlands alert icon flashes and an audio alarm sounds anytime the current
pass (swath width) crosses a previously applied area.
Q: How do I mark the A=B Line?
A: When performing straight passes, you define the initial pass by marking two points
in the field. Outback MAX generates a line through the two points defining the first
pass. Since you can work passes in any order, you can define the A=B line along the
edge of the field, down the middle of the field, or at any point in between. You define
the A=B line in two ways: marking Point A at the beginning of the initial pass and
marking Point B at the end or marking Point A at the beginning of the initial pass and
entering a desired heading angle.
Q: Can Outback MAX store a waypoint?
A: You can store a waypoint to guide back to that point. Waypoints are used primarily
when a job is paused. For example, when stopping for a refill you would pause the
job, save the point, and return back to that point to resume. Outback MAX
automatically records multiple points you can use as waypoints, including the last
point any data was recorded. You can also drop a flag to mark a waypoint and Outback
MAX can guide to it.
Q: Does bright sunlight affect the display?
A: Day mode and Night mode make the display screen easily viewable in any ambient
light situation. You can also use the brightness buttons on the right side of the
terminal to further adjust the display.
Q: How does Outback MAX account for implement lag in turns?
A: Outback MAX does not account for implement lag—it assumes turning lag will be
approximately the same on each pass. As long as vehicle spacing is correct,
implement spacing will follow. This also applies to side hills. Do not attempt to put the
antenna on the implement to account for lag.
Q: What electrical power do I need for Outback MAX?
A: The input voltage range is 10 to 36 VDC.
Outback MAX User Guide
162
PN 875-0325-000 Rev A1
Index
Numerics
brightness, see screen brightness
button
Apply 7
brightness (hard buttons on terminal)
4
Camera 7
Contour Lock 7
Engage (hard button on terminal) 4
eTurns 7
Favorites 8
Favorites (hard button on terminal) 4
Mapping Options 7
Menu 7
Path Planning 7
steering 8
zoom 6
2D projection 16
3D (map perspective) 77
3D projection 16
A
A+ Direction line 95
A=B grid option 93
A=B line
defining new line 96
option 93
setting 94
setting display options 85
using previous A=B line 97
using previously defined A=B line 96
actual turns (eTurns) 109
adding
favorite 13
implement 60
vehicle 53
adjusting paths
overview 100
path offset 101
shift guidance line 103
snap guidance line 102
updating point B 103
antenna
height 55
offset, determining, marker method
37
offset, skip and overlaps after setting
42
offset, track method, track and wheel
vehicles 34
offsets overview 33
pivot 55
antenna offset L/R 55
determining 34
determining-marker method 37
determining-track method 35
overview 33
antenna pivot 31
applied color map 83, 124
Apply button 7
As Applied, showing/hiding 80
attack, see steering attack
autolocating sections 63
C
calibrating
eTurns 64, 105
rate control 120, 126
rate control, meter calibration 63
rate control, system calibration 63
vehicle (overview) 45
vehicle (steps) 55
calibration values for rate control 127
calibration, editing for vehicle 46
camera button 7
cameras 140
capturing screen images 157
changing rate control target rate while operating 129
client 72
close valve 120
closing a job 71
color of vehicle 53
configuring
eTurns 107
implement 61
system (overview) 14
ConnX settings 25
continuing a job 70
Contour Lock
button 7
overview 104
contour path 98
guiding on subsequent passes 100
making a new first pass 100
controller type
rate control 63, 119
section control 63, 132
B
before you start a job 68
boom override 118
Outback MAX User Guide
163
PN 875-0325-000 Rev A1
Index
actual turns 109
button 7
calibration 64, 105
configuring 107
Headland Distance setting 107
Headland Prompt setting 107
making 107, 111
Max Speed setting 107
Next Pass setting 107
overview 105
predicted turns 109
speed 110
Turn Direction setting 107
event marker 81
deleting from job 83
editing preset marker 82
exclude area 112
exporting
implement 66
job 71
log files (eDriveX) 28
vehicle 58
external cameras 140
external lightbar 142
external switches 64, 134
converging filters
initial or re-convergence 47
manual driving sequence 48
overview 47
re-converging 48
self-convergence 48
correction type 19
coverage 64, 134
crop 72
cross track error indicator 6
D
defining new A=B line 96
deleting
applied prescription (Rx) map 124
client 72
crop 72
farm 72
favorite 13
field 72
implement 66
items associated with jobs 72
job 72
map imagery 88
prescription map 131
vehicle 58
diagnostics
eDriveX Diagnostics screen 154
eDriveX Status screen 152
GPS status 20
GPS Status screen 147
OmniSTAR 23
OmniSTAR Status screen 156
overview 146
Rate Section Control Diagnostics
screen 155
Terminal Diagnostics screen 150
diff age 9
dimensions (vehicle) 54
display, zooming in and out 12
dropping a marker 81
F
F/B offset, implement 44, 61
farm 72
favorites
adding 13
button 8
deleting 13
overview 13
selecting 13
field 72
field size 9
field view (map view) 76
fields, editing data 12
filters
converging 47
self-convergence 48
floor switch, using as a remote Apply control 7
Flow Range value, rate control calibration
63
Flow value, rate control calibration 127
E
ECU orientation 55
editing
event marker 82
implement 64
vehicle 57
vehicle calibration 46
editing field data 12
eDriveX
eDriveX Diagnostics screen 154
eDriveX Status screen 152
log files 28
engine speed - during calibration 46
eTurns
Outback MAX User Guide
G
GMT offset, see local time
GPS settings
correction type 19
GPS status 20
NTRIP 21
OmniSTAR 23
overview 18
164
PN 875-0325-000 Rev A1
Index
radio link 22
SBAS 21
subscriptions 20
GPS Status screen 20, 147
GPS, acquiring signal 3
guidance mode
changing 100
contour 98
pivot 97
straight 91
types 90
map imagery 85
vehicle 57
indicator
cross track error 6
headland alert 8
zoom distance 8
Indicator tab 3, 6
J
job
before you start 68
closing 71
continuing 70
creating job template 73
deleting 72
deleting event marker 83
exporting 71
importing 70
Indicator tab 9
loading previous 69
starting a new job 68
using job template 74
job template
creating 73
using 74
H
heading 9
headland alert 8, 16
Headland Distance setting (eTurns) 107
headland prompt (eTurns) 107
height (antenna) 55
help messages 26
high, vehicle position 77
I
imagery, see map imagery
implement
adding 60
configuration 61
deleting 66
editing 64
exporting 66
F/B offset overview 44
importing 65
L/R offset alternative method 43
L/R offset overview 38
L/R offset preferred method 40
loading previous 65
mount type 60
name 60
offset overview 38
offset, determining, preferred method
39
offset, skip and overlaps after setting
42
offsets (steps) 61
overlap 62
overview 59
skip 62
width 61
implement offset
F/B 44
L/R 38
L/R alternative method 43
L/R preferred method 40
overview 38
importing
implement 65
job 70
Outback MAX User Guide
K
K value, rate control calibration 63, 127
L
L/R offset
antenna 33, 55
implement 38, 61
language 14
latitude 9
lightbar
external 142
onscreen 5
settings 24
loading
prescription map 130
previous implement 65
previous job 69
previous vehicle 57
local time 15
log files (eDriveX)
exporting 28
numbering 28
overview 28
logs
exporting 28
file numbering 28
longitude 9
low vehicle position 77
165
PN 875-0325-000 Rev A1
Index
M
method 39
implement, F/B 44
implement, L/R 38
implement, L/R alternative method 43
implement, L/R preferred method 40
implement, overview 38
path 101
OmniSTAR
settings 23
Status screen 23, 156
on look ahead 63, 120
on time 64, 134
open valve 120
opening and closing valves 63
orientation, ECU 55
overlap 62
overriding all sections 136
machine width, effect on implement offset
40
making eTurns 107, 111
manual driving sequence for converging
filters 48
map
layers 80
options 76
perspective 76
settings 24
view 76
map imagery 80, 85
deleting 88
importing 85
selecting 87
Mapping Options button 7
marker method, antenna offset 37
marker, see event marker
Max Speed setting (eTurns) 107
measurement units, see units of measure
Menu button 7
meter calibration 63, 126
middle vehicle position 77
Min PWM value, rate control calibration
63, 127
mount type (implement) 60
P
panel, overview 10
pass 9
path
adjusting 100
contour 98
offset 101
options 92
pivot 97
planning basics 90
straight (overview) 91
Path Planning button 7
perimeter
closing (auto and manual close) 113
exclude area 112
multiple perimeters in a single job 112
pivot
antenna 55
path, setting 97
point B, updating 103
predicted turns (eTurns) 109
prescription map
deleting 131
loading 130
overview 130
showing/hiding 80
previous
A=B line 97
implement 65
vehicle 57
previously defined A=B line 96
Product Details tab 118
N
name
implement 60
vehicle 53
Next Pass setting (eTurns) 107
NH3 121
night mode 17
NMEA output 19
NTRIP settings 21
number of sections 63, 133
O
off time 64, 134
offset
antenna and implement, skip and
overlaps after setting 42
antenna L/R 55
antenna L/R determining 34
antenna L/R marker method 37
antenna L/R overview 33
antenna L/R track method 35
antenna, determining, marker method
37
antenna, overview 33
antenna, track method, track and
wheel vehicles 34
implement (steps) 61
implement, determining, preferred
Outback MAX User Guide
R
radio link settings 22
Rate 1 123
Rate 2 123
rate control 128
166
PN 875-0325-000 Rev A1
Index
applied color map 124
basic settings 119
buttons and indicators 116
calibration 120, 126
calibration values 63, 127
changing target rate while operating
129
controller type 63, 119
delete prescription (Rx) map 124
entering settings during adding implement 63
Flow value 127
K value 127
meter calibration 63, 126
Min PWM value 127
NH3 121
on look ahead 63, 120
open and close valve 120
prescription (Rx) maps 122
Product Details tab 118
Rate 1 and Rate 2 123
rate valve 63, 120
reset tank 123
scenarios 136
settings overview 24
setup overview 122
switchbox 143
system calibration 63
Tank Level 123
Trigger value 127
Rate Section Control Diagnostics screen
155
rate valve 63, 120
re-converging filters 48
reset tank (rate control) 123
returning to a point 96
RTK
and Diff Age 9
signal (correction) type 9
overriding all sections 136
scenarios 136
section location/width 63, 133
section valve 63, 132
Sections tab 118
setting sections individually 136
setup 132
switchbox 143
test sections 133
using 136
section location/width 63, 133
section valve 63, 132
Sections tab 118
selecting
favorite 13
map imagery 87
self-convergence for converging filters 48
self-convergence, filters 48
sensitivity, see steering sensitivity
setting
A+ Direction line 95
A=B line 94
paths 90
pivot path 97
sections individually 136
settings
2D or 3D projection 16
ConnX 25
correction type 19
GPS status 20
headland alert 16
language 14
lightbar 24
local time 15
map 24, 85
night mode 17
NMEA output 19
NTRIP 21
OmniSTAR 23
radio link 22
rate control 24
SBAS 21
screen brightness 14
steering smoothing 15
subscriptions 20
switchbox 25
systemwide 14
units of measure 15
shifting guidance line (path adjustment)
103
signal status 9
signal strength 9
signal type 9
skip 62
smoothing, see steering smoothing
snapping guidance line to current location
102
S
SBAS settings 21
scenarios for rate and section control 136
screen brightness 14
screen images, capturing 157
screen overview 5
section control
autolocating sections 63
Boom Override button 118
buttons and indicators 116
controller type 63, 132
coverage 64, 134
external switches 134
number of sections 63, 133
off time 64, 134
on time 64, 134
Outback MAX User Guide
167
PN 875-0325-000 Rev A1
Index
speed 9
engine speed during calibration 46
eTurns 110
starting
new job 68
Outback MAX after working with a job
4
Outback MAX for first time 3
steering
attack 56
sensitivity 56
smoothing 15
test 30
Steering button 8
steering options
steering attack 50
steering sensitivity 49
steering smoothing 50
straight path
A=B grid option 93
A=B line option 93
defining a new A=B line 96
overview 91
returning to a point 96
setting an A+ Direction line 95
setting an A=B line 94
using a previously defined A=B line 96
using previous A=B line 97
subscriptions 20
switchbox
settings 25
using 143
system calibration 63
systemwide settings
2D or 3D projection 16
headland alert 16
language 14
local time 15
night mode 17
NMEA output 19
screen brightness 14
steering smoothing 15
units of measure 15
steering test 30
Turn Direction setting (eTurns) 107
U
units of measure 15
updating point B 103
using 128
V
valve type (vehicle) 54
vehicle
adding 53
calibration 55
calibration overview 45
calibration steps for vehicle types 45
color 53
deleting 58
dimensions 54
editing 57
exporting 58
importing 57
loading previous 57
name 53
overview 52
position 76, 77
type 54
valve type 54
wheelbase 55
vehicle view (map view) 76
W
WAAS 160
wheelbase 55
width, implement 61
worked area 9
Z
zoom
buttons 6
distance indicator 8
zooming in 12
zooming out 12
T
tank level 123
template, job 74
template, job template 73
terminal buttons 4
Terminal Diagnostics screen 150
test sections 133
top down (map perspective) 77
Trigger value, rate control calibration 63,
127
troubleshooting
status and diagnostics screens 146
Outback MAX User Guide
168
PN 875-0325-000 Rev A1
End User License Agreement
IMPORTANT - This is an agreement (the "Agreement") between you, the end purchaser ("Licensee") and Hemisphere
GPS Inc. ("Hemisphere") which permits Licensee to use the Hemisphere software (the "Software") that accompanies this
Agreement. This Software may be licensed on a standalone basis or may be embedded in a Product. Please read and
ensure that you understand this Agreement before installing or using the Software Update or using a Product.
In this agreement any product that has Software embedded in it at the time of sale to the Licensee shall be referred to as a
"Product". As well, in this Agreement, the use of a Product shall be deemed to be use of the Software which is embedded
in the Product.
BY INSTALLING OR USING THE SOFTWARE UPDATE OR THE PRODUCT, LICENSEE THEREBY AGREES TO BE LEGALLY
BOUND BY THE TERMS OF THIS AGREEMENT. IF YOU DO NOT AGREE TO THESE TERMS, (I) DO NOT INSTALL OR USE
THE SOFTWARE, AND (II) IF YOU ARE INSTALLING AN UPDATE TO THE SOFTWARE, DO NOT INSTALL THE UPDATE AND
PROMPTLY DESTROY IT.
HEMISPHERE PROVIDES LIMITED WARRANTIES IN RELATION TO THE SOFTWARE. AS WELL, THOSE WHO USE THE
EMBEDDED SOFTWARE DO SO AT THEIR OWN RISK. YOU SHOULD UNDERSTAND THE IMPORTANCE OF THESE AND
OTHER LIMITATIONS SET OUT IN THIS AGREEMENT BEFORE INSTALLING OR USING THE SOFTWARE OR THE PRODUCT.
1.
2.
LICENSE. Hemisphere hereby grants to Licensee a non-transferable and non-exclusive license to use the Software
as embedded in a Product and all Updates (collectively the "Software"), solely in binary executable form.
RESTRICTIONS ON USE. Licensee agrees that Licensee and its employees will not directly or indirectly, in any
manner whatsoever:
a.
install or use more copies of the Software than the number of copies that have been licensed;
b.
use or install the Software in connection with any product other than the Product the Software was intended
to be used or installed on as set out in the documentation that accompanies the Software.
c.
copy any of the Software or any written materials for any purpose except as part of Licensee's normal backup
processes;
d.
modify or create derivative works based on the Software;
e.
sub-license, rent, lease, loan or distribute the Software;
f.
permit any third party to use the Software;
g.
use or operate Product for the benefit of any third party in any type of service outsourcing, application service,
provider service or service bureau capacity;
h.
reverse engineer, decompile or disassemble the Software or otherwise reduce it to a human perceivable form;
i.
3.
4.
5.
6.
7.
8.
9.
Assign this Agreement or sell or otherwise transfer the Software to any other party except as part of the sale
or transfer of the whole Product.
UPDATES. At Hemisphere's discretion Hemisphere may make Updates available to Licensee. An update
("Update") means any update to the Software that is made available to Licensee including error corrections,
enhancements and other modifications. Licensee may access, download and install Updates during the Warranty
Period only. All Updates that Licensee downloads, installs or uses shall be deemed to be Software and subject to this
Agreement. Hemisphere reserves the right to modify the Product without any obligation to notify, supply or install
any improvements or alterations to existing Software.
SUPPORT. Hemisphere may make available directly or through its authorized dealers telephone and email support
for the Software. Contact Hemisphere to find the authorized dealer near you. As well, Hemisphere may make
available user and technical documentation regarding the Software. Hemisphere reserves the right to reduce and
limit access to such support at any time.
BACKUPS AND RECOVERY. Licensee shall back-up all data used, created or stored by the Software on a regular
basis as necessary to enable proper recovery of the data and related systems and processes in the event of a
malfunction in the Software or any loss or corruption of data caused by the Software. Licensee shall assume all risks
of loss or damage for any failure to comply with the foregoing.
OWNERSHIP. Hemisphere and its suppliers own all rights, title and interest in and to the Software and related
materials, including all intellectual property rights. The Software is licensed to Licensee, not sold.
TRADEMARKS. "Hemisphere GPS", "Outback Guidance", "BEELINE", "Crescent", "Eclipse" and the associated logos
are trademarks of Hemisphere. Other trademarks are the property of their respective owners. Licensee may not use
any of these trademarks without the consent of their respective owners.
LIMITED WARRANTY. Hemisphere warrants solely to the Licensee, subject to the exclusions and procedures set
forth herein below, that for a period of one (1) year from the original date of purchase of the Product in which it is
embedded (the "Warranty Period"), the Software, under normal use and maintenance, will conform in all material
respects to the documentation provided with the Software and any media will be free of defects in materials and
workmanship. For any Update, Hemisphere warrants, for 90 days from performance or delivery, or for the balance of
the original Warranty Period, whichever is greater, that the Update, under normal use and maintenance, will
conform in all material respects to the documentation provided with the Update and any media will be free of
defects in materials and workmanship. Notwithstanding the foregoing, Hemisphere does not warrant that the
Software will meet Licensee's requirements or that its operation will be error free.
WARRANTY EXCLUSIONS. The warranty set forth in Section (8) will not apply to any deficiencies caused by (a)
the Product not being used as described in the documentation supplied to Licensee, (b) the Software having been
altered, modified or converted in any way by anyone other than Hemisphere approved by Hemisphere, (c) any
malfunction of Licensee's equipment or other software, or (d) damage occurring in transit or due to any accident,
abuse, misuse, improper installation, lightning (or other electrical discharge) or neglect other than that caused by
Hemisphere. Hemisphere GPS does not warrant or guarantee the precision or accuracy of positions obtained when
using the Software (whether standalone or embedded in a Product). The Product and the Software is not intended
and should not be used as the primary means of navigation or for use in safety of life applications. The potential
10.
11.
12.
13.
14.
15.
16.
17.
18.
19.
20.
positioning and navigation accuracy obtainable with the Software as stated in the Product or Software
documentation serves to provide only an estimate of achievable accuracy based on specifications provided by the
US Department of Defense for GPS positioning and DGPS service provider performance specifications, where
applicable.
WARRANTY DISCLAIMER. EXCEPT AS EXPRESSLY SET OUT IN THIS AGREEMENT, HEMISPHERE MAKES NO
REPRESENTATION, WARRANTY OR CONDITION OF ANY KIND TO LICENSEE, WHETHER VERBAL OR WRITTEN
AND HEREBY DISCLAIMS ALL REPRESENTATIONS, WARRANTIES AND CONDITIONS OF ANY KIND INCLUDING
FITNESS FOR A PARTICULAR PURPOSE, MERCHANTABILITY, ACCURACY, RELIABILITY OR THAT THE USE OF THE
SOFTWARE WILL BE UNINTERRUPTED OR ERROR-FREE AND HEREBY DISCLAIMS ALL REPRESENTATIONS,
WARRANTIES AND CONDITIONS ARISING AS A RESULT OF CUSTOM, USAGE OR TRADE AND THOSE ARISING
UNDER STATUTE.
LIMITS ON WARRANTY DISCLAIMER. Some jurisdictions do not allow the exclusion of implied warranties or
conditions, so some of the above exclusions may not apply to Licensee. In that case, any implied warranties or
conditions which would then otherwise arise will be limited in duration to ninety (90) days from the date of the
license of the Software or the purchase of the Product. The warranties given herein give Licensee specific legal rights
and Licensee may have other rights which may vary from jurisdiction to jurisdiction.
CHANGE TO WARRANTY. No employee or agent of Hemisphere is authorized to change the warranty provided or
the limitation or disclaimer of warranty provisions. All such changes will only be effective if pursuant to a separate
agreement signed by senior officers of the respective parties.
WARRANTY CLAIM. In the event Licensee has a warranty claim Licensee must first check for and install all
Updates that are made available. The warranty will not otherwise be honored. Proof of purchase may be required.
Hemisphere does not honor claims asserted after the end of the Warranty Period.
LICENSEE REMEDIES. In all cases which involve a failure of the Software to conform in any material respect to the
documentation during the Warranty Period or a breach of a warranty, Hemisphere's sole obligation and liability, and
Licensee's sole and exclusive remedy, is for Hemisphere, at Hemisphere's option, to (a) repair the Software, (b)
replace the Software with software conforming to the documentation, or (c) if Hemisphere is unable, on a
reasonable commercial basis, to repair the Software or to replace the Software with conforming software within
ninety (90) days, to terminate this Agreement and thereafter Licensee shall cease using the Software. Hemisphere
will also issue a refund for the price paid by Licensee less an amount on account of amortization, calculated on a
straight-line basis over a deemed useful life of three (3) years.
LIMITATION OF LIABILITY. IN NO EVENT WILL HEMISPHERE BE LIABLE TO LICENSEE FOR ANY INCIDENTAL,
CONSEQUENTIAL, SPECIAL OR INDIRECT DAMAGES INCLUDING ARISING IN RELATION TO ANY LOSS OF DATA,
INCOME, REVENUE, GOODWILL OR ANTICIPATED SAVINGS EVEN IF HEMISPHERE HAS BEEN INFORMED OF THE
POSSIBILITY OF SUCH LOSS OR DAMAGE. FURTHER, IN NO EVENT WILL HEMISPHERE'S TOTAL CUMULATIVE
LIABILITY HEREUNDER, FROM ALL CAUSES OF ACTION OF ANY KIND, EXCEED THE TOTAL AMOUNT PAID BY
LICENSEE TO HEMISPHERE TO PURCHASE THE PRODUCT. THIS LIMITATION AND EXCLUSION APPLIES
IRRESPECTIVE OF THE CAUSE OF ACTION, INCLUDING BUT NOT LIMITED TO BREACH OF CONTRACT,
NEGLIGENCE, STRICT LIABILITY, TORT, BREACH OF WARRANTY, MISREPRESENTATION OR ANY OTHER LEGAL
THEORY AND WILL SURVIVE A FUNDAMENTAL BREACH.
LIMITS ON LIMITATION OF LIABILITY. Some jurisdictions do not allow for the limitation or exclusion of liability for
incidental or consequential damages, so the above limitation or exclusion may not apply to Licensee and Licensee
may also have other legal rights which may vary from jurisdiction to jurisdiction.
BASIS OF BARGAIN. Licensee agrees and acknowledges that Hemisphere has set its prices and the parties have
entered into this Agreement in reliance on the limited warranties, warranty disclaimers and limitations of liability set
forth herein, that the same reflect an agreed-to allocation of risk between the parties (including the risk that a
remedy may fail of its essential purpose and cause consequential loss), and that the same forms an essential basis
of the bargain between the parties. Licensee agrees and acknowledges that Hemisphere would not have been able
to sell the Product at the amount charged on an economic basis without such limitations.
PROPRIETARY RIGHTS INDEMNITY. Hemisphere shall indemnify, defend and hold harmless Licensee from and
against any and all actions, claims, demands, proceedings, liabilities, direct damages, judgments, settlements, fines,
penalties, costs and expenses, including royalties and attorneys' fees and related costs, in connection with or arising
out of any actual infringement of any third party patent, copyright or other intellectual property right by the Software
or by its use, in accordance with this Agreement and documentation, PROVIDED THAT: (a) Hemisphere has the right
to assume full control over any action, claim, demand or proceeding, (b) Licensee shall promptly notify Hemisphere
of any such action, claim, demand, or proceeding, and (c) Licensee shall give Hemisphere such reasonable
assistance and tangible material as is reasonably available to Licensee for the defense of the action, claim, demand
or proceeding. Licensee shall not settle or compromise any of same for which Hemisphere has agreed to assume
responsibility without Hemisphere's prior written consent. Licensee may, at its sole cost and expense, retain
separate counsel from the counsel utilized or retained by Hemisphere.
INFRINGEMENT. If use of the Software may be enjoined due to a claim of infringement by a third party then, at its
sole discretion and expense, Hemisphere may do one of the following: (a) negotiate a license or other agreement so
that the Product is no longer subject to such a potential claim, (b) modify the Product so that it becomes noninfringing, provided such modification can be accomplished without materially affecting the performance and
functionality of the Product, (c) replace the Software, or the Product, with non-infringing software, or product, of
equal or better performance and quality, or (d) if none of the foregoing can be done on a commercially reasonable
basis, terminate this license and Licensee shall stop using the Product and Hemisphere shall refund the price paid by
Licensee less an amount on account of amortization, calculated on a straight-line basis over a deemed useful life of
three (3) years.
The foregoing sets out the entire liability of Hemisphere and the sole obligations of Hemisphere to Licensee in
respect of any claim that the Software or its use infringes any third party rights.
INDEMNIFICATION. Except in relation to an infringement action, Licensee shall indemnify and hold Hemisphere
harmless from any and all claims, damages, losses, liabilities, costs and expenses (including reasonable fees of
lawyers and other professionals) arising out of or in connection with Licensee's use of the Product, whether direct or
indirect, including without limiting the foregoing, loss of data, loss of profit or business interruption.
21.
22.
23.
24.
25.
26.
27.
28.
TERMINATION. Licensee may terminate this Agreement at any time without cause. Hemisphere may terminate this
Agreement on 30 days notice to Licensee if Licensee fails to materially comply with each provision of this
Agreement unless such default is cured within the 30 days. Any such termination by a party shall be in addition to
and without prejudice to such rights and remedies as may be available, including injunction and other equitable
remedies. Upon receipt by Licensee of written notice of termination from Hemisphere or termination by Licensee,
Licensee shall at the end of any notice period (a) cease using the Software; and (b) return to Hemisphere (or destroy
and provide a certificate of a Senior Officer attesting to such destruction) the Software and all related material and
any magnetic or optical media provided to Licensee. The provisions of Sections 6), 7), 8), 9), 10), 15), 21), 26) and 27)
herein shall survive the expiration or termination of this Agreement for any reason.
EXPORT RESTRICTIONS. Licensee agrees that Licensee will comply with all export control legislation of Canada,
the United States, Australia and any other applicable country's laws and regulations, whether under the Arms
Export Control Act, the International Traffic in Arms Regulations, the Export Administration Regulations, the
regulations of the United States Departments of Commerce, State, and Treasury, or otherwise as well as the export
control legislation of all other countries.
PRODUCT COMPONENTS. The Product may contain third party components. Those third party components may
be subject to additional terms and conditions. Licensee is required to agree to those terms and conditions in order to
use the Product.
FORCE MAJEURE EVENT. Neither party will have the right to claim damages as a result of the other's inability to
perform or any delay in performance due to unforeseeable circumstances beyond its reasonable control, such as
labor disputes, strikes, lockouts, war, riot, insurrection, epidemic, Internet virus attack, Internet failure, supplier
failure, act of God, or governmental action not the fault of the non-performing party.
FORUM FOR DISPUTES. The parties agree that the courts located in Calgary, Alberta, Canada and the courts of
appeal there from will have exclusive jurisdiction to resolve any disputes between Licensee and Hemisphere
concerning this Agreement or Licensee's use or inability to use the Software and the parties hereby irrevocably
agree to attorn to the jurisdiction of those courts. Notwithstanding the foregoing, either party may apply to any court
of competent jurisdiction for injunctive relief.
APPLICABLE LAW. This Agreement shall be governed by the laws of the Province of Alberta, Canada, exclusive of
any of its choice of law and conflicts of law jurisprudence.
CISG. The United Nations Convention on Contracts for the International Sale of Goods will not apply to this
Agreement or any transaction hereunder.
GENERAL. This is the entire agreement between Licensee and Hemisphere relating to the Product and Licensee's
use of the same, and supersedes all prior, collateral or contemporaneous oral or written representations, warranties
or agreements regarding the same. No amendment to or modification of this Agreement will be binding unless in
writing and signed by duly authorized representatives of the parties. Any and all terms and conditions set out in any
correspondence between the parties or set out in a purchase order which are different from or in addition to the
terms and conditions set forth herein, shall have no application and no written notice of same shall be required. In
the event that one or more of the provisions of this Agreement is found to be illegal or unenforceable, this
Agreement shall not be rendered inoperative but the remaining provisions shall continue in full force and effect.
Warranty Notice
COVERED PRODUCTS: This warranty covers all products manufactured by Hemisphere GPS and purchased by the end
purchaser (the "Products"), unless otherwise specifically and expressly agreed in writing by Hemisphere GPS.
LIMITED WARRANTY: Hemisphere GPS warrants solely to the end purchaser of the Products, subject to the exclusions
and procedures set forth below, that the Products sold to such end purchaser and its internal components shall be free,
under normal use and maintenance, from defects in materials, and workmanship and will substantially conform to
Hemisphere GPS’s applicable specifications for the Product, for a period of 12 months from delivery of such Product to
such end purchaser (the ”Warranty Period”). Repairs and replacement components for the Products are warranted, subject
to the exclusions and procedures set forth below, to be free, under normal use and maintenance, from defects in material
and workmanship, and will substantially conform to Hemisphere GPS’s applicable specifications for the Product, for 90
days from performance or delivery, or for the balance of the original Warranty Period, whichever is greater.
EXCLUSION OF ALL OTHER WARRANTIES. The LIMITED WARRANTY shall apply only if the Product is properly and
correctly installed, configured, interfaced, maintained, stored, and operated in accordance with Hemisphere GPS’s relevant
User’s Manual and Specifications, AND the Product is not modified or misused. The Product is provided “AS IS” and the
implied warranties of MERCHANTABILITY and FITNESS FOR A PARTICULAR PURPOSE and ALL OTHER WARRANTIES,
express, implied or arising by statute, by course of dealing or by trade usage, in connection with the design, sale,
installation, service or use of any products or any component thereof, are EXCLUDED from this transaction and shall not
apply to the Product. The LIMITED WARRANTY is IN LIEU OF any other warranty, express or implied, including but not
limited to, any warranty of MERCHANTABILITY or FITNESS FOR A PARTICULAR PURPOSE, title, and non-infringement.
LIMITATION OF REMEDIES. The purchaser’s EXCLUSIVE REMEDY against Hemisphere GPS shall be, at Hemisphere
GPS’s option, the repair or replacement of any defective Product or components thereof. The purchaser shall notify
Hemisphere GPS or a Hemisphere GPS’s approved service center immediately of any defect. Repairs shall be made
through a Hemisphere GPS approved service center only. Repair, modification or service of Hemisphere GPS products by
any party other than a Hemisphere GPS approved service center shall render this warranty null and void. The remedy in
this paragraph shall only be applied in the event that the Product is properly and correctly installed, configured, interfaced,
maintained, stored, and operated in accordance with Hemisphere GPS’s relevant User’s Manual and Specifications, AND
the Product is not modified or misused. NO OTHER REMEDY (INCLUDING, BUT NOT LIMITED TO, SPECIAL, INDIRECT,
INCIDENTAL, CONSEQUENTIAL OR CONTINGENT DAMAGES FOR LOST PROFITS, LOST SALES, INJURY TO PERSON OR
PROPERTY, OR ANY OTHER INCIDENTAL OR CONSEQUENTIAL LOSS) SHALL BE AVAILABLE TO PURCHASER, even if
Hemisphere GPS has been advised of the possibility of such damages. Without limiting the foregoing, Hemisphere GPS
shall not be liable for any damages of any kind resulting from installation, use, quality, performance or accuracy of any
Product.
HEMISPHERE IS NOT RESPONSIBLE FOR PURCHASER’S NEGLIGENCE OR UNAUTHORIZED USES OF THE
PRODUCT. IN NO EVENT SHALL HEMISPHERE GPS BE IN ANY WAY RESPONSIBLE FOR ANY DAMAGES RESULTING
FROM PURCHASER’S OWN NEGLIGENCE, OR FROM OPERATION OF THE PRODUCT IN ANY WAY OTHER THAN AS
SPECIFIED IN HEMISPHERE GPS’S RELEVANT USER’S MANUAL AND SPECIFICATIONS. Hemisphere GPS is NOT
RESPONSIBLE for defects or performance problems resulting from (1) misuse, abuse, improper installation, neglect of
Product; (2) the utilization of the Product with hardware or software products, information, data, systems, interfaces or
devices not made, supplied or specified by Hemisphere GPS; (3) the operation of the Product under any specification other
than, or in addition to, the specifications set forth in Hemisphere GPS’s relevant User’s Manual and Specifications; (4)
damage caused by accident or natural events, such as lightning (or other electrical discharge) or fresh/salt water
immersion of Product; (5) damage occurring in transit; (6) normal wear and tear; or (7) the operation or failure of operation
of any satellite-based positioning system or differential correction service; or the availability or performance of any
satellite-based positioning signal or differential correction signal.
THE PURCHASER IS RESPONSIBLE FOR OPERATING THE VEHICLE SAFELY. The purchaser is solely responsible
for the safe operation of the vehicle used in connection with the Product, and for maintaining proper system control
settings. UNSAFE DRIVING OR SYSTEM CONTROL SETTINGS CAN RESULT IN PROPERTY DAMAGE, INJURY, OR DEATH.
The purchaser is solely responsible for his/her safety and for the safety of others. The purchaser is solely responsible for
maintaining control of the automated steering system at all times. THE PURCHASER IS SOLELY RESPONSIBLE FOR
ENSURING THE PRODUCT IS PROPERLY AND CORRECTLY INSTALLED, CONFIGURED, INTERFACED, MAINTAINED,
STORED, AND OPERATED IN ACCORDANCE WITH HEMISPHERE GPS’S RELEVANT USER’S MANUAL AND
SPECIFICATIONS. Hemisphere GPS does not warrant or guarantee the positioning and navigation precision or accuracy
obtained when using Products. Products are not intended for primary navigation or for use in safety of life applications.
The potential accuracy of Products as stated in Hemisphere GPS literature and/or Product specifications serves to provide
only an estimate of achievable accuracy based on performance specifications provided by the satellite service operator (i.e.
US Department of Defense in the case of GPS) and differential correction service provider. Hemisphere GPS reserves the
right to modify Products without any obligation to notify, supply or install any improvements or alterations to existing
Products.
GOVERNING LAW. This agreement and any disputes relating to, concerning or based upon the Product shall be
governed by and interpreted in accordance with the laws of the State of Arizona.
OBTAINING WARRANTY SERVICE. In order to obtain warranty service, the end purchaser must bring the Product to a
Hemisphere GPS approved service center along with the end purchaser's proof of purchase. Hemisphere GPS does not
warrant claims asserted after the end of the warranty period. For any questions regarding warranty service or to obtain
information regarding the location of any of Hemisphere GPS approved service center, contact Hemisphere GPS at the
following address:
Hemisphere GPS
8444 N. 90th Street, Suite 130
Scottsdale, AZ 85258
Phone: 480-348-9919 Fax: 480-348-6370
[email protected]
www.hemispheregps.com
www.outbackguidance.com