1
Hema Explorer app User Guide Android
Table of Contents
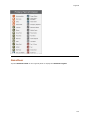
Overview ........................................................................................................................... 1
About this User Guide ....................................................................................................... 1
Portable (offline) versions of this user guide ........................................................................ 1
GPS on Android devices .................................................................................................... 2
A note about the Android interface ..................................................................................... 2
Getting to know the screen layout ...................................................................................... 3
Initial Startup Process....................................................................................................... 4
Creating a Cloud account ................................................................................................ 5
Downloading Initial Content ............................................................................................ 6
Manually downloading base content .................................................................................... 8
Useful Info ....................................................................................................................... 11
Hema Explorer Cloud ...................................................................................................... 11
App Support .................................................................................................................. 11
Tech Support Knowledegbase ....................................................................................... 11
Tech Support Ticket System ......................................................................................... 11
Maps ............................................................................................................................... 13
Overview....................................................................................................................... 13
Map Layers .................................................................................................................... 13
Zoom Levels .................................................................................................................. 15
Zoom Levels on Android version of Hema Explorer .......................................................... 16
Zoom level to scale mapping......................................................................................... 16
Tiles ............................................................................................................................. 17
Zooming into maps ........................................................................................................ 17
Downloading Maps ............................................................................................................ 19
Introduction .................................................................................................................. 19
Downloading Map Sections .............................................................................................. 19
Selecting which HERE Maps layer to download ................................................................... 20
i
Table of Contents
Managing Maps .............................................................................................................. 21
Downloading HERE Maps by area selection ..................................................................... 21
Downloading maps along a track ................................................................................... 24
Removing Downloaded Map Sections ............................................................................. 25
Adding Additional Maps ................................................................................................ 27
Side panel ........................................................................................................................ 31
Side Panel ..................................................................................................................... 31
My Data section .......................................................................................................... 32
Trip panel...................................................................................................................... 34
Introduction................................................................................................................ 34
Editing the Trip panel layout ......................................................................................... 36
Creating and Recording Tracks ...................................................................................... 37
GPS Status panel ........................................................................................................... 38
Tracks panel .................................................................................................................. 39
Tracks List panel ......................................................................................................... 40
Track Details panel ...................................................................................................... 40
Editing Tracks ............................................................................................................. 41
Deleting Tracks ........................................................................................................... 46
Waypoints panel ............................................................................................................ 49
Waypoint Details panel................................................................................................. 50
Deleting Waypoints ...................................................................................................... 55
Editing Waypoints........................................................................................................ 56
Settings Panel................................................................................................................ 60
Help Pane ................................................................................................................... 61
About......................................................................................................................... 61
Hema Explorer Cloud pane ........................................................................................... 62
Units pane .................................................................................................................. 63
Map Downloads pane ................................................................................................... 64
ii
Hema Explorer app User Guide - Android
Map Controls pane ....................................................................................................... 64
Storage pane .............................................................................................................. 65
Advanced pane ........................................................................................................... 66
Import File .................................................................................................................... 68
Downloads panel ............................................................................................................ 69
Pausing Downloads ...................................................................................................... 69
Resuming Paused Downloads ........................................................................................ 70
Layers panel ..................................................................................................................... 73
Introduction .................................................................................................................. 73
Maps ............................................................................................................................ 74
Weather Radar display .................................................................................................... 75
My Waypoints ................................................................................................................ 76
POIs ............................................................................................................................. 77
POIs ................................................................................................................................ 79
A note about Waypoints vs. POIs ..................................................................................... 79
Introduction .................................................................................................................. 79
POI Categories ............................................................................................................... 81
POI Nametag ................................................................................................................. 82
Point of Interest Details panel .......................................................................................... 82
POI Info pane ............................................................................................................. 83
Contacts pane ............................................................................................................. 84
Fuel pane ................................................................................................................... 84
Facilities pane ............................................................................................................. 85
Activities pane ............................................................................................................ 85
POI Actions ................................................................................................................... 86
Guide Me .................................................................................................................... 86
Driving Directions ........................................................................................................ 86
Waypoints ........................................................................................................................ 89
iii
Table of Contents
A note about Waypoints vs. POIs ..................................................................................... 89
Introduction .................................................................................................................. 89
Adding Waypoints .......................................................................................................... 89
Create Waypoint and Create Waypoint Near Me............................................................... 90
Take Picture................................................................................................................ 90
Sorting data .................................................................................................................. 93
Maps panel ................................................................................................................. 93
Tracks panel ............................................................................................................... 93
Waypoints panel .......................................................................................................... 94
Waypoint Details panel ................................................................................................... 95
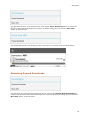
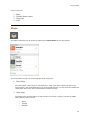
Routes ............................................................................................................................. 97
Introduction .................................................................................................................. 97
A note about creating routes with the Hema Explorer Android app........................................ 97
Creating Routes ............................................................................................................. 97
Tips on naming your data ............................................................................................. 99
Summary .....................................................................................................................103
Editing Routes ..............................................................................................................104
Modifying a Route .......................................................................................................106
Joining Routes ..............................................................................................................107
Following a Route ..........................................................................................................108
Legends ..........................................................................................................................109
Introduction .................................................................................................................109
1:250k Topo .................................................................................................................110
1:1M Road ...................................................................................................................110
POI Legend ..................................................................................................................111
Gazetteer .....................................................................................................................112
Searching .......................................................................................................................115
Glossary .........................................................................................................................117
iv
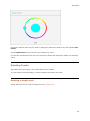
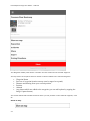
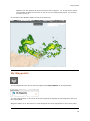
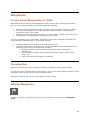
Overview
The Hema Explorer app is designed to allow you to find where you are on a map. The maps are
generally designed with 4WD vehicles and touring in mind.
If you have a waypoint visible, you can use the "Go To" function to draw a routing line to get to
the waypoint "as the crow flies", or opt to get driving directions in the Google Maps application
externally to the Hema Explorer app. Note that the Google Maps app may not be installed on your
device - you may need to install it from the Google Play Store.
The app does not do "turn-by-turn" navigation natively, rather it is designed so you can see
exactly where you are at any given time, and how you got to where you are currently located.
About this User Guide
The user guide you are currently viewing will change periodically as new features are added or
functionality changes within the app.
While we do our best to make sure that the information contained herein is accurate and useful,
you may find a problem, or feel that a certain topic requires more explanation.
In this case, please submit a ticket to our Tech Support department HERE.
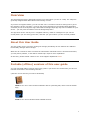
Portable (offline) versions of this user guide
You can download offline versions of this user guide to your device for access when you have no
internet connection in the following formats:
(click the icon for the file you want to download)
ePub file for use in most common eReader devices (including iOS, which uses the iBooks
app)
mobi file for use on Amazon Kindle eReader devices
1
Overview
PDF file for viewing almost everywhere else
Note that your device may support multiple formats.
GPS on Android devices
GPS positioning data is provided within Android devices by a function called Location Services.
Location Services can be found under the Settings of your device.
The function of Location Services is to provide positioning data to any apps on the device which
may have a use for it (including Navigation apps).
Android devices fall into two categories
1. Those that have internal GPS circuitry
2. Those that don't have any internal GPS
Generally speaking, almost all Android devices have a GPS receiver built-in, but there are some
which don't. These are usually cheaper generic devices.
If you wish to use the app to its fullest on an Android device without a built-in GPS, then you must
obtain an external GPS. Usually, these connect via Bluetooth.
If you have a device which does not have an internal GPS, it is up to you to source an external
GPS receiver which functions correctly via Location Services.
A note about the Android interface
Android is a highly customisable operating system.
The entire appearance of the user interface can be customised and changed.
Throughout this user guide there are images depicting various panels and panes which make up
the interface of the Hema Explorer app. Most of the images show the interface as it appears while
running on a Google Nexus 7 tablet with the stock Android operating system (version 4.4 as at the
time of writing).
Generally speaking, there will be no functional difference within the Hema Explorer app, regardless
of which version of Android it is running under.
Some images within the user guide have been modified or have been enhanced or magnified for
the sake of clarity.
2
Hema Explorer app User Guide - Android
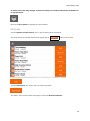
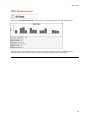
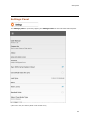
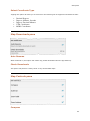
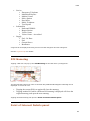
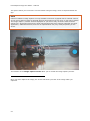
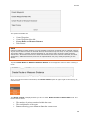
Getting to know the screen layout
The screen of the Hema Explorer app is shown above. The image shows the basic layout of the
app.
The layout consists of a map panel (covering the majority of the screen), with slide out panels at
the left and bottom of the screen.
There are a number of buttons location along the app titlebar along the top of the screen.
Access to some functions are via these buttons, while others are accessible from the slide out
panels.
Rotating the device will switch the app to landscape mode. All buttons etc. are still in the same
place. An example of landscape mode is shown below (note that the Android status bar has been
removed in this example).
3
Overview
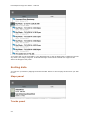
Initial Startup Process
Once started, the app will guide you through the initial startup process. If you are starting the app
after installing it on your device for the first time, you should accept the recommendations shown
here.
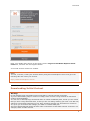
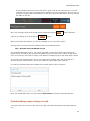
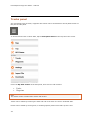
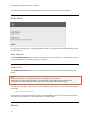
When you first start the app you will see the startup panel, shown below:
4
Hema Explorer app User Guide - Android
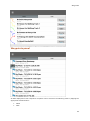
You are prompted to do one of the following:
•
•
•
Login to your existing Hema Explorer Cloud account via the I already have an
account link
Create an account via the Register with Hema button
Log in using your Facebook account via the Log in with Facebook button
You can choose to skip login at this point, but we do not recommend doing this.
Logging into the app allows you to use the additional features provided by the Cloud, such as autosync of your track logs and waypoints.
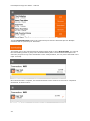
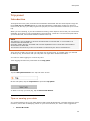
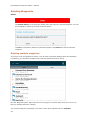
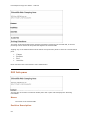
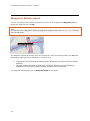
Creating a Cloud account
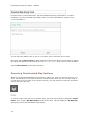
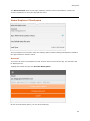
From the initial screen, tap the Register with Hema button. The account registration screen will
open.
5
Overview
Enter your details where shown on the panel, tick the I agree to the Hema Explorer Cloud
terms box, and then click the Register button.
Your Cloud account will then be created.
NOTE
You can, of course, create your account directly using the Hema Explorer Cloud. Just go to the
following URL and create your account.
http://cloud.hemaexplorer.com.au
Downloading Initial Content
Warning!
Do not attempt large downloads unless connected to a decent internet connection.
If you are downloading maps or sections of maps, there could be a large amount of data which
needs to be downloaded.
It is not wise to attempt large downloads while on mobile broadband plans, unless you are certain
that you have a large download limit, or that you are not risking reaching your limit. Your ISP may
charge for excess data consumed on your plan, and these charges can sometimes be excessive.
It is up to you to monitor and manage your data on a mobile data plan.
Any large data downloads should be done while connected to a fast stable internet connection, for
example, ADSL via WiFi at home.
6
Hema Explorer app User Guide - Android
After you have logged in, it is recommended that you allow the app to download the standard
content.
The standard content includes the Hema Maps Layers, and the Hema POIs.
The POI content will be downloaded automatically. ie. you cannot skip the download of the POI
content.
The app will prompt you to start the download process.
Skipping download of base content
You can choose to skip the download of the base content, but we recommend that you do not skip
this download.
If you do skip the content download, you will need to manually download it later. See this section
of the user guide for information on manually downloading the content.
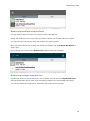
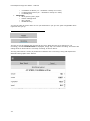
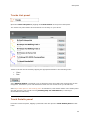
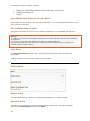
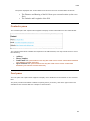
While downloading of content is in progress, you can check the status by going to the Downloads
panel.
Tap the Downloads button on the pull-out side panel to view the Downloads panel.
Tapping the button will open the Downloads panel, showing details of any downloads. As you can
see in the example below, the panel shows the status while downloading over an existing WiFi
internet connection.
Once items in the download list have completed downloading, they are displayed with a tick
adjacent to them, as shown below.
7
Overview
Manually downloading base content
Warning!
Do not attempt large downloads unless connected to a decent internet connection.
If you are downloading maps or sections of maps, there could be a large amount of data which
needs to be downloaded.
It is not wise to attempt large downloads while on mobile broadband plans, unless you are certain
that you have a large download limit, or that you are not risking reaching your limit. Your ISP may
charge for excess data consumed on your plan, and these charges can sometimes be excessive.
It is up to you to monitor and manage your data on a mobile data plan.
Any large data downloads should be done while connected to a fast stable internet connection, for
example, ADSL via WiFi at home.
If you have chosen to skip the downloading of the base content when you first stated the app, you
will have to download it at some stage in order to use it. As you chose to skip over the automatic
download of the base content, you will have to do it manually.
Open the Layers panel by tapping the Layers button at top-right.
8
Hema Explorer app User Guide - Android
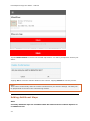
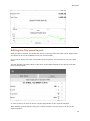
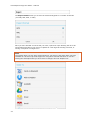
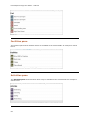
On the Layers panel, tap the Add more maps button
You will see the Add more maps panel, as shown below
9
Overview
As you can see from the example shown above, the maps which form the base content (Hema
Topo Atlas and Hema Road Atlas) both have a download button adjacent to them.
Tapping the Download button next to an item will add that item to the download queue.
Once the selected item has been queued, you will see the button has changed to Downloading.
Tapping the Downloading button will take you to the Downloads panel showing the status of the
downloads.
10
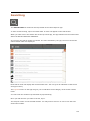
Useful Info
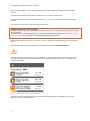
Here is some information which you may find useful while using the app.
Please note that all user guides etc. are constantly being updated. New versions are released as
soon as they become available.
Hema Explorer Cloud
The Hema Explorer Cloud is a useful extension of the app.
You can find the cloud at the following URL:
http://cloud.hemaexplorer.com.au/
When you first run the app on your device, you were prompted to create a user account. If you
have a user account, you can log in to the cloud with that account. If you did not create an
account, you can create one from within the app, or directly on the Cloud site itself.
App Support
Hema Maps maintains a Tech Support website in an effort to answer questions and provide
support for the use of our products.
The Tech Support website consists of the following:
Tech Support Knowledegbase
A Knowledgebase which consists of how-to articles and answers to some common questions. The
Knowledgebase divides the articles into categories and provides a search facility to make finding
the information you are looking for easier.
You can find the Tech Support Knowledgebase at the following URL:
http://hema.helpserve.com/Knowledgebase/List
Tech Support Ticket System
The Tech Support Ticket System allows you to submit a query related to any of the Hema
products.
The Tech Support Ticket System will automatically assign a case number to your query.
The Tech Support team will then do their best to assist you with the issue you are having via email
response.
You can find the Tech Support Ticket System at the following URL:
http://hema.helpserve.com/Tickets/Submit
11
Useful Info
Tips for using the Tech Support Ticket System
•
•
Please search the Knowledgebase before you submit a ticket. The answer to your
query is often already answered within the Knowledgebase.
If you do need to submit a ticket, please provide as much pertinent information related
to the issue you are having as possible. It makes it hard to assist if your ticket query is
along the lines of "The app doesn't work".
12
Maps
Overview
This chapter of the User Guide is designed to introduce you to some of the concepts related to the
use of maps within the Hema Explorer app.
You do not need to become a map expert, but it helps to have some understanding to make your
use of the app more enjoyable.
With typical mapping apps (such as Google Maps, etc.), a problem becomes apparent once you
leave an area where you have internet connectivity. The issue is that without an internet
connection, you can no longer "stream" new map information to your device, thus, you will have
no mapping for those locations. The Hema Explorer app is designed so that you have a set of maps
on-board, regardless of whether you have an active internet connection while using the app.
Warning!
Do not attempt large downloads unless connected to a decent internet connection.
If you are downloading maps or sections of maps, there could be a large amount of data which
needs to be downloaded.
It is not wise to attempt large downloads while on mobile broadband plans, unless you are certain
that you have a large download limit, or that you are not risking reaching your limit. Your ISP may
charge for excess data consumed on your plan, and these charges can sometimes be excessive.
It is up to you to monitor and manage your data on a mobile data plan.
Any large data downloads should be done while connected to a fast stable internet connection, for
example, ADSL via WiFi at home.
Map Layers
Maps are accessible from the Layers panel within the app. Each map is a separate layer. A good
analogy of layers is if you imagine a stack of paper maps sitting on a coffee table. Each map sheet
could be thought of as a "layer". Only one map (or layer) is visible at any one time. This is the one
which is sitting on the top of the pile. This is your "current map".
In the Hema Explorer app, layers come in a few forms:
1. Hema Maps Layers
2. In-app Purchased Maps
3. Additional layers provided by HERE Maps
Generally speaking, an In-app Purchased Map will offer more detail than the corresponding area of
the current Hema Maps Layer.
For example if you were on Fraser Island in Queensland, you may be viewing the Hema Maps
Layer of that area, but if you wished for a more detailed view, you might switch to the In-app
Purchased Map for Fraser Island.
Of course, not all areas will be covered by a specific In-app Purchased Map. In-app Purchased Map
availability is determined by many factors.
As well as map layers provided by Hema, the app gives you access to a number of other layers,
such as:
13
Maps
•
•
•
Street (provided by HERE Maps)
Terrain (provided by HERE Maps)
Satellite (provided by HERE Maps)
These additional layers provide another view of the area you are currently traversing.
Warning!
The layers provided by 3rd parties cannot be downloaded in their entirety for offline use.
They are available only where your device has an internet connection.
You CAN, however, download areas of these layers and save them for later use. For
example, you may be going to a specific area of Cape York, and wish to download the
satellite imagery of the area you will be visiting. You can do this using the Download for
offline function on the Layers pane.
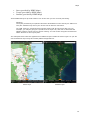
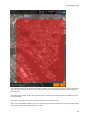
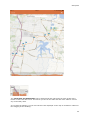
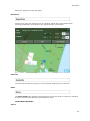
The examples below show the appearance of different layers within the same region. As you can
see the different layers may have totally different appearances.
Hema Layer
Satellite layer
14
Hema Explorer app User Guide - Android
Street layer
Terrain layer
Zoom Levels
Each map (or map layer) may consist of a number of zoom levels. As you zoom into (or enlarge)
the map which is currently displayed, the zoom level will change.
Each layer has a specific range of zoom levels which it covers. Once you have reached the
maximum zoom level of the current layer, it is not possible to zoom in any further. If an In-app
Purchased Map exists for that area, and you have it downloaded on your device, you can change
layers to view the In-app Purchased Map.
It is possible to display the current zoom level on screen as a small indicator called the Zoom
Label adjacent to the Map Scale Indicator by switching on the option in the Settings Panel.
Remember, you can double-tap the map to zoom in one whole zoom level at a time.
The image below shows an example of the Zoom-Level indicator, when switched on.
The diagram below gives you an idea of the different map layers in the Hema Explorer app.
15
Maps
Zoom Levels on Android version of Hema Explorer
Hema 1:1M 4.8 - 11.8
Hema 1:250K 11.9 - 13.8
HERE Maps [Street, Terrain, Satellite] 13.9 - MAX
Zoom level to scale mapping
Zoom Level
Approximate
Scale
0
1:
591,657,551
1
1:
295,828,775
2
1:
147,914,388
3
1 : 73,957,193
4
1 : 36,978,597
5
1 : 18,489,298
6
1 : 9,244,649
7
1 : 4,622,325
8
1 : 2,311,162
9
1 : 1,155,581
10
1 : 577,791
16
Hema Explorer app User Guide - Android
11
1 : 288,885
12
1 : 144,448
13
1 : 72,224
14
1 : 36,112
15
1 : 18,056
16
1 : 9,028
17
1 : 4,514
18
1 : 2,257
19
1 : 1,128
Tiles
Each map layer zoom-level consists of a large number of "tiles". A map tile is a small square of
map. When tiles are "stitched together" by the app, they form an area of map visible to you as a
seamless whole.
So, for each map layer, there could be a number of zoom-levels, and each zoom-level consists of a
(large) number of tiles.
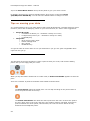
Zooming into maps
You can zoom into maps (ie. increase the level of detail) using two methods:
•
•
The usual "pinch open / closed" mechanism which is used on tablets and smartphones.
Double-tap the screen
Pinch Closed
Zoom Out
17
Pinch Open
Zoom In
Double Tap
Zoom in One Zoom Level at a
time
Downloading Maps
Warning!
Do not attempt large downloads unless connected to a decent internet connection.
If you are downloading maps or sections of maps, there could be a large amount of data which
needs to be downloaded.
It is not wise to attempt large downloads while on mobile broadband plans, unless you are certain
that you have a large download limit, or that you are not risking reaching your limit. Your ISP may
charge for excess data consumed on your plan, and these charges can sometimes be excessive.
It is up to you to monitor and manage your data on a mobile data plan.
Any large data downloads should be done while connected to a fast stable internet connection, for
example, ADSL via WiFi at home.
Introduction
When you install the app on your device, the app does not contain any maps. As part of the app
startup process, you are prompted to download the Hema Maps Layer.
You need to download the Hema Maps Layer so that it is available for offline use (ie. where you do
not have internet connectivity)
Note!
Be aware that downloading the Hema Maps Layer can take some time, as the data is large
(~2.5Gb). You also need to ensure that your device has enough free space on it to store the
downloaded data.
Apart from Hema Maps Layers, you can purchase and download one or more In-app Purchased
Maps. An In-app Purchased Map is a map which will be focused on a specific area of interest.
Currently, Android in-app purchases are available at no cost as an introductory offer.
Downloading Map Sections
Remember, some map layers are downloaded in their entirety for offline use.
•
•
Hema Maps Layers are completely downloaded (normally when the app is first run on
your device. If you purchase any additional Hema maps, these are also downloaded in
their entirety to your device.
HERE Maps are not able to be downloaded completely, but you have options to
download sections of these maps for offline use:
1. You can select a specified area of one of the HERE Maps layers, choose a zoom level, and
download the tiles for later offline use.
2. You can create a route, or view a track, and have the app download the map tiles required
to cover the path of the selected route or track.
Each of these options is discussed in more detail below.
19
Downloading Maps
The first step in downloading HERE Maps for offline use is to select which layer out of the Street,
Terrain and Satellite layers you wish to download.
Selecting which HERE Maps layer to download
You must first decide which of the HERE Maps layers you would like to download. Simply activate
the layer you require from the Layers panel.
Tap the Layers button to open the Layers panel.
20
Hema Explorer app User Guide - Android
Select the HERE Maps layer you want by tapping it. The currently active HERE Maps layer is shown
via a tick next to it in the Layers panel.
Whichever HERE Maps layer is selected will be the one that gets downloaded by the methods
shown below.
Managing Maps
Downloading HERE Maps by area selection
Tips!
If you intend to download a map area for offline use, it is easier to center and
zoom the area you are interested in before you select the area using the download
for offline function.
Whichever HERE Maps layer is selected when you tap the "Download for offline"
button will be the layer which you save. ie. if you are viewing the "Terrain" HERE
Maps layer, then that will be the layer which is saved.
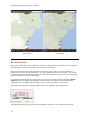
While on the Layers panel, tap the Download for offline button. The map area selection screen
will appear, which allows you to select an area for downloading.
On the map area selection screen, tap-and-drag to select an area of the currently selected HERE
Maps layer. As you drag, a translucent box will be drawn over the map to show the selected area.
21
Downloading Maps
You cannot drag the area selection box after creation. You must draw a new box if the existing one
does not suit. You can, however, resize the box using the circular drag handles at each corner of
the drag box.
The label at the center of the control bar shows how many tiles and the amount of data which will
be downloaded.
The label to the left of the slider control shows the current zoom level.
Once you are satisfied with the area, you can adjust the required zoom level using the slider at the
right of the control bar at the top of the screen.
22
Hema Explorer app User Guide - Android
Remember, there is a 2Gb data limit on each download.
23
Downloading Maps
If you increase the zoom level too much for a given area, the tile label will turn red. This
indicates you are trying to download more data than you are permitted to, and you will not
be able to continue with this download. In this case, adjust the Max Zoom value by moving
the slider to the left.
Once you are happy with the area that wish to download, tap the
right. If you change your mind, tap the
Cancel
Save
button at bottom-
button.
When you tap the Save button, you will be prompted to give your map a name.
The app gives your map area save a default name of the following form:
Map - DD/MM/YYYY HH:MM:SS am/pm
It is recommended that you give your saved map data a useful name rather than leaving the
default name. It might be fine to leave the default name if you only have a couple of map saves,
but if you have any more than a couple, it will become unwieldy trying to find which map is which.
As you see in the example below, giving your map area a sensible name will mean that it is
obvious what the map contains. You can use whatever map section name suits you.
You can also optionally add notes related to the saved map for future reference.
Once you are satisfied with your name tap the Save button to start the download process.
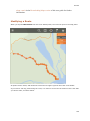
Downloading maps along a track
If you have a track or route on your device, the app can download map tiles along that path for
you.
24
Hema Explorer app User Guide - Android
From the track or route details panel, tap the Download Map Along Track button. You will be
prompted to give the download map tileset a name. The name will default to "Map for Track:
<Your Track Name>".
You can leave the default name or give it a new name, and or add notes if you require.
Once done, tap the Save button to begin download of the tileset. Once the Save button is tapped,
the map tiles download will be queued up in the Downloads panel, where you can check its status.
Tap the Cancel button to cancel the operation.
Removing Downloaded Map Sections
Whenever you download additional map sections for offline use, they will consume space on your
device. Periodically you may want to clean up old map sections which you are no longer using. ie.
you may do a big trip to Cape York, but after returning, you may decide to remove the unneeded
content until your next trip.
To view the maps which you have previously saved, open the Layers panel by tapping the Layers
button. Then, tap the My Maps button on the Layers panel. This will display the My Maps list,
showing any previously downloaded map sections.
25
Downloading Maps
Removing multiple map sections
You can delete multiple sections in one action from the My Maps list.
Simply tap-and-hold on one of the maps you wish to delete. The selected map will be ticked.
You can then tap on any of the other map sections you wish to delete.
Once you have selected the required map section for deletion, tap the Rubbish Bin button at
upper-right.
If you change your mind, tap the Done button without making any changes.
Removing a single map section
Tap the map section in the list which you wish to delete. This will open the Map Details pane.
The Map Details pane shows some more information related to the downloaded map section.
You can also display the map section, delete the map section from this panel.
26
Hema Explorer app User Guide - Android
Tap the Delete button to remove the selected map section. You will be prompted to confirm your
action.
Tapping OK will continue with the deletion of the content. Tapping Cancel will exit the process.
Note!
There will be a short delay while the content is deleted from your device's storage. The delay will
be proportional to the size of the content being deleted.
Adding Additional Maps
Note!
Currently additional maps are available within the Android version of Hema Explorer at
no additional cost.
27
Downloading Maps
At some point, this may change, and the currently free content will become available via
in-app purchase.
Open the Layers panel by tapping the Layers button.
Tap the Add more maps button. The in-app purchase panel will appear.
Any maps which are already installed will display with a
Remove
button next to them.
Tap the Add button next to the map you wish to purchase.
The status of the selected map will change to show the Download button.
28
Hema Explorer app User Guide - Android
Tap the Download button next to the required map to start the download process. Multiple
selections will be queued up for download.
The button next to the selected map will change status again to show Downloading. You can tap
the Downloading button to jump to the download status panel. The download status panel will
show the progress of any active downloads. In the example below, the only active download is the
Cape York map.
Once the download is complete, the download status screen will show a tick next to completed
downloads, as shown below:
29
Downloading Maps
If you wish, you can close the Download Status panel while downloads are active, and return to it
at any time from the pull-out side panel, by tapping the Downloads button.
30
Side panel
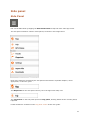
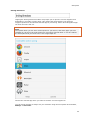
Side Panel
Pull out the Side Panel by tapping the Side Panel button at top-left of the main app screen.
The side panel contains a number of sub-panels, as shown in the image below.
Each of the functions provided by the sub-panels is discussed in separate chapters, where
appropriate, in this user guide.
The Map button on the side panel returns you to the app's main map view.
The Trip button on the side panel opens the Trip panel, showing details of the currently active
trip/track.
Further details are contained in the Trip panel section of this user guide.
31
Side panel
The GPS Status button opens the GPS Status panel, showing information related to the status
of the in-built GPS receiver.
Further details are in the GPS Status section of this user guide.
My Data section
The side panel sections under My Data relate specifically to the data which you have saved or
synced on your device.
The Tracks button opens the Tracks panel, showing all Tracks and Routes which you have on
your device.
Further details are in the Tracks panel section of this user guide.
The Waypoints button opens the Waypoints panel, showing all Waypoints which you have on
your device.
Further details are in the Waypoints panel section of this user guide.
The Settings button opens the Settings panel, where you can change the configuration of the
app on your device.
Further details are in the Settings panel section of this user guide.
The Import File button opens a browser panel, which you can use to import external files
(waypoints, tracks, routes, etc.) stored on your device.
Further details are in the Import File section of this user guide.
The Downloads button opens a Downloads panel, which you can use to view and manage inprogress downloads on your device.
32
Hema Explorer app User Guide - Android
Further details are in the Downloads panel section of this user guide.
33
Side panel
Trip panel
Introduction
Throughout this user guide, and other documentation associated with the Hema Explorer app, the
terms Trip Log and Track Log can be used interchangeably. Regardless of what you prefer to
refer to it as, the Trip (or Track) Log has one purpose, to store information related to your current
trip.
When you are travelling, if you have enabled recording, Hema Explorer will record your Tracks and
optionally sync them to your Hema Explorer Cloud account. Tracks are a record of the path which
you have followed, and contain statistics related to the trip.
NOTE
This feature is only available on devices equipped with an internal GPS, or connected to an
external GPS via Bluetooth etc.
Generally, Apple iPhones, and iPads with cellular capabilities have in-built GPS. Most Android
devices have in-built GPS.
The function and accuracy of the in-built GPS is controlled by the device manufacturer.
They can be a handy way to find your way back out of thick scrub, or perhaps when you entered
an area by day, and need to find your way back out again after darkness has fallen.
You can turn track logging on or off at any time.
Track logging functions are performed on the Trip panel.
Tap the Side panel button at the top-left of the screen.
On the side panel, tap the Trip button to open the Trip panel.
To start a new trip (or track) log, tap the New Track button.
Tips on naming your data
It is recommended to give your data (Routes, AND Tracks & Waypoints) a sensible name for future
reference, and to aid in identifying routes on your Cloud account, etc. here's some suggestions:
•
Routes & Tracks
34
Hema Explorer app User Guide - Android
•
o
o
o
rt-Brisbane-to-Roma ("rt" - identifies it clearly as a route)
tr-CapeYorkTrip-2013 ("tr" - identifies it clearly as a track)
tr-WA-Odyssey
Waypoints
o Micks_Secret_Barra_Spot
o Perfect-Campground
o Nice_Sunset
o RareBirdColony
You get the idea! It will be easier to use your data later if you give it a good recognisable name
right from the get-go.
The trip log can be paused and resumed at any time. When the trip log is paused (ie. not
recording), and the Paused button is displayed, simply tap it to resume recording. The button will
change state to show that it is currently recording, as shown above.
The trip panel shows a variety of parameters related to the current trip, along with Speed and
Altitude Profile graphs at the bottom.
35
Side panel
Editing the Trip panel layout
When the app is installed, the parameters shown on the trip panel are listed in their default order.
The display order can be modified to suit your personal taste.
If you wish to change the order of the fields on the Trip panel, tap-and-hold on one of the data
fields.
This will activate edit mode. While in edit mode, drag handles appear to the right of each data
field, as shown below:
To move a field up or down in the list, tap the drag-handle on the required data field.
While holding the drag-handle, drag it up or down the pane. Lift your finger to drop it in the
required position.
36
Hema Explorer app User Guide - Android
Once you have rearranged the fields to suit, tap-and-hold on one of the data fields to exit edit
mode. The drag handles will switch off, and your new layout will become permanent.
Remember that you can change the display order at any time by following the process above.
Creating and Recording Tracks
On the Trip panel, tap the New Track button. This signals that you wish to start a new track. The
previously open track will be closed.
A new (empty) track will be created. The app will assign a default name for the track.
However, you can tap the name field at the top of the track details pane, and enter any name you
like. Obviously, it is better to give the track a name which will be easily recognised later.
ie. 2014-Cape-York-Week1 is more meaningful than say New Track (3/18/14 7:49:38 AM).
When a new track is created, it is always in Paused mode.
After creating a new track, if you want the track to be recorded, you must un-pause the track by
tapping the Paused button.
Switch track recording on by tapping the Paused button. The button will change its status
indicating that the current track is now recording.
Once you are done recording, or if you want to suspend recording, switch back to pause mode by
tapping the Recording button again.
All tracks, whether active (either recording or paused), or finished, are accessible within the Tracks
section of the My Data panel .
37
Side panel
GPS Status panel
Tapping the GPS Status button on the side pull-out panel displays the GPS Status panel.
This shows the current latitude and longitude, and approximate accuracy available with the
available GPS signal quality, and the relative signal strengths of different satellites.
38
Hema Explorer app User Guide - Android
Tracks panel
Any saved data such as tracks, waypoints and routes can be accessed from the My Data section of
the pull-out side panel.
To access saved Track or Route data, tap the Side panel button at the top-left of the screen.
Under the My Data section of the side panel, there are two sub-sections:
•
•
Tracks
Waypoints
Note
The Tracks section contains both Tracks and Routes.
Tracks can be edited by trimming the start and end of the track to remove unwanted data.
Routes can be edited by moving and / or deleting specific points which make up the route.
39
Side panel
Tracks List panel
Open the Tracks List panel by tapping the Tracks button on the pull-out side panel.
The Tracks List panel shows all tracks which are currently on your device.
Tracks in the list can be sorted by tapping the appropriate header in the following order:
•
•
Name
Date
If the Showing button is switched on for a particular track, then that track will be drawn on the
map panel. This allows you to hide whichever tracks are not of interest to you at that time.
If the Sync Data option in the Settings panel is switched on, then tracks shown in the tracks panel
are also synced to your Cloud account providing they are switched off (ie. Showing is
deactivated for that track).
Track Details panel
From the Tracks List panel, tapping a particular track will open the Track Details panel for that
track.
40
Hema Explorer app User Guide - Android
Editing Tracks
The app allows you to modify tracks in the following ways:
•
•
•
•
•
Change the name of the track
Add notes to the track
Trim the track by modifying the start and end points
Determine whether the track is shown on the map panel
Deleting existing track logs
To edit an existing track, open the Tracks panel by tapping the Tracks button on the pull-out side
panel.
41
Side panel
Find the track you wish to modify in the Tracks panel, and tap it to open the Track Details panel
Change a Route or Track's Name and Notes
When a track is created by the app, it assigns a default name to the track. You can change the
name of the track at any time.
We recommend assigning a good name to the track right from the get-go to avoid confusion and
make it easier to locate your track data later. (See the Data Naming Tips in the Trip Panel section
of this user guide for more information).
To change a tracks name and add or edit notes associated with the track, tap the track in the
Tracks panel. The Track Details panel will open:
Tap the name at the top of the panel (in this case Fishing-20140209-CoomeraRiver) to open
the Edit Name panel.
42
Hema Explorer app User Guide - Android
You can modify the Track name, and / or add a note attached to the track here. Once you are
happy with the entries, tap the
Save
button. If you change your mind, tap the
Cancel
button.
Editing Points within a Route
Trimming a Track
You may have recorded a track, and it has some superfluous data at the start or end of it. You can
trim the beginning and end off a track quite simply.
Tap the track you wish to edit. The Track edit screen will appear.
43
Side panel
The Track Start and End handles can be dragged left and right along the track graph at the
bottom of the track edit screen. This allows you to trim the start and end of the track to remove
any unnecessary data.
As you drag the handles, you will see that the track displayed on the map is modified in relation to
the dragging of the handle(s).
44
Hema Explorer app User Guide - Android
Once you are satisfied with your edits, tap the Trim button at upper-right to make the changes
permanent.
If you change your mind, or wish to exit once changes have been made, tap the Cancel button at
upper-left.
Change the colour of a saved track
Open the Tracks List panel from the side pane by tapping the Tracks button.
On the Tracks List panel, find the track whose colour you would like to change.
Tap on the icon to the left of the track's name. This icon may show a map OR track thumbnail.
A colour selector will pop up.
45
Side panel
Choose the desired colour for your track by tapping to position the small circle, then tap the Save
button.
Tap the Back button on your device if you change your mind.
You will then see that the track colour on the preview button has changed to match your selected
colour.
Deleting Tracks
Any tracks which are visible in the Tracks panel can be deleted.
You can delete tracks individually, or delete multiple Tracks with one action.
Deleting a single track
Simply tap the track you wish to delete from the My Data panel.
46
Hema Explorer app User Guide - Android
Then, tap the Delete button on the Track Edit panel.
You will be prompted to confirm that you wish to delete the selected track log. Be sure you wish to
delete the item before tapping the OK button. If you change your mind, simply tap the Cancel
button.
47
Side panel
WARNING
When you delete a track log, it will also be deleted from your Hema Explorer Cloud account
when Cloud Sync is switched on.
Deleting multiple tracks
You can delete multiple tracks in one action from the Tracks list.
Simply tap-and-hold on one of the tracks you wish to delete. The selected track will be ticked.
You can then tap on any of the other tracks you wish to delete. Each track you tap will be selected,
as indicated by the tick mark.
Once you have selected the required tracks for deletion, tap the Rubbish Bin button at upperright.
Warning!
You will NOT receive a confirmation prompt when you tap the Delete button! The selected items
will be deleted immediately. Make sure that you wish to delete this data before you tap the Delete
icon.
If you change your mind, tap the Done button without making any changes.
48
Hema Explorer app User Guide - Android
Waypoints panel
Any saved data such as tracks, waypoints and routes can be accessed from the My Data section
of the pull-out side panel.
To access saved Waypoint data, tap the Side panel button at the top-left of the screen.
Under the My Data section of the side panel, there are two sub-sections:
•
•
Tracks
Waypoints
Note
The Tracks section contains both Tracks and Routes
Open the Waypoints panel by tapping the Waypoints button on the pull-out side panel.
49
Side panel
The Waypoints panel shows all waypoints which are currently on your device.
Waypoints in the list can be sorted by tapping the appropriate header into the following order:
•
•
Name
Date
Waypoint Details panel
Tap a waypoint in the Waypoint panel to open the Waypoint Details panel.
Note
You can also view a Waypoint's details by tapping the waypoint nametag of a waypoint selected on
the map panel.
50
Hema Explorer app User Guide - Android
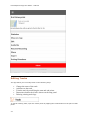
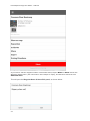
The Waypoint Details panel shows a number of items related to the selected waypoint.
The top section of the panel shows a number of items related to the selected waypoint:
•
•
•
•
•
•
Waypoint Name
Preview of waypoint location on map (can be tapped to expand)
Distance and bearing from your current position
Position
Altitude
Any photos which are added to the waypoint (you can add a photo by tapping the
Image Capture button)
The section below that includes functions which you can perform on the selected waypoint, such
as:
Show on map
51
Side panel
Shows the waypoint on the map panel
Reposition
Allows you to move the waypoint to a new location. Opens the screen shown below,
allowing modifications to be made to the waypoint name, and position.
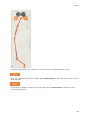
Guide Me
The Guide Me function will guide you to the selected waypoint as the crow flies.
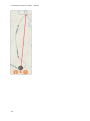
Share
The Share button will generate a link which can be sent via email to a friend etc. allowing
them to view this mark within the Hema Explorer Cloud.
MORE INFO REQUIRED!
Export
52
Hema Explorer app User Guide - Android
The Export button allows you to save the selected waypoint in a number of formats
(currently GPX, KML, or CSV).
Once you have decided on the format you want, a panel will open allowing the file to be
stored almost anywhere your device is capable of. This might be sending via email, or
storing in Dropbox or Google Drive.
Note
The options which you see here will be specific to your device, and which apps you have
installed etc. We do not provide support for using these external functions. ie. We are
making the assumption that you know how to configure and use Dropbox etc.
53
Side panel
Driving Directions
Tapping the Driving Directions button will prompt you to open the current waypoint as a
destination in a number of other apps. This means that Hema Explorer will pass the
waypoint position to the selected external app for processing. Some other Navigation apps
will work and some will not.
Note
The options which you see here will be specific to your device, and which apps you have
installed etc. We do not provide support for using these external apps. ie. We are making
the assumption that you know how to use Google Maps etc.
Choose the external app which you want to send the current waypoint to.
You can select whether to always use your selection using the two options at the bottom,
Always, or Just Once.
54
Hema Explorer app User Guide - Android
Deleting Waypoints
Delete
The Delete button on the waypoint details panel will delete the selected waypoint. You will
be prompted to confirm your action as shown below:
Tap OK to permanently delete the selected waypoint. Tap Cancel to keep the selected
waypoint.
Deleting multiple waypoints
If you have a lot of waypoints to delete, it can be time consuming deleting them all individually.
Fortunately, you can select multiple items, and then delete them all in one go.
One the Waypoints panel, tape-and-hold on any waypoint (it would make sense for it to be one
that you actually DO wish to delete).
The selected waypoint will display a tick mark on the left to indicate that it is selected.
55
Side panel
Simply tap on any other waypoints you wish to delete in this operation to select them, then tap
the garbage can icon at upper-right. This will delete ALL selected items.
WARNING!
You will NOT be prompted to confirm your action when you tap the garbage can icon, and this
action is not reversible, so be sure that what you have selected is exactly what you wish to delete.
Editing Waypoints
There are 2 methods which you can use to edit an existing waypoint
1. Tapping once on a Waypoint icon will open the POI Nametag. You can then tap the
Waypoint handle to open the Waypoint details panel, then tap the Edit button on the
panel.
2. Go to the MyData panel, tap on the waypoint required, which will display the
Waypoint details panel, then tap the Edit button.
Whichever method you use to get to the Waypoint details panel, it will look the same.
Changing a Waypoint's Name and Associated Notes
56
Hema Explorer app User Guide - Android
If you wish to edit the waypoint's name or associated notes, tap the Name or Notes field on the
Waypoint details panel. (the notes field in this example is empty, and therefore shows the text
Add notes here.
This will open the Waypoint Name & Notes Edit panel, as shown below.
57
Side panel
You can modify the waypoint name, and optionally enter some notes to describe the waypoint, or
call out safety hazards etc.
When you have finished editing the name and/or notes, tap the Save button to make your
changes permanent, or the Cancel button to exit without saving your changes.
Adding an image to an existing Waypoint
NOTE
Features related to image capture are only available on devices equipped with an internal camera.
If your device does not have an internal camera, the function may not work, or may not be visible.
The image capture / camera controls displayed on your device may not be the same as those
shown here. All devices which have in-built cameras will have some common elements, but their
appearance, additional features, and level of sophistication may vary widely depending on the
device.
You can attach images to an existing waypoint, or you can use the Take Picture option on the
Waypoints menu to create a new waypoint from a picture.
If your device has a built-in camera, then you will see a button on the Waypoint details pane which
allows you to take one or more pictures which are attached to that waypoint. The function uses the
device's image capture function. The controls shown here may be different to those on your
device.
Once the image has been captured, you will see a preview image, with the options below:
58
Hema Explorer app User Guide - Android
Tap the Accept button if you are satisfied with the image, and wish to save the captured image.
Tap the Redo button, if you do not want the image you captured, and wish to shoot a new image.
Tap the Cancel button to exit the image capture process without saving your image.
The captured images will sync to your Hema Explorer Cloud account.
59
Side panel
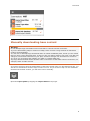
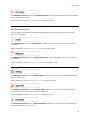
Settings Panel
The Settings panel is opened by tapping the Settings button on the left-hand slideout panel.
(due to it's size, the entire panel is not shown here)
60
Hema Explorer app User Guide - Android
The Settings panel is split into separate panes (sections). Each pane is described below.
Help Pane
The Help pane displays the current app Version number, along with some buttons allowing access
to other features.
User Manual
The User Manual button open a panel containing a quick user help screen, with a quick overview
of the main buttons and functions to get you started.
Contact Us
The Contact Us function allows you to send information to the Hema Tech Support Portal via
email.
Note
To use this feature, an email account must be configured on your device.
Please see your device documentation / help regarding configuration of an email account.
This is NOT the same as the account which you use with the Hema Explorer Cloud!
You can also "manually" submit a ticket to the system by going directly to the Hema Tech Support
Portal URL:
http://hema.helpserve.com
The Hema Tech Support Portal also contains a Knowledegbase, where you can find articles which
may answer your questions or be of assistance in using the app.
About
61
Side panel
The About function opens a web page containing various pieces of information, such as the
Terms & Conditions of use of the app and the Cloud.
Hema Explorer Cloud pane
The Hema Explorer Cloud pane within the Settings panel contains settings and statuses related to
the apps interaction with the Cloud.
Account
If you have an active Hema Explorer Cloud account which is linked to the app, the username will
be displayed here.
Tapping this button will open the Account details panel.
On the Account Details panel, you can do the following:
62
Hema Explorer app User Guide - Android
•
•
•
Change the email address which is liked to the app on your device
Change your password
Logout
Sync With Hema Explorer Cloud option
If this option is active (ticked), then the app will attempt to sync any changed data when it has an
active internet connection.
Use Cellular data for sync
This option will cause the device to use a cellular connection (if one is available) for data sync.
Warning!
Your ISP may charge for excess data consumed on your plan, and these charges can sometimes
be excessive.
It is up to you to monitor and manage your data on a mobile data plan.
Any data downloads should be done while connected to a fast stable internet connection, for
example, ADSL via WiFi at home.
Last Sync
The Last Sync button shows the date / time that the last successful sync operation was
performed.
Tapping the button will force start a manual sync operation
Units pane
Metric Units
Turn this option ON if you prefer to see speeds and distances etc. in Metric format.
Nautical Units
Turn this on if you prefer your units in nautical format. If switched on, the app will display
distances as Nautical Miles and speeds as Knots.
63
Side panel
Select Coordinate Type
Tapping this option will allow you to select from the following list of supported coordinate formats:
•
•
•
•
•
Decimal Degrees
Degrees, Minutes, Seconds
Degrees, Decimal Minutes
UTM Coordinates
MGRS Coordinates
Map Downloads pane
Auto Resume
When switched on, this option will restart any partial downloads when the app starts up.
Check Downloads
This option will perform a sanity check on any downloaded maps.
Map Controls pane
Compass
64
Hema Explorer app User Guide - Android
This option determines the visibility of the on screen compass.
The Compass appears at the top-center of the map panel.
Scale Bar
This option toggles the visibility of the on screen scale bar. The size and scale shown will vary
depending on the current zoom level. The units displayed are determined by the Units settings.
The scale bar appears at lower-left of the map panel.
Zoom Label
This option determines the visibility of the on-map Zoom Level indicator. The Zoom Level
indicator tells you at which zoom level you are viewing the current map.
The zoom label appears at lower-left of the map panel, adjacent to the Scale Bar (if it is also
switched on).
Zoom Buttons
This option determines the visibility of the on-map zoom buttons. You can zoom in and out of the
map using pinch and unpinch gestures, but sometimes this is inconvenient, for instance if you do
not wish to lose your current position while zooming. Tapping the zoom in / out buttons on screen
will perform the same function as pinch / unpinch, but will not lose your position fix.
The zoom buttons appear at the bottom-right of the map panel.
Storage pane
65
Side panel
Root folder
The Root folder parameter allows you to specify a different location for storage of the app data.
If your device has an external SD card for example, you could tell the app to use the external SD
card storage, which will help stop the device's internal storage filling.
NOTE
If you wish to utilise an external SD card for storage, it is wise to do so before you start
downloading maps etc.
If you have already downloaded basemaps etc. within the app, when you change the Root folder
storage location, there will be a delay while the content is copied from the old storage location to
the new location.
Do not change this setting if your device does not have additional storage (ie. external
SD Card)! There is no point in changing the folder to another folder which still resides on
internal memory - you will not be gaining anything by doing this.
Clear Automatic Map Cache
Over time, the app can accumulate a fair amount of data (map tiles being an example) in the
internal cache. You can periodically clear the cache using this option.
Advanced pane
Send logs
Allows you to send the logfile from the application directly to the Hema Tech Support Portal
(normally) via email.
Generally, you would only do this under the direction of a Tech Support consultant. If you DO use
this option directly, and wish to submit a support request via this email, please supply information
in the email to assist the tech support people in sorting out the issue.
66
Hema Explorer app User Guide - Android
Use uncorrected altitude
On some devices the hardware attempts to auto-correct altitude information calculated by the GPS
hardware. Sometimes this produced undesirable results.
This option should be switched off by default, and only switched on if your specific device seems to
have issues with calculating altitude.
67
Side panel
Import File
The Import File function will open an explorer-like interface on your device.
You can browse through your device's folders to find a file which has been stored previously.
The Import file function is capable of loading files in both GPX and KML formats.
68
Hema Explorer app User Guide - Android
Downloads panel
Tapping the Downloads button on the side panel opens the Downloads panel.
The Downloads panel shows the status of any queued downloads, as shown below:
If there are no active downloads, the panel shows this:
Pausing Downloads
69
Side panel
Tap-and-hold an entry in the download list, then tap the Pause Download button to pause the
download. Note that if basemaps are paused, the Pause dialog does not have the More Info
option, as shown below.
The map download entry will display a pause icon while it is in pause mode, as shown below.
Resuming Paused Downloads
Tap-and-hold on a paused map download in the list, and tap the Resume Download button to
continue the download. Note that if basemaps are resumed, the Resume dialog does not have the
More Info option, as shown below.
70
Hema Explorer app User Guide - Android
71
Layers panel
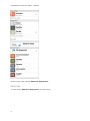
Introduction
The Layers panel is accessed by tapping the Layers button on the app titlebar.
The Layers panel displays the different layers which make up the map display area of the Hema
Explorer app.
73
Layers panel
Layers consist of
1.
2.
3.
4.
Maps
Weather Radar control
Waypoints
POIs
Maps
The Maps information can be found by tapping the Layers button on the app titlebar.
The maps within the app can be divided into these categories:
1. Hema Maps
The Hema Maps consist of the 1:1M Road and 1:250K Topo maps supplied as part of the
app purchase, and downloaded when you first started the app. You may also have additional
Hema Maps which have been purchased from within the app.
2. Other Maps
The Other Maps included within the app consist of a number of layers provided by HERE
Maps (Nokia). These include:
o
o
o
Street
Terrain
Satellite
74
Hema Explorer app User Guide - Android
These map layers are not available in their entirety for offline use due to size and licensing
restrictions.
3.
Downloaded map sections
You can select areas of the third party map layers to download for offline use. For more
information, see the section on Managing Maps in this user guide.
4.
My Maps
The My Maps section of the layers menu allows you to manage any map areas which you
have downloaded. For more information, see the section on Managing Maps in this user
guide.
Weather Radar display
Weather information within the Hema Explorer app comes in the following form
•
A static weather overlay shown on the map
In app weather data is provided by Weather Underground (http://www.wunderground.com)
This section explains details of the Weather Radar overlay.
The Weather Radar overlay can be found by tapping the Layers button on the app titlebar. The
current Weather Radar setting is seen under the Weather Radar label on the Layers panel.
Weather can be displayed over the map by dragging the slider on the Overlays pane to the right.
The weather information is switched OFF when the slider is all the way to the left.
As the slider is moved to the right, the weather display is switched on, and becomes more opaque
the further to the right the slider is dragged. The weather slider control changes weather display
from off to 100% transparent to 100% opaque.
Weather info is shown on a separate layer overlaid over the map.
NOTE
75
Layers panel
Weather info only appears at zoom levels from max to approx. 7.5, as the source data is
only available at these zoom levels. If you do not see weather data shown, try zooming
out until you see it.
An example of the Weather Radar overlay is shown below:
My Waypoints
The My Waypoints layer can be found by tapping the Layers button on the app titlebar.
You can toggle display on and off of all saved waypoints by tapping the My Waypoints control on
the Layers panel.
Waypoint display is on when there is a tick displayed next to My Waypoints on the Layers panel.
76
Hema Explorer app User Guide - Android
POIs
Information related to POIs is contained within the POIs section of this user guide.
77
POIs
A note about Waypoints vs. POIs
While POIs (Points of Interest) and Waypoints are both used to mark a single specific location,
there are some significant differences between Waypoints and POIs:
•
•
•
•
POIs are normally supplied by the app developer (usually as part of a package of POIs)
You cannot usually edit any of a POI's properties (such as position or name) as the
properties are set by the creator.
Waypoints are normally created by the user, or sourced from a friend, or the internet, etc.
The properties of a waypoints can be edited to suit yourself.
You may occasionally hear of "Rich POIs". Rich POI is a term used to describe a POI which has
more information associated with it. An example might be:
•
•
A standard POI shows the location of a camping ground only
A Rich POI of that same camping ground may show additional information related to the
camping ground, such as (to show a few examples):
• the phone number of the organisation responsible for the campground
management
• a list of facilities available at the campground (drinking water, mobile phone
access, etc.)
• links to the campground website (if available)
Introduction
POI display is controlled by the POI Panel on the Layers panel.
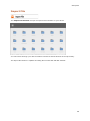
Open the Layers panel by tapping the Layers button at top-right of the screen.
The POI controls are located at the bottom of the Layers panel. Scroll down if necessary to show
the controls.
79
POIs
Each section on the panel shows a category. The number shown within the category name
indicates how many sub-categories within that category are currently switched on.
By default, all POI categories are active. That is, POIs will be displayed overlaid on the map for ALL
categories.
You can turn off specific sub-categories, or ALL POIs within a category from the Point of Interest
panel.
You can toggle the status of each category as a whole by tapping-and-holding on the category
name. In the example shown below, we have switched off all but the Accommodation category, as
shown by the indicator 4 of 4 for Accommodation. The other categories all show 0 of ...
Tapping a category expands that category to show the sub-categories within the category. The
Accommodation sub-categories are shown in the example below. Note that sub-categories which
are switched ON are those marked with a tick.
80
Hema Explorer app User Guide - Android
You can switch off any sub-category by tapping anywhere on the sub-category line. The example
below shows the "Accommodation" and "Camp" sub-categories have been switched off. Notice that
the tick mark is no longer shown against the switched-off sub-categories, and the number
adjacent to the category name shows 2 of 4.
POI Categories
The POIs which come as part of the app are divided into categories and sub-categories. The
categories and sub-categories are listed below.
•
•
81
Accommodation
• Accommodation
• Bush Camp
• Camp
• Caravan Park
Facility
• Dump Point
• Picnic Area
• Rest Area
• Toilet
• Water Points
POIs
•
Service
Emergency Telephone
Mechanical Repairs
Medical Centre
Police Station
Post Office
Public Telephone
Tyre Repairs
Information
• Parks and Wildlife
• Ranger Station
• Visitor Centre
• Visitor Centre - Accredited
Supply
• Fuel - 24 Hour
• Fuel
• General Stores
• Roadhouse
•
•
•
•
•
•
•
•
•
A legend can be displayed showing all icons for POI categories and sub-categories.
See the Legends topic for details.
POI Nametag
Tapping a POI icon will pop up the POI Nametag for the POI which you tapped on.
The POI nametag shows the name of the POI. Only ONE POI OR Waypoint nametag can be
displayed on screen at once.
•
•
Tapping the current POI icon again will close the nametag
Tapping another POI while a different POI nametag is displayed will close the
original nametag, and open the new nametag.
Tapping the POI nametag will open the Point of Interest Details panel.
Point of Interest Details panel
82
Hema Explorer app User Guide - Android
The Point of Interest details panel displays information related to the selected POI, as well as
providing actions which can be performed against the selected POI.
Tapping any of the detail headers shown below will expand the panel to show the relevant detail
pane.
•
•
•
•
Contact
Facilities
Fuel
Activities
Each of these items is discussed in more detail below.
POI Info pane
The top part of the Point of Interest details panel has a pane which displays the following
information
Name
The name of the selected POI
Position Description
83
POIs
The panel displayed next to the POI Preview shows two lines of information as follows:
•
•
The Distance and Bearing of the POI from your current location (as the crow
flies)
The Latitude and Longitude of the POI
Contacts pane
The Contacts pane will expand when tapped to display contact information for the selected POI.
The contact information available will depend on the POI selected, but may include some or all of
the following:
•
•
•
•
Address
Phone Number
Send Email link (This feature can only be used via an active connection between
your device and the internet)
Open Website link (This feature can only be used via an active connection
between your device and the internet)
Fuel pane
The Fuel pane will expand when tapped to display more detailed fuel information for the selected
POI.
The pane provides information related to opening hours (if known), and which types of fuel are
available at the selected POI. An example is shown below.
84
Hema Explorer app User Guide - Android
Facilities pane
The Facilities panel shows facilities which are available at the selected POI. An example is shown
below.
Activities pane
The Activities pane shows activities which may be available at the selected POI. An example is
shown below.
85
POIs
POI Actions
The POI Info pane also contains a number of options which allow you to interact with the POI.
Each of these items is discussed in more detail below.
Guide Me
The Guide Me option will create an as-the-crow-flies track to follow to get to the POI. This works in
the same way as directions to a user-created waypoint.
As soon as you begin the Guide Me process, the active destination will appear in the data panel at
the lower-left corner of the screen, as shown below.
The panel shows the following information:
•
•
•
•
The distance to the selected POI / waypoint
The bearing to the selected POI / waypoint
The approximate travel time to the selected POI / waypoint (based on current speed)
The name of the selected POI / waypoint
If you do NOT have a GPS fix, and you attempt to start a routing operation, the panel will not be
able provide any guidance, as shown in the example below.
If you wish to cancel the currently active destination, tap the Cancel Go To button within the
panel.
Driving Directions
86
Hema Explorer app User Guide - Android
NOTE
This feature can only be used via an active connection between your device and the internet
The Driving Directions option uses Google Maps to provide you with a list of directions to follow
to get to the selected POI from your current location. When tapped, either a panel will pop up
showing driving directions, or the external app itself will open.
Depending on the apps you have installed, you may be prompted to choose which app you would
like to use to produce a path between your current location and the selected POI.
Note that the functionality provided by these apps is external to the functionality within the Hema
Explorer app, and we have no control over the functionality provided by external apps.
87
Waypoints
A note about Waypoints vs. POIs
While POIs (Points of Interest) and Waypoints are both used to mark a single specific location,
there are some significant differences between Waypoints and POIs:
•
•
•
•
POIs are normally supplied by the app developer (usually as part of a package of POIs)
You cannot usually edit any of a POI's properties (such as position or name) as the
properties are set by the creator.
Waypoints are normally created by the user, or sourced from a friend, or the internet, etc.
The properties of a waypoints can be edited to suit yourself.
You may occasionally hear of "Rich POIs". Rich POI is a term used to describe a POI which has
more information associated with it. An example might be:
•
•
A standard POI shows the location of a camping ground only
A Rich POI of that same camping ground may show additional information related to the
camping ground, such as (to show a few examples):
• the phone number of the organisation responsible for the campground
management
• a list of facilities available at the campground (drinking water, mobile phone
access, etc.)
• links to the campground website (if available)
Introduction
Within the Hema Explorer app, a waypoint is defined as marking a single specific location.
You can have many waypoints within Hema Explorer, and you can switch waypoint visibility on and
off globally within the app from the Points of Interest panel.
Waypoints can be synced with your Hema Explorer Cloud account.
Adding Waypoints
To mark a waypoint, first tap the flag icon on the app titlebar. This will popup the Waypoints
menu.
89
Waypoints
The menu contains four options:
•
•
•
Create Waypoint
Create Waypoint Near Me
Take Picture
The first three options are discussed further down this page.
•
Create Route
The create route option allows you to create a series of waypoints which are linked together in a
sequence forming a track to follow.
See the Routes section for details on creating and using routes.
Create Waypoint and Create Waypoint Near Me
Create Waypoint
The Create Waypoint option creates a waypoint to mark your location. The location defaults to
the centre of the map panel (this might not necessarily be your current position), and the
Waypoint details window pops up showing details of your waypoint. While the Waypoint Details
window is open you can tap-and-drag the pin around to modify its position. Once you are satisfied
that the position is correct, you use the buttons on the Waypoint Details window to save your
changes.
Create Waypoint Near Me
The Create Waypoint Near Me option creates a waypoint to mark your location. The location
defaults to your current position, and the Waypoint details window pops up showing details of your
waypoint. While the Waypoint Details window is open you can tap-and-drag the pin around to
modify its position. Once you are satisfied that the position is correct, you can use the buttons on
the Waypoint Details window to save your changes.
Take Picture
90
Hema Explorer app User Guide - Android
This option allows you to mark the current location using an image, which is captured within the
app.
NOTE
Features related to image capture are only available on devices equipped with an internal camera.
If your device does not have an internal camera, the function may not work, or may not be visible.
The image capture / camera controls displayed on your device may not be the same as those
shown here. All devices which have in-built cameras will have some common elements, but their
appearance, additional features, and level of sophistication may vary widely depending on the
device.
The buttons on the Image Capture screen allow you to control the image capture process.
Once you have captured an image, the screen will show a preview of the image which you
captured.
91
Waypoints
Once the image has been captured, you will see a preview image, with the options below:
Tap the Accept button if you are satisfied with the image, and wish to save the captured image.
Tap the Redo button, if you do not want the image you captured, and wish to shoot a new
image.
Tap the Cancel button to exit the image capture process without saving your image.
The captured images will sync to your Hema Explorer Cloud account.
92
Hema Explorer app User Guide - Android
Your image will now be accessible in your Waypoints list on the My Data panel. It behaves just like
any other (non-image) waypoint. A thumbnail image will be shown instead of a waypoint icon
within the Waypoint List panel
Sorting data
You can sort your data by tapping the desired header button on the list page of the items you wish
to sort.
Maps panel
Tracks panel
93
Waypoints
Waypoints panel
All data displayed on their respective list panels can be sorted in the following order by tapping the
appropriate header button:
•
•
Name
Date
94
Hema Explorer app User Guide - Android
Waypoint Details panel
You can view details of an existing waypoint at any time by first tapping the Waypoint icon (by
default the waypoint icon is a flag).
Note
You can also view a Waypoint's details by tapping the waypoint within the Waypoint panel from the
pull-out side panel.
The Waypoint nametag shows the name of the Waypoint, and the nametag handle. Only ONE POI
OR Waypoint nametag can be displayed on screen at once.
•
•
Tapping the current Waypoint nametag or the Waypoint icon again will close that the
nametag
Tapping another Waypoint or POI while a different Waypoint or POI nametag is
displayed will close the original nametag, and open the new nametag.
The Waypoint nametag will open the Waypoint panel when tapped.
95
Waypoints
The Waypoint panel displays information related to the selected Waypoint, as well as providing
actions which can be performed against the selected Waypoint. The waypoint creation date and
time is also displayed at the bottom of the Waypoint panel.
All of these items are explained in the Waypoints panel section of this user guide.
96
Routes
Introduction
Within the Hema Explorer app, a route is defined as a collection of Route Waypoints in a sequence.
Each route waypoint is connected to the adjacent route waypoint(s) by straight line connections
("as-the-crow-flies").
You can have multiple routes within Hema Explorer, and you can switch any route between active
and inactive states.
Routes can be synced with your Hema Explorer Cloud account.
A note about creating routes with the Hema Explorer
Android app
As a general guide, we find the following technique makes for the fastest and simplest route
creation experience.
•
•
•
•
•
Zoom out a fair way so that you can see your start and end points if possible.
Add points at the major course changes along the route. (As you add a new point to
the route, the app automatically adds a new mini-handle halfway along the route
segment which was just created.)
Zoom in to see the detail of your course
Fine-tune the route by using the mini handles to refine the accuracy of the route.
You can make the route as detailed or as basic as you like, it's up to you.
The thing is to strike a balance between the time it takes to create the route, and the usefulness of
the route as an aid to getting you to your end destination.
Creating Routes
Tap the Waypoint button on the app titlebar. The Waypoint menu will pop up.
97
Routes
The options available are
•
•
•
•
Create Waypoint
Create Waypoint Near Me
Create Route or Measure Distance
Take Picture
NOTE
Features related to image capture are only available on devices equipped with an internal camera.
If your device does not have an internal camera, the function may not work, or may not be visible.
The image capture / camera controls displayed on your device may not be the same as those
shown here. All devices which have in-built cameras will have some common elements, but their
appearance, additional features, and level of sophistication may vary widely depending on the
device.
Tap the Create Route or Measure Distance button on the Waypoints menu to start creating a
route.
when you tap the Create route button, the Route control opens at upper-right of the screen, as
shown below
The Route control is displayed while you are in either Route Create OR Route Edit mode. The
Route control shows
•
•
•
The number of points contained within the route
The total distance of the route
Buttons allowing you to Clear or Save the current route
98
Hema Explorer app User Guide - Android
Tap in the Route Name field at the top of the panel to give your route a name.
By default, the app gives routes a standard name, when saving, of the form Route
(DD/MM/YYYY HH:MM:SS). You can leave the default name or change it to suit.
Tips on naming your data
It is recommended to give your data (Routes, AND Tracks & Waypoints) a sensible name for future
reference, and to aid in identifying routes on your Cloud account, etc. here's some suggestions:
•
•
Routes & Tracks
o rt-Brisbane-to-Roma ("rt" - identifies it clearly as a route)
o tr-CapeYorkTrip-2013 ("tr" - identifies it clearly as a track)
o tr-WA-Odyssey
Waypoints
o Micks_Secret_Barra_Spot
o Perfect-Campground
o Nice_Sunset
o RareBirdColony
You get the idea! It will be easier to use your data later if you give it a good recognisable name
right from the get-go.
Tap-and-hold on the map anywhere to place a point to start your route, and continue adding
points until you are happy with your route.
When you tap-and-hold in Route Edit or Create mode, a Route Point handle appears to show the
point.
There are a number of parts to the Route Point handle as shown below
The Point marker marks the actual point. You can tap-and-drag on the point marker to
move the point around on the map.
The Delete Point button will delete the active point from the route. If the active point is
the only (first) point in the route, then the route creation mode is cancelled. If the active
point is between two other points, when deleted, the route line will be drawn directly
between the two adjacent points.
99
Routes
The Point Info indicator shows some information about the current point. If the point if
the first in a route, the indicator will show the distance and bearing from your current
position, as shown above.
If the active point is the second or subsequent point within a route, an additional Point Info
indicator will appear. This extra indicator will show the distance of this point from the
previous point, along with the total distance of the route at that point, as shown below.
The Add Waypoint button will add the current point in the route as a waypoint.
Remember, a route is made up of a sequence of route points, which are not the same as
"normal" waypoints. Tapping this button on a point leaves that point as a part of the route,
but also adds a new "standalone" waypoint to mark that spot.
As you add points to the route, the Route control shows how many points make up your route,
and the total length of the route.
Each time you add a point, the line joining the previous point to the new point has a mini-handle
halfway along its length, as shown below.
If you tap the mini-handle, the point becomes a full blown route point, and is movable and editable
in the same way as any other route point. Once a mini-handle is converted to a full point, a new
mini-handle appears on the lines adjacent to the new point, where it links to the previous and next
points. the new mini-handles can be converted to points as well.
100
Hema Explorer app User Guide - Android
101
Routes
Continue adding points, and refining your route until you are satisfied with the result.
Once you are satisfied with your creation, tap the Save button to save your route in the Track list
under My Data.
If you make a mistake or change your mind, simply tap the Clear button to erase the entire
route, and start again.
102
Hema Explorer app User Guide - Android
Once you tap the Save button, you will be prompted to enter a name for your route, and you can
add notes as well.
As mentioned earlier, it is good practice to give routes a recognisable name, to make finding them
later easier. Add notes if you wish. An example is shown below.
Summary
As you can see, creating a route involves a number of steps:
•
•
•
•
103
Opening the create route panel
Adding points to the route
Moving points (if they are not in the right place)
Deleting points (if they are surplus to the route requirements)
Routes
•
Saving the route, giving the route a name and adding notes if required
Editing Routes
Any routes you have saved are visible in the Tracks pane of the My Data panel.
Routes visible in the My Data panel could have come from a number of sources, including:
•
•
•
•
a route you created earlier and saved on your device
a route (in GPX format) which a friend emailed to you, and you have opened on your
device
a route which you viewed on the Hema Explorer Cloud at
http://cloud.hemaexplorer.com.au, and then copied to your cloud account, which was
then subsequently synced to your device.
a route which was created in Google Maps (or some similar tool), and saved in KML
or GPX format, then imported into your Cloud account, and subsequently synced to
your device.
Open the side panel and tap the Track button to open the Tracks list.
Each route has a button next to it which allows you to show or hide the track/route on the map.
104
Hema Explorer app User Guide - Android
You can edit a route regardless of its Showing / Hidden status.
Tap the route you would like to edit. You will see the Details panel.
From the route details panel, you can do a number of things:
•
•
•
•
•
•
•
•
105
Change the name by tapping the name at the top of the panel. You can also edit
notes here.
See a larger preview of the route by tapping the map preview thumbnail.
Show the track on the main map panel
Edit the track points. This allows you to
Guide Me will start navigating to the first point in the route or track. See the section
on Following a Route further down this topic.
Export will allow you to save the track or route in multiple formats (GPX, KML or
CSV)
Driving Directions will open the track or route in the external app you choose, and
attempt to start navigation using the selected app.
Download Map Along Track will download tiles in the currently active HERE Maps
layers to cover the path of the track or route. See the section on Downloading maps
Routes
along a track in the Downloading Maps section of this user guide for further
information.
Modifying a Route
When you tap the Edit button from the route details panel, the route will open in the map panel.
All points will be visible, and the Route Control box at upper-right will show the route details.
If you wish to edit any points along the route, it is easier to zoom into the section of the route that
you wish to alter, as shown below.
106
Hema Explorer app User Guide - Android
After zooming in so you can easily see the point you wish to alter, tap the desired point to make it
active.
Once the point is active, the usual controls appear, allowing you to move or delete the point.
All operations on route points are performed in the same way as when you are in route create
mode.
After making changes to the route, save your changes by tapping the Save button.
Joining Routes
If you are creating a route, you have the option to join it to another route. The other route could
have been created by you on your device, or imported or synced via the cloud.
Simply create your new route as per usual.
When the END of the new route gets close to the START of the other route, just tap on the other
route. You will be asked if you want to add your new route, which is in the process of being
created, to the existing route, as shown below.
107
Routes
Tap the Add button to join the two route segments together, or tap the Cancel button to stop
the join, and continue editing the active route.
NOTE The new route which results from the joining of two routes take on the "personality" of the
existing route.
ie. If you have route "A", and then start creating route "B", when you join the routes, the new
"super route" will be route "A".
Following a Route
You can use the Guide Me function on the track details panel to start navigating to the first point in
a track or route.
When you choose to start navigating along a route, Hema Explorer will create a line between your
current position, and the first point in the route.
108
Legends
Introduction
Within the Hema Explorer app, various symbols are used to mark objects on maps. These may be
specific locations (POIs), or things such as roads or demarcation areas on a map.
The app has a number of legends which show the meaning of specific symbols.
Tap the Legend button to display the Legends panel. The Legends button is located on the app
titlebar at the top of the screen.
There are different legends for different aspects of the app. You can click each legend name below
to jump to specific information for that legend.
The legends available are
•
1:250K Topo
Symbols which are used within the 1:250K Topo map
•
1:1M Road
Symbols which are used within the 1:1M Road map
•
Points of Interest
Symbols used to differentiate categories and sub-categories of POIs included with the app
•
Gazetteer
Standard symbols used to differentiate high-level features which form the searchable
gazetteer.
109
Legends
1:250k Topo
Tap the 1:250k Topo label on the Legends panel to display the 1:250k Topo legend.
This legend shows features visible on the 1:250K topo layer of the Hema Maps Layer layer.
1:1M Road
Tap the 1:1M Road label on the Legends panel to display the 1:1M Road legend.
This legend shows features visible on the 1:1M Road layer of the Hema Maps Layer layer.
110
Hema Explorer app User Guide - Android
POI Legend
Tap the Points of Interest label on the Legends panel to display the Points of Interest
legend.
This legend shows all the sub-categories of POIs in the top section, and shows POI characteristics
below that.
Characteristics may apply to a specific sub-category of POIs, or they may simply apply to a POI
itself. ie. the POI characteristic "Activities" could apply to any POI, regardless of its sub-category.
111
Legends
Gazetteer
Tap the Gazetteer label on the Legends panel to display the Gazetteer legend.
112
Hema Explorer app User Guide - Android
113
Searching
The Search button is located on the top toolbar of the Hema Explorer app.
To enter a search string, tap in the search field. A cursor will appear in the search field
When you enter text in the Search box at the top of the app, the app searches for the entered text
within the POI and Gazetteer databases.
As you type, the search results are refined. The more characters you type, the more concise the
search results which are displayed.
Each search result will display with an associated icon. The icon gives an indication of the source
and type of entry.
The Legends built in to the app will give you an indication of the category of the search results
items.
You can scroll the results list up and down by tap-and-drag.
Once you find the item you want in the list, tap it.
The map will center on the selected location. You may need to zoom in or out to view the area
around the location.
115
Searching
An item which is displayed on the map with its nametag displayed behaves in exactly the same
way as any other POI or waypoint, in that you can navigate to it etc.
116
Glossary
A
Almanac: Information about satellite positions (which satellites are where and when). This
information is broadcast by all satellites, and contains information for all satellites. It is
usually valid for a period of a few months. The information facilitates quicker acquisition of
position.
Altitude: Height above ground
B
Backtrack: Retracing a previously recorded track in the reverse direction to that originally
travelled. Useful if you want to retrace your path to a given destination.
Bearing: The direction from your current position to your objective - usually shown in degrees.
eg. A bearing of 330 degrees means you should be travelling in a north-westerly direction.
C
Calibration (map): When producing a digital map, an image of the map has specific points
defined which correspond to coordinates (latitude / longitude), allowing a position to be
plotted on the map.
Cardinal Points: The major points of a compass - North, South, East & West. Intercardinal Points
are the points between the cardinal points - North-East, South-West, etc.
Cold Start: When a GPS is first started after it has not been used for some time, it does not have
the current ephemeris data, so is unable to use the satellites until the data is loaded.
Constellation (Satellite): The Satellite Constellation refers to the current satellite coverage. ie.
the number of satellites in view, which satellites, and where they are in the sky.
Contour Line: A line that joins places of equal elevation on a map. The closer together the
contour lines shown, the steeper the terrain that they represent.
Control Segment: A world-wide network of GPS monitoring and telemetry stations operated by,
or on behalf of, the US Department of Defense. The tracking data is used by the Master
Control Station at Colorado Springs to calculate satellites' positions (or "broadcast
ephemerides") and their clock biases.
D
Dead Reckoning: Navigating by noting the distance, direction and speed of travel, without using
any external reference points.
Degrees: A circle contains 360 of them! Can be used to specify direction - West is 270 Degrees.
Can also be used to specify position - The equator is at 0 Degrees North and South.
Brisbane is approx. 27.4679 degrees South.
DGPS: DIFFERENTIAL GLOBAL POSITIONING SYSTEM. Uses a fixed station to broadcast correction
information in an effort to reduce various errors to increase accuracy of position.
Digital Map: A map which is electronic, as opposed to a paper map. Usually means a file
containing a map image which has been calibrated.
DOP: DILUTION OF PRECISION. Errors arising from satellite geometry. A small number of
satellites grouped close together in the sky gives poor accuracy (high DOP), while many
satellites more evenly spread provides better accuracy (low DOP).
E
117
Glossary
Easting: UTM. Refers to how far East or West you are. In UTM references, it is specified before the
Northing. (Horizontally on a map).
EGNOS: EUROPEAN GEOSTATIONARY NAVIGATION OVERLAY SYSTEM. A European WAAS system.
Elevation: Height above a given reference point; usually mean sea level.
EPE: ESTIMATED POSITION ERROR. GPS receivers are never completely accurate. The EPE gives
an estimate of how far out the position given may be.
Ephemeris (correction): Data which can be used to correct small deviations in satellite orbits.
This data is required by GPS receivers before they can access satellites for navigation
purposes. See also Alamanac.
Equator: The imaginary line which divides the northern and southern hemispheres of the Earth. 0
degrees Latitude.
ETA: ESTIMATED TIME OF ARRIVAL. GPS works out what time you are likely to reach your
destination based on how far you have left before reaching it, and your average progress
towards it (VMG). More accurate if the conditions ahead are similar to those already
travelled. See also ETE.
ETE: ESTIMATED TIME EN ROUTE. Specifies how much time before reaching your destination. See
also ETA.
G
Gazetteer: The Gazetteer of Australia provides map-makers and the public with authoritative
information on the location and spelling of approved place names. Data is provided by
Geoscience Australia (http://www.ga.gov.au/)
GDA94: GEODETIC DATUM of AUSTRALIA, 1994. Replaced the AGD. GDA is similar to WGS84 for
most navigation purposes.
GDOP: GEOMETRIC DILUTION OF PRECISION. See DOP.
GeoStationary Satellite: A satellite which stays in the same position relative to the Earth.
GLONASS: GLOBAL ORBITING NAVIGATION SATELLITE SYSTEM. The Russian navigation satellite
system. Consists of 24 satellites, and is optimised for use in the northern hemisphere.
GMT: GREENWICH MEAN TIME. A worldwide time standard. Close to UTC
GoTo: Basic navigation to a waypoint. The receiver generally shows the direction to, distance and
probably ETA to the specified waypoint.
GPS: GLOBAL POSITIONING SYSTEM. A system which provides precise location based on data
transmitted from a constellation of 24 satellites. It consists of three segments: (1) Control
Segment, (2) Space Segment, and (3) User Segment.
GPS Receiver: An electronic circuit which receives signals from GPS satellites and calculates
information such as the receiver's location.
GPS Software: Software which runs on a PC, phone, tablet or other computing device which
allows management of things such as waypoints, routes, tracks, digital maps, etc.
GPX: GPX (for GPs eXchange) format is a type of file which can be used as a common format for
stoprage of GPS data (syuch as Waypoints, Tracklogs, and Routes). See
http://en.wikipedia.org/wiki/GPS_eXchange_Format
Grid Zone (UTM): An area of the UTM Grid, eg. 55H 10J
H
HDOP: HORIZONTAL DOP
Heading: The direction in which you are travelling. Usually specified in Degrees.
L
118
Hema Explorer app User Guide - Android
L1 & L2: The GPS system uses two frequencies for satellite signal broadcasts. L1 is for civilian
use. L2 is more accurate, and for military use.
Lat/Long: Latitude and Longitude. a grid system which represents your position on the surface of
the Earth by angles from the Earth's center.
Latitude: Defines how far North or South of the Equator you are. See also Parallels.
Longitude: Defines how far East or West you are relative to the imaginary line (the Prime
Meridian) which runs through Greenwich, England.
M
Mercator: A way of projecting a spherical Earth onto a flat surface (such as a map).
Meridian: A line of Longitude. Half circles which join North Pole to South Pole.
MGA: MAP GRID of AUSTRALIA. For most GPS navigation purposes, equivalent to UTM.
MGRS: MILITARY GRID REFERENCE SYSTEM. An extended version of the UTM system used by
military forces.
Mil: A way of measuring angles (like Degrees). There are 6400 mils in a circle, whereas there are
360 Degrees in a circle.
Minutes: 60 minutes subdivide a Degree. The actual distance covered by a minute depends upon
where you are in the world (not related to the time unit).
Moving Map: A Digital Map which has been calibrated, shwoing your position in real time as you
change location.
MSL: MEAN SEA LEVEL. The average level of the sea. Not the same world wide.
Multipath: Interference caused by reflected GPS signals arriving at the receiver, typically as a
result of nearby structures or other reflective surfaces. Errors caused by mutipath
interference reduce the accuracy of the receiver.
N
North (Grid): North according to your map's UTM gridlines.
North (Magnetic): North according to a compass.
North (True): North according to where the North Pole is.
Northing: UTM. Refers to how far North or South you are. In UTM references, it is specified after
the Easting. (Vertically on a map).
O
Odometer: Records distance as you move. Most cars have one. Similar to a Trip Computer.
Outage: A loss of satellite availability, due to (a) there not being enough satellites visible to
calculate a position, or (b) the value of the DOP indicator is greater than some predefined
value (which implies that the accuracy of the position is unreliable).
P
Parallels: Lines of Latitude.
PDOP: POSITIONAL DOP. (same as GDOP)
Position: The 3D coordinates of a point, usually given as Latitude, Longitude, and Altitude.
R
119
Glossary
Re-Radiating Antenna: A type of GPS antenna which receives the signal, transmits it along a
wire connection, then re-transmits the signal via another antenna attached to the end of
the wire.
Regional Denial: The term refers to where a GPS signal's coverage can be reduced or eliminated
over a specific geographic area.
Road Lock: This term refers to GPS software which "snaps" the vehicle position to the nearest
road even if the computed position shows the vehicle as not being on that road.
Route: A collection of waypoints linked together which are followed in sequence.
S
Scale: The ratio of a unit on a map to reality. eg. 1:25000 (1:25k), means one centimetre on the
map equates to 25000 centimetres (250 metres) in reality. Small-scale maps are 1:1M,
1:250k, 1:100k etc. Large-scale are 1:25k etc.
Seconds: Subdivision of a minute (Lat/long) into smaller units. There are 60 seconds in a minute.
Space Segment: The part of the GPS system in space, including the orbiting satellites and their
signal transmissions.
T
Turn-by-Turn: Turn-by-Turn navigation generally refers to a navigation system where the
software is capable of creating a route for you showing every step of the path between two
points. The software usually provides voice guidance, prompts and warnings along the
generated route. This type of software has been popularised by hardware devices, such as
Garmin, Tom Tom and Navman in-car GPS Navigation devices.
U
User Segment: The part of the GPS system which includes the user equipment, applications and
operational procedures.
UTC: UNIVERSAL TIME, COORDINATED. The world standard for time, adjusted for different
timezones. For all practical purposes, it is the same as GMT.
UTM: UNIVERSAL TRANSVERSE MERCATOR. An international standard for describing map
coordinates. It is a grid coordinate system that projects global sections onto a flat surface
to measure position in specific zones. These zones are 6 Degrees wide and are stepped
along the equator such that each zone corresponds to a north-south strip of the earth.
V
Velocity: Speed and direction.
VMG: VELOCITY MADE GOOD. Shows how quickly you are travelling toward your objective. This
usually less than your current speed, unless you are heading directly towards your
objective.
W
WAAS: WIDE AREA AUGMENTATION SYSTEM. A system which is similar to DGPS, although more
advanced. It is also a system used to help reduce the number of GPS errors, and thus the
accuracy.
Warm Start: When a GPS receiver starts up after having been used a relatively short time ago
(within a few hours), it still has valid ephemeris data, and thus know exactly where the
satellites are. A warm start generally means the GPS will find it's location quicker.
Waypoint: A coordinate that represents a position that a vessel, aircraft, vehicle or person has to
navigate to, with the aid of GPS.
120
Hema Explorer app User Guide - Android
WGS: WORLD GEODETIC SYSTEM
WMS: WAAS MASTER STATION. Works out signal error, and broadcasts it back to satellites.
X
XTE: CROSS TRACK ERROR. Specifies how far you are off course by distance when heading
towards an objective.
121