1
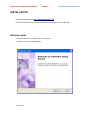
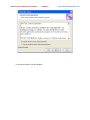
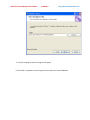
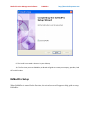
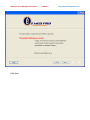
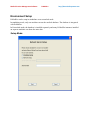
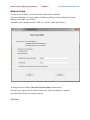
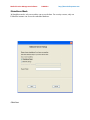
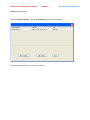
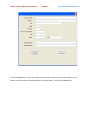
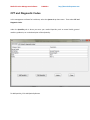
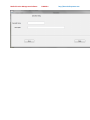
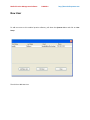
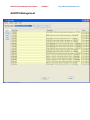
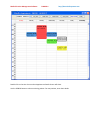
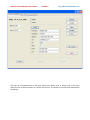
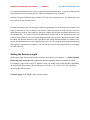
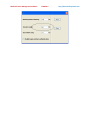
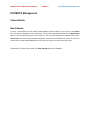
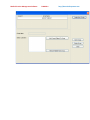
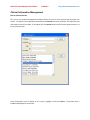
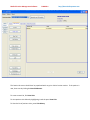
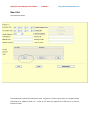
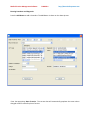
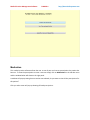
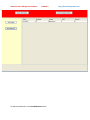
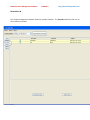
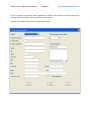
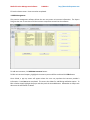
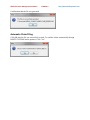
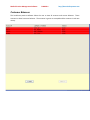
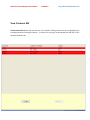
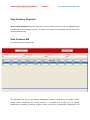
Medical Practice Management Software
EzMedPro
http://www.dsoftsystems.com
User Manual
For
Medical Practice Management Software
EzMedPro
http://www.dsoftsystems.com
Table of Contents
INSTALLATION ............................................................................................................................................... 4
Windows Install......................................................................................................................................... 4
EzMedPro Setup............................................................................................................................................ 8
Environment Setup ..................................................................................................................................... 10
Setup Mode:............................................................................................................................................ 10
Network Setup ........................................................................................................................................ 11
Standalone Mode .................................................................................................................................... 12
Environment Setup ................................................................................................................................. 13
Change Setup Mode.................................................................................................................................... 20
Backup and Restore Database .................................................................................................................... 21
Backup..................................................................................................................................................... 21
Restore .................................................................................................................................................... 22
Setup Company ........................................................................................................................................... 23
CPT and Diagnostic Codes ........................................................................................................................... 26
CPT Codes................................................................................................................................................ 28
ICD and Diagnostic codes ........................................................................................................................ 30
New User..................................................................................................................................................... 32
ALERTS Management .................................................................................................................................. 34
SCHEDULING ............................................................................................................................................... 35
Appointment Scheduler .......................................................................................................................... 35
Setting the Session Length ...................................................................................................................... 39
PATIENTS Management .............................................................................................................................. 41
Patient Details ......................................................................................................................................... 41
New Patients ....................................................................................................................................... 41
Guardian.............................................................................................................................................. 42
Patient Insurance ................................................................................................................................ 44
Emergency Contact ............................................................................................................................. 46
Groups ..................................................................................................................................................... 46
Clinical Information Management .......................................................................................................... 48
New Visit ............................................................................................................................................. 50
Intake Session ..................................................................................................................................... 52
Medical Practice Management Software
EzMedPro
http://www.dsoftsystems.com
Patient History .................................................................................................................................... 52
Medication .......................................................................................................................................... 53
Print HCFA ........................................................................................................................................... 56
Print Intake.......................................................................................................................................... 56
Print Medical Record........................................................................................................................... 56
Patient Bills Tab....................................................................................................................................... 57
Patient Lookup .................................................................................................................................... 58
View a Bill ............................................................................................................................................ 58
Patient Bills ......................................................................................................................................... 60
Patient Unpaid Bills ............................................................................................................................. 60
Create Fee ........................................................................................................................................... 60
Patient Payments .................................................................................................................................... 60
Medical BILLING .......................................................................................................................................... 67
Bills Per Period ........................................................................................................................................ 68
Today’s Bills............................................................................................................................................. 68
Print HCFA ............................................................................................................................................... 69
Electronic Claims ..................................................................................................................................... 70
Setup clearing house ........................................................................................................................... 70
Setup to Automatic Claim ................................................................................................................... 72
Setup the frequency to check for claim status ................................................................................... 74
Generate Claim File ............................................................................................................................. 75
Automatic Claim Filing ........................................................................................................................ 76
Customer Balances.................................................................................................................................. 77
View Customer Bill .............................................................................................................................. 78
View Customer Payments ................................................................................................................... 79
View Customer Bill .............................................................................................................................. 79
Insurance Claims ................................................................................................................................. 80
Insurance Payments ............................................................................................................................ 81
Customer Payments ............................................................................................................................ 82
Medical Practice Management Software
EzMedPro
http://www.dsoftsystems.com
INSTALLATION
Download EzMedPro from http://www.dsoftsystem.com
Go to the download Tab and Download EzMedPro for Windows, Linux or Mac OSX.
Windows Install
1- The download file is ezmedpro.exe or ezinstall.exe.
2- Double click on the downloaded file:
3- Click Next
Medical Practice Management Software
4- The Readme message will appear.
5- Accept the license
EzMedPro
http://www.dsoftsystems.com
Medical Practice Management Software
EzMedPro
6- Choose the folder to Install EzMedPro
http://www.dsoftsystems.com
Medical Practice Management Software
EzMedPro
http://www.dsoftsystems.com
7- A Screen showing the install in progress will appear
8 -The Install is complete screen will appear with a check box to start EzMedPro.
Medical Practice Management Software
EzMedPro
http://www.dsoftsystems.com
9- The install has created a shortcut in your desktop.
10- The first time you start EzMedPro, A Wizard will guide to create you company, provider, load
CPT and ICD codes.
EzMedPro Setup
When EzMedPro is started for the first time, the wizard screen will appear to help guide to setup
EzMedPro.
Medical Practice Management Software
Click Next.
EzMedPro
http://www.dsoftsystems.com
Medical Practice Management Software
EzMedPro
http://www.dsoftsystems.com
Environment Setup
EzMedPro can be setup in standalone or on networked mode.
In standalone mode, only one machine can use the medical database. The database is integrated
with EzMedPro.
In Networked mode, the database is installed separately and many EzMedPro instances installed
on separate machines can share the same data.
Setup Mode:
Medical Practice Management Software
EzMedPro
http://www.dsoftsystems.com
Network Setup
To setup Network Mode, you need to download the Network Database.
The network Database is only available on Windows platform. After Installing the Network
database, RESTART your machine.
EzMedPro can be installed on MAC OSX 10.5+ 64 bits, Linux and Windows.
To Setup Networked Mode, Chose the Network Setup as shown above.
Enter the server name or the IP address of the server where the Database is installed.
Enter the Shared Folder is no longer required.
Click Next
Medical Practice Management Software
EzMedPro
http://www.dsoftsystems.com
Standalone Mode
In Standalone mode, only one machine can access the data. For security reasons, only one
EzMedPro instance can access the embedded database.
Click Next
Medical Practice Management Software
EzMedPro
http://www.dsoftsystems.com
Environment Setup
After you have chosen the Setup Mode, EzMedPro will connect to the database and setup your
environment.
If your database has not been setup, you will need to provide your company information as well
as the first medical provider.
Medical Practice Management Software
EzMedPro
http://www.dsoftsystems.com
Click NEXT and a Window creates a company will show as below.
Medical Practice Management Software
EzMedPro
http://www.dsoftsystems.com
Enter the information Company Name, Address fields; EIN and Group NPI are required
information.
If you don’t have the Group NPI, Enter the main provider’s NPI.
Click Save.
Medical Practice Management Software
EzMedPro
http://www.dsoftsystems.com
A Trial version of CPT, HCPCS and ICD codes will be added to the database.
Click NEXT
Medical Practice Management Software
EzMedPro
Click NEXT
A Window to create a Provider will show as follows:
http://www.dsoftsystems.com
Medical Practice Management Software
EzMedPro
Click Lookup Button to get the correct Taxonomy code.
Click Save
http://www.dsoftsystems.com
Medical Practice Management Software
EzMedPro
http://www.dsoftsystems.com
Medical Practice Management Software
EzMedPro
http://www.dsoftsystems.com
Change Setup Mode
To change the setup mode from Network to Standalone, Backup your database first into a file.
Go to Options → Server Setup
EzMedPro setup section explain how to setup Network or Standalone mode.
Medical Practice Management Software
EzMedPro
http://www.dsoftsystems.com
Backup and Restore Database
Backup
To backup the database, Start EzMedPro, and Go System → Backup and Restore → Backup
Click Backup
Medical Practice Management Software
EzMedPro
http://www.dsoftsystems.com
Restore
To restore the database, Start EzMedPro, and Go System → Backup and Restore → Restore
Medical Practice Management Software
EzMedPro
http://www.dsoftsystems.com
Setup Company
The following Medical Billing Software can be used by any medical practice, family practice, mental
health, nursing and chiropractic practice. This medical billing and scheduling software is easy to use and
can perform appointment scheduling, case management, patient management, electronic medical
record, mental health management, nursing management, HCFA form and scheduling report functions.
This medical office software is easy to use and simple to get started. The user can start by selecting the
Medical Practice Management Software
EzMedPro
http://www.dsoftsystems.com
System drop down menu.
Then select Setup Company. Click on New Company tab and fill in information.
Click New Company Button to create your company.
Medical Practice Management Software
EzMedPro
http://www.dsoftsystems.com
Then select save button. The medical, family, mental health, chiropractor or nursing company name,
address, and EIN number should be displayed in the table above. Then click the Close button.
Medical Practice Management Software
EzMedPro
http://www.dsoftsystems.com
CPT and Diagnostic Codes
In this management software for healthcare, select the System drop down menu. Then select CPT and
Diagnostic Codes.
Under the Speciality tab is where you enter your medical Speciality such as mental health, general
medicine, pediatrics, etc. and a description of that Speciality.
To add Speciality, Click Add Speciality Button.
Medical Practice Management Software
EzMedPro
http://www.dsoftsystems.com
Medical Practice Management Software
EzMedPro
http://www.dsoftsystems.com
CPT Codes
To Add CPT Code, Click Add new Code
The window below will appear, fill in the information and click save. Enter the description and price in
the subsequent boxes. Make sure and highlight the correct Categoryt in the Speciality box and save the
data. The number, description and price should be listed in the CPT table
Medical Practice Management Software
EzMedPro
http://www.dsoftsystems.com
Medical Practice Management Software
EzMedPro
ICD and Diagnostic codes
Click on Diagnostic Codes Tab
To add a new code, Click Add new Code Button.
http://www.dsoftsystems.com
Medical Practice Management Software
EzMedPro
http://www.dsoftsystems.com
Enter the number in the box labeled Diagnostic Code. Fill in the description of that diagnostic code and
highlight the correct Speciality. Then press Save
Medical Practice Management Software
EzMedPro
http://www.dsoftsystems.com
New User
To add new users to this medical practice software, pull down the Systems Menu and click on User
Setup.
Then click on Add New User.
Medical Practice Management Software
EzMedPro
http://www.dsoftsystems.com
Fill out the corresponding information and click Save. The user’s first name, last name, emails and
phone # should be listed in the table. Press Close to exit.
To edit user information in this patient management software, highlight the user information needing to
be edited in the table. Once highlighted, click on Edit User, make the needed changes and then press
Save. The changes should be reflected in the existing screen. Then press Close to exit the screen.
Medical Practice Management Software
ALERTS Management
EzMedPro
http://www.dsoftsystems.com
Medical Practice Management Software
EzMedPro
http://www.dsoftsystems.com
Once EzMedPro has started, Alerts will show up if there are unbilled accounts. In order to address these
items, please go to the Patient tab; select the appropriate patient and bill. Once billed, click the refresh
button to update the Alerts.
SCHEDULING
Appointment Scheduler
To start scheduling in this management software for healthcare, press the Appointment Scheduler
button from any screen.
Medical Practice Management Software
EzMedPro
http://www.dsoftsystems.com
Double click on the time slot to and an Appointment Details Screen will show.
Use the SEARCH button to select an existing patient. For new patients, enter their details.
Medical Practice Management Software
EzMedPro
http://www.dsoftsystems.com
The user can view appointments in Day View, Week View, Month View, or Group View. Group View
allows the user to see all providers in a weekly view format. This allows for easy and clear appointment
scheduling.
Medical Practice Management Software
EzMedPro
http://www.dsoftsystems.com
The picture below show two providers on monthly view next to each other:
The Today button will automatically bring you back to today’s date in this medical scheduling software.
The Show Dates button will allow a monthly calendar to appear in the center of the screen. The user
can use the Show Dates button to find any particular date by clicking the single arrow (month) or double
arrow (year) buttons. Once the month and year are found, the user can then click on the day and the
schedule will automatically go to that date and show it in whatever view you have selected.
Medical Practice Management Software
EzMedPro
http://www.dsoftsystems.com
To remove the calendar from the screen simply clicks the Hide Dates button. To create an appointment
simply double click on the time preferred. A Session Scheduling screen will appear.
Populate all required fields and press schedule. This will save the appointment. The appointment will
then show up on the schedule in blue.
To make this appointment reoccurring go to Reoccurring Appointment tab and select the frequency and
either the Number of Times or Repeat Until button. Select the number of times the user wants the
appointment to repeat or select a date for the date to repeat until to make this appointment occur until
the selected date. If a patient confirms an appointment, double click on the appointment time and
press the confirm button. This will change the appointment color to green. Repeat this for the Called,
Cancelled, and No show buttons as well. Each button will change the appointment to a different color
so that the appointments are color coded therefore the user can recognize what might be happening
with a patient’s appointment at a glance. The user can also left click on the appointment to accomplish
the same functions.
Setting the Session Length
On the main page of this medical office software, main menu, go to options ---> Global Options
Round up start session by will round up the session length by number of minute specified.
For example, if the value is set to 15 Minutes, when you double click on the calendar, depending
on the position of the mouse, the session can start at 9:00, 9:15, 9:30 or 9:45. You can always
overwrite the start any time.
Session Length: Is the length of the visit per patient.
Medical Practice Management Software
EzMedPro
http://www.dsoftsystems.com
Medical Practice Management Software
EzMedPro
http://www.dsoftsystems.com
PATIENTS Management
Patient Details
New Patients
To enter a new patient into this mental health/medical practice software, simply click on the Patient
tab. The patient information screen will pop up. If this screen is populated, please click the New Patient
button in the left hand side of the screen to clear it. Then enter the information to populate the screen.
Please note the social security and home telephone numbers must be filled out if you do not have one
please enter a factious (000-00-0000) one so that you can continue to move down the screen.
If the patient is 18 years old or older, the View Guardian button will disappear.
Medical Practice Management Software
EzMedPro
http://www.dsoftsystems.com
Guardian
If the patient is a minor please click on the View Guardian button and populated the screen with your
data. You can then print out consent to treat that minor by pressing the Print Form button.
Medical Practice Management Software
EzMedPro
http://www.dsoftsystems.com
Medical Practice Management Software
EzMedPro
http://www.dsoftsystems.com
Patient Insurance
If using insurance, please click the Insurance Information button. Click on New Insurance and the
insurance information screen will pop up.
Please select the insurance name and status. Please note the insurance name is populated by preentering the insurance companies’ information under the Payers tab from the main menu. Please
search for the Payers tab heading in this document for more information. Then populate the rest of the
screen. If the relation to the insured is self the insured street, city, telephone #, ss# will be automatically
populated. Press save to secure data.
Medical Practice Management Software
EzMedPro
http://www.dsoftsystems.com
If a patient’s insurance changes, click on the Insurance Information tab and then highlight the listed
insurance that needs editing. Then click on View Insurance tab. The insurance information screen will
pop up. Pull down the status menu and change from active primary to whatever change has occurred.
Then save.
Medical Practice Management Software
EzMedPro
http://www.dsoftsystems.com
Emergency Contact
Emergency Contact can be filled out by simply clicking on the Emergency Contact button and populating
the screen with the information.
Groups
Click on the Group button, and we can create a group and assign new patient to it:
Medical Practice Management Software
EzMedPro
http://www.dsoftsystems.com
Medical Practice Management Software
EzMedPro
http://www.dsoftsystems.com
Clinical Information Management
Click on Clinical Info Tab.
This easy to use medical management software allows the user to locate patients quickly within the
system. If a patient has already been selected from the Details tab then the patients’ name will be listed
and ready to enter clinical data. If not please click the Search button and fill out the patients name or id
# in the pop up menu.
Once the patient’s name is display on the screen, highlight it and press Select. The patient data is
loaded and displayed on all the tabs.
Medical Practice Management Software
EzMedPro
http://www.dsoftsystems.com
The Session Id screen should then be populated with any prior clinical session entries. If the patient is
new, then start by clicking the New Visit Button.
To create a new Visit, Click New Visit
To view previous visit Select by highlighting it and the press View Visit
To View the list of previous visits, press Visit History
Medical Practice Management Software
EzMedPro
http://www.dsoftsystems.com
New Visit
Click New Visit button.
Please populate any data the needs to be used: Pregnancy or Illness/ Injury Date, First Symptom Date,
Authorization #, Medicaid Code, etc. Some of this data will populate the HCFA form or used for
Electronic claims.
Medical Practice Management Software
EzMedPro
http://www.dsoftsystems.com
Entering Procedure and Diagnostic
Press the Add button to add a Procedure. The Add Button is shown on the above picture.
Enter the appropriate date of service. The current date will automatically populate the screen unless
changed as well as office for place of service.
Medical Practice Management Software
EzMedPro
http://www.dsoftsystems.com
Select the appropriate CPT and Diagnostic Codes. The amount charged entered in for the CPT code
should populate the Charge field. The amount is set per CPT code. Main Many → System → CPT and
Diagnostic Codes.
Please make sure everything else is correct.
If you wish to enter in dates of service from a certain date to a certain date click the Top box. To save
and enter the information press Add to List.
The CPT and Diagnostic Code will then be listed in the corresponding box.
To add another procedure to the session, to be listed on the same HCFA form repeat the process again
starting with the Add button.
Once all the sessions are entered for this bill press SAVE button to secure the data.
Now the Intial Intake or Clinical Notes can be entered simply by pressing the button at the bottom right
hand corner of the screen. Please be aware that if this is the initial session the Intake Session button will
appear at the bottom of the screen.
If it is the first visit for the patient, Initial Session button will appear otherwise Clinical Notes will
appear. Patient and medical record management has never been easier.
Intake Session
The Intake Session is the first patient session.
Patient History
Medical History of the patient, you can upload files if the patient provides a soft copy of it. You can copy
and paste the information or entered it manually.
You can upload scanned files, PDF, Pictures, Xray pictures, and Word Documents.
Medical Practice Management Software
EzMedPro
http://www.dsoftsystems.com
Medication
This medical practice software allows the user to see all past and current prescriptions the patient has
been on. To view the prescriptions or enter a new one simply click on Medications in the side bar menu
and the window below will show on the right panel.
A window will pop up stating that no session was selected, do you want to view all the prescriptions for
this patient?
Click yes and a screen will pop up showing all listed prescriptions.
Medical Practice Management Software
EzMedPro
To add new Medication, Press New Medication button
http://www.dsoftsystems.com
Medical Practice Management Software
EzMedPro
http://www.dsoftsystems.com
To view details regarding a particular prescription, highlight the intended prescription and click View
Details.
To view a specific session click View History and highlight the session you want to view, then click
Medication in the side bar menu.
Medical Practice Management Software
EzMedPro
http://www.dsoftsystems.com
Print HCFA
This management software for healthcare allows the user to print a HCFA form by clicking View History
and highlighting the intended session.
Then click the Print HCFA button. A HCFA form will pop up with populated fields to print. Press Print to
print HCFA form or Cancel to discontinue.
Print Intake
This allows the Intake or Initial Session form to be printed.
Print Medical Record
This easy to use medical record management software allows the session notes to be printed. Please
note that each time you click this button, all the clinical notes completed will be printed.
Medical Practice Management Software
EzMedPro
http://www.dsoftsystems.com
Patient Bills Tab
The patients bills tab in this medical billing software allows the user to have an overview an account
including Total Charge, Total Adjustments, Total Received, Balance for a patient. It also includes details
such as name, type, status, insurance, date, charge, adjustment, insurance payment, copay, payment
and what’s due on the account.
Medical Practice Management Software
EzMedPro
http://www.dsoftsystems.com
Patient Lookup
If a patient has been selected from the Details tab then the patients’ name will be listed and ready to
enter clinical data. If not please click the Patient Lookup button and fill out the patients name, social
security # or id # in the pop up menu. Once the patient’s name is display on the screen, highlight it and
press Select.
View a Bill
Allows the user to view a particular session by highlighting the intended session and pressing the View a
Bill button.
Medical Practice Management Software
EzMedPro
http://www.dsoftsystems.com
Once on the Bill screen, the user can apply adjustments and record received payments. The user is also
able to record notes on the account. The user is able to print an invoice for this particular session or a
complete statement on the account from this screen.
Receiving Payments
The Receive Payment button allows the user to post received payments. This payment can be applied
to a specific session by checking the show unpaid sessions box. Once the partially paid or unpaid session
appear at the bottom of the screen, check the appropriate session to apply the payment to.
Enter the amount, the type of payment (cash, check or charge) and whether the payment is a copay, out
of pocket payment or insurance payment.
If Insurance payment is selected, unpaid or partially paid sessions will appear at the bottom of the
screen.
Please check the boxes the insurance payment applies to. This can also be done manually for copays
and out of pocket payments by checking the box marked Show Unpaid Sessions.
Always save data in each screen.
Medical Practice Management Software
EzMedPro
http://www.dsoftsystems.com
Patient Bills
Patient Bills shows all the patient including the paid bills
Patient Unpaid Bills
This screen gives an overview of unpaid bills on the patient’s account. Again View a Bill can be used
here to open up a specific session to apply a payment or adjustment by highlighting the intended
session and clicking the View a Bill button.
Create Fee
The Create Fee button in this medical billing software allows the user to create a fee, for example a no
show charge, on the account. Go to Total Charge in the upper left hand corner and place the amount for
charge. Then press save in the side bar menu on the right side of the screen.
Patient Payments
The Patient Payments tab gives an overview of all payments posted to a patient’s account. The user can
retrieve a patient’s information by using Lookup Patient (see Patient Lookup ). The user can review any
posted payment by highlighting the payment and then clicking the View Payment button. The user can
again use the Receive Payment button to post a payment and can print a receipt by highlighting the
intended payment and clicking the Print Receipt button.
Medical Practice Management Software
EzMedPro
http://www.dsoftsystems.com
PROVIDERS TAB
This medical management software allows for multiple providers. The Providers tab allows the user to
enter different providers.
Medical Practice Management Software
EzMedPro
http://www.dsoftsystems.com
To edit a providers’ information please highlight the provider in the Provider List Panel and click Edit
Provider, make the changes in the pop up screen and press save.
To add a new provider simply click on the Add New Provider.
Medical Practice Management Software
EzMedPro
http://www.dsoftsystems.com
Fill out the above screen. Press save when completed.
PAYERS Management
This practice management software allows the user easy access to insurance information. The Payers
Tab gives the user an overview of all the insurance companies entered into the software.
To Add new Insurance, click Add New Insurance button.
To Edit an Insurance Company, highlight the insurance you would like to edit and click Edit Button
Once clicked, a pop up screen will appear where the user can populate the insurance provider’s
information. Press Save once completed. This screen also allows for and Editing and Delete option. To
Edit or Delete simply highlight the payer and then push the intended button. Remember to always save
data once the information is edited.
Medical Practice Management Software
EzMedPro
http://www.dsoftsystems.com
Medical Practice Management Software
EzMedPro
http://www.dsoftsystems.com
REPORTS
This management software for healthcare allows the user to generate a weekly, monthly, or daily
revenue or calendar report by simply pressing the Report button. The Billing Report gives total copays,
payments, adjustments, and session costs for any specified time. Simply apply specific dates in the left
hand side bar menu, click on week, month or day and click the Billing Report button. A report will be
generated.
Medical Practice Management Software
EzMedPro
http://www.dsoftsystems.com
The Calendar report will generate the total number to appointments by week, month, or day using
specified dates that can be adjusted in the left hand side bar menu. Simply chose the specific time
frame ( not exceeding 31 days) and chose week, month, or day and click Calendar Report. The
scheduling report will show total appointments including total number of confirmed, new, and no show
appointments.
Medical Practice Management Software
EzMedPro
http://www.dsoftsystems.com
Medical BILLING
Current Bills
This practice management software allows for easy billing overview and access.
Medical Practice Management Software
EzMedPro
http://www.dsoftsystems.com
Bills Per Period
Bills Per Period button allows the user to see all unpaid bills during a certain time frame. Simply click on
the Bills Per Period button and enter the dates for the time frame needed and push Retrieve. A table
will follow showing name, type, status, etc.
Today’s Bills
Today’s Bills button allows the user to see all unpaid bills for the current day.
Medical Practice Management Software
EzMedPro
http://www.dsoftsystems.com
Print HCFA
Click Print HCFA form button:
This medical billing software allows the user to print any claim. Simply highlight the desired bill and click
the Print HCFA button.
If no claim is highlighted, all the claims will be printed.
Medical Practice Management Software
Electronic Claims
Setup clearing house
Click on Option and then Clearing House.
EzMedPro
http://www.dsoftsystems.com
Medical Practice Management Software
EzMedPro
http://www.dsoftsystems.com
Choose one recommended clearing house from DSOFT SYSTEMS or you can create a new one.
Highlight one clearing house and click Edit.
Medical Practice Management Software
EzMedPro
http://www.dsoftsystems.com
DSOFT SYSTEMS will provide you with Practice Number. Enter the number into the field “Practice
Number Loop 1000A NM108”.
Setup to Automatic Claim
In order to send automatically the file to the insurance companies through DSOFT SYSTEMS
partners, check the box “Advanced Transmission Settings”. The window below will appear to
setup the username and password.
Medical Practice Management Software
EzMedPro
http://www.dsoftsystems.com
The username and password will be provided to you by DSOFT SYSTEMS.
Enter the User Name and Password and click Save
Medical Practice Management Software
EzMedPro
http://www.dsoftsystems.com
Setup the frequency to check for claim status
It is recommended to check for the status of the claims every 4 hours (240 minutes).
Enter 240 in the test area of Remittance Time highlight below.
Medical Practice Management Software
EzMedPro
http://www.dsoftsystems.com
Generate Claim File
Click on Insurance EFile button.
A window to validate the claim file will appear/ You can change the file location and name.
Click Save.
Medical Practice Management Software
EzMedPro
http://www.dsoftsystems.com
Confirmation that the file was generated.
Automatic Claim Filing
Click OK after the file was successfully created. To send the claims automatically through
DSOFT SYSTEMS and its partners, Click “Yes”.
Medical Practice Management Software
EzMedPro
http://www.dsoftsystems.com
Customer Balances
This healthcare practice software allows the user to view all accounts and current balances. Those
accounts in white have zero balances. The accounts in green are overpaid and the accounts in red owe
money.
Medical Practice Management Software
EzMedPro
http://www.dsoftsystems.com
View Customer Bill
View Customer Bill button will take the user into a patient’s billing account screen by highlighting the
intended patient and clicking the button. To return here simply go to the BILLING tab and then to the
Customer Balances tab.
Medical Practice Management Software
EzMedPro
http://www.dsoftsystems.com
View Customer Payments
View Customer Payments button will take the user into a patient’s payment screen by highlighting the
intended patient and clicking the button. To return here simply do to the BILLING tab and then to the
Customer Balances tab.
View Customer Bill
This option shows the customer Bill.
This affordable and easy to use practice management software is appropriate for medical, family,
mental health, chiropractic, and nursing practices. It provides user friendly ways to manage
appointments scheduling, electronic medical records, HCFA forms, patient/case management, and
Medical Practice Management Software
EzMedPro
http://www.dsoftsystems.com
scheduling and billing reports. Thank you for choosing Ezmedpro and manage your healthcare practice
with excellence.
Insurance Claims
Click on Insurance EClaim to view all the batch claims that were sent.
Medical Practice Management Software
EzMedPro
Insurance Payments
The Insurance Payments show the insurance payments.
http://www.dsoftsystems.com
Medical Practice Management Software
EzMedPro
Customer Payments
To view the customer payments, Click on Customer Payment Tab.
There are 25 rows per page. Click next to see more payment.
http://www.dsoftsystems.com