1
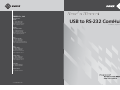
SUNIX Co., Ltd. Headquarters Taiwan Tel : +886-2-8913-1987 Fax: +886-2-8913-1986 Website: www.sunix.com.tw E-mail: [email protected] Germany Sunix Vertriebs Gmbh Tel : +49(0)6146-60 1345 Fax: +49(0)6146-60 1346 Website: www.sunix-europe.com E-mail: [email protected] Brasil Sunix do Brasil Ltda. Tel : +55-11-3833-9583 Fax: +55-11-3833-9583 Website: www.sunix-brasil.com.br E-mail: [email protected] China Shanghai Office Tel : +86-21-6469-1670 Fax: +86-21-6468-8346 Website: www.sunix.com.cn E-mail: [email protected] Shanghai Office Tel : +86-21-6469-1670 Fax: +86-21-6468-8346 Website: www.sunix.com.cn E-mail: [email protected] Beijin Office Tel : +86-010-86693735 Fax: +86-010-62653864 Shenzhen Office Tel : +86-755-21327310 771-USBCOMH00-001 User’s Manual USB to RS-232 ComHub 1st edition, August 2009 USB ComHub User’s Manual Copyright Copyright© 2005 SUNIX Co., Ltd. All Rights Reserved. No part of this publication may be reproduced, transcribed, stored in a retrieval system, translated into any language, or transmitted in any from or by any means, photocopying, manual, or otherwise, without prior written permission from SUNIX Co., Ltd. Disclaimer SUNIX Co., Ltd. shall not be liable for any incidental or consequential damages resulting from the performance or use of this equipment. SUNIX Co., Ltd. makes no representations or warranties regarding the contents of this manual. Information in this manual has been carefully checked for reliability; however, no guarantee is given as to the correctness of this content. In the interest of continued product improvement, this company reserves the right to revise the manual or include change in the specifications of the product described within it at any time without notice and without obligation to notify any person of such revision or changes. The information contained in this manual is provided for general use by the customers. Trademarks SUNIX is a registered trademark of SUNIX Co., Ltd. Other registered marks used herein are for identification purposes only and may be trademarks of their respective owners. SUNIX Co., Ltd. TEL : +886-2-8913-1987 Email : [email protected] INDEX Chapter 1 Introduction.............................................................................2 Overview ...........................................................................................3 Package Checklist ........................................................................... 4 Product Features.............................................................................. 5 Product Specifications ..................................................................... 5 Chapter 2 Hardware Installation............................................................10 Hardware Installation...................................................................... 10 Pin Assignment……..…………………………................................ 20 Mechanical Drawings..…………………………………………………21 Chapter 3 RS-232 ComHub Operation .................................................23 Driver Installation……..................................................................... 24 Verify RS-232 ComHub in System…………............................... 25 RS-232 ComHub Operation..……………….…............................... 25 Uninstalling Driver........................................…............................... 29 Chapter 4 Troubleshooting……………..................................................30 Troubleshooting……....................................................................... 31 Chapter 5 Contract Information……………………................................33 Contract Information……............................................................... 33 -1- SUNIX Co., Ltd. TEL : +886-2-8913-1987 Email : [email protected] 1. Introduction Thank you for purchasing the USB to RS-232 ComHub, which is designed to enable users accessing RS-232 devices without additional external power supply connection. SUNIX 4-Port RS-232 ComHub provides a simple and affordable way to add up to four RS-232 ports to your PC. The following topics are covered in this chapter: Overview Package Checklist Product Features Product Specifications -2- SUNIX Co., Ltd. TEL : +886-2-8913-1987 Email : [email protected] Overview The USB to RS-232 Comhub provides an external plug-and play RS-232 serial connection for computers, notebooks, laptops, and handlheld computing devices that support the USB specificaton. It comes with 4 standard DB9 male connecrors for peripherals to plug into and a USB cable for connectiong to computer's USB port, or to a USB hub. There are two models for USB to Serial ComHub series: UTS4009H - USB to 4-port RS-232 ComHub UTS4009HP - USB to 4-port RS-232 Powered ComHub With Optional +5V/12VDC Power Output SUNlX USB-to-RS232 ComHub enclosure is compatible with both USB 2.0 and 1.1 specifications with serial communication 921.6 Kbps maximum data transfer rate. With SUNlX UTS4009HP RS-232 Power Selectable communication ComHub, users can expand 4 RS-232 ports with 5 or 12 voltage output via pin 9th. It is designed for use in commercial applications without need to provide the serial devices with external power supplies, such as barcode scanner, keypad, POS device, printer, and other devices. SUNlX offers the most complete line of USB to I/O products for all your connection needs. UTS4009H UTS4009HP -3- SUNIX Co., Ltd. TEL : +886-2-8913-1987 Email : [email protected] Package Checklist Please check if the following items are present and in good condition upon opening your package. Contact your vendor if any item is damaged or missing. 1. USB to RS-232 ComHub 2. User's Manual (This document) 3. Clamped USB2.0 High Speed Cable (1pcs) 4. Software CD ROM 5. DC Jack Power Adapter 12V/1A Connector Type: (Only UTS4009HP) Optional Accessory: DIN-Rail and wall-Mount Option 1. Wall-Mount Kit 2. Din-Rail Kit Power Adapter Option (Only UTS4009HP) 1. +12VDC @ 4A Power Adapter with 6-pin Mini-Din Connector 2. +12VDC @ 1A Power Adapter with DC Jack Connector (Default one) Note: Optional accessory does not include in the standard packing. If any accessory requests, please contact your vendor for detail -4- SUNIX Co., Ltd. TEL : +886-2-8913-1987 Email : [email protected] Product Features Compliance with Universal Serial Bus (USB) Specification Revision 2.0 Expands 4-port RS-232 on system via USB2.0 High-Speed connection. High Speed 480Mbps USB communication and backward compatible with USB1.1 interface. Each serial port supports transmission rate up to 921 .6Kbps. Built-in ±15KV ESD protection for all serial signals meets IEC1000-4-2st andard. External LED indicates system status, data transmission and power output. Supports USB panel mount design to assure USB connections extremely safety and professional. Rugged and slim form factor aluminum chassis design meets IP30 standard. Optional accessory for easy DIN-Rail and Wall-Mounting ability. Plug-n-Play, I/O address and IRQ assigned by system. Extends operation temperature environment up to +70°C (158°F). Supports Microsoft Windows and Linux operation system. Certificated by CE, FCC, RoHS, and Microsoft WHQL approval. External LED indicates power output. Provides RS-232 serial port with optional +5 or +12VDC power output over 9th-pin. Each Powered COM port built-in short circuit and over current protection. -5- SUNIX Co., Ltd. TEL : +886-2-8913-1987 Email : [email protected] UTS4009H Specifications Serial Communication Interface RS-232 Bus USB (Universal Serial Bus) Spec 2.0 No. of Port 4-port FIFO 16 byte Hardware IRQ & IO Assigned by System Signal TxD, RxD, RTS, CTS, DTR, DSR, DCD, GND, RI Baud rate 50~921.6Kbps Data bit 5, 6, 7, 8 Stop bit 1, 1.5, 2 Protection ±15KV Human Body Model (HBM) RS-232 Connector DB9 Male USB Connector Mini Type B with Panel Mount Design Power Input Power for product USB Bus Power working +5VDC / 0.5A / 2.5W Power Consumption < 1W = 5V x 200mA Driver Support Microsoft Windows 95/98/ME/2000/XP/Vista/7 (X86/X64) Microsoft Embedded CE4.0/CE5.0/CE6.0 Embedded Microsoft Server 2003/2008 (X86/X64) Linux Linux 2.6.x Kernels Regulatory Approvals Hardware Green EN55022 Class B, EN55024, EN61000-3-2, EN61000-3-3, FCC Part 15 Class B, RoHS -6- SUNIX Co., Ltd. TEL : +886-2-8913-1987 Email : [email protected] Operation Environment Operation Temperature 0 to 70°C (32 to 158°F) Operation Humidity 5 to 95% RH Storage Temperature -20 to 85°C (-4 to 185°F) Mechanical Dimension 215 (W) x 72.3 (D) x 30 (H) mm Enclosure IP30 standard Material Aluminum and Polycarbonate (PC) Gross Weight 270 gram Cable Length 1.5M Mounting DIN Rail and Wall Mount Kit (Optional Accessory) -7- SUNIX Co., Ltd. TEL : +886-2-8913-1987 Email : [email protected] UTS4009HP Specifications Serial Communication Interface RS-232 Bus USB (Universal Serial Bus) Spec 2.0 No. of Port 4-port FIFO 16 byte Hardware IRQ & IO Assigned by System Signal TxD, RxD, RTS, CTS, DTR, DSR, DCD, GND, +5V/12VDC Baud rate 50~921.6Kbps Data bit 5, 6, 7, 8 Stop bit 1, 1.5, 2 Protection ±15KV Human Body Model (HBM) RS-232 Connector DB9 Male USB Connector Mini Type B with Panel Mount Design Power Input Power for product USB Bus Power working +5VDC / 0.5A / 2.5W Power Output to device Power Consumption External Power Adapter (Optional) +12VDC / 2A / 24W (DC Jack Adapter) +12VDC / 4A / 48W (Mini Din Adapter) +5VDC / 250mA @ (Non-Loading) Driver Support Microsoft Windows 95/98/ME/2000/XP/Vista/7 (X86/X64) Microsoft Embedded CE4.0/CE5.0/CE6.0 Embedded Microsoft Server 2003/2008 (X86/X64) Linux Linux 2.6.x Kernels Regulatory Approvals Hardware Green EN55022 Class B, EN55024, EN61000-3-2, EN61000-3-3, FCC Part 15 Class B, RoHS -8- SUNIX Co., Ltd. TEL : +886-2-8913-1987 Email : [email protected] Operation Environment Operation Temperature 0 to 70°C (32 to 158°F) Operation Humidity 5 to 95% RH Storage Temperature -20 to 85°C (-4 to 185°F) Mechanical Dimension 215 (W) x 72.3 (D) x 30 (H) mm Enclosure IP30 standard Material Aluminum and Polycarbonate (PC) Gross Weight 355 gram Cable Length 1.5M Mounting DIN Rail and Wall Mount Kit (Optional Accessory) -9- SUNIX Co., Ltd. TEL : +886-2-8913-1987 Email : [email protected] 2. Hardware Installation This chapter includes information about hardware installation and mechanical drawings for USB to RS-232 ComHub. The following topics are covered: Hardware Installation Pin Assignments - 10 - SUNIX Co., Ltd. TEL : +886-2-8913-1987 Email : [email protected] Hardware Installation LED Display UTS4009H USB Data Link LED Rx Name USB LINK Tx LED ACT Description Green Do NOT Light Green Flashlight USB connection between computer and ComHub is ready USB connection between computer and Hub is NOT ready Do NOT Light Rx Green Flashlight Do NOT Light Tx Data is transmitting between ComHub, and computer. There’s no any data communication between computer and ComHub Data is receiving between ComHub, and computer. There’s no any data communication between computer and ComHub UTS4009HP Power LED USB Data Link LED 5V, 12V, Tx, Rx Name Power USB LINK 5V 12V Tx LED ACT Description Green Do NOT Light Green Do NOT Light Green Do NOT Light Green Do NOT Light Green Flashlight Comhub is connectting with power. There’s no any power input to Comhub. USB connection between computer and ComHub is ready USB connection between computer and Hub is NOT ready +5VDC power output There’s no any power output +12VDC power outputs There’s no any power output Do NOT Light Rx Green Flashlight Do NOT Light Data is transmitting between ComHub, and computer. There’s no any data communication between computer and ComHub Data is receiving between ComHub, and computer. There’s no any data communication between computer and ComHub - 11 - SUNIX Co., Ltd. TEL : +886-2-8913-1987 Email : [email protected] Safety First Be careful using power output function and jumper settings, and it may burn out your serial device. SUNIX does not take responsibility for user's wrong operation. Please study both SUNIX product and serial device manuals carefully. 1. Make sure your serial device accepts DC power sources from COM port 9th-pin. 2. Make sure the DC power voltage is 5 or 12VDC. 3. Follow up below instructions to modify jumper settings. 4. Power OFF is manufactory default setting. RS-232 9th PIN Power Switch SUNIX UTS4009HP, 4-port RS-232 Powered ComHub Provides RS-232 serial port with optional +5 or +12VDC power output over 9th-pin. +5 or +12VDC Power Select Switch Power ON/OFF Switch Switch ACT Result Power ON Description Power switch is ON and +5VDC is selected. +5VDC LED shows green. The 9th PIN is +5VDC output. +5VDC Selected Power ON Power switch is ON and +12VDC is selected. +12VDC LED shows green. The 9th PIN is +12VDC output. +12VDC Selected Power OFF Power switch is OFF and +12VDC is selected. No Power output from the 9th PIN. +12VDC Selected Power OFF Power switch is OFF and +5VDC is selected. No Power output from the 9th PIN. +5VDC Selected - 12 - SUNIX Co., Ltd. TEL : +886-2-8913-1987 Email : [email protected] Earth Ground Connection Earth Ground Screw Pin Grounding and wire routing help limit the effects of noise due to electromagnetic interference (EMI). In order to reduce the environmental background noise, we have added earth ground cooper on the Hub side panel. User can run the ground connection from the Hub ground screw to the grounding surface. Power Adapter Connection DC 12V Power Adapter Input 6-pin Mini-Din Connector DC-12V DC-12V DC 12V Power Adapter Input DC Jack Connector Plug the DC plug into the DC jack and plug the AC adaptor into an electrical outlet. Please choice +12VDC Jack adapter or +12VDC 6-pin Mini-Din adapters to the 6-pin Mini-Din power adapter. Pay attention that Do NOT use both power adapters at the same time. Note: +12V DC Jack power adapter provides 2A total 24W and +12V 6-pin Mini-Din power adapter provides 4A total 48W. Please confirm the total power current of all serial device power consumption and select the suitable one. Safety First To avoid damaging, make sure to disconnect power connection before wiring or disposing the powered RS-232 ComHub. - 13 - SUNIX Co., Ltd. TEL : +886-2-8913-1987 Email : [email protected] USB Connection Plug USB connector type A into the USB port of host computer, and plug USB connector Mini B Type into the upstream port of the hub. USB Mini B Type Connector USB Panel Mount Screw With SUNIX screw-style panel mount connector and clamped cable design, USB to RS-232 ComHub build USB functionality into a secure and efficient fixed port. From basic port re-routes in a PC, to connections at podiums and kiosks, panel-mount cable is a great way to keep your connections extremely reliable, safety and professional. Please follow up below steps to complete the USB connection between computer and Hub. 1. 2. 3. 4. Turn both screws to the lift to loosen its. Plug the clamped USB2.0 cable into USB Mini B Type connector. Turn both screws to the right to tighten and fix the USB connector. Connect the other side of USB cable A type connector to your computer. - 14 - SUNIX Co., Ltd. TEL : +886-2-8913-1987 Email : [email protected] Cable Restraining Holder SUNIX Patten cable restraining holder prevents cable from coming loose easily. You can wire your power adapter cable around the holder which shown in the picture. - 15 - SUNIX Co., Ltd. TEL : +886-2-8913-1987 Email : [email protected] Wall Mount The plastic Wall Mount kit is optional and available upon request. Follow the steps below to install the Hub with the wall mounting plate. 1. To remove the DIN-Rail clip from the Hub, loosen the screws from the DIN Rail clip. 2. Place the wall mounting plate on the rear panel of the Hub. 3. Use the screws to tighten the wall mounting plate onto the Hub. 4. Use the hook holes at the corners of the wall mounting plate to hang the Hub onto the wall. 5. To remove the wall mounting plate, reverse the steps above. 1 2 Hook space to hold pin/screw at wall Holes for Screw to fix wall mount brackets Note: Wall Mount Kit is a optional accessory does not include in the standard packing. If any accessory requests, please contact your vendor for detail. - 16 - SUNIX Co., Ltd. TEL : +886-2-8913-1987 Email : [email protected] DIN Rail Mount The plastic DIN-Rail attachment plate should already be fixed to the rear panel of the Hub when you take it out of the box. If you need to attach the DIN-rail plate, see the steps as shown in below diagrams. Step 1: Holes for Screws Head for lower clip The DIN Rail kit consists of two brackets as shown in the figure. Affix the two brackets together by inserting the off-white bracket’s mounted head in yellow bracket. Step 2: You will hear the “click” sound once the head is completely placed and fixed. At this stage, slide this DIN Rail kit to Hub’s back panel. Carefully, align the holes provided for screws. - 17 - SUNIX Co., Ltd. TEL : +886-2-8913-1987 Email : [email protected] Step 3: Use four-pin screwdriver to tighten the two screws. Failing to do so, may cause falling of Hub from the DIN Rail. Step 4: Tighten the third screw at the bottom by turning the Hub at his back. To remove the DIN Rail kit, reverse the above steps. - 18 - SUNIX Co., Ltd. TEL : +886-2-8913-1987 Email : [email protected] Attaching the Hub to the DIN-rail is easy: just align and hook it over the top rail, making sure that the rail edges at top fixed into the space of DIN Rail kit. Once the heads fixed, then push down and press the Hub forward to snap into the bottom rail, as shown in the figures above. Once the Hub is fixed, you can use the screw at bottom to lock the Hub with DIN Rail. Screw for DIN Rail Lock Note: DIN Rail Mount Kit is a optional accessory does not include in the standard packing. If any accessory requests, please contact your vendor for detail. - 19 - SUNIX Co., Ltd. TEL : +886-2-8913-1987 Email : [email protected] Pin Assignments The RS-232 ComHub connectors are standard DB9 male type connectors. UTS4009H PIN DB9M DCD 1 RxD 2 TxD DTR 3 4 GND 5 DSR 6 RTS 7 CTS 8 RI 9 Note: SUNIX provides TTL signal or different power pin output product by special requirement. UTS4009HP PIN DB9M DCD RxD 1 2 TxD 3 DTR 4 GND 5 DSR 6 RTS CTS 7 8 N.A/5V/12V 9 Note: SUNIX provides TTL signal or different power pin output product by special requirement. * Client needs power output over DB9M connector 1st or 4th pin, instead of current 9th pin. * Client needs TTL (Low Voltage +3.3V) single output, instead of standard RS-232 signal. - 20 - SUNIX Co., Ltd. TEL : +886-2-8913-1987 Email : [email protected] Mechanical Drawings Please read the below images for RS-232 ComHub's layout details. UTS4009H Unit: mm - 21 - SUNIX Co., Ltd. TEL : +886-2-8913-1987 Email : [email protected] Unit: mm UTS4009HP - 22 - SUNIX Co., Ltd. TEL : +886-2-8913-1987 Email : [email protected] 3. USB to RS-232 ComHub Operation After USB to RS-232 ComHub hardware installs properly in your system, the first thing you should do is that check operation system detect the ComHub or not. This chapter introduces the method to confirm the USB to RS-232 ComHub installation and operation. The following topics covered in this chapter: Driver Installation Verify USB to RS-232 ComHub in System Port Setting Uninstalling Driver - 23 - SUNIX Co., Ltd. TEL : +886-2-8913-1987 Email : [email protected] Driver Installation Windows Installation In order to ensure proper operation of your USB to RS-232 ComHub, please follow the instructions below. 1. Please insert the CD driver into your CD/DVD ROM. 2. Click the Setup.exe from your CD/DVD device : \ USB \ USB to IO \ Setup.exe 3. Follow the onscreen installation step. 4. After finishing installation, please connect the USB to RS-232 ComHub to your PC. 5. Please check to see if each is installed properly in Device Manager. Start > Controller Panel > System > Device Manager Linux Installation We provide Linux 2.2.x, 2.4.x and 2.6.x kernel, including RedHat version 7.3, 8 and 9. 1. Please insert the CD driver into your CD/DVD ROM. 2. Please check the individual folder as the following location from your CD/DVD : \ USB \ USB to IO \ Linux \ - 24 - SUNIX Co., Ltd. TEL : +886-2-8913-1987 Email : [email protected] Verify USB to RS-232 ComHub in System Please check click on the “Device Manager” tab in System Properties, which you access from the Windows Control Panel. You should see an entry for the driver you installed under the Universal Serial Bus Controllers item. Start > Controller Panel > System > Device Manager Port Setting After installing USB to RS-232 ComHub successfully, you can modify the setting for each port in device manager. 1. Right click your mouse on the COM port, and select “Properties”. - 25 - SUNIX Co., Ltd. TEL : +886-2-8913-1987 Email : [email protected] 2. Select “Port Setting” page to modify COM port setting. 3. Select “Advanced” icon, you can modify COM port number and port function. 1 2 3 4 5 6 7 8 9 - 26 - SUNIX Co., Ltd. TEL : +886-2-8913-1987 Email : [email protected] Section 1: Under this section, you can select the COM port to which changes are required. Section 2: Rx-Disable: Tick marking this check box permanently disables receiving capacity of selected port. RTS Inactive: This is for setting the status of RTS signal. Default (Uncheck) is Active Low. Tx Shutdown: Tick marking this check box shuts down the transceiver on USB suspend state. Section 3: Rx-Sampling: This section is used to program the sampling point of each data bit Initial, middle or end). By default this value is set to 0x7 so that sampling takes place in the middle of each bit. Inter Character Gap: This value is used to program the gap between each data bit being sent or received. By default this value is set to 0x00, which sets the default gap. Section 4: Enable automatic HW flow control: Tick marking this check box enables Automatic HW flow control. Enable High baud rate: Enables high baud rates to serial COM applications. (110/150bps acts as 1.5 Mbps, 300bps acts as 3 Mbps and 600/1200 bps acts as 6 Mbps) Section 5: Clock to the serial port can be selected from this tab. Different clock options available are 1.8432 MHz (Default), 30 MHz, 96MHz, 120 MHz, PLL Out and External clock. Note: a. PLL clock out for Internal Clock can be programmed by selecting 12 MHz option and setting Loop Divisor and Pre Divisor values in the Global Settings tab. b. PLL clock out for External clock can be programmed by selecting External Clock option and setting Loop Divisor and Pre Divisor values in the Global Settings tab. Section 6: This section enables programming of custom baud rates for serial ports. Selecting suitable values for DLL and DLM can do this. If this section is enabled, these settings will be applied to the serial ports irrespective of those set in COM port application. - 27 - SUNIX Co., Ltd. TEL : +886-2-8913-1987 Email : [email protected] Section 7: This section is used to select different modes for serial ports. In RS 485 mode, DTR signal mode is enabled to set a suitable value for different line drivers. Section 8: This section enables remote wake up feature. Remote wake up can be enabled by checking. Section 9: When working in Hyper Threading / Dual Core PC's, check the Enable Threshold option to set the default value of 0x100 i.e., 256 bytes for completion. Or change the value as per requirement. 4. When serial device requires setting to a specific COM number, confirm the port number match the settings required for your serial device. Note that Under Windows 98, you will not be able to change the COM port number. You need to use the default COM port number assigned by the OS. SAFTY FIRST Unplugging or ejecting a device without first stopping them can often cause your computer to crash and lose valuable data. To safely unplug or eject any of the USB to RS-232 devices, firstly use the hardware wizard in the control panel to stop the devices. Or you can use the “Safety Remove” icon on the taskbar to quickly unplug or eject your devices. - 28 - SUNIX Co., Ltd. TEL : +886-2-8913-1987 Email : [email protected] Uninstalling Driver Using “Add or Remove program” in the control panel, and select “9710_7840_quadport_MSUninst” then click “Unstall”. System will uninstall. automatically. - 29 - SUNIX Co., Ltd. TEL : +886-2-8913-1987 Email : [email protected] 4. Trobleshooting This chapter shows some problems that user came with usually. Also you can check it if the USB to RS-232 ComHub can not work properly in your system after following hardware and software installation steps. - 30 - SUNIX Co., Ltd. TEL : +886-2-8913-1987 Email : [email protected] Troubleshooting 1. If the USB to RS-232 ComHub and devices connected to the computer do not seem to be working properly, please perform following basic troubleshooting steps: 1. Please verify that the USB to RS-232 ComHub is installed correctly. 2. Confirm that the port settings match the settings required for your serial device. 3. If the serial device requires software, make sure it’s installed properly. 4. Make sure the number of ports is matching the number of USB to RS-232 ComHub COM port. 5. USB to RS-232 ComHub does NOT support serial mouse. 6. Please download the latest driver to support your new serial product. 2. Why the COM port number will different under Windows 2000 and XP? The COM port number is assigned by which USB slot is used to connect to the computer. If changing USB slot, the port number will change. 3. The USB cable has been extended and the device no longer works. The length of the USB cable must not exceed 3.5 meters. Please do not extend the cable or a USB repeater must be used if the cable is longer than 3.5 meters. 4. Is it possible to connect current USB 1.1 devices to the Powered USB Hub? Yes. The device will not, however, obtain the USB 2.0 high speed (480 Mbits/sec) but the USB 1.1 full speed (12 Mbits/sec) communication. - 31 - SUNIX Co., Ltd. TEL : +886-2-8913-1987 Email : [email protected] 5. I can NOT get USB2.0 High Speed? Is there any driver update? USB to RS-232 ComHub built-in USB2.0 high speed controller, and it runs USB2.0 high speed data communication when user connects this ComHub to USB2.0 host port from computer. In addition, it is back compatible with USB1.1 full speed commuication when connecting USB1.1 host port. Please upgrade your computer USB interface to USB2.0 high speed specification. If your computer already built-in USB2.0 interface port, but it still can not run USB2.0 high speed commuication. Please upgread your operation system service pack to the latest one, because USB2.0 driver bounds with Microsoft Windows system. We suggest updating your operation system to Windows 2000 service pack 4, Windows XP service pack 2, and Windows Sever2003 service pack1 or later version. Right click your mouse on "My Computer" and select "Properties" to check your operation system service pack version as below pictures shown. 7. There is no +12 VDC power output to Powered RS-232 device. Please confrim both 12V power adapters are all connection ready. Please refer to the chaper2 hardware installation for detail. - 32 - SUNIX Co., Ltd. TEL : +886-2-8913-1987 Email : [email protected] 5. Contract Informaion Customer satisfaction is our number one concern, and to ensure that customers receive the full benefit of our products, SUNIX services has been set up to provide technical support, driver updates, product information, and user’s manual updates. The following services are provided E-mail for technical support ................................................ [email protected] World Wide Web (WWW) Site for product information:http://www.sunix.com.tw - 33 -