Transcript
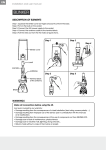
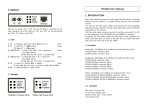
Standard Models:
SCS80 & SCS80R:
SCS160 & SCS160R:
SCS320 & SCS320R:
SCS480 & SCS480R:
Sentinel 32:
QUICK START GUIDE
SCS, SCS-R and Sentinel 32 Models
Contents (SCS AC):
Secure Console Server
Rack Mount Brackets
AC Power Cord (PWR-000006-R)
Adapter Kit (KIT-000001-R)
Adapter Kit (KIT-000003-R)
Users’ Manual CD
Contents (SCS DC):
Secure Console Server
Rack Mount Brackets
Adapter Kit (KIT-000001-R)
Adapter Kit (KIT-000003-R)
Users’ Manual CD
All models are available with the following options:
AC or DC power (SCSxx0 or SCSxx1)
dual hot-swappable redundant Power Supplies (SCSxxxR)
dual Console Port Interfaces – 1 DTE, 1 DCE (SCSxxx-D)
32-bit CardBus (SCSxxx-C)
Linux
Modem (SCSxxx-M)
8 Ports
16 Ports
32 Ports
48 Ports
32 Ports
®
The core of Thinklogical’s™ Secure Console Server is an x86-based computer running GNU/Linux. In addition, the SCS has built in technologies such as 4 GB
Compact Flash Drive and support for plug-compatible micro drives. Upon setup the SCS generates a unique set of Secure Shell Host (SSH) keys, a crucial security
feature lacking in some traditional console servers. Also featured is a full distribution, non-embedded Linux operating system. The SCS is the only console server on the
market that is able to integrate into existing system and configuration management software programs. This enables users to customize the capacity of the SCS, as well as
its level of integration into their particular environment. In addition, users are able to match security technology to fit their processes while modifying and enhancing features
to meet their specifications.
* STEP 4: Switch the unit ON (1).
The initial startup takes about 2
*NETWORK
minutes to generate the preSTEP 1: Connect to
defined ssh host keys. The
the Network with a
boot progress is displayed on
CAT5 cable.
the front panel LCD.
1
SCS320
Secure Console Server
17
1
18
2
19
5
3
* STEP 5: Verify
port connections.
20
21
22
23
24
25
26
27
28
29
30
31
32
4
CAUTION!
NETWORK
Replace with same type and rating fuse.
www.thinklogical.com
4
5
6
7
8
9
10
PORTS
11
12
13
14
15
16
CONSOLE
100-240V -, 0.5A, 50/60 Hz
STEP 2: (Optional) Connect to
the Console with a CAT5 cable.
SERIAL CONSOLE
CONNECTIONS
(PORTS 1-32)
2
*CONSOLE
STEP 3: Ensure that the ON/
OFF switch is in the OFF (0)
position. Connect the supplied
AC Power Cord and plug it into
a standard AC source.
T2A, 250 VAC
3
Thinklogical’s™ SCS-R series of Secure Console Servers provides server and network management as well as secure console and integrated power management
with enterprise-class security features. Unique to this line of console servers are the redundant AC and DC power supplies that function in a current sharing mode. The
SCS-R power supplies are also hot-swappable, enabling users to remove a failed power supply while the unit is operating. In addition, users can access and control any
combination of serial devices (servers, LAN/WAN devices, routers, workstations, etc.) through dual console and network ports.
*NETWORK 2
*NETWORK 1
Contents (SCS-R & Sentinel AC):
Secure Console Server
Rack Mount Brackets
2 AC Power Cords (PWR-000006-R)
AC ‘Y’ Power Cord (PWR-000008-R)
Adapter Kit (KIT-000001-R)
Adapter Kit (KIT-000003-R)
Users’ Manual CD
Contents (SCS-R & Sentinel -48VDC):
Secure Console Server
Rack Mount Brackets
Adapter Kit (KIT-000001-R)
Adapter Kit (KIT-000003-R)
Users’ Manual CD
All of the Sentinel 32's hot-swappable
modules are deigned for easy field
replacement.
Replace serial
ports in groups
of 8 without
affecting any of
the other ports.
STEP 1: Connect to
Networks 1 and/or Network 2
with CAT5 cable.
SCS320R
Secure Console Server
17
18
1
2
* STEP 5: Verify
port connections.
19
5
3
20
21
22
23
24
25
26
27
28
29
30
31
32
4
5
6
7
8
9
10
11
12
13
14
15
16
SERIAL CONSOLE
CONNECTIONS
(PORTS 1-32)
PORTS:
2
*CONSOLE 1
*CONSOLE 2
Sentinel 32
13-16
5-8
PORTS:
PORTS
1 NETWORK 2
1 CONSOLE 2
STEP 2: (Optional) Connect to
Console 1 and/or Console 2
with CAT5 cable.
21-24
29-32
6
7
8
5
6
7
8
5
6
7
8
5
6
7
8
NETWORK NETWORK
1
2
1
2
3
4
1
2
3
4
1
2
3
4
1
2
3
4
1 CONSOLE 2
PORTS
1-4
PORTS
9-12
1. Have the following Network addresses ready:
a. Your workstation/PC’s IP address (If the SCS is using Dynamic Host Configuration Protocol (DHCP)
addressing, nothing more is required.)
b. If assigning a static address to the SCS, the following are required: IP address, Network mask, Gateway
address, Primary Domain Name System (DNS) server address.
2. Settings
a. Create a route from your workstation/PC to the SCS default IP address of 10.9.8.7
i. Linux: route add -net 10.9.8.7 netmask 255.255.255.255 gw <PC IP address>
ii. Windows command line: route add 10.9.8.7 mask 255.255.255.255 <PC IP address>
iii. Solaris: route add -net 10.9.8.7 -netmask 255.255.255.255.0 <PC IP address>
3. Run timeconfig if you are not in the Eastern Time Zone.
4. Run netconfig to set the SCS network parameters for Network 1 (eth0). Network 2 is disabled. See on-line
documentation to enable Network 2.
a. From a console connection run service network restart
b. From a SSH connection run service network restart && exit (You will then have to restart your
SSH session.)
5. Use the stty command to change things like port names, baud rates, etc. These are temporary changes and will
be lost at reboot. To make permanent changes, edit /etc/rc.d/rc.serial This file contains a list of stty
commands (one for each port). Further information is available in the User’s Manual (CD provided).
Setting Up the Serial Console
1. Serial Console Settings= 9600, N, 8, 1
2. Login as root. The password is root.
Note: Console Port 1 is in Data Circuit-terminating Equipment (DCE) mode. Console Port 2 is in Data
Terminal Equipment (DTE) mode and is not enabled for logins. To use Console Port 2 the system
administrator must enable it. Port 2 is activated by editing the /etc/inittab file.
*
Port Connections
* Testing
The command pm can be used to verify device port connections. pm --all will test all ports and report the
correct DTE/DCE settings.
PHONE:
WEBSITE:
EMAIL:
(800) 291-3211
www.thinklogical.com
[email protected]
PORTS
17-20
PORTS
position. The initial startup takes about 2
minutes to generate the predefined ssh host
keys. The boot progress is displayed on the
front panel LCD.
CAUTION! Replace with same
type and
rating fuse.
100-240V -,
0.5A, 50/60 Hz
T 2A, 250 VAC
CAUTION! Replace with same
type and
rating fuse.
100-240V -,
0.5A, 50/60 Hz
T 2A, 250 VAC
3
STEP 3: Ensure that both
ON/OFF switches are in the
OFF (0) position. Connect the
supplied AC Power Cords and plug
them into a standard AC source.
5
Setting Up Via the Network
*
4
1
* STEP 4: Put both switches in the ON (1)
CAUTION! Replace with same
type and
rating fuse.
100-240V -,
0.5A, 50/60 Hz
T2A, 250 VAC
CAUTION! Replace with same
type and
rating fuse.
100-240V -,
0.5A, 50/60 Hz
T2A, 250 VAC
25-28
Secure Shell Host (SSH)
* Using
You must use SSH to connect to the SCS. From the command line, run the following: ssh [email protected]
Documentation
Thinklogical™ uses Linux man (short for manual) pages to document its software. The command man 1 lsi will list
user commands. The command man 8 lsi will list the administrator commands and man 5 lsi will list the various
configuration files. Individual command documentation can be accessed via man XXX where XXX is the command.
Examples: man ls, man tar, man lcd, man adduser
User Commands
1. The commands connect and monitor allow the user to use a short version of the port names.
You may use just the port number (1 through 48) or leave off /lsi/ports/
2. Connect <portname or number>
Examples:
i. connect 5
ii. connect port5
iii. connect /lsi/ports/port5
iv. connect /dev/tty/B5
Note: To exit connect, the default key sequence is ‘Esc A’.
3. Monitor <portname or number>
Examples: i. monitor 5
ii. monitor port5
iii. monitor /lsi/ports/port5
iv. monitor /dev/tty/B5
4. Browsing the port buffers
Examples: i. less /lsi/ports/buf_port5
ii. less /proc/port_buffers/5
iii. more </proc/port_buffers/7
5. Help is available for all SCS commands via man pages. The command man -a lsi will bring up
an overview of the SCS commands and files.
6. Several HOWTO’s covering system setup and configuration can be found at /usr/local/doc
Copyright © 2009. All rights reserved. Printed in the U.S.A. All trademarks and service marks are the property of their respective owners.
Secure_Console_Server_Quick_Start_Rev_K
Visit us online at www.thinklogical.com for more product information,
current updates and the complete line of Thinklogical™ products.