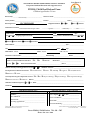
1
Broward ASQ Online User Guide 6301 NW 5th Way, Suite 3400 • Fort Lauderdale, FL 33309 • (954) 377-2188 • Fax (954) 377-2192 • www.elcbroward.org Table of Contents Part I: Program Administrator (Owner or Designee) Introduction to the Broward Program Administrator ASQ Online System Manual ........... 1 What is ASQ Online?....................................................................................................... 2 Overview of the Program Administrator Role .................................................................. 3 Part II: Provider (Teacher) Introduction to the Broward Provider ASQ Online System Manual.................................. 4 What is ASQ Online?....................................................................................................... 5 Overview of the Provider (Teacher) Role ........................................................................ 6 Part III: Overview of the Early Learning Coalition of Broward Role and Protocols Overview of ASQ Information Related to Broward County .............................................. 7 ASQ Online System Program Administrator Protocol...................................................... 8 Part 1 Setting Up Your Program ............................................................................... 10 Part II Managing Your Screening Program ............................................................... 23 ASQ Online System Provider Protocol .......................................................................... 41 Part IV: Attachments Attachment 1: Glossary of Important Terms and Conditions Attachment 2: ASQ Online Program Administrator User Manual Summary of Each Section Attachment 3: ASQ Online Provider User Manual Summary of Each Section Attachment 4: ASQ - 3 Score Interpretation and Recommendations for Follow-up Diagram Attachment 5: ASQ - 3 Action Steps Based on the Screening Results Attachment 6: ASQ:SE Score Interpretation and Recommendations for Follow-up Diagram Attachment 7: ASQ:SE Action Steps Based on the Screening Results Attachment 8: FDLRS/Child Find Referral Form Attachment 9: Customized Provider Packets Attachment 10: Inclusion Warm-Line Services Flyer Attachment 11: Equipment Needed From Internet Service Providers Attachment 12: Internet User’s Equipment Checklist Attachment 13: Internet Service Providers Attachment 14: List of Computer Services Companies Attachment 15: Websites with Information about Developmental Milestones Attachment 16: Tips for Talking with Parents Part 1: Broward Program Administrator (Owner or Designee) 6301 NW 5th Way, Suite 3400 • Fort Lauderdale, FL 33309 • (954) 377-2188 • Fax (954) 377-2192 • www.elcbroward.org Broward Program Administrator (Owner or Designee) ASQ Online User Manual The Brookes Publishing Company Program Administrator User Manual for the ASQ Online System is designed to help the Program Administrator (Owner or Designee) navigate ASQ Online and successfully perform all of its functions as a Program Administrator. The manual contains basic information on how to manage all facets of the ASQ Online program, assign Program Administrators and Program Users, Setting Screening Preferences, view all screenings, generate reports based on the screenings, create tasks for himself/herself and other Program Users, create and organize documents and other materials your program uses for screening, follow-ups, and referrals, design the Family Access page. The Broward Program Administrator (Owner or Designee) ASQ Online User Manual has been written to complement the Brookes Publishing Company Program Administrator User Manual. The Broward Manual has been organized to give the Broward Provider: • • • • • • • an understanding of the role of the Early Learning Coalition of Broward County, Inc. (ELC) in the ASQ Online System a visual presentation of the key steps in the screening management process a visual presentation of the role of the Program Administrator (Owner or Designee) a Protocol to follow for the use of the ASQ Online System the Referral process to FDLRS/Child Find A Summary of Each Section of the Provider User Manual Sample packets to share with parents/guardians regarding screenings and follow-up tasks. 1 2 Overview of the Program Administrator Role Step 1 Manage all CreC of the facets ASQ Online program Create early childhood program’s ASQ Online program Assign Program Administrators and Program Users Step 2 Setting screening preferences Has ability to view all screenings entered Generate reports based on screenings ‘s Step 3 Ability to create tasks for himself/ herself and other Program Users Create and organize documents and other materials your program users for screening, follow-ups, and referrals Step 4 Design the Family Access page Accept or reject screenings sent to your program through Family Access Step 5 Accept or reject screening sent to your program through Family Access Assign screenings to other program users (Providers) 3 Part II: Broward Provider (Teacher) 6301 NW 5th Way, Suite 3400 • Fort Lauderdale, FL 33309 • (954) 377-2188 • Fax (954) 377-2192 • www.elcbroward.org Broward Provider (Teacher) ASQ Online User Manual The Brookes Publishing Company Provider User Manual for the ASQ Online System is designed to help the Provider (Teacher) navigate ASQ Online and successfully perform all of its functions as a Provider. The manual contains basic information on how to enter child records, enter screenings, schedule tasks and print materials for the screening management of the Provider’s children, and generate reports. The Broward Provider (Teacher) ASQ Online User Manual has been written to complement the Brookes Publishing Company Provider User Manual. The Broward Manual has been organized to give the Broward Provider: • • • • • • • • • an understanding of the role of the Early Learning Coalition of Broward County, Inc. (ELC) in the ASQ Online System a visual presentation of the key steps in the screening management process a visual presentation of the role of the Provider (Teacher) a Protocol to follow for the use of the ASQ Online System information on interpreting scores on the screens the Referral process to Child Find Best Practices for Broward Providers A Summary of Each Section of the Provider User Manual Sample packets to share with parents/guardians regarding screenings and follow-up tasks 4 5 Overview of the Provider Role Step 1 Make sure that each child has a Child Profile in the ASQ Online System Step 2 Step 3 Have parent/ guardian complete an online screen for each child with the Provider/ Teacher in order to obtain results for each child’s screen ‘s Review and print out the Information Summary Sheet for each child to determine the follow-up tasks and to be able to share results with the parent/ guardian Step 4 Determine follow - up steps for each child e.g. annual screen, monitor progress, make a referral, provider intervention activities Step 5 Set future task/s for each child e.g. set next screening date 6 Part III: • Overview of the Early Learning Coalition Role • ASQ Online Program Administrator Protocol • ASQ Online Provider Protocol 6301 NW 5th Way, Suite 3400 • Fort Lauderdale, FL 33309 • (954) 377-2188 • Fax (954) 377-2192 • www.elcbroward.org Overview of ASQ Information Related to Broward County The Early Learning Coalition of Broward, Inc. (ELC) is excited to have the child care providers in Broward County who serve school readiness children participate in the ASQ screening process using the ASQ Online System. According to Brookes Publishing, the ASQ screening process focuses on the developmental and social-emotional needs of children from one month birth to 5.5 years: • looks at strengths and trouble spots • educates parents/guardians about developmental milestones • incorporates parents’/guardians’ expert knowledge about their children Florida legislation 6M-4.720 - Screening of Children in the School Readiness Program - requires: • all school readiness funded children 0 through kindergarten to be screened for possible developmental delays • with documentation of the learning progress of these children • upon their eligibility for school readiness financial assistance • within 45 days of enrollment • annual screening in the month of each child’s birthday for each child currently enrolled Role of the Early Learning Coalition of Broward County. Inc. www.elcbroward.org • The ELC is responsible for the coordination and monitoring of developmental and social-emotional screening of all children • The ELC selected the Ages & Stages Online System (ASQ) for Broward County child care centers and family child care homes serving school readiness children. • The Child Care Providers are also encouraged to administer the screening to children of private pay families. • The purpose of screening each child is so that the Provider has a developmental guideline for each child in order to meet each child’s needs. • The ASQ screen will be completed online by parents, guardians, and/or provider staff. 7 Early Learning Coalition of Broward, Inc. ASQ Online Program Administrator Protocol Subject: Use of the ASQ Online System for Developmental Screening of Children Birth through Five Years in the School Readiness Program by the Program Administrator Date: November 20, 2013 Purpose: To ensure consistency in the management of data for the Ages & Stages Questionnaire for children participating in the school readiness program by reviewing the key steps in the ASQ Online System. Action Steps: 1. Introduction: Become familiar with ASQ Online System features: It is important that all Program Administrator users of the ASQ Online System become familiar with all the features of the Online Screening System that will assist the Program Administrator in learning how to complete the steps involved. The Program Administrator is defined as the person who has the user role responsible for managing the early childhood program’s ASQ Online program. This protocol focuses on the key roles of a Program Administrator; however, the Program Administrator User Manual, located in the ASQ Online System, contains a great deal of additional material pertinent to all the key roles. Login to the ASQ Online System. The Program Administrator should have received an email from [email protected] providing him/her with the Program Administrator’s username and steps to create a password when the Program Administrator goes to www.asqonline.com. This will allow the Program Administrator to access the ASQ Online System. 1. View the drop down box on the top of the Home page marked “Program” 2. Select the role as “Program Administrator”. If the Program Administrator did not receive that email, he/she will contact the Early Learning Coalition of Broward., Inc. by January 1, 2014 at 954-377-2188. Locate the User Manual. On the Home page, the Provider should go the “Help” tab on the right side of the screen, and Click on “User Manual” to link directly to the “Program Administrator User Manual”. 8 Print the “Program Administrator User Manual”: This will make it easier for the Program Administrator: 1. To follow the steps in the process as he/she is learning the new system 2. To have the User Manual accessible while navigating the Online System as the Program Administrator cannot open the manual online and navigate the online system at the same time. Use the Program Administrator User Manual: Use the Program Administrator User Manual as a resource when questions arise as it provides an in-depth description of all steps in the online screening process. This will ensure accuracy and consistency in the management of the data. 1. The Manual will help the Program Administrator become familiar with the ASQ Online System using the Table of Contents. 2. A Glossary of Important Terms and Conditions has been included for easy reference to terms that will help clarify the steps in the process (See Attachment 1). 3. A document has been developed for Broward Program Administrators (Owner or Designee) that complements the Provider User Manual. The ASQ Online Program Administrator User Manual Summary of Each Section, which will be helpful to the Program Administrator to locate information more easily (See Attachment 2). Locate the “Online Tutorials” section: Watch the tutorial as the tutorial reviews the critical steps in the Online Screening System. 1. Go to “Quick Links” on the left-hand side of the “Home” page 2. Click on “Online Tutorials” found on that page. 3. Click on “Program Administrator Tutorial” 4. Click on the first icon link to view the tutorial on the Program Administrator’s computer or on the second item to view the tutorial on an ipad. Locate the ASQ Online Glossary: - click on the “Help” Quick Link to find the definition of the key words used in the ASQ Online System. 2 Navigating the ASQ Online System: The Program Administrator must learn how to navigate the ASQ Online system by using the top navigation menu on each page in Top Navigation Menu: This menu will take the Program Administrator to the different pages of ASQ Online. The pages include Home Page, My Profile, Child Profiles, Screening Management, Reports, and Family Access. • Home: Access Child Profiles, Screenings, and Help items from this page, which is customized to your role as Program Administrator. 9 • My Profile: View and edit your profile information, change your password, create and manage your personal notes and files, manage your user access, and create personal alert messages regarding various functions in ASQ Online. • Program: Find information regarding your program, add program users, add custom tasks, import and export data, and set your screening preferences. • Child Profiles: Manage all Child Profiles within your program, assign users to children, and view individual screenings. • Screening Management: Schedule screening tasks and non-screening tasks, generate and print screening and follow-up materials, create your own program specific documents and groups of documents, and keep track of the status of scheduled tasks for all children in your program. • Reports: Generate program-specific reports. • Family Access: Create and manage your Family Access web page used for online questionnaire completion, and accept or reject screens that have been submitted to you through Family Access. Quick Links: On the left side of each ASQ Online web page you will find the Quick Links. The list of Quick Links provided is specific to the web page you are currently viewing. Quick Links are designed to help you complete various tasks within the different pages of the site. The Help Quick Link will always appear as the last Quick Link, no matter what page of ASQ Online you are viewing. The Help page provides up-to-date information on ASQ Online, including FAQs, Tutorials, User Manuals, contact information, and other online help documentation. Part 1: Setting Up Your Program Part I of this manual is designed to help you set up your program for use. If you are a new ASQ Online user you will want to pay special attention to the instructions that follow, since you will need to set up your program before any screening information can be entered. 3 ASQ Online for Program Administrators When you are logged in to ASQ Online as a Program Administrator, the different pages of the site are specifically designed for the Program Administrator role. 10 3.1 Home Page Immediately after you log in to your ASQ Online account, you will be directed to your Home page, which is personalized according to your role within the system. It is from this page that you will have quick access to the important information you need to manage your ASQ Online program, including Child Profiles, Screenings, and Help documentation. Child Profiles At the top of your Home page, you will see a Child Profiles section, which lists the first five Child Profiles within your program. Within this section you also have the option to view all Child Profiles within your program by clicking on the “View All” tab. Clicking “View All” will take you to the Child Profiles page, where you will have the option to search for children using various search options. To the right of the “View All” tab is the “Add” tab, which allows you to add a new Child Profile. Screenings On the bottom left-hand side of your Home page, you will see the Screenings section. This section lists the five most-recent screenings in your program, including the child’s name, the questionnaire, the status (NEW, Finalized, or In Progress), the screening date, and a link to print the “Information Summary” Sheet. If you click “View All”, it will take you to a page of all screenings in your program. From this page you can search for child screenings and view and print the Information Summary Sheet. You can also easily identify which screenings have come in through Family Access, as well as assign any pending screenings. Help On the bottom right-hand corner of your Home page is the Help section. Here, you will find the links: Online Tutorial, FAQs, User Manual, and Email our Tech Support Team. 3.2 My Profile You can access your user profile by selecting My Profile from the top navigation menu. You’re My Profile page contains four tabbed sections. The My Profile section contains your personal information. The My Notes section is a place for your personal notes pertaining to a number of things within ASQ Online. The My Files section is a place for any personal files that you have uploaded into the system. And the My Access List section contains a list of the program(s) you have access to, and your role(s) within those programs. 11 3.2.1 Editing Your Profile The My Profile section contains your personal information, including your username and password. To edit any of the fields in the My Profile section: 1. 2. 3. 4. Select My Profile from the top navigation menu. Click the “Edit” tab to the right of the My Profile tab. Make the desired changes. Click the “Save” button. 3.2.2 My Notes This section allows you to enter and store notes that no one else in the system can access. To add a note: 1. Select My Profile from the top navigation menu. 2. Click on the “Add” tab to the right of the “My Notes” tab. 3. Fill out the following: a. Enter in the “Subject” of the note. b. Select the “Note type” from the drop-down menu. Your choices are Reminder, Contact Information, Goal, Procedures, and Other. c. Enter the text of the note in the “Description” text box. 4. Click “Save”. 3.2.3 My Files This section allows you to enter and store up to 10 files, no larger than 5MB each, that no one else in the system can access. To add a file: 1. Select My Profile from the top navigation menu. 2. Scroll down to the “My Files” section and click the “Add” tab. OR 1. Select the “Add File” Quick Link. 2. Click the “Browse” button to locate the file you wish to upload, on your computer. 3. Enter in an optional description of the file. 4. Click “Save”. You can also download any of your personal files to your computer through the My Files section. For instance, if you uploaded a file and are working on a separate computer, 12 you may wish to download the file so that you can save it to your current computer. To download a file: 1. Select My Profile from the top navigation menu. 2. Scroll down to the “My Files” section and click the” Download” link to the right of the file you would like to download. 3. A pop-up box will appear and you can choose to open this file or save it to your computer. To edit or delete a file: 1. Select My Profile from the top navigation menu. 2. Scroll down to the” My Files” section and click on the file you wish to edit or delete. 3. To edit the file, click the “Edit” tab. Make any changes and then click the “Save” button. 4. To delete the file, click the “Delete” tab. 3.2.4 My Access List This list shows you the program(s) that you have access to, and what roles you have within those programs. To toggle between your user roles, click the “View Access” link next to the role you wish to switch to. You will then be directed to the Home page of the role you just selected. 3.3 My Alerts As Program Administrator, you have the ability to set up personal alert messages regarding various ASQ Online functions, which can be sent to yourself via text message or email. These messages can be task reminders, Family Access alerts, or transfer alerts. In addition, you can select your preferred time zone that will be used when you set alerts scheduled at a specific time of day. NOTE: Standard text messaging rates apply to each text message alert received as provided in your wireless rate plan (contact your carrier for pricing plans and details). Email alerts will be subject to standard Internet access and usage charges imposed by your Internet service provider. 3.3.1 Task Reminders Task reminders alert you to when a task is due. You can choose to have the reminder sent to you via text, email, or both. When setting a task reminder, you choose the task as well as when you would like to receive the alert. You may add as many different combinations of task reminders as you would like. 13 To set a task reminder alert: 1. Select My Profile from the top navigation menu. 2. Select the “My Alerts” Quick Link. 3. The first section on the My Alerts page is Task Reminders. Under this section, you will see three drop-down menus. 4. In the first drop-down menu, select whether you would like to receive your alert via “Text,” “Email,” or “Text And Email.” 5. The second drop-down menu lists all of the tasks in your program, including any custom tasks you have created. Select which upcoming task you would like to be reminded of. 6. The third drop-down menu allows you to select when you would like to receive the message in relation to the task. Your options are: “1 week before;” “2 days before;” “1 day before;” and “On the day of.” 7. Click the “Add” button. 8. Ensure that you will receive this message by selecting “On” from the “Status” drop-down menu. (You can turn a task reminder off at any time from the “Status” drop-down menu.) 9. Once this task reminder has been added, click the “Save Changes” button, at the bottom of the page. NOTE: If you have selected to be alerted via text message, you must have a mobile phone number saved in your profile. 3.3.3 Family Access Alerts Family Access alerts allow you to pick a day, time, and frequency that you would like to receive an alert that a screening has been submitted, via Family Access, to be approved or rejected. You can choose to receive this alert via text message, email, or both. Family Access alerts will not alert you each time a screening has been submitted, but will simply alert you of any screenings that have been submitted according to the specified time frame you have selected. For example, if you select that you would like to receive a text message each day at 10AM, you will only receive that message once, at 10AM, daily. The message will let you know how many screenings have been submitted for you to approve or reject, up to that time. Say that 50 screenings have been submitted. You will not receive 50 alerts; you will receive one alert message informing you that 100 screenings have been submitted. To set Family Access alerts: 1. Select My Profile from the top navigation menu. 2. Select the “My Alerts” Quick Link. 3. Scroll down to the Family Access Alerts section of the My Alerts page. 4. The Family Access Alerts section has 3 columns: “Alert,” “Time,” and “Status.” 14 You have the option to set a text message alert and an email alert. 5. To set a text message alert: a. Under the “Alert” column, select the frequency with which you would like to receive the text alerts, from the drop-down menu next to “Text me.” Your options are: Daily or Weekly. b. If you choose to receive these text messages daily: In the “Time” column, select the time you wish to receive these alerts, from the drop-down menu. c. If you choose to receive these text messages weekly: In the “Time” column, select the day of the week you wish to receive these messages, from the “Day” drop-down menu. Then select the time of day you wish to receive these messages, from the “Time” drop-down menu. d. To ensure you receive these messages, set the status to “On,” from the “Status” drop-down menu. e. Click the “Save Changes” button at the bottom. 6. To set an email alert: a. Under the “Alert” column, select the frequency with which you would like to receive the email alerts, from the drop-down menu next to “Email me.” Your options are: Daily or Weekly. b. If you choose to receive these email messages daily: In the “Time” column, select the time you wish to receive these alerts, from the drop-down menu. c. If you choose to receive these email messages weekly: In the “Time” column, select the day of the week you wish to receive these messages, from the “Day” drop-down menu. Then select the time of day you wish to receive these messages, from the “Time” drop-down menu. d. To ensure you receive these messages, set the status to “On,” from the “Status” drop-down menu. e. Click the “Save Changes” button at the bottom of the page. NOTE: If you choose to receive both an email and text message alert, you don’t have to receive them both at the same time. You can customize the day and time you wish to receive each one. NOTE: If you have selected to be alerted via text message, you must have a mobile phone number saved in your profile. 4.2 Managing Program Users The ASQ Enterprise program comes with three predefined roles: Program Administrator (your role), Provider, and Reviewer. You can assign one or all of these roles to each user in your account. The designated Program Administrator has the most powerful role. 1. Set screening preferences 2. Create program users 3. Create and edit Child Profiles 15 4. 5. 6. 7. Assign Child Profiles to Providers Create and manage program documents and packets Run program reports. Create your Family Access web page The Provider role is designed for users such as professionals, employees, or contractors of your organization who work directly with children (e.g., teachers and therapists). 1. 2. 3. 4. 5. Can create and edit Child Profiles Enter child screening data Schedule tasks Generate and download documents and groups of documents Run child reports The Reviewer role is designed for users such as program directors and school superintendents who need to review aggregate reports on children’s progress. 1. Reviewers have the ability to generate reports 2. Cannot view, add, edit, or delete specific child records or screens Best Practice: The s Program Administrator should add the Provider role to himself/herself so that he/she can access all aspects of the ASQ Online System including assisting with the screening process by adding screens. 4.2.2 Adding Program Users As Program Administrator, you are responsible for creating the users in your program. You can create other Program Administrators, who will be able to perform the same functions that you have access to, and you can also create Providers and Reviewers. To add a new user: 1. Select Program from the top navigation menu. 2. Click the “Add” tab next to Recent Program Users. OR 1. Select the “Add Program User” Quick Link. 2. Enter the following profile information for the new program user. Items marked with an asterisk [*] are required. 3. Once you have entered the profile information for the new user, click the “Save” button. 4. Once you click “Save”, an email will be automatically generated by ASQ Online and sent to the new user at the email address that you just entered into his or her user profile. 16 5. The email will contain a link that will allow the new user to create his/her own password and then log in to ASQ Online. NOTE: To avoid confusion, it is highly suggested that each username you create for a new user be a combination of that person’s first initial + last name (e.g., Nancy Lemon – enter her username as: nlemon). (Sections 4.2.3 – 4.2.6 - “Program Users” - Program Administrator User Manual 4.2.7 Adding Access to an Existing Program User If a user already exists within a program as a Program Administrator, Provider, or Reviewer, you may add additional access to that user (e.g., you want your Program Administrator to also have the access rights of a Provider). To add additional access: 1. Select Program from the top navigation menu. 2. Depending on the type of access you want to add to a user, select one of the following Quick Links: a. “Add Program Administrator Access” b. “Add Provider Access” c. “Add Reviewer Access” 3. A list of available program users will appear. You can also search for available program users by last name and/or first name. 4. Click the check box to the left of the user’s name you wish to add access to ensuring a check mark appears. (You can select as many users as you want to add additional access). 5. Click the “Add” button in the top right corner of the Program Users list. 6. You will be taken back to the Program page, and a message will appear at the top saying, “User access was successfully added.” 4.2.9 Assigning Multiple Children to a Provider As Program Administrator, you have the ability to assign more than one child to a Provider at the same time. To assign multiple children to a Provider: 1. Select Program from the top navigation menu. 2. Select the “Search Program Users” Quick Link to see a list of all users in the program. 3. Under the “Program Users” tab, click on the user’s name you wish to assign children to. You can also search for users by last name, first name, and/or role. (NOTE: You can only assign children to a Provider.) 4. On the User Details page of the Provider you selected, there is a tab at 17 5. 6. 7. 8. 5 the bottom, called “Child List,” which lists all of the children currently assigned to that Provider. To assign more children, click on either the “Assign Children” tab next to the “Child List” tab, or select the “Assign Children to Provider” Quick Link. On the Assign Children page, there is a list of all of the children available to be assigned to this Provider (under the “Available Child List” tab). The list will include the child’s name, ID, alternate ID, and Primary Caregiver. There is a column on the right-hand side of the “Available Child List” section that says, “Assign to [Provider last name, first name]” with checkboxes underneath that correspond to each child listed. Put a checkmark in the box next to each child you wish to assign to this Provider. If you wish to assign all of the available children to this Provider, you may click the “Select all” button at the bottom of the page. Once you are finished selecting the children to assign, click the “Add” button at the bottom of the page. You will be returned to the User Details page, and the newly assigned children will appear under the “Child List” tab. Screening Preferences: The screening preferences feature provides Program Administrators the ability to set automatic screening tasks for Child Profiles, so that children are screened per the screening standards of the program. Program Administrators can set preferences so that screening tasks are automatically created for Child Profiles when: • The child enters the program • The child reaches a certain age • The child is age-appropriate for the program’s recommended screening intervals • The child needs to be re-screened based on the prior screening scores when: • Scores below cutoff for ASQ-3 questionnaires • Scores above cutoff for ASQ:SE questionnaires • Automatic screening tasks based on the child’s age • Example: “Create ASQ-3 screening tasks due when a child is [x] months and [x] days old.” • Automatic screening tasks based on the child’s tenure in the program (NOTE: This preference will only work for Child Profiles whose “Date of Admission to monitoring program” field is filled in.) • Example: “Create ASQ-3 screening tasks due [x] months and [x] days after a child’s entry to the monitoring program.” • Automatic screening tasks based on the child’s recommended interval • Example: “Create ASQ-3 screening tasks due when a child’s recommended interval is [x] months.” • Automatic re-screen tasks based on the child’s screening results 18 • Example: “Create tasks for ASQ-3 screenings that are below cutoff due [x] days later. Using the same interval.” • Example: “Create tasks for ASQ:SE screenings that are above cutoff due [x] days later. Using the recommended interval.” 6 Managing Child Profiles The Child Profiles page contains a list of Child Profiles that you, or other users, have added to the system. It also includes a section to search for Child Profiles. Each child has his/her own individual Child Profile page. These pages include Caregiver Profiles, and all screenings that have been entered into ASQ Online or accepted through Family Access for a child. As Program Administrator, you can create Child and Caregiver Profiles, assign users access to Child Profiles, and view screenings that have been entered by Providers. (As Program Administrator, you do not have the ability to enter child screenings for children in your program as only a Provider has access to that feature.) 6.1 Adding a Child Profile To add a new Child Profile to ASQ Online: 1. Click the “Add” tab to the right of the Child Profiles tab on your Home page. OR 1. Select the Child Profiles link from the top navigation menu. 2. Select the “Add Child Profile” Quick Link. 3. You will be directed to the Add Child Profile page. Fill out all required fields indicated by an asterisk [*], and any additional fields. 4. Click “Save”. NOTE: If any required information was not entered or if any information was not entered correctly, an error message will occur. If an error message appears, make the specified corrections and then click” Save”. ( Section 6 Managing Child Profiles - Program Administrator User Manual to view all tasks related to Child Profiles.) 6.6 Viewing Child Screenings The second tabbed section on a child’s profile page is the Child Screenings section. It is from here that you will be able to view all screenings entered for that child. To view a child’s screenings: 1. Click the “View All” tab to the right of the Child Profiles tab on your Home page. OR 19 1. Select Child Profiles from the top navigation menu. 2. Browse the Child Profiles list or search for a Child Profile, and click on the child’s name to access his or her profile. 3. Scroll down to the “Child Screenings” section. The child’s 5 most recent screenings will be listed. To see all screenings for the child, click the “View All” tab next to the “Child Screenings” tab. 4. Listed for each screening is the name of the questionnaire, who entered the data into the system, the status of the screening (either “Finalized” or “In progress”), the name of the caregiver who administered the screening, and the date the child was screened. 5. Click on the questionnaire that you would like to view. 6. You will be taken to the Information Summary page for that screening. At the Top are tabs with links to each area of the screening. By clicking on the tabs, you can view the questionnaire sheet, as filled out by the caregiver, for each area. 7. When finished viewing the screening, click the “Return to Child’s Profile” Quick Link to select and view another screening. 6.6.1 Printing Child Screenings There are two ways to print a completed screening for a child. From a Child Profile, you can: • Print a completed screening, including a coversheet, all areas of the questionnaire, and the Overall section • Print only the “Information Summary” Sheet. To print a screening from a Child Profile: 1. Click the “View All” tab to the right of the Child Profiles tab on your Home page. OR 1. Select Child Profiles from the top navigation menu. 2. Browse the Child Profiles list or search for a Child Profile. 3. Click on the child’s name to access his or her profile. 4. Locate the screening you want to print in the Child Screenings list. 5. Click “Print” next to the name of the questionnaire you would like to print. 6. A pop-up window will appear asking you if you want to open or save the PDF of the completed questionnaire. Select “Open”. 7. When the PDF is visible, either select the “Print” icon or go to File > Print. To print just the “Information Summary” Sheet: 1. Click the “View All” tab to the right of the Child Profiles tab on your Home page. OR 1. Select Child Profiles from the top navigation menu. 2. Browse the Child Profiles list or search for a Child Profile. 3. Click on the child’s name to access his or her profile. 20 4. Select the questionnaire to view the screening that contains the Information Summary Sheet you wish to print. Select the “Print Information Summary” Quick Link. 5. A pop-up window will appear asking if you want to open or save the PDF of the “Information Summary” Sheet. Select “Open”. 6. When the PDF is visible, either select the “Print” icon or go to File > Print. NOTE: Because ASQ screening results are supposed to be discussed with a caregiver following a screening, and because the Information Summary Sheet is not intended to take the place of this discussion with a caregiver, ASQ Online does not allow users to print out a completed screening that contains the completed Information Summary Sheet. 6.7 Viewing Tasks Within ASQ Online, you can schedule screening and non-screening tasks (such as follow-up actions), for the children in your program. These tasks help you to manage and better serve the children in your program. The Screening Management page is where you can add and keep track of all tasks, but you can also add and view a child’s tasks within their profile. (Section 9 “Screening Management” - Program Administrator User Manual.) To view a child’s tasks within their profile: 1. Click the “View All” tab to the right of the Child Profiles tab on your Home page. OR 1. Select Child Profiles from the top navigation menu. 2. Browse the Child Profiles list or search for a Child Profile. 3. Click on the child’s name to access his or her profile. 4. Scroll down to the “Tasks” section. The child’s first 5 tasks will be listed here. Click the “View All” tab to view a list of all tasks for this child. 5. To view the details of an individual task, click on the task type. From the Task Details page you can edit or delete this child’s task. 6.7.1 Adding Tasks via the Child Profile To add a task from a child’s profile: 1. Click the “View All” tab to the right of the Child Profiles tab on your Home page. OR 1. Select Child Profiles from the top navigation menu. 2. Browse the Child Profiles list or search for a Child Profile. 3. Click on the child’s name to access his or her profile. 4. Scroll down to the tasks “Tasks”. Click the “Add” tab. 5. Enter in the requested information (items marked with an asterisk [*] are required) 21 NOTE: If you select a screening task, you will need to also select the questionnaire type and interval (ASQ Online will recommend an interval). You can also enter a “Returned date” if you are creating this screening task after the screening has been completed, for tracking and reporting purposes. 6.9 Caregivers 6.9.1 Adding a New Caregiver Before a screening can be entered into ASQ Online for a child, there must be at least one caregiver assigned to the child. To add a new caregiver: 1. Click the “View All” tab to the right of the Child Profiles tab on your Home page. OR 1. Select Child Profiles from the top navigation menu. 2. Browse the Child Profiles list or search for a Child Profile. 3. Click on the child’s name to access his or her profile. 4. Click on the “Add” tab next to the Child’s Caregivers tab. OR 1. Select the “Add New Caregiver” Quick Link. 2. You will be directed to the Add Caregiver Profile page. Fill out all required fields indicated by an asterisk [*], and any additional fields you also wish to record regarding the caregiver: 3. Then click “Save”. . If this is the primary caregiver, check the box to the right of the field “Primary Caregiver Profile for,” located at the bottom of the Add Caregiver Profile page. The checkbox will list the child whose profile you are adding the caregiver to. There can only be one primary caregiver within each Child Profile. To change the primary caregiver within a Child Profile, click the “Edit” tab within the Caregiver Profile Details of the caregiver that you would like to be primary, and check the box next to “Primary Caregiver Profile.” Then click “Save.” NOTE: Marking a caregiver as “Primary Caregiver” for a child means that when you generate a packet that contains a letter to the child’s caregiver, it will be automatically addressed to this caregiver. . 6.9.2 Adding an Existing Caregiver To add a caregiver who already exists within ASQ Online as a caregiver for another child: 1. Click the “View All” tab to the right of the “Child Profiles” tab on your Home page. 22 1. 2. 3. 4. 5. 6. 7. OR Select Child Profiles from the top navigation menu. Browse the Child Profiles list or search for a Child Profile. Click on the child’s name to access his or her profile. Select the Add Existing Caregiver Quick Link. This will bring you to the Caregiver Profile Search page. Search for the caregiver by first or last name or locate the caregiver under the “Caregiver Profile List for [Child last name, first name]” tab. To associate the caregiver to the child, Click the “Add” link under the “Associate to [Child last name, first name]” column. You will be returned to the Child Profile Details page for this child, and a message will appear at the top saying that the child was successfully associated with the caregiver. To make this caregiver the Primary Caregiver, see section 6.9.4 “Editing a Caregiver Profile” - Program Administrator User Manual . Other information regarding Caregiver Profiles can be found in this section. 6.11 Merging Child Profiles If for any reason you have duplicates of the same Child Profile, you can merge those profiles together to create one Child Profile, without losing the data from either profile. To merge Child Profiles: 1. 2. 3. 4. Select Child Profiles from the top navigation menu. Select the name of a Child Profile you wish to merge. Next to “Child Profile Details”, click the “Merge” tab. You will be taken to a list of Child Profiles within your program. This page lists the child’s name, DOB, Child ID, and Alt. ID. The page will prompt you to select a target Child Profile for the merge. 5. Any Child Profiles that share the same birth date or name with the profile you are trying to merge will be in boldface. 6. Select the button next to the Child Profile you would like to merge. 7. Click the “Merge Child Profiles” button at the bottom of the page. Please note that when merging 2 profiles, the Child Profile that you are merging into is the data that will prevail. If the merging profile has separate demographic data than the profile being merged into, the demographic data will be overwritten. PART II: MANAGING YOUR SCREENING PROGRAM ASQ Online is referred to as an “online management system” for ASQ because instead of managing the administration of ASQ questionnaires, the results, and any follow-up decisions you make on paper, ASQ Online allows you to manage all components of ASQ within the system itself. 23 The online management system that is ASQ Online helps you capture and perform a process. The central part of this process is conducting an ASQ screening. ASQ Online helps you prepare for and conduct a screening, gives you access to resources you can use to interpret the screening results and make a follow-up decision, and allows you to schedule follow-up tasks (including sending results to parents or physicians and scheduling another screening in the appropriate time frame). By using the system to its fullest potential, the screening and referral process becomes seamless, and you are left with an electronic record of all actions you’ve taken and decisions you’ve made pertaining to any one child or group of children in your program. The ASQ Online management process is a circular one. The decisions you would typically make when using ASQ on paper are the same decisions you should make when working within ASQ Online. Your professional judgment should guide your actions. The online management system simply aids in the screening process, helping you keep track of information and reminding you to complete important tasks. Once you have set up your program, you can manage your program through the following sections of ASQ Online: • Screenings: Easily manage all screenings in your program through one central page. • Screening Management: Schedule screening and non-screening tasks, generate materials, and keep track of the tasks within your program. • Family Access: Have caregivers (parents) complete questionnaires online. • Reports: Generate and review to interpret screening results and decide on appropriate follow-up actions or tasks. 8 Program Screenings The Screenings page can be accessed via your Home page or the Screening Management page. The Screenings page provides you with a complete list of all screenings in your program and lists the child’s name, the questionnaire, the interval, the status, whether or not this screening came in through Family Access, the screening date, the name of the Provider who entered the screening, the name of the caregiver who completed the screening, and whether this screening was marked “Concern.” You can use this page to quickly and easily locate children and their screenings, assign any pending Family Access screenings to a Provider, view the questionnaire in its entirety, and print the Information Summary Sheet for a child. 24 To access the Screenings page: 1. On your Home page, click the “View All” tab next to the Screenings tab. OR 2. Select Screening Management from the top navigation menu. 3. Click the “View All” tab to the right of the “Screenings” tab. 8.1 Searching All Screenings in Your Program You can search for screenings in your program by questionnaire type, interval(s), Provider, status (NEW, Finalized, or In Progress), Screening date range, and Concern (Concern or No Concern). To search for screenings in your program: 1. On your Home page, click the “View All” tab next to the “Screenings” tab. OR 1. Select Screening Management from the top navigation menu, and click the “View All” tab next to the “Screenings” tab. 2. From the Screening Search section, you can use the following search fields to locate screenings. (NOTE: You can search using more than one search field at a time to narrow down your results.) a. Questionnaire type: Select either ASQ-3 English, ASQ-3 Spanish, ASQ:SE English, or ASQ:SE Spanish from the drop-down menu. b. Interval(s): Select the questionnaire interval. You can select multiple intervals at one time. c. Provider: Select the child’s Provider from the drop-down menu. d. Status: Select either NEW, Finalized, or In Progress from the drop-down menu. e Screening date range: Enter a date range. f. Concern: Select the result of either Concern or No Concern from the dropdown menu. 3. When finished selecting your search options, click the “Search” button. ASQ Online will pull up any results matching what you have selected in the search fields. 8.2 Assign Pending Family Access Screenings To assign any pending Family Access screenings to a Provider via the Screenings page: 1. On your Home page, click the “View All” tab next to the Screenings tab. OR 1. Select Screening Management from the top navigation menu, and click the “View All tab next to the Screenings tab. 2. If there are any pending Family Access screenings to assign, there will be a link 25 under the Screenings Search section informing you “There are [#] family access screenings to assign.” Click the link. 3. You will be taken to a list of pending screenings. This list includes the child’s name, the questionnaire, the screening date, and the name of the caregiver who completed the screening. 4. You can view the full contents of the screening in a new browser window by clicking the screening interval under the “Questionnaire” column. 5. To assign the screening to a Provider, select the Provider from the drop-down menu, and click the “Assign” button. 8.3 View the Child Profile & Questionnaire for a Screening To view a Child Profile and a questionnaire from the Screenings page: 1. On your Home page, click the “View All” tab next to the Screenings tab. OR 1. Select Screening Management from the top navigation menu, and click the “View All” tab next to the “Screenings” tab. 2. Under the “Screenings” section, click on the child’s name to view their profile. 3. To view the questionnaire for a child, under the “Screenings” section, click on the questionnaire next to the child’s name. This will pull up the “Information Summary Sheet” for that questionnaire, and you can click through the area tabs to view the screening in its entirety. 8.4 Print the Information Summary Sheet To print an Information Summary Sheet from the Screenings page: 1. On your Home page, click the “View All” tab next to the Screenings tab. OR 1. Select Screening Management from the top navigation menu, and click the “View All tab next to the “Screenings” tab. 2. Under the “Screenings” section, locate the child whose “Information Summary” Sheet you would like to print. 3. To the left of the child’s name, click the “Print” link under the “Print Summary” column. 4. A pop-up window will appear and you can choose to open the file to print or save it to your computer. 9 Screening Management The Screening Management page of ASQ Online is where you can schedule and manage all of the screening and follow-up tasks for the children in your program. From this page, Program Administrators can: • Schedule a screening or non-screening task. • View a list of screenings due to be mailed to caregivers; screenings that have 26 been mailed to caregivers but not yet returned; and scheduled screening tasks that have been completed. • View a list of non-screening tasks that are due, and tasks that have been completed. • View and print system-created packets, and create program packets for all users in your program. • View and print documents provided by the ASQ Online system, as well as create program documents for all users in your program. 9.2 Screening Management Main Page: Selecting Screening Management from the top navigation menu will take you to the Screening Management main page. This page has two sections: Screenings and Screening Due. 9.2.1 Screening Section The Screenings section is identical to the one found on your Home page, and lists the 5 most recent screenings for the children in your program. Clicking the “View All” tab will take you to the complete list of screenings. You can search for screenings by questionnaire type, interval(s), Provider, status (NEW, Finalized, or In Progress), Screening date range, and Concern (Concern or No Concern). The Screenings section lists the child’s name, the questionnaire, the interval, the status, whether or not this screening came in through Family Access, the screening date, the name of the Provider who entered the screening, the name of the caregiver who completed the screening, and whether this screening was marked “Concern.” You can print the “Information Summary” Sheet directly from this page, by clicking the “Print” link. Clicking the child’s name will take you to that child’s profile, and clicking the questionnaire will take you to the “Information Summary” Sheet, where you can view the screening in its entirety. 9.2.2 Screenings Due Section Screenings Due refers to screening tasks that have been scheduled, but the materials have not yet been sent to the caregiver for completion. 27 The “Screenings Due” section lists the first 5 scheduled screenings. Clicking the “View All” tab will take you to a list of all screenings that are due. You can search for screenings due by due date, the child’s date of birth (DOB), child name, child ID, Alt. ID, the name of the Provider assigned to this screening task, the questionnaire, and previous result (the questionnaire result for the last screening for this child). Clicking the “Edit” link next to any screening task due will allow you to make any changes to the screening task. To create a packet of screening materials to be mailed to the caregiver, click the link at the top of the page (“To create a packet to mail out materials for screenings due, click here to go to the View/Print Packets page”). NOTE: The “Screenings Due” section is only a list of screening tasks that are due. In order to complete the task, you will have to go to the View/Print Packets page and generate the materials associated with this task. 9.3 Screenings On the left-hand side of the page, you’ll notice that the Quick Links are split up into four categories: Screenings, Tasks, Packets, and Documents. The Screenings Quick Links assist you in scheduling screening tasks and keeping track of the status of screening tasks. 9.3.1 Scheduling a Screening To schedule a screening task for a child: 1. 2. 3. 4. Select Screening Management from the top navigation menu. Select the “Schedule Screening” Quick Link. Fill in the required information (items marked with an asterisk [*] are required) Click “Save”. This screening task will appear in the Screenings Due section. 9.3.2 Screenings Due Screenings Due refers to screening tasks that have been scheduled, but the materials have not yet been sent to the caregiver for completion. You’ll notice a number next to the “Screenings Due” Quick Link, which indicates how many screening tasks are due. Screenings that are due are completed once you generate the corresponding packet to mail to a caregiver. (Section 9.2.2 “Screenings Due Section” - Program Administrator User Manual). 28 9.3.3 Screenings Out “Screenings Out” refers to screening tasks in which the materials have been sent to the caregiver for completion, but have not yet been returned to your program. You’ll notice a number next to the “Screenings Out” Quick Link, which indicates how many screenings have been sent to caregivers but haven’t yet been returned. Selecting the “Screenings Out” Quick Link on the Screening Management page will take you to a list of all screenings that have been sent out but not yet returned. You can search for screenings out by date the materials were sent, the due date, the child’s date of birth (DOB), the child name, child ID, Alt. ID, name of the Provider, questionnaire, and the result of the child’s previous screening. The “Screenings Out” list includes the date the materials were sent, the due date, the child’s name, the responsible Provider, the questionnaire, the previous questionnaire, and the previous screening result. You can also edit the screening task by clicking the “Edit” link. 9.3.4 Screening Tasks Completed “Screening Tasks Completed” refers to screening tasks that were created, mailed out, received, and entered into the ASQ Online system. Once the screening has been entered into ASQ Online, the system will automatically complete the associated screening task. Selecting the “Screening Tasks Completed” Quick Link on the Screening Management page will take you to a list of all screening tasks that have been completed. You can search for completed screening tasks by the returned date, the date the materials were sent, the due date, the child’s date of birth (DOB), the child’s name, child ID, Alt. ID, the Provider in charge of this task, and the questionnaire. The “Screening Tasks Completed” list includes the returned date, the date the materials were sent to the caregiver, the due date of the task, the child’s date of birth (DOB), the responsible Provider, and the questionnaire. You can click the “Edit” link to make any changes to this screening task. To view the “Information Summary” Sheet for the screening, and the screening in its entirety, click the “View Summary” link next to the questionnaire. 9.4 Tasks Tasks refer to any non-screening action that you can schedule. ASQ Online provides you with system tasks, and you also have the ability to create custom tasks to fit the needs of your program. 29 The following task types are provided by ASQ Online: • Intro to Physician • Follow-up, Caregiver: Concern • Follow-up, Caregiver: No Concern • Follow-up, Physician: Concern • Follow-up, Physician: No Concern • Meeting, Team • Meeting, Caregiver • Referral • Phone Call • Email If you have created any custom tasks, they will appear at the bottom of the list of task types when adding a task. The Early Learning Coalition of Broward has added custom tasks: (Found at bottom of task list) • Activity packet prepared for Child • *Referred Child to FDLRS/Child Find • Repeat after 2 months • Repeat after 4 month • **Repeat yearly on 1st day of birthday month BEST PRACTICE FOR BROWARD PROVIDERS: *Broward Providers should select “Referred Child to FDLRS/Child Find” and not “Referral” to record where the referral has been sent. **Best Practice is to set a task to rescreen annually on the 1st day of the child’s brbirthday month. This task will meet the requirement to screen currently enrolled children 45 days within their birthdate. 9.4.1. Adding a Task To add a task: 1. Select Screening Management from the top navigation menu. 2. Select the “Add Task” Quick Link. 3. Enter in the following information (items marked with an asterisk [*] are required) 4. Click “Save” This task will appear in the Tasks Due section. 30 9.4.2 Tasks Due Tasks Due refers to non-screening tasks that have been scheduled but have not yet been completed. You’ll notice a number next to the “Tasks Due” Quick Link, which indicates how many tasks have been scheduled but not yet completed. A task will be marked “complete” when you have generated a corresponding packet. Selecting the “Tasks Due” Quick Link will take you to a list of all tasks that are due. Search for tasks due by due date, child date of birth (DOB), child name, child ID, Alt. ID, the name of the Provider, the task type, the previous questionnaire, and the previous result (the result of their last questionnaire). The “Tasks Due” list includes the due date, the child name, the child’s date of birth (DOB), the responsible Provider, the task type, the previous questionnaire, and the previous screening result. You can edit the task by clicking the “Edit” icon to the right of the task. To create a packet of task materials to be mailed to the caregiver, click the link at the top of the page which states (“To create a packet to mail out materials for tasks due, click here to go to the View/Print Packets page”). NOTE: The “Tasks Due” section is only a list of tasks that are due. In order to complete the task, you will have to go to the View/Print Packets page and generate the materials associated with that task. 9.4.3 Tasks Complete Tasks Completed refers to any scheduled tasks that have been completed. Generating a corresponding packet for the task will automatically complete the task in the ASQ Online system. Selecting the “Tasks Completed” Quick Link will take you to a list of all tasks that have been completed. You can search for completed tasks by completed date, due date, the child’s date of birth (DOB), child name, child ID, Alt. ID, the name of the Provider in charge of this task, and the task type. You can edit any task from this page by clicking the “Edit” icon to the right of the task. 9.5 Packets Packets are groups of documents that can be printed and mailed together to aid in the screening management of your program. There are two types of packets for Program Administrators in ASQ Online: System Packets and Program Packets. 31 • System packets are packets provided by the ASQ Online system. • Program packets are packets that a Program Administrator can create and customize, and can be generated and downloaded by all users in the program. 9.5.1 View/Print Packets The View/Print Packets page is where you will go to generate and download packets. Once a packet is generated, its corresponding task will be completed in the system. You can view all children that you have generated a packet for by clicking the “Child List” link next to the packet. Clicking the “View/Print Packets” Quick Link on the Screening Management page will take you to a list of all system packets and program packets. The first five packets will be listed, including the name of the packet, the questionnaire type, and options to view the packet, generate the packet, and view the child list. Use the “Next” button below the list of packets to scroll through all system and program packets available. 9.5.2 System Packets System packets are packets provided by the ASQ Online system. These packets include groups of documents to aid you in completing the associated task. You can’t edit system packets; if you wish to customize a packet for your program, you can create a program packet. 9.5.3 Program Packets Program Administrators can create customized program packets, which can be generated and downloaded by all users of their program. Program packets can include any system documents as well as any program documents created by the Program Administrator. Once a program packet is created, it will appear in the Program Packets section on the View/Print Packets page. From there, you can view the packet, generate the packet, edit or delete the packet, and view a list of children for whom the packet has been generated. Customized Provider Packets The Early Learning Coalition has developed packets to meet some of the Provider’s needs. These packets can be customized with the Provider’s logo and saved. The Program Administrator should create these packets, which will be found under Program Packets, and are recommended for use. 32 • ASQ - 3 Welcome and Initial Screening Packet – Parent Welcome Letter, ASQ-3 English – What is ASQ-3, English – Parent Questionnaire Cover Letter, ASQ - 3 English • ASQ - 3 Typical Follow-up Packet – Parent Feedback Letter: Typical, ASQ-3 English – ASQ-3 Parent Conference Sheet, English – Intervention Activities • ASQ - 3 Monitoring Packet – Parent Feedback Letter: Monitoring, ASQ-3 English – ASQ-3 Parent Conference Sheet, English – Intervention Activities • ASQ - 3 Follow-up Packet for Family of Child Referred to FDLRS/Child Find – Parent Feedback Letter: Monitoring, ASQ-3 English – ASQ-3 Parent Conference Sheet, English – Intervention Activities • ASQ - 3 Rescreening Packet – Parent Questionnaire Cover Letter – ASQ-3 English Questionnaire • ASQ:SE Welcome and Initial Screening Packet – Parent Welcome Letter, ASQ:SE English – Parent Questionnaire Cover Letter, ASQ:SE English • ASQ:SE Typical Follow-up Packet – Parent Feedback Letter: Typical, ASQ-3 English – Intervention Activities • ASQ:SE Monitoring Packet – Parent Feedback Letter: Monitoring, ASQ-3 English – Intervention Activities • ASQ:SE Follow-up Packet for Family of Child Referred to FDLRS/Child Find – Parent Feedback Letter: Monitoring, ASQ-3 English – Intervention Activities • ASQ:SE Rescreening Packet – Parent Questionnaire Cover Letter – ASQ-3 English Questionnaire – Best Practice for the Development of Packets Best Practice for the Development of Packets It is recommended that the Program Administrator creates a packet of documents for each developmental screening questionnaire and saves them in the Online System. • Providers will not have to develop these packets. • These packets will be available to the Provider (teacher) to give to a caregiver once the screening results have been interpreted. 33 9.5.3.1 Creating Packets To create a packet, you will name the packet, and add the documents. You can search for available documents to add to the packet by document name, questionnaire type, category (Screening, Follow-up, or Other), and document type (System or Program). To create a program packet: 1. 2. 3. 4. Select Screening Management from the top navigation menu. Select the “Create Packet” Quick Link. Enter a name for the packet in the “Packet name” field. Select the documents to add to the packet, from the “Available Documents” section. a. You can search for documents by document name, questionnaire type, category, and document type. To search within a column, begin typing the name of what you are searching for. ASQ Online will automatically pull up any documents fitting the information you have typed in the search field. b. Click the “Add” link to the right of the document that you wish to add. You can add as many documents as you would like to your program packet. 5. Once you have added the documents to the packet, you can change the order in which they will appear when the packet is generated, by dragging the documents. To drag the documents, click and hold the arrow icon to the left of the document, and move the document to the desired position. 6. If you would like to remove a document from the packet, click the Remove link to the right of the document. 7. When finished, click the “Create” button. This packet will now appear under Program Packets on the View/Print Packets page. (Section 9.5.3.2 - “Viewing, Editing, & Deleting Program Packets” - Program Administrator User Manual.) 9.5.4 Generating & Downloading Packets Generating a packet will serve two purposes. First, it will automatically complete the task associated with that packet. Second, it will allow you to download the packet as a PDF file so that you can print and mail it to the caregiver. To generate a packet: 1. 2. 3. 4. Select Screening Management from the top navigation menu. Click the “View/Print Packets” Quick Link. Locate the packet you would like to generate and click the “Generate” link. Locate the child for whom you would like to generate this packet and click the “Download” link. 5. When the packet has finished generating, click the “Download File” link. Then, open the PDF file or save it to your computer. 34 When you click the Generate link next to a packet, you will be taken to a page where you select the child or children for whom you would like to generate this packet. You will see four tabs and multiple search fields to assist you in quickly and easily locating the children for whom you are generating the packet. The four tabs are: Screenings Due, Tasks Due, Child Profiles, and Completed Screenings. (Sections 9.5.4.1 – 9.5.4.4 - Program Administrator User Manual) 9.5.5 View Child List If you wish to see a list of all children for whom you have generated a packet, you can click the “Child List” link to the right of that packet. The Child List page will show you each child for whom that packet has been generated, the child’s date of birth, and the date the packet was generated for that child. You can also search for specific children by date generated, child DOB, child name, child ID, and child alt. ID. To view a packet’s Child List: 1. Select Screening Management from the top navigation menu. 2. Select the “View/Print Packets” Quick Link. 3. Locate the system or program packet with the child list you would like to view. 4. Click the “Child List” link to the right of the packet. 9.6 Documents ASQ Online provides a number of documents to aid you in the screening management of your program. These documents include the forms found in the ASQ User’s Guides, as well as other system documents, and any program documents that the Program Administrator creates. Documents are what make up packets, but you can also download and print any document on its own, without generating a packet. There are 3 categories of documents: Screening, Follow-up, and Other. • Screening documents are all documents that are associated with the screening of children. • Follow-up documents are all documents intended to be used when following up on a screening with the child’s caregiver. • Other documents are additional documents that don’t fall into either Screening or Follow-up categories, but are still helpful to your program. (Sections 9.6.1 - 9.6.2.3 - Program Administrator User Manual) 35 9.6.1 View/Print Documents The View/Print Documents page lists all the system and program documents, in alphabetical order. The documents list includes the name, description of the document (for program documents only), the questionnaire type associated with the document (if applicable), the category (Screening, Follow-up, or Other), and the document type (System or Program). Each document will also include a Download link, so that you can generate the document as a PDF file and print it or save it to your computer. Any documents that contain dynamic content will have a Download Preview link to the right of the document. Clicking this will allow you to see what the document will look like when it is generated with child, caregiver, or program information within a packet, by using fake data as an example. (Section 9.6.2.1 “Dynamic Content” - Program Administrator User Manual.) To access the View/Print Documents page: 1. Select Screening Management from the top navigation menu. 2. Select the “View/Print Documents” Quick Link. 9.6.2 Creating Documents As Program Administrator, you have the ability to create documents that are specific to your program. Once you have created a program document, all users in your program will be able to view and download the document. To create a program document: 1. 2. 3. 4. 5. 6. 7. 8. 9. Select Screening Management from the top navigation menu. Select the “Create Document” Quick Link. Enter the title of your document in the “Name” field. Enter an optional description of this document in the “Description” field. Select the document category from the drop-down menu. Your options are Screening, Follow-up, or Other. Select a questionnaire type from the drop-down menu (ASQ-3 English/Spanish, ASQ:SE English/Spanish). In the “Content” field, enter the text of your document, and format it to your liking. If you wish to add dynamic content, click the icon of the baby and choose the dynamic content. (Section 9.6.2.1 “Dynamic Content” – Program Administrator User Manual). When finished, click the “Submit” button. This document will now be included on the View/Print documents page and will be listed as a Program document. You can add this document to any program packet that you have created. 36 10 Family Access Family Access is an online questionnaire completion system – an additional module that is seamlessly integrated with your ASQ Enterprise account. Family Access allows programs to create websites where they can direct caregivers to complete screenings for their children online. Once accepted by you, the screens that were entered via Family Access automatically become part of your program screens. There is no additional data entry necessary to enter screening results. 10.1 Family Access Landing Page The Family Access page in ASQ Online is where you are able to create your Family Access landing page. The landing page is a page that a user will visit (or “land on”) when they access the URL provided to them by the program. It is through the landing page that caregivers enter The Family Access landing page includes the following information: program logo, program address information, welcome message, ASQ-3 or ASQ:SE questionnaire information summary, consent paragraph, and optional footer logos. 10.2 A Caregiver’s View of a Family Access Landing Page When a caregiver visits a Family Access landing page, he or she is first asked to enter his or her child’s birth date and weeks premature. Once this information is entered, Family Access will generate the correct screening interval for the child and instruct the caregiver to print out a blank copy of the questionnaire to fill out with the child over the next week. It will also instruct the caregiver to return to the Family Access landing page to enter the information collected on the questionnaire for the child. When the caregiver selects the link to enter their child’s screening information, they are instructed to enter the child’s demographic information and their own demographic information, as well as their relationship to the child. The caregiver then enters the screening results and any notes that he or she may have recorded on the printed questionnaire into the online questionnaire. When finished the caregiver clicks Submit and is directed to a “Thank You” page. (Sections 10.3 - 10.6.3 Setting up Family Access - Program Administrator User Manual.). 10.8 Accepting/Rejecting Screenings Submitted via Family Access Once a caregiver submits a screening via Family Access, the Program Administrator can choose to accept or reject the screening with several options. 37 Your accept/reject options are: • • • • • Accept and attach to an existing child profile Accept as a new child profile and assign to provider Accept as a new child profile without assigning a provider Reject entirely Reject entirely and notify caregiver via email To view all screenings that have come in through Family Access, and begin the accepting/rejecting process: 1. Select Family Access from the top navigation menu. 2. Click the link that says, “You have [#] family access screenings to approve (or reject).” You will be taken to a list of all screenings that have come in through Family Access. Each child has their own drop-down box that includes their name, the caregiver, the questionnaire, the screened date, and the completed date. If you click the “Preview” link, you can view the demographic data as well as the number of items that were answered for each area. Click the arrow icon to the left of the child’s name to bring up the accept/reject options. 10.8.1 Accept/Reject Options If you choose “Accept and attach to an existing child profile,” a text box will appear, prompting you to start typing a child’s name to search. Begin to type the child’s name. You’ll see a drop-down menu of suggestions for the child you are looking for. Select the child and click the Process button. This screening will be added to the Child Profile you have selected. If you choose “Accept as a new child profile and assign to provider,” a drop-down menu will appear with a list of Provider’s in your program. Select the Provider you wish to assign this child to from the drop-down menu, and click the Process button. This child and his or her screening will now be a part of your program. If you choose “Accept as a new child profile without assigning to a provider” and click the Process button, the screening will remain in a pending status until it has been assigned to a Provider. (Section 10.9 “Assigning Pending Screenings to a Provider” - Program Administrator User Manual.) If you choose “Reject entirely,” the screening will not be included as part of your program and you will not have access to the data on that questionnaire. The option to “Reject entirely and notify the caregiver via email” will only be available if that child’s caregiver chose to include an email when they submitted the 38 Family Access screening. If you choose this option the screening will not be included as part of your program and you will not have access to the data on that questionnaire. The caregiver will be emailed either the generic letter or the custom letter that you created when creating or editing the Family Access landing page informing them that the screening was not accepted by your program. 10.9 Assigning Pending Screenings to a Provider Family Access gives you the ability to accept questionnaires that have come in, without immediately assigning these questionnaires to a Provider. This allows you to review the screening in its entirety before deciding which Provider in your program should be in charge of this child. If you chose “Accept as a new child profile without assigning a provider” when accepting this screening, it will be in a pending status until you have assigned it. To view pending unassigned screenings and assign them to a Provider: 1. Select Family Access from the top navigation menu. 2. Click the link “You have [#] family access screenings to assign.” 3. You will be taken to a list of pending screenings. This list includes the child’s name, the questionnaire, the screening date, and the name of the caregiver who completed the screening. 4. You can view the full contents of the screening in a new browser window by clicking the screening interval under the “Questionnaire” column. 5. To assign the screening to a Provider, select the Provider from the drop-down menu, and click the “Assign” button. 11 Reports Not only does ASQ Online have powerful features that make it easy to record, score, and track ASQ screenings, it also enables you and your users to quickly generate reports for individual children, individual programs, and/or groups of children across multiple programs. As Program Administrator, there are multiple reports you can generate, pulling together aggregate data from your program. The following reports are available to you within the Reports page: • Transfer History (NEW) • Screening Tasks Status, by Date (UPDATED – formerly Screening Responses Report) • Stats Snapshot, by Provider • Screening Status Summary (UPDATED – formerly ASQ-3 & ASQ:SE Screenings Completed, by Child Reports) • ASQ-3 & ASQ:SE Screening Scores (UPDATED – formerly ASQ-3 Screening Results Report) 39 • • • • • ASQ-3 & ASQ:SE Screening Results, by Child ASQ-3 & ASQ:SE Aggregate Results, by Category ASQ-3 Screenings Below Cutoff, by Area (NEW) ASQ:SE Screenings Above Cutoff (NEW) ASQ-3 & ASQ:SE Screenings, by Interval (NEW)Transfer History (NEW) 11.1 Report Generation Options After generating a report, you have three options: • Download PDF • Download CSV • Preview Report Download PDF: If you choose Download PDF, the report will open as a PDF file. You must have Adobe Acrobat Reader installed on your computer or you will be unable to view the report. Click here to download Adobe Acrobat Reader. Download CSV: If you choose Download CSV, the report will open or save as a CSV (Comma Separated Value) file, which can be opened with Microsoft Excel. You will then be able to view and manipulate the data to suit your needs. Preview Report: If you choose Preview Report, the report will open in a new browser window. You have the ability to change the sort order of columns, by clicking the arrow at the top of each column. 11.2 Recent Reports On the Reports page, you will see two tabs: Available Reports and Recent Reports. The Recent Reports section will list all reports that you have generated within the last two weeks, with the option to Preview, Download PDF, or Download CSV. This allows you to see your most recently generated reports without having to select the search criteria and generate the report again. (Section 11 Reports for a description of all the reports (11.4 -11.13) 11.14 Printing Reports When you generate a report as a PDF file, all reports will be 8.5 x 14. In order to print the report on 8.5 x 11 paper: 1. After generating the report and opening as a PDF (in Adobe Reader), select “File” -> “Print.” 2. In the Page Handling section, select the “Fit to Printable Area” option from the Page Scaling drop-down menu. 3. Click the “OK” button. 40 Early Learning Coalition of Broward, Inc. ASQ Online Provider Protocol Subject: Use of the ASQ Online System for Developmental Screening of Children Birth through Five Years in the School Readiness Program Date: November 20, 2013 Purpose: To ensure consistency in the management of data for the Ages & Stages Questionnaire for children participating in the school readiness program by reviewing the key steps in the ASQ Online System. Action Steps: 1. Introduction: Become familiar with ASQ Online System features: It is important that all Provider users of the ASQ Online System become familiar with all the features of the Online Screening System that will assist the Provider in learning how to complete the steps involved. The Provider is defined as the teacher of the child. This protocol focuses on the key roles of a Provider; however, the Provider User Manual, located in the ASQ Online System, contains a great deal of additional material pertinent to all the key roles. Login to the ASQ Online System. The Provider should have received an email from [email protected] providing him/her with the Provider’s username and steps to create a password when the Provider goes to www.asqonline.com. This will allow the Provider to access the ASQ Online System. 1. View the drop down box on the top of the Home page marked “Program” 2. Select the role as “Provider”. If the Provider did not receive that email, he/she will contact the Provider’s Program Administrator. The Program Administrator is defined as the person who has the user role responsible for managing the child care facility’s program. Locate the Provider User Manual. On the Home page, the Provider should go the “Help” tab on the right side of the screen, and click on “User Manual” to link directly to the “Provider User Manual”. 41 Print the Provider User Manual: This will make it easier for the Provider: 1. To follow the steps in the process as he/she is learning the new system 2. To have the User Manual accessible while navigating the Online System as the Provider cannot open the manual online and navigate the online system at the same time. Use the Provider User Manual: Use the Provider User Manual as a resource when questions arise as it provides an in-depth description of all steps in the online screening process. This will ensure accuracy and consistency in the management of the data. 1. The Manual will help the Provider become familiar with the ASQ Online System using the Table of Contents. 2. A Glossary of Important Terms and Conditions has been included for easy reference to terms that will help clarify the steps in the process (See Attachment 1). 3. A document has been developed for Broward Providers (Teachers) that complements the Provider User Manual. The ASQ Online Provider User Manual Summary of Each Section, which will be helpful to the Provider to locate information more easily (See Attachment 3). Locate the “Online Tutorials” section: Watch the tutorial as the tutorial reviews the critical steps in the Online Screening System. 1. Go to “Quick Links” on the left-hand side of the “Home” page 2. Click on “Online Tutorials” found on that page. 3. Click on “Provider Tutorial” 4. Click on the first icon link to view the tutorial on the Provider’s computer or on the second item to view the tutorial on an ipad. Locate the ASQ Online Glossary: - click on the “Help” Quick Link to find the definition of the key words used in the ASQ Online System. 2. Navigating the ASQ Online System: The Provider must learn how to navigate the ASQ Online system by using the top navigation menu on each page in order to complete specific tasks. This menu will take the Provider to the different pages of ASQ Online. The pages include Home Page, My Profile, Child Profiles, Screening Management, Reports, and Family Access. 42 • Home: Access Child Profiles, Screenings, and Help items from this page, which is customized to the Provider’s role as Provider. • My Profile: View and edit your profile information, change the Provider’s password create and manage your personal notes and files, view your user access, view a list of children assigned to the Provider, and create personal alert messages regarding various functions in ASQ Online. • Program: View your program details and view and search a list of all users in your program. • Child Profiles: Manage all Child Profiles assigned to the Provider and add new Child Profiles, add caregivers, and add and view child screenings. • Screening Management: Schedule screening tasks and non-screening tasks, generate and print screening and follow-up materials, create your own personal documents and groups of documents, and keep track of the scheduled tasks for all children assigned to the Provider. • Reports: Generate individual child reports and aggregate child reports for all children you are assigned to. • Family Access: Create and manage your Family Access web page used for online questionnaire completion, and accept or reject screens that have been submitted to your through Family Access. Quick Links On the left side of each ASQ Online web page you will find the Quick Links. The list of Quick Links provided is specific to the web page you are currently viewing. Quick Links are designed to help you complete various tasks within the different pages of the site. The “Help” Quick Link will always appear as the last Quick Link, no matter what page of ASQ Online you are viewing. The Help page provides up-to-date information on ASQ Online, including FAQs, Tutorials, User Manuals, contact information, and other online help documentation. 3 ASQ Online for Providers When you are logged in to ASQ Online as a Provider, the different pages of the site are specifically designed for the Provider role. 43 3.2 My Profile You can access your user profile by selecting My Profile from the top navigation menu. Your My Profile page contains four tabbed sections. • My Profile section contains your personal information. • My Notes section is a place for your personal notes pertaining to a number of things within ASQ Online. • My Files section is a place for any personal files that you have uploaded into the system. • My Access List section contains a list of the program(s) you have access to, and your role(s) within those programs. 3.2.1 Editing Your Profile The My Profile section contains your personal information, including your username and password. To edit any of the fields in the My Profile section: 1. 2. 3. 4. Select My Profile from the top navigation menu. Click the “Edit” tab to the right of the My Profile tab. Make the desired changes. Click the “Save” button. 3.3 My Alerts As a Provider, you have the ability to set up personal alert messages regarding various ASQ Online functions, which can be sent to yourself via text message or email. These messages can be task reminders, screening alerts, and Family Access alerts. In addition, you can select your preferred time zone for texting and emailing. NOTE: Standard text messaging rates apply to each text message alert received as provided in your wireless rate plan (contact your carrier for pricing plans and details). Email alerts will be subject to standard Internet access and usage charges imposed by your Internet service provider. 3.3.1 Task Reminders Task reminders alert you to when a task is due. You can choose to have the reminder sent to you via text, email, or both. When setting a task reminder, you choose the task as well as when you would like to receive the alert. You may add as many different combinations of task reminders as you would like. 44 To set a task reminder alert: 1. Select My Profile from the top navigation menu. 2. Select the “My Alerts” Quick Link. 3. The first section on the My Alerts page is Task Reminders. Under this section, you will see three drop-down menus. 4. In the first drop-down menu, select whether you would like to receive your alert via “Text,” “Email,” or “Text And Email.” 5. The second drop-down menu lists all of the tasks in your program, including any custom tasks you have created. Select which upcoming task you would like to be reminded of. 6. The third drop-down menu allows you to select when you would like to receive the message in relation to the task. Your options are: “1 week before;” “2 days before;” “1 day before;” and “On the day of.” 7. Click the “Add” button. 8. Ensure that you will receive this message by selecting “On” from the “Status” drop-down menu. (You can turn a task reminder off at any time from the “Status” 9. Once this task reminder has been added, click the “Save Changes” button, at the bottom of the page. NOTE: If you have selected to be alerted via text message, you must have a mobile phone number saved in your profile. 3.3.2 Screening Alerts Screening alerts let you know each time a screening has been finalized. You can choose to have these alerts sent to you via email, text message, or both. To set a screening alert: 1. 2. 3. 4. Select My Profile from the top navigation menu. Select the “My Alerts” Quick Link. Scroll down to the “Screening Alerts” section of the My Alerts page. You will see two options: a. Text me each time I finalize a screening. b. Email me each time I finalize a screening. This email will include a link to Tasks so I can schedule a follow-up action. 5. Next to each option is a “Status” drop-down box. 6. To receive a text message each time you finalize a screening, select “On” from the “Status” drop-down menu, to the right of “Text me each time I finalize a screening.” 7. To receive an email each time you finalize a screening, select “On” from the “Status” drop-down menu, to the right of “Email me each time I finalize a screening.” 8. If you wish to receive both a text message and an email when you finalize a screening, set both of the “Status” drop-down menus to “On.” 45 9. Click the “Save Changes” button at the bottom of the page. NOTE: If you have selected to be alerted via text message, you must have a mobile phone number saved in your profile. 3.4 Your Role: Provider As a Provider, you are responsible for managing the screening of children to whom you are assigned. Your main responsibilities will include entering in child and caregiver information, entering screening results for your children, and making decisions regarding future screenings, follow-up, and referrals. You also have the ability to create tasks for your children as well as the ability to create and organize documents and other materials that you will use for screenings, followups, and referrals. As a Family Access subscriber, as a Provider, you will be able work with the Program Administrator to design Family Access pages that you can be sent to the caregivers in your program so that they can fill out ASQ questionnaires online. 5 Managing Child Profiles The Provider is responsible for entering child and caregiver information. A caregiver is a parent, grandparent, foster-parent, or other person who lives with the child and is responsible for the care of the child. The following scenarios pertain to Broward early childhood providers and how to ensure every school readiness child has a child profile and can be screened. Viewing Child Profiles: The Provider must ensure that each child assigned to him/her has a Child Profile so that the screening data can be entered. The Provider can view a list of all the Child Profiles assigned to him/her to ensure that each child assigned to the Provider has a Child Profile (Section 5.3 “Viewing the Child Profiles List” - Provider User Manual - page 20). 1. The Provider will use the top navigation menu on the top of the page, and click on the “Home” page. 2. The first five Child Profiles that are assigned to the Provider will be listed. 3. Within this section the Provider has the option to view all Child Profiles assigned to him/her by clicking on the “View All” tab. 4. This will take the Provider to the “Child Profiles” page where the Provider has the option to search for children using various search options. 46 HINT: The easiest way to search for a child is to enter the child’s last name or the birth Thi date in the “to” and “from” spaces The following section has been written specifically for Broward early childhood providers. 5.1 Adding a Child Profile Adding a Child Profile for a Newly Enrolled child: A Child Profile must be added for every newly enrolled child is the Provider’s role so that screening data can be entered into the ASQ Online System. Any child profile that the Provider enters will automatically be assigned to him/her. To add a new Child Profile to ASQ Online: 1. Click the “Add” tab to the right of the Child Profiles tab on your Home page. OR 1. Select the Child Profiles link from the top navigation menu. 2. Select the “Add Child Profile” Quick Link. 3. You will be directed to the Add Child Profile page. Fill out all required fields indicated by an asterisk [*], and any additional fields. 4. Click “Save”. NOTE: If any required information was not entered or if any information was not entered correctly, an error message will occur. If an error message appears, make the specified corrections and then click” Save”. 5.9.1 Adding a New Caregiver The second step to adding a Child Profile is that the Provider will need to Add a Caregiver to each newly enrolled child (Section 5.9.1 - “Adding a New Caregiver” - Provider User Manual - pages 24 - 25). • The caregiver must be identified in order to add a child profile. • The caregiver is the person who fills out the questionnaire for the child. Adding a New Caregiver: 1. Select Child Profiles from the top navigation menu. 2. Browse the Child Profiles list under the “Child Profiles” tab or search for a Child Profile under the “Child Profile Search” at the top of the page. 47 3. Click on the child’s name to access his or her profile. 4. Go to “Quick Links” and Click on “Add New Caregiver” 5. Complete the required fields and Click “Save”. If this is the Primary Caregiver, check the box to the right of the field “Primary Caregiver Profile for,” located at the bottom of the Add Caregiver Profile page. The checkbox will list the child whose profile you are adding the caregiver to. There can only be one Primary Caregiver within each Child Profile. To change the Primary Caregiver within a Child Profile, click the “Edit” tab within the Caregiver Profile Details of the caregiver that you would like to be primary, and check the box next to “Primary Caregiver Profile for.” Then click “Save”. NOTE: Marking a caregiver as “Primary Caregiver” for a child means that when you generate a packet that contains a letter to the child’s caregiver, it will be automatically addressed to this caregiver. 5.9.2 Adding an Existing Caregiver: (Section 5.9.2 - “Adding an Existing Caregiver” Provider User Manual - page 25). To add an existing caregiver: 1. 2. 3. 4. Select Child Profiles from the top navigation menu. Browse the Child Profiles list or search for a Child Profile. Click on the child’s name to access his or her profile. Select the “Add Existing Caregiver” Quick Link. This will bring you to the Caregiver Profile Search page. 5. Search for the caregiver by first or last name or locate the caregiver under the “Caregiver Profile List for [Child last name, first name]” tab. 6. To associate the caregiver to the child, Click the “Add” link under the “Associate to [Child last name, first name]” column. 7. You will be returned to the Child Profile Details page for this child, and a message will appear at the top saying that the child was successfully associated with the caregiver. Adding a Child Profile for Children who are Currently Enrolled but not Assigned to the Provider: This is the Provider’s role so that screening data can be entered into the ASQ Online System. 1. The Provider can search for a specific child or children to whom he/she was assigned. 2. If a currently enrolled child is not assigned to the Provider, the Provider should follow the steps outlined in section 5.1 above. 3. The Provider should refer to section 5 “Managing Child Profiles” – Provider User Manual - pages 18 - 34 for details on other key tasks, e.g. Viewing and Editing Child Profile Details and Archiving or Deleting a Child Profile. 48 5.2 Searching for a Child Profile To search for a specific child or children to whom you are assigned: 1. Click the “View All” tab to the right of the Child Profiles tab on your Home page. OR 1. Select Child Profiles from the top navigation menu. 2. Search for a child or children by entering information in any of the following search fields: Child DOB, Child last name, Child first name, Child ID, Status (select either “Active” or “Archived” from the drop-down menu), Previous screening (select the screening result from the drop-down menu), Caregiver last name, Caregiver first name, and/or Alt. ID. 3. Click “Search”. 4. Once you have located the child you are looking for, click on the child’s name to view his or her profile. 5.3 Viewing the Child Profiles List To view a list of all the Child Profiles assigned to you: 1. Click the View All tab to the right of the Child Profiles tab on your Home page. OR 1. Select Child Profiles from the top navigation menu. 5.7 V iewing Tasks Within ASQ Online, you can schedule screening and non-screening tasks (such as follow-up actions), for the children assigned to you. These tasks help you to manage and better serve your children. The Screening Management page is where you can add and keep track of all tasks, but you can also add and view a child’s tasks within their profile. (Section 7 Screening Management - Provider User Manual.) To view a child’s tasks within their profile: 1. Click the “View All” tab to the right of the Child Profiles tab on your Home page. OR 1. Select Child Profiles from the top navigation menu. 2. Browse the “Child Profiles” list or search for a Child Profile. 3. Click on the child’s name to access his or her profile. 4. Scroll down to the tasks section. The child’s first 5 tasks will be listed here. Click the “View All” tab to view a list of all tasks for this child. 5. To view the details of an individual task, click on the task type. From the Task Details page you can edit or delete this child’s task. 49 5.7.1 Adding Tasks via the Child Profile To add a task from a child’s profile: 1. Click the “View All” tab to the right of the Child Profiles tab on your Home page. OR 1. Select Child Profiles from the top navigation menu. 2. Browse the Child Profiles list or search for a Child Profile. 3. Click on the child’s name to access his or her profile. 4. Scroll down to the tasks section. Click the “Add” tab. 5. Enter in the following information (items marked with an asterisk [*] are required) NOTE: If you select a screening task, you will need to also select the questionnaire type and interval (ASQ Online will recommend an interval). You can also enter a “Returned date” if you are creating this screening task after the screening has been completed, for tracking and reporting purposes. 5.11 Merging Child Profiles Before a screening can be entered into ASQ Online for a child, there must be at least one caregiver assigned to the child. If for any reason you have duplicates of the same Child Profile, you can merge those profiles together to create one Child Profile, without losing the data from either profile. To merge Child Profiles: 1. 2. 3. 4. Select Child Profiles from the top navigation menu. Select the name of a Child Profile you wish to merge. Next to Child Profile Details, click the “Merge” tab. You will be taken to a list of Child Profiles within your program. This page lists the child’s name, DOB, Child ID, and Alt. ID. The page will prompt you to select a target Child Profile for the merge. 5. Any Child Profiles that share the same birth date or name with the profile you are trying to merge will be in boldface. 6. Select the button next to the Child Profile you would like to merge. 7. Click the “Merge Child Profiles” button at the bottom of the page. Please note that when merging 2 profiles, the Child Profile that you are merging into is the data that will prevail. If the merging profile has separate demographic data than the profile being merged into, the demographic data will be overwritten. The Provider has the ability to enter the screening information and make decisions regarding any follow-up and referral processes once the child has a profile. 50 6 Child Screenings The Screenings page can be accessed via your Home page or the Screening Management page. The Screenings page provides you with a complete list of all screenings in your program and lists the child’s name, the questionnaire, the interval, the status, whether or not this screening came in through Family Access, the screening date, the name of the Provider who entered the screening, the name of the caregiver who completed the screening, and whether this screening was marked “Concern.” You can use this page to quickly and easily locate children and their screenings, assign any pending Family Access screenings to a Provider, view the questionnaire in its entirety, and print the “Information Summary” Sheet for a child. The following information has been specifically written according to the protocol which Broward early childhood Providers will follow. Child Screenings: The Provider is responsible for managing the screening of children to whom he/she is assigned. Main responsibilities include entering screening results for the children to whom the Provider is assigned and making decisions regarding future screenings, follow-up, and referrals. (Section 6 “Child Screenings” - Provider User Manual - pages 34 - 45 for information about these tasks and others, e.g. deleting a screen). Timeframes: The Provider must follow the time frames for ASQ Screenings set by Florida legislation 6M-4. 720 Screening of Children in the School Readiness Program. Newly Enrolled Child: The Provider or the Program Administrator with the caregiver complete an ASQ-3 and an ASQ:SE screen online for each newly enrolled child whose family receives school readiness assistance. BEST PRACTICE FOR BROWARD PROVIDERS: Florida legislation (6M-4.720 - Screening of Children in the School Readiness Program) says to screen a child no later than 45 days calendar days after: 1. His or her first enrollment in the School Readiness program or 2. Subsequent enrollment after being terminated or withdrawn from the School Readiness program. Best practice is to have the caregiver complete the ASQ-3 and ASQ:SE screens with the provider within 5 days of the child’s first (1) day of care at the child care facility. 51 Currently Enrolled: The Provider or the Program Administrator with the caregiver complete an ASQ-3 and ASQ:SE screen online for each child enrolled on an annual basis. By Request: Screens may be requested by the caregiver of a school readiness child or private pay child at any time. The Provider may also request a screening if there is a concern regarding the child’s development. Options for Screening a Child The Provider must ensure that each child who receives school readiness funding assigned to him/her has a completed ASQ - 3 and ASQ:SE screening with data entered into the Online System unless a parent does not want his/her child to be screened. Then, the parent must complete Form OEL-SR 24 at Family Central during intake for School Readiness services. A copy of the form must be sent to the early childhood program. BEST PRACTICE FOR BROWARD PROVIDERS Option 1: Online by the Caregiver and the Provider: The ASQ Screening should be completed online by the caregiver and the Provider at the child care facility. Option 2: Family Access - allows programs to create websites where they can direct caregivers to complete screening for their children online (Section 8 “Family Access” Provider User Manual - pages 70 - 79). a. Caregiver can go the web page following directions given to them by the Provider. b. Caregiver can enter the screening information for his/her child. c. Once a caregiver submits a screening via a Family Access URL that the Provider has created, the Provider can choose to accept or reject the screening with several options: 1. Accept and attach to an existing child profile 2. Accept as a new child profile and assign to the Provider 52 3. Reject entirely and the screening will not be included as part of the program 4. Reject entirely and notify caregiver via email that the screening was not accepted by the Provider Option 3: Provider may complete the screening: If a caregiver does not complete the screening with the Provider within the first 5 days of enrollment at the child care facility or return the screen via the Family Access System within the specified timeframe, the Provider may complete the screens for children if: a. The child has attended the facility at least part time for 30 or more days b. The currently enrolled child has been in care at the facility 10 months or more by the first day of the month of his/her next birthday c. The family or teacher has a concern regarding the child’s development To access the Screenings page: 1. On your Home page, click the “View All” tab next to the Screenings tab. OR 1. Select Screening Management from the top navigation menu. 2. Click the “View All” tab to the right of the “Screenings” tab. 6.1.1 Searching All Child Screenings You can search for screenings in your program by questionnaire type, interval(s), Provider, status (NEW, Finalized, or In Progress), Screening date range, and Concern (Concern or No Concern). To search for screenings in your program: 1. On your Home page, click the “View All” tab next to the “Screenings” tab. OR 1. Select Screening Management from the top navigation menu, and click the “View All” tab next to the “Screenings” tab. 2. From the Screening Search section, you can use the following search fields to locate screenings. (NOTE: You can search using more than one search field at a time to narrow down your results.) When finished selecting your search options, click the “Search” button. ASQ Online will pull up any results matching what you have selected in the search fields. 53 6.1.2 View the Child Profile & Questionnaire for a Screening To view a Child Profile and a questionnaire from the Screenings page: 1. On your Home page, click the “View All” tab next to the Screenings tab. OR 1. Select Screening Management from the top navigation menu, and click the “View All” tab next to the “Screenings” tab. 2. Under the “Screenings” section, click on the child’s name to view their profile. 3. To view the questionnaire for a child, under the “Screenings” section, click on the questionnaire next to the child’s name. This will pull up the “Information Summary Sheet” for that questionnaire, and you can click through the area tabs to view the screening in its entirety. 6.1.3 Print the “Information Summary” Sheet To print an “Information Summary” Sheet from the Screenings page: 1. On your Home page, click the “View All” tab next to the Screenings tab. OR 1. Select Screening Management from the top navigation menu, and click the “View All tab next to the “Screenings” tab. 2. Under the “Screenings” section, locate the child whose “Information Summary” Sheet you would like to print. 3. To the left of the child’s name, click the “Print” link under the “Print Summary” column. 4. A pop-up window will appear and you can choose to open the file to print or save it to your computer. 6.2 Adding a Screening There are two methods for entering ASQ-3 and ASQ:SE screening results for a child: the Long Form or the Short Form. 6.2.1 Adding an ASQ-3 or ASQ:SE Screening via the Long Form The ASQ-3 & ASQ:SE Online Long Forms are similar to the paper versions of the questionnaires, but without the graphics. The Long Form contains all questionnaire items in addition to a Comments section in which a parent’s comments can be entered. The answers you enter for each item are automatically converted to their numerical value and automatically totaled according to the ASQ-3 or ASQ:SE scoring logic. (Section 6.2.1 - “Adding an ASQ - 3 or ASQ:SE Screening via the Long Form” - Provider User Manual). 54 TIP: You are strongly encouraged to enter a task for this child after reviewing his or her “Information Summary” Sheet. The decision you make after reviewing the child’s scores and the cutoff scores can be easily recorded as a task that you are then reminded to complete. 6.2.3 Adding an ASQ:SE Screening via the Short Form By entering the ASQ:SE screening results for a child via the Short Form, you are choosing to view only the item numbers from the ASQ:SE questionnaire. The Short Form is intended for quick and easy data entry. The answers you select for each item are automatically converted to their numerical value and automatically totaled according to the ASQ:SE scoring logic. (Section 6.2.3 - “Adding an ASQ - 3 or ASQ:SE Screening via the Short Form” Provider User Manual). TIP: You are strongly encouraged to enter a task for this child after reviewing his or her “Information Summary” Sheet. The decision you make after reviewing the child’s scores and the cutoff scores can be easily recorded as a task that you are then reminded to complete. ASQ Online will provide you with a pop-up reminder to add a task for this child, when you are navigating away from the “Information Summary” page. 6.2.4 Saving a Partially-Completed Screening in Progress When entering screening results, the Provider may click “Save in Progress” at any time to save what you have entered so far for the screening. Once the Provider clicks “Save in Progress,” he/she may exit out of the screening, and he/she will find it listed under the Child’s Screenings tab marked Incomplete.” Since it is incomplete, this screening and its results will not be included in any reports until it is finalized. If the Provider has a partially completed screening saved, click on the name of the questionnaire at any time to resume entering screening results. 6.2.5 Finalizing a Screening Once the Provider has finished entering a screening, he/she can finalize it. Finalizing a screening will mark the Status as “Complete” under the Child Screenings tab on the Child Profile page. (Section 6.2.5 “Finalizing a Screening” - Provider User Manual page 43). To finalize a screening, make sure all items from the questionnaire have been filled in and any subsequent responses have been entered. 55 At the bottom of the questionnaire page, click the “Finalize” button. A pop-up window will appear saying, “You will not be able to alter your answers after you finalize this questionnaire. Do you want to finalize this questionnaire?” If the Provider wishes to finalize it, click “OK”. If he/she wishes to go back and make changes or do not want to finalize it at this time, click “Cancel”. Once the Provider has finalized a screening, he/she will be taken to the “Information Summary” page where he/she can schedule a follow-up task for the child. Once the Provider has finalized a screening, the screening and its results will be included in reports, and he/she cannot go back into the questionnaire to make any changes. 6.3 Viewing a Screening To view a screening: 1. Click the “View All” tab to the right of the Child Profiles tab on the Provider’s Home page. OR 1. Select Child Profiles from the top navigation menu. 2. Browse the Child Profiles list or search for a Child Profile. 3. Click on the child’s name to access his or her profile. 4 Scroll down to the “Child Screenings” section of the Child Profile. The child’s 5 most recent screenings will be listed. To see all screenings for the child, click the “View All” tab next to the “Child Screenings” tab. 5. In the Child Screenings list under the “Questionnaire” column, click on the name of the screening that the Provider would like to view. 6. The Provider will automatically be brought to the Information Summary page for that screening. By clicking on the tabs to the left of the “Summary” tab, the Provider may view item-by-item how the caregiver completed the screening. 7. Select “Return to Child’s Profile” from the Quick Links section to select and view another screening. (Section 6.3 “Viewing a Screening” - Provider User Manual - pages 43 - 44). 6.4 Printing a Screening There are two ways to print a completed screening for a child, via the Child Profile section. From a Child Profile, the Provider can: • Print a completed screening, including a coversheet, all areas of the questionnaire, and the Overall section • Print only the “Information Summary” Sheet 56 To print a screening from a Child Profile: 1. Click the “View All” tab to the right of the Child Profiles tab on the Provider’s Home page. OR 1. Select Child Profiles from the top navigation menu. 2. Browse the Child Profiles list or search for a Child Profile. 3 Click on the child’s name to access his or her profile. 4. Locate the screening the Provider wants to print in the Child Screenings list. 5. Click “Print” next to the name of the questionnaire he/she would like to print. 6. A pop-up window will appear asking the Provider if he/she wants to open or save the PDF of the completed questionnaire. Select “Open”. 7. When the PDF is visible, either select the “Print” icon or go to File > Print. To print only the “Information Summary” Sheet: 1. View the screening that contains the “Information Summary” Sheet the Provider wishes to print. (Section 6.3 “Viewing a Screening” - Provider User Manual - pages 43 - 44). 2. Select the “Print Information Summary” Quick Link. 3. A pop-up window will appear asking if the Provider wants to open or save the PDF of the completed questionnaire. Select “Open”. 4. When the PDF is visible, either select the Print icon or go to File > Print. (Section 6.4 “Printing a Screening” - Provider User Manual - pages 44 - 45) . 7 Screening Management The Screening Management page of ASQ Online is where you can schedule and manage all of the screening and follow-up tasks for the children to whom you are assigned. From this page, Providers can: • Schedule a screening or non-screening task. • View a list of screenings due to be mailed to caregivers; screenings that have been mailed to caregivers but not yet returned; and scheduled screening tasks that have been completed. • View a list of non-screening tasks that are due, and tasks that have been completed. • View and print system-created packets, and view and print program packets created by your Program Administrator. • Create your own packets to send to caregivers of children to whom you are assigned. • View and print documents provided by the ASQ Online system, view and print program documents created by your Program Administrator, and view, print, and create personal documents. 57 The Provider must become familiar with how to schedule a screening, track screenings for the children, interpret screen results, create follow-up tasks, and generate materials. The Provider will find all the details related to these steps in Section 7 of the Provider User Manual entitled “Screening Management” pages 45 - 70. 7.2.1 Screenings Section The Screenings section is identical to the one found on your Home page, and lists the 5 most recent screenings for the children to whom you are assigned. Clicking the “View All” tab will take you to the complete list of screenings. You can search for screenings by questionnaire type, interval(s), Provider, status (NEW, Finalized, or In Progress), Screening date range, and Concern (Concern or No Concern). You can print the “Information Summary” Sheet directly from this page, by clicking the “Print” link. Clicking the child’s name will take you to that child’s profile, and clicking the questionnaire will take you to the “Information Summary” Sheet, where you can view the screening in its entirety. 7.2.2 Screenings Due Section Screenings Due refers to screening tasks that you have scheduled, but the materials have not yet been sent to the caregiver for completion. The “Screenings Due” section lists the first 5 scheduled screenings for children to whom you are assigned. Clicking the “View All” tab will take you to a list of all screenings that are due. Search for screenings due by due date, the child’s date of birth (DOB), child name, child ID, Alt. ID, the questionnaire, and previous result (the questionnaire result for the last screening for this child). Clicking the “Edit” link next to any screening task due will allow you to make any changes to the screening task. To create a packet of screening materials to be mailed to the caregiver, click the link at the top of the page which states (“To create a packet to mail out materials for screenings due, click here to go to the View/Print Packets page”). NOTE: The Screenings Due section is only a list of screening tasks that are due. In order to complete the task, you will have to go to the View/Print Packets page and generate the materials associated with this task. 7.3 Screenings On the left-hand side of the page, you’ll notice that the Quick Links are split up into four categories: Screenings, Tasks, Packets, and Documents. 58 The Screenings Quick Links assist you in scheduling screening tasks and keeping track of the status of screening tasks. 7.3.1 Schedule a Screening To schedule a screening task for a child: 1. 2. 3. 4. Select Screening Management from the top navigation menu. Select the “Schedule Screening” Quick Link. Fill in the following information (items marked with an asterisk [*] are Click “Save”. This screening task will appear in the Screenings Due section (Section 7.3.1 ”Schedule a Screening” - Provider User Manual - page 50). 7.3.2 Screenings Due Screenings Due refers to screening tasks that have been scheduled, but the materials have not yet been sent to the caregiver for completion. You’ll notice a number next to the “Screenings Due” Quick Link, which indicates how many screening tasks are due. Screenings that are due are completed once you generate the corresponding packet to mail to a caregiver. The Provider must view the list of children with “Screenings Due” to view the screening tasks that the Provider has scheduled, but the materials have not yet been sent to the caregiver for completion. a. Lists the first 5 scheduled screenings for children to whom the Provider is assigned. b. Clicking the “View All” tab will take you to a list of all screenings that are due. You can search for screenings due by due date, the child’s date of birth (DOB), child name, child ID, Alt. ID, the questionnaire, and previous result (the questionnaire result for the last screening for this child). Clicking the “Edit” link next to any screening task due will allow you to make any changes to the screening task. c. To create a packet of screening materials to be mailed to the caregiver, click the link at the top of the page which states (“To create a packet to mail out materials for screenings due, click here to go to the View/Print Packets page”). For more information on “Screenings Due”, see Section 7.2.2 Screenings Due Section of the Provider User Manual. 59 NOTE: The Screenings Due section is only a list of screening tasks that are due. In order to complete the task, you will have to go to the View/Print Packets page and generate the materials associated with this task. 7.3.3 Screenings Out “Screenings Out” refers to screening tasks in which the materials have been sent to the caregiver for completion, but have not yet been returned to your program. You’ll notice a number next to the “Screenings Out” Quick Link, which indicates how many screenings have been sent to caregivers but haven’t yet been returned. Selecting the “Screenings Out” Quick Link on the Screening Management page will take you to a list of all screenings that have been sent out but not yet returned. You can search for “Screenings Out” by the date the materials were sent, the due date, the child’s name, the questionnaire, the previous questionnaire, and the previous screening result. You can also edit the screening task by clicking the “Edit” link. If you have the completed questionnaire from the caregiver, you can enter the screening results from this page by clicking the “Enter Screening” link. Once you enter the screening and finalize it, the screening task will be completed and it will move to Screening Tasks Completed. 7.3.4 Screening Tasks Completed “Screening Tasks Completed” refers to screening tasks that were created, mailed out, received, and entered into the ASQ Online system. Once the screening has been entered into ASQ Online, the system will automatically complete the associated screening task. Selecting the “Screening Tasks Completed” Quick Link on the Screening Management page will take you to a list of all screening tasks that have been completed. You can search for completed screening tasks by the returned date, the date the materials were sent, the due date, the child’s date of birth (DOB), the child’s name, child ID, Alt. ID, and the questionnaire. The “Screening Tasks Completed” list includes the returned date, the date the materials were sent to the caregiver, the due date of the task, the child’s name, the child’s date of birth (DOB), and the questionnaire. Click the “Edit” link to make any changes to this screening task. To view the “Information Summary” Sheet for the screening, and the screening in its entirety, click the “View Summary” link next to the questionnaire. 7.4 Tasks Tasks refer to any non-screening action that you can schedule. ASQ Online provides you with system tasks, and Program Administrators have the ability to create custom tasks to fit the needs of your program. 60 If your Program Administrator has created any custom tasks, they will appear at the bottom of the list of task types when adding a task. NOTE: If any required information was not entered or if any information was not entered correctly, an error message will occur. If an error message appears, make the specified corrections and then click” Save”. 7.4.1 Adding a Task For Broward Early Childhood Providers: Create Follow-up Tasks: The Provider interprets the screening results in order to set tasks for each child. A Task is a non-screening follow-up action, e.g. phone call to caregiver. (Section 7.4 “Tasks” - Provider User Manual - pages 51 - 53). Interpret Screening Results: The Provider should review the “Information Summary” for the ASQ - 3 and the ASQ:SE to interpret the screening results in order to determine the follow-up tasks that need to be created. 1. The Provider should use the ASQ - 3 and ASQ:SE Score Interpretation and Recommendations for Follow-up Diagrams (See Attachments 4 and 6) to determine the tasks needed for each child 2. The Provider should use the ASQ -3 and ASQ:SE Action Steps Based on the Screening Results (See Attachments 5 and 7) for steps to take to set tasks for a child. 3. Selecting a Task: ASQ Online provides the Provider with system tasks, and Program Administrators have the ability to create custom tasks to fit the needs of the Provider’s program. 4. The following task types are provided by ASQ Online: 1. Intro to Physician 2. Follow-up, Caregiver: Concern 3. Follow-up, Caregiver: Concern 4. Follow-up, Caregiver: No Concern 5. Follow-up, Physician: Concern 6. Follow-up, Physician: No Concern 7. Meeting, Team 8. Meeting, Caregiver 9. Referral 10. Phone Call 11. Email 61 The Early Learning Coalition of Broward has added custom tasks: (Found at bottom of task list) • Activity packet prepared for Child • *Referred Child to FDLRS/Child Find • Repeat after 2 months • Repeat after 4 month • **Repeat yearly on 1st day of birthday month BEST PRACTICE FOR BROWARD PROVIDERS: br Providers should select “Referred Child to FDLRS/Child Find” *Broward and not “Referral” to record where the referral has been sent. 5. IfPractice the Provider’s Program Administrator has created tasks, **Best is to set a task to rescreen annually on theany 1st custom day of the they will appear at This the bottom the list task types when adding child’s birthday month. task willofmeet theofrequirement to screen currently enrolled children 45 days within their birthdate. To add a task: 1. 2. 3. 4. Select Screening Management from the top navigation menu. Select the “Add Task” Quick Link. Enter in the following information (items marked with an asterisk [*] are required Click “Save”. This task will appear in the Tasks Due section. NOTE: If you select a screening task, you will need to also select the questionnaire type and interval (ASQ Online will recommend an interval). You can also enter a “Returned date” if you are creating this screening task after the screening has been completed, for tracking and reporting purposes. 7.4.2 Tasks Due “Tasks Due” refers to non-screening tasks that have been scheduled but have not yet been completed. You’ll notice a number next to the Tasks Due Quick Link, which indicates how many tasks have been scheduled but not yet completed. A task will be marked “complete” when you have generated a corresponding packet. Selecting the “Tasks Due” Quick Link will take you to a list of all tasks that are due. Search for tasks due by due date, child date of birth (DOB), child name, child ID, Alt. ID, the task type, the previous questionnaire, and the previous result (the result of their last questionnaire). Edit the task by clicking the “Edit” icon to the right of the task. 62 To create a packet of task materials to be mailed to the caregiver, click the link at the top of the page which states: “To create a packet to mail out materials for tasks due, click here to go to the View/Print Packets page”. NOTE: The “Tasks Due” section is only a list of tasks that are due. In order to complete the task, you will have to go to the View/Print Packets page and generate the materials associated with that task. 7.4.3 Tasks Completed “Tasks Completed” refers to any scheduled tasks that have been completed. Generating a corresponding packet for the task will automatically complete the task in the ASQ Online system. Selecting the “Tasks Completed” Quick Link will take you to a list of all tasks that have been completed. You can edit any task from this page by clicking the “Edit” icon to the right of the task. 7.5 Packets Packets are groups of documents that can be printed and mailed together to aid in the screening management of your program. There are three types of packets for Providers in ASQ Online: System Packets, Program Packets, and My Packets. • System packets are packets provided by the ASQ Online system. • Program packets are packets that a Program Administrator can create and customize, and can be generated and downloaded by all users in the program. • My Packets are packets that only you as a Provider can create, customize, and generate. No other system users will be able to view or generate any packets that you create. 7.5.1 View/Print Packets The View/Print Packets page is where you will go to generate and download packets. Once a packet is generated, its corresponding task will be completed in the system. You can view all children that you have generated a packet for by clicking the “Child List” link next to the packet. Clicking the “View/Print Packets” Quick Link on the Screening Management page will take you to a list of all system packets, program packets, and personal packets (“My Packets”). The first five packets will be listed, including the name of the packet, the questionnaire type (if applicable), and options to view the packet, generate the packet, and view the child list. 63 Use the “Next” button below the list of packets to scroll through all system and program packets available. 7.5.2 System Packets System packets are packets provided by the ASQ Online system. These packets include groups of documents to aid you in completing the associated task. You can’t edit system packets; if you wish to customize a packet for your children and caregivers, you can create a personal packet (“My Packets”). 7.5.3 Program Packets Program Administrators can create customized program packets, which you can generate and download as a Provider. Program packets can include any system documents as well as any program documents created by the Program Administrator. Once a program packet is created, it will appear in the Program Packets section on the View/Print Packets page. From there, you can view the packet, generate the packet, and view a list of children for whom the packet has been generated. 7.5.4 My Packets As a Provider, you can create customized packets to generate and download for the children to whom you are assigned. Personal packets can include system documents, program documents, and any personal documents that you have created. From there, you can view the packet, generate the packet, edit or delete the packet, and view a list of children for whom the packet has been generated. The Early Learning Coalition has developed packets to meet some of the Provider’s needs. These packets can be customized with the Provider’s logo and saved. The Program Administrator should create these packets, which will be found under Program Packets, and are recommended for use. To create a program packet: 1. Select Screening Management from the top navigation menu. 2. Select the “Create Packet” Quick Link. 3. Enter a name for the packet in the “Packet name” field. 4. Select the documents to add to the packet, from the Available Documents section. • ASQ - 3 Welcome and Initial Screening Packet – Parent Welcome Letter, ASQ-3 English – What is ASQ-3, English – Parent Questionnaire Cover Letter, ASQ - 3 English 64 • • • • • • • • • ASQ - 3 Typical Follow-up Packet – Parent Feedback Letter: Typical, ASQ-3 English – ASQ-3 Parent Conference Sheet, English – Intervention Activities ASQ - 3 Monitoring Packet – Parent Feedback Letter: Monitoring, ASQ-3 English – ASQ-3 Parent Conference Sheet, English – Intervention Activities ASQ - 3 Follow-up Packet for Family of Child Referred to FDLRS/Child Find – Parent Feedback Letter: Monitoring, ASQ-3 English – ASQ-3 Parent Conference Sheet, English – Intervention Activities ASQ - 3 Rescreening Packet – Parent Questionnaire Cover Letter – ASQ-3 English Questionnaire ASQ:SE Welcome and Initial Screening Packet – Parent Welcome Letter, ASQ:SE English – Parent Questionnaire Cover Letter, ASQ:SE English ASQ:SE Typical Follow-up Packet – Parent Feedback Letter: Typical, ASQ-3 English – Intervention Activities ASQ:SE Monitoring Packet – Parent Feedback Letter: Monitoring, ASQ-3 English – Intervention Activities ASQ:SE Follow-up Packet for Family of Child Referred to FDLRS/Child Find – Parent Feedback Letter: Monitoring, ASQ-3 English – Intervention Activities ASQ:SE Rescreening Packet – Parent Questionnaire Cover Letter – ASQ-3 English Questionnaire Best Practice for the Development of Packets Best Practice for the Development of Packets It is recommended that the Program Administrator creates a packet of documents for each developmental screening questionnaire by age and saves them in the 2. System. Documents: The Provider can View/Print and Create Documents which can Online • Providers will not have to develop these packets. • These packets will be available to the Provider to give to a caregiver once the 7.5.4.1 Creating a Packet screening results have been interpreted. 65 To create a packet, you will name the packet, and add the documents. You can search for available documents to add to the packet by document name, questionnaire type, category (Screening, Follow-up, or Other), and document type (System, Program, or Personal). To create a personal packet: 1. 2. 3. 4. Select Screening Management from the top navigation menu. Select the “Create Packet” Quick Link. Enter a name for the packet in the “Packet name” field. Select the documents to add to the packet, from the Available Documents section. a. You can search for documents by document name, questionnaire type, category, and document type. To search within a column, begin typing the name of what you are searching for. ASQ Online will automatically pull up any documents fitting the information you have typed in the search field. b. Click the “Add” link to the right of the document that you wish to add. You can add as many documents as you would like to your personal packet. 5. Once you have added the documents to the packet, you can change the order in which they will appear when the packet is generated, by dragging the documents. To drag the documents, click and hold the arrow icon to the left of the document, and move the document to the desired position. 6. If you would like to remove a document from the packet, click the “Remove” link to the right of the document. 7. When finished, click the “Create” button. This packet will appear under “Program Packets” on the View/Print Packets page. 7.5.5 Generating & Downloading Packets Generating a packet will serve two purposes. First, it will automatically complete the task associated with that packet. Second, it will allow you to download the packet as a PDF file, so that you can print and mail it to the caregiver. To generate a packet: 1. 2. 3. 4. Select Screening Management from the top navigation menu. Click the “View/Print Packets” Quick Link. Locate the packet you would like to generate and click the Generate link. Locate the child for whom you would like to generate this packet and click the “Download” link. 5. When the packet has finished generating, click the “Download File” link. You can then open the PDF file or save it to your computer. When you click the Generate link next to a packet, you will be taken to a page where you select the child or children for whom you would like to generate this 66 packet. You will see four tabs and multiple search fields to assist you in quickly and easily locating the children for whom you are generating the packet. The four tabs are: Screenings Due, Tasks Due, Child Profiles, and Completed Screenings. 7.5.6 Viewing the Child List If you wish to see a list of all children for whom you have generated a packet, you can click the “Child List” link to the right of that packet. The Child List page will show you each child for whom that packet has been generated, the child’s date of birth, and the date the packet was generated for that child. You can also search for specific children by date generated, child DOB, child name, child ID, and child alt. ID. 7.6 Documents ASQ Online provides a number of documents to aid you in the screening management of your program. These documents include the forms found in the ASQ User’s Guides, as well as other system documents, program documents that the Program Administrator has created, and personal documents that you have created as a Provider. Documents are what make up packets, but you can also download and print any document on its own, without generating a packet. There are 3 categories of documents: Screening, Follow-up, and Other. • Screening documents are all documents that are associated with the screening of children. • Follow-up documents are all documents intended to be used when following up on a screening with the child’s caregiver. • Other documents are additional documents that don’t fall into either Screening or Follow-up categories, but are still helpful to your program. 7.6.1 View/Print Documents The View/Print Documents page lists all the system, program, and personal documents, in alphabetical order. The documents list includes the name, description of the document (for program and personal documents only), the questionnaire type associated with the document (if applicable), the category (Screening, Follow-up, or Other), and the document type (System, Program, or Personal). 67 Each document will also include a “Download” link, so that you can generate the document as a PDF file and print it or save it to your computer. Any documents that contain dynamic content will have a “Download Preview” link to the right of the document. Clicking this will allow you to see what the document will look like when it is generated with child, caregiver, or program information within a packet, by using fake data as an example. (Section 7.6.2.1 – Dynamic Content – Provider User Manual - pages 67 - 69) To access the View/Print Documents page: 1. Select Screening Management from the top navigation menu. 2. Select the “View/Print Documents” Quick Link. 3. Locate the system document you would like to download. (You can easily narrow down your search to only system documents by selecting “System” from the “Document Type” drop-down menu.) 4. Click the Download link to the right of the document. 5. A pop-up window will appear and you can choose to open the PDF file or save it to your computer. NOTE: If the document includes dynamic content, it will have a” Download Preview” link to the right of the document. This will allow you to preview what the document will look like when populated with child, caregiver, and program data. But the download preview will only provide you with fake data. You would need to generate this document as part of a packet in order to have it populate with information from your program. 7.6.2 Creating Documents As a Provider, you can create your own documents that you can print or attach to any personal packets. Any documents that you create cannot be viewed or downloaded by anyone else in the system; you are the only user with access to personal documents. To create a personal document: 1. 2. 3. 4. 5. Select Screening Management from the top navigation menu. Select the “Create Document” Quick Link. Enter the title of your document in the “Name” field. Enter an optional description of this document in the “Description” field. Select the document category from the drop-down menu. Your options are Screening, Follow-up, or Other. 6. Select a questionnaire type from the drop-down menu (ASQ-3 English/Spanish, ASQ:SE English/Spanish). 7. In the “Content” field, enter the text of your document, and format it to your liking. 8. If you wish to add dynamic content, click the icon of the baby and choose the 68 dynamic content. (Section 7.6.2.1 - Dynamic Content - Provider User Manual pages 67 - 69.) 9. When finished, click the “Submit” button. This document will now be included on the View/Print documents page and will be listed as a Personal document. You can add this document to any personal packet that you have created. 8 Family Access Family Access is an online questionnaire completion system which allows programs to create websites where they can direct caregivers to complete screenings for their children online. Once accepted by you, the screens that were entered via Family Access automatically become part of your program screens. There is no additional data entry necessary to enter screening results. Packets and Documents can be sent to the caregiver via this website as well using the “Shared Family Access” page (Section 8.73 - “Using the Shared Family Access Page” - Provider User Manual - page 77). (Section 8 - Provider User Manual - for details regarding Family Access). 9 Reports Not only does ASQ Online have powerful features that make it easy to record, score, and track ASQ screenings, it also enables users to quickly generate reports for individual children, individual programs, and/or groups of children across multiple programs. As a Provider, there are a handful of reports that you can generate, pulling together aggregate data from one or all of the children assigned to you. The following reports are available to you within the Reports page: • Screening Tasks Status, by Date (UPDATED – formerly Screening Responses Report) • Screening Status Summary (UPDATED – formerly ASQ-3 & ASQ:SE Screenings Completed, by Child Reports) • ASQ-3 & ASQ:SE Screening Scores (UPDATED – formerly ASQ-3 & ASQ:SE Screening Results Reports) • ASQ-3 & ASQ:SE Screening Results, by Child • ASQ-3 & ASQ:SE Aggregate Results, by Category The Provider can generate Reports for individual children and individual programs. This feature pulls together the data in the ASQ Online System in report form from one or all 69 of the children assigned to the Provider. (See Section 9 “Reports” - Provider User Manual - pages 79 - 84). To generate a report: 1. 2. 3. 4. Go to the Navigation Bar on the top of each screen, and click on Reports Two tabs appear. Click on the “Available Reports” Tab to view the list of reports. Click on the “Recent Reports” Tab to see Recent Reports. The Recent Reports section will list all reports that you have generated within the last two weeks. This allows you to see the Provider’s most recently generated reports without having to select the search criteria and generate the report again. 5. Click “Generate Report”. 6. Three report generation options will appear: Download PDF, Download CSV, or Preview Report. 7. The page will display a “report status” while the report is being processed. 9.9 Printing Reports When you generate a report as a PDF file, all reports will be 8.5 x 14. In order to print the report on 8.5 x 11 paper: 1. After generating the report and opening as a PDF (in Adobe Reader), select “File” -> “Print.” 2. In the Page Handling section, select the “Fit to Printable Area” option from the Page Scaling drop-down menu. 3. Click the “OK” button. Best Practices for Broward Early Childhood Providers: A parent and teacher conference should occur when the results of a screening are obtained. See the section below and use the information as a guide. Caregiver and Provider Conference “Information Summary” : 1. Print two copies of the “Information Summary” for the ASQ-3 and the ASQ: SE for each child from this page by clicking the “Print Summary” link. a. Go to Screening Management on the Navigation Bar b. Go the “Screenings” tab 70 c. Find a child’s name and look to the right d. Find “Print Summary Sheet” heading, and click on the “Print” heading. The “Information Summary” appears. e. Go to “Quick Links”, and click on “Print Information Summary” to print. 2. Place one copy of the “Information Summary” for the ASQ - 3 and for the ASQ:SE in each child’s file. 3. The second copy of the “Information Summary” for the ASQ-3 and for the ASQ:SE should be shared with the caregiver at the conference held to discuss the screening results. Intervention Activities: 1. Identify the appropriate “Intervention Activities” for a child. a. Go to Screening Management on the Navigation Bar. b. Go to Go to “Quick Links”, and click on “View/Print Documents” 1. Go to page 2 of Documents to locate the “Intervention Activities” 2. Click on “Intervention Activities” and select the Interval for the child (age range). 2. The “Intervention Activities” sheet appears 3. Print two copies of the appropriate “Intervention Activities” for the child based on age for both the ASQ - 3 and the ASQ:SE. 4. Place one copy of the “Intervention Activities” for the ASQ - 3 and for the ASQ:SE in each child’s file. 5. The second copy of the “Intervention Activities” for the ASQ-3 and for the ASQ:SE should be shared with the caregiver at the conference held to discuss the screening results. 6. Use this information to develop lesson plans that will meet the needs of the child. The Conference: 1. The conference should occur once the Provider has interpreted the results. a. Based on the information in the ASQ - 3 Score Interpretation and Recommendations for Follow-up Diagram (See Attachment 4) to determine the tasks needed for each child b. Based on the information in the document entitled ASQ -3 Action Steps Based on the Screening Results (See Attachment 5) to determine the tasks needed for each child c. Based on the information in the ASQ:SE Score Interpretation and Recommendations for Follow-up Diagram (See Attachment 6) to determine the tasks needed for each child 71 d. Based on the information in the document entitled ASQ:SE Action Steps Based on the Screening Results (See Attachment 7) to determine the tasks needed for each child 2. The conference should occur once the Provider has selected the appropriate “Intervention Activities”. 3. The Provider should share the screening results, tasks needed, and the Intervention Activities with the Caregiver in a way that the Caregiver can understand and answer all the Caregiver’s questions. 10 Referral: If a score indicates that a referral needs to be made for a child to FDLRS/Child Find, the Provider must follow the procedures developed by Broward County to make a referral to FDLRS/Child Find and share this information with the caregiver at a conference. (See FDLRS/Child Find Referral Form Attachment 8) *If a Provider or caregiver identifies a vision or hearing concern, refer the caregiver to his/her pediatrician. *If the Provider or caregiver identifies an issue with a child’s behavior, the Provider should call the Warm Line Services at Family Central at 954-724-7540. 1. The Provider should complete the FDLRS/Child Find Referral Form and obtain the signature of the caregiver at the caregiver - teacher conference (See Attachment 8). 2. The Provider will fax the “FDLRS/ Child Find Referral Form” and the appropriate “Information Summary” to FDLRS/Child Find within a week. 3. The Provider must then set a Task for the child in the Online System Referred Child to FDLRS/Child Find. 4. Follow the steps in 7.4.1 on pages 20 - 22 of this Protocol. 72 Part IV: Attachments 6301 NW 5th Way, Suite 3400 • Fort Lauderdale, FL 33309 • (954) 377-2188 • Fax (954) 377-2192 • www.elcbroward.org 73 Attachment 1 Glossary of Important Terms and Definitions ASQ Enterprise: An ASQ Online annual subscription and account type for multisite programs. ASQ Family Access: An ASQ Online annual subscription that provides access to an online questionnaire completion system. ASQ Family Access links to an ASQ Enterprise account, allowing programs to create a secure, private webpage where caregivers can complete screenings for children online. ASQ Online: A web-based data management system for the Ages & Stages Questionnaires that makes it easier for ASQ users to manage and track child data. ASQ-3: Abbreviation for the Ages & Stages Questionnaires®, a developmental system that examines a child’s skills across developmental areas: Communication, Gross Motor, Fine Motor, Problem Solving, Personal-Social for children from birth to 5 ½ years ASQ: SE: Abbreviation for the Ages & Stages Questionnaires®: Social-Emotional, a screening tool that examines social-emotional behaviors in young children. ASQ: SE is a social-emotional screening system for children from birth to 5 ½ years. Below the Cutoff: An ASQ score in any developmental area that falls below the statistically derived referral cutoff point. Caregiver: A parent, grandparent, foster-parent, or other person who lives with the child and is responsible for the care of the child. Caregiver Profile: A page providing all the details for a specific caregiver, including the caregiver’s demographic information, profile notes, and associated Child Profiles. Child ID: A unique identification number automatically generated by the ASQ Online system for each child. These ID numbers can help differentiate between children with the same or similar last names, and can also help ensure confidentiality when necessary. Attachment 1 Child Profile: A page providing all the details for a specific child, including the child’s demographic information, screenings, events, profile notes, Caregiver Profiles, and assigned Provider and Reviewer profiles. Child Profile notes: A section of a child’s ASQ Online profile, where the Program Administrators and Providers can add and store notes regarding the child. Cutoff Point: Also known as referral cutoff point. A derived score that indicates when a child’s performance is suspect and referral for further assessment is appropriate. Developmental assessment: An assessment that establishes baseline, or entry level of measurement, of a child’s skills across developmental areas (e.g., Communication, Gross Motor, Fine Motor, Problem Solving, Personal-Social). Documents: The forms that are provided by ASQ Online as well as any documents created for your program by the Program Administrator and any documents that you have created as a Provider. Form: An individual document that may assist in the management of your screening program. Form template: An existing individual document that you may want to include in a campaign. Identified: Also known as screened. Descriptive of children whose score on a screening tool such as ASQ-3 or ASQ: SE, falls below the cutoff score, and who are identified as needing further assessment. Information Summary Sheet: A summary of a questionnaire that is generated once a screening is finalized. This summary shows total scores for each developmental area that is evaluated, and indicates where the scores fall in relation to the cutoff scores for referral and monitoring. Information Summary Sheets for ASQ-3 questionnaires also include the caregiver’s responses to the Overall questions, and a grid which records individual item responses. Attachment 1 Keycode: A unique number that comes in each box of ASQ-3 and ASQ: SE questionnaires that allow the user to “unlock” those paper questionnaires and all their corresponding components (forms, documents and packets) within the ASQ Online system. (Previously set up by the Early Learning Coalition staff for the early childhood programs) Long Form: A data entry option within ASQ Online where Providers enter the results of completed ASQ-3 or ASQ: SE screenings. The Long Form is similar to the paper versions of the questionnaires, containing all screenings items and text boxes in which a caregiver’s comments can be entered. Monitoring: Periodic developmental screening of young children. My Alerts: A section of a Program Administrator or Provider profile in which a user can set up personal alert messages regarding various ASQ Online functions, which can be sent via text message or email. Packets: A group of documents that can be organized and printed together to mail to the caregiver for screening and follow-up actions. Program Administrator (ASQ Enterprise): The ASQ Online user role assigned to the child care facility owner or designee who is responsible for managing an individual program within an ASQ Enterprise account Provider: The ASQ Online user role assigned to a teacher who is responsible for managing the screening and referral of children to which they are assigned. Referral: The outcome when a child’s score on a screening measure (such as ASQ 3 or ASQ: SE) or when parent’s/guardian’s concerns indicate that a follow up to a community agency for further assessment is warranted. Screening: A brief procedure to determine whether a child requires further and more comprehensive assessment. ASQ screenings consist of brief questionnaires that caregivers complete for a child. A screening will be marked as “Complete” in a child’s online profile only once all questionnaire responses have been entered and the Provider has finalized the screening. Until then, Providers can select “Save in Progress” and the screening will be saved as “Incomplete” in the child’s profile. Attachment 1 Screening Management: This section assists with scheduling screening and follow-up tasks and mailing materials to caregivers. Short Form: A quick data entry option within ASQ Online where Providers enter in the results of completed ASQ-3 and/or ASQ: SE screenings. The Short Form includes only the item numbers from the questionnaires, and is intended for efficient and easy data entry. Tasks: Schedule a screening or schedule non screening tasks (such as follow-up actions) for the children to whom you are assigned. Task reminder: A reminder of when a task is due. Program Administrators and Providers can choose to have the task reminder sent via text message, email, or both. Attachment 2 ASQ ONLINE PROGRAM ADMINISTRATOR USER MANUAL SUMMARY OF EACH SECTION 1 Introduction 1.1 Welcome to ASQ Online ASQ Online is a web-based management system for the Ages and Stages Questionnaires that makes it easier for ASQ users to manage and track child data. ASQ Online has all the integrity of ASQ-3 and ASQ:SE plus the convenience of automated scoring, and a powerful functionality that transforms ASQ findings into child screening reports. 1.2 About this User Manual Within this manual, you will find basic information on how to create users, enter child records, create tasks and print materials for the screening management of your program, and generate program reports. You will also find detailed instructions on how to navigate through each area of ASQ Online. This manual also provides information on additional training, professional development, online support and help, and several other resources that will prove very useful to you as a Program Administrator. 2 Navigating ASQ Online is set up so that you can easily navigate through the system using the top navigation menu and the Quick Links. PART I: SETTING UP YOUR PROGRAM Part I of this manual is designed to help you set up your program for use. If you are a new ASQ Online user you will want to pay special attention to the instructions that follow, since you will need to set up your program before any screening information can be entered. 3 ASQ Online for Program Administrators When you are logged in to ASQ Online as a Program Administrator, the different pages of the site are specifically designed for the Program Administrator role. 4 Managing Your Program The Program page of ASQ Online is where you will go to set up your program and manage all aspects of your program. It is within the Program page of ASQ Online that you can view and edit your program details, add all program users, and view and add program notes and files, as well as custom tasks. Attachment 2 5 Screening Preferences The screening preferences feature provides Program Administrators the ability to set automatic screening tasks for Child Profiles, so that children are screened per the screening standards of the program. Program Administrators can set preferences so that screening tasks are automatically created for Child Profiles when: • The child enters the program • The child reaches a certain age • The child is age-appropriate for the program’s recommended screening intervals • The child needs to be re-screened based on the prior screening scores 6 Managing Child Profiles The Child Profiles page contains a list of Child Profiles that you, or other users, have added to the system. It also includes a section to search for Child Profiles. Each child has their own individual Child Profile page. These pages include Caregiver Profiles, and all screenings that have been entered into ASQ Online or accepted through Family Access for a child. As Program Administrator, you can create Child and Caregiver Profiles, assign users access to Child Profiles, and view screenings that have been entered by Providers. (As Program Administrator, you do not have the ability to enter child screenings for children in your program, as only a Provider has access to that feature.) 7 Import/Export As Program Administrator, you have the ability to import child, caregiver, and screening data directly into your ASQ Online program, as well as export child, caregiver, and screening data from your program. You can import data using Data Templates available directly from ASQ Online. The Data Templates can also be used to update existing child, caregiver, and screening data. PART II: MANAGING YOUR SCREENING PROGRAM ASQ Online is referred to as an “online management system” for ASQ because instead of managing the administration of ASQ questionnaires, the results, and any follow-up decisions you make on paper, ASQ Online allows you to manage all components of ASQ within the system itself. The online management system that is ASQ Online helps you capture and perform a process. The central part of this process is conducting an ASQ screening. ASQ Online helps you prepare for and conduct a screening, gives you access to resources you can use to interpret the screening results and make a follow-up decision, and allows you to schedule follow-up tasks (including sending results to parents or physicians and scheduling another screening in the appropriate time frame). Attachment 2 By using the system to its fullest potential, the screening and referral process becomes seamless, and you are left with an electronic record of all actions you’ve taken and decisions you’ve made pertaining to any one child or group of children in your program. 8 Program Screenings The Screenings page can be accessed via your Home page or the Screening Management page. The Screenings page provides you with a complete list of all screenings in your program and lists the child’s name, the questionnaire, the interval, the status, whether or not this screening came in through Family Access, the screening date, the name of the Provider who entered the screening, the name of the caregiver who completed the screening, and whether this screening was marked “Concern.” You can use this page to quickly and easily locate children and their screenings, assign any pending Family Access screenings to a Provider, view the questionnaire in its entirety, and print the Information Summary Sheet for a child. 9 Screening Management The Screening Management page of ASQ Online is where you can schedule and manage all of the screening and follow-up tasks for the children in your program. From this page, Program Administrators can: • Schedule a screening or non-screening task. • View a list of screenings due to be mailed to caregivers; screenings that have been mailed to caregivers but not yet returned; and scheduled screening tasks that have been completed. • View a list of non-screening tasks that are due, and tasks that have been Completed . • View and print system-created packets, and create program packets for all users in your program. • View and print documents provided by the ASQ Online system, as well as create program documents for all users in your program. 10 Family Access Family Access is an online questionnaire completion system – an additional module that is seamlessly integrated with your ASQ Enterprise or Pro account for an additional subscription fee. Family Access allows programs to create websites where they can direct caregivers to complete screenings for their children online. Once accepted by you, the screens that were entered via Family Access automatically become part of your program screens. There is no additional data entry necessary to enter screening results. 11 Reports Not only does ASQ Online have powerful features that make it easy to record, score, and track ASQ screenings, it also enables you and your users to quickly generate reports for individual children, individual programs, and/or groups of children across multiple programs. Attachment 2 As Program Administrator, there are multiple reports you can generate, pulling together aggregate data from your program. 13 Additional Support There are several online help and support resources available to you and the registered users of you ASQ Online account. User manuals, FAQs, and self-guided online tutorials are always accessible within the Help section of your ASQ Online account. To view the support resources available, select the Help Quick Link from any page within ASQ Online. 14 Contact Information Technical Support: 1-866-404-9853 Sales and Customer Service: 1-866-638-3775 or [email protected] ASQ Online Implementation Manager: 1-866-638-3775 or [email protected] Training: 1-800-638-2775 or [email protected] Attachment 3 ASQ ONLINE PROVIDER USER MANUAL SUMMARY OF EACH SECTION 1 Introduction 1.1 Welcome to ASQ Online ASQ Online is a web-based data management system for the Ages & Stages Questionnaires® that makes it easier for ASQ users to manage and track child data. 1.2 About this User Manual Within this manual you will find basic information on how to enter child records, enter screenings, schedule tasks and print materials for the screening management of your children, and generate reports. 2 Navigating ASQ Online is set up so that you can easily navigate through the system using the top navigation menu and the Quick Links. 3 ASQ Online for Providers When you are logged in to ASQ Online as a Provider, the different pages of the site are specifically designed for the Provider role. 4 Program It is within the Program page of ASQ Online that you can view your program details and a list of all users within your program. 5 Managing Child Profiles The Child Profiles page contains a list of all Child Profiles that you have added to the system, or that have been assigned to you. Each child has their own individual Child Profile page. A child’s profile page includes: the child’s profile details; the child’s screenings; the child’s tasks; notes pertaining to the child; the child’s caregivers; a list of the child’s Providers and Reviewers; and, if applicable, the child’s transfer history. As a Provider, you can create Child and Caregiver Profiles, enter screening results, and add tasks and notes for the child. Attachment 3 6 Child Screens As a Provider, you have the ability to enter screening results for the children to whom you are assigned, as well as view, print, and delete screenings. You can add screenings from a child’s profile page, and you can manage screenings from the child’s profile page or the Screenings page. 7 Screening Management The Screening Management page of ASQ Online is where you can schedule and manage all of the screening and follow-up tasks for the children to whom you are assigned. From this page, Providers can: • Schedule a screening or non-screening task. • View a list of screenings due to be mailed to caregivers; screenings that have been mailed to caregivers but not yet returned; and scheduled screening tasks that have been completed. • View a list of non-screening tasks that are due, and tasks that have been completed. • View and print system-created packets, and view and print program packets created by your Program Administrator. • Create your own packets to send to caregivers of children to whom you are assigned. • View and print documents provided by the ASQ Online system, view and print program documents created by your Program Administrator, and view, print, and create personal documents. 8 Family Access Family Access is an online questionnaire completion system - an additional module that is seamlessly integrated with your ASQ Enterprise or Pro account for an additional subscription fee. 9 Reports Not only does ASQ Online have powerful features that make it easy to record, score, and track ASQ screenings, it also enables users to quickly generate reports for individual children, individual programs, and/or groups of children across multiple programs. Attachment 3 10 Username & Password Management For security reasons, you should never share your username and/or password with anyone. Should a professional at your organization need to use ASQ Online or access ASQ data, the Program Administrator should create a profile and username for them. 11 Additional Support There are several online help and support resources available to you and the registered users of your ASQ Online account. User manuals, FAQs, and selfguided online tutorials are always accessible within the Help section of your ASQ Online account. To view the support resources available, select the Help Quick Link from any page within ASQ Online. 12 Contact Information Technical Support: 1-866-404-9853 or click here. Sales and Customer Service: 1-866-638-3775 or [email protected] ASQ Online Implementation Manager: 1-866-638-3775 or [email protected] Training: 1-800-638-2775 or [email protected] Attachment 4 ASQ - 3 SCORE INTERPRETATION AND RECOMMENDATIONS FOR FOLLOW-UP DIAGRAM The ASQ - 3 Information Summary provides scores in 5 areas: Communication, Gross Motor, Fine Motor, Problem Solving, and Personal-Social. The scores in each area inform the Provider and parent/guardian of the status of the child regarding the child’s development in one of three ways: *Child’s Development appears to be on schedule; *Provide learning activities and monitor as child’s score is close to the cutoff. *Further assessment with a professional may be needed as the child’s score is below the cutoff. WHITE AREA GRAY AREA BLACK AREA One or more black areas RESCREEN ANNUALLY Provider uses “Intervention Activities” included in ASQ Online System to develop lesson plans to meet the specific needs of each child and gives a copy of the “Intervention Activities” to the parent so he/she can work with the child at home MONITOR Provider uses “Intervention Activities” included in ASQ Online System to develop lesson plans to meet the specific needs of each child and gives a copy of the “Intervention Activities” to the parent so he/she can work with the child at home *REFER For Evaluation to FDLRS/Child Find Provider uses “Intervention Activities” included in ASQ Online System to develop lesson plans to meet the specific needs of each child and gives a copy of the “Intervention Activities” to the parent so he/she can work with the child at home RESCREEN - can rescreen as needed Not Eligible Eligible Send Referral along with copies of the Information Summary for ASQ-3 and ASQ:SE FAX the FDLRS/CHILD FIND Referral Form to 754-321-7217 to make a referral Attachment 5 ASQ - 3 ACTION STEPS BASED ON THE SCREENING RESULTS Review the “Information Summary” Sheet to interpret the results. Then use this information to guide your “NEXT STEPS” If the child’s scores fall in the white area, it is above the cut-off and the child’s development appears to be on schedule. WHITE AREA 1. Schedule an annual rescreen based on the first day of the month of the child’s birthday the following year. 2. Provider schedules a conference with the parent/guardian - share the results of the “Information Summary” sheet for the ASQ - 3 and/or ASQ:SE. Provider prints two copies of the “Information Summary” sheet/s. One copy is given to the parent at the conference. Set a “Task.” 3. Other copy of the “Information Summary sheet/s for the ASQ - 3 and the ASQ:SE is placed in the child’s file. 4. Provider prints two copies of the “Intervention Activities”. One copy is given to the parent/guardian at the conference to use at home with his/her child. (Located in Documents Section in the Screening Management Tab on the Navigation Bar). 5. Other copy of “Intervention Activities” is placed in child’s file and used to individualize curriculum activities for child. GRAY AREA 1. Provider continues to use “Intervention Activities” in classroom to individualize curriculum for this child. (Located in Documents Section in the Screening Management tab on the Navigation Bar) 2. Provider schedules a conference with the parent to share results of the “Information Summary” sheet for the ASQ - 3 and/or ASQ:SE. Provider prints two copies of “Information Summary” sheet/s. One copy is given to the parent at the conference. Set a “Task.” 3. Other copy of the “Information Summary” sheet/s for the ASQ -3 and the ASQ:SE is placed in child’s file. 4. Provider prints two copies of the “Intervention Activities”. One copy is given to the parent at the conference to use at home with his/her child. (Located in Documents Section in the Screening Management Tab on the Navigation Bar) 5. Other copy of the “Intervention Activities” is placed in child’s file and used to individualize curriculum for this child. 6. Rescreen according to the date of the next preprinted ASQ Questionnaire to monitor the child’s progress after using the “Intervention Activities” and reevaluate the “Information Summary” sheet/s based on the “ASQ Score Interpretation and Recommendations for Follow-up Diagram” and the “Action Steps Based On the Screening Results (See Attachments 3 and 4). Set a “Task”. z BLACK AREA 1. Further assessment with a professional is needed. 2. Follow steps 2 and 3 under “GRAY AREA” 3. Provider completes the “FDLRS/Child Find Referral Form” with the parent/guardian and has him/her sign the Form indicating permission to refer the child. 4. Provider faxes the “Information Summary” sheet/s and the “FDLRS/Child Find Referral Form” to FDLRS/Child Find and places the “FDLRS/Child Find Referral Form” in the child’s file. 5. Follow steps 4 and 5 under “GRAY AREA” 6. Provider continues to use “Intervention Activities” in the classroom to individualize curriculum for this child while awaiting FDLRS/Child Find results (could be months). 7. Provider may contact Warm-line Services Specialist for further assistance to ensure positive services for Attachment 6 ASQ:SE SCORE INTERPRETATION AND RECOMMENDATIONS FOR FOLLOW-UP DIAGRAM The ASQ:SE total score informs the Provider and parent/guardian of the status of the child regarding the child’s development in one of two ways: “Child’s Development appears to be on schedule” or “Child is developing with concerns” BELOW CUTOFF SCORE ABOVE CUTOFF SCORE and MEETS THE REFERRAL CRITERIA Child’s Development appears to be on schedule RESCREEN ANNUALLY Provider uses “Intervention Activities” included in ASQ Online System to develop lesson plans to meet the specific needs of each child and gives a copy of the “Intervention Activities” to the parent so he/she can work with the child at home 1. Compare score with the cutoff score for the Developmental areas and for the total score 2. Consider the Referral Criteria in Step 4 on the Information Summary. • Setting /time factors • Development factors • Health factors • Family/cultural factors This enables the Provider to look at the assessment information in the context of other factors influencing a child’s life. Do Not Refer Refer for Mental Health Evaluation Send Referral along with copies of the Information Summary for ASQ-3 and ASQ:SE 3. If the Provider has completed steps 1 and 2 above and still has a concern, refer the child for a mental health evaluation. 4. Rescreen as needed. 5. Provider uses “Intervention Activities” included in ASQ Online System to develop lesson plans to meet the specific needs of each child and gives a copy of the “Intervention Activities” to the parent so he/she can work with the child at home FAX the FDLRS/CHILD FIND Referral Form to 754-321-7217 to make a referral Attachment 7 ASQ:SE ACTION STEPS BASED ON THE SCREENING RESULTS Review the “Information Summary” Sheet to interpret the results. Then use this information to guide your “NEXT STEPS” BELOW CUTOFF SCORE If the child’s scores fall below the Cutoff Score, the child’s development appears to be on schedule. 1. Schedule an annual rescreen based on the first day of the month of the child’s birthday the following year. 2. Provider schedules a conference with the parent to share the results of the “Information Summary” sheet for the ASQ:SE. Provider prints two copies of the “Information Summary” sheet. One copy is given to the parent at the conference. Set a “Task.” 3. Other copy of the “Information Summary sheet/s for the ASQ:SE is placed in the child’s file and used to individualize curriculum for this child. 4. Provider prints two copies of the “Intervention Activities”. One copy is given to the parent at the conference to use at home with his/her child. (Located in Documents Section in the Screening Management Tab on the Navigation Bar). 5. Other copy of “Intervention Activities” is placed in child’s file and used to individualize curriculum activities for this child. ABOVE THE CUTOFF SCORE AND MEETS THE REFERRAL CRITERIA If the child’s score falls above the Cutoff Score and the Referral Criteria on the ASQ:SE “Information Summary” sheet has been considered, the child may be developing with concerns. 1. Further assessment with a professional is needed. 2. Provider schedules a conference with the parent to share the results of the “Information Summary” sheet for the ASQ:SE. Provider prints two copies of the “Information Summary” sheet. One copy is given to the parent at the conference. Set a “Task.” 3. Other copy of the “Information Summary sheet/s for the ASQ:SE is placed in the child’s file and used to individualize curriculum for this child. 4. Provider completes the “FDLRS/Child Find Referral Form” with the parent and has him/her sign the Form indicating permission to refer the child. 5. Provider faxes the ASQ:SE “Information Summary” and the FDLRS/Child Find Referral Form” to FDLRS/Child Find and places the “FDLRS/Child Find Referral Form” in the child’s file. 6. Provider prints two copies of the “Intervention Activities”. One copy is given to the parent at the conference to use with his/her child. (Located in Documents Section in the Screening Management Tab on the Navigation Bar) Attachment 8 THE SCHOOL BOARD OF BROWARD COUNTY FLORIDA Exceptional Student Education and Support Services FDLRS / Child Find Referral Form Children Ages Birth to 5 Years Referred By: _________________________________________________ Director’s Name: ____________________________________________________ Child Care Facility Facility E-Mail: _________________________________________ Phone#: _____________________________ FAX #:______________________ ELC BROWARD Referring Source: ASQ3/SE Attached: Authorization to Refer: ___________________________________ Print Parent/Custodial Caregiver’s Name Y N ______________________________ Signature New __________________ Relationship Annual ___________________ Date: Child’s Name: DOB: Age: _________ Sex: M F Language Spoken at Home: Family receives SR financial assistance? Y N Parent Foster Parent Relative Guardian: Home Address: ______________________________________________________________________________________ Apt #: ________________________ City: State: Home Phone: 954/754 Work: 954/754 FL Zip: _________________________ Cell: 954/754 Alternative Contact Name: _________________________________________ Relationship: ________________________ Phone: __________________ Child Covered by Healthcare Insurance? Private: Y N Y N Medicaid #: ___________________________________ Name of Insurance Plan: ___________________________________________ Plan #: __________________________ Child is currently receiving protective service: Y Developmental / Educational Concerns: Behavioral Unknown N ChildNet Advocate: _____________________________________________ Communication Motor Self-Help Cognitive Social/Emotional Other: _______________________________________________________________________________________________ Currently Receiving Developmental Services? Behavioral Services Unknown Child has a Medical Diagnosis Y N Physical Therapy Speech Therapy Occupational Therapy Where? ___________________________________________________________________________ Y N What: _______________________________________________________________________ Comments FOR CHILD FIND USE ONLY FOR CDTC USE ONLY / PART C STATUS FDLRS #: ________________________________________________ Date of Referral: _________________________________________ Home School: _______________________________________________________________________ Screening Appointment: __________________________________ Part C Eligible Y N Date: _________________ Service Coordinator: _____________________________ Initial IFSP: ______________________________________ Transition IFSP Mtg.: ____________________________ F STATE OF FLORIDA, DEPARTMENT OF HEALTH CHILDREN’S MEDICAL SERVICES THE SCHOOL BOARD OF BROWARD COUNTY, FLORIDA Form Control # 2980 I Revised 9/13 Fax to FDLRS / Child Find at: 754 - 321 – 7217 Phone: 754 – 321 - 7200 Attachment 8 Directions for Use of FDLRS/Child Find Referral Form Referred By: ____Fill in Name of Your Facility__________________________ Director’s Name: _______Enter Director’s Name_________________ Child Care Facility Director’s Name Facility E-Mail: _____Facility E-mail ________________________ Phone#: ___Facility phone number_ FAX #: _Facility Fax Number___________ Referring Source: ELC BROWARD ASQ3/SE Attached: Authorization to Refer: ___Print Name of Parent or Guardian_____ Print Parent/Custodial Caregiver’s Name Y N Have Parent/Guardian Sign Here _ New Annual _Relationship to Child_ Signature Relationship Today’s Date_ Date: Child’s Name: _______Child’s Name________________________ DOB:_______Date of Birth________________ Age: __Child’s Age_______ Sex: MF Language Spoken at Home: ____ Home Language __________Family receives SR financial assistance? YN Complete accordingly Parent Foster Parent Relative Guardian:_____Check correct box & Put Name of Person here________________________________ Home Address: ______________Person’s Address_______________________________________________ Apt #:________Person’s Apartment #______ City: Person’s City _____________________________ State:__ FL_______ Zip_________Person’s Zip Code__________ Home Phone: 954/754_ Place Phone # Here ______ Work: 954/754___ Place Phone # Here Cell: 954/754 __ Place Phone # Here Alternative Contact Name: _Put Name of Adult Here_ Relationship: _Other Adult’s Relationship to Child Phone:_ Place Phone # Here____ Please fill in this information by checking the appropriate boxes and entering the names and numbers (for children under 3 ONLY) Child Covered by Healthcare Insurance? Y N Unknown Medicaid #: _______________________________ Private: Y N Name of Insurance Plan: ___________________________________________ Plan #: __________________________ If the child is receiving Protective Services, check the yes box below. To determine if a child is receiving Protective Services, locate the “Child Care Certificate” from Family Central. Find the “Eligibility” field. If a BG1 code is entered, check the yes box on this form, as the child is receiving Protective Services. Child is currently receiving Protective Service: Y N Child Net Advocate: __Add name if known_________________________ Please Fill in the Squares by Checking the Appropriate Boxes Developmental / Educational Concerns: Communication Motor Self-Help Cognitive Social/Emotional Behavioral Other: _______________________________________________________________________________________________ Please Fill in the Squares by Checking the Appropriate Boxes Currently Receiving Developmental Services? Behavioral Services Unknown Y N Physical Therapy Speech Therapy Occupational Therapy Where? ___Add if known___________________________________________________________ Please Fill in the Squares by Checking the Appropriate Boxes Child has a Medical Diagnosis Y N What?: _____ Add if known ______________________________________________________ Comments BOXES BELOW FOR OFFICE USE ONLY FOR FDLRS/CHILD FIND USE ONLY FOR CDTC USE ONLY / PART C STATUS FDLRS #: ________________________________________________ Date of Referral: _________________________________________ Part C Eligible Y N Date: _________________ Home School: _______________________________________________________________________ Service Coordinator: _____________________________ Screening Appointment: __________________________________ Initial IFSP: ______________________________________ Transition IFSP Mtg.: ____________________________ Fax This Completed Form with ASQ-3 and ASQ-SE Summary Sheets To: FDLRS/Child Find 754-321-7217 Phone: 754-321-7200 Attachment 9 Customized Provider Packets The Early Learning Coalition has developed packets to meet some of the Provider’s needs. These packets can be customized with the Provider’s logo and saved. They are found under Program Packets and are recommended for use. Go to Screening Management on the Top Navigation Menu. Click View/Print Packets in the Quick Links section. Look under Program Packets for the customized packets. • ASQ - 3 Welcome and Initial Screening Packet – – – • – ASQ - 3 Typical Follow-up Packet – – – • Parent Feedback Letter: Monitoring, ASQ-3 English Intervention Activities ASQ:SE Follow-up Packet for Family of Child Referred to FDLRS/Child Find – – • Parent Feedback Letter: Typical, ASQ-3 English Intervention Activities ASQ:SE Monitoring Packet – – • Parent Welcome Letter, ASQ-3 English Parent Questionnaire Cover Letter, ASQ-3 English What is ASQ-3, English ASQ-3 English Questionnaire ASQ:SE Typical Follow-up Packet – – • Parent Questionnaire Cover Letter ASQ-3 English Questionnaire ASQ:SE Welcome and Initial Screening Packet – – – – • Parent Feedback Letter: Monitoring, ASQ-3 English ASQ-3 Parent Conference Sheet, English Intervention Activities ASQ - 3 Rescreening Packet – – • Parent Feedback Letter: Monitoring, ASQ-3 English ASQ-3 Parent Conference Sheet, English Intervention Activities ASQ - 3 Follow-up Packet for Family of Child Referred to FDLRS/Child Find – – – • Parent Feedback Letter: Typical, ASQ-3 English ASQ-3 Parent Conference Sheet, English Intervention Activities ASQ - 3 Monitoring Packet – – – • Parent Welcome Letter, ASQ-3 English Parent Questionnaire Cover Letter, ASQ-3 English What is ASQ-3, English ASQ-3 English Questionnaire Parent Feedback Letter: Monitoring, ASQ-3 English Intervention Activities ASQ:SE Rescreening Packet – – Parent Questionnaire Cover Letter ASQ-3 English Questionnaire Attachment 10 Teachers and Directors… Serving Children with Special Needs? Call the Warm-Line 954-724-7540 Warm-Line Services for Childcare Providers The Inclusion Specialist at Family Central will give providers strategies to support the needs of children in their program with special needs, developmental disabilities, or challenging behaviors. Get Technical Assistance and Support With: ▪ Managing Challenging Behaviors ▪ Adapting the Classroom Environment ▪ Understanding Inclusion Laws and Regulations (ADA and IDEA) ▪ Understanding Individual Education Plans (IEP) & Family Service Plans (IFSP) ▪ Enhancing the Curriculum ▪ Child Development ▪ Information on Local Community Resources Sponsored by the Early Learning Coalition of Broward County, Inc. and the State of Florida, Office of Early Learning $244,596. (100%) Federal Funds Attachment 11 Equipment Needed From Internet Service Provider The I.S.P. you choose will come to your location and determine how to get internet service to you based on the Infrastructure of your (Telecom Room) or closet where your telephone system is located and they will provide you with the following item for lease based on the size of your organization and needs. Router. Gateway or (Door) to your Internal network and the Internet. Can be setup to allow or not allow certain kinds of traffic to and from your network. After the service provider confirms that you have Internet connectivity to your location that’s it and all they are responsible for. This is the DMARC or Demarcation point where the I.S.P’s responsibility ends and the Customers responsibility begins. So if you need to connect to the internet wirelessly it is up to the customer or customer’s IT Personnel to figure out a solution. Wireless access points can be found on the internet, Best Buy, and Wal-Mart. Attachment 12 Internet User's Equipment Checklist 1. Internet account with a connection provider. Often called 'ISP' (Internet Service Provider), these are usually phone or cable companies that charge you $20 to $80 a month for internet access. 2. Computer or mobile device with internet connection. PC or Macintosh is fine, as is an Apple or Android tablet. 3. Internet browser software. The most popular browsers are Chrome by Google, Internet Explorer by Microsoft, and Safari by Apple. Other browser choices include: Firefox, AOL, and Opera. 4. Anti-virus software. Symantec or MacAfee are common choices. Also many free alternatives on the internet. These will help to prevent a virus or scan and remove viruses if your computer becomes infected. 5. Email software. You can choose from Gmail, Outlook.com, Outlook 2013, or lesscommon email software’s like Eudora or GroupWise. Some of these email services are based online, while others require you to install them directly onto your computer. 6. Plug-In software. This is a big topic in its own right, but here are the mostcommon you will need: Java, Adobe Flash Player, Windows Media Player, and Apple Quick Time. For the most part, these plug-in products will prompt you automatically to install when you need them. 7. Optional: headset with microphone, stereo speakers, and webcam. These hardware devices will allow you to hear game sounds, do internet telephoning and video conferencing. 8. Optional: Anti-Spam software. 9. Optional: graphic software, so you can edit pictures you like. 10. Printer. Attachment 13 Internet Service Providers Broward County West Hollywood Internet Service Providers CenturyLink Business (866) 668-8393 Satellite Country (800) 570-6571 Satellite Star Internet – Hughes Net (877) 786-8409 World Communications Center Inc (480) 857-6656 All Bundles (877) 578-2154 TIME WARNER CABLE (877) 495-6635 Comcast XFINITY (877) 495-6637 The Word to the Word Organization (708) 748-7700 Hallandale Beach Internet Service Providers Benjamino Uniques (954) 454-8195 Mimosa (954) 367-3352 Attachment 13 CenturyLink Business (866) 668-8393 Satellite Country (800) 570-6571 Satellite Star Internet – Hughes Net (877) 786-8409 World Communications Center Inc (480) 857-6656 All Bundles (877) 578-2154 TIME WARNER CABLE (877) 495-6635 Comcast XFINITY (877) 495-6637 The Word to the Word Organization (708) 748-7700 Dania Internet Service Providers ZOOMRETURN.COM (954) 924-2231 Fred’s Legs Inc (954)646-1026 CenturyLink Business (866) 668-8393 Satellite Country (800) 570-6571 Satellite Star Internet – Hughes Net (877) 786-8409 Attachment 13 World Communications Center Inc (480) 857-6656 All Bundles (877) 578-2154 TIME WARNER CABLE (877) 495-6635 Comcast XFINITY (877) 495-6637 The Word to the Word Organization (708) 748-7700 Fort Lauderdale Internet Service Providers Digital Mojo-ATTUverse (888) 684-0683 DishNet (877) 678-8767 HughesNet Gen4 (877) 207-3761 Access High Speed Internet (877) 882-1448 Hostnet Broadband One (954) 739-4496 CenturyLink Business (866) 668-8393 Satellite Country (800) 570-6571 Satellite Star Internet – Hughes Net (877) 786-8409 Attachment 13 World Communications Center Inc (480) 857-6656 All Bundles (877) 578-2154 TIME WARNER CABLE (877) 495-6635 Comcast XFINITY (877) 495-6637 The Word to the Word Organization (708) 748-7700 Attachment 14 List of Computer Services Companies The following is a list of companies that offer everything from Cable installation to remotely logging in to your PC to fix any issues and onsite repair. A Plus Computer Medics 2900 Griffin Road Suite #1 Dania, Florida. 33312 (800)-864-9976 (954)-583-5414 http://www.apluscomputermedics.com/ ARK Solvers, Inc. http://www.arksolvers.com/ 1835 E Hallandale Beach Blvd Suite 701, Fort Lauderdale, FL 33309 (866)492-2085 Axis Network Cabling 3811 SW 47th Avenue #621 Davie, Florida 33314 (954)871-0113 http://www.axisnetworkcabling.com/ CompGuy USA 4300 N University Drive, Building F, Suite 101 Lauderhill, FL 33351 (954)495-4154 http://compguyusa.com/index.html Computer Remedy Man 100 N Andrews Ave, Fort Lauderdale, FL 33301 (954)684-0203 http://www.computerremedyman.com/ Fast-Teks 265 S Federal Hwy, Deerfield Beach, FL 33441 (954)942-8710 (954)946-5452 http://www.fastteks.com/northbrowardcounty/ Geeks on Site 6301 NW 5th Way #2400, Fort Lauderdale, FL (877) 929-6216 http://www.geeksonsite.com/ Attachment 14 IT Doctors http://itdoctors.com/broward-county_florida_laptop-repair.html 17021 West Dixie Highway Aventura, FL 33160 [email protected] Phone: 305-944-9404 Fax: 305-675-8082 PC Depot Inc. http://www.pc-depot.com/ 8004 NW 154 Street Suite 362 Miami Lakes, Florida 33016 Phone: (305) 644-1119 Fax: (786) 513-0579 Attachment 15 Websites with Information about Developmental Milestones 1. Center for Disease Control Learn the Signs – Act Early http://www.cdc.gov/ncbddd/actearly/milestones/index.html 2. Hallmark Developmental Milestones http://www.firstsigns.org/healthydev/milestones.htm 3. Developmental Milestones https://www.google.com/search?q=developmental+milestones&client=safari&hl=en&tb m=isch&tbo=u&source=univ&sa=X&ei=HmMAUujOCJP7yAHsxYCwDw&ved=0CDw QsAQ&biw=768&bih=928 4. March of Dimes http://www.marchofdimes.com/baby/what-is-normal-development.aspx 5. University of Michigan: Health System http://www.med.umich.edu/yourchild/topics/devmile.htm Attachment 16