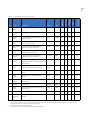
1
Enterprise Downloader
User Manual
Copyright
Copyright © 2006, GE Security Inc. All rights reserved.
This document may not be copied or otherwise reproduced, in whole or in part, except as
specifically permitted under US and international copyright law, without the prior written
consent from GE.
Document number/revision: 466-2243C (November 2006).
Disclaimer
THE INFORMATION IN THIS DOCUMENT IS SUBJECT TO CHANGE WITHOUT NOTICE. GE ASSUMES
NO RESPONSIBILITY FOR INACCURACIES OR OMISSIONS AND SPECIFICALLY DISCLAIMS ANY
LIABILITIES, LOSSES, OR RISKS, PERSONAL OR OTHERWISE, INCURRED AS A CONSEQUENCE,
DIRECTLY OR INDIRECTLY, OF THE USE OR APPLICATION OF ANY OF THE CONTENTS OF THIS
DOCUMENT. FOR THE LATEST DOCUMENTATION, CONTACT YOUR LOCAL SUPPLIER OR VISIT US
ONLINE AT WWW.GESECURITY.COM.
This publication may contain examples of screen captures and reports used in daily operations.
Examples may include fictitious names of individuals and companies. Any similarity to names
and addresses of actual businesses or persons is entirely coincidental.
Trademarks and patents
GE and the GE monogram are registered trademarks of General Electric.
Other trade names used in this document may be trademarks or registered trademarks of the
manufacturers or vendors of the respective products.
Software license agreement
IMPORTANT: This end-user license agreement (“Agreement”) is a legal agreement between
GE SECURITY and You. Read the following terms and conditions carefully before installing or
using this Software. This agreement provides a license from GE SECURITY to use the Software. It
also contains warranty information, disclaimers, and liability limitations. Installing and/or using
the Software confirms Your agreement to be bound by these terms and conditions. If You do not
agree with these terms and conditions, do not install or use the Software or, if already installed,
immediately cease all use of the Software and promptly uninstall all components of the
Software.
1. Definitions. The following definitions apply to this document:
a. “GE SECURITY”, with respect to title to or warranty of the Software, means GE Security Inc., a
Delaware corporation.
b. “Software” means Enterprise Downloader, the executable software or firmware programs and
accompanying documentation installed on the GE SECURITY products, plus any upgrades,
modified versions, updates, additions, and copies of the software furnished to Customer during the
term of the license granted herein.
c. “Documentation” means all associated media, printed materials, and electronic documentation
accompanying the Software.
d. “Licensed Product” means the Software and Documentation.
e. “Customer” means the person or organization, or parent or subsidiary thereof, who uses the
Software for its intended purposes, and excludes distributors, authorized resellers, value-added
resellers and original equipment manufacturers. Customer may be referred to as You or Your,
whether an individual or a business entity of any kind.
f. “Machine” means the computer, workstation, terminal, or other hardware product on which the
Software is installed.
2. License. All rights to and in the Licensed Product, including, but not limited to, copyrights,
patents, trademarks, and trade secrets, belong to GE SECURITY, and GE SECURITY retains title
to each copy of the Software. You agree that GE SECURITY at any time, upon reasonable
notice, may audit Your use of the Software for compliance with the terms and conditions of
this Agreement. Subject to the terms and conditions of this Agreement, GE SECURITY grants
You a nonexclusive license to use the Software, but only in the country where acquired,
provided that You agree to the following:
You may not:
a. transfer or distribute the Licensed Product to others, in electronic format or otherwise, and this
Agreement shall automatically terminate in the event of such a transfer or distribution;
b. sell, rent, lease, or sublicense the Software;
c. copy or modify the Licensed Product for any purpose, including for backup purposes.
iii
3. Term. This Agreement is effective until terminated. You may terminate this Agreement by
uninstalling all components of the Software from all Machines and returning the Software to
GE SECURITY. GE SECURITY may terminate this Agreement if You breach any of these terms
and conditions. Upon termination of this Agreement for any reason, You agree to uninstall all
components of the Software and return the Licensed Product to GE SECURITY. All provisions
of this Agreement relating to (i) disclaimer of warranties; (ii) limitations on liability, remedies,
and damages; and (iii) GE SECURITY’s proprietary rights, shall survive termination of this
Agreement.
4. Object code. The Software is delivered in object code only. You may not alter, merge,
modify, adapt, or translate the Software, nor decompile, disassemble, reverse-engineer, or
otherwise reduce the Software to a human-perceivable form, nor create derivative works or
programs based on the Software.
5. Limited warranty. GE SECURITY warrants that for one (1) year from the date of delivery of
the Licensed Product (Software Warranty Period), the functions contained in the Software
will be fit for their intended purpose as described in the applicable Documentation from
GE SECURITY, and will conform in all material respects to the specifications stated in such
Documentation. GE SECURITY does not warrant that the operation of the Software will be
uninterrupted or error-free. GE SECURITY does warrant that the media on which the
Software is furnished will be free from defects in materials and workmanship under normal
use for a period of thirty (30) days from the date of delivery (Media Warranty Period). Except
as specifically provided therein, any other software and any hardware furnished with or
accompanying the Software is not warranted by GE SECURITY.
Your exclusive remedy under this limited warranty for nonconforming Software shall be
repair or replacement of the Software, at the sole discretion of GE SECURITY. To obtain a
repair or replacement of nonconforming Software, contact GE SECURITY Customer Service
toll-free at 888-GESECURity or online at www.gesecurity.com during the Software Warranty
Period.
EXCEPT AS EXPRESSLY PROVIDED ABOVE, THE LICENSED PRODUCT IS PROVIDED “AS IS” WITHOUT
WARRANTY OF ANY KIND, EITHER EXPRESSED OR IMPLIED, INCLUDING, BUT NOT LIMITED TO,
IMPLIED WARRANTIES OF MERCHANTABILITY OR FITNESS FOR A PARTICULAR PURPOSE AND,
EXCEPT AS EXPRESSLY PROVIDED ABOVE, YOU ASSUME THE ENTIRE RISK AS TO THE QUALITY AND
PERFORMANCE OF THE LICENSED PRODUCT.
6. Limitation of liability. GE SECURITY’S SOLE OBLIGATION OR LIABILITY UNDER THIS
AGREEMENT IS THE REPAIR OR REPLACEMENT OF NONCONFORMING SOFTWARE AND/OR
DEFECTIVE MEDIA ACCORDING TO THE LIMITED WARRANTY ABOVE. IN NO EVENT WILL
GE SECURITY BE LIABLE FOR DAMAGES, WHETHER CONSEQUENTIAL, INCIDENTAL, OR
INDIRECT, NOR FOR LOSS OF DATA, LOSS OF PROFITS, OR LOST SAVINGS, ARISING FROM USE
OR INABILITY TO USE THE SOFTWARE OR DOCUMENTATION (OR ANY HARDWARE FURNISHED
WITH THE SOFTWARE), EVEN IF GE SECURITY HAS BEEN ADVISED OF THE POSSIBILITY OF
SUCH DAMAGES, NOR FOR ANY CLAIM BY ANY THIRD PARTY.
7. General. Any materials provided to You by GE SECURITY shall not be exported or
reexported in violation of any export provisions of the USA or any other applicable
jurisdiction. Any attempt to sublicense, assign, or transfer any of the rights, duties, or
obligations hereunder shall be void. This Agreement shall be governed by and interpreted
under the laws of the State of New York, United States of America, without regard to conflicts
of law provisions. You hereby consent to the exclusive jurisdiction of the state and federal
courts located in Multnomah County, Oregon, to resolve any disputes arising under or in
connection with this Agreement, with venue in Portland, Oregon.
8. Restricted rights legend. The Licensed Product is provided with RESTRICTED RIGHTS. In the
event the United States Government or an agency thereof is granted a license, the following
additional terms apply: Restricted Computer Software, as defined in the Commercial Computer
Software–Restricted Rights clause at Federal Acquisition Regulations 52.227-19, and the
restrictions as provided in subparagraphs (c)(1) and (c)(2) thereof; and as applicable, the
Government’s rights to use, modify, reproduce, release, perform, display, or disclose the Software
also are restricted as provided by paragraphs (b)(2) and (b)(3) of the Rights in Noncommercial
Technical Data and Computer Software–Small Business Innovative Research (SBIR) Program
clause at DFARS 252.227-7018.
iv
Enterprise Downloader
User Manual
9. Acknowledgment. You acknowledge that You have read and understand this agreement
and agree to be bound by its terms. You further agree that this agreement is the complete
and exclusive statement of the agreement between You and GE SECURITY, and supersedes
any proposal or prior agreement, oral or written, and any other communication relating to
the subject matter of this agreement.
Intended use
Use this product only for the purpose it was designed for; refer to the data sheet and user
documentation. For the latest product information, contact your local supplier or visit us online
at www.gesecurity.com.
1
Contents
Preface . . . . . . . . . . . . . . . . . . . . . . . . . . . . . . . . . . . . . . . . . . . . . . . . . . . . . . . . . . . . . . . . . . . . . . . . . . . . . . . . . . . . . . . . . 5
Conventions used in this document . . . . . . . . . . . . . . . . . . . . . . . . . . . . . . . . . . . . . . . . . . . . . . . . . . . . . . . . . . . . . . . . . . .5
Safety terms and symbols. . . . . . . . . . . . . . . . . . . . . . . . . . . . . . . . . . . . . . . . . . . . . . . . . . . . . . . . . . . . . . . . . . . . . . . . . . . .5
Chapter 1.
Introduction . . . . . . . . . . . . . . . . . . . . . . . . . . . . . . . . . . . . . . . . . . . . . . . . . . . . . . . . . . . . 7
Product overview . . . . . . . . . . . . . . . . . . . . . . . . . . . . . . . . . . . . . . . . . . . . . . . . . . . . . . . . . . . . . . . . . . . . . . . . . . . . . . . . 8
What’s new in this release . . . . . . . . . . . . . . . . . . . . . . . . . . . . . . . . . . . . . . . . . . . . . . . . . . . . . . . . . . . . . . . . . . . . . . . . . . . .9
Product contents . . . . . . . . . . . . . . . . . . . . . . . . . . . . . . . . . . . . . . . . . . . . . . . . . . . . . . . . . . . . . . . . . . . . . . . . . . . . . . . . . . 10
New release notification. . . . . . . . . . . . . . . . . . . . . . . . . . . . . . . . . . . . . . . . . . . . . . . . . . . . . . . . . . . . . . . . . . . . . . . . . . . . 10
Software requirements. . . . . . . . . . . . . . . . . . . . . . . . . . . . . . . . . . . . . . . . . . . . . . . . . . . . . . . . . . . . . . . . . . . . . . . . . . 11
Supported modems . . . . . . . . . . . . . . . . . . . . . . . . . . . . . . . . . . . . . . . . . . . . . . . . . . . . . . . . . . . . . . . . . . . . . . . . . . . . . . . . 11
Chapter 2.
Getting started . . . . . . . . . . . . . . . . . . . . . . . . . . . . . . . . . . . . . . . . . . . . . . . . . . . . . . . . 13
User interface (UI) . . . . . . . . . . . . . . . . . . . . . . . . . . . . . . . . . . . . . . . . . . . . . . . . . . . . . . . . . . . . . . . . . . . . . . . . . . . . . . 14
Log on. . . . . . . . . . . . . . . . . . . . . . . . . . . . . . . . . . . . . . . . . . . . . . . . . . . . . . . . . . . . . . . . . . . . . . . . . . . . . . . . . . . . . . . . . . . . . 14
Menu bar . . . . . . . . . . . . . . . . . . . . . . . . . . . . . . . . . . . . . . . . . . . . . . . . . . . . . . . . . . . . . . . . . . . . . . . . . . . . . . . . . . . . . . . . . . 15
Tool bar . . . . . . . . . . . . . . . . . . . . . . . . . . . . . . . . . . . . . . . . . . . . . . . . . . . . . . . . . . . . . . . . . . . . . . . . . . . . . . . . . . . . . . . . . . . 16
System preferences. . . . . . . . . . . . . . . . . . . . . . . . . . . . . . . . . . . . . . . . . . . . . . . . . . . . . . . . . . . . . . . . . . . . . . . . . . . . . . . . 17
CommServer . . . . . . . . . . . . . . . . . . . . . . . . . . . . . . . . . . . . . . . . . . . . . . . . . . . . . . . . . . . . . . . . . . . . . . . . . . . . . . . . . . . 18
Operation . . . . . . . . . . . . . . . . . . . . . . . . . . . . . . . . . . . . . . . . . . . . . . . . . . . . . . . . . . . . . . . . . . . . . . . . . . . . . . . . . . . . . . . . . 18
Operators (users). . . . . . . . . . . . . . . . . . . . . . . . . . . . . . . . . . . . . . . . . . . . . . . . . . . . . . . . . . . . . . . . . . . . . . . . . . . . . . . . . . . 20
JobServer. . . . . . . . . . . . . . . . . . . . . . . . . . . . . . . . . . . . . . . . . . . . . . . . . . . . . . . . . . . . . . . . . . . . . . . . . . . . . . . . . . . . . . 21
Operation . . . . . . . . . . . . . . . . . . . . . . . . . . . . . . . . . . . . . . . . . . . . . . . . . . . . . . . . . . . . . . . . . . . . . . . . . . . . . . . . . . . . . . . . . 21
Chapter 3.
Operators and groups . . . . . . . . . . . . . . . . . . . . . . . . . . . . . . . . . . . . . . . . . . . . . . . . . . 27
Operators . . . . . . . . . . . . . . . . . . . . . . . . . . . . . . . . . . . . . . . . . . . . . . . . . . . . . . . . . . . . . . . . . . . . . . . . . . . . . . . . . . . . . 28
Add operators . . . . . . . . . . . . . . . . . . . . . . . . . . . . . . . . . . . . . . . . . . . . . . . . . . . . . . . . . . . . . . . . . . . . . . . . . . . . . . . . . . . . . 28
Edit operators . . . . . . . . . . . . . . . . . . . . . . . . . . . . . . . . . . . . . . . . . . . . . . . . . . . . . . . . . . . . . . . . . . . . . . . . . . . . . . . . . . . . . 29
Delete operators . . . . . . . . . . . . . . . . . . . . . . . . . . . . . . . . . . . . . . . . . . . . . . . . . . . . . . . . . . . . . . . . . . . . . . . . . . . . . . . . . . . 29
Groups . . . . . . . . . . . . . . . . . . . . . . . . . . . . . . . . . . . . . . . . . . . . . . . . . . . . . . . . . . . . . . . . . . . . . . . . . . . . . . . . . . . . . . . . 30
Add groups . . . . . . . . . . . . . . . . . . . . . . . . . . . . . . . . . . . . . . . . . . . . . . . . . . . . . . . . . . . . . . . . . . . . . . . . . . . . . . . . . . . . . . . . 30
Edit groups . . . . . . . . . . . . . . . . . . . . . . . . . . . . . . . . . . . . . . . . . . . . . . . . . . . . . . . . . . . . . . . . . . . . . . . . . . . . . . . . . . . . . . . . 31
Delete groups. . . . . . . . . . . . . . . . . . . . . . . . . . . . . . . . . . . . . . . . . . . . . . . . . . . . . . . . . . . . . . . . . . . . . . . . . . . . . . . . . . . . . . 31
Assign members to groups . . . . . . . . . . . . . . . . . . . . . . . . . . . . . . . . . . . . . . . . . . . . . . . . . . . . . . . . . . . . . . . . . . . . . . . . . 31
2
Enterprise Downloader
User Manual
Chapter 4.
Accounts. . . . . . . . . . . . . . . . . . . . . . . . . . . . . . . . . . . . . . . . . . . . . . . . . . . . . . . . . . . . . . 33
Accounts . . . . . . . . . . . . . . . . . . . . . . . . . . . . . . . . . . . . . . . . . . . . . . . . . . . . . . . . . . . . . . . . . . . . . . . . . . . . . . . . . . . . . . 34
Create accounts . . . . . . . . . . . . . . . . . . . . . . . . . . . . . . . . . . . . . . . . . . . . . . . . . . . . . . . . . . . . . . . . . . . . . . . . . . . . . . . . . . . 34
Edit accounts . . . . . . . . . . . . . . . . . . . . . . . . . . . . . . . . . . . . . . . . . . . . . . . . . . . . . . . . . . . . . . . . . . . . . . . . . . . . . . . . . . . . . . 36
Delete accounts . . . . . . . . . . . . . . . . . . . . . . . . . . . . . . . . . . . . . . . . . . . . . . . . . . . . . . . . . . . . . . . . . . . . . . . . . . . . . . . . . . . . 37
Print accounts . . . . . . . . . . . . . . . . . . . . . . . . . . . . . . . . . . . . . . . . . . . . . . . . . . . . . . . . . . . . . . . . . . . . . . . . . . . . . . . . . . . . . 38
Account differences . . . . . . . . . . . . . . . . . . . . . . . . . . . . . . . . . . . . . . . . . . . . . . . . . . . . . . . . . . . . . . . . . . . . . . . . . . . . . . . . 39
Customers. . . . . . . . . . . . . . . . . . . . . . . . . . . . . . . . . . . . . . . . . . . . . . . . . . . . . . . . . . . . . . . . . . . . . . . . . . . . . . . . . . . . . 40
Add customers . . . . . . . . . . . . . . . . . . . . . . . . . . . . . . . . . . . . . . . . . . . . . . . . . . . . . . . . . . . . . . . . . . . . . . . . . . . . . . . . . . . . . 40
Edit customers . . . . . . . . . . . . . . . . . . . . . . . . . . . . . . . . . . . . . . . . . . . . . . . . . . . . . . . . . . . . . . . . . . . . . . . . . . . . . . . . . . . . . 41
Delete customers . . . . . . . . . . . . . . . . . . . . . . . . . . . . . . . . . . . . . . . . . . . . . . . . . . . . . . . . . . . . . . . . . . . . . . . . . . . . . . . . . . 41
Account extensions. . . . . . . . . . . . . . . . . . . . . . . . . . . . . . . . . . . . . . . . . . . . . . . . . . . . . . . . . . . . . . . . . . . . . . . . . . . . . 42
Create account extensions . . . . . . . . . . . . . . . . . . . . . . . . . . . . . . . . . . . . . . . . . . . . . . . . . . . . . . . . . . . . . . . . . . . . . . . . . 43
Edit account extensions . . . . . . . . . . . . . . . . . . . . . . . . . . . . . . . . . . . . . . . . . . . . . . . . . . . . . . . . . . . . . . . . . . . . . . . . . . . . 44
Delete account extensions. . . . . . . . . . . . . . . . . . . . . . . . . . . . . . . . . . . . . . . . . . . . . . . . . . . . . . . . . . . . . . . . . . . . . . . . . . 44
Bulk accounts. . . . . . . . . . . . . . . . . . . . . . . . . . . . . . . . . . . . . . . . . . . . . . . . . . . . . . . . . . . . . . . . . . . . . . . . . . . . . . . . . . 45
Create bulk accounts . . . . . . . . . . . . . . . . . . . . . . . . . . . . . . . . . . . . . . . . . . . . . . . . . . . . . . . . . . . . . . . . . . . . . . . . . . . . . . . 45
Chapter 5.
Jobs . . . . . . . . . . . . . . . . . . . . . . . . . . . . . . . . . . . . . . . . . . . . . . . . . . . . . . . . . . . . . . . . . . 47
Jobs . . . . . . . . . . . . . . . . . . . . . . . . . . . . . . . . . . . . . . . . . . . . . . . . . . . . . . . . . . . . . . . . . . . . . . . . . . . . . . . . . . . . . . . . . . 48
Create jobs. . . . . . . . . . . . . . . . . . . . . . . . . . . . . . . . . . . . . . . . . . . . . . . . . . . . . . . . . . . . . . . . . . . . . . . . . . . . . . . . . . . . . . . . . 49
Edit jobs . . . . . . . . . . . . . . . . . . . . . . . . . . . . . . . . . . . . . . . . . . . . . . . . . . . . . . . . . . . . . . . . . . . . . . . . . . . . . . . . . . . . . . . . . . . 50
Delete jobs . . . . . . . . . . . . . . . . . . . . . . . . . . . . . . . . . . . . . . . . . . . . . . . . . . . . . . . . . . . . . . . . . . . . . . . . . . . . . . . . . . . . . . . . . 50
Job history . . . . . . . . . . . . . . . . . . . . . . . . . . . . . . . . . . . . . . . . . . . . . . . . . . . . . . . . . . . . . . . . . . . . . . . . . . . . . . . . . . . . 51
Tracking differences . . . . . . . . . . . . . . . . . . . . . . . . . . . . . . . . . . . . . . . . . . . . . . . . . . . . . . . . . . . . . . . . . . . . . . . . . . . . 51
Chapter 6.
Templates . . . . . . . . . . . . . . . . . . . . . . . . . . . . . . . . . . . . . . . . . . . . . . . . . . . . . . . . . . . . 53
Panel templates. . . . . . . . . . . . . . . . . . . . . . . . . . . . . . . . . . . . . . . . . . . . . . . . . . . . . . . . . . . . . . . . . . . . . . . . . . . . . . . . 54
Create panel templates. . . . . . . . . . . . . . . . . . . . . . . . . . . . . . . . . . . . . . . . . . . . . . . . . . . . . . . . . . . . . . . . . . . . . . . . . . . . . 54
Edit panel templates. . . . . . . . . . . . . . . . . . . . . . . . . . . . . . . . . . . . . . . . . . . . . . . . . . . . . . . . . . . . . . . . . . . . . . . . . . . . . . . . 55
Delete panel templates . . . . . . . . . . . . . . . . . . . . . . . . . . . . . . . . . . . . . . . . . . . . . . . . . . . . . . . . . . . . . . . . . . . . . . . . . . . . . 55
Custom panel templates. . . . . . . . . . . . . . . . . . . . . . . . . . . . . . . . . . . . . . . . . . . . . . . . . . . . . . . . . . . . . . . . . . . . . . . . . . . . 55
Job templates . . . . . . . . . . . . . . . . . . . . . . . . . . . . . . . . . . . . . . . . . . . . . . . . . . . . . . . . . . . . . . . . . . . . . . . . . . . . . . . . . 56
Create job templates . . . . . . . . . . . . . . . . . . . . . . . . . . . . . . . . . . . . . . . . . . . . . . . . . . . . . . . . . . . . . . . . . . . . . . . . . . . . . . . 56
Edit job templates . . . . . . . . . . . . . . . . . . . . . . . . . . . . . . . . . . . . . . . . . . . . . . . . . . . . . . . . . . . . . . . . . . . . . . . . . . . . . . . . . . 57
Delete job templates . . . . . . . . . . . . . . . . . . . . . . . . . . . . . . . . . . . . . . . . . . . . . . . . . . . . . . . . . . . . . . . . . . . . . . . . . . . . . . . 57
Custom job templates . . . . . . . . . . . . . . . . . . . . . . . . . . . . . . . . . . . . . . . . . . . . . . . . . . . . . . . . . . . . . . . . . . . . . . . . . . . . . . 58
Chapter 7.
Troubleshooting and support . . . . . . . . . . . . . . . . . . . . . . . . . . . . . . . . . . . . . . . . . . . 59
Troubleshooting . . . . . . . . . . . . . . . . . . . . . . . . . . . . . . . . . . . . . . . . . . . . . . . . . . . . . . . . . . . . . . . . . . . . . . . . . . . . . . . 60
Troubleshooting your Enterprise Downloader system . . . . . . . . . . . . . . . . . . . . . . . . . . . . . . . . . . . . . . . . . . . . . . . . 60
Contacting technical support. . . . . . . . . . . . . . . . . . . . . . . . . . . . . . . . . . . . . . . . . . . . . . . . . . . . . . . . . . . . . . . . . . . . 64
Online publication library . . . . . . . . . . . . . . . . . . . . . . . . . . . . . . . . . . . . . . . . . . . . . . . . . . . . . . . . . . . . . . . . . . . . . . . . . . . 64
Appendix A. OEM codes . . . . . . . . . . . . . . . . . . . . . . . . . . . . . . . . . . . . . . . . . . . . . . . . . . . . . . . . . . . . 65
OEM code . . . . . . . . . . . . . . . . . . . . . . . . . . . . . . . . . . . . . . . . . . . . . . . . . . . . . . . . . . . . . . . . . . . . . . . . . . . . . . . . . . . . . 66
3
Appendix B. Panel sensor groups . . . . . . . . . . . . . . . . . . . . . . . . . . . . . . . . . . . . . . . . . . . . . . . . . . . 67
Allegro sensor groups. . . . . . . . . . . . . . . . . . . . . . . . . . . . . . . . . . . . . . . . . . . . . . . . . . . . . . . . . . . . . . . . . . . . . . . . . . . 68
Simon 2 sensor groups . . . . . . . . . . . . . . . . . . . . . . . . . . . . . . . . . . . . . . . . . . . . . . . . . . . . . . . . . . . . . . . . . . . . . . . . . . 71
Simon 3 sensor groups . . . . . . . . . . . . . . . . . . . . . . . . . . . . . . . . . . . . . . . . . . . . . . . . . . . . . . . . . . . . . . . . . . . . . . . . . . 73
Concord 3 sensor groups . . . . . . . . . . . . . . . . . . . . . . . . . . . . . . . . . . . . . . . . . . . . . . . . . . . . . . . . . . . . . . . . . . . . . . . . 75
Concord 4 sensor groups . . . . . . . . . . . . . . . . . . . . . . . . . . . . . . . . . . . . . . . . . . . . . . . . . . . . . . . . . . . . . . . . . . . . . . . . 77
Concord Express sensor groups . . . . . . . . . . . . . . . . . . . . . . . . . . . . . . . . . . . . . . . . . . . . . . . . . . . . . . . . . . . . . . . . . . 80
Appendix C. SIA requirements . . . . . . . . . . . . . . . . . . . . . . . . . . . . . . . . . . . . . . . . . . . . . . . . . . . . . . 83
Allegro SIA requirements . . . . . . . . . . . . . . . . . . . . . . . . . . . . . . . . . . . . . . . . . . . . . . . . . . . . . . . . . . . . . . . . . . . . . . . . 84
Simon 3 version 3.5 SIA requirements. . . . . . . . . . . . . . . . . . . . . . . . . . . . . . . . . . . . . . . . . . . . . . . . . . . . . . . . . . . . . 85
Simon 3 version 4 SIA requirements . . . . . . . . . . . . . . . . . . . . . . . . . . . . . . . . . . . . . . . . . . . . . . . . . . . . . . . . . . . . . . 86
Simon 3 version 5 European compliance . . . . . . . . . . . . . . . . . . . . . . . . . . . . . . . . . . . . . . . . . . . . . . . . . . . . . . . . . . 87
Concord 3 SIA requirements . . . . . . . . . . . . . . . . . . . . . . . . . . . . . . . . . . . . . . . . . . . . . . . . . . . . . . . . . . . . . . . . . . . . . 88
Concord 4 SIA requirements . . . . . . . . . . . . . . . . . . . . . . . . . . . . . . . . . . . . . . . . . . . . . . . . . . . . . . . . . . . . . . . . . . . . . 89
Concord Express SIA requirements . . . . . . . . . . . . . . . . . . . . . . . . . . . . . . . . . . . . . . . . . . . . . . . . . . . . . . . . . . . . . . . 90
4
Enterprise Downloader
User Manual
5
Preface
This is the GE Enterprise Downloader User Manual. This document includes an overview of the product and
detailed instructions explaining how to operate Enterprise Downloader v3.3 software.
There is also information describing how to contact technical support if you have questions or concerns.
Read these instructions and all ancillary documentation entirely before installing or operating this product. The
most current versions of this and related documentation may be found on our website. Refer to Online
publication library on page 64 for instructions on accessing our online publication library.
Note:
A qualified service person, complying with all applicable codes, should perform all required hardware installation.
Conventions used in this document
The following conventions are used in this document:
Bold
Menu items and buttons.
Italic
Emphasis of an instruction or point; special terms.
File names, path names, windows, panes, tabs, fields, variables, and other GUI elements.
Titles of books and various documents.
Blue italic
(Electronic version.) Hyperlinks to cross-references, related topics, and URL addresses.
Monospace
Text that displays on the computer screen.
Programming or coding sequences.
Safety terms and symbols
These terms may appear in this manual:
CAUTION:
Cautions identify conditions or practices that may result in damage to the equipment or other property.
WARNING:
Warnings identify conditions or practices that could result in equipment damage or serious personal injury.
6
Enterprise Downloader
User Manual
Chapter 1 Introduction
This chapter provides an overview of Enterprise Downloader, including minimum
software requirements.
In this chapter:
Product overview . . . . . . . . . . . . . . . . . . . . . . . . . . . . . . . . . . . . . . . . . . . 8
Software requirements. . . . . . . . . . . . . . . . . . . . . . . . . . . . . . . . . . . . . . . 11
8
Enterprise Downloader
User Manual
Product overview
Enterprise Downloader is a modular, scalable software solution for remote programming of certain GE control
panels. Enterprise Downloader maintains a database of account information and panel programming, and
allows you to upload panel programming and download centrally prepared configurations to panels.
Enterprise Downloader has three components:
User interface (UI) and database. The user interface works with the database to maintain and display
panel property settings and information. It links customers to accounts and to displays the results of
scheduled and unscheduled jobs.
JobServer. The JobServer continuously searches the database to identify communication jobs that are
ready to run and dispatches them to a communication server for processing. The JobServer runs
independently of the other system components, and can be run on any PC connected to the network with
the Enterprise Downloader database. The JobServer manages both scheduled and unscheduled jobs.
CommServer. CommServers will support up to four modems. CommServers interface with the
JobServers using Microsoft .NET services. CommServers are usually set up as a bank of servers to handle
unattended incoming calls, and also on individual machines with the user interface to be used for call-out
jobs specific for each user.
Chapter 1
Introduction
What’s new in this release
Updates since the 3.2 release include:
•
•
•
•
•
•
•
MS Word is no longer required for printing, all printing is now done in HTML format.
Minimum required RAM has changed from 256 to 512MB for server machines. Recommended RAM
has changed from 512MB to 1GB for server machines.
A Quick Search feature has been added in the Account Summary screen to allow the user to quickly
search for a specific account number.
You can now link modems used for outgoing calls to a specific computer name instead of linking to
login names. Previously the login name was used to link specific modems to jobs. There is now an
option in the Preferences menu to link the modem to a specific computer name instead of a user name.
This is useful if different users will be using the same workstation with a local modem for outgoing
jobs.
The CommServer UI is now minimized to the task bar instead of the system tray. This makes the
CommServer UI easier to access and also available to users that have their machines configured with
access blocking software that prohibits them from accessing the system tray.
Defaults in the Job screen have changed to more common job settings to reduce mouse clicks. The
default job call type setting is now Dial Out to Panel and the default job setting is now Ring/Hang/
Ring instead of 10 rings.
An option has been added to verify and upgrade the software version number from the central server
machine on startup if applicable. This is useful in large installations with several client machines
accessing a central database. Registry settings now include:
UpdateCheck. Under HKLM\Software\ITI Enterprise, if UpdateCheck exists, the software will look for
the upgrade. UpdateCheck is the string that lists the path to the text version file. For example, C:\Version
.txt or \\Servername\ProbgramFiles\ITIEnterprise\EDUI\Version.txt. Version.txt is a text file with
(3.3.13.0).
UdatePath. UpdatePath is the path to exe install and run. For example,
C:\EnterpriseInstall\E3SuitSetup.exe.
9
10
Enterprise Downloader
User Manual
Bug fixes include:
•
•
•
•
•
•
•
•
•
•
•
•
•
Toolbox database converter fixes. You can type in the Server name or use the drop down selection.
Fixed potential deadlock issue when several jobs are calling in at the same time.
Improved UI speed when opening Job edit or Job template screens.
Fixed the ability to edit account number values for partitions 2 to 6 on Concord 4 panels in Security tab
after upload.
Fixed the search by created date when the day value is a single digit.
Fixed the account creator issue when starting with certain HEX values.
Fixed the ability to create new accounts when typing in existing customer name with the same panel
type.
Fixed operator property restrictions when logging job history and printing security properties.
Fixed user interface issue with the database only displaying the first 500 customers. Any additional
customers added were not being displayed to the user, even though they were stored in the database.
Fixed issue when creating a new panel template, the default panel template was getting flagged as the
custom template to be used for callin jobs.
Issue resolved in multi client environment when new account extensions or folders were created from
one client, other client machines were not displaying the new values.
Fixed issue when user deleted a specific customer, the panel accounts linked to that customer were not
getting deleted.
Stay-on-line job issue resolved when software was installed in multi client environment causing
subsequent jobs to get stuck in queuing mode and not process.
Product contents
The Enterprise Downloader consists of the following:
•
•
•
the Enterprise Downloader CD;
Enterprise Downloader Installation Manual; and
Enterprise Downloader User Manual.
Inspect the package and contents for visible damage. If any components are damaged or missing, do not use the
unit; contact the supplier immediately. If you need to return the unit, you must ship it in the original box.
New release notification
To be notified of future software releases and bug fixes, we recommend that you contact GE Security and
register as an Enterprise Downloader user. You can register by:
•
•
Email: [email protected]; or by
Phone: 1.888.GESecurity
Chapter 1
Introduction
Software requirements
Table 1 shows the software requirements Enterprise Downloader v3.3 software. Systems with the minimum
memory specified for SQL Server may be unacceptably slow.
Table 1.
System requirements
All-in-one
Client only (UI
and CommServer) JobServer
Computer
Processor
Hard disk space
Memory (RAM)
Database Server
(MSDE)
Database Server
(SQL 2000)
IBM compatible
Minimum:
Minimum:
Minimum:
Minimum:
Minimum:
Pentium III
800MHz or faster
Pentium III
500MHz or faster
Pentium III
700MHz or faster
Pentium III
800MHz or faster
Pentium III
900MHz or faster
Recommended:
Recommended:
Recommended:
Recommended:
Recommended:
Pentium III
2GHz or faster
Pentium III
1GHz (4 ports)
Pentium III
1GHz or faster
Pentium III
1.5GHz or faster
Pentium III
2GHz or faster
Minimum: 20GB
Minimum: 10GB
Minimum: 10GB
Minimum: 10GB
Minimum: 40GB
Recommended:
60GB or more
Recommended:
Recommended:
Recommended:
Recommended:
20GB or more
10GB or more
20GB or more
80GB or more
Minimum: 512MB
Minimum: 256MB
Minimum: 512MB
Minimum: 512MB
Minimum: 512MB 1
Recommended:
Recommended:
Recommended:
Recommended:
Recommended:
1GB or more
512MB or more
1GB or more
1GB or more
1GB or more
Network connection
Required for network installation
Operating system
Windows 2000 and Windows XP (service pack 2)
Network protocols
TCP/IP
Display
1.
1024 x 768
1024 x 768
MSDE has a database size limit of 2GB.
Supported modems
Enterprise Downloader supports the following modems:
•
•
•
•
•
•
•
•
•
Allied Data TRON DF56.0;
AT&T Smartlink 14.4;
Hayes Accura 14.4;
Hayes Optima 2400;
Hayes Optima 33.6;
Practical Peripherals 14.4 MT II;
Practical Peripherals Mini 1200 SA;
Securcomm DL110; and
Super Modem 2400.
800 x 600
N/A
N/A
11
12
Enterprise Downloader
User Manual
Chapter 2 Getting started
This chapter describes how to log on to Enterprise Downloader and the basic user
Interface tools. It also gives an overview of the CommServer and JobServer.
In this chapter:
User interface (UI) . . . . . . . . . . . . . . . . . . . . . . . . . . . . . . . . . . . . . . . . . 14
CommServer . . . . . . . . . . . . . . . . . . . . . . . . . . . . . . . . . . . . . . . . . . . . . . 18
JobServer . . . . . . . . . . . . . . . . . . . . . . . . . . . . . . . . . . . . . . . . . . . . . . . . 21
14
Enterprise Downloader
User Manual
User interface (UI)
The user interface with the database maintains and displays panel property settings and information. It is used
to link customers to accounts and to display the results of scheduled and unscheduled jobs.
Log on
The Login window (Figure 1) requires the following information:
User Name. Enter ITI as the default user name.
Password. Enter password as the default password. (Passwords are case sensitive.)
Server. This is the name of the computer running the database. It will be (local) for a local (all-in-one)
setup with SQL database. It will be (local)\EDMSDE2000 for an MSDE database instance.The server
name is entered during the installation process (refer to the Enterprise Downloader Installation Manual).
Figure 1. Login window
The Enterprise Downloader main window (Figure 2) contains a menu bar and a tool bar with icons.
Figure 2. Enterprise Downloader home window
Chapter 2
Getting started
Menu bar
The menu bar includes the following options:
File:
New | Account. Use the New Account window to configure new accounts. See Create accounts on
page 34.
Search. Use the Search window to search and display information by account summary, customers, and
jobs based on different search criteria.
Login. Access the Login window. See Log on on page 14.
Exit. Log off and exit the interface.
Setup:
Operator. Use the Operator Setup tab to configure users and groups. See Operators on page 28.
Panel Templates. Use the Panel Template window to create panel templates with specific property values
to use to create new panels. See Panel templates on page 54.
Job Templates. Use the Job Template window to create specific job templates for call-in and call-out
jobs. See Job templates on page 56.
Account Extension Ctl+E. Use the Add Account Extension window to create account extensions to
organize large databases of accounts or group accounts by central station. See Account extensions on
page 42.
System Preference. Use the System Preferences window to set system preferences. See System
preferences on page 17.
Account Creator. Use the Account Creator window to create bulk accounts and save them to the
database. See Bulk accounts on page 45.
View
Customer Summary. Use the Customer Summary window to create, edit, and delete customers. See
Customers on page 40.
Account Summary. Use the Account Summary window to create, edit, and delete accounts. See Create
accounts on page 34.
Job Summary. Use the Job Summary window to view a list of jobs performed and to delete jobs. See
Delete jobs on page 50.
Folder Summary. Use the Folder Summary window to create and delete folders used to group account
information.
Admin. Not currently supported.
Help
Access the help files.
15
16
Enterprise Downloader
User Manual
Tool bar
Figure 3 shows the tool bar. The tools on the tool bar are shortcuts to some of the windows accessed by the
menu bar.
Figure 3. Tool bar icons
The icons on the tool bar are (from left to right):
Create New Account. Use the New Account window to configure new accounts. See Create accounts on
page 34.
Account Summary. Use the Account Summary window to create, edit, and delete accounts. See Create
accounts on page 34.
Job Summary. Use the Job Summary window to view a list of jobs performed and to delete jobs. See
Delete jobs on page 50.
Folder Summary. Use the Folder Summary window to create and delete folders used to group account
information.
Search. Use the Search window to search and display information by account summary, customers, and
jobs based on different search criteria.
Exit. Log off and exit the interface.
Customer Summary. Use the Customer Summary window to create, edit, and delete customers. See
Customers on page 40.
Chapter 2
Getting started
System preferences
To set system preferences, do the following:
1. Select Setup | System Preference to open the Preferences window (Figure 4).
Figure 4. System Preferences window
2. To edit a particular system preference, click on the value column for the specific value. Some values
are read only and cannot be changed. The options include:
•
•
•
•
•
•
•
•
Account Edit Tab Ordering. Edit this field to change the order that the tabs are presented in the
user interface when editing a panel.
Job Created By Option. Link the modem to a specific computer name instead of a user name.
Once this feature is enabled, enter the computer name in the Add User feature in the CommServer
properties screen.
Purge Old Job Histories. Click Purge to delete old records of job history logging. This will clear
up some database room if logging job history with jobs.
Accounts to be Created from Account Creator. This is the number of accounts that will be
created when using the Setup | Account Creator function. See Bulk accounts on page 45.
Database Version. Displays the version of database for this UI.
Days to Retain Job Histories. This is the number of days that the system will keep track of the
downloaded property values to the database. It is defaulted to 0 (off), but if you change it to 3, it
will track downloaded properties for three days and then will remove properties that have been
saved for greater than three days.
JobServer Name. Not currently supported.
CommServer Name. Not currently supported.
3. Click Apply.
17
18
Enterprise Downloader
User Manual
CommServer
The CommServer (Figure 5) allows you to configure specified modems to connect remotely to a control panel.
It comes with a user interface you can use to create and maintain modems connected to the computer’s COM
ports.
Figure 5. CommServer
Operation
To start and configure CommServer, double-click the E3 CommSvr icon on the desktop. The EDComServer
Monitor window (Figure 6) will appear.
Figure 6. EDCommServer Monitor window
Chapter 2
Getting started
To add a new modem, select Server | Add Communication. The New Communicator Properties window will
appear (Figure 7).
Figure 7. New Communicator Properties window
Select the correct COM port from the list in the Comm Port field and click Profiles to select the modem from
the list.
Note:
If connecting to a remote JobServer, the name of the machine running the remote JobServer must go in the JobServer
Name box.
Once started, the CommServer will indicate if it is unable to connect to the modem. If the modem connects
successfully, the CommServer will attempt to log on to the specified JobServer. The triangle icon under Server
on the menu bar (Figure 6 on page 18) will turn green if the CommServer is successful.
19
20
Enterprise Downloader
User Manual
To log off a CommServer from a JobServer, select the modem and click the gray triangle icon (Figure 6 on
page 18).
To exit the CommServer, select Server | Exit, or right-click the CommServer icon on the tool bar and select
Exit (Figure 6 on page 18).
Operators (users)
You can add operators (users) to the CommServer when you want to assign specific modems with specific
operators to run jobs.
To assign a specific operator to a specific modem, do the following:
1. Click Add in the New Communicator Properties window (Figure 7, New Communicator Properties
window).
2. Enter the user name of the operator (the same user name used to log on to Enterprise Downloader).
You can add multiple operators to the modem list.
3. Click OK.
Once an operator is added to a CommServer, only assigned jobs (from the Job Edit window) will go through
that CommServer. Call-out jobs will only go to this port if Use Unassigned CommServer is not checked in the
Job Edit window when operators are added. If no operators are added, all jobs must have the Use Unassigned
CommServer option checked in the Job Edit window.
Chapter 2
Getting started
JobServer
JobServer maintains a list of the available CommServers and dispatches incoming and outgoing jobs to and
from the panel to the appropriate CommServer. Once installed, JobServer is a service that runs in the
background on your PC.
Operation
To start the JobServer, double-click the E3JobServer UI icon on the desktop or click the Start button in
windows and select Programs | GE Security | E3JobServerUI. Either method will access the E3JobServer
Manager window shown in Figure 8.
Figure 8. JobServer Manager window
JobServer handles incoming and outgoing calls to and from a remote panel. It can handle multiple jobs at the
same time and maintains a list of all CommServers logged on to the service (Figure 9). You can stop and start
the JobServer service from the JobServer Manager window.
If the Start button is enabled, the JobServer service must be started. To start the service, click Start. Once
successfully started, a green triangle (representing the JobServer) will appear in the taskbar on your desktop.
21
22
Enterprise Downloader
User Manual
As CommServers are started, they will appear in the lower grid of the JobServer UI. As jobs are run, job
processing information will appear in the upper grid of the JobServer UI (Figure 9).
Figure 9. E3JobService Manager window
To exit JobServer, right-click the JobServer icon (green triangle) and select Exit.
Chapter 2
Getting started
JobServer options
To configure options in the JobServer, you can right-click on the JobServer icon on the tool bar (Figure 3 on
page 16) and select Options, or you can select File | Options in the JobServer UI. Either method will access
the JobServer Options window (Figure 10).
Figure 10. JobServer Options window
The following options are available on the General Settings tab:
Job Status Report Interval (%). This option is currently not supported.
Job Retry Times. This indicates the number of times a job will retry on failure.
JobServer TCP Port. The value in this field should remain 8855 unless you want to change the
connection port to communicate with the CommServer. If this is changed, the CommServer will also have
to be changed to match.
Enable Log File. This check box enables a log file to record debug messages sent by the JobServer. This
can create a large file that you will have to manually delete periodically.
23
24
Enterprise Downloader
User Manual
The Call-Out Database Settings tab (Figure 11) should show ITIED in the Current Working Databases field.
Do not change this setting.
Figure 11. Call-Out Database Settings tab
Chapter 2
Getting started
Use the Unscheduled Call-In Settings tab (Figure 12) to configure the action of the JobServer when an
unscheduled call comes in from a panel.
Figure 12. Unscheduled Call-In Settings tab
The following options are available on this tab:
Database for Call-In Job. The value in this field should be ITIED. Do not change.
Folder for Call-In Job. Use this option to save the incoming panel to a specified folder.
Call-In Job New Account. You can specify to upload the full panel, download the full panel, or do a
custom job on the panel if the panel calling in is a new panel and not currently in the database. A custom
job can be configured from the Job Template window to do certain job actions on specific properties. An
example of this would be when you want to create a custom job to download the phone values to a panel,
but upload the rest of the properties in the panel.
Call-In for Existing Account. This is the same as Call-In Job New Account, except it specifies the job
action to take when an account already exists in the database.
New Account Panel Template. Use this field to assign properties to a new account. See Panel templates
on page 54 for a description of how to configure and assign the template to the custom template. If you
select the Default ITI template, the defaulted values will populate the panel.
25
26
Enterprise Downloader
User Manual
Panel Type and Default DL Code. The JobServer UI shows the default Downloader (DL) code for the
panel. This value should match the value of the DL code of the panel calling in.
To change the value of the DL code, do the following:
1. Right-click the specific panel type.
2. Select Edit. Do not use the Add or Delete options.
3. Change the value of the DL code. The default DL code in the JobServer UI should match the DL code
in the custom panel template. If this value is changed here, it should also be changed in the Custom
Panel Template window for that panel type.
Note:
Any changes made in the JobServer Options window will not take effect until the JobService is stopped from the
JobServer UI and restarted.
Chapter 3 Operators and groups
This chapter provides information on how to create, edit, and delete operators and
groups.
In this chapter:
Operators . . . . . . . . . . . . . . . . . . . . . . . . . . . . . . . . . . . . . . . . . . . . . . . . 28
Groups. . . . . . . . . . . . . . . . . . . . . . . . . . . . . . . . . . . . . . . . . . . . . . . . . . . 30
28
Enterprise Downloader
User Manual
Operators
Operators are provided to allow users different operating privileges based on their login name and password.
These privileges can be edited and assigned by operators that are created with administrative privileges.
Add operators
To add operators, do the following:
1. Select Setup | Operators to access the Operator Setup tab (Figure 13).
Figure 13. Operator Setup tab
2. Click New to access the Add New Operator window (Figure 14 on page 29).
Chapter 3
Operators and groups
Figure 14. Add New Operator window
3. Enter the user name. This is the name that the operator will use to log on.
4. Enter a password for the operator and fill in the other fields as needed.
5. You must assign a user group to the operator. Select a specific user group from the list in the Available
User Groups field and click Add.
6. Click OK.
Edit operators
To edit operators, do the following:
1. Select Setup | Operators.
2. Select the operator on the list and click Edit.
3. Change the required information for the operator.
4. Click OK.
Delete operators
To delete operators, do the following:
1. Select Setup | Operators.
2. Select the operator on the list and click Delete.
29
30
Enterprise Downloader
User Manual
Groups
Groups are classifications of user privileges and rights that can be assigned to operators.
Add groups
To add groups, do the following:
1. Select Setup | Operators to access the Operator Setup tab (Figure 13 on page 28).
2. In the Groups field, click New.
3. Enter the name of the new group.
4. After creating the group, you must assign operating rights to that group. Operating rights include:
•
•
•
•
•
•
•
•
•
System Access. View, create, edit, and delete system settings. System settings pertains to
operators, user groups, group rights, folders, customers, administration information, and account
extensions. Only this group can change other users’ rights and delete system objects.
Account Access. View, create, edit, and delete accounts.
Job Access. View, create, edit, and delete jobs.
Template Access. View, create, edit, and delete templates.
Limited System Access. View, create, and edit partial system settings. This pertains to folders,
customers, and account extensions. These users cannot delete system items. They can only edit
their own password, not their rights.
View Accounts. View accounts only.
View Jobs. View jobs only.
View Templates. View templates only.
Property Restriction. Restricts edit, view, and delete of security properties (Enterprise
Downloader code, dealer code, and installer code).
Note:
All rights are cumulative. No right will limit another right, except the Property Restriction.
5. Click OK.
Chapter 3
Operators and groups
Edit groups
To edit groups, do the following:
1. Select Setup | Operators.
2. Select the group on the list and click Edit.
3. Change the required fields.
4. Click OK.
Delete groups
To delete groups, do the following:
1. Select Setup | Operators.
2. Select the group on the list and click Delete.
Assign members to groups
To assign operators to groups, do the following:
1. Select Setup | Operators.
2. Select the group on the list and click Assign Members.
31
32
Enterprise Downloader
User Manual
Chapter 4 Accounts
This chapter provides information on how to create, edit, and delete accounts. It
also covers how to create and use account extensions and bulk accounts.
In this chapter:
Accounts . . . . . . . . . . . . . . . . . . . . . . . . . . . . . . . . . . . . . . . . . . . . . . . . . 34
Account extensions . . . . . . . . . . . . . . . . . . . . . . . . . . . . . . . . . . . . . . . . . 42
Bulk accounts . . . . . . . . . . . . . . . . . . . . . . . . . . . . . . . . . . . . . . . . . . . . . 45
34
Enterprise Downloader
User Manual
Accounts
Accounts are security control panels that are installed at a remote location. They are represented by panel type
and an account number. Each account holds several different configuration properties that are stored in the
panel.
Create accounts
To create new accounts, do the following:
1. Select File | New | Account or click on the New Account icon (Figure 3 on page 16) to access the
Create New Account window (Figure 15).
Figure 15. Create New Account window
2. Select the panel type from the list in the Select Panel Type field.
Chapter 4
Accounts
3. Fill in the panel and customer information as needed. Only the account number and panel phone
number are required to contact a panel.
4. To assign an account to a folder, select the folder from the list in the Create In Folder field. A folder
can also be assigned from the Account Info tab in the Edit Account window.
5. Click OK to save the information and close the window, or click Apply to save the information and
keep the window open to continue creating new accounts.
35
36
Enterprise Downloader
User Manual
Edit accounts
You can select and edit existing accounts without connecting to the actual panel.
To edit accounts, do the following:
1. Select View | Account Summary or click the Account Summary icon (Figure 3 on page 16) to
access the Account Summary tab (Figure 16).
Figure 16. Account Summary tab
2. Double-click the account, or highlight the account and click Edit.
Chapter 4
Accounts
3. In the Edit Accounts window (Figure 17), you can click on the appropriate tab to access and change
specific settings. The settings that appear on the tabs depend on the panel type. Different systems will
have different settings. Clicking on the upper tabs will switch between groupings of properties and
clicking on the lower tabs will access more detailed information for a property grouping.
Figure 17. Edit Accounts window
4. Click OK to save the information and close the window, or click Apply to save the information and
keep the window open to continue editing accounts.
Delete accounts
To delete an existing account, do the following:
1. Select View | Account Summary or click the Account Summary icon (Figure 3 on page 16) to
access the Account Summary tab (Figure 16 on page 36).
2. Select a single account and click Delete. To delete blocks of accounts, highlight specific accounts with
your mouse or hold down the control key and click on specific accounts.
3. When prompted, click OK to confirm the deletion.
37
38
Enterprise Downloader
User Manual
Print accounts
Enterprise Downloader has a print option that allows you to print the values of a specific account to an HTML
file.
To print an account, do the following:
1. Select View | Account Summary or click the Account Summary icon (Figure 3 on page 16) to
access the Account Summary tab (Figure 16 on page 36).
2. Double-click on the account, or highlight the account and click Print to access the Print window
(Figure 18).
Figure 18. Print window
3. Select all or specific account properties you want to print.
4. Click Print. The section selected will be sent to an HTML file for printing.
Chapter 4
Accounts
Account differences
Enterprise Downloader allows you to track differences between values that are saved in the database and
values that are stored in the panel. After you do an upload with the Enable Difference Tracking option selected
in the Job Settings window (see Tracking differences on page 51), click Differences on the Account Summary
window (Figure 16 on page 36) to view the differences between the panel and database (Figure 19).
Figure 19. Differences window
To update the values in the database to match the actual panel data, do the following:
1. Select Mark to Update for each property you want to update. To select all of the properties in the list,
right-click on the window and select Select All Rows.
2. Click Update.
Note:
Some additional properties may appear in the Differences window after doing an update. This will occur for
some sensor and accessory module settings and is normal operaton.
When the Enable Difference Tracking option is set from the Job Settings window, you must manually update
the properties from the Differences window to be reflected in the database. If you want the actual panel
property values to always be reflected in the database, don’t select Enable Difference Tracking on the Job
Settings window.
39
40
Enterprise Downloader
User Manual
Customers
Customer data records are stored separately from panel data records. Panels my be linked to existing customer
data so that changes, such as a customer contact name, can be implemented by updating a single record. It is
not necessary to make the change on each panel controlled by that customer.
Add customers
To add customers, do the following:
1. Select View | Customer Summary to access the Customer Summary tab (Figure 20).
Figure 20. Customer Summary tab
2. Click Add to access the Add Customer window (Figure 21 on page 41).
Chapter 4
Accounts
Figure 21. Add Customer window
3. Enter the customer information
4. Click OK.
Edit customers
To edit customers, do the following:
1. Select View | Customer Summary to access the Customer Summary tab (Figure 20 on page 40).
2. Select the customer from the list and click Edit.
3. Change the required information.
4. Click OK.
Delete customers
To delete customers, do the following:
1. Select View | Customer Summary to access the Customer Summary tab (Figure 20 on page 40).
2. Select the customer from the list.
3. Click Delete.
Note:
When you delete a customer, you will also delete all accounts that are associated with that customer.
41
42
Enterprise Downloader
User Manual
Account extensions
Enterprise Downloader allows you to create account extensions so that panels with the same account number
can be distinguished from each other. The account extension consists of up to ten user-specified digits or letters
that are applied as a prefix to the panel’s account number when it is displayed or sorted. Account extensions are
determined by each panel’s programming for Central Station Phone Number 1 (CS1 Phone). Each CS1 phone
number supported by the central station is given a defined prefix. For example, if several accounts purchased
from Elmwood Security are all be configured to report to a receiver with a phone number of 800.555.1212 and
be identified with the prefix ELM, Enterprise Downloader will maintain a list where the phone number
800.555.1212 is paired with the ELM prefix.
Enterprise Downloader will not allow phone numbers to be typed into accounts that are configured with an
account extension. The phone number to be used for CS1 Phone is read from the account extension table, and
automatically stored with the panel’s account data. To change the CS1 Phone number in a panel, you must
select the account extension associated with the desired phone number and download the panel. When the
download is successfully completed, the database record for the panel will be updated to reflect the new
extension.
Chapter 4
Accounts
Create account extensions
To create account extensions, do the following:
1. Select Setup | Account Extension to access the Account Extension tab (Figure 22).
Figure 22. Account Extension tab
2. Click Add to access the Add Account Extension window (Figure 23 on page 44).
43
44
Enterprise Downloader
User Manual
Figure 23. Add Account Extension window
3. Enter the extension name or abbreviation in the Account Extension field.
4. Enter the phone number of the extension in the Panel Extension Value field.
5. Enter a description or comment in the Description field.
6. Click OK.
Note:
You can enter more than one phone number per extension name. To do this click Add and enter the name of an existing
extension in the Account Extension field, and enter a different phone number in the Panel Extension Value field.
Edit account extensions
To edit account extensions, do the following:
1. Select Setup | Account Extension.
2. Select the account extension on the list and click Edit.
3. Change the data in the appropriate field.
4. Click OK.
Delete account extensions
To delete account extensions, do the following:
1. Select Setup | Account Extension.
2. Select the account extension on the list.
3. Click Delete.
Note:
Deleting an extension will delete all the panels that are associated with that extension.
Chapter 4
Accounts
Bulk accounts
Use the Account Creator window when you want to create a large batch of sequential account numbers in the
database. You can specify the starting account number and the number of accounts to create. You can also
specify the panel template to use and the account extension. Account numbers can be created in hexadecimal or
decimal.
Create bulk accounts
To create bulk accounts, do the following:
1. Select Setup | Account Creator to access the Account Creator window (Figure 24).
Figure 24. Account Creator window
2. Select the panel template from the list in the Panel Template field.
3. Select the account extension (optional) from the list in the Account Extension field if needed.
4. Enter the number of accounts to be created.
5. Enter the starting account number.
6. Select the Create Accounts in Hex box if you want to create the account number with hexadecimal
values.
7. Click Run to generate the accounts.
8. Click Refresh to display the accounts in the Existing Account Number field.
Once the accounts are created, you must use the Edit Account window to view or edit the accounts.
45
46
Enterprise Downloader
User Manual
Chapter 5 Jobs
This chapter provides an overview of what jobs are and instructions on creating
and using jobs.
In this chapter:
Jobs . . . . . . . . . . . . . . . . . . . . . . . . . . . . . . . . . . . . . . . . . . . . . . . . . . . . . 48
Job history. . . . . . . . . . . . . . . . . . . . . . . . . . . . . . . . . . . . . . . . . . . . . . . . 51
Tracking differences . . . . . . . . . . . . . . . . . . . . . . . . . . . . . . . . . . . . . . . . 51
48
Enterprise Downloader
User Manual
Jobs
Enterprise Downloader communicates with a panel only when a job is created that instructs Enterprise
Downloader to do so. Enterprise Downloader defines a job as the combination of the connection type with the
downloaded type:
Connection type (who is calling who). Panel calls to Downloader. Downloader calls to the panel.
Load type (purpose of job). Full upload, full download, or user specified.
Connections to panels can go in one of the following directions:
•
•
Downloader can accept calls from panels whether the call is expected or not (a call-in job); and
Downloader can call individual panels (a call-out job).
Downloader connects with a panel in order to:
Upload from a panel. Downloader reads all loadable information from a panel and saves it in the
Downloader account. An upload copies all settings, overwriting any previous loadable account
information. Upload from a panel to get your previously installed panels into the Downloader database.
Download to a panel. Downloader writes all loadable account information from Downloader to the
panel. It will overwrite all previous settings in the panel. For example, download to a panel to reload all of
a panel’s settings when replacing a panel.
Merge with a panel. Downloader lets you do a job that uploads and downloads properties at the same
time. These job setting actions are selected from the Job Edit window under the Job Details tab.
Job templates
See Job templates on page 56 for information on how to create, edit, and delete job templates.
Chapter 5
Jobs
Create jobs
Jobs can be created at any time and stored until the designated start time. For example, if an area code changes,
you can schedule the accounts affected to call out so Downloader can download the new code to each panel.
To create a job, do the following:
1. From the Account Summary window, click New/Edit in the Jobs field. The New Job window
(Figure 25) appears.
Figure 25. New Job window
2. Fill in the following fields:
Call Type. Choose whether to dial out to the panel or wait for the panel to call Downloader.
Panel Dial Out Phone. Enter the phone number to call the remote panel.
Stay Online. Check this box to not hang up with the panel after a job is complete. This will allow you to
create and do another job once this job has completed. The panel will time out and disconnect after five
minutes of no information transferred.
Use Unassigned CommServer. Select this box to tell the JobServer to use any CommServer that is not
associated with a particular user. This should always be selected when you do not add users to the
CommServer when you create the CommServer. See Operators (users) on page 20.
Allow Early Call-In. Check this box when you have scheduled a job to process in the future and it is
okay if the panel calls in early for the change.
49
50
Enterprise Downloader
User Manual
Ring/Hang/Ring. Use the drop-down menu to indicate how to connect to the panel. These options
change per panel type.
Set Panel Time. Set the time in the panel.
Change Panel Account. Change the account number in the panel.
Change Account Extension. Change the account extension in the panel.
Change DL Code. Change the dealer code in the panel.
Set OEM Code and Clear OEM Code. These options are used by specific customers that have panels
made with special OEM features enabled.
Time of Day Offset. Use this option to set the time in panels that are located in a different time zone.
Enable Difference Tracking. Check this option when you want to compare the property values that are
in the panel with the property values represented in Downloader. This is useful if the user wants to see the
difference between a defaulted panel and the current values in a panel. If this value is checked, the user
must go to the differences window and manually update the values after an upload in order for those values
to be reflected in the database.
3. Click OK to save the information and close the window, or click Apply to save the information and
keep the window open to continue creating new jobs.
Edit jobs
To edit jobs, do the following:
1. From the Account Summary window, click New/Edit in the Jobs field. The New Job window
(Figure 25 on page 49) appears.
2. Change the appropriate fields.
3. Click OK to save the information and close the window, or click Apply to save the information and
keep the window open to continue editing new jobs.
Delete jobs
To delete jobs, do the following:
1. In the menu bar, select View | Job Summary, or click the Job Summary icon on the tool bar (Figure 3
on page 16). You can also delete jobs from the CommServer and JobServer interfaces.
2. Select the job from the list.
3. Click Delete.
Note:
You cannot delete jobs that are in processing or callback mode.
Chapter 5
Jobs
Job history
You can use Enterprise Downloader to track the history of the values downloaded to a panel.
To enable the job history option, do the following:
1. Select Setup | System Preferences.
2. Change the Days to Retain Job Histories field to a value other than 0. This represents the number of
days to retain the property history values.
3. Click Apply.
Once the job history option is enabled and properties are downloaded to a panel, you can view the job history.
To view job histories, do the following:
1. Select View | Account Summary. You can also access the information from View | Job Summary.
2. Select the account from the list.
3. Click History.
Tracking differences
Enterprise Downloader allows you to track the differences in property values between the actual data that is
stored in the panel, and what the user interface contains in the database. Job tracking is enabled on a per-job
basis. This means that you can specify whether or not to log differences on each specific job you run.
To enable difference tracking, do the following:
1. Select a specific account from the Account Summary window and click New/Edit.
2. Click Enable Difference Tracking (Figure 25 on page 49).
3. Once the job is successfully completed, select View | Account Summary or click the Account
Summary icon. From the Account Summary window (Figure 16 on page 36) you can see the
properties that are different between the database and the panel values.
See Account differences on page 39 to update the values in the database to match the actual panel data.
51
52
Enterprise Downloader
User Manual
Chapter 6 Templates
This chapter provides information on how to create and use panel and job
templates.
In this chapter:
Panel templates. . . . . . . . . . . . . . . . . . . . . . . . . . . . . . . . . . . . . . . . . . . . 54
Job templates . . . . . . . . . . . . . . . . . . . . . . . . . . . . . . . . . . . . . . . . . . . . . 56
54
Enterprise Downloader
User Manual
Panel templates
Enterprise Downloader is able to create and use multiple account templates. When you create a new account,
you can use these templates to define default values stored for the new account. You can specify a template to
use when you create an account and specify an account to be stored as a template.
Create panel templates
To create panel templates, do the following:
1. Select Setup | Panel Template to access the Panel Template tab (Figure 26).
Figure 26. Panel Template tab
2. Select the panel type from the list in the Panel Type field.
3. Click New to create a new panel template.
4. Change the properties you want to edit.
5. Click OK to save the information and close the window, or click Apply Changes to save the
information and keep the window open to continue creating templates.
Note:
You can also create a panel template when you are editing an account in the Edit Accounts window (Figure 17 on
page 37 by clicking Create Panel Template and entering a name for the template to store.
Chapter 6
Templates
Edit panel templates
To edit panel templates, do the following:
1. Select Setup | Panel Template.
2. Select the panel type you want to edit from the list in the Panel Type field.
3. Select the panel template you want to edit from the list in the Templates field.
4. Edit the required properties.
5. Click OK to save the information and close the window, or click Apply Changes to save the
information and keep the window open to continue editing panel templates.
Delete panel templates
To delete panel templates, do the following:
1. Select Setup | Panel Template.
2. Select the panel type you want to delete from the list in the Panel Type field.
3. Select the panel template you want to delete from the list in the Templates field.
4. Click Delete.
Custom panel templates
Use the custom panel template for unscheduled call-ins from a panel. Only one panel template is assigned as
the custom panel template. The custom panel template is specified from the JobServer UI to download specific
values to a panel. This is useful when you want to assign a new CSPhone (or any other property) to every panel
that calls in. You can modify a panel template with certain values and specify that template as the custom
template, then select the custom option for the New Account Panel Template value in the Unscheduled Call-in
Settings tab in the Options menu of the JobServer UI.
To assign a panel template as the custom template, do the following:
1. Select the template from the Panel Template tab (Figure 26 on page 54).
2. Select the Custom box.
3. Click OK.
Remember, although you can have numerous panel templates, only one panel template can be specified as the
custom panel template. If you assign a different template as the custom template, the previously assigned
custom template will no longer be the custom template.
55
56
Enterprise Downloader
User Manual
Job templates
Enterprise Downloader is able to create and use multiple job templates. When you create a new job, you can
use these templates to define the default job type. You can specify a template to use to create new jobs, and you
can specify a job to be stored as a template.
Enterprise Downloader comes populated with three job templates:
Full Upload. Does a full upload from/to the panel.
Full Download. Does a full download from/to the panel.
Custom. Operator specified job actions (the default custom template is full upload).
You can create as many other job templates as you want, but you can only assign one template to be the custom
job template (see Custom panel templates on page 55).
Create job templates
To create job templates, do the following:
1. Select Setup | Job Templates to access the Job Template tab (Figure 27).
Figure 27. Job Template tab
2. Select the panel type you wish to create a template for from the list in the Panel Type field.
3. Click New... to create a new job template.
4. Select the combinations of actions you want the job to do in the Job Details field.
Chapter 6
Templates
5. Click OK to save the information and close the window, or click Apply Changes to save the
information and keep the window open to continue creating job templates.
Note:
You can also create job templates while editing a job in the Edit Job window In that window, click Save As Template and
enter a template name to store the template.
Edit job templates
To edit job templates, do the following:
1. Select Setup | Job Templates.
2. Select the panel type from the list in the Panel Type field.
3. Select the job template you want to edit from the list in the Job Template field.
4. Edit the job details.
5. Click OK to save the information and close the window, or click Apply Changes to save the
information and keep the window open to continue editing job templates.
Delete job templates
To delete job templates, do the following:
1. Select Setup | Job Templates.
2. Select the panel type from the list in the Panel Type field.
3. Select the template from the Job Template field.
4. Click Delete.
57
58
Enterprise Downloader
User Manual
Custom job templates
Use the custom job template from the JobServer UI to specify what job action an unscheduled panel does when
calling in. For example, if you want to download specific phone properties to a panel and upload all other
information from the panel, you would modify the job template to download the phones and upload all other
properties as shown in Figure 28.
Figure 28. Job Templates window example
You also need to modify the custom panel template with the specific values to download.
These job templates can be specified from the JobServer UI to do certain actions depending on whether the
account already exists in the database, or whether it is a new account calling in. See JobServer on page 21.
Chapter 7 Troubleshooting and support
This chapter provides information to help you troubleshoot problems and contact
technical support in case you need assistance with your GE equipment.
In this chapter:
Troubleshooting . . . . . . . . . . . . . . . . . . . . . . . . . . . . . . . . . . . . . . . . . . . 60
Troubleshooting your Enterprise Downloader system. . . . . . . . . . . 60
Contacting technical support . . . . . . . . . . . . . . . . . . . . . . . . . . . . . . . . . 64
Online publication library . . . . . . . . . . . . . . . . . . . . . . . . . . . . . . . . 64
60
Enterprise Downloader
User Manual
Troubleshooting
This section provides information to help you diagnose and solve various problems that may arise while
configuring or using your GE product and offers technical support contacts in case you need assistance. (See
Contacting technical support on page 64.)
Troubleshooting your Enterprise Downloader system
• How do I access the event log?
Enterprise Downloader writes error logs to the system event viewer. To view the error logs, open the event
viewer on the machine and click on the EDUI log. (On a Windows 2000 machine, go to the control panel
and click Administrative Tools.) If an error was trapped, it will be displayed in the event viewer log and
may provide some useful debug information.
• Why am I unable to log on to the JobServer?
Verify that the name of the JobServer is the correct machine name in the CommServer property window.
• Why can’t I log on to the database from the user interface?
Check the server name. It should be similar to one of the following examples:
•
•
•
•
(local)
Your computer name
(local)\EDMSDE2000
Infra_24f43\EDMSDE2000
Verify that the SQL Manager is started. Go to C:\Program Files\Microsoft SQL Server\80\Tools\Binn and
start (sqlmangr.exe):
• What if I start a job and nothing happens?
To find the problem, do the following:
a. Verify that the Use unassigned CommServer option is checked if no users are entered in the
CommServer UI.
b. Confirm Dial out type is set to Dial out to panel.
c. Make sure the phone number is the correct number and has not been left blank.
• What should I do if the CommServer is unable to log on to the JobServer?
If you are unable to log on to JobServer, do the following:
a. Make sure the JobServer service is started.
b. Verify that the JobServer name in the CommServer properties window is correct.
c. Stop the JobServer service and restart it, then log on with CommServer.
d. Try to exit and restart CommServer.
Chapter 7
Troubleshooting and support
• Why has CommServer stopped responding (memory error)?
If the ports log out of JobServer, the CommServer disappears, or CommServer on XP pops up an error box,
stop and restart the CommServer.
• Why isn’t the modem responding?
Verify that the modem is turned on, plugged into a phone line, and the type is correctly defined as the right
Com port from the Profiles list.
• Why did my job fail?
Verify that JobServer is logged on (green triangle).
Verify that the CommServer is communicating with the modem (no Xs in CommServer UI).
• After a panel upload, why do the property values fail to appear in the user interface?
Make sure you do not have Enable Difference Tracking enabled in the Job window. If you do, you will
have to go to the Differences window and update the values.
After a panel upload, the system may take a while to update the properties to the database. On slower
machines, this may take some time to complete. Verify that the user interface indicates the job has
completed on the Job Summary or Account Summary window.
• Why do similar time values appear in the Differences window when their values are the same?
Sometimes dates will appear to be the same (for example, 10:00 AM for the Saved value and 10:00 AM for
the Panel value). Even though the times are the same, somethimes the associated dates will not be the
same. If updated, these values will no longer appear in the Differences window.
• How do I blank out an output trigger for a snapcard in a Concord panel?
In order to completely blank out an output trigger for a snapcard in the panel, you must go to the Output
Configuration window from the Onboard Options tab or go to the Output Responses window from the
Accessory Modules tab and select the following options:
•
•
•
Set the Output Trigger to (244) Blank Trigger.
Enable Siren Tracking and Trip Delay.
Set the Response Time to Sustained.
• How do I change the Access Code Length setting in a Simon panel?
Since the Access Code Length setting affects the security codes as well as the access codes, you must
download all access codes and properties as well as all security properties when changing the value of the
Access Code Length.
• How do I backup my database if I’m using the MSDE version of the SQL database?
The best way to backup the MSDE database is to copy the database files to a backup location. Before
copying these files, you will have to stop the SQL Server Service Manager. You can do this by doubleclicking the SQL Service icon located in the system tray, then clicking the Stop button. Once the files are
copied, it is important to restart the service.
The files are named: E3_Data.MDF, E3_Log.MDF, ITIED_Data.MDF, and ITIED_Log.LDF. These files
should be under location C:\Program Files\ITI Enterprise Downloader\Database.
61
62
Enterprise Downloader
User Manual
• How do I get the Downloader to handle unattended calls with a Downloader (DL) Code in the panel that is
not the default value?
The Downloader code is a 5-digit security code set in the panel that will not allow remote connectivity to
the panel if the code is not configured properly in the Downloader.
To get nondefault DL codes to upload into the Downloader when performing an unattended call-in, do the
following:
1. From the JobServer user interface, click on the File menu and select Options. Go to the Unscheduled
Call-in Settings tab. Under this tab, make sure the New Account Panel Template option is set to
Custom, not Default ITI. Then right-click the specific default DL code number and select Edit to
modify the number. After you change the number, click OK. You must change this number for each
corresponding panel type.
Note:
After you make any changes in the JobServer UI, you must stop and restart the service before the changes
will go into affect.
2. To edit the corresponding panel templates in the Enterprise Downloader user interface, click on the
Setup menu and select Panel Template. From the panel type selected, make sure to check the
appropriate template to be used for call-in data by clicking the Custom check box from the Template
tab. Once you are editing the template flagged as Custom, click on the Security tab and edit the
Downloader Code value to match the value in the panel.
Once you have completed this procedure, the values linked with the panel template flagged as Custom, will
be the values that get created and downloaded to the panel when a new panel calls in. The properties that
get downloaded into the panel are determined by job actions that are defined in the Job template set to
handle unattended call-ins.
• How can I turn down the volume on the modem?
Depending on your modem type, you should be able to lower the speaker volume in the modem
initialization string. It is a good idea to refer to your specific modem documentation, but usually adding
“LO” to the initialization string from the CommServer user interface will lower the speaker volume on the
modem.
• How can I adjust the ring/hang/ring timing when calling a panel?
There are two settings in the CommServer user interface that will change the timing of how the ring/hang/
ring setting will work. The Pause Length represents the time delay for each comma that is put into the dial
string. The Digit Length determines how long to wait after each digit is dialed. These time values are in
milliseconds (1000 = 1 second).
The Comm settings should be extended if the Downloader is calling the panel and hanging up before the
panel has a chance to receive the call.
The Comm settings should be shortened if the panel is receiving more than two rings before hanging up
and retrying on the ring/hang/ring setting.
Chapter 7
Troubleshooting and support
• How does the Use Unassigned CommServer setting work?
The Use Unassigned CommServer setting in the Job screen is used to determine which modem will be used
for a particular call-out job. Unassigned means that there are no users assigned to it from the CommServer
user interface screen.When the CommServer is initially configured, if no names are entered into the users
list, the Use Unassigned CommServer option will have to be checked for all call-out jobs.
If a user name or computer name is entered into the users list when configuring the CommServer, the Use
Unassigned CommServer option can be left unchecked.
Assigning user names to specific CommServer controls which modems are used for specific call-out jobs.
This can help with modem load sharing as well as helping to debug errors that occur during call-out.
63
64
Enterprise Downloader
User Manual
Contacting technical support
For assistance installing, operating, maintaining, and troubleshooting this product, refer to this document and
any other documentation provided. If you still have questions, you may contact technical support during
normal business hours (Monday through Friday, excluding holidays, between 6 a.m. and 5 p.m. Pacific Time).
Table 2.
Sales and support contact information
Sales
Phone
Technical support
Toll-free: 888.GESECURity (888.437.3287 in the US, including Alaska and Hawaii; Puerto Rico; Canada).
Outside the toll-free area: 503.885.5700.
E-mail
[email protected]
[email protected]
Fax
800.483.2495
541.752.9096 (available 24 hours a day)
Note:
Be ready at the equipment before calling for technical support.
Online publication library
Another great resource for assistance with your GE product is our online publication library, available to all of
our customers. To access the library, go to our website at the following location:
http://www.gesecurity.com
In the Tools area at the top, click the Publication Library link. After you register and log on, you may search
through our online library for the documentation you need.1
1.
Many GE documents are provided as PDFs (portable document format). To read these documents, you will need Adobe
Acrobat Reader, which can be downloaded free from Adobe’s website at www.adobe.com.
Appendix A OEM codes
This appendix describes how Enterprise Downloader works with the OEM codes
shipped with panels.
66
Enterprise Downloader
User Manual
OEM code
Certain panels ship from the factory with a specific, nonblank OEM code. Full remote programming access to
those panels requires that the standard Enterprise package be upgraded to register an OEM code that matches
the code installed in the panels at the factory. The objective of service provider protection is to allow a
monitoring center to:
•
•
•
have full upload/download access to their panels;
prevent any other monitoring center from having full access to their panels; and
allow installers running standard upload/download software to change all panel parameters, except
those that could redirect the panel to a new central station, or those that can prevent the original
monitoring center from connecting to the panel for upload/download.
A panel with no OEM code set can be processed by the standard Enterprise product. For these panels, the keys
for access are the download code and the dealer code. Both must match for any job to be processed at all.
When a panel has an OEM code, it cannot be programmed remotely by the standard Toolbox product. The
standard version of Enterprise will do partial processing on OEM code-protected panels. Parameters that
cannot be uploaded or downloaded (even if phone lock is not set) are:
•
•
•
•
•
•
•
•
•
CS phone 1;
CS phone 2;
SL phone;
phone lock;
DL access code;
phone mod 1;
phone mod 2;
dealer code/utility access code 1; and
account code.
A standard version of Enterprise can be upgraded to do full processing on panels that are protected by specific
OEM codes. This upgrade requires the use of a license diskette, and the upgrade cannot be copied from system
to system without the diskette. When Enterprise has been upgraded, it will process standard panels and do full
processing of OEM code panels when the panel code matches the code registered with Enterprise during the
upgrade.
Appendix B Panel sensor groups
This appendix provides tables of sensor groups for panels used with Enterprise
Downloader software.
In this appendix:
Allegro sensor groups . . . . . . . . . . . . . . . . . . . . . . . . . . . . . . . . . . . . . . . 68
Simon 2 sensor groups . . . . . . . . . . . . . . . . . . . . . . . . . . . . . . . . . . . . . . 71
Simon 3 sensor groups . . . . . . . . . . . . . . . . . . . . . . . . . . . . . . . . . . . . . . 73
Concord 3 sensor groups . . . . . . . . . . . . . . . . . . . . . . . . . . . . . . . . . . . . 75
Concord 4 sensor groups . . . . . . . . . . . . . . . . . . . . . . . . . . . . . . . . . . . . 77
Concord Express sensor groups . . . . . . . . . . . . . . . . . . . . . . . . . . . . . . . 80
Enterprise Downloader
User Manual
Allegro sensor groups
Table 3 shows the sensor groups for Allegro control panels.
No.
Name
Application
Alarm
Delay
CS Report
Chime
Active Levels
Allegro sensor groups
Supervisory
Table 3.
Restoral
68
00
Fixed panic
24-hour audible fixed emergency buttons
Police
Instant
No
Yes
Yes
No
1, 2, 3
01
Portable
panic
24-hour audible portable emergency
buttons
Police
Instant
No
No
Yes
No
1, 2, 3
02
Fixed panic
24-hour silent fixed emergency buttons
Silent
Instant
No
Yes
Yes
No
1, 2, 3
03
Portable
panic
24-hour silent portable emergency buttons
Silent
Instant
No
No
Yes
No
1, 2, 3
04
Fixed
Emergency
Instant
No
Yes
Yes
No
1, 2, 3
emergency
24-hour emergency sensor, such as pendant
panic or holdup button
Portable
24-hour portable emergency alert button
Emergency
Instant
No
No
Yes
No
1, 2, 3
06
emergency
08
Special
intrusion
Special belongings, such as gun cabinets
and wall safes
Police
Instant
Yes
Yes
Yes
No
1, 2, 3
09
Special
intrusion
Special belongings, such as gun cabinets
and wall safes
Police
Standard
Yes
Yes
Yes
No
1, 2, 3
10
Entry/exit
delay
Entry and exit doors that require a standard
delay time
Police
Standard
Yes
Yes
Yes
Yes
2, 3
13
Instant
perimeter
Exterior doors and windows
Police
Instant
Yes
Yes
Yes
Yes
2, 3
14
Instant
interior
Interior doors
Police
Follower
Yes
Yes
Yes
No
2, 3
15
Instant
interior
Interior PIR motion sensors 1
Police
Follower
No
Yes
Yes
No
2, 3
16
Instant
interior
Interior doors
Police
Follower
Yes
Yes
Yes
No
3
17
Instant
interior
PIR motion sensors
Police
Follower
No
Yes
Yes
No
3
18
Instant
interior
PIR motion sensors subject to false alarms
(cross-zone) 1 2
Police
Follower
No
Yes
Yes
No
3
19
Delayed
interior
Interior doors that initiate a delay before
going into alarm 1
Police
Standard
Yes
Yes
Yes
No
3
20
Delayed
interior
PIR motion sensors that initiate a delay
before going into alarm 1
Police
Standard
No
Yes
Yes
No
3
1
69
No.
Name
Application
Alarm
Delay
Supervisory
CS Report
Chime
Active Levels
Allegro sensor groups (continued)
Restoral
Table 3.
21
Local
instant
interior
24-hour local alarm zone protecting
anything that opens and closes
Police
Instant
Yes
Yes
No
No
1, 2, 3
22
Local
delayed
interior
Same as group 21, plus activation initiates a
delay before going into alarm
Police
Standard
Yes
Yes
No
No
1, 2, 3
23
Local
instant
emergency
24-hour local alarm zone protecting
anything that opens and closes 3
Emergency
Instant
Yes
Yes
No
No
1, 2, 3
25
Local
special
chime
Notify the user when a door is opened.
Sounds emit from a local annunciator. 1
Special
chime
Instant
No
Yes
No
No
1, 2, 3
26
Fire
24-hour fire, rate-of-rise heat, and smoke
sensors
Fire
Instant
Yes
Yes
Yes
No
1, 2, 3
29
Freeze
Freeze sensors
Emergency
Instant
Yes
Yes
Yes
No
1, 2, 3
33
Siren
Siren supervision
Silent
Instant
No
Yes
Yes
No
1, 2, 3
34
Gas
Carbon monoxide (CO) gas detectors
Emergency
Instant
Yes
Yes
yes
No
1, 2, 3
38
Water
Water sensors
Trouble
beeps
Instant
Yes
Yes
Yes
No
1, 2, 3
39
DTIM
Dialog Telephone Interface Module (DTIM) 4
Police
Instant
No
Yes
Yes
No
1.
2.
3.
4.
If using a PIR motion sensor, use only Part
No. 60-511-01-95.
3
This group is not certified as a primary protection circuit for UL listed systems and is for supplementary use only.
Sounds an instant local alarm if one sensor is tripped. Sounds police siren if two or more sensors are tripped within four minutes. Otherwise sensors are followers to delayed sensors. If Alarm Verification is on, group 18 functions like group 17.
This group has not been investigated by UL.
The DTIM will report in all levels.
Siren type
Police. A high level steady siren.
Fire. A high level temporal siren.
Silent. No siren.
Emergency. A low level on-off patterned siren.
70
Enterprise Downloader
User Manual
Delay
Instant. A sensor of this type will cause an immediate alarm if a violation occurs anytime in an active
arming level.
Standard. A sensor of this type will cause an entry delay if a violation occurs anytime in active arming
level. A violation during an exit delay will not cause an alarm.If the arming level modifier No Delay is
enabled, a sensor of this type will cause an immediate alarm if the violation occurs during an active arming
level.
Follower. A sensor of this type will cause an immediate alarm if a violation occurs during an active level
unless an entry or exit delay is in progress. If violated during an entry delay and the entry delay expires, the
sensor will go into alarm.
71
Simon 2 sensor groups
Simon 2 sensor groups
Type
Name/application
Siren Type
Restoral
00
Fixed panic: 24-hour audible fixed emergency button
Intrusion
I
No
Yes
1 ,2, 3, 4
01
Portable panic: 24-hour audible portable emergency buttons
Intrusion
I
No
No
1, 2, 3, 4
02
Fixed panic: 24-hour silent fixed emergency buttons. Status light will
not blink.
Silent
I
No
Yes
0, 1, 2, 3, 4
03
Portable panic: 24-hour silent portable emergency buttons. Status light
will not blink.
Silent
I
No
No
0, 1, 2, 3, 4
04
Fixed auxiliary: 24-hour auxiliary sensor, such as pendant panic
Emergency
I
No
Yes
0, 1, 2, 3, 4
05
Fixed auxiliary: 24-hour emergency button. Siren shutoff confirms CS
report.
Emergency
I
No
Yes
0, 1, 2, 3, 4
06
Portable auxiliary: 24-hour portable auxiliary alert button
Emergency
I
No
No
0, 1, 2, 3, 4
07
Portable auxiliary: 24-hour portable auxiliary button. Siren shutoff con- Emergency
firms CS report.
I
No
No
0, 1, 2, 3, 4
08
Special intrusion: gun cabinets such as and wall safes
Intrusion
I
Yes
Yes
1, 2, 3, 4
09
Special intrusion: gun cabinets such as and wall safes
Intrusion
S
Yes
Yes
1, 2, 3, 4
10
Entry/exit delay: Entry/exit delay that require a standard delay time.
Chime
Intrusion
S
Yes
Yes
2, 4
13
Instant perimeter: Exterior doors and windows. Chime.
Intrusion
I
Yes
Yes
2, 4
14
Instant interior: Interior doors
Intrusion
F
Yes
Yes
2, 3, 4
15
Instant interior: Interior PIR motion sensors 1
Intrusion
F
No
Yes
2, 3, 4
16
Instant interior: Interior doors
Intrusion
F
Yes
Yes
3, 4
17
Instant interior: PIR motion sensors
Intrusion
F
No
Yes
3, 4
19
Delayed interior: interior doors that initiate a delay before going into
alarm 1
Intrusion
S
Yes
Yes
3, 4
20
Delayed interior: PIR motion sensors that initiate a delay before going
into alarm 1
Intrusion
S
No
Yes
3, 4
21
Local instant interior: 24-hour local alarm zone protecting anything
that opens and closes. No report.
Intrusion
I
Yes
Yes
1, 2, 3, 4
22
Local delayed interior: same as group 21, plus activation initiates a
delay before going into alarm. No report. 1
Intrusion
S
Yes
Yes
1, 2, 3, 4
1
Supervisory
Active in Levels
Table 4.
Delay
Table 4 shows the sensor groups for Simon 2 control panels.
72
Enterprise Downloader
User Manual
Table 4.
Simon 2 sensor groups (continued)
23
Local instant auxiliary: 24 hour local alarm zone protecting anything
that opens and closes. 2 No report.
Emergency
I
Yes
Yes
01234
24
Local instant auxiliary: 24 hour local alarm zone protecting anything
that opens and closes. Sirens shut off at restoral. No report. 1
Emergency
I
Yes
Yes
01234
25
Local special chime: Notify the user when a door is opened. Sounds
emit from a local annunciator. 1 No report.
Three
beeps
I
No
Yes
01234
26
Fire: 24 hour fire, rate-of-rise heat, and smoke sensors 3.
Fire
I
Yes
Yes
01234
27
Lamp control or other customer feature. 2 No report.
Silent
I
Yes
Yes
01234
28
PIR motion sensor, sound sensor, or pressure mat. 2 No report.
Silent
I
No
Yes
01234
29
Auxiliary: Freeze and water sensors.
Trouble
Beeps
I
Yes
Yes
01234
32
PIR motion sensor or sound sensor. 2 No report.
Silent
I
No
No
01234
33
Supervised wireless siren (SWS)
Silent
I
Yes
Yes
01234
34
Carbon monoxide alarm
Emergency
I
Yes
No
01234
1.
2.
3.
This type is not certified as a primary protection circuit for UL-listed systems and is for supplementary use only.
This type has not been investigated by UL.
This type is required for UL-listed residential fire alarm applications.
Arming levels
0. Subdisarmed (used to bypass intrusion sensors that are active 24 hours a day). Only the Master Access
code can enter this level.
1. Disarm.
2. Arm doors and windows.
3. Arm motion sensors.
4. Arm doors/windows and motion sensors.
Delays
I. Instant delay, no delay, immediate alarm.
S. Standard delay, alarm sounds after programmed entry delay time.
F. Follower delay, alarm sounds immediately if entry/exit delay is not active, otherwise alarm sounds after
programmed entry delay time.
73
Simon 3 sensor groups
Type
Name/application
Siren type
00
Fixed panic: 24 hour audible fixed emergency button
Intrusion
I
No
Yes
1, 2, 3, 4
01
Portable panic: 24 hour audible portable emergency buttons
Intrusion
I
No
No
1, 2, 3, 4
02
Fixed panic: 24 hour silent fixed emergency buttons. Status light will
not blink.
Silent
I
No
Yes
0, 1, 2, 3, 4
03
Portable panic: 24 hour silent portable emergency buttons. Status
light will not blink.
Silent
I
No
No
0, 1, 2, 3, 4
04
Fixed auxiliary: 24 hour auxiliary sensor
Emergency
I
No
Yes
0, 1, 2, 3, 4
05
Fixed auxiliary: 24 hour emergency button. Siren shut off confirms CS
report.
Emergency
I
No
Yes
0, 1, 2, 3, 4
06
Portable auxiliary: 24 hour portable auxiliary alert button
Emergency
I
No
No
0, 1, 2, 3, 4
07
Portable auxiliary: 24 hour portable auxiliary button. Siren shut off
confirms CS report.
Emergency
I
No
No
0, 1, 2, 3, 4
08
Special intrusion: such as gun cabinets and wall safes
Intrusion
I
Yes
Yes
1, 2, 3, 4
09
Special intrusion: such as gun cabinets and wall safes
Intrusion
S
Yes
Yes
1, 2, 3, 4
10
Entry/exit delay: Entry/exit delay that require a standard delay time.
Chime
Intrusion
S
Yes
Yes
2, 4
13
Instant perimeter: Exterior doors and windows. Chime
Intrusion
I
Yes
Yes
2, 4
14
Instant interior: Interior doors
Intrusion
F
Yes
Yes
2, 3, 4
15
Instant interior: Interior PIR motion sensors 1
Intrusion
F
No
Yes
2, 3, 4
16
Instant interior: Interior doors
Intrusion
F
Yes
Yes
3, 4
17
Instant interior: PIR motion sensors and sound sensors 1
Intrusion
F
No
Yes
3, 4
18
Instant interior cross-zone PIR motion sensors 1
Intrusion
F
No
Yes
3, 4
19
Delayed interior: interior doors that initiate a delay before going into
alarm 1
Intrusion
S
Yes
Yes
3, 4
20
Delayed interior: PIR motion sensors that initiate a delay before going
into alarm 1
Intrusion
S
No
Yes
3, 4
21
Local instant interior: 24 hour and closes. No report local alarm zone
protecting anything that opens.
Intrusion
I
Yes
Yes
1, 2, 3, 4
Supervisory
Active in levels
Simon 3 sensor groups
Restoral
Table 5.
Delay
Table 5 shows the sensor groups for Simon 3 control panels.
Enterprise Downloader
User Manual
Type
Name/application
Siren type
Supervisory
Active in levels
Simon 3 sensor groups (continued)
Restoral
Table 5.
Delay
74
22
Local delayed interior: same as group 21, plus activation initiates a
delay before going into alarm. No report. 1
Intrusion
S
Yes
Yes
1, 2, 3, 4
23
Local instant auxiliary: 24 hour and closes. 2 No report local alarm
zone protecting anything that opens
Emergency
I
Yes
Yes
0, 1, 2, 3, 4
24
Local instant auxiliary: 24 hour local alarm zone protecting anything
that opens and closes. Sirens shut off at restoral. No report. 1
Emergency
I
Yes
Yes
0, 1, 2, 3, 4
25
Local special chime: Notify the user when a door is opened. Sounds
emit from a local annunciator. 1 Direct bypass and unbypass when no
special motion chime sensors are in the security system. No report.
Three
Beeps
I
No
Yes
0, 1, 2, 3, 4
26
Fire: 24-hour fire, rate-of-rise heat, and smoke sensors 3
Fire
I
Yes
Yes
0, 1, 2, 3, 4
27
Lamp controller other customer feature. 2 No report
Silent
I
Yes
Yes
0, 1, 2, 3, 4
28
PIR motion sensor, sound sensor, or pressure mat. 2 RF thermostat. No
report.
Silent
I
No
Yes
0, 1, 2, 3, 4
29
Auxiliary: Freeze sensors
Trouble
Beeps
I
Yes
Yes
0, 1, 2, 3, 4
32
PIR motion sensor or sound sensor. 2 No report.
Silent
I
No
No
0, 1, 2, 3, 4
34
Carbon monoxide alarm
Emergency
I
Yes
Yes
0, 1, 2, 3, 4
35
Entry/exit delay interior PIR motion
Intrusion
S
No
Yes
2, 3, 4
36
Special intrusion: such as gun cabinets and wall tripped safes. Reports
as tamper if tripped. RF thermostat. DTIM (tamper only).
Intrusion
I
Yes
Yes
1, 2, 3, 4
37
Light switch control: X10 modules turn either on or off when a door is
opened No report.
Silent
I
No
Yes
0, 1, 2, 3, 4
38
Auxiliary: Water sensors.
Trouble
beeps
I
Yes
Yes
0, 1, 2, 3, 4
1.
2.
3.
This type is not certified as a primary protection circuit for UL-listed systems and is for supplementary use only.
This type has not been investigated by UL.
This type is required for UL-listed residential fire alarm applications.
Delays
I. Instant delay, no delay, immediate alarm.
S. Standard delay, alarm sounds after programmed entry delay time.
F. Follower delay, alarm sounds immediately if entry/exit delay is not active, otherwise alarm sounds after
programmed entry delay time.
75
Concord 3 sensor groups
Table 6 shows the sensor groups for Concord 3 control panels.
No.
Name
Application
Alarm
Delay
Supervisory
CS Reports
Chime level 1
Active levels
Concord 3 sensor groups
Restoral
Table 6.
00
Fixed panic
24-hour audible fixed emergency buttons
Police
Instant
No
Yes
Yes
No
1, 2, 3
01
Portable
panic
24-hour audible portable emergency buttons
Police
Instant
No
No
Yes
No
1, 2, 3
02
Fixed panic
24-hour silent fixed emergency buttons
Silent
Instant
No
Yes
Yes
No
1, 2, 3
03
Portable
panic
24-hour silent portable emergency buttons
Silent
Instant
No
No
Yes
No
1, 2, 3
04
Fixed
auxiliary
24-hour auxiliary sensor, such as pendant panic or
holdup buttons
Auxiliary
Instant
No
Yes
Yes
No
1, 2, 3
05
Fixed
auxiliary
24-hour auxiliary emergency button. Siren shutoff
confirms CS report.
Auxiliary
Instant
No
Yes
yes
No
1, 2, 3
06
Portable
auxiliary
24-hour portable auxiliary alert button
Auxiliary
Instant
No
No
Yes
No
1, 2, 3
07
Portable
auxiliary
24-hour portable auxiliary button. Siren shutoff
confirms CS report.
Auxiliary
Instant
No
No
Yes
No
1, 2, 3
08
Special
intrusion
Special belongings, such as gun cabinets and wall
safes
Police
Instant
Yes
Yes
Yes
No
1, 2, 3
09
Special
intrusion
Special belongings, such as gun cabinets and wall
safes
Police
Standard
Yes
Yes
Yes
No
1, 2, 3
10
Entry/exit
delay
Entry and exit doors that require a standard delay
time
Police
Standard
Yes
Yes
Yes
Yes
2, 3
11
Entry/exit
delay
Garage doors and entrances that require an
extended delay time 1
Police
Extended
Yes
Yes
Yes
Yes
2, 3
12
Entry/exit
delay
Driveway gates and entrances that require a twice
extended delay time 1
Police
Twice
Extended
Yes
Yes
Yes
Yes
2, 3
13
Instant
perimeter
Exterior doors and windows
Police
Instant
Yes
Yes
Yes
Yes
2, 3
14
Instant
interior
Interior doors
Police
Follower
Yes
Yes
Yes
No
2, 3
15
Instant
interior
Interior PIR motion sensors 1
Police
Follower
No
Yes
Yes
No
2, 3
16
Instant
interior
Interior doors
Police
Follower
Yes
Yes
Yes
No
3
17
Instant
interior
PIR motion sensors 1
Police
Follower
No
Yes
Yes
No
3
Enterprise Downloader
User Manual
Delay
Chime level 1
Police
Follower
No
Yes
Yes
No
3
Interior doors that initiate a delay before going into
alarm 1
Police
Standard
Yes
Yes
Yes
No
3
Delayed
interior
PIR motion sensors that initiate a delay before
going into alarm 1
Police
Standard
No
Yes
Yes
No
3
21
Local
instant
interior
24-hour local alarm zone protecting anything that
opens and closes
Police
Instant
Yes
Yes
No
No
1, 2, 3
22
Local
delayed
interior
Same as group 21, plus activation initiates a delay
before going into alarm
Police
Standard
Yes
Yes
No
No
1, 2, 3
23
Local
instant
auxiliary
24-hour local alarm zone protecting anything that
opens and closes 3
Auxiliary
Instant
Yes
Yes
No
No
1, 2, 3
24
Local
instant
auxiliary
24-hour local alarm zone protecting anything that
opens and closes. Sirens shut off at restoral 1
Auxiliary
Instant
Yes
Yes
No
No
1, 2, 3
25
Local
special
chime
Notify the user when a door is opened. Sounds
emit from a local annunciator. 1
Special
Chime
Instant
No
Yes
No
No
1, 2, 3
26
Fire
24-hour fire, rate-of-rise heat, and smoke sensors
Fire
Instant
Yes
Yes
Yes
No
1, 2, 3
27
Output
module
HOM, lamp control or other customer feature
Silent
Instant
Yes
Yes
No
No
1, 2, 3
28
Output
module
HOM, PIR motion sensor, sound sensor or pressure
mat 3
Silent
Instant
No
Yes
No
No
1, 2, 3
29
Auxiliary
Freeze sensor
Auxiliary
Instant
Yes
Yes
Yes
No
1, 2, 3
32
Output
module
HOM, PIR motion sensor, sound sensor or pressure
mat 3
Silent
Instant
No
No
No
No
33
Siren
Wireless siren supervision 3
Silent
Instant
No
Yes
Yes
No
1, 2, 3
34
Gas
Carbon monoxide (CO) gas detectors 3
Auxiliary
Instant
Yes
Yes
Yes
No
1, 2, 3
35
Local
instant
police (day
zone)
Local alarm in levels 1 and 2. Report to CS in level 3. Police
Instant
Yes
Yes
Yes
No
1, 2, 3
No.
Name
Application
18
Instant
interior
PIR motion sensors subject to false alarms
19
Delayed
interior
20
1.
2.
3.
1 2
3
Active levels
Alarm
CS Reports
Concord 3 sensor groups (continued)
Supervisory
Table 6.
Restoral
76
This group is not certified as a primary protection circuit for UL-listed systems and is for supplementary use only.
Sounds instant police siren if two or more sensors are tripped within four minutes. Otherwise sensors are followers to delayed sensors.
If alarm verification is on, group 18 functions like group 17.
This group has not been investigated by UL.
77
Concord 4 sensor groups
Table 7 shows the sensor groups for Concord 4 control panels.
Alarm
Delay
Supervisory
CS Report
Chime (level 1)
Active
Concord 4 sensor groups
Restoral
Table 7.
Fixed panic 24-hour audible fixed emergency buttons.
Police
Instant
No
Yes
Yes
No
1, 2, 3
01
Portable
panic
Police
Instant
No
No
Yes
No
1, 2, 3
02
Fixed panic 24-hour silent fixed emergency buttons
Silent
Instant
No
Yes
Yes
No
1, 2, 3
03
Portable
panic
24-hour silent portable emergency buttons
Silent
Instant
No
No
Yes
No
1, 2, 3
04
Fixed
auxiliary
24-hour auxiliary sensor, such as pendant panic
or holdup button.
Auxiliary
Instant
No
Yes
Yes
No
1, 2, 3
05
Fixed
auxiliary
24-hour auxiliary emergency button. Siren
shutoff confirms CS report.
Auxiliary
Instant
No
Yes
Yes
No
1, 2, 3
06
Portable
auxiliary
24-hour portable auxiliary alert button
Auxiliary
Instant
No
No
Yes
No
1, 2, 3
07
Portable
auxiliary
24-hour portable auxiliary button. Siren shutoff
confirms CS report.
Auxiliary
Instant
No
No
Yes
No
1, 2, 3
08
Special
intrusion
Special belongings, such as gun cabinets and
wall safes
Police
Instant
Yes
Yes
Yes
No
1, 2, 3
09
Special
intrusion
Special belongings, such as gun cabinets and
wall safes
Police
Standard
Yes
Yes
Yes
No
1, 2, 3
10
Entry/exit
delay
Entry and exit doors that require a standard
delay time
Police
Standard
Yes
Yes
Yes
Yes
2, 3
11
Entry/exit
delay
Garage doors and entrances that require an
extended delay time 1
Police
Extended
Yes
Yes
Yes
Yes
2, 3
12
Entry/exit
delay
Driveway gates and entrances that require a
twice extended delay time 1
Police
Twice
Extended
Yes
Yes
Yes
Yes
2, 3
13
Instant
perimeter
Exterior doors and windows
Police
Instant
Yes
Yes
Yes
Yes
2, 3
14
Instant
interior
Interior doors
Police
Follower
Yes
Yes
Yes
No
2, 3
15
Instant
interior
Interior PIR motion sensors 1
Police
Follower
No
Yes
Yes
No
2, 3
16
Instant
interior
Interior doors
Police
Follower
Yes
Yes
Yes
No
3
No.
Name
00
Application
24-hour audible portable emergency buttons
Enterprise Downloader
User Manual
No.
Name
Application
Alarm
Delay
CS Report
Chime (level 1)
Active
Concord 4 sensor groups (continued)
Supervisory
Table 7.
Restoral
78
17
Instant
interior
PIR motion sensors 1
Police
Follower
No
Yes
Yes
No
3
18
Instant
interior
Instant interior cross-zone PIR motion sensors 1
Police
Follower
No
Yes
Yes
No
3
19
Delayed
interior
Interior doors that initiate a delay before going
into alarm 1
Police
Standard
Yes
Yes
Yes
No
3
20
Delayed
interior
PIR motion sensors that initiate a delay before
going into alarm 1
Police
Standard
No
Yes
Yes
No
3
21
Local
instant
interior
24-hour local alarm zone protecting anything
that opens and closes
Police
Instant
Yes
Yes
No
No
1, 2, 3
22
Local
delayed
interior
Same as group 21, plus activation initiates a
delay before going into alarm.
Police
Standard
Yes
Yes
No
No
1, 2, 3
23
Local
instant
auxiliary
24-hour local alarm zone protecting anything
that opens and closes 3
Auxiliary
Instant
Yes
Yes
No
No
1, 2, 3
24
Local
instant
auxiliary
24-hour local alarm zone protecting anything
that opens and closes. Sirens shut off at restoral.
Auxiliary
Instant
Yes
Yes
No
No
1, 2, 3
25
Local
special
chime
Notify the user when a door is opened. Sounds
emit from a local annunciator. 1
Special
chime
Instant
No
Yes
No
No
1, 2, 3
26
Fire
24-hour fire, rate-of-rise heat, and smoke
sensors
Fire
Instant
Yes
Yes
Yes
No
1, 2, 3
27
Output
module
HOM lamp control or other customer feature 3
Silent
Instant
Yes
Yes
No
No
1, 2, 3
28
Output
module
HOM, PIR motion sensor, sound sensor, or
pressure mat 3
Silent
Instant
No
Yes
No
No
1, 2, 3
29
Auxiliary
Freeze sensor
Auxiliary
Instant
Yes
Yes
Yes
No
1, 2, 3
32
Output
module
HOM, PIR motion sensor, sound sensor, or
pressure mat 3
Silent
Instant
No
No
No
No
33
Siren
Wireless siren supervision 3
Silent
Instant
No
Yes
Yes
No
1, 2, 3
34
Gas
Carbon monoxide (CO) gas detectors 3
Auxiliary
Instant
Yes
Yes
Yes
No
1, 2, 3
2
1
79
No.
Name
Application
Alarm
Delay
Supervisory
CS Report
Chime (level 1)
Active
Concord 4 sensor groups (continued)
Restoral
Table 7.
35
Local
instant
police (day
zone)
Local alarm in levels 1 and 2. Report to CS in
level 3.
Police
Instant
Yes
Yes
Yes
No
1, 2, 3
38
Auxiliary
Water sensor 3
Auxiliary
Instant
Yes
Yes
Yes
No
1, 2, 3
1.
2.
3.
This group is not certified as a primary protection circuit for UL-listed systems and is for supplementary use only.
Sounds instant police siren if two or more sensors are tripped within four minutes. Otherwise sensors are followers to delayed sensors.
If alarm verification is on, group 18 functions like group 17.
This group has not been investigated by UL.
Enterprise Downloader
User Manual
Concord Express sensor groups
Table 8 shows the sensor groups for Concord Express.
No.
Name
Application
Alarm
Delay
CS Report
Chime
Active levels
Concord Express sensor groups
Supervisory
Table 8.
Restoral
80
00
Fixed panic
24-hour audible fixed emergency buttons
Police
Instant
No
Yes
Yes
No
1, 2, 3
01
Portable
panic
24-hour audible portable emergency
buttons
Police
Instant
No
No
Yes
No
1, 2, 3
02
Fixed panic
24-hour silent fixed emergency buttons
Silent
Instant
No
Yes
Yes
No
1, 2, 3
03
Portable
panic
24-hour silent portable emergency buttons
Silent
Instant
No
No
Yes
No
1, 2, 3
04
Fixed
auxiliary
24-hour auxiliary sensor, such as pendant
panic or holdup button
Auxiliary
Instant
No
Yes
Yes
No
1, 2, 3
05
Fixed
Auxiliary
24-hour auxiliary emergency button. Siren
shutoff confirms CS report.
Auxiliary
Instant
No
Yes
Yes
No
1, 2, 3
06
Portable
auxiliary
24-hour portable auxiliary alert button
Auxiliary
Instant
No
No
Yes
No
1, 2, 3
07
Portable
auxiliary
24-hour portable auxiliary button. Siren
shutoff confirms CS report.
Auxiliary
Instant
No
No
Yes
No
1, 2, 3
08
Special
intrusion
Special belongings, such as gun cabinets
and wall safes
Police
Instant
Yes
Yes
Yes
No
1, 2, 3
09
Special
intrusion
Special belongings, such as gun cabinets
and wall safes.
Police
Standard
Yes
Yes
Yes
No
1, 2, 3
10
Entry/exit
delay
Entry and exit doors that require a standard
delay time
Police
Standard
Yes
Yes
Yes
Yes
2, 3
11
Entry/exit
delay
Garage doors and entrances that require an
extended delay time. 1
Police
Extended
Yes
Yes
Yes
Yes
2, 3
12
Entry/exit
delay
Driveway gates and entrances that require a
twice extended delay time. 1
Police
Twice
Extended
Yes
Yes
Yes
Yes
2, 3
13
Instant
perimeter
Exterior doors and windows.
Police
Instant
Yes
Yes
Yes
Yes
2, 3
14
Instant
interior
Interior doors.
Police
Follower
Yes
Yes
Yes
No
2, 3
15
Instant
Interior
Interior PIR motion sensors. 1
Police
Follower
No
Yes
Yes
No
2, 3
16
Instant
interior
Interior doors.
Police
Follower
Yes
Yes
Yes
No
3
81
No.
Name
Application
Alarm
Delay
Supervisory
CS Report
Chime
Active levels
Concord Express sensor groups (continued)
Restoral
Table 8.
17
Instant
interior
PIR motion sensors. 1
Police
Follower
No
Yes
Yes
No
3
18
Instant
interior
PIR motion sensors subject to false alarms. 1
Police
Follower
No
Yes
Yes
No
3
19
Delayed
interior
Interior doors that initiate a delay before
going into alarm. 1
Police
Standard
Yes
Yes
Yes
No
3
20
Delayed
interior
PIR motion sensors that initiate a delay
before going into alarm. 1
Police
Standard
No
Yes
Yes
No
3
21
Local instant
interior
24-hour local alarm zone protecting
anything that opens and closes.
Police
Instant
Yes
Yes
No
No
1, 2, 3
22
Local delayed
interior
Same as group 21, plus activation initiates a
delay before going into alarm.
Police
Standard
Yes
Yes
No
No
1, 2, 3
23
Local instant
auxiliary
24-hour local alarm zone protecting
anything that opens and closes. 3
Auxiliary
Instant
Yes
Yes
No
No
1, 2, 3
24
Local instant
auxiliary
24-hour local alarm zone protecting
anything that opens and closes. Sirens shut
off at restoral. 1
Auxiliary
Instant
Yes
Yes
No
No
1, 2, 3
25
Local special
chime
Notify the user when a door is opened.
Sounds emit from a local annunciator. 1
Special
chime
Instant
No
Yes
No
No
1, 2, 3
26
Fire
24-hour fire, rate-of-rise heat, and smoke
sensors. 4
Fire
Instant
Yes
Yes
Yes
No
1, 2, 3
27
Output
module
HOM lamp control or other customer
feature. 3
Silent
Instant
Yes
Yes
No
No
1, 2, 3
28
Output
module
HOM, PIR motion sensor, sound sensor, or
pressure mat. 3
Silent
Instant
No
Yes
No
No
1, 2, 3
29
Auxiliary
Freeze sensor.
Auxiliary
Instant
Yes
Yes
Yes
No
1, 2, 3
32
Output
module
HOM, PIR motion sensor, sound sensor, or
pressure mat. 3
Silent
Instant
No
No
No
No
1, 2, 3
34
Gas
Carbon monoxide (CO) gas detectors 3
Auxiliary
Instant
Yes
Yes
Yes
No
1, 2, 3
35
Local instant
police (day
zone)
Local alarm in levels 1 and 2. Reports to CS
in level 3.
Police
Instant
Yes
Yes
Yes
No
1, 2, 3
1.
2.
3.
4.
2
This group is not certified as a primary circuit for UL-listed systems and is for supplementary use only.
Sounds instant police siren if two or more sensors are tripped within four minutes. Otherwise sensors are followers to delayed sensors.
If Alarm Verification is on, group 18 functions like group 17.
This group has not been investigated by UL.
This group is required for UL-listed residential file alarm applications
82
Enterprise Downloader
User Manual
Appendix C SIA requirements
This appendix provides tables of SIA requirements for control panels used with
Enterprise Downloader.
In this appendix:
Allegro SIA requirements . . . . . . . . . . . . . . . . . . . . . . . . . . . . . . . . . . . . 84
Simon 3 version 3.5 SIA requirements . . . . . . . . . . . . . . . . . . . . . . . . . . 85
Simon 3 version 4 SIA requirements . . . . . . . . . . . . . . . . . . . . . . . . . . . . 86
Simon 3 version 5 European compliance . . . . . . . . . . . . . . . . . . . . . . . . 87
Concord 3 SIA requirements . . . . . . . . . . . . . . . . . . . . . . . . . . . . . . . . . . 88
Concord 4 SIA requirements . . . . . . . . . . . . . . . . . . . . . . . . . . . . . . . . . . 89
Concord Express SIA requirements . . . . . . . . . . . . . . . . . . . . . . . . . . . . 90
84
Enterprise Downloader
User Manual
Allegro SIA requirements
Table 9 shows the settings required to meet ANSI-SIA CP-01 requirements for Allegro control panels.
Table 9.
SIA requirements for Allegro
Function
Default setting
Required setting
Entry delay
30 seconds
30 to 240 seconds
Exit delay
60 seconds
45 to 254 seconds
Dial delay
30 seconds
15 to 45 seconds
Autostay arm
On
On
Predial string
None
Set if reporting to central station and customer has call waiting
service.
Exit extension
On
On
Swinger shutdown
One trip
1 to 2 trips
Smoke verify
Off
On
Duress code
Disabled
Disabled
Alarm verify/cross zoning
Disabled
Enabled for PIRs
85
Simon 3 version 3.5 SIA requirements
Table 10 shows the setting required to meet AMNSI-SIA CP-01 for Simon 3 version 3.5 control panels.
Table 10. Simon 3 version 3.5 SIA requirements
Option number
Function
Default setting
Required setting
10
Entry delay
30 seconds
30 to 240 seconds
11
Exit delay
60 seconds
45 to 240 seconds
17
Dialer delay
30 seconds
15 to 45 seconds
38
Autoarm
On
On
45
Sensor alarm restoral report
Off
3
52
Unvacated premises
On
On
56
Call waiting
Off
On if reporting to central
station and customer has call
waiting service
59
Exit extension
On
On
68
Swinger shutdown
On (one trip)
On (one trip)
69
SIA limits
On
On
86
Fire alarm verify
Off
On
86
Enterprise Downloader
User Manual
Simon 3 version 4 SIA requirements
Table 11 shows the settings are required to meet ANSI-SIA CP-01 for Simon 3 version 4 control panels.
Table 11. Simon 3 version 4 SIA requirements
Operator number
Function
Default setting
Required setting
10
Entry delay
30 seconds
30 to 254 seconds
11
Exit delay
60 seconds
45 to 254 seconds
17
Dialer delay
30 seconds
15 to 45 seconds
38
Autoarm
On
On
45
Sensor alarm restoral report
Off
3
52
Unvacated premises
On
On
56
Call
Off
On if reporting to central
station and customer has call
waiting service
59
Exit extension
On
On
68
Swinger shutdown
On (one trip)
On (one trip)
69
SIA limits
On
On
86
Fire alarm verify
Off
On
87
Simon 3 version 5 European compliance
The following settings are required for European compliance:
Option 84
Determines whether the panel is EN50131 compliant or not. This option can be set to off, 1, or 2.
If this option is set to 1, the panel turns on the following features needed to be EN50131 compliant:
•
•
•
•
•
•
•
entry delay maximum is changed to 45 seconds
the panel will disarm if an exit error occurs
the panel will disarm if an exit error occurs
the event buffer will not accept optional report types if 100 reports occur within one arming level
trouble messages are not cleared until the user listens to them in a status message
status LED on the panel will shut off if the panel is armed and the exit delay has expired
option 39, siren time out, maximum is set to 15 minutes
If this option is set to 2, the panel turns on the features listed above, and an access code is required to hear panel
status.
To turn on European compliance (return to default), do the following:
1. Press Add.
2. Press Option #.
3. Enter 84.
4. Use the numbered keys to enter 1 or 2.
To turn off European compliance, do the following:
1. Press Delete.
2. Press Option #.
3. Enter 84.
4. Press Done.
88
Enterprise Downloader
User Manual
Concord 3 SIA requirements
Table 12 shows the settings required to meet ANSI-SIA CP-01 for Concord # control panels.
Table 12. Concord 3 SIA requirements
Function
Default setting
Required setting
SIA false alarm reduction
On
On
Exit extension
On
On
Autostay arming
On
On
Duress code
Disabled
Disabled
Dialer abort
On
On
Dialer abort delay
30 seconds
15 to 45 seconds
Cancel message
On
On
Call wait cancel
Disabled
On if reporting to central station and customer has call waiting
service
Entry delay
30 seconds
30 to 240 seconds
Exit delay
60 seconds
45 to 184 seconds
Swinger limit
1
1
Smoke verify
Off
On if smoke alarms are programmed into system
Cross zoning
Disabled
Enabled for zones with a high probability of false alarms
89
Concord 4 SIA requirements
Table 13 shows the settings required to meet ANSI-SIA CP-01 for Concord 4 control panels.
Table 13. Concord 4 SIA requirements
Function
Default setting
Required setting
Exit extension
On
On
Duress code
Disabled
Disabled
Dialer abort delay
30 seconds
15 to 45 seconds
Cancel message
On
On
Call wait cancel
Disabled
On if reporting to central station and customer has call waiting
service
Entry delay
30 seconds
30 to 240 seconds
Exit delay
60 seconds
45 to 184 seconds
Swinger limit
1
1
Smoke verify
Off
On if smoke alarms are programmed into system
Cross zoning
Disabled
Enabled for zones with a high probability of false alarms
90
Enterprise Downloader
User Manual
Concord Express SIA requirements
Table 14 shows the settings required to meet ANSI-SIA CP-01 for Concord Express control panels.
Table 14. Concord Express SIA requirements
Function
Default setting
Required setting
SIA false alarm reduction
On
On
Exit extension
On
On
Autostay arming
On
On
Duress code
Disabled
Disabled
Dialer abort
On
On
Dialer abort delay
30 seconds
15 to 45 seconds
Cancel message
On
On
Call wait cancel
Disabled
On if reporting to central station and customer has call waiting
service
Entry delay
30 seconds
30 to 240 seconds
Exit delay
60 seconds
45 to 184 seconds
Swinger limit
1
1
Smoke verify
Off
On if smoke alarms are programmed into system
Cross zoning
Disabled
Enabled for zones with a high probability of false alarms
91
Index
A
help..........................................................................................................15
account creator screen.............................................................................45
I
accounts ..................................................................................................34
create ..................................................................................................34
delete ..................................................................................................37
edit ......................................................................................................36
extensions .....................................................................................15, 42
B
bulk accounts ....................................................................................15, 45
C
call type...................................................................................................49
conventions ...............................................................................................5
icons ........................................................................................................16
J
job templates .....................................................................................15, 56
jobs..........................................................................................................48
create ..................................................................................................49
delete ..................................................................................................50
download ............................................................................................48
edit ......................................................................................................50
history.................................................................................................51
merge ..................................................................................................48
upload.................................................................................................48
D
L
dealer code ..............................................................................................50
log on ......................................................................................................14
difference tracking ..................................................................................50
download.................................................................................................48
M
E
menu bar .................................................................................................15
early call in..............................................................................................49
modems supported ..................................................................................11
merge ......................................................................................................48
error messages.............................................................................65, 67, 83
extensions..........................................................................................15, 42
O
F
OEM code ...............................................................................................50
file menu .................................................................................................15
operators............................................................................................15, 28
G
P
groups......................................................................................................30
panel account ..........................................................................................50
add ......................................................................................................30
assign members ..................................................................................31
delete ..................................................................................................31
edit ......................................................................................................31
panel template ...................................................................................15, 54
operator setup tab....................................................................................28
panel time................................................................................................50
password .................................................................................................14
preface.......................................................................................................5
product
H
hardware requirements............................................................................30
contents.........................................................................................10, 29
overview ...........................................................8, 14, 28, 34, 48, 54, 56
publication library...................................................................................64
92
Enterprise Downloader
User Manual
R
requirements............................................................................................11
hardware ............................................................................................30
software ........................................................................................11, 30
templates
jobs .....................................................................................................56
panel ...................................................................................................54
tool bar
icons ...................................................................................................16
tracking differences.................................................................................51
S
troubleshooting .......................................................................................60
safety terms and symbols ..........................................................................5
U
server.......................................................................................................14
setup menu ..............................................................................................15
upload......................................................................................................48
software requirements.......................................................................11, 30
user name ................................................................................................14
supported modems ..................................................................................11
users ........................................................................................................28
system preference .............................................................................15, 17
add ......................................................................................................28
delete ..................................................................................................29
T
V
technical support .....................................................................................64
view menu...............................................................................................15