1
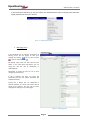
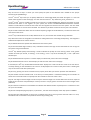
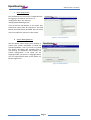
Administrator's manual
OpenMeetings2.0
Administrator's manual
June 2012
Administrator's manual
Table of content
1. Managing users ........................................................................................................................................ 1
2. Managing connections............................................................................................................................. 2
3. Managing usergroups ............................................................................................................................. 2
4. Managing rooms ...................................................................................................................................... 3
5. Configuration ........................................................................................................................................... 4
6. Language editor ....................................................................................................................................... 6
7. Ldap configuration ................................................................................................................................... 7
8. System Backup/Restore........................................................................................................................... 7
Administrator's manual
In this manual we will focus on only one menu, the 'Administration' menu, everything else has been
widely explained in the user's manual.
Figure 1 – Administration menu
1. Managing users
In this window you can edit the parameters of
existing users. Do not forget to save your
changes by clicking
You can also remove
users or add new ones.
By default, every new user will have the user
status. In the 'User level' drop down, you can
assign the user the role of 'moderator' or
'administrator'.
Remember to assign the user to one or more
usergroups (see point 3.)
If SIP is enabled, you here can enter the
parameters for the user (name, password and
authentication ID).
Finally, this is where you can determine in
advance whether or not the user's data will be
shown to its contacts. The user can of course
change these settings in his profile page.
Figure 2 – Managing users
Page 1
Administrator's manual
2. Managing connections
Figure 3 – Managing connections
Here you can see all the people connected to the system and decide to disconnect them. In this case, the person
will be ejected from the system but he may still be able to reconnect.
3. Managing usergroups
Figure 4 – Managing usergroups
As already explained above, a usergroup is a group where you can place users. A user can of course be part of
several usergroups. In this case, when connecting to the system, a dialog box will ask to what group he wants to
connect (if he wishes to change groups, he must first disconnect from the system).
Users of a group only access rooms created for that group, not the rooms created for another group.
In this menu you can see which users is part of what group(s), add or remove users from a certain group and
create new groups.
Page 2
Administrator's manual
4. Managing rooms
This is where you can edit, delete
and create meeting rooms.
When creating a room, after entering the
room name, choose the number of
participants allowed. There is no limitation in
the software, it will rather depend on your
server and bandwidth.
Next, define the type of room (conference
room, restricted room or interview room) and
whether the room is temporary (it will be
removed when it is closed) or not.
A conference room is a room where everyone
shares his camera and microphone, has access
to the whiteboard and can manage files. The
session recording records the whole screen.
A restricted room is a room in which users
must ask permission to share their camera
and where they do not have access to files.
The session recording records the whole
screen.
An interview room is a room where only two
users can share their video and audio (there
may be more than two users in the audience
and the moderator will then enable or disable
the cameras and microphones) and in which
there is no whiteboard. The recording session
only records video and audio.
Figure 5 - Managing rooms
Regarding moderation, if you do not check
this box, the first person to enter the room becomes the moderator. If the box is checked then a user will stay a
simple user. You can also designate someone as default moderator of the room by clicking on the green cross and
by selecting the user from the list.
You can then check or uncheck the box 'Allow user questions' and 'Audio only room'. Explanations for these check
boxes are given on the same page.
'Close room': you can close the room to prevent users from entering (you can still reopen it later) and specify a URL,
to which any user trying to enter the room will be redirected (do not forget to include the prefix http:// before the
address, otherwise it may not work).
The remaining options speak for themselves and need no further explanation here.
Page 3
Administrator's manual
5. Configuration
This is the system configuration
window, and the first thing to do
after installing an OpenMeetings
server.
We will see some of the available
parameters.
The
first
parameter,
'crypt_ClassName' lets you choose
the type of encryption for
passwords. By default the system
uses MD5 as php. You can change
this or write your own, in this case
be careful because passwords
already encoded in the system will
no longer work.
The
third
key
'allow_frontend_register' enables
or disables the button 'Register' in
the login window. By setting this
key to 0, no one will be able to
create an account in the system.
The fourth key 'default_group_id'
determines in which usergroup the
new registered user will be by
default.
Keys 6-11 are used to configure
the system for sending emails.
th
The 12 key 'application.name'
contains the name of the
application
name
(default:
'OpenMeetings') which appears in
some posts and in emails sent
when creating an event in the
calendar.
th
The 13
key 'default_lang_id'
contains the system's default
language number (in this case, one
for English). The ID of each
language can be found in the file 'languages.xml' in directory 'webapps / OpenMeetings / languages'.
Figure 6 – Configuration window
The three following keys concern swftools. This tool will convert the documents to .swf. 'swftools_zoom' is used to
adjust the number of dots per inch when converting and, as its name suggests, 'swtools_jpegquality' indicates the
quality for jpeg images.
Page 4
Administrator's manual
Keys 16 and 21 are keys in which you must specify the path to the different tools needed for the proper
functioning of OpenMeetings.
nd
rd
The 22 and 23 keys allow you to specify addresses to retrieve RSS feeds; the feeds will appear in a new tab
th
'News' which appears on the home page. You also need to set the 57 key 'dashboard_show_rssfeed' to 1.
th
th
The 24 and 25 keys are related to emails sent to new users. 'sendEmailAtRegister' determines whether an email
should be sent when a user registers on your system, the second 'sendEmailWithVerficationCode' indicates
whether a confirmation link must be sent to the user who registers for the first time in the system. The user needs
to click that link for his account to be activated. It is obvious key 25 doesn't make sense if key 24 is not activated.
Key 26 is used to determine which font to use when exporting images of the whiteboard; it is obvious that the font
must exist on the server.
th
The 27 key indicates which user is RPC, default user ID is 1, the one that was created during installation.
Keys 28 to 50 concern the integration and activation of SIP (protocol for connecting IP telephony). The integration
of SIP will be explained in a future manual.
Key 51 'default.timezone' specifies the default time zone of the system.
Key 52 'show.facebook.login' shows (or not) a 'Facebook' button on the login screen that allows the user to log into
the system using his Facebook ID.
th
The 53 key 'default.quality.screensharing' is used to indicate the quality of screen sharing, values are 0: greater
number of frames per second, no resizing; -1: No resizing; -2: size = 1/2 of the selected part; -3: size = 3/8 of the
selected part.
Key 55 'dashboard.show.myrooms' is used to display or hide the 'My room' tab on the homepage.
Key 56 'dashboard.show.chat' is used to display or hide the 'Chat' tab on the homepage.
th
If activated, the 58 key 'show.whiteboard.draw.status' displays for a few seconds the name of the user who is
currently drawing on the whiteboard. This name is not displayed on the screen of the person who is drawing but
only on the screen of all other participants.
Key 59 'max_upload_size' sets the maximum size (in bytes) of the files you want to upload on the whiteboard.
Key 60 'number.minutes.reminder.send' is the time (in minutes) before a scheduled meeting via the calendar to
which send a reminder email to all participants. No reminder is sent if the value is zero.
Keys 61 'user.login.minimum.length' and 62 'user.pass.minimum.length' are used to define the minimum required
length of the username and password (for security reasons it may be good to increase the minimum length of the
password).
Key 63 'calendar.conference.rooms.default.size indicates the default number of participants in a conference room
set up via the calendar.
Key 64 'use.old.style.ffmpeg.map.option', if placed at 1, uses the old format (0.0) of the map option in FFMPEG.
Key 65 'exclusive.audio.keycode' is where you can define which key to use to give the exclusive audio in a room,
the default code is 123 which corresponds to the F12 key (F1 being 112).
Page 5
Administrator's manual
Key 66 'ldap_default_id' controls whether the ldap domain is displayed by default in the login window.
th
The 67 and last key 'inviter.email.as.replyto' determines whether the e-mail address of the person who created
the event in the calendar is placed in the 'answer' field in the e-mail that is sent to participants for the invitation.
If you change a configuration value, remember that most of these parameters require the administrator to log off
for the changes to take effect.
6. Language editor
This is where you can edit
the text that appears in
OpenMeetings, both in
menus, icons or tooltips. If
you
make
changes,
remember to export the
file, it will be called
'english.xml' by default. If
you need to reinstall the
system, simply import that
file to apply all your
changes.
Figure 7 – Language editor
The default path for language files is: webapps/openmeetings/languages'.
To apply the changes, you must disconnect and reconnect to the system.
Page 6
Administrator's manual
7. Ldap configuration
This window lets you choose the configuration file
for logging in via LDAP or AD. There is a
configuration file in the directory
'webapps/OpenMeetings/conf'.
If you check the 'Add domain to user name' box,
the domain name (must be indicated in the field
below) will automatically be added after the name
of the user when he connects to the system.
Figure 8 – Ldap configuration
8. System Backup/Restore
The last options menu allows you to backup or
restore your system. Remember to check the
'Include uploaded...' box if you want to include
the session recordings and uploaded files in
your backup. As indicated in the window, the
system configuration is not saved nor are
language labels (see point 6. Language Editor)
you can export/import them via the editor in a
file like english.xml.
Figure 9 - Backup/Restore
Page 7